Embed Size (px)
Citation preview

Page 1 of 11
Apparel & Footwear GETTING STARTED GUIDE
Argentis Systems 2018 Coyright
Page 2 of 11
Table of Contents
1 Basic Initialization in SAP Business One® ......................................................................... 3
1.1 System Initialization ............................................................................................................3
1.2 General Settings ..................................................................................................................3
1.3 Posting Periods ...................................................................................................................3
1.4 Document Numbering .........................................................................................................3
1.5 User ....................................................................................................................................3
1.6 Freight ................................................................................................................................3
1.7 Sales Opportunities .............................................................................................................3
1.8 Business Partners Groups ....................................................................................................3
1.9 Inventory/Item Groups ........................................................................................................3
1.10 Business Partners ................................................................................................................3
2 Apparel & Footwear Settings .......................................................................................... 3
2.1 Setting Up the Solution – Requesting Licenses ......................................................................3
2.2 Apparel & Footwear Administration Setup ..................................................................4
2.2.1 General Settings .................................................................................................................... 4
2.2.1.1 Item Master Data ............................................................................................................................ 4
2.2.1.2 Documents Settings ........................................................................................................................ 5
2.2.1.3 Production ....................................................................................................................................... 7
2.2.1.4 Labelling .......................................................................................................................................... 8
2.2.1.5 Factoring ......................................................................................................................................... 9
2.2.1.6 Path ................................................................................................................................................. 9
2.2.1.7 Critical Path ................................................................................................................................... 10
2.2.1.8 Allocation ...................................................................................................................................... 10
2.2.1.9 Display ........................................................................................................................................... 10
2.2.1.10 Updatable UDF .............................................................................................................................. 11
Page 3 of 11
1 Basic Initialization in SAP Business One®
2 Apparel & Footwear Settings
2.1 Setting Up the Solution – Requesting Licenses
Upon registration of the solution, you have to perform a series of steps to activate it:
1. Scroll through the following path in the main menu of SAP Business One:
"Administration" → "Add-ons" → "Add-on Manager"
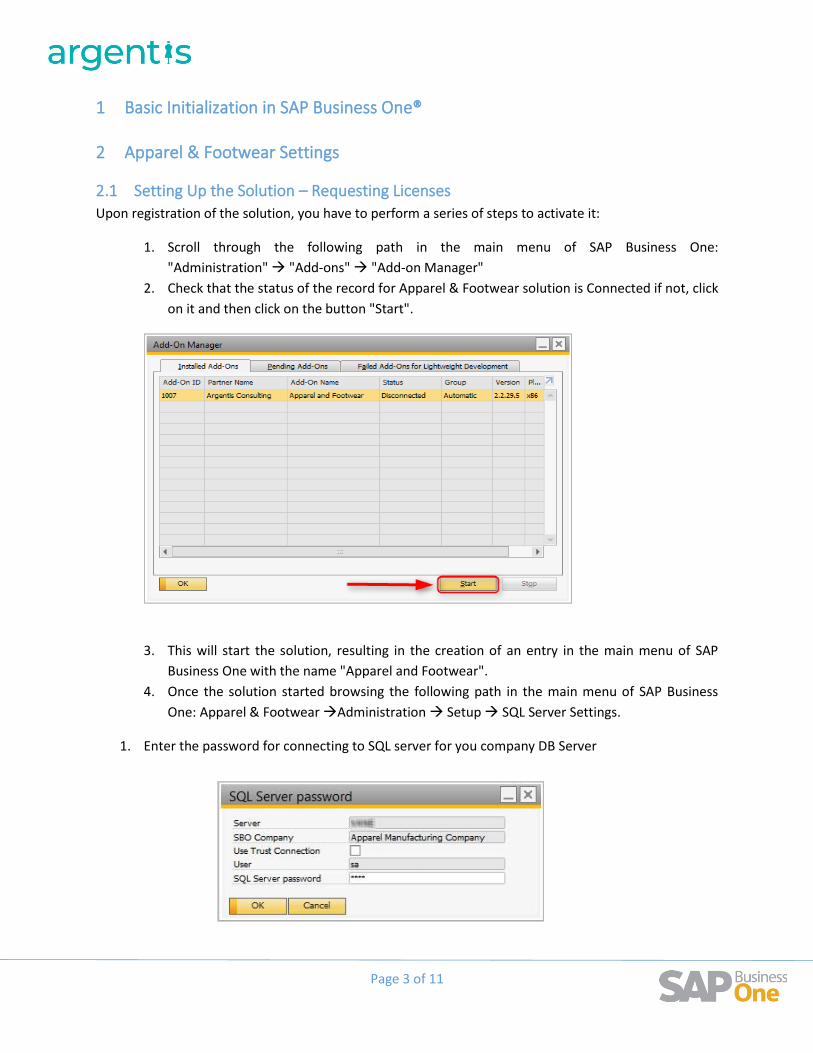
2. Check that the status of the record for Apparel & Footwear solution is Connected if not, click
on it and then click on the button "Start".
3. This will start the solution, resulting in the creation of an entry in the main menu of SAP
Business One with the name "Apparel and Footwear".
4. Once the solution started browsing the following path in the main menu of SAP Business
One: Apparel & Footwear →Administration → Setup → SQL Server Settings.
1. Enter the password for connecting to SQL server for you company DB Server
Page 4 of 11
2. In the SAP Business One status bar will be shown the degree of success of the connection to the
database server.
3. Close the form.
4. Once connected to the database server go through the following path in the main menu of SAP
Business One:
"Apparel & Footwear" → “Administration" → "Setup" → "Installation ID".
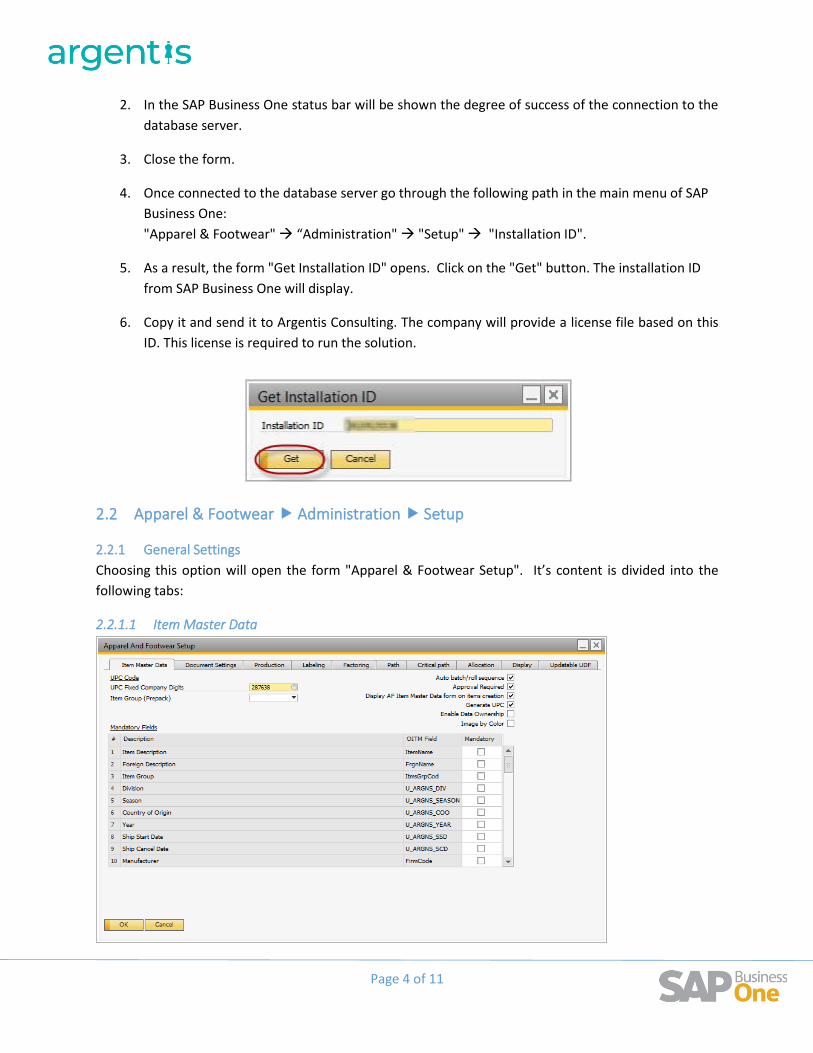
5. As a result, the form "Get Installation ID" opens. Click on the "Get" button. The installation ID
from SAP Business One will display.
6. Copy it and send it to Argentis Consulting. The company will provide a license file based on this
ID. This license is required to run the solution.
2.2 Apparel & Footwear Administration Setup
2.2.1 General Settings
Choosing this option will open the form "Apparel & Footwear Setup". It’s content is divided into the
following tabs:
2.2.1.1 Item Master Data
Page 5 of 11
1. Company fixed-Digit UPC Code: Add the fixed digit assigned to the company, used for the
creation and allocation of UPC barcode (Universal Product Code).
2. Item Group (Prepack): Select the desired Item Group for when you create the Prepack SKUs.
3. Auto batch / roll sequence: Check this box if you want the Lot IDs to be generated automatically
and sequentially.
4. Approval required: Check this option if you want to alert a user if a style needs to be approved
before creating master data in SAP Business One.
5. Generate UPC: Select this option if you want the UPC Code to be created automatically when
generating SKUs from the PDM (Product Data Management).
6. Display AF Item Master Data form on items creation: Select this option if you want to open the
Apparel Master Data when creating or updating inventory in SAP Business One.
7. Mandatory fields: List of fields in the table Apparel item master data where you can mark the
fields to be required as mandatory.
8. Enable Data Ownership: Check this option if you want to enable the data ownership
functionality on style master data. This module follows this concept:
1. Manager: the owner is the user’s manager per the manager field on the user’s employee record.
2. Branch: the user and the owner are members of the same branch. The branch is read from the
corresponding employee records.
3. Department: the user and the owner are members of the same department. The department is read
from the corresponding employee records.
4. Team: the user and the owner are members of the same team. Team membership is defined on the
corresponding employee records
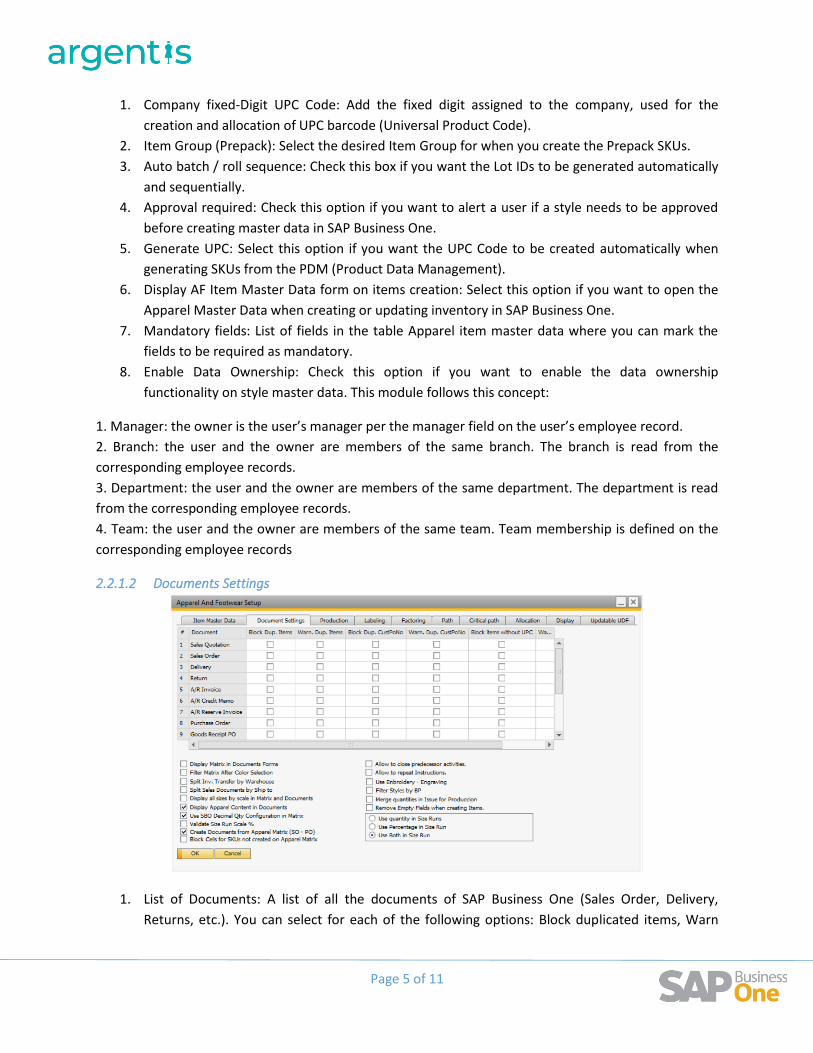
2.2.1.2 Documents Settings
1. List of Documents: A list of all the documents of SAP Business One (Sales Order, Delivery,
Returns, etc.). You can select for each of the following options: Block duplicated items, Warn
Page 6 of 11
Duplicated Items, Block Reference Duplicate, Duplicate reference notice, Lock article without
UPC, UPC Article without notice.
2. Display Matrix in Documents Forms: select this option to open the Apparel matrix automatically
3. Filter Matrix After Color Selection: matrix will show only after you select the desired colors in
marketing documents (add and edit form)
4. Split Inv. Transfer by Warehouse: select this option to create multiple documents when selecting
different warehouse in inventory transfer process, this is commonly used when transferring
styles to stores.
5. Split Sales Documents by Ship to: select this option to create multiple sales orders from the
Apparel Matrix. This is used for large orders for multiple customer ship to addresses.
6. Display all sizes by scale in Matrix and Documents: select this option to show the entire size-run
in marketing documents (add and edit form)
7. Display Apparel Content in Documents: selecting this option a tab “Cont. Apparel” will show in
marketing documents with the Apparel Matrix
8. Use SBO Decimal Qty. Configuration in Matrix
9. Validate Size Run Scale %
10. Create Documents from Apparel Matrix (SO - PO)
11. Block Cells for SKUs not created on Apparel Matrix
12. Allow to close predecessor activities: check this option if you are using Product Lifecycle
Management and you want to be able to close an activity that has one or more activities that
were meant to be done before.
13. Allow to repeat instructions: check this option if you want to be able to print Tech packs with
repeated sections.
14. Use Embroidery – Engraving. Select this option to initialize this module.
15. Filter Styles by BP: check this if you want that after choosing the Business Partner in the Add A.F
Items option, all the styles that will be shown to be chosen are only the ones that are linked to
that BP in the style’s PDM.
16. Merge quantities in Issue for Production: check this option so an item in the lines in the Issue for
Production is not repeated when having an item several times in the Apparel & Footwear
Manufacturing Order.
17. Remove empty fields when creating Items.
18. Options Size Run
a. Use quantity in Size Runs
b. Use percentage in Size Run
c. Use both in Size Run
Page 7 of 11
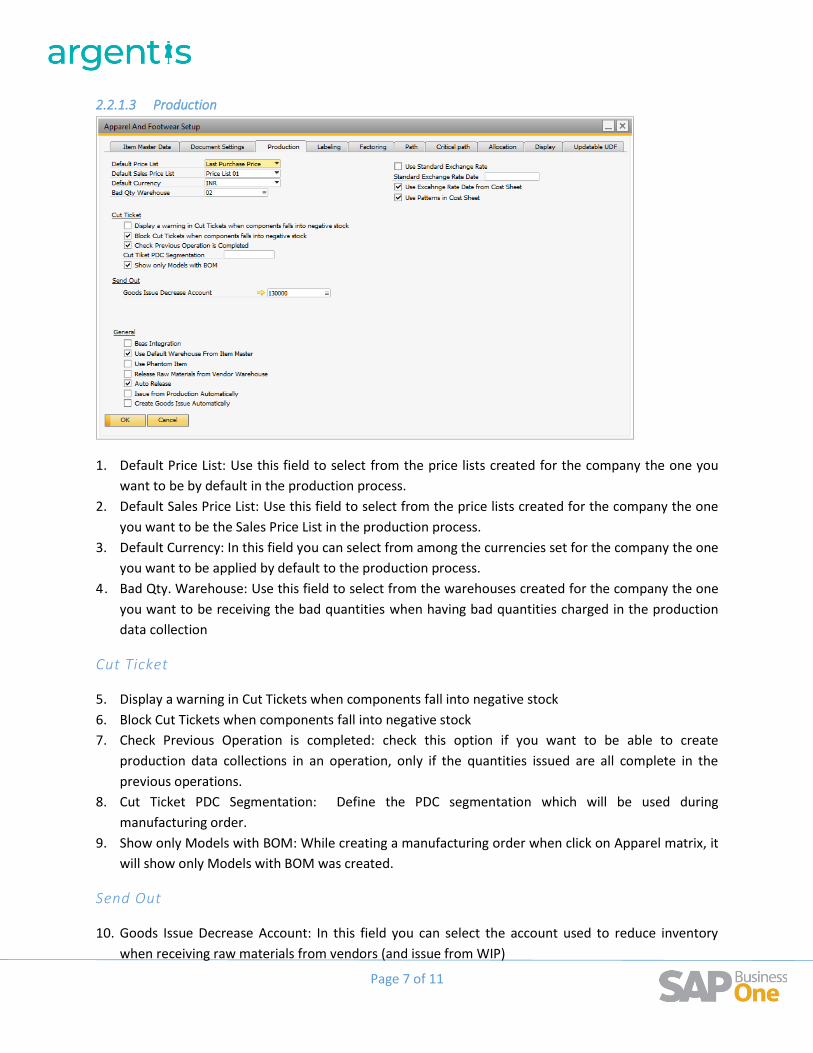
2.2.1.3 Production
1. Default Price List: Use this field to select from the price lists created for the company the one you
want to be by default in the production process.
2. Default Sales Price List: Use this field to select from the price lists created for the company the one
you want to be the Sales Price List in the production process.
3. Default Currency: In this field you can select from among the currencies set for the company the one
you want to be applied by default to the production process.
4. Bad Qty. Warehouse: Use this field to select from the warehouses created for the company the one
you want to be receiving the bad quantities when having bad quantities charged in the production
data collection
Cut Ticket
5. Display a warning in Cut Tickets when components fall into negative stock
6. Block Cut Tickets when components fall into negative stock
7. Check Previous Operation is completed: check this option if you want to be able to create
production data collections in an operation, only if the quantities issued are all complete in the
previous operations.
8. Cut Ticket PDC Segmentation: Define the PDC segmentation which will be used during
manufacturing order.
9. Show only Models with BOM: While creating a manufacturing order when click on Apparel matrix, it
will show only Models with BOM was created.
Send Out
10. Goods Issue Decrease Account: In this field you can select the account used to reduce inventory
when receiving raw materials from vendors (and issue from WIP)
Page 8 of 11
General
11. Beas Integration: Tick this if want to integrate with Beas
12. Use default warehouse from Item Master: Tick this if the default warehouse of the Item master
needs to use.
13. Use Phantom Item: Tick this when to use phantom item.
14. Release Raw Materials from Vendor Warehouse: Tick this when raw material needs to be release
from vendor warehouse only.
15. Auto Release: Tick this if it is needed to create a Manufacturing Order from Apparel and release all
the Production Orders that belongs to it automatically.
16. Create Goods Issue Automatically: Tick this if it is needed to issue the raw materials automatically.
Exchange Rate
User can select if the exchange rate date used in cost sheets is taken from the setup or is set to each
cost sheet.
17. Use Standard Exchange Rate
17.2 Standard Exchange Rate Date
18. Use Exchange Rate from Cost Sheet
If the “Use Exchange Rate Date from Cost Sheet” is selected, enter the date in the cost sheet. Enter the
values in difference currencies and save the cost sheet. The total vales are expressed in local currencies
but calculated from each currency rate.
19. Use Pattern in Cost Sheet: Tick this to enable Pattern in Cost sheet.
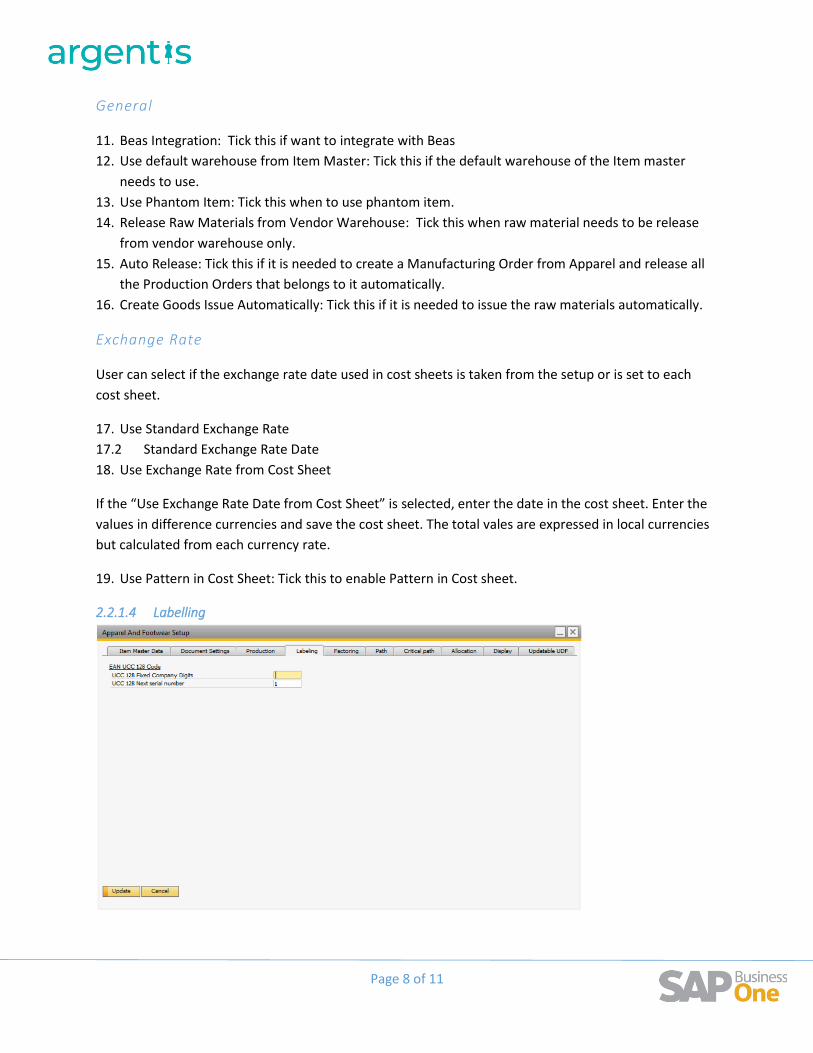
2.2.1.4 Labelling
Page 9 of 11
1. UCC 128 or fixed digits of the company: In this field you may enter the code assigned to your
company to generate bar code labels EAN-UCC 128.
2. UCC 128 or Next number: This field can enter the tag number from which to start with the
assignments.
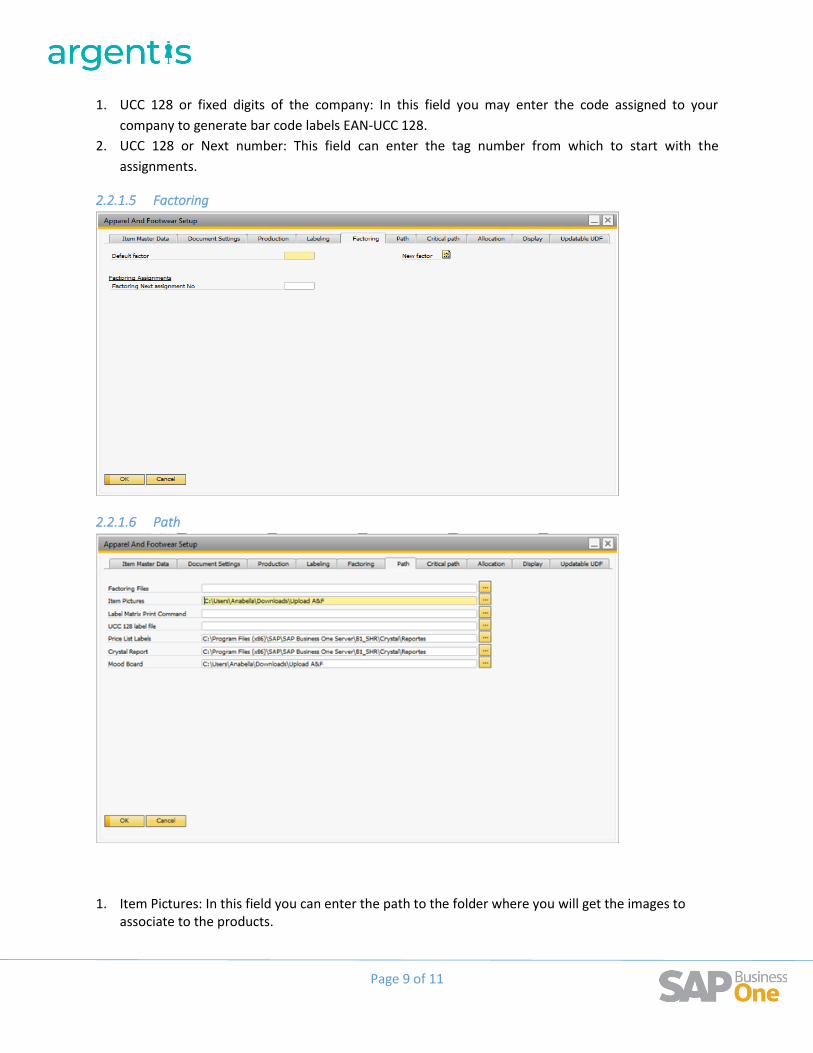
2.2.1.5 Factoring
2.2.1.6 Path
1. Item Pictures: In this field you can enter the path to the folder where you will get the images to associate to the products.
Page 10 of 11
2. Label Matrix or Print Command: In this field you can enter the path to the folder where the executable file print command, the Label Matrix software. (Only for label matrix owners)
3. UCC labels or File 128: In this field you can enter the path to the folder where you saved the file created by the solution to the UCC 128 label printing.
4. Price list labels: In this field you can enter the path to the folder where you will find price lists for the UCC 128 label printing.
5. Crystal Report: In this field you can enter the path to the folder where you have saved the Apparel reports provided by Argentis.
6. Mood Board: In this field you can enter the path to the folder where you will get the images to add to the mood boards.
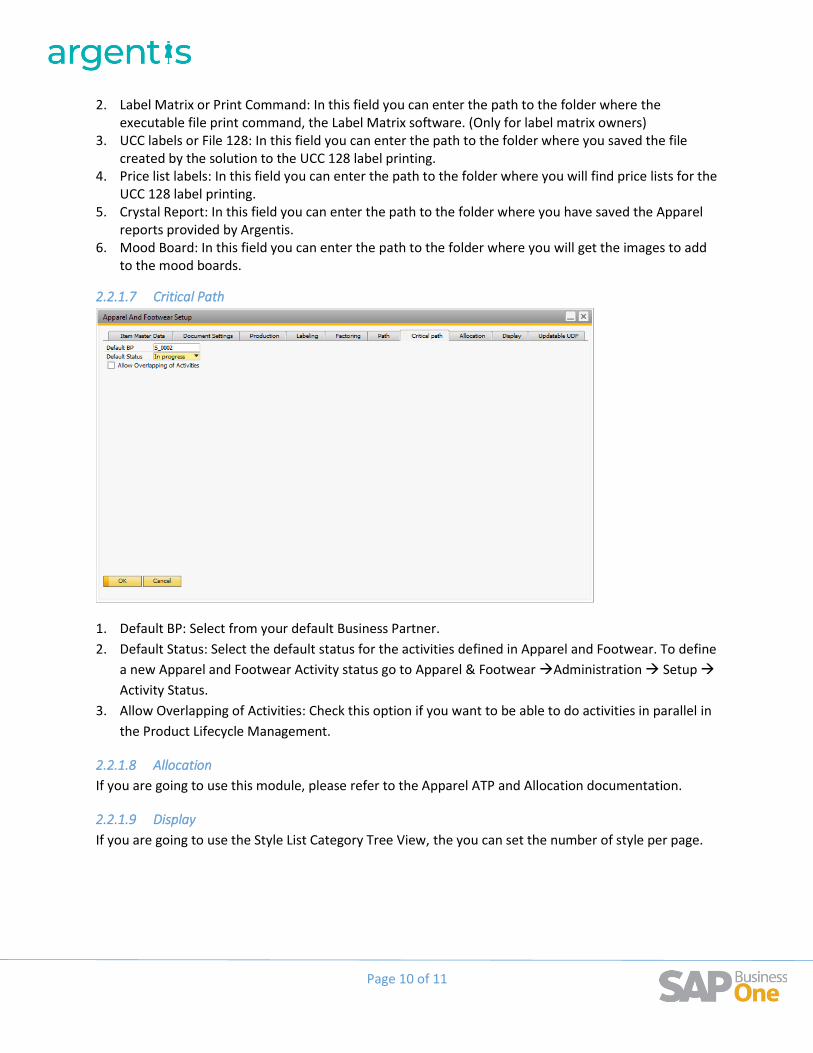
2.2.1.7 Critical Path
1. Default BP: Select from your default Business Partner.
2. Default Status: Select the default status for the activities defined in Apparel and Footwear. To define
a new Apparel and Footwear Activity status go to Apparel & Footwear →Administration → Setup →
Activity Status.
3. Allow Overlapping of Activities: Check this option if you want to be able to do activities in parallel in
the Product Lifecycle Management.
2.2.1.8 Allocation
If you are going to use this module, please refer to the Apparel ATP and Allocation documentation.
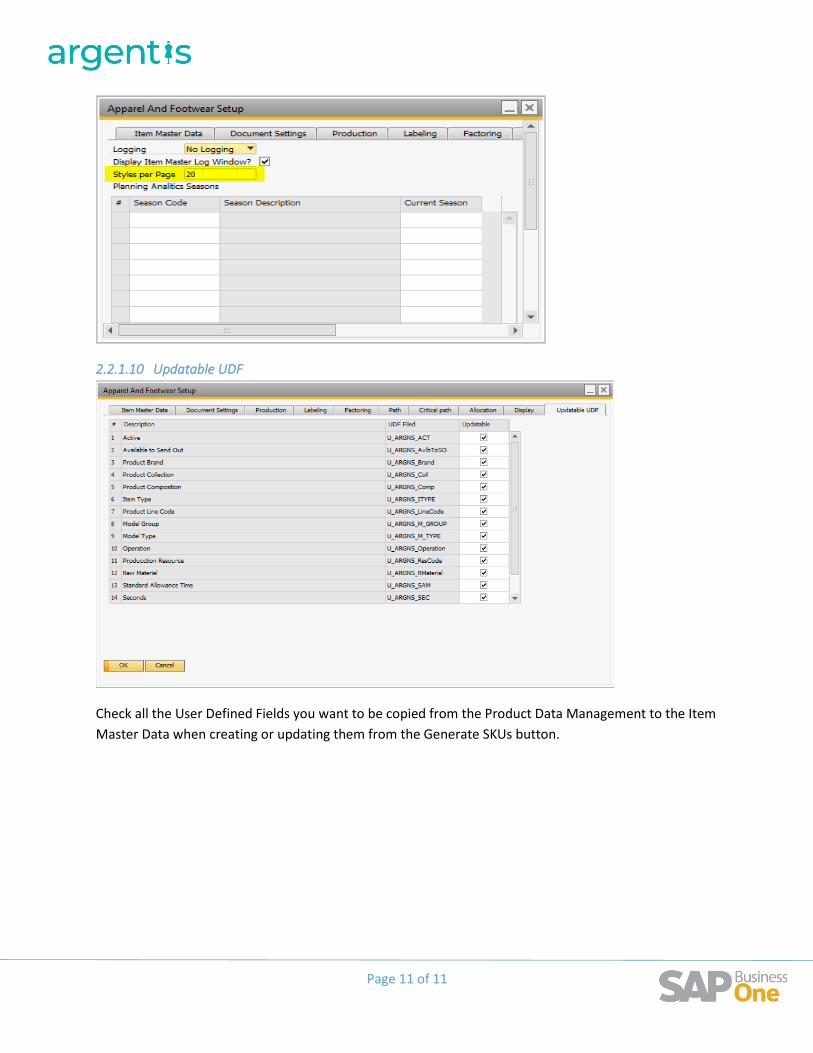
2.2.1.9 Display
If you are going to use the Style List Category Tree View, the you can set the number of style per page.
Page 11 of 11
2.2.1.10 Updatable UDF
Check all the User Defined Fields you want to be copied from the Product Data Management to the Item
Master Data when creating or updating them from the Generate SKUs button.


