Embed Size (px)
Citation preview
USER
2019
USER GUIDE (FOR IMPORTER) MyDHL+ Importer assigns shipment to shipper (for past IEO user)
Team: ESS Helpdesk Support
Company: DHL Express (Hong Kong) Limited
21/06/2019
USER GUIDE – MYDHL+ IMPORTER ASSIGNS SHIPMENTTO SHIPPER (FOR PAST IEO USER) 1
Index
Part I How the importer creates the shipment instruction (assign shipment) to the
shipper ?
Part II Which are the steps the importer creates the shipment instruction (assign
shipment) to the shipper ?
Part III Which are the steps the shipper creates waybill based on the importer’s
shipment instruction (assign shipment) ?
USER GUIDE – MYDHL+ IMPORTER ASSIGNS SHIPMENTTO SHIPPER (FOR PAST IEO USER) 2
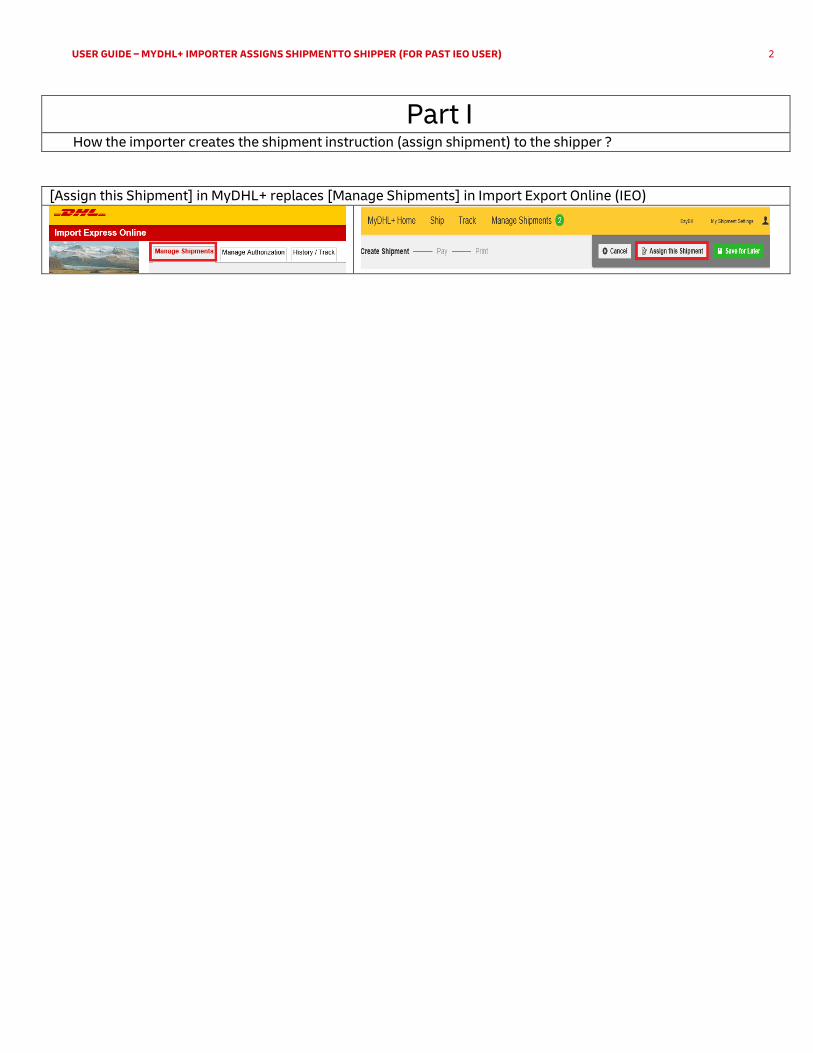
Part I How the importer creates the shipment instruction (assign shipment) to the shipper ?
[Assign this Shipment] in MyDHL+ replaces [Manage Shipments] in Import Export Online (IEO)
USER GUIDE – MYDHL+ IMPORTER ASSIGNS SHIPMENTTO SHIPPER (FOR PAST IEO USER) 3
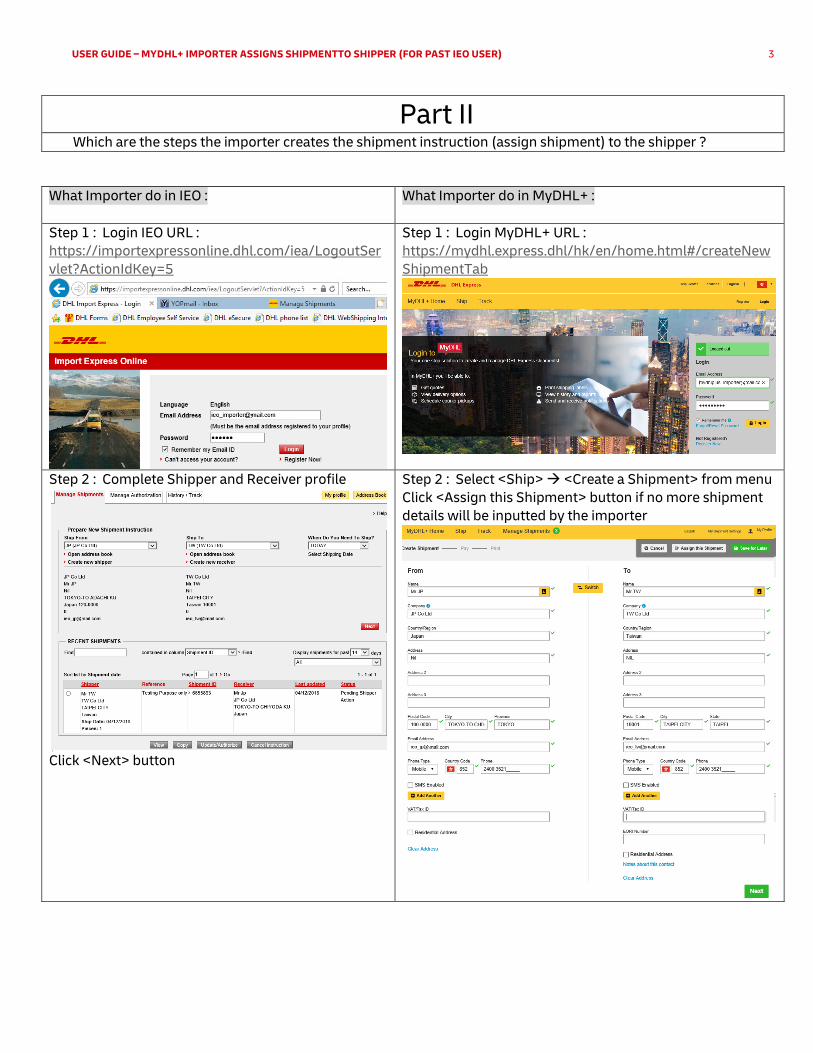
Part II Which are the steps the importer creates the shipment instruction (assign shipment) to the shipper ?
What Importer do in IEO :
What Importer do in MyDHL+ :
Step 1 : Login IEO URL :
https://importexpressonline.dhl.com/iea/LogoutSer
vlet?ActionIdKey=5
Step 1 : Login MyDHL+ URL :
https://mydhl.express.dhl/hk/en/home.html#/createNew
ShipmentTab
Step 2 : Complete Shipper and Receiver profile
Click <Next> button
Step 2 : Select <Ship> <Create a Shipment> from menu
Click <Assign this Shipment> button if no more shipment
details will be inputted by the importer
USER GUIDE – MYDHL+ IMPORTER ASSIGNS SHIPMENTTO SHIPPER (FOR PAST IEO USER) 4
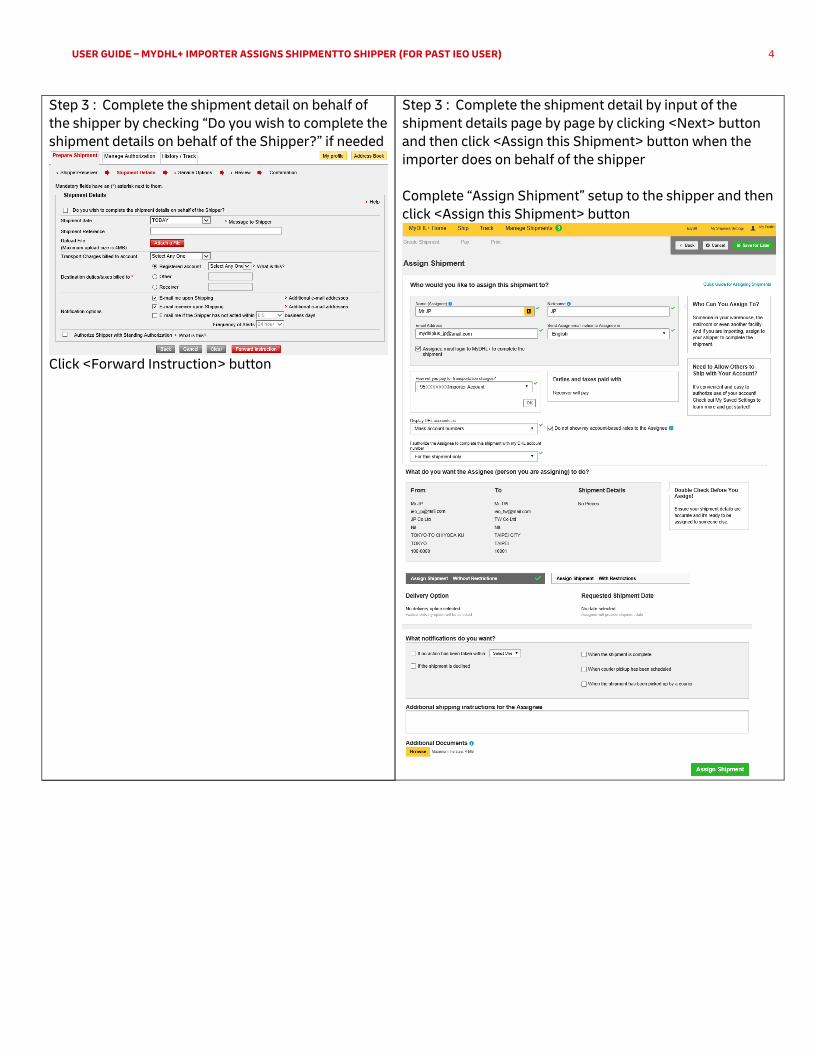
Step 3 : Complete the shipment detail on behalf of
the shipper by checking “Do you wish to complete the
shipment details on behalf of the Shipper?” if needed
Click <Forward Instruction> button
Step 3 : Complete the shipment detail by input of the
shipment details page by page by clicking <Next> button
and then click <Assign this Shipment> button when the
importer does on behalf of the shipper
Complete “Assign Shipment” setup to the shipper and then
click <Assign this Shipment> button
USER GUIDE – MYDHL+ IMPORTER ASSIGNS SHIPMENTTO SHIPPER (FOR PAST IEO USER) 5
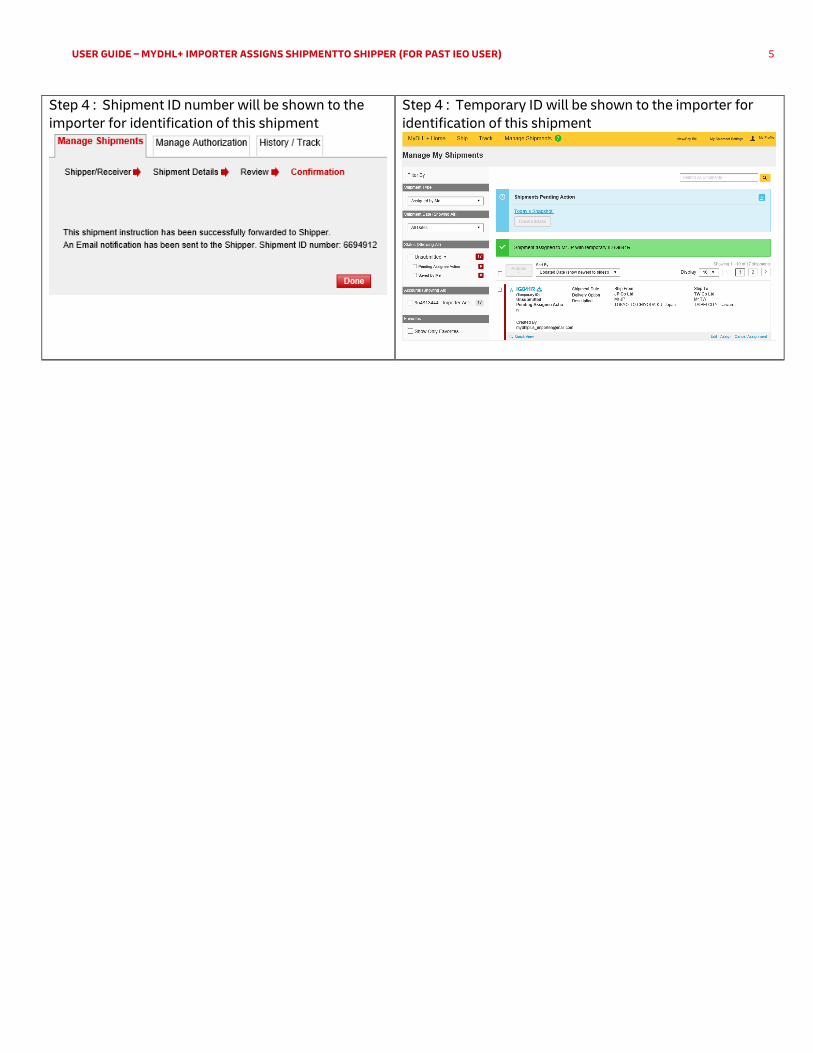
Step 4 : Shipment ID number will be shown to the
importer for identification of this shipment
Step 4 : Temporary ID will be shown to the importer for
identification of this shipment
USER GUIDE – MYDHL+ IMPORTER ASSIGNS SHIPMENTTO SHIPPER (FOR PAST IEO USER) 6
Part III Which are the steps the shipper creates waybill based on the importer’s shipment instruction (assign
shipment)?
What Shipper do in IEO : What Shipper do in MyDHL+ :
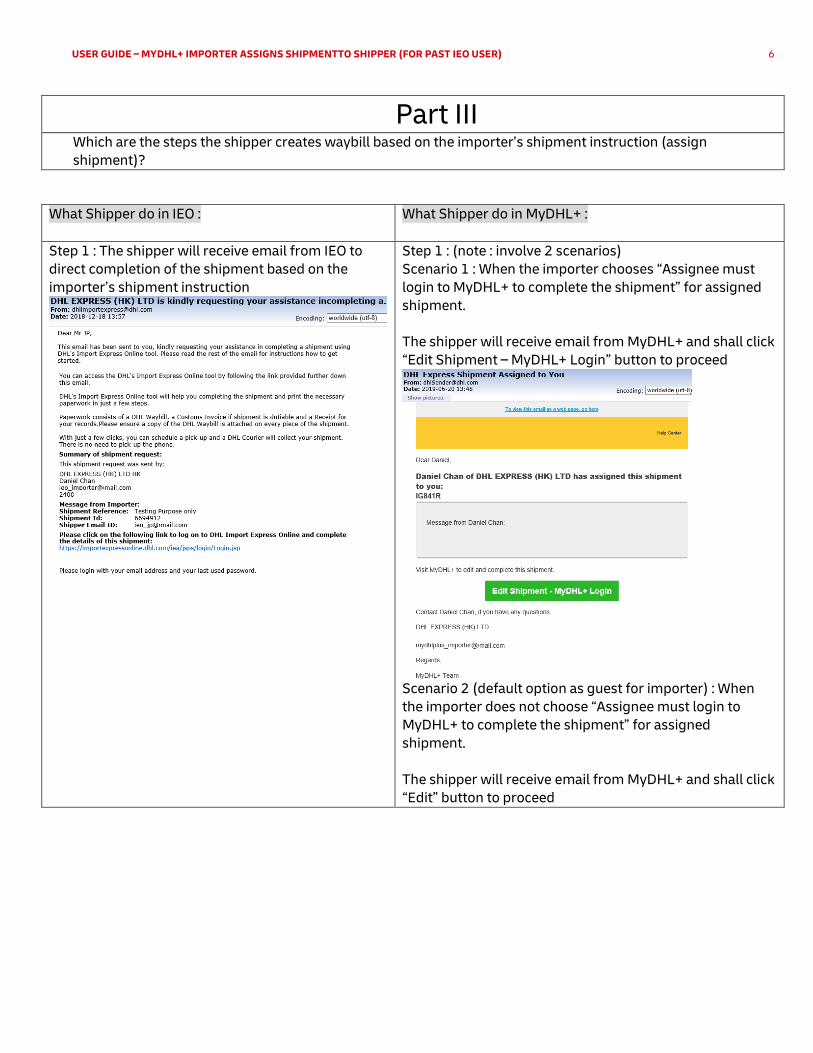
Step 1 : The shipper will receive email from IEO to
direct completion of the shipment based on the
importer’s shipment instruction
Step 1 : (note : involve 2 scenarios)
Scenario 1 : When the importer chooses “Assignee must
login to MyDHL+ to complete the shipment” for assigned
shipment.
The shipper will receive email from MyDHL+ and shall click
“Edit Shipment – MyDHL+ Login” button to proceed
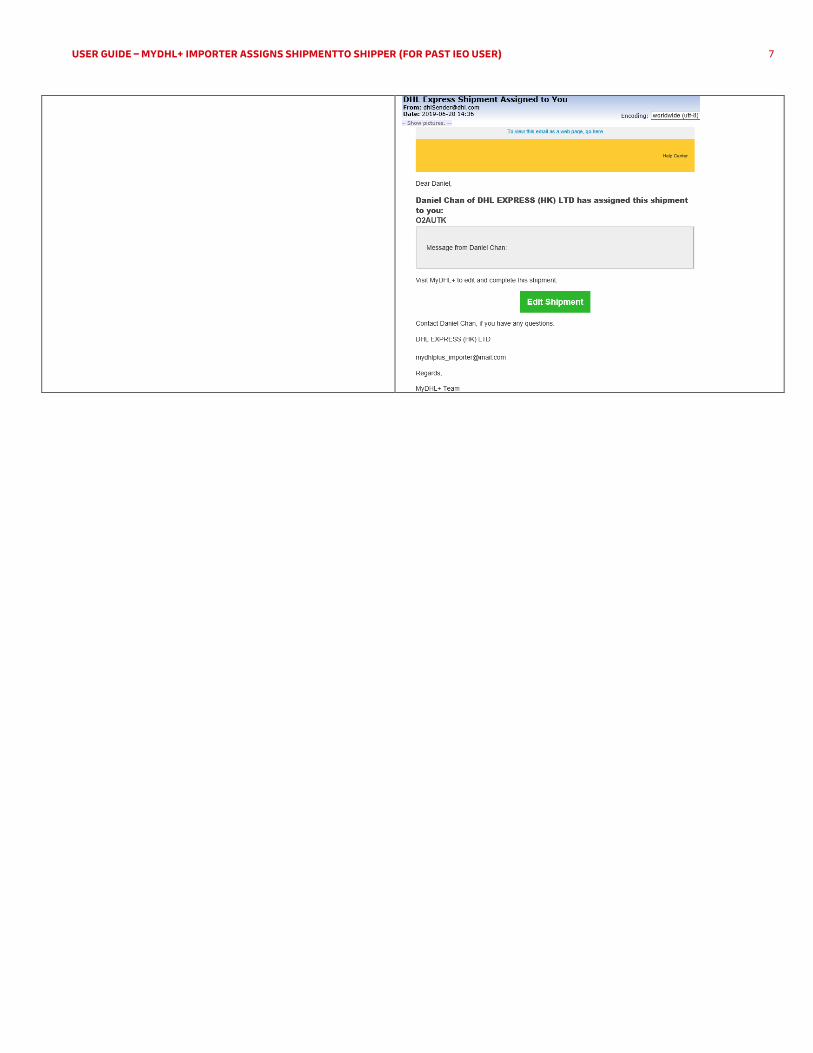
Scenario 2 (default option as guest for importer) : When
the importer does not choose “Assignee must login to
MyDHL+ to complete the shipment” for assigned
shipment.
The shipper will receive email from MyDHL+ and shall click
“Edit” button to proceed
USER GUIDE – MYDHL+ IMPORTER ASSIGNS SHIPMENTTO SHIPPER (FOR PAST IEO USER) 7
USER GUIDE – MYDHL+ IMPORTER ASSIGNS SHIPMENTTO SHIPPER (FOR PAST IEO USER) 8
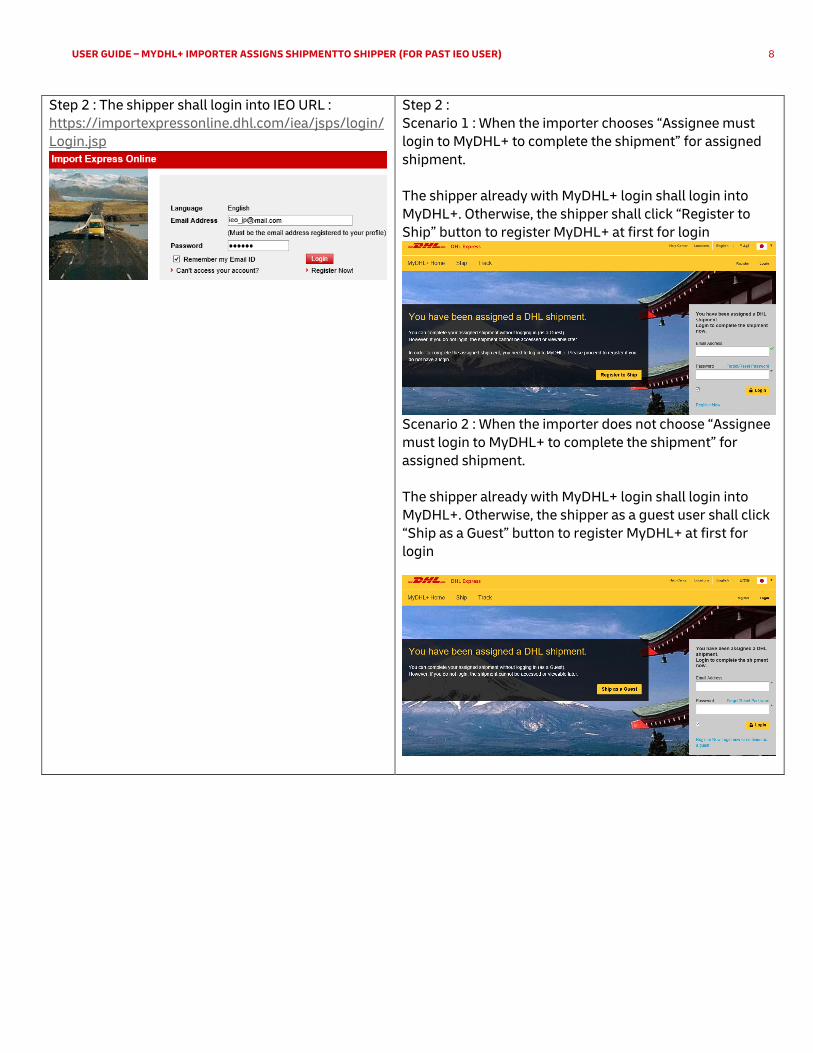
Step 2 : The shipper shall login into IEO URL :
https://importexpressonline.dhl.com/iea/jsps/login/
Login.jsp
Step 2 :
Scenario 1 : When the importer chooses “Assignee must
login to MyDHL+ to complete the shipment” for assigned
shipment.
The shipper already with MyDHL+ login shall login into
MyDHL+. Otherwise, the shipper shall click “Register to
Ship” button to register MyDHL+ at first for login
Scenario 2 : When the importer does not choose “Assignee
must login to MyDHL+ to complete the shipment” for
assigned shipment.
The shipper already with MyDHL+ login shall login into
MyDHL+. Otherwise, the shipper as a guest user shall click
“Ship as a Guest” button to register MyDHL+ at first for
login
USER GUIDE – MYDHL+ IMPORTER ASSIGNS SHIPMENTTO SHIPPER (FOR PAST IEO USER) 9
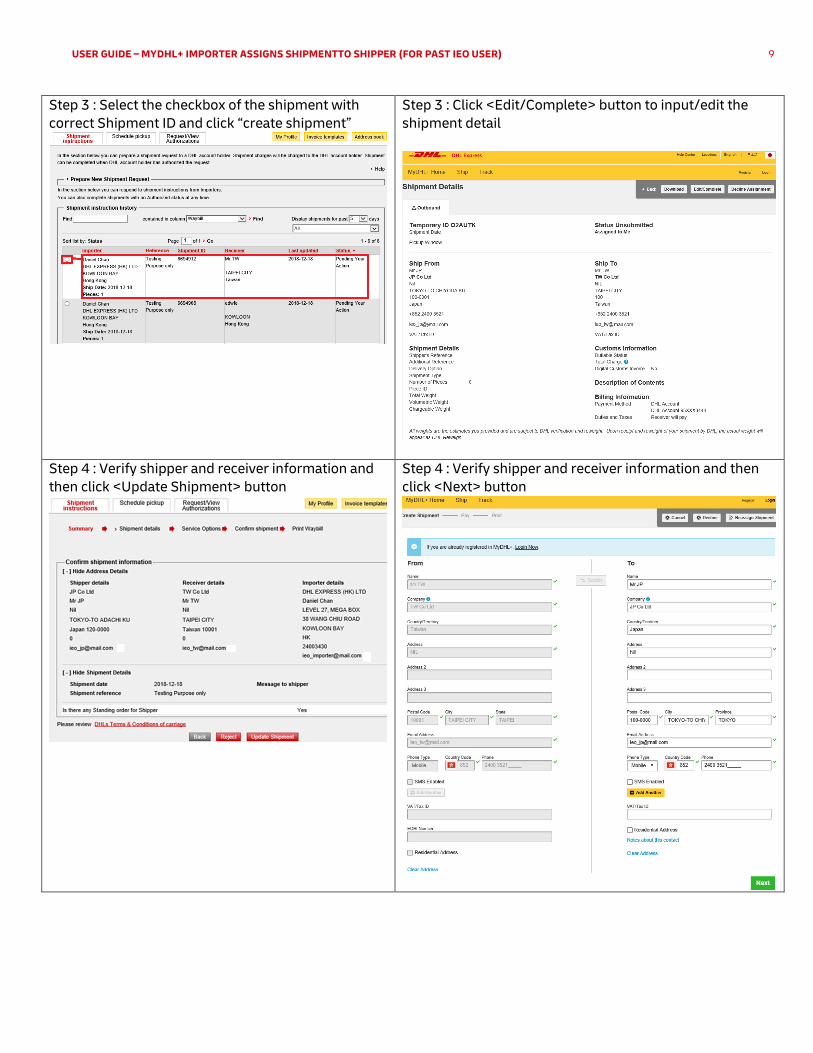
Step 3 : Select the checkbox of the shipment with
correct Shipment ID and click “create shipment”
Step 3 : Click <Edit/Complete> button to input/edit the
shipment detail
Step 4 : Verify shipper and receiver information and
then click <Update Shipment> button
Step 4 : Verify shipper and receiver information and then
click <Next> button
USER GUIDE – MYDHL+ IMPORTER ASSIGNS SHIPMENTTO SHIPPER (FOR PAST IEO USER) 10
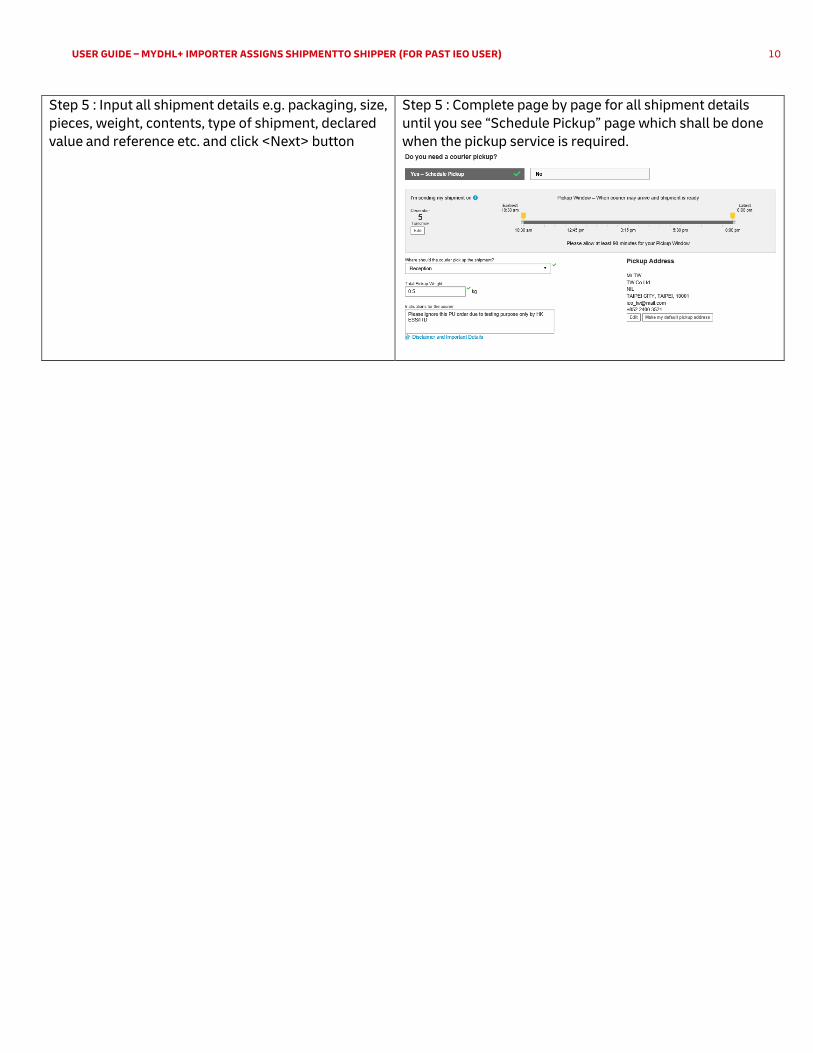
Step 5 : Input all shipment details e.g. packaging, size,
pieces, weight, contents, type of shipment, declared
value and reference etc. and click <Next> button
Step 5 : Complete page by page for all shipment details
until you see “Schedule Pickup” page which shall be done
when the pickup service is required.
USER GUIDE – MYDHL+ IMPORTER ASSIGNS SHIPMENTTO SHIPPER (FOR PAST IEO USER) 11
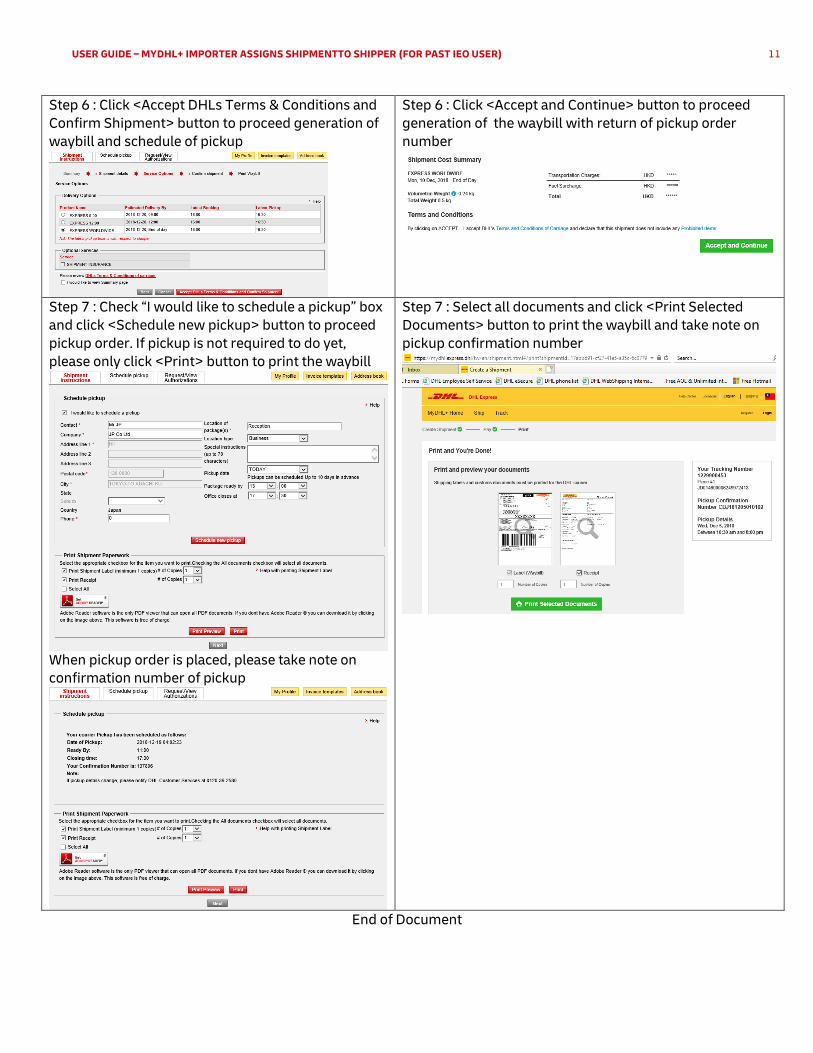
Step 6 : Click <Accept DHLs Terms & Conditions and
Confirm Shipment> button to proceed generation of
waybill and schedule of pickup
Step 6 : Click <Accept and Continue> button to proceed
generation of the waybill with return of pickup order
number
Step 7 : Check “I would like to schedule a pickup” box
and click <Schedule new pickup> button to proceed
pickup order. If pickup is not required to do yet,
please only click <Print> button to print the waybill
When pickup order is placed, please take note on
confirmation number of pickup
Step 7 : Select all documents and click <Print Selected
Documents> button to print the waybill and take note on
pickup confirmation number
End of Document


