Embed Size (px)
Citation preview

TensorFlow User Group ハード部 #22017/4/21
TensorFlow XLAは、
中で何をやっているのか?
TensorFlow r1.0(r1.1)で公開されたXLAのソースコードを追ってみました
@Vengineer

勉強会主催 : Xilinx Zynq MPSoC (2016/02/20) Altera SDK for OpenCL (2016/06/10) Xilinx SDSoC (2017/01/28)
PYNQ祭り (2017/03/04)
ブログ : Vengineerの戯言http://blogs.yahoo.co.jp/verification_engineer
Twitter : @Vengineer
書籍 : SystemVerilogスタートアップhttp://www.cqpub.co.jp/hanbai/books/36/36191.htm
自己紹介

Design Solution Forumhttp://www.dsforum.jp/
2017年10月13日(金)開催@新横浜今年で4年目
毎年500名を越える来場者
今年は「RISC-V」 関連を5講演予定
ディーブラーニング関連講演者募集中

「PYNQ祭り」延長戦 : FPGAディープラーニング実践懇親会
(2017/05/20)
https://fpgax.connpass.com/event/52935/
BNN-PYNQを実際にやってみよう
今すぐ、申込しよう

この資料は、
TensorFlow XLAに関するコードを
解析したものをまとめたです
TensorFlow r1.1対応
ご利用は、自己責任でお願いします

TensorFlow XLAとはhttps://www.tensorflow.org/performance/xla/
XLA(Accelerated Linear Algebra)は、TensorFlow計算を最適化する線形代数のドメイン固有のコンパイラです。 結果として、サーバーおよびモバイルプラットフォームでの速度、メモリ使用率、移植性が向上します。 当初、ほとんどのユーザーはXLAの大きなメリットは見られませんが、JIT(Just-In-Time)コンパイルやAOT(Ahead-Of-Time)コンパイルを使用してXLAを使用することで実験を開始できます。 新しいハードウェアアクセラレータをターゲットとする開発者は、XLAを試すことを特にお勧めします。
原文(英語)をそのまま、Google翻訳にお願いしました。

ブログにも書きました
TensorFlow XLAの衝撃2017年2月20日
http://blogs.yahoo.co.jp/verification_engineer/71016304.html

TensorFlow XLAって何?
Recap of TensorFlow DEV SUMMIT 2017で
発表された「XLAコンパイラ」 足立昌彦さん(株式会社カブク)
資料と解説を見てちょうだい
詳しくは、「TensorFlow XLAの情報と発表」
http://blogs.yahoo.co.jp/verification_engineer/71068236.html

これからお話する内容
0)、Pythonの式からTensorFlowグラフが どう変形されるかを見ていきます
1)、JIT (Just-In-Time) コンパイルただし、単一マシンのみで、GPUは1つ
2)、AOT (Ahead-Of-Time) コンパイルCPUのみx86-64/ARM/AARCH64/PowerPC

0)、Pythonの式からTensorFlowグラフがどう変形されるかを見ていきます

TensorFlow XLAは、まだ、
単一マシンでしか使えないので
DirectSessionの場合で

Session.runの動きpython/client/session.py
SessionInterface => BaseSession => Sessiondef run( self, fetches, feed_dict=None, options=None, run_metadata=None );
_run _do_run tf_session.TF_PRun
ここからC++の世界
c/c_api.ccのTF_Run関数
c/c_api.ccのTF_Run_Helper関数
Session::run (core/public/session.h) DirectSession::Run
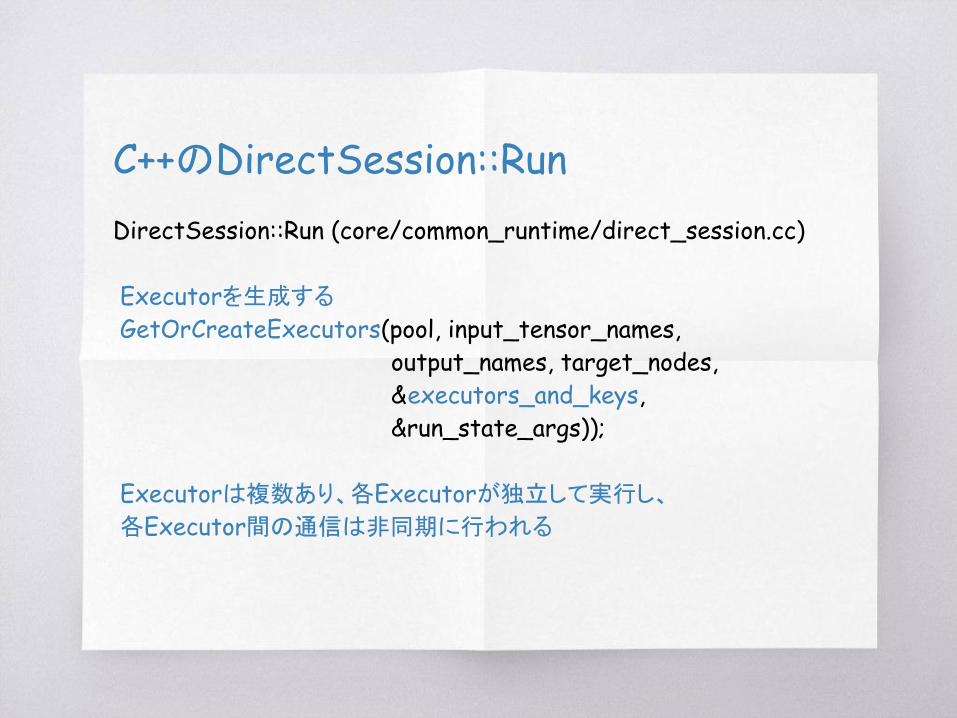
C++のDirectSession::RunDirectSession::Run (core/common_runtime/direct_session.cc)
Executorを生成する
GetOrCreateExecutors(pool, input_tensor_names, output_names, target_nodes, &executors_and_keys, &run_state_args));
Executorは複数あり、各Executorが独立して実行し、
各Executor間の通信は非同期に行われる

C++のDirectSession::Runの続き
DirectSession::Run (core/common_runtime/direct_session.cc)
実行部分のところ
for (const auto& item : executors_and_keys->items) { item.executor->RunAsync(args, barrier->Get()); } Executorが非同期に実行される
すべてExecutorの実行が終了するまで待つ
WaitForNotification(&run_state, &step_cancellation_manager, run_options.timeout_in_ms() > 0 ? run_options.timeout_in_ms() : operation_timeout_in_ms_);

executor->RunAsync
Executor::RunAsync (core/common_runtime/executor.h) ExecuteImple::RunAsync ExecuteState::RunAsync ExecuteState::ScheduleReady ExecuteState::Process (core/common_runtime/executor.cc)
・device->ComputeAsync 非同期の場合
・device->Compute 同期の場合

え、どこでグラフが
生成されるんだよ!

はい、ここです
DirectSession::GetOrCreateExecutors の
CreateGraphs 関数内でグラフを生成し、分割する
CreateGraphs( options, &graphs, &ek->flib_def, run_state_args));
その後に、
分割されたグラフ単位で Executor にて実行される

グラフは次のステップで作られる
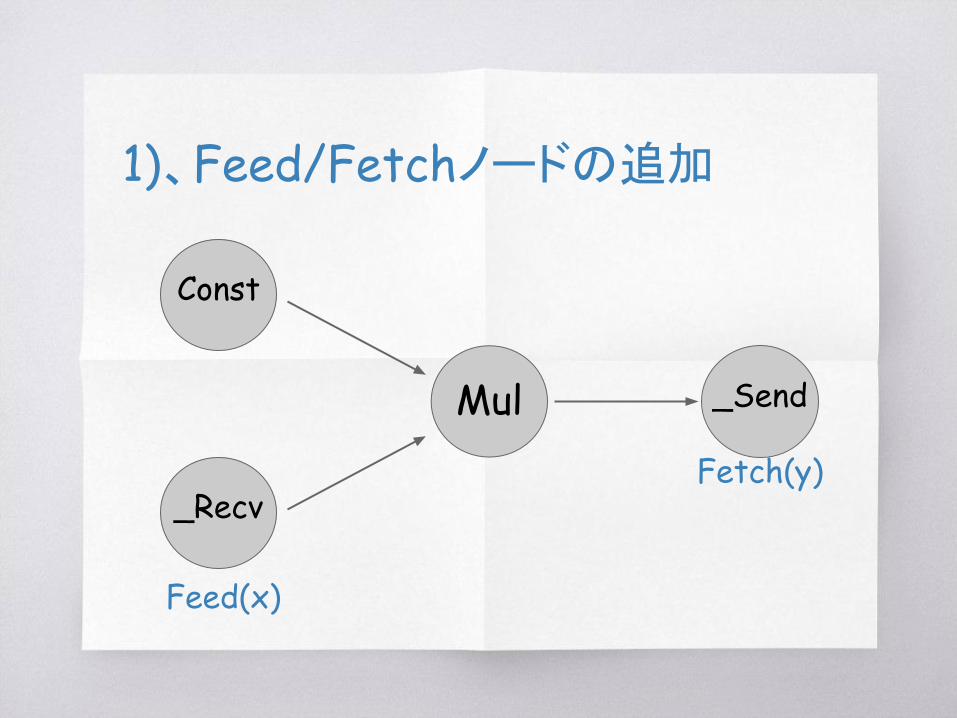
1)、Feed/Fetchノードの追加
subgraph::RewriteGraphForExecution(core/graph/subgraph.cc)
2)、PlacementSimplePlacer::Run(core/common_runtime/simple_placer.cc)
3)、グラフの分割 (同じデバイス&実行単位)Partition(core/graph/graph_partition.cc)

RewriteGraphForExecutioncore/graph/subgraph.cc
Feedノードを追加 (_Recv : .Attr("client_terminated", true)) if (!fed_outputs.empty()) { FeedInputs( g, device_info, fed_outputs, &name_index ); }
Fetchノードを追加 (_Send : .Attr("client_terminated", true)) std::vector<Node*> fetch_nodes; if (!fetch_outputs.empty()) { FetchOutputs( g, device_info, fetch_outputs, &name_index, &fetch_nodes ); }

SimplePlacer::Runcore/common_runtime/simple_placer.cc
1. First add all of the nodes.
2. Enumerate the constraint edges, and use them to update the disjoint node set.
3. For each node, assign a device based on the constraints in the disjoint node set.
4. Perform a second pass assignment for those nodes explicitly skipped during the first pass.

Partitioncore/graph/graph_partition.cc
1)、各デバイスで実行できる単位に分割する
デバイス : cpu / gpu / XLA_CPU / XLA_GPU 2)、各デバイス間に、_Send / _Recv ノードを追加する
例えば、cpu => gpu の部分に、
cpu側には _Send ノードを
gpu側には _Recv ノードを追加する

サンプルコードで確認してみよう

デバイスを gpu にすると
def test_gpu(self):
with tf.Session() as sess: x = tf.placeholder(tf.float32, [2], name="x") with tf.device("gpu"): y = x * 2 result = sess.run(y, {x: [1.5, 0.5]})

0)、最初
Mul
Const
Feed(x)
Fetch(y)

1)、Feed/Fetchノードの追加
Mul
_Recv
Const
_Send
Feed(x)
Fetch(y)

2)、Placement
Mul
_Recv
Const
_Send
cpu : Feed(x)
cpu : Fetch(y)
gpu
gpu

3)、グラフの分割
_Recv
_Recv_Send
_Send _Recv _Send
gpu
Feed(x) Fetch(y)cpu
MulConst

1)、JIT コンパイル

Using JIT Compilationhttps://www.tensorflow.org/performance/xla/jit
TensorFlow/XLA JITコンパイラは、XLAを使用してTensorFlowグラフの一部をコンパイルして実行します。 この標準的なTensorFlow実装の利点は、XLAが複数の演算子(カーネル融合)を少数のコンパイル済みカーネルに融合できることです。 TensorFlow Executorsが実行するように、演算子を融合させることで、メモリ帯域幅の要件を減らし、演算子を1つずつ実行するよりもパフォーマンスを向上させることができます。
原文(英語)をそのまま、Google翻訳にお願いしました。

JITが出来るようにビルドする
TensorFlowでXLAを使えるようにする by @adamrocker
http://blog.adamrocker.com/2017/03/build-tensorflow-xla-compiler.html
の
「A: TensorFlowのビルド」に詳しく書いてあります。
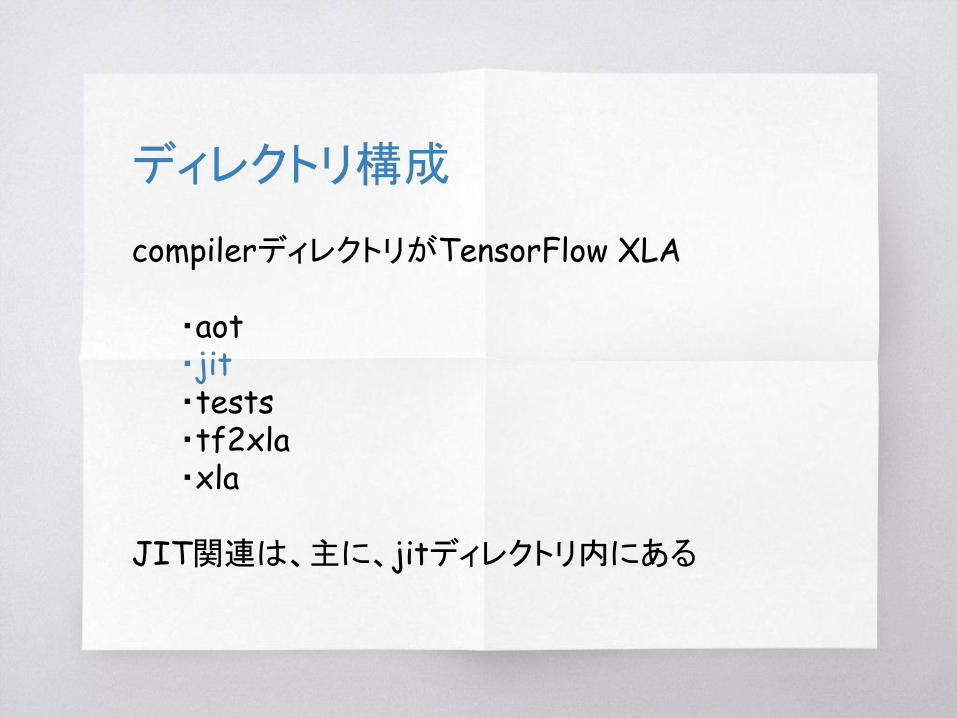
ディレクトリ構成
compilerディレクトリがTensorFlow XLA
・aot・jit・tests・tf2xla・xla
JIT関連は、主に、jitディレクトリ内にある

TensorFlow w/XLA: TensorFlow, Compiled! Expressiveness with performancehttps://autodiff-workshop.github.io/slides/JeffDean.pdf
XLA対応のデバイス

先ずは、TensorFlow XLAのJITでは
グラフがどのように変更されるか、確認してみよう

gpu を XLA_CPU に変更
def testXLA_JIT(self):
with tf.Session() as sess:
x = tf.placeholder(tf.float32, [2], name="x") with tf.device("device:XLA_CPU:0"): y = x * 2 result = sess.run(y, {x: [1.5, 0.5]})

0)、最初
Mul
Const
Feed(x)
Fetch(y)
1)、Feed/Fetchノードの追加
Mul
_Recv
Const
_Send
Feed(x)
Fetch(y)

2)、Placement
Mul
_Recv
Const
_Send
cpu : Feed(x)
cpu : Fetch(y)
XLA_CPU
XLA_CPU
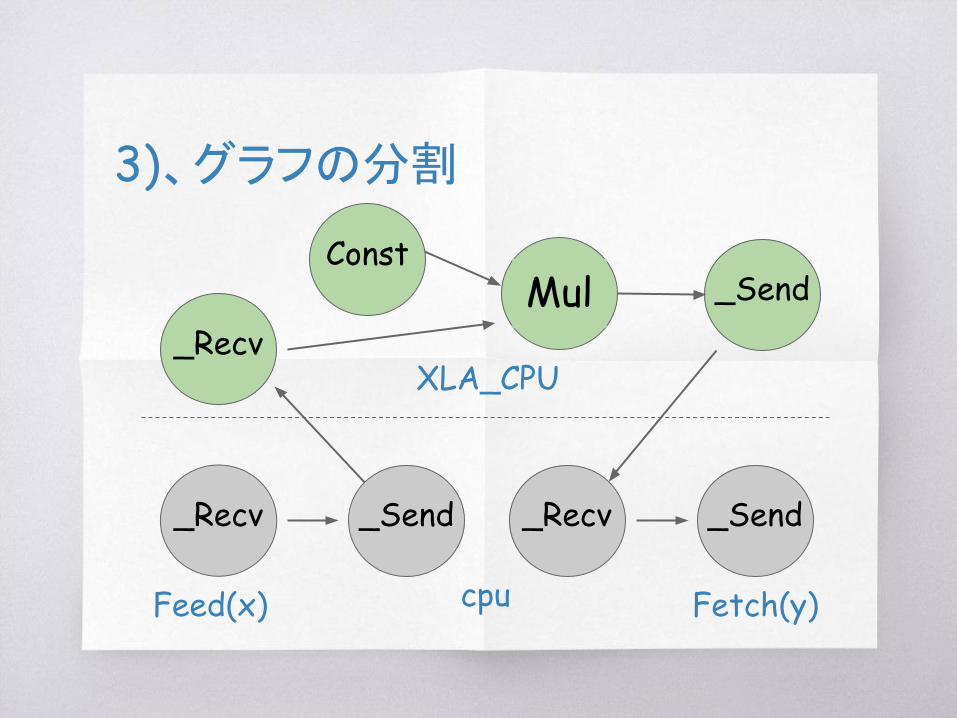
3)、グラフの分割
_Recv
_Recv_Send
_Send _Recv _Send
XLA_CPU
Feed(x) Fetch(y)cpu
MulConst
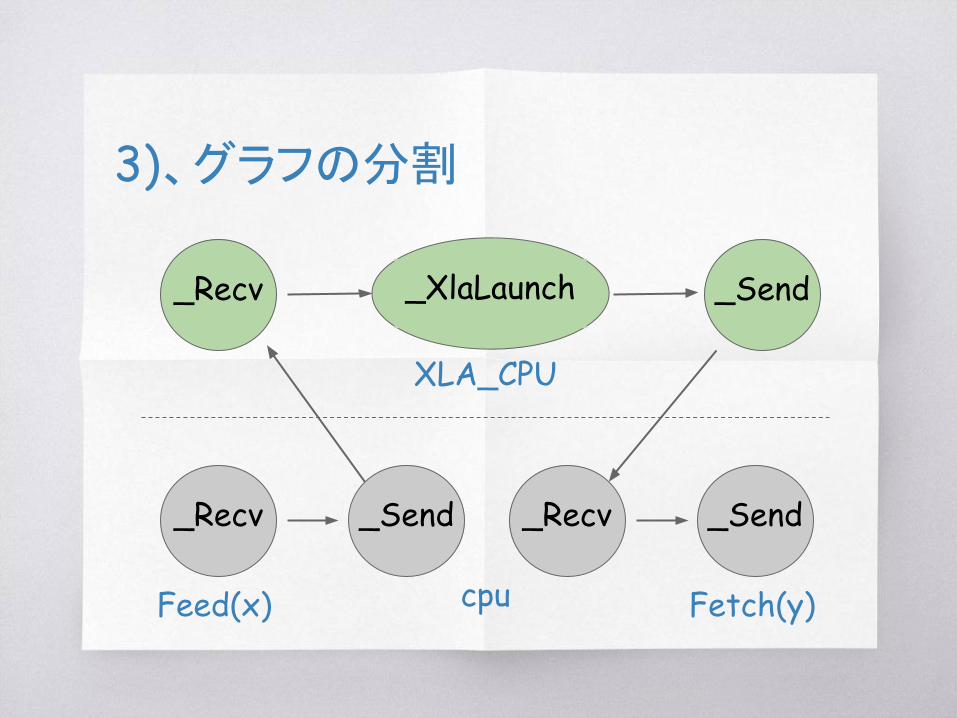
3)、グラフの分割
_XlaLaunch
_Recv
_Recv _Send
_Send _Recv _Send
XLA_CPU
Feed(x) Fetch(y)cpu

複数Opsを_XlaLaunch Opに変換
_XlaLaunch
XLA_CPU
MulConst
gpu

ええええ、なんで、_XlaLaunch
になっちゃうの?
どうして?

Passを使ってグラフを変形してるよcompiler/jit/jit_compilation_pass_registration.cc
REGISTER_OPTIMIZATIONマクロを使って、
OptimizationPassRegistry::POST_REWRITE_FOR_EXECPassを追加
・MarkForCompilationPass // コンパイル可能なものにマーク
mark_for_compilation_pass.{h,cc} ・EncapsulateSubgraphsPass // サブグラフを関数ノード
Encapsulate_subgraphs_pass.{h,cc} ・BuildXlaLaunchOpsPass // 関数ノードを_XlaLaunchに置換
build_xla_launch_ops_pass.{h,cc}
上から順番に実行される

これらのPassはいつ実行される?
1)、Feed/Fetchノードの追加
subgraph::RewriteGraphForExecution
ここで、PRE_PLACEMENTパス を実行
2)、Placementここで、POST_PLACEMENTパス を実行
SimpleGraphExecutionState::BuildGraph関数で
POST_REWRITE_FOR_EXEC を実行
3)、グラフの分割 Partitionここで、POST_PARTITIONINGパス を実行

複数Opsを_XlaLaunch Opに変換
_XlaLaunch
XLA_CPU
MulConst
gpu

_XlaLaunch Op って?

TensorFlow XLA : JITでは!
同じデバイス内で実行できるSubgraph単位のノードをギュギュッと1つにまとめて、
_XlaLaunch Op
内で実行する_XlaLaunchは、TensorFlow XLA専用のOpとして実装

_XlaLaunch Opで実装は?
・Register the new Op in a C++ file・Implement the Op in C++
compiler/kernels/xla_local_launch_op.hcompiler/kernels/xla_local_launch_op.cc

_XlaLaunch Op の登録
REGISTER_OP("_XlaLaunch") .Input("constants: Tconstants") .Attr("Tconstants: list(type) >= 0") .Input("args: Targs") .Attr("Targs: list(type) >= 0") .Output("results: Tresults") .Attr("Tresults: list(type) >= 0") .Attr("function: func") .Doc("XLA Launch Op. For use by the XLA JIT only.");

XlaLocalLaunchOp::Compute ・XlaCompilationCacheクラスのインスタンス(compiler)を生成
・_XlaLaunch Op内で実行する一連の関数群をコンパイル
ここで、LLVMを利用して、バイナリコードに変換する
compiler->Compile( function_, num_constant_args_, ctx, &kernel, &executable));
・各種パラメータ&入力リストをXLA用データに変換
・executableのRunを実行(バイナリコードが実行される) auto run_result = executable->Run(arg_ptrs, run_options); ・XLA用データを出力リストに変換
TensorFlow w/XLA: TensorFlow, Compiled! Expressiveness with performancehttps://autodiff-workshop.github.io/slides/JeffDean.pdf
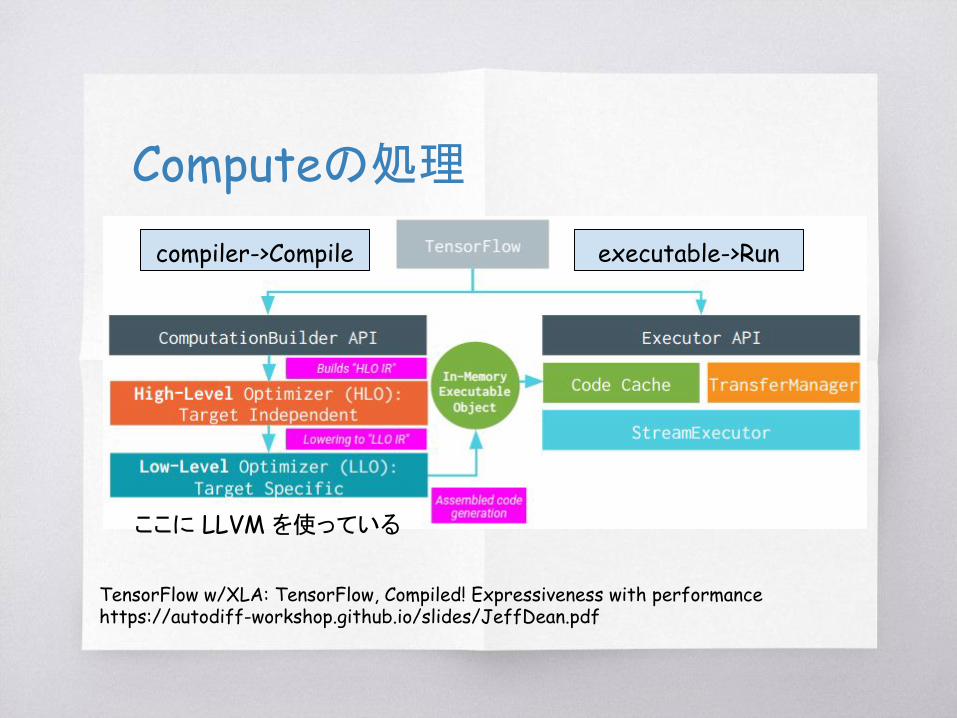
Computeの処理
ここに LLVM を使っている
compiler->Compile executable->Run

Compile
TensorFlowグラフから実行コードへの変換

XlaCompilationCache::Compilejit/xla_compilation_cache.cc
メンバー compiler_ は、XlaCompiler ・コンパイル済みで無いときは、コンパイルする
entry->compiled = true; entry->compilation_status = compiler_.CompileFunction( flr.get(), function, args, &entry->compilation_result);
・コンパイル済みコードでExecutableを生成する
entry->compilation_status = compiler_.BuildExecutable(entry->compilation_result, &entry->executable);
*executable = entry->executable.get();

XlaCompiler::CompileFuntionxf2xla/xla_compiler.cc
・CompileFunction 関数内のグラフからマシン語まで生成
1)、グラフの最適化 (OptimizeGraph)TensorFlowの標準関数
2)、グラフのコンパイル (CompileGraph)TensorFlowグラフからXLA(HLO) Computionへ

XlaCompiler::CompileGraphは、
2)のAOT で

TensorFlow w/XLA: TensorFlow, Compiled! Expressiveness with performancehttps://autodiff-workshop.github.io/slides/JeffDean.pdf
BuildExecutable
BuildHloModule
backend->compiler()->Compile
CpuExecutable

Service::BuildExecutablexla/service/service.cc
グラフからXLA HLOへ変換for (const VersionedComputationHandle& versioned_handle : versioned_handles) { auto module = computation_tracker_.BuildHloModule( Versioned_handle, true)); modules.push_back(std::move(module));}….XLA HLOからLLVM IR => Executableに変換
std::vector<std::unique_ptr<Executable>> executables = backend->compiler()->Compile( std::move(modules), std::move(module_configs), hlo_dumper, std::move(executors)));

XlaLocalLaunchOp::Compute ・XlaCompilationCacheクラスのインスタンス(compiler)を生成
・_XlaLaunch Op内で実行する一連の関数群をコンパイル
ここで、LLVMを利用して、バイナリコードに変換する
compiler->Compile( function_, num_constant_args_, ctx, &kernel, &executable));
・各種パラメータ&入力リストをXLA用データに変換
・executableのRunを実行(バイナリコードが実行される) auto run_result = executable->Run(arg_ptrs, run_options); ・XLA用データを出力リストに変換

TensorFlow w/XLA: TensorFlow, Compiled! Expressiveness with performancehttps://autodiff-workshop.github.io/slides/JeffDean.pdf
executable->Runを実行
executable->RunCpuExecutable

LocalExecutable::Runxla/client/local_client.cc
StatusOr<std::unique_ptr<ShapedBuffer>> LocalExecutable::Run( const tensorflow::gtl::ArraySlice<const ShapedBuffer*> arguments, const ExecutableRunOptions& options) { ExecutableRunOptions actual_options = options; ….. return executable_->ExecuteOnStream(&actual_options, arguments, nullptr);}
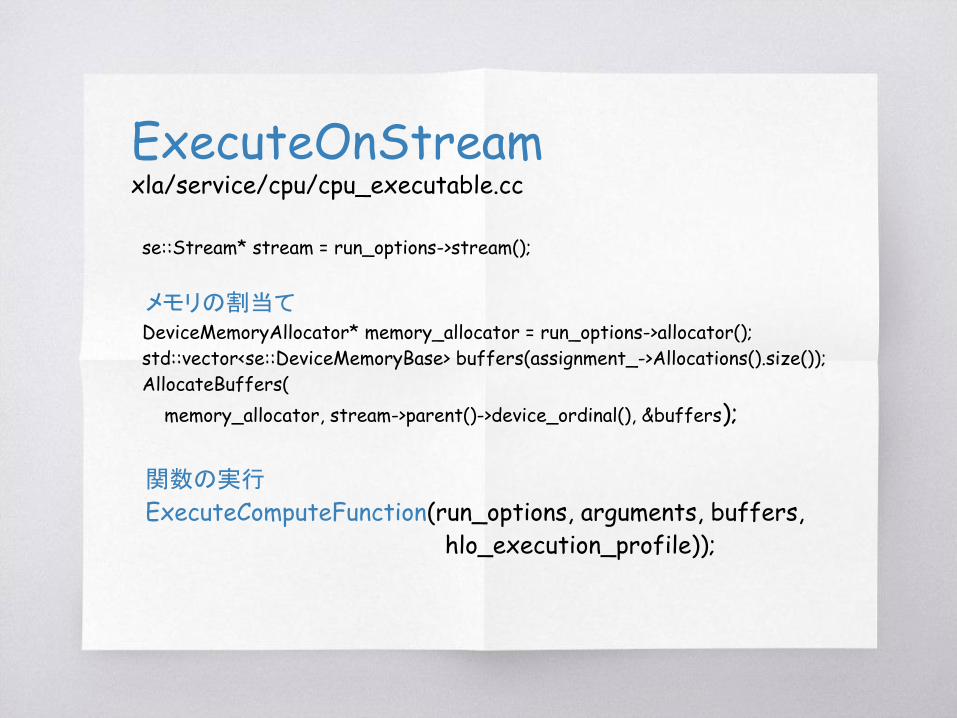
ExecuteOnStreamxla/service/cpu/cpu_executable.cc
se::Stream* stream = run_options->stream();
メモリの割当て DeviceMemoryAllocator* memory_allocator = run_options->allocator(); std::vector<se::DeviceMemoryBase> buffers(assignment_->Allocations().size()); AllocateBuffers( memory_allocator, stream->parent()->device_ordinal(), &buffers);
関数の実行
ExecuteComputeFunction(run_options, arguments, buffers, hlo_execution_profile));

ExecuteComputeFunctionxla/service/cpu/cpu_executable.cc
マシンコードに変換された関数 (compute_function_) を実行
compute_function_(result_buffer, run_options, args_array.data(),
buffer_pointers.data(), profile_counters.data());
CpuExecutableのコンストラクタで compute_function_ は設定
CpuExecutable::CpuExecutable( …., Const string& entry_function_name, …) {
llvm::JITSymbol sym = jit_->FindSymbol(entry_function_name); compute_function_ =reinterpret_cast<ComputeFunctionType>(sym.getAddress());
}

2)、AOT コンパイル

Using AOT compilationhttps://www.tensorflow.org/performance/xla/tfcompile
・tfcompileって、何?
・tfcompileは、何をする?
・tfcompileを使うには!
現時点(TensorFlow r1.1) では、AOTのターゲットは、
公式には、CPU(/x86-64/ARM64)のみサポート。
でも、コードにはCPU(ARM/PowerPC)もサポート。

tfcompileって、何?
・TensorFlowグラフを実行可能コードに
コンパイルする
・バイナリサイズ
およびランタイムオーバーヘッドを減らす
・利用例:推論用グラフを
モバイルデバイス用実行コードに変換

ランタイムが無くなる
TensorFlowグラフはTensorFlowランタイム上で実
行されるので、グラフ内の各ノードの実行ではラン
タイムオーバヘッドを招く
また、TensorFlowランタイム用のコードが必要であ
るため、バイナリサイズが大きくなる
tfcompileによって生成される実行コードは、
TensorFlowランタイムを使用せず、計算で実際に
使用されるカーネルにのみ依存する

tfcompileは、何をする?
tfcompileは、TensorFlowサブグラフからそのサ
ブグラフを実行する関数を生成する
Feedは関数の入力引数、Fetchは関数の出力引
数となる
すべてのPalceholdersとVariablesは、関数の入
力引数としてFeedとして指定する必要がある
tfcompileによって生成されたファイルは、
関数のオブジェクトファイルとして利用できる

tfcompileを使うには!
1) コンパイルするサブグラフを構成する
2) tf_libraryビルドマクロを使用して
サブグラフをコンパイルする
3) サブグラフを呼び出すコードを書く
4) 最終的なバイナリを作成する

tfcompile
バイナリでは提供されていないので、ソースコードからビルドす
る必要がある

tfcompileのビルドの仕方
TensorFlowでXLAを使えるようにする by @adamrocker
http://blog.adamrocker.com/2017/03/build-tensorflow-xla-compiler.html
の
「B: tfcompileを試す」に詳しく書いてあります。

tfcompile::Mainaot/tfcompile_main.cc
コンフィグファイルとグラフファイルの読み込み
ReadProtoFile("config", flags.config, &config); ReadProtoFile("graph", flags.graph, &graph_def);
グラフの初期化
InitGraph(graph_def, config, flags, &flib, &graph); グラフのコンパイル
CompileGraph(std::move(graph), flags, &flib, &compile_result);
ファイル(オブジェクト、ヘッダ)の書き出し
WriteStringToFile( …., …., …. );

グラフ情報
コンフィグ情報
グラフ情報をHLO(最適化)に変換
HLOをLLVMでCPU実行コードに変換
オブジェクトファイルへの出力
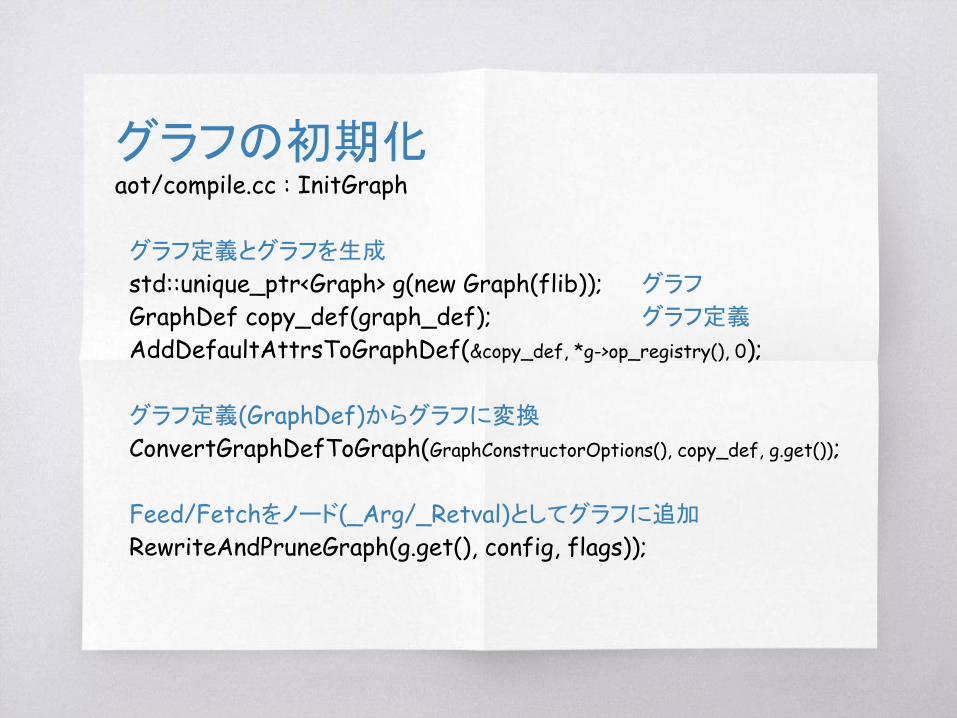
グラフの初期化aot/compile.cc : InitGraph
グラフ定義とグラフを生成
std::unique_ptr<Graph> g(new Graph(flib)); グラフ
GraphDef copy_def(graph_def); グラフ定義
AddDefaultAttrsToGraphDef(©_def, *g->op_registry(), 0);
グラフ定義(GraphDef)からグラフに変換
ConvertGraphDefToGraph(GraphConstructorOptions(), copy_def, g.get());
Feed/Fetchをノード(_Arg/_Retval)としてグラフに追加
RewriteAndPruneGraph(g.get(), config, flags));

0)、最初
Mul
Const
Feed(x)
Fetch(y)
x = tf.placeholder(tf.float32, [2], name="x")y = x * 2

1)、Feed/Fetchノードの追加
Mul
_Arg
Const
_Retval
Feed(x)
Fetch(y)
x = tf.placeholder(tf.float32, [2], name="x") y = x * 2

グラフのコンパイルaot/compile.cc : CompileGraph
TensorFlowグラフをXLA(HLO)フォーマットに変換
ConvertGraphToXla(client, std::move(graph), flib,
&computation, &compile_result->has_context_arg); コンパイルオプションの設定
xla::cpu::CpuAotCompilationOptions aot_opts( flags.target_triple, flags.target_cpu, flags.target_features, flags.entry_point, xla::cpu::CpuAotCompilationOptions::RelocationModel::BigPic); XLA(HLO)をコンパイル
return CompileXla(client, computation, aot_opts, compile_result);

ConvertGraphToXla
グラフ情報をXLA(HLO)に変換
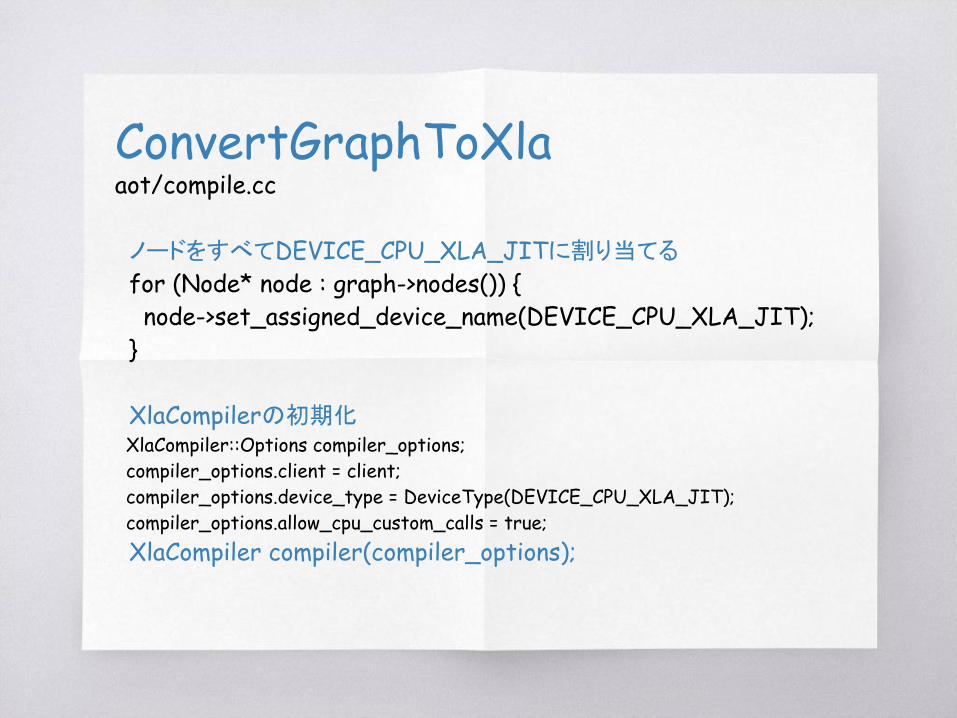
ConvertGraphToXlaaot/compile.cc
ノードをすべてDEVICE_CPU_XLA_JITに割り当てる
for (Node* node : graph->nodes()) { node->set_assigned_device_name(DEVICE_CPU_XLA_JIT); }
XlaCompilerの初期化 XlaCompiler::Options compiler_options; compiler_options.client = client; compiler_options.device_type = DeviceType(DEVICE_CPU_XLA_JIT); compiler_options.allow_cpu_custom_calls = true; XlaCompiler compiler(compiler_options);

2)、ノードをCPU_XLA_JITに
Mul
_Arg
Const
_Retval
Feed(x)
Fetch(y)
CPU_XLA_JIT

ConvertGraphToXlaaot/compile.cc
XlaCompilerのCompileGraph関数を実行
std::unique_ptr<FunctionLibraryRuntime> flib_run(NewFunctionLibraryRuntime( compiler.device_mgr(), Env::Default(), compiler.device(), graph->versions().producer(), flib_def, OptimizerOptions())); XlaCompiler::CompilationResult result; compiler.CompileGraph("tfcompile", std::move(graph),
flib_run.get(), xla_args, false, &result); グラフのコンパイル結果を XLA Computation を取り出す
*computation = std::move(result.computation);

XlaCompiler::CompileGraphxf2xla/xla_compiler.cc
グラフのコンパイル (CompileGraph)
1)、引数のビルド (BuildArguments)
2)、グラフの実行 (ExecuteGraph)XLA Computationの生成
3)、Executionの生成 (BuildComputation)XLA ComputationからLocalExecutable生成

https://docs.google.com/presentation/d/197G6FWQ4pqMS5cFkbNMkgQMoUV3B4Sdo9CzPNHJ5LBU/edit#slide=id.g1d042a8a7f_0_729 の20頁
XlaCompiler::ExecuteGraph

XlaCompiler::ExecuteGraph
・LocalExecutor グラフ内のすべてのノードのカーネルを生成し、実行する
・XLA Graph
・tf2xla kernels 各ノードのcompute関数でコンパイル(Compile関数)を実行

各種カーネルtf2xla/kernels
_Arg : declaration_op.cc Feedに対応
_Retval : retval_op.cc Fetchに対応
その他、このディレクトリにあるカーネルのみ、
XLA(HLO)に変換可能

https://docs.google.com/presentation/d/197G6FWQ4pqMS5cFkbNMkgQMoUV3B4Sdo9CzPNHJ5LBU/edit#slide=id.g1d042a8a7f_0_729 の22頁
CompileXla
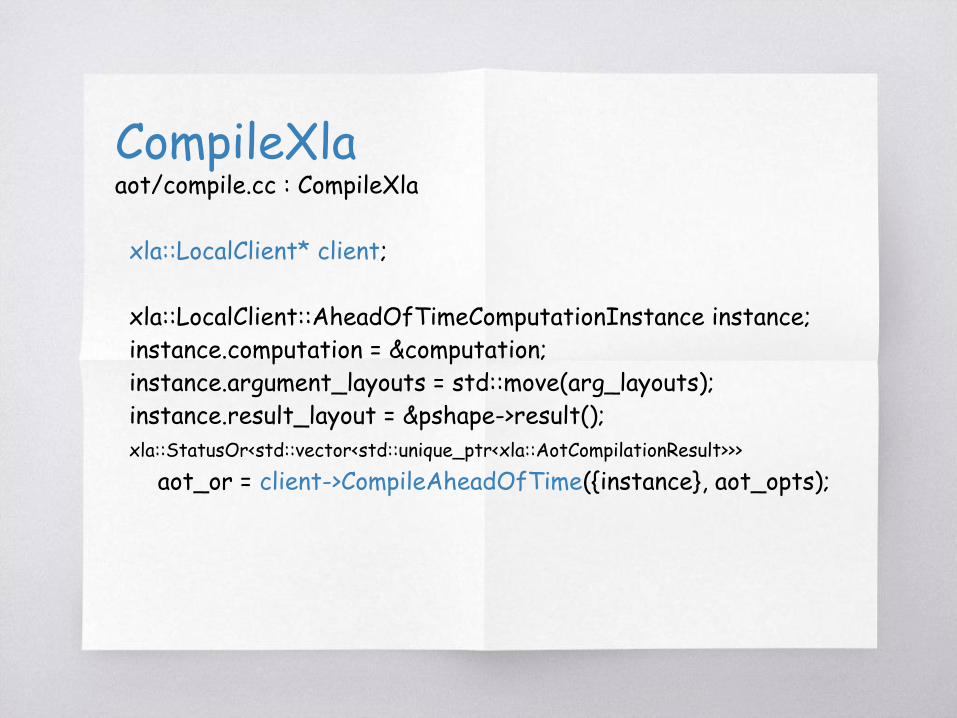
CompileXlaaot/compile.cc : CompileXla
xla::LocalClient* client;
xla::LocalClient::AheadOfTimeComputationInstance instance; instance.computation = &computation; instance.argument_layouts = std::move(arg_layouts); instance.result_layout = &pshape->result(); xla::StatusOr<std::vector<std::unique_ptr<xla::AotCompilationResult>>>
aot_or = client->CompileAheadOfTime({instance}, aot_opts);
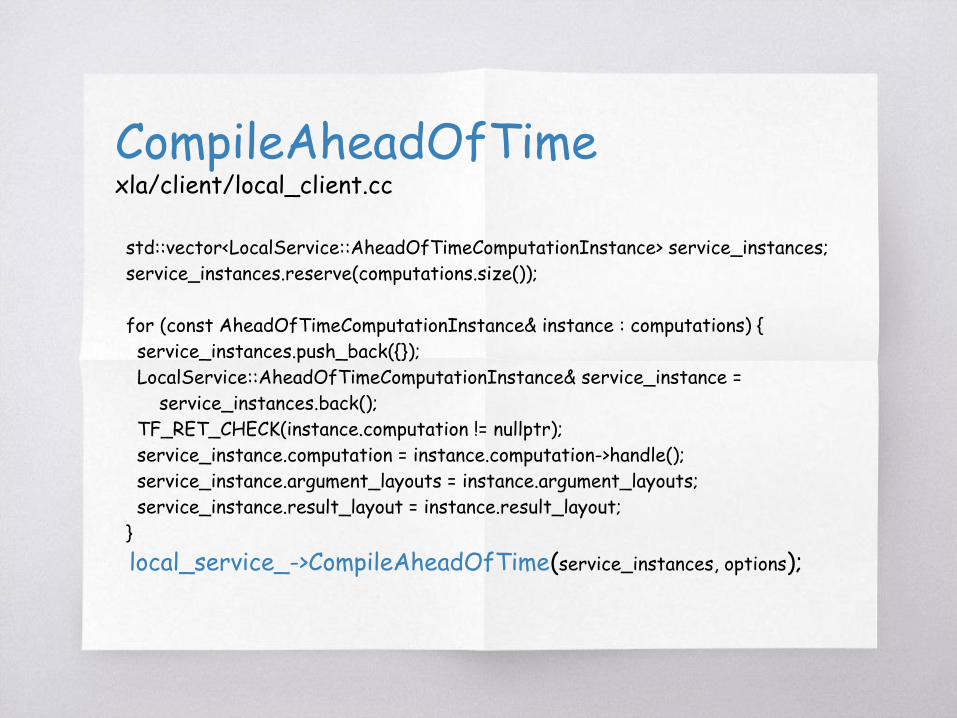
CompileAheadOfTimexla/client/local_client.cc
std::vector<LocalService::AheadOfTimeComputationInstance> service_instances; service_instances.reserve(computations.size());
for (const AheadOfTimeComputationInstance& instance : computations) { service_instances.push_back({}); LocalService::AheadOfTimeComputationInstance& service_instance = service_instances.back(); TF_RET_CHECK(instance.computation != nullptr); service_instance.computation = instance.computation->handle(); service_instance.argument_layouts = instance.argument_layouts; service_instance.result_layout = instance.result_layout; } local_service_->CompileAheadOfTime(service_instances, options);

CompileAheadOfTimexla/service/local_service.cc
std::vector<std::unique_ptr<HloModule>> hlo_modules; std::vector<std::unique_ptr<HloModuleConfig>> module_configs; for (const AheadOfTimeComputationInstance& instance : computations) { ….. std::unique_ptr<HloModule> hlo_module = computation_tracker_.BuildHloModule( Versioned_handle, true ); hlo_modules.push_back(std::move(hlo_module)); } HLOをコンパイル
return execute_backend_->compiler()->CompileAheadOfTime( std::move(hlo_modules), std::move(module_configs), MakeHloDumper(), options);

BuildHloModulexla/service/computation_tracker.cc
for (auto versioned_handle : post_order) { UserComputation* computation = ResolveInternal(versioned_handle.handle).ValueOrDie();
std::unique_ptr<HloComputation> hlo_computation = computation->BuildHloComputation( versioned_handle.version, resolver, include_unused_parameters));
hlo_computations[versioned_handle] = hlo_computation.get(); if (computation == entry_computation) { module->AddEntryComputation(std::move(hlo_computation)); } else { module->AddEmbeddedComputation(std::move(hlo_computation)); } }

BuildHloComputationxla/service/user_computation.cc
HLOのLoweringを行う std::unique_ptr<HloComputation> hlo_computation = ComputationLowerer::Lower( tensorflow::strings::StrCat(name(), ".v", version), session_computation_, version, std::move(hlo_resolver), include_unused_parameters);
return std::move(hlo_computation);

やっと出てきました
xla/cpu/cpu_compiler::CompileAheadOfTime
HLOを最適化し、LLVMを使って
CPUオブジェクトファイルを生成

CompileAheadOfTimexla/service/cpu/cpu_compiler.cc
LLVMのターゲット・データレイアウトの設定
HLOモジュール毎に下記の関数を実行
RunHloPasses(hlo_module, module_config, dump_hlo)); IrEmitter ir_emitter(*hlo_module, *module_config, *assignment,
&llvm_module, nullptr); for (auto embedded_computation : computation->MakeEmbeddedComputationsList()) { ir_emitter.EmitComputation(embedded_computation, embedded_computation->name(), false, &module_sequence.at(embedded_computation)).status()); }

RunHloPassesxla/service/cpu/cpu_compiler.cc
HLOに対して下記の最適化を実施する
Inliner / ConvCanonicalization / HloPassFix<HloPassPipeline> AlgebraicSimplifier / ReshapeMover HloSubcomputationUnification / HloCSE CpuInstructionFusion / CpuLayoutAssignment AlgebraicSimplifier / HloCSE / ParallelizationPreparation CopyInsertion / Parallelization / HloDCE
return pipeline.Run(hlo_module).status();
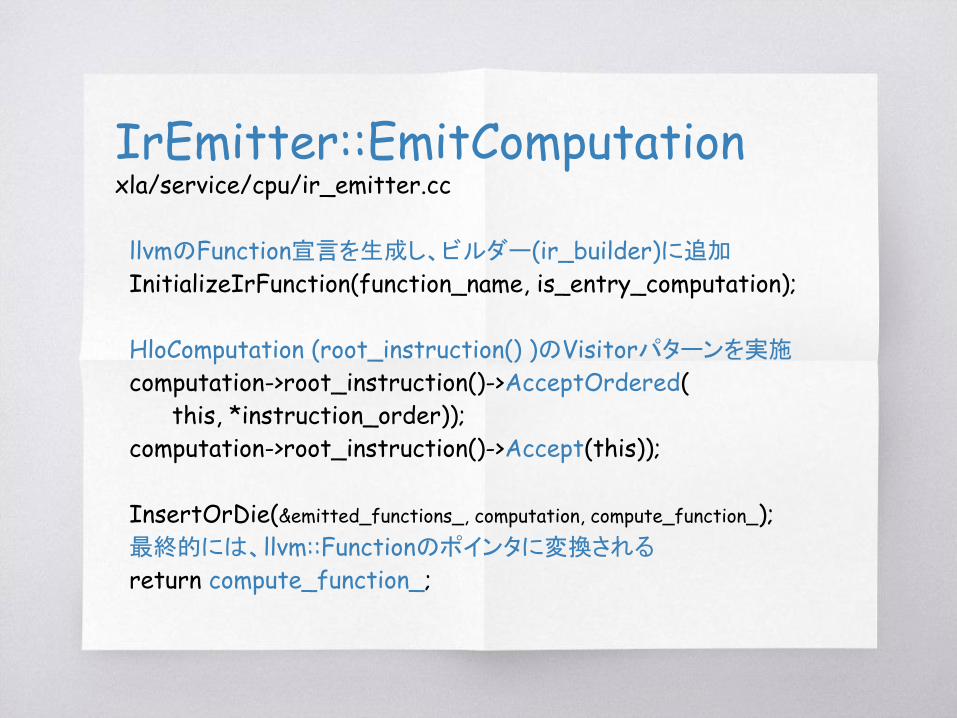
IrEmitter::EmitComputationxla/service/cpu/ir_emitter.cc
llvmのFunction宣言を生成し、ビルダー(ir_builder)に追加
InitializeIrFunction(function_name, is_entry_computation);
HloComputation (root_instruction() )のVisitorパターンを実施 computation->root_instruction()->AcceptOrdered( this, *instruction_order)); computation->root_instruction()->Accept(this)); InsertOrDie(&emitted_functions_, computation, compute_function_); 最終的には、llvm::Functionのポインタに変換される
return compute_function_;

関数のコンパイルxla/service/cpu/cpu_compiler.cc
Disassembler disassembler(*target_machine); CompilerFunctor compiler_functor( target_machine.get(), &disassembler, opt_level, CompilerFunctor::AllIntrinsics());
CompilerFunctor::operator()にて、llvm::moduleを
CPU実行オブジェクトに変換する
llvm::object::OwningBinary<llvm::object::ObjectFile> object_file =
compiler_functor(llvm_module);
LLVMでコンパイル後、
ObjectFileの生成
xla/service/cpu/compiler_functor.ccCompilerFunctior::operator()

LLVM IRの最適化パス
最適化パスの設定
llvm::legacy::PassManager module_passes; llvm::legacy::FunctionPassManager function_passes(&module); AddOptimizationPasses(&module_passes, &function_passes);
最適化パスの実行
function_passes.doInitialization(); for (auto func = module.begin(); func != module.end(); ++func) { function_passes.run(*func); } function_passes.doFinalization(); module_passes.run(module);

マシンコードの生成
llvm::MCContext* mc_context; llvm::legacy::PassManager codegen_passes; target_machine_->addPassesToEmitMC(codegen_passes, mc_context, ostream); codegen_passes.run(module);

ObjctFileの生成
std::unique_ptr<llvm::MemoryBuffer> memory_buffer( new llvm::ObjectMemoryBuffer(std::move(stream_buffer))); llvm::Expected<std::unique_ptr<llvm::object::ObjectFile>> object_file_or_error = llvm::object::ObjectFile::createObjectFile( memory_buffer->getMemBufferRef());
std::unique_ptr<llvm::object::ObjectFile> object_file = std::move(object_file_or_error.get());
return llvm::object::OwningBinary<llvm::object::ObjectFile>( std::move(object_file), std::move(memory_buffer));

新しいCPUへの対応は?
CpuCompiler を改造すればいいのですよ
xla/service/cpu/cpu_compiler.cc

InitializeLLVMTargetxla/service/cpu/cpu_compiler.cc
llvm::InitializeNativeTarget(); …. LLVMInitializeX86Target(); …. LLVMInitializeARMTarget(); …. LLVMInitializeAArch64Target(); …. LLVMInitializePowerPCTarget();
公式には、x86−64とAArch64のみサポートにはなっていますが?

ありがとうございました
ブログ : Vengineerの戯言http://blogs.yahoo.co.jp/verification_engineer
Twitter : @Vengineer
TensorFlow XLAの衝撃 2017年2月20日
http://blogs.yahoo.co.jp/verification_engineer/71016304.html


![Università degli Studi di Pavia Deep Learning and TensorFlow · Deep Learning and TensorFlow –Episode 4 [1] Deep Learning and TensorFlow Episode 4 TensorFlow Basics Part 1 Università](https://img.dokumen.tips/doc/110x75/604bff7ae8e0dd16d80c18a9/universit-degli-studi-di-pavia-deep-learning-and-tensorflow-deep-learning-and.jpg)