Embed Size (px)
Citation preview
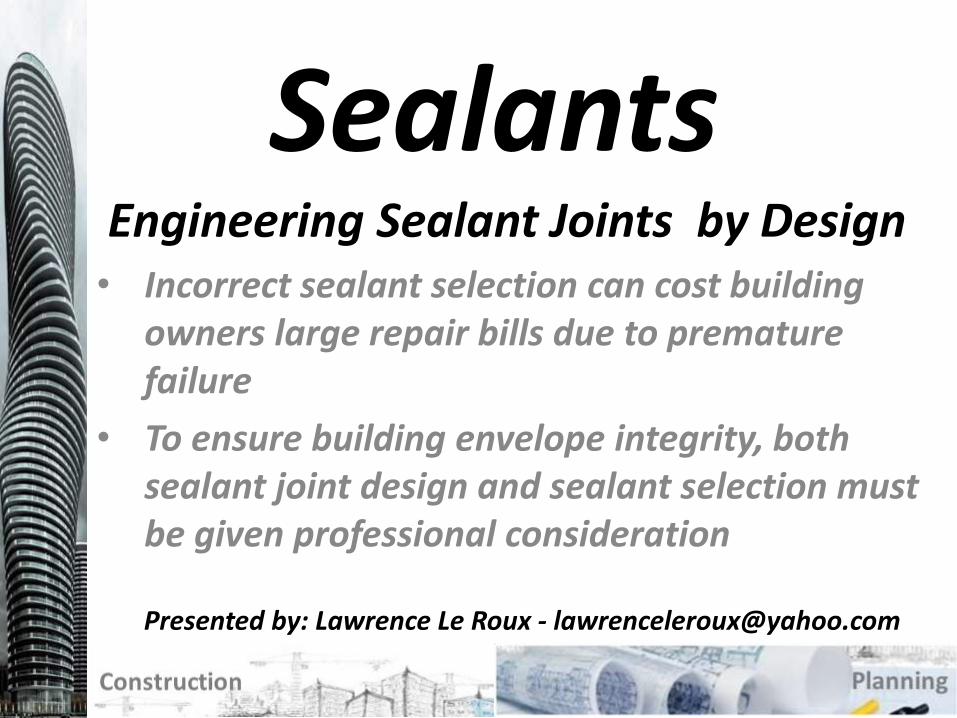
SealantsEngineering Sealant Joints by Design• Incorrect sealant selection can cost building
owners large repair bills due to premature failure
• To ensure building envelope integrity, both sealant joint design and sealant selection must be given professional consideration
Presented by: Lawrence Le Roux - [email protected]

Aim of Presentation
• Clearer understanding of joint design and sealant selection
• Role that ASTM C920-05 and other ASTM’s plays in the selection of a sealant
• Factors that influence joint design
Construction Planning
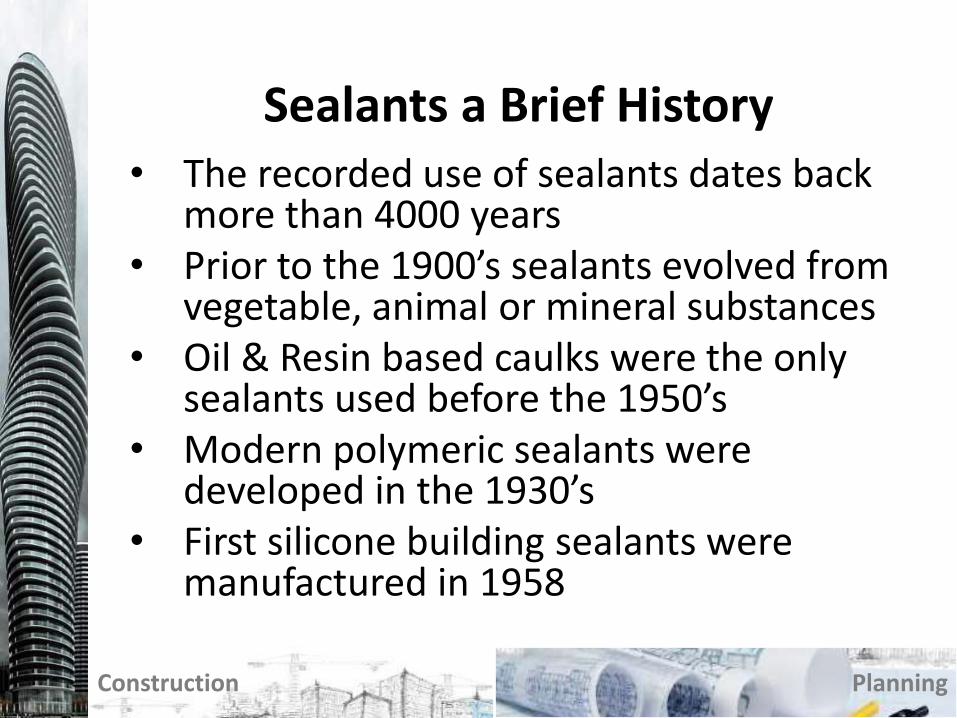
Sealants a Brief History• The recorded use of sealants dates back
more than 4000 years• Prior to the 1900’s sealants evolved from
vegetable, animal or mineral substances• Oil & Resin based caulks were the only
sealants used before the 1950’s• Modern polymeric sealants were
developed in the 1930’s• First silicone building sealants were
manufactured in 1958
Construction Planning

How Do You Determine if the Sealant Selected is Correct for the Application?
Construction Planning
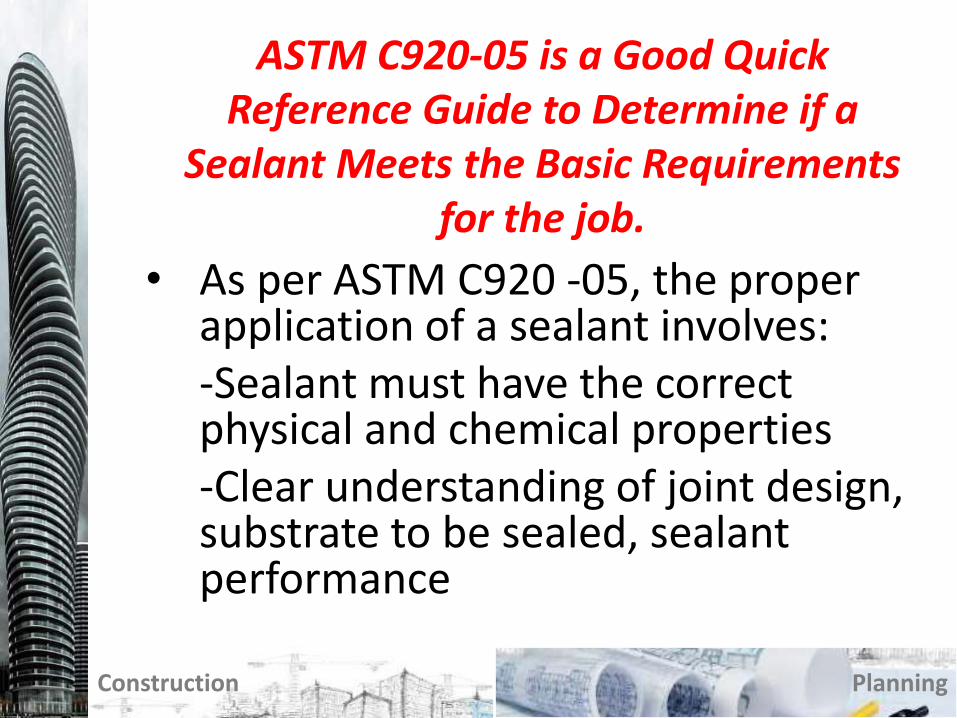
ASTM C920-05 is a Good Quick Reference Guide to Determine if a
Sealant Meets the Basic Requirements for the job.
• As per ASTM C920 -05, the proper application of a sealant involves:-Sealant must have the correct physical and chemical properties-Clear understanding of joint design, substrate to be sealed, sealant performance
Construction Planning

Testing Specification - ASTM C 920-05Standard Specification for Elastomeric Joint Sealants
Construction Planning
• The most widely accepted specification in the commercial sealant industry
• Requires a sealant to meet specific, certifiable physical properties
• Made up of test methods designed to obtain comparative data for all sealants in the market
• Designates grades, classes, and uses of sealants
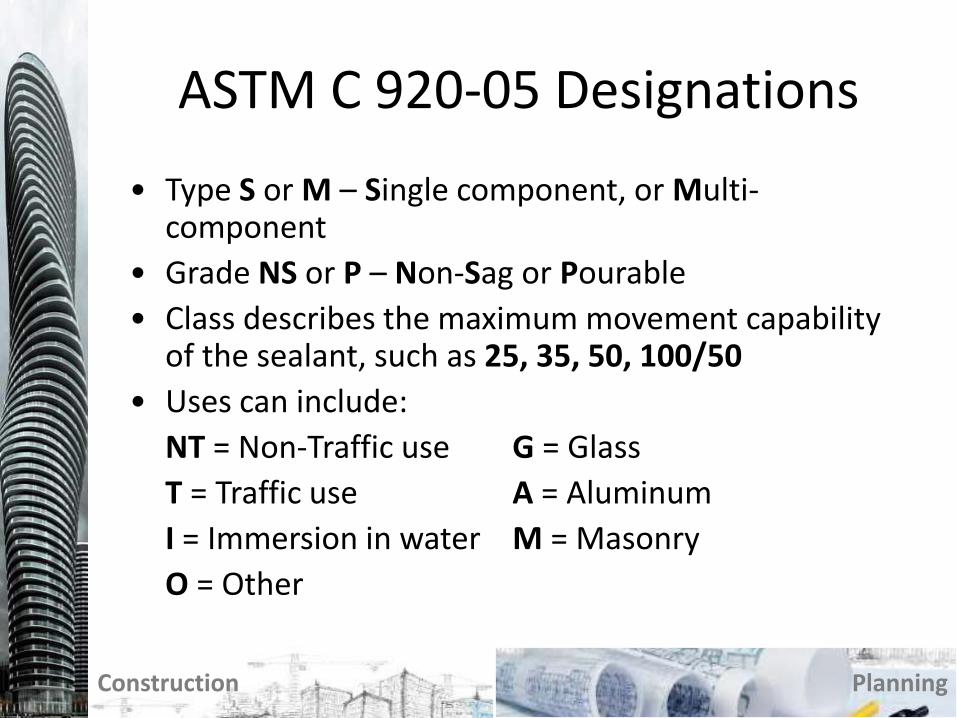
ASTM C 920-05 Designations
• Type S or M – Single component, or Multi-component
• Grade NS or P – Non-Sag or Pourable
• Class describes the maximum movement capability of the sealant, such as 25, 35, 50, 100/50
• Uses can include:
NT = Non-Traffic use G = Glass
T = Traffic use A = Aluminum
I = Immersion in water M = Masonry
O = Other
Construction Planning
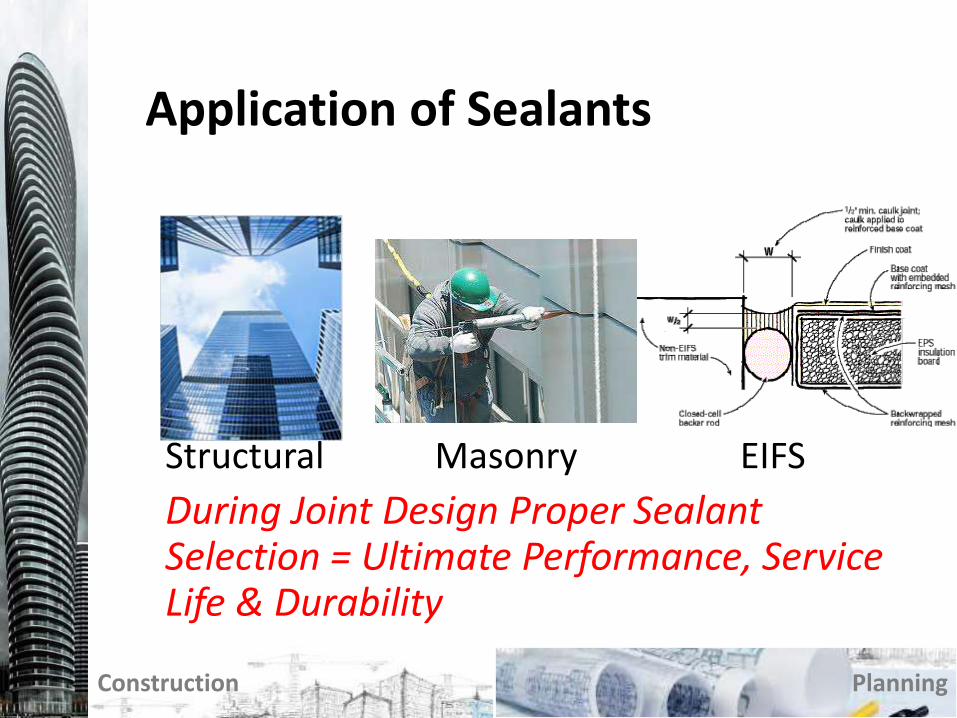
Application of Sealants
Structural Masonry EIFS
During Joint Design Proper Sealant Selection = Ultimate Performance, Service Life & Durability
Construction Planning

Construction Planning
Factors that Influence Sealant Selection & Application

Compatibility
Construction Planning
• Any gasket, sealant or setting block that comes into contact with the interior tensile or exterior weather sealant beads must be compatible

Question & Answer
• Question: What does the designation NT stand for in ASTM C920-05
• Answer: Non-Traffic Use
Construction Planning
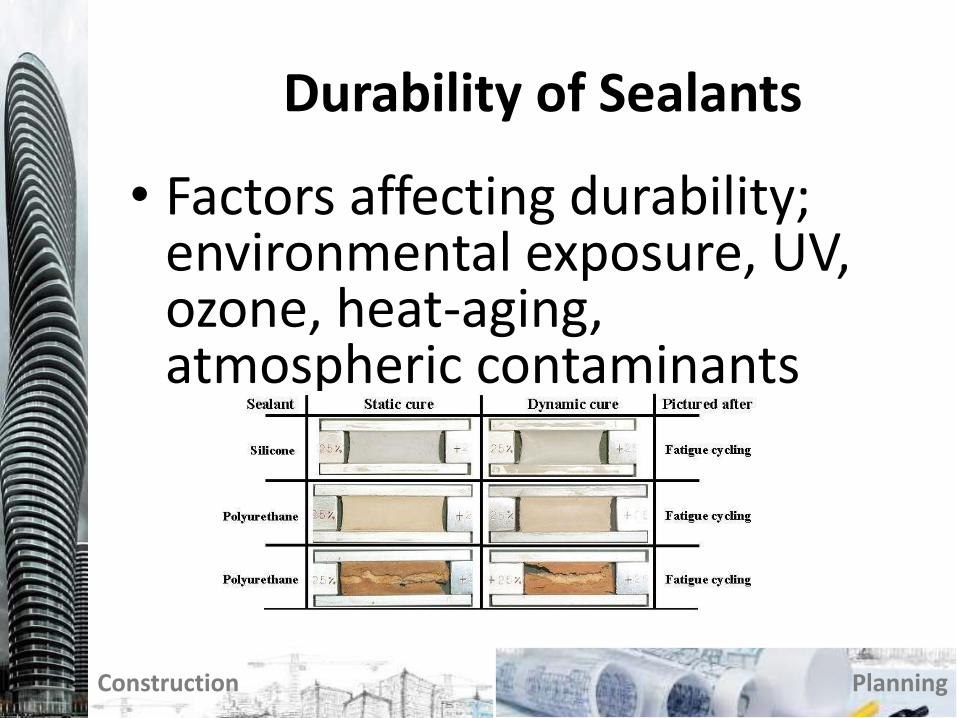
Durability of Sealants
• Factors affecting durability; environmental exposure, UV, ozone, heat-aging, atmospheric contaminants
Construction Planning
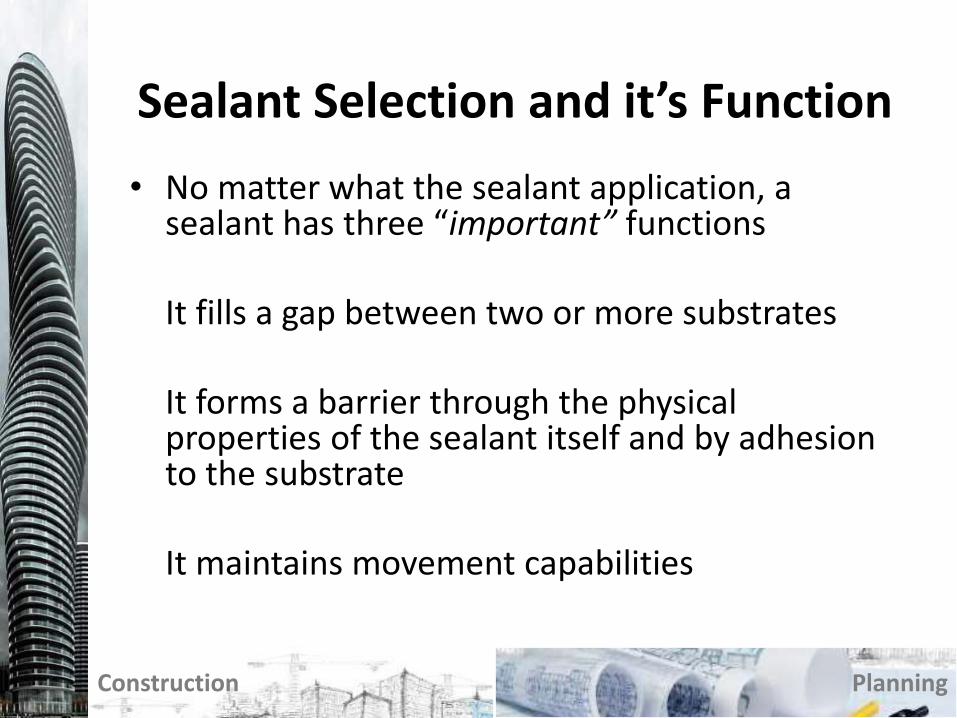
Sealant Selection and it’s Function
• No matter what the sealant application, a sealant has three “important” functions
It fills a gap between two or more substrates
It forms a barrier through the physical properties of the sealant itself and by adhesion to the substrate
It maintains movement capabilities
Construction Planning

Sealants Staining
• All sealant manufacturers will perform a full range of ASTM Testing before issuing a written stain warranty
• ASTM C510
ASTM C1248, 60 day test
• Ensure non staining
Polyurethane and Silicone
Sealants are selected
Construction Planning
Staining of Marble Visible
Visible Staining of Marble

Substrate• Adhesion of a sealant to a substrate surface
or another material or component is determined by manufacturers by using ASTM C794
• It is important to monitor Adhesion of a sealant to installed substrates before and during the project. This will ensure that corrective action can be taken should there be subsequent substrate surface changes
Construction Planning

Required Movement Capacity
• Sealants are manufactured with varying degrees of elasticity to accommodate different joint expansion requirements
• An Architect or Engineer can evaluate joint design to ensure that the proper sealant is selected in accordance with ASTM C920-5
Construction Planning
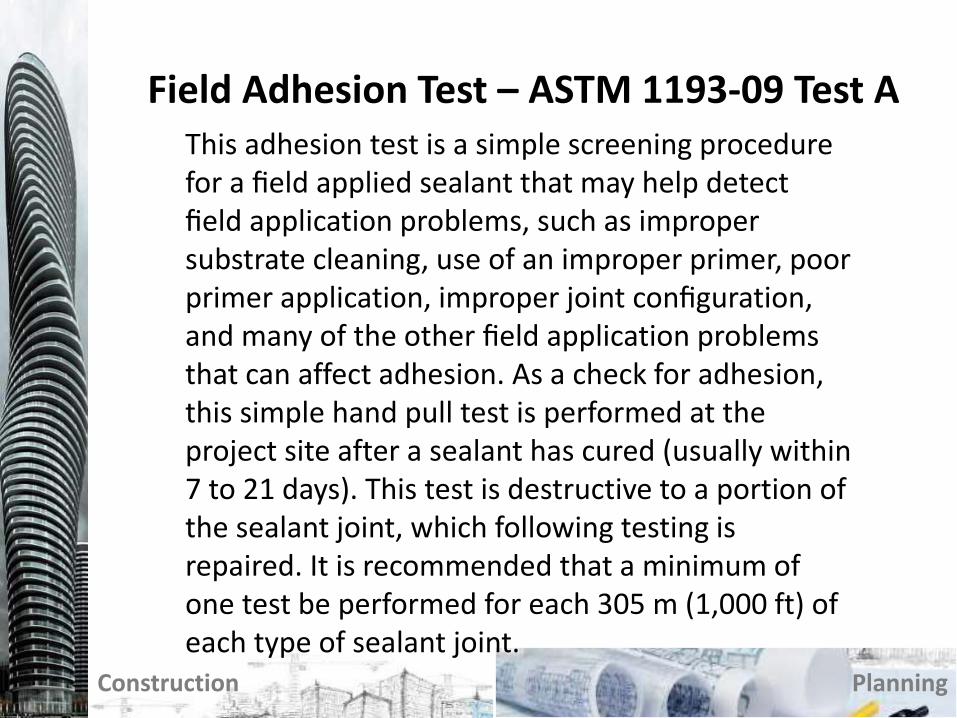
Field Adhesion Test – ASTM 1193-09 Test A
Construction Planning
This adhesion test is a simple screening procedure for a field applied sealant that may help detect field application problems, such as improper substrate cleaning, use of an improper primer, poor primer application, improper joint configuration, and many of the other field application problems that can affect adhesion. As a check for adhesion, this simple hand pull test is performed at the project site after a sealant has cured (usually within 7 to 21 days). This test is destructive to a portion of the sealant joint, which following testing is repaired. It is recommended that a minimum of one test be performed for each 305 m (1,000 ft) of each type of sealant joint.
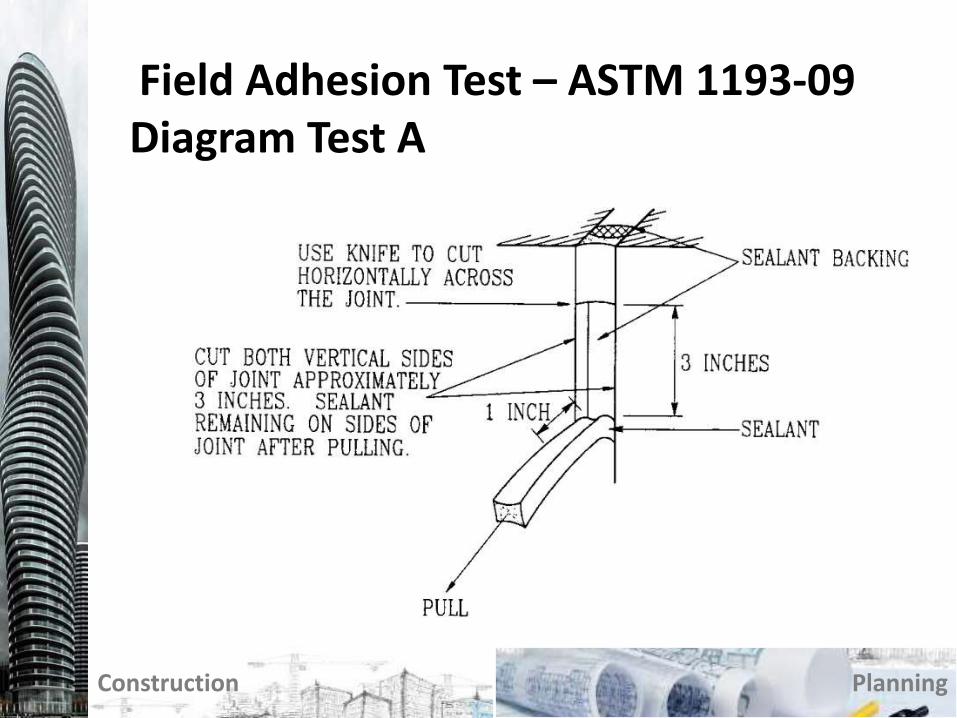
Field Adhesion Test – ASTM 1193-09 Diagram Test A
Construction Planning

Field Adhesion Test – ASTM 1193-09 Interpretation of Test Results Test A
Construction Planning
• If substrate adhesion is acceptable, the sealant should tear cohesively within itself or elongate to a manufacturer determined extension value from the 25 mm (1 in) gauge length indicated in before releasing from either substrate adhesively.

Joint Design – Joint Types
• Fixed Joints – Static/Non Moving Joints
• Expansion – Movement Expected
• Crack Control Joints
Construction Planning
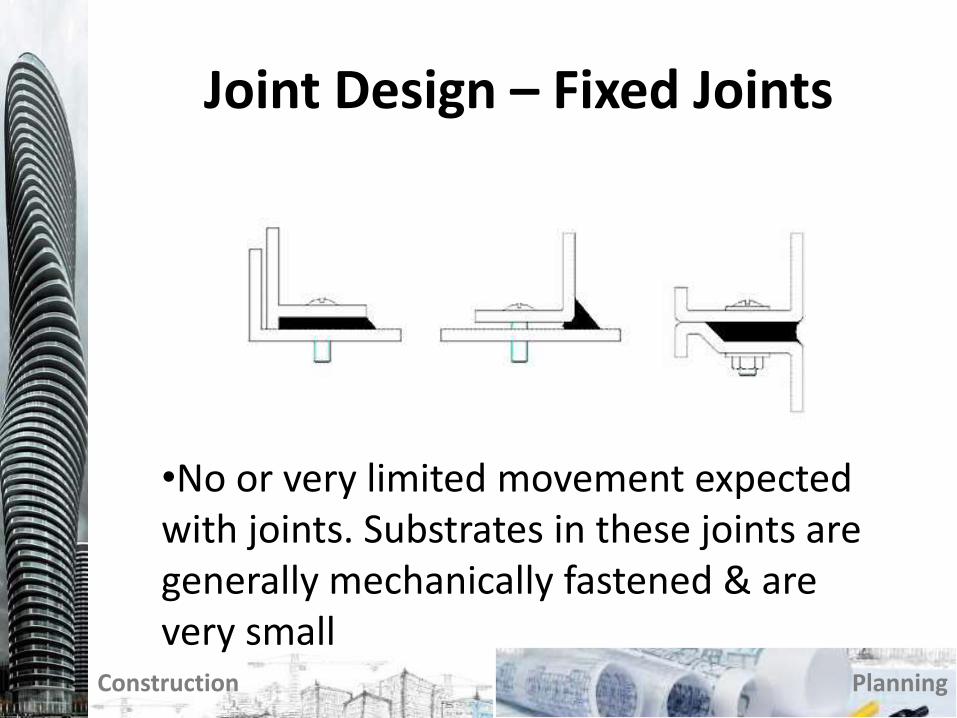
Joint Design – Fixed Joints
Construction Planning
•No or very limited movement expected with joints. Substrates in these joints are generally mechanically fastened & are very small
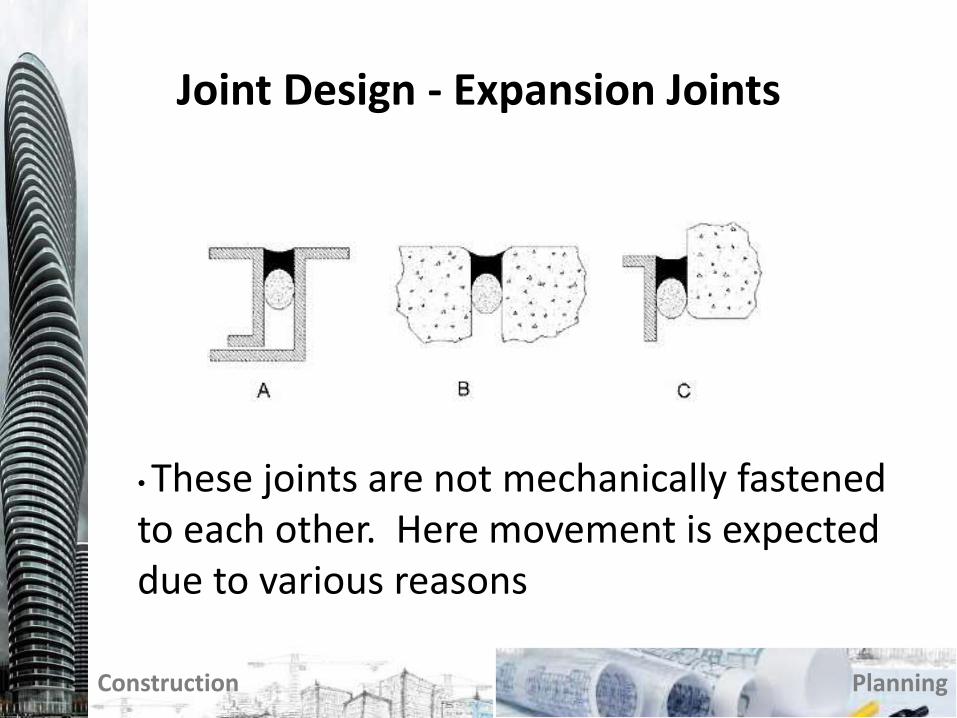
Joint Design - Expansion Joints
Construction Planning
•These joints are not mechanically fastened to each other. Here movement is expected due to various reasons

Joint Design – Expansion Joints Cont – Lap Joint
Construction Planning
•A Lap joint is an expansion joint because it will expand and contract, but instead of opening and closing, the joint will slide along itself and create shear.
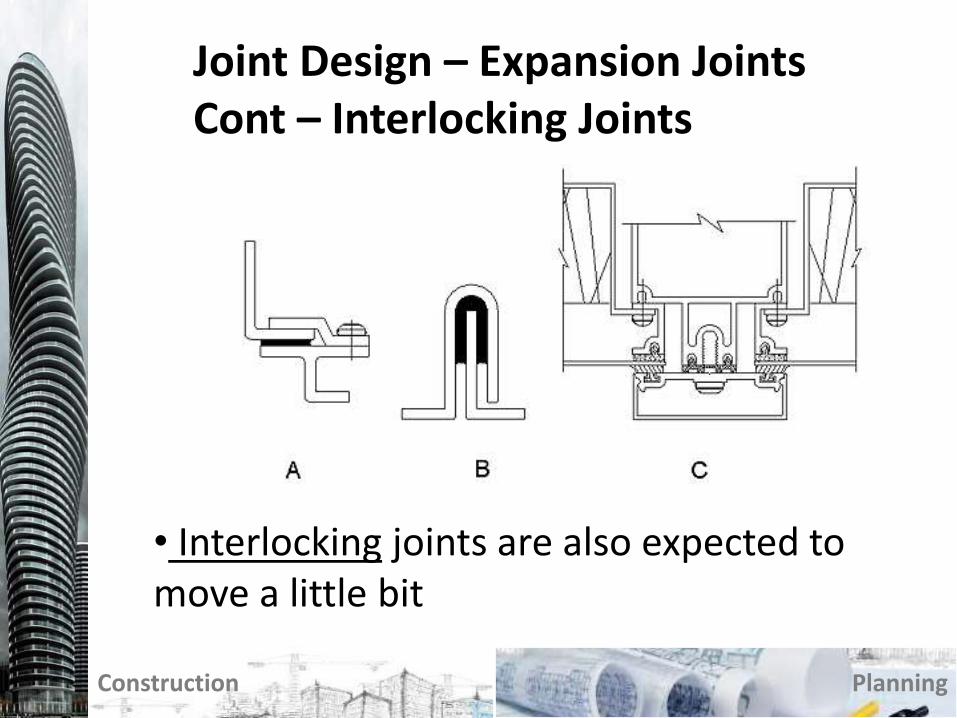
Joint Design – Expansion Joints Cont – Interlocking Joints
Construction Planning
• Interlocking joints are also expected to move a little bit

Joint Design – Expansion Joints Cont – Fillet Beads
Construction Planning
Fillet beads in angle joints experience expansion and contraction as well as shear.
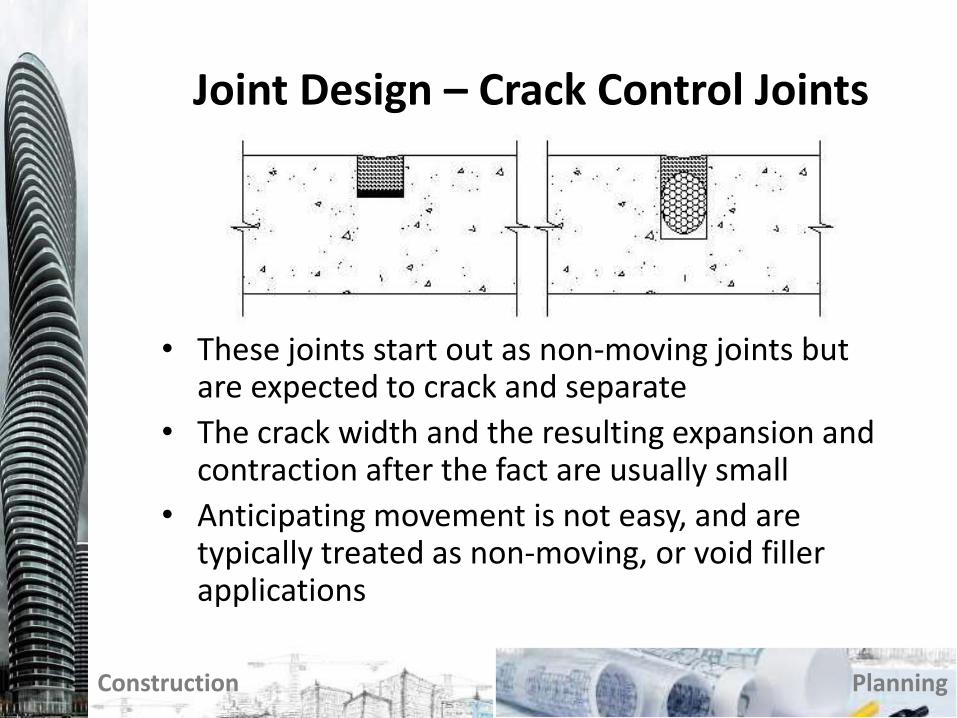
Joint Design – Crack Control Joints
Construction Planning
• These joints start out as non-moving joints but are expected to crack and separate
• The crack width and the resulting expansion and contraction after the fact are usually small
• Anticipating movement is not easy, and are typically treated as non-moving, or void filler applications
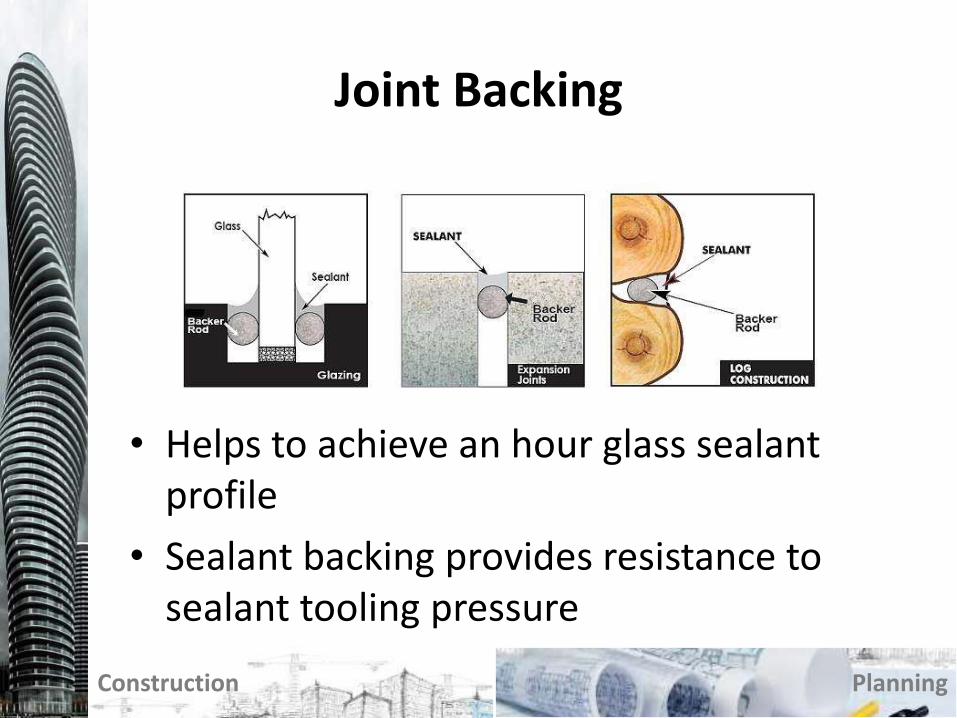
Joint Backing
• Helps to achieve an hour glass sealant profile
• Sealant backing provides resistance to sealant tooling pressure
Construction Planning
Construction Planning
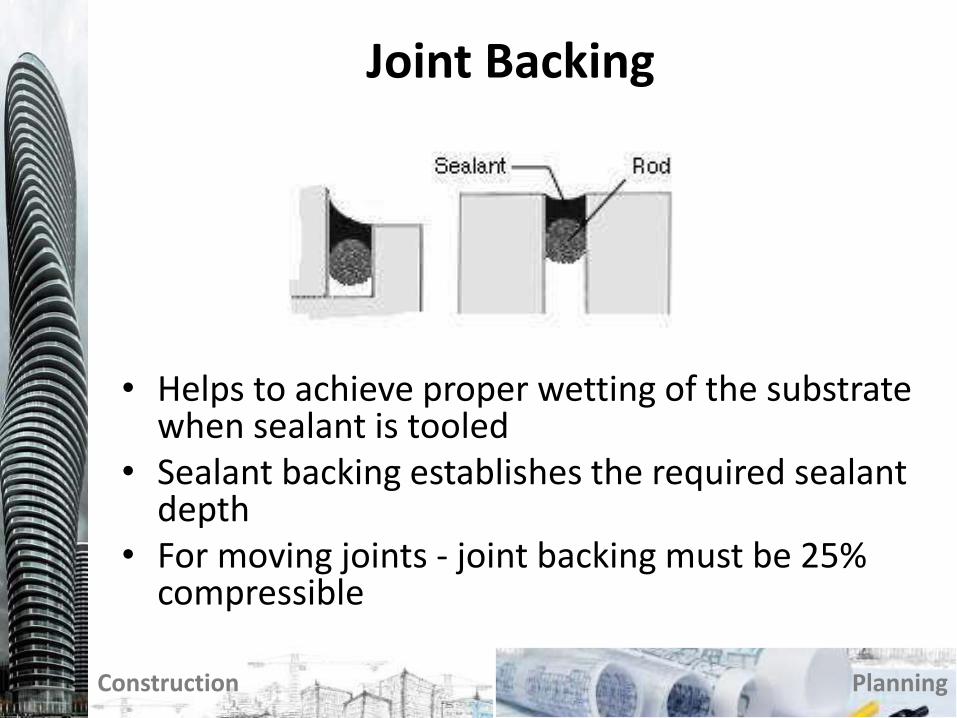
Joint Backing
• Helps to achieve proper wetting of the substrate when sealant is tooled
• Sealant backing establishes the required sealant depth
• For moving joints - joint backing must be 25% compressible
Construction Planning
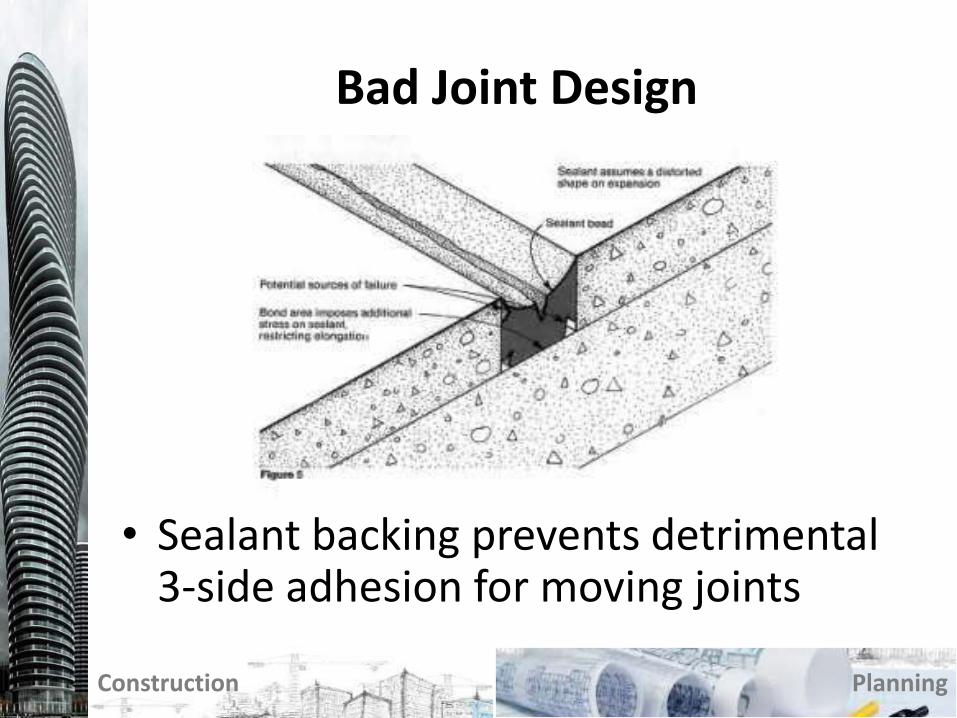
Bad Joint Design
• Sealant backing prevents detrimental 3-side adhesion for moving joints

Construction Planning
Joint Backing – Acceptable Types of Backing Material
• Closed & Open cell backing rod material is acceptable for use
• Polyethylene type backer rod material is recommended as sealant will generally not adhere to it

Construction Planning
Joint Design SpecificationsSealant Dimensions: W = Sealant width, D = Sealant depth, C = Contact area
• Expansion Joints - The minimum width and depth of anysealant application should be 1/4” by 1/4” (6 mm by 6 mm)• The maximum depth (D) of any sealant application shouldbe 1/2” (13 mm). Greater than 1/2’’ contact Tremco Rep• The depth (D) of sealant may be equal to the width (W) ofjoints that are less than 1/2” wide•For fillet beads, or angle beads the sealant should exhibit a minimum surface contact area (C) of 1/4” onto each substrate

Construction Planning
Movement Stresses on Joints
Expansion, Contraction, Shear, Flexure

Construction Planning
Expansion (Widening of the Joint)
Construction Planning
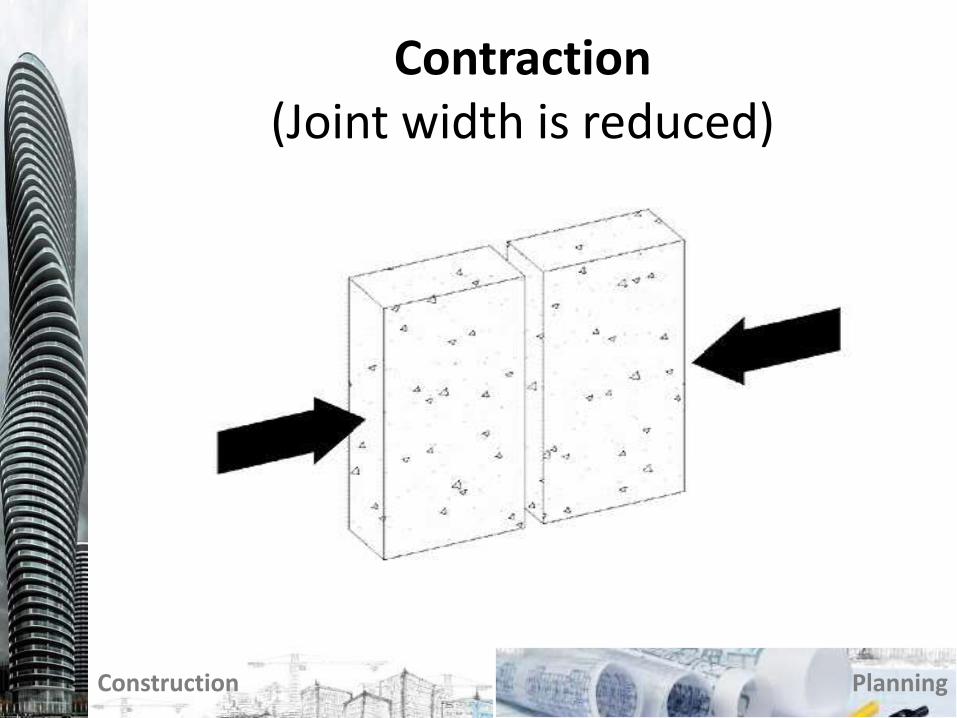
Contraction(Joint width is reduced)

Construction Planning
Shear(Transverse)

Construction Planning
The Affect of Building Joint
Movement on Sealants
• Building joints move in three different ways that affect the sealant in the joint: 1. Expansion 2. Contraction 3. Shear
1. Expansion
2. Contraction3. Shear

Question & Answer
• Question: In Canada, in which months of the year can we expect the sealant bead to experience compression?
• Answer: June, July & Aug
Construction Planning
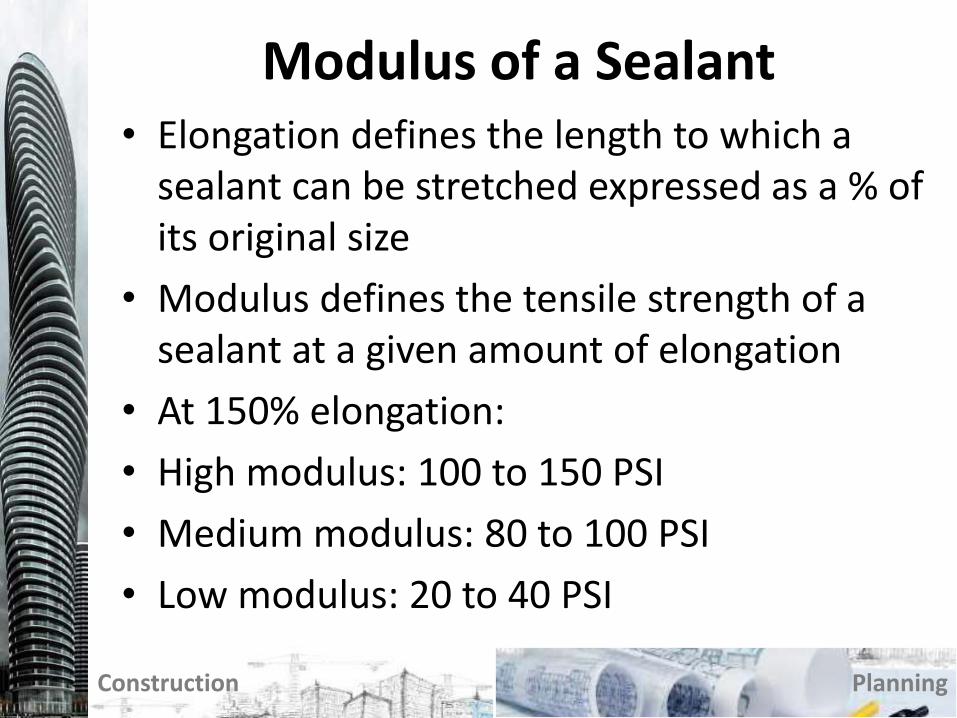
Modulus of a Sealant• Elongation defines the length to which a
sealant can be stretched expressed as a % of its original size
• Modulus defines the tensile strength of a sealant at a given amount of elongation
• At 150% elongation:
• High modulus: 100 to 150 PSI
• Medium modulus: 80 to 100 PSI
• Low modulus: 20 to 40 PSI
Construction Planning
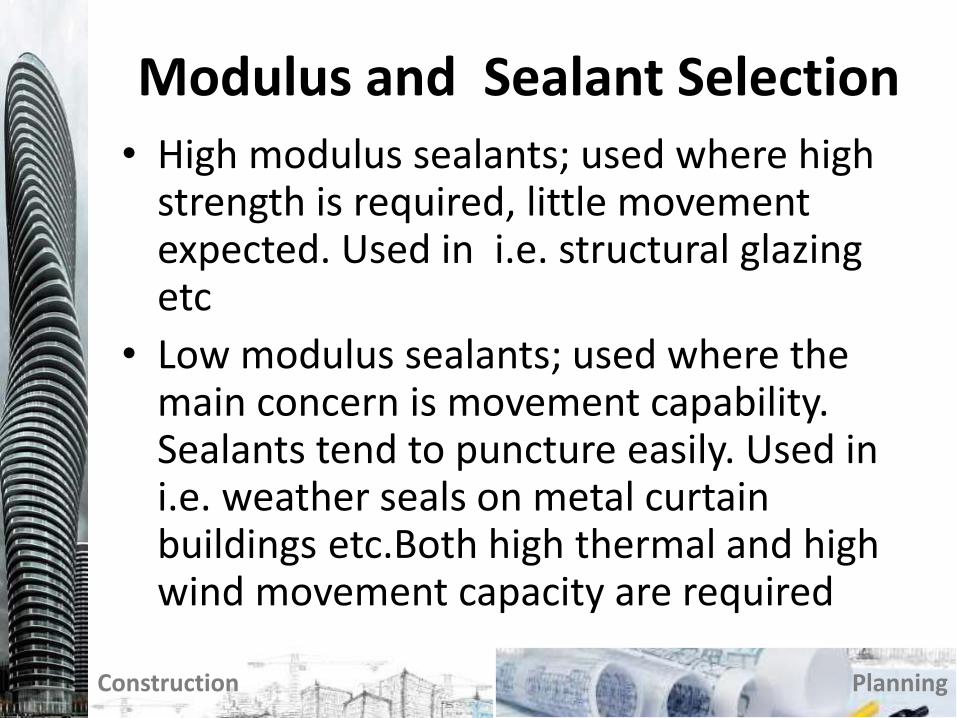
Modulus and Sealant Selection• High modulus sealants; used where high
strength is required, little movement expected. Used in i.e. structural glazing etc
• Low modulus sealants; used where the main concern is movement capability. Sealants tend to puncture easily. Used in i.e. weather seals on metal curtain buildings etc.Both high thermal and high wind movement capacity are required
Construction Planning

Construction Planning
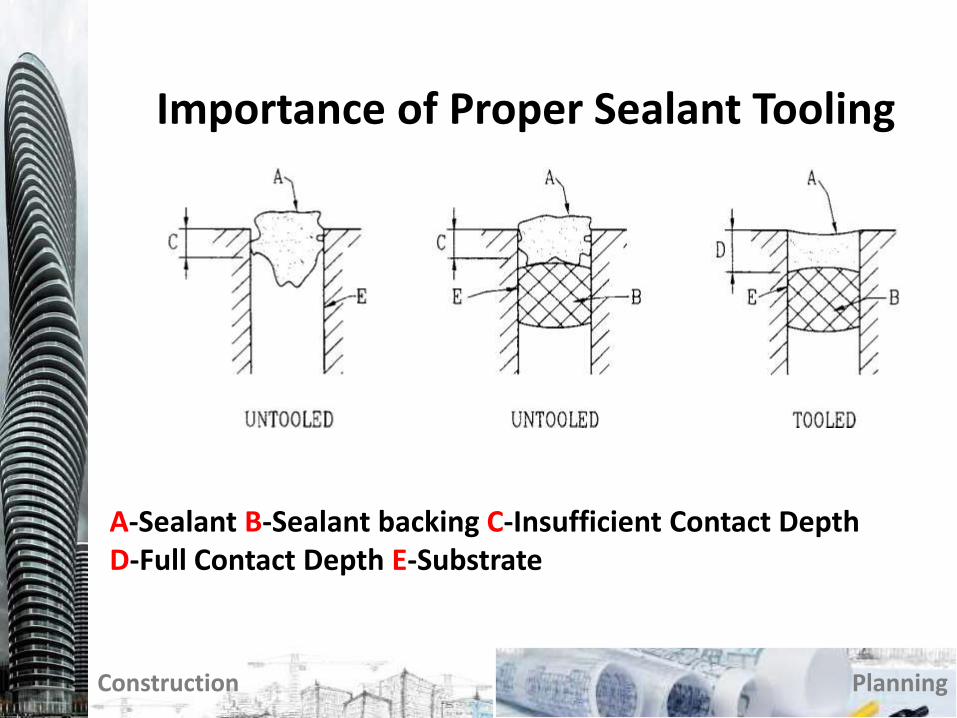
Importance of Proper Sealant Tooling Technique
• Proper application of sealant/filling of joint cavity is important when the correct tooling of a sealant is desired
• Tooling a non-sag sealant is important, it forces sealant into the cavity preventing air pockets
• Tooling should be completed before skinning or curing of the sealant starts
Construction Planning
Importance of Proper Sealant Tooling
A-Sealant B-Sealant backing C-Insufficient Contact Depth D-Full Contact Depth E-Substrate

Construction Planning
Importance of Proper Sealant Tooling Technique
• Proper tooling ensures that the sealant makes proper contact with substrate surfaces of a joint
• Several joint sealant configurations are possible – as per attached figure
• A project site mock-up would assist in determining the tooling procedure to use for the sealant application.

Construction Planning
Tooled Joint Configurations
A -Sealant B-Sealant Backing C-SubstrateD-Convex Tool Surface
E-Flat Tool Surface F-Shaped Tool Edge to control depthG -Rectangular Tool acceptable if joint width can be controlled

Construction Planning
The Most Important Aspect for Joint Design is a Clean Substrate

Construction Planning
Sealant Joint Cleaning Procedure
• One of the key requirements of good sealant adhesion is a clean surface
• Sealant joint surfaces must always be clean, dry and free of dust
• Proper cleaning is achieved by using the “two cloth” cleaning method
• Always confirm with the manufacturer that the cleaning material is compatible with their product.
--- End - Thank You ---