Embed Size (px)
Citation preview
Name: Date:
PGLO Lab PracticeCut out the descriptions of each step on the back page and match them to the pictures on the right.
1.
2.
3.
4.
5.
6.
7.
8.
9.
10.
11.
12.
Please cut out the steps below and match them with the pictures on the previous page.
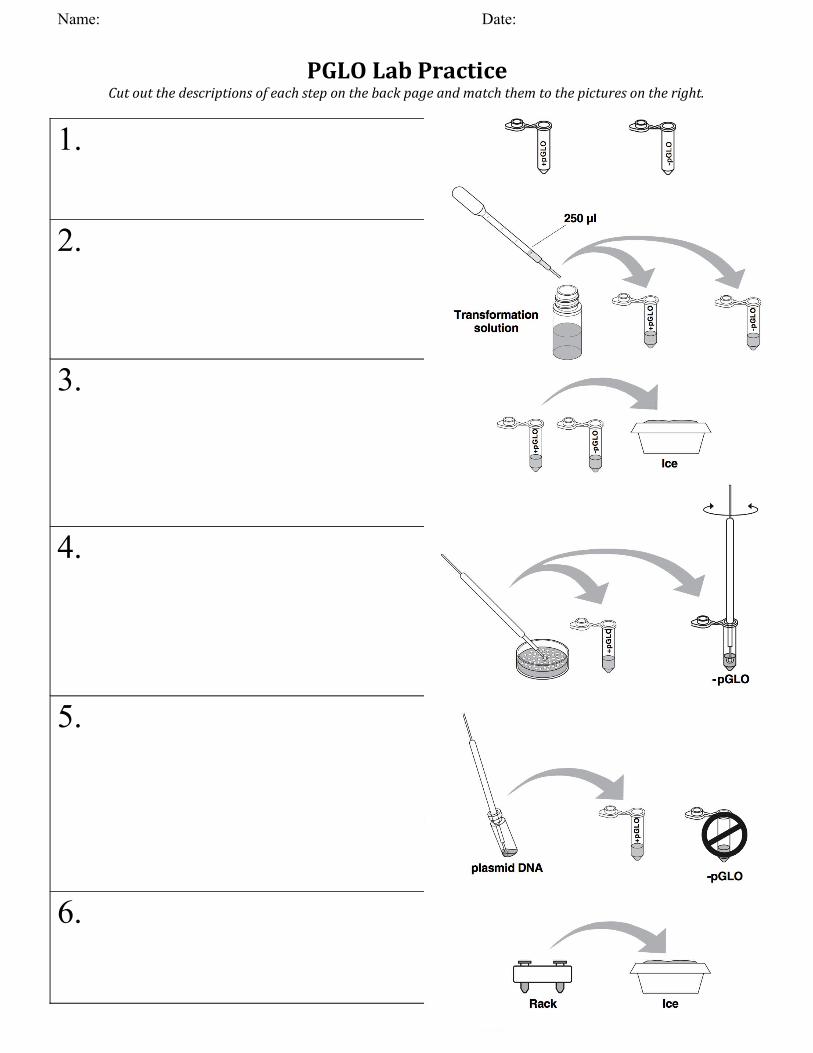
A. Label one mico test tube +pGLO and the other –pGLO. The +pGLO is the one with the plasmids, the –pGLO is the control without plasmids, just to compare.
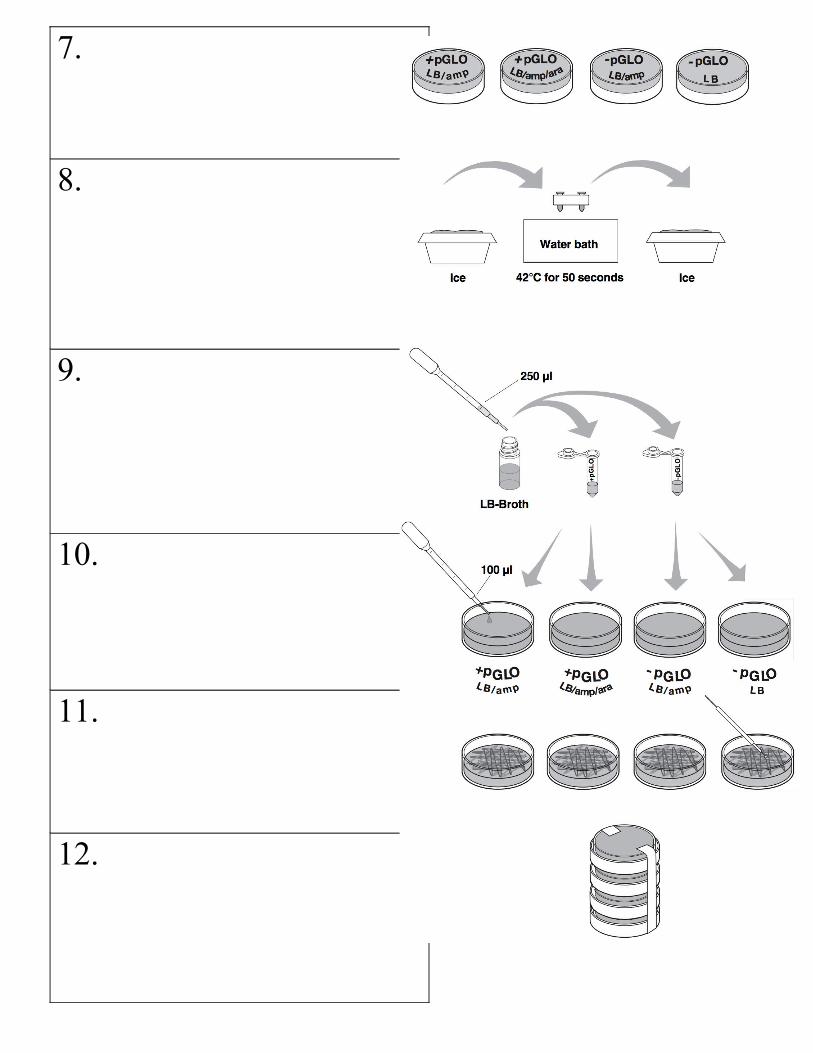
B. Use a new sterile inoculating loop to spread the liquid evenly across the surface of the agar in a zig-zag pattern. This spreads the bacteria out so it can reach all the nutrients.
C. Heat shock. Using the foam rack as a holder, move the microtubes into the water bath at 42°C for 50 seconds. This causes the phospholipids that make up the cell membrane of the bacteria to expand, allowing the plasmids to enter the bacteria.
D. Use a sterile inoculating loop to pick up a single spot of bacteria from the Petri dish. Put the loop in the microtubes and spin/twist the loop until all the bacteria is mixed into the solution.
E. Place the microtubes on ice. This brings down the temperature to shrink the cell membrane of the bacteria, making it more stretchy during heat shock.
F. Using a sterile pipette, add 250 microliters of LB Broth to each of the microtubes. This gives the bacteria extra nutrients.
G. While your tubes are sitting on ice, label your four Petri dishes as +pLGO LB/amp, +pGLO LB/amp/ara, -pGLO LB/amp, and –pGLO LB. Label them on the bottom, not the lid, so if you switch the lids accidentally, you still know which is which.
H. Using an new sterile pipette, add 100 microliters of the transformation and control suspensions onto the appropriate Petri dishes.
I. Put a new sterile inoculating loop into the plasmid DNA microtube. There should be a layer of plasmid solution across the ring. Mix it into the +pGLO microtube, but NOT the –pGLO microtube. We do this because the –pGLO is our control, to compare and make sure we are growing the bacteria right.
J. Put the microtubes in a test tube rack, and then on ice again, for 10 minutes. This brings down the temperature to shrink the cell membrane of the bacteria, making it more stretchy during heat shock.
K. Using a sterile pipette, transfer 250 microliters of transformation solution (CaCl2) to the microtubes. This gives the plasmid DNA a negative charge, which allows it to pass through the cell membrane of the bactiera.
L. Stack up your Petri dishes and tape them. Put them in an incubator at 37°C for 24 hours. This warm temperature is the best environment for the E. coli to grow in.