Embed Size (px)
Citation preview

Urban Airship & Android Application Integration Document
BrainBox Network. Copyright@2015. All rights reserved

The document provides steps to integrate Android Application with Urban Airship to facilitate Push and In‐App Notification. The integration process requires following steps ‐ 1.Create App on Google 2.Enable GCM Services 3.Get GCM Server API Key 4.Generate Configuration Files 5.Download Configuration Files 6.Create Account in Urban Airship 7.Download airshipconfig.properties Files 8.Configure GCM service 9.Android App Configuration 10.Android Gradle File Configuration 11.Android Manifest Permission 12.Application Class Configuration 13.Android Manifest Configuration 14.Add Tags 15.In‐App Configuration of Urban Airship 16.Send Push Notification from Urban Airship 17.Send In‐App Notification from Urban Airship 18.Set Notification Action ‐ Urban Airship
BrainBox Network. Copyright@2015. All rights reserved
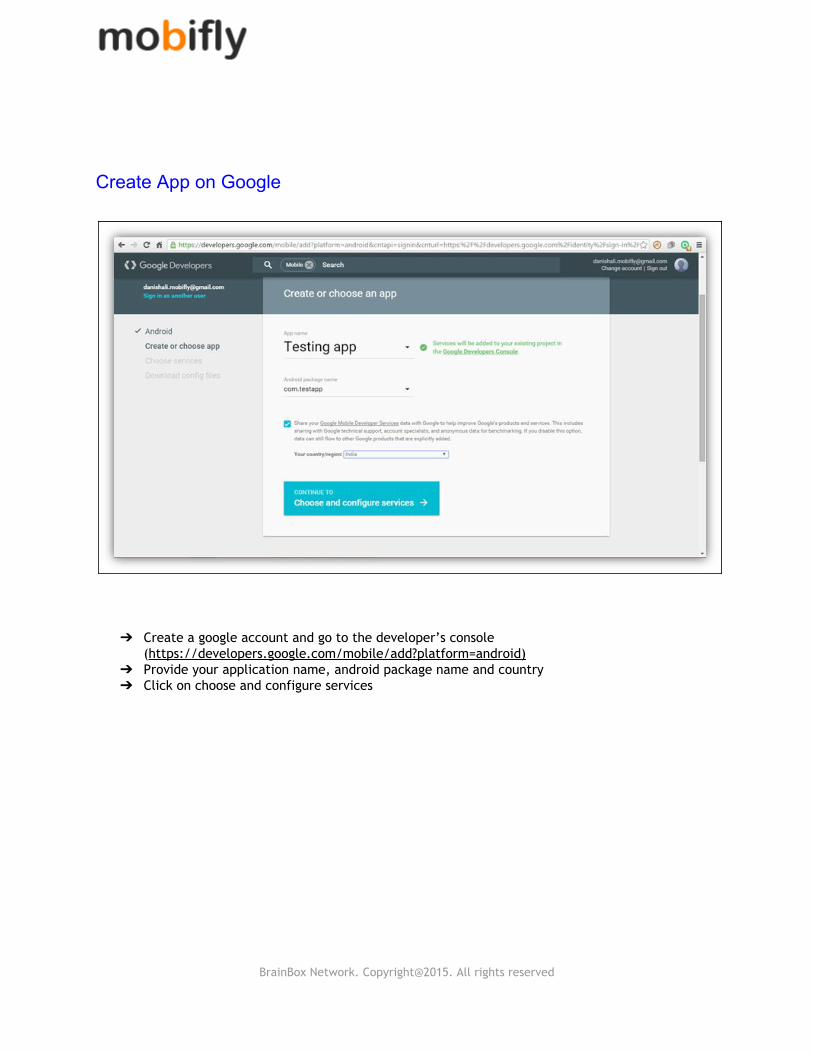
Create App on Google
➔ Create a google account and go to the developer’s console (https://developers.google.com/mobile/add?platform=android)
➔ Provide your application name, android package name and country ➔ Click on choose and configure services
BrainBox Network. Copyright@2015. All rights reserved

Enable GCM Service
➔ Select Cloud Messaging ➔ Click on Enable Google Cloud Messaging
BrainBox Network. Copyright@2015. All rights reserved
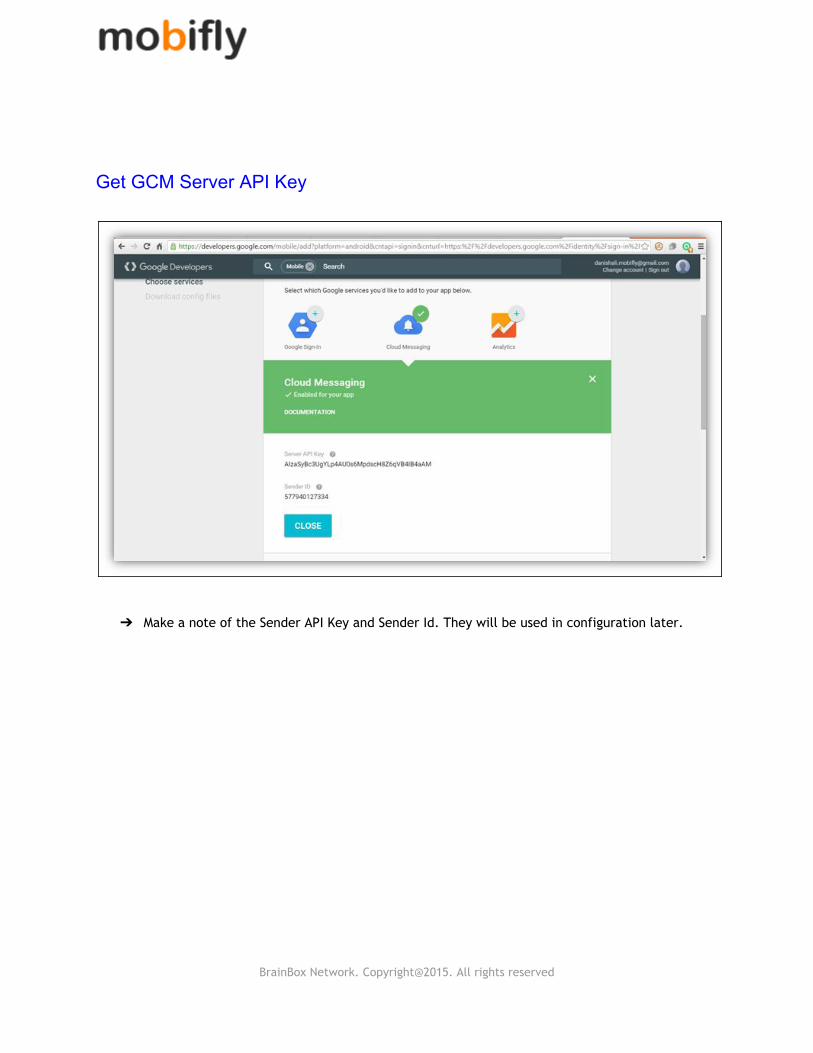
Get GCM Server API Key
➔ Make a note of the Sender API Key and Sender Id. They will be used in configuration later.
BrainBox Network. Copyright@2015. All rights reserved

Generate Configuration Files
➔ Click the Generate Configuration Files button
BrainBox Network. Copyright@2015. All rights reserved
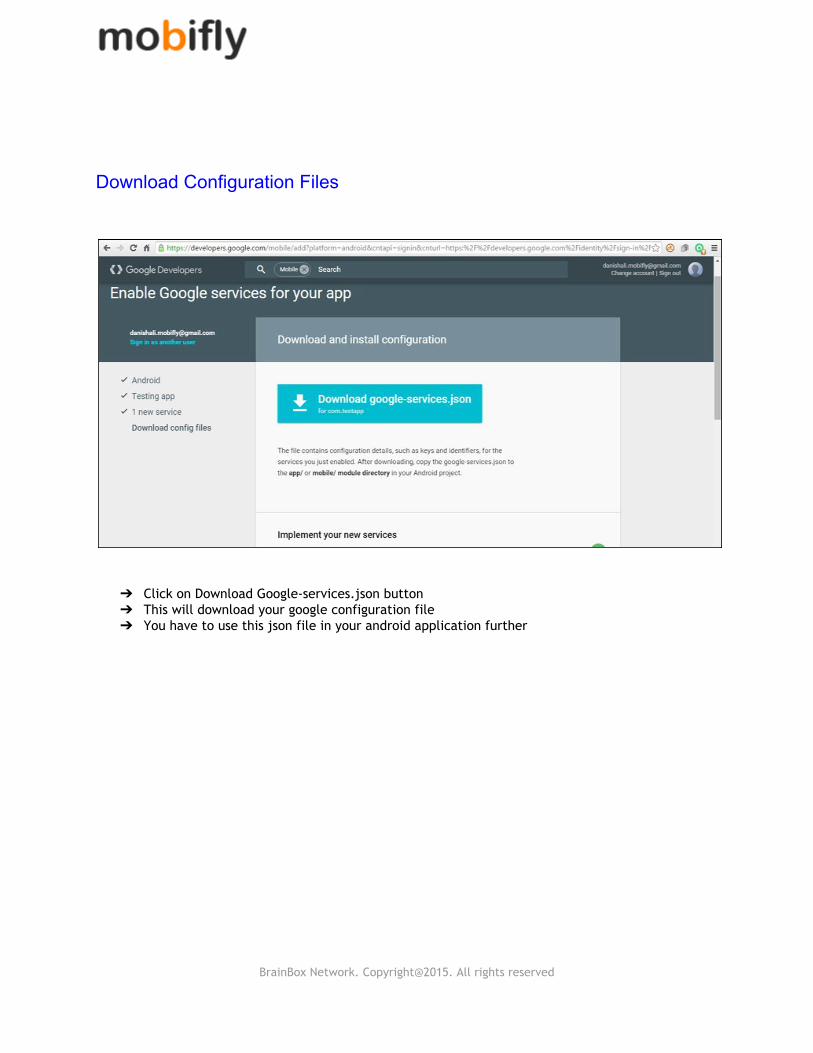
Download Configuration Files
➔ Click on Download Google‐services.json button ➔ This will download your google configuration file ➔ You have to use this json file in your android application further
BrainBox Network. Copyright@2015. All rights reserved

Create Account in Urban Airship
➔ Open www.urbanairship.com and click on Get Started
BrainBox Network. Copyright@2015. All rights reserved

•Choose the Starter free option and click on Get Started
BrainBox Network. Copyright@2015. All rights reserved

Provide your details in the form and click Sign Up.
BrainBox Network. Copyright@2015. All rights reserved

Provide your application details and click Save.
Ensure to choose ‘Production ‐ connecting to live servers’ in Production Status dropdown
BrainBox Network. Copyright@2015. All rights reserved

Download airshipconfig.properties file
Scroll down and click the Download button. You will find the production application key in this file
BrainBox Network. Copyright@2015. All rights reserved

Configure GCM service
➔ Scroll down and go to GCM setting. ➔ Provide the API key and Package name (package name of your android project) and Save ➔ Click on Configure Test List for notification testing
BrainBox Network. Copyright@2015. All rights reserved

Android App Configuration
➔ Keep the google‐services.json file in android app folder. ➔ Create an assets folder in android app and keep the airshipconfig.properties file in it.
BrainBox Network. Copyright@2015. All rights reserved

Android Gradle file Configuration
Now import the urban airship SDK and change the build.gradle file of your project like this.
repositories{ maven{ url http://dl.bintray.com/urbanairship/android } } dependencies{ compile ‘com.urbanairship.android:urbanairship‐sdk:7.0.+’ compile ‘com.android.support:cardview‐v7:23.1.1’ compile ‘com.google.android.gms:play‐services‐ location:8.4.0’ }
BrainBox Network. Copyright@2015. All rights reserved

Android Manifest Permission
Add the receiver to the manifest with the proper receiver class. Here we use AirshipReceiver.java class for getting Notification. Write the package name as shown below
<receiver android:name=".AirshipReceiver“ android:exported="false"> <intent‐filter> <action android:name="com.urbanairship.push.CHANNEL_UPDATED" /> <action android:name="com.urbanairship.push.OPENED" /> <action android:name="com.urbanairship.push.DISMISSED" /> <action android:name="com.urbanairship.push.RECEIVED" /> <action android:name="com.urbanairship.airmail.END_REGISTER" /> <action android:name="com.urbanairship.airmail.ACCEPT_PUSH" /> <action android:name="com.urbanairship.airmail.NOTIFY" /> <category android:name=“your package name" /> </intent‐filter> </receiver>
BrainBox Network. Copyright@2015. All rights reserved

Application Class Configuration
Create a class which extends Application class and write the code below in this class.
Ensure to use your own Production App Key , App Secret Key and GCM sender. public class AirDemoApplication extends Application { @Override public void onCreate() { super.onCreate(); AirshipConfigOptions options = new AirshipConfigOptions.Builder() .setDevelopmentAppKey("g1xHIsgQQkC02FvDWcFwqw")//leave blank of same as production key .setDevelopmentAppSecret("lVM2tFIxQrqzbt8PeB3qEA")//leave blank of same as production key .setProductionAppKey("g1xHIsgQQkC02FvDWcFwqw") .setProductionAppSecret("lVM2tFIxQrqzbt8PeB3qEA") .setInProduction(!BuildConfig.DEBUG) .setGcmSender("640437662963") .build(); UAirship.takeOff(this, options, new UAirship.OnReadyCallback() { @Override public void onAirshipReady(UAirship airship) { airship.getPushManager().setUserNotificationsEnabled(true);
BrainBox Network. Copyright@2015. All rights reserved
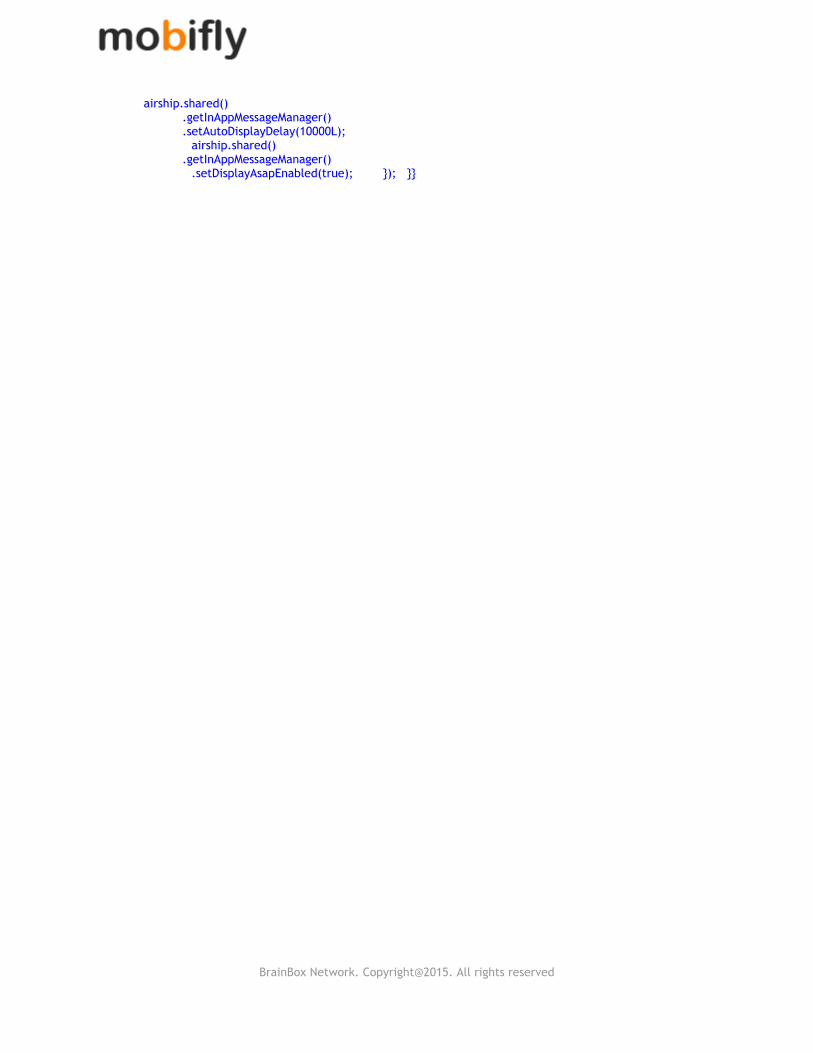
airship.shared() .getInAppMessageManager() .setAutoDisplayDelay(10000L); airship.shared() .getInAppMessageManager() .setDisplayAsapEnabled(true); }); }}
BrainBox Network. Copyright@2015. All rights reserved

Android Manifest Configuration
Call the application class in manifest.xml inside application.
BrainBox Network. Copyright@2015. All rights reserved

To Add Tags
Use the code below to tag user by sending user’s information to Urban Airship
Set<String> tags = new HashSet<String>(); tags = UAirship.shared().getPushManager().getTags(); tags.add("tag name"); UAirship.shared().getPushManager().setTags(tags); UAirship.shared().getPushManager().setAlias("alias name"); UAirship.shared().getPushManager().getNamedUser().setId("user name");
BrainBox Network. Copyright@2015. All rights reserved

InApp configuration of Urban Airship
➔ Open Urban Airship website and choose your production app ➔ Go to setting > configuration ➔ SelectIn‐App Messages ➔ Choose color of the message
BrainBox Network. Copyright@2015. All rights reserved

Send Push Notification from Urban Airship
Go to Messages Overview panel and click ‘New Push Message’
➔ Enter your message ➔ Choose broadcast to send on every device. ➔ Choose the Delivery time and send
BrainBox Network. Copyright@2015. All rights reserved

Send InApp Notification from Urban Airship
➔ Go to Messages Overview panel and choose option new message
➔ Check In‐App only ➔ Enter your message ➔ Disable notification action ➔ Choose all device ➔ Choose immediate delivery ➔ Confirm and send.
BrainBox Network. Copyright@2015. All rights reserved

Set Notification Action Urban Airship
Select action landing page and click on rich page. This will open a template. Click on the select button next to text.
BrainBox Network. Copyright@2015. All rights reserved
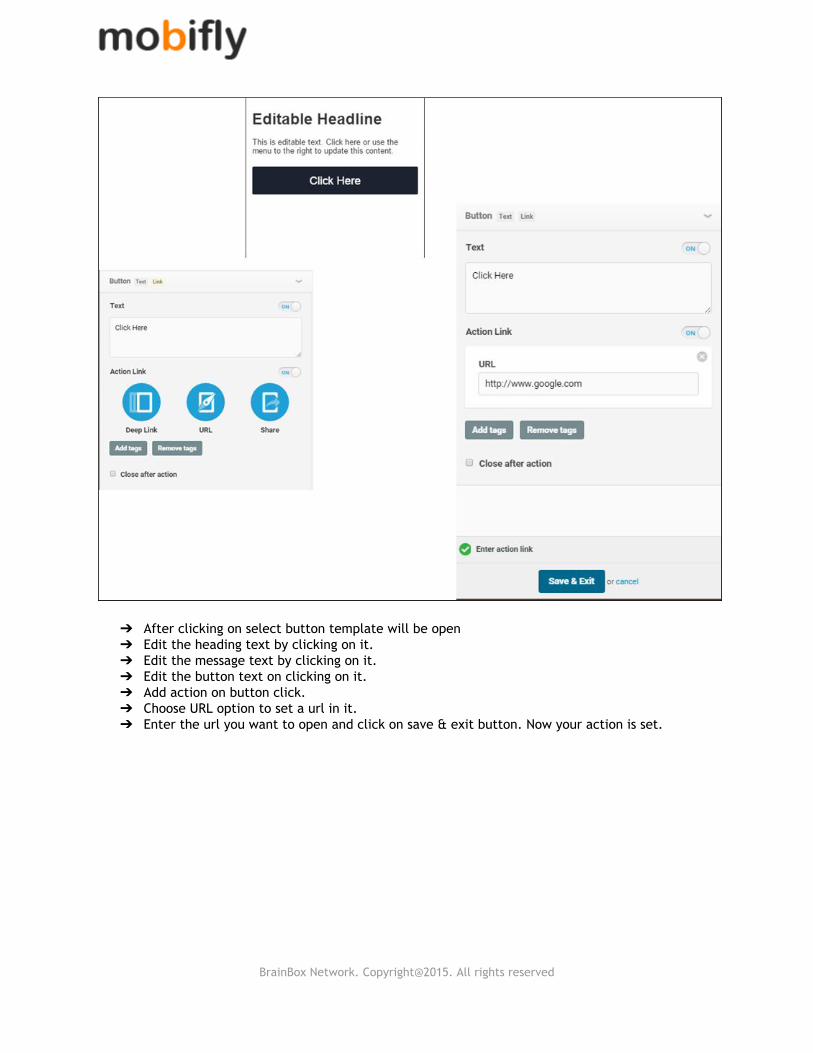
➔ After clicking on select button template will be open ➔ Edit the heading text by clicking on it. ➔ Edit the message text by clicking on it. ➔ Edit the button text on clicking on it. ➔ Add action on button click. ➔ Choose URL option to set a url in it. ➔ Enter the url you want to open and click on save & exit button. Now your action is set.
BrainBox Network. Copyright@2015. All rights reserved

Thank You So Very Much
For queries please write on [email protected] Developed By Danish Ali Android Developer ‐ Mobifly mobifly.in
BrainBox Network. Copyright@2015. All rights reserved