B
B
B
B
BB
B
A
A
A
A
A
A
A
DD
C
CC
C
Page 1 of 5© Disney / Pixar
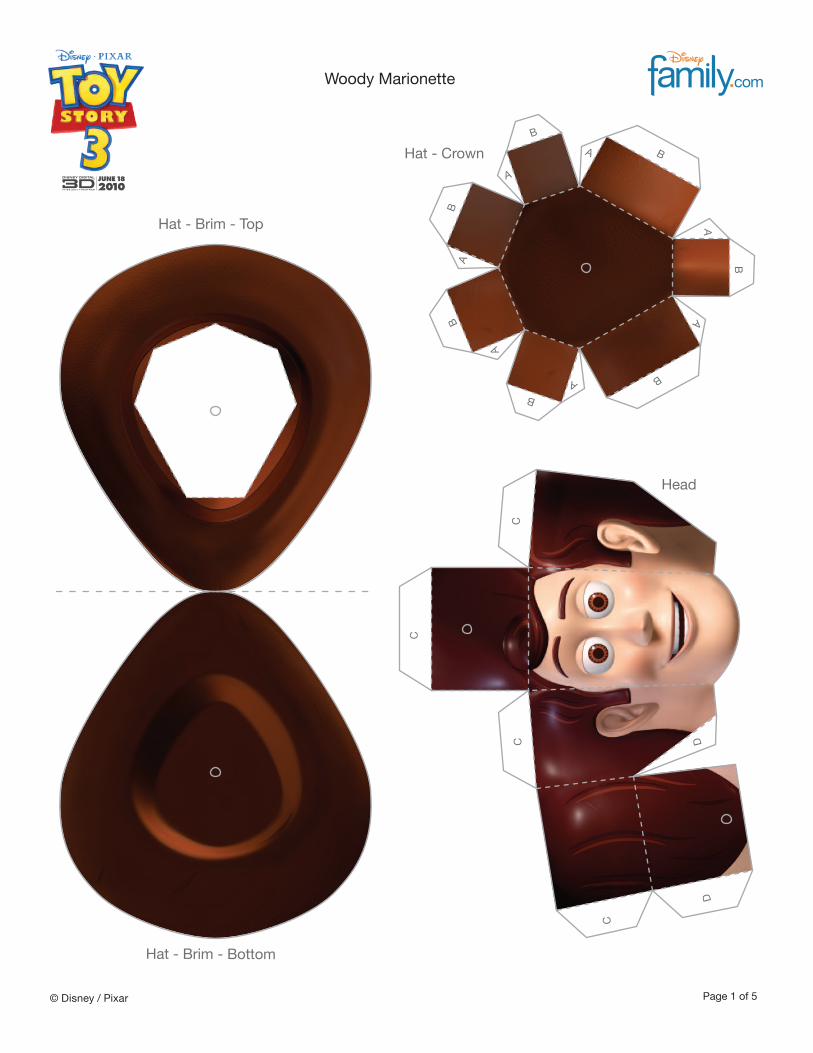
Woody Marionette
Hat - Brim - Top
Hat - Crown
Hat - Brim - Bottom
Head
Page 2 of 5© Disney / Pixar
© D
isne
y /
Pix
ar
Woody Marionette
E E
F F
F
G
G
G
G
G G
G
G
G
G
F
F
F F
F
F
F
EE
E E
E
E E
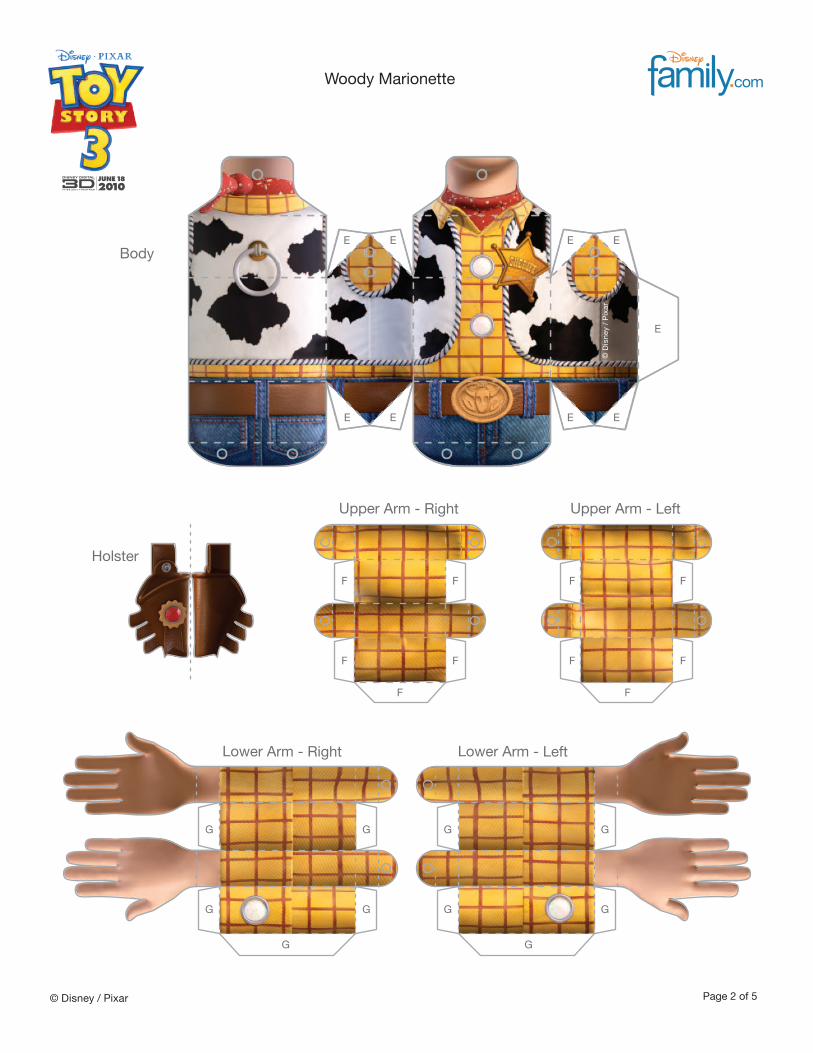
Body
Holster
Upper Arm - LeftUpper Arm - Right
Lower Arm - Right Lower Arm - Left

Page 3 of 5© Disney / Pixar
Woody Marionette
H H
H
H
H H
H H
H H
H H
H H
H
H H
H
H
H
Upper Leg - Right
Upper Leg - Left
Lower Leg - LeftLower Leg - Right
Boot - Right Boot - Left
Page 4 of 5
Woody Marionette: Instructions
© Disney / Pixar
Woody MarionetteYou’ll need:Large-eye sewing needle or embroidery needleKite stringGlue3 wooden craft sticks
1. Print out the marionette on regular paper or cardstock and cut out all of the pieces. Don’t cut along the dashed lines -- this is where you will fold the paper.
Woody’s Head and Hat2. Take the crown piece and fold the A and B tabs away from you. Glue the A tabs to the inside of each crown piece next to it.
3. Fold and glue the brim piece of the hat in half so the design is two-sided. Attach the crown to the brim by gluing the B tabs to the brim along the indicated line.
4. Fold all of the tabs on Woody’s head away from you. Glue the C tabs to shape and close the top of his head. Do not glue the D tabs yet.
Body and Arms5. Make Woody’s body piece by folding each dashed line away from you, except for the bottom dashed line below his belt, fold that line towards you. Glue the E tabs to the inside of the front and back pieces. Pinch the front and back piece where his neck and pelvis is (where you see the thread holes) and glue them together.
6. Fold and glue Woody’s holster in half so the design is two-sided. Glue it to the side of Woody’s right hip.
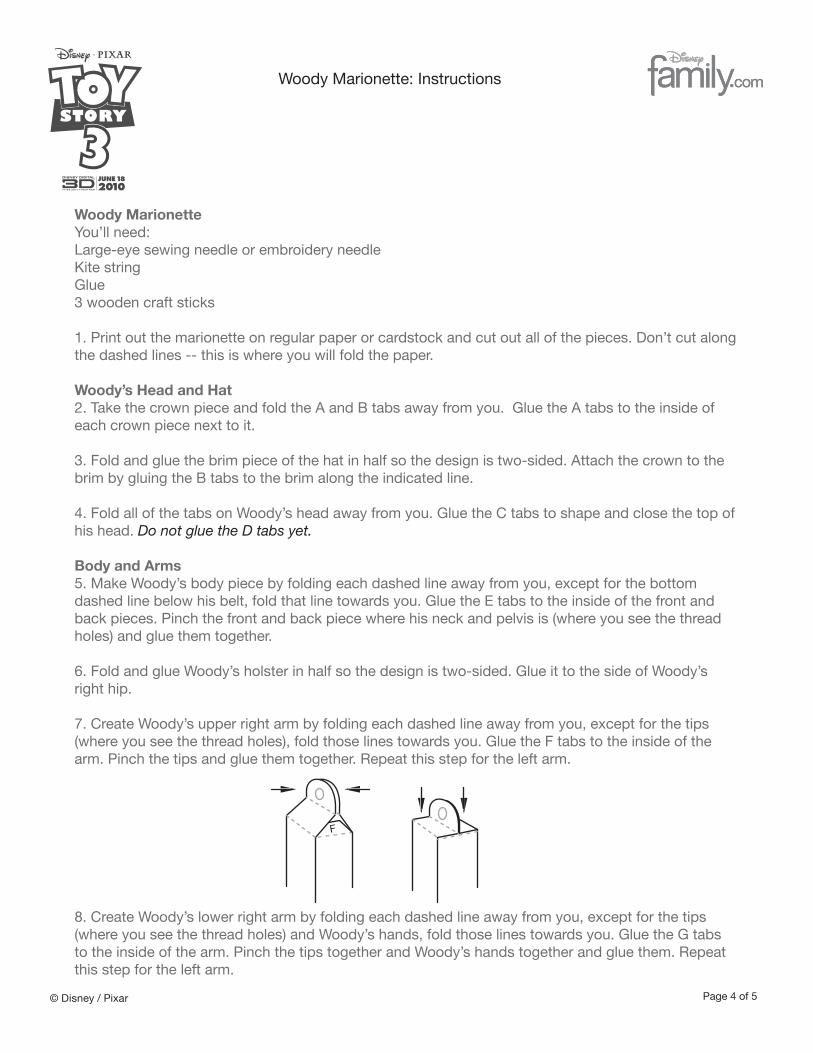
7. Create Woody’s upper right arm by folding each dashed line away from you, except for the tips (where you see the thread holes), fold those lines towards you. Glue the F tabs to the inside of the arm. Pinch the tips and glue them together. Repeat this step for the left arm.
8. Create Woody’s lower right arm by folding each dashed line away from you, except for the tips (where you see the thread holes) and Woody’s hands, fold those lines towards you. Glue the G tabs to the inside of the arm. Pinch the tips together and Woody’s hands together and glue them. Repeat this step for the left arm.
F

Legs and Boots9. Create Woody’s upper and lower legs by folding each dashed line away from you, except for the tips (where you see the thread holes), fold those lines towards you. Glue the H tabs to the inside the leg piece. Pinch the tips and glue them together. Repeat this step for each leg piece.
10. Fold and glue the boots in half so the design is two-sided.
To assemble your marionette:1. Cut a 7”piece of string and tie a thick knot at one end. Thread the string through your needle and push it up through the bottom of Woody’s head, through his hat, and out the top. Now that the string is in place you can glue and close the D tabs on the back of his head.
2. Next, cut a 15” piece of string and thread it onto the needle. Thread it through the hole at the bottom of Woody’s hairline and his neck on the body piece. Cut the string (about an inch-long piece) and tie the pieces together. Repeat this to attach each of his body pieces together.
3. Once Woody’s entire body is put together, cut two 14” pieces of string and two 12” pieces of string. Thread the 14” pieces through his knee holes. Tie the 12” pieces around his wrists.
4. Glue the wooden craft sticks together as shown. Tie the ends of the strings attached to Woody’s knees to the front stick and the strings attached to his wrists to the back stick. Tie the string attached to his head to the middle of the front stick.
Page 5 of 5© Disney / Pixar
Right Arm
Right Knee
Left Arm
Left Knee
Head
Head
Neck Arm
Body
Woody Marionette: Instructions (contd.)
Recommended