Module 4- REFLECTIONModule 4- REFLECTION
HUANG SHEN SHEN @ APPLE Student No.: 551099 Semester 2/2012Group 13
Module 1 - IDEATION

NATURAL PROCESS: SNOWFLAKE FORMATION
Plate grows into a prism. Facets grow at a different rate under different condition.
THE FORMATION OF SNOWFLAKES
Microscopic dust particles in a cloud
Dust particles, water vapour and impurities condenses and bond to form hexagonal lattice formation
Arms grow out of corners due to instabilities.More detailed pattern is created on arms due the its faster rate of growth compared to the facets
More plates are formed under different conditions again.More arms branch out of corners due to instabilities of the plates again which create the more complex look of a snowflake
The process behind that forms the pattern of a almost symmetrical 6-sided snowflake really is something that is hard to believe and understand. Snowflake is famous for its unique shape that has 6 branches emerging out from a hexagonal plate in the middle. How do water droplets, dirt and suspended impurities in the air form into something so unique and delicate? This is something that interest me the most among all the other natural processes.It is stated by scientist that the 6-sided structure reflects the molecular structure of water that was crystallised under a cold temperature.
What fascinate me the most is how the each 'facets' (hexagonally arranged water molecules) are formed.
How each arm that branches out of the corners turn out to be so detailed when being observed under the microscope.
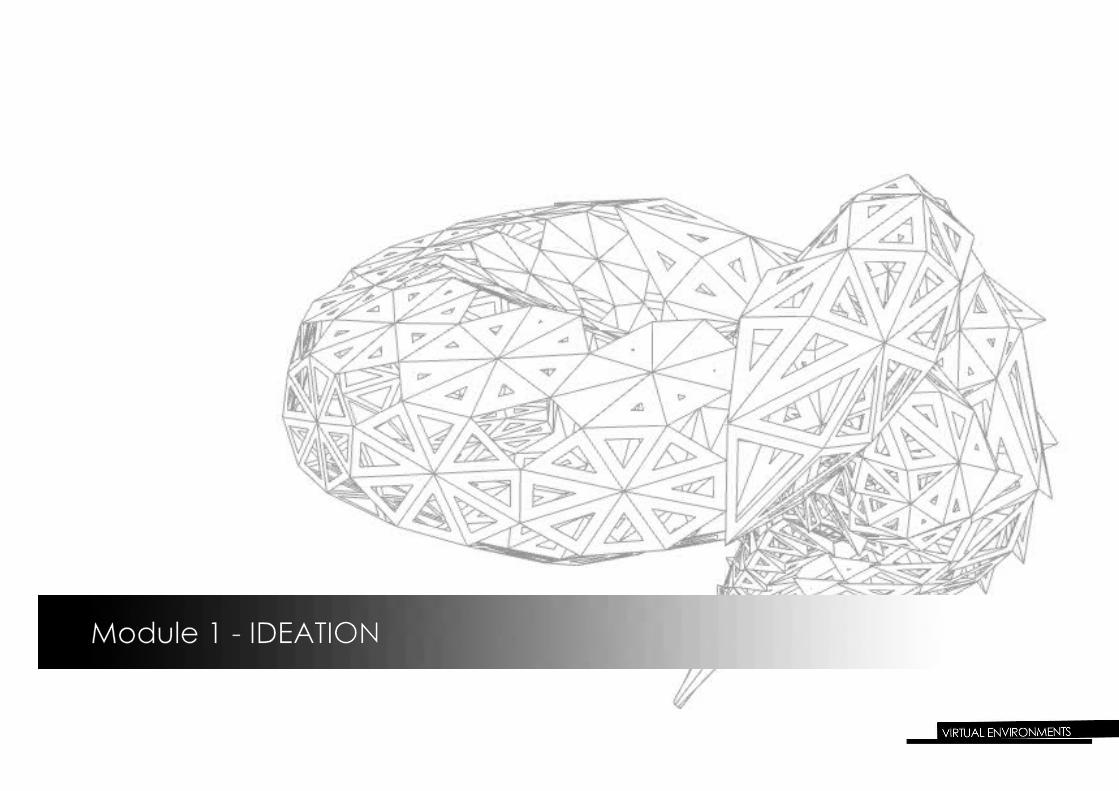
Snowflakes do not only consist of almost symmetrical star-like pattern. Under different conditions, snowflakes can be appeared in needle-shaped form or in plate-form.
Humidity is the largest factor affecting the shape and pattern of a snowflake. Diagram above shows the different types of snowflake formed under different level of humidity.
Self organization behaviour introduced by Ball (2012) related to how snowflakes are self organized in forming different patterns in order to withstand the different level of humidity in in order to gain stability.
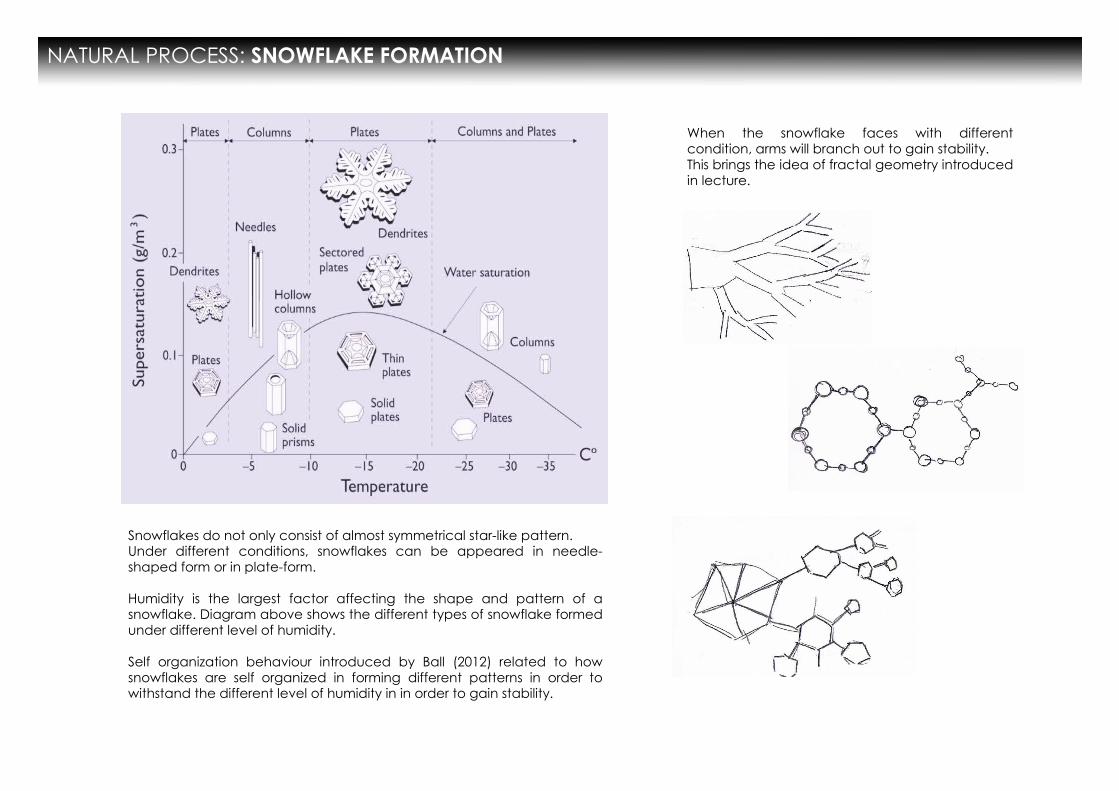
When the snowflake faces with different condition, arms will branch out to gain stability.This brings the idea of fractal geometry introduced in lecture.
NATURAL PROCESS: SNOWFLAKE FORMATION
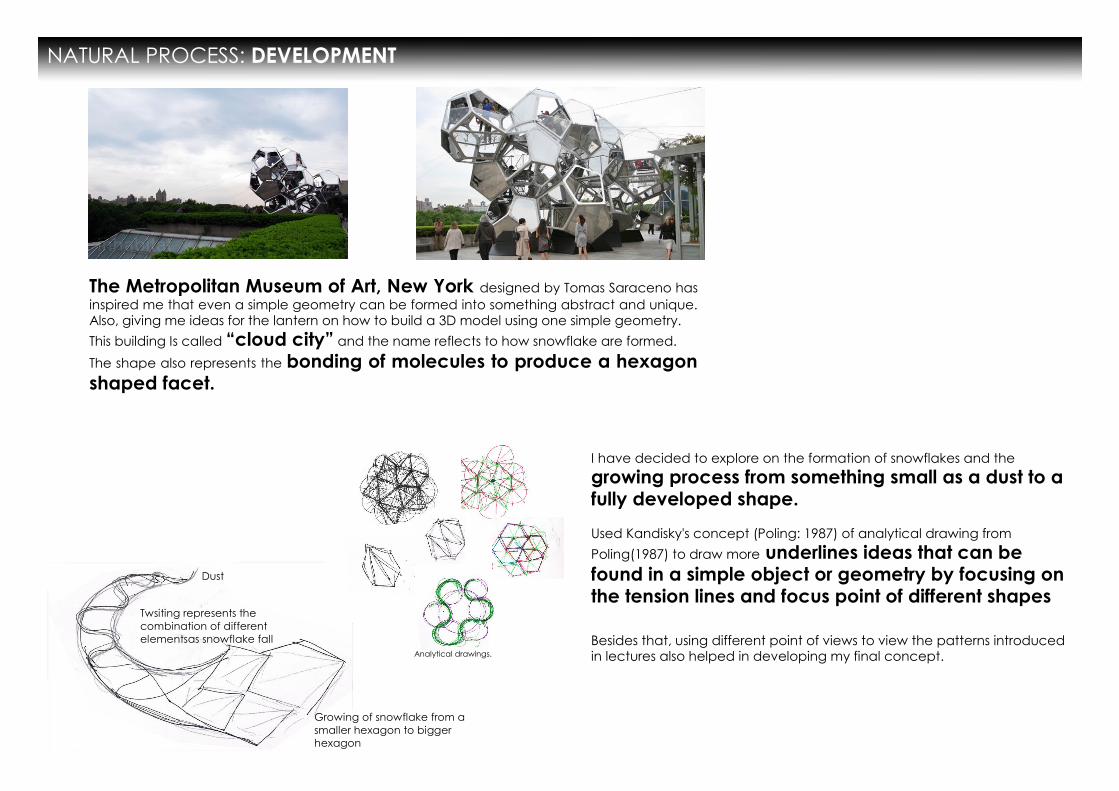
The Metropolitan Museum of Art, New York designed by Tomas Saraceno has inspired me that even a simple geometry can be formed into something abstract and unique. Also, giving me ideas for the lantern on how to build a 3D model using one simple geometry.
This building Is called “cloud city” and the name reflects to how snowflake are formed.
The shape also represents the bonding of molecules to produce a hexagon shaped facet.
I have decided to explore on the formation of snowflakes and the
growing process from something small as a dust to a fully developed shape.
Used Kandisky's concept (Poling: 1987) of analytical drawing from
Poling(1987) to draw more underlines ideas that can be found in a simple object or geometry by focusing on the tension lines and focus point of different shapes
Besides that, using different point of views to view the patterns introduced in lectures also helped in developing my final concept.
Growing of snowflake from a smaller hexagon to bigger hexagon
Dust
Twsiting represents the combination of different elementsas snowflake fall
NATURAL PROCESS: DEVELOPMENT
Analytical drawings.
DEVELOPMENT: CLAY MODEL
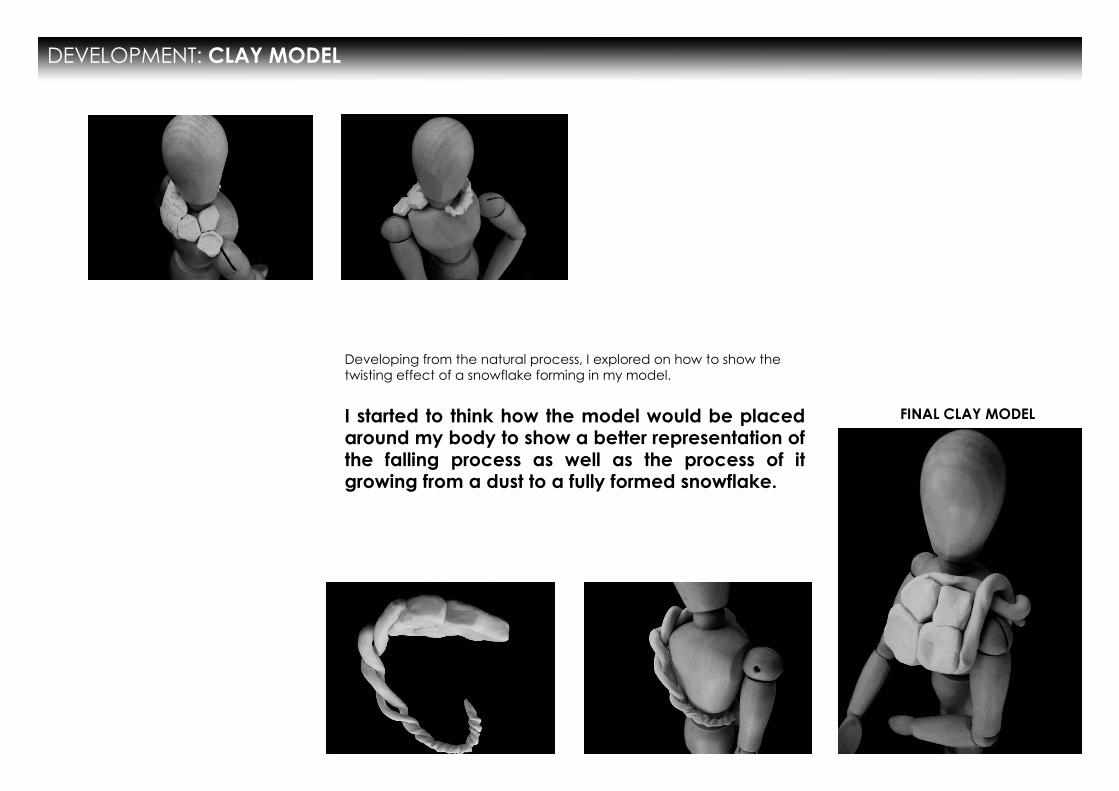
Developing from the natural process, I explored on how to show the twisting effect of a snowflake forming in my model.
I started to think how the model would be placed around my body to show a better representation of the falling process as well as the process of it growing from a dust to a fully formed snowflake.
FINAL CLAY MODEL
Module 2 - DESIGN
DIGITISATION: CONTOURING AND DIGITISING PROCESS
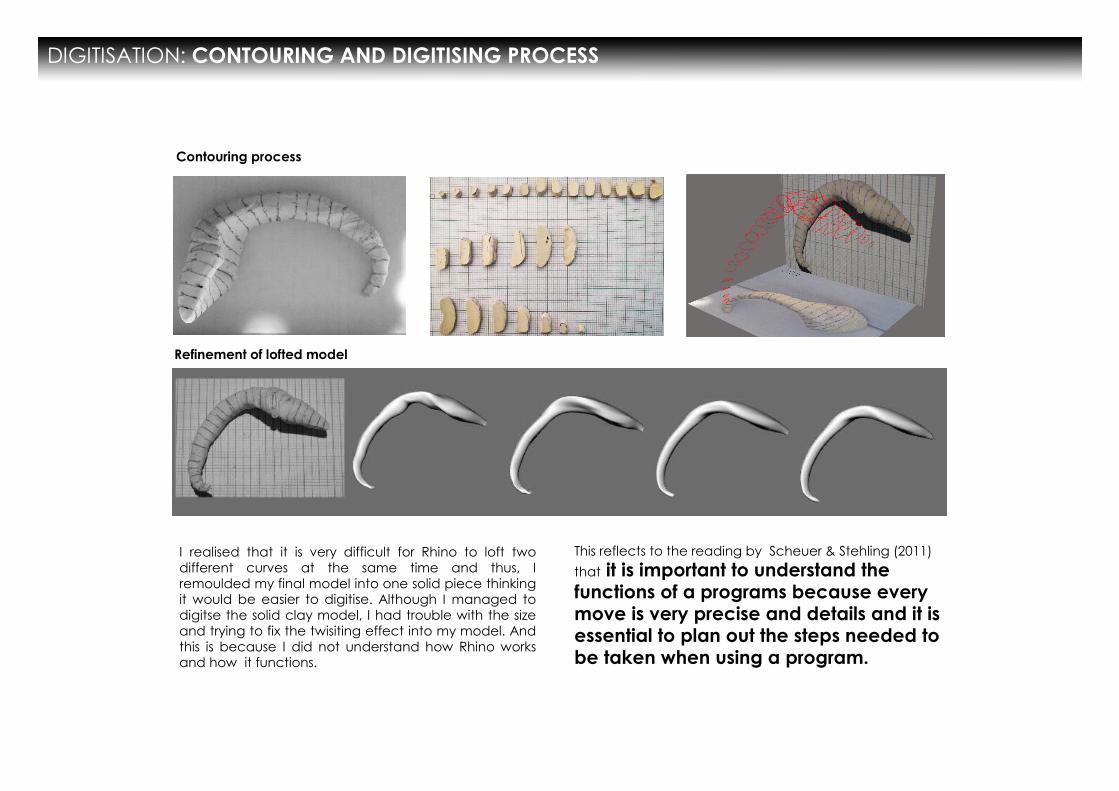
I realised that it is very difficult for Rhino to loft two different curves at the same time and thus, I remoulded my final model into one solid piece thinking it would be easier to digitise. Although I managed to digitse the solid clay model, I had trouble with the size and trying to fix the twisiting effect into my model. And this is because I did not understand how Rhino works and how it functions.
Refinement of lofted model
Contouring process
This reflects to the reading by Scheuer & Stehling (2011)
that it is important to understand the functions of a programs because every move is very precise and details and it is essential to plan out the steps needed to be taken when using a program.
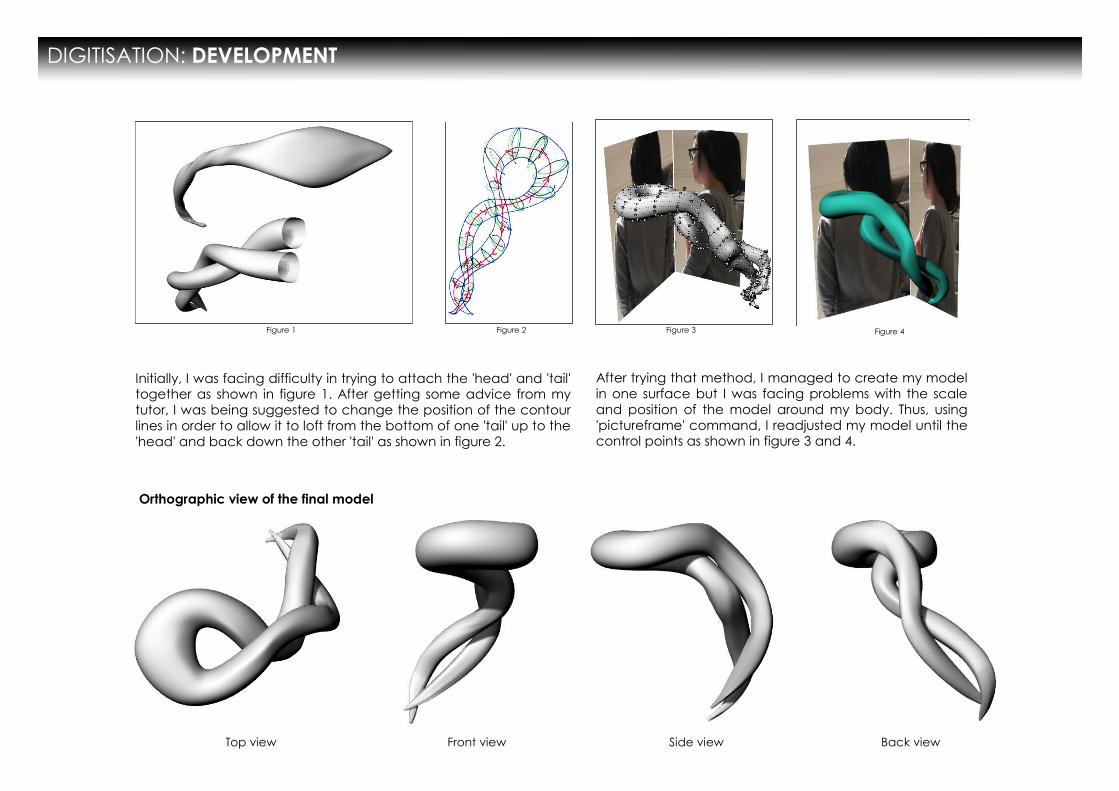
Orthographic view of the final model
Top view Front view Side view Back view
Figure 1
DIGITISATION: DEVELOPMENT
Figure 2 Figure 3 Figure 4
Initially, I was facing difficulty in trying to attach the 'head' and 'tail' together as shown in figure 1. After getting some advice from my tutor, I was being suggested to change the position of the contour lines in order to allow it to loft from the bottom of one 'tail' up to the 'head' and back down the other 'tail' as shown in figure 2.
After trying that method, I managed to create my model in one surface but I was facing problems with the scale and position of the model around my body. Thus, using 'pictureframe' command, I readjusted my model until the control points as shown in figure 3 and 4.
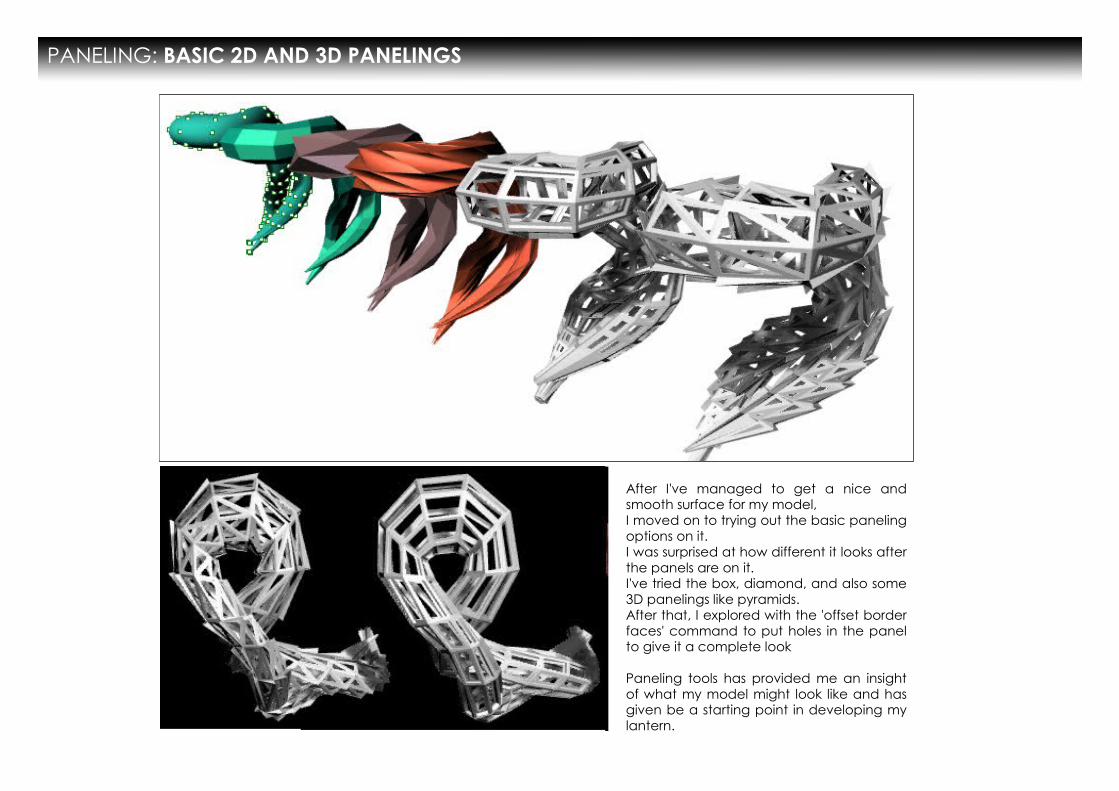
After I've managed to get a nice and smooth surface for my model, I moved on to trying out the basic paneling options on it.I was surprised at how different it looks after the panels are on it. I've tried the box, diamond, and also some 3D panelings like pyramids.After that, I explored with the 'offset border faces' command to put holes in the panel to give it a complete look
Paneling tools has provided me an insight of what my model might look like and has given be a starting point in developing my lantern.
PANELING: BASIC 2D AND 3D PANELINGS
PANELING: PRECEDENTS
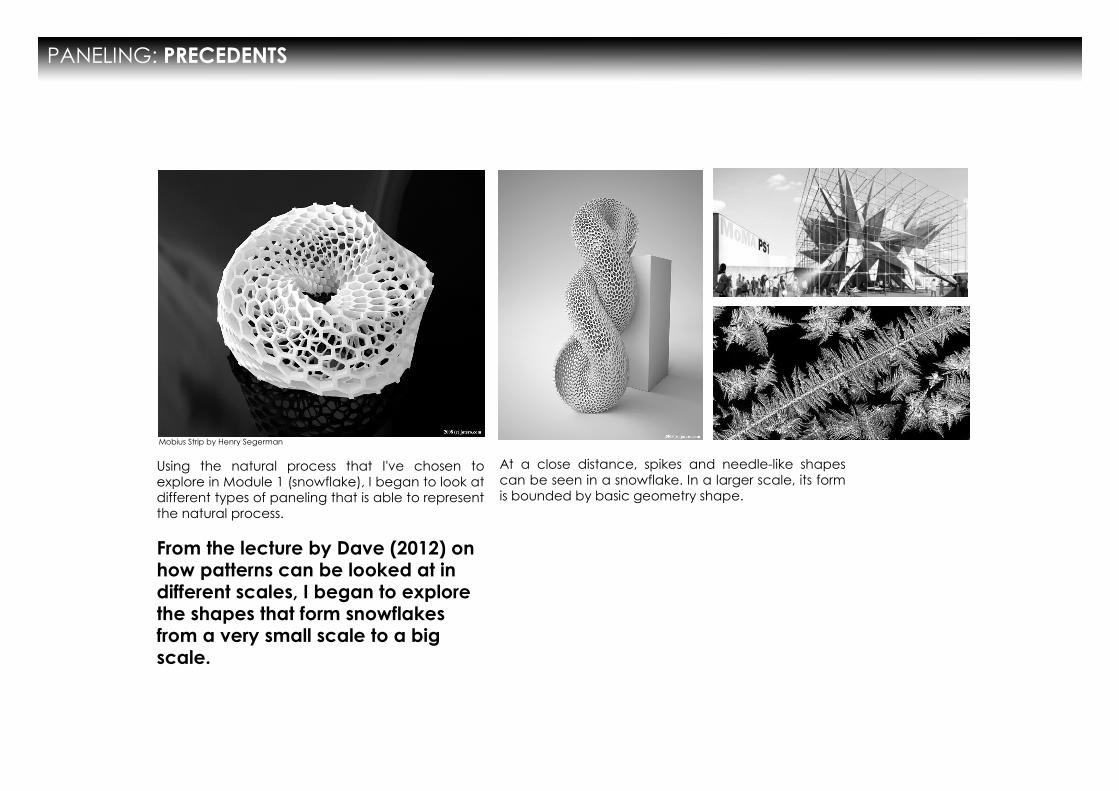
Using the natural process that I've chosen to explore in Module 1 (snowflake), I began to look at different types of paneling that is able to represent the natural process.
From the lecture by Dave (2012) on how patterns can be looked at in different scales, I began to explore the shapes that form snowflakes from a very small scale to a big scale.
At a close distance, spikes and needle-like shapes can be seen in a snowflake. In a larger scale, its form is bounded by basic geometry shape.
Mobius Strip by Henry Segerman
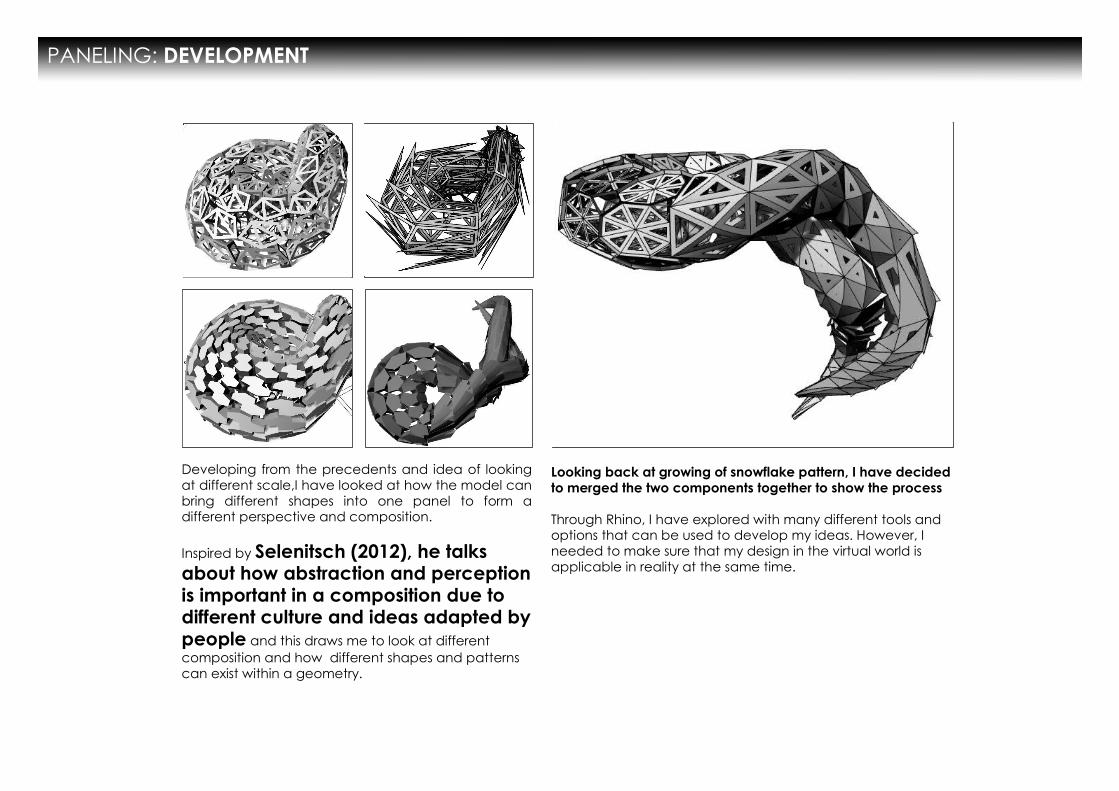
Looking back at growing of snowflake pattern, I have decided to merged the two components together to show the process
Through Rhino, I have explored with many different tools and options that can be used to develop my ideas. However, I needed to make sure that my design in the virtual world is applicable in reality at the same time.
PANELING: DEVELOPMENT
Developing from the precedents and idea of looking at different scale,I have looked at how the model can bring different shapes into one panel to form a different perspective and composition.
Inspired by Selenitsch (2012), he talks about how abstraction and perception is important in a composition due to different culture and ideas adapted by people and this draws me to look at different composition and how different shapes and patterns can exist within a geometry.
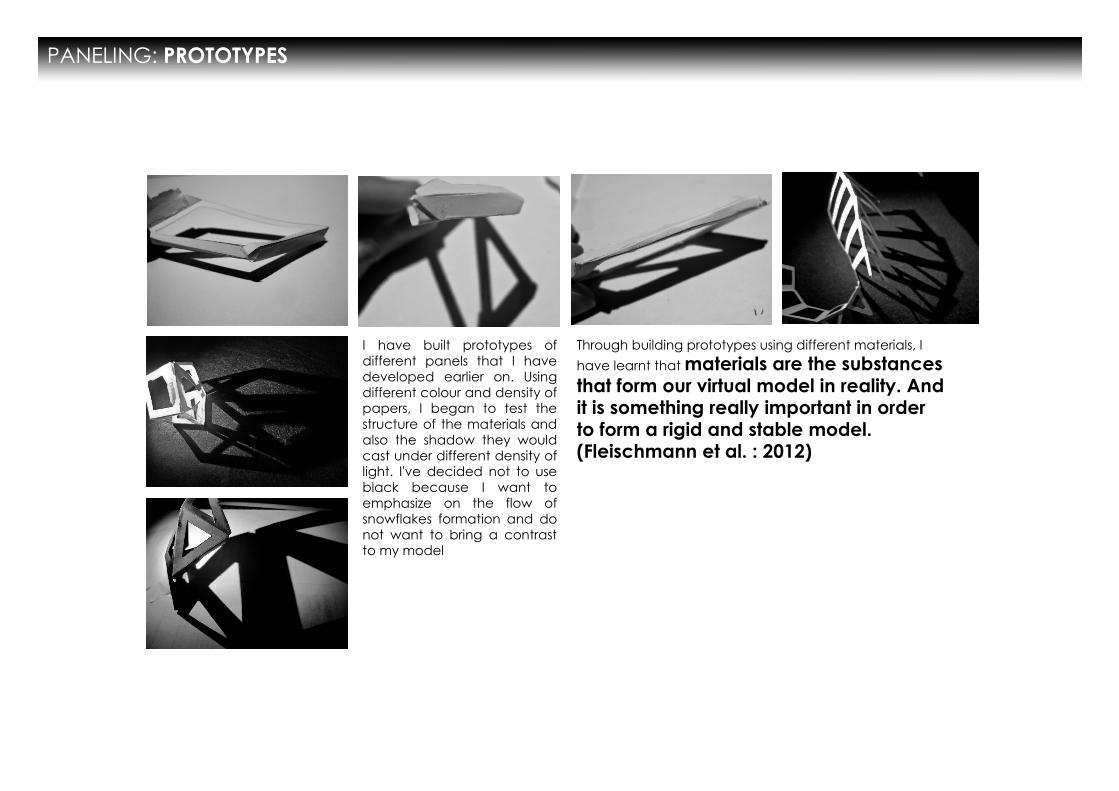
PANELING: PROTOTYPES
I have built prototypes of different panels that I have developed earlier on. Using different colour and density of papers, I began to test the structure of the materials and also the shadow they would cast under different density of light. I've decided not to use black because I want to emphasize on the flow of snowflakes formation and do not want to bring a contrast to my model
Through building prototypes using different materials, I
have learnt that materials are the substances that form our virtual model in reality. And it is something really important in order to form a rigid and stable model. (Fleischmann et al. : 2012)
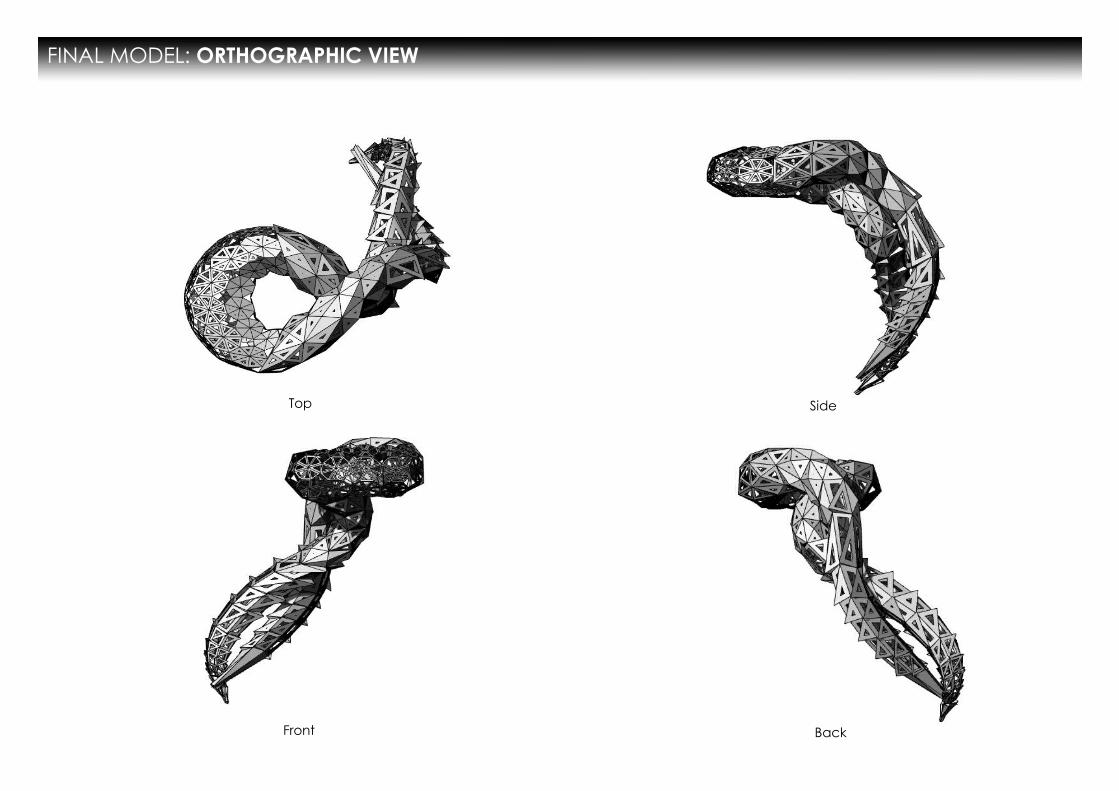
Top Side
Front Back
FINAL MODEL: ORTHOGRAPHIC VIEW
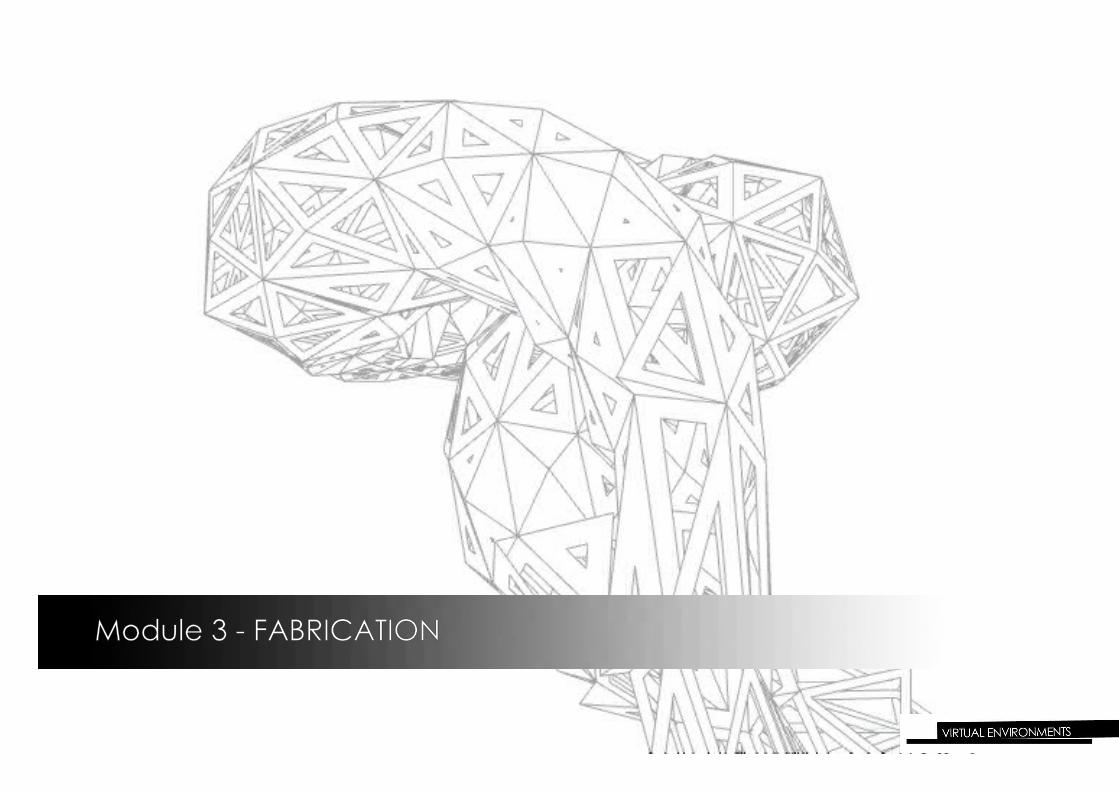
Module 3 - FABRICATION
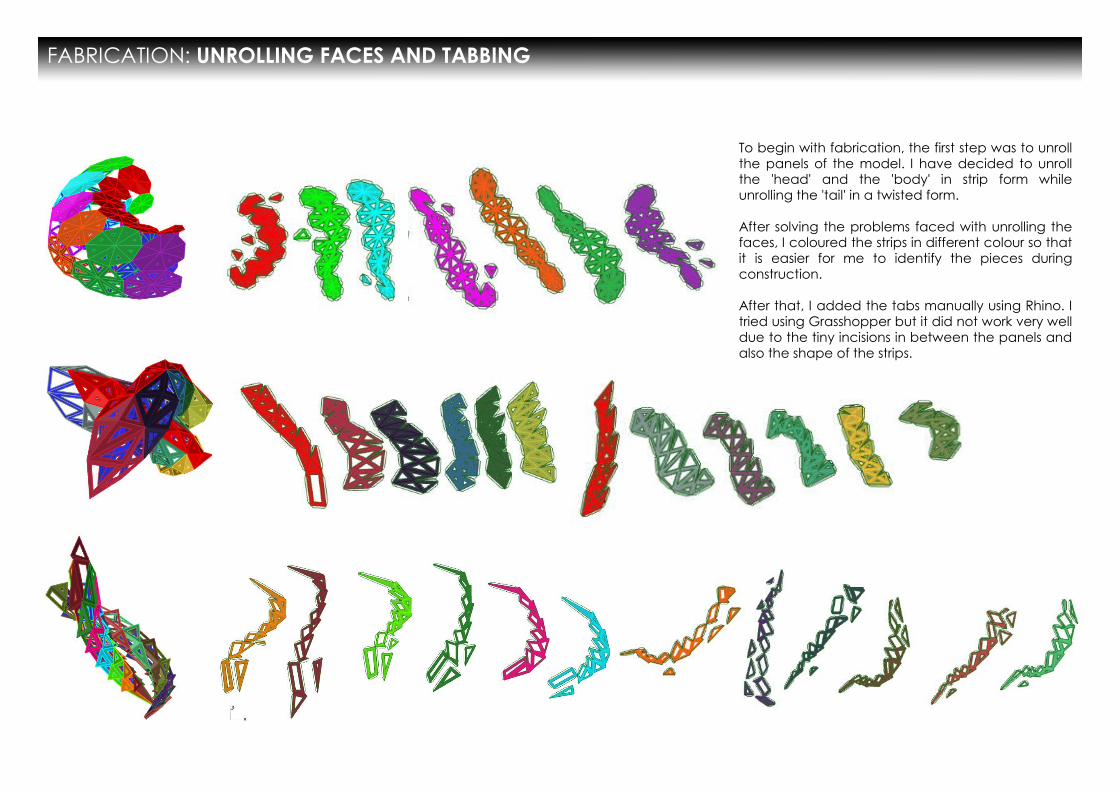
To begin with fabrication, the first step was to unroll the panels of the model. I have decided to unroll the 'head' and the 'body' in strip form while unrolling the 'tail' in a twisted form.
After solving the problems faced with unrolling the faces, I coloured the strips in different colour so that it is easier for me to identify the pieces during construction.
After that, I added the tabs manually using Rhino. I tried using Grasshopper but it did not work very well due to the tiny incisions in between the panels and also the shape of the strips.
FABRICATION: UNROLLING FACES AND TABBING
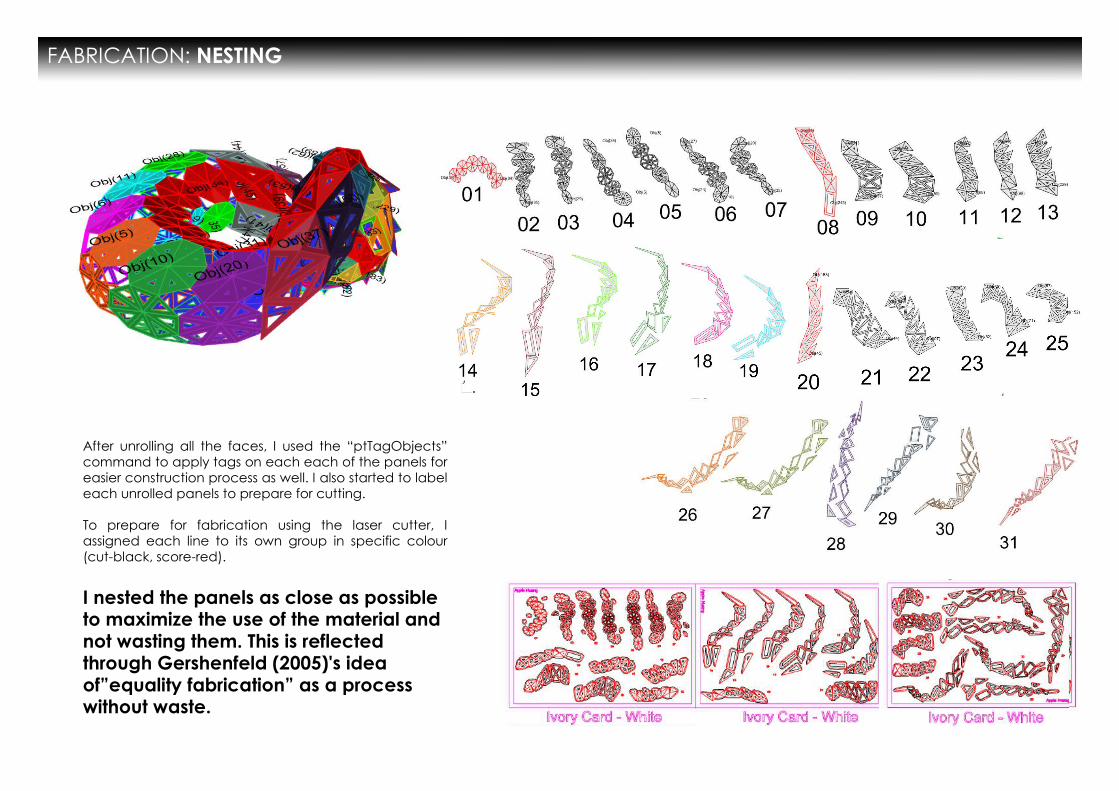
After unrolling all the faces, I used the “ptTagObjects” command to apply tags on each each of the panels for easier construction process as well. I also started to label each unrolled panels to prepare for cutting.
To prepare for fabrication using the laser cutter, I assigned each line to its own group in specific colour (cut-black, score-red).
I nested the panels as close as possible to maximize the use of the material and not wasting them. This is reflected through Gershenfeld (2005)'s idea of”equality fabrication” as a process without waste.
FABRICATION: NESTING
PROTOTYPE: CONSTRUCTION
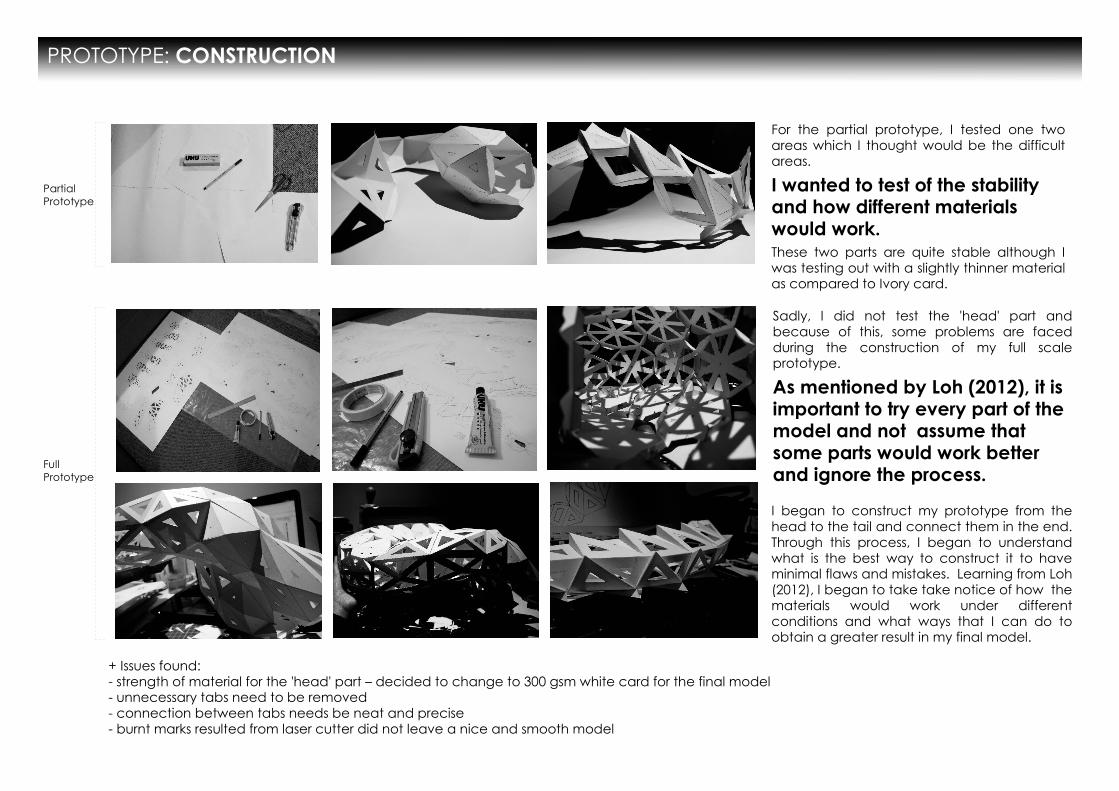
For the partial prototype, I tested one two areas which I thought would be the difficult areas.
I wanted to test of the stability and how different materials would work.These two parts are quite stable although I was testing out with a slightly thinner material as compared to Ivory card.
Sadly, I did not test the 'head' part and because of this, some problems are faced during the construction of my full scale prototype.
As mentioned by Loh (2012), it is important to try every part of the model and not assume that some parts would work better and ignore the process.
I began to construct my prototype from the head to the tail and connect them in the end. Through this process, I began to understand what is the best way to construct it to have minimal flaws and mistakes. Learning from Loh (2012), I began to take take notice of how the materials would work under different conditions and what ways that I can do to obtain a greater result in my final model.
Partial Prototype
Full Prototype
+ Issues found:- strength of material for the 'head' part – decided to change to 300 gsm white card for the final model- unnecessary tabs need to be removed - connection between tabs needs be neat and precise- burnt marks resulted from laser cutter did not leave a nice and smooth model
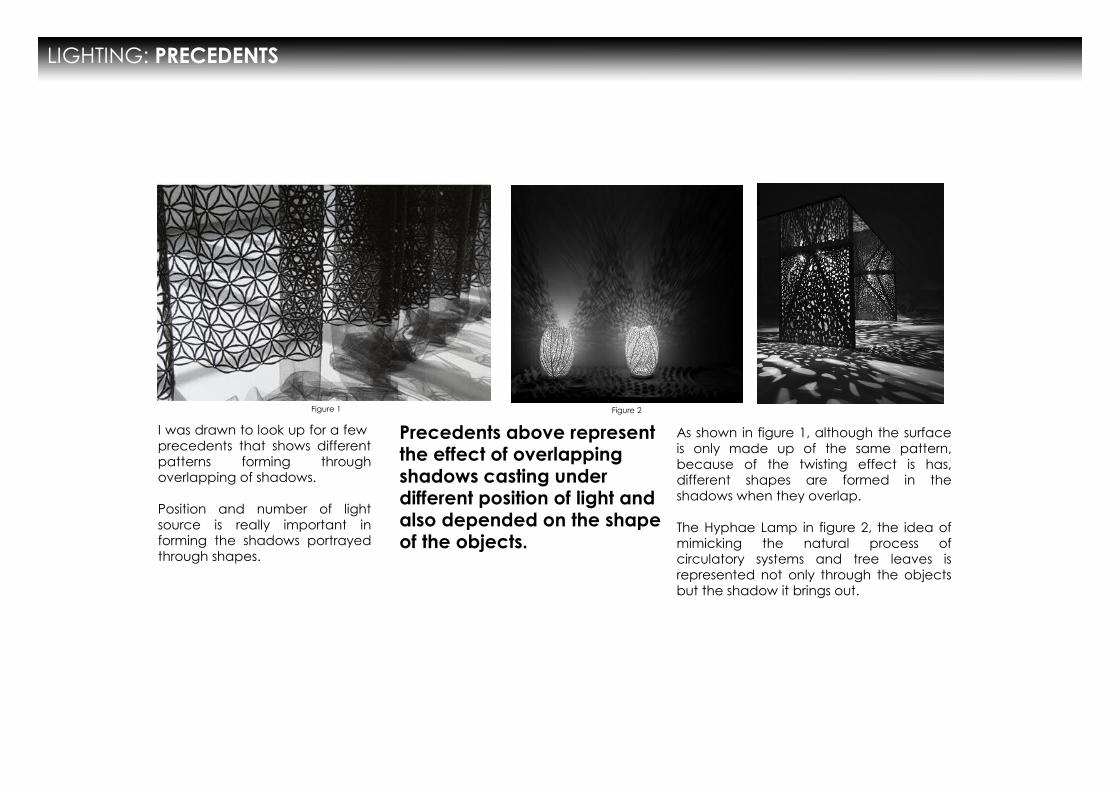
I was drawn to look up for a few precedents that shows different patterns forming through overlapping of shadows.
Position and number of light source is really important in forming the shadows portrayed through shapes.
LIGHTING: PRECEDENTS
As shown in figure 1, although the surface is only made up of the same pattern, because of the twisting effect is has, different shapes are formed in the shadows when they overlap.
The Hyphae Lamp in figure 2, the idea of mimicking the natural process of circulatory systems and tree leaves is represented not only through the objects but the shadow it brings out.
Figure 1 Figure 2
Precedents above represent the effect of overlapping shadows casting under different position of light and also depended on the shape of the objects.
FINAL MODEL: CONSTRUCTION
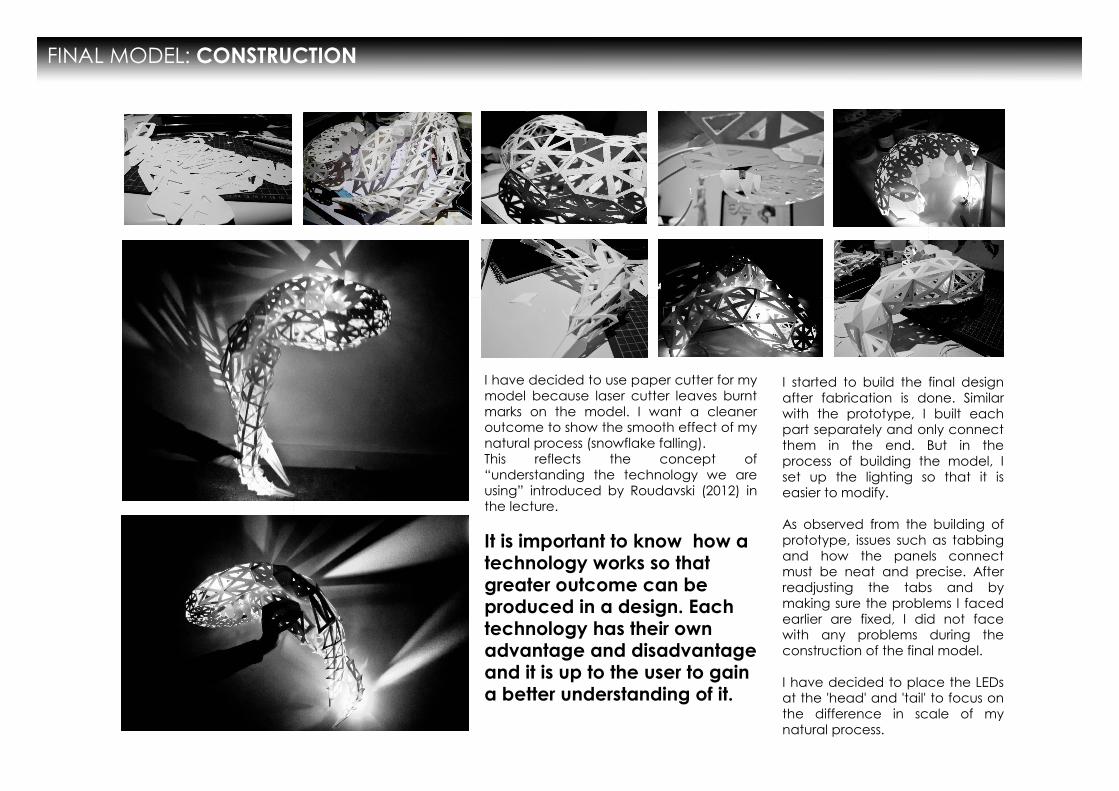
I have decided to use paper cutter for my model because laser cutter leaves burnt marks on the model. I want a cleaner outcome to show the smooth effect of my natural process (snowflake falling). This reflects the concept of “understanding the technology we are using” introduced by Roudavski (2012) in the lecture.
It is important to know how a technology works so that greater outcome can be produced in a design. Each technology has their own advantage and disadvantage and it is up to the user to gain a better understanding of it.
I started to build the final design after fabrication is done. Similar with the prototype, I built each part separately and only connect them in the end. But in the process of building the model, I set up the lighting so that it is easier to modify.
As observed from the building of prototype, issues such as tabbing and how the panels connect must be neat and precise. After readjusting the tabs and by making sure the problems I faced earlier are fixed, I did not face with any problems during the construction of the final model.
I have decided to place the LEDs at the 'head' and 'tail' to focus on the difference in scale of my natural process.
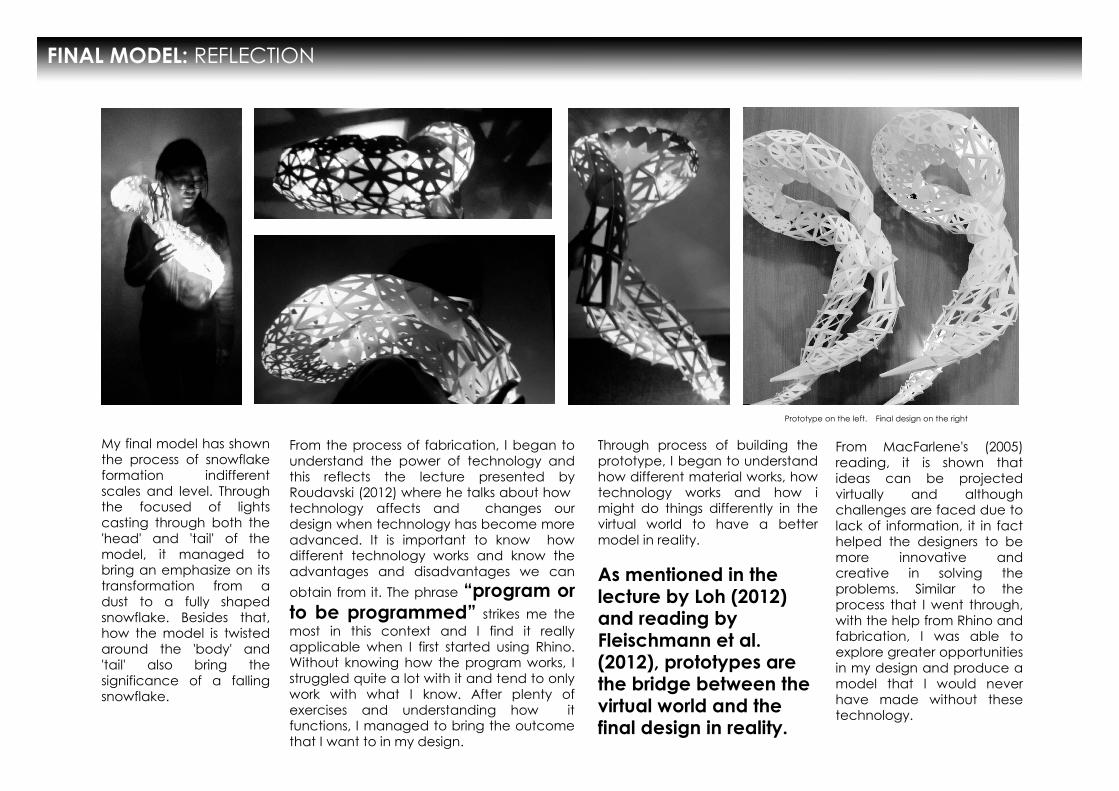
FINAL MODEL: REFLECTION
Through process of building the prototype, I began to understand how different material works, how technology works and how i might do things differently in the virtual world to have a better model in reality.
As mentioned in the lecture by Loh (2012) and reading by Fleischmann et al. (2012), prototypes are the bridge between the virtual world and the final design in reality.
My final model has shown the process of snowflake formation indifferent scales and level. Through the focused of lights casting through both the 'head' and 'tail' of the model, it managed to bring an emphasize on its transformation from a dust to a fully shaped snowflake. Besides that, how the model is twisted around the 'body' and 'tail' also bring the significance of a falling snowflake.
From the process of fabrication, I began to understand the power of technology and this reflects the lecture presented by Roudavski (2012) where he talks about how technology affects and changes our design when technology has become more advanced. It is important to know how different technology works and know the advantages and disadvantages we can
obtain from it. The phrase “program or to be programmed” strikes me the most in this context and I find it really applicable when I first started using Rhino. Without knowing how the program works, I struggled quite a lot with it and tend to only work with what I know. After plenty of exercises and understanding how it functions, I managed to bring the outcome that I want to in my design.
Prototype on the left. Final design on the right
From MacFarlene's (2005) reading, it is shown that ideas can be projected virtually and although challenges are faced due to lack of information, it in fact helped the designers to be more innovative and creative in solving the problems. Similar to the process that I went through, with the help from Rhino and fabrication, I was able to explore greater opportunities in my design and produce a model that I would never have made without these technology.
SUBJECT REFLECTION
This subject has opened up a door for me to experience the wonders of technology and has set a starting point for me as a designer. From model 1 until now, I have been constantly engaged with new knowledge and understanding of the virtual world.
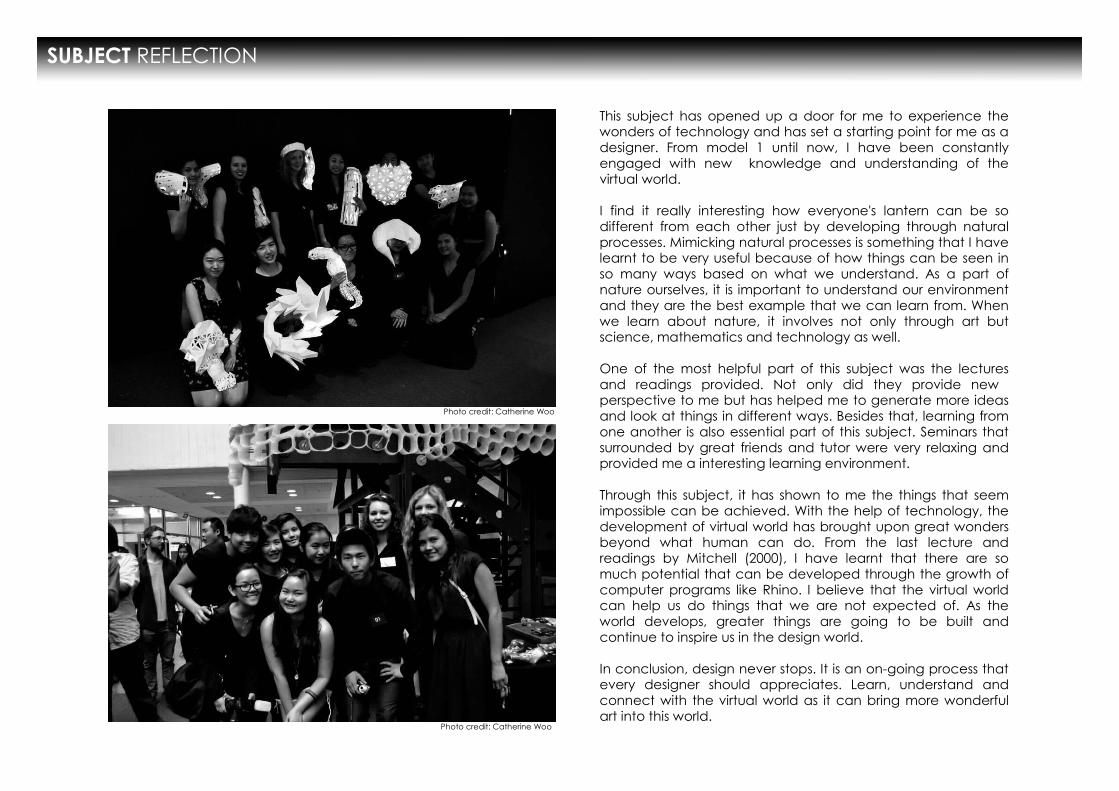
I find it really interesting how everyone's lantern can be so different from each other just by developing through natural processes. Mimicking natural processes is something that I have learnt to be very useful because of how things can be seen in so many ways based on what we understand. As a part of nature ourselves, it is important to understand our environment and they are the best example that we can learn from. When we learn about nature, it involves not only through art but science, mathematics and technology as well.
One of the most helpful part of this subject was the lectures and readings provided. Not only did they provide new perspective to me but has helped me to generate more ideas and look at things in different ways. Besides that, learning from one another is also essential part of this subject. Seminars that surrounded by great friends and tutor were very relaxing and provided me a interesting learning environment.
Through this subject, it has shown to me the things that seem impossible can be achieved. With the help of technology, the development of virtual world has brought upon great wonders beyond what human can do. From the last lecture and readings by Mitchell (2000), I have learnt that there are so much potential that can be developed through the growth of computer programs like Rhino. I believe that the virtual world can help us do things that we are not expected of. As the world develops, greater things are going to be built and continue to inspire us in the design world.
In conclusion, design never stops. It is an on-going process that every designer should appreciates. Learn, understand and connect with the virtual world as it can bring more wonderful art into this world.
Photo credit: Catherine Woo
Photo credit: Catherine Woo
Module OneBall, Philip (2012): Pattern Formation in Nature, AD: Architectural Design, Wiley, 82 (2), March, pp. 22-27
Poling, Clark (1987): Analytical Drawing. In Kandisky’s Teaching at the Bauhaus, Rizzoli, New York, pp. 107-132
http://www.asf.alaska.edu/program/gdc/project/alison/science/snow
http://sinearch.com/
http://likeflowersandbutterflies.blogspot.com.au/2010_11_01_archive.html
Module TwoFleischmann, M., Knippers, J., Lienhard, J., Menges, A., and Schleicher, S. (2012): Material Behaviour: Embedding Physical Properties in Computational Design Processes, D:Architectural Design, Wiley, 82 (2), March, pp. 44-51
Scheurer, F. and Stehling, H. (2011): Lost in Parameter Space? IAD: Architectural Design, Wiley, 81 (4), July, pp. 70-79
Dave, Bharat. 2012. Design Practices. Presented at University of Melbourne at 27th August 2012
Low, P. 2012. Material Spaces. Presented at University of Melbourne at 13th August 2012
http://forums.cgarchitect.com/15503-new-moebius-ring-torolf-17.html
http://inhabitat.com/hwkn%E2%80%99s-massive-spiky-wendy-pavilion-coming-to-moma-ps1-this-summer/
http://inhabitat.com/3500-spiky-plant-filled-vases-clad-the-firma-casas-walls-in-brazil/
Module ThreeDave, B. (2012). Design Practices. Presented at University of Melbourne on 27th August 2012
Feischmann, M., Knippers, J., Lienhard, J., Menges, A., and Schleicher, S. (2012): Material Behaviour: Embedding Physical Properties in Computational Design Processes, D:Architectural Design, Wiley, 82 (2), March, pp. 44-51
Loh, P. (2012). Fabricating Spaces II. Presented at University of Melbourne on 10th September 2012
Macfarlane, B. (2005): Making Ideas. In Architecture in the Digital Age, B. Kolarevic (ed.), Spon Press, London, pp. 182-197
Roudavski, S. (2012) Augmented Spaces. Presented at University of Melbourne on 1st October 2012.
Scheurer, F. and Stehling, H. (2011): Lost in Parameter Space? IAD: Architectural Design, Wiley, 81 (4), July, pp. 70-79
http://dornob.com/design/furnishings/lamps-lights/page/2/
http://inventorspot.com/articles/zen_and_the_shadow_art_of_the_riddled_table_17001
http://dornob.com/biomimicking-lamps-celebrate-the-beauty-of-natural-design/
Subject ReflectionDave, B. (2012). Lecture 10. Presented at University of Melbourne on 8th October 2012
Mitchell, W. (2000): Software: New Genius of Place. In e-Topia, MIT Press, Cambridge, MA, p. 42-68
Mitchell, W. (2000): Replacing Place. In The Digital Dialectic, P. Lunenfeld (ed.), MIT Press, Cambridge, MA, p. 112-127
REFERENCES
Recommended