TESTING WITH JUNIT IN ECLIPSE
Farzana Rahman
INTRODUCTION The class that you will want to test is created first so that
Eclipse will be able to find that class under test when you build the test case class. The test cases are built with the needed imports and extensions for JUnit to run. Once the test case class is built the actual test cases are then coded in by the programmer.
Reminder of JUnit Naming Conventions:
Test Case Class: Named [classname]Test.java, where classname is the name of the class that is being tested.
Test Case Method: Named test[methodname], where methodname is the name of the method that is tested.
ADDING JUNIT.JAR Right click on the project and select Properties. In the left
column select Java Build Path. To the right select the Libraries tab. Click the Add External JARs... Button to add the Jnit.jar. It is provided in Lab12.Zip that you should have downloaded from my webpage by this time.
Next I am going to provide some screenshots so that you can understand how to create Junit test cases.
Please use Lab1.java as the program to be tested and follow the steps as described.
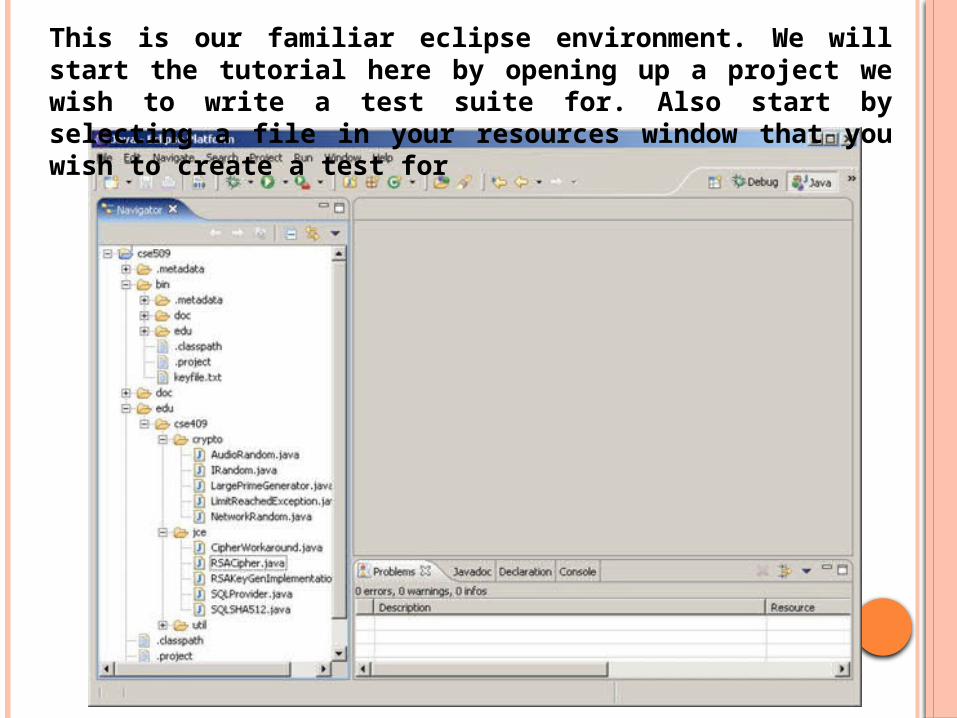
This is our familiar eclipse environment. We will start the tutorial here by opening up a project we wish to write a test suite for. Also start by selecting a file in your resources window that you wish to create a test for
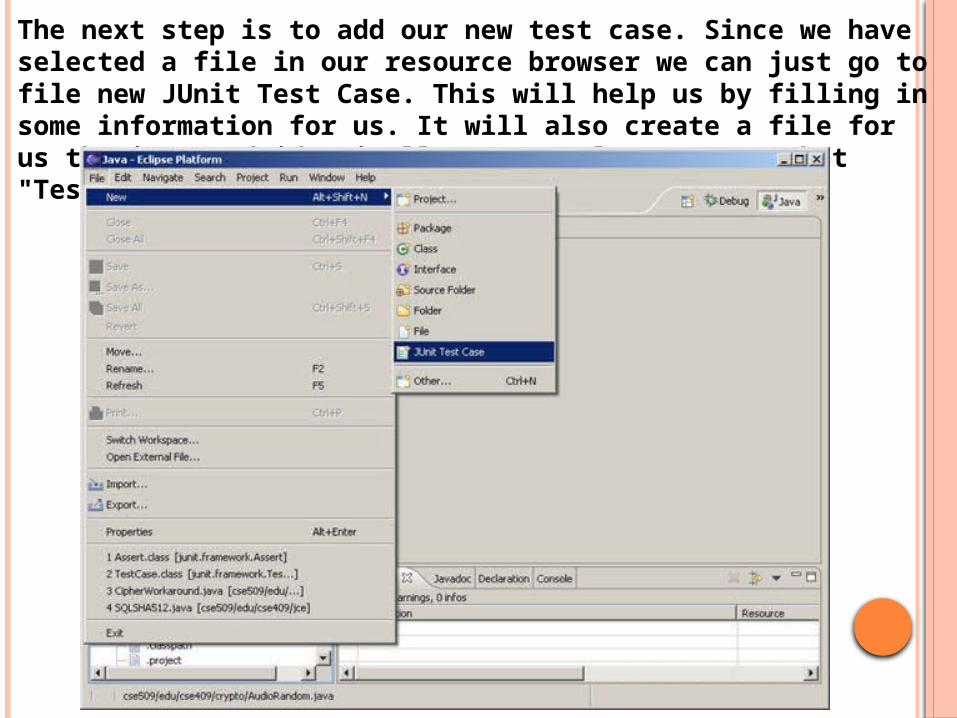
The next step is to add our new test case. Since we have selected a file in our resource browser we can just go to file new JUnit Test Case. This will help us by filling in some information for us. It will also create a file for us the is named identically to our class except that "Test" is appended to the name of the class.
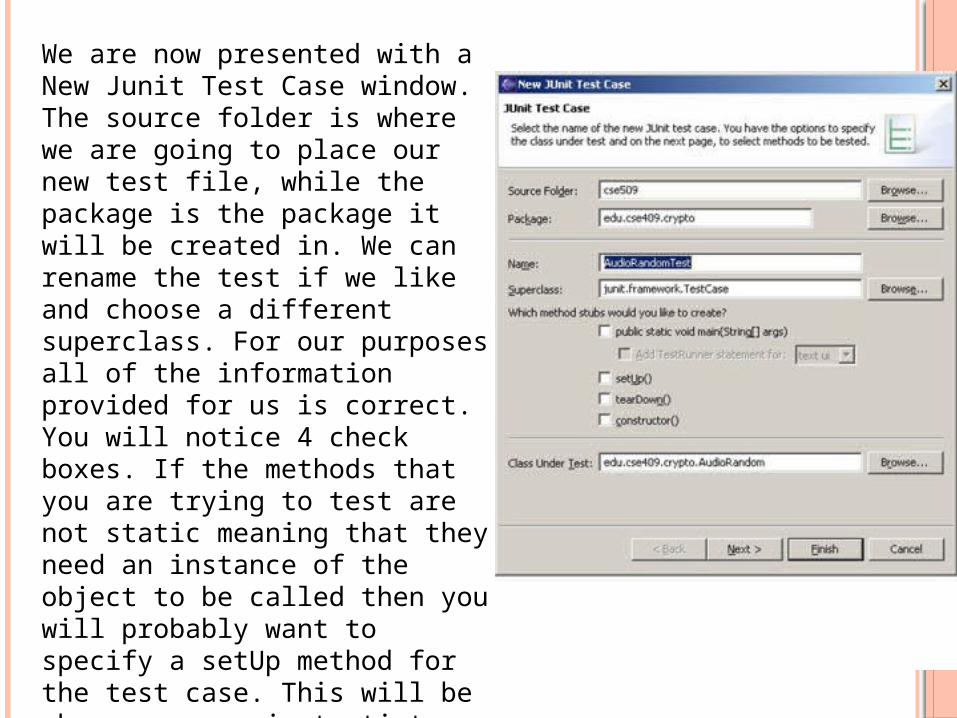
We are now presented with a New Junit Test Case window. The source folder is where we are going to place our new test file, while the package is the package it will be created in. We can rename the test if we like and choose a different superclass. For our purposes all of the information provided for us is correct. You will notice 4 check boxes. If the methods that you are trying to test are not static meaning that they need an instance of the object to be called then you will probably want to specify a setUp method for the test case. This will be where you can instantiate your object before running the tests. Also if your tests allocate any special resources you may want to select tearDown so you can properly dispose of the resources. After we are done with this you may click the next button.
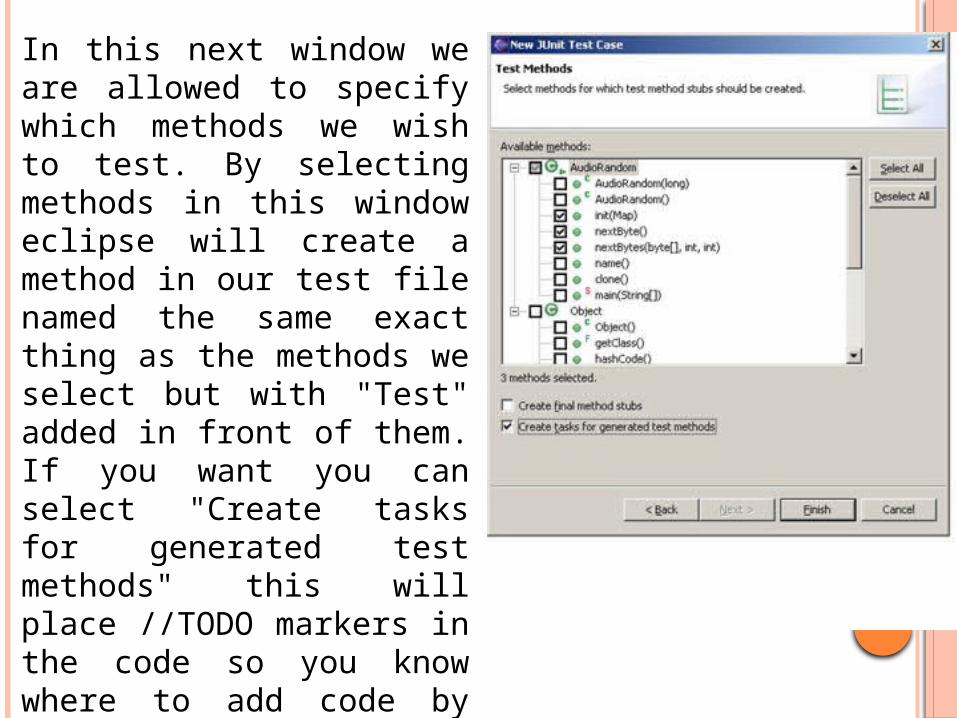
In this next window we are allowed to specify which methods we wish to test. By selecting methods in this window eclipse will create a method in our test file named the same exact thing as the methods we select but with "Test" added in front of them. If you want you can select "Create tasks for generated test methods" this will place //TODO markers in the code so you know where to add code by searching for //TODO.
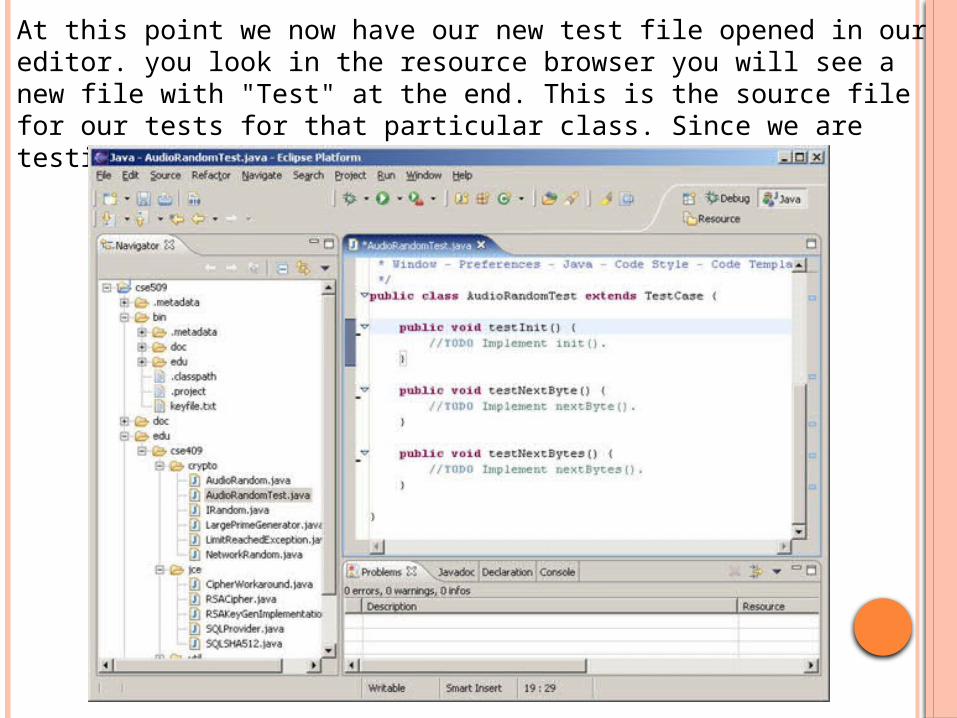
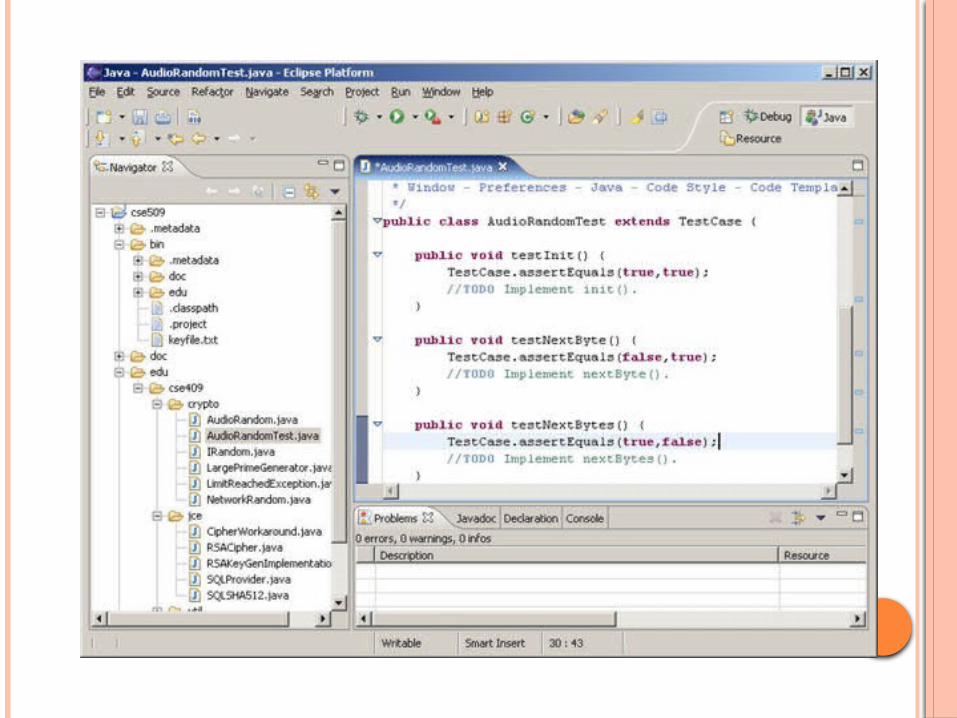
At this point we now have our new test file opened in our editor. you look in the resource browser you will see a new file with "Test" at the end. This is the source file for our tests for that particular class. Since we are testing for a reason lets fill in some test cases.
The JUnit framework provides us with several ways to judge if a test has succeeded or failed. Our TestCase object that we have extends Assert which provides the following functionality for testing. assertEquals: This provides a series of overloads that allows you to test if an actual value matches the expected one.•assertFalse: Use this if you know the function will always return false (fails if it receives true)•assertNotNull: If your method return null in the event of failure use this to check to see if it succeeds•assertNotSame: If your method is supposed to return an element from a list you can use this to check if the element returned is the one from the actual list•assertNull: If your method return null in the event of failure use this to check to see if it fails•fail: Will fail the test, use this in conjunction with conditionals•failNotEquals: Essentially the same as assertEquals but will fail the test if they arent equal instead of causing an error•failNotSame: Essentially the same as assertNotSame except instead of causing an error it will cause a failure
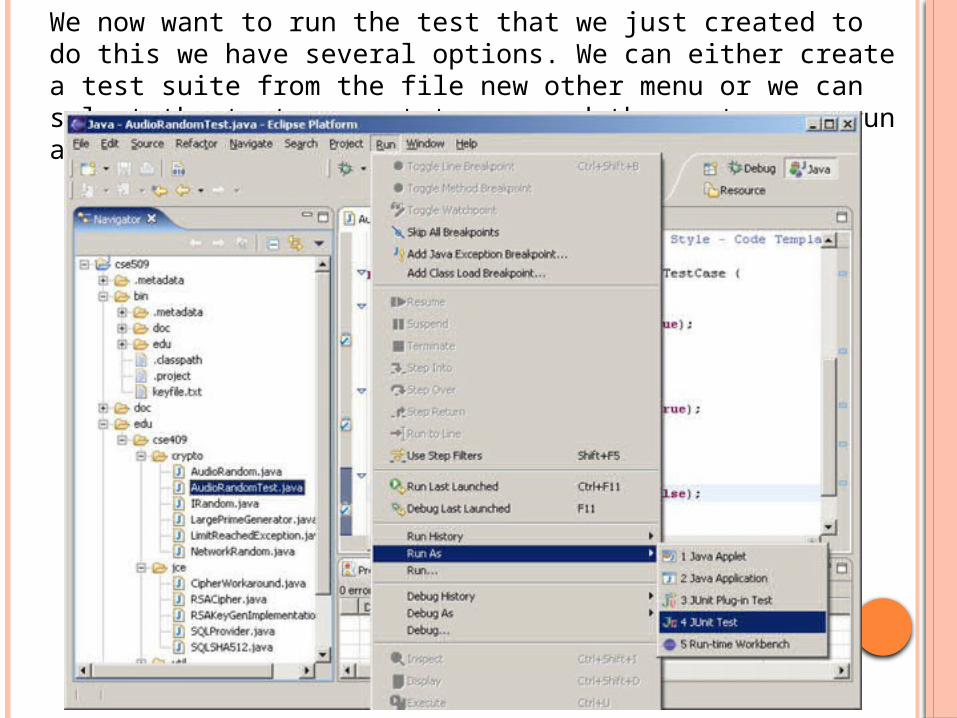
We now want to run the test that we just created to do this we have several options. We can either create a test suite from the file new other menu or we can select the test we want to run and then goto run, run as, JUnit test.

You will notice that eclipse has opened a JUnit window on the left side of your browser. This will display the results of your testing. If you have complex tests which call other tests you can see the trace of the failure at the bottom. You are also presented with which tests failed under the failures tab.
Enjoy Testing !!
Recommended