Rear Subframe Mount Insert Set for 8V Audi S3/A3 Quattro & MkVII Golf R (MQB)
Supplied Parts:
Front Insert for MQB AWD Rear Subframe (601-0030) x 2
Rear Insert for MQB AWD Rear Subframe (601-0031) x 2
Tools Needed:
Hands (2) (Opposable thumbs are required!)
18mm Socket
3/8” Ratchet
3/8” Extension (approximately 6”)
Small Pry Bar
Torque Wrench
034Motorsport’s Rear Subframe Insert Set for the AWD MQB chassis is designed to minimize drivetrain movement
and improve overall handling by locking down the rear subframe. By design, the billet 034Motorsport inserts fill the
voids of the factory rubber mounts and limit subframe shifting during weight-transferring maneuvers.
Installation of this upgrade is a straightforward process that will take approximately 1 hour to complete. These
instructions demonstrate how to install 1 front insert (601-0030) and 1 rear insert (601-0031). Duplicate this process
to install the complete set of 4 inserts.
Important: Install the 034Motorsport Subframe Mount Inserts one at a time to avoid shifting the subframe!
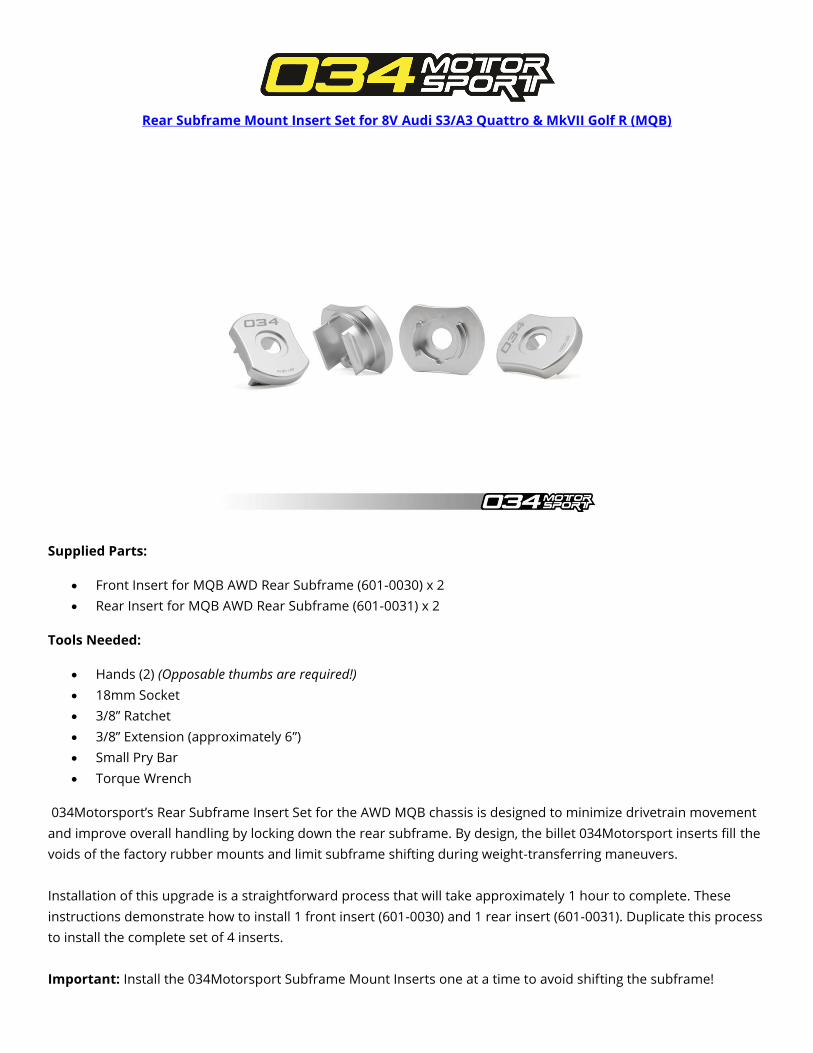
Step 1 – Raise the vehicle securely on jackstands or a lift, in order to gain access to the rear subframe. Important:
Install the 034Motorsport Subframe Mount Inserts one at a time to avoid shifting the subframe!
Step 2 - Using an 18mm Socket, remove the rear bolt securing the rear subframe to the chassis.
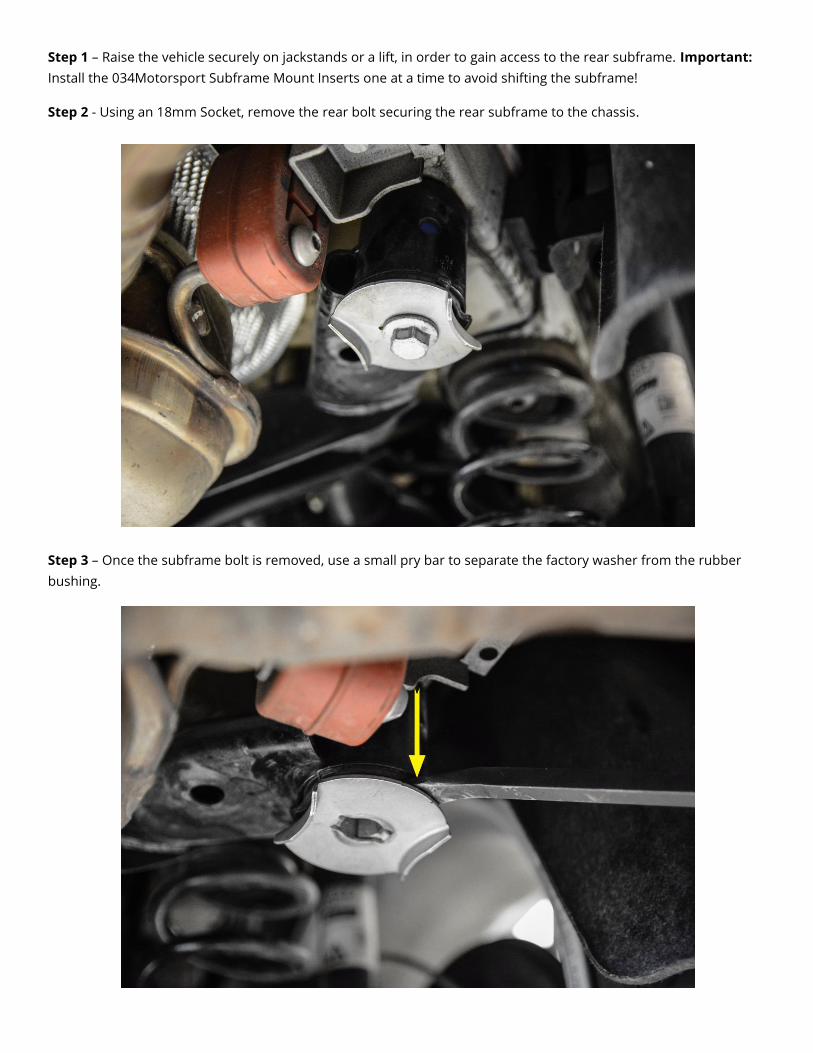
Step 3 – Once the subframe bolt is removed, use a small pry bar to separate the factory washer from the rubber
bushing.

Step 4 –Align the rear-specific 034Motorsport Rear Subframe Insert (601-0031) with the voids in the factory
subframe bushing.
Step 5 – Install rear subframe insert by pressing into the rubber voids of the factory rubber subframe bushing. We
recommend aligning the insert such that the 034 logo is toward the front of the car.
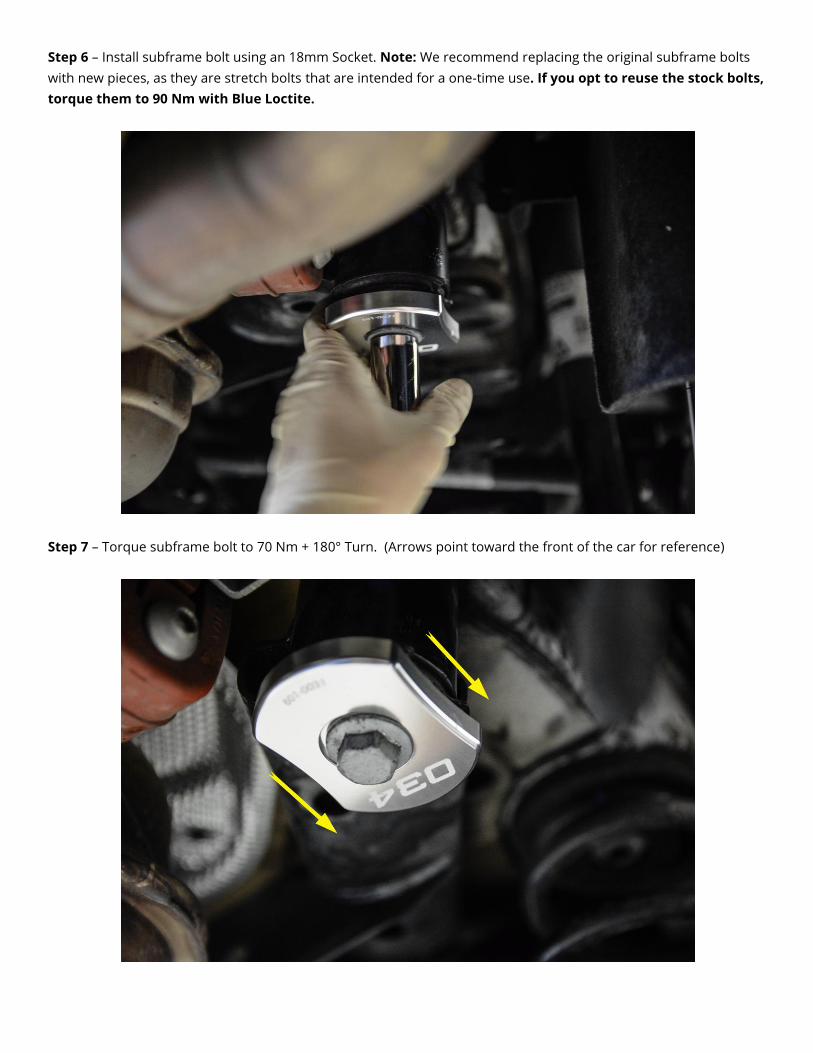
Step 6 – Install subframe bolt using an 18mm Socket. Note: We recommend replacing the original subframe bolts
with new pieces, as they are stretch bolts that are intended for a one-time use. If you opt to reuse the stock bolts,
torque them to 90 Nm with Blue Loctite.
Step 7 – Torque subframe bolt to 70 Nm + 180° Turn. (Arrows point toward the front of the car for reference)
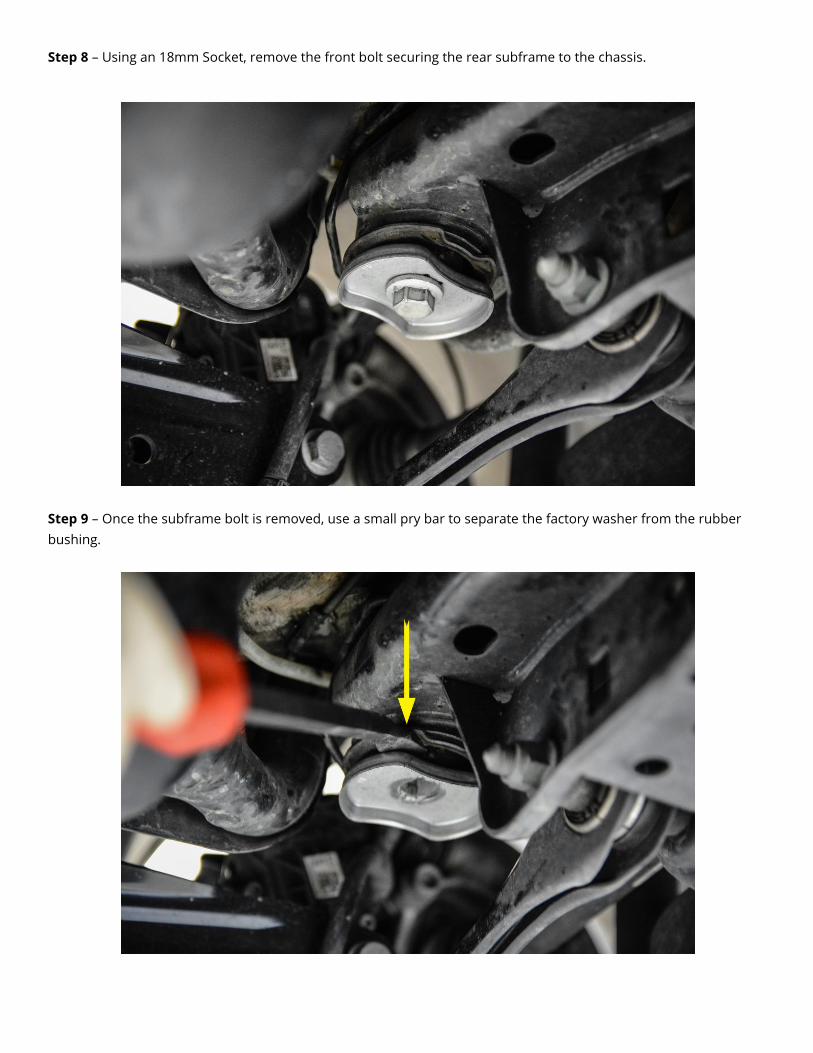
Step 8 – Using an 18mm Socket, remove the front bolt securing the rear subframe to the chassis.
Step 9 – Once the subframe bolt is removed, use a small pry bar to separate the factory washer from the rubber
bushing.
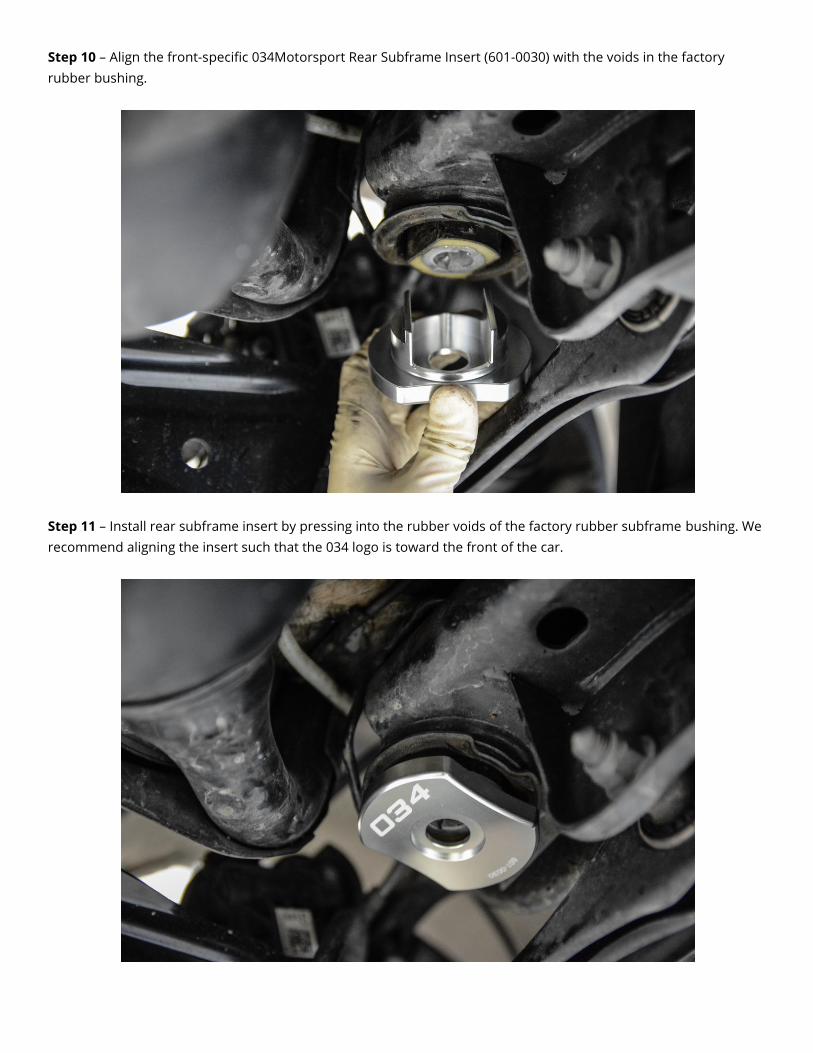
Step 10 – Align the front-specific 034Motorsport Rear Subframe Insert (601-0030) with the voids in the factory
rubber bushing.
Step 11 – Install rear subframe insert by pressing into the rubber voids of the factory rubber subframe bushing. We
recommend aligning the insert such that the 034 logo is toward the front of the car.
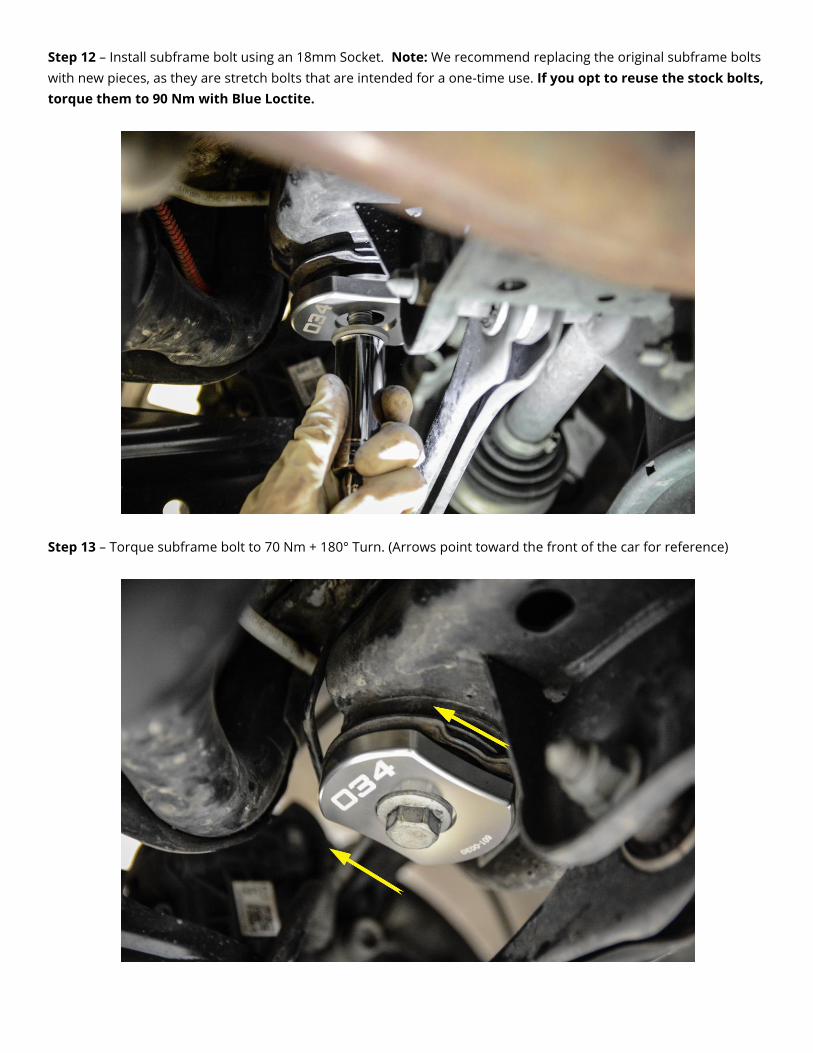
Step 12 – Install subframe bolt using an 18mm Socket. Note: We recommend replacing the original subframe bolts
with new pieces, as they are stretch bolts that are intended for a one-time use. If you opt to reuse the stock bolts,
torque them to 90 Nm with Blue Loctite.
Step 13 – Torque subframe bolt to 70 Nm + 180° Turn. (Arrows point toward the front of the car for reference)

Step 14 – Double-check the installation, and verify that everything is torqued to spec. Lower the vehicle from the lift
or jackstands, and enjoy the improved performance!
Recommended