Oracle® User Productivity Kit Knowledge Center E53040-01 March 2014
Oracle User Productivity Kit Knowledge Center
E53040-01
March 2014
Copyright © 1998, 2014, Oracle and/or its affiliates. All rights reserved.
Oracle and Java are registered trademarks of Oracle and/or its affiliates. Other names may be trademarks of their respective owners.
This software and related documentation are provided under a license agreement containing restrictions on use and disclosure and are protected by intellectual property laws. Except as expressly permitted in your license agreement or allowed by law, you may not use, copy, reproduce, translate, broadcast, modify, license, transmit, distribute, exhibit, perform, publish or display any part, in any form, or by any means. Reverse engineering, disassembly, or decompilation of this software, unless required by law for interoperability, is prohibited.
The information contained herein is subject to change without notice and is not warranted to be error-free. If you find any errors, please report them to us in writing.
If this software or related documentation is delivered to the U.S. Government or anyone licensing it on behalf of the U.S. Government, the following notice is applicable:
U.S. GOVERNMENT END USERS: Oracle programs, including any operating system, integrated software,
any programs installed on the hardware, and/or documentation, delivered to U.S. Government end users are “commercial computer software” pursuant to the applicable Federal Acquisition Regulation and agency-specific supplemental regulations. As such, use, duplication, disclosure, modification, and adaptation of the programs, including any operating system, integrated software, any programs installed on the hardware, and/or documentation, shall be subject to license terms and license restrictions applicable to the programs. No other rights are granted to the U.S. Government.
This software or hardware is developed for general use in a variety of information management applications. It is not developed or intended for use in any inherently dangerous applications, including applications that may create a risk of personal injury. If you use this software or hardware in dangerous applications, then you shall be responsible to take all appropriate fail-safe, backup, redundancy and other measures to its safe use. Oracle Corporation and its affiliates disclaim any liability for any damages caused by use of this software or hardware in dangerous applications.
Oracle is a registered trademark of Oracle Corporation and/or its affiliates. Other names may be trademarks of their respective owners.
This software and documentation may provide access to or information on content, products and services from third parties. Oracle Corporation and its affiliates are not responsible for and expressly disclaim all warranties of any kind with respect to third party content, products and services. Oracle Corporation and its affiliates will not be responsible for any loss, costs, or damages incurred due to your access to or use of third-party content, products or services.
iii
Contents
1 Overview .............................................................................................. 1
2 Use Knowledge Center on an iPad ........................................................ 2
3 Log in ................................................................................................... 3 3.1 Create a New User ......................................................................................... 4
4 Home Page ........................................................................................... 5 4.1 Continue Subjects in Progress ......................................................................... 6 4.2 View Usage Summary .................................................................................... 6
5 Knowledge Paths .................................................................................. 8 5.1 Knowledge Paths Page ................................................................................... 8
5.1.1 Enroll in a Knowledge Path ...................................................................... 8 5.2 Activity List Page ........................................................................................... 8 5.3 Play a Subject ............................................................................................... 9
5.3.1 Resize and Hide the Outline ....................................................................10 5.3.2 Open a Concept in a New Tab .................................................................11 5.3.3 Answer Questions in the Outline..............................................................11 5.3.4 Add a Note ...........................................................................................11 5.3.5 Share Content ......................................................................................12 5.3.6 Provide Feedback ..................................................................................12
5.4 Assessments ................................................................................................13 5.4.1 Answer Assessment Questions ................................................................13 5.4.2 Answer Know It? Questions ....................................................................14 5.4.3 Use the Summary Page ..........................................................................14 5.4.4 Use the Personalized Content Feature ......................................................15
6 Search ................................................................................................ 16
7 User Profile ........................................................................................ 17
8 Answer a Question ............................................................................. 18
9 Ask an Expert ..................................................................................... 19
10 Review Feedback .............................................................................. 20
11 Notebook .......................................................................................... 21


Overview
1
1 Overview The Knowledge Center is a browser-based application that enables you to obtain knowledge via the Internet or your company's intranet. Whether you need to learn something new or just
need a refresher, it can provide instruction to meet your specific needs. Copyright
Use Knowledge Center on an iPad
2
2 Use Knowledge Center on an iPad You can play content on iPad. Since iPad uses the iOS operating system, some adaptations were made to support iPad gestures such as swipe and tap.
You cannot record content for iOS applications so all content will be of Windows-based applications. Recorded topics could have such steps as double-clicks, right mouse clicks, and keyboard events that have no equivalent on iOS, such as "Press ENTER".
To help remedy this, special templates have been created for playback on iOS. These templates tell the user to "Swipe left to continue", rather than "Press ENTER to continue". In addition, for all unsupported actions such as mouse clicks and keyboard events, you can advance using swipe left. Of course, you can always tap in the action area for a step. The first time a user launches a topic in each session, a message displays instructing users to use swipe left to advance. This message only appears once. You can use the general iPad gestures of swipe and tap to navigate the Player
interface on an iPad. Note: Swiping right in a topic moves the playback to the previous step.
If an Adobe Acrobat (.pdf) file is attached to a concept in the Player outline, the file
will not scroll on iPad. To enable scrolling, an Open in New Window link appears in the Player. This opens the file in a new window, in which scrolling is enabled.
If the font for string inputs, bubble text, or web pages is MS Sans Serif or Tahoma, a
font substitution is made automatically, as these fonts do not exist on an iPad.
If the keyboard does not appear when you are prompted to enter text, you can tap in
the text entry field, which displays the keyboard or, in some cases, enters the text for you.
If a concept includes sound, you can click the Play icon on the Sound bar above the
concept to hear the audio playback. Topic sound starts automatically when you play the topic.
Log in
3
3 Log in To start the Knowledge Center, you may need to log in depending on the authentication method used. If required to log in, you need to log in with a valid user account. Depending on
your setup, you may also see a Workgroup field. A workgroup is a collection of users, user groups, and knowledge paths. If there is more than one workgroup on the server, you may need to select a workgroup. If you do not want to enter user credentials each time you log in, the Save My Username and Password option can be enabled. You can then bypass the Login page, starting with the next
session. When you enable this option, the Home page appears each time the Knowledge Center starts. This option does not appear if your administrator has disabled it. A user account may have dates attached to it. If your administrator sets a start date for your account, you cannot log into the system until the start date. If you attempt to log in before the start date, a message appears, informing you that your account will not be activated until mm/dd/yyyy. If your administrator sets an end date for your account, you cannot log in after
that date. Depending on the options set for you, you may receive a message that your account will expire in x days. The message appears in red text on the home page. If you attempt to log into the Knowledge Center with an expired account, a message appears, informing you that your account expired on mm/dd/yyyy. If dates are not set, your account is valid as soon as it is created and does not expire. If you want the Knowledge Center to appear in a language that is different than what is used
for the Login page, you can choose a language from the list of available languages.
To log in to Knowledge Center:
1. Open your browser and navigate to the link supplied by your administrator.
2. Click the language in which you want the interface to appear.
3. Enter a valid user name in the Username field.
4. Enter a valid password in the Password field.
5. If the Workgroup field is present, select the appropriate workgroup for the user name
you entered.
6. Click the Save my user name and password option if you want to skip the login screen the next time you start Knowledge Center.
7. Click Login.
Forgot Your Password Link
If you forget your password, you can use the Forgot Your Password? link (if the administrator has enabled this setting on the server). This link allows you to enter either your username or
your e-mail address. When you click OK, a message is automatically submitted to the administrator. You will then receive an e-mail message from the administrator that contains a link to a page where you can reset your password.
To log in if you have forgotten your password:
1. Open your browser and navigate to the link supplied by your administrator.
2. Click Forgot your password?.
3. Enter your user name in the Username field.
Log in
4
4. Enter your email address in the E-mail address field.
5. If the Workgroup field is present, select a workgroup.
6. Click Submit.
3.1 Create a New User The New User button may appear on the Login page, which allows you to create a new user account. The user account can be used to log in and access any content that is available to all users, but the user is not be enrolled in any Knowledge Paths.
The new user page contains fields in which you can enter the necessary information to create a Knowledge Center account. A red asterisk appears to the left of each mandatory field, including Last Name, First Name, and Username. If usernames are automatically generated, this field is automatically populated once you complete the First Name and Last Name fields. Fields without an asterisk to the left are optional.
If there is more than one workgroup at a company, you need to select a workgroup when creating a new account. The Workgroup list only appears if more than one workgroup is available. The administrator may have defined custom user fields that you can complete, such as Office or Date of Hire. These fields can be designated as optional or required.
To create a new user:
1. Open your browser and navigate to the link supplied by your administrator.
2. Click New User.
3. If the Workgroup field is present, select the workgroup in which you want to create
the new user.
4. Enter the user's last name in the Last Name field.
5. Enter the user's first name in the First Name field.
6. Enter a username for the user in the Username field. If usernames are automatically generated, this field is automatically populated once you complete the Last and First Name fields.
7. (Optional) Enter the user's email address in the E-mail Address field.
8. Enter a password in the Password field.
9. Enter the same password in the Confirm Password field.
10. Click Login.
11. On the Login page, use the new username and password you just created to log in.
Home Page
5
4 Home Page After you log in, the Knowledge Center home page appears. From the home page, you can start new subjects; continue a subject from a previous session; search for a specific subject;
update your profile; or view notes made while taking a subject. The Home button in the title bar at the top of any page returns you to this page. Note: The options that you have on the home page will vary depending on the setup at your company.
The home page contains a Navigation pane and a My Knowledge Center pane.
My Knowledge Center The My Knowledge Center pane provides links to your subject in progress as well as the
history of the subjects you have accessed. These links only appear if you have logged in previously and started a knowledge path. There is also a link to view a report of your usage summary, which includes the knowledge path name, date enrolled, activity, scores, and your
progress in each.
There are two icons that appear in the title bar of the My Knowledge Center pane as well as all
the other pages in Knowledge Center. Clicking the Knowledge Center Help icon opens the
Knowledge Center help system, and clicking the Logout icon logs you out of the Knowledge
Center. This icon only appears if you are logged in under Standard authentication.
Navigation The Navigation pane appears on the left side of the Knowledge Center. It may contain the following links, depending on the setup at your company and the product that has been
installed. Several of these links are available only in the Professional edition.
Knowledge Paths: Displays a list of available knowledge paths. A link is also available to enroll or withdraw from knowledge paths and start taking a subject. This
link only appears if the administrator has enabled this feature.
Player: Opens content directly in the Player, instead of going through a knowledge
path. This link only appears if the administrator has enabled this feature and there are titles that have been designated as available for direct launch. If there are multiple titles available, a page appears with a list in alphabetical order. It also displays the date when you last viewed the title and when it was last updated on the server. You
can click any of the column headings to sort the list by that column.
Search: Opens the Search page to locate specific information in a subject. This link only appears if the administrator has enabled this feature.
User Profile: Displays the Profile page where you can modify account information,
such as first or last name, e-mail address, and password. You can also change the language and use the Clear Stored Login option to clear the saved password
information. You may be able to change personal settings or only view them. In
addition, if the manager disabled the change password feature, the password fields do not appear on this page. This link only appears if the administrator has enabled this feature.
Answer a Question: Allows an expert to view a list of expert advice questions to
address. This only appears for users designated as experts for particular titles. An expert is someone who is a subject matter expert for one or more subjects. This link only appears if the administrator enabled the Expert Advice feature.
Ask an Expert: Accesses the expert advice features. The Expert Advice feature
enables users to communicate with subject matter experts regarding the subject content. This link only appears if the administrator enabled the Expert Advice feature.
Home Page
6
Review Feedback: Allows a feedback monitor to view a list of feedback comments. A
feedback monitor is someone who can view feedback and run a report. Also allows a
user to view comments about titles he or she is enrolled in, including their own comments.
Notebook: Allows you to view a list of sections in various subjects that contain notes or are bookmarked. You can view or delete notes, as well as return to the sections in the subjects to which they apply. This link only appears if the administrator has enabled this feature.
Reports: Allows you to create and run a variety of reports, such as a usage summary
that details an individual's progress or a breakdown of assessment questions and their effectiveness. The Reports link only appears if you have permission to run reports.
Manager: Allows you to create user accounts, user groups, and knowledge paths,
import content, and manage the server. The Manager link only appears if you have System Administrator or Manager permission.
4.1 Continue Subjects in Progress If you exit a subject or assessment in progress, the next time you log in the subject name
appears as a link in the Welcome section in the My Knowledge Center pane. This link allows you to quickly return to where you stopped in the subject. This link is only available if you have already started a subject. After starting at least one subject, a History area appears below the welcome message. This area provides links to the last five subjects you accessed. These links bring you to the subject interface for the selected subject, with the first section in the subject outline selected.
To continue a subject in progress:
1. To continue the most recent subject in which you worked, click the link for the subject
in the Welcome area.
2. To continue another subject in progress, click the link for the subject in the History area.
4.2 View Usage Summary The Usage Summary area of the home page includes a link to a report that includes the knowledge paths in which you are enrolled and activity status indicating the date you last worked in a subject. This report also includes assessment scores, as well as subject progress, expressed as a percentage. The Usage Summary report enables you to evaluate your progress
in subjects that you have accessed. Your name, username, and workgroup, if applicable, appear at the top of the report. Following
is a description of the information that appears in the report: Knowledge Path
Name: This column displays the knowledge path name.
Date Enrolled: This column displays the date you enrolled (or the manager enrolled you) in the knowledge path.
Activity
Name: This column displays the name of the activity for each knowledge path listed.
Home Page
7
Date Last Active in Subject: This column displays the date you last worked in the subject.
Scores
Type: This column displays the type of activity.
Score: This column displays your score for the pre- or post-assessment, if applicable.
Placeout or Required: This column displays the placeout score, if any, that is needed to place out of the pre- or post-assessment. This column also displays the required score, if any, that is needed to continue on to the next activity.
Progress
Subject: This column displays how much of the subject you completed, expressed as
a percentage, if applicable.
Knowledge Paths
8
5 Knowledge Paths In the Knowledge Center, you can access content through knowledge paths. A knowledge path can contain a series of related subjects or a single subject. It may also control the way you progress through the material. For example, the knowledge path for Microsoft Word may contain the Basic, Intermediate, and Advanced Word subjects, and it may require you to take the Basic subject before you can access the Intermediate subject. Subjects include the content, which can be web pages, multimedia, audio, and video. Subjects may also include assessments, which may appear within the subject outline as a review or before and after the subject, as pre- and post-assessments. Depending on the setup of the subject, the pre-assessment may be required before you can start the content, and the post-assessment may be required before you can access the next subject in the knowledge path. The Knowledge Paths link gives you access to the knowledge paths in which you are enrolled. You can also choose to enroll in optional knowledge paths. The Knowledge Paths link only
appears if the administrator has enabled this feature.
5.1 Knowledge Paths Page When you select the Knowledge Paths link, the Knowledge Paths page opens. From this page, you can select the desired knowledge path and begin taking the subjects included in the path.
The knowledge paths may be organized into categories to help you find a particular subject. Knowledge paths that are not categorized appear below the General heading. When you access the Knowledge Center for the first time, the list on the Knowledge Paths page reflects the paths in which your manager has enrolled you. If the Knowledge Paths page does not display any knowledge paths, or you want to look for more available subjects, you
can select the Enroll or Withdraw link to self-enroll in a knowledge path. However, this link is available only if self-enrollment is enabled.
5.1.1 Enroll in a Knowledge Path
The Enrollment page lists the knowledge paths in which you can enroll or are already enrolled. The process by which you enroll in a knowledge path depends upon your organization's setup. You may be able to enroll in a subject, or the administrator may handle enrollment. The Enrollment page displays only those paths with self-enrollment enabled and in which the administrator did not already enroll you. You can only withdraw from knowledge paths in
which you enrolled yourself. If no paths are available for self-enrollment, the page is blank.
To enroll in or withdraw from a knowledge path:
1. From the Knowledge Paths page, select the Enroll or Withdraw link.
2. Select the Enroll link to the right of the knowledge path in which you want to enroll.
3. Select the Withdraw link to the right of the knowledge path from which you want to
withdraw. Note: This link is only available for knowledge paths in which you enrolled yourself.
4. Click to return to the Knowledge Paths page.
5.2 Activity List Page You access the Activity List page by clicking the Knowledge Path link on the home page and then clicking the link for the desired knowledge path on the Knowledge Paths page. The Activity List page appears with different options, depending on whether you are starting or continuing a subject.
Knowledge Paths
9
The Info link gives you access to the Subject Tracking Information page. This page displays
the scores on the pre- and post-assessments and the percentage complete for the subject as a whole. There is also a link to enable you to display more detail about your progress in the
individual sections and topics in the subject.
To start or continue a subject:
1. Click the Start link next to the subject you want to start.
or Click the Continue link to continue a subject you were working on previously. Note: When you click the Continue link, the subject opens at the place where you
stopped previously.
2. Click Restart to restart a subject from the beginning.
To view information about a subject:
1. Click the Info link next to the subject.
2. On the Subject Tracking Information window, click the Show Detail link next to the
subject to display the Subject Tracking Detail screen.
3. Expand the outline in the Subject Tracking Detail window as desired to view the course.
4. Click next to a topic to open the Runtime Info box and display the details for that topic.
5. Click Close to close the Runtime Info box.
6. Click twice to close the Subject Tracking Detail and Subject Tracking Information windows.
5.3 Play a Subject By default, the subject interface consists of an Outline pane on the left and the Concept pane on the right. The Outline pane displays the status of sections in a hierarchical outline. Clicking
a plus symbol (+) displays subordinate levels and clicking a minus symbol (-) hides subordinate levels. Subject sections containing other sections are represented by book icons. Sections containing content files only are represented by page icons. There are two modes available for running a subject: Sequenced and Explorer. How you
navigate the outline depends upon the mode. In Explorer mode, which is the default, you can choose subject sections from the outline at random. Therefore, you are not limited to taking a
subject in a predefined order. In Sequenced mode, you move sequentially through the outline, working through each section from beginning to end. As you move through the subject in either mode, content displays in the Concept pane on the right. The nature of the content may vary. There may be conceptual information, some of which may be interactive. If the item is a topic, play modes may be available through buttons at the top of the Concept pane. In addition, there may be questions. For more information about how to play the content, click
the Help icon in the blue bar immediately above the Concept pane. As you complete subject sections, the tracking status icon next to the section indicates completion. When all subsections within a section are complete, the tracking status icon next to the main section shows completion.
Knowledge Paths
10
Tracking Status Indicators: The following tracking status indicators can appear next to
document names in the outline:
Indicates an outline document is not started
Indicates an outline document is in progress
Indicates an outline document is complete (non-scoreable document)
Indicates a question or topic with a scoreable Know It? mode has been passed
Indicates a question or topic with a scoreable Know It? mode has been failed
Tracking status text can also appear in the toolbar above the Concept pane and displays the status of the document selected in the Outline pane. Status text that can appear are Not Attempted, In Progress, Passed, Failed, or Complete. The status indicators in the outline represent the progress overall, with pass/fails based on
last completed attempt, and the status indicators above the Concept pane represent the status of the current attempt. Therefore, the status indicators may not match. Some details on the
changes to status, based on the attempt, are below.
The first time a topic is selected, the status updates from “not started” to "in progress". This is the start of a new attempt.
Any subsequent times a topic is selected, it retains its current status until you actively select a play mode, and then the status updates to "in progress". It remains in progress until you complete the required mode, and then the topic is set to pass, fail, or complete, depending on whether KnowIt? is part of the topic. This is a continuation of the current attempt.
If the topic is marked pass, fail, or complete, it resets to “in progress” when you launch any mode, and it updates to pass or fail if you complete the required mode again. This is a new attempt.
To play a subject:
1. Click an outline item to display its contents or use Previous or Next to navigate the outline.
2. At any time, you can click to return to the Activity List page or to return to the Knowledge Center home page.
5.3.1 Resize and Hide the Outline
You can resize the outline by dragging the border between the Outline and Concept panes. You can also hide the outline to display more of the content on the screen; for example, if you are teaching in a classroom and you want the students to be able to see more of the content,
or you are working on a smaller device such as an iPad.
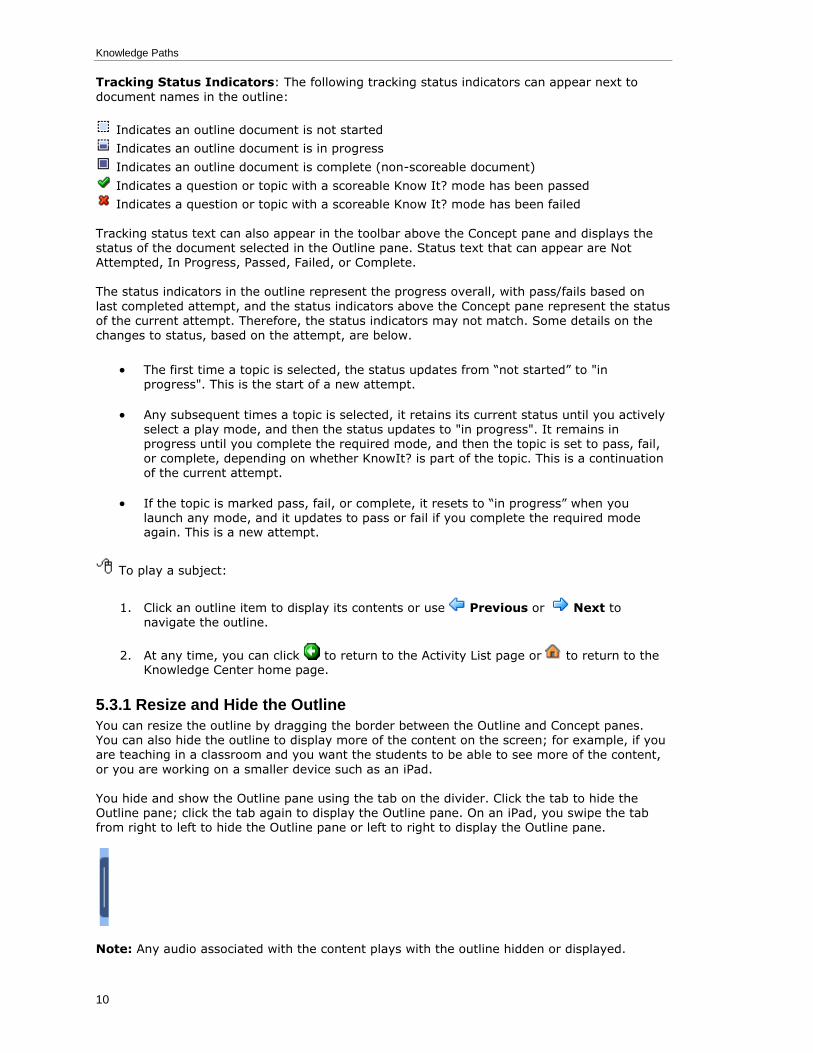
You hide and show the Outline pane using the tab on the divider. Click the tab to hide the Outline pane; click the tab again to display the Outline pane. On an iPad, you swipe the tab from right to left to hide the Outline pane or left to right to display the Outline pane.
Note: Any audio associated with the content plays with the outline hidden or displayed.
Knowledge Paths
11
5.3.2 Open a Concept in a New Tab
You can open the concept you are viewing in a new tab by clicking . This is particularly useful if you are viewing content on an iPad. If the concept is in a form that does not scroll in the Concept pane, such as an Adobe Acrobat file, you can launch the concept in a new tab in which you can scroll the file.
5.3.3 Answer Questions in the Outline
Questions may appear in the subject outline, either within sections in the outline or grouped together in an assessment. Questions in the outline serve as a review of the subject content. They can be in the form of true/false; multiple-choice (single answer); multiple-choice (many answer); hotspot; matching; and fill-in. Questions can also be of a custom type, that may be in the form of a Adobe Flash file, HTML page, or another format created in another application. Assessments may also contain Know It? questions, which launch the Know It? play mode for specific topics in the assessment. See Answer Know It? Questions in the Assessments section
for more information about Know It? questions.
If you are working in Sequenced mode, without the Outline pane displayed, a Question box opens when you move to a question in the subject. If you are working with the Outline pane displayed, in Sequenced or Explorer mode, you can click a question icon to display a question for a particular section.
The question icons indicate whether the question was answered correctly or incorrectly. A green checkmark indicates that you answered the question correctly, while a red X means an incorrect answer. After submitting an answer, you may see remediation information. Depending upon the setup, the remediation may simply indicate if an answer was correct or incorrect, or it may include
detailed information that fully explains why the correct answer is correct.
To answer a question:
1. Navigate to the question in the outline.
2. Depending on the question type, click the answer or answers, match the items in the
list, click the hotspot, or type the answer.
3. Click OK.
Remediation may appear to indicate whether your answer was correct or incorrect and may display why it is correct or incorrect. There may also be a Show Associated Content link, allowing you to view more content related to the question. Note: If you clicked Do Not Know, your answer is incorrect.
4. Click Next to move to the next item in the outline or click Take question again to reset the question (clearing the answer and remediation) so you can try it again.
5.3.4 Add a Note
While taking the subject, you can use the Notebook feature to record notes, if this feature is
enabled. You can add text to a note, just as if writing a note in a paper notebook. You can view these notes later, or use them as a bookmark to specific topics or information in the subject. Later, you can open the note from the Notebook page in the Knowledge Center and return to the subject. There is an Add Note icon at the top of each page while you are working with the subject content. Click this icon to open the Note window. The Description field displays the name of
the outline item; however, you can edit the description text as desired. The text in this field appears on the Notebook page, followed by the subject title. Below the Description field is the

Knowledge Paths
12
Additional Notes field where you can enter up to 255 characters of text. You can enter a brief
description of the note, plus more detailed information, if desired.
If the Note window blocks your view of the subject content, it can be moved by dragging the window title bar to the desired location. Note: If you have already added a note to a particular outline item, the icon changes to View
Note.
To add a note while taking the subject:
1. Click Add Note.
2. Edit the information in the Description field as desired.
3. Add text in the Additional Notes field as desired.
4. Click Save.
To edit a note while taking a subject:
1. Click View Note.
2. Edit the information as desired.
3. Click Save.
To delete a note:
1. Click View Note.
2. Click Delete.
Warning! Once you click the Delete button, the note is deleted and the action cannot be undone.
5.3.5 Share Content
When content is launched in the Knowledge Center using the Player link, the Share link
appears in the Player toolbar. The Share link provides the ability to send a URL link to a specific topic (or other asset such as a question) in the Player to other users. The URL to the asset displays as a modeless topic launch point that can be copied and pasted to e-mail or other messaging software.
The Share link does not appear for content launched through a Knowledge Path.
Note: If the user is required to log in to the Knowledge Center, they are prompted for login credentials when accessing an asset from the Share link. See Log in for more information on configuring Knowledge Center login.
5.3.6 Provide Feedback
In the subject interface, may appear in the navigation bar. Click it to open the Feedback
Details window and submit your feedback to the author. When posting a comment, you need to include a subject as well as the comment. When the comment is complete, click the Submit button to send it to the author.
Knowledge Paths
13
If you launch the Feedback Details window while you are taking a subject, the View Existing Feedback link appears. This link allows you to open the Review Feedback window to display
the existing comments, if applicable, you submitted for the subject.
5.4 Assessments When you are taking a subject, you may see a pre-assessment (taken before the subject), a post-assessment (taken after the subject), and/or an assessment within the outline itself. A pre-assessment enables you to record baseline knowledge prior to taking the subject and then compare it with post-subject knowledge to determine the level of knowledge gained. A pre-assessment also enables you to take advantage of the personalized content feature, if it is
available. When the personalized content feature is enabled, assessment results are used to create a personalized subject, which is a customized version of the full subject. You can create personalized content by excluding sections from the subject for which you demonstrated competency via the assessment. You may also be able to test out of a subject. A manager can set options that allow you to skip a subject and post-assessment if you meet or exceed a particular score on the pre-assessment.
A post-assessment gauges your understanding of the material after you take the subject, and provides a review of the material. A certain score may be required on the post-assessment for you to move on to the next activity, if one is available. In addition, personalized content is updated to reflect the results of a post-assessment. You can continue to use the new personalized content to focus only on the information with which you had difficulty. An assessment in the outline can function as a review of the material in the section. You can
retake an assessment and a post-assessment in the outline, even after moving on to other activities. Pre-assessments, however, can be taken only once.
5.4.1 Answer Assessment Questions
When you start an assessment, assessment questions appear one at a time, and you can respond by typing or clicking an answer. Assessment questions can be in the form of true/false; multiple-choice (single answer); multiple-choice (many answer); hotspot;
matching; and fill-in. Assessment questions can also be of a custom type, that may be in the form of a Adobe Flash file, HTML page, or another format created in another application.
Before you submit a final answer to a question, you can change the answer as many times as desired. Once you select an answer and the response is recorded, you cannot return to the question. If you do not know the answer to a question or are unsure, you can click Do Not Know in the Question box instead of guessing at an answer. When you click Do Not Know, the answer is considered incorrect for scoring purposes.
After selecting an answer, you may see remediation information. Depending upon the setup, the remediation may simply indicate if an answer was correct or incorrect, or it may include detailed information that fully explains why the correct answer is correct. After viewing the available information, you can continue on to the next question. The remediation feature can also be disabled, in which case the next question appears.
In a pre-assessment or post-assessment, a Show Associated Content link appears in the remediation window if the feature is enabled. When you click the link, the subject interface opens with the content displayed that contains the related instructional content. This new window may include navigation buttons, as well as a graphic that displays pertinent information. When you finish reviewing the content, you can close the window and continue taking the assessment.
As you move through the assessment questions, the progress pane at the bottom of the window shows the number of the current question and how many total questions are in the assessment.
Knowledge Paths
14
To answer a question in an assessment:
1. Click the Start button in the Concept pane.
2. Depending on the question type, click the answer or answers, match the items in the
list, click the hotspot, or type the answer.
3. Click OK. Remediation may appear to indicate whether your answer was correct or incorrect and may also provide information as to why the answer was correct or incorrect. Note: If you clicked Do Not Know, your answer is incorrect.
4. Click Continue to move to the next question in the assessment.
5.4.2 Answer Know It? Questions
Assessments may also contain Know It? questions. Know It? questions launch the Know It? play mode for a topic. The Know It? question opens with the score needed to pass. Know It? questions contribute to the final assessment score, but are also scored individually. Each Know It? question has a passing score percentage based on the number of steps completed correctly. Since Know It? mode is a simulated evaluation, you must perform the steps of the topic exactly as they were recorded during the content creation. If Try It! mode includes alternative methods of performing a step, either method will be scored properly in Know It?
mode. After you complete the Know It? steps, you are presented with your score as a percentage of steps completed properly without assistance. Therefore, you are scored correct only when you complete a step right the first time. The passing score (percent needed to pass) and a Result field also appear in the results. The Result field displays “Pass” or “Fail” to indicate if you
passed or failed the Know It? play mode.
When you complete a Know It? question in an assessment, your pass/fail status for that question is also assigned to the topic in the outline. If you pass a Know It? in the assessment,
a status indicator appears next to the associated topic in the outline, indicating that you
passed the requirements for that topic. Conversely, if you fail a Know It? in an assessment, a
status indicator appears showing that you failed the topic. If you retake a Know It?, either by taking it in the outline or in another assessment (for example a post-assessment), the status indicator for the topic in the outline will change to the most recent pass/fail status.
However, retaking a Know It? play mode for a topic in the outline will not change the results for an assessment you have already taken.
To answer a Know It? question in an assessment:
1. Press ENTER or click the Start link to start the topic.
2. Complete the first step in the task.
3. Continue to complete all steps and if necessary, take the appropriate action for missed steps as indicated in the remediation bubble. When the task is complete, you are
prompted to press ENTER or click the Continue link to view the results of the Know It? question.
4. Press ENTER or click the Finish link to return to the assessment.
5.4.3 Use the Summary Page
When you complete an assessment, an Assessment Summary page may appear, if the administrator has enabled it. The summary page displays assessment results and may allow
Knowledge Paths
15
you to configure personalized content. After viewing results and configuring personalized content, you can start either the full or the personalized subject.
The Summary page displays assessment results that include the following information:
The number of questions answered correctly
The number of questions in the assessment
The score displayed as a percentage correct
A response summary listing each question and whether your response was correct or
incorrect
Personal content options (if the Personalized Content feature is enabled)
You can print the summary information.
If the Summary page is disabled, you continue to the next item in the subject. If you are at the end of the subject, then you return to the Paths to Subjects page.
To use the Summary page:
1. Click Print to print the summary page.
Note: You may have to scroll to see the Print button.
2. Click Next in the Outline pane, or click the Next link above the Concept pane.
3. If personalized content is enabled, the Switch to Personalized Content link appears in the status bar above the Concept pane. Click it to launch a personalized subject based on your assessment results.
5.4.4 Use the Personalized Content Feature
The purpose of Knowledge Center personalized content is to allow you to complete an objective assessment of your skills in the subject matter and then take a subject that contains only the content upon which you need to focus. When an author or subject matter expert creates an assessment, he or she includes questions associated with subject content. When you complete an assessment, the Summary page displays a list of sections upon which assessment questions were based and includes your score on the questions for each section.
Knowledge Center can then filter the full subject to include only those sections whose associated questions you answered incorrectly. You can customize the Personalized Content by selecting or deselecting sections to include in the subject from the Summary page.
Search
16
6 Search You can search for content in those subjects to which you have access, or all titles on the server (if enabled by the administrator). You conduct a search by entering the desired search criteria, such as a word or multiple words. While the search includes content files, it does not search all file types used for subject content, such as Macromedia Flash files.
Note: For third-party content, you must be enrolled in a knowledge path linked to the third-party content for it to be included in the search. You can conduct a simple search, where you search for specific text, such as "saving" or "document". You can also conduct an advanced search. An advanced search enables you to use special characters and multiple search criteria, such as "open & document" to search for all subject sections containing both "open" and "document." To create advanced search
criteria, you use Boolean operators, as follows:
& both words must be present (for example, documents & formatting)
~ both words must be present in proximity, that is, near each other (for example,
documents ~ formatting)
| one of the words must be present (for example, documents | word)
! not matching a specific word. This must follow an & (for example, documents & ! word)
You can also use the * wildcard in a search to match any number of characters (for example, "da*ta"). These instructions also appear in the right pane of the Search page. The results of the search
appear in the left pane, as a list of links. By default, a maximum of 10 links appear; however, you can change the return limit. When you click a link, the section content appears in the right pane.
To search for content:
1. From the Knowledge Center, click Search.
2. Enter the text you want to search for in the Search field at the top of the page. Use
Boolean operators and wildcards as necessary.
3. (Optional) Click the Number of Results list and choose the maximum number of results you want.
4. Click .
5. Click any of the links in the left pane to view the content.
6. To modify the search, edit the search text and click again.
7. Click to clear the search criteria and the list of links.
User Profile
17
7 User Profile Your user profile contains your account information, such as last name, first name, username and e-mail address, as well as your password. If custom user fields were created, such as
Office or Hire Date, these fields are included in the user profile. Editing these fields may be necessary to correct spelling errors or update personal information. As you edit the information, note that fields with a red asterisk to the left are mandatory; therefore, you cannot delete information from these fields, leaving them blank. Depending upon the system configuration, you may be able to view your user profile information, but not
edit it. In addition, the password fields may not appear on this page. On the Login page, if you selected the Save My Username and password option to bypass the Login page, you can clear the stored login information by selecting the Clear Stored Login option. The next time you start Knowledge Center, the Login page appears. You can also change the language of the user interface by clicking the link for the desired
language.
To modify your user profile information:
1. From the Knowledge Center, click User Profile.
2. Modify the information as necessary.
Note: If you change your password, you must enter it again in the Confirm Password field. Also, be sure to enter information in all required fields.
3. Select a language for the user interface, if desired.
4. Select the Clear stored login option if you no longer wish to bypass the Login page.
5. Click Save.
Answer a Question
18
8 Answer a Question Answer a Question is part of the Expert Advice feature. This feature enables communication between users and subject matter experts on subject content. Users can submit questions, and an expert designated for that subject can respond. This link only appears if you are designated as an expert for specific content.
If you are an expert for a subject about which a user has asked a question, the question appears on the Answer a Question page. If e-mail is used for Expert Advice, the expert receives an e-mail with the subject "Expert Advice Request from <user name> regarding <subject>" in his/her mailbox. When the expert opens the e-mail message, a link to the question appears which he or she can click to launch Knowledge Center. On the Answer a Question page, the expert can view all open questions by clicking the Show
Open Items Only link at the top of the list of questions. The expert can then see which are in need of a response. He or she also can choose to view all items by clicking the Show All Items link. The question list can also be sorted by clicking the heading of the Subject or Date of last
activity columns.
To view and answer a question:
1. Click the link in the Subject column for the desired question.
2. In the Expert Conversation area in the lower pane of the page, enter the answer.
3. Click the View Report link in the top pane to view a report of all questions and answers for all subjects assigned to you. After generating a report, you can permanently delete a conversation (question and answer) from the server by clicking the Delete Conversation link next to the conversation you want to delete.
Ask an Expert
19
9 Ask an Expert Ask an Expert is part of the Expert Advice feature. This feature enables communication between users and subject matter experts on subject content. Users can submit questions,
and experts designated for that subject can respond. You can click the Ask an Expert link in the Navigation section of the home page. This displays the Get Expert Advice page with the Ask New Question link which allows you to create a new
question. In the subject interface, may appear in the navigation bar. Click it to open the
Question Details window and submit a question to an expert. The Ask an Expert icon appears only when an expert is available for the current subject. When posting a question, you need to include a subject as well as the question. When the question is complete, click the Submit button to send it to the expert. The question is posted
in Knowledge Center. If e-mail is used, a message containing a link to your question is sent to the expert and appears in the mailbox in his or her e-mail program inbox. The message is sent from the system (for example, the server e-mail address stored in Manager), not from you.
However, your name appears in the question list. If you launch the Question Details pane while you are taking a subject, the View Existing Questions link appears. This link allows you to open the Get Expert Advice page to display the
existing questions you submitted, for all courses. If you want to be notified that the expert's answer was posted, you should verify that an address is displayed in the e-mail area of the Ask New Question window. If it does not appear, you should return to the home page and use the User Profile link to enter your e-mail address. If you cannot edit your profile, you should contact the manager or system administrator for help.
Review Feedback
20
10 Review Feedback You can review your own feedback comments and the responses from feedback monitors on the Review Feedback page. Users designated as feedback monitors can view the comments and responses for all subjects assigned to them for feedback monitoring. The Subject column provides links that allow you to see the comments for a specific subject, and the Date of Last Activity column displays the most recent date on which a comment was posted for that
subject. The Show Open Items only link at the top of the page allows you to filter the list to view only the unread comments.
To view feedback and make a comment:
1. Click a link in the Subject column to view the feedback for that subject.
2. In the Comments area at the bottom, enter a comment.
3. Feedback monitors can click the View Report link in the top pane to view a report of
all the comments for all subjects assigned to them.
After generating a report, you can permanently delete a conversation (comment and response) from the server by clicking the Delete Conversation link next to the conversation you want to delete.

Notebook
21
11 Notebook The Notebook feature allows you to record notes while you are taking a subject. You can later view those notes from the Knowledge Center.
Notes are listed on the Notebook page by their description text, followed by the subject name. Note text appears below the description text. From any note, you can quickly access the subject content by clicking the Go to Subject link. You cannot edit notes on the Notebook page. To edit a note, you must go to the subject where
you added the note.
To view notes in the Notebook:
1. From the Knowledge Center, click Notebook.
2. To view the related subject content, click Go to Subject.
3. To return to the Knowledge Center, click .
To edit a note in the Notebook:
1. Click Go to Subject next to the note you want to edit.
2. Click the View Note link.
3. Edit the information as desired.
4. Click Save.
To delete a note in the Notebook:
1. Click Delete next to the note you want to delete. Warning! Be sure you click Delete for the correct note. You are not prompted to confirm the deletion, and there is no Undo.

Notebook
22
Recommended