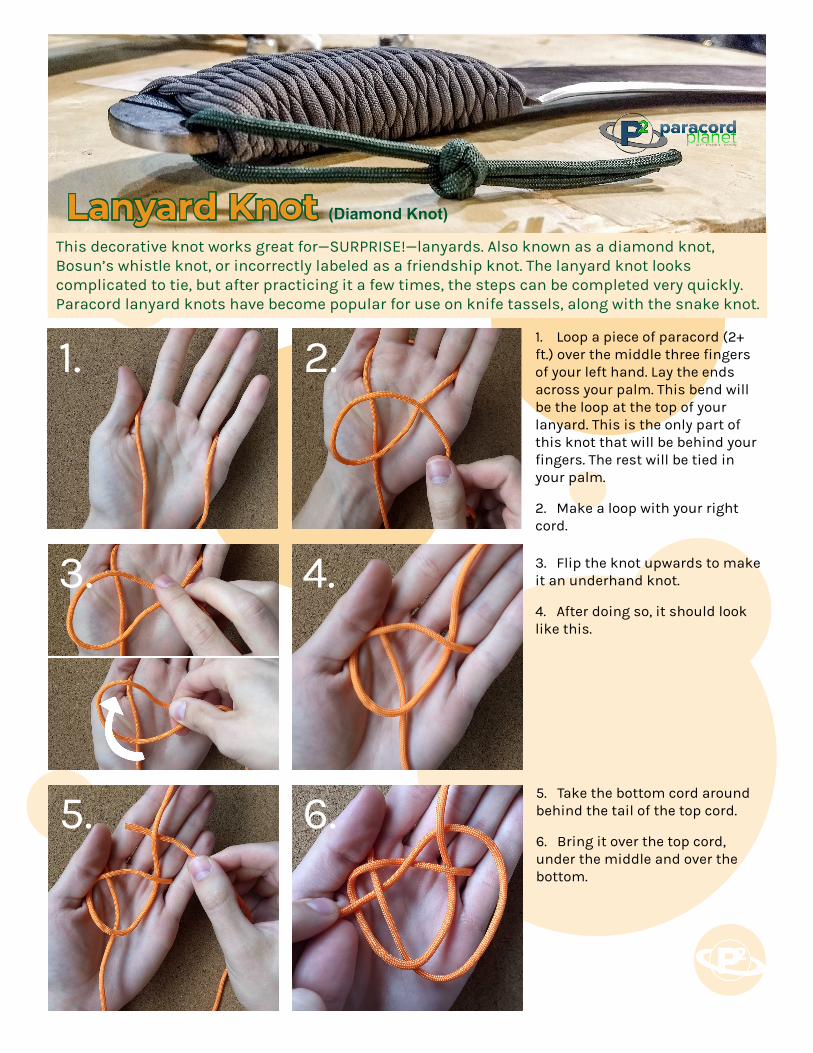
1. Loop a piece of paracord (2+ ft.) over the middle three fingers of your left hand. Lay the ends across your palm. This bend will be the loop at the top of your lanyard. This is the only part of this knot that will be behind your fingers. The rest will be tied in your palm.
2. Make a loop with your right cord.
1. 2.
3. Flip the knot upwards to make it an underhand knot.
4. After doing so, it should look like this.
3. 4.
Lanyard Knot (Diamond Knot)
This decorative knot works great for—SURPRISE!—lanyards. Also known as a diamond knot, Bosun’s whistle knot, or incorrectly labeled as a friendship knot. The lanyard knot looks complicated to tie, but after practicing it a few times, the steps can be completed very quickly. Paracord lanyard knots have become popular for use on knife tassels, along with the snake knot.
5. Take the bottom cord around behind the tail of the top cord.
6. Bring it over the top cord, under the middle and over the bottom.
6. 5.

All rights reserved © 2018 Paracord Planet
7. Dress the knot thus far so that it all fits into your palm. You will notice that it is a symmetrical, Celtic-looking knot. This is called a carrick bend.
8. Now bring the top cord counter-clockwise around toward the base of your thumb. Pass it underneath the knot and bring it up through the center.
9. Pull it mostly through, but leave a little bit of slack.
10. Now do the same thing with the other cord. Bring it around counter-clockwise and underneath the top cord.
10. 9.
8. 7.
11. Bring it to your middle finger and then underneath the knot.
12. Pull it up through the enter of the knot.
13. Dress the knot. Do not simply pull on both ends. You will have to gradually feed each cord through until the knot is tight.
14. Your first lanyard knot is done! (The one in the picture still needs a little more tightening.)
11.
14. 13.
12.
Recommended