Junos® OS
System Basics: Getting Started ConfigurationGuide
Release
12.3
Modified: 2016-06-10
Copyright © 2016, Juniper Networks, Inc.

Juniper Networks, Inc.1133 Innovation WaySunnyvale, California 94089USA408-745-2000www.juniper.net
Juniper Networks, Junos, Steel-Belted Radius, NetScreen, and ScreenOS are registered trademarks of Juniper Networks, Inc. in the UnitedStates and other countries. The Juniper Networks Logo, the Junos logo, and JunosE are trademarks of Juniper Networks, Inc. All othertrademarks, service marks, registered trademarks, or registered service marks are the property of their respective owners.
Juniper Networks assumes no responsibility for any inaccuracies in this document. Juniper Networks reserves the right to change, modify,transfer, or otherwise revise this publication without notice.
Junos®OS System Basics: Getting Started Configuration Guide
12.3Copyright © 2016, Juniper Networks, Inc.All rights reserved.
The information in this document is current as of the date on the title page.
YEAR 2000 NOTICE
Juniper Networks hardware and software products are Year 2000 compliant. Junos OS has no known time-related limitations through theyear 2038. However, the NTP application is known to have some difficulty in the year 2036.
ENDUSER LICENSE AGREEMENT
The Juniper Networks product that is the subject of this technical documentation consists of (or is intended for use with) Juniper Networkssoftware. Use of such software is subject to the terms and conditions of the End User License Agreement (“EULA”) posted athttp://www.juniper.net/support/eula.html. By downloading, installing or using such software, you agree to the terms and conditions ofthat EULA.
Copyright © 2016, Juniper Networks, Inc.ii

Table of Contents
About the Documentation . . . . . . . . . . . . . . . . . . . . . . . . . . . . . . . . . . . . . . . . . . . . xiii
Documentation and Release Notes . . . . . . . . . . . . . . . . . . . . . . . . . . . . . . . . . xiii
Supported Platforms . . . . . . . . . . . . . . . . . . . . . . . . . . . . . . . . . . . . . . . . . . . . xiii
Using the Examples in This Manual . . . . . . . . . . . . . . . . . . . . . . . . . . . . . . . . . xiv
Merging a Full Example . . . . . . . . . . . . . . . . . . . . . . . . . . . . . . . . . . . . . . . xiv
Merging a Snippet . . . . . . . . . . . . . . . . . . . . . . . . . . . . . . . . . . . . . . . . . . . xv
Documentation Conventions . . . . . . . . . . . . . . . . . . . . . . . . . . . . . . . . . . . . . . xv
Documentation Feedback . . . . . . . . . . . . . . . . . . . . . . . . . . . . . . . . . . . . . . . . xvii
Requesting Technical Support . . . . . . . . . . . . . . . . . . . . . . . . . . . . . . . . . . . . xviii
Self-Help Online Tools and Resources . . . . . . . . . . . . . . . . . . . . . . . . . . xviii
Opening a Case with JTAC . . . . . . . . . . . . . . . . . . . . . . . . . . . . . . . . . . . . xviii
Part 1 Overview
Chapter 1 Junos OS Overview . . . . . . . . . . . . . . . . . . . . . . . . . . . . . . . . . . . . . . . . . . . . . . . . . 3
Junos OS Overview . . . . . . . . . . . . . . . . . . . . . . . . . . . . . . . . . . . . . . . . . . . . . . . . . . . 3
Junos OS Architecture Overview . . . . . . . . . . . . . . . . . . . . . . . . . . . . . . . . . . . . . . . . 5
Product Architecture . . . . . . . . . . . . . . . . . . . . . . . . . . . . . . . . . . . . . . . . . . . . . . 5
Routing Process Architecture . . . . . . . . . . . . . . . . . . . . . . . . . . . . . . . . . . . . . . . 5
Packet Forwarding Engine . . . . . . . . . . . . . . . . . . . . . . . . . . . . . . . . . . . . . . 6
Routing Engine . . . . . . . . . . . . . . . . . . . . . . . . . . . . . . . . . . . . . . . . . . . . . . . 6
Router Hardware Components . . . . . . . . . . . . . . . . . . . . . . . . . . . . . . . . . . . . . . . . . 7
Junos OS Commit Model for Router or Switch Configuration . . . . . . . . . . . . . . . . . 8
Junos OS Routing Engine Components and Processes . . . . . . . . . . . . . . . . . . . . . . 9
Routing Engine Kernel . . . . . . . . . . . . . . . . . . . . . . . . . . . . . . . . . . . . . . . . . . . . 10
Initialization Process . . . . . . . . . . . . . . . . . . . . . . . . . . . . . . . . . . . . . . . . . . . . . 10
Management Process . . . . . . . . . . . . . . . . . . . . . . . . . . . . . . . . . . . . . . . . . . . . 10
Process Limits . . . . . . . . . . . . . . . . . . . . . . . . . . . . . . . . . . . . . . . . . . . . . . . . . . 10
Routing Protocol Process . . . . . . . . . . . . . . . . . . . . . . . . . . . . . . . . . . . . . . . . . 10
Interface Process . . . . . . . . . . . . . . . . . . . . . . . . . . . . . . . . . . . . . . . . . . . . . . . . 11
Chassis Process . . . . . . . . . . . . . . . . . . . . . . . . . . . . . . . . . . . . . . . . . . . . . . . . . 11
SNMP and MIB II Processes . . . . . . . . . . . . . . . . . . . . . . . . . . . . . . . . . . . . . . . . 11
List of Junos OS Processes . . . . . . . . . . . . . . . . . . . . . . . . . . . . . . . . . . . . . . . . . . . . 11
Junos OS Support for IPv4 Routing Protocols . . . . . . . . . . . . . . . . . . . . . . . . . . . . . 18
Junos OS Support for IPv6 Routing Protocols . . . . . . . . . . . . . . . . . . . . . . . . . . . . 20
Junos OS Routing and Forwarding Tables . . . . . . . . . . . . . . . . . . . . . . . . . . . . . . . . 21
Routing Policy Overview . . . . . . . . . . . . . . . . . . . . . . . . . . . . . . . . . . . . . . . . . . . . . . 21
Junos OS Support for VPNs . . . . . . . . . . . . . . . . . . . . . . . . . . . . . . . . . . . . . . . . . . . 22
Junos OS Configuration Basics . . . . . . . . . . . . . . . . . . . . . . . . . . . . . . . . . . . . . . . . 23
Junos OS Configuration from External Devices . . . . . . . . . . . . . . . . . . . . . . . . . . . . 23
Junos OS Tracing and Logging Operations . . . . . . . . . . . . . . . . . . . . . . . . . . . . . . . 24
iiiCopyright © 2016, Juniper Networks, Inc.

Chapter 2 Junos OS Security Overview . . . . . . . . . . . . . . . . . . . . . . . . . . . . . . . . . . . . . . . . 27
Junos OS Default Settings for Router Security . . . . . . . . . . . . . . . . . . . . . . . . . . . . 27
Junos OS Features for Router Security . . . . . . . . . . . . . . . . . . . . . . . . . . . . . . . . . . 27
Methods of Remote Access for Router Management . . . . . . . . . . . . . . . . . . . 28
Junos OS Supported Protocols and Methods for User Authentication . . . . . 28
Junos OS Plain-Text Password Requirements . . . . . . . . . . . . . . . . . . . . . . . . . 29
Junos OS Support for Routing Protocol Security Features and IPsec . . . . . . . 30
Junos OS Support for Firewall Filters . . . . . . . . . . . . . . . . . . . . . . . . . . . . . . . . 30
Junos OS Auditing Support for Security . . . . . . . . . . . . . . . . . . . . . . . . . . . . . . 31
Chapter 3 Junos OS Configuration Overview . . . . . . . . . . . . . . . . . . . . . . . . . . . . . . . . . . . 33
Methods for Configuring Junos OS . . . . . . . . . . . . . . . . . . . . . . . . . . . . . . . . . . . . . 34
Junos OS Command-Line Interface (CLI) . . . . . . . . . . . . . . . . . . . . . . . . . . . . 35
ASCII File . . . . . . . . . . . . . . . . . . . . . . . . . . . . . . . . . . . . . . . . . . . . . . . . . . . . . . 35
J-Web Package . . . . . . . . . . . . . . . . . . . . . . . . . . . . . . . . . . . . . . . . . . . . . . . . . 35
Junos XML Management Protocol Software . . . . . . . . . . . . . . . . . . . . . . . . . . 36
NETCONF XML Management Protocol Software . . . . . . . . . . . . . . . . . . . . . . 36
Configuration Commit Scripts . . . . . . . . . . . . . . . . . . . . . . . . . . . . . . . . . . . . . 36
Junos OS Configuration Using the CLI . . . . . . . . . . . . . . . . . . . . . . . . . . . . . . . . . . . 37
Creating and Activating a Candidate Configuration . . . . . . . . . . . . . . . . . . . . . . . . 37
Format for Specifying IP Addresses, Network Masks, and Prefixes in Junos OS
Configuration Statements . . . . . . . . . . . . . . . . . . . . . . . . . . . . . . . . . . . . . . . . 38
Format for Specifying Filenames and URLs in Junos OS CLI Commands . . . . . . . 38
Default Directories for Junos OS File Storage on the Router or Switch . . . . . . . . . 40
Directories on the Logical System . . . . . . . . . . . . . . . . . . . . . . . . . . . . . . . . . . 40
Initial Router or Switch Configuration Using the Junos OS . . . . . . . . . . . . . . . . . . . 41
Chapter 4 Junos OS Monitoring Tools Overview . . . . . . . . . . . . . . . . . . . . . . . . . . . . . . . . 43
Junos OS Tools for Monitoring the Router . . . . . . . . . . . . . . . . . . . . . . . . . . . . . . . . 43
Part 2 Configuration
Chapter 5 Configuring Basic System Management Features . . . . . . . . . . . . . . . . . . . . . 47
Configuring Basic Router or Switch Properties . . . . . . . . . . . . . . . . . . . . . . . . . . . . 48
Configuring the Hostname of the Router or Switch . . . . . . . . . . . . . . . . . . . . . . . . 49
Mapping the Name of the Router to IP Addresses . . . . . . . . . . . . . . . . . . . . . . . . . 49
Configuring an ISO System Identifier for the Router . . . . . . . . . . . . . . . . . . . . . . . . 50
Example: Configuring the Name of the Router, IP Address, and System ID . . . . . 50
Configuring the Domain Name for the Router or Switch . . . . . . . . . . . . . . . . . . . . . 51
Example: Configuring the Domain Name for the Router or Switch . . . . . . . . . . . . . 51
Configuring the Domains to Search When a Router or Switch Is Included in
Multiple Domains . . . . . . . . . . . . . . . . . . . . . . . . . . . . . . . . . . . . . . . . . . . . . . . 52
Configuring a DNS Name Server for Resolving a Hostname into Addresses . . . . . 52
Example: Configuring a Proxy Server for License Updates . . . . . . . . . . . . . . . . . . . 53
Configuring a Backup Router . . . . . . . . . . . . . . . . . . . . . . . . . . . . . . . . . . . . . . . . . . 56
Configuring a Backup Router Running IPv4 . . . . . . . . . . . . . . . . . . . . . . . . . . . 57
Configuring a Backup Router Running IPv6 . . . . . . . . . . . . . . . . . . . . . . . . . . . 58
Configuring Automatic Mirroring of the CompactFlash Card on the Hard Disk
Drive . . . . . . . . . . . . . . . . . . . . . . . . . . . . . . . . . . . . . . . . . . . . . . . . . . . . . . . . . 58
Copyright © 2016, Juniper Networks, Inc.iv
System Basics: Getting Started Configuration Guide

Using Junos OS to Specify the Number of Configurations Stored on the
CompactFlash Card . . . . . . . . . . . . . . . . . . . . . . . . . . . . . . . . . . . . . . . . . . . . . 59
Using Junos OS to Configure a Router or Switch to Transfer Its Configuration to
an Archive Site . . . . . . . . . . . . . . . . . . . . . . . . . . . . . . . . . . . . . . . . . . . . . . . . . 60
Configuring the Router or Switch to Transfer Its Currently Active
Configuration to an Archive . . . . . . . . . . . . . . . . . . . . . . . . . . . . . . . . . . . . 60
Configuring the Transfer Interval for Periodic Transfer of the Active
Configuration to an Archive Site . . . . . . . . . . . . . . . . . . . . . . . . . . . . . . . . 60
Configuring Transfer of the Current Active Configuration When a
Configuration Is Committed . . . . . . . . . . . . . . . . . . . . . . . . . . . . . . . . . . . . 61
Configuring Archive Sites for Transfer of Active Configuration Files . . . . . . . . 61
Configuring the Physical Location of the Router or Switch . . . . . . . . . . . . . . . . . . 62
Configuring the Root Password . . . . . . . . . . . . . . . . . . . . . . . . . . . . . . . . . . . . . . . . 63
Example: Configuring the Root Password . . . . . . . . . . . . . . . . . . . . . . . . . . . . . . . . 64
Example: Configuring a Plain-Text Password for Root Logins . . . . . . . . . . . . . . . . 65
Example: Configuring SSH Authentication for Root Logins . . . . . . . . . . . . . . . . . . 65
Special Requirements for Junos OS Plain-Text Passwords . . . . . . . . . . . . . . . . . . 65
Changing the Requirements for Junos OS Plain-Text Passwords . . . . . . . . . . . . . 68
Example: Changing the Requirements for Junos OS Plain-Text Passwords . . . . . 68
Configuring the Junos OS to Set Console and Auxiliary Port Properties . . . . . . . . 70
Configuring Multiple Routing Engines to Synchronize Committed Configurations
Automatically . . . . . . . . . . . . . . . . . . . . . . . . . . . . . . . . . . . . . . . . . . . . . . . . . . . 71
Compressing the Current Configuration File . . . . . . . . . . . . . . . . . . . . . . . . . . . . . . 73
Configuring the Junos OS to Make the Router or Interface Act as a DHCP or
BOOTP Relay Agent . . . . . . . . . . . . . . . . . . . . . . . . . . . . . . . . . . . . . . . . . . . . . 74
Disabling Junos OS Processes . . . . . . . . . . . . . . . . . . . . . . . . . . . . . . . . . . . . . . . . . 74
Viewing Core Files from Junos OS Processes . . . . . . . . . . . . . . . . . . . . . . . . . . . . . 74
Saving Core Files from Junos OS Processes . . . . . . . . . . . . . . . . . . . . . . . . . . . . . . 75
Configuring Failover to Backup Media if a Junos OS Process Fails . . . . . . . . . . . . . 75
Configuring the Junos OS to Display a System Login Message . . . . . . . . . . . . . . . 76
Configuring the Junos OS to Display a System Login Announcement . . . . . . . . . . 77
Configuring Junos OS for the First Time on a Router or Switch with a Single
Routing Engine . . . . . . . . . . . . . . . . . . . . . . . . . . . . . . . . . . . . . . . . . . . . . . . . . 78
Configuring the Junos OS for the First Time on a Router or Switch with Dual
Routing Engines . . . . . . . . . . . . . . . . . . . . . . . . . . . . . . . . . . . . . . . . . . . . . . . . 82
Configuring CLI Tips . . . . . . . . . . . . . . . . . . . . . . . . . . . . . . . . . . . . . . . . . . . . . . . . . 86
Upgrading to 64-bit Junos OS . . . . . . . . . . . . . . . . . . . . . . . . . . . . . . . . . . . . . . . . . 87
Disk Space Management for Junos OS Installation . . . . . . . . . . . . . . . . . . . . . . . . 90
Chapter 6 Configuration Statements . . . . . . . . . . . . . . . . . . . . . . . . . . . . . . . . . . . . . . . . . . 93
System Management Configuration Statements . . . . . . . . . . . . . . . . . . . . . . . . . . 94
announcement . . . . . . . . . . . . . . . . . . . . . . . . . . . . . . . . . . . . . . . . . . . . . . . . . . . . 101
archival . . . . . . . . . . . . . . . . . . . . . . . . . . . . . . . . . . . . . . . . . . . . . . . . . . . . . . . . . . 102
archive-sites (Configuration File) . . . . . . . . . . . . . . . . . . . . . . . . . . . . . . . . . . . . . . 103
autoinstallation . . . . . . . . . . . . . . . . . . . . . . . . . . . . . . . . . . . . . . . . . . . . . . . . . . . 105
backup-router . . . . . . . . . . . . . . . . . . . . . . . . . . . . . . . . . . . . . . . . . . . . . . . . . . . . . 106
commit fast-synchronize . . . . . . . . . . . . . . . . . . . . . . . . . . . . . . . . . . . . . . . . . . . . 107
commit synchronize . . . . . . . . . . . . . . . . . . . . . . . . . . . . . . . . . . . . . . . . . . . . . . . . 108
compress-configuration-files (System) . . . . . . . . . . . . . . . . . . . . . . . . . . . . . . . . 109
vCopyright © 2016, Juniper Networks, Inc.
Table of Contents

configuration . . . . . . . . . . . . . . . . . . . . . . . . . . . . . . . . . . . . . . . . . . . . . . . . . . . . . . 110
configuration-servers . . . . . . . . . . . . . . . . . . . . . . . . . . . . . . . . . . . . . . . . . . . . . . . . 111
domain-name . . . . . . . . . . . . . . . . . . . . . . . . . . . . . . . . . . . . . . . . . . . . . . . . . . . . . . 111
domain-search . . . . . . . . . . . . . . . . . . . . . . . . . . . . . . . . . . . . . . . . . . . . . . . . . . . . . 112
dump-device . . . . . . . . . . . . . . . . . . . . . . . . . . . . . . . . . . . . . . . . . . . . . . . . . . . . . . 113
events . . . . . . . . . . . . . . . . . . . . . . . . . . . . . . . . . . . . . . . . . . . . . . . . . . . . . . . . . . . . 114
host-name . . . . . . . . . . . . . . . . . . . . . . . . . . . . . . . . . . . . . . . . . . . . . . . . . . . . . . . . 114
inet6-backup-router . . . . . . . . . . . . . . . . . . . . . . . . . . . . . . . . . . . . . . . . . . . . . . . . 115
interfaces . . . . . . . . . . . . . . . . . . . . . . . . . . . . . . . . . . . . . . . . . . . . . . . . . . . . . . . . . 116
load-key-file . . . . . . . . . . . . . . . . . . . . . . . . . . . . . . . . . . . . . . . . . . . . . . . . . . . . . . . 117
location (System) . . . . . . . . . . . . . . . . . . . . . . . . . . . . . . . . . . . . . . . . . . . . . . . . . . 118
login-tip . . . . . . . . . . . . . . . . . . . . . . . . . . . . . . . . . . . . . . . . . . . . . . . . . . . . . . . . . . 119
max-configurations-on-flash . . . . . . . . . . . . . . . . . . . . . . . . . . . . . . . . . . . . . . . . . 119
message . . . . . . . . . . . . . . . . . . . . . . . . . . . . . . . . . . . . . . . . . . . . . . . . . . . . . . . . . 120
mirror-flash-on-disk . . . . . . . . . . . . . . . . . . . . . . . . . . . . . . . . . . . . . . . . . . . . . . . . 121
name-server . . . . . . . . . . . . . . . . . . . . . . . . . . . . . . . . . . . . . . . . . . . . . . . . . . . . . . 122
password (Proxy Systems) . . . . . . . . . . . . . . . . . . . . . . . . . . . . . . . . . . . . . . . . . . . 122
pic-console-authentication . . . . . . . . . . . . . . . . . . . . . . . . . . . . . . . . . . . . . . . . . . 123
port (Syslog) . . . . . . . . . . . . . . . . . . . . . . . . . . . . . . . . . . . . . . . . . . . . . . . . . . . . . . 124
port (Proxy Server) . . . . . . . . . . . . . . . . . . . . . . . . . . . . . . . . . . . . . . . . . . . . . . . . . 124
ports . . . . . . . . . . . . . . . . . . . . . . . . . . . . . . . . . . . . . . . . . . . . . . . . . . . . . . . . . . . . 125
processes . . . . . . . . . . . . . . . . . . . . . . . . . . . . . . . . . . . . . . . . . . . . . . . . . . . . . . . . 126
proxy (System) . . . . . . . . . . . . . . . . . . . . . . . . . . . . . . . . . . . . . . . . . . . . . . . . . . . . 127
root-authentication . . . . . . . . . . . . . . . . . . . . . . . . . . . . . . . . . . . . . . . . . . . . . . . . 128
root-login . . . . . . . . . . . . . . . . . . . . . . . . . . . . . . . . . . . . . . . . . . . . . . . . . . . . . . . . . 129
saved-core-context . . . . . . . . . . . . . . . . . . . . . . . . . . . . . . . . . . . . . . . . . . . . . . . . 130
saved-core-files . . . . . . . . . . . . . . . . . . . . . . . . . . . . . . . . . . . . . . . . . . . . . . . . . . . 130
server (Proxy) . . . . . . . . . . . . . . . . . . . . . . . . . . . . . . . . . . . . . . . . . . . . . . . . . . . . . . 131
static-host-mapping . . . . . . . . . . . . . . . . . . . . . . . . . . . . . . . . . . . . . . . . . . . . . . . . 131
system . . . . . . . . . . . . . . . . . . . . . . . . . . . . . . . . . . . . . . . . . . . . . . . . . . . . . . . . . . . 132
transfer-interval (Configuration) . . . . . . . . . . . . . . . . . . . . . . . . . . . . . . . . . . . . . . 133
transfer-on-commit . . . . . . . . . . . . . . . . . . . . . . . . . . . . . . . . . . . . . . . . . . . . . . . . 134
trusted-key . . . . . . . . . . . . . . . . . . . . . . . . . . . . . . . . . . . . . . . . . . . . . . . . . . . . . . . 135
username (System) . . . . . . . . . . . . . . . . . . . . . . . . . . . . . . . . . . . . . . . . . . . . . . . . 135
Part 3 Administration
Chapter 7 File Management Commands . . . . . . . . . . . . . . . . . . . . . . . . . . . . . . . . . . . . . . 139
file archive . . . . . . . . . . . . . . . . . . . . . . . . . . . . . . . . . . . . . . . . . . . . . . . . . . . . . . . . 140
file checksum md5 . . . . . . . . . . . . . . . . . . . . . . . . . . . . . . . . . . . . . . . . . . . . . . . . . 142
file checksum sha1 . . . . . . . . . . . . . . . . . . . . . . . . . . . . . . . . . . . . . . . . . . . . . . . . . 143
file checksum sha-256 . . . . . . . . . . . . . . . . . . . . . . . . . . . . . . . . . . . . . . . . . . . . . . 144
file compare . . . . . . . . . . . . . . . . . . . . . . . . . . . . . . . . . . . . . . . . . . . . . . . . . . . . . . 145
file copy . . . . . . . . . . . . . . . . . . . . . . . . . . . . . . . . . . . . . . . . . . . . . . . . . . . . . . . . . . 148
file delete . . . . . . . . . . . . . . . . . . . . . . . . . . . . . . . . . . . . . . . . . . . . . . . . . . . . . . . . 150
file list . . . . . . . . . . . . . . . . . . . . . . . . . . . . . . . . . . . . . . . . . . . . . . . . . . . . . . . . . . . . 151
file rename . . . . . . . . . . . . . . . . . . . . . . . . . . . . . . . . . . . . . . . . . . . . . . . . . . . . . . . 153
file show . . . . . . . . . . . . . . . . . . . . . . . . . . . . . . . . . . . . . . . . . . . . . . . . . . . . . . . . . 155
Copyright © 2016, Juniper Networks, Inc.vi
System Basics: Getting Started Configuration Guide

Chapter 8 System Software Administrative Commands . . . . . . . . . . . . . . . . . . . . . . . . 157
clear system commit . . . . . . . . . . . . . . . . . . . . . . . . . . . . . . . . . . . . . . . . . . . . . . . 158
clear system reboot . . . . . . . . . . . . . . . . . . . . . . . . . . . . . . . . . . . . . . . . . . . . . . . . 159
configure . . . . . . . . . . . . . . . . . . . . . . . . . . . . . . . . . . . . . . . . . . . . . . . . . . . . . . . . . 162
request system configuration rescue delete . . . . . . . . . . . . . . . . . . . . . . . . . . . . . 164
request system configuration rescue save . . . . . . . . . . . . . . . . . . . . . . . . . . . . . . . 165
request system halt . . . . . . . . . . . . . . . . . . . . . . . . . . . . . . . . . . . . . . . . . . . . . . . . 166
request system license add . . . . . . . . . . . . . . . . . . . . . . . . . . . . . . . . . . . . . . . . . . . 171
request system license delete . . . . . . . . . . . . . . . . . . . . . . . . . . . . . . . . . . . . . . . . . 172
request system license save . . . . . . . . . . . . . . . . . . . . . . . . . . . . . . . . . . . . . . . . . . 173
request system logout . . . . . . . . . . . . . . . . . . . . . . . . . . . . . . . . . . . . . . . . . . . . . . 174
request system partition abort . . . . . . . . . . . . . . . . . . . . . . . . . . . . . . . . . . . . . . . . 175
request system partition hard-disk . . . . . . . . . . . . . . . . . . . . . . . . . . . . . . . . . . . . . 177
request system power-off . . . . . . . . . . . . . . . . . . . . . . . . . . . . . . . . . . . . . . . . . . . 179
request system reboot . . . . . . . . . . . . . . . . . . . . . . . . . . . . . . . . . . . . . . . . . . . . . . 184
request system snapshot . . . . . . . . . . . . . . . . . . . . . . . . . . . . . . . . . . . . . . . . . . . . 189
request system software add . . . . . . . . . . . . . . . . . . . . . . . . . . . . . . . . . . . . . . . . . 195
request system zeroize . . . . . . . . . . . . . . . . . . . . . . . . . . . . . . . . . . . . . . . . . . . . . 203
Chapter 9 System Software Monitoring Commands . . . . . . . . . . . . . . . . . . . . . . . . . . . 209
show configuration . . . . . . . . . . . . . . . . . . . . . . . . . . . . . . . . . . . . . . . . . . . . . . . . . 210
show host . . . . . . . . . . . . . . . . . . . . . . . . . . . . . . . . . . . . . . . . . . . . . . . . . . . . . . . . 213
show system commit . . . . . . . . . . . . . . . . . . . . . . . . . . . . . . . . . . . . . . . . . . . . . . . 214
show system configuration archival . . . . . . . . . . . . . . . . . . . . . . . . . . . . . . . . . . . . 216
show system configuration rescue . . . . . . . . . . . . . . . . . . . . . . . . . . . . . . . . . . . . . 217
show system processes . . . . . . . . . . . . . . . . . . . . . . . . . . . . . . . . . . . . . . . . . . . . . 219
show system queues . . . . . . . . . . . . . . . . . . . . . . . . . . . . . . . . . . . . . . . . . . . . . . . 246
show system reboot . . . . . . . . . . . . . . . . . . . . . . . . . . . . . . . . . . . . . . . . . . . . . . . . 252
show system rollback . . . . . . . . . . . . . . . . . . . . . . . . . . . . . . . . . . . . . . . . . . . . . . 255
show system snapshot . . . . . . . . . . . . . . . . . . . . . . . . . . . . . . . . . . . . . . . . . . . . . 257
show system software . . . . . . . . . . . . . . . . . . . . . . . . . . . . . . . . . . . . . . . . . . . . . 260
show system statistics . . . . . . . . . . . . . . . . . . . . . . . . . . . . . . . . . . . . . . . . . . . . . 268
show system storage . . . . . . . . . . . . . . . . . . . . . . . . . . . . . . . . . . . . . . . . . . . . . . . 303
show system switchover . . . . . . . . . . . . . . . . . . . . . . . . . . . . . . . . . . . . . . . . . . . . 309
show system uptime . . . . . . . . . . . . . . . . . . . . . . . . . . . . . . . . . . . . . . . . . . . . . . . . 313
show system virtual-memory . . . . . . . . . . . . . . . . . . . . . . . . . . . . . . . . . . . . . . . . 318
show task . . . . . . . . . . . . . . . . . . . . . . . . . . . . . . . . . . . . . . . . . . . . . . . . . . . . . . . . 376
show task io . . . . . . . . . . . . . . . . . . . . . . . . . . . . . . . . . . . . . . . . . . . . . . . . . . . . . . 378
show task memory . . . . . . . . . . . . . . . . . . . . . . . . . . . . . . . . . . . . . . . . . . . . . . . . 380
show task replication . . . . . . . . . . . . . . . . . . . . . . . . . . . . . . . . . . . . . . . . . . . . . . . 384
show version . . . . . . . . . . . . . . . . . . . . . . . . . . . . . . . . . . . . . . . . . . . . . . . . . . . . . 386
start shell . . . . . . . . . . . . . . . . . . . . . . . . . . . . . . . . . . . . . . . . . . . . . . . . . . . . . . . . 394
test configuration . . . . . . . . . . . . . . . . . . . . . . . . . . . . . . . . . . . . . . . . . . . . . . . . . . 396
Part 4 Index
Index . . . . . . . . . . . . . . . . . . . . . . . . . . . . . . . . . . . . . . . . . . . . . . . . . . . . . . . . 399
viiCopyright © 2016, Juniper Networks, Inc.
Table of Contents

Copyright © 2016, Juniper Networks, Inc.viii
System Basics: Getting Started Configuration Guide

List of Figures
Part 1 Overview
Chapter 1 Junos OS Overview . . . . . . . . . . . . . . . . . . . . . . . . . . . . . . . . . . . . . . . . . . . . . . . . . 3
Figure 1: Product Architecture . . . . . . . . . . . . . . . . . . . . . . . . . . . . . . . . . . . . . . . . . . 6
Part 2 Configuration
Chapter 5 Configuring Basic System Management Features . . . . . . . . . . . . . . . . . . . . . 47
Figure 2: Proxy Server Example . . . . . . . . . . . . . . . . . . . . . . . . . . . . . . . . . . . . . . . . 53
Figure 3: Upgrading to the 64-bit Junos OS with Dual Routing Engines . . . . . . . . 88
Figure 4: Upgrading to the 64-bit Junos OS with a Single Routing Engine (Master
in Either Slot) . . . . . . . . . . . . . . . . . . . . . . . . . . . . . . . . . . . . . . . . . . . . . . . . . . 89
Figure 5: Upgrading to the 64-bit Junos OS with a Single Routing Engine (Master
Must Be in Slot 0) . . . . . . . . . . . . . . . . . . . . . . . . . . . . . . . . . . . . . . . . . . . . . . . 90
ixCopyright © 2016, Juniper Networks, Inc.

Copyright © 2016, Juniper Networks, Inc.x
System Basics: Getting Started Configuration Guide

List of Tables
About the Documentation . . . . . . . . . . . . . . . . . . . . . . . . . . . . . . . . . . . . . . . . . xiii
Table 1: Notice Icons . . . . . . . . . . . . . . . . . . . . . . . . . . . . . . . . . . . . . . . . . . . . . . . . . xvi
Table 2: Text and Syntax Conventions . . . . . . . . . . . . . . . . . . . . . . . . . . . . . . . . . . xvi
Part 1 Overview
Chapter 1 Junos OS Overview . . . . . . . . . . . . . . . . . . . . . . . . . . . . . . . . . . . . . . . . . . . . . . . . . 3
Table 3: Major Router Hardware Components . . . . . . . . . . . . . . . . . . . . . . . . . . . . . 8
Table 4: Junos OS Processes on MX Series Platform Only . . . . . . . . . . . . . . . . . . . 12
Table 5: Junos OS Processes . . . . . . . . . . . . . . . . . . . . . . . . . . . . . . . . . . . . . . . . . . 12
Chapter 3 Junos OS Configuration Overview . . . . . . . . . . . . . . . . . . . . . . . . . . . . . . . . . . . 33
Table 6: Methods for Configuring Junos OS . . . . . . . . . . . . . . . . . . . . . . . . . . . . . . 34
Part 2 Configuration
Chapter 5 Configuring Basic System Management Features . . . . . . . . . . . . . . . . . . . . . 47
Table 7: Special Requirements for Plain-Text Passwords . . . . . . . . . . . . . . . . . . . 66
Part 3 Administration
Chapter 9 System Software Monitoring Commands . . . . . . . . . . . . . . . . . . . . . . . . . . . 209
Table 8: show system commit Output Fields . . . . . . . . . . . . . . . . . . . . . . . . . . . . 214
Table 9: show system processes Output Fields . . . . . . . . . . . . . . . . . . . . . . . . . . 226
Table 10: show system queues Output Fields . . . . . . . . . . . . . . . . . . . . . . . . . . . . 247
Table 11: show system snapshot Output Fields . . . . . . . . . . . . . . . . . . . . . . . . . . 258
Table 12: show system storage Output Fields . . . . . . . . . . . . . . . . . . . . . . . . . . . . 305
Table 13: show system switchover Output Fields . . . . . . . . . . . . . . . . . . . . . . . . . . 311
Table 14: show system uptime Output Fields . . . . . . . . . . . . . . . . . . . . . . . . . . . . 315
Table 15: show system virtual-memory Output Fields . . . . . . . . . . . . . . . . . . . . . 321
Table 16: show task Output Fields . . . . . . . . . . . . . . . . . . . . . . . . . . . . . . . . . . . . . 376
Table 17: show task io Output Fields . . . . . . . . . . . . . . . . . . . . . . . . . . . . . . . . . . . 378
Table 18: show task memory Output Fields . . . . . . . . . . . . . . . . . . . . . . . . . . . . . 380
Table 19: show task replication Output Fields . . . . . . . . . . . . . . . . . . . . . . . . . . . 384
xiCopyright © 2016, Juniper Networks, Inc.

Copyright © 2016, Juniper Networks, Inc.xii
System Basics: Getting Started Configuration Guide

About the Documentation
• Documentation and Release Notes on page xiii
• Supported Platforms on page xiii
• Using the Examples in This Manual on page xiv
• Documentation Conventions on page xv
• Documentation Feedback on page xvii
• Requesting Technical Support on page xviii
Documentation and Release Notes
To obtain the most current version of all Juniper Networks®
technical documentation,
see the product documentation page on the Juniper Networks website at
http://www.juniper.net/techpubs/.
If the information in the latest release notes differs from the information in the
documentation, follow the product Release Notes.
Juniper Networks Books publishes books by Juniper Networks engineers and subject
matter experts. These books go beyond the technical documentation to explore the
nuances of network architecture, deployment, and administration. The current list can
be viewed at http://www.juniper.net/books.
Supported Platforms
For the features described in this document, the following platforms are supported:
• ACX Series
• MSeries
• MXSeries
• T Series
• J Series
• PTX Series
xiiiCopyright © 2016, Juniper Networks, Inc.

Using the Examples in This Manual
If you want to use the examples in this manual, you can use the loadmerge or the load
merge relative command. These commands cause the software to merge the incoming
configuration into the current candidate configuration. The example does not become
active until you commit the candidate configuration.
If the example configuration contains the top level of the hierarchy (or multiple
hierarchies), the example is a full example. In this case, use the loadmerge command.
If the example configuration does not start at the top level of the hierarchy, the example
is a snippet. In this case, use the loadmerge relative command. These procedures are
described in the following sections.
Merging a Full Example
To merge a full example, follow these steps:
1. From the HTML or PDF version of the manual, copy a configuration example into a
text file, save the file with a name, and copy the file to a directory on your routing
platform.
For example, copy the following configuration to a file and name the file ex-script.conf.
Copy the ex-script.conf file to the /var/tmp directory on your routing platform.
system {scripts {commit {file ex-script.xsl;
}}
}interfaces {fxp0 {disable;unit 0 {family inet {address 10.0.0.1/24;
}}
}}
2. Merge the contents of the file into your routing platform configuration by issuing the
loadmerge configuration mode command:
[edit]user@host# loadmerge /var/tmp/ex-script.confload complete
Copyright © 2016, Juniper Networks, Inc.xiv
System Basics: Getting Started Configuration Guide

Merging a Snippet
To merge a snippet, follow these steps:
1. From the HTML or PDF version of the manual, copy a configuration snippet into a text
file, save the file with a name, and copy the file to a directory on your routing platform.
For example, copy the following snippet to a file and name the file
ex-script-snippet.conf. Copy the ex-script-snippet.conf file to the /var/tmp directory
on your routing platform.
commit {file ex-script-snippet.xsl; }
2. Move to the hierarchy level that is relevant for this snippet by issuing the following
configuration mode command:
[edit]user@host# edit system scripts[edit system scripts]
3. Merge the contents of the file into your routing platform configuration by issuing the
loadmerge relative configuration mode command:
[edit system scripts]user@host# loadmerge relative /var/tmp/ex-script-snippet.confload complete
For more information about the load command, see the CLI User Guide.
Documentation Conventions
Table 1 on page xvi defines notice icons used in this guide.
xvCopyright © 2016, Juniper Networks, Inc.
About the Documentation

Table 1: Notice Icons
DescriptionMeaningIcon
Indicates important features or instructions.Informational note
Indicates a situation that might result in loss of data or hardware damage.Caution
Alerts you to the risk of personal injury or death.Warning
Alerts you to the risk of personal injury from a laser.Laser warning
Indicates helpful information.Tip
Alerts you to a recommended use or implementation.Best practice
Table 2 on page xvi defines the text and syntax conventions used in this guide.
Table 2: Text and Syntax Conventions
ExamplesDescriptionConvention
To enter configuration mode, type theconfigure command:
user@host> configure
Represents text that you type.Bold text like this
user@host> show chassis alarms
No alarms currently active
Represents output that appears on theterminal screen.
Fixed-width text like this
• A policy term is a named structurethat defines match conditions andactions.
• Junos OS CLI User Guide
• RFC 1997,BGPCommunities Attribute
• Introduces or emphasizes importantnew terms.
• Identifies guide names.
• Identifies RFC and Internet draft titles.
Italic text like this
Configure the machine’s domain name:
[edit]root@# set system domain-namedomain-name
Represents variables (options for whichyou substitute a value) in commands orconfiguration statements.
Italic text like this
Copyright © 2016, Juniper Networks, Inc.xvi
System Basics: Getting Started Configuration Guide

Table 2: Text and Syntax Conventions (continued)
ExamplesDescriptionConvention
• To configure a stub area, include thestub statement at the [edit protocolsospf area area-id] hierarchy level.
• The console port is labeledCONSOLE.
Represents names of configurationstatements, commands, files, anddirectories; configuration hierarchy levels;or labels on routing platformcomponents.
Text like this
stub <default-metricmetric>;Encloses optional keywords or variables.< > (angle brackets)
broadcast | multicast
(string1 | string2 | string3)
Indicates a choice between the mutuallyexclusive keywords or variables on eitherside of the symbol. The set of choices isoften enclosed in parentheses for clarity.
| (pipe symbol)
rsvp { # Required for dynamicMPLS onlyIndicates a comment specified on thesame line as the configuration statementto which it applies.
# (pound sign)
community namemembers [community-ids ]
Encloses a variable for which you cansubstitute one or more values.
[ ] (square brackets)
[edit]routing-options {static {route default {nexthop address;retain;
}}
}
Identifies a level in the configurationhierarchy.
Indention and braces ( { } )
Identifies a leaf statement at aconfiguration hierarchy level.
; (semicolon)
GUI Conventions
• In the Logical Interfaces box, selectAll Interfaces.
• To cancel the configuration, clickCancel.
Represents graphical user interface (GUI)items you click or select.
Bold text like this
In the configuration editor hierarchy,select Protocols>Ospf.
Separates levels in a hierarchy of menuselections.
> (bold right angle bracket)
Documentation Feedback
We encourage you to provide feedback, comments, and suggestions so that we can
improve the documentation. You can provide feedback by using either of the following
methods:
• Online feedback rating system—On any page of the Juniper Networks TechLibrary site
athttp://www.juniper.net/techpubs/index.html, simply click the stars to rate the content,
and use the pop-up form to provide us with information about your experience.
Alternately, you can use the online feedback form at
http://www.juniper.net/techpubs/feedback/.
xviiCopyright © 2016, Juniper Networks, Inc.
About the Documentation

• E-mail—Send your comments to [email protected]. Include the document
or topic name, URL or page number, and software version (if applicable).
Requesting Technical Support
Technical product support is available through the Juniper Networks Technical Assistance
Center (JTAC). If you are a customer with an active J-Care or Partner Support Service
support contract, or are covered under warranty, and need post-sales technical support,
you can access our tools and resources online or open a case with JTAC.
• JTAC policies—For a complete understanding of our JTAC procedures and policies,
review the JTAC User Guide located at
http://www.juniper.net/us/en/local/pdf/resource-guides/7100059-en.pdf.
• Product warranties—For product warranty information, visit
http://www.juniper.net/support/warranty/.
• JTAC hours of operation—The JTAC centers have resources available 24 hours a day,
7 days a week, 365 days a year.
Self-Help Online Tools and Resources
For quick and easy problem resolution, Juniper Networks has designed an online
self-service portal called the Customer Support Center (CSC) that provides you with the
following features:
• Find CSC offerings: http://www.juniper.net/customers/support/
• Search for known bugs: http://www2.juniper.net/kb/
• Find product documentation: http://www.juniper.net/techpubs/
• Find solutions and answer questions using our Knowledge Base: http://kb.juniper.net/
• Download the latest versions of software and review release notes:
http://www.juniper.net/customers/csc/software/
• Search technical bulletins for relevant hardware and software notifications:
http://kb.juniper.net/InfoCenter/
• Join and participate in the Juniper Networks Community Forum:
http://www.juniper.net/company/communities/
• Open a case online in the CSC Case Management tool: http://www.juniper.net/cm/
To verify service entitlement by product serial number, use our Serial Number Entitlement
(SNE) Tool: https://tools.juniper.net/SerialNumberEntitlementSearch/
Opening a Casewith JTAC
You can open a case with JTAC on the Web or by telephone.
• Use the Case Management tool in the CSC at http://www.juniper.net/cm/.
• Call 1-888-314-JTAC (1-888-314-5822 toll-free in the USA, Canada, and Mexico).
Copyright © 2016, Juniper Networks, Inc.xviii
System Basics: Getting Started Configuration Guide

For international or direct-dial options in countries without toll-free numbers, see
http://www.juniper.net/support/requesting-support.html.
xixCopyright © 2016, Juniper Networks, Inc.
About the Documentation

Copyright © 2016, Juniper Networks, Inc.xx
System Basics: Getting Started Configuration Guide

PART 1
Overview
• Junos OS Overview on page 3
• Junos OS Security Overview on page 27
• Junos OS Configuration Overview on page 33
• Junos OS Monitoring Tools Overview on page 43
1Copyright © 2016, Juniper Networks, Inc.

Copyright © 2016, Juniper Networks, Inc.2
System Basics: Getting Started Configuration Guide
CHAPTER 1
Junos OS Overview
• Junos OS Overview on page 3
• Junos OS Architecture Overview on page 5
• Router Hardware Components on page 7
• Junos OS Commit Model for Router or Switch Configuration on page 8
• Junos OS Routing Engine Components and Processes on page 9
• List of Junos OS Processes on page 11
• Junos OS Support for IPv4 Routing Protocols on page 18
• Junos OS Support for IPv6 Routing Protocols on page 20
• Junos OS Routing and Forwarding Tables on page 21
• Routing Policy Overview on page 21
• Junos OS Support for VPNs on page 22
• Junos OS Configuration Basics on page 23
• Junos OS Configuration from External Devices on page 23
• Junos OS Tracing and Logging Operations on page 24
Junos OSOverview
Juniper Networks provides high-performance network routers that create a responsive
and trusted environment for accelerating the deployment of services and applications
over a single network. Junos OS is the foundation of these high-performance networks.
Unlike other complex, monolithic software architectures, Junos OS incorporates key
design and developmental differences to deliver increased network availability, operational
efficiency, and flexibility. These key advantages are:
• One operating system
• One software release
• One modular software architecture
OneOperating System
Unlike other network operating systems that share a common name but splinter into
many different programs, the Junos© operating system is a single, cohesive operating
3Copyright © 2016, Juniper Networks, Inc.

system that is shared across all routers and product lines. This enables Juniper Networks
engineers to develop software features once and share the features across all product
lines simultaneously. Because features are common to a single source, generally these
features are implemented the same way for all the product lines, thus reducing the
training required to learn different tools and methods for each product. Furthermore,
because all Juniper Networks products use the same code base, interoperability among
products is not an issue.
One Software Release
Each new version of Junos OS is released concurrently for all product lines following a
preset schedule. Each new version of software must include all working features released
in previous releases of the software and must achieve zero critical regression errors. This
discipline ensures reliable operations for the entire release.
OneModular Software Architecture
Although individual modules of the Junos OS communicate through well-defined
interfaces, each module runs in its own protected memory space, preventing one module
from disrupting another. It also enables the independent restart of each module as
necessary. This is in contrast to monolithic operating systems for which a malfunction
in one module can ripple to others and cause a full system crash or restart. This modular
architecture then provides for a high level of performance, high availability, security, and
device scalability not found in other operating systems.
The Junos OS is preinstalled on your Juniper Networks router when you receive it from
the factory. Thus, when you first power on the router, all software starts automatically.
You simply need to configure the software so that the router can participate in the network.
You can upgrade the router software as new features are added or software problems
are fixed. You normally obtain new software by downloading the images from the Juniper
Networks Support Web page onto your router or onto another system on your local
network. Then you install the software upgrade onto the router.
Juniper Networks routers run only binaries supplied by Juniper Networks. Each Junos OS
image includes a digitally signed manifest of executables, which are registered with the
system only if the signature can be validated. Junos OS will not execute any binary without
a registered fingerprint. This feature protects the system against unauthorized software
and activity that might compromise the integrity of your router.
RelatedDocumentation
Junos OS Architecture Overview on page 5•
• Router Hardware Components on page 7
• Junos OS Commit Model for Router or Switch Configuration on page 8
• Junos OS Routing Engine Components and Processes on page 9
• Junos OS Support for IPv4 Routing Protocols on page 18
• Junos OS Support for IPv6 Routing Protocols on page 20
• Junos OS Routing and Forwarding Tables on page 21
• Routing Policy Overview on page 21
Copyright © 2016, Juniper Networks, Inc.4
System Basics: Getting Started Configuration Guide

• Junos OS Support for VPNs on page 22
Junos OS Architecture Overview
This topic provides an overview of the Junos OS product and routing process architecture:
• Product Architecture on page 5
• Routing Process Architecture on page 5
Product Architecture
The Junos OS provides IP routing protocol software as well as software for interface,
network, and chassis management. The Junos OS runs on all Juniper Networks J Series,
M Series, MX Series, and T Series routers.
• J Series Services Routers (J2300, J4300, and J6300) are deployed at the remote edge
of distributed networks.
• Most M Series routers are deployed in small and medium cores in peering, route reflector,
data center applications; or at the IP or Multiprotocol Label Switching (MPLS) edge
to support high-performance Layer 2 and Layer 3 services. All M Series routers have
redundant power and cooling and the M10i, M20, M40e, M120, M160, and M320 routers
have fully redundant hardware, including Routing Engines, switch interface components,
and packet forwarding components. The M120 router also supports Forwarding Engine
Board (FEB) failover. In the event of a FEB failure, a backup FEB can quickly take over
packet forwarding.
• The MX Series 3D Universal Edge Routers are Ethernet-optimized edge routers that
provide both switching and carrier-class Ethernet routing. The MX Series routers support
two types of Dense Port Concentrators (DPCs) with built-in Ethernet ports: Gigabit
Ethernet 40-port and 10-Gigabit Ethernet 4-port.
• T Series routers (T320, T640, T1600, TX Matrix, and TX Matrix Plus routers) are
deployed at the core of provider networks. These routers have fully redundant hardware,
including power and cooling, Routing Engines, and Switch Interface Boards.
A routingmatrix is a multichassis architecture composed of either one TX Matrix router
and from one to four T640 routers connected to the TX Matrix router, or one TX Matrix
Plus router and from one to four T1600 routers connected to the TX Matrix Plus router.
From the perspective of the user interface, the routing matrix appears as a single router.
On a routing matrix composed of a TX Matrix router and T640 routers, the TX Matrix
router controls all the T640 routers. On a routing matrix composed of a TX Matrix Plus
router and T1600 routers, the TX Matrix Plus router controls all the T1600 routers.
Routing Process Architecture
The routing process is handled by the following two components (see Figure 1 on page 6):
• Routing Engine
• Packet Forwarding Engine
5Copyright © 2016, Juniper Networks, Inc.
Chapter 1: Junos OS Overview

Because this architecture separates control operations such as routing updates and
system management from packet forwarding, the router can deliver superior performance
and highly reliable Internet operation.
Figure 1: Product Architecture
Junos OS
Packet Forwarding Engine
The Packet Forwarding Engine uses application-specific integrated circuits (ASICs) to
perform Layer 2 and Layer 3 packet switching, route lookups, and packet forwarding. The
Packet Forwarding Engine forwards packets between input and output interfaces. The
M Series routers (except the M7i, M40, and M320 routers) have redundant Packet
Forwarding Engines. The J Series Services Routers have a software-based Packet
Forwarding Engine.
Routing Engine
The Routing Engine controls the routing updates and system management. The Routing
Engine consists of routing protocol software processes running inside a protected memory
environment on a general-purpose computer platform. The Routing Engine handles all
the routing protocol processes and other software processes that control the routers’
interfaces, some of the chassis components, system management, and user access to
the router. These routers and software processes run on top of a kernel that interacts
with the Packet Forwarding Engine. All M Series (except the M7i and M40) routers and
T Series routers have redundant Routing Engines.
Copyright © 2016, Juniper Networks, Inc.6
System Basics: Getting Started Configuration Guide

The Routing Engine has these features:
• Routing protocol packets processing—All routing protocol packets from the network
are directed to the Routing Engine, and therefore do not delay the Packet Forwarding
Engine unnecessarily.
• Software modularity—Software functions have been divided into separate processes,
so a failure of one process has little or no effect on other software processes.
• In-depth IP functionality—Each routing protocol is implemented with a complete set
of IP features and provides full flexibility for advertising, filtering, and modifying routes.
Routing policies are set according to route parameters, such as prefix, prefix lengths,
and Border Gateway Protocol (BGP) attributes.
• Scalability—The Junos routing tables are designed to hold all the routes used in current
and near-future networks. Additionally, the Junos OS can efficiently support large
numbers of interfaces and virtual circuits.
• Management interfaces—System management is possible with a command-line
interface (CLI), a craft interface, and Simple Network Management Protocol (SNMP).
• Storage and change management—Configuration files, system images, and microcode
can be held and maintained in one primary and two secondary storage systems,
permitting local or remote upgrades.
• Monitoring efficiency and flexibility—Alarms can be generated and packets can be
counted without adversely affecting packet forwarding performance.
The Routing Engine constructs and maintains one or more routing tables. From the routing
tables, the Routing Engine derives a table of active routes, called the forwarding table,
which is then copied into the Packet Forwarding Engine. The forwarding table in the
Packet Forwarding Engine can be updated without interrupting the router’s forwarding.
In a Junos-FIPS environment, hardware configurations with two Routing Engines must
use IPsec and a private routing instance for all communications between the Routing
Engines. IPsec communication between the Routing Engines and Adaptive Services (AS)
II FIPS PICs is also required.
RelatedDocumentation
Junos OS Overview on page 3•
Router Hardware Components
The Junos OS runs on the following types of Juniper Networks routers and Packet
Transport Switches: ACX Series, J Series, M Series, MX Series, T Series, and PTX Series
Packet Transport Switches. Each network device consists of the major hardware
components as shown in Table 3 on page 8. One or more of the major hardware
components shown is used in each system.
7Copyright © 2016, Juniper Networks, Inc.
Chapter 1: Junos OS Overview

NOTE: The ACX Series router is a single-board router with a built-in RoutingEngine and one Packet Forwarding Engine. The “pseudo” FPCs and PICs aredescribed in ACX2000 and ACX2100 Routers Hardware and CLI TerminologyMapping
Table 3: Major Router Hardware Components
J SeriesPTXSeriesT Series
MXSeriesM Series
XXXXXRouting Engines
XXXControl Board
XXXSwitch Interface Board(SIB)
XForwarding Engine Board(FEB)
XXXXXPower Supply
XXXXXCooling System
XDensePortConcentrators(DPC)
XSwitch Control Board(SCB)
XXXFlexible PICConcentrators (FPC)
XPhysical InterfaceModule(PIM)
XXXPhysical Interface Card(PIC)
Flexible PIC Concentrators (FPCs) are each populated by PICs for various interface types.
On some routers, the PICs are installed directly in the chassis.
For information about specific components in your router, see the hardware guide for
your router.
RelatedDocumentation
Junos OS Architecture Overview on page 5•
Junos OS Commit Model for Router or Switch Configuration
The router or switch configuration is saved using a commit model: that is, a candidate
configuration is modified as desired and then committed to the system. Once a
configuration has been committed, the router or switch checks the configuration for
syntax errors, and if no errors are found, the configuration is saved as juniper.conf.gz and
activated. The former active configuration file is saved as the first rollback configuration
Copyright © 2016, Juniper Networks, Inc.8
System Basics: Getting Started Configuration Guide

file (juniper.conf.1.gz), and all other rollback configuration files are incremented by 1. For
example, juniper.conf.1.gz is incremented to juniper.conf.2.gz, making it the second rollback
configuration file. The router or switch can have a maximum of 49 rollback configurations
(1–49) saved on the system.
On the router or switch, the active configuration file and the first three rollback files
(juniper.conf.gz.1, juniper.conf.gz.2, juniper.conf.gz.3 ) are located in the /config directory.
If the file rescue.conf.gz is saved on the system, this file should also be saved in the /config
directory. The factory default files are located in the /etc/config directory.
There are two mechanisms used to propagate the configurations between Routing
Engines within a router or switch:
• Synchronization—Propagates a configuration from one Routing Engine to a second
Routing Engine within the same router or switch chassis.
NOTE: The QFX3500 switch has only one Routing Engine.
To synchronize configurations, use the commit synchronizeCLI command. If one of the
Routing Engines is locked, the synchronization fails. If synchronization fails because of
a locked configuration file, you can use the commit synchronize force command. This
command overrides the lock and synchronizes the configuration files.
• Distribution—Propagates a configuration across the routing plane on a multichassis
router or switch. Distribution occurs automatically. There is no user command available
to control the distribution process. If a configuration is locked during a distribution of
a configuration, the locked configuration does not receive the distributed configuration
file, so the synchronization fails. You need to clear the lock before the configuration
and resynchronize the routing planes.
NOTE: When you use the commit synchronize force CLI command on a
multichassis platform, the forced synchronizationof the configuration filesdoes not affect the distribution of the configuration file across the routingplane. If a configuration file is locked on a router or switch remote from therouter or switchwhere the commandwas issued, the synchronization failson the remote router or switch. You need to clear the lock and reissue thesynchronization command.
RelatedDocumentation
Configuring Junos OS for the First Time on a Router or Switch with a Single Routing
Engine on page 78
•
Junos OS Routing Engine Components and Processes
The Junos OS runs on the Routing Engine. The Junos OS consists of software processes
that support Internet routing protocols, control router interfaces and the router chassis,
and enable router system management. The Junos OS processes run on top of a kernel,
9Copyright © 2016, Juniper Networks, Inc.
Chapter 1: Junos OS Overview

which enables communication between processes and provides a direct link to the Packet
Forwarding Engine software. The Junos OS can be used to configure routing protocols
and router interface properties, as well as to monitor and troubleshoot protocol and
network connectivity problems.
The Routing Engine software consists of several software processes that control router
functionality and a kernel that provides the communication among all the processes:
Routing Engine Kernel
The Routing Engine kernel provides the underlying infrastructure for all Junos OS
processes. In addition, it provides the link between the routing tables and the Routing
Engine’s forwarding table. It is also responsible for all communication with the Packet
Forwarding Engine, which includes keeping the Packet Forwarding Engine’s copy of the
forwarding table synchronized with the master copy in the Routing Engine.
Initialization Process
Within the Junos OS, an initialization process (init) starts and monitors all the other
software processes when the router boots.
If a software process terminates or fails to start when called, the init process attempts
to restart it a limited number of times and logs any failure information for further
investigation.
Management Process
The management process (mgd) manages the configuration of the router and all user
commands. The management process is responsible for notifying other processes when
a new configuration is committed. A dedicated management process handles Junos XML
protocol XML requests from its client, which may be the command-line interface (CLI)
or any Junos XML protocol client.
Process Limits
There are limits to the total number of Junos OS processes that can run simultaneously
on a system. There are also limits set for the maximum number of iterations of any single
process. The limit for iterations of any single process can only be reached if the limit of
overall system processes is not exceeded.
Access methods such as telnet and SSH spawn multiple system processes for each
session created. For this reason, it might not be possible to simultaneously support the
maximum number of access sessions for multiple services.
Routing Protocol Process
Within the Junos OS, the routing protocol process (rpd) controls the routing protocols
that run on the router. The rpd process starts all configured routing protocols and handles
all routing messages. It maintains one or more routing tables, which consolidate the
routing information learned from all routing protocols. From this routing information, the
routing protocol process determines the active routes to network destinations and installs
these routes into the Routing Engine’s forwarding table. Finally, it implements routing
policy, which enables you to control the routing information that is transferred between
Copyright © 2016, Juniper Networks, Inc.10
System Basics: Getting Started Configuration Guide

the routing protocols and the routing table. Using routing policy, you can filter and limit
the transfer of information as well as set properties associated with specific routes.
Interface Process
The Junos interface process enables you to configure and control the physical interface
devices and logical interfaces present in a router. You can configure interface properties
such as the interface location (which slot the Flexible PIC Concentrator [FPC] is installed
in and which location on the FPC the Physical Interface Card [PIC] is installed in), the
interface encapsulation, and interface-specific properties. You can configure the interfaces
currently present in the router, as well as interfaces that are not present but that you
might add later.
The Junos interface process communicates through the Junos kernel with the interface
process in the Packet Forwarding Engine, enabling the Junos OS to track the status and
condition of the router’s interfaces.
Chassis Process
The Junos chassis process enables you to configure and control the properties of the
router, including conditions that trigger alarms. The chassis process (chassisd) on the
Routing Engine communicates directly with its peer processes running on the Packet
Forwarding Engine.
SNMP andMIB II Processes
The Junos OS supports the Simple Network Management Protocol (SNMP), which helps
administrators monitor the state of a router. The software supports SNMP version 1
(SNMPv1), version 2 (SNMPv2, also known as version 2c, or v2c), and version 3 (SNMPv3).
The Junos implementation of SNMP does not include any of the security features that
were originally included in the IETF SNMP drafts but were later dropped. The SNMP
software is controlled by the Junos SNMP and Management Information Base II (MIB II)
processes, which consist of an SNMP master agent and various subagents.
RelatedDocumentation
Junos OS Architecture Overview on page 5•
List of Junos OS Processes
Junos OS consists of multiple processes that run on different platforms and have unique
functions. The separation of functions provides operational stability, because each
process accesses its own protected memory space.
Table 4 on page 12 describes the processes that run only on MX Series 3D Universal Edge
Routers.
11Copyright © 2016, Juniper Networks, Inc.
Chapter 1: Junos OS Overview

Table 4: Junos OS Processes onMX Series PlatformOnly
DescriptionNameProcess
Defines the operation of synchronous Ethernetand Precision Time Protocol (PTP) on aJuniper MX Series router. The operationincludes communication with the PacketForwarding Engine (clock-sync module) toprogram and process clock events from theEEC clock.
Operates the PTP stack, exchanges packets,and handles the configuration changes for themodular MX Series (MX80).
Controls the configuration and monitoring ofthe overall operation of the PTP functionalityfor chassis-based MX platforms (MX240,MX480, and so on).
clksyncdClksync process (RE)
Programs and monitors the modular interfacecard (MIC), the CPLD, and the EEC clock. Peerof the clksyncd process module.
Captures all PTP and Synchronous Ethernetstatistics on the Packet Forwarding Engineand provides them to the Routing Engine.
clock-syncClock-sync process(PFE)
Exchanges proprietary Junos OS messagesbetween two Juniper MX Series routers thattake part in a multi-chassis link aggregationgroup (LAG).
iccpdInterchassiscommunication process
Acts as a relay process to collect interfacestatistics for all software development kit(SDK) applications.
Interacts with the pfed process to collect thelogical interface statistics for SDKapplications.
stats-agentdStatistics agent process
Table 5 on page 12 lists all the other processes that are common across platforms.
Table 5: Junos OS Processes
DescriptionProcessName
Manages the configuration for stateful firewall,Network Address Translation (NAT), intrusiondetection service (IDS), and IP Security (IPsec)services on the Adaptive Services PIC.
adaptive-servicesAdaptive services process
Configures the system alarm.alarm-controlAlarm control process
Copyright © 2016, Juniper Networks, Inc.12
System Basics: Getting Started Configuration Guide

Table 5: Junos OS Processes (continued)
DescriptionProcessName
Works with a special Internet Group ManagementProtocol (IGMP) session to collect outgoinginterface mapping events in a scalable manner.
ancpd-serviceAccess Node Control Protocol (ANCP)process
Identifies an application using intrusion detectionand prevention (IDP) to allow or deny traffic basedon applications running on standard or nonstandardports.
application-identificationApplication identification process
Gathers statistical data that can be used for generalnetwork monitoring, analyzing, and tracking usagepatterns, for billing a user based upon the amountof time or type of services accessed.
audit-processRADIUS accounting process
Configures interfaces automatically.auto-configurationAuto-configuration process
Enables a router, switch, or interface to act as aDynamic Host Configuration Protocol (DHCP) orbootstrap protocol (BOOTP) relay agent. DHCPrelaying is disabled.
bootpBoot process
Specifies the location to which a subscriber's initialWeb browser session is redirected, enabling initialprovisioning and service selection for the subscriber.
captive-portal-content-deliveryCaptive portal content delivery process
(M10, M10i, M7i, and MX Series routers only)Establishes L2TP tunnels and Point-to-PointProtocol (PPP) sessions through L2TP tunnels.
ce-l2tp-serviceUniversal Edge Layer 2 TunnelingProtocol process
Monitors the physical link between two switches.cfmEthernet OAM connectivity faultmanagement process
Manages the chassis.chassis-controlChassis control process
Controls the router's or switch’s CoS configuration.class-of-serviceClass of service process
Uses Synchronous Ethernet (SyncE) for externalclock synchronization .
clksyncd-serviceEthernet clock synchronization process
Controls the I/O of the craft interface.craft-controlCraft interface I/O control process
(EX Series switches and MX Series routers only)Manages the replication of updates from the masterto the slave in the database management system.
database-replicationDatabase replication process
Traces the path taken by the packet through thenetwork.
datapath-trace-serviceDatapath trace process
13Copyright © 2016, Juniper Networks, Inc.
Chapter 1: Junos OS Overview
Table 5: Junos OS Processes (continued)
DescriptionProcessName
(EX Series switches and MX Series routers only)Enables a DHCP server to allocate network IPaddresses and deliver configuration settings to clienthosts without user intervention.
dhcp-serviceDynamic Host Configuration Protocolprocess
Implements the Diameter protocol which uses theTransmission Control Protocol (TCP) and StreamControl Transmission Protocol (SCTP) instead ofUser Datagram Protocol (UDP), for monitoring thenetwork.
diameter-serviceDiameter process
Checks the health of the hard disk drive on theRouting Engine.
disk-monitoringDisk monitoring process
Controls the DFC configurations on MonitoringServices III PICs.
dynamic-flow-captureDynamic flow capture (DFC) process
Logs the ECC parity errors into the memory on theRouting Engine.
ecc-error-loggingECC parity errors logging process
Provides IEEE 802.1ag OAM CFM databaseinformation for CFM maintenance association endpoints (MEPs) in a CFM session.
ethernet-connectivity-fault-managementConnectivity fault management (CFM)process
(EX Series switches and MX Series routers only)Provides the OAM link fault management (LFM)information for Ethernet interfaces.
ethernet-link-fault-managementEthernet OAM Link-Fault-Managementprocess
Configures the application to handle all generatedevents.
event-processing
or
eventd
Event processing process
Manages the firewall configuration and enablesaccepting or rejecting packets that are transiting aninterface on a router or switch.
firewallFirewall process
(EX Series switches and MX Series routers only)Manages general authentication of a user.
general-authentication-serviceGeneral authentication process
Synchronizes data within a set of two (or more) PEsthat form a redundancy group (RG).
iccp-serviceInter-Chassis Communication Protocol(ICCP) process
Enables various attack detection and preventiontechniques on traffic traversing the network.
idp-policyIDP policy process
Provides bidirectional exchange of managementinformation between two Asynchronous TransferMode (ATM) interfaces across a physicalconnection.
ilmiIntegrated Local Management Interfaceprocess
Copyright © 2016, Juniper Networks, Inc.14
System Basics: Getting Started Configuration Guide

Table 5: Junos OS Processes (continued)
DescriptionProcessName
Configures the IP multicast family.inet-processInet process
Initializes the USB modem.initInit process
Controls the router's or switch’s physical interfacedevices and logical interfaces.
interface-controlInterface control process
Replicates the state of the backup Routing Enginewhen graceful Routing Engine switchover (GRES)is configured.
kernel-replicationKernel replication process
Enables a router to:
• Learn unicast media access control (MAC)addresses to avoid flooding the packets to all theports in a bridge domain.
• Create a source MAC entry in its source anddestination MAC tables for each MAC addresslearned from packets received on ports thatbelong to the bridge domain.
l2-learningLayer 2 address flooding and learningprocess
Enables features such as Layer 2 protocol tunnelingand nonstop bridging.
l2cpd-serviceLayer 2 Control Protocol process
The process:
• Provides a standardized means for exchanginginformation between partner systems on a link.
• Allows the link aggregation control instances toreach agreement on the identity of the LinkAggregation Group (LAG) to which the linkbelongs, and then to move the link to that LAG.
• Enables the transmission and reception processesfor the link to function in an orderly manner.
lacpLink Aggregation Control Protocolprocess
Manages traffic engineering links.link-managementLink management process
Regulates the collection of statistics related toapplications and application groups and tracking ofinformation about dynamic subscribers and staticinterfaces.
local-policy-decision-functionLocal policy decision function process
Manages multiple instances of the routing protocolsprocess (rpd) on a machine running logical routers.
logical-system-mux
or
lrmuxd
Logical system multiplexer process
Configures MAC address validation that enables arouter to validate if received packets contain atrusted IP source and an Ethernet MAC sourceaddress.
mac-validationMAC validation process
15Copyright © 2016, Juniper Networks, Inc.
Chapter 1: Junos OS Overview

Table 5: Junos OS Processes (continued)
DescriptionProcessName
Provides the router's MIB II agent.mib-processManagement Information Base II process
Configures Junos OS Mobile IP features.mobile-ipMobile IP process
(EX Series switches and MX Series routers only)Completes NFS mount requests.
mountd-serviceNFS mount requests process
Enables tracing of forwarding equivalence classes(FECs) for LDP Layered Service Providers (LSPs).
mpls-tracerouteMPLS Periodic Traceroute process
Configures mutliservice edge routers.mspdMultiservice process
(EX Series switches and MX Series routers only)Makes Layer 3 information, such as the MACaddresses of members of a multicast group, knownto Layer 2 devices, such as VLAN switches.
multicast-snoopingMulticast Snooping process
Enables a router or a switch to resolve hostnamesinto addresses.
named-serviceDNS server process
Displays the process, which specifies the maximumlength of time that the router waits for its neighborto re-establish an LDP session.
neighbor-livenessBidirectional Forwarding Detectionprocess
Provides remote file access for applications thatneed NFS-based transport.
nfsd-serviceRemote NFS server process
Provides the mechanisms to synchronize time andcoordinate time distribution in a large, diversenetwork.
ntpNetwork time process
Enables the application of policies to dynamicsubscribers that are controlled by a subscribertermination device.
packet-triggered-subscribersPacket-triggered dynamic subscribersand policy control (PTCP) process
Enables peer selection.peer-selection-servicePeer selection service process
Processes a variety of time-sensitive periodic tasksso that other processes can more optimally directtheir resources.
periodic-packet-servicesPeriodic packet management process
Gathers and reports Packet Forwarding Enginestatistics.
pfedPacket Forwarding Engine process
Configures the Packet Gateway Control Protocol(PGCP) that is required for the border gatewayfunction (BGF) feature.
pgcp-service
or
pgcpd
Packet gateway service process
Copyright © 2016, Juniper Networks, Inc.16
System Basics: Getting Started Configuration Guide

Table 5: Junos OS Processes (continued)
DescriptionProcessName
Enables a reliable transport layer for multicastapplications.
pgmPragmatic General Multicast process
Enables PICs to send special logging information tothe Routing Engine for archiving on the hard disk.
pic-services-logging
or
fsad (the file system accessdaemon)
PIC services logging process
Enables transporting IP traffic across point-to-pointlinks.
pppPoint-to-Point Protocol (PPP) process
Enables transporting IP traffic across universal edgerouters.
ppp-serviceUniversal edge PPP process
Allows users to connect to a network of hosts overa bridge or access concentrator.
pppoePoint-to-Point Protocol over Ethernetprocess
Extends the SNMP RMON alarm infrastructure toprovide predefined monitoring for a selected set ofobject instances (such as file system usage, CPUusage, and memory usage) and dynamic objectinstances (such as Junos OS processes).
process-monitor
or
pmond
Process health monitor process
Serves as an active or backup process of anapplication server and can be configured to processtraffic for more than one logical application server.
redundancy-interface-processRedundancy interface managementprocess
Provides the ping and traceroute MIBs.remote-operationsRemote operations process
Enables cleaning of resources by entities other thanthe application itself.
resource-cleanupResource cleanup process
Directs forwarding on the basis of routing tables,which maintain a record of the routes to variousnetwork destinations.
routingRouting process
Performs packet sampling based on particular inputinterfaces and various fields in the packet header.
samplingTraffic sampling control process
Configures the session border controller functionalitythat enables delivery of voice, video, and othermultimedia services with assured quality andsecurity.
sbc-configuration-processSession Border Control SBCconfiguration process
Runs on the Routing Engine and enablescommunication between the SDK application andJunos OS. Although the SDK service process ispresent on the router, it is turned off by default.
sdk-serviceSDK service process
17Copyright © 2016, Juniper Networks, Inc.
Chapter 1: Junos OS Overview

Table 5: Junos OS Processes (continued)
DescriptionProcessName
(EX Series switches and MX Series routers only)Provides support for protecting NDP messages.
secure-neighbor-discovery
or
send
Secure Neighbor Discovery (SND)protocol process
Enables Junos OS to work with the Session andResource Control (SRC) software.
service-deploymentService Deployment System (SDX)process
Enables the monitoring of network devices from acentral location, and provides the router's or switch’sSNMP master agent.
snmpSimple Network Management Protocolprocess
Monitors any SONET interface that participates inAPS.
sonet-apsSONET Automatic Protection Switching(APS) process
Associates subscribers with statically configuredinterfaces, and provides dynamic service activationand activation for these subscribers.
static-subscribersStatic subscribers process
Enables the Operations, Administration, andMaintenance of Layer 2 tunneled networks.
tunnel-oamdTunnel OAM process
(EX Series switches and MX Series routers only)Enables hosts on a LAN to make use of redundantrouting platforms on that LAN without requiringmore than the static configuration of a single defaultroute on the hosts.
vrrpVirtual Router Redundancy Protocol(VRRP) process
Enables the watchdog timer when Junos OSencounters a problem.
watchdogWatchdog timer process
Junos OS Support for IPv4 Routing Protocols
Junos OS implements full IP routing functionality, providing support for IP version 4 (IPv4).
The routing protocols are fully interoperable with existing IP routing protocols, and they
have been developed to provide the scale and control necessary for the Internet core.
Junos OS provides the following routing and Multiprotocol Label Switching (MPLS)
applications protocols:
• Unicast routing protocols:
Copyright © 2016, Juniper Networks, Inc.18
System Basics: Getting Started Configuration Guide

• BGP—Border Gateway Protocol, version 4, is an exterior gateway protocol (EGP)
that guarantees loop-free exchange of routing information between routing domains
(also called autonomous systems). BGP, in conjunction with Junos routing policy,
provides a system of administrative checks and balances that can be used to
implement peering and transit agreements.
• ICMP—Internet Control Message Protocol router discovery enables hosts to discover
the addresses of operational routers on the subnet.
• IS-IS—Intermediate System-to-Intermediate System is a link-state interior gateway
protocol (IGP) for IP networks that uses the shortest-path-first (SPF) algorithm,
which also is referred to as the Dijkstra algorithm, to determine routes. The Junos
IS-IS software is a new and complete implementation of the protocol, addressing
issues of scale, convergence, and resilience.
• OSPF—Open Shortest Path First, version 2, is an IGP that was developed for IP
networks by the Internet Engineering Task Force (IETF). OSPF is a link-state protocol
that makes routing decisions based on the SPF algorithm. The Junos OSPF software
is a new and complete implementation of the protocol, addressing issues of scale,
convergence, and resilience.
• RIP—Routing Information Protocol, version 2, is a distance-vector IGP for IP networks
based on the Bellman-Ford algorithm. RIP dynamically routes packets between a
subscriber and a service provider without the subscriber having to configure BGP or
participate in the service provider’s IGP discovery process.
• Multicast routing protocols:
• DVMRP—Distance Vector Multicast Routing Protocol is a dense-mode
(flood-and-prune) multicast routing protocol.
• IGMP—Internet Group Management Protocol, versions 1 and 2, is used to manage
membership in multicast groups.
• MSDP—Multicast Source Discovery Protocol enables multiple Protocol Independent
Multicast (PIM) sparse mode domains to be joined. A rendezvous point (RP) in a
PIM sparse mode domain has a peer relationship with an RP in another domain,
enabling it to discover multicast sources from other domains.
• PIM sparse mode and dense mode—Protocol-Independent Multicast is a multicast
routing protocol. PIM sparse mode routes to multicast groups that might span
wide-area and interdomain internets. PIM dense mode is a flood-and-prune protocol.
• SAP/SDP—Session Announcement Protocol and Session Description Protocol handle
conference session announcements.
• MPLS applications protocols:
• LDP—The Label Distribution Protocol provides a mechanism for distributing labels
in non-traffic-engineered applications. LDP enables routers to establish
label-switched paths (LSPs) through a network by mapping network layer routing
information directly to data-link layer switched paths. LSPs created by LDP can also
traverse LSPs created by the Resource Reservation Protocol (RSVP).
19Copyright © 2016, Juniper Networks, Inc.
Chapter 1: Junos OS Overview

• MPLS—Multiprotocol Label Switching, formerly known as tag switching, enables
you to manually or dynamically configure LSPs through a network. It lets you direct
traffic through particular paths rather than rely on the IGP’s least-cost algorithm to
choose a path.
• RSVP—The Resource Reservation Protocol, version 1, provides a mechanism for
engineering network traffic patterns that is independent of the shortest path decided
upon by a routing protocol. RSVP itself is not a routing protocol; it operates with
current and future unicast and multicast routing protocols. The primary purpose of
the Junos RSVP software is to support dynamic signaling for MPLS LSPs.
RelatedDocumentation
Junos OS Overview on page 3•
• Junos OS Support for IPv6 Routing Protocols on page 20
Junos OS Support for IPv6 Routing Protocols
The Junos OS implements IP routing functionality, providing support for IP version 6
(IPv6). The routing protocols have been developed to provide the scale and control
necessary for the Internet core.
The software supports the following unicast routing protocols:
• BGP—Border Gateway Protocol version 4, is an EGP that guarantees loop-free exchange
of routing information between routing domains (also called autonomous systems).
BGP, in conjunction with Junos routing policies, provides a system of administrative
checks and balances that can be used to implement peering and transit agreements.
• ICMP—Internet Control Message Protocol router discovery enables hosts to discover
the addresses of operational routers on the subnet.
• IS-IS—Intermediate System-to-Intermediate System is a link-state IGP for IP networks
that uses the SPF algorithm, which also is referred to as the Dijkstra algorithm, to
determine routes. The Junos OS supports a new and complete implementation of the
protocol, addressing issues of scale, convergence, and resilience.
• OSPF version 3 (OSPFv3) supports IPv6. The fundamental mechanisms of OSPF such
as flooding, designated router (DR) election, area-based topologies, and the SPF
calculations remain unchanged. Some differences exist either because of changes in
protocol semantics between IPv4 and IPv6, or because of the need to handle the
increased address size of IPv6.
• RIP—Routing Information Protocol version 2 is a distance-vector IGP for IP networks
based on the Bellman-Ford algorithm. RIP dynamically routes packets between a
subscriber and a service provider without the subscriber having to configure BGP or to
participate in the service provider’s IGP discovery process.
RelatedDocumentation
Junos OS Overview on page 3•
• Junos OS Support for IPv4 Routing Protocols on page 18
Copyright © 2016, Juniper Networks, Inc.20
System Basics: Getting Started Configuration Guide

Junos OS Routing and Forwarding Tables
A major function of the Junos OS routing protocol process is to maintain the Routing
Engine’s routing tables and use these tables to determine the active routes to network
destinations. The routing protocol process then installs these routes into the Routing
Engine’s forwarding table. The Junos OS kernel then copies this forwarding table to the
Packet Forwarding Engine.
The routing protocol process maintains multiple routing tables. By default, it maintains
the following three routing tables. You can configure additional routing tables to suit your
requirements.
• Unicast routing table—Stores routing information for all unicast routing protocols
running on the router. BGP, IS-IS, OSPF, and RIP all store their routing information in
this routing table. You can configure additional routes, such as static routes, to be
included in this routing table. BGP, IS-IS, OSPF, and RIP use the routes in this routing
table when advertising routing information to their neighbors.
• Multicast routing table (cache)—Stores routing information for all the running multicast
protocols. DVMRP and PIM both store their routing information in this routing table,
and you can configure additional routes to be included in this routing table.
• MPLS routing table—Stores MPLS path and label information.
With each routing table, the routing protocol process uses the collected routing
information to determine active routes to network destinations.
For unicast routes, the routing protocol process determines active routes by choosing
the most preferred route, which is the route with the lowest preference value. By default,
the route’s preference value is simply a function of how the routing protocol process
learned about the route. You can modify the default preference value using routing policy
and with software configuration parameters.
For multicast traffic, the routing protocol process determines active routes based on
traffic flow and other parameters specified by the multicast routing protocol algorithms.
The routing protocol process then installs one or more active routes to each network
destination into the Routing Engine’s forwarding table.
RelatedDocumentation
Routing Policy Overview on page 21•
Routing Policy Overview
By default, all routing protocols place their routes into the routing table. When advertising
routes, the routing protocols by default advertise only a limited set of routes from the
routing table. Specifically, each routing protocol exports only the active routes that were
learned by that protocol. In addition, the interior gateway protocols (IS-IS, OSPF, and
RIP) export the direct (interface) routes for the interfaces on which they are explicitly
configured.
21Copyright © 2016, Juniper Networks, Inc.
Chapter 1: Junos OS Overview

You can control the routes that a protocol places into each table and the routes from
that table that the protocol advertises. You do this by defining one or more routing policies
and then applying them to the specific routing protocol.
Routing policies applied when the routing protocol places routes into the routing table
are referred to as import policies because the routes are being imported into the routing
table. Policies applied when the routing protocol is advertising routes that are in the
routing table are referred to as export policies because the routes are being exported
from the routing table. In other words, the terms import and export are used with respect
to the routing table.
A routing policy enables you to control (filter) which routes a routing protocol imports
into the routing table and which routes a routing protocol exports from the routing table.
A routing policy also enables you to set the information associated with a route as it is
being imported into or exported from the routing table. Filtering imported routes enables
you to control the routes used to determine active routes. Filtering routes being exported
from the routing table enables you to control the routes that a protocol advertises to its
neighbors.
You implement routing policy by defining policies. A policy specifies the conditions to
use to match a route and the action to perform on the route when a match occurs. For
example, when a routing table imports routing information from a routing protocol, a
routing policy might modify the route’s preference, mark the route with a color to identify
it and allow it to be manipulated later, or prevent the route from even being installed in
a routing table. When a routing table exports routes into a routing protocol, a policy might
assign metric values, modify the BGP community information, tag the route with additional
information, or prevent the route from being exported altogether. You also can define
policies for redistributing the routes learned from one protocol into another protocol.
RelatedDocumentation
Junos OS Routing and Forwarding Tables on page 21•
• Junos OS Support for IPv4 Routing Protocols on page 18
• Junos OS Support for IPv6 Routing Protocols on page 20
Junos OS Support for VPNs
The Junos OS supports several types of virtual private networks (VPNs):
• Layer 2 VPNs—A Layer 2 VPN links a set of sites that share routing information, and
whose connectivity is controlled by a collection of policies. A Layer 2 VPN is not aware
of routes within a customer’s network. It simply provides private links between a
customer’s sites over the service provider’s existing public Internet backbone.
• Layer 3 VPNs—A Layer 3 VPN is the same thing as a Layer 2 VPN, but it is aware of
routes within a customer’s network, requiring more configuration on the part of the
service provider than a Layer 2 VPN. The sites that make up a Layer 3 VPN are connected
over a service provider’s existing public Internet backbone.
• Interprovider VPNs—An interprovider VPN supplies connectivity between two VPNs in
separate autonomous systems (ASs). This functionality can be used by a VPN customer
Copyright © 2016, Juniper Networks, Inc.22
System Basics: Getting Started Configuration Guide

with connections to several Internet service providers (ISPs), or different connections
to the same ISP in various geographic regions.
• Carrier-of-carrier VPNs—Carrier-of-carrier VPNs allow a VPN service provider to supply
VPN service to a customer who is also a service provider. The latter service provider
supplies Internet or VPN service to an end customer.
RelatedDocumentation
Junos OS Overview on page 3•
Junos OS Configuration Basics
Your router comes with Junos OS installed on it. When you power on the router, all
software starts automatically. You simply need to configure the software so that the
router will be ready to participate in the network.
To configure the Junos OS, you must specify a hierarchy of configuration statements that
define the preferred software properties. You can configure all properties of the Junos
OS, including interfaces, general routing information, routing protocols, and user access,
as well as some system hardware properties. After you have created a candidate
configuration, you commit the configuration to be evaluated and activated by the Junos
OS.
RelatedDocumentation
Junos OS Configuration from External Devices on page 23•
• Methods for Configuring Junos OS on page 34
• Initial Router or Switch Configuration Using the Junos OS on page 41
Junos OS Configuration from External Devices
You can configure the router from a system console connected to the router’s console
port or by using Telnet to access the router remotely. The router provides three ports on
the craft interface for connecting external management devices to the Routing Engine
and the Junos OS:
• Console port—Connects a system console using an RS-232 serial cable.
• Auxiliary port—Connects a laptop or modem using an RS-232 serial cable.
• Ethernet management port—Connects the Routing Engine to a management LAN (or
any other device that plugs into an Ethernet connection) for remote management
through a PC or other client device. The Ethernet port is 10/100 megabits per second
(Mbps) autosensing and requires an RJ-45 connector.
RelatedDocumentation
Methods for Configuring Junos OS on page 34•
• Configuring the Junos OS to Set Console and Auxiliary Port Properties on page 70
23Copyright © 2016, Juniper Networks, Inc.
Chapter 1: Junos OS Overview

Junos OS Tracing and Logging Operations
Tracing and logging operations allow you to track events that occur in the router—both
normal router operations and error conditions—and to track the packets that are generated
by or passed through the router. The results of tracing and logging operations are placed
in files in the /var/log directory on the router.
The Junos OS provides an option to do remote tracing for specific processes, which greatly
reduces use of the router’s internal storage for tracing and is analogous to remote system
logging. You configure remote tracing system-wide using the tracing statement at the
[edit system]hierarchy level. By default, remote tracing is not configured. You can disable
remote tracing for specific processes using the no-remote-trace statement at the [edit
process-name traceoptions] hierarchy level. This feature does not alter local tracing
functionality in any way, and logging files are stored on the router.
The Junos OS supports remote tracing for the following processes:
• chassisd—Chassis-control process
• eventd—Event-processing process
• cosd—Class-of-service process
• spd—Adaptive-services process
Logging operations use a system logging mechanism similar to the UNIX syslogd utility
to record systemwide, high-level operations, such as interfaces going up or down and
users logging in to or out of the router. You configure these operations by using the syslog
statement at the [edit system] hierarchy level, as described in Junos OS System Log
Configuration Overview, and by using the options statement at the [edit routing-options]
hierarchy level, as described in the Junos OS Routing Protocols Configuration Guide.
Tracing operations record more detailed messages about the operation of routing
protocols, such as the various types of routing protocol packets sent and received, and
routing policy actions. You configure tracing operations using the traceoptions statement.
You can define tracing operations in different portions of the router configuration:
• Global tracing operations—Define tracing for all routing protocols. You define these
tracing operations at the [edit routing-options] hierarchy level of the configuration.
• Protocol-specific tracing operations—Define tracing for a specific routing protocol. You
define these tracing operations in the [edit protocol] hierarchy when configuring the
individual routing protocol. Protocol-specific tracing operations override any equivalent
operations that you specify in the global traceoptions statement. If there are no
equivalent operations, they supplement the global tracing options. If you do not specify
any protocol-specific tracing, the routing protocol inherits all the global tracing
operations.
• Tracing operations within individual routing protocol entities—Some protocols allow
you to define more granular tracing operations. For example, in Border Gateway Protocol
(BGP), you can configure peer-specific tracing operations. These operations override
any equivalent BGP-wide operations or, if there are no equivalents, supplement them.
Copyright © 2016, Juniper Networks, Inc.24
System Basics: Getting Started Configuration Guide

If you do not specify any peer-specific tracing operations, the peers inherit, first, all the
BGP-wide tracing operations and, second, the global tracing operations.
• Interface tracing operations—Define tracing for individual router interfaces and for the
interface process itself. You define these tracing operations at the [edit interfaces]
hierarchy level of the configuration as described in the Junos® OS Network Interfaces.
• Remote tracing—To enable system-wide remote tracing, include thedestination-override
syslog host statement at the [edit system tracing] hierarchy level. This specifies the
remote host running the system log process (syslogd), which collects the traces. Traces
are written to file(s) on the remote host per the syslogd configuration in /etc/syslog.conf.
By default remote tracing is not configured.
To override the system-wide remote tracing configuration for a particular process,
include theno-remote-tracestatement at the [editprocess-name traceoptions]hierarchy.
When no-remote-trace is enabled, the process does local tracing.
NOTE: When remote tracing is configured, traces will go to the remotehost.
To collect traces, use the local0 facility as the selector in /etc/syslog.confon the remote
host. To separate traces from various processes into different files, include the process
name or trace-file name if it is specified at the [edit process-name traceoptions file]
hierarchy level, in the Program field in /etc/syslog.conf. If your syslog server supports
parsing hostname and program-name, then you can separate traces from the various
processes.
RelatedDocumentation
• Junos OS System Log Configuration Overview
25Copyright © 2016, Juniper Networks, Inc.
Chapter 1: Junos OS Overview

Copyright © 2016, Juniper Networks, Inc.26
System Basics: Getting Started Configuration Guide

CHAPTER 2
Junos OS Security Overview
• Junos OS Default Settings for Router Security on page 27
• Junos OS Features for Router Security on page 27
Junos OS Default Settings for Router Security
The Junos OS protects against common router security weaknesses with the following
default settings:
• The Junos OS does not forward directed broadcast messages. Directed broadcast
services send ping requests from a spoofed source address to a broadcast address
and can be used to attack other Internet users. For example, if broadcast ping messages
were allowed on the 200.0.0.0/24 network, a single ping request could result in up to
254 responses to the supposed source of the ping. The source would actually become
the victim of a denial-of-service (DoS) attack.
• Only console access to the router is enabled by default. Remote management access
to the router and all management access protocols, including Telnet, FTP, and SSH
(Secure Shell), are disabled by default.
• The Junos OS does not support the SNMP set capability for editing configuration data.
Although the software supports the SNMP set capability for monitoring and
troubleshooting the network, this support exposes no known security issues. (You can
configure the software to disable this SNMP set capability.)
• The Junos OS ignores martian addresses that contain the following prefixes:0.0.0.0/8,
127.0.0.0/8, 128.0.0.0/16, 191.255.0.0/16, 192.0.0.0/24, 223.255.55.0/24, and
240.0.0.0/4. Martian addresses are reserved host or network addresses about which
all routing information should be ignored.
Junos OS Features for Router Security
Router security consists of three major elements: physical security of the router, operating
system security, and security that can be effected through configuration. Physical security
involves restricting access to the router. Exploits that can easily be prevented from remote
locations are extremely difficult or impossible to prevent if an attacker can gain access
to the router’s management port or console. The inherent security of the Junos operating
system also plays an important role in router security. The Junos OS is extremely stable
27Copyright © 2016, Juniper Networks, Inc.

and robust. The Junos OS also provides features to protect against attacks, allowing you
to configure the router to minimize vulnerabilities.
The following are Junos OS features available to improve router security:
• Methods of Remote Access for Router Management on page 28
• Junos OS Supported Protocols and Methods for User Authentication on page 28
• Junos OS Plain-Text Password Requirements on page 29
• Junos OS Support for Routing Protocol Security Features and IPsec on page 30
• Junos OS Support for Firewall Filters on page 30
• Junos OS Auditing Support for Security on page 31
Methods of Remote Access for Router Management
When you first install the Junos OS, all remote access to the router is disabled, thereby
ensuring that remote access is possible only if deliberately enabled by an authorized
user. You can establish remote communication with a router in one of the following ways:
• Out-of-band management—Enables connection to the router through an interface
dedicated to router management. Juniper Networks routers support out-of-band
management with a dedicated management Ethernet interface, as well as EIA-232
console and auxiliary ports. On all routers other than the TX Matrix Plus router, T1600
router, T1600 routers connected to a TX Matrix Plus router in a routing matrix, T640
routers with a Routing Engine supporting 64-bit Junos OS, and PTX Series Transport
switches, the management interface is fxp0. On a TX Matrix Plus router, T1600 router,
T1600 routers in a routing matrix, T640 routers with a Routing Engine supporting 64-bit
Junos OS, and PTX Series Transport switches, the management Ethernet Interface is
labeled em0. The management Ethernet interface connects directly to the Routing
Engine. No transit traffic is allowed through this interface, providing complete separation
of customer and management traffic and ensuring that congestion or failures in the
transit network do not affect the management of the router.
• Inband management—Enables connection to the routers using the same interfaces
through which customer traffic flows. Although this approach is simple and requires
no dedicated management resources, it has some disadvantages:
• Management flows and transit traffic flows are mixed together. Any attack traffic
that is mixed with the normal traffic can affect the communication with the router.
• The links between router components might not be totally trustworthy, leading to
the possibility of wiretapping and replay attacks.
For management access to the router, the standard ways to communicate with the router
from a remote console are with Telnet and SSH. SSH provides secure encrypted
communications and is therefore useful for inband router management. Telnet provides
unencrypted, and therefore less secure, access to the router.
Junos OS Supported Protocols andMethods for User Authentication
On a router, you can create local user login accounts to control who can log in to the
router and the access privileges they have. A password, either an SSH key or a Message
Copyright © 2016, Juniper Networks, Inc.28
System Basics: Getting Started Configuration Guide

Digest 5 (MD5) password, is associated with each login account. To define access
privileges, you create login classes into which you group users with similar jobs or job
functions. You use these classes to explicitly define what commands their users are and
are not allowed to issue while logged in to the router.
The management of multiple routers by many different personnel can create a user
account management problem. One solution is to use a central authentication service
to simplify account management, creating and deleting user accounts only on a single,
central server. A central authentication system also simplifies the use of one-time
password systems such as SecureID, which offer protection against password sniffing
and password replay attacks (attacks in which someone uses a captured password to
pose as a router administrator).
The Junos OS supports two protocols for central authentication of users on multiple
routers:
• Remote Authentication Dial-In User Service (RADIUS) and Terminal Access Controller
Access Control System Plus (TACACS+).
• RADIUS, a multivendor IETF standard whose features are more widely accepted than
those of TACACS+ or other proprietary systems. All one-time-password system vendors
support RADIUS.
The Junos OS also supports the following authentication methods:
• Internet Protocol Security (IPsec). IPsec architecture provides a security suite for the
IPv4 and IPv6 network layers. The suite provides such functionality as authentication
of origin, data integrity, confidentiality, replay protection, and nonrepudiation of source.
In addition to IPsec, the Junos OS also supports the Internet Key Exchange (IKE), which
defines mechanisms for key generation and exchange, and manages security
associations (SAs).
• MD5 authentication of MSDP peering sessions. This authentication provides protection
against spoofed packets being introduced into a peering session.
• SNMPv3 authentication and encryption. SNMPv3 uses the user-based security model
(USM) for message security and the view-based access control model (VACM) for
access control. USM specifies authentication and encryption. VACM specifies
access-control rules.
Junos OS Plain-Text Password Requirements
The Junos OS has special requirements when you create plain-text passwords on a router.
The default requirements for plain-text passwords are as follows:
• The password must be between 6 and 128 characters long.
• You can include uppercase letters, lowercase letters, numbers, punctuation marks,
and any of the following special characters:
! @ # $ % ^ & * , + = < > : ;
Control characters are not recommended.
• The password must contain at least one change of case or character class.
29Copyright © 2016, Juniper Networks, Inc.
Chapter 2: Junos OS Security Overview

You can change the requirements for plain-text passwords.
You can include the plain-text-password statement at the following hierarchy levels:
• [edit system diag-port-authentication]
• [edit system pic-console-authentication]
• [edit system root-authentication]
• [edit system login user username authentication]
Junos OS Support for Routing Protocol Security Features and IPsec
The main task of a router is to forward user traffic toward its intended destination based
on the information in the router’s routing and forwarding tables. You can configure routing
policies that define the flows of routing information through the network, controlling
which routes the routing protocols place in the routing tables and which routes they
advertise from the tables. You can also use routing policies to change specific route
characteristics, change the BGP route flap-damping values, perform per-packet load
balancing, and enable class of service (CoS).
Attackers can send forged protocol packets to a router with the intent of changing or
corrupting the contents of its routing table or other databases, which can degrade the
functionality of the router. To prevent such attacks, you must ensure that routers form
routing protocol peering or neighboring relationships with trusted peers. One way to do
this is by authenticating routing protocol messages. The Junos BGP, IS-IS, OSPF, RIP,
and RSVP protocols support HMAC-MD5 authentication, which uses a secret key
combined with the data being protected to compute a hash. When the protocols send
messages, the computed hash is transmitted with the data. The receiver uses the
matching key to validate the message hash.
The Junos OS supports the IPsec security suite for the IPv4 and IPv6 network layers. The
suite provides such functionality as authentication of origin, data integrity, confidentiality,
replay protection, and nonrepudiation of source. The Junos OS also supports IKE, which
defines mechanisms for key generation and exchange, and manages SAs.
Junos OS Support for Firewall Filters
Firewall filters allow you to control packets transiting the router to a network destination
and packets destined for and sent by the router. You can configure firewall filters to
control which data packets are accepted on and transmitted from the physical interfaces,
and which local packets are transmitted from the physical interfaces and the Routing
Engine. Firewall filters provide a means of protecting your router from excessive traffic.
Firewall filters that control local packets can also protect your router from external
aggressions, such as DoS attacks.
To protect the Routing Engine, you can configure a firewall filter only on the router’s
loopback interface. Adding or modifying filters for each interface on the router is not
necessary. You can design firewall filters to protect against ICMP and Transmission
Control Protocol (TCP) connection request (SYN) floods and to rate-limit traffic being
sent to the Routing Engine.
Copyright © 2016, Juniper Networks, Inc.30
System Basics: Getting Started Configuration Guide

Junos OS Auditing Support for Security
The Junos OS logs significant events that occur on the router and within the network.
Although logging itself does not increase security, you can use the system logs to monitor
the effectiveness of your security policies and router configurations. You can also use
the logs when reacting to a continued and deliberate attack as a means of identifying
the source address, router, or port of the attacker’s traffic. You can configure the logging
of different levels of events, from only critical events to all events, including informational
events. You can then inspect the contents of the system log files either in real time or
later.
Debugging and troubleshooting are much easier when the timestamps in the system log
files of all routers are synchronized, because events that span the network might be
correlated with synchronous entries in multiple logs. The Junos OS supports the Network
Time Protocol (NTP), which you can enable on the router to synchronize the system
clocks of routers and other networking equipment. By default, NTP operates in an
unauthenticated mode. You can configure various types of authentication, including an
HMAC-MD5 scheme.
RelatedDocumentation
• IPsec Overview
• Junos OS System Log Configuration Overview
31Copyright © 2016, Juniper Networks, Inc.
Chapter 2: Junos OS Security Overview

Copyright © 2016, Juniper Networks, Inc.32
System Basics: Getting Started Configuration Guide

CHAPTER 3
Junos OS Configuration Overview
• Methods for Configuring Junos OS on page 34
• Junos OS Configuration Using the CLI on page 37
• Creating and Activating a Candidate Configuration on page 37
• Format for Specifying IP Addresses, Network Masks, and Prefixes in Junos OS
Configuration Statements on page 38
• Format for Specifying Filenames and URLs in Junos OS CLI Commands on page 38
• Default Directories for Junos OS File Storage on the Router or Switch on page 40
• Initial Router or Switch Configuration Using the Junos OS on page 41
33Copyright © 2016, Juniper Networks, Inc.

Methods for Configuring Junos OS
You can use any of the methods shown in Table 6 on page 34 to configure Junos OS:
Table 6: Methods for Configuring Junos OS
DescriptionMethod
Create the configuration for the device using the CLI. You can entercommands from a single command line, and scroll through recentlyexecuted commands.
Command-line interface(CLI)
Load an ASCII file containing a configuration that you created earlier,either on this system or on another system. You can then activateand run the configuration file, or you can edit it using the CLI andthen activate it.
ASCII file
Use the J-Web graphical user interface (GUI) to configure the device.J-Web enables you to monitor, configure, troubleshoot, and managethe router on a client by means of a Web browser. The J-Web GUIis preinstalled on J Series Services Routers and is an optionalsoftware package that can be installed on M Series and T Seriesrouters. J-Web is not available for the QFX Series.
J-Web graphical userinterface (GUI)
Use Junos XML protocol Perl client modules to develop customapplications for configuring information on devices that run JunosOS. Client applications use the Junos XML management protocolto request and change configuration information on JuniperNetworks J Series, M Series, and T Series routers. The Junos XMLmanagement protocol is customized for Junos OS, and operationsin the API are equivalent to those in the Junos OS CLI.
Junos XML managementprotocol (API)
Use NETCONF Perl client modules to develop custom applicationsfor configuring information on devices that run Junos OS. Clientapplications use the NETCONF XML management protocol torequest and change configuration information on Juniper NetworksJ Series, M Series, and T Series routers. The NETCONF XMLmanagement protocol includes features that accommodate theconfiguration data models of multiple vendors.
NETCONF applicationprogramming interface(API)
Create scripts that run at commit time to enforce customconfiguration rules. Commit scripts are written in ExtensibleStylesheet Language Transformations (XSLT). Commit scripts arenot available for the QFX Series.
Configuration commitscripts
The following sections contain complete descriptions of the methods you can use to
configure Junos OS:
• Junos OS Command-Line Interface (CLI) on page 35
• ASCII File on page 35
• J-Web Package on page 35
• Junos XML Management Protocol Software on page 36
Copyright © 2016, Juniper Networks, Inc.34
System Basics: Getting Started Configuration Guide

• NETCONF XML Management Protocol Software on page 36
• Configuration Commit Scripts on page 36
Junos OS Command-Line Interface (CLI)
The Junos OS CLI is a straightforward command interface. You use Emacs-style keyboard
sequences to move around on a command line and scroll through a buffer that contains
recently executed commands. You type commands on a single line, and the commands
are executed when you press the Enter key. The CLI also provides command help and
command completion. For more information about the CLI, see the CLI User Guide and
CLI Explorer.
ASCII File
You can load an ASCII file containing a configuration that you created earlier, either on
this system or another system. You can then activate and run the configuration file as is,
or you can edit it using the CLI and then activate it.
J-Web Package
As an alternative to entering CLI commands, the Junos OS supports the J-Web graphical
user interface (GUI). The J-Web user interface enables you to monitor, configure,
troubleshoot, and manage the router on a client by means of a Web browser with
Hypertext Transfer Protocol (HTTP) or HTTP over Secure Sockets Layer (HTTPS) enabled.
The J-Web user interface is preinstalled on J Series Services Routers. It is provided as an
optional, licensed software package (jweb package) on M Series and T Series routers.
The jweb package is not included in jinstall and jbundle software bundles. It must be
installed separately. To install the package on M Series and T Series routers, follow the
procedure described in the Installation and Upgrade Guide.
J-Web supports weak (56-bit) encryption by default. This enables international customers
to install J-Web and use HTTPS connections for J-Web access. Domestic customers can
also install the jcrypto strong encryption package. This package automatically overrides
the weak encryption. For more information about the J-Web GUI, see the J-Web Interface
User Guide.
NOTE: Because the J-Web package is bundled separately from otherpackages, it is possible tohaveaversionmismatchbetween J-WebandotherJunos OS packages you have installed.
To check for a versionmismatch, use the show system alarms CLI command.
If the version number does not match exactly, a system alarm appears. Forexample, if you install the7.4R1.2 jroutepackageand the7.4R1.1 jwebpackage,
an alarm is activated. For more information on the show system alarms
command, see the CLI Explorer.
35Copyright © 2016, Juniper Networks, Inc.
Chapter 3: Junos OS Configuration Overview

Junos XMLManagement Protocol Software
The Junos XML management protocol is an Extensible Markup Language (XML)
application that client applications use to request and change configuration information
on Juniper Networks J Series, M Series, MX Series, and T Series routers. This API is
customized for Junos OS, and operations in the API are equivalent to Junos OS CLI
configuration mode commands. The Junos XML management protocol includes a set of
Perl modules that enable client applications to communicate with a Junos XML protocol
server on the router. The Perl modules are used to develop custom applications for
configuring and monitoring Junos OS.
For a complete description of how to use Junos XML and Junos XML management protocol
software, see the Junos XML Management Protocol Developer Guide.
NETCONF XMLManagement Protocol Software
The NETCONF XML management protocol is an Extensible Markup Language (XML)
application that client applications can use to request and change configuration
information on Juniper Networks J Series, M Series, MX Series, and T Series routers. This
API is customized for Junos OS, and includes features that accommodate the configuration
data models of multiple vendors. The NETCONF XML management protocol includes a
set of Perl modules that enable client applications to communicate with a NETCONF
server on the router. The Perl modules are used to develop custom applications for
configuring and monitoring Junos OS.
For a complete description of how to use Junos XML and NETCONF XML management
protocol software, see the NETCONF XMLManagement Protocol Guide .
Configuration Commit Scripts
You can create and use scripts that run at commit time to enforce custom configuration
rules. If a configuration breaks the custom rules, the script can generate actions that the
Junos OS performs. These actions include:
• Generating custom error messages
• Generating custom warning messages
• Generating custom system log messages
• Making changes to the configuration
Configuration commit scripts also enable you to create macros, which expand simplified
custom aliases for frequently used configuration statements into standard Junos
configuration statements. Commit scripts are written in Extensible Stylesheet Language
Transformations (XSLT). For more information, see the Junos OS Configuration and
Operations Automation Guide.
RelatedDocumentation
Junos OS Configuration from External Devices on page 23•
Copyright © 2016, Juniper Networks, Inc.36
System Basics: Getting Started Configuration Guide

Junos OS Configuration Using the CLI
You configure the Junos OS using the Junos OS command-line interface (CLI). The CLI
is described in detail in the CLI User Guide.
After completing the initial minimal configuration, you can configure software properties.
If you configure the software interactively using the CLI, you enter software configuration
statements to create a candidate configuration that contains a hierarchy of statements.
At any hierarchy level, you generally can enter statements in any order. While you are
configuring the software, you can display all or portions of the candidate configuration,
and you can insert or delete statements. Any changes you make affect only the candidate
configuration, not the active configuration that is running on the router.
The configuration hierarchy logically groups related functions, which results in
configuration statements that have a consistent syntax. For example, you configure
routing protocols, routing policies, interfaces, and SNMP management in their own
separate portions of the configuration hierarchy.
At each level of the hierarchy, you can display a list of the statements available at that
level, along with short descriptions of the statements’ functions. To have the CLI complete
the statement name if it is unambiguous or to provide a list of possible completions, you
can type a partial statement name followed by a space or tab.
More than one user can edit a router’s configuration simultaneously. All changes made
by all users are visible to everyone editing the configuration.
RelatedDocumentation
Disk Space Management for Junos OS Installation on page 90•
• Creating and Activating a Candidate Configuration on page 37
Creating and Activating a Candidate Configuration
You enter software configuration statements using the CLI to create a candidate
configuration that contains a hierarchy of statements. To have a candidate configuration
take effect, you commit the changes. At this point, the candidate file is checked for proper
syntax, activated, and marked as the current, operational software configuration file. If
multiple users are editing the configuration, when you commit the candidate configuration,
all changes made by all the users take effect.
The CLI always maintains a copy of previously committed versions of the software
configuration. If you need to return to a previous configuration, you can do this from within
the CLI.
RelatedDocumentation
Junos OS Commit Model for Router or Switch Configuration on page 8•
37Copyright © 2016, Juniper Networks, Inc.
Chapter 3: Junos OS Configuration Overview

Format for Specifying IP Addresses, Network Masks, and Prefixes in Junos OSConfiguration Statements
Many statements in the Junos OS configuration include an option to specify an IP address
or route prefix. This option is represented in one of the following ways:
• network/prefix-length—Network portion of the IP address, followed by a slash and the
destination prefix length (previously called the subnet mask). For example, 10.0.0.1/8.
• network—IP address. For example, 10.0.0.2.
• destination-prefix/prefix-length—Route prefix, followed by a slash and the destination
prefix length. For example, 192.168.1.10/32.
You enter all IP addresses in classless mode. You can enter the IP address with or without
a prefix length, in standard dotted notation (for example, 1.2.3.4), or hexadecimal notation
as a 32-bit number in network-byte order (for example, 0x01020304). If you omit any
octets, they are assumed to be zero. Specify the prefix length as a decimal number from
1 through 32.
RelatedDocumentation
Format for Specifying Filenames and URLs in Junos OS CLI Commands on page 38•
Format for Specifying Filenames and URLs in Junos OS CLI Commands
In some command-line interface (CLI) commands and configuration
statements—including file copy, file archive, load, save, set system login user username
authentication load-key-file, and requestsystemsoftwareadd—you can include a filename.
On a routing matrix, you can include chassis information (for example, lcc0, lcc0-re0, or
lcc0-re1) as part of the filename.
A routing matrix is a multichassis architecture composed of either one TX Matrix router
and from one to four T640 routers connected to the TX Matrix router, or one TX Matrix
Plus router and from one to four T1600 routers connected to the TX Matrix Plus router.
From the perspective of the user interface, the routing matrix appears as a single router.
On a routing matrix composed of the TX Matrix router and T640 routers, the TX Matrix
router controls all the T640 routers. On a routing matrix composed of a TX Matrix Plus
router and T1600 routers, the TX Matrix Plus router controls all the T1600 routers.
You can specify a filename or URL in one of the following ways:
Copyright © 2016, Juniper Networks, Inc.38
System Basics: Getting Started Configuration Guide

• filename—File in the user’s current directory on the local CompactFlash card (not
applicable on the QFX Series). You can use wildcards to specify multiple source files
or a single destination file. Wildcards are not supported in Hypertext Transfer Protocol
(HTTP) or FTP.
NOTE: Wildcards are supported only by the file (compare | copy | delete |
list | rename | show) commands. When you issue the file show command
with a wildcard, it must resolve to one filename.
• path/filename—File on the local flash disk.
• /var/filename or /var/path/filename—File on the local hard disk. You can also specify
a file on a local Routing Engine for a specific T640 router or a T1600 router in a routing
matrix:
user@host> file delete lcc0-re0:/var/tmp/junk
• a:filename or a:path/filename—File on the local removable media. The default path is
/ (the root-level directory). The removable media can be in MS-DOS or UNIX (UFS)
format.
• hostname:/path/filename, hostname:filename, hostname:path/filename, or
“scp://hostname/path/filename”—File on an scp/ssh client. This form is not available
in the worldwide version of the Junos OS. The default path is the user’s home directory
on the remote system. You can also specify hostname as username@hostname.
• ftp://hostname/path/filename—File on an FTP server. You can also specify hostname
as username@hostname or username:password@hostname. The default path is the
user’s home directory. To specify an absolute path, the path must start with %2F; for
example, ftp://hostname/%2Fpath/filename. To have the system prompt you for the
password, specify prompt in place of the password. If a password is required and you
do not specify the password or prompt, an error message is displayed:
user@host> file copy ftp://[email protected]/filenamefile copy ftp.hostname.net: Not logged in.
user@host> file copy ftp://username:[email protected]/filenamePassword for [email protected]:
• re0:/path/filename or re1:/path/filename—File on a local Routing Engine. You can also
specify a file on a local Routing Engine for a specific T640 router or a T1600 router in
a routing matrix:
user@host> show log lcc0-re1:chassisd
NOTE: You cannot specify a URL for a file on a Hypertext Transfer Protocol(HTTP) server, because HTTP URLs are not writable.
RelatedDocumentation
Format for Specifying IP Addresses, Network Masks, and Prefixes in Junos OS
Configuration Statements on page 38
•
• Default Directories for Junos OS File Storage on the Router or Switch on page 40
39Copyright © 2016, Juniper Networks, Inc.
Chapter 3: Junos OS Configuration Overview

Default Directories for Junos OS File Storage on the Router or Switch
Junos OS files are stored in the following directories on the router or switch:
• /altconfig—When you back up the currently running and active file system partitions
on the router or switch to standby partitions using the request system snapshot
command, the /config directory is backed up to /altconfig. Normally, the /config
directory is on the CompactFlash card and /altconfig is on the hard disk.
• /altroot—When you back up the currently running and active file system partitions on
the router to standby partitions using the request system snapshot command, the root
file system (/) is backed up to /altroot. Normally, the root directory is on the
CompactFlash card and /altroot is on the hard disk.
• /config—This directory is located on the primary boot device, that is, on the device from
which the router or switch booted (generally the CompactFlash card (device wd0) or
internal flash storage. This directory contains the current operational router or switch
configuration and the last three committed configurations, in the files juniper.conf,
juniper.conf.1, juniper.conf.2, and juniper.conf.3, respectively.
• /var—This directory is located either on the hard disk (device wd2) or internal flash
storage. It contains the following subdirectories:
• /home—Contains users’ home directories, which are created when you create user
access accounts. For users using SSH authentication, their .ssh file, which contains
their SSH key, is placed in their home directory. When a user saves or loads a
configuration file, that file is loaded from the user’s home directory unless the user
specifies a full pathname.
• /db/config—Contains up to 46 additional previous versions of committed
configurations, which are stored in the files juniper.conf.4.gz through juniper.conf.49.gz.
• /log—Contains system log and tracing files.
• /tmp—Contains core files. The software saves up to five core files, numbered from
0 through 4. File number 0 is the oldest core file and file number 4 is the newest core
file. To preserve the oldest core files, the software overwrites the newest core file,
number 4, with any subsequent core file.
Each router or switch ships with removable media (devicewfd0) that contains a backup
copy of the Junos OS.
Directories on the Logical System
In addition to saving the configuration of logical systems in the current juniper.conf file,
each logical system has an individual directory structure created in the
/var/logical-systems/logical-system-name directory.
The /var/logical-systems/logical-system-name directory contains the following
subdirectories:
• /config—Contains the current operational configuration specific to the logical system.
Copyright © 2016, Juniper Networks, Inc.40
System Basics: Getting Started Configuration Guide

• /log—Contains system log and tracing files specific to the logical system.
To maintain backward compatibility for the log files with previous versions of Junos
OS, a symbolic link (symlink) from the /var/logs/logical-system-name directory to the
/var/logical-systems/logical-system-name directory is created when a logical system
is configured.
• /tmp—Contains temporary files specific to the logical system.
This file system for each logical system enables logical system users to view trace logs
and modify logical system files. Logical system administrators have full access to view
and modify all files specific to the logical system.
Logical system users and administrators can save and load configuration files at the
logical-system hierarchy level using the save and load configuration mode commands.
In addition, they can also issue theshowlog,monitor, and fileoperational mode commands
at the logical-system hierarchy level.
RelatedDocumentation
Format for Specifying Filenames and URLs in Junos OS CLI Commands on page 38•
Initial Router or Switch Configuration Using the Junos OS
This topic provides an overview of initial router or switch configuration tasks using the
Junos OS.
When you turn on a router or switch for the first time, the Junos OS automatically boots
and starts. You must enter basic configuration information so that the router or switch
is on the network and you can log in to it over the network.
To configure the router or switch initially, you must connect a terminal or laptop computer
to the router or switch through the console port—a serial port on the front of the router
or switch. Only console access to the router or switch is enabled by default. Remote
management access to the router or switch and all management access protocols,
including Telnet, FTP, and SSH, are disabled by default.
When you first connect to the router or switch console, you must log in as the user root.
At first, the root account requires no password. You see that you are the user root,because
the command prompt shows the username root@#.
You must start the Junos OS command-line interface (CLI) using the command cli. The
command prompt root@> indicates that you are the user root and that you are in the
Junos OS operational mode. Enter the Junos OS configuration mode by typing the
command configure. The command prompt root@# indicates that you are in the Junos
OS configuration mode.
When you first configure a router or switch, you must configure the following basic
properties:
• Router or switch hostname
• Domain name
41Copyright © 2016, Juniper Networks, Inc.
Chapter 3: Junos OS Configuration Overview

• IP address of the router or switch management Ethernet interface—To find the
management Ethernet interface that you should use for configuration, see Supported
Routing Engines by Chassis.
• IP address of a backup router
• IP address of one or more DNS name servers on your network
• Password for the root account
RelatedDocumentation
• Configuring Junos OS for the First Time on a Router or Switch with a Single Routing
Engine on page 78
• Configuring the Junos OS for the First Time on a Router or Switch with Dual Routing
Engines on page 82
• Supported Routing Engines by Chassis
• Junos OS Configuration Using the CLI on page 37
Copyright © 2016, Juniper Networks, Inc.42
System Basics: Getting Started Configuration Guide

CHAPTER 4
Junos OS Monitoring Tools Overview
• Junos OS Tools for Monitoring the Router on page 43
Junos OS Tools for Monitoring the Router
The primary method of monitoring and troubleshooting the Junos OS, routing protocols,
network connectivity, and the router hardware is to enter commands from the CLI. The
CLI enables you to display information in the routing tables and routing protocol-specific
data, and to check network connectivity using ping and traceroute commands.
The J-Web graphical user interface (GUI) is a Web-based alternative to using CLI
commands to monitor, troubleshoot, and manage the router.
The Junos OS includes SNMP software, which enables you to manage routers. The SNMP
software consists of an SNMP master agent and a MIB II agent, and supports MIB II SNMP
version 1 traps and version 2 notifications, SNMP version 1Get andGetNext requests, and
version 2 GetBulk requests.
The software also supports tracing and logging operations so that you can track events
that occur in the router—both normal router operations and error conditions—and track
the packets that are generated by or pass through the router. Logging operations use a
syslog-like mechanism to record system-wide, high-level operations, such as interfaces
going up or down and users logging in to or out of the router. Tracing operations record
more detailed messages about the operation of routing protocols, such as the various
types of routing protocol packets sent and received, and routing policy actions.
RelatedDocumentation
• Methods for Configuring Junos OS on page 34
• Junos OS Features for Router Security on page 27
43Copyright © 2016, Juniper Networks, Inc.

Copyright © 2016, Juniper Networks, Inc.44
System Basics: Getting Started Configuration Guide

PART 2
Configuration
• Configuring Basic System Management Features on page 47
• Configuration Statements on page 93
45Copyright © 2016, Juniper Networks, Inc.

Copyright © 2016, Juniper Networks, Inc.46
System Basics: Getting Started Configuration Guide

CHAPTER 5
Configuring Basic SystemManagementFeatures
• Configuring Basic Router or Switch Properties on page 48
• Configuring the Hostname of the Router or Switch on page 49
• Mapping the Name of the Router to IP Addresses on page 49
• Configuring an ISO System Identifier for the Router on page 50
• Example: Configuring the Name of the Router, IP Address, and System ID on page 50
• Configuring the Domain Name for the Router or Switch on page 51
• Example: Configuring the Domain Name for the Router or Switch on page 51
• Configuring the Domains to Search When a Router or Switch Is Included in Multiple
Domains on page 52
• Configuring a DNS Name Server for Resolving a Hostname into Addresses on page 52
• Example: Configuring a Proxy Server for License Updates on page 53
• Configuring a Backup Router on page 56
• Configuring Automatic Mirroring of the CompactFlash Card on the Hard Disk
Drive on page 58
• Using Junos OS to Specify the Number of Configurations Stored on the CompactFlash
Card on page 59
• Using Junos OS to Configure a Router or Switch to Transfer Its Configuration to an
Archive Site on page 60
• Configuring the Physical Location of the Router or Switch on page 62
• Configuring the Root Password on page 63
• Example: Configuring the Root Password on page 64
• Example: Configuring a Plain-Text Password for Root Logins on page 65
• Example: Configuring SSH Authentication for Root Logins on page 65
• Special Requirements for Junos OS Plain-Text Passwords on page 65
• Changing the Requirements for Junos OS Plain-Text Passwords on page 68
• Example: Changing the Requirements for Junos OS Plain-Text Passwords on page 68
• Configuring the Junos OS to Set Console and Auxiliary Port Properties on page 70
47Copyright © 2016, Juniper Networks, Inc.

• Configuring Multiple Routing Engines to Synchronize Committed Configurations
Automatically on page 71
• Compressing the Current Configuration File on page 73
• Configuring the Junos OS to Make the Router or Interface Act as a DHCP or BOOTP
Relay Agent on page 74
• Disabling Junos OS Processes on page 74
• Viewing Core Files from Junos OS Processes on page 74
• Saving Core Files from Junos OS Processes on page 75
• Configuring Failover to Backup Media if a Junos OS Process Fails on page 75
• Configuring the Junos OS to Display a System Login Message on page 76
• Configuring the Junos OS to Display a System Login Announcement on page 77
• Configuring Junos OS for the First Time on a Router or Switch with a Single Routing
Engine on page 78
• Configuring the Junos OS for the First Time on a Router or Switch with Dual Routing
Engines on page 82
• Configuring CLI Tips on page 86
• Upgrading to 64-bit Junos OS on page 87
• Disk Space Management for Junos OS Installation on page 90
Configuring Basic Router or Switch Properties
When you configure the router initially, you must configure the basic properties of a router,
such as the router’s hostname, IP addresses, and the name of the domain in which the
router is located.
To configure basic router properties:
1. Configure the router’s hostname.
See “Configuring the Hostname of the Router or Switch” on page 49
2. Map the router’s hostname to IP addresses.
See “Mapping the Name of the Router to IP Addresses” on page 49.
3. Configure an ISO system identifier for the router.
See “Configuring an ISO System Identifier for the Router” on page 50.
4. Configure the router’s domain name.
See “Configuring the Domain Name for the Router or Switch” on page 51.
RelatedDocumentation
Example: Configuring the Name of the Router, IP Address, and System ID on page 50•
• Configuring Junos OS for the First Time on a Router or Switch with a Single Routing
Engine on page 78
• Configuring the Junos OS for the First Time on a Router or Switch with Dual Routing
Engines on page 82
Copyright © 2016, Juniper Networks, Inc.48
System Basics: Getting Started Configuration Guide

• Configuring the Physical Location of the Router or Switch on page 62
• Configuring a Backup Router on page 56
Configuring the Hostname of the Router or Switch
To configure the name of the router or switch, include the host-name statement at the
[edit system] hierarchy level:
[edit system]host-name hostname;
The name value must be less than 256 characters.
RelatedDocumentation
Example: Configuring the Name of the Router, IP Address, and System ID on page 50•
• Example: Configuring the Name of the Switch, IP Address, and System ID
• Configuring Basic Router or Switch Properties on page 48
• Mapping the Hostname of the Switch to IP Addresses
• host-name
Mapping the Name of the Router to IP Addresses
To map a router’s hostname to one or more IP addresses, include the inet statement at
the [edit system static-host-mapping hostname] hierarchy level:
[edit system]static-host-mapping {hostname {inet [ addresses ];alias [ aliases ];
}}
hostname is the name specified by thehost-name statement at the [editsystem]hierarchy
level.
For each host, you can specify one or more aliases.
RelatedDocumentation
Configuring Basic Router or Switch Properties on page 48•
• Example: Configuring the Name of the Router, IP Address, and System ID on page 50
• Configuring the Domain Name for the Router or Switch on page 51
49Copyright © 2016, Juniper Networks, Inc.
Chapter 5: Configuring Basic System Management Features

Configuring an ISO System Identifier for the Router
For IS-IS to operate on the router, you must configure a system identifier (system ID).
The system identifier is commonly the media access control (MAC) address or the IP
address expressed in binary-coded decimal (BCD).
To configure an International Organization for Standardization (ISO) system ID, include
the sysid statement at the [edit system static-host-mapping hostname] hierarchy level:
[edit system]static-host-mapping {hostname {sysid system-identifier;
}}
hostname is the name specified by thehost-name statement at the [editsystem]hierarchy
level.
system-identifier is the ISO system identifier. It is the 6-byte system ID portion of the IS-IS
network service access point (NSAP). We recommend that you use the host’s IP address
represented in BCD format. For example, the IP address 192.168.1.77 is 1921.6800.1077 in
BCD.
RelatedDocumentation
Configuring Basic Router or Switch Properties on page 48•
• Example: Configuring the Name of the Router, IP Address, and System ID on page 50
Example: Configuring the Name of the Router, IP Address, and System ID
The following example shows how to configure the router’s name, map the name to an
IP address and alias, and configure a system identifier:
[edit]user@host# set system host-name router-sj1[edit]user@host# set system static-host-mapping router-sj1 inet 192.168.1.77[edit]user@host# set system static-host-mapping router-sj1 alias sj1[edit]user@host# set system static-host-mapping router-sj1 sysid 1921.6800.1077[edit]user@host# showsystem {host-name router-sj1;static-host-mapping {router-sj1 {inet 192.168.1.77;alias sj1;sysid 1921.6800.1077;
}}
}
Copyright © 2016, Juniper Networks, Inc.50
System Basics: Getting Started Configuration Guide

RelatedDocumentation
Configuring Basic Router or Switch Properties on page 48•
Configuring the Domain Name for the Router or Switch
For each router or switch, you should configure the name of the domain in which the
router or switch is located. This is the default domain name that is appended to hostnames
that are not fully qualified.
To configure the domain name, include the domain-name statement at the [edit system]
hierarchy level:
[edit system]domain-name domain-name;
The following example shows how to configure the domain name:
[edit]user@host# set system domain-name company.net[edit]user@host# showsystem {domain-name company.net;
}
RelatedDocumentation
domain-name on page 111•
• domain-name
• Example: Configuring the Domain Name for the Router or Switch on page 51
Example: Configuring the Domain Name for the Router or Switch
The following example shows how to configure the router or switch domain name:
[edit]user@host# set system domain-name company.net[edit]user@host# showsystem {domain-name company.net;
}
RelatedDocumentation
domain-name•
• Configuring the Domain Name for the Router or Switch on page 51
51Copyright © 2016, Juniper Networks, Inc.
Chapter 5: Configuring Basic System Management Features

Configuring the Domains to SearchWhen a Router or Switch Is Included in MultipleDomains
If your router or switch is included in several different domains, you can configure those
domain names to be searched.
To configure more than one domain to be searched, include thedomain-search statement
at the [edit system] hierarchy level:
[edit system]domain-search [ domain-list ];
The domain list can contain up to six domain names, with a total of up to 256 characters.
The following example shows how to configure two domains to be searched:
[edit system]domain-search [ domainone.net domainonealternate.com ]
RelatedDocumentation
Example: Configuring the Domain Name for the Router or Switch on page 51•
• Configuring a DNS Name Server for Resolving a Hostname into Addresses on page 52
Configuring a DNS Name Server for Resolving a Hostname into Addresses
Configuring a DNSName Server for Resolving a Hostname into Addresses
To have the router or switch resolve hostnames into addresses, you must configure a
maximum of three Domain Name System (DNS) name servers by including the
name-server statement at the [edit system] hierarchy level:
[edit system]name-server {address;
}
The following example shows how to configure two DNS name servers:
[edit]user@host# set system name-server 192.168.1.253[edit]user@host# set system name-server 192.168.1.254[edit]user@host# showsystem {name server {192.168.1.253;192.168.1.254;
}}
RelatedDocumentation
Configuring the Domains to Search When a Router or Switch Is Included in Multiple
Domains on page 52
•
Copyright © 2016, Juniper Networks, Inc.52
System Basics: Getting Started Configuration Guide

• name-server on page 122
Example: Configuring a Proxy Server for License Updates
• Requirements on page 53
• Overview on page 53
• Configuration on page 53
• Verification on page 55
Requirements
This example uses the following hardware and software components:
• An M Series, MX Series, PTX Series, SRX Series device
• Junos OS Release 11.4 running on the device
Overview
In Junos OS Release 11.4 and later, you can download Juniper Networks license updates
using a proxy server. This feature is supported on M Series and SRX Series devices. In
earlier releases, downloading license updates was only possible by directly connecting
to the Juniper Networks License Management System.
In an enterprise, there might be devices in a private network that might be restricted from
connecting to the Internet directly for security reasons. In such scenarios, you can configure
a proxy server in the private network to connect to the LMS and download the license
updates, and have the routers or devices in the private network connect to the proxy
server to download the licenses or license updates. In Figure 2 on page 53,R0 is the router
in the private network. P represents the proxy server and LMS represents the Juniper
Networks License Management System.
Figure 2: Proxy Server Example
To enable this feature, you configure the device with details of the proxy server at the
[edit system proxy] hierarchy level.
Configuration
CLI QuickConfiguration
To quickly configure this example, copy the following commands, paste them into a text
file, remove any line breaks, change any details necessary to match your network
configuration, and then copy and paste the commands into the CLI at the [edit]hierarchy
level.
53Copyright © 2016, Juniper Networks, Inc.
Chapter 5: Configuring Basic System Management Features

Router R0 set system proxy server 192.168.1.10set system proxy port 3128set system proxy username user1set system proxy password user123set system license traceoptions file license.logset system license traceoptions flag all
Step-by-StepProcedure
The following example requires you to navigate various levels in the configuration
hierarchy. For information about navigating the CLI, see the CLI User Guide.
To configure the proxy server properties on the device:
1. Configure the proxy server IP address or hostname.
[edit system proxy]user@hostR0# set server 192.168.1.10
2. Configure a port number (ranging from 0 through 65535) used to connect to the
proxy server.
[edit system proxy]user@hostR0# set port 3128
3. Configure the password as configured on the proxy server.
[edit system proxy]user@R0# set password user123
4. Configure the username as configured on the proxy server.
[edit system proxy]user@R0# set username user1
5. Configure trace options for licenses.
[edit system license]user@R0# set traceoptions file license.loguser@R0# set traceoptions flag all
Results From configuration mode, confirm your configuration by entering the show system
command. If the output does not display the intended configuration, repeat the
instructions in this example to correct the configuration.
user@R0# show systemproxy {server 192.168.1.10;port 3128;username user1;password "$ABC123"; ## SECRET-DATA
}license {traceoptions {file license.log;flag all;
}}
If you are done configuring the router, enter commit from configuration mode.
Copyright © 2016, Juniper Networks, Inc.54
System Basics: Getting Started Configuration Guide

Verification
Confirm that the configuration is working properly.
Verifying That the License Is Downloaded
Purpose Verify that the license is downloaded using the proxy server.
Action 1. Delete the existing license using the request system license delete license-filename
command.
2. Download the license using the request system license update command.
user@R0> request system license updateRequest to automatically update license keys from https://devicex.example.com has been sent, use 'show system license' to check status.
3. Verify the license using the show system license command.
user@R0> show system licenseLicense usage: Licenses Licenses Licenses Expiry Feature name used installed needed av_key_kaspersky_engine 0 1 02011-11-17 16:00:00 PST idp-sig 1 1 02011-11-17 16:00:00 PST ax411-wlan-ap 0 2 0 permanent
Licenses installed: License identifier: JUNOS282725 License version: 2 Valid for device: AG2909AA0014 Features: av_key_kaspersky_engine - Kaspersky AV date-based, 2010-11-21 16:00:00 PST - 2011-11-17 16:00:00 PST
4. Check the system log file to verify that the license is downloaded using the proxy
server.
user@R0> show /var/log/license.logNov 18 08:14:14 Received SIGHUP signalNov 18 08:14:17 GRES not enabled.Nov 18 08:14:17 License download proxy server configured.Nov 18 08:14:17 License download proxy server: 192.168.1.10Nov 18 08:14:17 License download proxy server port: 3128Nov 18 08:14:17 License download proxy user name: user1Nov 18 08:14:17 License download proxy user password: xxxNov 18 08:14:18 Access configuration autoupdate url: devicex.example.comNov 18 08:14:18 Access configuration renew-before-expiration: 60 daysNov 18 08:14:18 Access configuration renew-interval: 1 hoursNov 18 08:16:53 Received SIGUSR1 signal, license download start...Nov 18 08:16:58 env HTTP_PROXY=http://192.168.1.10/Nov 18 08:16:58 env HTTP_PROXY_AUTH="basic:*:abc:xxx"HTTP_PROXY_AUTH="basic:*:user:<password>" /usr/sbin/license_fetch -o/tmp/license.keys.1053'https://devicex.example.com/junos/key_retrieval?serial=ABC123'2> /tmp/license.status.1053
55Copyright © 2016, Juniper Networks, Inc.
Chapter 5: Configuring Basic System Management Features

Nov 18 08:17:03 /tmp/license.keys.1053 505 kB505 kBps
RelatedDocumentation
password (Proxy Systems) on page 122•
• port on page 124
• proxy on page 127
• server on page 131
• username on page 135
Configuring a Backup Router
When a router or switch is booting, the routing protocol process (rpd) is not running;
therefore, the router or switch has no static or default routes. To ensure the router or
switch is reachable over the network while it boots or if the rpd fails to start properly,
configure a backup router (running IP version 4 [IPv4] or IP version 6 [IPv6]), which is a
router that is directly connected to the local router or switch (that is, on the same subnet)
through its private management interface (e.g., fxp0).
By default, all hosts (default route) are reachable through the backup router. To achieve
network reachability while loading, configuring, and recovering the router or switch, but
without installing a default route in the forwarding table, include the destination option,
specifying an address that is reachable through the backup router. Specify the address
in the format network/mask-length so that the entire network is reachable through the
backup router.
Any destinations defined by the backup router are not visible in the routing table, they
are only visible in the local forwarding table when rpd is not running. Therefore, a
recommended best practice is to also include the destinations of the backup router
configured as static routes with the retain flag at the [edit routing-options] hierarchy
level. The retain flag is necessary to allow the static route to remain in the forwarding
table when rpd stops running, because the routing table does not exist if rpd is not running.
On systems with dual redundant Routing Engines, the backup Routing Engine's reachability
through the private management interface is based only on the functionality of the
backup-router configuration, it is not based on whether the rpd is running. The backup
router adds the destination prefix upon bootup, whereas configuring a static route requires
rpd to run first before installing the destination prefix. If rpd is allowed to run on the backup
Routing Engine, then a destination can be ad ded in the routing table and the forwarding
table by configuring static route with retain.
Copyright © 2016, Juniper Networks, Inc.56
System Basics: Getting Started Configuration Guide

NOTE:
• Due to a system limitation, do not configure the destination addressspecified in the backup-router as ‘0.0.0.0/0’ or ‘::/0’. Themask has to bea non-zero value.
• Active routes andmore specific routes take precedence over destinationprefixes defined with the backup-router statement.
The following topics describe how to configure a backup router running IPv4 and IPv6,
respectively:
1. Configuring a Backup Router Running IPv4 on page 57
2. Configuring a Backup Router Running IPv6 on page 58
Configuring a Backup Router Running IPv4
To configure a backup router running IPv4, include the backup-router statement at the
[edit system] hierarchy level:
[edit system]backup-router address <destination destination-address>;
NOTE: TheRoutingEngineon thebackup router only supports 16destinationaddresses. If you configuremore than 16 destination addresses, the JunosOS ignores destination addresses after the sixteenth address and displaysa commit-time warningmessage to this effect.
The address defined in thebackup-routerstatement is not installed into the routing table,it is only installed to the forwarding table. To install the destination address definition inthe routing table, you can also configure a static route with the same destinationconfiguration as the backup-router. Both the backup-router and the static route willinstall the destination address into the forwarding table, however, because using only astatic route requires rpd to run, the preferred method is to use the backup-routerconfiguration.
Use this example to configure a backup router running IPv4 and have its address remainin the routing and forwarding tables:
[edit]system {backup-router 192.168.1.254 destination 208.197.1.0/24;
}routing-options {static {route 208.197.1.0/24 {next-hop 192.168.1.254;retain;
}}
}
57Copyright © 2016, Juniper Networks, Inc.
Chapter 5: Configuring Basic System Management Features

Configuring a Backup Router Running IPv6
To configure a backup router running IPv6, include the inet6-backup-router statement
at the [edit system] hierarchy level:
[edit system]inet6-backup-router “address <destination destination-address>”;
The following example shows how to configure a backup router running IPv6 and haveits address remain in the routing and forwarding tables:
[edit]system {inet6-backup-router 8:3::1 destination abcd::/48;
}routing-options {rib inet6.0 {static {route abcd::/48 {next-hop 8:3::1;retain;
}}
}}
RelatedDocumentation
Configuring Junos OS for the First Time on a Router or Switch with a Single Routing
Engine on page 78
•
• Configuring the Junos OS for the First Time on a Router or Switch with Dual Routing
Engines on page 82
• Requirements for Routers with a Backup Router Configuration.
Configuring Automatic Mirroring of the CompactFlash Card on the Hard Disk Drive
You can direct the hard disk to automatically mirror the contents of the CompactFlash
card. When you include the mirror-flash-on-disk statement, the hard disk maintains a
synchronized mirror copy of the CompactFlash card contents. Data written to the
CompactFlash card is simultaneously updated in the mirrored copy of the hard disk. If
the CompactFlash card fails to read data, the hard disk automatically retrieves its mirrored
copy of the CompactFlash card. This feature is not available on the J Series routers.
CAUTION: Werecommendthat youdisable flash-to-diskmirroringwhenyouupgrade or downgrade the router.
You cannot issue the request system snapshot commandwhile flash-to-disk
mirroring is enabled.
To configure the mirroring of the CompactFlash card to the hard disk, include the
mirror-flash-on-disk statement at the [edit system] hierarchy level:
Copyright © 2016, Juniper Networks, Inc.58
System Basics: Getting Started Configuration Guide

[edit system]mirror-flash-on-disk;
NOTE: After youhaveenabledordisabled themirror-flash-on-diskstatement,
youmust reboot the router for your changes to take effect. To reboot, issuethe request system reboot command.
RelatedDocumentation
Using Junos OS to Specify the Number of Configurations Stored on the CompactFlash
Card on page 59
•
• Configuring Junos OS for the First Time on a Router or Switch with a Single Routing
Engine on page 78
Using JunosOS toSpecify theNumber of Configurations Stored on theCompactFlashCard
By default, the Junos OS saves the current configuration and three previous versions of
the committed configuration on the CompactFlash card. The currently operational Junos
OS configuration is stored in the file juniper.conf.gz, and the last three committed
configurations are stored in the files juniper.conf.1.gz, juniper.conf.2.gz, and juniper.conf.3.gz.
These four files are located in the router or switch’sCompactFlash card in the directory
/config.
In addition to saving the current configuration and the current operational version, you
can also specify how many previous versions of the committed configurations you want
stored on the CompactFlash card in the directory /config. The remaining previous versions
of committed configurations are stored in the directory /var/db/config on the hard disk.
This is useful when you have very large configurations that might not fit on the
CompactFlash card.
To specify how many previous versions of the committed configurations you want stored
on the CompactFlash card, include the max-configurations-on-flash statement at the
[edit system] hierarchy level:
[edit system]max-configurations-on-flash number;
number is a value from 0 through 49.
RelatedDocumentation
Configuring Automatic Mirroring of the CompactFlash Card on the Hard Disk Drive on
page 58
•
• max-configurations-on-flash
59Copyright © 2016, Juniper Networks, Inc.
Chapter 5: Configuring Basic System Management Features

Using Junos OS to Configure a Router or Switch to Transfer Its Configuration to anArchive Site
You can configure a router or switch to transfer its configuration to an archive file
periodically. The following tasks describe how to transfer the configuration to an archive
site:
1. Configuring the Router or Switch to Transfer Its Currently Active Configuration to an
Archive on page 60
2. Configuring the Transfer Interval for Periodic Transfer of the Active Configuration to
an Archive Site on page 60
3. Configuring Transfer of the Current Active Configuration When a Configuration Is
Committed on page 61
4. Configuring Archive Sites for Transfer of Active Configuration Files on page 61
Configuring the Router or Switch to Transfer Its Currently Active Configuration to an Archive
If you want to back up your device’s current configuration to an archive site, you can
configure the router or switch to transfer its currently active configuration by FTP or
secure copy (SCP) periodically or after each commit.
To configure the router or switch to transfer its currently active configuration to an archive
site, include statements at the [edit system archival configuration] hierarchy level:
[edit system archival configuration]archive-sites {ftp://username<:password>@host-address<:port>/url-path;scp://username<:password>@host-address<:port>/url-path;
}transfer-interval interval;transfer-on-commit;
NOTE: When specifying a URL in a Junos OS statement using an IPv6 hostaddress, youmustenclose theentireURL inquotationmarks ("")andenclosethe IPv6 host address in brackets ([ ]). For example,“ftp://username<:password>@[ipv6-host-address]<:port>/url-path”
Configuring the Transfer Interval for Periodic Transfer of the Active Configuration to anArchiveSite
To configure the router or switch to periodically transfer its currently active configuration
to an archive site, include the transfer-interval statement at the [edit system archival
configuration] hierarchy level:
[edit system archival configuration]transfer-interval interval;
The interval is a period of time ranging from 15 through 2880 minutes.
Copyright © 2016, Juniper Networks, Inc.60
System Basics: Getting Started Configuration Guide

Configuring Transfer of the Current Active ConfigurationWhen a Configuration Is Committed
To configure the router or switch to transfer its currently active configuration to an archive
site each time you commit a candidate configuration, include the transfer-on-commit
statement at the [edit system archival configuration] hierarchy level:
[edit system archival configuration]transfer-on-commit;
NOTE: When specifying a URL in a Junos OS statement using an IPv6 hostaddress, youmustenclose theentireURL inquotationmarks ("")andenclosethe IPv6 host address in brackets ([ ]). For example,“scp://username<:password>@[ipv6-host-address]<:port>/url-path”
Configuring Archive Sites for Transfer of Active Configuration Files
When you configure the router or switch to transfer its configuration files, you specify an
archive site to which the files are transferred. If you specify more than one archive site,
the router or switch attempts to transfer files to the first archive site in the list, moving
to the next site only if the transfer fails.
When you use the archive-sites statement, you can specify a destination as an FTP URL,
or SCP-style remote file specification. The URL type file:// is also supported.
To configure the archive site, include the archive-sites statement at the
[edit system archival configuration] hierarchy level:
[edit system archival configuration]archive-sites {ftp://username@host:<port>url-path password password;scp://username@host:<port>url-path password password;file://<path>/<filename>;
}
NOTE: When specifying a URL in a Junos OS statement using an IPv6 hostaddress, youmustenclose theentireURL inquotationmarks ("")andenclosethe IPv6 host address in brackets ([ ]). For example,“scp://username<:password>@[ipv6-host-address]<:port>/url-path”
When you specify the archive site, do not add a forward slash (/) to the end of the URL.
The format for the destination filename is as follows:
<router-name>_juniper.conf[.gz]_YYYYMMDD_HHMMSS
NOTE: The time included in thedestination filename isalways inCoordinatedUniversal Time (UTC) regardless of whether the time on the router isconfigured asUTCor the local time zone. The default time zone on the routeror switch is UTC.
61Copyright © 2016, Juniper Networks, Inc.
Chapter 5: Configuring Basic System Management Features

Configuring the Physical Location of the Router or Switch
To configure the physical location of the router or switch, you can configure the following
options for the location statement at the [edit system] hierarchy level:
• altitude feet—Number of feet above sea level.
• building name—Name of the building, 1 to 28 characters in length. If the string contains
spaces, enclose it in quotation marks (" ").
• country-code code—Two-letter country code.
• floor number—Floor in the building.
• hcoord horizontal-coordinate—Bellcore Horizontal Coordinate.
• lata transport--area—Local Access Transport Area.
• latitude degrees—Latitude in degree format.
• longitude degrees—Longitude in degree format.
• npa-nxx number—First six digits of the phone number (area code and exchange).
• postal-code postal-code—Postal code.
• rack number—Rack number.
• vcoord vertical-coordinate—Bellcore Vertical Coordinate.
The following example shows how to configure the physical location of the router orswitch:
[edit system]location {altitude feet;building name;country-code code;floor number;hcoord horizontal-coordinate;lata service-area;latitude degrees;longitude degrees;npa-nxx number;postal-code postal-code;rack number;vcoord vertical-coordinate;
}
RelatedDocumentation
Configuring Basic Router or Switch Properties on page 48•
Copyright © 2016, Juniper Networks, Inc.62
System Basics: Getting Started Configuration Guide

Configuring the Root Password
The Junos OS is preinstalled on the router or switch. When the router or switch is powered
on, it is ready to be configured. Initially, you log in as the user root with no password. The
root directory of a UNIX device is the entry point to all other folders and files on that
device. As a result, access to the root directory is restricted by default to a predefined
user account known as root user. The root user (also referred to as superuser) has
unrestricted access and full permissions within the system. The expression “log in as
root” is commonly used when an action requires you to log into the device as the root
user.
NOTE: If you configure a blank password using the encrypted-password
statement at the [edit system root-authentication] hierarchy level for root
authentication, you can commit a configuration, but you are not able to login as superuser and gain root level access to the router or switch.
After you log in, you should configure the root (superuser) password by including the
root-authentication statement at the [edit system] hierarchy level and configuring one
of the password options:
[edit system]root-authentication {(encrypted-password "password"| plain-text-password);load-key-fileURL filename;ssh-dsa “public-key” <from hostname>;ssh-ecdsa “public-key” <from hostname>;ssh-rsa “public-key” <from hostname>;
}
If you configure the plain-text-password option, you are prompted to enter and confirm
the password:
[edit system]user@host# set root-authentication plain-text-passwordNew password: type password hereRetype new password: retype password here
The default requirements for plain-text passwords are:
• The password must be between 6 and 128 characters long
• You can include most character classes in a password (uppercase letters, lowercase
letters, numbers, punctuation marks, and other special characters). Control characters
are not recommended.
• Valid passwords must contain at least one change of case or character class.
You can use the load-key-file URL filename statement to load an SSH key file that was
previously generated using ssh-keygen. TheURL filename is the path to the file’s location
and name. When using this option, the contents of the key file are copied into the
63Copyright © 2016, Juniper Networks, Inc.
Chapter 5: Configuring Basic System Management Features

configuration immediately after entering the load-key-fileURL statement. This command
loads RSA (SSH version 1 and SSH version 2) and DSA (SSH version 2) public keys.
Optionally, you can use the ssh-dsa, ssh-ecdsa, or ssh-rsa statements to directly configure
SSH RSA, DSA, or ECDSA keys to authenticate root logins. You can configure more than
one public key for SSH authentication of root logins as well as for user accounts. When
a user logs in as root, the public keys are referenced to determine whether the private
key matches any of them.
To view the SSH keys entries, use the configuration mode show command. For example:
[edit system]user@host# set root-authentication load-key-file my-host:.ssh/id_dsa.pub.file.19692 | 0 KB | 0.3 kB/s | ETA: 00:00:00 | 100%[edit system]user@host# showroot-authentication {ssh-rsa "1024 35 97276382040842510554682267572498642416303222074049625283903820386901415845349641700196106083587229615634757491827360336127644187426594689320773910834481012683125957722625461667999278316123500438660915866283822489746732605661192148953981396556156378621194032768780653816960202749164163735913269396344008443 [email protected]"; #SECRET-DATA
}
Junos-FIPS software has special password requirements. FIPS passwords must be
between 10 and 20 characters in length. Passwords must use at least three of the five
defined character sets (uppercase letters, lowercase letters, digits, punctuation marks,
and other special characters). If Junos-FIPS is installed on the router or switch, you cannot
configure passwords unless they meet this standard. If you use the encrypted-password
option, then a null-password (empty) is not permitted.
You cannot configure a blank password for encrypted-password using blank quotation
marks (" "). You must configure a password whose number of characters range from 1
through 128 characters and enclose the password in quotation marks.
RelatedDocumentation
Example: Configuring the Root Password•
• Example: Configuring a Plain-Text Password for Root Logins on page 65
• Example: Configuring SSH Authentication for Root Logins on page 65
• Example: Changing the Requirements for Junos OS Plain-Text Passwords on page 68
• Recovering the Root Password
Example: Configuring the Root Password
The following example shows how to configure the root password:
[edit]user@switch# set system root-authentication encrypted-password"$1$14c5.$sBopasddsdfs0"
[edit]
Copyright © 2016, Juniper Networks, Inc.64
System Basics: Getting Started Configuration Guide

user@switch# showsystem {root-authentication {encrypted-password "$1$14c5.$sBopasddsdfs0";
}}
RelatedDocumentation
Configuring the Root Password on page 63•
• Example: Configuring a Plain-Text Password for Root Logins on page 65
• Configuring the Root Password
Example: Configuring a Plain-Text Password for Root Logins
The following example shows how to set a plain-text password for root logins:
[edit]user@switch# set system root-authentication plain-text-passwordNew password: type root passwordRetype new password: retype root password[edit]user@switch# showsystem {root-authentication {encrypted-password "$1$14c5.$sBopasddsdfs0";
}}
RelatedDocumentation
Configuring the Root Password on page 63•
Example: Configuring SSH Authentication for Root Logins
The following example shows how to configure two public DSA keys for SSHauthentication of root logins:
[edit system]root-authentication {encrypted-password "$1$1wp5tqMX$uy/u5H7OdXTwfWTmeJWXe/";## SECRET-DATA;ssh-dsa "2354 95 [email protected]";ssh-dsa "0483 02 [email protected]";
}
RelatedDocumentation
Configuring the Root Password on page 63•
• Special Requirements for Junos OS Plain-Text Passwords on page 65
Special Requirements for Junos OS Plain-Text Passwords
Junos OS has special requirements when you create plain-text passwords on a router or
switch. Table 7 on page 66 shows the default requirements.
65Copyright © 2016, Juniper Networks, Inc.
Chapter 5: Configuring Basic System Management Features

Table 7: Special Requirements for Plain-Text Passwords
Junos-FIPSJunos OS
FIPS passwords must be between 10 and 20characters long
The password must be between 6 and 128characters long.
You can include most character classes in apassword (uppercase letters, lowercase letters,numbers, punctuation marks, and other specialcharacters). Control characters are notrecommended.
You can include most character classes in apassword (uppercase letters, lowercase letters,numbers, punctuation marks, and other specialcharacters). Control characters are notrecommended.
Passwords must use at least three of the fivedefined character classes (uppercase letters,lowercase letters, numbers, punctuation marks,and other special characters).
Valid passwords must contain at least onechange of case or character class.
You can change the requirements for plain-text passwords.
Junos OS supports the following five character classes for plain-text passwords:
• Lowercase letters
• Uppercase letters
• Numbers
• Punctuation
• Special characters: ! @ # $ % ^ & * , +< > : ;
Control characters are not recommended.
You can include the plain-text-password statement at the following hierarchy levels:
• [edit system diag-port-authentication]
• [edit system pic-console-authentication]
• [edit system root-authentication]
• [edit system login user username authentication]
Thechange-typestatement specifies whether the password is checked for the following:
• The total number of character sets used (character-set)
• The total number of character set changes (set-transitions)
For example, the following password:
MyPassWd@2
has four character sets (uppercase letters, lowercase letters, special characters, and
numbers) and seven character set changes (M–y, y–P,P–a, s–W,W–d,d–@, and@–2).
Copyright © 2016, Juniper Networks, Inc.66
System Basics: Getting Started Configuration Guide
The change-type statement is optional. If you omit the change-typeoption, Junos-FIPS
plain-text passwords are checked for character sets, and Junos OS plain-text passwords
are checked for character set changes.
The minimum-changes statement specifies how many character sets or character set
changes are required for the password. This statement is optional. If you do not use
the minimum-changes statement, character sets are not checked for Junos OS. If the
change-type statement is configured for the character-set option, then the
minimum-changes value must be 5 or less, because Junos OS only supports five
character sets.
The format statement specifies the hash algorithm (md5, sha1ordes) for authenticating
plain-text passwords. This statement is optional. For Junos OS, the default format is
md5. For Junos-FIPS, only sha1 is supported.
Themaximum-length statement specifies the maximum number of characters allowed
in a password. This statement is optional. By default, Junos OS passwords have no
maximum; however, only the first 128 characters are significant. Junos-FIPS passwords
must be 20 characters or less. The range for Junos OS maximum-length passwords is
from 20 to 128 characters.
Theminimum-length statement specifies the minimum number of characters required
for a password. This statement is optional. By default, Junos OS passwords must be
at least 6 characters long, and Junos-FIPS passwords must be at least 10 characters
long. The range is from 6 to 20 characters.
Changes to password requirements do not take effect until the configuration is
committed. When requirements change, only newly created, plain-text passwords are
checked; existing passwords are not checked against the new requirements.
The default configuration for Junos OS plain-text passwords is:
[edit system login]passwords {change-type character-sets;formatmd5;minimum-changes 1;minimum-length 6;
}
The default configuration for Junos-FIPS plain-text passwords is:
[edit system login]passwords {change-type set-transitions;format sha1;maximum-length 20;minimum-changes 3;minimum-length 10;
}
RelatedDocumentation
Changing the Requirements for Junos OS Plain-Text Passwords on page 68•
• Configuring the Root Password on page 63
• Changing the Requirements for Junos OS Plain-Text Passwords
67Copyright © 2016, Juniper Networks, Inc.
Chapter 5: Configuring Basic System Management Features

• Configuring the Root Password
Changing the Requirements for Junos OS Plain-Text Passwords
To change the requirements for plain-text passwords, include the password statement
at the [edit system login] hierarchy level:
[edit system login]password {change-type (set-transitions | character-set);format (md5 | sha1);maximum-length length;minimum-changes number;minimum-length length;minimum-lower-cases number;minimum-numerics number;minimum-punctuations number;minimum-upper-cases number;
}
NOTE: These statements apply to plain-text passwords only, not encryptedpasswords.
RelatedDocumentation
Special Requirements for Junos OS Plain-Text Passwords on page 65•
• Configuring the Root Password on page 63
• Example: Changing the Requirements for Junos OS Plain-Text Passwords on page 68
Example: Changing the Requirements for Junos OS Plain-Text Passwords
This example shows how to set various maximum and minimum requirements for
plain-text passwords to increase password strength.
• Requirements on page 69
• Overview on page 69
• Configuration on page 69
Copyright © 2016, Juniper Networks, Inc.68
System Basics: Getting Started Configuration Guide

Requirements
This example requires a device running Junos 12.2 or greater. The minimum-length and
maximum-length password requirements statements are available in earlier releases,
however, you must have Junos OS Release 12.2 or greater to configure
minimum-lower-cases, minimum-numerics, minimum-punctuations, or
minimum-upper-cases.
Overview
You can use a variety of requirements to strengthen plain-text passwords for greater
security. Junos OS provides a number of possible configurations at the [edit system login
password] hierarchy level that allow you to require users to create plain-text passwords
that conform to a particular set of requirements that may include such things as length,
number of changes, type of characters, numbers, or letter case.
Configuration
CLI QuickConfiguration
To quickly configure this example, copy the following commands, paste them into a text
file, remove any line breaks, change any details necessary to match your network
configuration, and then copy and paste the commands into the CLI at the [edit]hierarchy
level.
set system login passwordminimum-length 12
set system login passwordmaximum-length 22
set system login passwordminimum-numerics 1
set system login passwordminimum-upper-cases 1
set system login passwordminimum-lower-cases 1
set system login passwordminimum-punctuations 1
Configuring Requirements for Plain-Text Passwords
Step-by-StepProcedure
This example configures password requirements that require the user to creat a password
that has a minimum length of 12 characters, a maximum length of 22 characters, and
that includes at least one lower-case letter, at least one upper-case letter, at least one
punctuation character, and at least one numeric character.
1. Navigate to configuration mode in the [system login password] hierarchy level.
user@host> edit[edit]user@host# edit system login password
2. Set a minimum length requirement of 12 characters and a maximum length
requirement of 22 characters for user passwords.
[edit system login password]user@host# set minimum-length 12[edit system login password]
69Copyright © 2016, Juniper Networks, Inc.
Chapter 5: Configuring Basic System Management Features

user@host# set maximum-length 22
3. Require users to set a password that has at least one lower-case letter and at least
one upper-case letter.
[edit system login password]user@host# set minimum-lower-cases 1[edit system login password]user@host# set minimum-upper-cases 1
4. Require users to set a password that has at least one punctuation-class character
and at least one number.
[edit system login password]user@host# set minimum-punctuations 1[edit system login password]user@host# set minimum-numerics 1
Results
From configuration mode, confirm your configuration by entering the show command at
the edit system login password hierarchy level. if the output does not display the intended
configuration, repeat the instructions in this example to correct the configuration.
[edit system login password]user@host# showminimum-length 12;maximum-length 22;minimum-numerics 1;minimum-upper-cases 1;minimum-lower-cases 1;
RelatedDocumentation
Special Requirements for Junos OS Plain-Text Passwords on page 65•
• password (Login)
Configuring the Junos OS to Set Console and Auxiliary Port Properties
Each router or switch has a console port and an auxiliary port for connecting terminals
to the router or switch. The console port is enabled by default, and its speed is 9600 baud.
The auxiliary port is disabled by default.
To configure the properties for the console and auxiliary ports, include theports statement
at the [edit system] hierarchy level:
[edit system]ports {auxiliary {disable;insecure;type terminal-type;
}console {disable;
Copyright © 2016, Juniper Networks, Inc.70
System Basics: Getting Started Configuration Guide

insecure;log-out-on-disconnect;type terminal-type;
}}
By default, the terminal type is unknown, and the terminal speed is 9600 baud for both
the console and auxiliary ports. To change the terminal type, include the type statement,
specifying a terminal-type of ansi, vt100, small-xterm, or xterm. The first three terminal
types set a screen size of 80 columns by 24 lines. The last type, xterm, sets the size to
80 columns by 65 rows.
By default, the console session is not logged out when the data carrier is lost on the
console modem control lines. To log out the session when the data carrier on the console
port is lost, include the log-out-on-disconnect statement. You can use the show system
users command to verify the console session is logged out.
NOTE: The log-out-on-disconnect statement is not operational on MX80
routers. OnMX80 routers youmust manually log out from the console withthe request system logout u0 command.
By default, terminal connections to the console and auxiliary ports are secure. When you
configure the console as insecure, root logins are not allowed to establish terminal
connections. In addition, superusers and anyone with a user identifier (UID) of 0 are not
allowed to establish terminal connections in multiuser mode when you configure the
console as insecure. To disable root login connections to the console and auxiliary ports,
include the insecure statement. This option can be used to prevent a user from attempting
password recovery by booting into single-user mode, if the user does not know the root
password.
To disable console login, include the disable statement. By default, console login
is enabled.
For Common Criteria compliance, the console port must be disabled.
RelatedDocumentation
Methods for Configuring Junos OS on page 34•
• console
• ports on page 125
ConfiguringMultiple Routing Engines to Synchronize Committed ConfigurationsAutomatically
If your router or switch has multiple Routing Engines, you can manually direct one Routing
Engine to synchronize its configuration with the others by issuing the commit synchronize
command.
71Copyright © 2016, Juniper Networks, Inc.
Chapter 5: Configuring Basic System Management Features

To make the Routing Engines synchronize automatically whenever a configuration is
committed, include the commit synchronize statement at the [edit system] hierarchy
level:
[edit system]commit synchronize;
The Routing Engine on which you execute the commit command (requesting Routing
Engine) copies and loads its candidate configuration to the other (responding) Routing
Engines. All Routing Engines then perform a syntax check on the candidate configuration
file being committed. If no errors are found, the configuration is activated and becomes
the current operational configuration on all Routing Engines.
For the commit synchronization process, the master Routing Engine commits the
configuration and sends a copy of the configuration to the backup Routing Engine. Then
the backup Routing Engine loads and commits the configuration. So, the commit
synchronization between the master and backup Routing Engines takes place one Routing
Engine at a time. If the configuration has a large text size or many apply-groups, commit
times can be longer than desired.
You can use the commit fast-synchronize statement to have the synchronization between
the master and backup Routing Engines occur simultaneously instead of sequentially.
This can reduce the time needed for synchronization because the commits on the master
and backup Routing Engines occur in parallel.
Include the fast-synchronize statement at the [edit system] hierarchy level to have
synchronize occur simultaneously between the master and the backup Routing Engines:
[edit system]commit fast-synchronize
NOTE:
• If commit fails on either Routing Engine, the commit process is rolled backon theotherRoutingEngineaswell. Thisensures thatbothRoutingEngineshave the same configuration.
• When the fast-synchronize statement is configured, the commits on the
master Routing Engine and the backup Routing Engine run in parallel. Inthisprocess, theconfiguration isvalidatedonlyon theRoutingEnginewhereyou execute the commit command. Therefore, it is recommended not to
include toomany configuration details in groups like re0 and re1, becausetheconfigurationspecified ingroup re0 isappliedonly if thecurrentRoutingEngine is inslot0.Likewise, theconfigurationspecified ingroup re1 isappliedonly if the current Routing Engine is in slot 1.
• Ensure that the Junos OS software version running on both the RoutingEngines is same.
RelatedDocumentation
Junos OS Commit Model for Router or Switch Configuration on page 8•
Copyright © 2016, Juniper Networks, Inc.72
System Basics: Getting Started Configuration Guide

Compressing the Current Configuration File
By default, the current operational configuration file is compressed, and is stored in the
file juniper.conf.gz, in the /config file system, along with the last three committed versions
of the configuration. If you have large networks, the current configuration file might exceed
the available space in the /config file system. Compressing the current configuration file
enables the file to fit in the file system, typically reducing the size of the file by 90 percent.
You might want to compress your current operation configuration files when they reach
3 megabytes (MB) in size.
When you compress the current configuration file, the names of the configuration files
change. To determine the size of the files in the /config file system, issue the file list
/config detail command.
NOTE: We recommend that you compress the configuration files (this is thedefault) tominimize the amount of disk space that they require.
• If you want to compress the current configuration file, include the
compress-configuration-files statement at the [edit system] hierarchy level:
[edit system]compress-configuration-files;
Commit the current configuration file to include the compression-configuration-files
statement. Commit the configuration again to compress the current configuration file:
[edit system]user@host# set compress-configuration-filesuser@host# commitcommit completeuser@host# commitcommit complete
• If you do not want to compress the current operational configuration file, include the
no-compress-configuration-files statement at the [edit system] hierarchy level:
[edit system]no-compression-configuration-files;
Commit the current configuration file to include the no-compress-configuration-files
statement. Commit the configuration again to uncompress the current configuration file:
[edit system]user@host# commitcommit completeuser@host# commitcommit complete
RelatedDocumentation
Junos OS Commit Model for Router or Switch Configuration on page 8•
• compress-configuration-files
73Copyright © 2016, Juniper Networks, Inc.
Chapter 5: Configuring Basic System Management Features

Configuring the Junos OS toMake the Router or Interface Act as a DHCP or BOOTPRelay Agent
To configure a router or interface to act as a bootstrap protocol (DHCP or BOOTP) relay
agent, you include statements at the [edit forwarding-options helpers] hierarchy level.
For J Series Services Routers, you can configure a router or interface as a DHCP server
by including statements at the [edit system services] hierarchy level.
NOTE: You cannot configure a router or interface as a DHCP server and aBOOTP relay agent at the same time.
Disabling Junos OS Processes
CAUTION: Never disable any of the software processes unless instructed todo so by a Customer Support engineer.
To disable a software process, specify the appropriate option in the processes statement
at the [edit system] hierarchy level:
[edit system]processes {process-name (enable | disable);
}
NOTE: The process-name variable is one of the valid process names. You can
obtain a complete list of process names by using the CLI commandcompletion feature. For additional information, see processes.
RelatedDocumentation
Configuring Failover to Backup Media if a Junos OS Process Fails on page 75•
• Configuring Password Authentication for the Diagnostics Port
• Viewing Core Files from Junos OS Processes on page 74
Viewing Core Files from Junos OS Processes
When an internal Junos process generates a core file, the output found at /var/crash/
and /var/tmp/ can now be viewed. This provides a quick method of finding core issues
across large networks.
Use the CLI command show system core-dumps to view core files.
root@host> show system core-dumps
Copyright © 2016, Juniper Networks, Inc.74
System Basics: Getting Started Configuration Guide

-rw------- 1 root wheel 268369920 Jun 18 17:59 /var/crash/vmcore.0-rw-rw---- 1 root field 3371008 Jun 18 17:53 /var/tmp/rpd.core.0-rw-r--r-- 1 root wheel 27775914 Jun 18 17:59 /var/crash/kernel.0
RelatedDocumentation
Saving Core Files from Junos OS Processes on page 75•
• Saving Core Files Generated by Junos OS Processes
Saving Core Files from Junos OS Processes
By default, when an internal Junos process generates a core file, the file and associated
context information are saved for debugging purposes in a compressed tar file named
/var/tmp/process-name.core.core-number.tgz. The contextual information includes the
configuration and system log message files.
To disable the saving of core files and associated context information, include the
no-saved-core-context statement at the [edit system] hierarchy level:
[edit system]no-saved-core-context;
To save the core files only, include the saved-core-files statement at the [edit system]
hierarchy level and specify the number of files to save:
[edit system]saved-core-files number;
number is the number of core files to save and can be a value from 1 through 10.
To save the core files along with the contextual information, include the
saved-core-context statement at the [edit system] hierarchy level:
[edit system]saved-core-context;
RelatedDocumentation
Viewing Core Files from Junos OS Processes on page 74•
Configuring Failover to BackupMedia if a Junos OS Process Fails
For routers or switches with redundant Routing Engines, you can configure the router or
switch to switch to backup media that contains a version of the system if a software
process fails repeatedly. You can configure the router or switch to fail over either to
backup media or to the other Routing Engine. To configure automatic switchover to
backup media if a software process fails, include the failover statement at the [edit system
processes process-name] hierarchy level:
[edit system processes]process-name failover (alternate-media | other-routing-engine);
process-name is one of the valid process names. If this statement is configured for a
process, and that process fails four times within 30 seconds, the router reboots from
either the alternative media or the other Routing Engine.
75Copyright © 2016, Juniper Networks, Inc.
Chapter 5: Configuring Basic System Management Features
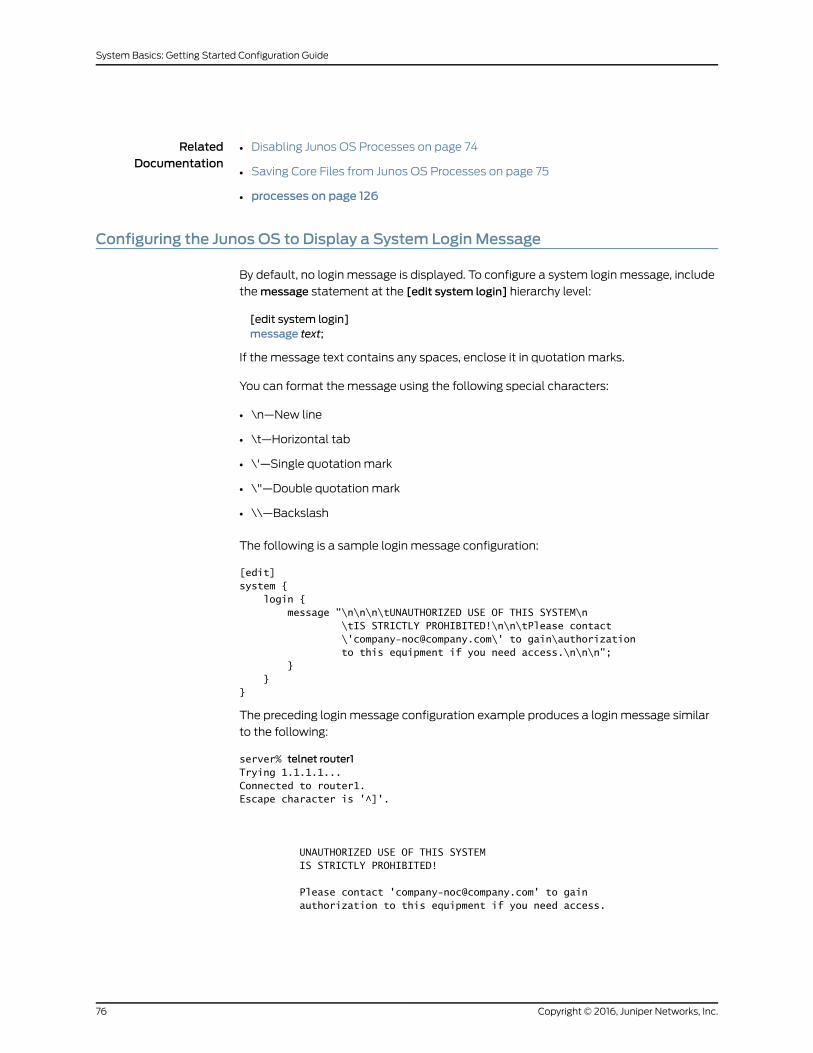
RelatedDocumentation
Disabling Junos OS Processes on page 74•
• Saving Core Files from Junos OS Processes on page 75
• processes on page 126
Configuring the Junos OS to Display a System Login Message
By default, no login message is displayed. To configure a system login message, include
the message statement at the [edit system login] hierarchy level:
[edit system login]message text;
If the message text contains any spaces, enclose it in quotation marks.
You can format the message using the following special characters:
• \n—New line
• \t—Horizontal tab
• \'—Single quotation mark
• \"—Double quotation mark
• \\—Backslash
The following is a sample login message configuration:
[edit]system { login { message "\n\n\n\tUNAUTHORIZED USE OF THIS SYSTEM\n \tIS STRICTLY PROHIBITED!\n\n\tPlease contact \'[email protected]\' to gain\authorization to this equipment if you need access.\n\n\n"; } }}
The preceding login message configuration example produces a login message similar
to the following:
server% telnet router1Trying 1.1.1.1...Connected to router1.Escape character is '^]'.
UNAUTHORIZED USE OF THIS SYSTEM IS STRICTLY PROHIBITED!
Please contact '[email protected]' to gain authorization to this equipment if you need access.
Copyright © 2016, Juniper Networks, Inc.76
System Basics: Getting Started Configuration Guide

router1 (ttyp0)
login:
A system login message appears before the user logs in. A system login announcement
appears after the user logs in. See “Configuring the Junos OS to Display a System Login
Announcement” on page 77.
RelatedDocumentation
Configuring the Junos OS to Display a System Login Announcement on page 77•
• Defining Junos OS Login Classes
Configuring the Junos OS to Display a System Login Announcement
By default, no login announcement is displayed. To configure a system login
announcement, include theannouncement statement at the [edit systemlogin]hierarchy
level:
[edit system login]announcement text;
If the announcement text contains any spaces, enclose it in quotation marks.
A system login announcement appears after the user logs in. A system login message
appears before the user logs in. See “Configuring the Junos OS to Display a System Login
Message” on page 76.
TIP: You can use the same special characters described in “Configuring theJunos OS to Display a System Login Message” on page 76 to format yoursystem login announcement.
RelatedDocumentation
Configuring the Junos OS to Display a System Login Message on page 76•
77Copyright © 2016, Juniper Networks, Inc.
Chapter 5: Configuring Basic System Management Features

Configuring Junos OS for the First Time on a Router or Switch with a Single RoutingEngine
When you turn on a router the first time, Junos OS automatically boots and starts. You
must enter basic configuration information so that the router is on the network and you
can log in to it over the network.
To configure the router initially, you must connect a terminal or laptop computer to the
router through the console port—a serial port on the front of the router. Only console
access to the router is enabled by default. Remote management access to the router
and all management access protocols, including Telnet, FTP, and SSH, are disabled
by default.
To configure the Junos OS for the first time on a router with a single Routing Engine,
follow these steps:
1. Connect a terminal or laptop computer to the router through the console port—a serial
port on the front of the router. Only console access to the router is enabled by default.
2. Power on the router and wait for it to boot.
The Junos OS boots automatically. The boot process is complete when you see the
login: prompt on the console.
3. Log in as the user root.
Initially, the root user account requires no password. You can see that you are the root
user, because the prompt on the router shows the username root@#.
4. Start the Junos OS command-line interface (CLI):
root@# cliroot@>
5. Enter Junos OS configuration mode:
cli> configure[edit]root@#
6. Configure the name of the router (the router hostname). We do not recommend
spaces in the router name. However, if the name does include spaces, enclose the
entire name in quotation marks (" ").
[edit]root@# set system host-name hostname
7. Configure the router’s domain name:
[edit]root@# set system domain-name domain-name
NOTE: Before youbeginStep8, seeSupportedRoutingEngines byChassisto find themanagementEthernet interface thatyoushoulduse toperformthis configuration.
Copyright © 2016, Juniper Networks, Inc.78
System Basics: Getting Started Configuration Guide

8. Configure the IP address and prefix length for the router management Ethernet
interface. The management Ethernet interface provides a separate out-of-band
management network for the router.
• For devices that use management Ethernet interface fxp0:
[edit]root@# set interfaces fxp0 unit 0 family inet address address/prefix-length
• For devices that use management Ethernet interface em0:
[edit]root@# set interfaces em0 unit 0 family inet address address/prefix-length
To use em0 as an out-of-band management Ethernet interface, you must configure
its logical port, em0.0, with a valid IP address.
9. Configure the IP address of a backup or default router. This device is called the backup
router, because it is used only while the routing protocol process is not running. Choose
a router that is directly connected to the local router by way of the management
interface. The router uses this backup router only when it is booting and only or when
the Junos routing software (the routing protocol process, rpd) is not running.
For routers with two Routing Engines, the backup Routing Engine,RE1, uses the backup
router as a default gateway after the router boots. This enables you to access the
backup Routing Engine. (RE0 is the default master Routing Engine.)
NOTE: The backup router Routing Engine does not support more than 16destinations. If you configuremore than 16 destinations on the backupRouting Engine, the JunosOS ignores any destination addresses after thesixteenth address and displays a commit-time warningmessage to thiseffect.
[edit]root@# set system backup-router address
10. Configure the IP address of a DNS server. The router uses the DNS name server to
translate hostnames into IP addresses.
[edit]root@# set system name-server address
11. Set the root password, entering either a clear-text password that the system will
encrypt, a password that is already encrypted, or an SSH public key string.
Choose one of the following:
a. To enter a clear-text password, use the following command:
[edit]root@# set system root-authentication plain-text-passwordNew password: type passwordRetype new password: retype password
b. To enter a password that is already encrypted, use the following command:
[edit]
79Copyright © 2016, Juniper Networks, Inc.
Chapter 5: Configuring Basic System Management Features

root@# set system root-authentication encrypted-password encrypted-password
c. To enter an SSH public key, use the following command:
[edit]root@# set system root-authentication ssh-rsa key
12. Optionally, display the configuration statements:
[edit]root@ showsystem {host-name hostname;domain-name domain.name;backup-router address;root-authentication {(encrypted-password "password" | public-key);ssh-dsa "public-key";ssh-ecdsa "public-key";ssh-rsa "public-key";
}name-server {address;
}interfaces {fxp0 {unit 0 {family inet {address address ;
}}
}}
}
On routers that use management Ethernet interface em0, you will see em0 in place
of fxp0 in the show command output.
13. Commit the configuration, which activates the configuration on the router:
[edit]root@# commit
After committing the configuration, you see the newly configured hostname appear
after the username in the prompt—for example, user@host#.
The defaults for Junos OS are now set on the router.
If you want to configure additional Junos OS properties at this time, remain in the CLI
configuration mode and add the necessary configuration statements. You need to
commit your configuration changes to activate them on the router.
14. Exit from the CLI configuration mode.
[edit]root@hostname# exitroot@hostname>
15. Back up the configuration on the hard drive.
Copyright © 2016, Juniper Networks, Inc.80
System Basics: Getting Started Configuration Guide

After you have installed the software on the router, committed the configuration, and
are satisfied that the new configuration is successfully running, you should issue the
request system snapshot command to back up the new software to the /altconfig file
system. If you do not issue the request system snapshot command, the configuration
on the alternate boot device will be out of sync with the configuration on the primary
boot device.
The request system snapshot command causes the root file system to be backed up
to /altroot, and /config to be backed up to /altconfig. The root and /config file systems
are on the router’s CompactFlash card, and the /altroot and /altconfig file systems
are on the router’s hard disk.
NOTE: After you issue the request systemsnapshot command, you cannot
return to the previous version of the software, because the running copyand the backup copy of the software are identical.
RelatedDocumentation
Initial Router or Switch Configuration Using the Junos OS on page 41•
• Supported Routing Engines by Chassis
• Format for Specifying IP Addresses, Network Masks, and Prefixes in Junos OS
Configuration Statements on page 38
• Default Directories for Junos OS File Storage on the Router or Switch on page 40
• Configuring Basic Router or Switch Properties on page 48
• Configuring Automatic Mirroring of the CompactFlash Card on the Hard Disk Drive on
page 58
81Copyright © 2016, Juniper Networks, Inc.
Chapter 5: Configuring Basic System Management Features

Configuring the Junos OS for the First Time on a Router or Switch with Dual RoutingEngines
If a router has dual Routing Engines, you can create configuration groups and use the
same configuration for both Routing Engines. This ensures that the configuration will not
change during a failover scenario because of the identical configuration shared between
the Routing Engines.
Configure the hostnames and addresses of the two Routing Engines using configuration
groups at the [edit groups] hierarchy level. Use the reserved configuration group re0 for
the Routing Engine in slot 0 and re1 for the Routing Engine in slot 1 to define Routing
Engine-specific parameters. Configuring re0and re1groups enables both Routing Engines
to use the same configuration file.
Use the apply-groups statement to reproduce the configuration group information in the
main part of the configuration.
The commit synchronize command commits the same configuration on both Routing
Engines. The command makes the active or applied configuration the same for both
Routing Engines with the exception of the groups, re0 being applied to only RE0 and re1
being applied only to RE1. If you do not synchronize the configurations between two
Routing Engines and one of them fails, the router may not forward traffic correctly,
because the backup Routing Engine may have a different configuration.
To initially configure a router with dual Routing Engines, follow these steps:
1. Go to “Configuring Junos OS for the First Time on a Router or Switch with a Single
Routing Engine” on page 78 and follow Step 1 through Step 5 to initially configure the
backup Routing Engine.
2. Create the configuration group re0. The re0 group is a special group designator that
is only used by RE0 in a redundant routing platform.
[edit]root@# set groups re0
3. Navigate to the groups re0 level of the configuration hierarchy.
[edit]root@# edit groups re0
4. Specify the router hostname.
[edit groups re0]root@# set system host-name host-name
NOTE: The hostname specified in the router configuration is not used bytheDNS server to resolve to the correct IP address. This hostname is usedto display the name of the Routing Engine in the CLI. For example, thehostname appears at the command-line prompt when the user is loggedin to the CLI:
user-name@host-name>
Copyright © 2016, Juniper Networks, Inc.82
System Basics: Getting Started Configuration Guide

NOTE: Before youbeginStep5, seeSupportedRouting Engines byChassisto find themanagementEthernet interface thatyoushoulduse toperformthis configuration.
5. Configure the IP address and prefix length for the router management Ethernet
interface. The management Ethernet interface provides a separate out-of-band
management network for the router.
• For routers that use management Ethernet interface fxp0:
[edit groups]root@# set interfaces fxp0 unit 0 family inet address address/prefix-length
• For routers that use management Ethernet interface em0:
[edit groups]root@# set interfaces em0 unit 0 family inet address address/prefix-length
To use em0 as an out-of-band management Ethernet interface, you must configure
its logical port, em0.0, with a valid IP address.
6. Set the loopback interface address for re0 configuration group:
[edit groups]root@# set re0 interfaces lo0 unit 0 family inet address address/prefix-length
7. Return to the top level of the hierarchy.
[edit groups re0]root@# top
8. Create the configuration group re1.
[edit]root@# set groups re1
9. Navigate to the groups re1 level of the configuration hierarchy.
[edit]root@# edit groups re1
10. Specify the router hostname.
[edit groups re1]root@# set system host-name host-name
NOTE: Before youbeginStep 11, seeSupportedRoutingEnginesbyChassisto find themanagementEthernet interface thatyoushoulduse toperformthis configuration.
11. Configure the IP address and prefix length for the router management Ethernet
interface.
• For routers that use management Ethernet interface fxp0:
[edit groups]root@# set interfaces fxp0 unit 0 family inet address address/prefix-length
83Copyright © 2016, Juniper Networks, Inc.
Chapter 5: Configuring Basic System Management Features

• For routers that use management Ethernet interface em0:
[edit groups]root@# set interfaces em0 unit 0 family inet address address/prefix-length
To use em0 as an out-of-band management Ethernet interface, you must configure
its logical port, em0.0, with a valid IP address.
12. Set the loopback interface address for re1 configuration group:
[edit groups]root@# set re1 interfaces lo0 unit 0 family inet address address/prefix-length
13. Return to the top level of the hierarchy.
[edit groups re0]root@# top
14. Configure theapply-groupsstatement to reproduce the configuration group information
to the main part of the configuration and to specify the group application order.
[edit]root@# set apply-groups [ re0 re1 ]
15. Configure Routing Engine redundancy:
[edit]root@# set chassis redundancy routing-engine 0masterroot@# set chassis redundancy routing-engine 1 backup
16. Save the configuration change on both Routing Engines:
[edit]user@host> commit synchronizeroot@#
After the configuration changes are saved, complete the management console
configuration.
1. Configure the IP address of the DNS server.
[edit ]root@# set system name-server address
2. Configure the router domain name:
[edit ]root@# set system domain-name domain-name
3. Configure the IP address of a backup or default router. This device is called the backup
router, because it is used only while the routing protocol process is not running. Choose
a router that is directly connected to the local router by way of the management
interface. The router uses this backup router only when it is booting and only or when
the Junos routing software (the routing protocol process, rpd) is not running.
For routers with two Routing Engines, the backup Routing Engine,RE1, uses the backup
router as a default gateway after the router boots. This enables you to access the
backup Routing Engine. (RE0 is the default master Routing Engine.)
Copyright © 2016, Juniper Networks, Inc.84
System Basics: Getting Started Configuration Guide

NOTE: The backup router Routing Engine does not support more than 16destinations. If you configuremore than 16 destinations on the backupRouting Engine, the JunosOS ignores any destination addresses after thesixteenth address and displays a commit-time warningmessage to thiseffect.
[edit]root@# set system backup-router address
4. Set the root password, entering either a clear-text password that the system will
encrypt, a password that is already encrypted, or an SSH public key string.
Choose one of the following:
a. To enter a clear-text password, use the following command:
[edit]root@# set system root-authentication plain-text-passwordNew password: type passwordRetype new password: retype password
b. To enter a password that is already encrypted, use the following command:
[edit]root@# set system root-authentication encrypted-password encrypted-password
c. To enter an SSH public key, use the following command:
[edit]root@# set system root-authentication ssh-rsa key
5. Optionally, display the configuration statements:
[edit]root@ showsystem {host-name hostname;domain-name domain.name;backup-router address;root-authentication {(encrypted-password "password" | public-key);ssh-dsa "public-key";ssh-ecdsa "public-key";ssh-rsa "public-key";
}name-server {address;
}interfaces {fxp0 {unit 0 {family inet {address address ;
}}
}}
85Copyright © 2016, Juniper Networks, Inc.
Chapter 5: Configuring Basic System Management Features

}
On routers that use management Ethernet interface em0, you will see em0 in place
of fxp0 in the show command output.
6. After you have installed the new software and are satisfied that it is successfully
running, issue the request system snapshot command to back up the new software
on both master and backup Routing Engines.
{master}user@host> request system snapshot
The root file system is backed up to /altroot, and /config is backed up to /altconfig.
The root and /config file systems are on the router’s CompactFlash card, and the
/altroot and /altconfig file systems are on the router’s hard disk.
NOTE: After you issue the request systemsnapshotcommand, you cannot
return to the previous version of the software, because the running copyand backup copy of the software are identical.
For information about creating configuration groups, see CLI User Guide.
For information about configuring high availability features for redundant Routing Engine
systems and the re0 group, see Junos OS High Availability Configuration Guide.
RelatedDocumentation
Configuring Junos OS for the First Time on a Router or Switch with a Single Routing
Engine on page 78
•
• Supported Routing Engines by Chassis
• Initial Router or Switch Configuration Using the Junos OS on page 41
• Format for Specifying IP Addresses, Network Masks, and Prefixes in Junos OS
Configuration Statements on page 38
• Default Directories for Junos OS File Storage on the Router or Switch on page 40
• Configuring Basic Router or Switch Properties on page 48
• Configuring Automatic Mirroring of the CompactFlash Card on the Hard Disk Drive on
page 58
Configuring CLI Tips
The Junos OS CLI provides the option of configuring CLI tips for the user. By default, the
tip command is not enabled when a user logs in.
• To enable tips, include the login-tip statement at the [edit systemloginclassclass-name]
hierarchy level:
[edit system login class class-name]login-tip;
Copyright © 2016, Juniper Networks, Inc.86
System Basics: Getting Started Configuration Guide

Adding this statement enables the tip command for the class specified, provided the
user logs in using the CLI.
RelatedDocumentation
CLI User Interface Overview•
• Defining Junos OS Login Classes
• login-tip
Upgrading to 64-bit Junos OS
Just like any other operating system, the 64-bit version of Junos OS can address more
memory than the 32-bit version of the operating system. In order to support larger Routing
Engine memory sizes, an upgrade from the 32-bit to the 64-bit Junos OS running on the
Routing Engine hardware is necessary. The upgrade path is relatively straightforward
and another form of Routing Engine hardware and software upgrade. However, there are
three different and distinct Routing Engine configurations that must be taken into account
when upgrading to the 64-bit Junos OS. This topic covers all three.
The In Service Software Upgrade (ISSU) procedure is not supported while upgrading
from the 32-bit version of Junos OS to the 64-bit version of Junos OS. The upgrade process
involves some downtime, so traffic will be affected.
NOTE: The 64-bit version of Junos OS is not supported on every RoutingEngine. To determine whether your router and Routing Engine support a64-bit version of Junos OS, see Supported Routing Engines by Chassis.
Before you begin, you must have:
• A properly configured and functional router
• One or two Routing Engines installed that support the 64-bit Junos OS
• Decided to allow single Routing Engines systems to use either slot 0 or slot 1 as master
or not (this decision will determine which upgrade path to follow for single Routing
Engine systems)
When you upgrade a Routing Engine to the 64-bit Junos OS, you can support larger
Routing Engine memory sizes. However, the exact procedure depends on whether there
are one or two Routing Engines installed. For systems with a single Routing Engine, the
procedure varies based on whether the master Routing Engine must always be in slot 0
or not.
87Copyright © 2016, Juniper Networks, Inc.
Chapter 5: Configuring Basic System Management Features
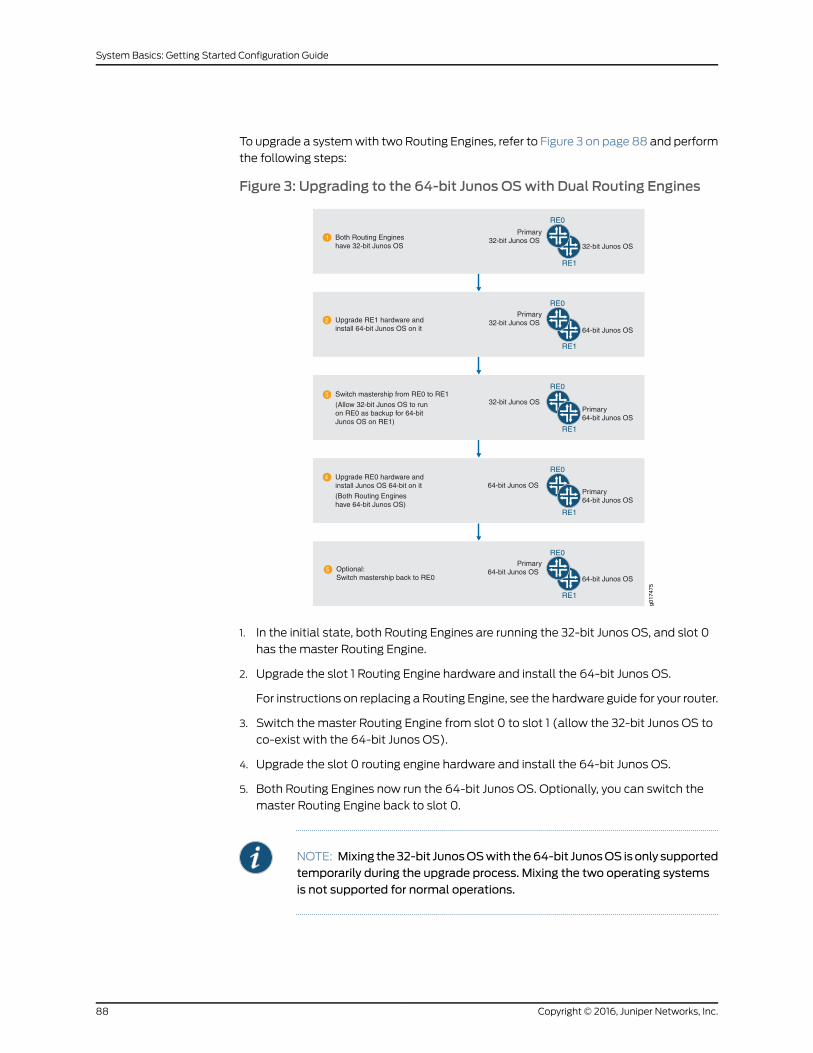
To upgrade a system with two Routing Engines, refer to Figure 3 on page 88 and perform
the following steps:
Figure 3: Upgrading to the 64-bit Junos OSwith Dual Routing Engines
1
2
3
4
5
Both Routing Engineshave 32-bit Junos OS
RE1
RE0
32-bit Junos OS
Upgrade RE1 hardware andinstall 64-bit Junos OS on it 64-bit Junos OS
RE1
RE0
Switch mastership from RE0 to RE1
(Allow 32-bit Junos OS to runon RE0 as backup for 64-bitJunos OS on RE1)
32-bit Junos OS
RE1
RE0
Primary64-bit Junos OS
Upgrade RE0 hardware andinstall Junos OS 64-bit on it
(Both Routing Engineshave 64-bit Junos OS)
Primary64-bit Junos OS
64-bit Junos OS
RE1
RE0
Optional:Switch mastership back to RE0 64-bit Junos OS
RE1
RE0
g017
475
Primary32-bit Junos OS
Primary32-bit Junos OS
Primary64-bit Junos OS
1. In the initial state, both Routing Engines are running the 32-bit Junos OS, and slot 0
has the master Routing Engine.
2. Upgrade the slot 1 Routing Engine hardware and install the 64-bit Junos OS.
For instructions on replacing a Routing Engine, see the hardware guide for your router.
3. Switch the master Routing Engine from slot 0 to slot 1 (allow the 32-bit Junos OS to
co-exist with the 64-bit Junos OS).
4. Upgrade the slot 0 routing engine hardware and install the 64-bit Junos OS.
5. Both Routing Engines now run the 64-bit Junos OS. Optionally, you can switch the
master Routing Engine back to slot 0.
NOTE: Mixing the32-bit JunosOSwith the64-bit JunosOS isonly supportedtemporarily during the upgrade process. Mixing the two operating systemsis not supported for normal operations.
Copyright © 2016, Juniper Networks, Inc.88
System Basics: Getting Started Configuration Guide

Figure 4: Upgrading to the 64-bit Junos OSwith a Single Routing Engine(Master in Either Slot)
1
2
4
3
g017
477
Single Routing Enginehas 32-bit Junos OS
Primary32-bit Junos OS
RE1
RE0
Add RE1 hardware and install64-bit Junos OS on it
Switch mastership
(Routing Engine in RE0 is nowthe backup Routing Engine)
64-bit Junos OS
Blank
Blank
RE1
RE0
Once system is operational,remove RE0 Routing Engine Primary
64-bit Junos OS
RE1
RE0
Primary64-bit Junos OS
32-bit Junos
RE0
RE1
Primary32-bit Junos
To upgrade a system with a single Routing Engine, where the master Routing Engine can
be in either slot 0 or slot 1, refer to Figure 3 on page 88and perform the following steps:
1. In the initial state, the slot 0 Routing Engine is running the 32-bit Junos OS and slot 1
is blank.
2. Install the upgraded Routing Engine hardware in slot 1 and install the 64-bit Junos OS.
For instructions on installing a Routing Engine, see the hardware guide for your router.
3. When the 64-bit Junos OS is configured properly, remove the slot 0 Routing Engine
running the 32-bit Junos OS.
89Copyright © 2016, Juniper Networks, Inc.
Chapter 5: Configuring Basic System Management Features

To upgrade a system with a single Routing Engine, where the master Routing Engine
must be in slot 0, refer to Figure 5 on page 90 and perform the following steps:
Figure 5: Upgrading to the 64-bit Junos OSwith a Single Routing Engine(Master Must Be in Slot 0)
1
3
2
Single Routing Enginehas 32-bit Junos OS
Primary32-bit Junos OS
RE1
RE0
Blank
Once system is operational,remove RE1 Routing Engine
Primary64-bit Junos OS
RE1
Blank
• Upgrade RE0 hardwareand install 64-bit Junos OS on it
• Add Routing Engine from RE0 to RE1and install 32-bit Junos OS on it
(Routing Engine in RE1 is nowthe backup Routing Engine)
32-bit Junos OS
RE1
RE0
Primary64-bitJunos OS
g017
476
RE0
1. In the initial state, the slot 0 Routing Engine is running the 32-bit Junos OS and slot 1
is blank.
2. Install the slot 0 Routing Engine hardware in slot 1. Install the upgraded Routing Engine
hardware in slot 0 and install the 64-bit Junos OS.
For instructions on installing a Routing Engine, see the hardware guide for your router.
3. When the 64-bit Junos OS is configured properly, remove the slot 1 routing engine
running the 32-bit Junos OS.
RelatedDocumentation
Checklist for Reinstalling Junos OS•
Disk SpaceManagement for Junos OS Installation
A Junos OS installation or upgrade may fail if your router has a shortage of disk space. If
a disk space error occurs, use one or more of the following options to complete the
installation:
• Use the request system storage cleanup command to delete unnecessary files and
increase storage space on the router.
• Specify the unlink option when you use the request system software add command to
install the Junos OS:
• On the J Series routers, theunlinkoption removes the software package at the earliest
opportunity to create enough disk space for the installation to finish.
• On the M Series, MX Series, and T Series routers, the unlink option removes the
software package after a successful upgrade.
Copyright © 2016, Juniper Networks, Inc.90
System Basics: Getting Started Configuration Guide

• Download the software packages you need from the Juniper Networks Support Web
site, http://www.juniper.net/support/. The download program provides intelligent disk
space management to enable installation.
NOTE: If you are upgrading the J Series router from a remote location, theinstallation program automatically checks for enough disk space for theprocess to finish.
RelatedDocumentation
• Junos OS Configuration Using the CLI on page 37
91Copyright © 2016, Juniper Networks, Inc.
Chapter 5: Configuring Basic System Management Features

Copyright © 2016, Juniper Networks, Inc.92
System Basics: Getting Started Configuration Guide

CHAPTER 6
Configuration Statements
• System Management Configuration Statements on page 94
• announcement on page 101
• archival on page 102
• archive-sites (Configuration File) on page 103
• autoinstallation on page 105
• backup-router on page 106
• commit fast-synchronize on page 107
• commit synchronize on page 108
• compress-configuration-files (System) on page 109
• configuration on page 110
• configuration-servers on page 111
• domain-name on page 111
• domain-search on page 112
• dump-device on page 113
• events on page 114
• host-name on page 114
• inet6-backup-router on page 115
• interfaces on page 116
• load-key-file on page 117
• location (System) on page 118
• login-tip on page 119
• max-configurations-on-flash on page 119
• message on page 120
• mirror-flash-on-disk on page 121
• name-server on page 122
• password (Proxy Systems) on page 122
• pic-console-authentication on page 123
• port (Syslog) on page 124
93Copyright © 2016, Juniper Networks, Inc.

• port (Proxy Server) on page 124
• ports on page 125
• processes on page 126
• proxy (System) on page 127
• root-authentication on page 128
• root-login on page 129
• saved-core-context on page 130
• saved-core-files on page 130
• server (Proxy) on page 131
• static-host-mapping on page 131
• system on page 132
• transfer-interval (Configuration) on page 133
• transfer-on-commit on page 134
• trusted-key on page 135
• username (System) on page 135
SystemManagement Configuration Statements
This topic lists all the configuration statements that you can include at the [edit system]
hierarchy level to configure system management features:
system {accounting {events [ login change-log interactive-commands ];destination {radius {server {server-address {accounting-port port-number;retry number;secret password;source-address address;timeout seconds;
}}
}tacplus {server {server-address {port port-number;secret password;single-connection;timeout seconds;
}}
}}
}
Copyright © 2016, Juniper Networks, Inc.94
System Basics: Getting Started Configuration Guide
archival {configuration {archive-sites {ftp://<username>:<password>@<host>:<port>/<url-path>;ftp://<username>:<password>@<host>:<port>/<url-path>;
}transfer-interval interval;transfer-on-commit;
}}allow-v4mapped-packets;arp {aging-timerminutes;gratuitous-arp-delay;gratuitous-arp-on-ifup;interfaces;passive-learning;purging;
}authentication-order [ authentication-methods ];backup-router address <destination destination-address>;commit synchronize;(compress-configuration-files | no-compress-configuration-files);default-address-selection;dump-device (compact-flash | remove-compact | usb);diag-port-authentication (encrypted-password “password” | plain-text-password);dynamic-profile-options {versioning;
}domain-name domain-name;domain-search [ domain-list ];host-name hostname;inet6-backup-router address <destination destination-address>;internet-options {tcp-mssmss-value;(gre-path-mtu-discovery | no-gre-path-mtu-discovery);icmpv4-rate-limit bucket-size bucket-size packet-rate packet-rate;icmpv6-rate-limit bucket-size bucket-size packet-rate packet-rate;(ipip-path-mtu-discovery | no-ipip-path-mtu-discovery);(ipv6-path-mtu-discovery | no-ipv6-path-mtu-discovery);ipv6-path-mtu-discovery-timeout;no-tcp-rfc1323-paws;no-tcp-rfc1323;(path-mtu-discovery | no-path-mtu-discovery);source-port upper-limit <upper-limit>;(source-quench | no-source-quench);tcp-drop-synfin-set;
}location {altitude feet;building name;country-code code;floor number;hcoord horizontal-coordinate;lata service-area;latitude degrees;
95Copyright © 2016, Juniper Networks, Inc.
Chapter 6: Configuration Statements

longitude degrees;npa-nxx number;postal-code postal-code;rack number;vcoord vertical-coordinate;
}login {announcement text;class class-name {access-end;access-start;allow-commands “regular-expression”;( allow-configuration | allow-configuration-regexps) “regular expression 1” “regularexpression 2”;
allowed-days;deny-commands “regular-expression”;( deny-configuration | deny-configuration-regexps ) “regular expression 1” “regularexpression 2 ”;
idle-timeoutminutes;login-scriptlogin-tip;permissions [ permissions ];
}message text;password {change-type (set-transitions | character-set);format (md5 | sha1 | des);maximum-length length;minimum-changes number;minimum-length length;
}retry-options {backoff-threshold number;backoff-factor seconds;minimum-time seconds;tries-before-disconnect number;
}user username {full-name complete-name;uid uid-value;class class-name;authentication {(encrypted-password “password” | plain-text-password);ssh-rsa “public-key”;ssh-dsa “public-key”;
}}
}login-tip number;mirror-flash-on-disk;name-server {address;
}no-multicast-echo;no-redirects;no-ping-record-route;
Copyright © 2016, Juniper Networks, Inc.96
System Basics: Getting Started Configuration Guide

no-ping-time-stamp;ntp {authentication-key key-number type type value password;boot-server address;broadcast <address> <key key-number> <version value> <ttl value>;broadcast-client;multicast-client <address>;peer address <key key-number> <version value> <prefer>;source-address source-address;server address <key key-number> <version value> <prefer>;trusted-key [ key-numbers ];
}ports {auxiliary {type terminal-type;
}pic-console-authentication {encrypted-password encrypted-password;plain-text-password;console {insecure;log-out-on-disconnect;type terminal-type;disable;
}}processes {process--name (enable | disable) failover (alternate-media | other-routing-engine);timeout seconds;
}}radius-server server-address {accounting-port port-number;port port-number;retry number;secret password;source-address source-address;timeout seconds;
}radius-options {password-protocolmschap-v2;}attributes {nas-ip-address ip-address;
root-authentication {(encrypted-password “password” | plain-text-password);ssh-rsa “public-key”;ssh-dsa “public-key”;
}(saved-core-context | no-saved-core-context);saved-core-files saved-core-files;scripts {commit {allow-transients;file filename {optional;
97Copyright © 2016, Juniper Networks, Inc.
Chapter 6: Configuration Statements

refresh;refresh-from url;source url;
}traceoptions {file <filename><filesnumber><size size><world-readable | no-world-readable>;flag flag;no-remote-trace;
}op {file filename {arguments {argument-name {description descriptive-text;
}}command filename-alias;description descriptive-text;refresh;refresh-from url;source url;
}refresh;refresh-from url;traceoptions {file <filename><filesnumber><size size><world-readable | no-world-readable>;flag flag;no-remote-trace;
}}
}services {finger {connection-limit limit;rate-limit limit;
}flow-tap-dtcp {ssh {connection-limit limit;rate-limit limit;
}}ftp {connection-limit limit;rate-limit limit;
}service-deployment {servers server-address {port port-number;
}source-address source-address;
}ssh {root-login (allow | deny | deny-password);protocol-version [v1 v2];connection-limit limit;
Copyright © 2016, Juniper Networks, Inc.98
System Basics: Getting Started Configuration Guide

rate-limit limit;}telnet {connection-limit limit;rate-limit limit;
}web-management {http {interfaces [ interface-names ];port port;
}https {interfaces [ interface-names ];local-certificate name;port port;
}session {idle-timeout [ minutes ];session-limit [ session-limit ];
}}xnm-clear-text {connection-limit limit;rate-limit limit;
}xnm-ssl {connection-limit limit;local-certificate name;rate-limit limit;
}}static-host-mapping {hostname {alias [ alias ];inet [ address ];sysid system-identifier;
}}syslog {archive <files number> <size size> <world-readable | no-world-readable>;console {facility severity;
}file filename {facility severity;archive <archive-sites {ftp-url <password password>}> <files number> <size size><start-time"YYYY-MM-DD.hh:mm"><transfer-intervalminutes><world-readable |no-world-readable>;
explicit-priority;match "regular-expression";structured-data {brief;
}}host (hostname | other-routing-engine | scc-master) {facility severity;
99Copyright © 2016, Juniper Networks, Inc.
Chapter 6: Configuration Statements

explicit-priority;facility-override facility;log-prefix string;match "regular-expression";source-address source-address;structured-data {brief;
}}source-address source-address;time-format (year | millisecond | year millisecond);user (username | *) {facility severity;match "regular-expression";
}}tacplus-options {service-name service-name;(no-cmd-attribute-value | exclude-cmd-attribute);
}tacplus-server server-address {secret password;single-connection;source-address source-address;timeout seconds;
}time-zone (GMThour-offset | time-zone);}tracing {destination-override {syslog host;}
}use-imported-time-zones;
}
Copyright © 2016, Juniper Networks, Inc.100
System Basics: Getting Started Configuration Guide

announcement
Syntax announcement text;
Hierarchy Level [edit system login]
Release Information Statement introduced before Junos OS Release 7.4.
Statement introduced in Junos OS Release 9.0 for EX Series switches.
Description Configure a system login announcement. This announcement appears after a user logs
in.
Options text—Text of the announcement. If the text contains any spaces, enclose it in quotation
marks.
Required PrivilegeLevel
system—To view this statement in the configuration.
system-control—To add this statement to the configuration
RelatedDocumentation
• Configuring the Junos OS to Display a System Login Announcement on page 77
• message on page 120
101Copyright © 2016, Juniper Networks, Inc.
Chapter 6: Configuration Statements

archival
Syntax archival {configuration {archive-sites {file://<path>/<filename>;ftp://username@host:<port>url-path password password;http://username@host:<port>url-path password password;pasvftp://username@host:<port>url-path password password;scp://username@host:<port>url-path password password;
}transfer-interval interval;transfer-on-commit;
}}
Hierarchy Level [edit system]
Release Information Statement introduced before Junos OS Release 7.4.
Statement introduced in Junos OS Release 9.0 for EX Series switches.
Statement introduced in Junos OS Release 11.1 for the QFX Series.
Description Configure copying of the currently active configuration to an archive site. An archive site
can be a file, or an FTP or SCP location.
NOTE: Theedit systemarchivalhierarchy is not availableonQFabric systems.
Options The remaining statements are explained separately.
NOTE: The [edit system archival] hierarchy is not available on QFabric
systems.
Required PrivilegeLevel
admin—To view this statement in the configuration.
admin-control—To add this statement to the configuration.
RelatedDocumentation
• Using Junos OS to Configure a Router or Switch to Transfer Its Configuration to an
Archive Site on page 60
Copyright © 2016, Juniper Networks, Inc.102
System Basics: Getting Started Configuration Guide

archive-sites (Configuration File)
Syntax archive-sites {file://<path>/<filename>;ftp://username@host:<port>url-path password password;http://username@host:<port>url-path password password;pasvftp://username@host:<port>url-path password password;scp://username@host:<port>url-path password password;
}
Hierarchy Level [edit system archival configuration]
Release Information Statement introduced before Junos OS Release 7.4.
Statement introduced in Junos OS Release 9.0 for EX Series switches.
Statement introduced in Junos OS Release 11.1 for the QFX Series.
Description Specify where to transfer the current configuration files. When specifying a URL in a Junos
OS statement using an IPv6 host address, you must enclose the entire URL in quotation
marks (" ") and enclose the IPv6 host address in brackets ([ ]). For example,
"scp://username<:password>@[ipv6-host-address]<:port>/url-path"
If you specify more than one archive site, the router or switch attempts to transfer the
configuration files to the first archive site in the list, moving to the next only if the transfer
fails. The format for the destination filename is
router-name_juniper.conf[.gz]_YYYYMMDD_HHMMSS.
NOTE: The time included in the destination filename is in local time zone(system time).
NOTE: The [edit system archival] hierarchy is not available on QFabric
systems.
Options The prefix used in the configuration statement determines the form of transfer:
file://—transfer on a path to a named file
ftp://—transfer using active FTP server
pasvftp://—transfer to a device that only accepts passive FTP services
scp://—transfer to a known host using background SCP file transfers
Required PrivilegeLevel
system—To view this statement in the configuration.
system-control—To add this statement to the configuration.
103Copyright © 2016, Juniper Networks, Inc.
Chapter 6: Configuration Statements

RelatedDocumentation
• Configuring Archive Sites for Transfer of Active Configuration Files on page 61
• configuration on page 110
• transfer-on-commit on page 134
Copyright © 2016, Juniper Networks, Inc.104
System Basics: Getting Started Configuration Guide

autoinstallation
Syntax autoinstallation {configuration-servers {url;
}interfaces {interface-name {bootp;rarp;
}}
}
Hierarchy Level [edit system]
Release Information Statement introduced before Junos OS Release 7.4.
Statement introduced in Junos OS Release 9.1 for EX Series switches.
Statement introduced in Junos OS Release 12.2 for ACX Series Universal Access Routers.
Description For ACX Series routers, J Series Services routers, and EX Series switches only. Download
a configuration file automatically from an FTP, Hypertext Transfer Protocol (HTTP), or
Trivial FTP (TFTP) server. When you power on a router or switch configured for
autoinstallation, it requests an IP address from a Dynamic Host Configuration Protocol
(DHCP) server. Once the router or switch has an address, it sends a request to a
configuration server and downloads and installs a configuration.
Options The remaining statements are explained separately.
Required PrivilegeLevel
system—To view this statement in the configuration.
system-control—To add this statement to the configuration.
RelatedDocumentation
• ACX Series Autoinstallation Overview
• Before You Begin Autoinstallation on an ACX Series Universal Access Router
• Autoinstallation Configuration of ACX Series Universal Access Routers
• USB Autoinstallation on ACX Series Routers
• Verifying Autoinstallation on ACX Series Universal Access Routers
• show system autoinstallation status
• Upgrading Software Using Automatic Software Download
• J Series Services Router Basic LAN andWAN Access Configuration Guide
• configuration-servers on page 111
• idle-timeout
105Copyright © 2016, Juniper Networks, Inc.
Chapter 6: Configuration Statements

backup-router
Syntax backup-router address <destination destination-address>;
Hierarchy Level [edit system]
Release Information Statement introduced before Junos OS Release 7.4.
Description Set a default router (running IP version 4 [IPv4]) to use while the local router (running
IPv4) is booting and if the routing protocol processes fail to start. The Junos OS removes
the route to this router as soon as the software starts.
Options address—Address of the default router.
destinationdestination-address—(Optional) Destination address that is reachable through
the backup router. You can include this option to achieve network reachability while
loading, configuring, and recovering the router, but without the risk of installing a
default route in the forwarding table.
Default: All hosts (default route) are reachable through the backup router.
Required PrivilegeLevel
system—To view this statement in the configuration.
system-control—To add this statement to the configuration.
RelatedDocumentation
• Configuring a Backup Router on page 56
Copyright © 2016, Juniper Networks, Inc.106
System Basics: Getting Started Configuration Guide

commit fast-synchronize
Syntax commit fast-synchronize;
Hierarchy Level [edit system]
Release Information Statement introduced in Junos OS Release 12.2.
Description Configure the commits to run in parallel on both the master and backup Routing Engines
to reduce the time taken for commit synchronization. Valid only on systems with two
Routing Engines.
NOTE:
• When the fast-synchronize statement is configured, the commits on the
master Routing Engine and the backup Routing Engine run in parallel. Inthisprocess, theconfiguration isvalidatedonlyon theRoutingEnginewhereyou execute the commit command. Therefore, it is recommended not to
include toomany configuration details in groups like re0 and re1, becausetheconfigurationspecified ingroup re0 isappliedonly if thecurrentRoutingEngine is inslot0.Likewise, theconfigurationspecified ingroup re1 isappliedonly if the current Routing Engine is in slot 1.
• Ensure that the Junos OS software version running on both the RoutingEngines is same.
Required PrivilegeLevel
system—To view this statement in the configuration.
system-control—To add this statement to the configuration.
RelatedDocumentation
• Configuring Multiple Routing Engines to Synchronize Committed Configurations
Automatically on page 71
• commit synchronize on page 108
107Copyright © 2016, Juniper Networks, Inc.
Chapter 6: Configuration Statements

commit synchronize
Syntax commit synchronize;
Hierarchy Level [edit system]
Release Information Statement introduced in Junos OS Release 7.4.
Statement introduced in Junos OS Release 10.4 for EX Series switches.
Description For devices with multiple Routing Engines only. Configure the commit command to
automatically result in a commit synchronizeaction between dual Routing Engines within
the same chassis. The Routing Engine on which you execute the commit command (the
requesting Routing Engine) copies and loads its candidate configuration to the other
(the responding) Routing Engine. Each Routing Engine then performs a syntax check on
the candidate configuration file being committed. If no errors are found, the configuration
is activated and becomes the current operational configuration on both Routing Engines.
NOTE: When you configure nonstop active routing (NSR), youmust includethe commit synchronize statement. Otherwise, the commit operation fails.
On the TX Matrix router, synchronization only occurs between the Routing Engines within
the same chassis and when synchronization is complete, the new configuration is then
distributed to the Routing Engines on the T640 routers. That is, the master Routing Engine
on the TX Matrix router distributes the configuration to the master Routing Engine on
each T640 router. Likewise, the backup Routing Engine on the TX Matrix router distributes
the configuration to the backup Routing Engine on each T640 router.
In EX Series Virtual Chassis configurations:
• On EX4200 switches in Virtual Chassis, synchronization occurs between the switch in
the master role and the switch in the backup role.
• On EX8200 switches in a Virtual Chassis, synchronization occurs only between the
master and backup XRE200 External Routing Engines.
Options and-quit—(Optional) (EX Series only) Quit configuration mode if the commit
synchronization succeeds.
comment—(Optional) (EX Series only) Write a message to the commit log.
and-force—(Optional) (EX Series only) Force a commit synchronization on the other
Routing Engine (ignore warnings).
Required PrivilegeLevel
system—To view this statement in the configuration.
system-control—To add this statement to the configuration.
RelatedDocumentation
Synchronizing the Routing Engine Configuration•
Copyright © 2016, Juniper Networks, Inc.108
System Basics: Getting Started Configuration Guide

• Configuring Multiple Routing Engines to Synchronize Committed Configurations
Automatically on page 71
compress-configuration-files (System)
Syntax (compress-configuration-files | no-compress-configuration-files);
Hierarchy Level [edit system]
Release Information Statement introduced before Junos OS Release 7.4.
Description Compress the current operational configuration file. By default, the current operational
configuration file is compressed, and is stored in the file juniper.conf, in the /config file
system, along with the last three committed versions of the configuration. However, with
large networks, the current configuration file might exceed the available space in the
/config file system. Compressing the current configuration file allows the file to fit in the
file system, typically reducing the size of the file by 90 percent. The current configuration
file is compressed on the second commit of the configuration after the first commit is
made to include the compress-configuration-files statement.
NOTE: We recommend that you enable compression of the routerconfiguration files tominimize the amount of disk space that they require.
Default The current operational configuration file is uncompressed.
Required PrivilegeLevel
system—To view this statement in the configuration.
system-control—To add this statement to the configuration.
RelatedDocumentation
• Compressing the Current Configuration File on page 73
109Copyright © 2016, Juniper Networks, Inc.
Chapter 6: Configuration Statements

configuration
Syntax configuration {transfer-interval interval;transfer-on-commit;archive-sites {file://<path>/<filename>;ftp://username@host:<port>url-path password password;http://username@host:<port>url-path password password;pasvftp://username@host:<port>url-path password password;scp://username@host:<port>url-path password password;
}}
Hierarchy Level [edit system archival]
Release Information Statement introduced before Junos OS Release 7.4.
Statement introduced in Junos OS Release 9.0 for EX Series switches.
Statement introduced in Junos OS Release 11.1 for the QFX Series.
Description Configure the router or switch to periodically transfer its currently active configuration
(or after each commit).
NOTE: The [edit system archival] hierarchy is not available on QFabric
systems.
Options The remaining statements are explained separately.
Required PrivilegeLevel
system—To view this statement in the configuration.
system-control—To add this statement to the configuration.
RelatedDocumentation
• Using Junos OS to Configure a Router or Switch to Transfer Its Configuration to an
Archive Site on page 60
• archive
• archive-sites on page 103
• transfer-interval on page 133
• transfer-on-commit on page 134
Copyright © 2016, Juniper Networks, Inc.110
System Basics: Getting Started Configuration Guide

configuration-servers
Syntax configuration-servers {url;
}
Hierarchy Level [edit system autoinstallation]
Release Information Statement introduced before Junos OS Release 7.4.
Statement introduced in Junos OS Release 9.0 for EX Series switches.
Description For J Series Services Routers and EX Series switches only, configure the URL address of
a server from which to obtain configuration files. Examples of URLs:
tftp://hostname/path/filename
ftp://username:[email protected]/filename /
Required PrivilegeLevel
system—To view this statement in the configuration.
system-control—To add this statement to the configuration.
RelatedDocumentation
• Upgrading Software Using Automatic Software Download
• Getting Started Guide for your router model
• autoinstallation on page 105
• idle-timeout
domain-name
Syntax domain-name domain-name;
Hierarchy Level [edit system]
Release Information Statement introduced before Junos OS Release 7.4.
Statement introduced in Junos OS Release 9.0 for EX Series switches.
Description Configure the name of the domain in which the router or switch is located. This is the
default domain name that is appended to hostnames that are not fully qualified.
Options domain-name—Name of the domain.
Required PrivilegeLevel
system—To view this statement in the configuration.
system-control—To add this statement to the configuration.
RelatedDocumentation
• Configuring the Domain Name for the Router or Switch on page 51
111Copyright © 2016, Juniper Networks, Inc.
Chapter 6: Configuration Statements

domain-search
Syntax domain-search [ domain-list ];
Hierarchy Level [edit system],[edit system services dhcp],[edit system services dhcp],[edit system services dhcp pool],[edit system services dhcp static-binding]
Release Information Statement introduced before Junos OS Release 7.4.
Statement introduced in Junos OS Release 9.0 for EX Series switches.
Description Configure a list of domains to be searched.
Options domain-list—A list of domain names to search. The list can contain up to six domain
names, with a total of up to 256 characters.
Required PrivilegeLevel
system—To view this statement in the configuration.
system-control—To add this statement to the configuration.
RelatedDocumentation
• Configuring the Domains to Search When a Router or Switch Is Included in Multiple
Domains on page 52
• Configuring the Router or Interface to Act as a DHCP Server on J Series Services Routers
• Configuring a DHCP Server on Switches (CLI Procedure)
Copyright © 2016, Juniper Networks, Inc.112
System Basics: Getting Started Configuration Guide

dump-device
Syntax dump-device {compact-flash;removable-compact-flash;usb;
}
Hierarchy Level [edit system]
Release Information Statement introduced before Junos OS Release 7.4.
Description For J Series Services Routers only. Configure the medium used for storing memory
snapshots of system failure. When you specify the storage and an operating system fails,
the operating system writes a snapshot of the state of the router when it failed to the
storage medium. When the operating system is rebooted, the storage device is checked
for a snapshot. If found, the snapshot of memory is written to the /var/crash directory
on the router and can be examined by Juniper Networks customer support to help
determine the cause of failure.
If the swap partition on the device medium is not large enough for the system memory
snapshot, the snapshot is not successfully written to the directory. Use the requestsystem
snapshot command to specify the swap partition.
Options compact-flash—The primary CompactFlash card.
removable-compact-flash—The CompactFlash card on the front of the router (J4300
and J6300 only) as the system software failure memory snapshot device.
usb—The device attached to the universal serial bus (USB) port.
Required PrivilegeLevel
system—To view this statement in the configuration.
system-control—To add this statement to the configuration.
RelatedDocumentation
• Getting Started Guide for your router model
113Copyright © 2016, Juniper Networks, Inc.
Chapter 6: Configuration Statements
events
Syntax events [ events ];
Hierarchy Level [edit system accounting]
Release Information Statement introduced before Junos OS Release 7.4.
Statement introduced in Junos OS Release 9.0 for EX Series switches.
Description Configure the types of events to track and log.
Options events—Event types; can be one or more of the following:
• change-log—Audit configuration changes.
• interactive-commands—Audit interactive commands (any command-line input).
• login—Audit logins.
Required PrivilegeLevel
system—To view this statement in the configuration.
system-control—To add this statement to the configuration.
RelatedDocumentation
• Configuring TACACS+ System Accounting
host-name
Syntax host-name hostname;
Hierarchy Level [edit system]
Release Information Statement introduced before Junos OS Release 7.4.
Statement introduced in Junos OS Release 9.0 for EX Series switches.
Description Set the hostname of the router or switch.
Options hostname—Name of the router or switch.
Required PrivilegeLevel
system—To view this statement in the configuration.
system-control—To add this statement to the configuration.
RelatedDocumentation
• Configuring the Hostname of the Router or Switch on page 49
Copyright © 2016, Juniper Networks, Inc.114
System Basics: Getting Started Configuration Guide

inet6-backup-router
Syntax inet6-backup-router address <destination destination-address>;
Hierarchy Level [edit system]
Release Information Statement introduced before Junos OS Release 7.4.
Statement introduced in Junos OS Release 9.0 for EX Series switches.
Description Set a default router (running IP version 6 [IPv6]) to use while the local router or switch
(running IPv6) is booting and if the routing protocol processes fail to start. The Junos OS
removes the route to this router or switch as soon as the software starts.
Options address—Address of the default router.
destinationdestination-address—(Optional) Destination address that is reachable through
the backup router. You can include this option to achieve network reachability while
loading, configuring, and recovering the router or switch, but without the risk of
installing a default route in the forwarding table.
Default: All hosts (default route) are reachable through the backup router.
Required PrivilegeLevel
system—To view this statement in the configuration.
system-control—To add this statement to the configuration.
RelatedDocumentation
• Configuring a Backup Router on page 56
115Copyright © 2016, Juniper Networks, Inc.
Chapter 6: Configuration Statements

interfaces
Syntax interfaces {interface-name {bootp;rarp;slarp;
}}
Hierarchy Level [edit system autoinstallation]
Release Information Statement introduced before Junos OS Release 7.4.
Statement introduced in Junos OS Release 9.0 for EX Series switches.
Description For J Series Services Routers and EX Series switches only. Configure the interface on
which to perform autoinstallation. A request for an IP address is sent from the interface.
Specify the IP address procurement protocol.
Options bootp—Send requests over serial interfaces with Frame Relay.
rarp—Send requests over Ethernet interfaces.
slarp—(On J Series Services Routers only) Send requests over serial interfaces with HDLC.
Required PrivilegeLevel
system—To view this statement in the configuration.
system-control—To add this statement to the configuration.
RelatedDocumentation
• Upgrading Software Using Automatic Software Download
• J Series Services Router Basic LAN andWAN Access Configuration Guide
• autoinstallation on page 105
Copyright © 2016, Juniper Networks, Inc.116
System Basics: Getting Started Configuration Guide

load-key-file
Syntax load-key-fileURL filename;
Hierarchy Level [edit system root-authentication],[edit system login user username authentication]
Release Information Statement introduced before Junos OS Release 7.4.
Statement introduced in Junos OS Release 9.0 for EX Series switches.
Statement introduced in Junos OS Release 11.1 for the QFX Series.
Description Load RSA (SSH version 1 and SSH version 2) and DSA or ECDSA (SSH version 2) public
keys from a previously-generated named file at a specified URL location. The file contains
one or more SSH keys that are copied into the configuration when the command is issued.
Required PrivilegeLevel
admin—To view this statement in the configuration.
admin-control—To add this statement to the configuration.
RelatedDocumentation
• Configuring the Root Password on page 63
• Configuring the Root Password
• Configuring Junos OS User Accounts
• Configuring Junos OS User Accounts
117Copyright © 2016, Juniper Networks, Inc.
Chapter 6: Configuration Statements

location (System)
Syntax location {altitude feet;building name;country-code code;floor number;hcoord horizontal-coordinate;lata transport–area;latitude degrees;longitude degrees;npa-nxx number;postal-code postal-code;rack number;vcoord vertical-coordinate;
}
Hierarchy Level [edit system]
Release Information Statement introduced before Junos OS Release 7.4.
Statement introduced in Junos OS Release 9.0 for EX Series switches.
Description Configure the system location in various formats.
Options altitude feet—Number of feet above sea level.
building name—Name of building. The name of the building can be 1 to 28 characters in
length. If the string contains spaces, enclose it in quotation marks (" ").
country-code code—Two-letter country code.
floor number—Floor in the building.
hcoord horizontal-coordinate—Bellcore Horizontal Coordinate.
lata transport-area—Local Access Transport Area.
latitude degrees—Latitude in degree format.
longitude degrees—Longitude in degree format.
npa-nxx number—First six digits of the phone number (area code and exchange).
postal-code postal-code—Postal code.
rack number—Rack number.
vcoord vertical-coordinate—Bellcore Vertical Coordinate.
Required PrivilegeLevel
system—To view this statement in the configuration.
system-control—To add this statement to the configuration.
Copyright © 2016, Juniper Networks, Inc.118
System Basics: Getting Started Configuration Guide

RelatedDocumentation
• Configuring the Physical Location of the Router or Switch on page 62
login-tip
Syntax login-tip;
Hierarchy Level [edit system login class class-name]
Release Information Statement introduced before Junos OS Release 7.4.
Statement introduced in Junos OS Release 9.0 for EX Series switches.
Description Enable CLI tips at login.
Default Disabled.
Required PrivilegeLevel
system—To view this statement in the configuration.
system-control—To add this statement to the configuration.
RelatedDocumentation
• Configuring CLI Tips on page 86
max-configurations-on-flash
Syntax max-configurations-on-flash number;
Hierarchy Level [edit system]
Release Information Statement introduced before Junos OS Release 7.4.
Description Specify the number of configurations stored on the CompactFlash card.
Options number—The number of configurations stored on the CompactFlash card.
Range: 0 through 49. The most recently saved configuration is number 0, and the oldest
saved configuration is number 49.
Required PrivilegeLevel
system—To view this statement in the configuration.
system-control—To add this statement to the configuration.
RelatedDocumentation
• Using Junos OS to Specify the Number of Configurations Stored on the CompactFlash
Card on page 59
119Copyright © 2016, Juniper Networks, Inc.
Chapter 6: Configuration Statements

message
Syntax message text;
Hierarchy Level [edit system login]
Release Information Statement introduced before Junos OS Release 7.4.
Statement introduced in Junos OS Release 9.0 for EX Series switches.
Description Configure a system login message. This message appears before a user logs in.
You can format the message using the following special characters:
• \n—New line
• \t—Horizontal tab
• \'—Single quotation mark
• \"—Double quotation mark
• \\—Backslash
Options text—Text of the message.
Required PrivilegeLevel
system—To view this statement in the configuration.
system-control—To add this statement to the configuration
RelatedDocumentation
• Configuring the Junos OS to Display a System Login Message on page 76
• announcement on page 101
Copyright © 2016, Juniper Networks, Inc.120
System Basics: Getting Started Configuration Guide

mirror-flash-on-disk
Syntax mirror-flash-on-disk;
Hierarchy Level [edit system]
Release Information Statement introduced before Junos OS Release 7.4.
Description Configure the hard disk to automatically mirror the contents of the CompactFlash card.
The hard disk maintains a synchronized mirror copy of the CompactFlash card contents.
Data written to the CompactFlash card is simultaneously updated in the mirrored copy
of the hard disk. If the CompactFlash card fails to read data, the hard disk automatically
retrieves its mirrored copy of the CompactFlash card. This command is not available on
the J Series routers.
CAUTION: We recommend that you disable flash disk mirroring when youupgrade or downgrade the router.
You cannot issue the request system snapshot commandwhile the
mirror-flash-on-disk statement is enabled.
NOTE: After youhaveenabledordisabled themirror-flash-on-diskstatement,
youmust reboot the router for your changes to take effect. To reboot, issuethe request system reboot command.
Required PrivilegeLevel
system—To view this statement in the configuration.
system-control—To add this statement to the configuration.
RelatedDocumentation
• Configuring Automatic Mirroring of the CompactFlash Card on the Hard Disk Drive on
page 58
121Copyright © 2016, Juniper Networks, Inc.
Chapter 6: Configuration Statements
name-server
Syntax name-server {address;
}
Hierarchy Level [edit system],[edit system services dhcp],[edit system services dhcp],[edit system services dhcp pool],[edit system services dhcp static-binding]
Release Information Statement introduced before Junos OS Release 7.4.
Statement introduced in Junos OS Release 9.0 for EX Series switches.
Description Configure one or more Domain Name System (DNS) name servers.
Options address—Address of the name server. To configure multiple name servers, include a
maximum of three address options.
Required PrivilegeLevel
system—To view this statement in the configuration.
system-control—To add this statement to the configuration.
RelatedDocumentation
• Configuring a DNS Name Server for Resolving a Hostname into Addresses on page 52
• Configuring the Router or Interface to Act as a DHCP Server on J Series Services Routers
• Configuring a DHCP Server on Switches (CLI Procedure)
password (Proxy Systems)
Syntax password password;
Hierarchy Level [edit system proxy]
Release Information Statement introduced in Junos OS Release 11.4.
Description Configure the proxy server parameters for a device.
Required PrivilegeLevel
system—To view this statement in the configuration.
system-control—To add this statement to the configuration.
RelatedDocumentation
• Example: Configuring a Proxy Server for License Updates on page 53
Copyright © 2016, Juniper Networks, Inc.122
System Basics: Getting Started Configuration Guide

pic-console-authentication
Syntax pic-console authentication {(encrypted-password "password" | plain-text-password);
}
Hierarchy Level [edit system]
Release Information Statement introduced before Junos OS Release 7.4.
Description Configure console access to Physical Interface Cards (PICs).
Default Disabled. By default, there is no password setting for console access.
Options encrypted-password " password"—Use MD5 or other encrypted authentication. Specify
the MD5 or other password. You can specify only one encrypted password.
You cannot configure a blank password for encrypted-password using blank quotation
marks (" "). You must configure a password whose number of characters range from
1 through 128 characters and enclose the password in quotation marks.
plain-text-password—Use a plain-text password. The CLI prompts you for the password
and then encrypts it. The CLI displays the encrypted version, and the software places
the encrypted version in its user database. You can specify only one plain-text
password.
The default requirements for plain-text passwords are:
• The password must be between 6 and 128 characters long
• You can include most character classes in a password (uppercase letters, lowercase
letters, numbers, punctuation marks, and other special characters). Control characters
are not recommended.
• Valid passwords must contain at least one change of case or character class.
Required PrivilegeLevel
admin—To view this statement in the configuration.
admin-control—To add this statement to the configuration.
RelatedDocumentation
• Configuring the Junos OS to Set Console and Auxiliary Port Properties on page 70
• Configuring Password Authentication for Console Access to PICs
123Copyright © 2016, Juniper Networks, Inc.
Chapter 6: Configuration Statements

port (Syslog)
Syntax port port number;
Hierarchy Level [edit system syslog host hostname | other-routing-engine| scc-master)]
Release Information Statement introduced in Junos OS Release 11.3.
Description Specify the port number for the remote syslog server.
Options port number—Port number of the remote syslog server.
Range: 0 through 65535
Default: 514
Required PrivilegeLevel
system—To view this statement in the configuration.
system-control—To add this statement to the configuration.
RelatedDocumentation
• syslog
• host
port (Proxy Server)
Syntax port port-number;
Hierarchy Level [edit system proxy]
Release Information Statement introduced in Junos OS Release 11.4.
Description Configure the port number for the proxy server ranging from 0 through 65535.
Required PrivilegeLevel
system—To view this statement in the configuration.
system-control—To add this statement to the configuration.
RelatedDocumentation
• Example: Configuring a Proxy Server for License Updates on page 53
Copyright © 2016, Juniper Networks, Inc.124
System Basics: Getting Started Configuration Guide

ports
Syntax ports {auxiliary {disable;insecure;type terminal-type;port-type (mini-usb | rj45);
}console {disable;insecure;log-out-on-disconnect;type terminal-type;
}}
Hierarchy Level [edit system]
Release Information Statement introduced before Junos OS Release 7.4.
Statement introduced in Junos OS Release 9.0 for EX Series switches.
Description Configure the properties of the console and auxiliary ports. The ports are located on the
router’s craft interface.
See the switch’s hardware documentation for port locations.
The remaining statements are explained separately.
Required PrivilegeLevel
system—To view this statement in the configuration.
system-control—To add this statement to the configuration.
RelatedDocumentation
• Configuring the Junos OS to Set Console and Auxiliary Port Properties on page 70
125Copyright © 2016, Juniper Networks, Inc.
Chapter 6: Configuration Statements

processes
Syntax processes {process-name (enable | disable) failover (alternate-media | other-routing-engine);timeout seconds;
}
Hierarchy Level [edit system]
Release Information Statement introduced before Junos OS Release 7.4.
Statement introduced in Junos OS Release 9.0 for EX Series switches.
Description Configure which Junos OS processes are running on the router or switch.
CAUTION: Never disable any of the software processes unless instructed todo so by a customer support engineer.
Default All processes are enabled by default.
Options (enable | disable)—(Optional) Enable or disable a specified process.
failover (alternate-media |other-routing-engine)—(Optional) For routers or switches with
redundant Routing Engines only, switch to backup media if a process fails repeatedly.
If a process fails four times within 30 seconds, the router or switch reboots from the
alternate media or the other Routing Engine.
process-name—One of the valid process names. You can obtain a complete list of process
names by using the CLI command completion feature. After specifying a process
name, command completion also indicates any additional options for that process.
timeoutseconds—(Optional) How often the system checks the watchdog timer, in seconds.
If the watchdog timer has not been checked in the specified number of seconds, the
system reloads. If you set the time value too low, it is possible for the system to
reboot immediately after it loads.
Values: 15, 60, or 180
Default: 180 seconds (rounded up to 291 seconds by the Junos kernel)
Required PrivilegeLevel
system—To view this statement in the configuration.
system-control—To add this statement to the configuration.
RelatedDocumentation
• Disabling Junos OS Processes on page 74
Copyright © 2016, Juniper Networks, Inc.126
System Basics: Getting Started Configuration Guide

proxy (System)
Syntax proxy {server (hostname | ip-address);port port-number;username username;password password;
}
Hierarchy Level [edit system]
Release Information Statement introduced in Junos OS Release 11.4.
Description Configure the proxy server properties for a device.
The remaining statements are explained separately.
Required PrivilegeLevel
system—To view this statement in the configuration.
system-control—To add this statement to the configuration.
RelatedDocumentation
• Example: Configuring a Proxy Server for License Updates on page 53
127Copyright © 2016, Juniper Networks, Inc.
Chapter 6: Configuration Statements
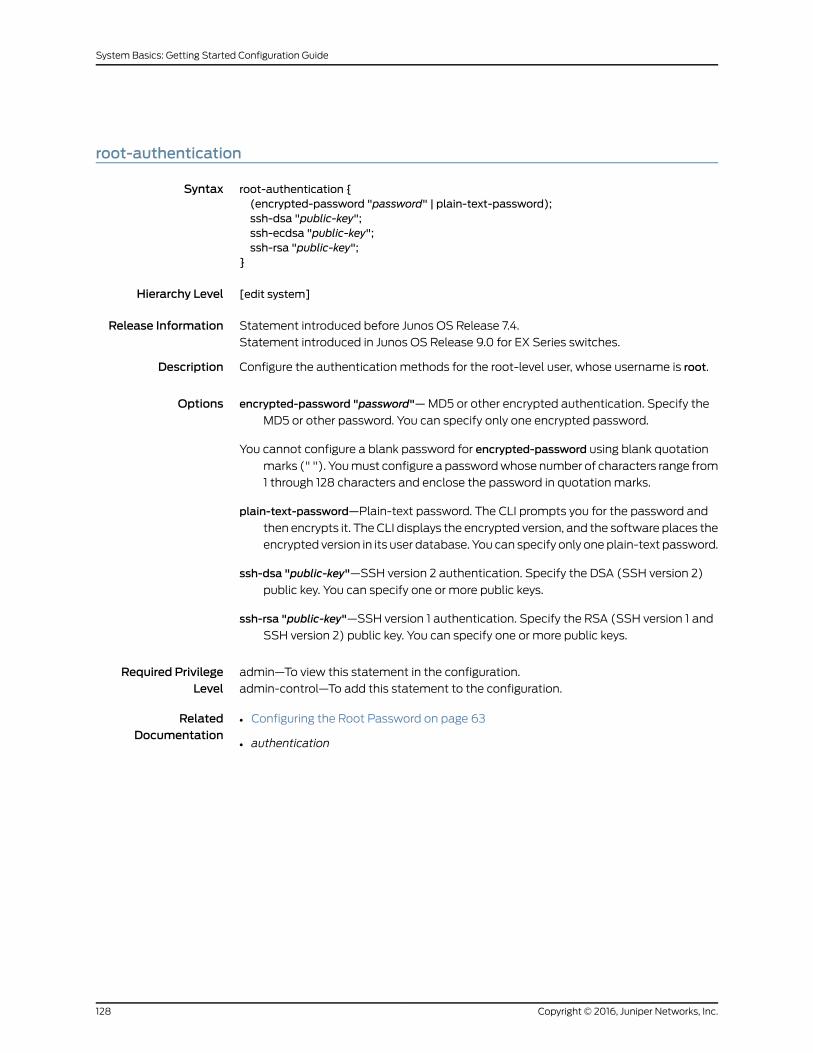
root-authentication
Syntax root-authentication {(encrypted-password "password" | plain-text-password);ssh-dsa "public-key";ssh-ecdsa "public-key";ssh-rsa "public-key";
}
Hierarchy Level [edit system]
Release Information Statement introduced before Junos OS Release 7.4.
Statement introduced in Junos OS Release 9.0 for EX Series switches.
Description Configure the authentication methods for the root-level user, whose username is root.
Options encrypted-password "password"— MD5 or other encrypted authentication. Specify the
MD5 or other password. You can specify only one encrypted password.
You cannot configure a blank password for encrypted-password using blank quotation
marks (" "). You must configure a password whose number of characters range from
1 through 128 characters and enclose the password in quotation marks.
plain-text-password—Plain-text password. The CLI prompts you for the password and
then encrypts it. The CLI displays the encrypted version, and the software places the
encrypted version in its user database. You can specify only one plain-text password.
ssh-dsa "public-key"—SSH version 2 authentication. Specify the DSA (SSH version 2)
public key. You can specify one or more public keys.
ssh-rsa "public-key"—SSH version 1 authentication. Specify the RSA (SSH version 1 and
SSH version 2) public key. You can specify one or more public keys.
Required PrivilegeLevel
admin—To view this statement in the configuration.
admin-control—To add this statement to the configuration.
RelatedDocumentation
• Configuring the Root Password on page 63
• authentication
Copyright © 2016, Juniper Networks, Inc.128
System Basics: Getting Started Configuration Guide

root-login
Syntax root-login (allow | deny | deny-password);
Hierarchy Level [edit system services ssh]
Release Information Statement introduced before Junos OS Release 7.4.
Statement introduced in Junos OS Release 9.0 for EX Series switches.
Statement introduced in Junos OS Release 11.1 for the QFX Series.
Description Control user access through SSH.
Default Allow user access through SSH.
Options allow—Allow users to log in to the router or switch as root through SSH.
deny—Disable users from logging in to the router or switch as root through SSH.
deny-password—Allow users to log in to the router or switch as root through SSH when
the authentication method (for example, RSA authentication) does not require a
password.
Required PrivilegeLevel
admin—To view this statement in the configuration.
admin-control—To add this statement to the configuration.
RelatedDocumentation
• Configuring SSH Service for Remote Access to the Router or Switch
129Copyright © 2016, Juniper Networks, Inc.
Chapter 6: Configuration Statements

saved-core-context
Syntax (saved-core-context | no-saved-core-context);
Hierarchy Level [edit system]
Release Information Statement introduced before Junos OS Release 7.4.
Description Configure whether the router saves core files generated by internal Junos processes,
along with contextual information (system log files and a copy of the current
configuration):
• saved-core-context—The router saves each cores file and its associated context in a
compressed tar file named /var/tmp/process-name.core.core-number.tgz.
• no-saved-core-context—The router does not save cores files and their
associated context.
The router saves core files.
Required PrivilegeLevel
admin—To view this statement in the configuration.
admin-control—To add this statement to the configuration.
RelatedDocumentation
• Saving Core Files from Junos OS Processes on page 75
• saved-core-files on page 130
saved-core-files
Syntax saved-core-files number;
Hierarchy Level [edit system]
Release Information Statement introduced before Junos OS Release 7.4.
Description Save core files generated by internal Junos processes, but not the associated contextual
information (configuration and system log files).
Options number—Maximum number of core files to save.
Range: 1 through 10
Required PrivilegeLevel
admin—To view this statement in the configuration.
admin-control—To add this statement to the configuration.
RelatedDocumentation
• Saving Core Files from Junos OS Processes on page 75
• saved-core-context on page 130
Copyright © 2016, Juniper Networks, Inc.130
System Basics: Getting Started Configuration Guide

server (Proxy)
Syntax server (hostname | ip-address);
Hierarchy Level [edit system proxy]
Release Information Statement introduced in Junos OS Release 11.4.
Description Configure the proxy server name or IP address.
Required PrivilegeLevel
system—To view this statement in the configuration.
system-control—To add this statement to the configuration.
RelatedDocumentation
• Example: Configuring a Proxy Server for License Updates on page 53
static-host-mapping
Syntax static-host-mapping {hostname {alias [ aliases ];inet [ addresses ];sysid system-identifier;
}}
Hierarchy Level [edit system]
Release Information Statement introduced before Junos OS Release 7.4.
Description Map a hostname to one or more IP addresses and aliases, and configure an International
Organization for Standardization (ISO) system identifier (system ID).
Options alias alias—Alias for the hostname.
hostname—Fully qualified hostname.
inet address—IP address. You can specify one or more IP addresses for the host.
sysid system-identifier—ISO system identifier (system ID). This is the 6-byte portion of
the Intermediate System-to-Intermediate System (IS-IS) network service access
point (NSAP). We recommend that you use the host’s IP address represented in
binary-coded decimal (BCD) format. For example, the IP address 208.197.169.18 is
2081.9716.9018 in BCD.
Required PrivilegeLevel
system—To view this statement in the configuration.
system-control—To add this statement to the configuration.
RelatedDocumentation
• Configuring the Hostname of the Router or Switch on page 49
131Copyright © 2016, Juniper Networks, Inc.
Chapter 6: Configuration Statements

system
Syntax system { ... }
Hierarchy Level [edit]
Release Information Statement introduced before Junos OS Release 7.4.
Statement introduced in Junos OS Release 9.0 for EX Series switches.
Description Configure system management properties.
Required PrivilegeLevel
system—To view this statement in the configuration.
system-control—To add this statement to the configuration.
RelatedDocumentation
• System Management Configuration Statements on page 94
Copyright © 2016, Juniper Networks, Inc.132
System Basics: Getting Started Configuration Guide

transfer-interval (Configuration)
Syntax transfer-interval interval;
Hierarchy Level [edit system archival configuration]
Release Information Statement introduced before Junos OS Release 7.4.
Statement introduced in Junos OS Release 9.0 for EX Series switches.
Statement introduced in Junos OS Release 11.1 for the QFX Series.
Description Configure the router or switch to periodically transfer its currently active configuration
to an archive site.
NOTE: Theedit systemarchivalhierarchy is not availableonQFabric systems.
Options interval—Interval at which to transfer the current configuration to an archive site.
Range: 15 through 2880 minutes
NOTE: The [edit system archival] hierarchy is not available on QFabric
systems.
Required PrivilegeLevel
system—To view this statement in the configuration.
system-control—To add this statement to the configuration.
RelatedDocumentation
• Configuring the Transfer Interval for Periodic Transfer of the Active Configuration to
an Archive Site on page 60
• archive
• configuration on page 110
• transfer-on-commit on page 134
133Copyright © 2016, Juniper Networks, Inc.
Chapter 6: Configuration Statements

transfer-on-commit
Syntax transfer-on-commit;
Hierarchy Level [edit system archival configuration]
Release Information Statement introduced before Junos OS Release 7.4.
Statement introduced in Junos OS Release 9.0 for EX Series switches.
Statement introduced in Junos OS Release 11.1 for the QFX Series.
Description Configure the router or switch to transfer its currently active configuration to an archive
site each time you commit a candidate configuration.
NOTE: When specifying a URL in a Junos OS statement using an IPv6 hostaddress, youmustenclose theentireURL inquotationmarks (“ ”)andenclosethe IPv6 host address in brackets ([ ]). For example,“ftp://username<:password>@[ipv6-host-address]<:port>/url-path” .
NOTE: The [edit system archival] hierarchy is not available on QFabric
systems.
Required PrivilegeLevel
system—To view this statement in the configuration.
system-control—To add this statement to the configuration.
RelatedDocumentation
• Configuring Transfer of the Current Active Configuration When a Configuration Is
Committed on page 61
• archive
• configuration on page 110
• transfer-interval on page 133
Copyright © 2016, Juniper Networks, Inc.134
System Basics: Getting Started Configuration Guide

trusted-key
Syntax trusted-key [ key-numbers ];
Hierarchy Level [edit system ntp]
Release Information Statement introduced before Junos OS Release 7.4.
Statement introduced in Junos OS Release 9.0 for EX Series switches.
Description For NTP, configure the keys you are allowed to use when you configure the local router
or switch to synchronize its time with other systems on the network.
Options key-numbers—One or more key numbers. Each key can be any 32-bit unsigned integer
except 0.
Required PrivilegeLevel
system—To view this statement in the configuration.
system-control—To add this statement to the configuration.
RelatedDocumentation
• Configuring NTP Authentication Keys
• authentication-key
• broadcast
• peer
• server
username (System)
Syntax username username;
Hierarchy Level [edit system proxy]
Release Information Statement introduced in Junos OS Release 11.4.
Description Configure the username as configured in the proxy server.
Required PrivilegeLevel
system—To view this statement in the configuration.
system-control—To add this statement to the configuration.
RelatedDocumentation
• Example: Configuring a Proxy Server for License Updates on page 53
135Copyright © 2016, Juniper Networks, Inc.
Chapter 6: Configuration Statements

Copyright © 2016, Juniper Networks, Inc.136
System Basics: Getting Started Configuration Guide

PART 3
Administration
• File Management Commands on page 139
• System Software Administrative Commands on page 157
• System Software Monitoring Commands on page 209
137Copyright © 2016, Juniper Networks, Inc.

Copyright © 2016, Juniper Networks, Inc.138
System Basics: Getting Started Configuration Guide

CHAPTER 7
File Management Commands
• file archive
• file checksum md5
• file checksum sha1
• file checksum sha-256
• file compare
• file copy
• file delete
• file list
• file rename
• file show
139Copyright © 2016, Juniper Networks, Inc.

file archive
Syntax file archive destination destination source source<compress>
Release Information Command introduced before Junos OS Release 7.4.
Command introduced in Junos OS Release 9.0 for EX Series switches.
Command introduced in Junos OS Release 11.1 for the QFX Series.
Description Archive, and optionally compress, one or multiple local system files as a single file, locally
or at a remote location.
Options destination destination—Destination of the archived file or files. Specify the destination
as a URL or filename. The Junos OS adds one of the following suffixes if the
destination filename does not already have it:
• For archived files—The suffix .tar
• For archived and compressed files—The suffix .tgz
source source—Source of the original file or files. Specify the source as a URL or filename.
compress—(Optional) Compress the archived file with the GNU zip (gzip) compression
utility. The compressed files have the suffix .tgz.
Required PrivilegeLevel
maintenance
List of Sample Output file archive (Multiple Files) on page 140file archive (Single File) on page 140file archive (with Compression) on page 141
Output Fields When you enter this command, you are provided feedback on the status of your request.
Sample Output
file archive (Multiple Files)
The following sample command archives all message files in the local directory
/var/log/messages as the single file messages-archive.tar.
user@host> file archive source /var/log/messages* destination /var/log/messages-archive.tar/usr/bin/tar: Removing leading / from absolute path names in the archive.
user@host>
file archive (Single File)
The following sample command archives one message file in the local directory
/var/log/messages as the single file messages-archive.tar.
user@host> file archive source /var/log/messages destination /var/log/messages-archive.tar/usr/bin/tar: Removing leading / from absolute path names in the archive.user@host
Copyright © 2016, Juniper Networks, Inc.140
System Basics: Getting Started Configuration Guide

file archive (with Compression)
The following sample command archives and compresses all message files in the local
directory /var/log/messages as the single file messages-archive.tgz.
user@host> file archive compress source /var/log/messages* destination/var/log/messages-archive.tgz/usr/bin/tar: Removing leading / from absolute path names in the archive.
141Copyright © 2016, Juniper Networks, Inc.
Chapter 7: File Management Commands

file checksummd5
Syntax file checksummd5 <pathname> filename
Release Information Command introduced before Junos OS Release 7.4.
Command introduced in Junos OS Release 9.0 for EX Series switches.
Command introduced in Junos OS Release 11.1 for the QFX Series.
Description Calculate the Message Digest 5 (MD5) checksum of a file.
Options pathname—(Optional) Path to a filename.
filename—Name of a local file for which to calculate the MD5 checksum.
Required PrivilegeLevel
maintenance
RelatedDocumentation
Configuring Checksum Hashes for a Commit Script in the Junos OS Configuration and
Operations Automation Guide
•
• Configuring Checksum Hashes for an Event Script in the Junos OS Configuration and
Operations Automation Guide
• Configuring Checksum Hashes for an Op Script in the Junos OS Configuration and
Operations Automation Guide
• Executing anOpScript fromaRemoteSite in the JunosOSConfiguration andOperations
Automation Guide
• file checksum sha-256 on page 144
• file checksum sha1 on page 143
• op
List of Sample Output file checksummd5 on page 142
Output Fields When you enter this command, you are provided feedback on the status of your request.
Sample Output
file checksummd5
user@host> file checksummd5 jbundle-5.3R2.4-export-signed.tgzMD5 (jbundle-5.3R2.4-export-signed.tgz) = 2a3b69e43f9bd4893729cc16f505a0f5
Copyright © 2016, Juniper Networks, Inc.142
System Basics: Getting Started Configuration Guide

file checksum sha1
Syntax file checksum sha1 <pathname> filename
Release Information Command introduced in Junos OS Release 9.5.
Command introduced in Junos OS Release 9.5 for EX Series switches.
Command introduced in Junos OS Release 11.1 for the QFX Series.
Description Calculate the Secure Hash Algorithm (SHA-1) checksum of a file.
Options pathname—(Optional) Path to a filename.
filename—Name of a local file for which to calculate the SHA-1 checksum.
Required PrivilegeLevel
maintenance
RelatedDocumentation
Configuring Checksum Hashes for a Commit Script in the Junos OS Configuration and
Operations Automation Guide
•
• Configuring Checksum Hashes for an Event Script in the Junos OS Configuration and
Operations Automation Guide
• Configuring Checksum Hashes for an Op Script in the Junos OS Configuration and
Operations Automation Guide
• Executing anOpScript fromaRemoteSite in the JunosOSConfiguration andOperations
Automation Guide
• file checksummd5 on page 142
• file checksum sha-256 on page 144
• op
List of Sample Output file checksum sha1 on page 143
Output Fields When you enter this command, you are provided feedback on the status of your request.
Sample Output
file checksum sha1
user@host> file checksum sha1 /var/db/scripts/opscript.slax
SHA1 (/var/db/scripts/commitscript.slax) = ba9e47120c7ce55cff29afd73eacd370e162c676
143Copyright © 2016, Juniper Networks, Inc.
Chapter 7: File Management Commands

file checksum sha-256
Syntax file checksum sha-256 <pathname> filename
Release Information Command introduced in Junos OS Release 9.5.
Command introduced in Junos OS Release 9.5 for EX Series switches.
Command introduced in Junos OS Release 11.1 for the QFX Series.
Description Calculate the Secure Hash Algorithm 2 family (SHA-256) checksum of a file.
Options pathname—(Optional) Path to a filename.
filename—Name of a local file for which to calculate the SHA-256 checksum.
Required PrivilegeLevel
maintenance
RelatedDocumentation
Configuring Checksum Hashes for a Commit Script in the Junos OS Configuration and
Operations Automation Guide
•
• Configuring Checksum Hashes for an Event Script in the Junos OS Configuration and
Operations Automation Guide
• Configuring Checksum Hashes for an Op Script in the Junos OS Configuration and
Operations Automation Guide
• Executing anOpScript fromaRemoteSite in the JunosOSConfiguration andOperations
Automation Guide
• file checksummd5 on page 142
• file checksum sha1 on page 143
• op
List of Sample Output file checksum sha-256 on page 144
Output Fields When you enter this command, you are provided feedback on the status of your request.
Sample Output
file checksum sha-256
user@host> file checksum sha-256 /var/db/scripts/commitscript.slax
SHA256 (/var/db/scripts/commitscript.slax) = 94c2b061fb55399e15babd2529453815601a602b5c98e5c12ed929c9d343dd71
Copyright © 2016, Juniper Networks, Inc.144
System Basics: Getting Started Configuration Guide

file compare
Syntax file compare (files filename filename)<context | unified><ignore-white-space>
Release Information Command introduced before Junos OS Release 7.4.
Command introduced in Junos OS Release 9.0 for EX Series switches.
Command introduced in Junos OS Release 11.1 for the QFX Series.
Description Compare two local files and describe the differences between them in default, context,
or unified output styles:
• Default—In the first line of output, c means lines were changed between the two files,
d means lines were deleted between the two files, and a means lines were added
between the two files. The numbers preceding this alphabetical marker represent the
first file, and the lines after the alphabetical marker represent the second file. A left
angle bracket (<) in front of output lines refers to the first file. A right angle bracket (>)
in front of output lines refers to the second file.
• Context—The display is divided into two parts. The first part is the first file; the second
part is the second file. Output lines preceded by an exclamation point (!) have changed.
Additions are marked with a plus sign (+), and deletions are marked with a
minus sign (-).
• Unified—The display is preceded by the line number from the first and the second file
(xx,xxx,x). Before the line number, additions to the file are marked with a plus sign (+),
and deletions to the file are marked with a minus sign (-). The body of the output
contains the affected lines. Changes are viewed as additions plus deletions.
Options files filename—Names of two local files to compare.
context—(Optional) Display output in context format.
ignore-white-space—(Optional) Ignore changes in the amount of white space.
unified—(Optional) Display output in unified format.
Required PrivilegeLevel
none
List of Sample Output file compare files on page 146file compare files context on page 146file compare files unified on page 146file compare files unified ignore-white-space on page 146
Output Fields When you enter this command, you are provided feedback on the status of your request.
145Copyright © 2016, Juniper Networks, Inc.
Chapter 7: File Management Commands

Sample Output
file compare files
user@host> file compare files /tmp/one /tmp/two100c100< full-name "File 1";---> full-name "File 2";102c102< class foo; # 'foo' is not defined---> class super-user;
file compare files context
user@host> file compare files /tmp/one /tmp/two context*** /tmp/one Wed Dec 3 17:12:50 2003--- /tmp/two Wed Dec 3 09:13:14 2003****************** 97,104 **** } } user bill {! full-name "Bill Smith";! class foo; # 'foo' is not defined authentication { encrypted-password SECRET; }--- 97,105 ---- } } user bill {! full-name "Bill Smith";! uid 1089;! class super-user; authentication { encrypted-password SECRET; }
file compare files unified
user@host> file compare files /tmp/one /tmp/two unified--- /tmp/one Wed Dec 3 17:12:50 2003+++ /tmp/two Wed Dec 3 09:13:14 2003@@ -97,8 +97,9 @@ } } user bill {- full-name "Bill Smith";- class foo; # 'foo' is not defined+ full-name "Bill Smith";+ uid 1089;+ class super-user; authentication { encrypted-passwordSECRET; }
file compare files unified ignore-white-space
user@host> file compare files /tmp/one /tmp/two unified ignore-white-space
Copyright © 2016, Juniper Networks, Inc.146
System Basics: Getting Started Configuration Guide

--- /tmp/one Wed Dec 3 09:13:10 2003+++ /tmp/two Wed Dec 3 09:13:14 2003@@ -99,7 +99,7 @@ user bill { full-name "Bill Smith"; uid 1089;- class foo; # 'foo' is not defined+ class super-user; authentication { encrypted-password <SECRET>; # SECRET-DATA }
147Copyright © 2016, Juniper Networks, Inc.
Chapter 7: File Management Commands

file copy
Syntax file copy source destination<source-address address>
Release Information Command introduced before Junos OS Release 7.4.
source-address option added in Junos OS Release 7.4.
Command introduced in Junos OS Release 9.0 for EX Series switches.
Command introduced in Junos OS Release 11.1 for QFX Series switches.
Description Copy files from one place to another on the local router or switch or between the local
router or switch and a remote system.
Options source—Source of the original file. Specify this as a URL or filename.
destination—Destination of the copied file. Specify this as a URL or filename. If you are
copying a file to the current directory (your home directory on the local router or
switch) and are not renaming the file, specify the destination with a period (.).
source-address address—(Optional) Source IP host address. This option is useful for
specifying the source address of a secure copy (scp) file transfer.
Required PrivilegeLevel
maintenance
RelatedDocumentation
Format for Specifying Filenames and URLs in Junos OS CLI Commands on page 38•
• Default Directories for Junos OS File Storage on the Router or Switch on page 40
List of Sample Output file copy (A File from the Router or Switch to a PC) on page 148file copy (A Configuration File Between Routing Engines) on page 148file copy (A Log File Between Routing Engines) on page 149file copy (A File from the TXMatrix Plus Router to a T1600 Router Connected to theTXMatrix Plus Router) on page 149
Output Fields When you enter this command, you are provided feedback on the status of your request.
Sample Output
file copy (A File from the Router or Switch to a PC)
user@host> file copy /var/tmp/rpd.core.4 berry:/c/junipero/tmp
...transferring.file...... | 0 KB | 0.3 kB/s | ETA: 00:00:00 | 100%
file copy (A Configuration File Between Routing Engines)
The following sample command copies a configuration file from Routing Engine 0 to
Routing Engine 1:
user@host> file copy /config/juniper.conf re1:/var/tmp/copied-juniper.conf
Copyright © 2016, Juniper Networks, Inc.148
System Basics: Getting Started Configuration Guide

file copy (A Log File Between Routing Engines)
The following sample command copies a log file from Routing Engine 0 to Routing Engine
1:
user@host> file copy lcc0-re0:/var/log/chassisd lcc0-re1:/var/tmp
file copy (A File from the TXMatrix Plus Router to a T1600 Router Connected to the TXMatrix Plus Router)
The following sample command copies a text file from Routing Engine 1 on the
switch-fabric chassis sfc0 to Routing Engine 1 on the line-card chassis lcc0:
user@host> file copy sfc0-re1:/tmp/sample.txt lcc0-re1:/var/tmp
Sample Output
149Copyright © 2016, Juniper Networks, Inc.
Chapter 7: File Management Commands

file delete
Syntax file delete filename<purge>
Release Information Command introduced before Junos OS Release 7.4.
Command introduced in Junos OS Release 9.0 for EX Series switches.
Command introduced in Junos OS Release 11.1 for the QFX Series.
Description Delete a file on the local router or switch.
Options filename—Name of the file to delete. For a routing matrix, include chassis information in
the filename if the file to be deleted is not local to the Routing Engine from which
the command is issued.
purge—(Optional) Overwrite regular files before deleting them.
Required PrivilegeLevel
maintenance
List of Sample Output file delete on page 150file delete (RoutingMatrix) on page 150
Output Fields When you enter this command, you are provided feedback on the status of your request.
Sample Output
file delete
user@host> file list /var/tmpdcd.corerpd.coresnmpd.core
user@host> file delete /var/tmp/snmpd.coreuser@host> file list /var/tmpdcd.corerpd.core
file delete (RoutingMatrix)
user@host> file list lcc0-re0:/var/tmpdcd.corerpd.coresnmpd.core
user@host> file delete lcc0-re0:/var/tmp/snmpd.coreuser@host> file list /var/tmpdcd.corerpd.core
Copyright © 2016, Juniper Networks, Inc.150
System Basics: Getting Started Configuration Guide

file list
Syntax file list<detail | recursive><filename>
Release Information Command introduced before Junos OS Release 7.4.
Command introduced in Junos OS Release 9.0 for EX Series switches.
Command introduced in Junos OS Release 11.1 for the QFX Series.
Description Display a list of files on the local router or switch.
Options none—Display a list of all files for the current directory.
detail | recursive—(Optional) Display detailed output or descend recursively through the
directory hierarchy, respectively.
filename—(Optional) Display a list of files. For a routing matrix, the filename must include
the chassis information.
Additional Information The default directory is the home directory of the user logged in to the router or switch.
To view available directories, enter a space and then a backslash (/) after the file list
command. To view files within a specific directory, include a backslash followed by the
directory and, optionally, subdirectory name after the file list command.
Required PrivilegeLevel
maintenance
List of Sample Output file list on page 151file list (RoutingMatrix) on page 151
Output Fields When you enter this command, you are provided feedback on the status of your request.
Sample Output
file list
user@host> file list /var/tmpdcd.corerpd.coresnmpd.core
file list (RoutingMatrix)
user@host> file list lcc0-re0:var/tmplcc0-re0:--------------------------------------------------------------------------/var/tmp/:.gdbinit.pccarddTest/chassisd*chassisd.nathan*check_time*
151Copyright © 2016, Juniper Networks, Inc.
Chapter 7: File Management Commands

cores/diagTestPrep*diagtest*diagtest.user*do_switchovers*dump_test*err.manoj.logesw_clearstats*esw_counter*esw_debug*esw_debug_ge*esw_filt_test*esw_filter_tnp_addr*esw_getstats*esw_phy*esw_stats*
Copyright © 2016, Juniper Networks, Inc.152
System Basics: Getting Started Configuration Guide

file rename
Syntax file rename source destination
Release Information Command introduced before Junos OS Release 7.4.
Command introduced in Junos OS Release 9.0 for EX Series switches.
Command introduced in Junos OS Release 11.1 for the QFX Series.
Description Rename a file on the local router or switch.
Options destination—New name for the file.
source—Original name of the file. For a routing matrix, the filename must include the
chassis information.
Required PrivilegeLevel
maintenance
List of Sample Output file rename on page 153file rename (RoutingMatrix) on page 153
Output Fields When you enter this command, you are provided feedback on the status of your request.
Sample Output
file rename
The following example lists the files in /var/tmp, renames one of the files, and then
displays the list of files again to reveal the newly named file.
user@host> file list /var/tmpdcd.corerpd.coresnmpd.core
user@host> file rename /var/tmp/dcd.core /var/tmp/dcd.core.990413user@host> file list /var/tmpdcd.core.990413rpd.coresnmpd.core
file rename (RoutingMatrix)
The following example lists the files in /var/tmp, renames one of the files, and then
displays the list of files again to reveal the newly named file.
user@host> file list lcc0-re1:/var/tmplcc0-re1:--------------------------------------------------------------------------
/var/tmp:.pccarddsartre.conf snmpd syslogd.core-tarball.0.tgz
153Copyright © 2016, Juniper Networks, Inc.
Chapter 7: File Management Commands

user@host> file rename lcc0-re0:/var/tmp/snmpd /var/tmp/snmpd.rruser@host> file list lcc0-re1:/var/tmplcc0-re1:--------------------------------------------------------------------------
/var/tmp:.pccarddsartre.conf snmpd.rr syslogd.core-tarball.0.tgz
Copyright © 2016, Juniper Networks, Inc.154
System Basics: Getting Started Configuration Guide

file show
Syntax file show filename<encoding (base64 | raw)>
Release Information Command introduced before Junos OS Release 7.4.
Command introduced in Junos OS Release 9.0 for EX Series switches.
Command introduced in Junos OS Release 11.1 for the QFX Series.
Description Display the contents of a file.
Options filename—Name of a file. For a routing matrix, the filename must include the chassis
information.
encoding(base64 | raw)—(Optional) Encode file contents with base64 encoding or show
raw text.
Required PrivilegeLevel
maintenance
List of Sample Output file show on page 155file show (RoutingMatrix) on page 155
Output Fields When you enter this command, you are provided feedback on the status of your request.
Sample Output
file show
user@host> file show /var/log/messagesApr 13 21:00:08 romney /kernel: so-1/1/2: loopback suspected; going to standby.Apr 13 21:00:40 romney /kernel: so-1/1/2: loopback suspected; going to standby.Apr 13 21:02:48 romney last message repeated 4 timesApr 13 21:07:04 romney last message repeated 8 timesApr 13 21:07:13 romney /kernel: so-1/1/0: Clearing SONET alarm(s) RDI-PApr 13 21:07:29 romney /kernel: so-1/1/0: Asserting SONET alarm(s) RDI-P...
file show (RoutingMatrix)
user@host> file show lcc0-re0:/var/tmp/.gdbinitlcc0-re0:--------------------------------------------------------------------------##################################################################### Settings####################################################################
set print pretty
##################################################################### Basic stuff####################################################################
define msgbuf printf "%s", msgbufp->msg_ptrend
155Copyright © 2016, Juniper Networks, Inc.
Chapter 7: File Management Commands
# hex dump of a block of memory# usage: dump address lengthdefine dump p $arg0, $arg1 set $ch = $arg0 set $j = 0 set $n = $arg1 while ($j < $n) #printf "%x %x ",&$ch[$j],$ch[$j] printf "%x ",$ch[$j] set $j = $j + 1 if (!($j % 16)) printf "\n" end endend
Copyright © 2016, Juniper Networks, Inc.156
System Basics: Getting Started Configuration Guide
CHAPTER 8
System Software AdministrativeCommands
• clear system commit
• clear system reboot
• configure
• request system configuration rescue delete
• request system configuration rescue save
• request system halt
• request system license add
• request system license delete
• request system license save
• request system logout
• request system partition abort
• request system partition hard-disk
• request system power-off
• request system reboot
• request system snapshot
• request system software add
• request system zeroize
157Copyright © 2016, Juniper Networks, Inc.

clear system commit
Syntax clear system commit
Release Information Command introduced before Junos OS Release 7.4.
Command introduced in Junos OS Release 9.0 for EX Series switches.
Command introduced in Junos OS Release 11.1 for the QFX Series.
Description Clear any pending commit operation.
Options This command has no options.
Required PrivilegeLevel
maintenance (or the actual user who scheduled the commit)
RelatedDocumentation
show system commit on page 214•
List of Sample Output clear system commit on page 158clear system commit (None Pending) on page 158clear system commit (User Does Not Have Required Privilege Level) on page 158
Output Fields When you enter this command, you are provided feedback on the status of your request.
Sample Output
clear system commit
user@host> clear system commitPending commit cleared.
clear system commit (None Pending)
user@host> clear system commitNo commit scheduled.
clear system commit (User Does Not Have Required Privilege Level)
user@host> clear system commiterror: Permission denied
Copyright © 2016, Juniper Networks, Inc.158
System Basics: Getting Started Configuration Guide

clear system reboot
List of Syntax Syntax on page 159
Syntax (EX Series Switches) on page 159
Syntax (TX Matrix Router) on page 159
Syntax (TX Matrix Plus Router) on page 159
Syntax (QFX Series) on page 159
Syntax clear system reboot<both-routing-engines>
Syntax (EX SeriesSwitches)
clear system reboot<all-members><both-routing-engines><local><membermember-id>
Syntax (TXMatrixRouter)
clear system reboot<both-routing-engines><all-chassis | all-lcc | lcc number | scc>
Syntax(TXMatrixPlusRouter)
clear system reboot<both-routing-engines><all-chassis | all-lcc | lcc number | sfc number>
Syntax (QFX Series) clear system reboot<infrastructure name><interconnect-device name><node-group name>
Release Information Command introduced before Junos OS Release 7.4.
Command introduced in Junos OS Release 9.0 for EX Series switches.
sfc option introduced for the TX Matrix Plus router in Junos OS Release 9.6.
Command introduced in Junos OS Release 11.1 for the QFX Series.
Description Clear any pending system software reboots or halts. When issued on a TX Matrix router
without any options, the default behavior clears all pending system software reboots or
halts on all T640 routers connected to the TX Matrix router. When issued on a TX Matrix
Plus router without any options, the default behavior clears all pending system software
reboots or halts on all T1600 routers connected to the TX Matrix Plus router.
Options none—Clear all pending system software reboots or halts.
all-chassis—(TX Matrix and TX Matrix Plus routers only) (Optional) Clear all halt or reboot
requests for all the Routing Engines in the chassis.
all-lcc—(TX Matrix and TX Matrix Plus routers only) (Optional) On a TX Matrix router,
clear all halt or reboot requests for all T640 routers (or line-card chassis) connected
to the TX Matrix router. On a TX Matrix Plus router, clear all halt or reboot requests
for all T1600 routers (or line-card chassis) connected to the TX Matrix Plus router.
159Copyright © 2016, Juniper Networks, Inc.
Chapter 8: System Software Administrative Commands

all-members—(EX4200 switches only) (Optional) Clear all halt or reboot requests on
all members of the Virtual Chassis configuration.
both-routing-engines—(Systems with multiple Routing Engines) (Optional) Clear all halt
or reboot requests on both Routing Engines. On a TX Matrix router, clear both Routing
Engines on all chassis connected to the TX Matrix router. Likewise, on a TX Matrix
Plus router, clear both Routing Engines on all chassis connected to the TX Matrix
Plus router.
infrastructure name—(QFabric systems) (Optional) Clear all halt or reboot requests on
the fabric control Routing Engines or fabric manager Routing Engines.
interconnect-devicename—(QFabric systems) (Optional) Clear all halt or reboot requests
on the Interconnect device.
lccnumber—(TX Matrix and TX Matrix Plus routers only) (Optional) On a TX Matrix router,
clear all halt or reboot requests for a specific T640 router that is connected to the
TX Matrix router. On a TX Matrix Plus router, clear all halt or reboot requests for a
specific T1600 router that is connected to the TX Matrix Plus router. Replace number
with a value from 0 through 3.
local—(EX4200 switches only) (Optional) Clear all halt or reboot requests on the local
Virtual Chassis member.
membermember-id—(EX4200 switches only) (Optional) Clear all halt or reboot requests
on the specified member of the Virtual Chassis configuration. Replace member-id
with a value from 0 through 9.
node-group name—(QFabric systems) (Optional) Clear all halt or reboot requests on the
Node group.
scc—(TX Matrix routers only) (Optional) Clear all halt or reboot requests for the TX Matrix
router (or switch-card chassis).
sfc number—(TX Matrix Plus routers only) (Optional) Clear all halt or reboot requests for
the TX Matrix Plus router (or switch-fabric chassis). Replace number with 0.
Required PrivilegeLevel
maintenance
RelatedDocumentation
request system reboot on page 184•
• request system reboot
• Rebooting and Halting a QFX Series Product
List of Sample Output clear system reboot on page 161clear system reboot (TXMatrix Router) on page 161clear system reboot (QFX Series) on page 161
Output Fields When you enter this command, you are provided feedback on the status of your request.
Copyright © 2016, Juniper Networks, Inc.160
System Basics: Getting Started Configuration Guide
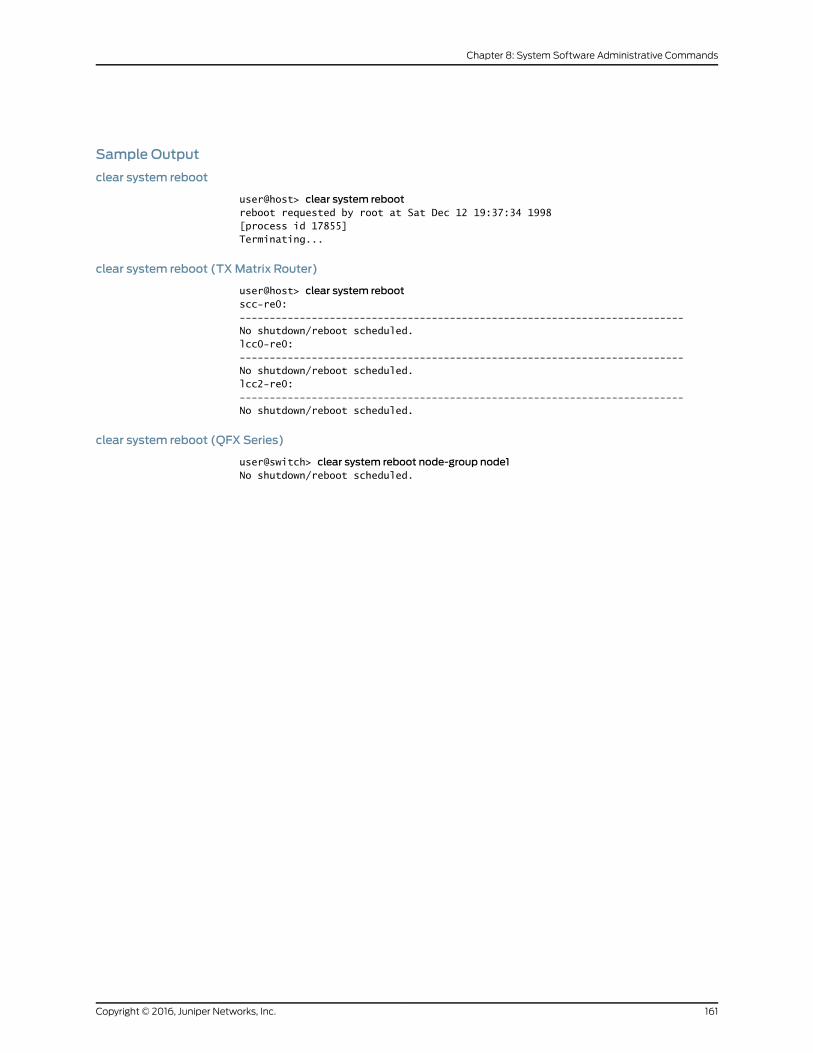
Sample Output
clear system reboot
user@host> clear system rebootreboot requested by root at Sat Dec 12 19:37:34 1998[process id 17855]Terminating...
clear system reboot (TXMatrix Router)
user@host> clear system rebootscc-re0:--------------------------------------------------------------------------No shutdown/reboot scheduled.lcc0-re0:--------------------------------------------------------------------------No shutdown/reboot scheduled.lcc2-re0:--------------------------------------------------------------------------No shutdown/reboot scheduled.
clear system reboot (QFX Series)
user@switch> clear system reboot node-group node1No shutdown/reboot scheduled.
161Copyright © 2016, Juniper Networks, Inc.
Chapter 8: System Software Administrative Commands

configure
Syntax configure<batch><dynamic><exclusive><private>
Release Information Command introduced before Junos OS Release 7.4.
Command introduced in Junos OS Release 9.0 for EX Series switches.
Description Enter configuration mode. When this command is entered without any optional keywords,
everyone can make configuration changes and commit all changes made to the
configuration.
Options none—Enter configuration mode.
batch—(Optional) Work in the batch commit mode where commit operations are executed
in batches.
dynamic—(Optional) Configure routing policies and certain routing policy objects in a
dynamic database that is not subject to the same verification required in the standard
configuration database. As a result, the time it takes to commit changes to the
dynamic database is much shorter than for the standard configuration database.
You can then reference these policies and policy objects in routing policies you
configure in the standard database.
exclusive—(Optional) Lock the candidate configuration for as long as you remain in
configuration mode, allowing you to make changes without interference from other
users. Other users can enter and exit configuration mode, but they cannot change
the configuration.
private—(Optional) Allow multiple users to edit different parts of the configuration at
the same time and to commit only their own changes, or to roll back without
interfering with one another's changes. You cannot commit changes in configure
private mode when another user is in configure exclusive mode.
Additional Information For more information about the different methods of entering configuration mode and
the restrictions that apply, see the Junos OS System Basics Configuration Guide.
Required PrivilegeLevel
configure
RelatedDocumentation
show configuration on page 210•
List of Sample Output configure on page 163
Output Fields When you enter this command, you are placed in configuration mode and the system
prompt changes from hostname> to hostname#.
Copyright © 2016, Juniper Networks, Inc.162
System Basics: Getting Started Configuration Guide

Sample Output
configure
user@host> configureEntering configuration mode[edit]user@host#
163Copyright © 2016, Juniper Networks, Inc.
Chapter 8: System Software Administrative Commands
request system configuration rescue delete
Syntax request system configuration rescue delete
Release Information Command introduced before Junos OS Release 7.4.
Command introduced in Junos OS Release 9.0 for EX Series switches.
Command introduced in Junos OS Release 11.1 for the QFX Series.
Description Delete an existing rescue configuration.
NOTE: The [edit system configuration] hierarchy is not available on QFabric
systems.
Options This command has no options.
Required PrivilegeLevel
maintenance
RelatedDocumentation
request system configuration rescue save on page 165•
• request system software rollback
• show system commit on page 214
List of Sample Output request system configuration rescue delete on page 164
Output Fields This command produces no output.
Sample Output
request system configuration rescue delete
user@host> request system configuration rescue delete
Copyright © 2016, Juniper Networks, Inc.164
System Basics: Getting Started Configuration Guide

request system configuration rescue save
Syntax request system configuration rescue save
Release Information Command introduced before Junos OS Release 7.4.
Command introduced in Junos OS Release 9.0 for EX Series switches.
Command introduced in Junos OS Release 11.1 for the QFX Series.
Description Save the most recently committed configuration as the rescue configuration so that you
can return to it at any time by using the rollback command.
NOTE: The [edit system configuration] hierarchy is not available on QFabric
systems.
Options This command has no options.
Required PrivilegeLevel
maintenance
RelatedDocumentation
request system software delete•
• request system software rollback
• show system commit on page 214
List of Sample Output request system configuration rescue save on page 165
Output Fields This command produces no output.
Sample Output
request system configuration rescue save
user@host> request system configuration rescue save
165Copyright © 2016, Juniper Networks, Inc.
Chapter 8: System Software Administrative Commands

request system halt
List of Syntax Syntax on page 166
Syntax (EX Series Switches) on page 166
Syntax (PTX Series) on page 166
Syntax (TX Matrix Router) on page 166
Syntax (TX Matrix Plus Router) on page 166
Syntax (MX Series Router) on page 167
Syntax (QFX Series) on page 167
Syntax request system halt<at time><both-routing-engines><other-routing-engine><inminutes><media (compact-flash | disk | removable-compact-flash | usb)><message "text">
Syntax (EX SeriesSwitches)
request system halt<all-members><at time><both-routing-engines><inminutes><local><media (external | internal)><membermember-id><message "text"><other-routing-engine><slice slice>
Syntax (PTX Series) request system halt<at time><both-routing-engines><other-routing-engine><inminutes><media (compact-flash | disk)><message "text">
Syntax (TXMatrixRouter)
request system halt<all-lcc | lcc number | scc><at time><both-routing-engines><other-routing-engine><inminutes><media (compact-flash | disk)><message "text">
Syntax(TXMatrixPlusRouter)
request system halt<all-chassis | all-lcc | lcc number | sfc number><at time><both-routing-engines><other-routing-engine><inminutes>
Copyright © 2016, Juniper Networks, Inc.166
System Basics: Getting Started Configuration Guide

<media (compact-flash | disk)><message "text">
Syntax (MX SeriesRouter)
request system halt<all-members><at time><both-routing-engines><inminutes><local><media (external | internal)><membermember-id><message "text"><other-routing-engine>
Syntax (QFX Series) request system halt<all-members><at time><director-device director-device-id><inminutes><local><media ><membermember-id><message "text"><slice slice>
Release Information Command introduced before Junos OS Release 7.4.
other-routing-engine option introduced in Junos OS Release 8.0.
Command introduced in Junos OS Release 9.0 for EX Series switches.
sfc option introduced for the TX Matrix Plus router in Junos OS Release 9.6.
Command introduced in Junos OS Release 11.1 for the QFX Series.
director-device option introduced for QFabric systems in Junos OS Release 12.2.
Description Stop the router or switch software.
NOTE: Whenyou issuethiscommandonan individualcomponent inaQFabricsystem, youwill receive awarning that says “Hardware-basedmembers willhalt, Virtual Junos Routing Engines will reboot.” If you want to halt only onemember of a Node group, use themember option from the Node group CLI.
You cannot issue this command from the QFabric CLI.
Options none—Stop the router or switch software immediately.
all-chassis—(TX Matrix and TX Matrix Plus routers only) (Optional) Halt all chassis.
all-lcc—(TX Matrix and TX Matrix Plus routers only) (Optional) On a TX Matrix router,
halt all T640 routers (or line-card chassis) connected to the TX Matrix router. On a
TX Matrix Plus router, halt all T1600 routers (or line-card chassis) connected to the
TX Matrix Plus router.
167Copyright © 2016, Juniper Networks, Inc.
Chapter 8: System Software Administrative Commands

all-members—(EX4200 switches and MX Series routers only) (Optional) Halt all members
of the Virtual Chassis configuration.
at time—(Optional) Time at which to stop the software, specified in one of the following
ways:
• now—Stop the software immediately. This is the default.
• +minutes—Number of minutes from now to stop the software.
• yymmddhhmm—Absolute time at which to stop the software, specified as year,
month, day, hour, and minute.
• hh:mm—Absolute time on the current day at which to stop the software.
both-routing-engines—(Optional) Halt both Routing Engines at the same time.
director-devicedirector-device-id—(QFabric systems only) Halt a specific Director device.
lccnumber—(TX Matrix and TX Matrix Plus routers only) (Optional) On a TX Matrix router,
halt a specific T640 router that is connected to the TX Matrix router. On a TX Matrix
Plus router, halt a specific T1600 router that is connected to the TX Matrix Plus
router. Replace number with a value from 0 through 3.
local—(EX4200 switches and MX Series routers only) (Optional) Halt the local Virtual
Chassis member.
inminutes—(Optional) Number of minutes from now to stop the software. This option
is an alias for the at +minutes option.
media (compact-flash | disk | removable-compact-flash | usb)—(Optional) Boot medium
for the next boot. (The options removable-compact-flash and usb pertain to J Series
routers only.)
media (external | internal)—(EX Series and QFX Series switches and MX Series routers
only) (Optional) Halt the boot media:
• external—Halt the external mass storage device.
• internal—Halt the internal flash device.
membermember-id—(EX4200 switches and MX Series routers only) (Optional) Halt the
specified member of the Virtual Chassis configuration. For EX4200 switches, replace
member-id with a value from 0 through 9. For an MX Series Virtual Chassis, replace
member-id with a value of 0 or 1.
message "text"—(Optional) Message to display to all system users before stopping the
software.
other-routing-engine—(Optional) Halt the other Routing Engine from which the command
is issued. For example, if you issue the command from the master Routing Engine,
the backup Routing Engine is halted. Similarly, if you issue the command from the
backup Routing Engine, the master Routing Engine is halted.
Copyright © 2016, Juniper Networks, Inc.168
System Basics: Getting Started Configuration Guide
scc—(TX Matrix routers only) (Optional) Halt the TX Matrix router (or switch-card chassis).
sfc number—(TX Matrix Plus routers only) (Optional) Halt the TX Matrix Plus router (or
switch-fabric chassis). Replace number with 0.
slice slice—(EX Series and QFX Series switches only) (Optional) Halt a partition on the
boot media. This option has the following suboptions:
• 1—Halt partition 1.
• 2—Halt partition 2.
• alternate—Reboot from the alternate partition.
Additional Information On the M7i router, the request system halt command does not immediately power down
the Packet Forwarding Engine. The power-down process can take as long as 5 minutes.
On a TX Matrix or TX Matrix Plus router, if you issue the request system halt command
on the master Routing Engine, all the master Routing Engines connected to the routing
matrix are halted. If you issue this command on the backup Routing Engine, all the backup
Routing Engines connected to the routing matrix are halted. If you issue the requestsystem
halt both-routing-engines command on the TX Matrix or TX Matrix Plus router, all the
Routing Engines on the routing matrix are halted.
NOTE: If you have a router or switchwith two Routing Engines and youwantto shut the power off to the router or switch or remove a Routing Engine, youmust first halt the backupRouting Engine (if it has been upgraded), and thenhalt themaster Routing Engine. To halt a Routing Engine, issue the request
system halt command. You can also halt both Routing Engines at the same
time by issuing the request system halt both-routing-engines command.
Required PrivilegeLevel
maintenance
RelatedDocumentation
clear system reboot on page 159•
• request system power-off on page 179
• Rebooting and Halting a QFX Series Product
List of Sample Output request system halt on page 170request system halt (In 2 Hours) on page 170request system halt (Immediately) on page 170request system halt (At 1:20 AM) on page 170
Output Fields When you enter this command, you are provided feedback on the status of your request.
169Copyright © 2016, Juniper Networks, Inc.
Chapter 8: System Software Administrative Commands
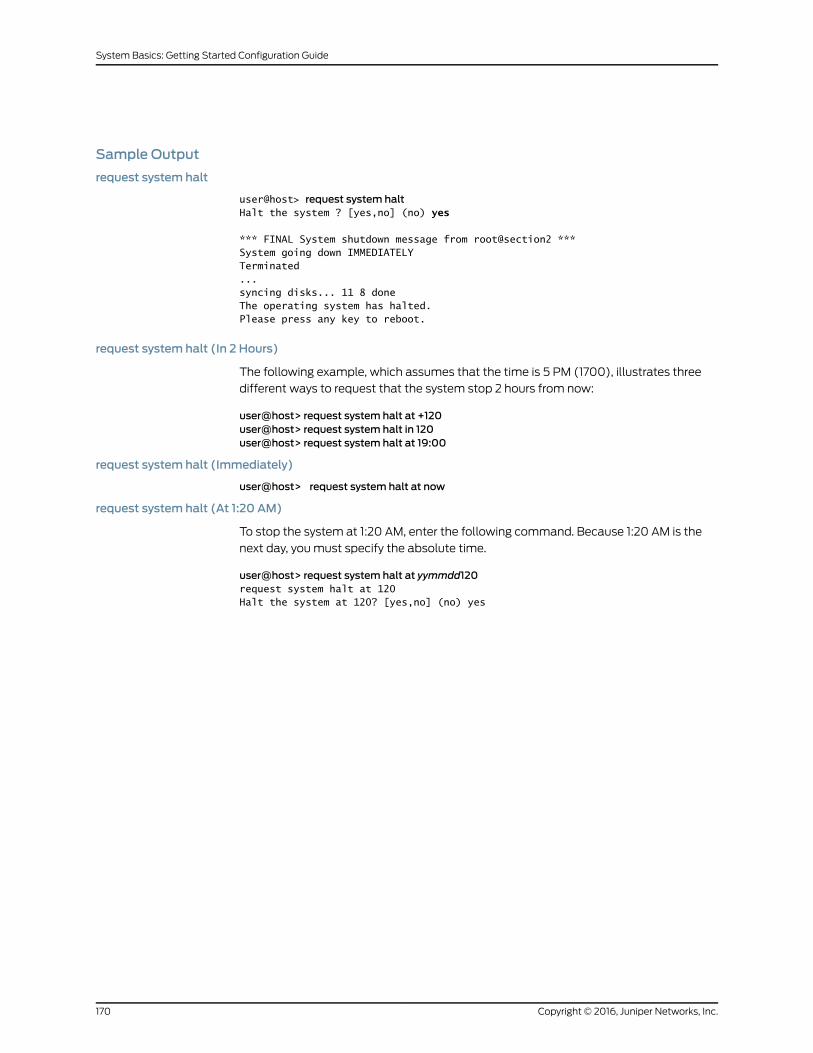
Sample Output
request system halt
user@host> request system haltHalt the system ? [yes,no] (no) yes
*** FINAL System shutdown message from root@section2 ***System going down IMMEDIATELYTerminated...syncing disks... 11 8 doneThe operating system has halted.Please press any key to reboot.
request system halt (In 2 Hours)
The following example, which assumes that the time is 5 PM (1700), illustrates three
different ways to request that the system stop 2 hours from now:
user@host> request system halt at +120user@host> request system halt in 120user@host> request system halt at 19:00
request system halt (Immediately)
user@host> request system halt at now
request system halt (At 1:20 AM)
To stop the system at 1:20 AM, enter the following command. Because 1:20 AM is the
next day, you must specify the absolute time.
user@host> request system halt at yymmdd120request system halt at 120Halt the system at 120? [yes,no] (no) yes
Copyright © 2016, Juniper Networks, Inc.170
System Basics: Getting Started Configuration Guide

request system license add
Syntax request system license add (filename | terminal)
Release Information Command introduced before Junos OS Release 7.4.
Command introduced in Junos OS Release 9.0 for EX Series switches.
Command introduced in Junos OS Release 11.1 for the QFX Series.
Description Add a license key.
Options filename—License key from a file or URL. Specify the filename or the URL where the key
is located.
terminal—License key from the terminal.
Required PrivilegeLevel
maintenance
RelatedDocumentation
Adding New Licenses (CLI Procedure)•
List of Sample Output request system license add on page 171
Output Fields When you enter this command, you are provided feedback on the status of your request.
Sample Output
request system license add
user@host> request system license add terminal
171Copyright © 2016, Juniper Networks, Inc.
Chapter 8: System Software Administrative Commands

request system license delete
List of Syntax Syntax on page 172
Syntax (QFX Series) on page 172
Syntax request system license delete license-id
Syntax (QFX Series) request system license delete license-identifier
Release Information Command introduced before Junos OS Release 7.4.
Command introduced in Junos OS Release 9.0 for EX Series switches.
Command introduced in Junos OS Release 11.1 for the QFX Series.
Description Delete a license key. You can delete only one license at a time.
Options license-id—License ID that uniquely identifies a license key.
license-identification—(QFX Series) License ID that uniquely identifies a license key.
Required PrivilegeLevel
maintenance
RelatedDocumentation
Deleting a License (CLI Procedure)•
List of Sample Output request system license delete on page 172
Output Fields When you enter this command, you are provided feedback on the status of your request.
Sample Output
request system license delete
user@host> request system license delete G03000002223
Copyright © 2016, Juniper Networks, Inc.172
System Basics: Getting Started Configuration Guide

request system license save
Syntax request system license save (filename | terminal)
Release Information Command introduced before Junos OS Release 7.4.
Command introduced in Junos OS Release 9.0 for EX Series switches.
Command introduced in Junos OS Release 11.1 for the QFX Series.
Description Save installed license keys to a file or URL.
Options filename—License key from a file or URL. Specify the filename or the URL where the key
is located.
terminal—License key from the terminal.
Required PrivilegeLevel
maintenance
RelatedDocumentation
Saving License Keys•
List of Sample Output request system license save on page 173
Output Fields When you enter this command, you are provided feedback on the status of your request.
Sample Output
request system license save
user@host> request system license save ftp://user@host/license.conf
173Copyright © 2016, Juniper Networks, Inc.
Chapter 8: System Software Administrative Commands

request system logout
Syntax request system logout (pid pid | terminal terminal | user username)<all>
Release Information Command introduced before Junos OS Release 7.4.
Command introduced in Junos OS Release 9.0 for EX Series switches.
Command introduced in Junos OS Release 11.1 for the QFX Series.
Description Log out users from the router or switch and the configuration database. If a user held the
configure exclusive lock, this command clears the exclusive lock.
Options all—(Optional) Log out all sessions owned by a particular PID, terminal session, or user.
(On a TX Matrix or TX Matrix Plus router, this command is broadcast to all chassis.)
pid pid—Log out the user session using the specified management process identifier
(PID). The PID type must be management process.
terminal terminal—Log out the user for the specified terminal session.
user username—Log out the specified user.
Required PrivilegeLevel
configure
RelatedDocumentation
Junos OS System Basics Configuration Guide•
List of Sample Output request system logout on page 174
Output Fields When you enter this command, you are provided feedback on the status of your request.
Sample Output
request system logout
user@host> request system logout user tammy allConnection closed by foreign host.
Copyright © 2016, Juniper Networks, Inc.174
System Basics: Getting Started Configuration Guide

request system partition abort
List of Syntax Syntax on page 175
Syntax (TX Matrix Router) on page 175
Syntax (TX Matrix Plus Router) on page 175
Syntax (MX Series Router) on page 175
Syntax request system partition abort
Syntax (TXMatrixRouter)
request system partition abort<all-chassis | all-lcc | lcc number | scc>
Syntax(TXMatrixPlusRouter)
request system partition abort<all-chassis | all-lcc | lcc number | sfc number>
Syntax (MX SeriesRouter)
request system partition abort<all-members><local><membermember-id>
Release Information Command introduced before Junos OS Release 7.4.
sfc option introduced for the TX Matrix Plus router in Junos OS Release 9.6.
Description Terminate a previously scheduled storage media partition operation. If the command is
issued between the time of a partition request and a reboot, the partition request is
aborted and the storage media is not affected.
Options all-chassis—(TX Matrix and TX Matrix Plus routers only) (Optional) Abort a previously
scheduled partition operation for all chassis.
all-lcc—(TX Matrix and TX Matrix Plus routers only) (Optional) On a TX Matrix router,
abort a previously scheduled partition operation on all T640 routers (or line-card
chassis) connected to the TX Matrix router. On a TX Matrix Plus router, abort a
previously scheduled partition operation on all T1600 routers (or line-card chassis)
connected to the TX Matrix Plus router.
all-members—(MX Series routers only) (Optional) Abort a previously scheduled partition
operation for all members of the Virtual Chassis configuration.
lcc number—(TX Matrix and TX Matrix Plus routers only) (Optional) On a TX Matrix Plus
router, abort a previously scheduled partition operation on a specific T640 router
that is connected to the TX Matrix router. On a TX Matrix Plus router, abort a
previously scheduled partition operation on a specific T1600 router that is connected
to the TX Matrix Plus router. Replace number with a value from 0 through 3.
local—(MX Series routers only) (Optional) Abort a previously scheduled partition operation
for the local Virtual Chassis member.
membermember-id—(MX Series routers only) (Optional) Abort a previously scheduled
partition operation for the specified member of the Virtual Chassis configuration.
Replace member-id with a value of 0 or 1.
175Copyright © 2016, Juniper Networks, Inc.
Chapter 8: System Software Administrative Commands

scc—(TX Matrix routers only) (Optional) Abort a previously scheduled partition operation
on the TX Matrix router (or switch-card chassis).
sfc number—(TX Matrix Plus routers only) (Optional) Abort a previously scheduled
partition operation on the TX Matrix Plus router (or switch-fabric chassis). Replace
number with 0.
Required PrivilegeLevel
maintenance
RelatedDocumentation
request system partition hard-disk on page 177•
List of Sample Output request system partition abort on page 176
Output Fields When you enter this command, you are provided feedback on the status of your request.
Sample Output
request system partition abort
user@host> request system partition abortThe hard disk is no longer scheduled to be partitioned.
Copyright © 2016, Juniper Networks, Inc.176
System Basics: Getting Started Configuration Guide

request system partition hard-disk
List of Syntax Syntax on page 177
Syntax (TX Matrix Router) on page 177
Syntax (TX Matrix Plus Router) on page 177
Syntax (MX Series Router) on page 177
Syntax request system partition hard-disk
Syntax (TXMatrixRouter)
request system partition hard-disk<all-chassis | all-lcc | lcc number | scc>
Syntax(TXMatrixPlusRouter)
request system partition hard-disk<all-chassis | all-lcc | lcc number | sfc number>
Syntax (MX SeriesRouter)
request system partition hard-disk<all-members><local><membermember-id>
Release Information Command introduced before Junos OS Release 7.4.
sfc option introduced for the TX Matrix Plus router in Junos OS Release 9.6.
Description Set up the hard disk for partitioning. After this command is issued, the hard disk is
partitioned the next time the system is rebooted. When the hard disk is partitioned, the
contents of /altroot and /altconfig are saved and restored. All other data on the hard
disk is at risk of being lost.
Options all-chassis—(TX Matrix and TX Matrix Plus routers only) (Optional) Schedule a partition
of the hard disk for all routers in the chassis at its next reboot.
all-lcc—(TX Matrix and TX Matrix Plus routers only) (Optional) On a TX Matrix router,
schedule a partition of the hard disk on all T640 routers (or line-card chassis)
connected to the TX Matrix router at their next reboot. On a TX Matrix Plus router,
schedule a partition of the hard disk on all T1600 routers (or line-card connected to
the TX Matrix Plus router.
all-members—(MX Series routers only) (Optional) Schedule a partition of the hard disk
for all members of the Virtual Chassis configuration.
lcc number—(TX Matrix and TX Matrix Plus routers only) (Optional) On a TX Matrix Plus
router, schedule a partition of the hard disk on a specific T640 router connected to
the TX Matrix router. On a TX Matrix Plus router, schedule a partition of the hard disk
on a specific T1600 router that is connected to the TX Matrix Plus router. Replace
number with a value from 0 through 3.
local—(MX Series routers only) (Optional) Schedule a partition of the hard disk for the
local member of the Virtual Chassis.
177Copyright © 2016, Juniper Networks, Inc.
Chapter 8: System Software Administrative Commands

membermember-id—(MX Series routers only) (Optional) Schedule a partition of the hard
disk for the specified member of the Virtual Chassis configuration. Replacemember-id
with a value of 0 or 1.
scc—(TX Matrix routers only) (Optional) Schedule a partition of the hard disk on the
T640 router connected to the TX Matrix router (or switch-card chassis).
sfc number—(TX Matrix Plus routers only) (Optional) Schedule a partition of the hard
disk on the T1600 router connected to the TX Matrix Plus router (or switch-fabric
chassis). Replace number with 0.
Additional Information To immediately partition the hard disk, use the request system reboot command. To
cancel the partition request, use the request system partition abort command.
Required PrivilegeLevel
maintenance
RelatedDocumentation
request system partition abort on page 175•
List of Sample Output request system partition hard-disk on page 178
Output Fields When you enter this command, you are provided feedback on the status of your request.
Sample Output
request system partition hard-disk
user@host> request system partition hard-diskWARNING: The hard disk is about to be partitioned. The contentsWARNING: of /altroot and /altconfig will be saved and restored.WARNING: All other data is at risk. This is the setup stage, theWARNING: partition happens during the next reboot.
Setting up to partition the hard disk ...
WARNING: A REBOOT IS REQUIRED TO PARTITION THE HARD DISK. Use theWARNING: 'request system reboot' command when you are ready to proceedWARNING: with the partitioning. To abort the partition of the hard diskWARNING: use the 'request system partition abort' command.
Copyright © 2016, Juniper Networks, Inc.178
System Basics: Getting Started Configuration Guide

request system power-off
List of Syntax Syntax on page 179
Syntax (EX Series Switches) on page 179
Syntax (TX Matrix Router) on page 179
Syntax (TX Matrix Plus Router) on page 179
Syntax (MX Series Router) on page 179
Syntax (QFX Series) on page 180
Syntax request system power-off<both-routing-engines><other-routing-engine><at time><inminutes><media (compact-flash | disk | removable-compact-flash | usb)><message "text">
Syntax (EX SeriesSwitches)
request system power-off<all-members><at time><both-routing-engines><inminutes><local><media (external | internal)><membermember-id><message "text"><other-routing-engine><slice slice>
Syntax (TXMatrixRouter)
request system power-off<all-chassis | all-lcc | lcc number | scc><both-routing-engines><other-routing-engine><at time><inminutes><media (compact-flash | disk)><message "text">
Syntax(TXMatrixPlusRouter)
request system power-off<all-chassis | all-lcc | lcc number | sfc number><both-routing-engines><other-routing-engine><at time><inminutes><media (compact-flash | disk)><message "text">
Syntax (MX SeriesRouter)
request system power-off<all-members><at time><both-routing-engines><inminutes><local>
179Copyright © 2016, Juniper Networks, Inc.
Chapter 8: System Software Administrative Commands

<media (external | internal)><membermember-id><message "text"><other-routing-engine>
Syntax (QFX Series) request system power-off<at time><inminutes><media (external | internal)><message "text"><slice slice>
Release Information Command introduced in Junos OS Release 8.0.
Command introduced in Junos OS Release 9.0 for EX Series switches.
Command introduced in Junos OS Release 11.1 for the QFX Series.
Description Power off the software.
NOTE: Whenyou issuethiscommandonan individualcomponent inaQFabricsystem, youwill receive awarning that says “Hardware-basedmembers willhalt, Virtual Junos Routing Engines will reboot.” If you want to halt only onemember, use themember option. You cannot issue this command from the
QFabric CLI.
NOTE: For a standalonechassis (suchasMXSeries, PTXSeries, andTSeriesrouters), the request topoweroff thesystem isapplicableonly to theRoutingEngines. When you request to power off both Routing Engines, all the FPCsin thechassis shutdownafter approximately 10minutesand thechassis fansrun at full speed. The FPCs shut down because they no longer havecommunicationwith theRoutingEnginesandan Inter-IntegratedCircuit (l2C)timeout occurred.
Options none—Power off the router or switch software immediately.
all-chassis—(Optional) (TX Matrix and TX Matrix Plus router only) Power off all Routing
Engines in the chassis.
all-lcc—(Optional) (TX Matrix and TX Matrix Plus router only) On a TX Matrix router,
power off all T640 routers (or line-card chassis) connected to the TX Matrix router.
On a TX Matrix Plus router, power off all T1600 routers (or line-card chassis)
connected to the TX Matrix Plus router.
all-members—(EX4200 switches and MX Series routers only) (Optional) Power off all
members of the Virtual Chassis configuration.
at time—(Optional) Time at which to power off the software, specified in one of the
following ways:
Copyright © 2016, Juniper Networks, Inc.180
System Basics: Getting Started Configuration Guide

• now—Power off the software immediately. This is the default.
• +minutes—Number of minutes from now to power off the software.
• yymmddhhmm—Absolute time at which to power off the software, specified as
year, month, day, hour, and minute.
• hh:mm—Absolute time on the current day at which to power off the software.
both-routing-engines—(Optional) Power off both Routing Engines at the same time.
inminutes—(Optional) Number of minutes from now to power off the software. This
option is an alias for the at +minutes option.
lcc number—(Optional) (TX Matrix and TX Matrix Plus router only) On a TX Matrix router,
power off a T640 router that is connected to the TX Matrix router. On a TX Matrix
Plus router, power off a T1600 router that is connected to the TX Matrix Plus router.
Replace number with a value from 0 through 3.
local—(EX4200 switches and MX Series routers only) (Optional) Power off the local
Virtual Chassis member.
media (compact-flash | disk | removable-compact-flash | usb)—(Optional) Boot medium
for the next boot. (The options removable-compact-flash and usb pertain to the J
Series routers only.)
media (external | internal)—(EX Series and QFX Series switches and MX Series routers
only) (Optional) Power off the boot media:
• external—Power off the external mass storage device.
• internal—Power off the internal flash device.
membermember-id—(EX4200 switches and MX Series routers only) (Optional) Power
off the specified member of the Virtual Chassis configuration. For EX4200 switches,
replace member-id with a value from 0 through 9. For an MX Series Virtual Chassis,
replace member-id with a value of 0 or 1.
message "text"—(Optional) Message to display to all system users before powering off
the software.
other-routing-engine—(Optional) Power off the other Routing Engine from which the
command is issued. For example, if you issue the command from the master Routing
Engine, the backup Routing Engine is halted. Similarly, if you issue the command
from the backup Routing Engine, the master Routing Engine is halted.
scc—(Optional) (TX Matrix router only) Power off only the master Routing Engine or the
backup Routing Engine on the TX Matrix router (or switch-card chassis). If you issue
the command from the master Routing Engine, the master SCC is powered off. If
you issue the command from the backup Routing Engine, the backup SCC is powered
off.
181Copyright © 2016, Juniper Networks, Inc.
Chapter 8: System Software Administrative Commands
sfc number—(Optional) (TX Matrix Plus router only) Power off only the master Routing
Engine or the backup Routing Engine on the TX Matrix Plus router (or switch-fabric
chassis). If you issue the command from the master Routing Engine, the master SFC
is powered off. If you issue the command from the backup Routing Engine, the backup
SFC is powered off. Replace number with zero.
slice slice—(EX Series and QFX Series switches only) (Optional) Power off a partition on
the boot media. This option has the following suboptions:
• 1—Power off partition 1.
• 2—Power off partition 2.
• alternate—Reboot from the alternate partition.
Additional Information On a routing matrix composed of a TX Matrix router and T640 routers, if you issue the
request system power-off command on the TX Matrix master Routing Engine, all the
master Routing Engines connected to the routing matrix are powered off. If you issue this
command on the backup Routing Engine, all the backup Routing Engines connected to
the routing matrix are powered off.
Likewise, on a routing matrix composed of a TX Matrix Plus router and T1600 routers, if
you issue the request system power-off command on the TX Matrix Plus master Routing
Engine, all the master Routing Engines connected to the routing matrix are powered off.
If you issue this command on the backup Routing Engine, all the backup Routing Engines
connected to the routing matrix are powered off.
If you issue the requestsystempower-offboth-routing-enginescommand on the TX Matrix
or TX Matrix Plus router, all the Routing Engines on the routing matrix are powered off.
Required PrivilegeLevel
maintenance
List of Sample Output request system power-off on page 182
Output Fields When you enter this command, you are provided feedback on the status of your request.
Sample Output
request system power-off
user@host> request system power-off message “This router will be powered off in 30minutes.Please save your data and log out immediately.”warning: This command will not halt the other routing-engine.If planning to switch off power, use the both-routing-engines option.Power Off the system ? [yes,no] (no) yes
*** FINAL System shutdown message from remote@nutmeg *** System going down IMMEDIATELY
This router will be powered off in 30 minutes. Please save your data and log outimmediately.
Shutdown NOW![pid 5177]
Copyright © 2016, Juniper Networks, Inc.182
System Basics: Getting Started Configuration Guide

183Copyright © 2016, Juniper Networks, Inc.
Chapter 8: System Software Administrative Commands

request system reboot
List of Syntax Syntax on page 184
Syntax (EX Series Switches) on page 184
Syntax (TX Matrix Router) on page 184
Syntax (TX Matrix Plus Router) on page 184
Syntax (MX Series Router) on page 184
Syntax request system reboot<at time><both-routing-engines><inminutes><media (compact-flash | disk | removable-compact-flash | usb)><message "text"><other-routing-engine>
Syntax (EX SeriesSwitches)
request system reboot<all-members><at time><both-routing-engines><inminutes><local><media (external | internal)><membermember-id><message "text"><other-routing-engine><slice slice>
Syntax (TXMatrixRouter)
request system reboot<all-chassis | all-lcc | lcc number | scc><at time><both-routing-engines><inminutes><media (compact-flash | disk)><message "text"><other-routing-engine>
Syntax(TXMatrixPlusRouter)
request system reboot<all-chassis | all-lcc | lcc number | sfc number><at time><both-routing-engines><inminutes><media (compact-flash | disk)><message "text"><other-routing-engine><partition (1 | 2 | alternate)>
Syntax (MX SeriesRouter)
request system reboot<all-members><at time><both-routing-engines><inminutes><local>
Copyright © 2016, Juniper Networks, Inc.184
System Basics: Getting Started Configuration Guide

<media (external | internal)><membermember-id><message "text"><other-routing-engine>
Release Information Command introduced before Junos OS Release 7.4.
Option other-routing-engine introduced in Junos OS Release 8.0.
Command introduced in Junos OS Release 9.0 for EX Series switches.
Option sfc introduced for the TX Matrix Plus router in Junos OS Release 9.6.
Option both-routing-engines introduced in Junos OS Release 12.1.
Description Reboot the software.
Options none—Reboot the software immediately.
all-chassis—(TX Matrix and TX Matrix Plus routers only) (Optional) On a TX Matrix router
or TX Matrix Plus router, reboot all routers connected to the TX Matrix or TX Matrix
Plus router, respectively.
all-lcc—(TX Matrix and TX Matrix Plus routers only) (Optional) On a TX Matrix router or
TX Matrix Plus router, reboot all line card chassis connected to the TX Matrix or TX
Matrix Plus router, respectively.
all-members—(EX4200 switches and MX Series routers only) (Optional) Reboot the
software on all members of the Virtual Chassis configuration.
at time—(Optional) Time at which to reboot the software, specified in one of the following
ways:
• now—Stop or reboot the software immediately. This is the default.
• +minutes—Number of minutes from now to reboot the software.
• yymmddhhmm—Absolute time at which to reboot the software, specified as year,
month, day, hour, and minute.
• hh:mm—Absolute time on the current day at which to stop the software, specified
in 24-hour time.
both-routing-engines—(Optional) Reboot both Routing Engines at the same time.
inminutes—(Optional) Number of minutes from now to reboot the software. This option
is an alias for the at +minutes option.
lccnumber—(TX Matrix and TX Matrix Plus routers only) (Optional) On a TX Matrix router
or TX Matrix Plus router, the number of a specified line card chassis connected to
the TX Matrix or TX Matrix Plus router, respectively. Replace number with a value
from 0 through 3.
local—(EX4200 switches and MX Series routers only) (Optional) Reboot the software
on the local Virtual Chassis member.
185Copyright © 2016, Juniper Networks, Inc.
Chapter 8: System Software Administrative Commands

media (compact-flash | disk | removable-compact-flash | usb)—(Optional) Boot medium
for next boot. (The options removable-compact-flash and usb pertain to the J Series
routers only.)
media (external | internal)—(EX Series switches and MX Series routers only) (Optional)
Reboot the boot media:
• external—Reboot the external mass storage device.
• internal—Reboot the internal flash device.
membermember-id—(EX4200 switches and MX Series routers only) (Optional) Reboot
the software on the specified member of the Virtual Chassis configuration. For
EX4200 switches, replacemember-idwith a value from 0 through 9. For an MX Series
Virtual Chassis, replace member-id with a value of 0 or 1.
message "text"—(Optional) Message to display to all system users before stopping or
rebooting the software.
other-routing-engine—(Optional) Reboot the other Routing Engine from which the
command is issued. For example, if you issue the command from the master Routing
Engine, the backup Routing Engine is rebooted. Similarly, if you issue the command
from the backup Routing Engine, the master Routing Engine is rebooted.
partition—(TX Matrix Plus routers only) (Optional) Reboot using the specified partition
on the boot media. This option has the following suboptions:
• 1—Reboot from partition 1.
• 2—Reboot from partition 2.
• alternate—Reboot from the alternate partition.
scc—(TX Matrix routers only) (Optional) Reboot the Routing Engine on the TX Matrix
switch-card chassis. If you issue the command from re0, re0 is rebooted. If you issue
the command from re1, re1 is rebooted.
sfc number—(TX Matrix Plus routers only) (Optional) Reboot the Routing Engine on the
TX Matrix Plus switch-fabric chassis. If you issue the command from re0, re0 is
rebooted. If you issue the command from re1, re1 is rebooted. Replace number with
0.
slice slice—(EX Series switches only) (Optional) Reboot a partition on the boot media.
This option has the following suboptions:
• 1—Power off partition 1.
• 2—Power off partition 2.
• alternate—Reboot from the alternate partition.
Additional Information Reboot requests are recorded in the system log files, which you can view with the show
logcommand (see show log). Also, the names of any running processes that are scheduled
Copyright © 2016, Juniper Networks, Inc.186
System Basics: Getting Started Configuration Guide

to be shut down are changed. You can view the process names with the show system
processes command (see show system processes).
On a TX Matrix or TX Matrix Plus router, if you issue the request system reboot command
on the master Routing Engine, all the master Routing Engines connected to the routing
matrix are rebooted. If you issue this command on the backup Routing Engine, all the
backup Routing Engines connected to the routing matrix are rebooted.
NOTE: Before issuing the request system reboot command on a TXMatrix
Plus routerwithnooptionsor theall-chassis,all-lcc, lccnumber, or sfcoptions,
verify that master Routing Engine for all routers in the routingmatrix are inthe same slot number. If themaster Routing Engine for a line-card chassis isin a different slot number than themaster Routing Engine for a TXMatrixPlus router, the line-card chassis might become logically disconnected fromthe routingmatrix after the request system reboot command.
NOTE: To reboot a router that has two Routing Engines, reboot the backupRouting Engine (if you have upgraded it) first, and then reboot themasterRouting Engine.
Required PrivilegeLevel
maintenance
RelatedDocumentation
clear system reboot on page 159•
• request system halt on page 166
• request system reboot
• Rebooting and Halting a QFX Series Product
List of Sample Output request system reboot on page 187request system reboot (at 2300) on page 188request system reboot (in 2 Hours) on page 188request system reboot (Immediately) on page 188request system reboot (at 1:20 AM) on page 188
Output Fields When you enter this command, you are provided feedback on the status of your request.
Sample Output
request system reboot
user@host> request system rebootReboot the system ? [yes,no] (no)
187Copyright © 2016, Juniper Networks, Inc.
Chapter 8: System Software Administrative Commands

request system reboot (at 2300)
user@host> request system reboot at 2300message ?Maintenance time!?Reboot the system ? [yes,no] (no) yes
shutdown: [pid 186]*** System shutdown message from [email protected] ***System going down at 23:00
request system reboot (in 2 Hours)
The following example, which assumes that the time is 5 PM (17:00), illustrates three different ways to request the system to reboot in two hours:
user@host> request system reboot at +120user@host> request system reboot in 120user@host> request system reboot at 19:00
request system reboot (Immediately)
user@host> request system reboot at now
request system reboot (at 1:20 AM)
To reboot the system at 1:20 AM, enter the following command. Because 1:20 AM is the next day, you must specify the absolute time.
user@host> request system reboot at 06060120request system reboot at 120Reboot the system at 120? [yes,no] (no) yes
Copyright © 2016, Juniper Networks, Inc.188
System Basics: Getting Started Configuration Guide

request system snapshot
List of Syntax Syntax on page 189
Syntax (ACX Series Routers) on page 189
Syntax (EX Series Switches) on page 189
Syntax (MX Series Routers) on page 189
Syntax (TX Matrix Routers) on page 189
Syntax (TX Matrix Plus Routers) on page 189
Syntax request system snapshot<partition>
Syntax (ACX SeriesRouters)
request system snapshot<media type><partition>
Syntax (EX SeriesSwitches)
request system snapshot<all-members | local | membermember-id><media type><partition><re0 | re1 | routing-engine routing-engine-id><slice alternate>
Syntax (MX SeriesRouters)
request system snapshot<all-members><config-partition><local><membermember-id><media usb-port-number><partition><root-partition>
Syntax (TXMatrixRouters)
request system snapshot<all-chassis | all-lcc | lcc number | scc><config-partition><partition><root-partition>
Syntax(TXMatrixPlusRouters)
request system snapshot<all-chassis | all-lcc | lcc number | sfc number><config-partition><partition><root-partition>
Release Information Command introduced before Junos OS Release 7.4.
Command introduced in Junos OS Release 10.0 for EX Series switches.
Command introduced in Junos OS Release 12.2 for ACX Series switches.
Options <config-partition> and <root-partition> introduced in Junos OS Release 13.1 for
M, MX, T, TX Series switches.
Option media usb-port-number introduced in Junos OS Release 13.2 for MX104 routers.
189Copyright © 2016, Juniper Networks, Inc.
Chapter 8: System Software Administrative Commands

Description On the router, back up the currently running and active file system partitions to standby
partitions that are not running. Specifically, the root file system (/) is backed up to
•
/altroot, and /config is backed up to /altconfig. The root and /config file systems are
on the router's flash drive, and the /altrootand /altconfig file systems are on the router's
hard drive.
• On the switch, take a snapshot of the files currently used to run the switch—the
complete contents of the root (/) , /altroot, /config, /var, and /var-tmp directories,
which include the running Junos OS, the active configuration, and log files.
CAUTION: After you run the request system snapshot command, you cannot
return to thepreviousversionof thesoftware,becausethe runningandbackupcopies of the software are identical.
Options The specific options available depend upon the router or switch:
none—Back up the currently running software as follows:
• On the router, back up the currently running and active file system partitions to
standby partitions that are not running. Specifically, the root file system (/) is
backed up to /altroot, and /config is backed up to /altconfig. The root and /config
file systems are on the router's flash drive, and the /altroot and /altconfig file
systems are on the router's hard drive.
• On the switch, take a snapshot of the files currently used to run the switch and
copy them to the media that the switch did not boot from. If the switch is booted
from internal media, the snapshot is copied to external (USB) media. If the switch
is booted from external (USB) media, the snapshot is copied to internal media.
• If the snapshot destination is external media but a USB flash drive is not
connected, an error message is displayed.
• If the automatic snapshot procedure is already in progress, the command returns
the following error: Snapshot already in progress. Cannot startmanual snapshot.
For additional information about the automatic snapshot feature, see
Understanding Resilient Dual-Root Partitions on Switches.
all-chassis | all-lcc | lcc number—(TX Matrix and TX Matrix Plus router only) (Optional)
• all-chassis—On a TX Matrix router, archive data and executable areas for all Routing
Engines in the chassis. On a TX Matrix Plus router, archive data and executable
areas for all Routing Engines in the chassis.
• all-lcc—On a TX Matrix router, archive data and executable areas for all T640
routers (or line-card chassis) connected to a TX Matrix router. On a TX Matrix Plus
router, archive data and executable areas for all routers (or line-card chassis)
connected to a TX Matrix Plus router.
• lccnumber—On a TX Matrix router, archive data and executable areas for a specific
T640 router (or line-card chassis) that is connected to a TX Matrix router. On a
Copyright © 2016, Juniper Networks, Inc.190
System Basics: Getting Started Configuration Guide

TX Matrix Plus router, archive data and executable areas for a specific router
(line-card chassis) that is connected to a TX Matrix Plus router.
Replace number with the following values depending on the LCC configuration:
• 0 through 3, when T640 routers are connected to a TX Matrix router in a routing
matrix.
• 0 through 3, when T1600 routers are connected to a TX Matrix Plus router in a
routing matrix.
• 0 through 7, when T1600 routers are connected to a TX Matrix Plus router with
3D SIBs in a routing matrix.
• 0, 2, 4, or 6, when T4000 routers are connected to a TX Matrix Plus router with
3D SIBs in a routing matrix.
all-members | local |membermember-id—(EX Series switch Virtual Chassis and MX Series
routers only) (Optional) Specify where to place the snapshot (archive data and
executable areas) in a Virtual Chassis:
• all-members—Create a snapshot (archive data and executable areas) for all
members of the Virtual Chassis.
• local—Create a snapshot (archive data and executable areas) on the member of
the Virtual Chassis that you are currently logged into.
• membermember-id—Create a snapshot (archive data and executable areas) for
the specified member of the Virtual Chassis.
config-partition—(M, MX, T, TX Series routers only) Create a snapshot of the configuration
partition only and store it onto the default /altconfig on the hard disk device or an
/altconfig on a USB device.
media type—(ACX Series, M320, T640, MX960 routers, and EX Series switches
only)(Optional) Specify the boot device the software is copied to:
• compact-flash—Copy software to the primary compact flash drive.
• external—(Switches only) Copy software to an external mass storage device, such
as a USB flash drive. If a USB drive is not connected, the switch displays an error
message.
• internal—Copy software to an internal flash drive.
• removable-compact-flash—Copy software to the removable compact flash drive.
• usb—(ACX Series, M320, T640, MX960 routers only) Copy software to the device
connected to the USB port.
• usb0—(MX104 routers only) Copy software to the device connected to the USB0
port.
• usb1—(MX104 routers only) Copy software to the device connected to the USB1
port.
191Copyright © 2016, Juniper Networks, Inc.
Chapter 8: System Software Administrative Commands
partition—(Optional) Repartition the flash drive before a snapshot occurs. If the partition
table on the flash drive is corrupted, the request system snapshot command fails
and reports errors. The partition option is only supported for restoring the software
image from the hard drive to the flash drive.
(Routers only) You cannot issue the request system snapshot command when you
enable flash disk mirroring. We recommend that you disable flash disk mirroring
when you upgrade or downgrade the software. For more information, see the Junos
OS System Basics Configuration Guide.
(EX Series switches only) If the snapshot destination is the media that the switch
did not boot from, you must use the partition option.
re0 | re1 | routing-engine routing-engine-id—(EX6200 and EX8200 switches only) Specify
where to place the snapshot in a redundant Routing Engine configuration.
• re0—Create a snapshot on Routing Engine 0.
• re1—Create a snapshot on Routing Engine 1.
• routing-engine routing-engine-id—Create a snapshot on the specified Routing
Engine.
root-partition—(M, MX, T, TX Series routers only) Create a snapshot of the root partition
only and store it onto the default /altroot on the hard disk device or an /altroot on a
USB device.
slice alternate—(EX Series switches only) (Optional) Take a snapshot of the active root
partition and copy it to the alternate slice on the boot media.
scc—(TX Matrix router only) (Optional) Archive data and executable areas for a TX Matrix
router (or switch-card chassis).
sfc number—(TX Matrix Plus router only) (Optional) Archive data and executable areas
for a TX Matrix Plus router (or switch-fabric chassis). Replace number with 0.
Additional Information (Routers only) Before upgrading the software on the router, when you have a known
stable system, issue the request system snapshot command to back up the software,
•
including the configuration, to the /altroot and /altconfig file systems. After you have
upgraded the software on the router and are satisfied that the new packages are
successfully installed and running, issue the request systemsnapshot command again
to back up the new software to the /altroot and /altconfig file systems.
• (Routers only) You cannot issue the request system snapshot command when you
enable flash disk mirroring. We recommend that you disable flash disk mirroring when
you upgrade or downgrade the software. For more information, see the JunosOSSystem
Basics Configuration Guide
• (TX Matrix and TX Matrix Plus router only) On a routing matrix, if you issue the request
system snapshot command on the master Routing Engine, all the master Routing
Engines connected to the routing matrix are backed up. If you issue this command on
the backup Routing Engine, all the backup Routing Engines connected to the routing
matrix are backed up.
Copyright © 2016, Juniper Networks, Inc.192
System Basics: Getting Started Configuration Guide

Required PrivilegeLevel
maintenance
RelatedDocumentation
show system snapshot on page 257•
• show system auto-snapshot
List of Sample Output request system snapshot (Routers) on page 193request system snapshot (EX Series Switches) on page 193request system snapshot (When the Partition Flag Is On) on page 193request system snapshot (MX104 routerswhenmedia device ismissing) on page 194request system snapshot (WhenMirroring Is Enabled) on page 194request system snapshot all-lcc (RoutingMatrix) on page 194request system snapshot all-members (Virtual Chassis) on page 194
Output Fields When you enter this command, you are provided feedback on the status of your request.
Sample Output
request system snapshot (Routers)
user@host> request system snapshotumount: /altroot: not currently mountedCopying / to /altroot.. (this may take a few minutes)umount: /altconfig: not currently mountedCopying /config to /altconfig.. (this may take a few minutes)
The following filesystems were archived: / /config
request system snapshot (EX Series Switches)
user@switch> request system snapshot partitionClearing current label...Partitioning external media (/dev/da1) ...Partitions on snapshot:
Partition Mountpoint Size Snapshot argument s1a /altroot 179M none s2a / 180M none s3d /var/tmp 361M none s3e /var 121M none s4d /config 60M noneCopying '/dev/da0s1a' to '/dev/da1s1a' .. (this may take a few minutes)Copying '/dev/da0s2a' to '/dev/da1s2a' .. (this may take a few minutes)Copying '/dev/da0s3d' to '/dev/da1s3d' .. (this may take a few minutes)Copying '/dev/da0s3e' to '/dev/da1s3e' .. (this may take a few minutes)Copying '/dev/da0s4d' to '/dev/da1s4d' .. (this may take a few minutes)The following filesystems were archived: /altroot / /var/tmp /var /config
request system snapshot (When the Partition Flag Is On)
user@host> request system snapshot partitionPerforming preliminary partition checks ...Partitioning ad0 ...umount: /altroot: not currently mountedCopying / to /altroot.. (this may take a few minutes)
The following filesystems were archived: / /config
193Copyright © 2016, Juniper Networks, Inc.
Chapter 8: System Software Administrative Commands

request system snapshot (MX104 routers whenmedia device is missing)
user@host > request system snapshotmedia usb0error: usb0 media missing or invalid
request system snapshot (WhenMirroring Is Enabled)
user@host> request system snapshotSnapshot is not possible since mirror-flash-on-disk is configured.
request system snapshot all-lcc (RoutingMatrix)
user@host> request system snapshot all-lcclcc0-re0:--------------------------------------------------------------------------Copying '/' to '/altroot' .. (this may take a few minutes)Copying '/config' to '/altconfig' .. (this may take a few minutes)The following filesystems were archived: / /config
lcc2-re0:--------------------------------------------------------------------------Copying '/' to '/altroot' .. (this may take a few minutes)Copying '/config' to '/altconfig' .. (this may take a few minutes)The following filesystems were archived: / /config
request system snapshot all-members (Virtual Chassis)
user@switch> request system snapshot all-membersmedia internalfpc0:--------------------------------------------------------------------------Copying '/dev/da0s2a' to '/dev/da0s1a' .. (this may take a few minutes)The following filesystems were archived: /
fpc1:--------------------------------------------------------------------------Copying '/dev/da0s2a' to '/dev/da0s1a' .. (this may take a few minutes)The following filesystems were archived: /
fpc2:--------------------------------------------------------------------------Copying '/dev/da0s2a' to '/dev/da0s1a' .. (this may take a few minutes)The following filesystems were archived: /
fpc3:--------------------------------------------------------------------------Copying '/dev/da0s2a' to '/dev/da0s1a' .. (this may take a few minutes)The following filesystems were archived: /
fpc4:--------------------------------------------------------------------------Copying '/dev/da0s2a' to '/dev/da0s1a' .. (this may take a few minutes)The following filesystems were archived: /
fpc5:--------------------------------------------------------------------------Copying '/dev/da0s2a' to '/dev/da0s1a' .. (this may take a few minutes)The following filesystems were archived: /
Copyright © 2016, Juniper Networks, Inc.194
System Basics: Getting Started Configuration Guide

request system software add
List of Syntax Syntax on page 195
Syntax (EX Series Switches) on page 195
Syntax (TX Matrix Router) on page 195
Syntax (TX Matrix Plus Router) on page 195
Syntax (MX Series Router) on page 196
Syntax (QFX Series) on page 196
Syntax request system software add package-name<best-effort-load><delay-restart><force><no-copy><no-validate><re0 | re1><reboot><set [package-name package-name]><unlink><upgrade-with-config><upgrade-with-config-format format><validate>
Syntax (EX SeriesSwitches)
request system software add package-name<best-effort-load><delay-restart><force><no-copy><no-validate><re0 | re1><reboot><set [package-name package-name]><upgrade-with-config><upgrade-with-config-format format><validate>
Syntax (TXMatrixRouter)
request system software add package-name<best-effort-load><delay-restart><force><lcc number | scc><no-copy><no-validate><re0 | re1><reboot><set [package-name package-name]><unlink><upgrade-with-config><upgrade-with-config-format format><validate>
Syntax(TXMatrixPlusRouter)
request system software add package-name<best-effort-load>
195Copyright © 2016, Juniper Networks, Inc.
Chapter 8: System Software Administrative Commands

<delay-restart><force><lcc number | sfc number><no-copy><no-validate><re0 | re1><reboot><set [package-name package-name]><unlink><upgrade-with-config><upgrade-with-config-format format><validate>
Syntax (MX SeriesRouter)
request system software add package-name<best-effort-load><delay-restart><force><membermember-id><no-copy><no-validate><re0 | re1><reboot><set [package-name package-name]><unlink><upgrade-with-config><upgrade-with-config-format format><validate>
Syntax (QFX Series) request system software add package-name<best-effort-load><component all><delay-restart><force><no-copy><no-validate><partition><reboot><unlink><upgrade-with-config><upgrade-with-config-format format><validate>
Release Information Command introduced before Junos OS Release 7.4.
best-effort-load and unlink options added in Junos OS Release 7.4.
Command introduced in Junos OS Release 9.0 for EX Series switches.
sfc option introduced for the TX Matrix Plus router in Junos OS Release 9.6.
Command introduced in Junos OS Release 11.1 for the QFX Series.
set [package-name package-name] option added in Junos OS Release 11.1 for EX Series
switches.
set [package-name package-name] option added in Junos OS Release 12.2 for M Series,
MX Series, T Series routers, and Branch SRX Series Services Gateways.
Copyright © 2016, Juniper Networks, Inc.196
System Basics: Getting Started Configuration Guide
NOTE: On EX Series switches, the set [package-name package-name] option
allows you to install only two software packages on amixed EX4200 andEX4500 Virtual Chassis, whereas, on M Series, MX Series, T Series routers,and Branch SRX Series Services Gateways, the set [package-name
package-name] option allows you to install multiple software packages and
software add-on packages at the same time.
upgrade-with-config and upgrade-with-config-format format options added in Junos OS
Release 12.3 for M Series routers, MX Series routers, T Series routers, EX Series Ethernet
switches, and QFX Series devices.
Description NOTE: We recommend that you always download the software image to/var/tmp only. On EX Series and QFX Series switches, youmust use the
/var/tmp directory. Other directories are not supported.
Install a software package or bundle on the router or switch.
Options package-name—Location from which the software package or bundle is to be installed.
For example:
• /var/tmp/package-name—For a software package or bundle that is being installed
from a local directory on the router or switch.
• protocol://hostname/pathname/package-name—For a software package or bundle
that is to be downloaded and installed from a remote location. Replace protocol
with one of the following:
• ftp—File Transfer Protocol.
Use ftp://hostname/pathname/package-name. To specify authentication
credentials, use
ftp://<username>:<password>@hostname/pathname/package-name. To have
the system prompt you for the password, specify prompt in place of the
password. If a password is required, and you do not specify the password or
prompt, an error message is displayed.
• http—Hypertext Transfer Protocol.
Use http://hostname/pathname/package-name. To specify authentication
credentials, use
http://<username>:<password>@hostname/pathname/package-name. If a
password is required and you omit it, you are prompted for it.
• scp—Secure copy (available only for Canada and U.S. version).
Use scp://hostname/pathname/package-name. To specify authentication
credentials, use
scp://<username>:<password>@hostname/pathname/package-name.
197Copyright © 2016, Juniper Networks, Inc.
Chapter 8: System Software Administrative Commands

NOTE:
• The pathname in the protocol is the relative path to the user’s home
directory on the remote system and not the root directory.
• Do not use the scp protocol in the request system software add
command to downloadand install a software package or bundle froma remote location. The previous statement does not apply to theQFabric switch. The software upgrade is handled by theMGD processwhich does not support scp.Use the file copy command to copy the software package or bundle
from the remote location to the /var/tmp directory on the hard disk:
file copy scp://source/package-name /var/tmp
Then install the software package or bundle using the request system
software add command:
request system software add /var/tmp/package-name
• On a J Series Services Router, when you install the software from aremote location, the package is removed at the earliest opportunity inorder tomake room for the installation to be completed. If you copythe software to a local directory on the router and then install the newpackage, use the unlink option to achieve the same effect and allow
the installation to be completed.
best-effort-load—(Optional) Activate a partial load and treat parsing errors as warnings
instead of errors.
component all—(QFabric systems only) (Optional) Install software package on all of the
QFabric components.
delay-restart—(Optional) Install a software package or bundle, but do not restart software
processes.
force—(Optional) Force the addition of the software package or bundle (ignore warnings).
lcc number—(TX Matrix and TX Matrix Plus routers only) (Optional) In a routing matrix
based on the TX Matrix router, install a software package or bundle on a T640 router
(or line-card chassis) that is connected to the TX Matrix router. In a routing matrix
based on the TX Matrix Plus router, install a software package or bundle on a T1600
router (or line-card chassis) that is connected to the TX Matrix Plus router. Replace
number with a value from 0 through 3.
membermember-id—(MX Series routers only) (Optional) Install a software package on
the specified Virtual Chassis member. Replace member-id with a value of 0 or 1.
partition—(QFX3500 switches only) (Optional) Format and repartition the media before
installation.
scc—(TX Matrix routers only) (Optional) Install a software package or bundle on a Routing
Engine on a TX Matrix router (or switch-card chassis).
Copyright © 2016, Juniper Networks, Inc.198
System Basics: Getting Started Configuration Guide

sfcnumber—(TX Matrix Plus routers only) (Optional) Install a software package or bundle
on a Routing Engine on a TX Matrix Plus router (or switch-fabric chassis). Replace
number with 0.
no-copy—(Optional) Install a software package or bundle, but do not save copies of the
package or bundle files.
no-validate—(Optional) When loading a software package or bundle with a different
release, suppress the default behavior of the validate option.
re0 | re1—(Optional) On routers or switches that support dual or redundant Routing
Engines, load a software package or bundle on the Routing Engine in slot 0 (re0) or
the Routing Engine in slot 1 (re1).
reboot—(Optional) After adding the software package or bundle, reboot the system. On
a QFabric switch, the software installation is not complete until you reboot the
component for which you have installed the software.
set [package-name package-name]—(Mixed EX4200 and EX4500 Virtual Chassis only)
(Optional) Install two software packages—a package for an EX4200 switch and the
same release of the package for an EX4500 switch—to upgrade all member switches
in a mixed EX4200 and EX4500 Virtual Chassis.
set [package-name package-name]—(M Series, MX Series, T Series routers, and Branch
SRX Series Services Gateways only) (Optional) Install multiple software packages
and software add-on packages at the same time.
unlink—(Optional) On J Series Services Routers, this option ensures that the software
package is removed at the earliest opportunity in order to make room for the
installation to be completed. On M Series, T Series, and MX Series routers, use the
unlink option to remove the software package from this directory after a successful
upgrade is completed.
upgrade-with-config—(Optional) Install one or more configuration files.
upgrade-with-config-format format—(Optional) Specify the configuration file fomat, text
or xml. The default format is text.
NOTE: Theupgrade-with-configandupgrade-with-config-formatoptions
are only available locally on the router or switch. In a routingmatrix, theconfiguration is applied only to the local router and is not propagated toother routers.
The options are validated during the validation process and applied tothe router or switch during the upgrade process. If the upgrade processis successful, the options are removed from the configuration. If theupgrade process fails, the configuration file is renamedwith the .failedsuffix.
199Copyright © 2016, Juniper Networks, Inc.
Chapter 8: System Software Administrative Commands

validate—(Optional) Validate the software package or bundle against the current
configuration as a prerequisite to adding the software package or bundle. This is the
default behavior when the software package or bundle being added is a different
release.
NOTE: The request system software add validate command is not
supported on EX Series switches except for EX9200 switches.
Additional Information NOTE: The request system snapshot command is currently not supported on
the QFabric system. Also, you cannot add or install multiple packages on aQFabric system.
Before upgrading the software on the router or switch, when you have a known stable
system, issue the request system snapshot command to back up the software, including
the configuration, to the /altroot and /altconfig file systems. After you have upgraded
the software on the router or switch and are satisfied that the new package or bundle is
successfully installed and running, issue the request system snapshot command again
to back up the new software to the /altroot and /altconfig file systems.
After you run the request system snapshot command, you cannot return to the previous
version of the software, because the running and backup copies of the software are
identical.
If you are upgrading more than one package at the same time, delete the operating
system package, jkernel, last. Add the operating system package, jkernel, first and the
routing software package, jroute, last. If you are upgrading all packages at once, delete
and add them in the following order:
user@host> request system software add /var/tmp/jbaseuser@host> request system software add /var/tmp/jkerneluser@host> request system software add /var/tmp/jpfeuser@host> request system software add /var/tmp/jdocsuser@host> request system software add /var/tmp/jrouteuser@host> request system software add /var/tmp/jcrypto
By default, when you issue the request system software add package-name command on
a TX Matrix master Routing Engine, all the T640 master Routing Engines that are
connected to it are upgraded to the same version of software. If you issue the same
command on the TX Matrix backup Routing Engine, all the T640 backup Routing Engines
that are connected to it are upgraded to the same version of software.
Likewise, when you issue the request system software add package-name command on
a TX Matrix Plus master Routing Engine, all the T1600 master Routing Engines that are
connected to it are upgraded to the same version of software. If you issue the same
command on the TX Matrix Plus backup Routing Engine, all the T1600 backup Routing
Engines that are connected to it are upgraded to the same version of software.
Copyright © 2016, Juniper Networks, Inc.200
System Basics: Getting Started Configuration Guide

Required PrivilegeLevel
maintenance
RelatedDocumentation
request system software delete•
• request system software rollback
• request system storage cleanup
• Upgrading Software on QFX3500 and QFX3600 Standalone Switches
• Upgrading Software on a QFabric System
• request system software add (Maintenance)
List of Sample Output request system software add validate on page 201requestsystemsoftwareadd(MixedEX4200andEX4500VirtualChassis)onpage202request system software add component all (QFabric Systems) on page 202
Output Fields When you enter this command, you are provided feedback on the status of your request.
Sample Output
request system software add validate
user@host> requestsystemsoftwareaddvalidate/var/tmp/ jinstall-7.2R1.7-domestic-signed.tgzChecking compatibility with configurationInitializing...Using jbase-7.1R2.2Using /var/tmp/jinstall-7.2R1.7-domestic-signed.tgzVerified jinstall-7.2R1.7-domestic.tgz signed by PackageProduction_7_2_0Using /var/validate/tmp/jinstall-signed/jinstall-7.2R1.7-domestic.tgzUsing /var/validate/tmp/jinstall/jbundle-7.2R1.7-domestic.tgzChecking jbundle requirements on /Using /var/validate/tmp/jbundle/jbase-7.2R1.7.tgzUsing /var/validate/tmp/jbundle/jkernel-7.2R1.7.tgzUsing /var/validate/tmp/jbundle/jcrypto-7.2R1.7.tgzUsing /var/validate/tmp/jbundle/jpfe-7.2R1.7.tgzUsing /var/validate/tmp/jbundle/jdocs-7.2R1.7.tgzUsing /var/validate/tmp/jbundle/jroute-7.2R1.7.tgzValidating against /config/juniper.conf.gzmgd: commit completeValidation succeededValidating against /config/rescue.conf.gzmgd: commit completeValidation succeededInstalling package '/var/tmp/jinstall-7.2R1.7-domestic-signed.tgz' ...Verified jinstall-7.2R1.7-domestic.tgz signed by PackageProduction_7_2_0Adding jinstall...
WARNING: This package will load JUNOS 7.2R1.7 software.WARNING: It will save JUNOS configuration files, and SSH keysWARNING: (if configured), but erase all other files and informationWARNING: stored on this machine. It will attempt to preserve dumpsWARNING: and log files, but this can not be guaranteed. This is theWARNING: pre-installation stage and all the software is loaded whenWARNING: you reboot the system.
Saving the config files ...Installing the bootstrap installer ...
201Copyright © 2016, Juniper Networks, Inc.
Chapter 8: System Software Administrative Commands

WARNING: A REBOOT IS REQUIRED TO LOAD THIS SOFTWARE CORRECTLY. Use theWARNING: 'request system reboot' command when software installation isWARNING: complete. To abort the installation, do not reboot your system,WARNING: instead use the 'request system software delete jinstall'WARNING: command as soon as this operation completes.
Saving package file in /var/sw/pkg/jinstall-7.2R1.7-domestic-signed.tgz ...Saving state for rollback ...
Sample Output
request system software add (Mixed EX4200 and EX4500 Virtual Chassis)
user@switch> request system software add set[/var/tmp/jinstall-ex-4200-11.1R1.1-domestic-signed.tgz/var/tmp/jinstall-ex-4500-11.1R1.1-domestic-signed.tgz]...
request system software add component all (QFabric Systems)
user@switch> requestsystemsoftwareadd/pbdata/packages/jinstall-qfabric-12.2X50-D1.3.rpmcomponent all...
Copyright © 2016, Juniper Networks, Inc.202
System Basics: Getting Started Configuration Guide

request system zeroize
Syntax request system zeroize<media>
Release Information Command introduced before Junos OS Release 9.0.
Command introduced in Junos OS Release 11.2 for EX Series switches.
Option media added in Junos OS Release 11.4 for EX Series switches.
Command introduced in Junos OS Release 12.2 for MX Series devices.
Command introduced in Junos OS Release 12.3 for the QFX Series.
Description NOTE: Themedia option is not available on the QFX Series.
Remove all configuration information on the Routing Engines and reset all key values. If
the device has dual Routing Engines, the command is broadcast to all Routing Engines
on the device. The command removes all data files, including customized configuration
and log files, by unlinking the files from their directories. The command removes all
user-created files from the system including all plain-text passwords, secrets, and private
keys for SSH, local encryption, local authentication, IPsec, RADIUS, TACACS+, and SNMP.
This command reboots the device and sets it to the factory default configuration. After
the reboot, you cannot access the device through the management Ethernet interface.
Log in through the console as root and start the Junos OS command-line interface (CLI)
by typing cli at the prompt.
To completely erase user-created data so that it is unrecoverable, use the media option.
Options media—(Optional) In addition to removing all configuration and log files, themediaoption
causes memory and the media to be scrubbed, removing all traces of any user-created
files. Every storage device attached to the system is scrubbed, including disks, flash
drives, removable USBs, and the like. The duration of the scrubbing process is
dependent on the size of the media being erased. As a result, the request system
zeroizemedia operation can take considerably more time than the request system
zeroize operation. However, the critical security parameters are all removed at the
beginning of the process.
Required PrivilegeLevel
maintenance
RelatedDocumentation
request system snapshot on page 189•
• request system snapshot
• Reverting to the Default Factory Configuration for the EX Series Switch
• Reverting to the Rescue Configuration for the EX Series Switch
• Reverting to the Default Factory Configuration
203Copyright © 2016, Juniper Networks, Inc.
Chapter 8: System Software Administrative Commands

• Reverting to the Rescue Configuration
• Reverting to the Default Factory Configuration by Using the request system zeroize
Command
List of Sample Output request system zeroize on page 204request system zeroizemedia on page 205
Sample Output
request system zeroize
user@host> request system zeroizewarning: System will be rebooted and may not boot without configurationErase all data, including configuration and log files? [yes,no] (no) yes
0 1 1 0 0 0 done
syncing disks... All buffers synced.Uptime: 5d19h20m26srecorded reboot as normal shutdownRebooting...
U-Boot 1.1.6 (Mar 11 2011 - 04:39:06)
Board: EX4200-24T 2.11EPLD: Version 6.0 (0x85)DRAM: Initializing (1024 MB)FLASH: 8 MB
Firmware Version: --- 01.00.00 ---USB: scanning bus for devices... 2 USB Device(s) found scanning bus for storage devices... 1 Storage Device(s) found
ELF file is 32 bitConsoles: U-Boot console
FreeBSD/PowerPC U-Boot bootstrap loader, Revision 2.4([email protected], Fri Mar 11 03:03:36 UTC 2011)Memory: 1024MBbootsequencing is enabledbootsuccess is setnew boot device = disk0s1:Loading /boot/defaults/loader.conf/kernel data=0x915c84+0xa1260 syms=[0x4+0x7cbd0+0x4+0xb1c19]
Hit [Enter] to boot immediately, or space bar for command prompt.Booting [/kernel]...Kernel entry at 0x800000e0 ...GDB: no debug ports presentKDB: debugger backends: ddbKDB: current backend: ddbCopyright (c) 1996-2011, Juniper Networks, Inc.All rights reserved.Copyright (c) 1992-2006 The FreeBSD Project.Copyright (c) 1979, 1980, 1983, 1986, 1988, 1989, 1991, 1992, 1993, 1994 The Regents of the University of California. All rights reserved.JUNOS 11.1R1.8 #0: 2011-03-09 20:14:25 UTC
Copyright © 2016, Juniper Networks, Inc.204
System Basics: Getting Started Configuration Guide

[email protected]:/volume/build/junos/11.1/release/11.1R1.8/obj-powerpc/bsd/kernels/ JUNIPER-EX/kernelTimecounter "decrementer" frequency 50000000 Hz quality 0cpu0: Freescale e500v2 core revision 2.2cpu0: HID0 80004080...
request system zeroizemedia
user@host> request system zeroizemediawarning: System will be rebooted and may not boot without configurationErase all data, including configuration and log files? [yes,no] (no) yes
warning: ipsec-key-management subsystem not running - not needed by configuration.warning: zeroizing fpc0
{master:0}root> Waiting (max 60 seconds) for system process `vnlru' to stop...done. . .Syncing disks, vnodes remaining...2 4 2 4 3 2 1 1 0 0 0 done
syncing disks... All buffers synced.Uptime: 14m50srecorded reboot as normal shutdownRebooting...
U-Boot 1.1.6 (Apr 21 2011 - 13:58:42)
Board: EX4200-48PX 1.1EPLD: Version 8.0 (0x82)DRAM: Initializing (512 MB)FLASH: 8 MBNAND: No NAND device found!!!0 MiB
Firmware Version: --- 01.00.00 ---USB: scanning bus for devices... 2 USB Device(s) found scanning bus for storage devices... 1 Storage Device(s) found
ELF file is 32 bitConsoles: U-Boot console
FreeBSD/PowerPC U-Boot bootstrap loader, Revision 2.2([email protected], Fri Feb 26 17:48:51 PST 2010)Memory: 512MBLoading /boot/defaults/loader.conf /kernel data=0x9abfdc+0xb06e4 syms=[0x4+0x83b30+0x4+0xbd7c6]
Hit [Enter] to boot immediately, or space bar for command prompt.Booting [/kernel] in 1 second... Booting [/kernel]... Kernel entry at 0x800000e0 ...GDB: no debug ports presentKDB: debugger backends: ddbKDB: current backend: ddbCopyright (c) 1996-2011, Juniper Networks, Inc.All rights reserved.Copyright (c) 1992-2006 The FreeBSD Project.Copyright (c) 1979, 1980, 1983, 1986, 1988, 1989, 1991, 1992, 1993, 1994 The Regents of the University of California. All rights reserved.JUNOS 11.4R1.2 #0: 2011-10-27 18:05:39 UTC
205Copyright © 2016, Juniper Networks, Inc.
Chapter 8: System Software Administrative Commands

[email protected]:/volume/build/junos/11.4/release/11.4R1.2/obj-powerpc/bsd/kernels/JUNIPER-EX/kernelcan't re-use a leaf (all_slot_serialid)!Timecounter "decrementer" frequency 50000000 Hz quality 0cpu0: Freescale e500v2 core revision 2.2cpu0: HID0 80004080<EMCP,TBEN,EN_MAS7_UPDATE>real memory = 511705088 (488 MB)avail memory = 500260864 (477 MB)ETHERNET SOCKET BRIDGE initialisingInitializing EXSERIES platform properties .... . .Automatic reboot in progress...Media check on da0 on ex platforms** /dev/da0s2aFILE SYSTEM CLEAN; SKIPPING CHECKSclean, 20055 free (31 frags, 2503 blocks, 0.0% fragmentation)zeroizing /dev/da0s1a .... . .zeroizing /dev/da0s3d .... . .zeroizing /dev/da0s3e .... . .zeroizing /dev/da0s4d .... . .zeroizing /dev/da0s4e .... . .
syncing disks... All buffers synced.Uptime: 3m40sRebooting...
U-Boot 1.1.6 (Apr 21 2011 - 13:58:42)
Board: EX4200-48PX 1.1EPLD: Version 8.0 (0x82)DRAM: Initializing (512 MB)FLASH: 8 MBNAND: No NAND device found!!!0 MiB
Firmware Version: --- 01.00.00 ---USB: scanning bus for devices... 2 USB Device(s) found scanning bus for storage devices... 1 Storage Device(s) found
ELF file is 32 bitConsoles: U-Boot console
FreeBSD/PowerPC U-Boot bootstrap loader, Revision 2.2([email protected], Fri Feb 26 17:48:51 PST 2010)Memory: 512MBLoading /boot/defaults/loader.conf /kernel data=0x9abfdc+0xb06e4 syms=[0x4+0x83b30+0x4+0xbd7c6]
Hit [Enter] to boot immediately, or space bar for command prompt.Booting [/kernel] in 1 second... Booting [/kernel]... Kernel entry at 0x800000e0 ...GDB: no debug ports presentKDB: debugger backends: ddbKDB: current backend: ddbCopyright (c) 1996-2011, Juniper Networks, Inc.All rights reserved.
Copyright © 2016, Juniper Networks, Inc.206
System Basics: Getting Started Configuration Guide

Copyright (c) 1992-2006 The FreeBSD Project.Copyright (c) 1979, 1980, 1983, 1986, 1988, 1989, 1991, 1992, 1993, 1994 The Regents of the University of California. All rights reserved.JUNOS 11.4R1.2 #0: 2011-10-27 18:05:39 UTC [email protected]:/volume/build/junos/11.4/release/11.4R1.2/obj-powerpc/bsd/kernels/JUNIPER-EX/kernelcan't re-use a leaf (all_slot_serialid)!Timecounter "decrementer" frequency 50000000 Hz quality 0cpu0: Freescale e500v2 core revision 2.2cpu0: HID0 80004080 <EMCP,TBEN,EN_MAS7_UPDATE>real memory = 511705088 (488 MB)avail memory = 500260864 (477 MB)ETHERNET SOCKET BRIDGE initialisingInitializing EXSERIES platform properties .... . .Automatic reboot in progress...Media check on da0 on ex platforms** /dev/da0s1aFILE SYSTEM CLEAN; SKIPPING CHECKSclean, 20064 free (48 frags, 2502 blocks, 0.1% fragmentation)zeroizing /dev/da0s2a .... . .Creating initial configuration...mgd: error: Cannot open configuration file: /config/juniper.confmgd: warning: activating factory configurationmgd: commit completemgd: ----------------------------------------------------------mgd: Please login as 'root'. No password is required.mgd: To start Initial Setup, type 'ezsetup' at the JUNOS prompt.mgd: To start JUNOS CLI, type 'cli' at the JUNOS prompt.mgd: ----------------------------------------------------------Setting initial options: debugger_on_panic=NO debugger_on_break=NO.Starting optional daemons: .Doing initial network setup:. . .
Amnesiac (ttyu0)
207Copyright © 2016, Juniper Networks, Inc.
Chapter 8: System Software Administrative Commands

Copyright © 2016, Juniper Networks, Inc.208
System Basics: Getting Started Configuration Guide
CHAPTER 9
System Software Monitoring Commands
• show configuration
• show host
• show system commit
• show system configuration archival
• show system configuration rescue
• show system processes
• show system queues
• show system reboot
• show system rollback
• show system snapshot
• show system software
• show system statistics
• show system storage
• show system switchover
• show system uptime
• show system virtual-memory
• show task
• show task io
• show task memory
• show task replication
• show version
• start shell
• test configuration
209Copyright © 2016, Juniper Networks, Inc.

show configuration
Syntax show configuration<statement-path>
Release Information Command introduced before Junos OS Release 7.4.
Command introduced in Junos OS Release 9.0 for EX Series switches.
Description Display the configuration that currently is running on the router or switch, which is the
last committed configuration.
Options none—Display the entire configuration.
statement-path—(Optional) Display one of the following hierarchies in a configuration.
(Each statement-path option has additional suboptions not described here. See the
appropriate configuration guide or EX Series switch documentation for more
information.)
• access—Network access configuration.
• access-profile—Access profile configuration.
• accounting-options—Accounting data configuration.
• applications—Applications defined by protocol characteristics.
• apply-groups—Groups from which configuration data is inherited.
• chassis—Chassis configuration.
• chassis network-services—Current running mode.
• class-of-service—Class-of-service configuration.
• diameter—Diameter base protocol layer configuration.
• ethernet-switching-options—(EX Series switch only) Ethernet switching
configuration.
• event-options—Event processing configuration.
• firewall—Firewall configuration.
• forwarding-options—Options that control packet sampling.
• groups—Configuration groups.
• interfaces—Interface configuration.
• jsrc—JSRC partition configuration.
• jsrc-partition—JSRC partition configuration.
• logical-systems—Logical system configuration.
• poe—(EX Series switch only) Power over Ethernet configuration.
• policy-options—Routing policy option configuration.
• protocols—Routing protocol configuration.
Copyright © 2016, Juniper Networks, Inc.210
System Basics: Getting Started Configuration Guide

• routing-instances—Routing instance configuration.
• routing-options—Protocol-independent routing option configuration.
• security—Security configuration.
• services—Service PIC applications configuration.
• snmp—Simple Network Management Protocol configuration.
• system—System parameters configuration.
• virtual-chassis—(EX Series switch only) Virtual Chassis configuration.
• vlans—(EX Series switch only) VLAN configuration.
Additional Information The portions of the configuration that you can view depend on the user class that you
belong to and the corresponding permissions. If you do not have permission to view a
portion of the configuration, the text ACCESS-DENIED is substituted for that portion of
the configuration. If you do not have permission to view authentication keys and passwords
in the configuration, because the secret permission bit is not set for your user account,
the text SECRET-DATA is substituted for that portion of the configuration. If an identifier
in the configuration contains a space, the identifier is displayed in quotation marks.
Likewise, when you issue the show configuration command with the | display set pipe
option to view the configuration as set commands, those portions of the configuration
that you do not have permissions to view are substituted with the text ACCESS-DENIED.
Required PrivilegeLevel
view
RelatedDocumentation
Displaying the Current Junos OS Configuration•
• Overview of Junos OS CLI Operational Mode Commands
List of Sample Output show configuration on page 211show configuration policy-options on page 212
Output Fields This command displays information about the current running configuration.
Sample Output
show configuration
user@host> show configuration## Last commit: 2006-10-31 14:13:00 PST by alant version "8.2I0 [builder]"; ## last changed: 2006-10-31 14:05:53 PSTsystem { host-name nestor; domain-name east.net; backup-router 192.1.1.254; time-zone America/Los_Angeles; default-address-selection; name-server { 192.154.169.254; 192.154.169.249;
211Copyright © 2016, Juniper Networks, Inc.
Chapter 9: System Software Monitoring Commands

192.154.169.176; } services { telnet; } tacplus-server { 1.2.3.4 { secret /* SECRET-DATA */; ... } }}interfaces { ...} protocols { isis { export "direct routes"; }}policy-options { policy-statement "direct routes" { from protocol direct; then accept; }}
show configuration policy-options
user@host> show configuration policy-optionspolicy-options { policy-statement "direct routes" { from protocol direct; then accept; }}
Copyright © 2016, Juniper Networks, Inc.212
System Basics: Getting Started Configuration Guide
show host
Syntax show host hostname
Release Information Command introduced before Junos OS Release 7.4.
Command introduced in Junos OS Release 9.0 for EX Series switches.
Command introduced in Junos OS Release 11.1 for the QFX Series.
Description Display Domain Name System (DNS) hostname information.
Options hostname—Hostname or address.
Additional Information The show host command displays the raw data received from the DNS server.
Required PrivilegeLevel
view
List of Sample Output show host on page 213
Sample Output
show host
user@host> show host snarksnark.boojum.net has address 192.168.1.254
user@host> show host 192.168.1.254Name: snark.boojum.net Address: 192.168.1.254Aliases:
213Copyright © 2016, Juniper Networks, Inc.
Chapter 9: System Software Monitoring Commands

show system commit
Syntax show system commit
Release Information Command introduced before Junos OS Release 7.4.
Command introduced in Junos OS Release 9.0 for EX Series switches.
Command introduced in Junos OS Release 11.1 for the QFX Series.
Description Display the system commit history and any pending commit operation.
Options This command has no options.
Required PrivilegeLevel
view
RelatedDocumentation
clear system commit on page 158•
List of Sample Output show system commit on page 215show system commit (At a Particular Time) on page 215show system commit (At the Next Reboot) on page 215show system commit (Rollback Pending) on page 215show system commit (QFX Series) on page 215
Output Fields Table 8 on page 214 describes the output fields for the show system commit command.
Output fields are listed in the approximate order in which they appear.
Table 8: show system commit Output Fields
Field DescriptionField Name
Displays the last 50 commit operations listed, most recent to first. The identifier rescue designates aconfiguration created for recovery using the request system configuration rescue save command.
Commit history
Date and time of the commit operation.Timestamp
User who executed the commit operation.Username
Method used to execute the commit operation:
• cli—CLI interactive user performed the commit operation.
• Junos XML protocol—Junos XML protocol client performed the commit operation.
• synchronize—The commit synchronize command was performed on the other Routing Engine.
• snmp—An SNMP set request caused the commit operation.
• button—A button on the router or switch was pressed to commit a rescue configuration for recovery.
• autoinstall—A configuration obtained through autoinstallation was committed.
• other—When there is no login name associated with the session, the values for user and clientdefault to root and other. For example, during a reboot after package installation, mgd commitsthe configuration as a system commit, and there is no login associated with the commit.
Commitmethod
Copyright © 2016, Juniper Networks, Inc.214
System Basics: Getting Started Configuration Guide

Sample Output
show system commit
user@host> show system commit0 2003-07-28 19:14:04 PDT by root via other1 2003-07-25 22:01:36 PDT by user via cli2 2003-07-25 22:01:32 PDT by user via cli3 2003-07-25 21:30:13 PDT by root via button4 2003-07-25 13:46:48 PDT by user via cli5 2003-07-25 05:33:21 PDT by root via autoinstall...rescue 2002-05-10 15:32:03 PDT by root via other
show system commit (At a Particular Time)
user@host> show system commitcommit requested by root via cli at Tue May 7 15:59:00 2002
show system commit (At the Next Reboot)
user@host> show system commitcommit requested by root via cli at reboot
show system commit (Rollback Pending)
user@host> show system commit0 2005-01-05 15:00:37 PST by root via cli commit confirmed, rollback in 3mins
show system commit (QFX Series)
user@switch> show system commit0 2011-11-25 19:17:49 PST by root via cli
215Copyright © 2016, Juniper Networks, Inc.
Chapter 9: System Software Monitoring Commands
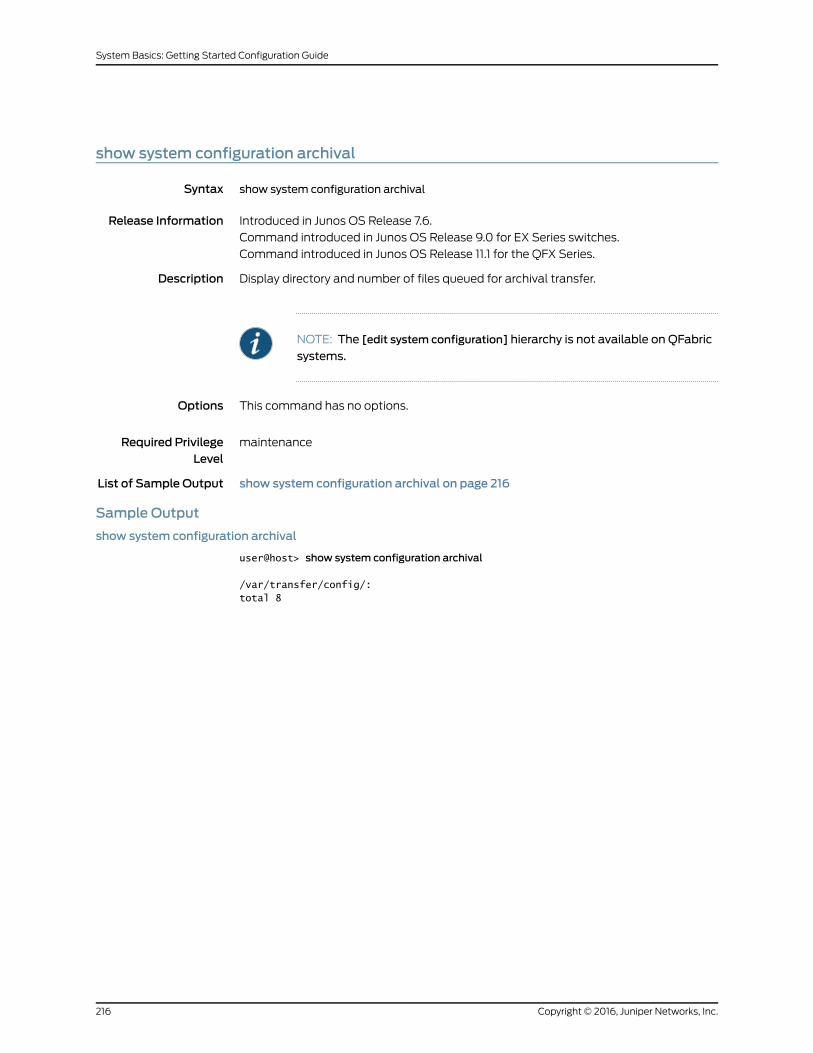
show system configuration archival
Syntax show system configuration archival
Release Information Introduced in Junos OS Release 7.6.
Command introduced in Junos OS Release 9.0 for EX Series switches.
Command introduced in Junos OS Release 11.1 for the QFX Series.
Description Display directory and number of files queued for archival transfer.
NOTE: The [edit system configuration] hierarchy is not available on QFabric
systems.
Options This command has no options.
Required PrivilegeLevel
maintenance
List of Sample Output show system configuration archival on page 216
Sample Output
show system configuration archival
user@host> show system configuration archival
/var/transfer/config/:total 8
Copyright © 2016, Juniper Networks, Inc.216
System Basics: Getting Started Configuration Guide

show system configuration rescue
Syntax show system configuration rescue
Release Information Command introduced before Junos OS Release 7.4.
Command introduced in Junos OS Release 9.0 for EX Series switches.
Command introduced in Junos OS Release 11.1 for the QFX Series.
Description Display a rescue configuration, if one exists.
NOTE: The [edit system configuration] hierarchy is not available on QFabric
systems.
Options This command has no options.
Required PrivilegeLevel
maintenance
RelatedDocumentation
show system configuration archival on page 216•
List of Sample Output show system configuration rescue on page 217
Sample Output
show system configuration rescue
user@switch> show system configuration rescueversion "7.3"; groups { global { system { host-name router1; domain-name customer.net; domain-search [ customer.net ]; backup-router 192.168.124.254; name-server { 172.17.28.11; 172.17.28.101; 172.17.28.100; 172.17.28.10; } login { user user1 { uid 928; class ; shell csh; authentication { encrypted-password "$ABC123."; ## SECRET-DATA } } } services { ftp;
217Copyright © 2016, Juniper Networks, Inc.
Chapter 9: System Software Monitoring Commands

rlogin; rsh; telnet; } } }....
Copyright © 2016, Juniper Networks, Inc.218
System Basics: Getting Started Configuration Guide

show system processes
List of Syntax Syntax on page 219
Syntax (EX Series Switches) on page 219
Syntax (MX Series Routers) on page 219
Syntax (QFX Series) on page 219
Syntax (TX Matrix Routers) on page 219
Syntax (TX Matrix Plus Routers) on page 219
Syntax show system processes<brief | detail | extensive | summary><health (pid process-identifer | process-name process-name)><providers><resource-limits (brief | detail) process-name><wide>
Syntax (EX SeriesSwitches)
show system processes<all-members><brief | detail | extensive | summary><health (pid process-identifer | process-name process-name)><local><membermember-id><providers><resource-limits (brief | detail) process-name><wide>
Syntax (MX SeriesRouters)
show system processes<all-members><brief | detail | extensive | summary><health (pid process-identifer | process-name process-name)><local><membermember-id><providers><resource-limits (brief | detail) process-name><wide>
Syntax (QFX Series) show system processes<brief | detail | extensive | summary ><health (pid process-identifer | process-name process-name)><interconnect-device name><node-group name><providers><resource-limits><wide>
Syntax (TXMatrixRouters)
show system processes<brief | detail | extensive | summary><all-chassis| all-lcc | lcc number | scc><wide>
Syntax(TXMatrixPlusRouters)
show system processes<brief | detail | extensive | summary><all-chassis| all-lcc | lcc number | sfc number>
219Copyright © 2016, Juniper Networks, Inc.
Chapter 9: System Software Monitoring Commands

<wide>
Release Information Command introduced before Junos OS Release 7.4.
Command introduced in Junos OS Release 9.0 for EX Series switches.
Option sfc introduced for the TX Matrix Plus router in Junos OS Release 9.6.
Command introduced in Junos OS Release 11.1 for the QFX Series.
Description Display information about software processes that are running on the router or switch
and that have controlling terminals.
Options none—Display standard information about system processes.
brief | detail | extensive | summary—(Optional) Display the specified level of detail.
adaptive-services—(Optional) Display the configuration management process that
manages the configuration for stateful firewall, Network Address Translation (NAT),
intrusion detection services (IDS), and IP Security (IPsec) services on the Adaptive
Services PIC.
alarm-control—(Optional) Display the process to configure the system alarm.
all-chassis—(TX Matrix and TX Matrix Plus routers only) (Optional) Display standard
system process information about all the T640 routers (in a routing matrix based
on the TX Matrix router) or all the T1600 routers (in a routing matrix based on the
TX Matrix Plus router) in the chassis.
all-lcc—(TX Matrix and TX Matrix Plus routers only) (Optional) Display standard system
process information for all T640 routers (or line-card chassis) connected to the
TX Matrix router. Display standard system process information for all T1600 routers
(or line-card chassis) connected to the TX Matrix Plus router.
all-members—(EX4200 switches and MX Series routers only) (Optional) Display standard
system process information for all members of the Virtual Chassis configuration.
ancpd-service—Display the Access Node Control Protocol (ANCP) process, which works
with a special Internet Group Management Protocol (IGMP) session to collect
outgoing interface mapping events in a scalable manner.
application-identification—Display the process that identifies an application using intrusion
detection and prevention (IDP) to allow or deny traffic based on applications running
on standard or nonstandard ports.
audit-process—(Optional) Display the RADIUS accounting process.
auto-configuration—Display the Interface Auto-Configuration process.
bootp—Display the process that enables a router, switch, or interface to act as a Dynamic
Host Configuration Protocol (DHCP) or bootstrap protocol (BOOTP) relay agent.
DHCP relaying is disabled.
captive-portal-content-delivery—Display the HTTP redirect service by specifying the
location to which a subscriber's initial Web browser session is redirected, enabling
initial provisioning and service selection for the subscriber.
Copyright © 2016, Juniper Networks, Inc.220
System Basics: Getting Started Configuration Guide

ce-l2tp-service—(Optional) (M10, M10i, M7i, and MX Series routers only) Display the
Universal Edge Layer 2 Tunneling Protocol (L2TP) process, which establishes L2TP
tunnels and Point-to-Point Protocol (PPP) sessions through L2TP tunnels.
cfm—Display Ethernet Operations, Administration, and Maintenance (OAM) connectivity
fault management (CFM) process, which can be used to monitor the physical link
between two switches.
chassis-control—(Optional) Display the chassis management process.
class-of-service—(Optional) Display the class-of-service (CoS) process, which controls
the router's or switch’s CoS configuration.
clksyncd-service—Display the external clock synchronization process, which uses
synchronous Ethernet (SyncE).
craft-control—Display the process for the I/O of the craft interface.
database-replication—(EX Series switches and MX Series routers only) (Optional) Display
the database replication process.
datapath-trace-service—Display the packet path tracing process.
dhcp-service—(EX Series switches and MX Series routers only) (Optional) Display the
Dynamic Host Configuration Protocol process, which enables a DHCP server to
allocate network IP addresses and deliver configuration settings to client hosts
without user intervention.
diameter-service—(Optional) Display the diameter process.
disk-monitoring—(Optional) Display the disk monitoring process, which checks the health
of the hard disk drive on the Routing Engine.
dynamic-flow-capture—(Optional) Display the dynamic flow capture (DFC) process,
which controls DFC configurations on Monitoring Services III PICs.
ecc-error-logging—(Optional) Display the error checking and correction (ECC) process,
which logs ECC parity errors in memory on the Routing Engine.
ethernet-connectivity-fault-management— Display the process that provides IEEE 802.1ag
OAM connectivity fault management (CFM) database information for CFM
maintenance association end points (MEPs) in a CFM session.
ethernet-link-fault-management—(EX Series switches and MX Series routers only)
(Optional) Display the process that provides the OAM link fault management (LFM)
information for Ethernet interfaces.
event-processing—(Optional) Display the event process (eventd).
firewall—(Optional) Display the firewall management process, which manages the
firewall configuration and enables accepting or rejecting packets that are transiting
an interface on a router or switch.
221Copyright © 2016, Juniper Networks, Inc.
Chapter 9: System Software Monitoring Commands

general-authentication-service—(EX Series switches and MX Series routers only)
(Optional) Display the general authentication process.
health (pid process-identifer | process-name process-name)—(Optional) Display process
health information, either by process id (PID) or by process name.
iccp-service—Display the Inter-Chassis Communication Protocol (ICCP) process.
idp-policy—Display the intrusion detection and prevention (IDP) protocol process.
ilmi—Display the Integrated Local Management Interface (ILMI) protocol process, which
provides bidirectional exchange of management information between two ATM
interfaces across a physical connection.
inet-process—Display the IP multicast family process.
init—Display the process that initializes the USB modem.
interface-control—(Optional) Display the interface process, which controls the router's
or switch’s physical interface devices and logical interfaces.
kernel-replication—(Optional) Display the kernel replication process, which replicates
the state of the backup Routing Engine when graceful Routing Engine switchover
(GRES) is configured.
l2-learning—(Optional) Display the Layer 2 address flooding and learning process.
l2cpd-service—Display the Layer 2 Control Protocol process, which enables features such
as Layer 2 protocol tunneling and nonstop bridging.
lacp—(Optional) Display the Link Aggregation Control Protocol (LACP)process. LACP
provides a standardized means for exchanging information between partner systems
on a link to allow their link aggregation control instances to reach agreement on the
identity of the LAG to which the link belongs, and then to move the link to that LAG,
and to enable the transmission and reception processes for the link to function in
an orderly manner.
lccnumber—(TX Matrix and TX Matrix Plus routers only) (Optional) On a TX Matrix router,
display standard system process information for a specific T640 router that is
connected to the TX Matrix router. On a TX Matrix Plus router, display standard
system process information for a specific T1600 router that is connected to the TX
Matrix Plus router. Replace number with a value from 0 through 3.
local—(EX4200 switches and MX Series routers only) (Optional) Display standard system
process information for the local Virtual Chassis member.
local-policy-decision-function—Display the process for the Local Policy Decision Function,
which regulates collection of statistics related to applications and application groups
and tracking of information about dynamic subscribers and static interfaces.
logical-system-mux—Display the logical router multiplexer process (lrmuxd), which
manages the multiple instances of the routing protocols process (rpd) on a machine
running logical routers.
Copyright © 2016, Juniper Networks, Inc.222
System Basics: Getting Started Configuration Guide

mac-validation—Display the MAC validation process, which configures MAC address
validation for subscriber interfaces created on demux interfaces in dynamic profiles
on MX Series routers.
membermember-id—(EX4200 switches and MX Series routers only) (Optional) Display
standard system process information for the specified member of the Virtual Chassis
configuration. For EX4200 switches, replacemember-idwith a value from 0 through
9. For an MX Series Virtual Chassis, replace member-id with a value of 0 or 1.
mib-process—(Optional) Display the MIB II process, which provides the router's MIB II
agent.
mobile-ip—(Optional) Display the Mobile IP process, which configures Junos OS Mobile
IP features.
mountd-service—(EX Series switches and MX Series routers only) (Optional) Display the
service for NFS mounts requests.
mpls-traceroute—(Optional) Display the MPLS Periodic Traceroute process.
mspd—(Optional) Display the Multiservice process.
multicast-snooping—(EX Series switches and MX Series routers only) (Optional) Display
the multicast snooping process, which makes Layer 2 devices such as VLAN switches
aware of Layer 3 information, such as the media access control (MAC) addresses
of members of a multicast group.
named-service—(Optional) Display the DNS Server process, which is used by a router or
a switch to resolve hostnames into addresses.
neighbor-liveness—Display the process, which specifies the maximum length of time that
the router waits for its neighbor to re-establish an LDP session.
nfsd-service—(Optional) Display the Remote NFS Server process, which provides remote
file access for applications that need NFS-based transport.
ntp—Display the Network Time Protocol (NTP) process, which provides the mechanisms
to synchronize time and coordinate time distribution in a large, diverse network.
packet-triggered-subscribers—Display the packet-triggered subcribers and policy control
(PTSP) process, which allows the application of policies to dynamic subscribers
that are controlled by a subscriber termination device.
peer-selection-service—(Optional) Display the Peer Selection Service process.
periodic-packet-services—Display the Periodic packet management process, which is
responsible for processing a variety of time-sensitive periodic tasks so that other
processes can more optimally direct their resources.
pfe—Display the Packet Forwarding Engine management process.
pgcp-service—(Optional) Display the pgcpd service process running on the Routing
Engine.
223Copyright © 2016, Juniper Networks, Inc.
Chapter 9: System Software Monitoring Commands

pgm—Display the Pragmatic General Multicast (PGM) protocol process, which enables
a reliable transport layer for multicast applications.
pic-services-logging—(Optional) Display the logging process for some PICs. With this
process, also known as fsad (the file system access daemon), PICs send special
logging information to the Routing Engine for archiving on the hard disk.
ppp—(Optional) Display the Point-to-Point Protocol (PPP) process, which is the
encapsulation protocol process for transporting IP traffic across point-to-point links.
ppp-service—Display the Universal edge PPP process, which is the encapsulation protocol
process for transporting IP traffic across universal edge routers.
pppoe—(Optional) Display the Point-to-Point Protocol over Ethernet (PPPoE) process,
which combines PPP that typically runs over broadband connections with the
Ethernet link-layer protocol that allows users to connect to a network of hosts over
a bridge or access concentrator.
process-monitor—Display the process health monitor process (pmond).
providers—(Optional) Display provider processes.
redundancy-interface-process—(Optional) Display the ASP redundancy process.
remote-operations—(Optional) Display the remote operations process, which provides
the ping and traceroute MIBs.
resource-cleanup—Display the resource cleanup process.
resource-limits (brief | detail) process-name—(Optional) Display process resource limits.
routing—(Optional) Display the routing protocol process.
sampling—(Optional) Display the sampling process, which performs packet sampling
based on particular input interfaces and various fields in the packet header.
sbc-configuration-process—Display the session border controller (SBC) process of the
border signaling gateway (BSG).
scc—(TX Matrix routers only) (Optional) Display standard system process information
for the TX Matrix router (or switch-card chassis).
sdk-service—Display the SDK Service process, which runs on the Routing Engine and is
responsible for communications between the SDK application and Junos OS. Although
the SDK Service process is present on the router, it is turned off by default.
secure-neighbor-discovery—(EX Series switches and MX Series routers only) (Optional)
Display the secure Neighbor Discovery Protocol (NDP) process, which provides
support for protecting NDP messages.
send—(Optional) Display the Secure Neighbor Discovery Protocol (SEND) process, which
provides support for protecting Neighbor Discovery Protocol (NDP) messages.
Copyright © 2016, Juniper Networks, Inc.224
System Basics: Getting Started Configuration Guide

service-deployment—(Optional) Display the service deployment process, which enables
Junos OS to work with the Session and Resource Control (SRC) software.
sfcnumber—(TX Matrix Plus routers only) (Optional) Display system process information
for the TX Matrix Plus router (or switch-fabric chassis). Replace number with 0.
snmp—Display the SNMP process, which enables the monitoring of network devices from
a central location and provides the router's or switch’s SNMP master agent.
sonet-aps—Display the SONET Automatic Protection Switching (APS) process, which
monitors any SONET interface that participates in APS.
static-subscribers—(Optional) Display the Static subscribers process, which associates
subscribers with statically configured interfaces and provides dynamic service
activation and activation for these subscribers.
tunnel-oamd—(Optional) Display the Tunnel OAM process, which enables the Operations,
Administration, and Maintenance of Layer 2 tunneled networks. Layer 2 protocol
tunneling (L2PT) allows service providers to send Layer 2 protocol data units (PDUs)
across the provider’s cloud and deliver them to Juniper Networks EX Series Ethernet
Switches that are not part of the local broadcast domain.
vrrp—(EX Series switches and MX Series routers only) (Optional) Display the Virtual
Router Redundancy Protocol (VRRP) process, which enables hosts on a LAN to
make use of redundant routing platforms on that LAN without requiring more than
the static configuration of a single default route on the hosts.
watchdog—Display the watchdog timer process, which enables the watchdog timer when
Junos OS encounters a problem.
wide—(Optional) Display process information that might be wider than 80 columns.
Additional Information By default, when you issue the show system processes command on a TX Matrix or TX
Matrix Plus master Routing Engine, the command is broadcast to all the T640 (in a
routing matrix based on the TX Matrix router) or T1600 (in a routing matrix based on the
TX Matrix Plus router) master Routing Engines connected to it. Likewise, if you issue the
same command on the TX Matrix or TX Matrix Plus backup Routing Engine, the command
is broadcast to all the T640 (in a routing matrix based on the TX Matrix router) or T1600
(in a routing matrix based on the TX Matrix Plus router) backup Routing Engines that are
connected to it.
Required PrivilegeLevel
view
RelatedDocumentation
List of Junos OS Processes on page 11•
List of Sample Output show system processes on page 228show system processes brief on page 228show system processes detail on page 229show system processes extensive on page 229
225Copyright © 2016, Juniper Networks, Inc.
Chapter 9: System Software Monitoring Commands
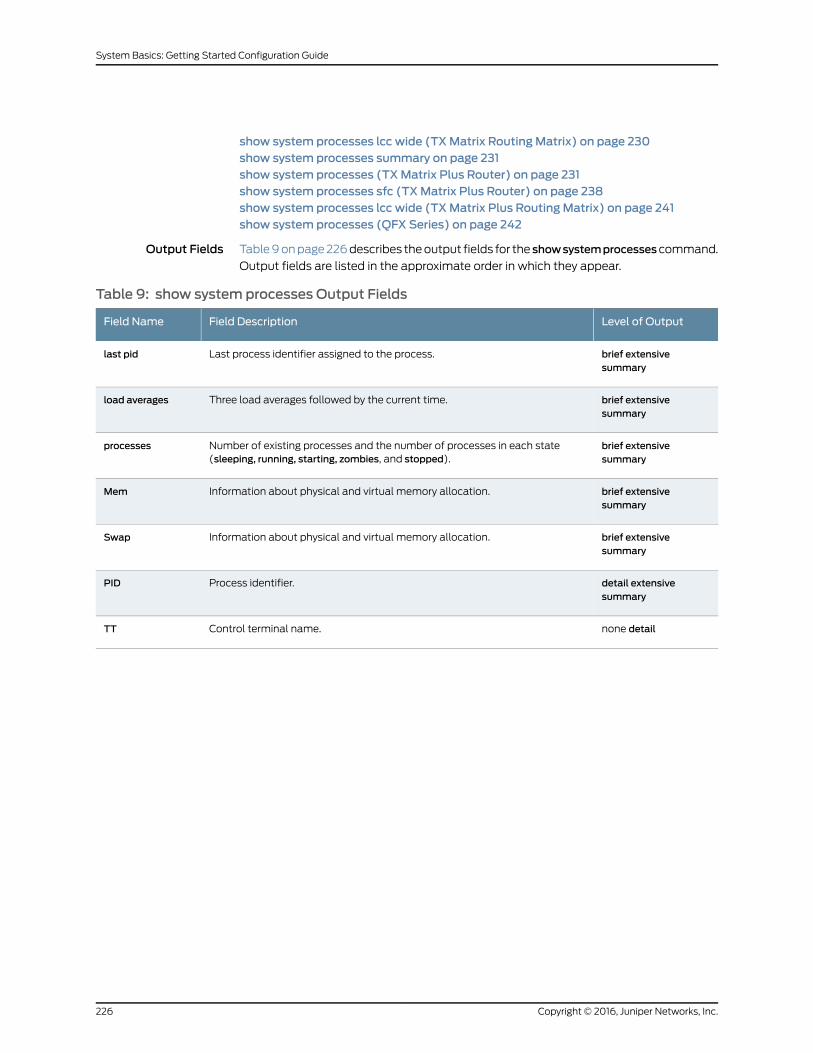
show system processes lcc wide (TXMatrix RoutingMatrix) on page 230show system processes summary on page 231show system processes (TXMatrix Plus Router) on page 231show system processes sfc (TXMatrix Plus Router) on page 238show system processes lcc wide (TXMatrix Plus RoutingMatrix) on page 241show system processes (QFX Series) on page 242
Output Fields Table 9 on page 226 describes the output fields for the showsystemprocessescommand.
Output fields are listed in the approximate order in which they appear.
Table 9: show system processes Output Fields
Level of OutputField DescriptionField Name
brief extensivesummary
Last process identifier assigned to the process.last pid
brief extensivesummary
Three load averages followed by the current time.load averages
brief extensivesummary
Number of existing processes and the number of processes in each state(sleeping, running, starting, zombies, and stopped).
processes
brief extensivesummary
Information about physical and virtual memory allocation.Mem
brief extensivesummary
Information about physical and virtual memory allocation.Swap
detail extensivesummary
Process identifier.PID
none detailControl terminal name.TT
Copyright © 2016, Juniper Networks, Inc.226
System Basics: Getting Started Configuration Guide

Table 9: show system processes Output Fields (continued)
Level of OutputField DescriptionField Name
none detailSymbolic process state. The state is given by a sequence of letters. The firstletter indicates the run state of the process:
• D—In disk or other short-term, uninterruptible wait
• I—Idle (sleeping longer than about 20 seconds)
• R—Runnable
• S—Sleeping for less than 20 seconds
• T—Stopped
• Z—Dead (zombie)
• +—The process is in the foreground process group of its control terminal.
• <—The process has raised CPU scheduling priority.
• >—The process has specified a soft limit on memory requirements and iscurrently exceeding that limit; such a process is not swapped.
• A—The process requested random page replacement.
• E—The process is trying to exit.
• L—The process has pages locked in core.
• N—The process has reduced CPU scheduling priority.
• S—The process requested first-in, first-out (FIFO) page replacement.
• s—The process is a session leader.
• V—The process is temporarily suspended.
• W—The process is swapped out.
• X—The process is being traced or debugged.
STAT
detailUser identifier.UID
extensive summaryProcess owner.USERNAME
detailParent process identifier.PPID
detail extensivesummary
(D)—Short-term CPU usage.
(E and S)—Raw (unweighted) CPU usage. The value of this field is used to sortthe processes in the output.
CPU
detailResident set size.RSS
detailSymbolic name of the wait channel.WCHAN
detailLocal time when the process started running.STARTED
detail extensivesummary
Current priority of the process. A lower number indicates a higher priority.PRI
detail extensivesummary
UNIX "niceness" value. A lower number indicates a higher priority.NI or NICE
extensive summaryTotal size of the process (text, data, and stack), in kilobytes.SIZE
227Copyright © 2016, Juniper Networks, Inc.
Chapter 9: System Software Monitoring Commands

Table 9: show system processes Output Fields (continued)
Level of OutputField DescriptionField Name
extensive summaryCurrent amount of resident memory, in kilobytes.RES
extensive summaryCurrent state of the process (for example, sleep,wait, run, idle, zombie, or stop).STATE
detail extensivesummary
(S)—Number of system and user CPU seconds that the process has used.
(None, D, and E)—Total amount of time that the command has been running.
TIME
extensive summaryWeighted CPU usage.WCPU
detail extensivesummary
Command that is currently running.COMMAND
Sample Output
show system processes
user@host> show system processesPID TT STAT TIME COMMAND 0 ?? DLs 0:00.70 (swapper) 1 ?? Is 0:00.35 /sbin/init -- 2 ?? DL 0:00.00 (pagedaemon) 3 ?? DL 0:00.00 (vmdaemon) 4 ?? DL 0:42.37 (update) 5 ?? DL 0:00.00 (if_jnx) 80 ?? Ss 0:14.66 syslogd -s 96 ?? Is 0:00.01 portmap 128 ?? Is 0:02.70 cron 173 ?? Is 0:02.24 /usr/local/sbin/sshd (sshd1) 189 ?? S 0:03.80 /sbin/watchdog -t180 190 ?? I 0:00.03 /usr/sbin/tnetd -N 191 ?? S 2:24.76 /sbin/ifd -N 192 ?? S< 0:55.44 /usr/sbin/xntpd -N 195 ?? S 0:53.11 /usr/sbin/snmpd -N 196 ?? S 1:15.73 /usr/sbin/mib2d -N 198 ?? I 0:00.75 /usr/sbin/inetd -N 2677 ?? I 0:00.01 /usr/sbin/mgd -N 2712 ?? Ss 0:00.24 rlogind 2735 ?? R 0:00.00 /bin/ps -ax 1985 p0- S 0:07.41 ./rpd -N 2713 p0 Is 0:00.24 -tcsh (tcsh) 2726 p0 S+ 0:00.07 cli
show system processes brief
user@host> show system processes brieflast pid: 543; load averages: 0.00, 0.00, 0.00 18:29:4737 processes: 1 running, 36 sleeping
Mem: 25M Active, 3976K Inact, 19M Wired, 8346K Buf, 202M FreeSwap: 528M Total, 64K Used, 528M Free
Copyright © 2016, Juniper Networks, Inc.228
System Basics: Getting Started Configuration Guide

show system processes detail
user@host> show system processes detailPID UID PPID CPU PRI NI RSS WCHAN STARTED TT STAT TIME COMMAND 3151 1049 3129 2 28 0 672 - 1:13PM p0 R+ 0:00.00 ps -ax -r 1 0 0 0 10 0 376 wait 1:51PM ?? Is 0:00.29 /sbin/ini 2 0 0 0 -18 0 12 psleep 1:51PM ?? DL 0:00.00 (pagedae 3 0 0 0 28 0 12 psleep 1:51PM ?? DL 0:00.00 (vmdaemo 4 0 0 0 28 0 12 update 1:51PM ?? DL 0:07.15 (update) 5 0 0 0 2 0 12 pfesel 1:51PM ?? IL 0:02.90 (if_pfe) 27 0 1 0 10 0 17936 mfsidl 1:51PM ?? Is 0:00.46 mfs /dev/ 81 0 1 0 2 0 496 select 1:52PM ?? Ss 0:31.21 syslogd - 119 1 1 0 2 0 492 select 1:52PM ?? Is 0:00.00 portmap 134 0 1 0 2 0 580 select 1:52PM ?? S 0:02.95 amd -p -a 151 0 1 0 18 0 532 pause 1:52PM ?? Is 0:00.34 cron 183 0 1 0 2 0 420 select 1:52PM ?? Ss 0:00.07 /usr/loca 206 0 1 0 18 0 72 pause 1:52PM ?? S 0:00.51 /sbin/wat 207 0 1 0 2 0 520 select 1:52PM ?? I 0:00.16 /usr/sbin 208 0 1 0 2 0 536 select 1:52PM ?? S 0:08.21 /sbin/dcd 210 0 1 255 2 -12 740 select 1:52PM ?? S< 0:05.83 /usr/sbin 211 0 1 0 2 0 376 select 1:52PM ?? S 0:00.03 /usr/sbin 215 0 1 0 2 0 548 select 1:52PM ?? I 0:00.50 /usr/sbin 219 0 1 0 3 0 540 ttyin 1:52PM v0 Is+ 0:00.02 /usr/libe 220 0 1 0 3 0 540 ttyin 1:52PM v1 Is+ 0:00.01 /usr/libe 221 0 1 0 3 0 540 ttyin 1:52PM v2 Is+ 0:00.01 /usr/libe 222 0 1 0 3 0 540 ttyin 1:52PM v3 Is+ 0:00.01 /usr/libe 735 0 1 0 2 0 468 select 2:47PM ?? S 0:19.14 /usr/sbin 736 0 1 0 2 0 212 select 2:47PM ?? S 0:14.13 /usr/sbin 1380 0 1 0 3 0 888 ttyin 7:32PM d0 Is+ 0:00.46 bash 3019 0 207 0 2 0 636 select 10:49AM ?? Ss 0:02.93 tnp.chass 3122 0 1380 0 2 0 1764 select 12:33PM d0 S 0:00.77 ./rpd -N 3128 0 215 0 2 0 580 select 12:45PM ?? Ss 0:00.12 rlogind 3129 1049 3128 0 18 0 944 pause 12:45PM p0 Ss 0:00.14 -tcsh (tc 0 0 0 0 -18 0 0 sched 1:51PM ?? DLs 0:00.10 (swapper
show system processes extensive
user@host> show system processes extensivelast pid: 544; load averages: 0.00, 0.00, 0.00 18:30:3337 processes: 1 running, 36 sleeping
Mem: 25M Active, 3968K Inact, 19M Wired, 8346K Buf, 202M FreeSwap: 528M Total, 64K Used, 528M Free PID USERNAME PRI NICE SIZE RES STATE TIME WCPU CPU COMMAND 544 root 30 0 604K 768K RUN 0:00 0.00% 0.00% top 3 root 28 0 0K 12K psleep 0:00 0.00% 0.00% vmdaemon 4 root 28 0 0K 12K update 0:03 0.00% 0.00% update 528 user 18 0 660K 948K pause 0:00 0.00% 0.00% tcsh 204 root 18 0 300K 544K pause 0:00 0.00% 0.00% csh 131 root 18 0 332K 532K pause 0:00 0.00% 0.00% cron 186 root 18 0 196K 68K pause 0:00 0.00% 0.00% watchdog 27 root 10 0 512M 16288K mfsidl 0:00 0.00% 0.00% mount_mfs 1 root 10 0 620K 344K wait 0:00 0.00% 0.00% init 304 root 3 0 884K 900K ttyin 0:00 0.00% 0.00% bash 200 root 3 0 180K 540K ttyin 0:00 0.00% 0.00% getty 203 root 3 0 180K 540K ttyin 0:00 0.00% 0.00% getty 202 root 3 0 180K 540K ttyin 0:00 0.00% 0.00% getty 201 root 3 0 180K 540K ttyin 0:00 0.00% 0.00% getty 194 root 2 0 2248K 1640K select 0:11 0.00% 0.00% rpd 205 root 2 0 964K 800K select 0:12 0.00% 0.00% tnp.chassisd 189 root 2 -12 352K 740K select 0:03 0.00% 0.00% xntpd
229Copyright © 2016, Juniper Networks, Inc.
Chapter 9: System Software Monitoring Commands

114 root 2 0 296K 612K select 0:00 0.00% 0.00% amd 188 root 2 0 780K 600K select 0:00 0.00% 0.00% dcd 527 root 2 0 176K 580K select 0:00 0.00% 0.00% rlogind 195 root 2 0 212K 552K select 0:00 0.00% 0.00% inetd 187 root 2 0 192K 532K select 0:00 0.00% 0.00% tnetd 83 root 2 0 188K 520K select 0:00 0.00% 0.00% syslogd 538 root 2 0 1324K 516K select 0:00 0.00% 0.00% mgd 99 daemon 2 0 176K 492K select 0:00 0.00% 0.00% portmap 163 root 2 0 572K 420K select 0:00 0.00% 0.00% nsrexecd 192 root 2 0 560K 400K select 0:10 0.00% 0.00% snmpd 191 root 2 0 1284K 376K select 0:00 0.00% 0.00% mgd 537 user 2 0 636K 364K select 0:00 0.00% 0.00% cli 193 root 2 0 312K 204K select 0:07 0.00% 0.00% mib2d 5 root 2 0 0K 12K pfesel 0:00 0.00% 0.00% if_pfe 2 root -18 0 0K 12K psleep 0:00 0.00% 0.00% pagedaemon 0 root -18 0 0K 0K sched 0:00 0.00% 0.00% swapper
show system processes lcc wide (TXMatrix RoutingMatrix)
user@host> show system processes lcc 2 widelcc2-re0:-------------------------------------------------------------------------- PID TT STAT TIME COMMAND 0 ?? DLs 0:00.00 (swapper) 1 ?? ILs 0:00.10 /sbin/preinit -- (init) 2 ?? DL 0:00.00 (pagedaemon) 3 ?? DL 0:00.00 (vmdaemon) 4 ?? DL 0:00.00 (bufdaemon) 5 ?? DL 0:00.04 (syncer) 6 ?? DL 0:00.00 (netdaemon) 7 ?? IL 0:00.00 (if_pic_listen) 8 ?? IL 0:00.00 (scs_housekeeping) 9 ?? IL 0:00.00 (if_pfe_listen) 10 ?? DL 0:00.00 (vmuncachedaemon) 11 ?? SL 0:00.02 (cb_poll) 172 ?? ILs 0:00.21 mfs -o noauto /dev/ad1s1b /tmp (newfs) 2909 ?? Is 0:00.00 pccardd 2932 ?? Ss 0:00.07 syslogd -r -s 3039 ?? Is 0:00.00 cron 3217 ?? I 0:00.00 /sbin/watchdog -d 3218 ?? I 0:00.02 /usr/sbin/tnetd -N 3221 ?? S 0:00.11 /usr/sbin/alarmd -N 3222 ?? S 0:00.85 /usr/sbin/craftd -N 3223 ?? S 0:00.05 /usr/sbin/mgd -N 3224 ?? I 0:00.02 /usr/sbin/inetd -N 3225 ?? I 0:00.00 /usr/sbin/tnp.sntpd -N 3226 ?? I 0:00.01 /usr/sbin/tnp.sntpc -N 3228 ?? I 0:00.01 /usr/sbin/smartd -N 3231 ?? I 0:00.01 /usr/sbin/eccd -N 3425 ?? S 0:00.09 /usr/sbin/dfwd -N 3426 ?? S 0:00.19 /sbin/dcd -N 3427 ?? I 0:00.04 /usr/sbin/pfed -N 3430 ?? S 0:00.10 /usr/sbin/ksyncd -N 3482 ?? S 1:53.63 /usr/sbin/chassisd -N 4285 ?? SL 0:00.01 (peer proxy) 4286 ?? SL 0:00.00 (peer proxy) 4303 ?? Ss 0:00.00 mgd: (mgd) (root) (mgd) 4304 ?? R 0:00.00 /bin/ps -ax -ww 3270 d0 Is+ 0:00.00 /usr/libexec/getty std.9600 ttyd0
Copyright © 2016, Juniper Networks, Inc.230
System Basics: Getting Started Configuration Guide

show system processes summary
user@host> show system processes summarylast pid: 543; load averages: 0.00, 0.00, 0.00 18:29:4737 processes: 1 running, 36 sleeping
Mem: 25M Active, 3976K Inact, 19M Wired, 8346K Buf, 202M FreeSwap: 528M Total, 64K Used, 528M Free
PID USERNAME PRI NICE SIZE RES STATE TIME WCPU CPU COMMAND 527 root 2 0 176K 580K select 0:00 0.04% 0.04% rlogind 543 root 30 0 604K 768K RUN 0:00 0.00% 0.00% top
show system processes (TXMatrix Plus Router)
user@host> show system processessfc0-re0:-------------------------------------------------------------------------- PID TT STAT TIME COMMAND 0 ?? WLs 0:00.00 [swapper] 1 ?? ILs 0:00.18 /packages/mnt/jbase/sbin/init -- 2 ?? DL 0:00.20 [g_event] 3 ?? DL 0:00.39 [g_up] 4 ?? DL 0:00.32 [g_down] 5 ?? DL 0:00.00 [thread taskq] 6 ?? DL 0:00.09 [kqueue taskq] 7 ?? DL 0:00.01 [pagedaemon] 8 ?? DL 0:00.00 [vmdaemon] 9 ?? DL 0:06.63 [pagezero] 10 ?? DL 0:00.00 [ktrace] 11 ?? RL 310:52.98 [idle] 12 ?? WL 0:11.03 [swi2: net] 13 ?? WL 0:27.58 [swi7: clock sio] 14 ?? WL 0:00.00 [swi6: vm] 15 ?? DL 0:03.02 [yarrow] 16 ?? WL 0:00.00 [swi9: +] 17 ?? WL 0:00.00 [swi8: +] 18 ?? WL 0:00.00 [swi5: cambio] 19 ?? WL 0:00.00 [swi9: task queue] 20 ?? WL 0:11.41 [irq16: uhci0 uhci*] 21 ?? DL 0:00.00 [usb0] 22 ?? DL 0:00.00 [usbtask] 23 ?? WL 0:39.51 [irq17: uhci1 uhci*] 24 ?? DL 0:00.00 [usb1] 25 ?? WL 0:00.00 [irq18: uhci2 uhci*] 26 ?? DL 0:00.83 [usb2] 27 ?? DL 0:00.00 [usb3] 28 ?? DL 0:00.00 [usb4] 29 ?? DL 0:00.00 [usb5] 30 ?? DL 0:00.73 [usb6] 31 ?? DL 0:00.00 [usb7] 32 ?? WL 0:00.00 [irq14: ata0] 33 ?? WL 0:00.00 [irq15: ata1] 34 ?? WL 0:00.00 [irq1: atkbd0] 35 ?? WL 0:00.00 [swi0: sio] 36 ?? WL 0:00.00 [irq11: isab0] 37 ?? WL 0:00.00 [swi3: ip6opt ipopt] 38 ?? WL 0:00.00 [swi4: ip6mismatch+] 39 ?? WL 0:00.00 [swi1: ipfwd] 40 ?? DL 0:00.02 [bufdaemon] 41 ?? DL 0:00.02 [vnlru]
231Copyright © 2016, Juniper Networks, Inc.
Chapter 9: System Software Monitoring Commands

42 ?? DL 0:00.39 [syncer] 43 ?? DL 0:00.05 [softdepflush] 44 ?? DL 0:00.00 [netdaemon] 45 ?? DL 0:00.02 [vmuncachedaemon] 46 ?? DL 0:00.00 [if_pic_listen] 47 ?? DL 0:00.35 [vmkmemdaemon] 48 ?? DL 0:00.00 [cb_poll] 49 ?? DL 0:00.06 [if_pfe_listen] 50 ?? DL 0:00.00 [scs_housekeeping] 51 ?? IL 0:00.00 [kern_dump_proc] 52 ?? IL 0:00.00 [nfsiod 0] 53 ?? IL 0:00.00 [nfsiod 1] 54 ?? IL 0:00.00 [nfsiod 2] 55 ?? IL 0:00.00 [nfsiod 3] 56 ?? DL 0:00.37 [schedcpu] 57 ?? DL 0:00.56 [md0] 79 ?? DL 0:02.58 [md1] 100 ?? DL 0:00.03 [md2] 118 ?? DL 0:00.01 [md3] 139 ?? DL 0:00.95 [md4] 160 ?? DL 0:00.12 [md5] 181 ?? DL 0:00.00 [md6] 217 ?? DL 0:00.02 [md7] 227 ?? DL 0:00.05 [md8] 1341 ?? SL 0:01.34 [bcmTX] 1342 ?? SL 0:01.68 [bcmXGS3AsyncTX] 1343 ?? SL 0:41.40 [bcmLINK.0] 1345 ?? SL 0:33.83 [bcmLINK.1] 1350 ?? Is 0:00.01 /usr/sbin/cron 1502 ?? S 0:00.01 /sbin/watchdog -t-1 1503 ?? S 0:00.86 /usr/libexec/bslockd -mp -N 1504 ?? S 0:00.01 /usr/sbin/tnetd -N 1507 ?? S 0:01.32 /usr/sbin/alarmd -N 1508 ?? S 0:14.54 /usr/sbin/craftd -N 1509 ?? S 0:01.19 /usr/sbin/mgd -N 1512 ?? I 0:00.05 /usr/sbin/inetd -N 1513 ?? S 0:00.10 /usr/sbin/tnp.sntpd -N 1517 ?? S 0:00.11 /usr/sbin/smartd -N 1525 ?? S 0:01.10 /usr/sbin/idpd -N 1526 ?? S 0:01.43 /usr/sbin/license-check -U -M -p 10 -i 10 1527 ?? I 0:00.01 /usr/libexec/getty Pc ttyv0 1616 ?? DL 0:00.30 [peer proxy] 1617 ?? DL 0:00.32 [peer proxy] 1618 ?? DL 0:00.34 [peer proxy] 1619 ?? DL 0:00.30 [peer proxy] 2391 ?? Is 0:00.01 telnetd 7331 ?? Ss 0:00.03 telnetd 9538 ?? DL 0:01.16 [jsr_kkcm] 9613 ?? DL 0:00.18 [peer proxy]23781 ?? Ss 0:00.01 telnetd23926 ?? Ss 0:00.01 mgd: (mgd) (user)/dev/ttyp2 (mgd)36867 ?? S 0:03.14 /usr/sbin/rpd -N36874 ?? S 0:00.08 /usr/sbin/lmpd36876 ?? S 0:00.17 /usr/sbin/lacpd -N36877 ?? S 0:00.15 /usr/sbin/bfdd -N36878 ?? S 0:05.05 /usr/sbin/ppmd -N36907 ?? S 0:25.07 /usr/sbin/chassisd -N37775 ?? S 0:00.01 /usr/sbin/bdbrepd -N45727 ?? S 0:00.02 /usr/sbin/xntpd -j -N -g (ntpd)45729 ?? S 0:00.38 /usr/sbin/l2ald -N45730 ?? S< 0:00.12 /usr/sbin/apsd -N
Copyright © 2016, Juniper Networks, Inc.232
System Basics: Getting Started Configuration Guide

45731 ?? SN 0:00.10 /usr/sbin/sampled -N45732 ?? S 0:00.03 /usr/sbin/ilmid -N45733 ?? S 0:00.09 /usr/sbin/rmopd -N45734 ?? S 0:00.30 /usr/sbin/cosd45735 ?? I 0:00.00 /usr/sbin/rtspd -N45736 ?? S 0:00.06 /usr/sbin/fsad -N45737 ?? S 0:00.05 /usr/sbin/rdd -N45738 ?? S 0:00.10 /usr/sbin/pppd -N45739 ?? S 0:00.05 /usr/sbin/dfcd -N45740 ?? S 0:00.07 /usr/sbin/lfmd -N45741 ?? S 0:00.01 /usr/sbin/mplsoamd -N45742 ?? I 0:00.01 /usr/sbin/sendd -N45743 ?? S 0:00.08 /usr/sbin/appidd -N45744 ?? S 0:00.05 /usr/sbin/mspd -N45745 ?? S 0:00.25 /usr/sbin/jdiameterd -N45746 ?? S 0:00.10 /usr/sbin/pfed -N45747 ?? S 0:00.19 /usr/sbin/lpdfd -N45748 ?? S 0:00.63 /sbin/dcd -N45750 ?? S 0:00.45 /usr/sbin/mib2d -N45751 ?? S 0:00.15 /usr/sbin/dfwd -N45752 ?? S 0:00.15 /usr/sbin/irsd -N45764 ?? S 0:20.59 /usr/sbin/snmpd -N56479 ?? Ss 0:00.00 mgd: (mgd) (root) (mgd)56480 ?? R 0:00.00 /bin/ps -ax 1142 d0- I 0:00.01 /usr/sbin/usbd -N 1160 d0- S 0:29.17 /usr/sbin/eventd -N -r -s -A 6527 d0 Is+ 0:00.00 /usr/libexec/getty std.9600 ttyd0 2392 p1 Is 0:00.00 login [pam] (login) 2393 p1 I 0:00.00 -csh (csh) 2394 p1 I 0:00.00 su - 2395 p1 I+ 0:00.01 -su (csh)23782 p2 Is 0:00.00 login [pam] (login)23881 p2 I 0:00.00 -csh (csh)23925 p2 S+ 0:00.03 cli 7332 p3 Is 0:00.00 login [pam] (login) 7333 p3 I 0:00.00 -csh (csh)23780 p3 S+ 0:00.02 telnet aj
lcc0-re0:-------------------------------------------------------------------------- PID TT STAT TIME COMMAND 0 ?? WLs 0:00.00 [swapper] 1 ?? ILs 0:00.16 /packages/mnt/jbase/sbin/init -- 2 ?? DL 0:00.01 [g_event] 3 ?? DL 0:00.16 [g_up] 4 ?? DL 0:00.11 [g_down] 5 ?? DL 0:00.00 [thread taskq] 6 ?? DL 0:00.00 [kqueue taskq] 7 ?? DL 0:00.00 [pagedaemon] 8 ?? DL 0:00.00 [vmdaemon] 9 ?? DL 0:01.77 [pagezero] 10 ?? DL 0:00.00 [ktrace] 11 ?? RL 17:22.31 [idle] 12 ?? WL 0:00.32 [swi2: net] 13 ?? WL 0:01.21 [swi7: clock sio] 14 ?? WL 0:00.00 [swi6: vm] 15 ?? DL 0:00.10 [yarrow] 16 ?? WL 0:00.00 [swi9: +] 17 ?? WL 0:00.00 [swi8: +] 18 ?? WL 0:00.00 [swi5: cambio] 19 ?? WL 0:00.00 [swi9: task queue]
233Copyright © 2016, Juniper Networks, Inc.
Chapter 9: System Software Monitoring Commands

20 ?? WL 0:02.73 [irq10: bcm0 uhci1*] 21 ?? WL 0:00.02 [irq11: cb0 uhci0+*] 22 ?? DL 0:00.00 [usb0] 23 ?? DL 0:00.00 [usbtask] 24 ?? DL 0:00.00 [usb1] 25 ?? DL 0:00.05 [usb2] 26 ?? DL 0:00.00 [usb3] 27 ?? DL 0:00.00 [usb4] 28 ?? DL 0:00.00 [usb5] 29 ?? DL 0:00.04 [usb6] 30 ?? DL 0:00.00 [usb7] 31 ?? WL 0:00.00 [irq14: ata0] 32 ?? WL 0:00.00 [irq15: ata1] 33 ?? WL 0:00.00 [irq1: atkbd0] 34 ?? WL 0:00.00 [swi0: sio] 35 ?? WL 0:00.00 [swi3: ip6opt ipopt] 36 ?? WL 0:00.00 [swi4: ip6mismatch+] 37 ?? WL 0:00.00 [swi1: ipfwd] 38 ?? DL 0:00.00 [bufdaemon] 39 ?? DL 0:00.00 [vnlru] 40 ?? DL 0:00.01 [syncer] 41 ?? DL 0:00.00 [softdepflush] 42 ?? DL 0:00.00 [netdaemon] 43 ?? DL 0:00.00 [vmuncachedaemon] 44 ?? DL 0:00.00 [if_pic_listen] 45 ?? DL 0:00.02 [vmkmemdaemon] 46 ?? DL 0:00.01 [cb_poll] 47 ?? DL 0:00.00 [if_pfe_listen] 48 ?? DL 0:00.00 [scs_housekeeping] 49 ?? IL 0:00.00 [kern_dump_proc] 50 ?? IL 0:00.00 [nfsiod 0] 51 ?? IL 0:00.00 [nfsiod 1] 52 ?? IL 0:00.00 [nfsiod 2] 53 ?? IL 0:00.00 [nfsiod 3] 54 ?? DL 0:00.01 [schedcpu] 55 ?? DL 0:00.73 [md0] 77 ?? DL 0:03.54 [md1] 98 ?? DL 0:00.37 [md2] 116 ?? DL 0:00.02 [md3] 137 ?? DL 0:00.56 [md4] 158 ?? DL 0:00.15 [md5] 179 ?? DL 0:00.00 [md6] 215 ?? DL 0:00.03 [md7] 225 ?? DL 0:00.03 [md8] 1078 ?? DL 0:00.00 [jsr_kkcm] 1363 ?? SL 0:00.09 [bcmTX] 1364 ?? SL 0:00.10 [bcmXGS3AsyncTX] 1365 ?? SL 0:03.08 [bcmLINK.0] 1370 ?? Is 0:00.00 /usr/sbin/cron 1522 ?? S 0:00.00 /sbin/watchdog -t-1 1523 ?? S 0:00.05 /usr/libexec/bslockd -mp -N 1524 ?? I 0:00.01 /usr/sbin/tnetd -N 1526 ?? S 0:04.98 /usr/sbin/chassisd -N 1527 ?? S 0:00.04 /usr/sbin/alarmd -N 1528 ?? I 0:00.40 /usr/sbin/craftd -N 1529 ?? S 0:00.08 /usr/sbin/mgd -N 1532 ?? I 0:00.04 /usr/sbin/inetd -N 1533 ?? I 0:00.00 /usr/sbin/tnp.sntpd -N 1534 ?? I 0:00.00 /usr/sbin/tnp.sntpc -N 1536 ?? S 0:00.01 /usr/sbin/smartd -N 1540 ?? I 0:00.07 /usr/sbin/jcsd -N
Copyright © 2016, Juniper Networks, Inc.234
System Basics: Getting Started Configuration Guide

1541 ?? S 0:00.11 /usr/sbin/idpd -N 1542 ?? I 0:00.00 /usr/libexec/getty Pc ttyv0 2089 ?? DL 0:00.01 [peer proxy] 2090 ?? DL 0:00.01 [peer proxy] 2091 ?? DL 0:00.01 [peer proxy] 2657 ?? S 0:00.02 /usr/sbin/dfwd -N 2658 ?? S 0:00.02 /sbin/dcd -N 2659 ?? S 0:00.05 /usr/sbin/snmpd -N 2660 ?? S 0:00.01 /usr/sbin/mib2d -N 2661 ?? S 0:00.01 /usr/sbin/pfed -N 2662 ?? S 0:00.01 /usr/sbin/irsd -N 2667 ?? S 0:00.13 /usr/sbin/ksyncd -N 2690 ?? Ss 0:00.00 mgd: (mgd) (root) (mgd) 2691 ?? R 0:00.00 /bin/ps -ax 1164 d0- S 0:00.00 /usr/sbin/usbd -N 1182 d0- S 0:00.34 /usr/sbin/eventd -N -r -s -A 1543 d0 Is+ 0:00.00 /usr/libexec/getty std.9600 ttyd0
lcc1-re0:-------------------------------------------------------------------------- PID TT STAT TIME COMMAND 0 ?? WLs 0:00.00 [swapper] 1 ?? ILs 0:00.17 /packages/mnt/jbase/sbin/init -- 2 ?? DL 0:00.01 [g_event] 3 ?? DL 0:00.16 [g_up] 4 ?? DL 0:00.11 [g_down] 5 ?? DL 0:00.00 [thread taskq] 6 ?? DL 0:00.00 [kqueue taskq] 7 ?? DL 0:00.00 [pagedaemon] 8 ?? DL 0:00.00 [vmdaemon] 9 ?? DL 0:01.77 [pagezero] 10 ?? DL 0:00.00 [ktrace] 11 ?? RL 17:22.83 [idle] 12 ?? WL 0:00.35 [swi2: net] 13 ?? WL 0:01.20 [swi7: clock sio] 14 ?? WL 0:00.00 [swi6: vm] 15 ?? DL 0:00.10 [yarrow] 16 ?? WL 0:00.00 [swi9: +] 17 ?? WL 0:00.00 [swi8: +] 18 ?? WL 0:00.00 [swi5: cambio] 19 ?? WL 0:00.00 [swi9: task queue] 20 ?? WL 0:02.87 [irq10: bcm0 uhci1*] 21 ?? WL 0:00.02 [irq11: cb0 uhci0+*] 22 ?? DL 0:00.00 [usb0] 23 ?? DL 0:00.00 [usbtask] 24 ?? DL 0:00.00 [usb1] 25 ?? DL 0:00.05 [usb2] 26 ?? DL 0:00.00 [usb3] 27 ?? DL 0:00.00 [usb4] 28 ?? DL 0:00.00 [usb5] 29 ?? DL 0:00.04 [usb6] 30 ?? DL 0:00.00 [usb7] 31 ?? WL 0:00.00 [irq14: ata0] 32 ?? WL 0:00.00 [irq15: ata1] 33 ?? WL 0:00.00 [irq1: atkbd0] 34 ?? WL 0:00.00 [swi0: sio] 35 ?? WL 0:00.00 [swi3: ip6opt ipopt] 36 ?? WL 0:00.00 [swi4: ip6mismatch+] 37 ?? WL 0:00.00 [swi1: ipfwd] 38 ?? DL 0:00.00 [bufdaemon] 39 ?? DL 0:00.00 [vnlru]
235Copyright © 2016, Juniper Networks, Inc.
Chapter 9: System Software Monitoring Commands

40 ?? DL 0:00.01 [syncer] 41 ?? DL 0:00.00 [softdepflush] 42 ?? DL 0:00.00 [netdaemon] 43 ?? DL 0:00.00 [vmuncachedaemon] 44 ?? DL 0:00.00 [if_pic_listen] 45 ?? DL 0:00.02 [vmkmemdaemon] 46 ?? DL 0:00.01 [cb_poll] 47 ?? DL 0:00.00 [if_pfe_listen] 48 ?? DL 0:00.00 [scs_housekeeping] 49 ?? IL 0:00.00 [kern_dump_proc] 50 ?? IL 0:00.00 [nfsiod 0] 51 ?? IL 0:00.00 [nfsiod 1] 52 ?? IL 0:00.00 [nfsiod 2] 53 ?? IL 0:00.00 [nfsiod 3] 54 ?? DL 0:00.02 [schedcpu] 55 ?? DL 0:00.75 [md0] 77 ?? DL 0:03.40 [md1] 98 ?? DL 0:00.37 [md2] 116 ?? DL 0:00.02 [md3] 137 ?? DL 0:00.56 [md4] 158 ?? DL 0:00.15 [md5] 179 ?? DL 0:00.00 [md6] 215 ?? DL 0:00.03 [md7] 225 ?? DL 0:00.03 [md8] 1052 ?? DL 0:00.00 [jsr_kkcm] 1337 ?? SL 0:00.09 [bcmTX] 1338 ?? SL 0:00.10 [bcmXGS3AsyncTX] 1339 ?? SL 0:03.10 [bcmLINK.0] 1344 ?? Is 0:00.00 /usr/sbin/cron 1496 ?? S 0:00.00 /sbin/watchdog -t-1 1497 ?? S 0:00.05 /usr/libexec/bslockd -mp -N 1498 ?? I 0:00.01 /usr/sbin/tnetd -N 1500 ?? S 0:04.97 /usr/sbin/chassisd -N 1501 ?? S 0:00.04 /usr/sbin/alarmd -N 1502 ?? I 0:00.40 /usr/sbin/craftd -N 1503 ?? S 0:00.08 /usr/sbin/mgd -N 1506 ?? I 0:00.04 /usr/sbin/inetd -N 1507 ?? I 0:00.00 /usr/sbin/tnp.sntpd -N 1508 ?? I 0:00.00 /usr/sbin/tnp.sntpc -N 1510 ?? S 0:00.01 /usr/sbin/smartd -N 1514 ?? I 0:00.07 /usr/sbin/jcsd -N 1515 ?? S 0:00.18 /usr/sbin/idpd -N 1516 ?? I 0:00.00 /usr/libexec/getty Pc ttyv0 2068 ?? DL 0:00.01 [peer proxy] 2069 ?? DL 0:00.01 [peer proxy] 2070 ?? DL 0:00.01 [peer proxy] 2666 ?? S 0:00.02 /sbin/dcd -N 2667 ?? S 0:00.01 /usr/sbin/irsd -N 2668 ?? S 0:00.01 /usr/sbin/pfed -N 2669 ?? S 0:00.05 /usr/sbin/snmpd -N 2670 ?? S 0:00.01 /usr/sbin/mib2d -N 2671 ?? S 0:00.02 /usr/sbin/dfwd -N 2675 ?? S 0:00.13 /usr/sbin/ksyncd -N 2699 ?? Ss 0:00.00 mgd: (mgd) (root) (mgd) 2700 ?? R 0:00.00 /bin/ps -ax 1138 d0- S 0:00.00 /usr/sbin/usbd -N 1156 d0- S 0:00.37 /usr/sbin/eventd -N -r -s -A 1517 d0 Is+ 0:00.00 /usr/libexec/getty std.9600 ttyd0
lcc2-re0:--------------------------------------------------------------------------
Copyright © 2016, Juniper Networks, Inc.236
System Basics: Getting Started Configuration Guide

PID TT STAT TIME COMMAND 0 ?? WLs 0:00.00 [swapper] 1 ?? ILs 0:00.18 /packages/mnt/jbase/sbin/init -- 2 ?? DL 0:00.01 [g_event] 3 ?? DL 0:00.17 [g_up] 4 ?? DL 0:00.12 [g_down] 5 ?? DL 0:00.00 [thread taskq] 6 ?? DL 0:00.00 [kqueue taskq] 7 ?? DL 0:00.00 [pagedaemon] 8 ?? DL 0:00.00 [vmdaemon] 9 ?? DL 0:01.77 [pagezero] 10 ?? DL 0:00.00 [ktrace] 11 ?? RL 17:19.13 [idle] 12 ?? WL 0:00.36 [swi2: net] 13 ?? WL 0:01.20 [swi7: clock sio] 14 ?? WL 0:00.00 [swi6: vm] 15 ?? DL 0:00.13 [yarrow] 16 ?? WL 0:00.00 [swi9: +] 17 ?? WL 0:00.00 [swi8: +] 18 ?? WL 0:00.00 [swi5: cambio] 19 ?? WL 0:00.00 [swi9: task queue] 20 ?? WL 0:03.03 [irq10: bcm0 uhci1*] 21 ?? WL 0:00.02 [irq11: cb0 uhci0+*] 22 ?? DL 0:00.00 [usb0] 23 ?? DL 0:00.00 [usbtask] 24 ?? DL 0:00.00 [usb1] 25 ?? DL 0:00.05 [usb2] 26 ?? DL 0:00.00 [usb3] 27 ?? DL 0:00.00 [usb4] 28 ?? DL 0:00.00 [usb5] 29 ?? DL 0:00.04 [usb6] 30 ?? DL 0:00.00 [usb7] 31 ?? WL 0:00.00 [irq14: ata0] 32 ?? WL 0:00.00 [irq15: ata1] 33 ?? WL 0:00.00 [irq1: atkbd0] 34 ?? WL 0:00.00 [swi0: sio] 35 ?? WL 0:00.00 [swi3: ip6opt ipopt] 36 ?? WL 0:00.00 [swi4: ip6mismatch+] 37 ?? WL 0:00.00 [swi1: ipfwd] 38 ?? DL 0:00.00 [bufdaemon] 39 ?? DL 0:00.00 [vnlru] 40 ?? DL 0:00.01 [syncer] 41 ?? DL 0:00.00 [softdepflush] 42 ?? DL 0:00.00 [netdaemon] 43 ?? DL 0:00.00 [vmuncachedaemon] 44 ?? DL 0:00.00 [if_pic_listen] 45 ?? DL 0:00.02 [vmkmemdaemon] 46 ?? DL 0:00.01 [cb_poll] 47 ?? DL 0:00.00 [if_pfe_listen] 48 ?? DL 0:00.00 [scs_housekeeping] 49 ?? IL 0:00.00 [kern_dump_proc] 50 ?? IL 0:00.00 [nfsiod 0] 51 ?? IL 0:00.00 [nfsiod 1] 52 ?? IL 0:00.00 [nfsiod 2] 53 ?? IL 0:00.00 [nfsiod 3] 54 ?? DL 0:00.02 [schedcpu] 55 ?? DL 0:00.75 [md0] 77 ?? DL 0:03.48 [md1] 98 ?? DL 0:00.59 [md2] 116 ?? DL 0:00.02 [md3] 137 ?? DL 0:00.56 [md4]
237Copyright © 2016, Juniper Networks, Inc.
Chapter 9: System Software Monitoring Commands

158 ?? DL 0:00.15 [md5] 179 ?? DL 0:00.00 [md6] 215 ?? DL 0:00.03 [md7] 225 ?? DL 0:00.03 [md8] 1052 ?? DL 0:00.00 [jsr_kkcm] 1337 ?? SL 0:00.09 [bcmTX] 1338 ?? SL 0:00.10 [bcmXGS3AsyncTX] 1339 ?? SL 0:03.22 [bcmLINK.0] 1344 ?? Is 0:00.00 /usr/sbin/cron 1496 ?? S 0:00.00 /sbin/watchdog -t-1 1497 ?? S 0:00.05 /usr/libexec/bslockd -mp -N 1498 ?? S 0:00.01 /usr/sbin/tnetd -N 1500 ?? R 0:05.17 /usr/sbin/chassisd -N 1501 ?? S 0:00.04 /usr/sbin/alarmd -N 1502 ?? I 0:00.39 /usr/sbin/craftd -N 1503 ?? S 0:00.08 /usr/sbin/mgd -N 1506 ?? I 0:00.05 /usr/sbin/inetd -N 1507 ?? I 0:00.00 /usr/sbin/tnp.sntpd -N 1508 ?? I 0:00.00 /usr/sbin/tnp.sntpc -N 1510 ?? S 0:00.01 /usr/sbin/smartd -N 1514 ?? I 0:00.07 /usr/sbin/jcsd -N 1515 ?? S 0:00.17 /usr/sbin/idpd -N 1516 ?? I 0:00.00 /usr/libexec/getty Pc ttyv0 2591 ?? DL 0:00.01 [peer proxy] 2592 ?? DL 0:00.01 [peer proxy] 2593 ?? DL 0:00.01 [peer proxy] 2597 ?? DL 0:00.00 [peer proxy] 3192 ?? S 0:00.01 /usr/sbin/irsd -N 3193 ?? S 0:00.05 /usr/sbin/snmpd -N 3194 ?? S 0:00.02 /sbin/dcd -N 3195 ?? S 0:00.01 /usr/sbin/pfed -N 3196 ?? S 0:00.01 /usr/sbin/mib2d -N 3197 ?? S 0:00.02 /usr/sbin/dfwd -N 3198 ?? S 0:00.13 /usr/sbin/ksyncd -N 3228 ?? Ss 0:00.00 mgd: (mgd) (root) (mgd) 3229 ?? R 0:00.00 /bin/ps -ax 1138 d0- S 0:00.00 /usr/sbin/usbd -N 1156 d0- S 0:00.42 /usr/sbin/eventd -N -r -s -A 1517 d0 Is+ 0:00.00 /usr/libexec/getty std.9600 ttyd0...
show system processes sfc (TXMatrix Plus Router)
user@host> show system processes sfc 0sfc0-re0:-------------------------------------------------------------------------- PID TT STAT TIME COMMAND 0 ?? WLs 0:00.00 [swapper] 1 ?? SLs 0:00.18 /packages/mnt/jbase/sbin/init -- 2 ?? DL 0:00.20 [g_event] 3 ?? DL 0:00.39 [g_up] 4 ?? DL 0:00.32 [g_down] 5 ?? DL 0:00.00 [thread taskq] 6 ?? DL 0:00.09 [kqueue taskq] 7 ?? DL 0:00.01 [pagedaemon] 8 ?? DL 0:00.00 [vmdaemon] 9 ?? DL 0:06.63 [pagezero] 10 ?? DL 0:00.00 [ktrace] 11 ?? RL 312:09.00 [idle] 12 ?? WL 0:11.07 [swi2: net] 13 ?? WL 0:27.70 [swi7: clock sio]
Copyright © 2016, Juniper Networks, Inc.238
System Basics: Getting Started Configuration Guide

14 ?? WL 0:00.00 [swi6: vm] 15 ?? DL 0:03.03 [yarrow] 16 ?? WL 0:00.00 [swi9: +] 17 ?? WL 0:00.00 [swi8: +] 18 ?? WL 0:00.00 [swi5: cambio] 19 ?? WL 0:00.00 [swi9: task queue] 20 ?? WL 0:11.46 [irq16: uhci0 uhci*] 21 ?? DL 0:00.00 [usb0] 22 ?? DL 0:00.00 [usbtask] 23 ?? WL 0:39.63 [irq17: uhci1 uhci*] 24 ?? DL 0:00.00 [usb1] 25 ?? WL 0:00.00 [irq18: uhci2 uhci*] 26 ?? DL 0:00.84 [usb2] 27 ?? DL 0:00.00 [usb3] 28 ?? DL 0:00.00 [usb4] 29 ?? DL 0:00.00 [usb5] 30 ?? DL 0:00.73 [usb6] 31 ?? DL 0:00.00 [usb7] 32 ?? WL 0:00.00 [irq14: ata0] 33 ?? WL 0:00.00 [irq15: ata1] 34 ?? WL 0:00.00 [irq1: atkbd0] 35 ?? WL 0:00.00 [swi0: sio] 36 ?? WL 0:00.00 [irq11: isab0] 37 ?? WL 0:00.00 [swi3: ip6opt ipopt] 38 ?? WL 0:00.00 [swi4: ip6mismatch+] 39 ?? WL 0:00.00 [swi1: ipfwd] 40 ?? DL 0:00.02 [bufdaemon] 41 ?? DL 0:00.02 [vnlru] 42 ?? DL 0:00.39 [syncer] 43 ?? DL 0:00.05 [softdepflush] 44 ?? DL 0:00.00 [netdaemon] 45 ?? DL 0:00.02 [vmuncachedaemon] 46 ?? DL 0:00.00 [if_pic_listen] 47 ?? DL 0:00.35 [vmkmemdaemon] 48 ?? DL 0:00.00 [cb_poll] 49 ?? DL 0:00.06 [if_pfe_listen] 50 ?? DL 0:00.00 [scs_housekeeping] 51 ?? IL 0:00.00 [kern_dump_proc] 52 ?? IL 0:00.00 [nfsiod 0] 53 ?? IL 0:00.00 [nfsiod 1] 54 ?? IL 0:00.00 [nfsiod 2] 55 ?? IL 0:00.00 [nfsiod 3] 56 ?? DL 0:00.37 [schedcpu] 57 ?? DL 0:00.56 [md0] 79 ?? DL 0:02.58 [md1] 100 ?? DL 0:00.03 [md2] 118 ?? DL 0:00.01 [md3] 139 ?? DL 0:00.95 [md4] 160 ?? DL 0:00.12 [md5] 181 ?? DL 0:00.00 [md6] 217 ?? DL 0:00.02 [md7] 227 ?? DL 0:00.05 [md8] 1341 ?? SL 0:01.35 [bcmTX] 1342 ?? SL 0:01.69 [bcmXGS3AsyncTX] 1343 ?? SL 0:41.57 [bcmLINK.0] 1345 ?? SL 0:33.97 [bcmLINK.1] 1350 ?? Is 0:00.01 /usr/sbin/cron 1502 ?? S 0:00.01 /sbin/watchdog -t-1 1503 ?? S 0:00.86 /usr/libexec/bslockd -mp -N 1504 ?? I 0:00.01 /usr/sbin/tnetd -N 1507 ?? S 0:01.32 /usr/sbin/alarmd -N
239Copyright © 2016, Juniper Networks, Inc.
Chapter 9: System Software Monitoring Commands

1508 ?? S 0:14.54 /usr/sbin/craftd -N 1509 ?? S 0:01.20 /usr/sbin/mgd -N 1512 ?? S 0:00.05 /usr/sbin/inetd -N 1513 ?? S 0:00.10 /usr/sbin/tnp.sntpd -N 1517 ?? S 0:00.11 /usr/sbin/smartd -N 1525 ?? S 0:01.11 /usr/sbin/idpd -N 1526 ?? S 0:01.43 /usr/sbin/license-check -U -M -p 10 -i 10 1527 ?? I 0:00.01 /usr/libexec/getty Pc ttyv0 1616 ?? DL 0:00.30 [peer proxy] 1617 ?? DL 0:00.32 [peer proxy] 1618 ?? DL 0:00.34 [peer proxy] 1619 ?? DL 0:00.30 [peer proxy] 2391 ?? Is 0:00.01 telnetd 7331 ?? Ss 0:00.03 telnetd 9538 ?? DL 0:01.16 [jsr_kkcm] 9613 ?? DL 0:00.18 [peer proxy]23781 ?? Ss 0:00.01 telnetd23926 ?? Ss 0:00.03 mgd: (mgd) (user)/dev/ttyp2 (mgd)36867 ?? S 0:03.14 /usr/sbin/rpd -N36874 ?? S 0:00.08 /usr/sbin/lmpd36876 ?? S 0:00.17 /usr/sbin/lacpd -N36877 ?? S 0:00.15 /usr/sbin/bfdd -N36878 ?? S 0:05.05 /usr/sbin/ppmd -N36907 ?? S 0:26.63 /usr/sbin/chassisd -N37775 ?? S 0:00.01 /usr/sbin/bdbrepd -N45727 ?? S 0:00.02 /usr/sbin/xntpd -j -N -g (ntpd)45729 ?? S 0:00.40 /usr/sbin/l2ald -N45730 ?? S< 0:00.13 /usr/sbin/apsd -N45731 ?? SN 0:00.10 /usr/sbin/sampled -N45732 ?? S 0:00.03 /usr/sbin/ilmid -N45733 ?? S 0:00.09 /usr/sbin/rmopd -N45734 ?? S 0:00.31 /usr/sbin/cosd45735 ?? I 0:00.00 /usr/sbin/rtspd -N45736 ?? S 0:00.06 /usr/sbin/fsad -N45737 ?? S 0:00.05 /usr/sbin/rdd -N45738 ?? S 0:00.10 /usr/sbin/pppd -N45739 ?? S 0:00.05 /usr/sbin/dfcd -N45740 ?? S 0:00.08 /usr/sbin/lfmd -N45741 ?? S 0:00.01 /usr/sbin/mplsoamd -N45742 ?? I 0:00.01 /usr/sbin/sendd -N45743 ?? S 0:00.08 /usr/sbin/appidd -N45744 ?? S 0:00.05 /usr/sbin/mspd -N45745 ?? S 0:00.27 /usr/sbin/jdiameterd -N45746 ?? S 0:00.10 /usr/sbin/pfed -N45747 ?? S 0:00.19 /usr/sbin/lpdfd -N45748 ?? S 0:00.64 /sbin/dcd -N45750 ?? S 0:00.46 /usr/sbin/mib2d -N45751 ?? S 0:00.16 /usr/sbin/dfwd -N45752 ?? S 0:00.15 /usr/sbin/irsd -N45764 ?? S 0:20.60 /usr/sbin/snmpd -N56481 ?? Ss 0:00.02 telnetd56548 ?? Rs 0:00.19 mgd: (mgd) (user)/dev/ttyp0 (mgd)56577 ?? Ss 0:00.00 mgd: (mgd) (root) (mgd)56578 ?? R 0:00.00 /bin/ps -ax 1142 d0- S 0:00.01 /usr/sbin/usbd -N 1160 d0- S 0:29.71 /usr/sbin/eventd -N -r -s -A 6527 d0 Is+ 0:00.00 /usr/libexec/getty std.9600 ttyd056482 p0 Is 0:00.00 login [pam] (login)56483 p0 S 0:00.01 -csh (csh)56547 p0 S+ 0:00.02 cli 2392 p1 Is 0:00.00 login [pam] (login)
Copyright © 2016, Juniper Networks, Inc.240
System Basics: Getting Started Configuration Guide

2393 p1 I 0:00.00 -csh (csh) 2394 p1 I 0:00.00 su - 2395 p1 I+ 0:00.01 -su (csh)23782 p2 Is 0:00.00 login [pam] (login)23881 p2 I 0:00.00 -csh (csh)23925 p2 S+ 0:00.03 cli 7332 p3 Is 0:00.00 login [pam] (login) 7333 p3 I 0:00.00 -csh (csh)23780 p3 S+ 0:00.02 telnet aj
show system processes lcc wide (TXMatrix Plus RoutingMatrix)
user@host> show system processes lcc 2 widelcc2-re0:-------------------------------------------------------------------------- PID TT STAT TIME PROVIDER COMMAND 0 ?? WLs 0:00.00 (null) [swapper] 1 ?? ILs 0:00.19 /packages/mnt/jbase/sbin/init -- 2 ?? DL 0:00.02 [g_event] 3 ?? DL 0:00.19 [g_up] 4 ?? DL 0:00.13 [g_down] 5 ?? DL 0:00.00 [thread taskq] 6 ?? DL 0:00.00 [kqueue taskq] 7 ?? DL 0:00.00 [pagedaemon] 8 ?? DL 0:00.00 [vmdaemon] 9 ?? DL 0:01.77 [pagezero] 10 ?? DL 0:00.00 [ktrace] 11 ?? RL 20:33.81 [idle] 12 ?? WL 0:00.38 [swi2: net] 13 ?? WL 0:01.43 [swi7: clock sio] 14 ?? WL 0:00.00 [swi6: vm] 15 ?? DL 0:00.14 [yarrow] 16 ?? WL 0:00.00 [swi9: +] 17 ?? WL 0:00.00 [swi8: +] 18 ?? WL 0:00.00 [swi5: cambio] 19 ?? WL 0:00.00 [swi9: task queue] 20 ?? WL 0:03.18 [irq10: bcm0 uhci1*] 21 ?? WL 0:00.03 [irq11: cb0 uhci0+*] 22 ?? DL 0:00.00 [usb0] 23 ?? DL 0:00.00 [usbtask] 24 ?? DL 0:00.00 [usb1] 25 ?? DL 0:00.06 [usb2] 26 ?? DL 0:00.00 [usb3] 27 ?? DL 0:00.00 [usb4] 28 ?? DL 0:00.00 [usb5] 29 ?? DL 0:00.05 [usb6] 30 ?? DL 0:00.00 [usb7] 31 ?? WL 0:00.00 [irq14: ata0] 32 ?? WL 0:00.00 [irq15: ata1] 33 ?? WL 0:00.00 [irq1: atkbd0] 34 ?? WL 0:00.00 [swi0: sio] 35 ?? WL 0:00.00 [swi3: ip6opt ipopt] 36 ?? WL 0:00.00 [swi4: ip6mismatch+] 37 ?? WL 0:00.00 [swi1: ipfwd] 38 ?? DL 0:00.00 [bufdaemon] 39 ?? DL 0:00.00 [vnlru] 40 ?? DL 0:00.02 [syncer] 41 ?? DL 0:00.01 [softdepflush] 42 ?? DL 0:00.00 [netdaemon] 43 ?? DL 0:00.00 [vmuncachedaemon] 44 ?? DL 0:00.00 [if_pic_listen]
241Copyright © 2016, Juniper Networks, Inc.
Chapter 9: System Software Monitoring Commands

45 ?? DL 0:00.03 [vmkmemdaemon] 46 ?? DL 0:00.01 [cb_poll] 47 ?? DL 0:00.00 [if_pfe_listen] 48 ?? DL 0:00.00 [scs_housekeeping] 49 ?? IL 0:00.00 [kern_dump_proc] 50 ?? IL 0:00.00 [nfsiod 0] 51 ?? IL 0:00.00 [nfsiod 1] 52 ?? IL 0:00.00 [nfsiod 2] 53 ?? IL 0:00.00 [nfsiod 3] 54 ?? DL 0:00.02 [schedcpu] 55 ?? DL 0:00.75 [md0] 77 ?? DL 0:03.84 [md1] 98 ?? DL 0:00.59 [md2] 116 ?? DL 0:00.02 [md3] 137 ?? DL 0:00.72 [md4] 158 ?? DL 0:00.15 [md5] 179 ?? DL 0:00.00 [md6] 215 ?? DL 0:00.03 [md7] 225 ?? DL 0:00.03 [md8] 1052 ?? DL 0:00.00 [jsr_kkcm] 1337 ?? SL 0:00.11 [bcmTX] 1338 ?? SL 0:00.12 [bcmXGS3AsyncTX] 1339 ?? SL 0:03.82 [bcmLINK.0] 1344 ?? Is 0:00.00 /usr/sbin/cron 1496 ?? I 0:00.00 /sbin/watchdog -t-1 1497 ?? S 0:00.06 /usr/libexec/bslockd -mp -N 1498 ?? I 0:00.01 /usr/sbin/tnetd -N 1500 ?? S 0:09.93 /usr/sbin/chassisd -N 1501 ?? S 0:00.05 /usr/sbin/alarmd -N 1502 ?? I 0:00.39 /usr/sbin/craftd -N 1503 ?? S 0:00.09 /usr/sbin/mgd -N 1506 ?? I 0:00.05 /usr/sbin/inetd -N 1507 ?? I 0:00.00 /usr/sbin/tnp.sntpd -N 1508 ?? I 0:00.00 /usr/sbin/tnp.sntpc -N 1510 ?? S 0:00.01 /usr/sbin/smartd -N 1514 ?? I 0:00.07 /usr/sbin/jcsd -N 1515 ?? S 0:00.17 /usr/sbin/idpd -N 1516 ?? I 0:00.00 /usr/libexec/getty Pc ttyv0 2591 ?? DL 0:00.01 [peer proxy] 2592 ?? DL 0:00.01 [peer proxy] 2593 ?? DL 0:00.01 [peer proxy] 2597 ?? DL 0:00.01 [peer proxy] 3192 ?? S 0:00.02 /usr/sbin/irsd -N 3193 ?? S 0:00.05 /usr/sbin/snmpd -N 3194 ?? S 0:00.04 /sbin/dcd -N 3195 ?? I 0:00.01 /usr/sbin/pfed -N 3196 ?? S 0:00.02 /usr/sbin/mib2d -N 3197 ?? I 0:00.03 /usr/sbin/dfwd -N 3198 ?? S 0:00.15 /usr/sbin/ksyncd -N 3559 ?? Ss 0:00.00 mgd: (mgd) (root) (mgd) 3560 ?? R 0:00.00 /bin/ps -ax -Jpww 1138 d0- S 0:00.00 /usr/sbin/usbd -N 1156 d0- S 0:00.50 /usr/sbin/eventd -N -r -s -A 1517 d0 Is+ 0:00.00 /usr/libexec/getty std.9600 ttyd0
show system processes (QFX Series)
user@switch> show system processesPID TT STAT TIME COMMAND 0 ?? WLs -2341043:-31.01 [swapper] 1 ?? SLs 0:01.34 /packages/mnt/jbase/sbin/init --
Copyright © 2016, Juniper Networks, Inc.242
System Basics: Getting Started Configuration Guide

2 ?? DL 2:48.31 [g_event] 3 ?? DL 1:47.44 [g_up] 4 ?? DL 1:37.82 [g_down] 5 ?? DL 0:00.00 [kdm_tcp_poller] 6 ?? DL 0:00.00 [thread taskq] 7 ?? DL 0:04.86 [kqueue taskq] 9 ?? DL 0:03.94 [pagedaemon] 10 ?? DL 0:00.00 [ktrace] 11 ?? RL 0:00.00 [idle: cpu31] 12 ?? RL 0:00.00 [idle: cpu30] 13 ?? RL 0:00.00 [idle: cpu29] 14 ?? RL 0:00.00 [idle: cpu28] 15 ?? RL 0:00.00 [idle: cpu27] 16 ?? RL 0:00.00 [idle: cpu26] 17 ?? RL 0:00.00 [idle: cpu25] 18 ?? RL 0:00.00 [idle: cpu24] 19 ?? RL 0:00.00 [idle: cpu23] 20 ?? RL 0:00.00 [idle: cpu22] 21 ?? RL 0:00.00 [idle: cpu21] 22 ?? RL 0:00.00 [idle: cpu20] 23 ?? RL 0:00.00 [idle: cpu19] 24 ?? RL 0:00.00 [idle: cpu18] 25 ?? RL 0:00.00 [idle: cpu17] 26 ?? RL 0:00.00 [idle: cpu16] 27 ?? RL 0:00.00 [idle: cpu15] 28 ?? RL 0:00.00 [idle: cpu14] 29 ?? RL 0:00.00 [idle: cpu13] 30 ?? RL 0:00.00 [idle: cpu12] 31 ?? RL 0:00.00 [idle: cpu11] 32 ?? RL 0:00.00 [idle: cpu10] 33 ?? RL 0:00.00 [idle: cpu9] 34 ?? RL 18184:07.25 [idle: cpu8] 35 ?? RL 0:00.00 [idle: cpu7] 36 ?? RL 17862:11.31 [idle: cpu6] 37 ?? RL 19343:45.16 [idle: cpu5] 38 ?? RL 5192:38.30 [idle: cpu4] 39 ?? RL 0:00.00 [idle: cpu3] 40 ?? RL 19278:02.24 [idle: cpu2] 41 ?? RL 19291:00.72 [idle: cpu1] 42 ?? RL 18910:31.21 [idle: cpu0] 43 ?? WL 19:03.74 [swi2: net] 44 ?? WL 261:43.82 [swi7: clock sio] 45 ?? WL 0:00.00 [swi6: vm] 46 ?? DL 2:18.57 [yarrow] 47 ?? WL 0:00.00 [swi9: +] 48 ?? WL 0:00.00 [swi8: +] 49 ?? WL 0:12.36 [swi5: cambio] 50 ?? WL 0:00.00 [swi9: task queue] 51 ?? WL 0:00.00 [swi0: sio] 52 ?? WL 0:32.40 [irq39: ehci0] 53 ?? DL 0:00.21 [usb0] 54 ?? DL 0:00.00 [usbtask] 55 ?? WL 0:00.00 [irq22: xlr_lbus0] 56 ?? WL 0:00.00 [irq38: xlr_lbus0] 57 ?? WL 0:00.00 [swi3: ip6opt ipopt] 58 ?? WL 0:00.00 [swi4: ip6mismatch+] 59 ?? WL 0:00.00 [swi1: ipfwd] 60 ?? DL 0:18.65 [pagezero] 61 ?? DL 0:18.59 [bufdaemon] 62 ?? DL 1:10.44 [vnlru_mem] 63 ?? DL 1:51.66 [syncer]
243Copyright © 2016, Juniper Networks, Inc.
Chapter 9: System Software Monitoring Commands

64 ?? DL 0:20.22 [vnlru] 65 ?? DL 0:40.48 [softdepflush] 66 ?? DL 0:00.00 [netdaemon] 67 ?? DL 20:47.67 [vmkmemdaemon] 68 ?? DL 0:00.00 [if_pfe_listen] 69 ?? SL 0:02.80 [kdm_checkkcore] 70 ?? SL 0:03.34 [kdm_savekcore] 71 ?? SL 0:04.31 [kdm_livekcore] 72 ?? SL 0:06.14 [kdm_logger] 73 ?? SL 0:04.31 [kdm_kdb] 74 ?? SL 0:00.02 [devrt_kernel_thread] 75 ?? DL 0:21.54 [vmuncachedaemon] 76 ?? DL 0:00.00 [if_pic_listen0] 77 ?? SL 0:00.00 [nfsiod 0] 78 ?? SL 0:00.00 [nfsiod 1] 79 ?? SL 0:00.00 [nfsiod 2] 80 ?? SL 0:00.00 [nfsiod 3] 81 ?? WL 5:59.98 [irq13: +] 82 ?? RL 105:06.81 [pkt_sender: cpu0] 83 ?? DL 0:03.62 [md0] 95 ?? DL 0:37.04 [md1] 115 ?? DL 0:06.01 [md2] 135 ?? DL 0:00.75 [md3] 155 ?? DL 0:21.17 [md4] 175 ?? DL 0:01.90 [md5] 195 ?? DL 0:06.26 [md6] 231 ?? DL 0:00.01 [md7] 755 ?? Ss 0:04.17 /usr/sbin/cron 847 ?? S 0:00.10 /usr/sbin/tnetd -N 849 ?? S 0:06.82 /usr/sbin/mgd -N 850 ?? S 0:00.32 /usr/sbin/inetd -N 852 ?? S 1:05.34 /usr/sbin/dhcpd -N 853 ?? S 0:00.18 /usr/sbin/inetd -p /var/run/inetd_4.pid -N -JU __juni 855 ?? L 1181:02.21 /usr/sbin/dc-pfe -N (pafxpc) 857 ?? S 17:55.86 /usr/sbin/vccpd -N 896 ?? S 93:43.45 /usr/sbin/chassism -N 953 ?? S 0:02.89 /sbin/watchdog -t-1 954 ?? S 3:34.00 /sbin/dcd -N 955 ?? S 10:30.13 /usr/sbin/chassisd -N 956 ?? DL 0:00.21 [peer proxy] 957 ?? S 4:07.43 /usr/sbin/alarmd -N 958 ?? S 0:31.69 /usr/sbin/craftd -N 959 ?? S 0:55.16 /usr/sbin/mib2d -N 960 ?? S 3:40.64 /usr/sbin/rpd -N 961 ?? S 0:00.03 /usr/sbin/tnp.sntpd -N 962 ?? S 0:51.94 /usr/sbin/pfed -N 963 ?? S 0:47.31 /usr/sbin/rmopd -N 964 ?? S 0:33.65 /usr/sbin/cosd 965 ?? S 1:48.41 /usr/sbin/ppmd -N 966 ?? S 0:07.18 /usr/sbin/dfwd -N 967 ?? S 1:02.56 /usr/sbin/bfdd -N 968 ?? S 0:00.63 /usr/sbin/rdd -N 969 ?? S 0:40.61 /usr/sbin/dfcd -N 971 ?? S 0:07.81 /usr/sbin/bdbrepd -N 972 ?? S 0:00.28 /usr/sbin/sendd -N 973 ?? S 1:37.69 /usr/sbin/xntpd -j -N -g -JU __example_process4__ (nt 974 ?? S 5:56.28 /usr/sbin/snmpd -N -JU __example_process4__ 975 ?? S 16:46.82 /usr/sbin/jdiameterd -N 976 ?? S 2:34.13 /usr/sbin/eswd -N 977 ?? S 1:03.05 /usr/sbin/sflowd -N 978 ?? S 0:22.30 /usr/sbin/fcd -N
Copyright © 2016, Juniper Networks, Inc.244
System Basics: Getting Started Configuration Guide

979 ?? S 1:07.01 /usr/sbin/vccpdf -N 982 ?? S 0:25.25 /usr/sbin/mcsnoopd -N 983 ?? S 3:45.68 /usr/sbin/rpdf -N 1043 ?? S 0:37.87 /usr/sbin/lacpd -N 1048 ?? DL 0:01.29 [peer proxy] 1111 ?? WL 0:00.00 [swi2: FMNITHRD+] 1112 ?? DL 0:00.03 [peer proxy] 12816 ?? S 15:35.32 /usr/sbin/sfid -N30893 ?? Ss 0:00.65 sshd: tlewis@ttyp0 (sshd)30897 ?? Ss 0:00.15 mgd: (mgd) (tlewis)/dev/ttyp0 (mgd)30905 ?? Ss 0:00.64 sshd: tlewis@ttyp1 (sshd)30909 ?? Ss 0:00.15 mgd: (mgd) (tlewis)/dev/ttyp1 (mgd)30910 ?? Ss 0:01.26 sshd: tcheng@ttyp2 (sshd)30914 ?? Ss 0:00.80 mgd: (mgd) (tcheng)/dev/ttyp2 (mgd)30937 ?? R 0:00.03 /bin/ps -ax 661 d0- S 0:21.24 /usr/sbin/eventd -N -r -s -A 860 d0 Ss+ 0:00.07 /usr/libexec/getty std.9600 ttyd030896 p0 Ss+ 0:00.55 -cli (cli) 30908 p1 Ss+ 0:00.50 -cli (cli) 30913 p2 Ss+ 0:00.85 -cli (cli)
245Copyright © 2016, Juniper Networks, Inc.
Chapter 9: System Software Monitoring Commands

show system queues
List of Syntax Syntax on page 246
Syntax (TX Matrix Router) on page 246
Syntax (TX Matrix Plus Router) on page 246
Syntax (MX Series Router) on page 246
Syntax show system queues
Syntax (TXMatrixRouter)
show system queues<all-chassis| all-lcc | lcc number | scc>
Syntax(TXMatrixPlusRouter)
show system queues<all-chassis | all-lcc | lcc number | sfc number>
Syntax (MX SeriesRouter)
show system queues<all-members><local><membermember-id>
Release Information Command introduced before Junos OS Release 7.4.
sfc option introduced for the TX Matrix Plus router in Junos OS Release 9.6.
Description Display queue statistics.
Options all-chassis—(TX Matrix and TX Matrix Plus routers only) (Optional) On a TX Matrix router,
display system queue statistics for all the T640 routers in the chassis that are
connected to the TX Matrix router. On a TX Matrix Plus router, display system queue
statistics for all the T1600 routers in the chassis that are connected the TX Matrix
Plus router.
all-lcc—(TX Matrix and TX Matrix Plus routers only) (Optional) Display system queue
statistics for all LCC chassis attached to the TX Matrix or TX Matrix Plus routers.
all-members—(MX Series routers only) (Optional) Display system queue statistics for
all members of the Virtual Chassis configuration.
lccnumber—(TX Matrix and TX Matrix Plus routers only) (Optional) On a TX Matrix router,
display system queue statistics for a specific T640 router that is connected to the
TX Matrix router. On a TX Matrix Plus router, display system queue statistics for a
specific T1600 router that is connected to the TX Matrix Plus router. Replace number
with a value from 0 through 3.
local—(MX Series routers only) (Optional) Display system queue statistics for the local
Virtual Chassis member.
membermember-id—(MX Series routers only) (Optional) Display system queue statistics
for the specified member of the Virtual Chassis configuration. Replace member-id
with a value of 0 or 1.
scc—(TX Matrix routers only) (Optional) Display queue statistics for the TX Matrix router.
Copyright © 2016, Juniper Networks, Inc.246
System Basics: Getting Started Configuration Guide

sfc number—(TX Matrix Plus routers only) (Optional) Display system queue statistics for
the TX Matrix Plus router (or switch-fabric chassis). Replace number with 0.
Additional Information By default, when you issue the show system queues command on a TX Matrix or TX
Matrix Plus master Routing Engine, the command is broadcast to all the T640 (in a
routing matrix based on the TX Matrix router) or T1600 (in a routing matrix based on the
TX Matrix Plus router) master Routing Engines connected to it. Likewise, if you issue the
same command on the TX Matrix or TX Matrix Plus backup Routing Engine, the command
is broadcast to all the T640 (in a routing matrix based on the TX Matrix router) or T1600
(in a routing matrix based on the TX Matrix router) backup Routing Engines that are
connected to it.
Required PrivilegeLevel
maintenance
List of Sample Output show system queues on page 247show system queues scc (TXMatrix Router) on page 248show system queues sfc (TXMatrix Router) on page 248
Output Fields Table 10 on page 247 lists the output fields for the showsystemqueuescommand. Output
fields are listed in the approximate order in which they appear.
Table 10: show system queues Output Fields
Field DescriptionField Name
Interface on the router on which the queue exists:
• fxp0—Management Ethernet interface
• fxp1—Internal Ethernet interface
• lsi—Internally generated interface and not configurable
• dsc—Discard interface
Output interface
Number of bytes in the queue.bytes
Maximum number of bytes allowed in the queue.max
Number of packets in the queue.packets
Maximum number of packets allowed in the queue.max
Number of packets dropped from the queue.drops
Sample Output
show system queues
user@host> show system queuesoutput interface bytes max packets max dropsfxp0 0 1250000 0 4166 6fxp1 0 1250000 0 4166 19
247Copyright © 2016, Juniper Networks, Inc.
Chapter 9: System Software Monitoring Commands

lsi 0 12500 0 41 0dsc 0 0 0 0 0
show system queues scc (TXMatrix Router)
user@host> show system queues sccoutput interface bytes max packets max dropsfxp0 0 1250000 0 4166 5lsi 0 12500 0 41 0dsc 0 0 0 0 0lo0 0 0 0 0 0bcm0 0 12500000 0 30000 0em0 0 12500000 0 30000 0gre 0 12500 0 41 0ipip 0 12500 0 41 0tap 0 0 0 0 0pime 0 12500 0 41 0pimd 0 12500 0 41 0mtun 0 12500 0 41 0so-1/0/0 0 125000 0 416 0so-1/1/0 0 125000 0 416 0so-21/0/0 0 125000 0 416 0ge-21/1/0 0 1250000 0 4166 0ge-21/1/1 0 1250000 0 4166 3ge-21/2/0 0 1250000 0 4166 0ge-21/2/1 0 1250000 0 4166 3so-21/3/0 0 125000 0 416 0so-0/0/0 0 125000 0 416 0so-0/1/0 0 125000 0 416 0so-0/2/0 0 125000 0 416 0pd-0/3/0 0 12500 0 41 0pe-0/3/0 0 12500 0 41 0gr-0/3/0 0 12500 0 41 0ip-0/3/0 0 12500 0 41 0vt-0/3/0 0 12500 0 41 0mt-0/3/0 0 12500 0 41 0lt-0/3/0 0 12500 0 41 0so-17/0/0 0 125000 0 416 0input protocol bytes max packets max dropssplfwdq 0 1000000 0 1000 0splnetq 0 1000000 0 1000 0arpintrq 0 1000 0 50 0optionq 0 200000 0 200 0icmpq 0 50000 0 50 0frlmiq 0 0 0 0 0spppintrq 0 25000 0 250 0clnlintrq 0 200000 0 200 0tnpintrq 0 1250000 0 4166 0tagintrq 0 200000 0 200 0tagfragq 0 200000 0 200 0
show system queues sfc (TXMatrix Router)
user@host> show system queues sfc 0sfc0-re0:--------------------------------------------------------------------------output interface bytes max packets max dropsixgbe1 0 125000000 0 45000 4384ixgbe0 0 125000000 0 45000 0lsi 0 12500 0 41 0dsc 0 0 0 0 0
Copyright © 2016, Juniper Networks, Inc.248
System Basics: Getting Started Configuration Guide

lo0 0 0 0 0 0em0 0 12500000 0 41666 1gre 0 12500 0 41 0ipip 0 12500 0 41 0tap 0 0 0 0 0pime 0 12500 0 41 0pimd 0 12500 0 41 0mtun 0 12500 0 41 0xe-12/0/0 0 1250000 0 4166 0xe-12/0/1 0 1250000 0 4166 0xe-12/0/2 0 1250000 0 4166 0xe-12/0/3 0 1250000 0 4166 0xe-12/1/0 0 1250000 0 4166 0xe-12/1/1 0 1250000 0 4166 0xe-12/1/2 0 1250000 0 4166 0xe-12/1/3 0 1250000 0 4166 0xe-20/0/0 0 1250000 0 4166 0xe-20/0/1 0 1250000 0 4166 0xe-20/0/2 0 1250000 0 4166 0xe-20/0/3 0 1250000 0 4166 0xe-20/1/0 0 1250000 0 4166 0xe-20/1/1 0 1250000 0 4166 0xe-20/1/2 0 1250000 0 4166 0xe-20/1/3 0 1250000 0 4166 0ge-15/0/0 0 1250000 0 4166 75ge-15/0/1 0 1250000 0 4166 0ge-15/0/2 0 1250000 0 4166 75ge-15/0/3 0 1250000 0 4166 75ge-15/0/4 0 1250000 0 4166 0ge-15/0/5 0 1250000 0 4166 0ge-15/0/6 0 1250000 0 4166 0ge-15/0/7 0 1250000 0 4166 0ge-15/0/8 0 1250000 0 4166 0ge-15/0/9 0 1250000 0 4166 0xe-4/0/0 0 1250000 0 4166 0xe-4/0/1 0 1250000 0 4166 0xe-4/0/2 0 1250000 0 4166 0xe-4/0/3 0 1250000 0 4166 0xe-4/1/0 0 1250000 0 4166 0xe-4/1/1 0 1250000 0 4166 0xe-4/1/2 0 1250000 0 4166 0xe-4/1/3 0 1250000 0 4166 0xe-24/0/0 0 1250000 0 4166 0xe-24/0/1 0 1250000 0 4166 0xe-24/0/2 0 1250000 0 4166 0xe-24/0/3 0 1250000 0 4166 0xe-24/1/0 0 1250000 0 4166 0xe-24/1/1 0 1250000 0 4166 0xe-24/1/2 0 1250000 0 4166 0xe-24/1/3 0 1250000 0 4166 0ge-7/0/0 0 1250000 0 4166 0ge-7/0/1 0 1250000 0 4166 0ge-7/0/2 0 1250000 0 4166 0ge-7/0/3 0 1250000 0 4166 75ge-7/0/4 0 1250000 0 4166 0ge-7/0/5 0 1250000 0 4166 0ge-7/0/6 0 1250000 0 4166 0ge-7/0/7 0 1250000 0 4166 0ge-7/0/8 0 1250000 0 4166 0ge-7/0/9 0 1250000 0 4166 0so-7/1/0 0 125000 0 416 0
249Copyright © 2016, Juniper Networks, Inc.
Chapter 9: System Software Monitoring Commands

so-7/2/0 0 125000 0 416 0xe-21/0/0 0 1250000 0 4166 0xe-21/0/1 0 1250000 0 4166 0xe-21/0/2 0 1250000 0 4166 0xe-21/0/3 0 1250000 0 4166 0xe-21/1/0 0 1250000 0 4166 0xe-21/1/1 0 1250000 0 4166 0xe-21/1/2 0 1250000 0 4166 0xe-21/1/3 0 1250000 0 4166 0xe-14/0/0 0 1250000 0 4166 0xe-14/0/1 0 1250000 0 4166 0xe-14/0/2 0 1250000 0 4166 0xe-14/0/3 0 1250000 0 4166 0xe-14/1/0 0 1250000 0 4166 0xe-14/1/1 0 1250000 0 4166 0xe-14/1/2 0 1250000 0 4166 0xe-14/1/3 0 1250000 0 4166 0xe-25/0/0 0 1250000 0 4166 0xe-25/0/1 0 1250000 0 4166 0xe-25/0/2 0 1250000 0 4166 0xe-25/0/3 0 1250000 0 4166 0xe-25/1/0 0 1250000 0 4166 0xe-25/1/1 0 1250000 0 4166 0xe-25/1/2 0 1250000 0 4166 0xe-25/1/3 0 1250000 0 4166 0so-22/0/0 0 125000 0 416 0so-22/0/1 0 125000 0 416 0so-22/0/2 0 125000 0 416 0so-22/0/3 0 125000 0 416 0xe-22/1/0 0 1250000 0 4166 0xe-22/1/1 0 1250000 0 4166 0xe-22/1/2 0 1250000 0 4166 0xe-22/1/3 0 1250000 0 4166 0xe-6/0/0 0 1250000 0 4166 0xe-6/0/1 0 1250000 0 4166 0xe-6/0/2 0 1250000 0 4166 0xe-6/0/3 0 1250000 0 4166 0xe-6/1/0 0 1250000 0 4166 0xe-6/1/1 0 1250000 0 4166 0xe-6/1/2 0 1250000 0 4166 0xe-6/1/3 0 1250000 0 4166 0xe-26/0/0 0 1250000 0 4166 0xe-26/0/1 0 1250000 0 4166 0xe-26/0/2 0 1250000 0 4166 0xe-26/0/3 0 1250000 0 4166 0xe-26/1/0 0 1250000 0 4166 0xe-26/1/1 0 1250000 0 4166 0xe-26/1/2 0 1250000 0 4166 0xe-26/1/3 0 1250000 0 4166 0ge-31/0/0 0 1250000 0 4166 0ge-31/0/1 0 1250000 0 4166 0ge-31/0/2 0 1250000 0 4166 0ge-31/0/3 0 1250000 0 4166 0ge-31/0/4 0 1250000 0 4166 75ge-31/0/5 0 1250000 0 4166 0ge-31/0/6 0 1250000 0 4166 75ge-31/0/7 0 1250000 0 4166 0ge-31/0/8 0 1250000 0 4166 0ge-31/0/9 0 1250000 0 4166 0pd-31/1/0 0 12500 0 41 0pe-31/1/0 0 12500 0 41 0
Copyright © 2016, Juniper Networks, Inc.250
System Basics: Getting Started Configuration Guide

gr-31/1/0 0 12500 0 41 0ip-31/1/0 0 12500 0 41 0vt-31/1/0 0 12500 0 41 0mt-31/1/0 0 12500 0 41 0lt-31/1/0 0 12500 0 41 0so-29/0/0 0 125000 0 416 0so-29/0/1 0 125000 0 416 0so-29/0/2 0 125000 0 416 0so-29/0/3 0 125000 0 416 0xe-29/1/0 0 1250000 0 4166 0xe-29/1/1 0 1250000 0 4166 0xe-29/1/2 0 1250000 0 4166 0xe-29/1/3 0 1250000 0 4166 0so-28/0/0 0 125000 0 416 0so-28/0/1 0 125000 0 416 0so-28/0/2 0 125000 0 416 0so-28/0/3 0 125000 0 416 0ge-23/0/0 0 1250000 0 4166 0ge-23/0/1 0 1250000 0 4166 0ge-23/0/2 0 1250000 0 4166 0ge-23/0/3 0 1250000 0 4166 0ge-23/0/4 0 1250000 0 4166 0ge-23/0/5 0 1250000 0 4166 0ge-23/0/6 0 1250000 0 4166 0ge-23/0/7 0 1250000 0 4166 0ge-23/0/8 0 1250000 0 4166 0ge-23/0/9 0 1250000 0 4166 0input protocol bytes max packets max dropssplfwdq 0 1000000 0 1000 0splnetq 0 1000000 0 1000 0arpintrq 0 1000 0 50 0optionq 0 200000 0 200 0icmpq 0 50000 0 50 0frlmiq 0 0 0 0 0spppintrq 0 25000 0 250 0atmctlpktq 0 0 0 0 0atmoamq 0 0 0 0 0tnpintrq 0 1250000 0 4166 0tagintrq 0 200000 0 200 0tagfragq 0 200000 0 200 0
251Copyright © 2016, Juniper Networks, Inc.
Chapter 9: System Software Monitoring Commands

show system reboot
List of Syntax Syntax on page 252
Syntax (EX Series Switches) on page 252
Syntax (TX Matrix Router) on page 252
Syntax (TX Matrix Plus Router) on page 252
Syntax (MX Series Router) on page 252
Syntax (QFX Series) on page 252
Syntax show system reboot<both-routing-engines>
Syntax (EX SeriesSwitches)
show system reboot<all-members><both-routing-engines><local><membermember-id>
Syntax (TXMatrixRouter)
show system reboot<all-chassis | all-lcc | lcc number | scc><both-routing-engines>
Syntax(TXMatrixPlusRouter)
show system reboot<all-chassis| all-lcc | lcc number | sfc number><both-routing-engines>
Syntax (MX SeriesRouter)
show system reboot<all-members><both-routing-engines><local><membermember-id>
Syntax (QFX Series) show system reboot<both-routing-engines><infrastructure name><interconnect-device name><node-device name>
Release Information Command introduced before Junos OS Release 7.4.
Command introduced in Junos OS Release 9.0 for EX Series switches.
sfc option introduced for the TX Matrix Plus router in Junos OS Release 9.6.
Command introduced in Junos OS Release 11.1 for the QFX Series.
Description Display pending system reboots or halts.
Options none—Display pending reboots or halts on the active Routing Engine.
all-chassis—(TX Matrix and TX Matrix Plus routers only) (Optional) On a TX Matrix router,
display halt or reboot request information for all the T640 routers in the chassis that
are connected to the TX Matrix router. On a TX Matrix router, display halt or reboot
request information for all the T1600 routers in the chassis that are connected to
the TX Matrix Plus router.
Copyright © 2016, Juniper Networks, Inc.252
System Basics: Getting Started Configuration Guide

all-members—(EX4200 switches and MX Series routers only) (Optional) Display halt or
reboot request information for all members of the Virtual Chassis configuration.
all-lcc—(TX Matrix and TX Matrix Plus routers only) (Optional) On a TX Matrix router,
display system halt or reboot request information for all T640 routers (or line-card
chassis) connected to the TX Matrix router. On a TX Matrix Plus router, display halt
or reboot request information for all T1600 routers (or line-card chassis) connected
to the TX Matrix Plus router
both-routing-engines—(Systems with multiple Routing Engines) (Optional) Display halt
or reboot request information on both Routing Engines.
infrastructure name—(QFabric systems only) (Optional) Display reboot request
information on the fabric manager Routing Engines and fabric control Routing Engines.
interconnect-device name—(QFabric systems only) (Optional) Display reboot request
information on the Interconnect device.
lccnumber—(TX Matrix and TX Matrix Plus routers only) (Optional) On a TX Matrix router,
display halt or reboot request information for a specific T640 router that is connected
to the TX Matrix router. On a TX Matrix Plus router, display halt or reboot request
information for a specific T1600 router that is connected to the TX Matrix Plus router.
Replace number with a value from 0 through 3.
local—(EX4200 switches and MX Series routers only) (Optional) Display halt or reboot
request information for the local Virtual Chassis member.
membermember-id—(EX4200 switches and MX Series routers only) (Optional) Display
halt or reboot request information for the specified member of the Virtual Chassis
configuration. For EX4200 switches, replacemember-idwith a value from 0 through
9. For an MX Series Virtual Chassis, replace member-id with a value of 0 or 1.
node-groupname—(QFabric systems only) (Optional) Display reboot request information
on the Node group.
scc—(TX Matrix router only) (Optional) Display halt or reboot request information for
the TX Matrix router (or switch-card chassis).
sfc—(TX Matrix Plus router only) (Optional) Display halt or reboot request information
for the TX Matrix Plus router (or switch-fabric chassis).
Additional Information By default, when you issue the showsystemreboot command on a TX Matrix or TX Matrix
Plus master Routing Engine, the command is broadcast to all the T640 (in a routing
matrix based on the TX Matrix router) or T1600 (in a routing matrix based on the TX
Matrix Plus router) master Routing Engines connected to it. Likewise, if you issue the
same command on the TX Matrix or TX Matrix Plus backup Routing Engine, the command
is broadcast to all the T640 (in a routing matrix based on the TX Matrix router) or T1600
(in a routing matrix based on the TX Matrix Plus router) backup Routing Engines that are
connected to it.
253Copyright © 2016, Juniper Networks, Inc.
Chapter 9: System Software Monitoring Commands

Required PrivilegeLevel
maintenance
List of Sample Output show system reboot on page 254show system reboot all-lcc (TXMatrix Router) on page 254show system reboot sfc (TXMatrix Plus Router) on page 254show system reboot (QFX3500 Switch) on page 254
Sample Output
show system reboot
user@host> show system rebootreboot requested by root at Wed Feb 10 17:40:46 1999[process id 17885]
show system reboot all-lcc (TXMatrix Router)
user@host> show system reboot all-lcclcc0-re0:--------------------------------------------------------------------------No shutdown/reboot scheduled.
lcc2-re0:--------------------------------------------------------------------------No shutdown/reboot scheduled.
show system reboot sfc (TXMatrix Plus Router)
user@host> show system sfc 0No shutdown/reboot scheduled.
show system reboot (QFX3500 Switch)
user@switch> show system rebootNo shutdown/reboot scheduled.
Copyright © 2016, Juniper Networks, Inc.254
System Basics: Getting Started Configuration Guide

show system rollback
Syntax show system rollback number<compare number>
Release Information Command introduced before Junos OS Release 7.4.
Command introduced in Junos OS Release 9.0 for EX Series switches.
Command introduced in Junos OS Release 11.1 for the QFX Series.
Description Display the contents of a previously committed configuration, or the differences between
two previously committed configurations.
NOTE: The show system rollback command is a purely operational mode
command and cannot be issued with run from the configurationmode.
Options number—Number of a configuration to view. The output displays the configuration. The
range of values is 0 through 49.
compare number—(Optional) Number of another previously committed (rollback)
configuration to compare to rollback number. The output displays the differences
between the two configurations. The range of values is 0 through 49.
Required PrivilegeLevel
view
List of Sample Output show system rollback compare on page 255
Sample Output
show system rollback compare
user@host> show system rollback 3 compare 1[edit]+ interfaces {+ ge-1/1/1 {+ unit 0 {+ family inet {+ filter {+ input mf_plp;+ }+ address 14.1.1.1/30;+ }+ }+ }+ ge-1/2/1 {+ unit 0 {+ family inet {+ filter {+ input mf_plp;+ }+ address 13.1.1.1/30;+ }
255Copyright © 2016, Juniper Networks, Inc.
Chapter 9: System Software Monitoring Commands

+ }+ }+ ge-1/3/0 {+ unit 0 {+ family inet {+ filter {+ input mf_plp;+ }+ address 12.1.1.1/30;+ }+ }+ }+}
Copyright © 2016, Juniper Networks, Inc.256
System Basics: Getting Started Configuration Guide

show system snapshot
List of Syntax Syntax on page 257
Syntax (EX Series Switches) on page 257
Syntax show system snapshot
Syntax (EX SeriesSwitches)
show system snapshot<all-members|local|membermember-id><media (external | internal)>
Release Information Command introduced in Junos OS Release 7.6.
Command introduced in Junos OS Release 10.0 for EX Series switches.
Description Display information about the backup software:
• On the routers, display information about the backup software, which is located in the
/altroot, and /altconfig file systems or on the alternate media.
• On the switches, display information about the backup of the root file system (/) and
directories /altroot,/config, /var, and /var/tmp, which are located either on an external
USB flash drive or in internal flash memory.
NOTE: To back up software, use the request system snapshot command.
Options none—Display information about the backup software.
all-members | local | membermember-id—(EX Series switch Virtual Chassis only)
(Optional) Display the snapshot in a Virtual Chassis:
• all-members—Display the snapshot for all members of the Virtual Chassis.
• local—Display the snapshot on the member of the Virtual Chassis that you are
currently logged into.
• membermember-id—Display the snapshot for the specified member of the Virtual
Chassis.
media (external | internal)—(EX Series switch only) (Optional) Display the destination
media location for the snapshot. The external option specifies the snapshot on an
external mass storage device, such as a USB flash drive. The internaloption specifies
the snapshot on an internal memory source, such as internal flash memory. If no
additional options are specified, the command displays the snapshot stored in both
slices.
Required PrivilegeLevel
view
257Copyright © 2016, Juniper Networks, Inc.
Chapter 9: System Software Monitoring Commands

RelatedDocumentation
request system snapshot on page 189•
List of Sample Output show system snapshot (Router) on page 258show system snapshotmedia external (Switch) on page 258show system snapshotmedia internal (Switch) on page 259
Output Fields Table 11 on page 258 lists the output fields for theshowsystemsnapshotcommand. Output
fields are listed in the approximate order in which they appear.
Table 11: show system snapshot Output Fields
Field DescriptionField Name
Date and time of the last snapshot.Creation date
Junos OS release number of individual softwarepackages.
JUNOS version on snapshot
Sample Output
show system snapshot (Router)
user@host> show system snapshotInformation for snapshot on hard-diskCreation date: Oct 5 13:53:29 2005JUNOS version on snapshot: jbase : 7.3R2.5 jcrypto: 7.3R2.5 jdocs : 7.3R2.5 jkernel: 7.3R2.5 jpfe : M40-7.3R2.5 jroute : 7.3R2.5
show system snapshotmedia external (Switch)
user@switch> show system snapshotmedia externalInformation for snapshot on external (/dev/da1s1a) (backup)Creation date: Mar 19 03:37:18 2012JUNOS version on snapshot: jbase : ex-12.1I20120111_0048_user jcrypto-ex: 12.1I20120111_0048_user jdocs-ex: 12.1I20120111_0048_user jroute-ex: 12.1I20120111_0048_user jswitch-ex: 12.1I20120111_0048_user jweb-ex: 12.1I20120111_0048_userInformation for snapshot on external (/dev/da1s2a) (primary)Creation date: Mar 19 03:38:25 2012JUNOS version on snapshot: jbase : ex-12.2I20120305_2240_user jcrypto-ex: 12.2I20120305_2240_user jdocs-ex: 12.2I20120305_2240_user jroute-ex: 12.2I20120305_2240_user jswitch-ex: 12.2I20120305_2240_user jweb-ex: 12.2I20120305_2240_user
Copyright © 2016, Juniper Networks, Inc.258
System Basics: Getting Started Configuration Guide

show system snapshotmedia internal (Switch)
user@switch> show system snapshotmedia internalInformation for snapshot on internal (/dev/da0s1a) (backup)Creation date: Mar 14 05:01:02 2011JUNOS version on snapshot: jbase : 11.1R1.9 jcrypto-ex: 11.1R1.9 jdocs-ex: 11.1R1.9 jkernel-ex: 11.1R1.9 jroute-ex: 11.1R1.9 jswitch-ex: 11.1R1.9 jweb-ex: 11.1R1.9 jpfe-ex42x: 11.1R1.9Information for snapshot on internal (/dev/da0s2a) (primary)Creation date: Mar 30 08:46:27 2011JUNOS version on snapshot: jbase : 11.2-20110330.0 jcrypto-ex: 11.2-20110330.0 jdocs-ex: 11.2-20110330.0 jkernel-ex: 11.2-20110330.0 jroute-ex: 11.2-20110330.0 jswitch-ex: 11.2-20110330.0 jweb-ex: 11.2-20110330.0 jpfe-ex42x: 11.2-20110330.0
259Copyright © 2016, Juniper Networks, Inc.
Chapter 9: System Software Monitoring Commands

show system software
List of Syntax Syntax on page 260
Syntax (EX Series Switches) on page 260
Syntax (TX Matrix Router) on page 260
Syntax (TX Matrix Plus Router) on page 260
Syntax (J Series Routers) on page 260
Syntax (QFX Series) on page 260
Syntax show system software<detail>
Syntax (EX SeriesSwitches)
show system software<all-members><detail><local><membermember-id>
Syntax (TXMatrixRouter)
show system software<all-chassis | all-lcc | lcc number | scc><detail>
Syntax(TXMatrixPlusRouter)
show system software<all-chassis | all-lcc | lcc number | sfc number><detail>
Syntax (J SeriesRouters)
show system software<backup><detail>
Syntax (QFX Series) show system software<detail><infrastructure name><interconnect-device name><node-group name>
Release Information Command introduced before Junos OS Release 7.4.
Command introduced in Junos OS Release 9.0 for EX Series switches.
sfc option introduced for the TX Matrix Plus router in Junos OS Release 9.6.
Command introduced in Junos OS Release 11.1 for the QFX Series.
Description Display the Junos OS extensions loaded on your router or switch.
Options none—Display standard information about all loaded Junos OS extensions.
all-chassis—(TX Matrix and TX Matrix Plus routers only) (Optional) Display system
software information for all the T640 routers (TX Matrix Router) or all the T1600
routers (TX Matrix Plus Router) in the chassis.
all-lcc—(TX Matrix and TX Matrix Plus routers only) (Optional) On a TX Matrix router,
display system software information for all T640 routers (or line-card chassis)
connected to the TX Matrix router. On a TX Matrix Plus router, display system software
Copyright © 2016, Juniper Networks, Inc.260
System Basics: Getting Started Configuration Guide

information for all T1600 routers (or line-card chassis) connected to the TX Matrix
Plus router
all-members—(EX4200 switches only) (Optional) Display the system software running
on all members of the Virtual Chassis configuration.
backup—(J Series routers only) (Optional) Display the status of old system software
packages only.
detail—(Optional) Display detailed information about available Junos OS extensions.
infrastructure name—(QFabric systems only) (Optional) Display the system software
running on the fabric control Routing Engine and the fabric manager Routing Engine.
interconnect-devicename—(QFabric systems only) (Optional) Display the system software
running on the Interconnect device.
lccnumber—(TX Matrix and TX Matrix Plus routers only) (Optional) On a TX Matrix router,
display system software information for a specific T640 router that is connected to
the TX Matrix router. On a TX Matrix Plus router, display system software information
for a specific T1600 router that is connected to the TX Matrix Plus router. Replace
number with a value from 0 through 3.
local—(EX4200 switches only) (Optional) Display the system software running on the
local Virtual Chassis member.
membermember-id—(EX4200 switches only) (Optional) Display the system software
running on the specified member of the Virtual Chassis configuration. Replace
member-id with a value from 0 through 9.
node-group name—(QFabric systems only) (Optional) Display the system software
running on the Node group.
scc—(Routing matrix only) (Optional) Display the system software running on a TX Matrix
router (or switch-card chassis).
sfc—(TX Matrix Plus routers only) (Optional) Display system software information for
the TX Matrix Plus router (or switch-fabric chassis).
Required PrivilegeLevel
maintenance
List of Sample Output show system software on page 262show system software (TXMatrix Plus Router) on page 262show system software (QFX Series) on page 266
Output Fields When you enter this command, you are provided a list of Junos OS packages installed
on the router and their corresponding Junos OS release number.
261Copyright © 2016, Juniper Networks, Inc.
Chapter 9: System Software Monitoring Commands

Sample Output
show system software
user@host> show system softwareInformation for jbase:
Comment:JUNOS Base OS Software Suite [7.2R1.7]
Information for jcrypto:
Comment:JUNOS Crypto Software Suite [7.2R1.7]Information for jdocs:
Comment:JUNOS Online Documentation [7.2R1.7]
Information for jkernel:
Comment:JUNOS Kernel Software Suite [7.2R1.7]
Information for jpfe:
Comment:JUNOS Packet Forwarding Engine Support (M20/M40) [7.2R1.7]
Information for jroute:
Comment:JUNOS Routing Software Suite [7.2R1.7]
Information for junos:
Comment:JUNOS Base OS boot [7.2R1.7]
show system software (TXMatrix Plus Router)
user@host> show system softwaresfc0-re0:--------------------------------------------------------------------------Information for jbase:
Comment:JUNOS Base OS Software Suite [9.6-20090515.0]
Information for jcrypto:
Comment:JUNOS Crypto Software Suite [9.6-20090515.0]
Copyright © 2016, Juniper Networks, Inc.262
System Basics: Getting Started Configuration Guide

Information for jdocs:
Comment:JUNOS Online Documentation [9.6-20090515.0]Information for jkernel:
Comment:JUNOS Kernel Software Suite [9.6-20090515.0]
Information for jpfe:
Comment:JUNOS Packet Forwarding Engine Support (T-Series) [9.6-20090515.0]
Information for jpfe-common:
Comment:JUNOS Packet Forwarding Engine Support (M/T Common) [9.6-20090515.0]
Information for jroute:Comment: JUNOS Routing Software Suite [9.6-20090515.0]
Information for jservices-aacl:
Comment:JUNOS Services AACL Container package [9.6-20090515.0]
Information for jservices-appid:
Comment:JUNOS AppId Services [9.6-20090515.0]
Information for jservices-bgf:
Comment:JUNOS Border Gateway Function package [9.6-20090515.0]Information for jservices-idp:
Comment:JUNOS IDP Services [9.6-20090515.0]
Information for jservices-llpdf:
Comment:JUNOS Services LL-PDF Container package [9.6-20090515.0]
263Copyright © 2016, Juniper Networks, Inc.
Chapter 9: System Software Monitoring Commands

Information for jservices-sfw:
Comment:JUNOS Services Stateful Firewall [9.6-20090515.0]Information for jservices-voice:
Comment:JUNOS Voice Services Container package [9.6-20090515.0]
Information for junos:
Comment:JUNOS Base OS boot [9.6-20090515.0]...lcc0-re0:--------------------------------------------------------------------------Information for jbase:
Comment:JUNOS Base OS Software Suite [9.6-20090515.0]
Information for jcrypto:
Comment:JUNOS Crypto Software Suite [9.6-20090515.0]
Information for jdocs:
Comment:JUNOS Online Documentation [9.6-20090515.0]
Information for jkernel:
Comment:JUNOS Kernel Software Suite [9.6-20090515.0]
Information for jpfe:
Comment:JUNOS Packet Forwarding Engine Support (T-Series) [9.6-20090515.0]
Information for jpfe-common:
Comment:JUNOS Packet Forwarding Engine Support (M/T Common) [9.6-20090515.0]
Copyright © 2016, Juniper Networks, Inc.264
System Basics: Getting Started Configuration Guide

Information for jroute:
Comment:JUNOS Routing Software Suite [9.6-20090515.0]
Information for jservices-aacl:
Comment:JUNOS Services AACL Container package [9.6-20090515.0]
Information for jservices-appid:
Comment:JUNOS AppId Services [9.6-20090515.0]
Information for jservices-bgf:
Comment:JUNOS Border Gateway Function package [9.6-20090515.0]
Information for jservices-idp:
Comment:JUNOS IDP Services [9.6-20090515.0]
Information for jservices-llpdf:
Comment:JUNOS Services LL-PDF Container package [9.6-20090515.0]
Information for jservices-sfw:
Comment:JUNOS Services Stateful Firewall [9.6-20090515.0]
Information for jservices-voice:
Comment:JUNOS Voice Services Container package [9.6-20090515.0]
Information for junos:
Comment:
265Copyright © 2016, Juniper Networks, Inc.
Chapter 9: System Software Monitoring Commands

JUNOS Base OS boot [9.6-20090515.0]
lcc1-re0:--------------------------------------------------------------------------Information for jbase:
Comment:JUNOS Base OS Software Suite [9.6-20090515.0]
Information for jcrypto:
Comment:JUNOS Crypto Software Suite [9.6-20090515.0]...
show system software (QFX Series)
user@switch> show system softwareInformation for jbase:
Comment:JUNOS Base OS Software Suite [11.3-20110730.0]
Information for jcrypto:
Comment:JUNOS Crypto Software Suite [11.3-20110730.0]
Information for jdocs:
Comment:JUNOS Online Documentation [11.3-20110730.0]
Information for jkernel:
Comment:JUNOS Kernel Software Suite [11.3-20110730.0]
Information for jpfe:
Comment:JUNOS Packet Forwarding Engine Support (QFX) [11.3-20110730.0]
Information for jroute:
Comment:JUNOS Routing Software Suite [11.3-20110730.0]
Copyright © 2016, Juniper Networks, Inc.266
System Basics: Getting Started Configuration Guide

Information for jswitch:
Comment:JUNOS Enterprise Software Suite [11.3-20110730.0]
Information for junos:
Comment:JUNOS Base OS boot [11.3-20110730.0]
Information for jweb:
Comment:JUNOS Web Management [11.3-20110730.0]
267Copyright © 2016, Juniper Networks, Inc.
Chapter 9: System Software Monitoring Commands

show system statistics
List of Syntax Syntax on page 268
Syntax (EX Series Switches) on page 268
Syntax (TX Matrix Router) on page 268
Syntax (TX Matrix Plus Router) on page 268
Syntax (MX Series Router) on page 268
Syntax (QFX Series) on page 268
Syntax show system statistics
Syntax (EX SeriesSwitches)
show system statistics<all-members><local><membermember-id>
Syntax (TXMatrixRouter)
show system statistics<all-chassis | all-lcc | lcc number | scc>
Syntax(TXMatrixPlusRouter)
show system statistics<all-chassis | all-lcc | lcc number | sfc number>
Syntax (MX SeriesRouter)
show system statistics<all-members><local><membermember-id>
Syntax (QFX Series) show system statistics
Release Information Command introduced before JUNOS Release 7.4.
Command introduced in Junos OS Release 9.0 for EX Series switches.
sfc option introduced for the TX Matrix Plus router in JUNOS Release 9.6.
Command introduced in Junos OS Release 11.1 for the QFX Series.
Description Display system-wide protocol-related statistics.
Options none—Display system statistics for all the following protocols:
• arp—Address Resolution Protocol
• bridge—IEEE 802.1 Bridging
• clns—Connectionless Network Service
• esis—End System-to-Intermediate System
• ethoamcfm—Ethernet OAM protocol for connectivity fault management
• ethoamlfm—Ethernet OAM protocol for link fault management
• icmp—Internet Control Message Protocol
• icmp6—Internet Control Message Protocol version 6
• igmp—Internet Group Management Protocol
Copyright © 2016, Juniper Networks, Inc.268
System Basics: Getting Started Configuration Guide

• ip—Internet Protocol version 4
• ip6—Internet Protocol version 6
• mpls—Multiprotocol Label Switching
• rdp—Reliable Datagram Protocol
• tcp—Transmission Control Protocol
• tnp—Trivial Network Protocol
• ttp—TNP Tunneling Protocol
• tudp—Trivial User Datagram Protocol
• udp—User Datagram Protocol
• vpls—Virtual Private LAN Service
all-chassis—(TX Matrix and TX Matrix Plus routers only) (Optional) Display system
statistics for a protocol for all the routers in the chassis.
all-lcc—(TX Matrix and TX Matrix Plus routers only) (Optional) On a TX Matrix router,
display system statistics for a protocol for all T640 routers (or line-card chassis)
connected to the TX Matrix router. On a TX Matrix Plus router, display system
statistics for a protocol for all T1600 routers (or line-card chassis) connected to the
TX Matrix Plus router
all-members—(EX4200 switches and MX Series routers only) (Optional) Display system
statistics for a protocol for all members of the Virtual Chassis configuration.
lccnumber—(TX Matrix and TX Matrix Plus routers only) (Optional) On a TX Matrix router,
display system statistics for a protocol for a specific T640 router that is connected
to the TX Matrix router. On a TX Matrix Plus router, display system statistics for a
protocol for a specific T1600 router that is connected to the TX Matrix Plus router.
Replace number with a value from 0 through 3.
local—(EX4200 switches and MX Series routers only) (Optional) Display system statistics
for a protocol for the local Virtual Chassis member.
membermember-id—(EX4200 switches and MX Series routers only) (Optional) Display
system statistics for a protocol for the specified member of the Virtual Chassis
configuration. For EX4200 switches, replacemember-idwith a value from 0 through
9. For an MX Series Virtual Chassis, replace member-id with a value of 0 or 1.
scc—(TX Matrix routers only) (Optional) Display system statistics for a protocol for the
TX Matrix router (or switch-card chassis).
sfc number—(TX Matrix Plus routers only) (Optional) Display system statistics for a
protocol for the TX Matrix Plus router (or switch-fabric chassis). Replace number
with 0.
Additional Information By default, when you issue the show system statistics command on a TX Matrix or TX
Matrix Plus master Routing Engine, the command is broadcast to all the T640 (in a
269Copyright © 2016, Juniper Networks, Inc.
Chapter 9: System Software Monitoring Commands

routing matrix based on the TX Matrix router) or T1600 (in a routing matrix based on the
TX Matrix Plus router) master Routing Engines connected to it. Likewise, if you issue the
same command on the TX Matrix or TX Matrix Plus backup Routing Engine, the command
is broadcast to all the T640 (in a routing matrix based on the TX Matrix router) or T1600
(in a routing matrix based on the TX Matrix Plus router) backup Routing Engines that are
connected to it.
Required PrivilegeLevel
view
List of Sample Output show system statistics on page 270show system statistics (EX Series Switches) on page 277show system statistics (TXMatrix Router) on page 286show system statistics (QFX Series) on page 293
Sample Output
show system statistics
user@host> show system statisticsip: 3682087 total packets received 0 bad header checksums 0 with size smaller than minimum 0 with data size < data length 0 with header length < data size 0 with data length < header length 0 with incorrect version number 0 packets destined to dead next hop 0 fragments received 0 fragments dropped (dup or out of space) 0 fragments dropped (queue overflow) 0 fragments dropped after timeout 0 fragments dropped due to over limit 0 packets reassembled ok 3664774 packets for this host 17316 packets for unknown/unsupported protocol 0 packets forwarded 0 packets not forwardable 0 redirects sent 6528 packets sent from this host 0 packets sent with fabricated ip header 0 output packets dropped due to no bufs 0 output packets discarded due to no route 0 output datagrams fragmented 0 fragments created 0 datagrams that can't be fragmented 0 packets with bad options 1123 packets with options handled without error 0 strict source and record route options 0 loose source and record route options 0 record route options 0 timestamp options 0 timestamp and address options 0 timestamp and prespecified address options 0 option packets dropped due to rate limit 1123 router alert options 0 multicast packets dropped (no iflist) 0 packets dropped (src and int don't match)
Copyright © 2016, Juniper Networks, Inc.270
System Basics: Getting Started Configuration Guide

icmp: 0 drops due to rate limit 0 calls to icmp_error 0 errors not generated because old message was icmp Output histogram: echo reply: 75 0 messages with bad code fields 0 messages less than the minimum length 0 messages with bad checksum 0 messages with bad source address 0 messages with bad length 0 echo drops with broadcast or multicast destination address 0 timestamp drops with broadcast or multicast destination address Input histogram: echo: 75 router advertisement: 130 75 message responses generatedtcp: 3844 packets sent 3618 data packets (1055596 bytes) 0 data packets (0 bytes) retransmitted 0 resends initiated by MTU discovery 205 ack-only packets (148 packets delayed) 0 URG only packets 0 window probe packets 0 window update packets 1079 control packets 5815 packets received 3377 acks (for 1055657 bytes) 24 duplicate acks 0 acks for unsent data 2655 packets (15004 bytes) received in-sequence 1 completely duplicate packet (0 bytes) 0 old duplicate packets 0 packets with some dup. data (0 bytes duped) 0 out-of-order packets (0 bytes) 0 packets (0 bytes) of data after window 0 window probes 7 window update packets 0 packets received after close 0 discarded for bad checksums 0 discarded for bad header offset fields 0 discarded because packet too short 1 connection request 32 connection accepts 0 bad connection attempts 0 listen queue overflows 33 connections established (including accepts) 30 connections closed (including 0 drops) 27 connections updated cached RTT on close 27 connections updated cached RTT variance on close 0 connections updated cached ssthresh on close 0 embryonic connections dropped 3374 segments updated rtt (of 3220 attempts) 0 retransmit timeouts 0 connections dropped by rexmit timeout 0 persist timeouts 0 connections dropped by persist timeout 344 keepalive timeouts 0 keepalive probes sent 0 connections dropped by keepalive
271Copyright © 2016, Juniper Networks, Inc.
Chapter 9: System Software Monitoring Commands

1096 correct ACK header predictions 1314 correct data packet header predictions 32 syncache entries added 0 retransmitted 0 dupsyn 0 dropped 32 completed 0 bucket overflow 0 cache overflow 0 reset 0 stale 0 aborted 0 badack 0 unreach 0 zone failures 0 cookies sent 0 cookies received 0 ACKs sent in response to in-window but not exact RSTs 0 ACKs sent in response to in-window SYNs on established connections 0 rcv packets dropped by TCP due to bad address 0 out-of-sequence segment drops due to insufficient memory 1058 RST packets 0 ICMP packets ignored by TCP 0 send packets dropped by TCP due to auth errors 0 rcv packets dropped by TCP due to auth errorsudp: 3658884 datagrams received 0 with incomplete header 0 with bad data length field 0 with bad checksum 3657342 dropped due to no socket 3657342 broadcast/multicast datagrams dropped due to no socket 0 dropped due to full socket buffers 0 not for hashed pcb 4291311496 delivered 1551 datagrams outputipsec: 0 inbound packets processed successfully 0 inbound packets violated process security policy 0 inbound packets with no SA available 0 invalid inbound packets 0 inbound packets failed due to insufficient memory 0 inbound packets failed getting SPI 0 inbound packets failed on AH replay check 0 inbound packets failed on ESP replay check 0 inbound AH packets considered authentic 0 inbound AH packets failed on authentication 0 inbound ESP packets considered authentic 0 inbound ESP packets failed on authentication 0 outbound packets processed successfully 0 outbound packets violated process security policy 0 outbound packets with no SA available 0 invalid outbound packets 0 outbound packets failed due to insufficient memory 0 outbound packets with no routeigmp: 17186 messages received 0 messages received with too few bytes 0 messages received with bad checksum 0 membership queries received 0 membership queries received with invalid field(s)
Copyright © 2016, Juniper Networks, Inc.272
System Basics: Getting Started Configuration Guide

0 membership reports received 0 membership reports received with invalid field(s) 0 membership reports received for groups to which we belong 0 membership reports sentarp: 44181302 datagrams received 2 ARP requests received 2028 ARP replies received 3156 resolution requests received 0 unrestricted proxy requests 0 received proxy requests 0 proxy requests not proxied 0 with bogus interface 787 with incorrect length 712 for non-IP protocol 0 with unsupported op code 0 with bad protocol address length 0 with bad hardware address length 0 with multicast source address 7611 with multicast target address 0 with my own hardware address 14241699 for an address not on the interface 0 with a broadcast source address 0 with source address duplicate to mine 29929250 which were not for me 0 packets discarded waiting for resolution 6 packets sent after waiting for resolution 17812 ARP requests sent 2 ARP replies sent 0 requests for memory denied 0 requests dropped on entry 0 requests dropped during retryip6: 0 total packets received 0 with size smaller than minimum 0 with data size < data length 0 with bad options 0 with incorrect version number 0 fragments received 0 fragments dropped (dup or out of space) 0 fragments dropped after timeout 0 fragments that exceeded limit 0 packets reassembled ok 0 packets for this host 0 packets forwarded 0 packets not forwardable 0 redirects sent 0 packets sent from this host 0 packets sent with fabricated ip header 0 output packets dropped due to no bufs, etc. 0 output packets discarded due to no route 0 output datagrams fragmented 0 fragments created 0 datagrams that can't be fragmented 0 packets that violated scope rules 0 multicast packets which we don't join Mbuf statistics: 0 packets whose headers are not continuous 0 tunneling packets that can't find gif 0 packets discarded due to too may headers 0 failures of source address selection
273Copyright © 2016, Juniper Networks, Inc.
Chapter 9: System Software Monitoring Commands

0 forward cache hit 0 forward cache miss 0 packets destined to dead next hop 0 option packets dropped due to rate limit 0 packets dropped (src and int don't match) 0 packets dropped due to bad protocolicmp6: 0 calls to icmp_error 0 errors not generated because old message was icmp error or so 0 errors not generated because rate limitation 0 messages with bad code fields 0 messages < minimum length 0 bad checksums 0 messages with bad length Histogram of error messages to be generated: 0 no route 0 administratively prohibited 0 beyond scope 0 address unreachable 0 port unreachable 0 packet too big 0 time exceed transit 0 time exceed reassembly 0 erroneous header field 0 unrecognized next header 0 unrecognized option 0 redirect 0 unknown 0 message responses generated 0 messages with too many ND optionsipsec6: 0 inbound packets processed successfully 0 inbound packets violated process security policy 0 inbound packets with no SA available 0 invalid inbound packets 0 inbound packets failed due to insufficient memory 0 inbound packets failed getting SPI 0 inbound packets failed on AH replay check 0 inbound packets failed on ESP replay check 0 inbound AH packets considered authentic 0 inbound AH packets failed on authentication 0 inbound ESP packets considered authentic 0 inbound ESP packets failed on authentication 0 outbound packets processed successfully 0 outbound packets violated process security policy 0 outbound packets with no SA available 0 invalid outbound packets 0 outbound packets failed due to insufficient memory 0 outbound packets with no routeclnl: 0 total packets received 0 packets delivered 0 too small 0 bad header length 0 bad checksum 0 bad version 0 unknown or unsupported protocol 0 bogus sdl size 0 no free memory in socket buffer 0 send packets discarded 0 sbappend failure
Copyright © 2016, Juniper Networks, Inc.274
System Basics: Getting Started Configuration Guide

0 mcopy failure 0 address fields were not reasonable 0 segment information forgotten 0 forwarded packets 0 total packets sent 0 output packets discarded 0 non-forwarded packets 0 packets fragmented 0 fragments sent 0 fragments discarded 0 fragments timed out 0 fragmentation prohibited 0 packets reconstructed 0 packets destined to dead nexthop 0 packets discarded due to no route 0 Error pdu rate drops 0 ER pdu generation failureesis: 0 total pkts received 0 total packets consumed by protocol 0 pdus received with bad checksum 0 pdus received with bad version number 0 pdus received with bad type field 0 short pdus received 0 bogus sdl size 0 bad header length 0 unknown or unsupported protocol 0 no free memory in socket buffer 0 send packets discarded 0 sbappend failure 0 mcopy failure 0 ISO family not configuredtnp: 146776365 unicast packets received 0 broadcast packets received 0 fragmented packets received 0 hello packets dropped 0 fragments dropped 0 fragment reassembly queue flushes 0 hello packets received 0 control packets received 49681642 rdp packets received 337175 udp packets received 96757548 tunnel packets received 0 input packets discarded with no protocol 98397591 unicast packets sent 0 broadcast packets sent 0 fragmented packets sent 0 hello packets dropped 0 fragments dropped 0 hello packets sent 0 control packets sent 49681642 rdp packets sent 337175 udp packets sent 48378774 tunnel packets sent 0 packets sent with unknown protocolrdp: 49681642 input packets 0 discards for bad checksum 0 discards bad sequence number 0 refused connections
275Copyright © 2016, Juniper Networks, Inc.
Chapter 9: System Software Monitoring Commands

2031964 acks received 0 dropped due to full socket buffers 49692 retransmits 49681642 output packets 24815968 acks sent 28 connects 0 closes 22783990 keepalives received 22783990 keepalives senttudp: 337175 datagrams received 0 with incomplete header 0 with bad data length field 0 with bad checksum 0 dropped due to no socket 0 broadcast/multicast datagrams dropped due to no socket 0 dropped due to full socket buffers 337175 delivered 337175 datagrams outputttp: 398749 packets sent 0 packets sent while unconnected 0 packets sent while interface down 0 packets sent couldn't get buffer 0 packets sent couldn't find neighbor 44696687 L2 packets received 0 unknown L3 packets received 3682087 IPv4 L3 packets received 0 MPLS L3 packets received 0 MPLS->IPv4 L3 packets received 0 IPv4->MPLS L3 packets received 0 IPv6 L3 packets received 0 ARP L3 packets received 0 CLNP L3 packets received 0 TNP L3 packets received 0 NULL L3 packets received 0 cyclotron cycle L3 packets received 0 cyclotron send L3 packets received 0 packets received while unconnected 0 packets received from unknown ifl 0 input packets couldn't get buffer 0 input packets with bad type 0 input packets with discard type 0 Input packets with too many tlvs 0 Input packets with bad tlv header 70633 Input packets with bad tlv type 68877 Input packets dropped based on tlv result 0 input packets for which rt lookup is bypassedmpls: 0 total mpls packets received 0 packets forwarded 0 packets dropped 0 with header too small 0 after tagging, can't fit link MTU 0 with IPv4 explicit NULL tag 0 with IPv4 explicit NULL cksum errors 0 with router alert tag 0 lsp ping packets (ttl-expired/router alert) 0 with ttl expired 0 with tag encoding error 0 packets discarded, no route
Copyright © 2016, Juniper Networks, Inc.276
System Basics: Getting Started Configuration Guide

vpls: 0 total packets received 0 with size smaller than minimum 0 with incorrect version number 0 packets for this host 0 packets with no logical interface 0 packets with no family 0 packets with no route table 0 packets with no auxiliary table 0 packets with no corefacing entry 0 packets with no CE-facing entry 0 mac route learning requests 0 mac routes learnt 0 requests to learn an existing route 0 learning requests while learning disabled on interface 0 learning requests over capacity 0 mac routes moved 0 requests to move static route 0 mac route aging requests 0 mac routes aged 0 bogus address in aging requests 0 requests to age static route 0 requests to re-ageout aged route 0 requests involving multiple peer FEs 0 aging acks from PFE 0 aging non-acks from PFE 0 aging requests timed out waiting on FEs 0 aging requests over max-rate 0 errors finding peer FEs
show system statistics (EX Series Switches)
user@host> show system statisticsTcp: 571779 packets sent 21517 data packets (1797102 bytes) 2 data packets retransmitted (20 bytes) 0 resends initiated by MTU discovery 3708 ack only packets (531 packets delayed) 0 URG only packets 1 window probe packets 1 window update packets 1093063 control packets 1132541 packets received 20961 acks(for 1796102 bytes) 5861 duplicate acks 0 acks for unsent data 19556 packets received in-sequence(232079 bytes) 3018 completely duplicate packets(0 bytes) 0 old duplicate packets 4 packets with some duplicate data(4 bytes duped) 2 out-of-order packets(2 bytes) 0 packets of data after window(0 bytes) 0 window probes 39 window update packets 0 packets received after close 0 discarded for bad checksums 0 discarded for bad header offset fields 0 discarded because packet too short 546519 connection requests 78 connection accepts
277Copyright © 2016, Juniper Networks, Inc.
Chapter 9: System Software Monitoring Commands

0 bad connection attempts 0 listen queue overflows 100 connections established (including accepts) 546596 connections closed (including 6 drops) 47 connections updated cached RTT on close 47 connections updated cached RTT variance on close 0 connections updated cached ssthresh on close 546497 embryonic connections dropped 20453 segments updated rtt(of 566914 attempts) 2 retransmit timeouts 0 connections dropped by retransmit timeout 0 persist timeouts 0 connections dropped by persist timeout 3028 keepalive timeouts 3027 keepalive probes sent 1 connections dropped by keepalive 7515 correct ACK header predictions 12258 correct data packet header predictions 78 syncache entries added 0 retransmitted 0 dupsyn 4 dropped 78 completed 0 bucket overflow 0 cache overflow 0 reset 0 stale 0 aborted 0 badack 0 unreach 0 zone failures 0 cookies sent 0 cookies received 1 SACK recovery episodes 1 segment retransmits in SACK recovery episodes 1 byte retransmits in SACK recovery episodes 71 SACK options (SACK blocks) received 1 SACK options (SACK blocks) sent 0 SACK scoreboard overflow 0 ACKs sent in response to in-window but not exact RSTs 0 ACKs sent in response to in-window SYNs on established connections 0 rcv packets dropped by TCP due to bad address 0 out-of-sequence segment drops due to insufficient memory 546544 RST packets 0 ICMP packets ignored by TCP 0 send packets dropped by TCP due to auth errors 0 rcv packets dropped by TCP due to auth errors 0 outgoing segments dropped due to policingudp: 147 datagrams received 0 with incomplete header 0 with bad data length field 0 with bad checksum 9 dropped due to no socket 0 broadcast/multicast datagrams dropped due to no socket 0 dropped due to full socket buffers 0 not for hashed pcb 138 delivered 0 datagrams outputip: 73704 total packets received
Copyright © 2016, Juniper Networks, Inc.278
System Basics: Getting Started Configuration Guide

0 bad header checksums 0 with size smaller than minimum 0 with data size < data length 0 with header length < data size 0 with data length < header length 0 with incorrect version number 0 packets destined to dead next hop 0 fragments received 0 fragments dropped (dup or out of space) 0 fragments dropped (queue overflow) 0 fragments dropped after timeout 0 fragments dropped due to over limit 0 packets reassembled ok 1133057 packets for this host 0 packets for unknown/unsupported protocol 40146 packets forwarded 0 packets not forwardable 40146 redirects sent 1121700 packets sent from this host 0 packets sent with fabricated ip header 0 output packets dropped due to no bufs 0 output packets discarded due to no route 0 output datagrams fragmented 0 fragments created 0 datagrams that can't be fragmented 0 packets with bad options 0 packets with options handled without error 0 strict source and record route options 0 loose source and record route options 0 record route options 0 timestamp options 0 timestamp and address options 0 timestamp and prespecified address options 0 option packets dropped due to rate limit 0 router alert options 0 multicast packets dropped (no iflist) 0 packets dropped (src and int don't match) 0 transit re packets dropped on mgmt i/f 0 packets used first nexthop in ecmp unilist 0 incoming ttpoip packets received 0 incoming ttpoip packets dropped 0 outgoing TTPoIP packets sent 0 outgoing TTPoIP packets droppedicmp: 0 drops due to rate limit 9 calls to icmp_error 0 errors not generated because old message was icmp Output histogram: 295 echo reply 9 destination unreachable 0 messages with bad code fields 0 messages less than the minimum length 0 messages with bad checksum 0 messages with bad source address 0 messages with bad length 0 echo drops with broadcast or multicast destinaton address 0 timestamp drops with broadcast or multicast destination address Input histogram: 295 echo 295 message responses generatedigmp:
279Copyright © 2016, Juniper Networks, Inc.
Chapter 9: System Software Monitoring Commands

0 messages received 0 messages received with too few bytes 0 messages received with bad checksum 0 membership queries received 0 membership queries received with invalid fields 0 membership reports received 0 membership reports received with invalid fields 0 membership reports received for groups to which we belong 0 Membership reports sentraw_if: 0 RAW packets transmitted 0 PPPOE packets transmitted 0 ISDN packets transmitted 0 DIALER packets transmitted 0 PPP packets transmitted to pppd 0 PPP packets transmitted to jppd 0 IGMPL2 packets transmitted 13 output drops due to tx error 0 MPU packets transmitted 0 PPPOE packets received 0 ISDN packets received 0 DIALER packets received 0 PPP packets received from pppd 0 MPU packets received 0 PPP packets received from jppd 0 IGMPL2 packets received 0 Input drops due to bogus protocol 0 input drops due to no mbufs available 0 input drops due to no space in socket 0 input drops due to no socketarp: 186413 datagrams received 88 ARP requests received 88 ARP replies received 0 resolution request received 0 unrestricted proxy requests 0 restricted proxy requests 0 received proxy requests 0 proxy requests not proxied 0 restricted proxy requests not proxied 0 datagrams with bogus interface 0 datagrams with incorrect length 0 datagrams for non-IP protocol 0 datagrams with unsupported op code 0 datagrams with bad protocol address length 0 datagrams with bad hardware address length 0 datagrams with multicast source address 0 datagrams with multicast source address 0 datagrams with my own hardware address 164 datagrams for an address not on the interface 0 datagrams with a broadcast source address 0 datagrams with source address duplicate to mine 186065 datagrams which were not for me 0 packets discarded waiting for resolution 0 packets sent after waiting for resolution 50 ARP requests sent 88 ARP replies sent 0 requests for memory denied 0 requests dropped on entry 0 requests dropped during retry 0 requests dropped due to interface deletion
Copyright © 2016, Juniper Networks, Inc.280
System Basics: Getting Started Configuration Guide

0 requests on unnumbered interfaces 0 new requests on unnumbered interfaces 0 replies for from unnumbered interfaces 0 requests on unnumbered interface with non-subnetted donor 0 replies from unnumbered interface with non-subnetted donorip6: 0 total packets received 0 packets with size smaller than minimum 0 packets with data size < data length 0 packets with bad options 0 packets with incorrect version number 0 fragments received 0 fragments dropped (dup or out of space) 0 fragments dropped after timeout 0 fragments that exceeded limit 0 packets reassembled ok 0 packets for this host 0 packets forwarded 0 packets not forwardable 0 redirects sent 0 packets sent from this host 0 packets sent with fabricated ip header 0 output packets dropped due to no bufs, etc. 0 output datagrams fragmented 0 fragments created 0 datagrams that can't be fragmented 0 packets that violated scope rules 0 multicast packets which we don't join 0 packets whose headers are not continuous 0 tunneling packets that can't find gif 0 packets discarded due to too may headers 0 failures of source address selection 0 forward cache hit 0 forward cache miss 0 Packets destined to dead next hop 0 option packets dropped due to rate limit 0 Packets dropped (src and int don't match) 0 packets dropped due to bad protocol 0 transit re packet(null) dropped on mgmt i/ficmp6: 0 Calls to icmp_error 0 Errors not generated because old message was icmp error 0 Errors not generated because rate limitation 0 Messages with bad code fields 0 Messages < minimum length 0 Bad checksums 0 Messages with bad length 0 No route 0 Administratively prohibited 0 Beyond scope 0 Address unreachable 0 Port unreachable 0 packet too big 0 Time exceed transit 0 Time exceed reassembly 0 Erroneous header field 0 Unrecognized next header 0 Unrecognized option 0 redirect 0 Unknown 0 Message responses generated
281Copyright © 2016, Juniper Networks, Inc.
Chapter 9: System Software Monitoring Commands

0 Messages with too many ND optionspfkey: 0 Requests sent from userland 0 Bytes sent from userland histogram by message type: 0 reserved 0 dump 0 Messages with invalid length field 0 Messages with invalid version field 0 Messages with invalid message type field 0 Messages too short 0 Messages with memory allocation failure 0 Messages with duplicate extension 0 Messages with invalid extension type 0 Messages with invalid sa type 0 Messages with invalid address extension 0 Requests sent to userland 0 Bytes sent to userland histogram by message type: 0 reserved 0 dump 0 Messages toward single socket 0 Messages toward all sockets 0 Messages toward registered sockets 0 Messages with memory allocation failureclnl: 0 Total packets received 0 Packets delivered 0 Too small packets 0 Packets with bad header length 0 Packets with bad checksum 0 Bad version packets 0 Unknown or unsupported protocol packets 0 Packets with bogus sdl size 0 No free memory in socket buffer 0 Send packets discarded 0 Sbappend failure 0 Mcopy failure 0 Address fields were not reasonable 0 Segment information forgotten 0 Forwarded packets 0 Total packets sent 0 Output packets discarded 0 Non-forwarded packets 0 Packets fragmented 0 Fragments sent 0 Fragments discarded 0 Fragments timed out 0 Fragmentation prohibited 0 Packets reconstructed 0 Packets destined to dead nexthop 0 Packets discarded due to no route 0 Error pdu rate drops 0 ER pdu generation failureesis: 0 Total pkts received 0 Total packets consumed by protocol 0 Pdus received with bad checksum 0 Pdus received with bad version number 0 Pdus received with bad type field 0 Short pdus received
Copyright © 2016, Juniper Networks, Inc.282
System Basics: Getting Started Configuration Guide

0 Pdus withbogus sdl size 0 Pdus with bad header length 0 Pdus with unknown or unsupport protocol 0 No free memory in socket buffer 0 Send packets discarded 0 Sbappend failure 0 Mcopy failure 0 ISO family not configuredtnp: 0 Unicast packets received 0 Broadcast packets received 0 Fragmented packets received 0 Hello packets dropped 0 Fragments dropped 0 Fragment reassembly queue flushes 0 Packets with tnp src address collision received 0 Hello packets received 0 Control packets received 0 Rdp packets received 0 Udp packets received 0 Tunnel packets received 0 Input packets discarded with no protocol 0 Packets of version unspecified received 0 Packets of version 1 received 0 Packets of version 2 received 0 Packets of version 3 received 0 Unicast packets sent 0 Broadcast packets sent 0 Fragmented packets sent 0 Hello packets dropped 0 Fragments dropped 0 Hello packets sent 0 Control packets sent 0 Rdp packets sent 0 Udp packets sent 0 Tunnel packets sent 0 Packets sent with unknown protocol 0 Packets of version unspecified sent 0 Packets of version 1 sent 0 Packets of version 2 sent 0 Packets of version 3 sentrdp: 0 Input packets 0 Packets discarded for bad checksum 0 Packets discarded due to bad sequence number 0 Refused connections 0 Acks received 0 Packets dropped due to full socket buffers 0 Retransmits 0 Output packets 0 Acks sent 0 Connects 0 Closes 0 Keepalives received 0 Keepalives senttudp: 67 Datagrams received 0 Datagrams with incomplete header 0 Datagrams with bad data length field 0 Datagrams with bad checksum 0 Datagrams dropped due to no socket
283Copyright © 2016, Juniper Networks, Inc.
Chapter 9: System Software Monitoring Commands

0 Broadcast/multicast datagrams dropped due to no socket 0 Datagrams dropped due to full socket buffers 67 Delivered 68 Datagrams outputttp: 0 Packets sent 0 Packets sent while unconnected 0 Packets sent while interface down 0 Packets sent couldn't get buffer 0 Packets sent couldn't find neighbor 0 L2 packets received 0 Unknown L3 packets received 0 IPv4 L3 packets received 0 MPLS L3 packets received 0 MPLS->IPV4 L3 packets received 0 IPv4->MPLS L3 packets received 0 IPv6 L3 packets received 0 ARP L3 packets received 0 CLNP L3 packets received 0 TNP L3 packets received 0 NULL L3 packets received 0 Cyclotron cycle L3 packets received 0 Cyclotron send L3 packets received 0 Packets received while unconnected 0 Packets received from unknown ifl 0 Input packets couldn't get buffer 0 Input packets with bad type 0 Input packets with discard type 0 Input packets with too many tlvs 0 Input packets with bad tlv header 70633 Input packets with bad tlv type 68877 Input packets dropped based on tlv result 0 Input packets for which rt lookup is bypassedmpls: 0 Total MPLS packets received 0 Packets forwarded 0 Packets dropped 0 Packets with header too small 0 After tagging, packets can't fit link MTU 0 Packets with IPv4 explicit NULL tag 0 Packets with IPv4 explicit NULL cksum errors 0 Packets with router alert tag 0 LSP ping packets (ttl-expired/router alert) 0 Packets with ttl expired 0 Packets with tag encoding error 0 Packets discarded due to no route 0 Packets used first nexthop in ecmp unilistvpls: 0 Total packets received 0 Packets with size smaller than minimum 0 Packets with incorrect version number 0 Packets for this host 0 Packets with no logical interface 0 Packets with no family 0 Packets with no route table 0 Packets with no auxiliary table 0 Packets with no corefacing entry 0 packets with no CE-facing entry 0 MAC route learning requests 0 MAC routes learnt 0 Requests to learn an existing route
Copyright © 2016, Juniper Networks, Inc.284
System Basics: Getting Started Configuration Guide

0 Learning requests while learning disabled on interface 0 Learning requests over capacity 0 MAC routes moved 0 Requests to move static route 0 MAC route aging requests 0 MAC routes aged 0 Bogus address in aging requests 0 Requests to age static route 0 Requests to re-ageout aged route 0 Requests involving multiple peer FEs 0 Aging acks from PFE 0 Aging non-acks from PFE 0 Aging requests timed out waiting on FEs 0 Aging requests over max-rate 0 Errors finding peer FEs 0 Unsupported platform 0 Packets dropped due to no l3 route table 0 Packets dropped due to no local ifl 0 Packets punted 0 Packets dropped due to no socketbridge: Input: 0 packets received 0 packets forwarded 0 packets failed to forward 0 packets dropped 0 packets with vmember lookup failures 0 packets with vlan lookup failures 0 packets with stp state lookup failures 0 packets dropped due to stp blocked/listening 0 packets dropped due to stp learning 0 packets with src MAC learning failures 0 packets with input control processing failures Forward: 0 packets sent successfully 0 packets with send failures 0 packets forwarded to l3 interface 0 packets with l3 send failures 0 packets discarded 0 packets with l2ifl store failures 0 packets with ifl mismatch failures 0 packets with packet duplication failures 0 packets with tag lookup failures 0 packets with no route for DMAC 0 packets with no route table 0 packets with no nexthop 0 packets with dead nexthop 0 packets with eof reached error Learning: 0 MACs learned 0 packets sent to l3 interface 0 packets with l3 send failures 0 packets hit holdq while learning 0 MAC moves 0 packets discarded 0 packets with no route for SMAC 0 packets with no nexthop 0 packets with dead nexthop 0 packets dropped due to no resolve route 0 packets with l3 ifd lookup failures 0 packets with l3 ifl lookup failures
285Copyright © 2016, Juniper Networks, Inc.
Chapter 9: System Software Monitoring Commands

0 packets with l3 invalid rnh 0 packets with no route for SMAC in clone learning 0 packets with no nexhop in clone learning 0 packets with dead nexthop in clone learning 0 packets dropped due to no resolve nh in clone learning Output: 0 packets forwarded 0 packets failed to forward 0 packets with vmember lookup failures 0 packets with vlan lookup failures 0 packets with input control processing failures Send: 0 packets sent successfully 0 packets with send failures 0 packets dropped due to interface down 0 packets with dev output failures 0 blocked ifl discards 0 packets with tag lookup failures 0 packets with stp state lookup failures 0 packets with tag insertion failures 0 packets with tag removal failures Flood: 0 packets flooded 0 flood failures IGMP: 0 packets sent successfully 0 packets with send failures 0 packets forwarded 0 packets failed to forward 0 packets with mpull failures 0 packets with vmember lookup failures 0 packets with vlan lookup failures 0 packets with ifl lookup failures 0 packets with tag lookup failures Misc: 0 packets with size smaller than minimum 0 packets with double tags 0 packets with no ifl 0 packets with no family 0 packets with no route table
show system statistics (TXMatrix Router)
user@host> show system statisticssfc0-re0:--------------------------------------------------------------------------Tcp: 361694 packets sent 326507 data packets (103237236 bytes) 2343 data packets retransmitted (2673324 bytes) 0 resends initiated by MTU discovery 33857 ack only packets (31613 packets delayed) 0 URG only packets 14 window probe packets 387 window update packets 1108 control packets 345879 packets received 298207 acks(for 103141728 bytes) 438 duplicate acks 0 acks for unsent data 204578 packets received in-sequence(13820995 bytes)
Copyright © 2016, Juniper Networks, Inc.286
System Basics: Getting Started Configuration Guide

6 completely duplicate packets(18 bytes) 0 old duplicate packets 0 packets with some duplicate data(0 bytes duped) 0 out-of-order packets(0 bytes) 0 packets of data after window(0 bytes) 0 window probes 899 window update packets 166 packets received after close 0 discarded for bad checksums 0 discarded for bad header offset fields 0 discarded because packet too short 406 connection requests 233 connection accepts 0 bad connection attempts 0 listen queue overflows 616 connections established (including accepts) 911 connections closed (including 41 drops) 346 connections updated cached RTT on close 346 connections updated cached RTT variance on close 200 connections updated cached ssthresh on close 23 embryonic connections dropped 298155 segments updated rtt(of 287216 attempts) 1163 retransmit timeouts 27 connections dropped by retransmit timeout 0 persist timeouts 0 connections dropped by persist timeout 5 keepalive timeouts 5 keepalive probes sent 0 connections dropped by keepalive 69922 correct ACK header predictions 34993 correct data packet header predictions 233 syncache entries added 0 retransmitted 0 dupsyn 0 dropped 233 completed 0 bucket overflow 0 cache overflow 0 reset 0 stale 0 aborted 0 badack 0 unreach 0 zone failures 0 cookies sent 0 cookies received 23 SACK recovery episodes 68 segment retransmits in SACK recovery episodes 71542 byte retransmits in SACK recovery episodes 158 SACK options (SACK blocks) received 0 SACK options (SACK blocks) sent 0 SACK scoreboard overflow 0 ACKs sent in response to in-window but not exact RSTs 0 ACKs sent in response to in-window SYNs on established connections 0 rcv packets dropped by TCP due to bad address 0 out-of-sequence segment drops due to insufficient memory 259 RST packets 0 ICMP packets ignored by TCP 0 send packets dropped by TCP due to auth errors 0 rcv packets dropped by TCP due to auth errors 0 outgoing segments dropped due to policing
287Copyright © 2016, Juniper Networks, Inc.
Chapter 9: System Software Monitoring Commands

lcc0-re0:--------------------------------------------------------------------------Tcp: 346 packets sent 222 data packets (22894 bytes) 0 data packets retransmitted (0 bytes) 0 resends initiated by MTU discovery 80 ack only packets (12 packets delayed) 0 URG only packets 0 window probe packets 5 window update packets 42 control packets 358 packets received 268 acks(for 22939 bytes) 9 duplicate acks 0 acks for unsent data 203 packets received in-sequence(33820 bytes) 0 completely duplicate packets(0 bytes) 0 old duplicate packets 0 packets with some duplicate data(0 bytes duped) 0 out-of-order packets(0 bytes) 0 packets of data after window(0 bytes) 0 window probes 6 window update packets 0 packets received after close 0 discarded for bad checksums 0 discarded for bad header offset fields 0 discarded because packet too short 13 connection requests 18 connection accepts 0 bad connection attempts 0 listen queue overflows 31 connections established (including accepts) 35 connections closed (including 2 drops) 3 connections updated cached RTT on close 3 connections updated cached RTT variance on close 0 connections updated cached ssthresh on close 0 embryonic connections dropped 268 segments updated rtt(of 247 attempts) 0 retransmit timeouts 0 connections dropped by retransmit timeout 0 persist timeouts 0 connections dropped by persist timeout 0 keepalive timeouts 0 keepalive probes sent 0 connections dropped by keepalive 0 correct ACK header predictions 42 correct data packet header predictions 18 syncache entries added 0 retransmitted 0 dupsyn 0 dropped 18 completed 0 bucket overflow 0 cache overflow 0 reset 0 stale 0 aborted 0 badack 0 unreach
Copyright © 2016, Juniper Networks, Inc.288
System Basics: Getting Started Configuration Guide

0 zone failures 0 cookies sent 0 cookies received 0 SACK recovery episodes 0 segment retransmits in SACK recovery episodes 0 byte retransmits in SACK recovery episodes 0 SACK options (SACK blocks) received 0 SACK options (SACK blocks) sent 0 SACK scoreboard overflow 0 ACKs sent in response to in-window but not exact RSTs 0 ACKs sent in response to in-window SYNs on established connections 0 rcv packets dropped by TCP due to bad address 0 out-of-sequence segment drops due to insufficient memory 5 RST packets 0 ICMP packets ignored by TCP 0 send packets dropped by TCP due to auth errors 0 rcv packets dropped by TCP due to auth errors 0 outgoing segments dropped due to policing
lcc1-re0:--------------------------------------------------------------------------Tcp: 348 packets sent 223 data packets (22895 bytes) 0 data packets retransmitted (0 bytes) 0 resends initiated by MTU discovery 81 ack only packets (13 packets delayed) 0 URG only packets 0 window probe packets 5 window update packets 42 control packets 360 packets received 269 acks(for 22940 bytes) 9 duplicate acks 0 acks for unsent data 203 packets received in-sequence(33820 bytes) 0 completely duplicate packets(0 bytes) 0 old duplicate packets 0 packets with some duplicate data(0 bytes duped) 0 out-of-order packets(0 bytes) 0 packets of data after window(0 bytes) 0 window probes 6 window update packets 0 packets received after close 0 discarded for bad checksums 0 discarded for bad header offset fields 0 discarded because packet too short 13 connection requests 18 connection accepts 0 bad connection attempts 0 listen queue overflows 31 connections established (including accepts) 36 connections closed (including 2 drops) 3 connections updated cached RTT on close 3 connections updated cached RTT variance on close 0 connections updated cached ssthresh on close 0 embryonic connections dropped 269 segments updated rtt(of 248 attempts) 0 retransmit timeouts 0 connections dropped by retransmit timeout 0 persist timeouts
289Copyright © 2016, Juniper Networks, Inc.
Chapter 9: System Software Monitoring Commands

0 connections dropped by persist timeout 0 keepalive timeouts 0 keepalive probes sent 0 connections dropped by keepalive 0 correct ACK header predictions 43 correct data packet header predictions 18 syncache entries added 0 retransmitted 0 dupsyn 0 dropped 18 completed 0 bucket overflow 0 cache overflow 0 reset 0 stale 0 aborted 0 badack 0 unreach 0 zone failures 0 cookies sent 0 cookies received 0 SACK recovery episodes 0 segment retransmits in SACK recovery episodes 0 byte retransmits in SACK recovery episodes 0 SACK options (SACK blocks) received 0 SACK options (SACK blocks) sent 0 SACK scoreboard overflow 0 ACKs sent in response to in-window but not exact RSTs 0 ACKs sent in response to in-window SYNs on established connections 0 rcv packets dropped by TCP due to bad address 0 out-of-sequence segment drops due to insufficient memory 5 RST packets 0 ICMP packets ignored by TCP 0 send packets dropped by TCP due to auth errors 0 rcv packets dropped by TCP due to auth errors 0 outgoing segments dropped due to policing
lcc2-re0:--------------------------------------------------------------------------Tcp: 405 packets sent 271 data packets (23926 bytes) 0 data packets retransmitted (0 bytes) 0 resends initiated by MTU discovery 86 ack only packets (13 packets delayed) 0 URG only packets 0 window probe packets 5 window update packets 46 control packets 418 packets received 321 acks(for 23975 bytes) 9 duplicate acks 0 acks for unsent data 234 packets received in-sequence(34403 bytes) 0 completely duplicate packets(0 bytes) 0 old duplicate packets 0 packets with some duplicate data(0 bytes duped) 0 out-of-order packets(0 bytes) 0 packets of data after window(0 bytes) 0 window probes 7 window update packets
Copyright © 2016, Juniper Networks, Inc.290
System Basics: Getting Started Configuration Guide
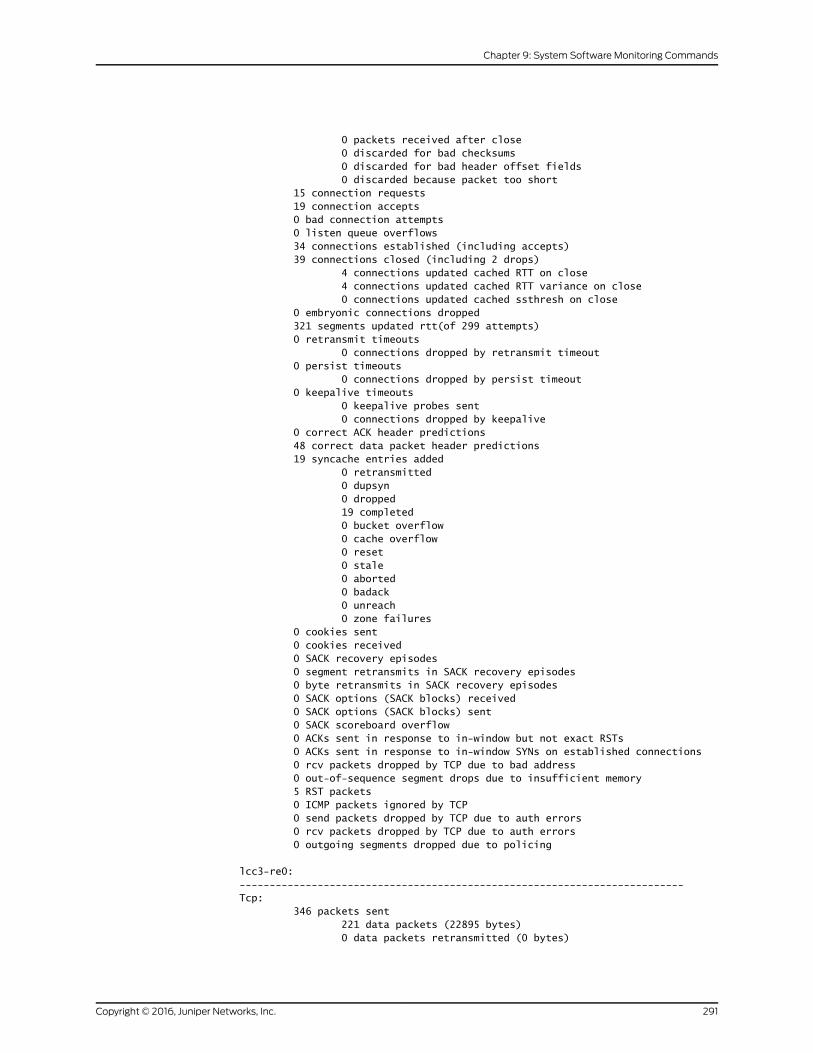
0 packets received after close 0 discarded for bad checksums 0 discarded for bad header offset fields 0 discarded because packet too short 15 connection requests 19 connection accepts 0 bad connection attempts 0 listen queue overflows 34 connections established (including accepts) 39 connections closed (including 2 drops) 4 connections updated cached RTT on close 4 connections updated cached RTT variance on close 0 connections updated cached ssthresh on close 0 embryonic connections dropped 321 segments updated rtt(of 299 attempts) 0 retransmit timeouts 0 connections dropped by retransmit timeout 0 persist timeouts 0 connections dropped by persist timeout 0 keepalive timeouts 0 keepalive probes sent 0 connections dropped by keepalive 0 correct ACK header predictions 48 correct data packet header predictions 19 syncache entries added 0 retransmitted 0 dupsyn 0 dropped 19 completed 0 bucket overflow 0 cache overflow 0 reset 0 stale 0 aborted 0 badack 0 unreach 0 zone failures 0 cookies sent 0 cookies received 0 SACK recovery episodes 0 segment retransmits in SACK recovery episodes 0 byte retransmits in SACK recovery episodes 0 SACK options (SACK blocks) received 0 SACK options (SACK blocks) sent 0 SACK scoreboard overflow 0 ACKs sent in response to in-window but not exact RSTs 0 ACKs sent in response to in-window SYNs on established connections 0 rcv packets dropped by TCP due to bad address 0 out-of-sequence segment drops due to insufficient memory 5 RST packets 0 ICMP packets ignored by TCP 0 send packets dropped by TCP due to auth errors 0 rcv packets dropped by TCP due to auth errors 0 outgoing segments dropped due to policing
lcc3-re0:--------------------------------------------------------------------------Tcp: 346 packets sent 221 data packets (22895 bytes) 0 data packets retransmitted (0 bytes)
291Copyright © 2016, Juniper Networks, Inc.
Chapter 9: System Software Monitoring Commands

0 resends initiated by MTU discovery 81 ack only packets (13 packets delayed) 0 URG only packets 0 window probe packets 5 window update packets 42 control packets 360 packets received 267 acks(for 22940 bytes) 9 duplicate acks 0 acks for unsent data 203 packets received in-sequence(33820 bytes) 0 completely duplicate packets(0 bytes) 0 old duplicate packets 0 packets with some duplicate data(0 bytes duped) 0 out-of-order packets(0 bytes) 0 packets of data after window(0 bytes) 0 window probes 6 window update packets 0 packets received after close 0 discarded for bad checksums 0 discarded for bad header offset fields 0 discarded because packet too short 13 connection requests 18 connection accepts 0 bad connection attempts 0 listen queue overflows 31 connections established (including accepts) 35 connections closed (including 2 drops) 3 connections updated cached RTT on close 3 connections updated cached RTT variance on close 0 connections updated cached ssthresh on close 0 embryonic connections dropped 267 segments updated rtt(of 246 attempts) 0 retransmit timeouts 0 connections dropped by retransmit timeout 0 persist timeouts 0 connections dropped by persist timeout 0 keepalive timeouts 0 keepalive probes sent 0 connections dropped by keepalive 0 correct ACK header predictions 43 correct data packet header predictions 18 syncache entries added 0 retransmitted 0 dupsyn 0 dropped 18 completed 0 bucket overflow 0 cache overflow 0 reset 0 stale 0 aborted 0 badack 0 unreach 0 zone failures 0 cookies sent 0 cookies received 0 SACK recovery episodes 0 segment retransmits in SACK recovery episodes 0 byte retransmits in SACK recovery episodes 0 SACK options (SACK blocks) received
Copyright © 2016, Juniper Networks, Inc.292
System Basics: Getting Started Configuration Guide

0 SACK options (SACK blocks) sent 0 SACK scoreboard overflow 0 ACKs sent in response to in-window but not exact RSTs 0 ACKs sent in response to in-window SYNs on established connections 0 rcv packets dropped by TCP due to bad address 0 out-of-sequence segment drops due to insufficient memory 5 RST packets 0 ICMP packets ignored by TCP 0 send packets dropped by TCP due to auth errors 0 rcv packets dropped by TCP due to auth errors 0 outgoing segments dropped due to policing
show system statistics (QFX Series)
user@switch> show system statisticsTcp:571779 packets sent21517 data packets (1797102 bytes)2 data packets retransmitted (20 bytes)0 resends initiated by MTU discovery3708 ack only packets (531 packets delayed)0 URG only packets1 window probe packets1 window update packets1093063 control packets1132541 packets received20961 acks(for 1796102 bytes)5861 duplicate acks0 acks for unsent data19556 packets received in-sequence(232079 bytes)3018 completely duplicate packets(0 bytes)0 old duplicate packets4 packets with some duplicate data(4 bytes duped)2 out-of-order packets(2 bytes)0 packets of data after window(0 bytes)0 window probes39 window update packets0 packets received after close0 discarded for bad checksums0 discarded for bad header offset fields0 discarded because packet too short546519 connection requests78 connection accepts0 bad connection attempts0 listen queue overflows100 connections established (including accepts)546596 connections closed (including 6 drops)47 connections updated cached RTT on close47 connections updated cached RTT variance on close0 connections updated cached ssthresh on close546497 embryonic connections dropped20453 segments updated rtt(of 566914 attempts)2 retransmit timeouts0 connections dropped by retransmit timeout0 persist timeouts0 connections dropped by persist timeout3028 keepalive timeouts3027 keepalive probes sent1 connections dropped by keepalive7515 correct ACK header predictions12258 correct data packet header predictions
293Copyright © 2016, Juniper Networks, Inc.
Chapter 9: System Software Monitoring Commands

78 syncache entries added0 retransmitted0 dupsyn4 dropped78 completed0 bucket overflow0 cache overflow0 reset0 stale0 aborted0 badack0 unreach0 zone failures0 cookies sent0 cookies received1 SACK recovery episodes1 segment retransmits in SACK recovery episodes1 byte retransmits in SACK recovery episodes71 SACK options (SACK blocks) received1 SACK options (SACK blocks) sent0 SACK scoreboard overflow0 ACKs sent in response to in-window but not exact RSTs0 ACKs sent in response to in-window SYNs on established connections0 rcv packets dropped by TCP due to bad address0 out-of-sequence segment drops due to insufficient memory546544 RST packets0 ICMP packets ignored by TCP0 send packets dropped by TCP due to auth errors0 rcv packets dropped by TCP due to auth errors0 outgoing segments dropped due to policingudp:147 datagrams received0 with incomplete header0 with bad data length field0 with bad checksum9 dropped due to no socket0 broadcast/multicast datagrams dropped due to no socket0 dropped due to full socket buffers0 not for hashed pcb138 delivered0 datagrams outputip:73704 total packets received0 bad header checksums0 with size smaller than minimum0 with data size < data length0 with header length < data size0 with data length < header length0 with incorrect version number0 packets destined to dead next hop0 fragments received0 fragments dropped (dup or out of space)0 fragments dropped (queue overflow)0 fragments dropped after timeout0 fragments dropped due to over limit0 packets reassembled ok1133057 packets for this host0 packets for unknown/unsupported protocol40146 packets forwarded0 packets not forwardable40146 redirects sent
Copyright © 2016, Juniper Networks, Inc.294
System Basics: Getting Started Configuration Guide

1121700 packets sent from this host0 packets sent with fabricated ip header0 output packets dropped due to no bufs0 output packets discarded due to no route0 output datagrams fragmented0 fragments created0 datagrams that can't be fragmented0 packets with bad options0 packets with options handled without error0 strict source and record route options0 loose source and record route options0 record route options0 timestamp options0 timestamp and address options0 timestamp and prespecified address options0 option packets dropped due to rate limit0 router alert options0 multicast packets dropped (no iflist)0 packets dropped (src and int don't match)0 transit re packets dropped on mgmt i/f0 packets used first nexthop in ecmp unilist0 incoming ttpoip packets received0 incoming ttpoip packets dropped0 outgoing TTPoIP packets sent0 outgoing TTPoIP packets droppedicmp:0 drops due to rate limit9 calls to icmp_error0 errors not generated because old message was icmpOutput histogram:295 echo reply9 destination unreachable0 messages with bad code fields0 messages less than the minimum length0 messages with bad checksum0 messages with bad source address0 messages with bad length0 echo drops with broadcast or multicast destinaton address0 timestamp drops with broadcast or multicast destination addressInput histogram:295 echo295 message responses generatedigmp:0 messages received0 messages received with too few bytes0 messages received with bad checksum0 membership queries received0 membership queries received with invalid fields0 membership reports received0 membership reports received with invalid fields0 membership reports received for groups to which we belong0 Membership reports sentraw_if:0 RAW packets transmitted0 PPPOE packets transmitted0 ISDN packets transmitted0 DIALER packets transmitted0 PPP packets transmitted to pppd0 PPP packets transmitted to jppd0 IGMPL2 packets transmitted13 output drops due to tx error
295Copyright © 2016, Juniper Networks, Inc.
Chapter 9: System Software Monitoring Commands

0 MPU packets transmitted0 PPPOE packets received0 ISDN packets received0 DIALER packets received0 PPP packets received from pppd0 MPU packets received0 PPP packets received from jppd0 IGMPL2 packets received0 Input drops due to bogus protocol0 input drops due to no mbufs available0 input drops due to no space in socket0 input drops due to no socketarp:186413 datagrams received88 ARP requests received88 ARP replies received0 resolution request received0 unrestricted proxy requests0 restricted proxy requests0 received proxy requests0 proxy requests not proxied0 restricted proxy requests not proxied0 datagrams with bogus interface0 datagrams with incorrect length0 datagrams for non-IP protocol0 datagrams with unsupported op code0 datagrams with bad protocol address length0 datagrams with bad hardware address length0 datagrams with multicast source address0 datagrams with multicast source address0 datagrams with my own hardware address164 datagrams for an address not on the interface0 datagrams with a broadcast source address0 datagrams with source address duplicate to mine186065 datagrams which were not for me0 packets discarded waiting for resolution0 packets sent after waiting for resolution50 ARP requests sent88 ARP replies sent0 requests for memory denied0 requests dropped on entry0 requests dropped during retry0 requests dropped due to interface deletion0 requests on unnumbered interfaces0 new requests on unnumbered interfaces0 replies for from unnumbered interfaces0 requests on unnumbered interface with non-subnetted donor0 replies from unnumbered interface with non-subnetted donorip6:0 total packets received0 packets with size smaller than minimum0 packets with data size < data length0 packets with bad options0 packets with incorrect version number0 fragments received0 fragments dropped (dup or out of space)0 fragments dropped after timeout0 fragments that exceeded limit0 packets reassembled ok0 packets for this host0 packets forwarded
Copyright © 2016, Juniper Networks, Inc.296
System Basics: Getting Started Configuration Guide

0 packets not forwardable0 redirects sent0 packets sent from this host0 packets sent with fabricated ip header0 output packets dropped due to no bufs, etc.0 output datagrams fragmented0 fragments created0 datagrams that can't be fragmented0 packets that violated scope rules0 multicast packets which we don't join0 packets whose headers are not continuous0 tunneling packets that can't find gif0 packets discarded due to too may headers0 failures of source address selection0 forward cache hit0 forward cache miss0 Packets destined to dead next hop0 option packets dropped due to rate limit0 Packets dropped (src and int don't match)0 packets dropped due to bad protocol0 transit re packet(null) dropped on mgmt i/ficmp6:0 Calls to icmp_error0 Errors not generated because old message was icmp error0 Errors not generated because rate limitation0 Messages with bad code fields0 Messages < minimum length0 Bad checksums0 Messages with bad length0 No route0 Administratively prohibited0 Beyond scope0 Address unreachable0 Port unreachable0 packet too big0 Time exceed transit0 Time exceed reassembly0 Erroneous header field0 Unrecognized next header0 Unrecognized option0 redirect0 Unknown0 Message responses generated0 Messages with too many ND optionspfkey:0 Requests sent from userland0 Bytes sent from userlandhistogram by message type:0 reserved0 dump0 Messages with invalid length field0 Messages with invalid version field0 Messages with invalid message type field0 Messages too short0 Messages with memory allocation failure0 Messages with duplicate extension0 Messages with invalid extension type0 Messages with invalid sa type0 Messages with invalid address extension0 Requests sent to userland0 Bytes sent to userland
297Copyright © 2016, Juniper Networks, Inc.
Chapter 9: System Software Monitoring Commands

histogram by message type:0 reserved0 dump0 Messages toward single socket0 Messages toward all sockets0 Messages toward registered sockets0 Messages with memory allocation failureclnl:0 Total packets received0 Packets delivered0 Too small packets0 Packets with bad header length0 Packets with bad checksum0 Bad version packets0 Unknown or unsupported protocol packets0 Packets with bogus sdl size0 No free memory in socket buffer0 Send packets discarded0 Sbappend failure0 Mcopy failure0 Address fields were not reasonable0 Segment information forgotten0 Forwarded packets0 Total packets sent0 Output packets discarded0 Non-forwarded packets0 Packets fragmented0 Fragments sent0 Fragments discarded0 Fragments timed out0 Fragmentation prohibited0 Packets reconstructed0 Packets destined to dead nexthop0 Packets discarded due to no route0 Error pdu rate drops0 ER pdu generation failureesis:0 Total pkts received0 Total packets consumed by protocol0 Pdus received with bad checksum0 Pdus received with bad version number0 Pdus received with bad type field0 Short pdus received0 Pdus withbogus sdl size0 Pdus with bad header length0 Pdus with unknown or unsupport protocol0 No free memory in socket buffer0 Send packets discarded0 Sbappend failure0 Mcopy failure0 ISO family not configuredtnp:0 Unicast packets received0 Broadcast packets received0 Fragmented packets received0 Hello packets dropped0 Fragments dropped0 Fragment reassembly queue flushes0 Packets with tnp src address collision received0 Hello packets received0 Control packets received
Copyright © 2016, Juniper Networks, Inc.298
System Basics: Getting Started Configuration Guide

0 Rdp packets received0 Udp packets received0 Tunnel packets received0 Input packets discarded with no protocol0 Packets of version unspecified received0 Packets of version 1 received0 Packets of version 2 received0 Packets of version 3 received0 Unicast packets sent0 Broadcast packets sent0 Fragmented packets sent0 Hello packets dropped0 Fragments dropped0 Hello packets sent0 Control packets sent0 Rdp packets sent0 Udp packets sent0 Tunnel packets sent0 Packets sent with unknown protocol0 Packets of version unspecified sent0 Packets of version 1 sent0 Packets of version 2 sent0 Packets of version 3 sentrdp:0 Input packets0 Packets discarded for bad checksum0 Packets discarded due to bad sequence number0 Refused connections0 Acks received0 Packets dropped due to full socket buffers0 Retransmits0 Output packets0 Acks sent0 Connects0 Closes0 Keepalives received0 Keepalives senttudp:67 Datagrams received0 Datagrams with incomplete header0 Datagrams with bad data length field0 Datagrams with bad checksum0 Datagrams dropped due to no socket0 Broadcast/multicast datagrams dropped due to no socket0 Datagrams dropped due to full socket buffers67 Delivered68 Datagrams outputttp:0 Packets sent0 Packets sent while unconnected0 Packets sent while interface down0 Packets sent couldn't get buffer0 Packets sent couldn't find neighbor0 L2 packets received0 Unknown L3 packets received0 IPv4 L3 packets received0 MPLS L3 packets received0 MPLS->IPV4 L3 packets received0 IPv4->MPLS L3 packets received0 IPv6 L3 packets received0 ARP L3 packets received
299Copyright © 2016, Juniper Networks, Inc.
Chapter 9: System Software Monitoring Commands

0 CLNP L3 packets received0 TNP L3 packets received0 NULL L3 packets received0 Cyclotron cycle L3 packets received0 Cyclotron send L3 packets received0 Packets received while unconnected0 Packets received from unknown ifl0 Input packets couldn't get buffer0 Input packets with bad type0 Input packets with discard type0 Input packets with too many tlvs0 Input packets with bad tlv header70633 Input packets with bad tlv type68877 Input packets dropped based on tlv result0 Input packets for which rt lookup is bypassedmpls:0 Total MPLS packets received0 Packets forwarded0 Packets dropped0 Packets with header too small0 After tagging, packets can't fit link MTU0 Packets with IPv4 explicit NULL tag0 Packets with IPv4 explicit NULL cksum errors0 Packets with router alert tag0 LSP ping packets (ttl-expired/router alert)0 Packets with ttl expired0 Packets with tag encoding error0 Packets discarded due to no route0 Packets used first nexthop in ecmp unilistvpls:0 Total packets received0 Packets with size smaller than minimum0 Packets with incorrect version number0 Packets for this host0 Packets with no logical interface0 Packets with no family0 Packets with no route table582 Copyright © 2010, Juniper Networks, Inc.0 Packets with no auxiliary table0 Packets with no corefacing entry0 packets with no CE-facing entry0 MAC route learning requests0 MAC routes learnt0 Requests to learn an existing route0 Learning requests while learning disabled on interface0 Learning requests over capacity0 MAC routes moved0 Requests to move static route0 MAC route aging requests0 MAC routes aged0 Bogus address in aging requests0 Requests to age static route0 Requests to re-ageout aged route0 Requests involving multiple peer FEs0 Aging acks from PFE0 Aging non-acks from PFE0 Aging requests timed out waiting on FEs0 Aging requests over max-rate0 Errors finding peer FEs0 Unsupported platform0 Packets dropped due to no l3 route table
Copyright © 2016, Juniper Networks, Inc.300
System Basics: Getting Started Configuration Guide

0 Packets dropped due to no local ifl0 Packets punted0 Packets dropped due to no socketbridge:Input:0 packets received0 packets forwarded0 packets failed to forward0 packets dropped0 packets with vmember lookup failures0 packets with vlan lookup failures0 packets with stp state lookup failures0 packets dropped due to stp blocked/listening0 packets dropped due to stp learning0 packets with src MAC learning failures0 packets with input control processing failuresForward:0 packets sent successfully0 packets with send failures0 packets forwarded to l3 interface0 packets with l3 send failures0 packets discarded0 packets with l2ifl store failures0 packets with ifl mismatch failures0 packets with packet duplication failures0 packets with tag lookup failures0 packets with no route for DMAC0 packets with no route table0 packets with no nexthop0 packets with dead nexthop0 packets with eof reached errorLearning:0 MACs learned0 packets sent to l3 interface0 packets with l3 send failures0 packets hit holdq while learning0 MAC moves0 packets discarded0 packets with no route for SMAC0 packets with no nexthop0 packets with dead nexthop0 packets dropped due to no resolve route0 packets with l3 ifd lookup failures0 packets with l3 ifl lookup failures0 packets with l3 invalid rnh0 packets with no route for SMAC in clone learning0 packets with no nexhop in clone learning0 packets with dead nexthop in clone learning0 packets dropped due to no resolve nh in clone learningOutput:0 packets forwarded0 packets failed to forward0 packets with vmember lookup failures0 packets with vlan lookup failures0 packets with input control processing failuresSend:0 packets sent successfully0 packets with send failures0 packets dropped due to interface down0 packets with dev output failures0 blocked ifl discards
301Copyright © 2016, Juniper Networks, Inc.
Chapter 9: System Software Monitoring Commands

0 packets with tag lookup failures0 packets with stp state lookup failures0 packets with tag insertion failures0 packets with tag removal failuresFlood:0 packets flooded0 flood failuresIGMP:0 packets sent successfully0 packets with send failures0 packets forwarded0 packets failed to forward0 packets with mpull failures0 packets with vmember lookup failures0 packets with vlan lookup failures0 packets with ifl lookup failures0 packets with tag lookup failuresMisc:0 packets with size smaller than minimum0 packets with double tags0 packets with no ifl0 packets with no family0 packets with no route table
Copyright © 2016, Juniper Networks, Inc.302
System Basics: Getting Started Configuration Guide

show system storage
List of Syntax Syntax on page 303
Syntax (EX Series Switches) on page 303
Syntax (TX Matrix Router) on page 303
Syntax (TX Matrix Plus Router) on page 303
Syntax (MX Series Router) on page 303
Syntax (QFX Series) on page 303
Syntax show system storage<detail>
Syntax (EX SeriesSwitches)
show system storage<detail><all-members><local><membermember-id>
Syntax (TXMatrixRouter)
show system storage<detail><all-chassis | all-lcc | lcc number | scc>
Syntax(TXMatrixPlusRouter)
show system storage<detail><all-chassis | all-lcc | lcc number | sfc number>
Syntax (MX SeriesRouter)
show system storage<detail><all-members><local><membermember-id>
Syntax (QFX Series) show system storage<detail><infrastructure name><interconnect-device name><node-group name>
Release Information Command introduced before Junos OS Release 7.4.
Command introduced in Junos OS Release 9.0 for EX Series switches.
sfc option introduced for the TX Matrix Plus router in JUNOS Release 9.6.
Command introduced in Junos OS Release 11.1 for the QFX Series.
Description Display statistics about the amount of free disk space in the router's or switch’s file
systems.
Options none—Display standard information about the amount of free disk space in the router's
or switch’s file systems.
detail—(Optional) Display detailed output.
303Copyright © 2016, Juniper Networks, Inc.
Chapter 9: System Software Monitoring Commands

all-chassis—(TX Matrix and TX Matrix Plus routers only) (Optional) Display system
storage statistics for all the routers in the chassis.
all-lcc—(TX Matrix and TX Matrix Plus routers only) (Optional) On a TX Matrix router,
display system storage statistics for all T640 routers (or line-card chassis) connected
to the TX Matrix router. On a TX Matrix Plus router, display system storage statistics
for all T1600 routers (or line-card chassis) connected to the TX Matrix Plus router.
all-members—(EX4200 switches and MX Series routers only) (Optional) Display system
storage statistics for all members of the Virtual Chassis configuration.
infrastructurename—(QFabric systems only) (Optional) Display system storage statistics
for the fabric control Routing Engines or fabric manager Routing Engines.
interconnect-device name—(QFabric systems only) (Optional) Display system storage
statistics for the Interconnect device.
lccnumber—(TX Matrix and TX Matrix Plus routers only) (Optional) On a TX Matrix router,
display system storage statistics for a specific T640 router that is connected to the
TX Matrix router. On a TX Matrix Plus router, display system storage statistics for a
specific T1600 router that is connected to the TX Matrix Plus router. Replace number
with a value from 0 through 3.
local—(EX4200 switches and MX Series routers only) (Optional) Display system storage
statistics for the local Virtual Chassis member.
membermember-id—(EX4200 switches and MX Series routers only) (Optional) Display
system storage statistics for the specified member of the Virtual Chassis
configuration. For EX4200 switches, replacemember-idwith a value from 0 through
9. For an MX Series Virtual Chassis, replace member-id with a value of 0 or 1.
node-group name—(QFabric systems only) (Optional) Display system storage statistics
for the Node group.
scc—(TX Matrix routers only) (Optional) Display system storage statistics for the TX
Matrix router (or switch-card chassis).
sfc number—(TX Matrix Plus routers only) (Optional) Display system storage statistics
for the TX Matrix Plus router (or switch-fabric chassis). Replace number with 0.
Additional Information By default, when you issue the show system storage command on a TX Matrix or TX
Matrix Plus master Routing Engine, the command is broadcast to all the T640 (in a
routing matrix based on a TX Matrix router) or T1600 (in a routing matrix based on a TX
Matrix Plus router) master Routing Engines connected to it. Likewise, if you issue the
same command on the TX Matrix or TX Matrix Plus backup Routing Engine, the command
is broadcast to all the T640 (in a routing matrix based on a TX Matrix router) or T1600
(in a routing matrix based on a TX Matrix Plus router) backup Routing Engines that are
connected to it.
Required PrivilegeLevel
view
Copyright © 2016, Juniper Networks, Inc.304
System Basics: Getting Started Configuration Guide

List of Sample Output show system storage on page 305show system storage (TXMatrix Plus Router) on page 305show system storage (QFX3500 Switch) on page 307
Output Fields Table 12 on page 305 describes the output fields for the show system storage command.
Output fields are listed in the approximate order in which they appear.
Table 12: show system storage Output Fields
Field DescriptionField Name
Name of the filesystem.Filesystem
Size of the filesystem.Size
Amount of space used in the filesystem.Used
Amount of space available in the filesystem.Avail
Percentage of the filesystem space that is being used.Capacity
Directory in which the filesystem is mounted.Mounted on
Sample Output
show system storage
user@host> show system storageFilesystem Size Used Avail Capacity Mounted on/dev/ad0s1a 77M 37M 34M 52% /devfs 16K 16K 0B 100% /dev//dev/vn0 12M 12M 0B 100% /packages/mnt/jbase/dev/vn1 39M 39M 0B 100% /packages/mnt/jkernel-7.2R1.7/dev/vn2 12M 12M 0B 100% /packages/mnt/jpfe-M40-7.2R1.7/dev/vn3 2.3M 2.3M 0B 100% /packages/mnt/jdocs-7.2R1.7/dev/vn4 14M 14M 0B 100% /packages/mnt/jroute-7.2R1.7/dev/vn5 4.5M 4.5M 0B 100% /packages/mnt/jcrypto-7.2R1.7mfs:172 1.5G 4.0K 1.3G 0% /tmp/dev/ad0s1e 12M 20K 11M 0% /configprocfs 4.0K 4.0K 0B 100% /proc/dev/ad1s1f 9.4G 4.9G 3.7G 57% /var
show system storage (TXMatrix Plus Router)
user@host> show system storagesfc0-re0:--------------------------------------------------------------------------Filesystem Size Used Avail Capacity Mounted on/dev/ad0s1a 3.4G 178M 2.9G 6% /devfs 1.0K 1.0K 0B 100% /devdevfs 1.0K 1.0K 0B 100% /dev//dev/md0 33M 33M 0B 100% /packages/mnt/jbase
305Copyright © 2016, Juniper Networks, Inc.
Chapter 9: System Software Monitoring Commands

/dev/md1 216M 216M 0B 100% /packages/mnt/jkernel-9.6-20090519.0/dev/md2 66M 66M 0B 100% /packages/mnt/jpfe-T-9.6-20090519.0/dev/md3 4.1M 4.1M 0B 100% /packages/mnt/jdocs-9.6-20090519.0/dev/md4 57M 57M 0B 100% /packages/mnt/jroute-9.6-20090519.0/dev/md5 15M 15M 0B 100% /packages/mnt/jcrypto-9.6-20090519.0/dev/md6 34M 34M 0B 100% /packages/mnt/jpfe-common-9.6-20090519.0/dev/md7 2.0G 10.0K 1.8G 0% /tmp/dev/md8 2.0G 1.0M 1.8G 0% /mfs/dev/ad0s1e 383M 82K 352M 0% /configprocfs 4.0K 4.0K 0B 100% /proc/dev/ad1s1f 52G 7.5G 40G 16% /var
lcc0-re0:--------------------------------------------------------------------------Filesystem Size Used Avail Capacity Mounted on/dev/ad0s1a 3.4G 178M 2.9G 6% /devfs 1.0K 1.0K 0B 100% /devdevfs 1.0K 1.0K 0B 100% /dev//dev/md0 33M 33M 0B 100% /packages/mnt/jbase/dev/md1 216M 216M 0B 100% /packages/mnt/jkernel-9.6-20090519.0/dev/md2 66M 66M 0B 100% /packages/mnt/jpfe-T-9.6-20090519.0/dev/md3 4.1M 4.1M 0B 100% /packages/mnt/jdocs-9.6-20090519.0/dev/md4 57M 57M 0B 100% /packages/mnt/jroute-9.6-20090519.0/dev/md5 15M 15M 0B 100% /packages/mnt/jcrypto-9.6-20090519.0/dev/md6 34M 34M 0B 100% /packages/mnt/jpfe-common-9.6-20090519.0/dev/md7 2.0G 10.0K 1.8G 0% /tmp/dev/md8 2.0G 540K 1.8G 0% /mfs/dev/ad0s1e 383M 88K 352M 0% /configprocfs 4.0K 4.0K 0B 100% /proc/dev/ad1s1f 52G 6.3G 41G 13% /var
lcc1-re0:--------------------------------------------------------------------------Filesystem Size Used Avail Capacity Mounted on/dev/ad0s1a 3.4G 178M 2.9G 6% /devfs 1.0K 1.0K 0B 100% /devdevfs 1.0K 1.0K 0B 100% /dev//dev/md0 33M 33M 0B 100% /packages/mnt/jbase/dev/md1 216M 216M 0B 100% /packages/mnt/jkernel-9.6-20090519.0/dev/md2 66M 66M 0B 100% /packages/mnt/jpfe-T-9.6-20090519.0/dev/md3 4.1M 4.1M 0B 100% /packages/mnt/jdocs-9.6-20090519.0/dev/md4 57M 57M 0B 100% /packages/mnt/jroute-9.6-20090519.0/dev/md5 15M 15M 0B 100% /packages/mnt/jcrypto-9.6-20090519.0/dev/md6 34M 34M 0B 100%
Copyright © 2016, Juniper Networks, Inc.306
System Basics: Getting Started Configuration Guide

/packages/mnt/jpfe-common-9.6-20090519.0/dev/md7 2.0G 10.0K 1.8G 0% /tmp/dev/md8 2.0G 540K 1.8G 0% /mfs/dev/ad0s1e 383M 88K 352M 0% /configprocfs 4.0K 4.0K 0B 100% /proc/dev/ad1s1f 23G 13G 7.7G 64% /var
lcc2-re0:--------------------------------------------------------------------------Filesystem Size Used Avail Capacity Mounted on/dev/ad0s1a 3.4G 178M 2.9G 6% /devfs 1.0K 1.0K 0B 100% /devdevfs 1.0K 1.0K 0B 100% /dev//dev/md0 33M 33M 0B 100% /packages/mnt/jbase/dev/md1 216M 216M 0B 100% /packages/mnt/jkernel-9.6-20090519.0/dev/md2 66M 66M 0B 100% /packages/mnt/jpfe-T-9.6-20090519.0/dev/md3 4.1M 4.1M 0B 100% /packages/mnt/jdocs-9.6-20090519.0/dev/md4 57M 57M 0B 100% /packages/mnt/jroute-9.6-20090519.0/dev/md5 15M 15M 0B 100% /packages/mnt/jcrypto-9.6-20090519.0/dev/md6 34M 34M 0B 100% /packages/mnt/jpfe-common-9.6-20090519.0/dev/md7 2.0G 10.0K 1.8G 0% /tmp/dev/md8 2.0G 540K 1.8G 0% /mfs/dev/ad0s1e 383M 64K 352M 0% /configprocfs 4.0K 4.0K 0B 100% /proc/dev/ad1s1f 23G 3.7G 17G 18% /var
lcc3-re0:--------------------------------------------------------------------------Filesystem Size Used Avail Capacity Mounted on/dev/ad0s1a 3.4G 178M 2.9G 6% /devfs 1.0K 1.0K 0B 100% /devdevfs 1.0K 1.0K 0B 100% /dev//dev/md0 33M 33M 0B 100% /packages/mnt/jbase/dev/md1 216M 216M 0B 100% /packages/mnt/jkernel-9.6-20090519.0/dev/md2 66M 66M 0B 100% /packages/mnt/jpfe-T-9.6-20090519.0/dev/md3 4.1M 4.1M 0B 100% /packages/mnt/jdocs-9.6-20090519.0/dev/md4 57M 57M 0B 100% /packages/mnt/jroute-9.6-20090519.0/dev/md5 15M 15M 0B 100% /packages/mnt/jcrypto-9.6-20090519.0/dev/md6 34M 34M 0B 100% /packages/mnt/jpfe-common-9.6-20090519.0/dev/md7 2.0G 10.0K 1.8G 0% /tmp/dev/md8 2.0G 540K 1.8G 0% /mfs/dev/ad0s1e 383M 34K 352M 0% /configprocfs 4.0K 4.0K 0B 100% /proc/dev/ad1s1f 23G 18G 3.5G 84% /var
show system storage (QFX3500 Switch)
user@switch> show system storage
307Copyright © 2016, Juniper Networks, Inc.
Chapter 9: System Software Monitoring Commands

Filesystem Size Used Avail Capacity Mounted on/dev/da0s2a 343M 192M 123M 61% /devfs 1.0K 1.0K 0B 100% /dev/dev/md0 119M 119M 0B 100% /packages/mnt/jbase/dev/md1 513M 513M 0B 100% /packages/mnt/jkernel-qfx-11.1R1.5/dev/md2 37M 37M 0B 100% /packages/mnt/jpfe-qfx-e9xxx-11.1R1.5/dev/md3 6.0M 6.0M 0B 100% /packages/mnt/jdocs-qfx-11.1R1.5/dev/md4 216M 216M 0B 100% /packages/mnt/jroute-qfx-11.1R1.5/dev/md5 59M 59M 0B 100% /packages/mnt/jcrypto-qfx-11.1R1,5/dev/md6 85M 85M 0B 100% /packages/mnt/jswitch-qfx-11.1R1.5/dev/md7 63M 8.0K 58M 0% /tmp/dev/da0s2f 228M 14M 196M 7% /var/dev/da0s3d 590M 3.0M 540M 1% /var/tmp/dev/da0s3e 104M 162K 95M 0% /configprocfs 4.0K 4.0K 0B 100% /proc
Copyright © 2016, Juniper Networks, Inc.308
System Basics: Getting Started Configuration Guide

show system switchover
List of Syntax Syntax on page 309
Syntax (TX Matrix Router) on page 309
Syntax (TX Matrix Plus Router) on page 309
Syntax (MX Series Router) on page 309
Syntax show system switchover
Syntax (TXMatrixRouter)
show system switchover<all-chassis | all-lcc | lcc number | scc>
Syntax(TXMatrixPlusRouter)
show system switchover<all-chassis | all-lcc | lcc number | sfc number>
Syntax (MX SeriesRouter)
show system switchover<all-members><local><membermember-id>
Release Information Command introduced before Junos OS Release 7.4.
Command introduced in Junos OS Release 9.0 for EX Series switches.
sfc option introduced for the TX Matrix Plus router in Junos OS Release 9.6.
Description Display whether graceful Routing Engine switchover is configured, the state of the kernel
replication (ready or synchronizing), any replication errors, and whether the primary and
standby Routing Engines are using compatible versions of the kernel database.
NOTE: Issue the show system switchover command only on the backup
RoutingEngine.Thiscommand isnotsupportedonthemasterRoutingEngine.because the kernel-replication process daemon does not run on themaster
Routing Engine. This process runs only on the backup Routing Engine.
Beginning Junos OS Release 9.6, the show system switchover command has
been deprecated on themaster Routing Engine on all routers other than aTXMatrix (switch-card chassis) or a TXMatrix Plus (switch-fabric chassis)router.
However, ina routingmatrix, if you issue theshowsystemswitchovercommand
onthemasterRoutingEngineof theTXMatrix router (or switch-cardchassis),the CLI displays graceful switchover information for themaster RoutingEngine of the T640 routers (or line-card chassis) in the routingmatrix.Likewise, if you issue the show system switchover command on themaster
Routing Engine of a TXMatrix Plus router (or switch-fabric chassis), the CLIdisplays output for themaster Routing Engine of T1600 routers (or line-cardchassis) in the routingmatrix.
309Copyright © 2016, Juniper Networks, Inc.
Chapter 9: System Software Monitoring Commands

Options all-chassis—(TX Matrix and TX Matrix Plus routers only) (Optional) On a TX Matrix router,
display graceful Routing Engine switchover information for all Routing Engines on
the TX Matrix router and the T640 routers configured in the routing matrix. On a TX
Matrix Plus router, display graceful Routing Engine switchover information for all
Routing Engines on the TX Matrix Plus router and the T1600 routers configured in
the routing matrix.
all-lcc—(TX Matrix and TX Matrix Plus routers only) (Optional) On a TX Matrix router,
display graceful Routing Engine switchover information for all T640 routers (or
line-card chassis) connected to the TX Matrix router. On a TX Matrix Plus router,
display graceful Routing Engine switchover information for all T1600 routers (or
line-card chassis) connected to the TX Matrix Plus router.
all-members—(MX Series routers only) (Optional) Display graceful Routing Engine
switchover information for all Routing Engines on all members of the Virtual Chassis
configuration.
lcc number—(TX Matrix and TX Matrix Plus router only) (Optional) On a TX Matrix router,
display graceful Routing Engine switchover information for a specific T640 router
(or line-card chassis) connected to the TX Matrix router. On a TX Matrix Plus router,
display graceful Routing Engine switchover information for a specific T1600 router
(or line-card chassis) connected to the TX Matrix Plus router.Replace number with
0.
local—(MX Series routers only) (Optional) Display graceful Routing Engines switchover
information for all Routing Engines on the local Virtual Chassis member.
membermember-id—(MX Series routers only) (Optional) Display graceful Routing Engine
switchover information for all Routing Engines on the specified member of the Virtual
Chassis configuration. Replace member-id with a value of 0 or 1.
scc—(TX Matrix router only) (Optional) Display graceful Routing Engine switchover
information for the TX Matrix router (or switch-card chassis).
sfc—(TX Matrix Plus router only) (Optional) Display graceful Routing Engine switchover
information for the TX Matrix Plus router (or switch-fabric chassis).
Additional Information If you issue the showsystemswitchover command on a TX Matrix backup Routing Engine,
the command is broadcast to all the T640 backup Routing Engines that are connected
to it.
Likewise, if you issue the show system switchover command on a TX Matrix Plus backup
Routing Engine, the command is broadcast to all the T1600 backup Routing Engines that
are connected to it.
If you issue the show system switchover command on the active Routing Engine in the
master router of an MX Series Virtual Chassis, the router displays an error message that
graceful Routing Engine switchover (GRES) is not enabled on this member.
Required PrivilegeLevel
view
Copyright © 2016, Juniper Networks, Inc.310
System Basics: Getting Started Configuration Guide

List of Sample Output show system switchover (Backup Routing Engine) on page 311show system switchover all-lcc (RoutingMatrix) on page 311
Output Fields Table 13 on page 311 describes the output fields for the showsystemswitchovercommand.
Output fields are listed in the approximate order in which they appear.
Table 13: show system switchover Output Fields
Field DescriptionField Name
Display graceful Routing Engine switchover status:
• On—Indicates graceful-switchover is specified for the routing-options configuration command.
• Off—Indicates graceful-switchover is not specified for the routing-options configuration command.
Graceful switchover
State of the configuration database:
• Ready—Configuration database has synchronized.
• Synchronizing—Configuration database is synchronizing. Displayed when there are updates withinthe last 5 seconds.
• Synchronize failed—Configuration database synchronize process failed.
Configurationdatabase
State of the kernel database:
• Ready—Kernel database has synchronized.
• Synchronizing—Kernel database is synchronizing. Displayed when there are updates within the last5 seconds.
• Version incompatible—The primary and standby Routing Engines are running incompatible kerneldatabase versions.
• Replicationerror—An error occurred when the state was replicated from the primary Routing Engine.Inspect /var/log/ksyncd for possible causes, or notify Juniper Networks customer support.
Kernel database
Routing Engine peer state:
• Steady State—Peer completed switchover transition.
• Peer Connected—Peer in switchover transition.
Peer state
Sample Output
show system switchover (Backup Routing Engine)
user@host> show system switchoverGraceful switchover: OnConfiguration database: ReadyKernel database: ReadyPeer state: Steady State
show system switchover all-lcc (RoutingMatrix)
user@host> show system switchover all-lcc
lcc0-re0:--------------------------------------------------------------------------Multichassis replication: OnConfiguration database: ReadyKernel database: ReadyPeer state: Steady State
311Copyright © 2016, Juniper Networks, Inc.
Chapter 9: System Software Monitoring Commands

lcc2-re0:--------------------------------------------------------------------------Multichassis replication: OnConfiguration database: ReadyKernel database: ReadyPeer state: Steady State
Copyright © 2016, Juniper Networks, Inc.312
System Basics: Getting Started Configuration Guide

show system uptime
List of Syntax Syntax on page 313
Syntax (EX Series Switches) on page 313
Syntax (QFX Series) on page 313
Syntax (TX Matrix Router) on page 313
Syntax (TX Matrix Plus Router) on page 313
Syntax (MX Series Router) on page 313
Syntax show system uptime
Syntax (EX SeriesSwitches)
show system uptime<all-members><local><membermember-id>
Syntax (QFX Series) show system uptime<director-group name><infrastructure name><interconnect-device name><node-group name>
Syntax (TXMatrixRouter)
show system uptime<all-chassis | all-lcc | lcc number | scc>
Syntax(TXMatrixPlusRouter)
show system uptime<detail><all-chassis | all-lcc | lcc number | sfc number>
Syntax (MX SeriesRouter)
show system uptime<all-members><invoke-on><local><membermember-id>
Release Information Command introduced before Junos OS Release 7.4.
Command introduced in Junos OS Release 9.0 for EX Series switches.
sfc option introduced for the TX Matrix Plus router in JUNOS Release 9.6.
Command introduced in Junos OS Release 11.1 for the QFX Series.
Description Display the current time and information about how long the router or switch, router or
switch software, and routing protocols have been running.
Options none—Show time since the system rebooted and processes started.
all-chassis—(TX Matrix and TX Matrix Plus routers only) (Optional) Show time since the
system rebooted and processes started on all the routers in the chassis.
all-lcc—(TX Matrix and TX Matrix Plus routers only) (Optional) On a TX Matrix router,
show time since the system rebooted and processes started for all T640 routers (or
line-card chassis) connected to the TX Matrix router. On a TX Matrix Plus router,
313Copyright © 2016, Juniper Networks, Inc.
Chapter 9: System Software Monitoring Commands

show time since the system rebooted and processes started for all T1600 routers
(or line-card chassis) connected to the TX Matrix Plus router.
all-members—(EX4200 switches and MX Series routers only) (Optional) Show time
since the system rebooted and processes started on all members of the Virtual
Chassis configuration.
director-group name—(QFabric systems only) (Optional) Show time since the system
rebooted and processes started on the Director group.
infrastructure name—(QFabric systems only) (Optional) Show time since the system
rebooted and processes started on the fabric control Routing Engine and fabric
manager Routing Engine.
interconnect-device name—(QFabric systems only) (Optional) Show time since the
system rebooted and processes started on the Interconnect device.
invoke-on—(MX Series routers only) (Optional) Display the time since the system rebooted
and processes started on the master Routing Engine, backup Routing Engine, or both,
on a router with two Routing Engines.
lccnumber—(TX Matrix and TX Matrix Plus routers only) (Optional) On a TX Matrix router,
show time since the system rebooted and processes started for a specific T640
router that is connected to the TX Matrix router. On a TX Matrix Plus router, show
time since the system rebooted and processes started for a specific T1600 router
that is connected to the TX Matrix Plus router. Replace number with a value from 0
through 3.
local—(EX4200 switches and MX Series routers only) (Optional) Show time since the
system rebooted and processes started on the local Virtual Chassis member.
membermember-id—(EX4200 switches and MX Series routers only) (Optional) Show
time since the system rebooted and processes started on the specified member of
the Virtual Chassis configuration. For EX4200 switches, replace member-id with a
value from 0 through 9. For an MX Series Virtual Chassis, replace member-id with a
value of 0 or 1.
node-group name—(QFabric systems only) (Optional) Show time since the system
rebooted and processes started on the Node group.
scc—(TX Matrix routers only) (Optional) Show time since the system rebooted and
processes started for the TX Matrix router (or switch-card chassis).
sfcnumber—(TX Matrix Plus routers only) (Optional) Show time since the system rebooted
and processes started for the TX Matrix Plus router (or switch-fabric chassis). Replace
number with 0.
Additional Information By default, when you issue the showsystemuptime command on a TX Matrix or TX Matrix
Plus master Routing Engine, the command is broadcast to all the T640 (in a routing
matrix based on a TX Matrix router) or T1600 (in a routing matrix based on a TX Matrix
Plus router) master Routing Engines connected to it. Likewise, if you issue the same
command on the TX Matrix or TX Matrix Plus backup Routing Engine, the command is
Copyright © 2016, Juniper Networks, Inc.314
System Basics: Getting Started Configuration Guide

broadcast to all the T640 (in a routing matrix based on a TX Matrix router) or T1600 (in
a routing matrix based on a TX Matrix Plus router) backup Routing Engines that are
connected to it.
Required PrivilegeLevel
view
RelatedDocumentation
Monitoring System Process Information•
• Monitoring System Properties
• 10-Gigabit Ethernet LAN/WAN PIC with XFP (T640 Router)
List of Sample Output show system uptime on page 315show system uptime all-lcc (TXMatrix Router) on page 316show system uptime all-lcc (TXMatrix Plus Router) on page 316show system uptime (QFX Series) on page 317
Output Fields Table 14 on page 315 describes the output fields for the show system uptime command.
Output fields are listed in the approximate order in which they appear.
Table 14: show system uptimeOutput Fields
Field DescriptionField Name
Current system time in UTC.Current time
Date and time when the Routing Engine on the router or switch was last booted and how long it hasbeen running.
System booted
Date and time when the routing protocols were last started and how long they have been running.Protocols started
Date and time when a configuration was last committed. Also shows the name of the user who issuedthe last commit command.
Last configured
Current time, in the local time zone, and how long the router or switch has been operational.time and up
Number of users logged in to the router or switch.users
Load averages for the last 1 minute, 5 minutes, and 15 minutes.load averages
Sample Output
show system uptime
user@host> show system uptimeCurrent time: 1998-10-13 19:45:47 UTC System booted: 1998-10-12 20:51:41 UTC (22:54:06 ago)Protocols started: 1998-10-13 19:33:45 UTC (00:12:02 ago)Last configured: 1998-10-13 19:33:45 UTC (00:12:02 ago) by abc12:45PM up 22:54, 2 users, load averages: 0.07, 0.02, 0.01
315Copyright © 2016, Juniper Networks, Inc.
Chapter 9: System Software Monitoring Commands

show system uptime all-lcc (TXMatrix Router)
user@host> show system uptime all-lcclcc0-re0:--------------------------------------------------------------------------Current time: 2004-09-13 09:55:35 PDTSystem booted: 2004-09-13 03:13:55 PDT (06:41:40 ago)Last configured: 2004-09-13 03:17:48 PDT (06:37:47 ago) by root9:55AM PDT up 6:42, 1 user, load averages: 0.02, 0.03, 0.00lcc2-re0:--------------------------------------------------------------------------Current time: 2004-09-13 09:55:35 PDTSystem booted: 2004-09-12 03:23:43 PDT (1d 06:31 ago)Last configured: 2004-09-13 03:05:36 PDT (06:49:59 ago) by root9:55AM PDT up 1 day, 6:32, 1 user, load averages: 0.02, 0.01, 0.00
show system uptime all-lcc (TXMatrix Plus Router)
user@host> show system uptime all-lccsfc0-re0:--------------------------------------------------------------------------Current time: 2009-05-25 00:24:30 PDTSystem booted: 2009-05-24 06:39:33 PDT (17:44:57 ago)Protocols started: 2009-05-24 06:40:30 PDT (17:44:00 ago)Last configured: 2009-05-24 06:33:27 PDT (17:51:03 ago) by gregdo12:24AM up 17:45, 2 users, load averages: 0.07, 0.05, 0.01
lcc0-re0:--------------------------------------------------------------------------Current time: 2009-05-25 00:24:30 PDTSystem booted: 2009-05-24 06:39:46 PDT (17:44:44 ago)error: the routing subsystem is not runningLast configured: 2009-05-24 06:40:47 PDT (17:43:43 ago) by root12:24AM up 17:45, 0 users, load averages: 0.00, 0.00, 0.00
lcc1-re0:--------------------------------------------------------------------------Current time: 2009-05-25 00:24:30 PDTSystem booted: 2009-05-24 06:39:38 PDT (17:44:52 ago)error: the routing subsystem is not runningLast configured: 2009-05-24 06:40:18 PDT (17:44:12 ago) by root12:24AM up 17:45, 0 users, load averages: 0.00, 0.00, 0.00
lcc2-re0:--------------------------------------------------------------------------Current time: 2009-05-25 00:24:30 PDTSystem booted: 2009-05-24 06:39:48 PDT (17:44:42 ago)error: the routing subsystem is not runningLast configured: 2009-05-24 06:40:44 PDT (17:43:46 ago) by root12:24AM up 17:45, 0 users, load averages: 0.00, 0.00, 0.00
lcc3-re0:--------------------------------------------------------------------------Current time: 2009-05-25 00:24:30 PDTSystem booted: 2009-05-24 06:39:44 PDT (17:44:46 ago)error: the routing subsystem is not runningLast configured: 2009-05-24 06:40:08 PDT (17:44:22 ago) by root12:24AM up 17:45, 0 users, load averages: 0.00, 0.00, 0.00
Copyright © 2016, Juniper Networks, Inc.316
System Basics: Getting Started Configuration Guide

show system uptime (QFX Series)
user@switch> show system uptimeCurrent time: 2010-08-27 03:12:30 PDTSystem booted: 2010-08-13 17:11:54 PDT (1w6d 10:00 ago)Protocols started: 2010-08-13 17:13:56 PDT (1w6d 09:58 ago)Last configured: 2010-08-26 05:54:00 PDT (21:18:30 ago) by user 3:12AM up 13 days, 10:01, 3 users, load averages: 0.00, 0.00, 0.00
317Copyright © 2016, Juniper Networks, Inc.
Chapter 9: System Software Monitoring Commands

show system virtual-memory
List of Syntax Syntax on page 318
Syntax (EX Series) on page 318
Syntax (TX Matrix Router) on page 318
Syntax (TX Matrix Plus Router) on page 318
Syntax (MX Series Router) on page 318
Syntax (QFX Series) on page 318
Syntax show system virtual-memory
Syntax (EX Series) show system virtual-memory<all-members><local><membermember-id>
Syntax (TXMatrixRouter)
show system virtual-memory<all-chassis | all-lcc | lcc number | scc>
Syntax(TXMatrixPlusRouter)
show system virtual-memory<all-chassis | all-lcc | lcc number | sfc number>
Syntax (MX SeriesRouter)
show system virtual-memory<all-members><local><membermember-id>
Syntax (QFX Series) show system virtual-memory<infrastructure name><interconnect-device name><node-group name>
Release Information Command introduced before Junos OS Release 7.4.
Command introduced in Junos OS Release 9.0 for EX Series switches.
sfc option introduced for the TX Matrix Plus router in Junos OS Release 9.6.
Command introduced in Junos OS Release 11.1 for the QFX Series.
Description Display the usage of Junos OS kernel memory listed first by size of allocation and then
by type of usage. Use the show system virtual-memory command for troubleshooting
with Juniper Networks Customer Support.
Options none—Display kernel dynamic memory usage information.
all-chassis—(TX Matrix and TX Matrix Plus routers only) (Optional) Display kernel dynamic
memory usage information for all chassis.
all-lcc—(TX Matrix and TX Matrix Plus routers only) (Optional) On a TX Matrix router,
display kernel dynamic memory usage information for all T640 routers (or line-card
chassis) connected to the TX Matrix router. On a TX Matrix Plus router, display kernel
dynamic memory usage information for all T1600 routers (or line-card chassis)
connected to the TX Matrix Plus router.
Copyright © 2016, Juniper Networks, Inc.318
System Basics: Getting Started Configuration Guide

all-members—(EX4200 switches and MX Series routers only) (Optional) Display kernel
dynamic memory usage information for all members of the Virtual Chassis
configuration.
infrastructurename—(QFabric systems only) (Optional) Display kernel dynamic memory
usage information for the fabric control Routing Engine and fabric manager Routing
Engine.
interconnect-device name—(QFabric systems only) (Optional) Display kernel dynamic
memory usage information for the Interconnect device.
lccnumber—(TX Matrix and TX Matrix Plus routers only) (Optional) On a TX Matrix router,
display kernel dynamic memory usage information for a specific T640 router that is
connected to the TX Matrix router. On a TX Matrix Plus router, display kernel dynamic
memory usage information for a specific T1600 router that is connected to the TX
Matrix Plus router. Replace number with a value from 0 through 3.
local—(EX4200 switches and MX Series routers only) (Optional) Display kernel dynamic
memory usage information for the local Virtual Chassis member.
membermember-id—(EX4200 switches and MX Series routers only) (Optional) Display
kernel dynamic memory usage information for the specified member of the Virtual
Chassis configuration. For EX4200 switches, replace member-id with a value from
0 through 9. For an MX Series Virtual Chassis, replace member-id with a value of 0
or 1.
node-group name—(QFabric systems only) (Optional) Display kernel dynamic memory
usage information for the Node group.
scc—(TX Matrix routers only) (Optional) Display kernel dynamic memory usage
information for the TX Matrix router (or switch-card chassis).
sfc number—(TX Matrix Plus routers only) (Optional) Display kernel dynamic memory
usage information for the TX Matrix Plus router (or switch-fabric chassis). Replace
number with 0.
Additional Information By default, when you issue the show system virtual-memory command on a TX Matrix or
TX Matrix Plus master Routing Engine, the command is broadcast to all the T640 (in a
routing matrix based on a TX Matrix router) or T1600 (in a routing matrix based on a TX
Matrix Plus router) master Routing Engines connected to it. Likewise, if you issue the
same command on the TX Matrix or TX Matrix Plus backup Routing Engine, the command
is broadcast to all the T640 (in a routing matrix based on a TX Matrix router) or T1600
(in a routing matrix based on a TX Matrix Plus router) backup Routing Engines that are
connected to it.
319Copyright © 2016, Juniper Networks, Inc.
Chapter 9: System Software Monitoring Commands

NOTE: Theshowsystemvirtual-memorycommandwiththe |displayXMLpipe
option now displays XML output for the command in the parent tags:<vmstat-memstat-malloc>, <vmstat-memstat-zone>, <vmstat-sumstat>,
<vmstat-intr>, and <vmstat-kernel-state>with each child element as a
separate XML tag. In Junos OS Releases 10.1 and earlier, the | display XML
option for this command does not have an XML API element and the entireoutput is displayed in a single <output> tag element.
Required PrivilegeLevel
view
List of Sample Output show system virtual-memory on page 322show system virtual-memory scc (TXMatrix Router) on page 326show system virtual-memory sfc (TXMatrix Plus Router) on page 327show system virtual-memory | display xml on page 330show system virtual-memory (QFX Series) on page 353
Output Fields Table 15 on page 321 lists the output fields for the showsystemvirtual-memorycommand.
Output fields are listed in the approximate order in which they appear.
Copyright © 2016, Juniper Networks, Inc.320
System Basics: Getting Started Configuration Guide

Table 15: show system virtual-memory Output Fields
Field DescriptionField Name
Memory statistics by bucket size
Memory block size (bytes). The kernel memory allocator appropriates blocks of memory whose sizeis exactly a power of 2.
Size
Number of memory blocks of this size that are in use (bytes).In Use
Number of memory blocks of this size that are free (bytes).Free
Number of memory allocation requests made.Requests
Maximum value the free list can have. Once the system starts reclaiming physical memory, it continuesuntil the free list is increased to this value.
HighWater
Total number of times that the free elements for a bucket size exceed the high-water mark for thatbucket size.
Couldfree
Memory usage type by bucket size
Memory block size (bytes).Size
Kernel modules that are using these memory blocks. For a definition of each type, refer to a FreeBSDbook.
Type(s)
Memory statistics by type
Kernel module that is using dynamic memory.Type
Number of memory blocks used by this type. The number is rounded up.InUse
Amount of memory in use, in kilobytes (KB).MemUse
Maximum memory ever used by this type.HighUse
Maximum memory that can be allocated to this type.Limit
Total number of dynamic memory allocation requests this type has made.Requests
Number of times requests were blocked for reaching the maximum limit.Type Limit
Number of times requests were blocked for the kernel map.Kern Limit
Memory block sizes this type is using.Size(s)
Memory Totals
Total kernel dynamic memory in use (bytes, rounded up).In Use
Total kernel dynamic memory free (bytes, rounded up).Free
321Copyright © 2016, Juniper Networks, Inc.
Chapter 9: System Software Monitoring Commands

Table 15: show system virtual-memory Output Fields (continued)
Field DescriptionField Name
Total number of memory allocation requests.Requests
Kernel module that is using memory.ITEM
Memory block size (bytes).Size
Maximum memory that can be allocated to this type.LImit
Number of memory blocks used by this type. The number is rounded up.Used
Number of memory blocks available to this type.Free
Total number of memory allocation requests this type has made.Requests
Timer events and scheduling interruptions.interrupt
Total number of interruptions for each type.total
Interruption rate.rate
Total for all interruptions.Total
Sample Output
show system virtual-memory
user@host> show system virtual-memoryMemory statistics by bucket sizeSize In Use Free Requests HighWater Couldfree 16 906 118 154876 1280 0 32 455 313 209956 640 0 64 4412 260 75380 320 20 128 3200 32 19361 160 81 256 1510 10 8844 80 4 512 446 2 5085 40 0 1K 18 2 5901 20 0 2K 1128 2 4445 10 1368 4K 185 1 456 5 0 8K 5 1 2653 5 0 16K 181 0 233 5 0 32K 2 0 1848 5 0 64K 20 0 22 5 0128K 5 0 5 5 0256K 2 0 2 5 0512K 1 0 1 5 0
Memory usage type by bucket sizeSize Type(s) 16 uc_devlist, nexusdev, iftable, temp, devbuf, atexit, COS, BPF, DEVFS mount, DEVFS node, vnodes, mount, pcb, soname, proc-args, kld, MD disk, rman, ATA generic, bus, sysctl, ippool, pfestat, ifstate,
Copyright © 2016, Juniper Networks, Inc.322
System Basics: Getting Started Configuration Guide

pfe_ipc, mkey, rtable, ifmaddr, ipfw, rnode 32 atkbddev, dirrem, mkdir, diradd, freefile, freefrag, indirdep, bmsafemap, newblk, temp, devbuf, COS, vnodes, cluster_save buffer, pcb, soname, proc-args, sigio, kld, Gzip trees, taskqueue, SWAP, eventhandler, bus, sysctl, uidinfo, subproc, pgrp, pfestat, itable32, ifstate, pfe_ipc, mkey, rtable, ifmaddr, ipfw, rnode, rtnexthop 64 isadev, iftable, MFS node, allocindir, allocdirect, pagedep, temp, devbuf, lockf, COS, NULLFS hash, DEVFS name, vnodes, cluster_save buffer, vfscache, pcb, soname, proc-args, file, AR driver, AD driver, Gzip trees, rman, eventhandler, bus, sysctl, subproc, pfestat, pic, ifstate, pfe_ipc, mkey, ifaddr, rtable, ipfw 128 ZONE, freeblks, inodedep, temp, devbuf, zombie, COS, DEVFS node, vnodes, mount, vfscache, pcb, soname, proc-args, ttys, dev_t, timecounter, kld, Gzip trees, ISOFS node, bus, uidinfo, cred, session, pic, itable16, ifstate, pfe_ipc, rtable, ifstat, metrics, rtnexthop, iffamily 256 iflogical, iftable, MFS node, FFS node, newblk, temp, devbuf, NFS daemon, vnodes, proc-args, kqueue, file desc, Gzip trees, bus, subproc, itable16, ifstate, pfe_ipc, sysctl, rtnexthop 512 UFS mount, temp, devbuf, mount, BIO buffer, ptys, ttys, AR driver, Gzip trees, ISOFS mount, msg, ioctlops, ATA generic, bus, proc, pfestat, lr, ifstate, pfe_ipc, rtable, ipfw, ifstat, rtnexthop 1K iftable, temp, devbuf, NQNFS Lease, kqueue, kld, AD driver, Gzip trees, sem, MD disk, bus, ifstate, pfe_ipc, ipfw 2K uc_devlist, UFS mount, temp, devbuf, BIO buffer, pcb, AR driver, Gzip trees, ioctlops, bus, ipfw, ifstat, rcache 4K memdesc, iftable, UFS mount, temp, devbuf, kld, Gzip trees, sem, msg 8K temp, devbuf, syncache, Gzip trees 16K indirdep, temp, devbuf, shm, msg 32K pagedep, kld, Gzip trees 64K VM pgdata, devbuf, MSDOSFS mount128K UFS ihash, inodedep, NFS hash, kld, ISOFS mount256K mbuf, vfscache512K SWAP
Memory statistics by type Type Kern Type InUse MemUse HighUse Limit Requests Limit Limit Size(s) isadev 13 1K 1K127753K 13 0 0 64 atkbddev 2 1K 1K127753K 2 0 0 32 uc_devlist 24 3K 3K127753K 24 0 0 16,2K nexusdev 3 1K 1K127753K 3 0 0 16 memdesc 1 4K 4K127753K 1 0 0 4K mbuf 1 152K 152K127753K 1 0 0 256K iflogical 6 2K 2K127753K 6 0 0 256 iftable 17 9K 9K127753K 18 0 0 16,64,256,1K,4K ZONE 15 2K 2K127753K 15 0 0 128 VM pgdata 1 64K 64K127753K 1 0 0 64K UFS mount 12 26K 26K127753K 12 0 0 512,2K,4K UFS ihash 1 128K 128K127753K 1 0 0 128K MFS node 6 2K 3K127753K 35 0 0 64,256 FFS node 906 227K 227K127753K 1352 0 0 256 dirrem 0 0K 4K127753K 500 0 0 32 mkdir 0 0K 1K127753K 38 0 0 32 diradd 0 0K 6K127753K 521 0 0 32 freefile 0 0K 4K127753K 374 0 0 32 freeblks 0 0K 8K127753K 219 0 0 128 freefrag 0 0K 1K127753K 193 0 0 32 allocindir 0 0K 25K127753K 1518 0 0 64 indirdep 0 0K 17K127753K 76 0 0 32,16K allocdirect 0 0K 10K127753K 760 0 0 64 bmsafemap 0 0K 1K127753K 72 0 0 32
323Copyright © 2016, Juniper Networks, Inc.
Chapter 9: System Software Monitoring Commands

newblk 1 1K 1K127753K 2279 0 0 32,256 inodedep 1 128K 175K127753K 2367 0 0 128,128K pagedep 1 32K 33K127753K 47 0 0 64,32K temp 1239 92K 96K127753K 8364 0 0 16,32,64K devbuf 1413 5527K 5527K127753K 1535 0 0 16,32,64,128,256 lockf 38 3K 3K127753K 2906 0 0 64 atexit 1 1K 1K127753K 1 0 0 16 zombie 0 0K 2K127753K 3850 0 0 128 NFS hash 1 128K 128K127753K 1 0 0 128K NQNFS Lease 1 1K 1K127753K 1 0 0 1K NFS daemon 1 1K 1K127753K 1 0 0 256 syncache 1 8K 8K127753K 1 0 0 8K COS 353 44K 44K127753K 353 0 0 16,32,64,128 BPF 189 3K 3K127753K 189 0 0 16MSDOSFS mount 1 64K 64K127753K 1 0 0 64K NULLFS hash 1 1K 1K127753K 1 0 0 64 DEVFS mount 2 1K 1K127753K 2 0 0 16 DEVFS name 487 31K 31K127753K 487 0 0 64 DEVFS node 471 58K 58K127753K 479 0 0 16,128 vnodes 28 7K 7K127753K 429 0 0 16,32,64,128,256 mount 15 8K 8K127753K 18 0 0 16,128,512cluster_save buffer 0 0K 1K127753K 55 0 0 32,64 vfscache 1898 376K 376K127753K 3228 0 0 64,128,256K BIO buffer 49 98K 398K127753K 495 0 0 512,2K pcb 159 16K 17K127753K 399 0 0 16,32,64,128,2K soname 82 10K 10K127753K 42847 0 0 16,32,64,128 proc-args 57 2K 3K127753K 2105 0 0 16,32,64,128,256 ptys 32 16K 16K127753K 32 0 0 512 ttys 254 33K 33K127753K 522 0 0 128,512 kqueue 5 3K 4K127753K 23 0 0 256,1K sigio 1 1K 1K127753K 27 0 0 32 file 383 24K 24K127753K 16060 0 0 64 file desc 76 19K 20K127753K 3968 0 0 256 shm 1 12K 12K127753K 1 0 0 16K dev_t 286 36K 36K127753K 286 0 0 128 timecounter 10 2K 2K127753K 10 0 0 128 kld 11 117K 122K127753K 34 0 0 16,32,128,1K,4K AR driver 1 1K 3K127753K 5 0 0 64,512,2K AD driver 2 2K 3K127753K 2755 0 0 64,1K Gzip trees 0 0K 46K127753K 133848 0 0 32,64,128,256 ISOFS node 1136 142K 142K127753K 1189 0 0 128 ISOFS mount 9 132K 132K127753K 10 0 0 512,128K sem 3 6K 6K127753K 3 0 0 1K,4K MD disk 2 2K 2K127753K 2 0 0 16,1K msg 4 25K 25K127753K 4 0 0 512,4K,16K rman 59 4K 4K127753K 461 0 0 16,64 ioctlops 0 0K 2K127753K 992 0 0 512,2K taskqueue 2 1K 1K127753K 2 0 0 32 SWAP 2 413K 413K127753K 2 0 0 32,512K ATA generic 6 3K 3K127753K 6 0 0 16,512 eventhandler 17 1K 1K127753K 17 0 0 32,64 bus 340 30K 31K127753K 794 0 0 16,32,64,128,256 sysctl 0 0K 1K127753K 130262 0 0 16,32,64 uidinfo 4 1K 1K127753K 10 0 0 32,128 cred 22 3K 3K127753K 3450 0 0 128 subproc 156 10K 10K127753K 7882 0 0 32,64,256 proc 2 1K 1K127753K 2 0 0 512 session 12 2K 2K127753K 34 0 0 128 pgrp 16 1K 1K127753K 45 0 0 32 ippool 1 1K 1K127753K 1 0 0 16 pfestat 0 0K 1K127753K 47349 0 0 16,32,64,512
Copyright © 2016, Juniper Networks, Inc.324
System Basics: Getting Started Configuration Guide

pic 5 1K 1K127753K 5 0 0 64,128 lr 1 1K 1K127753K 1 0 0 512 itable32 110 4K 4K127753K 110 0 0 32 itable16 161 26K 26K127753K 161 0 0 128,256 ifstate 694 159K 160K127753K 1735 0 0 16,32,64,128,1K pfe_ipc 0 0K 1K127753K 56218 0 0 16,32,64,128,1K mkey 250 4K 4K127753K 824 0 0 16,32,64 ifaddr 9 1K 1K127753K 9 0 0 64 sysctl 0 0K 1K127753K 30 0 0 256 rtable 49 6K 6K127753K 307 0 0 16,32,64,128,512 ifmaddr 22 1K 1K127753K 22 0 0 16,32 ipfw 23 10K 10K127753K 48 0 0 16,32,64,512,2K ifstat 698 805K 805K127753K 698 0 0 128,512,2K rcache 4 8K 8K127753K 4 0 0 2K rnode 27 1K 1K127753K 285 0 0 16,32 metrics 1 1K 1K127753K 3 0 0 128 rtnexthop 57 9K 9K127753K 312 0 0 32,128,256,512 iffamily 12 2K 2K127753K 12 0 0 128
Memory Totals: In Use Free Requests 9311K 54K 489068
ITEM SIZE LIMIT USED FREE REQUESTSPIPE: 192, 0, 4, 81, 4422SWAPMETA: 160, 95814, 0, 0, 0unpcb: 160, 0, 114, 36, 279ripcb: 192, 25330, 5, 37, 5syncache: 128, 15359, 0, 64, 5tcpcb: 576, 25330, 23, 12, 32udpcb: 192, 25330, 14, 28, 255socket: 256, 25330, 246, 26, 819KNOTE: 96, 0, 27, 57, 71NFSNODE: 352, 0, 0, 0, 0NFSMOUNT: 544, 0, 0, 0, 0VNODE: 224, 0, 2778, 43, 2778NAMEI: 1024, 0, 0, 8, 40725VMSPACE: 192, 0, 57, 71, 3906PROC: 448, 0, 73, 17, 3923DP fakepg: 64, 0, 0, 0, 0PV ENTRY: 28, 499566, 44530, 152053, 1525141MAP ENTRY: 48, 0, 1439, 134, 351075KMAP ENTRY: 48, 35645, 179, 119, 10904MAP: 108, 0, 7, 3, 7VM OBJECT: 92, 0, 2575, 109, 66912
792644 cpu context switches 9863474 device interrupts 286510 software interrupts 390851 traps 3596829 system calls 16 kernel threads created 3880 fork() calls 27 vfork() calls 0 rfork() calls 0 swap pager pageins 0 swap pager pages paged in 0 swap pager pageouts 0 swap pager pages paged out 380 vnode pager pageins 395 vnode pager pages paged in 122 vnode pager pageouts
325Copyright © 2016, Juniper Networks, Inc.
Chapter 9: System Software Monitoring Commands
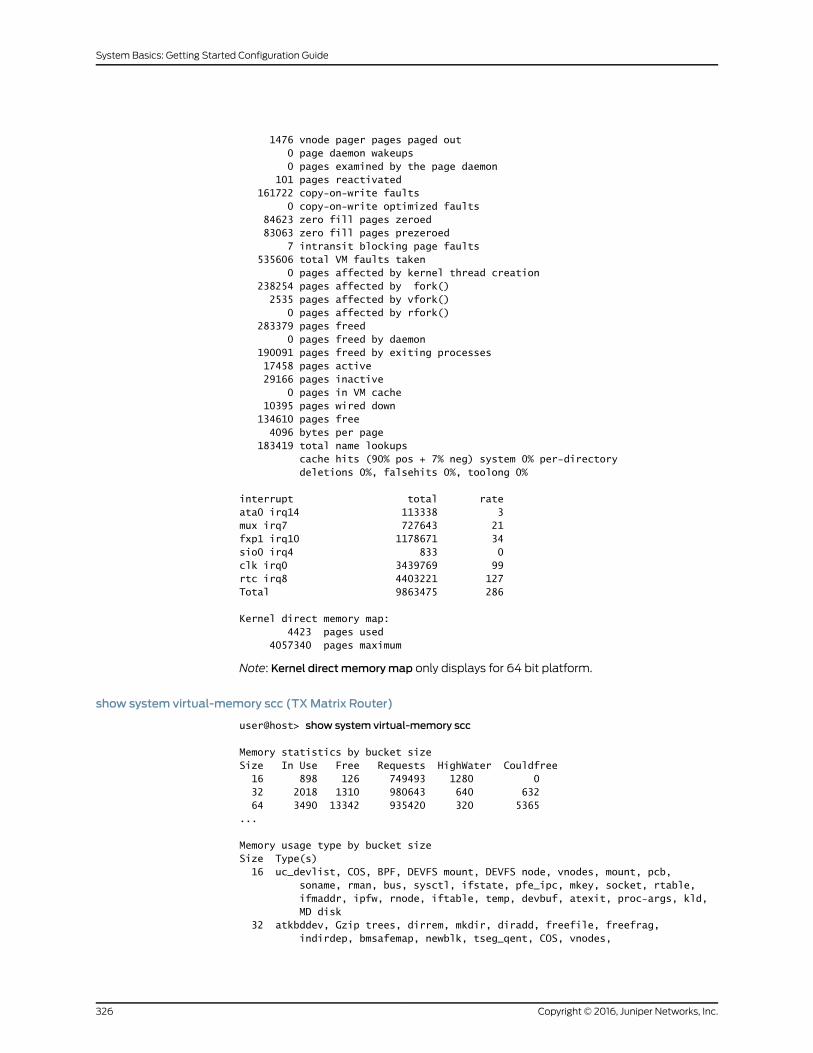
1476 vnode pager pages paged out 0 page daemon wakeups 0 pages examined by the page daemon 101 pages reactivated 161722 copy-on-write faults 0 copy-on-write optimized faults 84623 zero fill pages zeroed 83063 zero fill pages prezeroed 7 intransit blocking page faults 535606 total VM faults taken 0 pages affected by kernel thread creation 238254 pages affected by fork() 2535 pages affected by vfork() 0 pages affected by rfork() 283379 pages freed 0 pages freed by daemon 190091 pages freed by exiting processes 17458 pages active 29166 pages inactive 0 pages in VM cache 10395 pages wired down 134610 pages free 4096 bytes per page 183419 total name lookups cache hits (90% pos + 7% neg) system 0% per-directory deletions 0%, falsehits 0%, toolong 0%
interrupt total rateata0 irq14 113338 3mux irq7 727643 21fxp1 irq10 1178671 34sio0 irq4 833 0clk irq0 3439769 99rtc irq8 4403221 127Total 9863475 286
Kernel direct memory map: 4423 pages used 4057340 pages maximum
Note: Kernel direct memorymap only displays for 64 bit platform.
show system virtual-memory scc (TXMatrix Router)
user@host> show system virtual-memory scc
Memory statistics by bucket sizeSize In Use Free Requests HighWater Couldfree 16 898 126 749493 1280 0 32 2018 1310 980643 640 632 64 3490 13342 935420 320 5365...
Memory usage type by bucket sizeSize Type(s) 16 uc_devlist, COS, BPF, DEVFS mount, DEVFS node, vnodes, mount, pcb, soname, rman, bus, sysctl, ifstate, pfe_ipc, mkey, socket, rtable, ifmaddr, ipfw, rnode, iftable, temp, devbuf, atexit, proc-args, kld, MD disk 32 atkbddev, Gzip trees, dirrem, mkdir, diradd, freefile, freefrag, indirdep, bmsafemap, newblk, tseg_qent, COS, vnodes,
Copyright © 2016, Juniper Networks, Inc.326
System Basics: Getting Started Configuration Guide
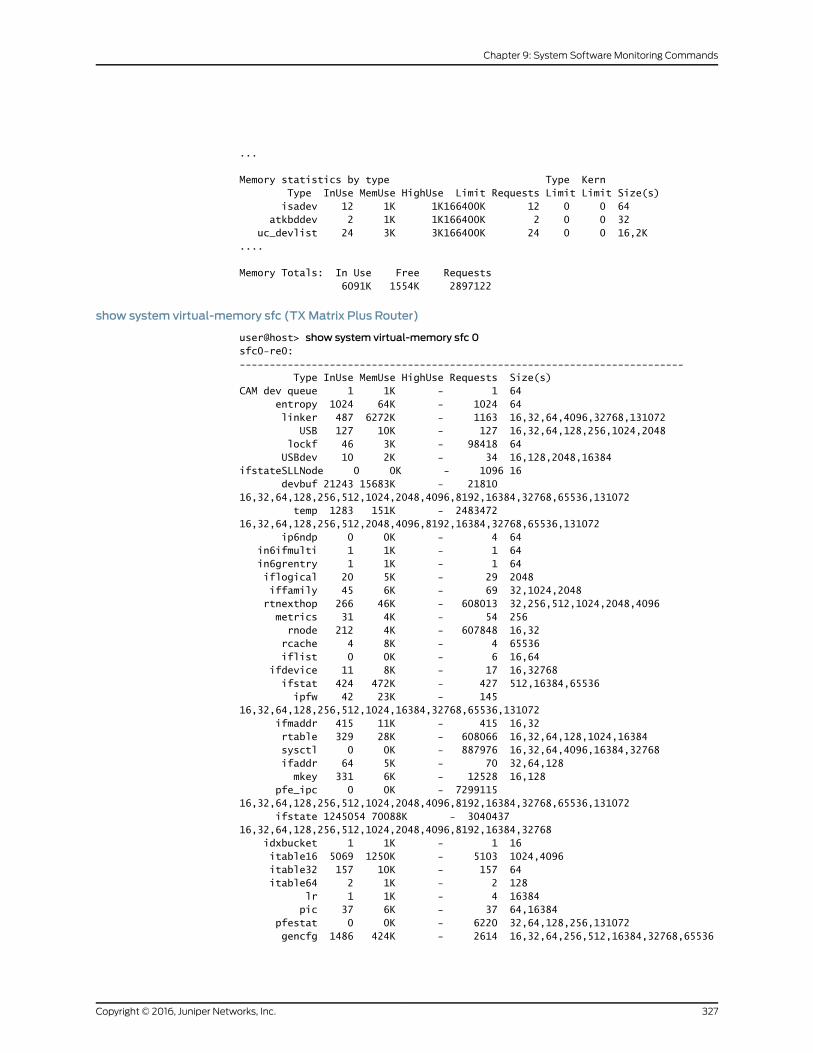
...
Memory statistics by type Type Kern Type InUse MemUse HighUse Limit Requests Limit Limit Size(s) isadev 12 1K 1K166400K 12 0 0 64 atkbddev 2 1K 1K166400K 2 0 0 32 uc_devlist 24 3K 3K166400K 24 0 0 16,2K....
Memory Totals: In Use Free Requests 6091K 1554K 2897122
show system virtual-memory sfc (TXMatrix Plus Router)
user@host> show system virtual-memory sfc 0sfc0-re0:-------------------------------------------------------------------------- Type InUse MemUse HighUse Requests Size(s)CAM dev queue 1 1K - 1 64 entropy 1024 64K - 1024 64 linker 487 6272K - 1163 16,32,64,4096,32768,131072 USB 127 10K - 127 16,32,64,128,256,1024,2048 lockf 46 3K - 98418 64 USBdev 10 2K - 34 16,128,2048,16384ifstateSLLNode 0 0K - 1096 16 devbuf 21243 15683K - 21810 16,32,64,128,256,512,1024,2048,4096,8192,16384,32768,65536,131072 temp 1283 151K - 2483472 16,32,64,128,256,512,2048,4096,8192,16384,32768,65536,131072 ip6ndp 0 0K - 4 64 in6ifmulti 1 1K - 1 64 in6grentry 1 1K - 1 64 iflogical 20 5K - 29 2048 iffamily 45 6K - 69 32,1024,2048 rtnexthop 266 46K - 608013 32,256,512,1024,2048,4096 metrics 31 4K - 54 256 rnode 212 4K - 607848 16,32 rcache 4 8K - 4 65536 iflist 0 0K - 6 16,64 ifdevice 11 8K - 17 16,32768 ifstat 424 472K - 427 512,16384,65536 ipfw 42 23K - 145 16,32,64,128,256,512,1024,16384,32768,65536,131072 ifmaddr 415 11K - 415 16,32 rtable 329 28K - 608066 16,32,64,128,1024,16384 sysctl 0 0K - 887976 16,32,64,4096,16384,32768 ifaddr 64 5K - 70 32,64,128 mkey 331 6K - 12528 16,128 pfe_ipc 0 0K - 7299115 16,32,64,128,256,512,1024,2048,4096,8192,16384,32768,65536,131072 ifstate 1245054 70088K - 3040437 16,32,64,128,256,512,1024,2048,4096,8192,16384,32768 idxbucket 1 1K - 1 16 itable16 5069 1250K - 5103 1024,4096 itable32 157 10K - 157 64 itable64 2 1K - 2 128 lr 1 1K - 4 16384 pic 37 6K - 37 64,16384 pfestat 0 0K - 6220 32,64,128,256,131072 gencfg 1486 424K - 2614 16,32,64,256,512,16384,32768,65536
327Copyright © 2016, Juniper Networks, Inc.
Chapter 9: System Software Monitoring Commands

jsr 2 1K - 22 16 idl 1 4K - 165 32,64,128,256,512,1024,2048,8192,16384,32768,65536,131072 rtsmsg 0 0K - 16 131072 module 250 16K - 250 64,128 mtx_pool 1 8K - 1 64,128 DEVFS3 113 13K - 114 256 DEVFS1 106 24K - 106 2048 pgrp 15 1K - 8600 64 session 11 2K - 2829 512 proc 2 1K - 2 16384 subproc 296 572K - 24689 2048,131072 cred 38 5K - 619244 256 plimit 18 4K - 21311 2048 uidinfo 3 1K - 10 32,512 sysctloid 2701 82K - 2701 16,32,64 sysctltmp 0 0K - 15572 16,32,64,1024 umtx 171 11K - 171 64 SWAP 2 277K - 2 64 bus 779 125K - 3072 16,32,64,128,32768 bus-sc 67 62K - 1477 16,32,64,512,1024,2048,8192,16384,65536,131072 devstat 8 17K - 8 16,131072 eventhandler 46 2K - 47 32,128 kobj 93 186K - 111 65536 DEVFS 8 1K - 9 16,64 rman 106 7K - 490 16,32,64 sbuf 0 0K - 28234 16,32,32768,131072...lcc0-re0: -------------------------------------------------------------------------- Type InUse MemUse HighUse Requests Size(s)CAM dev queue 1 1K - 1 64 entropy 1024 64K - 1024 64 linker 487 6272K - 1163 16,32,64,4096,32768,131072 USB 127 10K - 127 16,32,64,128,256,1024,2048 lockf 23 2K - 169585 64 USBdev 10 2K - 34 16,128,2048,16384 devbuf 5128 10760K - 5310 16,32,64,128,256,512,1024,2048,4096,8192,16384,32768,65536,131072 temp 1285 151K - 10770 16,32,64,128,256,512,2048,4096,8192,16384,32768,65536,131072 ip6ndp 0 0K - 4 64 iflogical 20 5K - 29 2048 iffamily 45 6K - 69 32,1024,2048 rtnexthop 189 29K - 1211988 32,256,512,1024,2048,4096 metrics 11 2K - 16 256 rnode 135 3K - 606391 16,32 rcache 4 8K - 4 65536 iflist 0 0K - 6 16,64 ifdevice 11 8K - 17 16,32768 ifstat 412 471K - 415 512,16384,65536 ipfw 42 23K - 91 16,32,64,128,256,512,1024,16384,32768,65536,131072 ifmaddr 415 11K - 415 16,32 rtable 225 20K - 606584 16,32,64,128,1024,16384 sysctl 0 0K - 2302479 16,32,64 ifaddr 53 4K - 69 32,64,128 mkey 133 3K - 8974 16,128 pfe_ipc 0 0K - 19035108 16,32,64,128,512,1024,2048,8192,16384,32768,65536,131072
Copyright © 2016, Juniper Networks, Inc.328
System Basics: Getting Started Configuration Guide

ifstate 710270 42176K - 9583703 16,32,64,128,256,512,1024,2048,8192,16384,32768 idxbucket 1 1K - 1 16 itable16 5045 1245K - 1825178 1024,4096 itable32 157 10K - 157 64 itable64 2 1K - 2 128 lr 1 1K - 4 16384 pic 37 6K - 37 64,16384 pfestat 0 0K - 1682 32,64,128,256,131072 gencfg 1486 424K - 2812 16,32,64,256,512,16384,32768,65536 jsr 0 0K - 22 16 idl 0 0K - 4 32768,131072 rtsmsg 0 0K - 3 131072 module 250 16K - 250 64,128 mtx_pool 1 8K - 1 64,128 DEVFS3 108 12K - 109 256 DEVFS1 101 23K - 101 2048 pgrp 5 1K - 917 64 session 5 1K - 917 512 proc 2 1K - 2 16384 subproc 217 441K - 4867 2048,131072 cred 21 3K - 48719 256 plimit 9 2K - 5255 2048 uidinfo 2 1K - 2 32,512 sysctloid 2786 85K - 2786 16,32,64 sysctltmp 0 0K - 1833 16,32,64,1024 umtx 126 8K - 126 64 SWAP 2 277K - 2 64 bus 780 125K - 2734 16,32,64,128,32768 bus-sc 69 69K - 1194 16,32,64,512,1024,2048,8192,16384,65536,131072 devstat 8 17K - 8 16,131072 eventhandler 45 2K - 46 32,128 kobj 93 186K - 111 65536 DEVFS 8 1K - 9 16,64 rman 94 6K - 477 16,32,64 sbuf 0 0K - 532 16,32,32768,131072 NULLFS hash 1 1K - 1 64 taskqueue 5 1K - 5 64 turnstiles 127 8K - 127 64 Unitno 6 1K - 44 16,64 ioctlops 0 0K - 1771718 16,32,64,128,8192,16384,65536,131072
iov 0 0K - 79425 16,64,128,256,512,1024,2048,131072 msg 4 25K - 4 32768,131072 sem 4 7K - 4 16384,32768,131072 shm 2 13K - 4 32768 ttys 93 16K - 195 512,32768 soname 31 3K - 389284 16,32,64,256 pcb 101 16K - 4374 16,32,64,128,1024,2048,4096,16384,65536 BIO buffer 40 80K - 750 65536 vfscache 1 512K - 1 65536cluster_save buffer 0 0K - 55 32,64 VFS hash 1 256K - 1 32,64 vnodes 1 1K - 1 512 mount 266 21K - 481 16,32,64,128,256,4096,32768 vnodemarker 0 0K - 2497 16384 pfs_nodes 25 3K - 25 128 pfs_vncache 144 5K - 386 32 STP 1 1K - 1 64
329Copyright © 2016, Juniper Networks, Inc.
Chapter 9: System Software Monitoring Commands

GEOM 173 15K - 1068 16,32,64,128,256,512,2048,16384,32768,131072 syncache 1 8K - 1 16,32,64,128,256,512,2048,16384,32768,131072 tlv_stat 0 0K - 223 16,32,64,128,256,512,2048,16384,32768,131072 NFS daemon 1 8K - 1 16,32,64,128,256,512,2048,16384,32768,131072 p1003.1b 1 1K - 1 16 MD disk 9 18K - 9 65536 ata_generic 2 2K - 25 16,16384,32768 ISOFS mount 7 1K - 13 512 ISOFS node 1439 135K - 1453 128 CAM SIM 1 1K - 1 64 CAM XPT 6 1K - 9 16,64,16384 CAM periph 1 1K - 1 128 ad_driver 2 1K - 2 256 pagedep 1 64K - 105 64 inodedep 1 256K - 552 256 newblk 1 1K - 327 64,4096 bmsafemap 0 0K - 19 64 allocdirect 0 0K - 326 128 freefrag 0 0K - 31 32 freeblks 0 0K - 103 2048 freefile 0 0K - 175 32 diradd 0 0K - 590 64 mkdir 0 0K - 166 32 dirrem 0 0K - 382 32 savedino 0 0K - 283 512 UFS mount 15 36K - 15 2048,65536,131072 ata_dma 6 1K - 6 256 UMAHash 1 4K - 5 4096,16384,32768,65536,131072 cdev 26 3K - 26 256 file desc 111 25K - 5199 16,1024,2048,16384 VM pgdata 2 65K - 2 64 sigio 1 1K - 27 32 kenv 30 5K - 33 16,32,64,131072 atkbddev 2 1K - 2 32 kqueue 0 0K - 88 1024,4096,32768 proc-args 28 2K - 3970 32,64,128,256,512,1024 isadev 23 2K - 23 64 zombie 1 1K - 4651 128 ithread 92 7K - 92 16,64,256 legacydrv 3 1K - 3 16 memdesc 1 4K - 1 131072 nexusdev 2 1K - 2 16 CAM queue 3 1K - 3 16 KTRACE 100 10K - 100 128 kbdmux 5 9K - 5 128,2048,65536,131072ITEM SIZE LIMIT USED FREE REQUESTSUMA Kegs: 136, 0, 71, 1, 71...
show system virtual-memory | display xml
user@host> show system virtual-memory | display xml<rpc-reply xmlns:junos="http://xml.juniper.net/junos/10.2R1/junos"> <system-virtual-memory-information> <vmstat-memstat-malloc> <memstat-name>CAM dev queue</memstat-name> <inuse>1</inuse>
Copyright © 2016, Juniper Networks, Inc.330
System Basics: Getting Started Configuration Guide

<memuse>1</memuse> <high-use>-</high-use> <memstat-req>1</memstat-req> <memstat-size>64</memstat-size> <memstat-name>entropy</memstat-name> <inuse>1024</inuse> <memuse>64</memuse> <high-use>-</high-use> <memstat-req>1024</memstat-req> <memstat-size>64</memstat-size> <memstat-name>linker</memstat-name> <inuse>481</inuse> <memuse>1871</memuse> <high-use>-</high-use> <memstat-req>1145</memstat-req> <memstat-size>16,32,64,4096,32768,131072</memstat-size> <memstat-name>lockf</memstat-name> <inuse>56</inuse> <memuse>4</memuse> <high-use>-</high-use> <memstat-req>5998</memstat-req> <memstat-size>64</memstat-size> <memstat-name>devbuf</memstat-name> <inuse>2094</inuse> <memuse>3877</memuse> <high-use>-</high-use> <memstat-req>2099</memstat-req>
<memstat-size>16,32,64,128,512,1024,4096,8192,16384,32768,65536,131072</memstat-size>
<memstat-name>temp</memstat-name> <inuse>21</inuse> <memuse>66</memuse> <high-use>-</high-use> <memstat-req>3127</memstat-req>
<memstat-size>16,32,64,128,256,512,2048,4096,8192,16384,32768,65536,131072</memstat-size>
<memstat-name>ip6ndp</memstat-name> <inuse>0</inuse> <memuse>0</memuse> <high-use>-</high-use> <memstat-req>4</memstat-req> <memstat-size>64</memstat-size> <memstat-name>in6ifmulti</memstat-name> <inuse>1</inuse> <memuse>1</memuse> <high-use>-</high-use> <memstat-req>1</memstat-req> <memstat-size>64</memstat-size> <memstat-name>in6grentry</memstat-name> <inuse>1</inuse> <memuse>1</memuse> <high-use>-</high-use> <memstat-req>1</memstat-req> <memstat-size>64</memstat-size> <memstat-name>iflogical</memstat-name> <inuse>13</inuse> <memuse>3</memuse> <high-use>-</high-use> <memstat-req>13</memstat-req>
331Copyright © 2016, Juniper Networks, Inc.
Chapter 9: System Software Monitoring Commands

<memstat-size>64,2048</memstat-size> <memstat-name>iffamily</memstat-name> <inuse>28</inuse> <memuse>4</memuse> <high-use>-</high-use> <memstat-req>28</memstat-req> <memstat-size>32,1024,2048</memstat-size> <memstat-name>rtnexthop</memstat-name> <inuse>127</inuse> <memuse>18</memuse> <high-use>-</high-use> <memstat-req>129</memstat-req> <memstat-size>32,256,512,1024,2048,4096</memstat-size> <memstat-name>metrics</memstat-name> <inuse>3</inuse> <memuse>1</memuse> <high-use>-</high-use> <memstat-req>5</memstat-req> <memstat-size>256</memstat-size> <memstat-name>inifmulti</memstat-name> <inuse>3</inuse> <memuse>1</memuse> <high-use>-</high-use> <memstat-req>3</memstat-req> <memstat-size>64</memstat-size> <memstat-name>ingrentry</memstat-name> <inuse>6</inuse> <memuse>1</memuse> <high-use>-</high-use> <memstat-req>6</memstat-req> <memstat-size>64</memstat-size> <memstat-name>rnode</memstat-name> <inuse>68</inuse> <memuse>2</memuse> <high-use>-</high-use> <memstat-req>76</memstat-req> <memstat-size>16,32</memstat-size> <memstat-name>rcache</memstat-name> <inuse>4</inuse> <memuse>8</memuse> <high-use>-</high-use> <memstat-req>4</memstat-req> <memstat-size>65536</memstat-size> <memstat-name>ifdevice</memstat-name> <inuse>4</inuse> <memuse>1</memuse> <high-use>-</high-use> <memstat-req>4</memstat-req> <memstat-size>16</memstat-size> <memstat-name>ifstat</memstat-name> <inuse>40</inuse> <memuse>22</memuse> <high-use>-</high-use> <memstat-req>40</memstat-req> <memstat-size>512,16384,32768</memstat-size> <memstat-name>ipfw</memstat-name> <inuse>42</inuse> <memuse>23</memuse> <high-use>-</high-use> <memstat-req>91</memstat-req>
Copyright © 2016, Juniper Networks, Inc.332
System Basics: Getting Started Configuration Guide

<memstat-size>16,32,64,128,256,512,1024,16384,32768,65536,131072</memstat-size> <memstat-name>ifmaddr</memstat-name> <inuse>103</inuse> <memuse>3</memuse> <high-use>-</high-use> <memstat-req>103</memstat-req> <memstat-size>16,32</memstat-size> <memstat-name>rtable</memstat-name> <inuse>129</inuse> <memuse>14</memuse> <high-use>-</high-use> <memstat-req>139</memstat-req> <memstat-size>16,32,64,128,1024,16384</memstat-size> <memstat-name>sysctl</memstat-name> <inuse>0</inuse> <memuse>0</memuse> <high-use>-</high-use> <memstat-req>14847</memstat-req> <memstat-size>16,32,64,4096,16384,32768</memstat-size> <memstat-name>ifaddr</memstat-name> <inuse>29</inuse> <memuse>3</memuse> <high-use>-</high-use> <memstat-req>29</memstat-req> <memstat-size>64,128</memstat-size> <memstat-name>mkey</memstat-name> <inuse>345</inuse> <memuse>6</memuse> <high-use>-</high-use> <memstat-req>2527</memstat-req> <memstat-size>16,128</memstat-size> <memstat-name>pfe_ipc</memstat-name> <inuse>0</inuse> <memuse>0</memuse> <high-use>-</high-use> <memstat-req>1422</memstat-req>
<memstat-size>16,32,64,128,512,1024,2048,8192,16384,32768,65536,131072</memstat-size>
<memstat-name>ifstate</memstat-name> <inuse>594</inuse> <memuse>51</memuse> <high-use>-</high-use> <memstat-req>655</memstat-req>
<memstat-size>16,32,64,128,256,1024,2048,4096,16384,32768</memstat-size> <memstat-name>itable16</memstat-name> <inuse>276</inuse> <memuse>52</memuse> <high-use>-</high-use> <memstat-req>294</memstat-req> <memstat-size>1024,4096</memstat-size> <memstat-name>itable32</memstat-name> <inuse>160</inuse> <memuse>10</memuse> <high-use>-</high-use> <memstat-req>160</memstat-req> <memstat-size>64</memstat-size> <memstat-name>itable64</memstat-name> <inuse>2</inuse> <memuse>1</memuse>
333Copyright © 2016, Juniper Networks, Inc.
Chapter 9: System Software Monitoring Commands

<high-use>-</high-use> <memstat-req>2</memstat-req> <memstat-size>128</memstat-size> <memstat-name>lr</memstat-name> <inuse>1</inuse> <memuse>1</memuse> <high-use>-</high-use> <memstat-req>1</memstat-req> <memstat-size>16384</memstat-size> <memstat-name>pic</memstat-name> <inuse>5</inuse> <memuse>1</memuse> <high-use>-</high-use> <memstat-req>5</memstat-req> <memstat-size>64,512</memstat-size> <memstat-name>pfestat</memstat-name> <inuse>0</inuse> <memuse>0</memuse> <high-use>-</high-use> <memstat-req>162</memstat-req> <memstat-size>16,32,128,256,16384</memstat-size> <memstat-name>gencfg</memstat-name> <inuse>224</inuse> <memuse>56</memuse> <high-use>-</high-use> <memstat-req>540</memstat-req> <memstat-size>16,32,64,256,512,32768,65536</memstat-size> <memstat-name>jsr</memstat-name> <inuse>2</inuse> <memuse>1</memuse> <high-use>-</high-use> <memstat-req>4</memstat-req> <memstat-size>16</memstat-size> <memstat-name>idl</memstat-name> <inuse>0</inuse> <memuse>0</memuse> <high-use>-</high-use> <memstat-req>13</memstat-req> <memstat-size>16,32,64,128,256,4096,16384,32768,131072</memstat-size>
<memstat-name>rtsmsg</memstat-name> <inuse>0</inuse> <memuse>0</memuse> <high-use>-</high-use> <memstat-req>2</memstat-req> <memstat-size>131072</memstat-size> <memstat-name>module</memstat-name> <inuse>249</inuse> <memuse>16</memuse> <high-use>-</high-use> <memstat-req>249</memstat-req> <memstat-size>64,128</memstat-size> <memstat-name>mtx_pool</memstat-name> <inuse>1</inuse> <memuse>8</memuse> <high-use>-</high-use> <memstat-req>1</memstat-req> <memstat-size>64,128</memstat-size> <memstat-name>DEVFS3</memstat-name> <inuse>109</inuse> <memuse>12</memuse>
Copyright © 2016, Juniper Networks, Inc.334
System Basics: Getting Started Configuration Guide

<high-use>-</high-use> <memstat-req>117</memstat-req> <memstat-size>256</memstat-size> <memstat-name>DEVFS1</memstat-name> <inuse>102</inuse> <memuse>23</memuse> <high-use>-</high-use> <memstat-req>109</memstat-req> <memstat-size>2048</memstat-size> <memstat-name>pgrp</memstat-name> <inuse>12</inuse> <memuse>1</memuse> <high-use>-</high-use> <memstat-req>21</memstat-req> <memstat-size>64</memstat-size> <memstat-name>session</memstat-name> <inuse>8</inuse> <memuse>1</memuse> <high-use>-</high-use> <memstat-req>15</memstat-req> <memstat-size>512</memstat-size> <memstat-name>proc</memstat-name> <inuse>2</inuse> <memuse>1</memuse> <high-use>-</high-use> <memstat-req>2</memstat-req> <memstat-size>16384</memstat-size> <memstat-name>subproc</memstat-name> <inuse>244</inuse> <memuse>496</memuse> <high-use>-</high-use> <memstat-req>1522</memstat-req> <memstat-size>2048,131072</memstat-size> <memstat-name>cred</memstat-name> <inuse>30</inuse> <memuse>4</memuse> <high-use>-</high-use> <memstat-req>11409</memstat-req> <memstat-size>256</memstat-size> <memstat-name>plimit</memstat-name> <inuse>17</inuse> <memuse>4</memuse> <high-use>-</high-use> <memstat-req>133</memstat-req> <memstat-size>2048</memstat-size> <memstat-name>uidinfo</memstat-name> <inuse>3</inuse> <memuse>1</memuse> <high-use>-</high-use> <memstat-req>6</memstat-req> <memstat-size>32,512</memstat-size> <memstat-name>sysctloid</memstat-name> <inuse>1117</inuse> <memuse>34</memuse> <high-use>-</high-use> <memstat-req>1117</memstat-req> <memstat-size>16,32,64</memstat-size> <memstat-name>sysctltmp</memstat-name> <inuse>0</inuse> <memuse>0</memuse> <high-use>-</high-use>
335Copyright © 2016, Juniper Networks, Inc.
Chapter 9: System Software Monitoring Commands

<memstat-req>743</memstat-req> <memstat-size>16,32,64,1024</memstat-size> <memstat-name>umtx</memstat-name> <inuse>144</inuse> <memuse>9</memuse> <high-use>-</high-use> <memstat-req>144</memstat-req> <memstat-size>64</memstat-size> <memstat-name>SWAP</memstat-name> <inuse>2</inuse> <memuse>209</memuse> <high-use>-</high-use> <memstat-req>2</memstat-req> <memstat-size>64</memstat-size> <memstat-name>bus</memstat-name> <inuse>496</inuse> <memuse>55</memuse> <high-use>-</high-use> <memstat-req>1196</memstat-req> <memstat-size>16,32,64,128,32768</memstat-size> <memstat-name>bus-sc</memstat-name> <inuse>23</inuse> <memuse>33</memuse> <high-use>-</high-use> <memstat-req>335</memstat-req>
<memstat-size>16,32,64,512,1024,2048,8192,16384,65536,131072</memstat-size> <memstat-name>devstat</memstat-name> <inuse>10</inuse> <memuse>21</memuse> <high-use>-</high-use> <memstat-req>10</memstat-req> <memstat-size>16,131072</memstat-size> <memstat-name>eventhandler</memstat-name> <inuse>35</inuse> <memuse>2</memuse> <high-use>-</high-use> <memstat-req>36</memstat-req> <memstat-size>32,128</memstat-size> <memstat-name>kobj</memstat-name> <inuse>93</inuse> <memuse>186</memuse> <high-use>-</high-use> <memstat-req>111</memstat-req> <memstat-size>65536</memstat-size> <memstat-name>DEVFS</memstat-name> <inuse>8</inuse> <memuse>1</memuse> <high-use>-</high-use> <memstat-req>9</memstat-req> <memstat-size>16,64</memstat-size> <memstat-name>rman</memstat-name> <inuse>71</inuse> <memuse>5</memuse> <high-use>-</high-use> <memstat-req>433</memstat-req> <memstat-size>16,32,64</memstat-size> <memstat-name>sbuf</memstat-name> <inuse>0</inuse> <memuse>0</memuse> <high-use>-</high-use>
Copyright © 2016, Juniper Networks, Inc.336
System Basics: Getting Started Configuration Guide
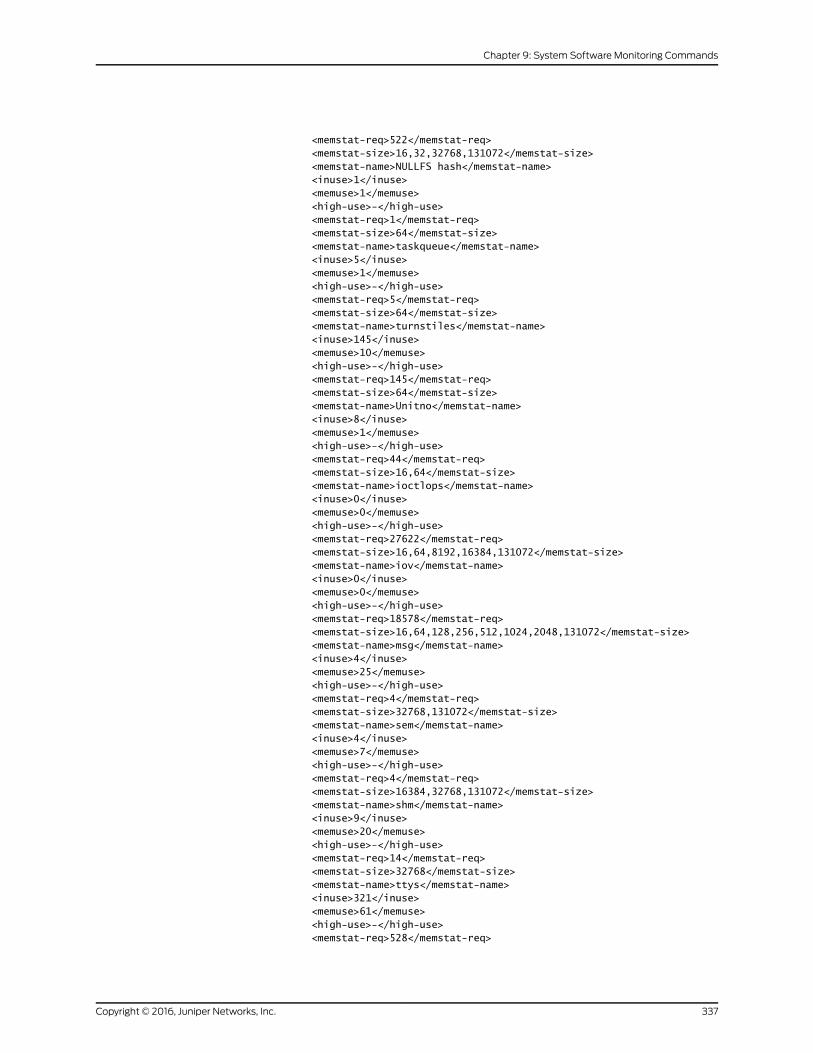
<memstat-req>522</memstat-req> <memstat-size>16,32,32768,131072</memstat-size> <memstat-name>NULLFS hash</memstat-name> <inuse>1</inuse> <memuse>1</memuse> <high-use>-</high-use> <memstat-req>1</memstat-req> <memstat-size>64</memstat-size> <memstat-name>taskqueue</memstat-name> <inuse>5</inuse> <memuse>1</memuse> <high-use>-</high-use> <memstat-req>5</memstat-req> <memstat-size>64</memstat-size> <memstat-name>turnstiles</memstat-name> <inuse>145</inuse> <memuse>10</memuse> <high-use>-</high-use> <memstat-req>145</memstat-req> <memstat-size>64</memstat-size> <memstat-name>Unitno</memstat-name> <inuse>8</inuse> <memuse>1</memuse> <high-use>-</high-use> <memstat-req>44</memstat-req> <memstat-size>16,64</memstat-size> <memstat-name>ioctlops</memstat-name> <inuse>0</inuse> <memuse>0</memuse> <high-use>-</high-use> <memstat-req>27622</memstat-req> <memstat-size>16,64,8192,16384,131072</memstat-size> <memstat-name>iov</memstat-name> <inuse>0</inuse> <memuse>0</memuse> <high-use>-</high-use> <memstat-req>18578</memstat-req> <memstat-size>16,64,128,256,512,1024,2048,131072</memstat-size> <memstat-name>msg</memstat-name> <inuse>4</inuse> <memuse>25</memuse> <high-use>-</high-use> <memstat-req>4</memstat-req> <memstat-size>32768,131072</memstat-size> <memstat-name>sem</memstat-name> <inuse>4</inuse> <memuse>7</memuse> <high-use>-</high-use> <memstat-req>4</memstat-req> <memstat-size>16384,32768,131072</memstat-size> <memstat-name>shm</memstat-name> <inuse>9</inuse> <memuse>20</memuse> <high-use>-</high-use> <memstat-req>14</memstat-req> <memstat-size>32768</memstat-size> <memstat-name>ttys</memstat-name> <inuse>321</inuse> <memuse>61</memuse> <high-use>-</high-use> <memstat-req>528</memstat-req>
337Copyright © 2016, Juniper Networks, Inc.
Chapter 9: System Software Monitoring Commands

<memstat-size>512,32768</memstat-size> <memstat-name>ptys</memstat-name> <inuse>1</inuse> <memuse>1</memuse> <high-use>-</high-use> <memstat-req>1</memstat-req> <memstat-size>128</memstat-size> <memstat-name>mbuf_tag</memstat-name> <inuse>0</inuse> <memuse>0</memuse> <high-use>-</high-use> <memstat-req>23383</memstat-req> <memstat-size>16</memstat-size> <memstat-name>soname</memstat-name> <inuse>115</inuse> <memuse>12</memuse> <high-use>-</high-use> <memstat-req>24712</memstat-req> <memstat-size>16,32,64,256</memstat-size> <memstat-name>pcb</memstat-name> <inuse>216</inuse> <memuse>33</memuse> <high-use>-</high-use> <memstat-req>484</memstat-req>
<memstat-size>16,32,64,128,1024,2048,4096,16384,32768,65536</memstat-size> <memstat-name>BIO buffer</memstat-name> <inuse>43</inuse> <memuse>86</memuse> <high-use>-</high-use> <memstat-req>405</memstat-req> <memstat-size>65536</memstat-size> <memstat-name>vfscache</memstat-name> <inuse>1</inuse> <memuse>256</memuse> <high-use>-</high-use> <memstat-req>1</memstat-req> <memstat-size>65536</memstat-size> <memstat-name>cluster_save buffer</memstat-name> <inuse>0</inuse> <memuse>0</memuse> <high-use>-</high-use> <memstat-req>2</memstat-req> <memstat-size>32,64</memstat-size> <memstat-name>VFS hash</memstat-name> <inuse>1</inuse> <memuse>128</memuse> <high-use>-</high-use> <memstat-req>1</memstat-req> <memstat-size>32,64</memstat-size> <memstat-name>vnodes</memstat-name> <inuse>1</inuse> <memuse>1</memuse> <high-use>-</high-use> <memstat-req>1</memstat-req> <memstat-size>512</memstat-size> <memstat-name>mount</memstat-name> <inuse>290</inuse> <memuse>23</memuse> <high-use>-</high-use> <memstat-req>535</memstat-req>
Copyright © 2016, Juniper Networks, Inc.338
System Basics: Getting Started Configuration Guide

<memstat-size>16,32,64,128,256,4096,32768</memstat-size> <memstat-name>vnodemarker</memstat-name> <inuse>0</inuse> <memuse>0</memuse> <high-use>-</high-use> <memstat-req>498</memstat-req> <memstat-size>16384</memstat-size> <memstat-name>pfs_nodes</memstat-name> <inuse>25</inuse> <memuse>3</memuse> <high-use>-</high-use> <memstat-req>25</memstat-req> <memstat-size>128</memstat-size> <memstat-name>pfs_vncache</memstat-name> <inuse>27</inuse> <memuse>1</memuse> <high-use>-</high-use> <memstat-req>53</memstat-req> <memstat-size>32</memstat-size> <memstat-name>STP</memstat-name> <inuse>1</inuse> <memuse>1</memuse> <high-use>-</high-use> <memstat-req>1</memstat-req> <memstat-size>64</memstat-size> <memstat-name>GEOM</memstat-name> <inuse>146</inuse> <memuse>11</memuse> <high-use>-</high-use> <memstat-req>1042</memstat-req>
<memstat-size>16,32,64,128,256,512,2048,16384,32768,131072</memstat-size> <memstat-name>syncache</memstat-name> <inuse>1</inuse> <memuse>8</memuse> <high-use>-</high-use> <memstat-req>1</memstat-req>
<memstat-size>16,32,64,128,256,512,2048,16384,32768,131072</memstat-size> <memstat-name>tlv_stat</memstat-name> <inuse>0</inuse> <memuse>0</memuse> <high-use>-</high-use> <memstat-req>8</memstat-req>
<memstat-size>16,32,64,128,256,512,2048,16384,32768,131072</memstat-size> <memstat-name>NFS daemon</memstat-name> <inuse>1</inuse> <memuse>8</memuse> <high-use>-</high-use> <memstat-req>1</memstat-req>
<memstat-size>16,32,64,128,256,512,2048,16384,32768,131072</memstat-size> <memstat-name>p1003.1b</memstat-name> <inuse>1</inuse> <memuse>1</memuse> <high-use>-</high-use> <memstat-req>1</memstat-req> <memstat-size>16</memstat-size> <memstat-name>MD disk</memstat-name> <inuse>10</inuse>
339Copyright © 2016, Juniper Networks, Inc.
Chapter 9: System Software Monitoring Commands

<memuse>20</memuse> <high-use>-</high-use> <memstat-req>10</memstat-req> <memstat-size>65536</memstat-size> <memstat-name>ata_generic</memstat-name> <inuse>1</inuse> <memuse>1</memuse> <high-use>-</high-use> <memstat-req>6</memstat-req> <memstat-size>16,16384,32768</memstat-size> <memstat-name>ISOFS mount</memstat-name> <inuse>8</inuse> <memuse>1</memuse> <high-use>-</high-use> <memstat-req>15</memstat-req> <memstat-size>512</memstat-size> <memstat-name>ISOFS node</memstat-name> <inuse>1440</inuse> <memuse>135</memuse> <high-use>-</high-use> <memstat-req>1457</memstat-req> <memstat-size>128</memstat-size> <memstat-name>CAM SIM</memstat-name> <inuse>1</inuse> <memuse>1</memuse> <high-use>-</high-use> <memstat-req>1</memstat-req> <memstat-size>64</memstat-size> <memstat-name>CAM XPT</memstat-name> <inuse>6</inuse> <memuse>1</memuse> <high-use>-</high-use> <memstat-req>9</memstat-req> <memstat-size>16,64,16384</memstat-size> <memstat-name>CAM periph</memstat-name> <inuse>1</inuse> <memuse>1</memuse> <high-use>-</high-use> <memstat-req>1</memstat-req> <memstat-size>128</memstat-size> <memstat-name>ad_driver</memstat-name> <inuse>1</inuse> <memuse>1</memuse> <high-use>-</high-use> <memstat-req>1</memstat-req> <memstat-size>256</memstat-size> <memstat-name>pagedep</memstat-name> <inuse>1</inuse> <memuse>32</memuse> <high-use>-</high-use> <memstat-req>106</memstat-req> <memstat-size>64</memstat-size> <memstat-name>inodedep</memstat-name> <inuse>1</inuse> <memuse>128</memuse> <high-use>-</high-use> <memstat-req>464</memstat-req> <memstat-size>256</memstat-size> <memstat-name>newblk</memstat-name> <inuse>1</inuse> <memuse>1</memuse>
Copyright © 2016, Juniper Networks, Inc.340
System Basics: Getting Started Configuration Guide

<high-use>-</high-use> <memstat-req>336</memstat-req> <memstat-size>64,4096</memstat-size> <memstat-name>bmsafemap</memstat-name> <inuse>0</inuse> <memuse>0</memuse> <high-use>-</high-use> <memstat-req>63</memstat-req> <memstat-size>64</memstat-size> <memstat-name>allocdirect</memstat-name> <inuse>0</inuse> <memuse>0</memuse> <high-use>-</high-use> <memstat-req>320</memstat-req> <memstat-size>128</memstat-size> <memstat-name>indirdep</memstat-name> <inuse>0</inuse> <memuse>0</memuse> <high-use>-</high-use> <memstat-req>17</memstat-req> <memstat-size>32</memstat-size> <memstat-name>allocindir</memstat-name> <inuse>0</inuse> <memuse>0</memuse> <high-use>-</high-use> <memstat-req>15</memstat-req> <memstat-size>64</memstat-size> <memstat-name>freefrag</memstat-name> <inuse>0</inuse> <memuse>0</memuse> <high-use>-</high-use> <memstat-req>12</memstat-req> <memstat-size>32</memstat-size> <memstat-name>freeblks</memstat-name> <inuse>0</inuse> <memuse>0</memuse> <high-use>-</high-use> <memstat-req>40</memstat-req> <memstat-size>2048</memstat-size> <memstat-name>freefile</memstat-name> <inuse>0</inuse> <memuse>0</memuse> <high-use>-</high-use> <memstat-req>101</memstat-req> <memstat-size>32</memstat-size> <memstat-name>diradd</memstat-name> <inuse>0</inuse> <memuse>0</memuse> <high-use>-</high-use> <memstat-req>465</memstat-req> <memstat-size>64</memstat-size> <memstat-name>mkdir</memstat-name> <inuse>0</inuse> <memuse>0</memuse> <high-use>-</high-use> <memstat-req>136</memstat-req> <memstat-size>32</memstat-size> <memstat-name>dirrem</memstat-name> <inuse>0</inuse> <memuse>0</memuse> <high-use>-</high-use>
341Copyright © 2016, Juniper Networks, Inc.
Chapter 9: System Software Monitoring Commands

<memstat-req>168</memstat-req> <memstat-size>32</memstat-size> <memstat-name>newdirblk</memstat-name> <inuse>0</inuse> <memuse>0</memuse> <high-use>-</high-use> <memstat-req>1</memstat-req> <memstat-size>32</memstat-size> <memstat-name>savedino</memstat-name> <inuse>0</inuse> <memuse>0</memuse> <high-use>-</high-use> <memstat-req>157</memstat-req> <memstat-size>512</memstat-size> <memstat-name>UFS mount</memstat-name> <inuse>15</inuse> <memuse>36</memuse> <high-use>-</high-use> <memstat-req>15</memstat-req> <memstat-size>2048,65536,131072</memstat-size> <memstat-name>ata_dma</memstat-name> <inuse>2</inuse> <memuse>1</memuse> <high-use>-</high-use> <memstat-req>2</memstat-req> <memstat-size>256</memstat-size> <memstat-name>UMAHash</memstat-name> <inuse>1</inuse> <memuse>2</memuse> <high-use>-</high-use> <memstat-req>4</memstat-req> <memstat-size>4096,16384,32768,65536</memstat-size> <memstat-name>cdev</memstat-name> <inuse>22</inuse> <memuse>3</memuse> <high-use>-</high-use> <memstat-req>22</memstat-req> <memstat-size>256</memstat-size> <memstat-name>file desc</memstat-name> <inuse>141</inuse> <memuse>32</memuse> <high-use>-</high-use> <memstat-req>1583</memstat-req> <memstat-size>16,1024,2048,16384</memstat-size> <memstat-name>VM pgdata</memstat-name> <inuse>2</inuse> <memuse>65</memuse> <high-use>-</high-use> <memstat-req>2</memstat-req> <memstat-size>64</memstat-size> <memstat-name>sigio</memstat-name> <inuse>1</inuse> <memuse>1</memuse> <high-use>-</high-use> <memstat-req>20</memstat-req> <memstat-size>32</memstat-size> <memstat-name>kenv</memstat-name> <inuse>24</inuse> <memuse>5</memuse> <high-use>-</high-use> <memstat-req>27</memstat-req>
Copyright © 2016, Juniper Networks, Inc.342
System Basics: Getting Started Configuration Guide

<memstat-size>16,32,64,131072</memstat-size> <memstat-name>atkbddev</memstat-name> <inuse>2</inuse> <memuse>1</memuse> <high-use>-</high-use> <memstat-req>2</memstat-req> <memstat-size>32</memstat-size> <memstat-name>kqueue</memstat-name> <inuse>15</inuse> <memuse>9</memuse> <high-use>-</high-use> <memstat-req>19</memstat-req> <memstat-size>1024,4096,32768</memstat-size> <memstat-name>proc-args</memstat-name> <inuse>57</inuse> <memuse>3</memuse> <high-use>-</high-use> <memstat-req>1001</memstat-req> <memstat-size>16,32,64,128,256,512,1024</memstat-size> <memstat-name>isadev</memstat-name> <inuse>21</inuse> <memuse>2</memuse> <high-use>-</high-use> <memstat-req>21</memstat-req> <memstat-size>64</memstat-size> <memstat-name>zombie</memstat-name> <inuse>0</inuse> <memuse>0</memuse> <high-use>-</high-use> <memstat-req>1278</memstat-req> <memstat-size>128</memstat-size> <memstat-name>ithread</memstat-name> <inuse>69</inuse> <memuse>5</memuse> <high-use>-</high-use> <memstat-req>69</memstat-req> <memstat-size>16,64,256</memstat-size> <memstat-name>legacydrv</memstat-name> <inuse>4</inuse> <memuse>1</memuse> <high-use>-</high-use> <memstat-req>4</memstat-req> <memstat-size>16</memstat-size> <memstat-name>memdesc</memstat-name> <inuse>1</inuse> <memuse>4</memuse> <high-use>-</high-use> <memstat-req>1</memstat-req> <memstat-size>131072</memstat-size> <memstat-name>nexusdev</memstat-name> <inuse>2</inuse> <memuse>1</memuse> <high-use>-</high-use> <memstat-req>2</memstat-req> <memstat-size>16</memstat-size> <memstat-name>CAM queue</memstat-name> <inuse>3</inuse> <memuse>1</memuse> <high-use>-</high-use> <memstat-req>3</memstat-req> <memstat-size>16</memstat-size>
343Copyright © 2016, Juniper Networks, Inc.
Chapter 9: System Software Monitoring Commands

<memstat-name>$PIR</memstat-name> <inuse>4</inuse> <memuse>1</memuse> <high-use>-</high-use> <memstat-req>4</memstat-req> <memstat-size>32</memstat-size> <memstat-name>KTRACE</memstat-name> <inuse>100</inuse> <memuse>10</memuse> <high-use>-</high-use> <memstat-req>100</memstat-req> <memstat-size>128</memstat-size> <memstat-name>kbdmux</memstat-name> <inuse>5</inuse> <memuse>9</memuse> <high-use>-</high-use> <memstat-req>5</memstat-req> <memstat-size>128,2048,65536,131072</memstat-size> </vmstat-memstat-malloc> <vmstat-memstat-zone> <zone-name>UMA Kegs:</zone-name> <zone-size>136</zone-size> <count-limit>0</count-limit> <used>71</used> <free>1</free> <zone-req>71</zone-req> <zone-name>UMA Zones:</zone-name> <zone-size>120</zone-size> <count-limit>0</count-limit> <used>71</used> <free>19</free> <zone-req>71</zone-req> <zone-name>UMA Slabs:</zone-name> <zone-size>64</zone-size> <count-limit>0</count-limit> <used>490</used> <free>41</free> <zone-req>579</zone-req> <zone-name>UMA RCntSlabs:</zone-name> <zone-size>104</zone-size> <count-limit>0</count-limit> <used>276</used> <free>20</free> <zone-req>276</zone-req> <zone-name>UMA Hash:</zone-name> <zone-size>128</zone-size> <count-limit>0</count-limit> <used>4</used> <free>26</free> <zone-req>5</zone-req> <zone-name>16 Bucket:</zone-name> <zone-size>76</zone-size> <count-limit>0</count-limit> <used>30</used> <free>20</free> <zone-req>30</zone-req> <zone-name>32 Bucket:</zone-name> <zone-size>140</zone-size> <count-limit>0</count-limit> <used>33</used> <free>23</free>
Copyright © 2016, Juniper Networks, Inc.344
System Basics: Getting Started Configuration Guide

<zone-req>33</zone-req> <zone-name>64 Bucket:</zone-name> <zone-size>268</zone-size> <count-limit>0</count-limit> <used>33</used> <free>9</free> <zone-req>33</zone-req> <zone-name>128 Bucket:</zone-name> <zone-size>524</zone-size> <count-limit>0</count-limit> <used>49</used> <free>0</free> <zone-req>49</zone-req> <zone-name>VM OBJECT:</zone-name> <zone-size>128</zone-size> <count-limit>0</count-limit> <used>2111</used> <free>79</free> <zone-req>25214</zone-req> <zone-name>MAP:</zone-name> <zone-size>160</zone-size> <count-limit>0</count-limit> <used>7</used> <free>41</free> <zone-req>7</zone-req> <zone-name>KMAP ENTRY:</zone-name> <zone-size>68</zone-size> <count-limit>35336</count-limit> <used>19</used> <free>149</free> <zone-req>2397</zone-req> <zone-name>MAP ENTRY:</zone-name> <zone-size>68</zone-size> <count-limit>0</count-limit> <used>2031</used> <free>153</free> <zone-req>62417</zone-req> <zone-name>PV ENTRY:</zone-name> <zone-size>24</zone-size> <count-limit>509095</count-limit> <used>57177</used> <free>6333</free> <zone-req>1033683</zone-req> <zone-name>DP fakepg:</zone-name> <zone-size>72</zone-size> <count-limit>0</count-limit> <used>0</used> <free>0</free> <zone-req>0</zone-req> <zone-name>mt_zone:</zone-name> <zone-size>64</zone-size> <count-limit>0</count-limit> <used>238</used> <free>57</free> <zone-req>238</zone-req> <zone-name>16:</zone-name> <zone-size>16</zone-size> <count-limit>0</count-limit> <used>2114</used> <free>119</free> <zone-req>80515</zone-req>
345Copyright © 2016, Juniper Networks, Inc.
Chapter 9: System Software Monitoring Commands

<zone-name>32:</zone-name> <zone-size>32</zone-size> <count-limit>0</count-limit> <used>1335</used> <free>134</free> <zone-req>10259</zone-req> <zone-name>64:</zone-name> <zone-size>64</zone-size> <count-limit>0</count-limit> <used>3529</used> <free>129</free> <zone-req>29110</zone-req> <zone-name>96:</zone-name> <zone-size>96</zone-size> <count-limit>0</count-limit> <used>2062</used> <free>58</free> <zone-req>4365</zone-req> <zone-name>112:</zone-name> <zone-size>112</zone-size> <count-limit>0</count-limit> <used>361</used> <free>164</free> <zone-req>24613</zone-req> <zone-name>128:</zone-name> <zone-size>128</zone-size> <count-limit>0</count-limit> <used>359</used> <free>61</free> <zone-req>942</zone-req> <zone-name>160:</zone-name> <zone-size>160</zone-size> <count-limit>0</count-limit> <used>364</used> <free>44</free> <zone-req>577</zone-req> <zone-name>224:</zone-name> <zone-size>224</zone-size> <count-limit>0</count-limit> <used>422</used> <free>20</free> <zone-req>1950</zone-req> <zone-name>256:</zone-name> <zone-size>256</zone-size> <count-limit>0</count-limit> <used>204</used> <free>36</free> <zone-req>1225</zone-req> <zone-name>288:</zone-name> <zone-size>288</zone-size> <count-limit>0</count-limit> <used>2</used> <free>24</free> <zone-req>10</zone-req> <zone-name>512:</zone-name> <zone-size>512</zone-size> <count-limit>0</count-limit> <used>49</used> <free>7</free> <zone-req>911</zone-req> <zone-name>1024:</zone-name>
Copyright © 2016, Juniper Networks, Inc.346
System Basics: Getting Started Configuration Guide

<zone-size>1024</zone-size> <count-limit>0</count-limit> <used>213</used> <free>11</free> <zone-req>1076</zone-req> <zone-name>2048:</zone-name> <zone-size>2048</zone-size> <count-limit>0</count-limit> <used>199</used> <free>113</free> <zone-req>640</zone-req> <zone-name>4096:</zone-name> <zone-size>4096</zone-size> <count-limit>0</count-limit> <used>144</used> <free>7</free> <zone-req>2249</zone-req> <zone-name>Files:</zone-name> <zone-size>72</zone-size> <count-limit>0</count-limit> <used>665</used> <free>77</free> <zone-req>16457</zone-req> <zone-name>MAC labels:</zone-name> <zone-size>20</zone-size> <count-limit>0</count-limit> <used>3998</used> <free>227</free> <zone-req>21947</zone-req> <zone-name>PROC:</zone-name> <zone-size>544</zone-size> <count-limit>0</count-limit> <used>116</used> <free>10</free> <zone-req>1394</zone-req> <zone-name>THREAD:</zone-name> <zone-size>416</zone-size> <count-limit>0</count-limit> <used>127</used> <free>17</free> <zone-req>131</zone-req> <zone-name>KSEGRP:</zone-name> <zone-size>88</zone-size> <count-limit>0</count-limit> <used>127</used> <free>73</free> <zone-req>131</zone-req> <zone-name>UPCALL:</zone-name> <zone-size>44</zone-size> <count-limit>0</count-limit> <used>0</used> <free>0</free> <zone-req>0</zone-req> <zone-name>SLEEPQUEUE:</zone-name> <zone-size>32</zone-size> <count-limit>0</count-limit> <used>145</used> <free>194</free> <zone-req>145</zone-req> <zone-name>VMSPACE:</zone-name> <zone-size>268</zone-size>
347Copyright © 2016, Juniper Networks, Inc.
Chapter 9: System Software Monitoring Commands
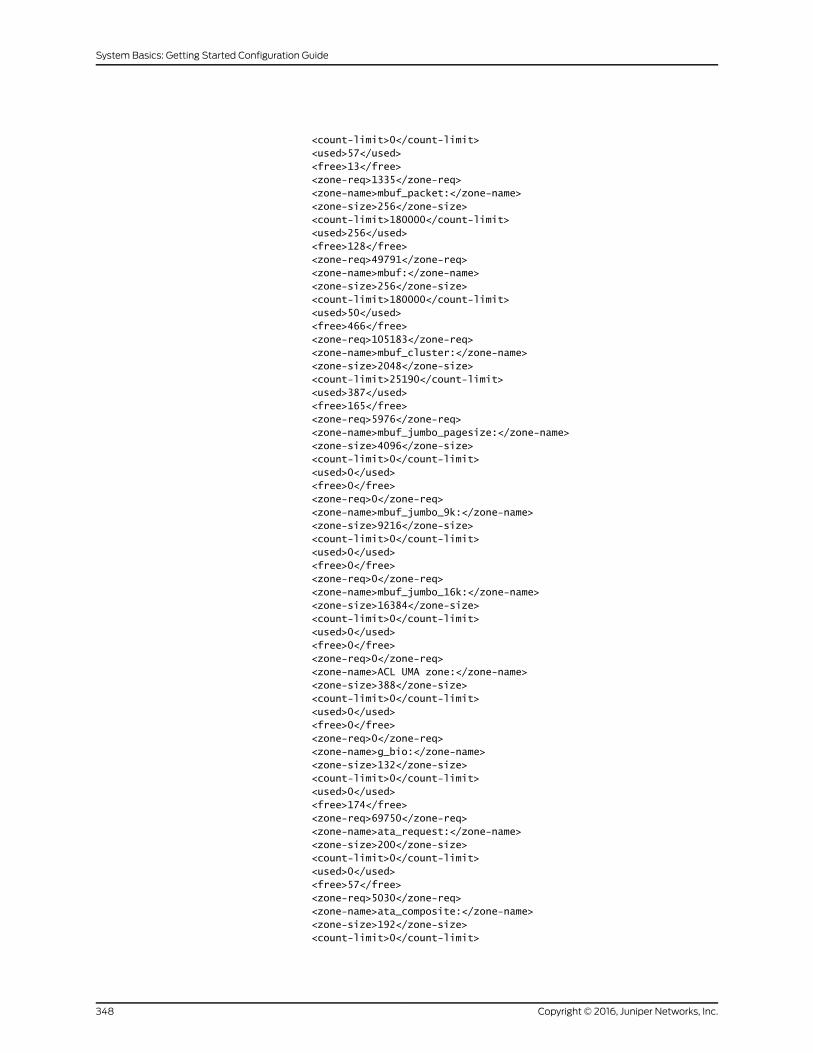
<count-limit>0</count-limit> <used>57</used> <free>13</free> <zone-req>1335</zone-req> <zone-name>mbuf_packet:</zone-name> <zone-size>256</zone-size> <count-limit>180000</count-limit> <used>256</used> <free>128</free> <zone-req>49791</zone-req> <zone-name>mbuf:</zone-name> <zone-size>256</zone-size> <count-limit>180000</count-limit> <used>50</used> <free>466</free> <zone-req>105183</zone-req> <zone-name>mbuf_cluster:</zone-name> <zone-size>2048</zone-size> <count-limit>25190</count-limit> <used>387</used> <free>165</free> <zone-req>5976</zone-req> <zone-name>mbuf_jumbo_pagesize:</zone-name> <zone-size>4096</zone-size> <count-limit>0</count-limit> <used>0</used> <free>0</free> <zone-req>0</zone-req> <zone-name>mbuf_jumbo_9k:</zone-name> <zone-size>9216</zone-size> <count-limit>0</count-limit> <used>0</used> <free>0</free> <zone-req>0</zone-req> <zone-name>mbuf_jumbo_16k:</zone-name> <zone-size>16384</zone-size> <count-limit>0</count-limit> <used>0</used> <free>0</free> <zone-req>0</zone-req> <zone-name>ACL UMA zone:</zone-name> <zone-size>388</zone-size> <count-limit>0</count-limit> <used>0</used> <free>0</free> <zone-req>0</zone-req> <zone-name>g_bio:</zone-name> <zone-size>132</zone-size> <count-limit>0</count-limit> <used>0</used> <free>174</free> <zone-req>69750</zone-req> <zone-name>ata_request:</zone-name> <zone-size>200</zone-size> <count-limit>0</count-limit> <used>0</used> <free>57</free> <zone-req>5030</zone-req> <zone-name>ata_composite:</zone-name> <zone-size>192</zone-size> <count-limit>0</count-limit>
Copyright © 2016, Juniper Networks, Inc.348
System Basics: Getting Started Configuration Guide

<used>0</used> <free>0</free> <zone-req>0</zone-req> <zone-name>GENCFG:</zone-name> <zone-size>72</zone-size> <count-limit>1000004</count-limit> <used>57</used> <free>102</free> <zone-req>57</zone-req> <zone-name>VNODE:</zone-name> <zone-size>292</zone-size> <count-limit>0</count-limit> <used>2718</used> <free>25</free> <zone-req>2922</zone-req> <zone-name>VNODEPOLL:</zone-name> <zone-size>72</zone-size> <count-limit>0</count-limit> <used>0</used> <free>0</free> <zone-req>0</zone-req> <zone-name>S VFS Cache:</zone-name> <zone-size>68</zone-size> <count-limit>0</count-limit> <used>2500</used> <free>76</free> <zone-req>3824</zone-req> <zone-name>L VFS Cache:</zone-name> <zone-size>291</zone-size> <count-limit>0</count-limit> <used>51</used> <free>14</free> <zone-req>63</zone-req> <zone-name>NAMEI:</zone-name> <zone-size>1024</zone-size> <count-limit>0</count-limit> <used>0</used> <free>8</free> <zone-req>53330</zone-req> <zone-name>NFSMOUNT:</zone-name> <zone-size>480</zone-size> <count-limit>0</count-limit> <used>0</used> <free>0</free> <zone-req>0</zone-req> <zone-name>NFSNODE:</zone-name> <zone-size>460</zone-size> <count-limit>0</count-limit> <used>0</used> <free>0</free> <zone-req>0</zone-req> <zone-name>PIPE:</zone-name> <zone-size>404</zone-size> <count-limit>0</count-limit> <used>27</used> <free>9</free> <zone-req>717</zone-req> <zone-name>KNOTE:</zone-name> <zone-size>72</zone-size> <count-limit>0</count-limit> <used>42</used>
349Copyright © 2016, Juniper Networks, Inc.
Chapter 9: System Software Monitoring Commands

<free>64</free> <zone-req>3311</zone-req> <zone-name>socket:</zone-name> <zone-size>412</zone-size> <count-limit>25191</count-limit> <used>343</used> <free>8</free> <zone-req>2524</zone-req> <zone-name>unpcb:</zone-name> <zone-size>140</zone-size> <count-limit>25200</count-limit> <used>170</used> <free>26</free> <zone-req>2157</zone-req> <zone-name>ipq:</zone-name> <zone-size>52</zone-size> <count-limit>216</count-limit> <used>0</used> <free>0</free> <zone-req>0</zone-req> <zone-name>udpcb:</zone-name> <zone-size>232</zone-size> <count-limit>25194</count-limit> <used>19</used> <free>32</free> <zone-req>31</zone-req> <zone-name>inpcb:</zone-name> <zone-size>232</zone-size> <count-limit>25194</count-limit> <used>40</used> <free>28</free> <zone-req>105</zone-req> <zone-name>tcpcb:</zone-name> <zone-size>520</zone-size> <count-limit>25193</count-limit> <used>40</used> <free>16</free> <zone-req>105</zone-req> <zone-name>tcptw:</zone-name> <zone-size>56</zone-size> <count-limit>5092</count-limit> <used>0</used> <free>0</free> <zone-req>0</zone-req> <zone-name>syncache:</zone-name> <zone-size>128</zone-size> <count-limit>15360</count-limit> <used>0</used> <free>60</free> <zone-req>55</zone-req> <zone-name>tcpreass:</zone-name> <zone-size>20</zone-size> <count-limit>1690</count-limit> <used>0</used> <free>0</free> <zone-req>0</zone-req> <zone-name>sackhole:</zone-name> <zone-size>20</zone-size> <count-limit>0</count-limit> <used>0</used> <free>0</free>
Copyright © 2016, Juniper Networks, Inc.350
System Basics: Getting Started Configuration Guide

<zone-req>0</zone-req> <zone-name>ripcb:</zone-name> <zone-size>232</zone-size> <count-limit>25194</count-limit> <used>5</used> <free>29</free> <zone-req>5</zone-req> <zone-name>SWAPMETA:</zone-name> <zone-size>276</zone-size> <count-limit>94948</count-limit> <used>0</used> <free>0</free> <zone-req>0</zone-req> <zone-name>FFS inode:</zone-name> <zone-size>132</zone-size> <count-limit>0</count-limit> <used>1146</used> <free>72</free> <zone-req>1306</zone-req> <zone-name>FFS1 dinode:</zone-name> <zone-size>128</zone-size> <count-limit>0</count-limit> <used>1146</used> <free>24</free> <zone-req>1306</zone-req> <zone-name>FFS2 dinode:</zone-name> <zone-size>256</zone-size> <count-limit>0</count-limit> <used>0</used> <free>0</free> <zone-req>0</zone-req> </vmstat-memstat-zone> <vmstat-sumstat> <cpu-context-switch>934906</cpu-context-switch> <dev-intr>1707986</dev-intr> <soft-intr>33819</soft-intr> <traps>203604</traps> <sys-calls>1200636</sys-calls> <kernel-thrds>60</kernel-thrds> <fork-calls>1313</fork-calls> <vfork-calls>21</vfork-calls> <rfork-calls>0</rfork-calls> <swap-pageins>0</swap-pageins> <swap-pagedin>0</swap-pagedin> <swap-pageouts>0</swap-pageouts> <swap-pagedout>0</swap-pagedout> <vnode-pageins>23094</vnode-pageins> <vnode-pagedin>23119</vnode-pagedin> <vnode-pageouts>226</vnode-pageouts> <vnode-pagedout>3143</vnode-pagedout> <page-daemon-wakeup>0</page-daemon-wakeup> <page-daemon-examined-pages>0</page-daemon-examined-pages> <pages-reactivated>8821</pages-reactivated> <copy-on-write-faults>48364</copy-on-write-faults> <copy-on-write-optimized-faults>31</copy-on-write-optimized-faults> <zero-fill-pages-zeroed>74665</zero-fill-pages-zeroed> <zero-fill-pages-prezeroed>70061</zero-fill-pages-prezeroed> <transit-blocking-page-faults>85</transit-blocking-page-faults> <total-vm-faults>191824</total-vm-faults>
<pages-affected-by-kernel-thrd-creat>0</pages-affected-by-kernel-thrd-creat>
351Copyright © 2016, Juniper Networks, Inc.
Chapter 9: System Software Monitoring Commands

<pages-affected-by-fork>95343</pages-affected-by-fork> <pages-affected-by-vfork>3526</pages-affected-by-vfork> <pages-affected-by-rfork>0</pages-affected-by-rfork> <pages-freed>221502</pages-freed> <pages-freed-by-deamon>0</pages-freed-by-deamon> <pages-freed-by-exiting-proc>75630</pages-freed-by-exiting-proc> <pages-active>45826</pages-active> <pages-inactive>13227</pages-inactive> <pages-in-vm-cache>49278</pages-in-vm-cache> <pages-wired-down>10640</pages-wired-down> <pages-free>70706</pages-free> <bytes-per-page>4096</bytes-per-page> <swap-pages-used>0</swap-pages-used> <peak-swap-pages-used>0</peak-swap-pages-used> <total-name-lookups>214496</total-name-lookups> <positive-cache-hits>92</positive-cache-hits> <negative-cache-hits>5</negative-cache-hits> <pass2>0</pass2> <cache-deletions>0</cache-deletions> <cache-falsehits>0</cache-falsehits> <toolong>0</toolong> </vmstat-sumstat> <vmstat-intr> <intr-name>irq0: clk </intr-name> <intr-cnt>1243455</intr-cnt> <intr-rate>999</intr-rate> <intr-name>irq4: sio0 </intr-name> <intr-cnt>1140</intr-cnt> <intr-rate>0</intr-rate> <intr-name>irq8: rtc </intr-name> <intr-cnt>159164</intr-cnt> <intr-rate>127</intr-rate> <intr-name>irq9: cbb1 fxp0 </intr-name> <intr-cnt>28490</intr-cnt> <intr-rate>22</intr-rate> <intr-name>irq10: fxp1 </intr-name> <intr-cnt>20593</intr-cnt> <intr-rate>16</intr-rate> <intr-name>irq14: ata0 </intr-name> <intr-cnt>5031</intr-cnt> <intr-rate>4</intr-rate> <intr-name>Total</intr-name> <intr-cnt>1457873</intr-cnt> <intr-rate>1171</intr-rate> </vmstat-intr> <vm-kernel-state> <vm-kmem-map-free>248524800</vm-kmem-map-free> </vm-kernel-state> <kernel-direct-mm-size-information> <vm-directmm-size-used>4644</vm-directmm-size-used> <vm-directmm-size-max>4057334</vm-directmm-size-max> </kernel-direct-mm-size-information> </system-virtual-memory-information> <cli> <banner></banner> </cli></rpc-reply>
Note: <kernel-direct-mm-size-information> only displays for 64 bit platform.
Copyright © 2016, Juniper Networks, Inc.352
System Basics: Getting Started Configuration Guide

show system virtual-memory (QFX Series)
user@switch> show system virtual-memory | display xml<rpc-reply xmlns:junos="http://xml.juniper.net/junos/11.1R1/junos"> <system-virtual-memory-information> <vmstat-memstat-malloc> <memstat-name>CAM dev queue</memstat-name> <inuse>1</inuse> <memuse>1</memuse> <high-use>-</high-use> <memstat-req>1</memstat-req> <memstat-size>64</memstat-size> <memstat-name>entropy</memstat-name> <inuse>1024</inuse> <memuse>64</memuse> <high-use>-</high-use> <memstat-req>1024</memstat-req> <memstat-size>64</memstat-size> <memstat-name>linker</memstat-name> <inuse>481</inuse> <memuse>1871</memuse> <high-use>-</high-use> <memstat-req>1145</memstat-req> <memstat-size>16,32,64,4096,32768,131072</memstat-size> <memstat-name>lockf</memstat-name> <inuse>56</inuse> <memuse>4</memuse> <high-use>-</high-use> <memstat-req>5998</memstat-req> <memstat-size>64</memstat-size> <memstat-name>devbuf</memstat-name> <inuse>2094</inuse> <memuse>3877</memuse> <high-use>-</high-use> <memstat-req>2099</memstat-req>
<memstat-size>16,32,64,128,512,1024,4096,8192,16384,32768,65536,131072</memstat-size>
<memstat-name>temp</memstat-name> <inuse>21</inuse> <memuse>66</memuse> <high-use>-</high-use> <memstat-req>3127</memstat-req>
<memstat-size>16,32,64,128,256,512,2048,4096,8192,16384,32768,65536,131072</memstat-size>
<memstat-name>ip6ndp</memstat-name> <inuse>0</inuse> <memuse>0</memuse> <high-use>-</high-use> <memstat-req>4</memstat-req> <memstat-size>64</memstat-size> <memstat-name>in6ifmulti</memstat-name> <inuse>1</inuse> <memuse>1</memuse> <high-use>-</high-use> <memstat-req>1</memstat-req> <memstat-size>64</memstat-size> <memstat-name>in6grentry</memstat-name> <inuse>1</inuse> <memuse>1</memuse>
353Copyright © 2016, Juniper Networks, Inc.
Chapter 9: System Software Monitoring Commands

<high-use>-</high-use> <memstat-req>1</memstat-req> <memstat-size>64</memstat-size> <memstat-name>iflogical</memstat-name> <inuse>13</inuse> <memuse>3</memuse> <high-use>-</high-use> <memstat-req>13</memstat-req> <memstat-size>64,2048</memstat-size> <memstat-name>iffamily</memstat-name> <inuse>28</inuse> <memuse>4</memuse> <high-use>-</high-use> <memstat-req>28</memstat-req> <memstat-size>32,1024,2048</memstat-size> <memstat-name>rtnexthop</memstat-name> <inuse>127</inuse> <memuse>18</memuse> <high-use>-</high-use> <memstat-req>129</memstat-req> <memstat-size>32,256,512,1024,2048,4096</memstat-size> <memstat-name>metrics</memstat-name> <inuse>3</inuse> <memuse>1</memuse> <high-use>-</high-use> <memstat-req>5</memstat-req> <memstat-size>256</memstat-size> <memstat-name>inifmulti</memstat-name> <inuse>3</inuse> <memuse>1</memuse> <high-use>-</high-use> <memstat-req>3</memstat-req> <memstat-size>64</memstat-size> <memstat-name>ingrentry</memstat-name> <inuse>6</inuse> <memuse>1</memuse> <high-use>-</high-use> <memstat-req>6</memstat-req> <memstat-size>64</memstat-size> <memstat-name>rnode</memstat-name> <inuse>68</inuse> <memuse>2</memuse> <high-use>-</high-use> <memstat-req>76</memstat-req> <memstat-size>16,32</memstat-size> <memstat-name>rcache</memstat-name> <inuse>4</inuse> <memuse>8</memuse> <high-use>-</high-use> <memstat-req>4</memstat-req> <memstat-size>65536</memstat-size> <memstat-name>ifdevice</memstat-name> <inuse>4</inuse> <memuse>1</memuse> <high-use>-</high-use> <memstat-req>4</memstat-req> <memstat-size>16</memstat-size> <memstat-name>ifstat</memstat-name> <inuse>40</inuse> <memuse>22</memuse> <high-use>-</high-use>
Copyright © 2016, Juniper Networks, Inc.354
System Basics: Getting Started Configuration Guide

<memstat-req>40</memstat-req> <memstat-size>512,16384,32768</memstat-size> <memstat-name>ipfw</memstat-name> <inuse>42</inuse> <memuse>23</memuse> <high-use>-</high-use> <memstat-req>91</memstat-req>
<memstat-size>16,32,64,128,256,512,1024,16384,32768,65536,131072</memstat-size> <memstat-name>ifmaddr</memstat-name> <inuse>103</inuse> <memuse>3</memuse> <high-use>-</high-use> <memstat-req>103</memstat-req> <memstat-size>16,32</memstat-size> <memstat-name>rtable</memstat-name> <inuse>129</inuse> <memuse>14</memuse> <high-use>-</high-use> <memstat-req>139</memstat-req> <memstat-size>16,32,64,128,1024,16384</memstat-size> <memstat-name>sysctl</memstat-name> <inuse>0</inuse> <memuse>0</memuse> <high-use>-</high-use> <memstat-req>14847</memstat-req> <memstat-size>16,32,64,4096,16384,32768</memstat-size> <memstat-name>ifaddr</memstat-name> <inuse>29</inuse> <memuse>3</memuse> <high-use>-</high-use> <memstat-req>29</memstat-req> <memstat-size>64,128</memstat-size> <memstat-name>mkey</memstat-name> <inuse>345</inuse> <memuse>6</memuse> <high-use>-</high-use> <memstat-req>2527</memstat-req> <memstat-size>16,128</memstat-size> <memstat-name>pfe_ipc</memstat-name> <inuse>0</inuse> <memuse>0</memuse> <high-use>-</high-use> <memstat-req>1422</memstat-req>
<memstat-size>16,32,64,128,512,1024,2048,8192,16384,32768,65536,131072</memstat-size>
<memstat-name>ifstate</memstat-name> <inuse>594</inuse> <memuse>51</memuse> <high-use>-</high-use> <memstat-req>655</memstat-req>
<memstat-size>16,32,64,128,256,1024,2048,4096,16384,32768</memstat-size> <memstat-name>itable16</memstat-name> <inuse>276</inuse> <memuse>52</memuse> <high-use>-</high-use> <memstat-req>294</memstat-req> <memstat-size>1024,4096</memstat-size> <memstat-name>itable32</memstat-name>
355Copyright © 2016, Juniper Networks, Inc.
Chapter 9: System Software Monitoring Commands

<inuse>160</inuse> <memuse>10</memuse> <high-use>-</high-use> <memstat-req>160</memstat-req> <memstat-size>64</memstat-size> <memstat-name>itable64</memstat-name> <inuse>2</inuse> <memuse>1</memuse> <high-use>-</high-use> <memstat-req>2</memstat-req> <memstat-size>128</memstat-size> <memstat-name>lr</memstat-name> <inuse>1</inuse> <memuse>1</memuse> <high-use>-</high-use> <memstat-req>1</memstat-req> <memstat-size>16384</memstat-size> <memstat-name>pic</memstat-name> <inuse>5</inuse> <memuse>1</memuse> <high-use>-</high-use> <memstat-req>5</memstat-req> <memstat-size>64,512</memstat-size> <memstat-name>pfestat</memstat-name> <inuse>0</inuse> <memuse>0</memuse> <high-use>-</high-use> <memstat-req>162</memstat-req> <memstat-size>16,32,128,256,16384</memstat-size> <memstat-name>gencfg</memstat-name> <inuse>224</inuse> <memuse>56</memuse> <high-use>-</high-use> <memstat-req>540</memstat-req> <memstat-size>16,32,64,256,512,32768,65536</memstat-size> <memstat-name>jsr</memstat-name> <inuse>2</inuse> <memuse>1</memuse> <high-use>-</high-use> <memstat-req>4</memstat-req> <memstat-size>16</memstat-size> <memstat-name>idl</memstat-name> <inuse>0</inuse> <memuse>0</memuse> <high-use>-</high-use> <memstat-req>13</memstat-req> <memstat-size>16,32,64,128,256,4096,16384,32768,131072</memstat-size>
<memstat-name>rtsmsg</memstat-name> <inuse>0</inuse> <memuse>0</memuse> <high-use>-</high-use> <memstat-req>2</memstat-req> <memstat-size>131072</memstat-size> <memstat-name>module</memstat-name> <inuse>249</inuse> <memuse>16</memuse> <high-use>-</high-use> <memstat-req>249</memstat-req> <memstat-size>64,128</memstat-size> <memstat-name>mtx_pool</memstat-name>
Copyright © 2016, Juniper Networks, Inc.356
System Basics: Getting Started Configuration Guide

<inuse>1</inuse> <memuse>8</memuse> <high-use>-</high-use> <memstat-req>1</memstat-req> <memstat-size>64,128</memstat-size> <memstat-name>DEVFS3</memstat-name> <inuse>109</inuse> <memuse>12</memuse> <high-use>-</high-use> <memstat-req>117</memstat-req> <memstat-size>256</memstat-size> <memstat-name>DEVFS1</memstat-name> <inuse>102</inuse> <memuse>23</memuse> <high-use>-</high-use> <memstat-req>109</memstat-req> <memstat-size>2048</memstat-size> <memstat-name>pgrp</memstat-name> <inuse>12</inuse> <memuse>1</memuse> <high-use>-</high-use> <memstat-req>21</memstat-req> <memstat-size>64</memstat-size> <memstat-name>session</memstat-name> <inuse>8</inuse> <memuse>1</memuse> <high-use>-</high-use> <memstat-req>15</memstat-req> <memstat-size>512</memstat-size> <memstat-name>proc</memstat-name> <inuse>2</inuse> <memuse>1</memuse> <high-use>-</high-use> <memstat-req>2</memstat-req> <memstat-size>16384</memstat-size> <memstat-name>subproc</memstat-name> <inuse>244</inuse> <memuse>496</memuse> <high-use>-</high-use> <memstat-req>1522</memstat-req> <memstat-size>2048,131072</memstat-size> <memstat-name>cred</memstat-name> <inuse>30</inuse> <memuse>4</memuse> <high-use>-</high-use> <memstat-req>11409</memstat-req> <memstat-size>256</memstat-size> <memstat-name>plimit</memstat-name> <inuse>17</inuse> <memuse>4</memuse> <high-use>-</high-use> <memstat-req>133</memstat-req> <memstat-size>2048</memstat-size> <memstat-name>uidinfo</memstat-name> <inuse>3</inuse> <memuse>1</memuse> <high-use>-</high-use> <memstat-req>6</memstat-req> <memstat-size>32,512</memstat-size> <memstat-name>sysctloid</memstat-name> <inuse>1117</inuse>
357Copyright © 2016, Juniper Networks, Inc.
Chapter 9: System Software Monitoring Commands

<memuse>34</memuse> <high-use>-</high-use> <memstat-req>1117</memstat-req> <memstat-size>16,32,64</memstat-size> <memstat-name>sysctltmp</memstat-name> <inuse>0</inuse> <memuse>0</memuse> <high-use>-</high-use> <memstat-req>743</memstat-req> <memstat-size>16,32,64,1024</memstat-size> <memstat-name>umtx</memstat-name> <inuse>144</inuse> <memuse>9</memuse> <high-use>-</high-use> <memstat-req>144</memstat-req> <memstat-size>64</memstat-size> <memstat-name>SWAP</memstat-name> <inuse>2</inuse> <memuse>209</memuse> <high-use>-</high-use> <memstat-req>2</memstat-req> <memstat-size>64</memstat-size> <memstat-name>bus</memstat-name> <inuse>496</inuse> <memuse>55</memuse> <high-use>-</high-use> <memstat-req>1196</memstat-req> <memstat-size>16,32,64,128,32768</memstat-size> <memstat-name>bus-sc</memstat-name> <inuse>23</inuse> <memuse>33</memuse> <high-use>-</high-use> <memstat-req>335</memstat-req>
<memstat-size>16,32,64,512,1024,2048,8192,16384,65536,131072</memstat-size> <memstat-name>devstat</memstat-name> <inuse>10</inuse> <memuse>21</memuse> <high-use>-</high-use> <memstat-req>10</memstat-req> <memstat-size>16,131072</memstat-size> <memstat-name>eventhandler</memstat-name> <inuse>35</inuse> <memuse>2</memuse> <high-use>-</high-use> <memstat-req>36</memstat-req> <memstat-size>32,128</memstat-size> <memstat-name>kobj</memstat-name> <inuse>93</inuse> <memuse>186</memuse> <high-use>-</high-use> <memstat-req>111</memstat-req> <memstat-size>65536</memstat-size> <memstat-name>DEVFS</memstat-name> <inuse>8</inuse> <memuse>1</memuse> <high-use>-</high-use> <memstat-req>9</memstat-req> <memstat-size>16,64</memstat-size> <memstat-name>rman</memstat-name> <inuse>71</inuse>
Copyright © 2016, Juniper Networks, Inc.358
System Basics: Getting Started Configuration Guide

<memuse>5</memuse> <high-use>-</high-use> <memstat-req>433</memstat-req> <memstat-size>16,32,64</memstat-size> <memstat-name>sbuf</memstat-name> <inuse>0</inuse> <memuse>0</memuse> <high-use>-</high-use> <memstat-req>522</memstat-req> <memstat-size>16,32,32768,131072</memstat-size> <memstat-name>NULLFS hash</memstat-name> <inuse>1</inuse> <memuse>1</memuse> <high-use>-</high-use> <memstat-req>1</memstat-req> <memstat-size>64</memstat-size> <memstat-name>taskqueue</memstat-name> <inuse>5</inuse> <memuse>1</memuse> <high-use>-</high-use> <memstat-req>5</memstat-req> <memstat-size>64</memstat-size> <memstat-name>turnstiles</memstat-name> <inuse>145</inuse> <memuse>10</memuse> <high-use>-</high-use> <memstat-req>145</memstat-req> <memstat-size>64</memstat-size> <memstat-name>Unitno</memstat-name> <inuse>8</inuse> <memuse>1</memuse> <high-use>-</high-use> <memstat-req>44</memstat-req> <memstat-size>16,64</memstat-size> <memstat-name>ioctlops</memstat-name> <inuse>0</inuse> <memuse>0</memuse> <high-use>-</high-use> <memstat-req>27622</memstat-req> <memstat-size>16,64,8192,16384,131072</memstat-size> <memstat-name>iov</memstat-name> <inuse>0</inuse> <memuse>0</memuse> <high-use>-</high-use> <memstat-req>18578</memstat-req> <memstat-size>16,64,128,256,512,1024,2048,131072</memstat-size> <memstat-name>msg</memstat-name> <inuse>4</inuse> <memuse>25</memuse> <high-use>-</high-use> <memstat-req>4</memstat-req> <memstat-size>32768,131072</memstat-size> <memstat-name>sem</memstat-name> <inuse>4</inuse> <memuse>7</memuse> <high-use>-</high-use> <memstat-req>4</memstat-req> <memstat-size>16384,32768,131072</memstat-size> <memstat-name>shm</memstat-name> <inuse>9</inuse> <memuse>20</memuse>
359Copyright © 2016, Juniper Networks, Inc.
Chapter 9: System Software Monitoring Commands

<high-use>-</high-use> <memstat-req>14</memstat-req> <memstat-size>32768</memstat-size> <memstat-name>ttys</memstat-name> <inuse>321</inuse> <memuse>61</memuse> <high-use>-</high-use> <memstat-req>528</memstat-req> <memstat-size>512,32768</memstat-size> <memstat-name>ptys</memstat-name> <inuse>1</inuse> <memuse>1</memuse> <high-use>-</high-use> <memstat-req>1</memstat-req> <memstat-size>128</memstat-size> <memstat-name>mbuf_tag</memstat-name> <inuse>0</inuse> <memuse>0</memuse> <high-use>-</high-use> <memstat-req>23383</memstat-req> <memstat-size>16</memstat-size> <memstat-name>soname</memstat-name> <inuse>115</inuse> <memuse>12</memuse> <high-use>-</high-use> <memstat-req>24712</memstat-req> <memstat-size>16,32,64,256</memstat-size> <memstat-name>pcb</memstat-name> <inuse>216</inuse> <memuse>33</memuse> <high-use>-</high-use> <memstat-req>484</memstat-req>
<memstat-size>16,32,64,128,1024,2048,4096,16384,32768,65536</memstat-size> <memstat-name>BIO buffer</memstat-name> <inuse>43</inuse> <memuse>86</memuse> <high-use>-</high-use> <memstat-req>405</memstat-req> <memstat-size>65536</memstat-size> <memstat-name>vfscache</memstat-name> <inuse>1</inuse> <memuse>256</memuse> <high-use>-</high-use> <memstat-req>1</memstat-req> <memstat-size>65536</memstat-size> <memstat-name>cluster_save buffer</memstat-name> <inuse>0</inuse> <memuse>0</memuse> <high-use>-</high-use> <memstat-req>2</memstat-req> <memstat-size>32,64</memstat-size> <memstat-name>VFS hash</memstat-name> <inuse>1</inuse> <memuse>128</memuse> <high-use>-</high-use> <memstat-req>1</memstat-req> <memstat-size>32,64</memstat-size> <memstat-name>vnodes</memstat-name> <inuse>1</inuse> <memuse>1</memuse>
Copyright © 2016, Juniper Networks, Inc.360
System Basics: Getting Started Configuration Guide

<high-use>-</high-use> <memstat-req>1</memstat-req> <memstat-size>512</memstat-size> <memstat-name>mount</memstat-name> <inuse>290</inuse> <memuse>23</memuse> <high-use>-</high-use> <memstat-req>535</memstat-req> <memstat-size>16,32,64,128,256,4096,32768</memstat-size> <memstat-name>vnodemarker</memstat-name> <inuse>0</inuse> <memuse>0</memuse> <high-use>-</high-use> <memstat-req>498</memstat-req> <memstat-size>16384</memstat-size> <memstat-name>pfs_nodes</memstat-name> <inuse>25</inuse> <memuse>3</memuse> <high-use>-</high-use> <memstat-req>25</memstat-req> <memstat-size>128</memstat-size> <memstat-name>pfs_vncache</memstat-name> <inuse>27</inuse> <memuse>1</memuse> <high-use>-</high-use> <memstat-req>53</memstat-req> <memstat-size>32</memstat-size> <memstat-name>STP</memstat-name> <inuse>1</inuse> <memuse>1</memuse> <high-use>-</high-use> <memstat-req>1</memstat-req> <memstat-size>64</memstat-size> <memstat-name>GEOM</memstat-name> <inuse>146</inuse> <memuse>11</memuse> <high-use>-</high-use> <memstat-req>1042</memstat-req>
<memstat-size>16,32,64,128,256,512,2048,16384,32768,131072</memstat-size> <memstat-name>syncache</memstat-name> <inuse>1</inuse> <memuse>8</memuse> <high-use>-</high-use> <memstat-req>1</memstat-req>
<memstat-size>16,32,64,128,256,512,2048,16384,32768,131072</memstat-size> <memstat-name>tlv_stat</memstat-name> <inuse>0</inuse> <memuse>0</memuse> <high-use>-</high-use> <memstat-req>8</memstat-req>
<memstat-size>16,32,64,128,256,512,2048,16384,32768,131072</memstat-size> <memstat-name>NFS daemon</memstat-name> <inuse>1</inuse> <memuse>8</memuse> <high-use>-</high-use> <memstat-req>1</memstat-req>
<memstat-size>16,32,64,128,256,512,2048,16384,32768,131072</memstat-size>
361Copyright © 2016, Juniper Networks, Inc.
Chapter 9: System Software Monitoring Commands

<memstat-name>p1003.1b</memstat-name> <inuse>1</inuse> <memuse>1</memuse> <high-use>-</high-use> <memstat-req>1</memstat-req> <memstat-size>16</memstat-size> <memstat-name>MD disk</memstat-name> <inuse>10</inuse> <memuse>20</memuse> <high-use>-</high-use> <memstat-req>10</memstat-req> <memstat-size>65536</memstat-size> <memstat-name>ata_generic</memstat-name> <inuse>1</inuse> <memuse>1</memuse> <high-use>-</high-use> <memstat-req>6</memstat-req> <memstat-size>16,16384,32768</memstat-size> <memstat-name>ISOFS mount</memstat-name> <inuse>8</inuse> <memuse>1</memuse> <high-use>-</high-use> <memstat-req>15</memstat-req> <memstat-size>512</memstat-size> <memstat-name>ISOFS node</memstat-name> <inuse>1440</inuse> <memuse>135</memuse> <high-use>-</high-use> <memstat-req>1457</memstat-req> <memstat-size>128</memstat-size> <memstat-name>CAM SIM</memstat-name> <inuse>1</inuse> <memuse>1</memuse> <high-use>-</high-use> <memstat-req>1</memstat-req> <memstat-size>64</memstat-size> <memstat-name>CAM XPT</memstat-name> <inuse>6</inuse> <memuse>1</memuse> <high-use>-</high-use> <memstat-req>9</memstat-req> <memstat-size>16,64,16384</memstat-size> <memstat-name>CAM periph</memstat-name> <inuse>1</inuse> <memuse>1</memuse> <high-use>-</high-use> <memstat-req>1</memstat-req> <memstat-size>128</memstat-size> <memstat-name>ad_driver</memstat-name> <inuse>1</inuse> <memuse>1</memuse> <high-use>-</high-use> <memstat-req>1</memstat-req> <memstat-size>256</memstat-size> <memstat-name>pagedep</memstat-name> <inuse>1</inuse> <memuse>32</memuse> <high-use>-</high-use> <memstat-req>106</memstat-req> <memstat-size>64</memstat-size> <memstat-name>inodedep</memstat-name>
Copyright © 2016, Juniper Networks, Inc.362
System Basics: Getting Started Configuration Guide

<inuse>1</inuse> <memuse>128</memuse> <high-use>-</high-use> <memstat-req>464</memstat-req> <memstat-size>256</memstat-size> <memstat-name>newblk</memstat-name> <inuse>1</inuse> <memuse>1</memuse> <high-use>-</high-use> <memstat-req>336</memstat-req> <memstat-size>64,4096</memstat-size> <memstat-name>bmsafemap</memstat-name> <inuse>0</inuse> <memuse>0</memuse> <high-use>-</high-use> <memstat-req>63</memstat-req> <memstat-size>64</memstat-size> <memstat-name>allocdirect</memstat-name> <inuse>0</inuse> <memuse>0</memuse> <high-use>-</high-use> <memstat-req>320</memstat-req> <memstat-size>128</memstat-size> <memstat-name>indirdep</memstat-name> <inuse>0</inuse> <memuse>0</memuse> <high-use>-</high-use> <memstat-req>17</memstat-req> <memstat-size>32</memstat-size> <memstat-name>allocindir</memstat-name> <inuse>0</inuse> <memuse>0</memuse> <high-use>-</high-use> <memstat-req>15</memstat-req> <memstat-size>64</memstat-size> <memstat-name>freefrag</memstat-name> <inuse>0</inuse> <memuse>0</memuse> <high-use>-</high-use> <memstat-req>12</memstat-req> <memstat-size>32</memstat-size> <memstat-name>freeblks</memstat-name> <inuse>0</inuse> <memuse>0</memuse> <high-use>-</high-use> <memstat-req>40</memstat-req> <memstat-size>2048</memstat-size> <memstat-name>freefile</memstat-name> <inuse>0</inuse> <memuse>0</memuse> <high-use>-</high-use> <memstat-req>101</memstat-req> <memstat-size>32</memstat-size> <memstat-name>diradd</memstat-name> <inuse>0</inuse> <memuse>0</memuse> <high-use>-</high-use> <memstat-req>465</memstat-req> <memstat-size>64</memstat-size> <memstat-name>mkdir</memstat-name> <inuse>0</inuse>
363Copyright © 2016, Juniper Networks, Inc.
Chapter 9: System Software Monitoring Commands

<memuse>0</memuse> <high-use>-</high-use> <memstat-req>136</memstat-req> <memstat-size>32</memstat-size> <memstat-name>dirrem</memstat-name> <inuse>0</inuse> <memuse>0</memuse> <high-use>-</high-use> <memstat-req>168</memstat-req> <memstat-size>32</memstat-size> <memstat-name>newdirblk</memstat-name> <inuse>0</inuse> <memuse>0</memuse> <high-use>-</high-use> <memstat-req>1</memstat-req> <memstat-size>32</memstat-size> <memstat-name>savedino</memstat-name> <inuse>0</inuse> <memuse>0</memuse> <high-use>-</high-use> <memstat-req>157</memstat-req> <memstat-size>512</memstat-size> <memstat-name>UFS mount</memstat-name> <inuse>15</inuse> <memuse>36</memuse> <high-use>-</high-use> <memstat-req>15</memstat-req> <memstat-size>2048,65536,131072</memstat-size> <memstat-name>ata_dma</memstat-name> <inuse>2</inuse> <memuse>1</memuse> <high-use>-</high-use> <memstat-req>2</memstat-req> <memstat-size>256</memstat-size> <memstat-name>UMAHash</memstat-name> <inuse>1</inuse> <memuse>2</memuse> <high-use>-</high-use> <memstat-req>4</memstat-req> <memstat-size>4096,16384,32768,65536</memstat-size> <memstat-name>cdev</memstat-name> <inuse>22</inuse> <memuse>3</memuse> <high-use>-</high-use> <memstat-req>22</memstat-req> <memstat-size>256</memstat-size> <memstat-name>file desc</memstat-name> <inuse>141</inuse> <memuse>32</memuse> <high-use>-</high-use> <memstat-req>1583</memstat-req> <memstat-size>16,1024,2048,16384</memstat-size> <memstat-name>VM pgdata</memstat-name> <inuse>2</inuse> <memuse>65</memuse> <high-use>-</high-use> <memstat-req>2</memstat-req> <memstat-size>64</memstat-size> <memstat-name>sigio</memstat-name> <inuse>1</inuse> <memuse>1</memuse>
Copyright © 2016, Juniper Networks, Inc.364
System Basics: Getting Started Configuration Guide

<high-use>-</high-use> <memstat-req>20</memstat-req> <memstat-size>32</memstat-size> <memstat-name>kenv</memstat-name> <inuse>24</inuse> <memuse>5</memuse> <high-use>-</high-use> <memstat-req>27</memstat-req> <memstat-size>16,32,64,131072</memstat-size> <memstat-name>atkbddev</memstat-name> <inuse>2</inuse> <memuse>1</memuse> <high-use>-</high-use> <memstat-req>2</memstat-req> <memstat-size>32</memstat-size> <memstat-name>kqueue</memstat-name> <inuse>15</inuse> <memuse>9</memuse> <high-use>-</high-use> <memstat-req>19</memstat-req> <memstat-size>1024,4096,32768</memstat-size> <memstat-name>proc-args</memstat-name> <inuse>57</inuse> <memuse>3</memuse> <high-use>-</high-use> <memstat-req>1001</memstat-req> <memstat-size>16,32,64,128,256,512,1024</memstat-size> <memstat-name>isadev</memstat-name> <inuse>21</inuse> <memuse>2</memuse> <high-use>-</high-use> <memstat-req>21</memstat-req> <memstat-size>64</memstat-size> <memstat-name>zombie</memstat-name> <inuse>0</inuse> <memuse>0</memuse> <high-use>-</high-use> <memstat-req>1278</memstat-req> <memstat-size>128</memstat-size> <memstat-name>ithread</memstat-name> <inuse>69</inuse> <memuse>5</memuse> <high-use>-</high-use> <memstat-req>69</memstat-req> <memstat-size>16,64,256</memstat-size> <memstat-name>legacydrv</memstat-name> <inuse>4</inuse> <memuse>1</memuse> <high-use>-</high-use> <memstat-req>4</memstat-req> <memstat-size>16</memstat-size> <memstat-name>memdesc</memstat-name> <inuse>1</inuse> <memuse>4</memuse> <high-use>-</high-use> <memstat-req>1</memstat-req> <memstat-size>131072</memstat-size> <memstat-name>nexusdev</memstat-name> <inuse>2</inuse> <memuse>1</memuse> <high-use>-</high-use>
365Copyright © 2016, Juniper Networks, Inc.
Chapter 9: System Software Monitoring Commands

<memstat-req>2</memstat-req> <memstat-size>16</memstat-size> <memstat-name>CAM queue</memstat-name> <inuse>3</inuse> <memuse>1</memuse> <high-use>-</high-use> <memstat-req>3</memstat-req> <memstat-size>16</memstat-size> <memstat-name>$PIR</memstat-name> <inuse>4</inuse> <memuse>1</memuse> <high-use>-</high-use> <memstat-req>4</memstat-req> <memstat-size>32</memstat-size> <memstat-name>KTRACE</memstat-name> <inuse>100</inuse> <memuse>10</memuse> <high-use>-</high-use> <memstat-req>100</memstat-req> <memstat-size>128</memstat-size> <memstat-name>kbdmux</memstat-name> <inuse>5</inuse> <memuse>9</memuse> <high-use>-</high-use> <memstat-req>5</memstat-req> <memstat-size>128,2048,65536,131072</memstat-size> </vmstat-memstat-malloc> <vmstat-memstat-zone> <zone-name>UMA Kegs:</zone-name> <zone-size>136</zone-size> <count-limit>0</count-limit> <used>71</used> <free>1</free> <zone-req>71</zone-req> <zone-name>UMA Zones:</zone-name> <zone-size>120</zone-size> <count-limit>0</count-limit> <used>71</used> <free>19</free> <zone-req>71</zone-req> <zone-name>UMA Slabs:</zone-name> <zone-size>64</zone-size> <count-limit>0</count-limit> <used>490</used> <free>41</free> <zone-req>579</zone-req> <zone-name>UMA RCntSlabs:</zone-name> <zone-size>104</zone-size> <count-limit>0</count-limit> <used>276</used> <free>20</free> <zone-req>276</zone-req> <zone-name>UMA Hash:</zone-name> <zone-size>128</zone-size> <count-limit>0</count-limit> <used>4</used> <free>26</free> <zone-req>5</zone-req> <zone-name>16 Bucket:</zone-name> <zone-size>76</zone-size> <count-limit>0</count-limit>
Copyright © 2016, Juniper Networks, Inc.366
System Basics: Getting Started Configuration Guide

<used>30</used> <free>20</free> <zone-req>30</zone-req> <zone-name>32 Bucket:</zone-name> <zone-size>140</zone-size> <count-limit>0</count-limit> <used>33</used> <free>23</free> <zone-req>33</zone-req> <zone-name>64 Bucket:</zone-name> <zone-size>268</zone-size> <count-limit>0</count-limit> <used>33</used> <free>9</free> <zone-req>33</zone-req> <zone-name>128 Bucket:</zone-name> <zone-size>524</zone-size> <count-limit>0</count-limit> <used>49</used> <free>0</free> <zone-req>49</zone-req> <zone-name>VM OBJECT:</zone-name> <zone-size>128</zone-size> <count-limit>0</count-limit> <used>2111</used> <free>79</free> <zone-req>25214</zone-req> <zone-name>MAP:</zone-name> <zone-size>160</zone-size> <count-limit>0</count-limit> <used>7</used> <free>41</free> <zone-req>7</zone-req> <zone-name>KMAP ENTRY:</zone-name> <zone-size>68</zone-size> <count-limit>35336</count-limit> <used>19</used> <free>149</free> <zone-req>2397</zone-req> <zone-name>MAP ENTRY:</zone-name> <zone-size>68</zone-size> <count-limit>0</count-limit> <used>2031</used> <free>153</free> <zone-req>62417</zone-req> <zone-name>PV ENTRY:</zone-name> <zone-size>24</zone-size> <count-limit>509095</count-limit> <used>57177</used> <free>6333</free> <zone-req>1033683</zone-req> <zone-name>DP fakepg:</zone-name> <zone-size>72</zone-size> <count-limit>0</count-limit> <used>0</used> <free>0</free> <zone-req>0</zone-req> <zone-name>mt_zone:</zone-name> <zone-size>64</zone-size> <count-limit>0</count-limit> <used>238</used>
367Copyright © 2016, Juniper Networks, Inc.
Chapter 9: System Software Monitoring Commands

<free>57</free> <zone-req>238</zone-req> <zone-name>16:</zone-name> <zone-size>16</zone-size> <count-limit>0</count-limit> <used>2114</used> <free>119</free> <zone-req>80515</zone-req> <zone-name>32:</zone-name> <zone-size>32</zone-size> <count-limit>0</count-limit> <used>1335</used> <free>134</free> <zone-req>10259</zone-req> <zone-name>64:</zone-name> <zone-size>64</zone-size> <count-limit>0</count-limit> <used>3529</used> <free>129</free> <zone-req>29110</zone-req> <zone-name>96:</zone-name> <zone-size>96</zone-size> <count-limit>0</count-limit> <used>2062</used> <free>58</free> <zone-req>4365</zone-req> <zone-name>112:</zone-name> <zone-size>112</zone-size> <count-limit>0</count-limit> <used>361</used> <free>164</free> <zone-req>24613</zone-req> <zone-name>128:</zone-name> <zone-size>128</zone-size> <count-limit>0</count-limit> <used>359</used> <free>61</free> <zone-req>942</zone-req> <zone-name>160:</zone-name> <zone-size>160</zone-size> <count-limit>0</count-limit> <used>364</used> <free>44</free> <zone-req>577</zone-req> <zone-name>224:</zone-name> <zone-size>224</zone-size> <count-limit>0</count-limit> <used>422</used> <free>20</free> <zone-req>1950</zone-req> <zone-name>256:</zone-name> <zone-size>256</zone-size> <count-limit>0</count-limit> <used>204</used> <free>36</free> <zone-req>1225</zone-req> <zone-name>288:</zone-name> <zone-size>288</zone-size> <count-limit>0</count-limit> <used>2</used> <free>24</free>
Copyright © 2016, Juniper Networks, Inc.368
System Basics: Getting Started Configuration Guide
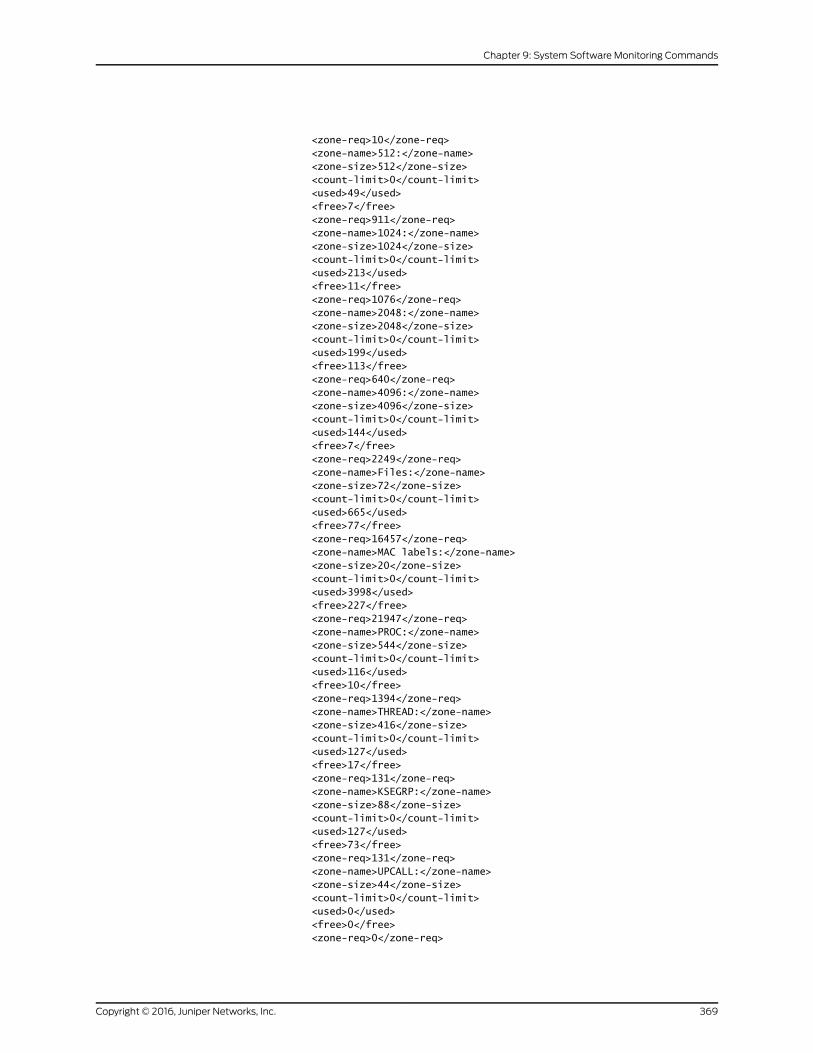
<zone-req>10</zone-req> <zone-name>512:</zone-name> <zone-size>512</zone-size> <count-limit>0</count-limit> <used>49</used> <free>7</free> <zone-req>911</zone-req> <zone-name>1024:</zone-name> <zone-size>1024</zone-size> <count-limit>0</count-limit> <used>213</used> <free>11</free> <zone-req>1076</zone-req> <zone-name>2048:</zone-name> <zone-size>2048</zone-size> <count-limit>0</count-limit> <used>199</used> <free>113</free> <zone-req>640</zone-req> <zone-name>4096:</zone-name> <zone-size>4096</zone-size> <count-limit>0</count-limit> <used>144</used> <free>7</free> <zone-req>2249</zone-req> <zone-name>Files:</zone-name> <zone-size>72</zone-size> <count-limit>0</count-limit> <used>665</used> <free>77</free> <zone-req>16457</zone-req> <zone-name>MAC labels:</zone-name> <zone-size>20</zone-size> <count-limit>0</count-limit> <used>3998</used> <free>227</free> <zone-req>21947</zone-req> <zone-name>PROC:</zone-name> <zone-size>544</zone-size> <count-limit>0</count-limit> <used>116</used> <free>10</free> <zone-req>1394</zone-req> <zone-name>THREAD:</zone-name> <zone-size>416</zone-size> <count-limit>0</count-limit> <used>127</used> <free>17</free> <zone-req>131</zone-req> <zone-name>KSEGRP:</zone-name> <zone-size>88</zone-size> <count-limit>0</count-limit> <used>127</used> <free>73</free> <zone-req>131</zone-req> <zone-name>UPCALL:</zone-name> <zone-size>44</zone-size> <count-limit>0</count-limit> <used>0</used> <free>0</free> <zone-req>0</zone-req>
369Copyright © 2016, Juniper Networks, Inc.
Chapter 9: System Software Monitoring Commands

<zone-name>SLEEPQUEUE:</zone-name> <zone-size>32</zone-size> <count-limit>0</count-limit> <used>145</used> <free>194</free> <zone-req>145</zone-req> <zone-name>VMSPACE:</zone-name> <zone-size>268</zone-size> <count-limit>0</count-limit> <used>57</used> <free>13</free> <zone-req>1335</zone-req> <zone-name>mbuf_packet:</zone-name> <zone-size>256</zone-size> <count-limit>180000</count-limit> <used>256</used> <free>128</free> <zone-req>49791</zone-req> <zone-name>mbuf:</zone-name> <zone-size>256</zone-size> <count-limit>180000</count-limit> <used>50</used> <free>466</free> <zone-req>105183</zone-req> <zone-name>mbuf_cluster:</zone-name> <zone-size>2048</zone-size> <count-limit>25190</count-limit> <used>387</used> <free>165</free> <zone-req>5976</zone-req> <zone-name>mbuf_jumbo_pagesize:</zone-name> <zone-size>4096</zone-size> <count-limit>0</count-limit> <used>0</used> <free>0</free> <zone-req>0</zone-req> <zone-name>mbuf_jumbo_9k:</zone-name> <zone-size>9216</zone-size> <count-limit>0</count-limit> <used>0</used> <free>0</free> <zone-req>0</zone-req> <zone-name>mbuf_jumbo_16k:</zone-name> <zone-size>16384</zone-size> <count-limit>0</count-limit> <used>0</used> <free>0</free> <zone-req>0</zone-req> <zone-name>ACL UMA zone:</zone-name> <zone-size>388</zone-size> <count-limit>0</count-limit> <used>0</used> <free>0</free> <zone-req>0</zone-req> <zone-name>g_bio:</zone-name> <zone-size>132</zone-size> <count-limit>0</count-limit> <used>0</used> <free>174</free> <zone-req>69750</zone-req> <zone-name>ata_request:</zone-name>
Copyright © 2016, Juniper Networks, Inc.370
System Basics: Getting Started Configuration Guide

<zone-size>200</zone-size> <count-limit>0</count-limit> <used>0</used> <free>57</free> <zone-req>5030</zone-req> <zone-name>ata_composite:</zone-name> <zone-size>192</zone-size> <count-limit>0</count-limit> <used>0</used> <free>0</free> <zone-req>0</zone-req> <zone-name>GENCFG:</zone-name> <zone-size>72</zone-size> <count-limit>1000004</count-limit> <used>57</used> <free>102</free> <zone-req>57</zone-req> <zone-name>VNODE:</zone-name> <zone-size>292</zone-size> <count-limit>0</count-limit> <used>2718</used> <free>25</free> <zone-req>2922</zone-req> <zone-name>VNODEPOLL:</zone-name> <zone-size>72</zone-size> <count-limit>0</count-limit> <used>0</used> <free>0</free> <zone-req>0</zone-req> <zone-name>S VFS Cache:</zone-name> <zone-size>68</zone-size> <count-limit>0</count-limit> <used>2500</used> <free>76</free> <zone-req>3824</zone-req> <zone-name>L VFS Cache:</zone-name> <zone-size>291</zone-size> <count-limit>0</count-limit> <used>51</used> <free>14</free> <zone-req>63</zone-req> <zone-name>NAMEI:</zone-name> <zone-size>1024</zone-size> <count-limit>0</count-limit> <used>0</used> <free>8</free> <zone-req>53330</zone-req> <zone-name>NFSMOUNT:</zone-name> <zone-size>480</zone-size> <count-limit>0</count-limit> <used>0</used> <free>0</free> <zone-req>0</zone-req> <zone-name>NFSNODE:</zone-name> <zone-size>460</zone-size> <count-limit>0</count-limit> <used>0</used> <free>0</free> <zone-req>0</zone-req> <zone-name>PIPE:</zone-name> <zone-size>404</zone-size>
371Copyright © 2016, Juniper Networks, Inc.
Chapter 9: System Software Monitoring Commands

<count-limit>0</count-limit> <used>27</used> <free>9</free> <zone-req>717</zone-req> <zone-name>KNOTE:</zone-name> <zone-size>72</zone-size> <count-limit>0</count-limit> <used>42</used> <free>64</free> <zone-req>3311</zone-req> <zone-name>socket:</zone-name> <zone-size>412</zone-size> <count-limit>25191</count-limit> <used>343</used> <free>8</free> <zone-req>2524</zone-req> <zone-name>unpcb:</zone-name> <zone-size>140</zone-size> <count-limit>25200</count-limit> <used>170</used> <free>26</free> <zone-req>2157</zone-req> <zone-name>ipq:</zone-name> <zone-size>52</zone-size> <count-limit>216</count-limit> <used>0</used> <free>0</free> <zone-req>0</zone-req> <zone-name>udpcb:</zone-name> <zone-size>232</zone-size> <count-limit>25194</count-limit> <used>19</used> <free>32</free> <zone-req>31</zone-req> <zone-name>inpcb:</zone-name> <zone-size>232</zone-size> <count-limit>25194</count-limit> <used>40</used> <free>28</free> <zone-req>105</zone-req> <zone-name>tcpcb:</zone-name> <zone-size>520</zone-size> <count-limit>25193</count-limit> <used>40</used> <free>16</free> <zone-req>105</zone-req> <zone-name>tcptw:</zone-name> <zone-size>56</zone-size> <count-limit>5092</count-limit> <used>0</used> <free>0</free> <zone-req>0</zone-req> <zone-name>syncache:</zone-name> <zone-size>128</zone-size> <count-limit>15360</count-limit> <used>0</used> <free>60</free> <zone-req>55</zone-req> <zone-name>tcpreass:</zone-name> <zone-size>20</zone-size> <count-limit>1690</count-limit>
Copyright © 2016, Juniper Networks, Inc.372
System Basics: Getting Started Configuration Guide

<used>0</used> <free>0</free> <zone-req>0</zone-req> <zone-name>sackhole:</zone-name> <zone-size>20</zone-size> <count-limit>0</count-limit> <used>0</used> <free>0</free> <zone-req>0</zone-req> <zone-name>ripcb:</zone-name> <zone-size>232</zone-size> <count-limit>25194</count-limit> <used>5</used> <free>29</free> <zone-req>5</zone-req> <zone-name>SWAPMETA:</zone-name> <zone-size>276</zone-size> <count-limit>94948</count-limit> <used>0</used> <free>0</free> <zone-req>0</zone-req> <zone-name>FFS inode:</zone-name> <zone-size>132</zone-size> <count-limit>0</count-limit> <used>1146</used> <free>72</free> <zone-req>1306</zone-req> <zone-name>FFS1 dinode:</zone-name> <zone-size>128</zone-size> <count-limit>0</count-limit> <used>1146</used> <free>24</free> <zone-req>1306</zone-req> <zone-name>FFS2 dinode:</zone-name> <zone-size>256</zone-size> <count-limit>0</count-limit> <used>0</used> <free>0</free> <zone-req>0</zone-req> </vmstat-memstat-zone> <vmstat-sumstat> <cpu-context-switch>934906</cpu-context-switch> <dev-intr>1707986</dev-intr> <soft-intr>33819</soft-intr> <traps>203604</traps> <sys-calls>1200636</sys-calls> <kernel-thrds>60</kernel-thrds> <fork-calls>1313</fork-calls> <vfork-calls>21</vfork-calls> <rfork-calls>0</rfork-calls> <swap-pageins>0</swap-pageins> <swap-pagedin>0</swap-pagedin> <swap-pageouts>0</swap-pageouts> <swap-pagedout>0</swap-pagedout> <vnode-pageins>23094</vnode-pageins> <vnode-pagedin>23119</vnode-pagedin> <vnode-pageouts>226</vnode-pageouts> <vnode-pagedout>3143</vnode-pagedout> <page-daemon-wakeup>0</page-daemon-wakeup> <page-daemon-examined-pages>0</page-daemon-examined-pages> <pages-reactivated>8821</pages-reactivated>
373Copyright © 2016, Juniper Networks, Inc.
Chapter 9: System Software Monitoring Commands

<copy-on-write-faults>48364</copy-on-write-faults> <copy-on-write-optimized-faults>31</copy-on-write-optimized-faults> <zero-fill-pages-zeroed>74665</zero-fill-pages-zeroed> <zero-fill-pages-prezeroed>70061</zero-fill-pages-prezeroed> <transit-blocking-page-faults>85</transit-blocking-page-faults> <total-vm-faults>191824</total-vm-faults>
<pages-affected-by-kernel-thrd-creat>0</pages-affected-by-kernel-thrd-creat> <pages-affected-by-fork>95343</pages-affected-by-fork> <pages-affected-by-vfork>3526</pages-affected-by-vfork> <pages-affected-by-rfork>0</pages-affected-by-rfork> <pages-freed>221502</pages-freed> <pages-freed-by-deamon>0</pages-freed-by-deamon> <pages-freed-by-exiting-proc>75630</pages-freed-by-exiting-proc> <pages-active>45826</pages-active> <pages-inactive>13227</pages-inactive> <pages-in-vm-cache>49278</pages-in-vm-cache> <pages-wired-down>10640</pages-wired-down> <pages-free>70706</pages-free> <bytes-per-page>4096</bytes-per-page> <swap-pages-used>0</swap-pages-used> <peak-swap-pages-used>0</peak-swap-pages-used> <total-name-lookups>214496</total-name-lookups> <positive-cache-hits>92</positive-cache-hits> <negative-cache-hits>5</negative-cache-hits> <pass2>0</pass2> <cache-deletions>0</cache-deletions> <cache-falsehits>0</cache-falsehits> <toolong>0</toolong> </vmstat-sumstat> <vmstat-intr> <intr-name>irq0: clk </intr-name> <intr-cnt>1243455</intr-cnt> <intr-rate>999</intr-rate> <intr-name>irq4: sio0 </intr-name> <intr-cnt>1140</intr-cnt> <intr-rate>0</intr-rate> <intr-name>irq8: rtc </intr-name> <intr-cnt>159164</intr-cnt> <intr-rate>127</intr-rate> <intr-name>irq9: cbb1 fxp0 </intr-name> <intr-cnt>28490</intr-cnt> <intr-rate>22</intr-rate> <intr-name>irq10: fxp1 </intr-name> <intr-cnt>20593</intr-cnt> <intr-rate>16</intr-rate> <intr-name>irq14: ata0 </intr-name> <intr-cnt>5031</intr-cnt> <intr-rate>4</intr-rate> <intr-name>Total</intr-name> <intr-cnt>1457873</intr-cnt> <intr-rate>1171</intr-rate> </vmstat-intr> <vm-kernel-state> <vm-kmem-map-free>248524800</vm-kmem-map-free> </vm-kernel-state> </system-virtual-memory-information> <cli> <banner></banner> </cli></rpc-reply>
Copyright © 2016, Juniper Networks, Inc.374
System Basics: Getting Started Configuration Guide

375Copyright © 2016, Juniper Networks, Inc.
Chapter 9: System Software Monitoring Commands

show task
Syntax show task<logical-system (all | logical-system-name)><summary><task-name>iomemoryreplicationsnooping
Release Information Command introduced before Junos OS Release 7.4.
Description Display routing protocol tasks on the Routing Engine.
Options none—Display all routing protocol tasks on the Routing Engine.
logical-system(all | logical-system-name)—(Optional) Perform this operation on all logical
systems or on a particular logical system.
summary—(Optional) Display summary information about running tasks.
task-name—(Optional) Display information about running tasks for all tasks whose name
begins with this string (for example, BGP_Group_69_153 and BGP_Group_70_153 are
both displayed when you run the show task BGP_Group command).
io—Show i/o statistics for all tasks displayed.
memory—Show memory statistics for all tasks displayed.
replication—Show only replication tasks.
snooping—Show only snooping tasks.
Required PrivilegeLevel
view
RelatedDocumentation
show task io on page 378•
• show taskmemory on page 380
List of Sample Output show task on page 377
Output Fields Table 16 on page 376 describes the output fields for the show task command. Output
fields are listed in the approximate order in which they appear.
Table 16: show task Output Fields
Field DescriptionField Name
Current priority of the process. A lower number indicates a higher priority.Pri
Name of the task.Task Name
Copyright © 2016, Juniper Networks, Inc.376
System Basics: Getting Started Configuration Guide

Table 16: show task Output Fields (continued)
Field DescriptionField Name
IP protocol number associated with the process.Pro
TCP or UDP port number associated with the task.Port
Socket number of the task.So
Flags for the task:
• Accept—Task is waiting for incoming connections.
• Connect—Task is waiting for a connection to be completed.
• Delete—Task has been deleted and is being cleaned up.
• LowPrio—Task will be dispatched to read its socket after otherhigher-priority tasks.
Flags
Sample Output
show task
user@host> show taskPri Task Name Pro Port So Flags 10 IF 15 LABEL 15 ISO 15 INET 7 20 Aggregate 20 RT 30 ICMP 1 9 39 ISIS I/O 12 40 IS-IS 10 40 BGP RT Background <LowPrio> 40 BGP.0.0.0.0+179 179 15 <Accept LowPrio> 50 BGP_69.192.168.201.234+179 179 17 <LowPrio> 50 BGP_70.192.168.201.233+179 179 16 <LowPrio> 50 BGP_Group_69_153 <LowPrio> 50 BGP_Group_70_153 <LowPrio> 50 ASPaths 60 KRT 255 1 60 Redirect 70 MGMT.local 14 <LowPrio> 70 MGMT_Listen./var/run/rpd_mgmt 13 <Accept LowPrio> 70 SNMP Subagent./var/run/sub_rpd.sock 8 <LowPrio>
377Copyright © 2016, Juniper Networks, Inc.
Chapter 9: System Software Monitoring Commands

show task io
List of Syntax Syntax on page 378
Syntax (EX Series Switches) on page 378
Syntax show task io<logical-system (all | logical-system-name)>
Syntax (EX SeriesSwitches)
show task io
Release Information Command introduced before Junos OS Release 7.4.
Command introduced in Junos OS Release 9.0 for EX Series switches.
Description Display I/O statistics for routing protocol tasks on the Routing Engine.
Options none—Display I/O statistics for routing protocol tasks on the Routing Engine.
logical-system(all | logical-system-name)—(Optional) Perform this operation on all logical
systems or on a particular logical system.
Required PrivilegeLevel
view
List of Sample Output show task io on page 378
Output Fields Table 17 on page 378 describes the output fields for the show task io command. Output
fields are listed in the approximate order in which they appear.
Table 17: show task io Output Fields
Field DescriptionField Name
Name of the task.Task Name
Number of input ready notifications.Reads
Number of output ready notifications.Writes
Number of requests to the kernel for input.Rcvd
Number of requests to the kernel for output.Sent
Number of sent requests that failed.Dropped
Sample Output
show task io
user@host> show task ioTask Name Reads Writes Rcvd Sent Dropped LMP Client 1 1 0 0 0 IF 0 0 0 0 0
Copyright © 2016, Juniper Networks, Inc.378
System Basics: Getting Started Configuration Guide

INET6 0 0 0 0 0 INET 0 0 0 0 0 ISO 0 0 0 0 0 Memory 0 0 0 0 0 RPD Unix Domain Server./var/ru 0 0 0 0 0 RPD Unix Domain Server./var/ru 1 0 0 0 0 RPD Unix Domain Server./var/ru 2 0 0 0 0 RPD Server.0.0.0.0+666 0 0 0 0 0 Aggregate 0 0 0 0 0 RT 0 0 0 0 0 ICMP 0 0 0 0 0 Router-Advertisement 0 0 0 0 0 ICMPv6 0 0 0 0 0 IS-IS I/O./var/run/ppmd_contro 1307 1 0 0 0 l2vpn global task 0 0 0 0 0 IS-IS 0 0 0 0 0 BFD I/O./var/run/bfdd_control 1307 1 0 0 0 TED 0 0 0 0 0 ASPaths 0 0 0 0 0 Resolve tree 1 0 0 0 0 0 KStat 0 0 0 0 0 KRT Request 0 0 63 0 0 KRT Ifstate 106 0 295 0 0 KRT 0 0 0 0 0 Redirect 0 0 0 0 0...
379Copyright © 2016, Juniper Networks, Inc.
Chapter 9: System Software Monitoring Commands

show taskmemory
List of Syntax Syntax on page 380
Syntax (EX Series Switches) on page 380
Syntax show taskmemory<brief | detail | history | summary><logical-system (all | logical-system-name)>
Syntax (EX SeriesSwitches)
show taskmemory<brief | detail | history | summary>
Release Information Command introduced before Junos OS Release 7.4.
Command introduced in Junos OS Release 9.0 for EX Series switches.
Description Display memory utilization for routing protocol tasks on the Routing Engine.
Options none—Display standard information about memory utilization for routing protocol tasks
on the Routing Engine on all logical systems.
brief | detail | history | summary—(Optional) Display the specified level of output. Use the
history option to display a history of memory utilization information.
logical-system(all | logical-system-name)—(Optional) Perform this operation on all logical
systems or on a particular logical system.
Required PrivilegeLevel
view
List of Sample Output show taskmemory on page 382show taskmemory detail on page 382
Output Fields Table 18 on page 380 describes the output fields for the show taskmemory command.
Output fields are listed in the approximate order in which they appear.
Table 18: show taskmemory Output Fields
Level of OutputField DescriptionField Name
All levelsMemory currently in use.Memory CurrentlyIn Use
none specified, brief,history
Maximum memory ever used.MemoryMaximumEver Used
none specified, briefMemory currently available.Memory Available
none specified, brief,history, summary
Memory capacity in 1000-byte kilobytes.Size (kB)
none specified, briefPercentage of memory currently available.Percentage
Copyright © 2016, Juniper Networks, Inc.380
System Basics: Getting Started Configuration Guide

Table 18: show taskmemory Output Fields (continued)
Level of OutputField DescriptionField Name
none specified, brief,history
Timestamp.When
detailMemory utilization by memory size:
• Size—Block size, in bytes.
• TPT—indicates transient memory, and P indicates full page.
• Allocs—Number of blocks allocated for named objects.
• Mallocs—Number of blocks allocated for anonymous objects.
• Alloc Bytes—Number of blocks allocated times block size.
• MaxAllocs—Maximum value ofAllocs.
• MaxBytes—Maximum value of Alloc Bytes.
• FreeBytes—Total number of bytes unused on memory pages for this block size.
Overall MemoryReport
detailMemory utilization by named objects:
• Size—Size of the named object in bytes.
• Alloc Size—Actual memory used by that object in bytes.
• DTP—indicates debug,D T indicates transient, and P indicates full page.
• Alloc Blocks—Number of named objects allocated.
• AllocBytes—Number of blocks allocated times block size.
• MaxAlloc Blocks—Maximum value of Alloc Blocks.
• Max Alloc Bytes—Maximum value of AllocBytes.
Allocator MemoryReport
detailMemory utilization for miscellaneous use:
• Allocs—Number of allocations.
• Bytes—Total bytes consumed.
• MaxAllocs—Maximum value of Allocs.
• MaxBytes—Maximum value of Bytes.
• FuncCalls—Cumulative number of Allocs.
Malloc UsageReport
detailMemory allocated dynamically by the system.Dynamicallyallocatedmemory
detailProgram and base station subsystem (BSS) memory.Programdata+BSSmemory
detailInternal memory overhead.Pagedataoverhead
detailInternal memory overhead.Page directory size
detailTotal memory, in bytes, that is currently in use and percentage of availablememory (in parentheses).
Total bytes in use
381Copyright © 2016, Juniper Networks, Inc.
Chapter 9: System Software Monitoring Commands

Sample Output
show taskmemory
user@host> show taskmemoryMemory Size (kB) Percentage When Currently In Use: 29417 3% now Maximum Ever Used: 33882 4% 00/02/11 22:07:03 Available: 756281 100% now
show taskmemory detail
user@host> show taskmemory detail------------------------- Overall Memory Report ------------------------- Size TP Allocs Mallocs AllocBytes MaxAllocs MaxBytes FreeBytes 8 - 111 888 112 896 3208 12 92 149 2892 247 2964 1204 12 T - - - 5 60 - 16 7 11 288 23 368 3808 20 100 33 2660 164 3280 1436 20 T - - - 40 800 - 24 162 15 4248 177 4248 3944 24 T - - - 4 96 - 28 371 - 10388 372 10416 1900 32 6 23 928 30 960 3168...------------------------------------------------------------------------- 606182 715302 118810
------------------------ Allocator Memory Report ------------------------ Name Size Alloc DTP Alloc Alloc MaxAlloc MaxAlloc Size Blocks Bytes Blocks Bytes patroot 8 12 84 1008 87 1044 sockaddr_un.i802 8 12 2 24 2 24 cos_nhm_nh 8 12 1 12 1 12 sockaddr_un.tag 8 12 3 36 4 48 gw_entry_list 8 12 1 12 1 12 bgp_riblist_01 8 12 1 12 2 24 ospf_intf_ev 8 12 - - 6 72 krt_remnant_rt 8 12 T - - 5 60... ------------------------------------------------------------------------- 164108 221552
-------------------------- Malloc Usage Report -------------------------- Name Allocs Bytes MaxAllocs MaxBytes FuncCalls MGMT.local 1 8 1 8 1 BGP.0.0.0.0+179 - - 1 8 2 BGP RT Background 4 74748 4 74748 4 SNMP Subagent./var/run/ - 52 1 9172 56 OSPFv2 I/O./var/run/ppm 1 66536 2 66552 4551 OSPF 6 67655 7 67703 68 KRT - - 1 3784 18 ASPaths 3 80 3 80 3 -- sockaddr -- 183 2100 184 2108 1645 BFD I/O./var/run/bfdd_c 1 65535 2 65551 4555 RT 48 872 48 872 48 Scheduler 42 628 43 628 88 --Anonymous-- 56 1100 58 1140 112 --System-- 82 58364 114 60044 4654 -------------------------------------------------------------------------
Copyright © 2016, Juniper Networks, Inc.382
System Basics: Getting Started Configuration Guide

337678 352398
Dynamically allocated memory: 765952 Maximum: 765952 Program data+BSS memory: 1568768 Maximum: 1568768 Page data overhead: 53248 Maximum: 53248 Page directory size: 4096 Maximum: 4096 ---------- Total bytes in use: 2392064 (0% of available memory)
383Copyright © 2016, Juniper Networks, Inc.
Chapter 9: System Software Monitoring Commands

show task replication
Syntax show task replication
Release Information Command introduced in Junos OS Release 8.5.
Command introduced in Junos OS Release 9.0 for EX Series switches.
Description Displays nonstop active routing (NSR) status. When you issue this command on the
master Routing Engine, the status of nonstop active routing synchronization is also
displayed.
Options This command has no options.
Required PrivilegeLevel
view
List of Sample Output show task replication (Issued on theMaster Routing Engine) on page 384show task replication (Issued on the Backup Routing Engine) on page 385
Output Fields Table 19 on page 384 lists the output fields for the showtask replicationcommand. Output
fields are listed in the approximate order in which they appear.
Table 19: show task replication Output Fields
Field DescriptionField Name
Displays whether or not graceful Routing Engine switchover isconfigured. The status can be Enabled or Disabled.
Stateful replication
Displays the Routing Engine on which the command is issued:Master, Backup, or Not applicable (when the router has only oneRouting Engine).
REmode
Protocols that are supported by nonstop active routing.Protocol
Nonstop active routing synchronization status for the supportedprotocols. States are NotStarted, InProgress, and Complete.
Synchronization Status
Sample Output
show task replication (Issued on theMaster Routing Engine)
user@host> show task replication Stateful Replication: Enabled RE mode: Master
Protocol Synchronization Status OSPF NotStarted BGP Complete IS-IS NotStarted LDP Complete PIM Complete
Copyright © 2016, Juniper Networks, Inc.384
System Basics: Getting Started Configuration Guide

show task replication (Issued on the Backup Routing Engine)
user@host> show task replication Stateful Replication: Enabled RE mode: Backup
385Copyright © 2016, Juniper Networks, Inc.
Chapter 9: System Software Monitoring Commands

show version
List of Syntax Syntax on page 386
Syntax (EX Series Switches) on page 386
Syntax (TX Matrix Router) on page 386
Syntax (TX Matrix Plus Router) on page 386
Syntax (MX Series Router) on page 386
Syntax (QFX Series) on page 386
Syntax show version<brief | detail>
Syntax (EX SeriesSwitches)
show version<all-members><brief | detail><local><membermember-id>
Syntax (TXMatrixRouter)
show version<brief | detail><all-chassis | all-lcc | lcc number | scc>
Syntax(TXMatrixPlusRouter)
show version<all-chassis | all-lcc | lcc number | sfc number><brief | detail>
Syntax (MX SeriesRouter)
show version<brief | detail><all-members><local><membermember-id>
Syntax (QFX Series) show version<brief | detail><component component-name | all>
Release Information Command introduced before Junos OS Release 7.4.
Command introduced in Junos OS Release 9.0 for EX Series switches.
sfc option introduced for the TX Matrix Plus router in Junos OS Release 9.6.
Command introduced in Junos OS Release 11.1 for the QFX Series.
Description Display the hostname and version information about the software running on the router
or switch.
Options none—Display standard information about the hostname and version of the software
running on the router or switch.
brief | detail—(Optional) Display the specified level of output.
all-members—(EX4200 switches and MX Series routers only) (Optional) Display standard
information about the hostname and version of the software running on all members
of the Virtual Chassis configuration.
Copyright © 2016, Juniper Networks, Inc.386
System Basics: Getting Started Configuration Guide

component all—(QFabric systems only) (Optional) Display the host name and version
information about the software running on all the components on the QFabric system.
componentcomponent-name—(QFabric systems only) (Optional) Display the host name
and version information about the software running on a specific QFabric system
component. Replace component-name with the name of the QFabric system
component. Thecomponent-namecan be the name of a diagnostics Routing Engine,
Director group, fabric control Routing Engine, fabric manager Routing Engine,
Interconnect device, or Node group.
local—(EX4200 switches and MX Series routers only) (Optional) Display standard
information about the hostname and version of the software running on the local
Virtual Chassis member.
membermember-id—(EX4200 switches and MX Series routers only) (Optional) Display
standard information about the hostname and version of the software running on
the specified member of the Virtual Chassis configuration. For EX4200 switches,
replace member-id with a value from 0 through 9. For an MX Series Virtual Chassis,
replace member-id with a value of 0 or 1.
scc—(TX Matrix routers only) (Optional) Display the hostname and version information
about the software running on the TX Matrix router (or switch-card chassis).
sfc number—(TX Matrix Plus routers only) (Optional) Display the hostname and version
information about the software running on the TX Matrix Plus router (or switch-fabric
chassis). Replace number with 0.
Additional Information By default, when you issue the show version command on a TX Matrix or TX Matrix Plus
master Routing Engine, the command is broadcast to all the T640 (in a routing matrix
based on a TX Matrix router) or T1600 (in a routing matrix based on a TX Matrix Plus
router) master Routing Engines connected to it. Likewise, if you issue the same command
on the TX Matrix or TX Matrix Plus backup Routing Engine, the command is broadcast
to all the T640 (in a routing matrix based on a TX Matrix router) or T1600 (in a routing
matrix based on a TX Matrix Plus router) backup Routing Engines that are connected to
it.
Required PrivilegeLevel
view
List of Sample Output show version on page 388show version (TXMatrix Plus Router) on page 388show version (MX Series Router) on page 391show version (QFX3500 Switch) on page 391show version (QFabric System) on page 391show version component all (QFabric System) on page 391
387Copyright © 2016, Juniper Networks, Inc.
Chapter 9: System Software Monitoring Commands

Sample Output
show version
user@host> show versionHostname: router1Model: m20JUNOS Base OS boot [7.2-20050312.0]JUNOS Base OS Software Suite [7.2-20050312.0]JUNOS Kernel Software Suite [7.2R1.7]JUNOS Packet Forwarding Engine Support (M20/M40) [7.2R1.7]JUNOS Routing Software Suite [7.2R1.7]JUNOS Online Documentation [7.2R1.7]JUNOS Crypto Software Suite [7.2R1.7]
{master}
user@host> show version psd 1psd1-re0:--------------------------------------------------------------------------Hostname: chinaModel: t640JUNOS Base OS boot [9.1I20080311_1959_builder]JUNOS Base OS Software Suite [9.1-20080321.0]JUNOS Kernel Software Suite [9.1-20080321.0]JUNOS Crypto Software Suite [9.1-20080321.0]JUNOS Packet Forwarding Engine Support (M/T Common) [9.1-20080321.0]JUNOS Packet Forwarding Engine Support (T-series) [9.1-20080321.0]JUNOS Online Documentation [9.1-20080321.0]JUNOS Routing Software Suite [9.1-20080321.0]labpkg [7.0]
show version (TXMatrix Plus Router)
user@host> show versionsfc0-re0:--------------------------------------------------------------------------Hostname: hostModel: txpJUNOS Base OS boot [12.3-20121019.0]JUNOS Base OS Software Suite [12.3-20121019.0]JUNOS Kernel Software Suite [12.3-20121019.0]JUNOS Crypto Software Suite [12.3-20121019.0]JUNOS Packet Forwarding Engine Support (M/T Common) [12.3-20121019.0]JUNOS Packet Forwarding Engine Support (T-Series) [12.3-20121019.0]JUNOS Online Documentation [12.3-20121019.0]JUNOS Services AACL Container package [12.3-20121019.0]JUNOS Services Application Level Gateways [12.3-20121019.0]JUNOS AppId Services [12.3-20121019.0]JUNOS Border Gateway Function package [12.3-20121019.0]JUNOS Services Captive Portal and Content Delivery Container package [12.3-20121019.0]JUNOS Services HTTP Content Management package [12.3-20121019.0]JUNOS IDP Services [12.3-20121019.0]JUNOS Services LL-PDF Container package [12.3-20121019.0]JUNOS Services NAT [12.3-20121019.0]JUNOS Services PTSP Container package [12.3-20121019.0]JUNOS Services RPM [12.3-20121019.0]JUNOS Services Stateful Firewall [12.3-20121019.0]JUNOS Voice Services Container package [12.3-20121019.0]JUNOS Services Example Container package [12.3-20121019.0]
Copyright © 2016, Juniper Networks, Inc.388
System Basics: Getting Started Configuration Guide

JUNOS Services Crypto [12.3-20121019.0]JUNOS Services SSL [12.3-20121019.0]JUNOS Services IPSec [12.3-20121019.0]JUNOS Runtime Software Suite [12.3-20121019.0]JUNOS Routing Software Suite [12.3-20121019.0]
lcc0-re0:--------------------------------------------------------------------------Hostname: host1Model: t1600JUNOS Base OS boot [12.3-20121019.0]JUNOS Base OS Software Suite [12.3-20121019.0]JUNOS Kernel Software Suite [12.3-20121019.0]JUNOS Crypto Software Suite [12.3-20121019.0]JUNOS Packet Forwarding Engine Support (M/T Common) [12.3-20121019.0]JUNOS Packet Forwarding Engine Support (T-Series) [12.3-20121019.0]JUNOS Online Documentation [12.3-20121019.0]JUNOS Services AACL Container package [12.3-20121019.0]JUNOS Services Application Level Gateways [12.3-20121019.0]JUNOS AppId Services [12.3-20121019.0]JUNOS Border Gateway Function package [12.3-20121019.0]JUNOS Services Captive Portal and Content Delivery Container package [12.3-20121019.0]JUNOS Services HTTP Content Management package [12.3-20121019.0]JUNOS IDP Services [12.3-20121019.0]JUNOS Services LL-PDF Container package [12.3-20121019.0]JUNOS Services NAT [12.3-20121019.0]JUNOS Services PTSP Container package [12.3-20121019.0]JUNOS Services RPM [12.3-20121019.0]JUNOS Services Stateful Firewall [12.3-20121019.0]JUNOS Voice Services Container package [12.3-20121019.0]JUNOS Services Example Container package [12.3-20121019.0]JUNOS Services Crypto [12.3-20121019.0]JUNOS Services SSL [12.3-20121019.0]JUNOS Services IPSec [12.3-20121019.0]JUNOS Runtime Software Suite [12.3-20121019.0]JUNOS Routing Software Suite [12.3-20121019.0]
lcc1-re0:--------------------------------------------------------------------------Hostname: host2Model: t1600JUNOS Base OS boot [12.3-20121019.0]JUNOS Base OS Software Suite [12.3-20121019.0]JUNOS Kernel Software Suite [12.3-20121019.0]JUNOS Crypto Software Suite [12.3-20121019.0]JUNOS Packet Forwarding Engine Support (M/T Common) [12.3-20121019.0]JUNOS Packet Forwarding Engine Support (T-Series) [12.3-20121019.0]JUNOS Online Documentation [12.3-20121019.0]JUNOS Services AACL Container package [12.3-20121019.0]JUNOS Services Application Level Gateways [12.3-20121019.0]JUNOS AppId Services [12.3-20121019.0]JUNOS Border Gateway Function package [12.3-20121019.0]JUNOS Services Captive Portal and Content Delivery Container package [12.3-20121019.0]JUNOS Services HTTP Content Management package [12.3-20121019.0]JUNOS IDP Services [12.3-20121019.0]JUNOS Services LL-PDF Container package [12.3-20121019.0]JUNOS Services NAT [12.3-20121019.0]JUNOS Services PTSP Container package [12.3-20121019.0]JUNOS Services RPM [12.3-20121019.0]
389Copyright © 2016, Juniper Networks, Inc.
Chapter 9: System Software Monitoring Commands

JUNOS Services Stateful Firewall [12.3-20121019.0]JUNOS Voice Services Container package [12.3-20121019.0]JUNOS Services Example Container package [12.3-20121019.0]JUNOS Services Crypto [12.3-20121019.0]JUNOS Services SSL [12.3-20121019.0]JUNOS Services IPSec [12.3-20121019.0]JUNOS Runtime Software Suite [12.3-20121019.0]JUNOS Routing Software Suite [12.3-20121019.0]
lcc2-re0:--------------------------------------------------------------------------Hostname: host3Model: t1600JUNOS Base OS boot [12.3-20121019.0]JUNOS Base OS Software Suite [12.3-20121019.0]JUNOS Kernel Software Suite [12.3-20121019.0]JUNOS Crypto Software Suite [12.3-20121019.0]JUNOS Packet Forwarding Engine Support (M/T Common) [12.3-20121019.0]JUNOS Packet Forwarding Engine Support (T-Series) [12.3-20121019.0]JUNOS Online Documentation [12.3-20121019.0]JUNOS Services AACL Container package [12.3-20121019.0]JUNOS Services Application Level Gateways [12.3-20121019.0]JUNOS AppId Services [12.3-20121019.0]JUNOS Border Gateway Function package [12.3-20121019.0]JUNOS Services Captive Portal and Content Delivery Container package [12.3-20121019.0]JUNOS Services HTTP Content Management package [12.3-20121019.0]JUNOS IDP Services [12.3-20121019.0]JUNOS Services LL-PDF Container package [12.3-20121019.0]JUNOS Services NAT [12.3-20121019.0]JUNOS Services PTSP Container package [12.3-20121019.0]JUNOS Services RPM [12.3-20121019.0]JUNOS Services Stateful Firewall [12.3-20121019.0]JUNOS Voice Services Container package [12.3-20121019.0]JUNOS Services Example Container package [12.3-20121019.0]JUNOS Services Crypto [12.3-20121019.0]JUNOS Services SSL [12.3-20121019.0]JUNOS Services IPSec [12.3-20121019.0]JUNOS Runtime Software Suite [12.3-20121019.0]JUNOS Routing Software Suite [12.3-20121019.0]
lcc3-re0:--------------------------------------------------------------------------Hostname: host4 Model: t1600JUNOS Base OS boot [12.3-20121019.0]JUNOS Base OS Software Suite [12.3-20121019.0]JUNOS Kernel Software Suite [12.3-20121019.0]JUNOS Crypto Software Suite [12.3-20121019.0]JUNOS Packet Forwarding Engine Support (M/T Common) [12.3-20121019.0]JUNOS Packet Forwarding Engine Support (T-Series) [12.3-20121019.0]JUNOS Online Documentation [12.3-20121019.0]JUNOS Services AACL Container package [12.3-20121019.0]JUNOS Services Application Level Gateways [12.3-20121019.0]JUNOS AppId Services [12.3-20121019.0]JUNOS Border Gateway Function package [12.3-20121019.0]JUNOS Services Captive Portal and Content Delivery Container package [12.3-20121019.0]JUNOS Services HTTP Content Management package [12.3-20121019.0]JUNOS IDP Services [12.3-20121019.0]JUNOS Services LL-PDF Container package [12.3-20121019.0]
Copyright © 2016, Juniper Networks, Inc.390
System Basics: Getting Started Configuration Guide

JUNOS Services NAT [12.3-20121019.0]JUNOS Services PTSP Container package [12.3-20121019.0]JUNOS Services RPM [12.3-20121019.0]JUNOS Services Stateful Firewall [12.3-20121019.0]JUNOS Voice Services Container package [12.3-20121019.0]JUNOS Services Example Container package [12.3-20121019.0]JUNOS Services Crypto [12.3-20121019.0]JUNOS Services SSL [12.3-20121019.0]JUNOS Services IPSec [12.3-20121019.0]JUNOS Runtime Software Suite [12.3-20121019.0]JUNOS Routing Software Suite [12.3-20121019.0]
show version (MX Series Router)
user@host5> show versionHostname: host5Model: mx80JUNOS Base OS boot [11.3-20110717.0]JUNOS Base OS Software Suite [11.3-20110717.0]JUNOS Kernel Software Suite [11.3-20110717.0]JUNOS Crypto Software Suite [11.3-20110717.0]JUNOS Packet Forwarding Engine Support (MX80) [11.3-20110717.0]JUNOS Online Documentation [11.3-20110717.0]JUNOS Routing Software Suite [11.3-20110717.0]
show version (QFX3500 Switch)
user@switch> show versionHostname: switchModel: qfx_s3500JUNOS Base OS boot [11.1R1]JUNOS Base OS Software Suite [11.1R1]JUNOS Kernel Software Suite [11.1R1]JUNOS Crypto Software Suite [11.1R1JUNOS Online Documentation [11.1R1]JUNOS Enterprise Software Suite [11.1R1]JUNOS Packet Forwarding Engine Support (QFX) [11.1R1]JUNOS Routing Software Suite [11.1R1]
show version (QFabric System)
user@qfabric> show versionHostname: qfabricModel: qfx3000-gSerial Number: qfsn-0123456789QFabric System ID: f158527a-f99e-11e0-9fbd-00e081c57cdaJUNOS Base Version [12.2I20111018_0215_dc-builder]
show version component all (QFabric System)
user@switch> show version component alldg1:–Hostname: qfabricModel: qfx3100JUNOS Base Version [11.3R1.6]
dg0:-Hostname: qfabricModel: qfx3100JUNOS Base Version [11.3R1.6]
391Copyright © 2016, Juniper Networks, Inc.
Chapter 9: System Software Monitoring Commands

NW-NG-0:-Hostname: qfabricModel: qfx-jvreJUNOS Base OS boot [11.3R1.6]JUNOS Base OS Software Suite [11.3R1.6]JUNOS Kernel Software Suite [11.3R1.6]JUNOS Crypto Software Suite [11.3R1.6]JUNOS Online Documentation [11.3R1.6]JUNOS Enterprise Software Suite [11.3R1.6]JUNOS Packet Forwarding Engine Support (QFX RE) [11.3R1.6]JUNOS Routing Software Suite [11.3R1.6]
FC-0:-Hostname: qfabricModel: qfx-jvreJUNOS Base OS boot [11.3R1.6]JUNOS Base OS Software Suite [11.3R1.6]JUNOS Kernel Software Suite [11.3R1.6]JUNOS Crypto Software Suite [11.3R1.6]JUNOS Online Documentation [11.3R1.6]JUNOS Enterprise Software Suite [11.3R1.6]JUNOS Packet Forwarding Engine Support (QFX RE) [11.3R1.6]JUNOS Routing Software Suite [11.3R1.6]
FC-1:Hostname: qfabric Model: qfx-jvreJUNOS Base OS boot [11.3R1.6]JUNOS Base OS Software Suite [11.3R1.6]JUNOS Kernel Software Suite [11.3R1.6]JUNOS Crypto Software Suite [11.3R1.6]JUNOS Online Documentation [11.3R1.6]JUNOS Enterprise Software Suite [11.3R1.6]JUNOS Packet Forwarding Engine Support (QFX RE) [11.3R1.6]JUNOS Routing Software Suite [11.3R1.6]
DRE-0:-Hostname: dre-0Model: qfx-jvreJUNOS Base OS boot [11.3R1.6]JUNOS Base OS Software Suite [11.3R1.6]JUNOS Kernel Software Suite [11.3R1.6]JUNOS Crypto Software Suite [11.3R1.6]JUNOS Online Documentation [11.3R1.6]JUNOS Enterprise Software Suite [11.3R1.6]JUNOS Packet Forwarding Engine Support (QFX RE) [11.3R1.6]JUNOS Routing Software Suite [11.3R1.6]
FM-0:-Hostname: qfabricModel: qfx-jvreJUNOS Base OS boot [11.3R1.6]JUNOS Base OS Software Suite [11.3R1.6]JUNOS Kernel Software Suite [11.3R1.6]JUNOS Crypto Software Suite [11.3R1.6]JUNOS Online Documentation [11.3R1.6]
Copyright © 2016, Juniper Networks, Inc.392
System Basics: Getting Started Configuration Guide

JUNOS Enterprise Software Suite [11.3R1.6]JUNOS Packet Forwarding Engine Support (QFX RE) [11.3R1.6]JUNOS Routing Software Suite [11.3R1.6]
nodedevice1:-Hostname: qfabricModel: QFX3500JUNOS Base OS boot [11.3R1.6]JUNOS Base OS Software Suite [11.3R1.6]JUNOS Kernel Software Suite [11.3R1.6]JUNOS Crypto Software Suite [11.3R1.6]JUNOS Online Documentation [11.3R1.6]JUNOS Enterprise Software Suite [11.3R1.6]JUNOS Packet Forwarding Engine Support (QFX RE) [11.3R1.6]JUNOS Routing Software Suite [11.3R1.6]
interconnectdevice1:-Hostname: qfabricModel: QFX3108JUNOS Base OS boot [11.3R1.6]JUNOS Base OS Software Suite [11.3R1.6]JUNOS Kernel Software Suite [11.3R1.6]JUNOS Crypto Software Suite [11.3R1.6]JUNOS Online Documentation [11.3R1.6]JUNOS Enterprise Software Suite [11.3R1.6]JUNOS Packet Forwarding Engine Support (QFX RE) [11.3R1.6]JUNOS Routing Software Suite [11.3R1.6]warning: from interconnectdevice0: Disconnected
393Copyright © 2016, Juniper Networks, Inc.
Chapter 9: System Software Monitoring Commands

start shell
Syntax start shell (csh | sh)<user username>
Release Information Command introduced before Junos OS Release 7.4.
Command introduced in Junos OS Release 9.0 for EX Series switches.
Command introduced in Junos OS Release 11.1 for the QFX Series.
Description Exit from the CLI environment and create a UNIX-level shell. To return to the CLI, type
exit from the shell.
NOTE:
• To issue this command, the user must have the required login accessprivileges configured by including the permissions statement at the [edit
system login class class-name] hierarchy level.
• UNIX wheel groupmembership or permissions are no longer required toissue this command.
Options csh—Create a UNIX C shell.
sh—Create a UNIX Bourne shell.
user username—(Optional) Start the shell as another user.
Additional Information When you are in the shell, the shell prompt has the following format:
username@hostname%
An example of the prompt is:
root@host%
Required PrivilegeLevel
shell and maintenance
List of Sample Output start shell csh on page 394
Output Fields When you enter this command, you are provided feedback on the status of your request.
Sample Output
start shell csh
user@host> start shell csh%
exit%
Copyright © 2016, Juniper Networks, Inc.394
System Basics: Getting Started Configuration Guide

username@hostname% start shell sh%
exituser@host>
395Copyright © 2016, Juniper Networks, Inc.
Chapter 9: System Software Monitoring Commands
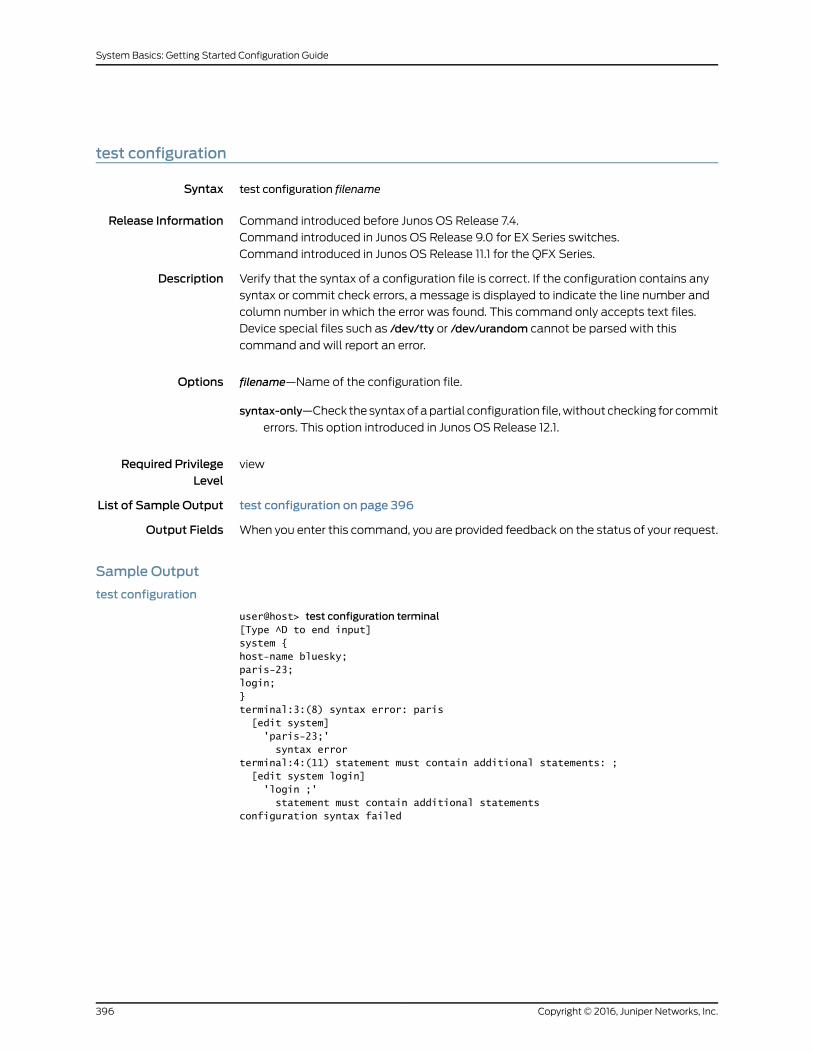
test configuration
Syntax test configuration filename
Release Information Command introduced before Junos OS Release 7.4.
Command introduced in Junos OS Release 9.0 for EX Series switches.
Command introduced in Junos OS Release 11.1 for the QFX Series.
Description Verify that the syntax of a configuration file is correct. If the configuration contains any
syntax or commit check errors, a message is displayed to indicate the line number and
column number in which the error was found. This command only accepts text files.
Device special files such as /dev/tty or /dev/urandom cannot be parsed with this
command and will report an error.
Options filename—Name of the configuration file.
syntax-only—Check the syntax of a partial configuration file, without checking for commit
errors. This option introduced in Junos OS Release 12.1.
Required PrivilegeLevel
view
List of Sample Output test configuration on page 396
Output Fields When you enter this command, you are provided feedback on the status of your request.
Sample Output
test configuration
user@host> test configuration terminal[Type ^D to end input]system {host-name bluesky;paris-23;login;}terminal:3:(8) syntax error: paris [edit system] 'paris-23;' syntax errorterminal:4:(11) statement must contain additional statements: ; [edit system login] 'login ;' statement must contain additional statementsconfiguration syntax failed
Copyright © 2016, Juniper Networks, Inc.396
System Basics: Getting Started Configuration Guide

PART 4
Index
• Index on page 399
397Copyright © 2016, Juniper Networks, Inc.

Copyright © 2016, Juniper Networks, Inc.398
System Basics: Getting Started Configuration Guide

Index
Symbols#, comments in configuration statements..................xvii
( ), in syntax descriptions...................................................xvii
/altconfig directory
altconfig file system....................................................189
/altroot directory
altroot file system........................................................189
/config directory
config file system.........................................................189
64-bit
Upgrade Routing Engine Junos OS..........................87
< >, in syntax descriptions..................................................xvii
[ ], in configuration statements........................................xvii
{ }, in configuration statements.......................................xvii
| (pipe), in syntax descriptions.........................................xvii
Aaborting partitioning operation........................................175
access, router remotely........................................................28
activating a configuration....................................................37
addresses
IP addresses....................................................................50
alias option for static-host-mapping
statement.............................................................................131
alias statement.......................................................................131
/altconfig directory.................................................................40
/altroot directory.....................................................................40
announcement statement.................................................101
usage guidelines..............................................................77
announcements
system login......................................................................77
archival configuration
displaying.........................................................................216
archival statement...............................................................102
usage guidelines............................................................60
archive router configuration...............................................60
archive-sites statement
configuration files.........................................................103
usage guidelines..............................................................61
archiving files..........................................................................140
ASCII file, Junos OS, configuring using............................34
authentication
root password..........................................................63, 65
user......................................................................................28
autoinstallation statement...............................................105
auxiliary port
properties..........................................................................70
auxiliary statement
usage guidelines.............................................................70
Bbacking up partitions...........................................................189
backup router configuration...............................................60
backup routers...............................................................56, 106
backup software, displaying information....................257
backup-router statement..................................................106
usage guidelines.............................................................56
BOOTP relay agent.................................................................74
braces, in configuration statements...............................xvii
brackets
angle, in syntax descriptions....................................xvii
square, in configuration statements......................xvii
Cchange-type statement
usage guidelines.............................................................65
checksum
calculating for a file....................................142, 143, 144
clear system commit command.....................................158
clear system reboot command.......................................159
CLI
exiting to create UNIX-level shell..........................394
Junos OS, configuring using................................34, 35
commands
filenames, specifying....................................................38
URLs, specifying.............................................................38
comments, in configuration statements......................xvii
commit fast-synchronize statement.............................107
commit operations, pending
clearing.............................................................................158
displaying.........................................................................214
commit scripts
Junos OS, configuring using................................34, 36
commit synchronize command........................................82
commit synchronize statement......................................108
usage guidelines..............................................................71
CompactFlash cards
mirroring to hard disk...................................................58
comparing files.......................................................................145
399Copyright © 2016, Juniper Networks, Inc.

compress-configuration-files statement....................109
usage guidelines.............................................................73
compressing configuration files...............................73, 109
compressing files..................................................................140
/config directory
location of configuration files...................................40
configuration
activating...........................................................................37
deleting rescue configuration..................................164
displaying
archival configuration........................................216
current configuration.........................................210
previous configuration......................................255
rescue configuration............................................217
files See configuration files
saving rescue configuration......................................165
syntax, verifying...........................................................396
configuration files
compressing............................................................73, 109
filename, specifying......................................................38
URL, specifying...............................................................38
configuration mode, entering...........................................162
configuration statement.....................................................110
usage guidelines............................................................60
configuration statements
specifying IP addresses in..........................................38
configuration-servers statement.......................................111
configure command.............................................................162
console port
properties..........................................................................70
console statement
physical port
usage guidelines....................................................70
conventions
text and syntax...............................................................xvi
copying
files....................................................................................148
core dump files
usage guidelines.............................................................75
viewing................................................................................74
curly braces, in configuration statements....................xvii
current time, displaying.......................................................313
customer support.................................................................xviii
contacting JTAC............................................................xviii
Ddeleting
files....................................................................................150
destination option................................................................106
DHCP/BOOTP relay agent...................................................74
directories
Junos OS...........................................................................40
disk space available, displaying......................................303
disk space, available
managing..........................................................................90
DNS
hostnames, displaying................................................213
DNS name servers..................................................................52
documentation
comments on.................................................................xvii
Domain Name System See DNS
domain names on routers....................................................51
domain-name statement
router...................................................................................111
usage guidelines..............................................................51
domain-search statement..................................................112
usage guidelines.............................................................52
domains to be searched...............................................52, 112
dump-device statement......................................................113
Eencrypted passwords....................................................63, 65
encrypted-password option.......................................63, 65
erasing user data..................................................................203
events statement...................................................................114
export routing policies............................................................21
Ffailover statement
usage guidelines.............................................................75
failover, configuring.................................................................75
file archive command..........................................................140
file checksum md5 command.........................................142
file checksum sha-256 command.................................144
file checksum sha1 command..........................................143
file compare command......................................................145
file copy command...............................................................148
file delete command...........................................................150
file list command....................................................................151
file rename command.........................................................153
file show command..............................................................155
file systems
free disk space, displaying.......................................303
partitions, backing up.................................................189
filenames, specifying in commands................................38
files
archiving..........................................................................140
calculating checksum...............................142, 143, 144
Copyright © 2016, Juniper Networks, Inc.400
System Basics: Getting Started Configuration Guide

comparing.......................................................................145
compressing..................................................................140
configuration files, compressing............................109
configuration, compressing........................................73
contents, displaying.....................................................155
copying.............................................................................148
deleting............................................................................150
list of, displaying............................................................151
renaming..........................................................................153
firewall filters............................................................................30
first-time router configuration............................................41
font conventions.....................................................................xvi
forwarding table.......................................................................21
free disk space, displaying................................................303
Gglobal tracing operations.....................................................24
graceful switchover, displaying......................................309
Hhalts
pending
clearing....................................................................159
displaying...............................................................252
requesting.......................................................................166
hard disk
mirroring CompactFlash cards.................................58
partitioning
aborting...................................................................175
requesting................................................................177
hardware components............................................................7
host-name statement..........................................................114
usage guidelines.............................................................49
hostnames, DNS, displaying.............................................213
II/O statistics, routing protocol tasks,
displaying............................................................................378
import routing policies...........................................................21
inet statement.........................................................................131
usage guidelines.............................................................49
inet6-backup-router statement.......................................115
usage guidelines.............................................................56
initial configuration
Junos OS.............................................................................41
insecure statement
usage guidelines..............................................................71
installing software.......................................................195, 196
interfaces
tracing operations..........................................................25
interfaces statement............................................................116
IP addresses.............................................................................49
router mapping...............................................................50
router names, mapping...............................................49
specifying in configuration statements.................38
JJ Series Services Routers........................................................5
J-Web graphical user interface (GUI)
Junos OS, configuring using................................34, 35
juniper.conf file, compressing....................................73, 109
Junos OS.....................................................................................41
directories stored in......................................................40
disk space, displaying................................................303
halt, requesting a..........................................................166
loaded extensions, displaying................................260
methods for configuring..............................................34
ASCII file............................................................34, 35
CLI........................................................................34, 35
CLI, ASCII file, J-Web GUI...................................34
commit scripts................................................34, 36
J-Web GUI.........................................................34, 35
Junos XML management protocol..........34, 36
NETCONF XML management
protocol.........................................................34, 36
monitoring tools.............................................................43
passwords, plain-text, requirements......................29
pending reboots
clearing....................................................................159
displaying...............................................................252
processes, displaying..................................................219
queue statistics, displaying.....................................246
rebooting.........................................................................184
redundant Routing Engines, initial
configuration...............................................................82
security, default settings..............................................27
software properties, configuring...............................37
system statistics, displaying...................................268
tasks, displaying
I/O statistics..........................................................378
memory usage....................................................380
protocol..................................................................376
Upgrade Routing Engine to 64-bit..........................87
uptime, displaying........................................................313
version, displaying
general....................................................................386
virtual memory, displaying........................................318
401Copyright © 2016, Juniper Networks, Inc.
Index

JUNOS Software
powering off....................................................................179
upgrade
performing.............................................................195
Junos XML management protocol
Junos OS, configuring using................................34, 36
Junos-FIPS
dual Routing Engines.......................................................7
IPsec requirements...........................................................7
password requirements..............................................64
Kkernel memory usage, displaying....................................318
kernel replication state, displaying................................309
Llicenses
adding.................................................................................171
deleting.............................................................................172
saving.................................................................................173
load-key-file command
usage guidelines.............................................................63
load-key-file statement.......................................................117
usage guidelines.....................................................63, 65
location statement................................................................118
usage guidelines.............................................................62
log-out-on-disconnect statement
usage guidelines..............................................................71
logging operations
tracing operations..........................................................24
logging out users....................................................................174
login announcements, system...........................................77
login messages, system........................................................76
login-tip statement...............................................................119
logout, users.............................................................................174
Mmanuals
comments on.................................................................xvii
martian addresses..................................................................27
max-configurations-on-flash statement......................119
usage guidelines.............................................................59
maximum-length statement
usage guidelines.............................................................65
MD5 checksum, calculating..............................................142
memory, displaying for tasks...........................................380
message statement.............................................................120
usage guidelines.............................................................76
messages
system login.....................................................................76
minimum-changes statement
usage guidelines.............................................................65
minimum-length statement
usage guidelines.............................................................65
mirror-flash-on-disk statement........................................121
usage guidelines.............................................................58
monitoring tools
tracing operations..........................................................24
monitoring tools for Junos OS...........................................43
MPLS routing table..................................................................21
multicast routing table...........................................................21
Nname servers, DNS.................................................................52
name-server statement......................................................122
usage guidelines.............................................................52
names
domain names on routers............................................51
names................................................................................50
router .................................................................................49
NETCONF XML management protocol
Junos OS, configuring using................................34, 36
network
masks.................................................................................38
no-compress-configuration-files statement.............109
usage guidelines.............................................................73
no-saved-core-context statement................................130
usage guidelines.............................................................75
PPacket Forwarding Engine.....................................................6
parentheses, in syntax descriptions...............................xvii
partitioning the hard disk
aborting............................................................................175
requesting........................................................................177
partitions, backing up..........................................................189
password statement............................................................122
passwords
root...............................................................................63, 65
passwords statement
usage guidelines.............................................................65
pic-console-authentication statement........................123
plain-text password
requirements...................................................................29
plain-text passwords.............................................................63
root password..........................................................63, 65
plain-text-password option........................................63, 65
Copyright © 2016, Juniper Networks, Inc.402
System Basics: Getting Started Configuration Guide

port statement.......................................................................124
ports
auxiliary port properties..............................................70
console port properties...............................................70
ports statement.....................................................................125
usage guidelines.............................................................70
powering off routing software
requesting a system power off................................179
prefixes
specifying in configuration statements.................38
processes
configuring failover................................................75, 126
displaying information................................................219
processes statement...........................................................126
protocol-specific tracing operations...............................24
proxy
usage guidelines.............................................................53
proxy server
configuring........................................................................53
proxy statement.....................................................................127
Qqueues
statistics, displaying...................................................246
Rrebooting router software
pending reboots
clearing....................................................................159
displaying...............................................................252
requesting a system reboot.....................................184
redundancy
configuring failover................................................75, 126
remote access, router, establishing.................................28
removing
files....................................................................................150
renaming files.........................................................................153
replication errors, displaying............................................309
request system configuration rescue delete
command............................................................................164
request system configuration rescue save
command............................................................................165
request system halt command.......................................166
request system license add command..........................171
request system license delete command....................172
request system license save command........................173
request system logout command...................................174
request system partition abort command...................175
request system partition hard-disk command...........177
request system power-off command...........................179
request system reboot command..................................184
request system snapshot command............................189
request system software add command....................195
request system zeroize command................................203
rescue configuration
deleting............................................................................164
displaying.........................................................................217
saving................................................................................165
rollback
displaying........................................................................255
root password...................................................................63, 65
root-authentication statement.......................................128
usage guidelines.....................................................63, 65
root-login statement...........................................................129
route prefixes............................................................................38
router security...........................................................................27
access.................................................................................28
firewall filters...................................................................30
Junos OS, security, default settings.........................27
routing protocol security features...........................30
system log messages....................................................31
user authentication.......................................................28
routers
backup......................................................................56, 106
DNS name servers, configuring.................................52
domain names.................................................................51
domains to be searched......................................52, 112
failover, configuring...............................................75, 126
hardware components...................................................7
initial configuration.........................................................41
Junos OS
initial configuration for redundant Routing
Engines.................................................................82
names
configuring...............................................................50
mapping to IP addresses...........................49, 50
Packet Forwarding Engine............................................6
physical system location.............................................62
ports
auxiliary port properties......................................70
console port properties.......................................70
remote access, establishing......................................28
Routing Engine..................................................................6
security features..............................................................27
Routing Engine
Upgrade to 64-bit Junos OS......................................87
403Copyright © 2016, Juniper Networks, Inc.
Index

Routing Engines
available disk space, managing...............................90
overview...............................................................................6
redundant
Junos OS, initial configuration..........................82
single
Junos OS, initial configuration..........................78
switchover information, displaying......................309
routing protocol process
IPv6 routing protocols..................................................20
routing policy....................................................................21
routing tables....................................................................21
routing protocol security features....................................30
routing protocol tasks
displaying........................................................................376
statistics, displaying...................................................378
routing tables.............................................................................21
Ssaved-core-context statement.......................................130
usage guidelines.............................................................75
saved-core-files statement..............................................130
usage guidelines.............................................................75
security
router, features.................................................................27
router, Junos OS default settings..............................27
server statement.....................................................................131
sha-256 checksum, calculating......................................144
SHA–1 checksum, calculating..........................................143
show configuration command.........................................210
show host command...........................................................213
show system commit command....................................214
show system configuration archival
command............................................................................216
show system configuration rescue command............217
show system processes command................................219
show system queues command....................................246
show system reboot command......................................252
show system rollback command...................................255
show system snapshot command.................................257
show system software command.................................260
show system statistics
command...................158, 164, 214, 268, 313, 394, 396
show system storage command....................................303
show system switchover command.............................309
show system uptime command......................................313
show system virtual-memory command....................318
show task command...........................................................376
show task io command......................................................378
show task memory command.......................................380
show task replication command...................................384
show version command....................................................386
software processes
configuring failover................................................75, 126
SSH key files......................................................................63, 65
start shell command..........................................................394
static-host-mapping statement......................................131
usage guidelines............................................................50
statistics
protocol-related, displaying....................................268
routing protocol I/O, displaying..............................378
system queues, displaying.......................................246
subnet masks...........................................................................38
support, technical See technical support
switchover, displaying information about..................309
syntax conventions................................................................xvi
syntax of configuration files, verifying..........................396
sysid statement.......................................................................131
usage guidelines............................................................50
system identifier, IS-IS
configuring........................................................................50
system log messages.............................................................31
system login........................................................................76, 77
system statement.................................................................132
usage guidelines.............................................................94
Ttasks
I/O statistics, displaying............................................378
memory usage, displaying.......................................380
protocol, displaying.....................................................376
technical support
contacting JTAC............................................................xviii
terminal type..............................................................................71
terminating partitioning operation..................................175
test configuration command...........................................396
time, displaying......................................................................313
tracing operations...................................................................24
transfer interval
usage guidelines............................................................60
transfer-interval statement
archiving of configuration..........................................133
transfer-on-commit statement.......................................134
usage guidelines..............................................................61
transferring router configuration to archive site.........60
trusted-key statement........................................................135
Copyright © 2016, Juniper Networks, Inc.404
System Basics: Getting Started Configuration Guide

type statement
auxiliary port
usage guidelines.....................................................71
console port
usage guidelines.....................................................71
Uunicast routing table...............................................................21
UNIX-level shell, creating..................................................394
upgrading software
performing......................................................................195
uptime, displaying.................................................................313
URLs, specifying in commands.........................................38
user authentication
methods............................................................................29
protocols for central authentication.......................29
router security.................................................................28
user data, erasing.................................................................203
username statement...........................................................135
users
logging users out...........................................................174
V/var/db/config directory.......................................................40
/var directory............................................................................40
/var/home directory..............................................................40
/var/log directory....................................................................40
verifying syntax of configuration file.............................396
version
software, displaying
general....................................................................386
virtual memory, displaying.................................................318
VPNs............................................................................................22
405Copyright © 2016, Juniper Networks, Inc.
Index

Copyright © 2016, Juniper Networks, Inc.406
System Basics: Getting Started Configuration Guide
Recommended