FUJITSU SoftwareInterstage AR Processing Server V1.1.1
Installation Guide
B1WS-1105-02ENZ0(00)December 2014
Preface
Purpose of this document
This document explains how to install, uninstall, set up, and remove the setup for Interstage AR Processing Server.
Intended readers
This document is intended for system operation administrators who will perform tasks on Interstage AR Processing Server, such asinstallation and setup.
Users who reference this document will be able to obtain an overview of Interstage AR Processing Server, as well as information on howto install, uninstall, set up, and remove the setup. Readers of this document are also assumed to have knowledge of:
- Smart devices
- Operating system that will be used with this product
- Web servers
- Databases
Structure of this document
This document is structured as follows:
Chapter 1 Server
Explains how to install Interstage AR Processing Server on servers.
Chapter 2 Smart devices
Explains how to install Interstage AR Processing Server on smart devices.
Chapter 3 Server
Explains how to set up Interstage AR Processing Server on servers.
Chapter 4 Smart devices
Explains how to set up Interstage AR Processing Server on smart devices.
Chapter 5 Setup removal
Explains how to remove the setup of Interstage AR Processing Server from a server.
Chapter 6 Setup removal for smart devices
Explains how to remove the setup of Interstage AR Processing Server from a smart device.
Chapter 7 Uninstallation from a server
Explains how to uninstall Interstage AR Processing Server from a server.
Chapter 8 Smart devices
Explains how to uninstall Interstage AR Processing Server from a smart device.
Chapter 9 Migration
Explains notes and procedures for migration to or from an Interstage AR Processing Server.
Abbreviations
This manual uses the following abbreviations for the operating systems:
Official name Abbreviation
Microsoft Windows Server 2012 R2 Foundation Windows Server 2012 R2 Windows
Microsoft Windows Server 2012 R2 Standard
Microsoft Windows Server 2012 R2 Datacenter
- i -

Official name Abbreviation
Microsoft Windows Server 2012 Foundation Windows Server 2012
Microsoft Windows Server 2012 Standard
Microsoft Windows Server 2012 Datacenter
Microsoft Windows Server 2008 R2 Standard Windows Server 2008 R2
Microsoft Windows Server 2008 R2 Enterprise
Microsoft Windows Server 2008 R2 Datacenter
Microsoft Windows Server 2008 R2 Foundation
Windows 8.1 Windows 8.1
Windows 8.1 Pro
Windows 8.1 Enterprise
Windows 8 Windows 8
Windows 8 Pro
Windows 8 Enterprise
Red Hat Enterprise Linux 6 (for Intel64) RHEL 6 Linux
Red Hat Enterprise Linux 7 (for Intel64) RHEL 7
Notations
In this manual, text that must be replaced by the user is denoted in italicsWithMixedCase (for example, installDir).
Trademarks
- Access, Excel, PowerPoint and Word are products of Microsoft Corporation in the United States.
- Adobe, Acrobat, Adobe Reader, Acrobat Reader, the Adobe logo, Adobe AIR, Flash and Flash Player are registered trademarks ortrademarks of Adobe Systems Incorporated in the United States and other countries.
- Android is a registered trademark of Google Inc.
- Eclipse is an open platform for the development tool integration constructed by Eclipse Foundation, Inc. that is an open communityof the development tool provider.
- Internet Explorer, the Microsoft Internet Explorer logo, Microsoft, Windows, Windows Server, Visual Studio and other names andproduct names of Microsoft products are registered trademarks or trademarks of Microsoft Corporation in the United States and/orother countries.
- Interstage is a registered trademark of Fujitsu Limited.
- iOS is a trademark of Apple Inc.
- Oracle and Java are registered trademarks of Oracle and/or its affiliates. Other company names and/or product names appearing in thisdocument may also be trademarks or registered trademarks of their respective companies.
- QuickTime and the QuickTime logo are trademarks of Apple Inc., registered in the United States and other countries.
- Xeon and Xeon Inside are trademarks of Intel Corporation in the United States and other countries.
- Other company names and product names used in this document are trademarks or registered trademarks of their respective owners.
Note that system names and product names in this document are not accompanied by trademark symbols such as (TM) or (R).
Export Controls
Exportation/release of this document may require necessary procedures in accordance with the regulations of your resident countryand/or US export control laws.
- ii -

Notice
- Information in this document may be subject to change without prior notice.
- No part of the contents of this document may be reproduced without the written permission of Fujitsu Limited.
- Fujitsu assumes no responsibility for infringement of any patent rights or other rights of third parties arising from use of informationin the manual.
Issue date
December 2014
Copyright
Copyright 2014 FUJITSU LIMITED
- iii -

ContentsPart 1 Installation......................................................................................................................................................................1
Chapter 1 Server......................................................................................................................................................................21.1 Tasks required before installation........................................................................................................................................................2
1.1.1 Install required packages..............................................................................................................................................................21.1.2 Check users...................................................................................................................................................................................2
1.2 Installation in Windows.......................................................................................................................................................................21.2.1 Run the installation.......................................................................................................................................................................21.2.2 Configure the web server..............................................................................................................................................................51.2.3 Check the installation settings......................................................................................................................................................61.2.4 Check completion.........................................................................................................................................................................71.2.5 Troubleshooting............................................................................................................................................................................7
1.2.5.1 The installation was run but Interstage AR Processing Server is already installed...............................................................71.2.5.2 The installation was run on an unsupported operating system..............................................................................................71.2.5.3 The installation was run but disk space was insufficient.......................................................................................................81.2.5.4 Installation directory check....................................................................................................................................................81.2.5.5 Invalid values in the FQDN or IP address of the web server................................................................................................81.2.5.6 Failed to extract resources.....................................................................................................................................................9
1.3 Installation in Linux.............................................................................................................................................................................91.3.1 Run the installation.......................................................................................................................................................................91.3.2 Troubleshooting..........................................................................................................................................................................10
1.3.2.1 AR is already installed.........................................................................................................................................................101.3.2.2 The installation was run on an unsupported operating system............................................................................................111.3.2.3 The installation was run but disk space was insufficient.....................................................................................................111.3.2.4 Installation directory check..................................................................................................................................................111.3.2.5 Server configuration selection.............................................................................................................................................111.3.2.6 Operation mode selection....................................................................................................................................................111.3.2.7 Invalid values in the FQDN or IP address of the web server..............................................................................................111.3.2.8 A package required for installation was not found..............................................................................................................11
1.4 Silent installation...............................................................................................................................................................................121.4.1 Create an installation parameter CSV file..................................................................................................................................12
1.4.1.1 Specification format.............................................................................................................................................................121.4.1.2 List of parameters................................................................................................................................................................131.4.1.3 Parameter details..................................................................................................................................................................131.4.1.4 Configuration notes..............................................................................................................................................................141.4.1.5 Run the silent installation....................................................................................................................................................151.4.1.6 Check the installation results...............................................................................................................................................15
1.5 If Model B, C, or D is selected..........................................................................................................................................................17
Chapter 2 Smart devices........................................................................................................................................................182.1 Installing the Android version...........................................................................................................................................................182.2 Installing the iOS version..................................................................................................................................................................182.3 Installing the Windows version.........................................................................................................................................................18
Part 2 Setup............................................................................................................................................................................20
Chapter 3 Server....................................................................................................................................................................213.1 Setup required for each model...........................................................................................................................................................213.2 Tasks required before setup...............................................................................................................................................................21
3.2.1 Check the port number................................................................................................................................................................213.2.2 Check the setup parameters........................................................................................................................................................22
3.3 Setup (Windows)...............................................................................................................................................................................243.3.1 Executing the setup.....................................................................................................................................................................243.3.2 Troubleshooting measures during setup.....................................................................................................................................24
3.4 Setup (Linux).....................................................................................................................................................................................253.4.1 Executing the setup.....................................................................................................................................................................25
- iv -

3.4.2 Troubleshooting measures during setup.....................................................................................................................................253.5 If Model A is selected (for small-scale entry models used in an intranet environment)...................................................................263.6 If Model B is selected (for small-scale entry models used in an Internet environment)...................................................................29
3.6.1 Interstage Application Server V11 (web server layer)...............................................................................................................293.7 If Model C is selected (for medium- to large-scale, high reliability, high availability models used in an intranet environment)....30
3.7.1 Symfoware Server Standard Edition V12 (DB server layer)......................................................................................................303.7.2 Interstage Application Server V11 (AP server layer).................................................................................................................313.7.3 Load balancer..............................................................................................................................................................................32
3.8 If Model D is selected (for medium- to large-scale, high reliability, high availability models used in an Internet environment). . .333.8.1 Interstage Application Server V11 (web server layer)...............................................................................................................33
3.9 Tasks required after setup..................................................................................................................................................................33
Chapter 4 Smart devices........................................................................................................................................................354.1 Setup for Android..............................................................................................................................................................................35
4.1.1 Account settings..........................................................................................................................................................................354.1.2 Recognition mode settings..........................................................................................................................................................374.1.3 Certificate settings......................................................................................................................................................................38
4.2 Setup for iOS.....................................................................................................................................................................................384.2.1 Account settings..........................................................................................................................................................................384.2.2 Recognition mode settings..........................................................................................................................................................404.2.3 Certificate settings......................................................................................................................................................................40
4.3 Setup for Windows............................................................................................................................................................................414.3.1 Account settings..........................................................................................................................................................................414.3.2 Recognition mode settings..........................................................................................................................................................434.3.3 Camera settings...........................................................................................................................................................................434.3.4 Certificate settings......................................................................................................................................................................44
Part 3 Setup removal..............................................................................................................................................................45
Chapter 5 Setup removal........................................................................................................................................................465.1 Setup removal (Windows).................................................................................................................................................................465.2 Setup removal (Linux).......................................................................................................................................................................46
Chapter 6 Setup removal for smart devices...........................................................................................................................47
Part 4 Uninstallation............................................................................................................................................................... 48
Chapter 7 Uninstallation from a server...................................................................................................................................497.1 Uninstallation(Windows)...................................................................................................................................................................49
7.1.1 Uninstallation procedure.............................................................................................................................................................497.1.2 Tasks required after uninstallation..............................................................................................................................................507.1.3 Installation resources deletion....................................................................................................................................................50
7.1.3.1 Uninstalling related products...............................................................................................................................................507.1.3.2 Deleting Interstage AR Processing Server...........................................................................................................................50
7.2 Uninstallation (Linux)........................................................................................................................................................................527.2.1 Uninstallation procedure.............................................................................................................................................................527.2.2 Tasks required after uninstallation..............................................................................................................................................537.2.3 Installation resources deletion....................................................................................................................................................53
7.2.3.1 Related product uninstallation.............................................................................................................................................537.2.3.2 Interstage AR Processing Server resources deletion...........................................................................................................53
7.3 Notes on Uninstall (middleware).......................................................................................................................................................54
Chapter 8 Smart devices........................................................................................................................................................568.1 Deletion procedure (Android)............................................................................................................................................................568.2 Deletion procedure (iOS)...................................................................................................................................................................568.3 Deletion procedure (Windows)..........................................................................................................................................................56
Part 5 Migration......................................................................................................................................................................57
Chapter 9 Migration................................................................................................................................................................58
- v -

9.1 Notes on migration.............................................................................................................................................................................589.1.1 Version conflict between the server and smart devices..............................................................................................................589.1.2 Shapes.........................................................................................................................................................................................58
9.2 Migration procedure..........................................................................................................................................................................599.2.1 Server..........................................................................................................................................................................................599.2.2 Smart device...............................................................................................................................................................................60
9.2.2.1 Migration procedure (Android)...........................................................................................................................................619.2.2.2 Migration procedure (iOS)...................................................................................................................................................61
- vi -
Part 1 InstallationThis chapter explains the installation of Interstage AR Processing Server.
Chapter 1 Server..............................................................................................................................................2
Chapter 2 Smart devices................................................................................................................................18
- 1 -

Chapter 1 ServerThis section explains how to install Interstage AR Processing Server.
1.1 Tasks required before installation
1.1.1 Install required packagesIf installing the Linux version, ensure that the required packages have been installed. Refer to "Operating environment" in the Overviewfor details on required packages.
1.1.2 Check usersSetup and setup removal will not execute normally if the users below exist.
If that is the case, take appropriate action, such as changing their names, for example.
- arsvdmpg
- arsvdmpg
1.2 Installation in WindowsThis section explains how to install the Windows version. 1.2.5 TroubleshootingIf issues arise during installation, refer to "1.2.5Troubleshooting" and take the corresponding corrective action.
1.2.1 Run the installation1. Log in as a computer administrator or as a member of the Administrators group.
2. Insert the installation DVD in the computer DVD drive.
3. The installer will start automatically, displaying a feature selection window. If the installer does not start automatically, executeautorun.exe to start it manually. Select Installation.
Note
Always execute autorun.exe as an administrator.
- 2 -
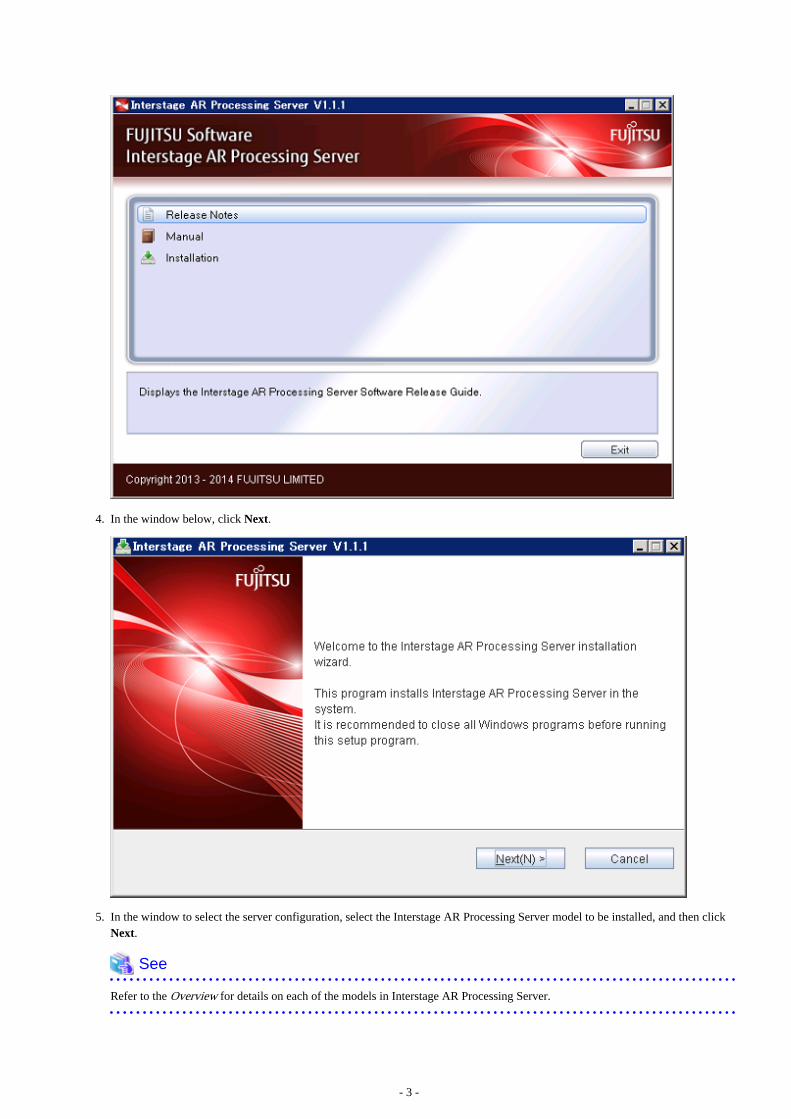
4. In the window below, click Next.
5. In the window to select the server configuration, select the Interstage AR Processing Server model to be installed, and then clickNext.
See
Refer to the Overview for details on each of the models in Interstage AR Processing Server.
- 3 -

6. Specify the installation directory for Interstage AR Processing Server. To install in the default directory, click Next. To change theinstallation directory, click Browse, specify the desired directory, and then click Next.
Note
Note the following regarding the name of the installation directory:
- It can contain the following characters:
- Alphanumeric characters
- Spaces
- 4 -
- Hyphens
- Underscores
- Parentheses
- It can be up to 45 characters long.
- If it ends with a space, a formatting error occurs.
- If the user specifies a directory and clicks Next, but then clicks Back to return to specify a different one, then the directory thatwas initially specified might still exist- delete it if not required.
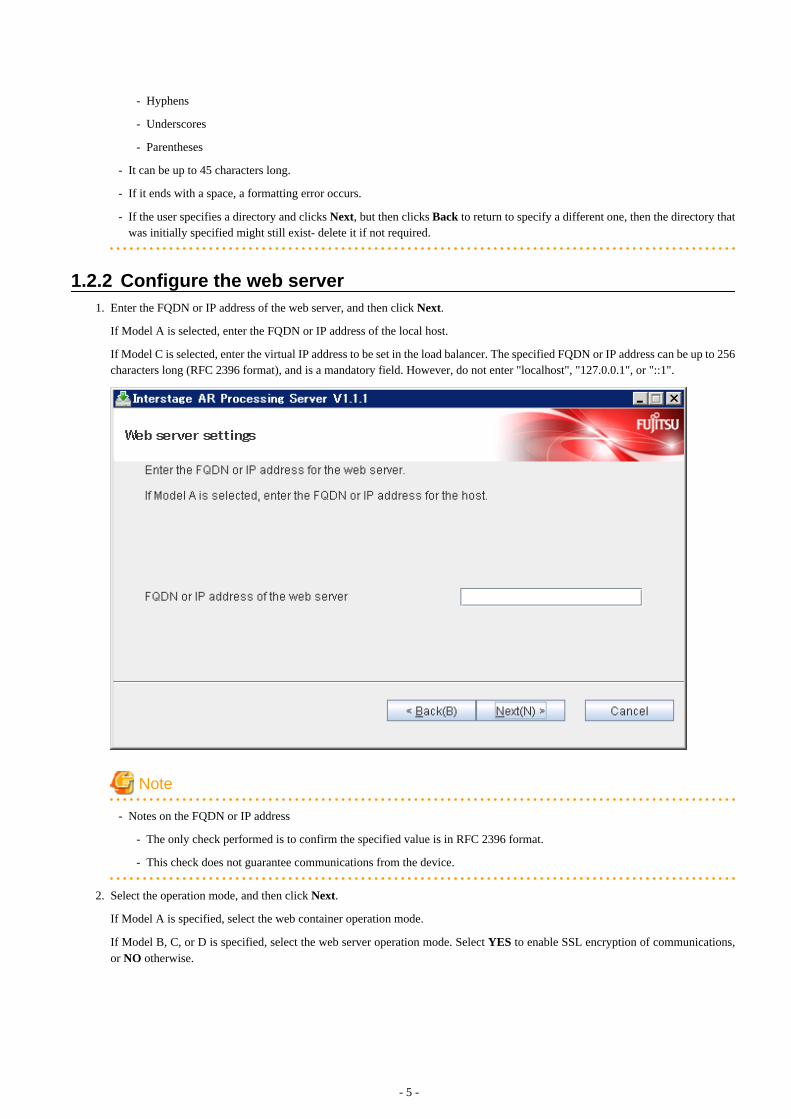
1.2.2 Configure the web server1. Enter the FQDN or IP address of the web server, and then click Next.
If Model A is selected, enter the FQDN or IP address of the local host.
If Model C is selected, enter the virtual IP address to be set in the load balancer. The specified FQDN or IP address can be up to 256characters long (RFC 2396 format), and is a mandatory field. However, do not enter "localhost", "127.0.0.1", or "::1".
Note
- Notes on the FQDN or IP address
- The only check performed is to confirm the specified value is in RFC 2396 format.
- This check does not guarantee communications from the device.
2. Select the operation mode, and then click Next.
If Model A is specified, select the web container operation mode.
If Model B, C, or D is specified, select the web server operation mode. Select YES to enable SSL encryption of communications,or NO otherwise.
- 5 -

1.2.3 Check the installation settingsCheck the displayed settings, and then click Confirm.
Note
Do not forcibly quit installation, otherwise results cannot be guaranteed.
- 6 -
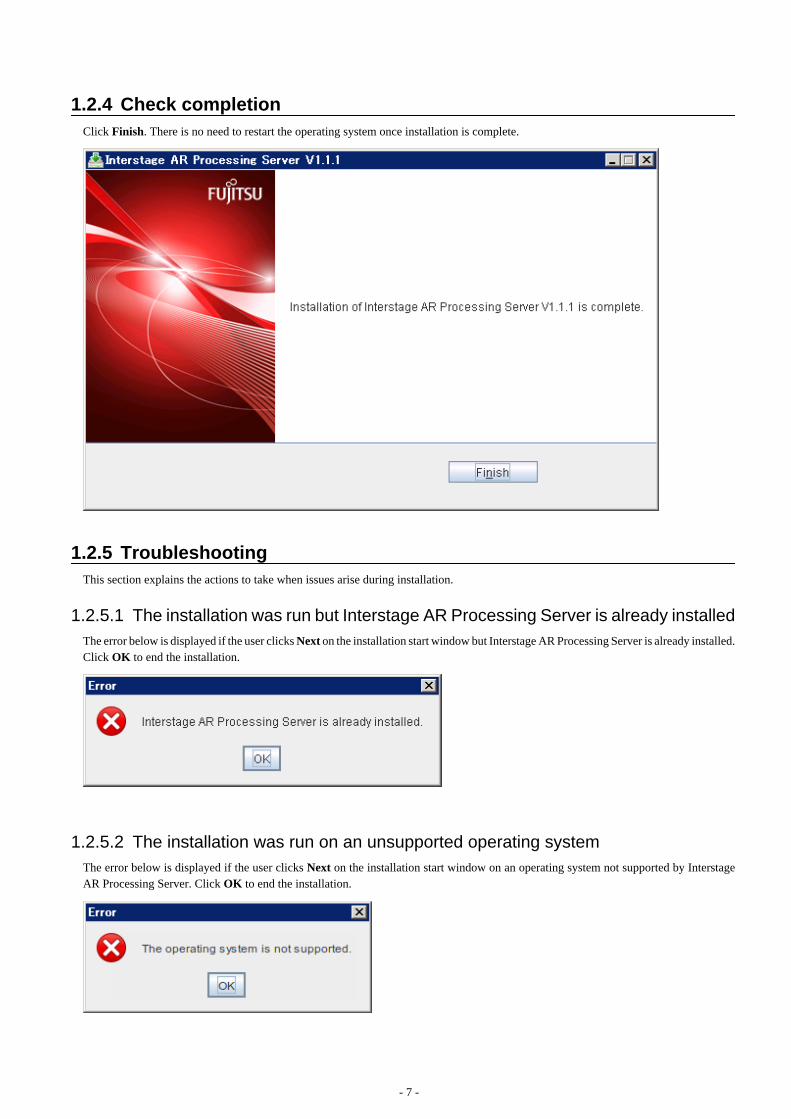
1.2.4 Check completionClick Finish. There is no need to restart the operating system once installation is complete.
1.2.5 TroubleshootingThis section explains the actions to take when issues arise during installation.
1.2.5.1 The installation was run but Interstage AR Processing Server is already installedThe error below is displayed if the user clicks Next on the installation start window but Interstage AR Processing Server is already installed.Click OK to end the installation.
1.2.5.2 The installation was run on an unsupported operating systemThe error below is displayed if the user clicks Next on the installation start window on an operating system not supported by InterstageAR Processing Server. Click OK to end the installation.
- 7 -

1.2.5.3 The installation was run but disk space was insufficientThe error below is displayed if the user clicks Next on the installation start window but disk space is insufficient. Click OK to return tothe installation directory configuration window.
1.2.5.4 Installation directory checkThe error below is displayed if the specified installation directory is in a non-existent drive, is a non-empty directory, or is an emptydirectory to which the administrator has not been assigned full control permissions. Click OK to return to the installation directoryconfiguration window.
Either change the installation directory, or delete all directories and files contained in the specified installation directory. If required, backup resources before deleting.
The error below is displayed if the specified installation directory contains invalid characters or is more than 45 characters long. ClickOK to end the installation.
1.2.5.5 Invalid values in the FQDN or IP address of the web serverThe error below is displayed if the specified FQDN or IP address of the web server is more than 256 characters long, or if an invalid valueis specified as the host name or literal IP address. Click OK to return to the web server configuration window.
The error below is displayed if "localhost", "127.0.0.1", or "::1" is specified. Click OK to return to the web server configuration window.
- 8 -

1.2.5.6 Failed to extract resourcesThe error below is displayed if the specified installation directory exists, but the administrator has not been assigned full control permissionsto it. Click OK to end the installation.
1.3 Installation in Linux
1.3.1 Run the installation1. Log in as a superuser (root) to the server on which Interstage AR Processing Server will be installed.
2. Insert the product DVD in the computer DVD drive, and mount it.
mount -t iso9660 -r /dev/deviceFileName dvdRomMountPoint
3. Execute the installation command.
# cd dvdRomMountPoint
# ./setup.sh
4. In the installation start screen, enter "y" to start the installation, or "n" to end it.
Interstage AR Processing Server V1.1.1 Install Wizard
Product name: Interstage AR Processing Server Standard Edition
Version: V1.1.1
Company name: Fujitsu Limited
Start installation?
[y,n]
=>
5. In the Server Configuration Settings screen, check the description, and then press Enter.
=== [ Server Configuration Settings ] ===
- Model A: Small-scale entry model for an intranet environment (all-in-one minimum configuration)
- Model B: Small-scale entry model for an Internet environment (deploy the web server to a DMZ)
- Model C: Medium- to large-scale, high-reliability, high-availability model for an intranet
environment (multi-server configuration)
- Model D: Medium- to large-scale, high-reliability, high-availability model for an Internet
environment (in addition to the above, web servers are deployed to a DMZ)
Refer to the Overview for information on system configurations and models.
[Press Enter key]
6. Enter the number of the server configuration to be installed.
- 9 -
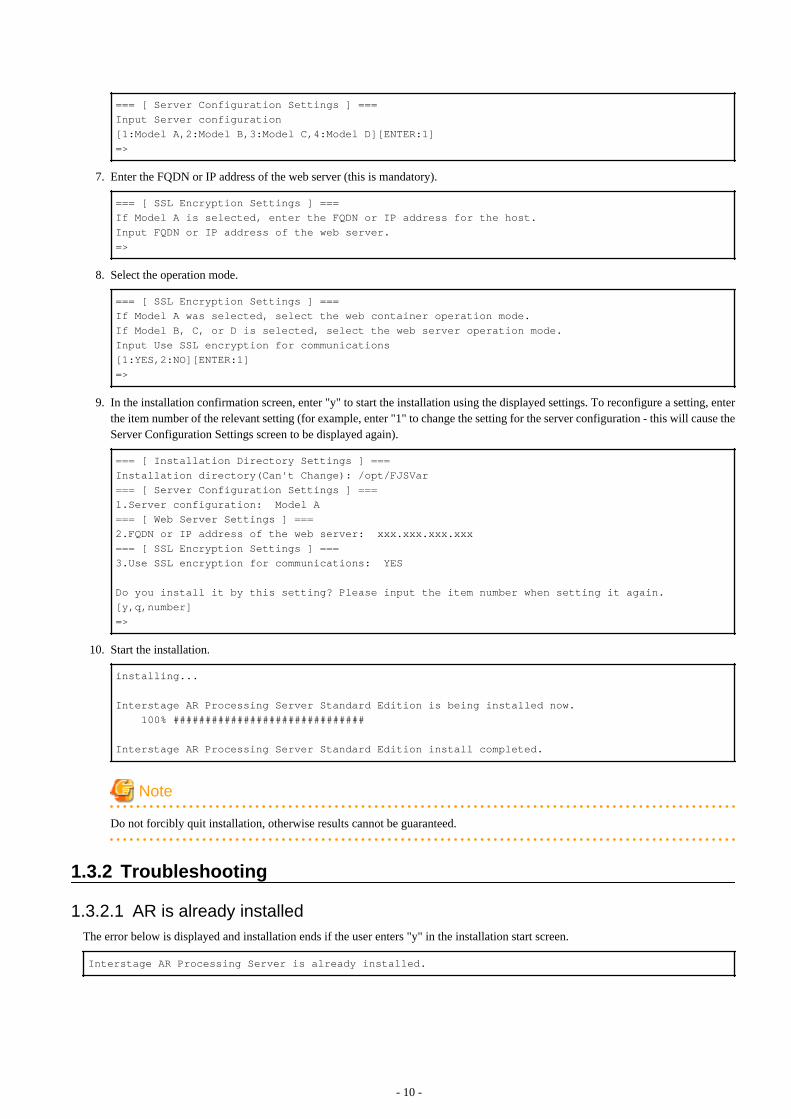
=== [ Server Configuration Settings ] ===
Input Server configuration
[1:Model A,2:Model B,3:Model C,4:Model D][ENTER:1]
=>
7. Enter the FQDN or IP address of the web server (this is mandatory).
=== [ SSL Encryption Settings ] ===
If Model A is selected, enter the FQDN or IP address for the host.
Input FQDN or IP address of the web server.
=>
8. Select the operation mode.
=== [ SSL Encryption Settings ] ===
If Model A was selected, select the web container operation mode.
If Model B, C, or D is selected, select the web server operation mode.
Input Use SSL encryption for communications
[1:YES,2:NO][ENTER:1]
=>
9. In the installation confirmation screen, enter "y" to start the installation using the displayed settings. To reconfigure a setting, enterthe item number of the relevant setting (for example, enter "1" to change the setting for the server configuration - this will cause theServer Configuration Settings screen to be displayed again).
=== [ Installation Directory Settings ] ===
Installation directory(Can't Change): /opt/FJSVar
=== [ Server Configuration Settings ] ===
1.Server configuration: Model A
=== [ Web Server Settings ] ===
2.FQDN or IP address of the web server: xxx.xxx.xxx.xxx
=== [ SSL Encryption Settings ] ===
3.Use SSL encryption for communications: YES
Do you install it by this setting? Please input the item number when setting it again.
[y,q,number]
=>
10. Start the installation.
installing...
Interstage AR Processing Server Standard Edition is being installed now.
100% ##############################
Interstage AR Processing Server Standard Edition install completed.
Note
Do not forcibly quit installation, otherwise results cannot be guaranteed.
1.3.2 Troubleshooting
1.3.2.1 AR is already installedThe error below is displayed and installation ends if the user enters "y" in the installation start screen.
Interstage AR Processing Server is already installed.
- 10 -

1.3.2.2 The installation was run on an unsupported operating systemThe error below is displayed and installation ends if the user enters "y" in the installation start screen on an operating system not supportedby Interstage AR Processing Server.
The operating system is not supported.
1.3.2.3 The installation was run but disk space was insufficientThe error below is displayed and installation ends if the user enters "y" in the installation start screen.
The available disk space is insufficient.
1.3.2.4 Installation directory checkThe error below is displayed if the installation directory is not empty. Delete the opt/FJSVar, /etc/opt/FJSVar, and /var/opt/FJSVardirectories, or delete all the directories and files contained in these directories. If required, back up resources before deleting.
The installation directory does not exist, or the directory is not empty.
1.3.2.5 Server configuration selectionThe error below is displayed and the user is prompted for a new value if the specified server configuration is not 1, 2, 3, or 4.
Select "Model A", "Model B", "Model C", or "Model D".
=== [ Server Configuration Settings ] ===
Input Server configuration
[1:Model A,2:Model B,3:Model C,4:Model D][ENTER:1]
=>
1.3.2.6 Operation mode selectionThe error below is displayed and the user is prompted for a new value if the specified operation mode is not 1 or 2.
Select "YES" or "NO".
=== [ SSL Encryption Settings ] ===
If Model A was selected, select the web container operation mode.
If Model B, C, or D is selected, select the web server operation mode.
Specify whether to use SSL encryption for communications.
[1:YES,2:NO][ENTER:1]
=>
1.3.2.7 Invalid values in the FQDN or IP address of the web serverThe error below is displayed and the user is prompted for a new value if the specified FQDN or IP address of the web server is more than128 characters long, or if an invalid value is specified as the host name or literal IP address.
Enter the host name or IP address using up to 128 characters.
The error below is displayed and the user is prompted for a new value if "localhost", "127.0.0.1", or "::1" is specified.
Do not use "localhost", "127.0.0.1", or "::1" as the FQDN name.
1.3.2.8 A package required for installation was not foundIf a package required for installation of the product is missing, the message below is output, followed by the list of missing packages.
The package necessary for the installation of the product does not exist.
- 11 -
1.4 Silent installationThis section explains the silent installation of Interstage AR Processing Server.
Interstage AR Processing Server is usually installed by entering the required information in dialog format as the installation is run. However,silent installation allows the installation to be performed without entering any information in dialog format. Note that silent installationcan be used for new installations of Interstage AR Processing Server. However, as with normal installations (using dialog format), anoverwrite installation will still result in an error.
Silent installation is executed using the following procedure:
1. Create an installation parameter CSV file
2. Run the silent installation
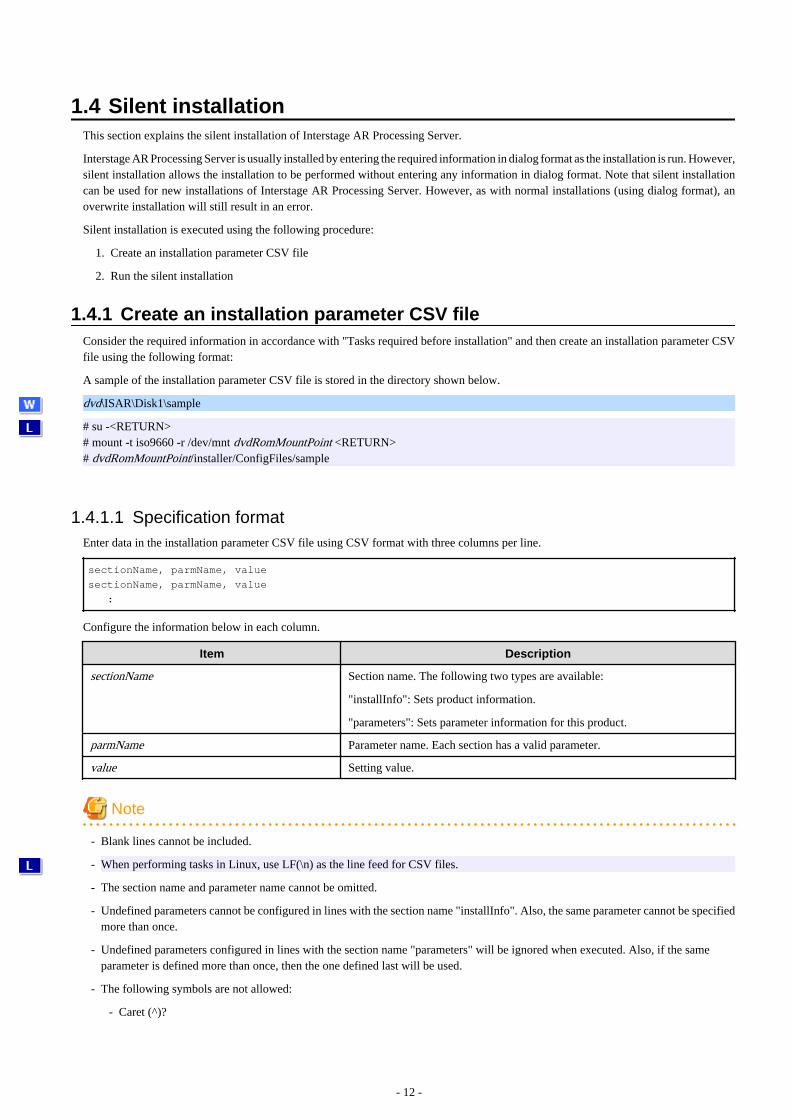
1.4.1 Create an installation parameter CSV fileConsider the required information in accordance with "Tasks required before installation" and then create an installation parameter CSVfile using the following format:
A sample of the installation parameter CSV file is stored in the directory shown below.
dvd\ISAR\Disk1\sample
# su -<RETURN># mount -t iso9660 -r /dev/mnt dvdRomMountPoint <RETURN># dvdRomMountPoint/installer/ConfigFiles/sample
1.4.1.1 Specification formatEnter data in the installation parameter CSV file using CSV format with three columns per line.
sectionName, parmName, value
sectionName, parmName, value
:
Configure the information below in each column.
Item Description
sectionName Section name. The following two types are available:
"installInfo": Sets product information.
"parameters": Sets parameter information for this product.
parmName Parameter name. Each section has a valid parameter.
value Setting value.
Note
- Blank lines cannot be included.
- When performing tasks in Linux, use LF(\n) as the line feed for CSV files.
- The section name and parameter name cannot be omitted.
- Undefined parameters cannot be configured in lines with the section name "installInfo". Also, the same parameter cannot be specifiedmore than once.
- Undefined parameters configured in lines with the section name "parameters" will be ignored when executed. Also, if the sameparameter is defined more than once, then the one defined last will be used.
- The following symbols are not allowed:
- Caret (^)?
- 12 -
- Less than sign (<)
- Greater than sign (>)
- Question mark (?)
- Asterisk (*)
- Ampersand (&)
- Pipe (|)
- Semicolon (;)
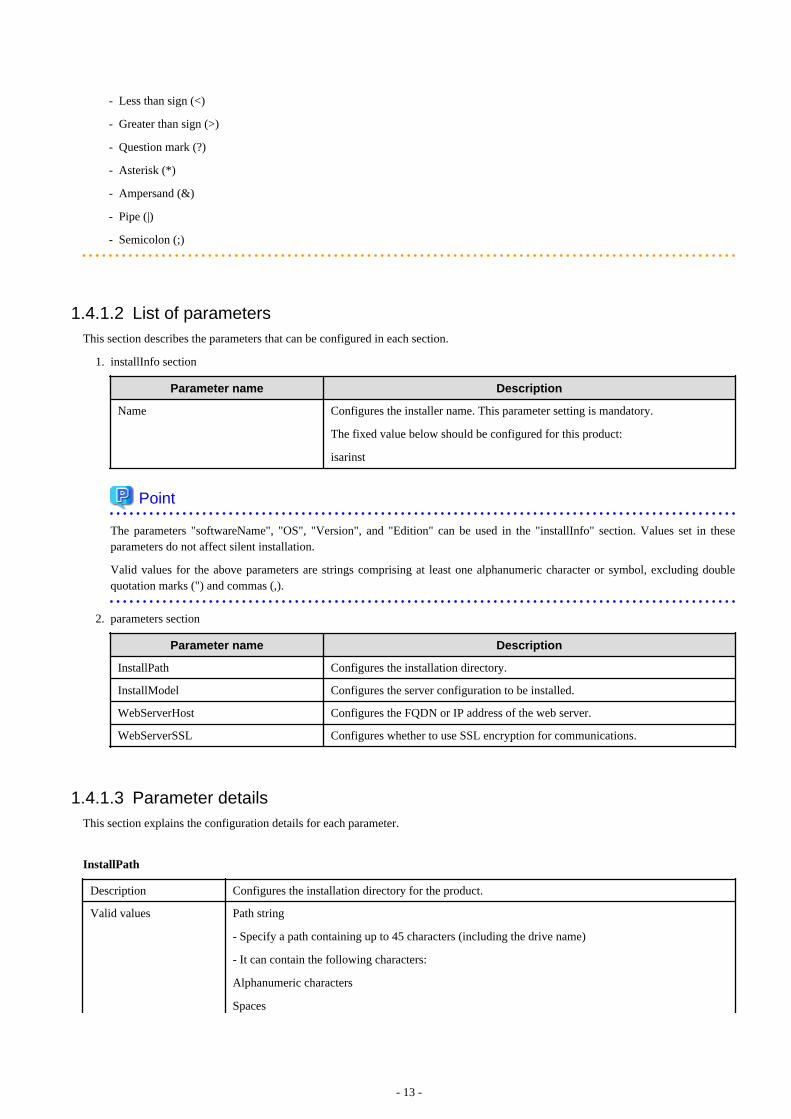
1.4.1.2 List of parametersThis section describes the parameters that can be configured in each section.
1. installInfo section
Parameter name Description
Name Configures the installer name. This parameter setting is mandatory.
The fixed value below should be configured for this product:
isarinst
Point
The parameters "softwareName", "OS", "Version", and "Edition" can be used in the "installInfo" section. Values set in theseparameters do not affect silent installation.
Valid values for the above parameters are strings comprising at least one alphanumeric character or symbol, excluding doublequotation marks (") and commas (,).
2. parameters section
Parameter name Description
InstallPath Configures the installation directory.
InstallModel Configures the server configuration to be installed.
WebServerHost Configures the FQDN or IP address of the web server.
WebServerSSL Configures whether to use SSL encryption for communications.
1.4.1.3 Parameter detailsThis section explains the configuration details for each parameter.
InstallPath
Description Configures the installation directory for the product.
Valid values Path string
- Specify a path containing up to 45 characters (including the drive name)
- It can contain the following characters:
Alphanumeric characters
Spaces
- 13 -
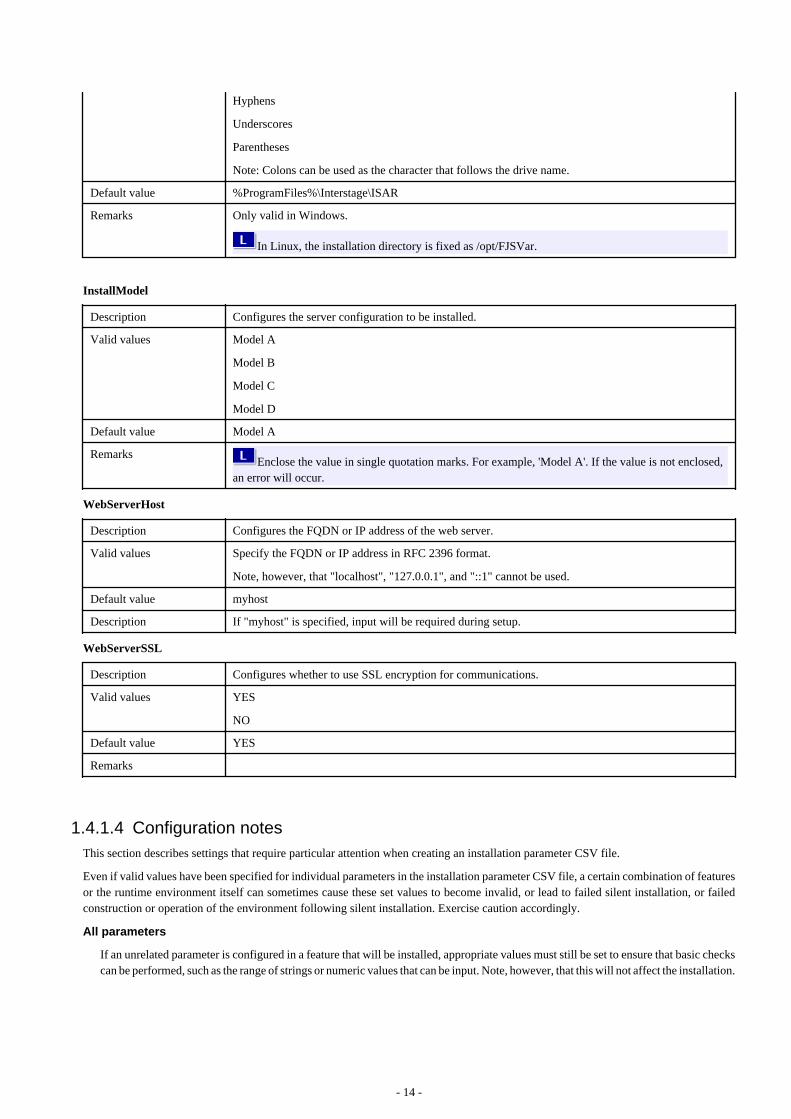
Hyphens
Underscores
Parentheses
Note: Colons can be used as the character that follows the drive name.
Default value %ProgramFiles%\Interstage\ISAR
Remarks Only valid in Windows.
In Linux, the installation directory is fixed as /opt/FJSVar.
InstallModel
Description Configures the server configuration to be installed.
Valid values Model A
Model B
Model C
Model D
Default value Model A
RemarksEnclose the value in single quotation marks. For example, 'Model A'. If the value is not enclosed,
an error will occur.
WebServerHost
Description Configures the FQDN or IP address of the web server.
Valid values Specify the FQDN or IP address in RFC 2396 format.
Note, however, that "localhost", "127.0.0.1", and "::1" cannot be used.
Default value myhost
Description If "myhost" is specified, input will be required during setup.
WebServerSSL
Description Configures whether to use SSL encryption for communications.
Valid values YES
NO
Default value YES
Remarks
1.4.1.4 Configuration notesThis section describes settings that require particular attention when creating an installation parameter CSV file.
Even if valid values have been specified for individual parameters in the installation parameter CSV file, a certain combination of featuresor the runtime environment itself can sometimes cause these set values to become invalid, or lead to failed silent installation, or failedconstruction or operation of the environment following silent installation. Exercise caution accordingly.
All parameters
If an unrelated parameter is configured in a feature that will be installed, appropriate values must still be set to ensure that basic checkscan be performed, such as the range of strings or numeric values that can be input. Note, however, that this will not affect the installation.
- 14 -

"InstallPath"
For the installation directory, do not specify a path that ends in a space followed by a number, since this will result in an error.
Parameters in "XXXPath" or "XXXDirectory" format
If either of the following conditions is satisfied, silent installation will fail. Check the installation environment in advance.
- A directory that cannot be written to is specified
- The capacity of the specified directory or drive is insufficient
"InstallModel"
Enclose the value in single quotation marks. For example, 'Model A'. If the value is not enclosed, an error will occur.
1.4.1.5 Run the silent installationRefer to "Operating environment" in the Overview before running the silent installation.
Also check the file against the issues mentioned in "Configuration notes", and then store this file in any directory.
Log in as an administrator, insert the installation DVD-ROM in the computer DVD-ROM drive, and execute the following command fromthe command prompt (note that if the installer window is displayed by automatic startup, the installer must be ended before executing thecommand).
dvdRomDrive\ISAR\Disk1\isarsilentinstall.bat -s installationParmCsvFile -l errorLogFile [-c]
Note
- Specify the full name of the installation parameter CSV file and of the error log file. Enclose the value in double quotation marks if itcontains spaces.
- Specify an existing directory with write permissions as the error log file directory. Note that if a file with the same name as the specifiederror log file already exists, it will be overwritten during execution.
- Note that a User Account Control (UAC) warning message may be displayed when silent installation is executed in Windows Server2008 R2 - if this happens, allow installation to proceed. This warning message can be prevented by disabling User Account Control.
- If -c is specified, the batch file will only check the content of the installation parameter CSV file - it will not perform installation.
- The error log file will only contain entries if an error occurs.
Insert the installation DVD-ROM in the computer DVD-ROM drive and execute the isarsilentinstall.sh shell script. This operation mustbe executed as a superuser.
# su -<RETURN># mount -t iso9660 -r /dev/mnt dvdRomMountPoint <RETURN># dvdRomMountPoint /installer/ConfigFiles/isarsilentinstall.sh -s installParmCsvFile -l errLogFile [-c]
Note
- Specify the full name of the installation parameter CSV file and of the error log file.
- Specify an existing directory with write permissions as the error log file directory. Note that if a file with the same name as the specifiederror log file already exists, it will be overwritten during execution.
1.4.1.6 Check the installation resultsCheck the command return value and the message in the error log file. The command return values are explained below.
- 15 -
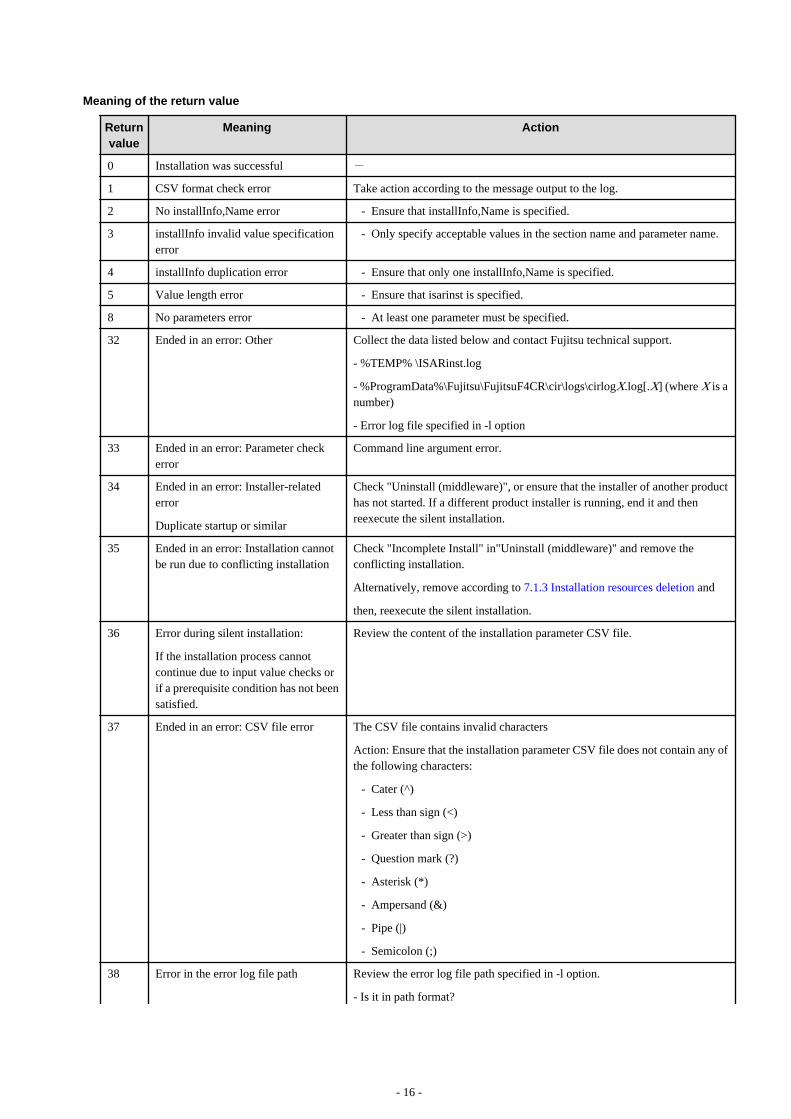
Meaning of the return value
Returnvalue
Meaning Action
0 Installation was successful -
1 CSV format check error Take action according to the message output to the log.
2 No installInfo,Name error - Ensure that installInfo,Name is specified.
3 installInfo invalid value specificationerror
- Only specify acceptable values in the section name and parameter name.
4 installInfo duplication error - Ensure that only one installInfo,Name is specified.
5 Value length error - Ensure that isarinst is specified.
8 No parameters error - At least one parameter must be specified.
32 Ended in an error: Other Collect the data listed below and contact Fujitsu technical support.
- %TEMP% \ISARinst.log
- %ProgramData%\Fujitsu\FujitsuF4CR\cir\logs\cirlogX.log[.X] (where X is anumber)
- Error log file specified in -l option
33 Ended in an error: Parameter checkerror
Command line argument error.
34 Ended in an error: Installer-relatederror
Duplicate startup or similar
Check "Uninstall (middleware)", or ensure that the installer of another producthas not started. If a different product installer is running, end it and thenreexecute the silent installation.
35 Ended in an error: Installation cannotbe run due to conflicting installation
Check "Incomplete Install" in"Uninstall (middleware)" and remove theconflicting installation.
Alternatively, remove according to 7.1.3 Installation resources deletion and
then, reexecute the silent installation.
36 Error during silent installation:
If the installation process cannotcontinue due to input value checks orif a prerequisite condition has not beensatisfied.
Review the content of the installation parameter CSV file.
37 Ended in an error: CSV file error The CSV file contains invalid characters
Action: Ensure that the installation parameter CSV file does not contain any ofthe following characters:
- Cater (^)
- Less than sign (<)
- Greater than sign (>)
- Question mark (?)
- Asterisk (*)
- Ampersand (&)
- Pipe (|)
- Semicolon (;)
38 Error in the error log file path Review the error log file path specified in -l option.
- Is it in path format?
- 16 -
Returnvalue
Meaning Action
- Does the error log file storage directory path exist?
- Have write permissions for the error log file been configured correctly?
If the return value is 36, open the error log file and check the detailed error information. Error information is explained below.
Error information
ui.requirement.id=ISAR_exlusiveCheck
ui.errorMsg=Interstage AR Processing Server is already installed.
ui.requirement.id=ISAR_OSCheck
ui.errorMsg=The operating system is not supported.
ui.requirement.id=ISAR_reqEnoughDiskSpace
ui.errorMsg=The available disk space is insufficient.
ui.requirement.id=ISAR_reqValidPath
ui.errorMsg=The installation directory does not exist, or the directory is not empty.
ui.input.id=ISAR_PARAM_InstallPath
ui.errorMsg=The format of the installation directory is incorrect.
ui.input.id=ISAR_PARAM_WebServerHost
ui.errorMsg=Enter the host name or IP address using up to 256 characters.
ui.artifact.id=checkHostNameCmd_ISAR_PARAM_WebServerHost
ui.errorMsg=Do not use localhost, 127.0.0.1 for the FQDN name.
If no error information was output to the error log file, check the points below:
- Has an invalid configuration value been specified as the installation model?
- Has an invalid configuration value been specified for SSL encryption?
- Has a path name ending in a space followed by a number been specified for the installation directory?
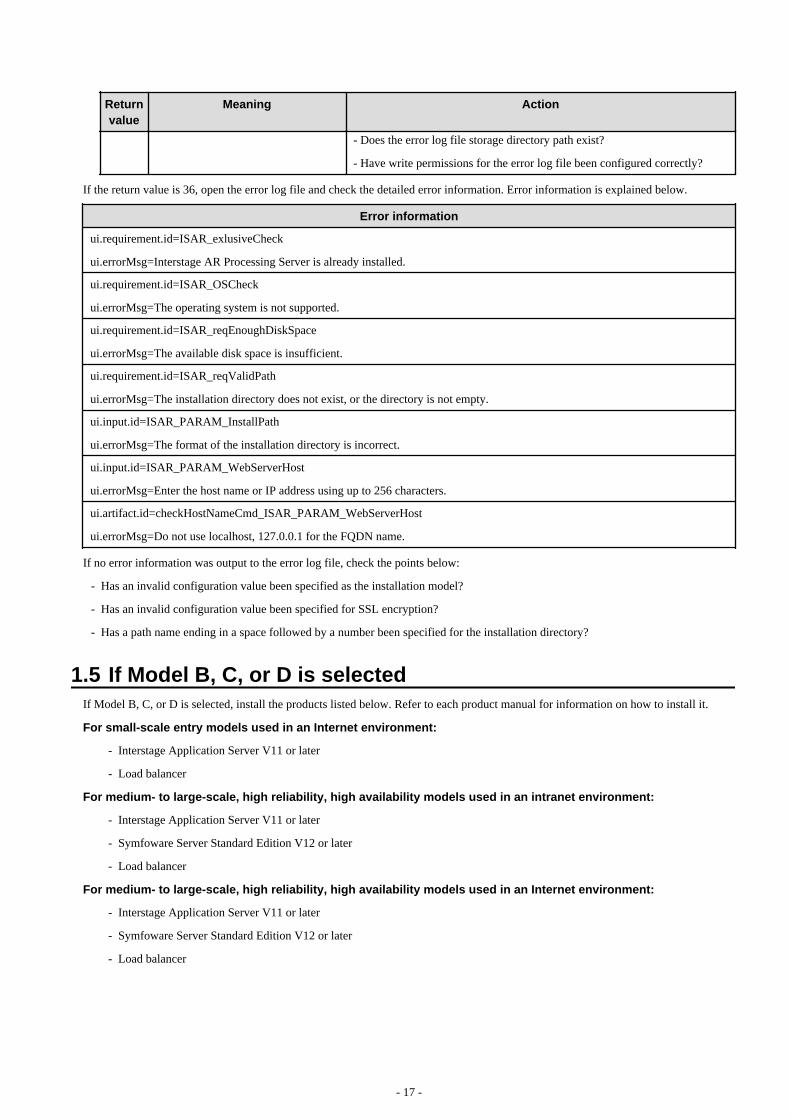
1.5 If Model B, C, or D is selectedIf Model B, C, or D is selected, install the products listed below. Refer to each product manual for information on how to install it.
For small-scale entry models used in an Internet environment:
- Interstage Application Server V11 or later
- Load balancer
For medium- to large-scale, high reliability, high availability models used in an intranet environment:
- Interstage Application Server V11 or later
- Symfoware Server Standard Edition V12 or later
- Load balancer
For medium- to large-scale, high reliability, high availability models used in an Internet environment:
- Interstage Application Server V11 or later
- Symfoware Server Standard Edition V12 or later
- Load balancer
- 17 -

Chapter 2 Smart devicesAn application must be installed to use the client authoring tool provided by Interstage AR Processing Server on a smart device.
2.1 Installing the Android versionAn application to execute client authoring is provided with Interstage AR Processing Server.
InstallDir\mobileclient/android/ARClientAuthoring.apkInstallDir\mobileclient/android/ARClientDev.apk
/opt/FJSVar/mobileclient/android/ARClientAuthoring.apk/opt/FJSVar/mobileclient/android/ARClientDev.apk
When installing on a smart device, select an installation method that is suited to the style of business and user.
Example
The example below installs the application on the smart device by connecting to a PC via USB (the USB connection method varies fordifferent smart devices - refer to the relevant smart device manual for details).
1. Copy the native application to the PC.
2. Select Unknown sources on the smart device, to allow installation of the application obtained via USB.
1. On the Settings screen, tap Security,
2. Select Unknown sources.
3. Connect the smart device to the PC using a USB cable.
4. If the PC does not recognize the driver, then install it.
5. On the PC, select the smart device using Windows Explorer - if the PC does not recognize the smart device, refer to the smart devicemanual.
6. Copy the native application from the PC to the mounted smart device.
7. On the PC taskbar, select Safely remove hardware and eject media and release the mounted device.
8. On the smart device:
1. Start the application with the file management feature and select the native application. If there is no application with a filemanagement feature, then install one.
2. In the installation screen, start the installation.
3. Upon completion, on the Settings screen, Security menu, clear Unknown source.
2.2 Installing the iOS versionThe executable file for the client authoring tool (iOS) is not offered as a product, because Apple Inc. does not permit distribution ofexecutable files.
To execute the client authoring tool on iOS, the client company must enter into a contract with Apple Inc. and build the client authoringtool before it can be used.
Refer to the Developer's Guide for details on how to build the client authoring tool.
2.3 Installing the Windows versionAn application to execute client authoring is provided with Interstage AR Processing Server. The application installer is stored in:
InstallDir\mobileclient\Windows\ARClientSetup.msi
- 18 -
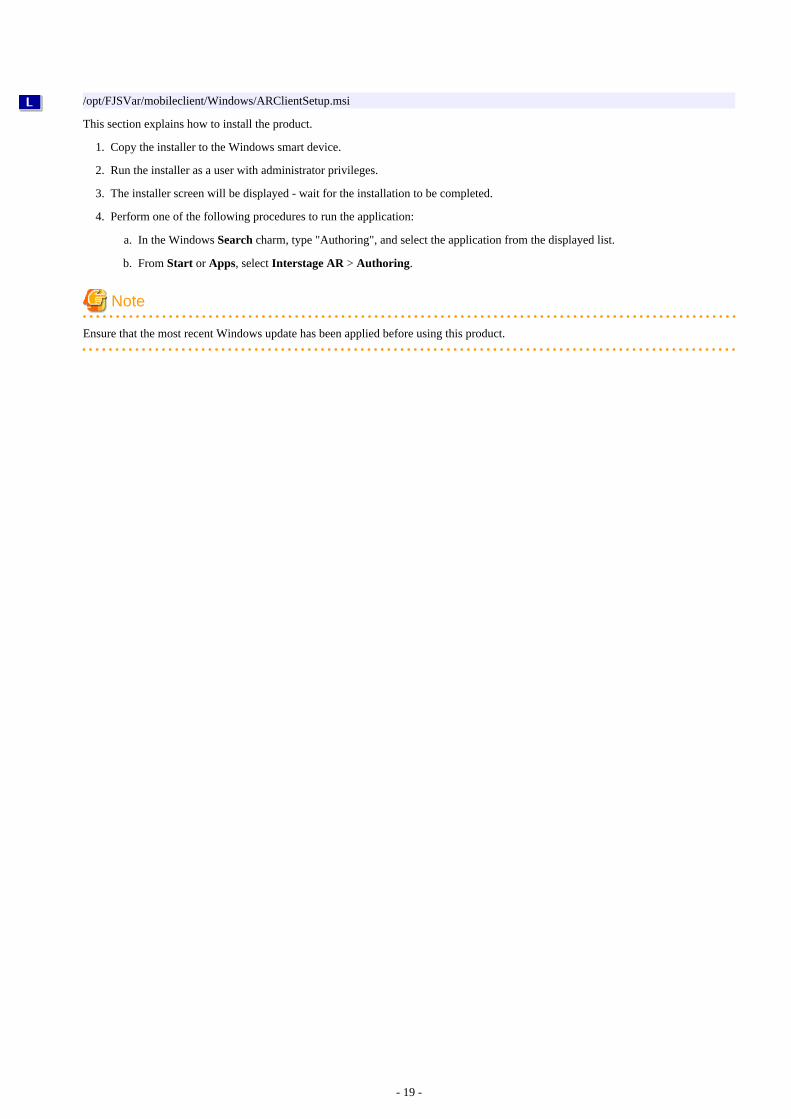
/opt/FJSVar/mobileclient/Windows/ARClientSetup.msi
This section explains how to install the product.
1. Copy the installer to the Windows smart device.
2. Run the installer as a user with administrator privileges.
3. The installer screen will be displayed - wait for the installation to be completed.
4. Perform one of the following procedures to run the application:
a. In the Windows Search charm, type "Authoring", and select the application from the displayed list.
b. From Start or Apps, select Interstage AR > Authoring.
Note
Ensure that the most recent Windows update has been applied before using this product.
- 19 -

Part 2 SetupThis chapter explains how to setup Interstage AR Processing Server on servers and smart devices.
Chapter 3 Server............................................................................................................................................21
Chapter 4 Smart devices................................................................................................................................35
- 20 -

Chapter 3 ServerSetup must be performed in accordance with the environment used before using Interstage AR Processing Server.
3.1 Setup required for each modelThe setup command can be used to set up Interstage AR Processing Server according to the selected model.
If Model A or B is selected
If Model A or B is selected, the setup for the database and web container required to use the AR server will be executed automaticallyand at the same time.
- Database setup
- Creates the AR database
- Registers and starts the AR services
- Web container setup
- Integrated settings for the web container and AR database
- Deploys the AR server feature module to the web container, and registers and starts services
If Model C or D is selected
If Model C or D is selected, information for the web server and web container of the parameter file will be specified in the configurationfile.
Note
The AR server environment will be initialized when setup is executed. If required, backup resources before reexecuting the setup.
3.2 Tasks required before setupEnsure that the following tasks are performed before setup.
3.2.1 Check the port numberInterstage AR Processing Server uses port numbers for its database and web container features. Before installing, ensure that none of theports below is already in use by another program - if this happens, then revise the parameter file before setup (the file is referenced duringsetup).
Also check the port numbers for the web server, AP server, and DB server that will be used for Models B, C, and D.
ItemNo.
Features Details Port number Modifiable
1 Database feature Port that the client connects to 9201 N
2 Web container feature (domain) HTTP listener port for operationmanagement
9101 Y
3 HTTP listener port 9108 Y
4 JMX connector listener port foroperation management
9109 Y
5 HTTPS listener port 9110 Y
6 Connection port for the messagebroker
9111 Y
- 21 -

ItemNo.
Features Details Port number Modifiable
7 IIOP (ORB) listener port 9112 Y
8 IIOP/SSL listener port for mutualauthentication
9113 Y
9 IIOP/SSL listener port 9114 Y
10 Web container feature (RESTAPI/overlay application)
HTTP listener port 9102 Y
11 HTTPS listener port 9104 Y
12 Web container feature (datamanagement console)
HTTP listener port 9103 Y
13 HTTPS listener port 9105 Y
- Database featurePort number for accessing the database.
- Web container feature (domain)Port number for operations relating to the AR processing server.
- Web container feature (REST API/overlay application)Port number used when utilizing the REST API or overlay application provided by this product (refer to the Reference Guide fordetails).
- Web container feature (data management console)Port number for accessing the data management console provided by this product.
3.2.2 Check the setup parametersThis section describes the content of the parameter file referenced during setup, as well as details of input checks. The parameter file storesparameters input from the window during installation, as well as parameters that can be changed by the user during setup.
The directory is shown below.
installDir\setup_parameter\arsv_setup_parameters.txt
/etc/opt/FJSVar/setup_parameter/arsv_setup_parameters.txt
ItemNo.
Description Parameter file Window
input
Input check
Key Default value Possible characters Lower limit
Upperlimit
1 Installation model INSTALL_MODEL
Model A Y Model A, Model B,Model C, Model D
- -
2 Database portnumber
PGPORT 9201 - Numbers 1 65535
3 Web serverFQDN/IP
WEBSERVER_HOST
None Y Characters that can beused in the host nameor IP address.
Note that "localhost","127.0.0.1", and "::1"cannot be used.
- -
4 Operation mode WEBSERVER_SSL
YES Y YES, NO - -
5 HTTP listener portfor operationmanagement
DOMAIN_ADMINPORT
9101 - Numbers 1 65535
- 22 -

ItemNo.
Description Parameter file Window
input
Input check
Key Default value Possible characters Lower limit
Upperlimit
6 HTTP listener port DOMAIN_INSTANCEPORT
9108 - Numbers 1 65535
7 JMX connectorlistener port foroperationmanagement
DOMAIN_JMXPORT
9109 - Numbers 1 65535
8 HTTPS listenerport
HTTP_SSL_PORT
9110 - Numbers 1 65535
9 Connection portfor the messagebroker
JMS_PORT 9111 - Numbers 1 65535
10 IIOP (ORB)listener port
ORB_LISTENER_PORT
9112 - Numbers 1 65535
11 IIOP/SSL listenerport for mutualauthentication
ORB_MUTUALAUTH_PORT
9113 - Numbers 1 65535
12 IIOP/SSL listenerport
ORB_SSL_PORT
9114 - Numbers 1 65535
13 Web serverHTTPS port
WEB_SSL_PORT
443 - Numbers 1 65535
14 Web server HTTPport
WEB_PORT 80 - Numbers 1 65535
15 Backup directory BACKUP_DIRinstallDirbackup
/var/opt/FJSVarbackup
- Up to 127 characters - -
16 HTTP listener port(REST API)
AR_DBSERVICE_PORT
9102 - Numbers 1 -
17 HTTPS listenerport (REST API)
AR_DBSERVICE_SSL_PORT
9104 - Numbers 1 -
18 HTTP listener port(data managementconsole)
AR_CONSOLE_PORT
9103 - Numbers 1 -
19 HTTPS listenerport (datamanagementconsole)
AR_CONSOLE_SSL_PORT
9105 - Numbers 1 -
Note
- Do not specify directories using the Windows 8.3 format.
- During setup, no error is generated, even if an incorrect path is specified for the web server or the backup directory.
- Specify the correct path in the parameter file, and perform the setup again.
- Ensure that the console can be accessed using the specified web server host FQDN/IP. If the connection fails, remove the setup, specifya valid FQDN/IP, and then execute the setup again.
- 23 -

3.3 Setup (Windows)
3.3.1 Executing the setup1. Log in as administrator to the server on which Interstage AR Processing Server will be set up.
2. Execute the setup batch script.
"installDir\bin\setup\arsv_setup.bat"
3. Setup will start.
Interstage AR Processing Server SETUP START.
4. Ensure that the setup is complete.
Interstage AR Processing Server SETUP END.
Note
- Ensure that the directories below have been deleted (if they still remain after reexecuting setup, delete them before performing setupoperations).
- installDir\fjje6_domainsroot
- Ensure that the installation process is complete before starting the command prompt window to execute the setup command. Thecommand prompt must be started by a user with administrator privileges. To do that, from the context menu, select Run asadministrator.
- Creating operating system users
If model A or B is selected, a user (arsvdmpg) will be added automatically to access the database features. Do not change or deleteany settings such as the password. If settings are changed or deleted, the product may not operate correctly.
- Completing the setup
It may take some time to setup the web container features. If an error occurs during access immediately following setup, wait for afew moments before reconnecting.
3.3.2 Troubleshooting measures during setupIf an error occurs during setup, return to the pre-setup state, and check if there are any issues with the parameter file referenced duringsetup.
A log file is output with the execution progress of the setup. If setup fails, check the log file below.
"installDir\logs\ISARinst.setup.log"
Incorrect specification of the parameter file
A continuously output message such as the one below indicates that the parameter file may have been specified incorrectly:
** cmd execute failure number
*** FAILURE featureName setup **
Check the content of the parameter file.
- Are any keys missing or incorrect?
- Do the values contain invalid characters?
- Is the specified port number already being used?
The automatically generated user (arsvdmpg) already exists
An output message such as the one below indicates that the automatically generated user (arsvdmpg) already exists:
- 24 -

net user arsvdmpg ****** /add Account already exists
Ensure that the automatically generated user does not exist, and then execute the setup again.
3.4 Setup (Linux)
3.4.1 Executing the setup1. Log in as a superuser (root) to the server on which Interstage AR Processing Server will be setup.
2. If Model A or B is selected, configure /etc/hosts as shown below:
arServerIpAddress hostName
Example
Example /etc/hosts
192.0.2.0 hostname
3. Execute the setup script.
/opt/FJSVar/bin/setup/arsv_setup.sh
4. Setup will start.
Interstage AR Processing Server SETUP START.
5. Ensure that the setup is complete.
Interstage AR Processing Server SETUP END.
Note
- Ensure that the directories below have been deleted (if they still remain after reexecuting setup, delete them before performing setupoperations).
- /var/opt/FJSVar/fjje6_domainsroot
3.4.2 Troubleshooting measures during setupIf an error occurs during setup, return to the pre-setup state, and check if there are any issues with the parameter file referenced duringsetup.
A log file is output with the execution progress of the setup. If setup fails, check the log file below.
/var/opt/FJSVar/logs/ISARinst.setup.log
Required packages are not installed
An output message such as the one below indicates that packages required for setup have not been installed - if this occurs, install therequired packages (refer to "Operating environment" in the Overview for details).
error while loading shared libraries: libreadline.so.5: cannot open shared object file: No such
file or directory
Failed web container startup
An output message such as the one below indicates that web container startup has failed - if this occurs, add webContainerIpAddressand hostName to /etc/hosts:
- 25 -
There is a process already using the admin port 9101 -- it probably is another instance of a
GlassFish server.
Example
Example /etc/hosts
192.0.2.0 hostname
Incorrect specification of the parameter file
A continuously output message such as the one below indicates that the parameter file may have been specified incorrectly:
** cmd execute failure number
*** FAILURE featureName setup **
Check the content of the parameter file.
- Are any keys missing or incorrect?
- Do the values contain invalid characters?
- Is the specified port number already being used?
The automatically generated user (arsvdmpg) already exists
An output message such as the one below indicates that the automatically generated user (arsvdmpg) already exists:
The automatically generated user (arsvdmpg) already exists.
Ensure that the automatically generated user does not exist, and then execute the setup again.
3.5 If Model A is selected (for small-scale entry models used in anintranet environment)
If using basic authentication
Install and build the following product to configure basic authentication using Model A:
- Interstage Application Server V11
Refer to 3.6.1 Interstage Application Server V11 (web server layer) for details on how to configure an environment for integrating theweb server (Interstage Application Server) with an AR processing server (such as the data management console).
If using SSL communications
The AppCache feature will not operate effectively in Android 4.4 or later, iOS8 or later, or Windows, unless an SSL certificate signedby the certificate authority (CA) is used. Therefore, a certificate signed by the CA must be configured in the web container to performSSL communications.
Note
To specify settings in the keystore or truststore, use the keytool command stored in the directory below:
installDir\components\STFISAR_HJDK7\jdk7\bin
/opt/FJSVar/components/STFISAR_HJDK7/jdk7/bin
Refer to the JDK7 specifications for details on keytool command specifications.
- 26 -

See
The keystore/truststore passwords specified in the keytool command are written to the file below and should be confirmed (note thatonly administrators can reference it):
installDir\bin\setup\work\masterpassfile.txt
/opt/FJSVar/bin/setup/work/masterpassfile.txt
1. Back up the keystore file below:
installDir\fjje6_domainsroot\domains\domain1\config\keystore.jks
/var/opt/FJSVar/fjje6_domainsroot/domains/domain1/config/keystore.jks
2. If using an existing alias, delete the relevant public key/private key pair registered in the keystore.
Example
If the alias is 'newcert'
keytool -delete -alias newcert -keystore installDir\fjje6_domainsroot\domains\domain1\config
\keystore.jks
keytool -delete -alias newcert -keystore /var/opt/FJSVar/fjje6_domainsroot/domains/domain1/
config/keystore.jks
3. Generate a new public key/private key pair in the keystore using any alias, and specify the X.500 identifiers below in accordancewith the X.500 identifier specifications and the CA procedure:
X.500 identifier Meaning
CN (Common Name) Full name For a server certificate, use FQDN or the IP address(*1)
OU (Organization Unit) Organizational unit (for example, department)
O (Organization) Organization (for example, company)
L (Locality) Town or region (for example, suburb)
ST (State or Province) State or province
C (Country) Country name code (ISO 3166)
*1: If the FQDN or the IP address of the URL do not match the CN, a host name detection error will occur when performingSSL communications.
Example
The example below uses RSA key generation algorithm with 2048-bit key length, SHA1 with RSA signature algorithm, 'newcert'alias, and 365-day validity period.
keytool -genkeypair -alias newcert -keyalg RSA -keysize 2048 -sigalg SHA1withRSA -dname
"CN=example.jp, OU=Example Organization Unit, O=Example Organization, L=Example City,
ST=Example Prefecture, C=JP" -validity 365 -keystore installDir\fjje6_domainsroot\domains
\domain1\config\keystore.jks
keytool -genkeypair -alias newcert -keyalg RSA -keysize 2048 -sigalg SHA1withRSA -dname
"CN=example.jp, OU=Example Organization Unit, O=Example Organization, L=Example City,
ST=Example Prefecture, C=JP" -validity 365 -keystore /var/opt/FJSVar/fjje6_domainsroot/domains/
domain1/config/keystore.jks
4. Specify the private key password (press Enter to ensure that it matches the keystore password).
- 27 -
5. Generate a certificate signing request (CSR) from the keystore.
Example
The example below uses the alias 'newcert' and the CSR file name 'newcert.csr'.
keytool -certreq -alias newcert -file newcert.csr -keystore installDir\fjje6_domainsroot\domains
\domain1\config\keystore.jks
keytool -certreq -alias newcert -file newcert.csr -keystore /var/opt/FJSVar/fjje6_domainsroot/
domains/domain1/config/keystore.jks
6. Send a CSR to the CA and obtain the following:
- Certificate signed by the CA
- CA root certificate
- Intermediate CA certificate (if required)
7. Register the CA root certificate in the keystore.
Example
The example below uses the alias 'ca_root' and the certificate file name 'ca_root.cer'.
keytool -importcert -alias ca_root -file ca_root.cer -trustcacerts -keystore installDir
\fjje6_domainsroot\domains\domain1\config\keystore.jks
keytool -importcert -alias ca_root -file ca_root.cer -trustcacerts -keystore /var/opt/FJSVar/
fjje6_domainsroot/domains/domain1/config/keystore.jks
8. If required, sequentially register intermediate CA certificates in the keystore, beginning with the highest layer of certificate.
Example
The example below uses the alias 'ca_inter' and the certificate file name 'ca_inter.cer'.
keytool -importcert -alias ca_inter -file ca_inter.cer -trustcacerts -keystore installDir
\fjje6_domainsroot\domains\domain1\config\keystore.jks
keytool -importcert -alias ca_inter -file ca_inter.cer -trustcacerts -keystore /var/opt/FJSVar/
fjje6_domainsroot/domains/domain1/config/keystore.jks
9. Register the obtained certificate in the keystore.
Example
The example below uses the alias 'newcert' and the certificate file name 'mycert.cer'.
keytool -importcert -alias newcert -file mycert.cer -trustcacerts -keystore installDir
\fjje6_domainsroot\domains\domain1\config\keystore.jks
keytool -importcert -alias newcert -file mycert.cer -trustcacerts -keystore /var/opt/FJSVar/
fjje6_domainsroot/domains/domain1/config/keystore.jks
10. Back up the truststore file below:
installDir\fjje6_domainsroot\domains\domain1\config\cacerts.jks
/var/opt/FJSVar/fjje6_domainsroot/domains/domain1/config/cacerts.jks
11. Register the CA root certificate in the truststore.
- 28 -

Example
The example below uses the alias 'ca_root' and the certificate file name 'ca_root.cer'.
keytool -importcert -alias ca_root -file ca_root.cer -trustcacerts -keystore installDir
\fjje6_domainsroot\domains\domain1\config\cacerts.jks
keytool -importcert -alias ca_root -file ca_root.cer -trustcacerts -keystore /var/opt/FJSVar/
fjje6_domainsroot/domains/domain1/config/cacerts.jks
12. If required, sequentially register intermediate CA certificates in the keystore, beginning with the highest layer of certificate.
Example
The example below uses the alias 'ca_inter' and the certificate file name 'ca_inter.cer'.
keytool -importcert -alias ca_inter -file ca_inter.cer -trustcacerts -keystore installDir
\fjje6_domainsroot\domains\domain1\config\cacerts.jks
keytool -importcert -alias ca_inter -file ca_inter.cer -trustcacerts -keystore /var/opt/FJSVar/
fjje6_domainsroot/domains/domain1/config/cacerts.jks
13. Specify the certificate that was registered using arsvsetSSL.bat in each of the web container ports.
Example
The example below uses the alias 'newcert'.
arsvsetSSL.bat newcert
arsvsetSSL.sh newcert
14. Ensure that the update datetime of the web container domain.xml stored in the directory below has been modified, and restartthe web container:
installDir\fjje6_domainsroot\domains\domain1\config
/var/opt/FJSVar/fjje6_domainsroot/domains/domain1/config
3.6 If Model B is selected (for small-scale entry models used in anInternet environment)
Install and build the following product to build Model B.
- Interstage Application Server V11 (web server layer)
Note
Note that communications will not use SSL encryption between the web server and web container if Model B is used, even if under Selectoperation mode, Use SSL encryption is set to YES.
3.6.1 Interstage Application Server V11 (web server layer)In addition to the AP server and DB server layers built as a result of the AR server setup process, a web server layer must be built forModel B. Refer to the product manual for details on how to install and set up the web server.
Use Interstage Application Server to configure the connection to the AR processing server. Configure the AR processing server accessdirectories as shown below when configuring the web server:
- 29 -

http://arServerFqdnOrIpAddress:httpListenerPortNumber/arsvdmc/
http://arServerFqdnOrIpAddress:httpListenerPortNumber/arsvdm/
http://arServerFqdnOrIpAddress:httpListenerPortNumber/arsvfdm/
Also configure settings in the web server for integration with web applications created by the user.
Note
The data management console (arsvdmc) provided by the AR server has built-in operating system authentication. Configure the settingsto suit your environment if authenticating users on the web server.
Refer to the product manual for details on the configuration procedure.
3.7 If Model C is selected (for medium- to large-scale, highreliability, high availability models used in an intranetenvironment)
Install and build the following products to build Model C.
- Symfoware Server Standard Edition V12 (DB server layer)
- Interstage Application Server V11 (AP server layer)
- Load balancer
Note
- Interstage AR Processing Server supports open source interfaces such as the Symfoware Server SQL interface. Support for nativeinterfaces is not offered.
The load balancer enables access to AR processing servers deployed to multiple AP servers. Build the DB server for shared use by theAP servers. The settings for each product are described below. Refer to the relevant product manual for details on the configurationprocedure. Note that environment settings must be configured for each AP server.
The AR server settings for products to be built are described below.
3.7.1 Symfoware Server Standard Edition V12 (DB server layer)Configure the DB server. The user information for the databases created here will be used in AP server settings described later in thedocument. Refer to the product manual for details on how to install and set up the DB server. When setup is complete, configure settingsusing the procedure below.
1. Create the following databases, which will be used by the AR processing server.
- Database name: arsvdmUsed by data management features.
- Database name: arsvfdmUsed by file data management features.
2. Create the tables for each of the databases. Execute the SQL statements stored in the directory shown below:
installDir\bin\setup\data
/opt/FJSVar/bin/setup/data
- Database name: arsvdmExecute createDataManagerTable.sql to create the tables (lock, qtype, qattribute, qentity, qvalue).
- Database name: arsvfdmExecute createFileDataManagerTable.sql to create the tables (filelock, fileproperties).
- 30 -

3. For tables that require the arsvdm database default values, import the data. Use the data stored in the directory shown to import:
installDir\bin\setup\data
/opt/FJSVar/bin/setup/data
- Table name: qtypeImports defaultQTypeStructure.txt.
- Table name: qattributeImports defaultQAttributeStructure.txt.
4. Configure the client authentication settings to allow connection from the client (AP server) to the database. If multiple AP serversare used, configure the settings for each of them.
3.7.2 Interstage Application Server V11 (AP server layer)Refer to the product manual for details on how to install and set up the AP server. When setup is complete, configure settings using theprocedure below.
Note
Apply urgent updates to the Interstage Application Server included with Interstage Application Server. Refer to the readme for specificupdate numbers.
1. Create a script based on the one below to configure a connection to the database. The example below shows a batch file when asingle cluster is built in Windows:
set DOMAIN_ADMINPORT=%HTTP listener port for AP server operation management%
set DOMAIN_ADMINPORT=%HTTP listener port for AP server operation management%
set ARSVDMDB=arsvdm
set ARSVFDMDB=arsvfdm
set ARCLUSTER=%Name of cluster that deploys the app%
set PGPORT=%DB server port number%
set PGUSER=%User name for database built on DB server%
set PGPASSWORD=%User password for database built on DB server%
set ARDB=%DB server IP address%
set APSDIR=%Installation directory for the application server included with Interstage
Application Server%
call %APSDIR%\F3FMisje6\glassfish\bin\asadmin.bat --port %DOMAIN_ADMINPORT% create-jdbc-
connection-pool --datasourceclassname org.postgresql.ds.PGSimpleDataSource --restype
javax.sql.DataSource --property portNumber=%PGPORT%:password=%PGPASSWORD%:user=%PGUSER
%:databaseName=%ARSVDMDB%:SocketTimeout=60:ServerName=%ARDB% %ARSVDMDB%
call %APSDIR%\F3FMisje6\glassfish\bin\asadmin.bat --port %DOMAIN_ADMINPORT% create-jdbc-
connection-pool --datasourceclassname org.postgresql.ds.PGSimpleDataSource --restype
javax.sql.DataSource --property portNumber=%PGPORT%:password=%PGPASSWORD%:user=%PGUSER
%:databaseName=%ARSVFDMDB%:SocketTimeout=60:ServerName=%ARDB% %ARSVFDMDB%
call %APSDIR%\F3FMisje6\glassfish\bin\asadmin.bat --port %DOMAIN_ADMINPORT% create-jdbc-resource
--connectionpoolid %ARSVDMDB% --target %ARCLUSTER% jdbc/ARDataManager
call %APSDIR%\F3FMisje6\glassfish\bin\asadmin.bat --port %DOMAIN_ADMINPORT% create-jdbc-resource
--connectionpoolid %ARSVFDMDB% --target %ARCLUSTER% jdbc/ARFileDataManager
2. Modify the settings of the configuration file used by Interstage AR Processing Server (FILE_STORE_BASEDIR descriptor inarsvfdmwebapi.properties) to suit the environment - the configuration file directory is shown below:
installDir\conf
/opt/FJSVar/conf
To manage files that are common to all AP servers, the FILE_STORE_BASEDIR descriptor in arsvfdmwebapi.properties mustreference the same directory on all AP servers. Create a shared directory and configure permissions settings to allow full controlaccess from the AP server(s) being used.
- 31 -

Example
Modification example (Windows)
- arsvfdmwebapi.properties"FILE_STORE_BASEDIR = sharedDirectory\\arsvfdm_data"
Escape the path delimiter "\" with another backslash, that is, "\\".
3. Copy all configuration files to the web container library directory below:
The directory contains the configuration files below:
arsvadmui.properties
arsvdmc.properties
arsvfdm_mimetype.properties
arsvfdmwebapi.properties
arsvlogging.properties
The directory for copying the web container directory is shown below.
%Java EE 6 commonDir%\domains\domain1\lib\classes
%Java EE 6commonDir%/domains/domain1/lib/classes/
4. Copy the JDBC data source library published by the DB server to the library used by the web server - the target directory is listedbelow:
%Java EE 6 commonDir%\domains\domain1\lib
%Java EE 6 commonDir%/domains/domain1/lib/classes/
The directory of the Symfoware client JDBC data source module to be added to the library is listed below:
symfowareClientInstallDir\JDBC\lib\postgresql-jdbc4.jar
/opt/symfoclient64/jdbc/lib/postgresql-jdbc4.jar
5. Copy the library below, which is used by Interstage AR Processing Server, to the web container library directory (the directory towhich the JDBC data source has been deployed). The library provided by Interstage AR Processing Server is installed in the directorybelow:
installDir\lib
/opt/FJSVar/lib
The modules to be added are listed below:
arsvadmui.jar
arsvcmn.jar
arsvdm.jar
arsvfdm.jar
arsvnativelibloader.jar
6. Deploy the following war files, which are provided by Interstage AR Processing Server, to the AP server(s).
installDir\webapps\arsvdmc.warinstallDir\webapps\arsvdm.warinstallDir\webapps\arsvfdm.war
/opt/FJSVar/webapps/arsvdmc.war/opt/FJSVar/webapps/arsvdm.war/opt/FJSVar/webapps/arsvfdm.war
7. Web applications created by the user should also be deployed to the AP server(s).
3.7.3 Load balancerTo distribute the load across the AP servers, configure settings according to the manual.
- 32 -

3.8 If Model D is selected (for medium- to large-scale, highreliability, high availability models used in an Internetenvironment)
Install and build the following products to build Model D:
- Symfoware Server Standard Edition V12 (DB server layer)
- Interstage Application Server V11 (AP server layer/web server layer)
- Load balancer
Model D comprises the Model C configuration with an added web server layer construction. This section describes only the web serverlayer construction. Refer to 3.7 If Model C is selected (for medium- to large-scale, high reliability, high availability models used in anintranet environment) for details on other configurations. The AR server settings for products to be built are described below. If multipleweb servers are used, configure the environment settings for each of them.
3.8.1 Interstage Application Server V11 (web server layer)Refer to the product manual for details on how to install and set up the web server.
Configure the environment for integrating the web server and AR processing server. The AR processing server can be accessed as describedbelow:
http://apServerFqdnOrIpAddress:portNumberConfiguredInApServer/arsvdmc/
http://apServerFqdnOrIpAddress:portNumberConfiguredInApServer/arsvdm/
http://apServerFqdnOrIpAddress:portNumberConfiguredInApServer/arsvfdm/
Also configure settings in the web server for connecting to web applications created by the user.
3.9 Tasks required after setupTo check if Interstage AR Processing Server has been set up correctly, access the data management console from the AR data managementclient and ensure that login is possible.
1. Access the data management console from the browser. The URL varies depending on the configuration: Refer to the following:
Example
- Model A with SSL encryption
https://arServerName:httpsListenerPortForDataMgmtConsole/arsvdmc/
- Model A without SSL encryption
http://arServerName:httpsListenerPortForDataMgmtConsole/arsvdmc/
- Model B, C, or D with SSL encryption
https://webServerName:httpsListenerPortForDataMgmtConsole/arsvdmc/
- Model B, C, or D without SSL encryption
http://webServerName:httpsListenerPortForDataMgmtConsole/arsvdmc/
2. Ensure that the login window is displayed, and log in using an account that can be authenticated by the operating system.
3. Ensure that the scenario management window is displayed.
Note
- If logging in to the data management console, do not use an account that contains spaces in the ID or password.
- 33 -

- If accessing from the server, the data management console can be called from the Start menu.
- When confirming access, adequately configure firewalls to suit the environment used.
- If accessing from the data management console, register the site as a trusted website using your browser security settings.
- If the login window is not displayed, check if the AR processing server can be accessed from the AR data management client.
- 34 -

Chapter 4 Smart devicesSetup must be performed before using client authoring or the overlay application provided by Interstage AR.
4.1 Setup for AndroidConfigure the settings below to use features such as overlay application or client authoring on Android:
- Account settingsConfigure the settings required to connect to a server running Interstage AR Processing Server.
- Recognition mode settingsSelect the recognition type to be used.
- Certificate settingsIf using a smart device with Android 4.4 or later, configure the certificate settings to perform SSL communication with Interstage ARProcessing Server using a self-certificate.
4.1.1 Account settingsConfigure an account for a server running Interstage AR Processing Server.
Note
- An account must be created for the AR server if performing client authoring or similar tasks.
- Multiple accounts cannot be configured for a single AR server.
- For information on how to configure accounts for overlay applications developed by a system developer, check with the developerdirectly.
Follow the procedure below to configure an account:
1. In the list of smart device applications, tap the InterstageAR Authoring or InterstageAR Dev icon to start the client authoringtool.
2. In the status bar, tap the menu icon, and then select Settings.
3. From the menu list, tap Account Setting.
- 35 -

4. In the Account Setting window, select Add New Account.
5. In the Account Type Selection window, select AR server account.
6. Input the account information to the AR server, and then select Register.
- URLEnter the server URL, according to the server configuration.
Example
- Model A with SSL encryptionhttps://arServerName:httpsListenerPortForRestApi
- Model A without SSL encryptionhttp://arServerName:httpsListenerPortForRestApi
- Model B, C, or D with SSL encryptionhttps://webServerName:webServerHttpsListenerPortForRestApi
- Model B, C, or D without SSL encryptionhttp://webServerName:webServerHttpsListenerPortForRestApi
- ID and passwordIf the server uses basic authentication, then enter the account information (no input is required if basic authentication is not used).
7. If obtaining resources from a file management server other than Interstage AR Processing Server, configure the connectioninformation required for basic authentication, in accordance with the system configuration (for servers with no basic authentication,this is not necessary, since there is no need to store the individual account settings).
1. Select Add New Account.
2. From the Account Type Selection window, select Other account. If an AR server account has already been created, there isno need to select the account type.
3. Enter the account information to a file management server other than an Interstage AR Processing Server and selectRegister.
Point
AR processing server account names are prefixed with an asterisk (*) in the Account List window.
- 36 -

Up to ten accounts can be configured as "other accounts".
Follow the procedure below to edit or delete information for registered AR server accounts or for other accounts (for overlay applicationsdeveloped by a system developer, check with the developer directly).
Editing account information
1. In the list of smart device applications, tap the InterstageAR Authoring or InterstageAR Dev icon to start the client authoringtool.
2. In the status bar, tap the menu icon and select Settings.
3. Tap Account Setting.
4. Information for registered accounts will be displayed - tap the account to be edited.
5. In the Account Information Input window, edit the account, and then tap Register.
Deleting account information
1. In the list of smart device applications, tap the InterstageAR Authoring or InterstageAR Dev icon to start the client authoringtool.
2. In the status bar, tap the menu icon and select Settings.
3. Tap Account Setting.
4. Tap and hold the account to be deleted from the registered account information.
5. In the confirmation dialog box, tap OK.
4.1.2 Recognition mode settingsSelect the recognition mode to use to achieve AR (for overlay applications developed by a system developer, check with the developerdirectly).
1. In the list of smart device applications, tap the InterstageAR Authoring or InterstageAR Dev icon to start the client authoringtool.
2. In the status bar, tap the menu icon and select Settings.
3. Select Recognition mode.
4. Select the recognition mode to be used.
- AR markerIdentifies the target using an AR marker.
- Location DataIdentifies the target using Location Data.
- BeaconIdentifies the target using a beacon.
- BarcodeIdentifies the target using a barcode.
Note
- It is not possible to have all modes set to OFF - at least one mode must be ON to use AR.
- If using Location Data as the recognition mode, access to location services must be enabled in the settings on your smart device.
- If using beacon as the recognition mode, Bluetooth must be enabled in the settings on your smart device.
- 37 -

4.1.3 Certificate settingsBefore specifying settings on the smart device, deploy the certificate obtained on the server through the certificate authority to the clientstorage (refer to 3.5 If Model A is selected (for small-scale entry models used in an intranet environment) for details on how to create acertificate). Follow the procedure below to install a certificate on the client:
1. From Settings, open Security.
2. From Install certificates, select the prepared certificate - this will start certificate installation. In the prompt for the certificate name,specify a name that is easy to manage.
3. Tap Trusted credentials > User, and ensure that the installed certificate is listed.
Point
A PIN or password must be set for the lock on the device screen in order to install the certificate.
Note
- On some models, the used certificate may be deleted after installation.
- Ensure that you specify the device settings time within the period of validity of the certificate, otherwise the certificate will remaininvalid.
4.2 Setup for iOSConfigure the settings below to use features such as overlay application or client authoring on iOS:
- Account settingsConfigure the settings required to connect to a server running Interstage AR Processing Server.
- Recognition mode settingsSelect the recognition type to be used.
- Certificate settingsIf using a smart device with iOS8 or later, configure the settings to perform SSL communication with Interstage AR Processing Serverusing a self-certificate.
4.2.1 Account settingsConfigure an account for a server running Interstage AR Processing Server.
Note
- An account must be created for the AR server if performing client authoring or similar tasks.
- Multiple accounts cannot be configured for a single AR server.
- For information on how to configure accounts for overlay applications developed by a system developer, check with the developerdirectly.
Follow the procedure below to configure an account:
1. In the list of smart device applications, tap the InterstageAR Authoring or InterstageAR Dev icon to start the client authoringtool.
2. From the displayed menu, select Settings.
- 38 -
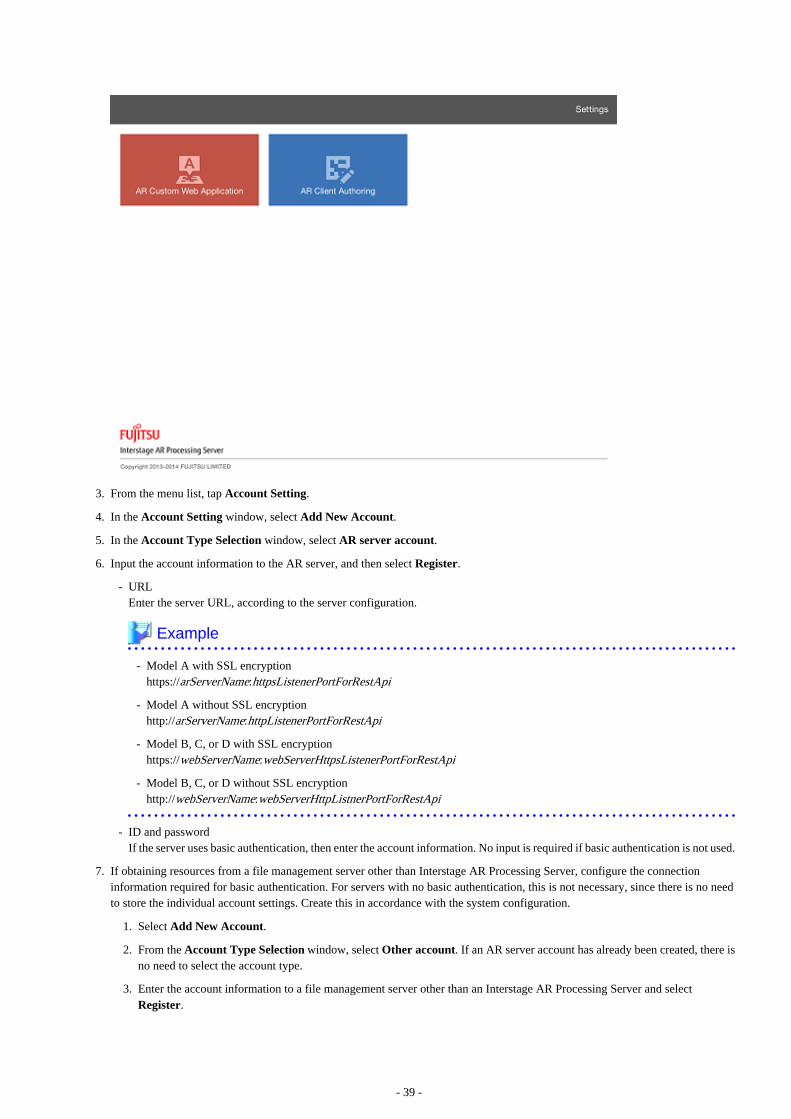
3. From the menu list, tap Account Setting.
4. In the Account Setting window, select Add New Account.
5. In the Account Type Selection window, select AR server account.
6. Input the account information to the AR server, and then select Register.
- URLEnter the server URL, according to the server configuration.
Example
- Model A with SSL encryptionhttps://arServerName:httpsListenerPortForRestApi
- Model A without SSL encryptionhttp://arServerName:httpListenerPortForRestApi
- Model B, C, or D with SSL encryptionhttps://webServerName:webServerHttpsListenerPortForRestApi
- Model B, C, or D without SSL encryptionhttp://webServerName:webServerHttpListnerPortForRestApi
- ID and passwordIf the server uses basic authentication, then enter the account information. No input is required if basic authentication is not used.
7. If obtaining resources from a file management server other than Interstage AR Processing Server, configure the connectioninformation required for basic authentication. For servers with no basic authentication, this is not necessary, since there is no needto store the individual account settings. Create this in accordance with the system configuration.
1. Select Add New Account.
2. From the Account Type Selection window, select Other account. If an AR server account has already been created, there isno need to select the account type.
3. Enter the account information to a file management server other than an Interstage AR Processing Server and selectRegister.
- 39 -

Point
AR processing server account names are prefixed with an asterisk (*) in the Account List window.
Up to ten accounts can be configured as "other accounts".
Follow the procedure below to edit or delete information for registered AR server accounts or for other accounts (for overlay applicationsdeveloped by a system developer, check with the developer directly).
Editing account information
1. In the list of smart device applications, tap the InterstageAR Authoring or InterstageAR Dev icon to start the application.
2. From the displayed menu, select Settings.
3. From the menu list, tap Account Setting.
4. Information for registered accounts will be displayed - tap the account to be edited.
5. In the Account Information Input window, edit the account, and then tap Register.
Deleting account information
1. In the list of smart device applications, tap the InterstageAR Authoring or InterstageAR Dev icon to start the application.
2. From the displayed menu, select Settings.
3. From the menu list, tap Account Setting.
4. Tap and hold the account to be deleted from the registered account information.
5. In the confirmation dialog box, tap OK.
4.2.2 Recognition mode settingsSelect the recognition mode to use to achieve AR (for overlay applications developed by a system developer, check with the developerdirectly).
1. In the list of smart device applications, tap the InterstageAR Authoring or InterstageAR Dev icon to start the client authoringtool.
2. From the displayed menu, select Settings.
3. Select Recognition Mode.
4. Select the recognition mode to be used.
- AR markerIdentifies the target using an AR marker.
- Location DataIdentifies the target using location data.
- BarcodeIdentifies the target using a barcode.
Note
- It is not possible to have all modes set to OFF - at least one mode must be ON to use AR.
- If using Location Data as the recognition mode, access to location services must be enabled in the settings on your smart device.
4.2.3 Certificate settingsFollow the procedure below to install a certificate on the client:
1. Download the certificate deployed to the Web server to the client, or send it to the client by email.
- 40 -

2. On the smart device, select the certificate to display its information.
3. Tap Install.
You can check the installed certificate by tapping Settings > General > About.
4.3 Setup for WindowsConfigure the settings below to use features such as overlay application or client authoring on iOS:
- Account settingsConfigure the settings required to connect to a server running Interstage AR Processing Server.
- Recognition mode settingsSelect the recognition type to be used.
- Camera settingsSelect the camera to be used.
- Certificate settingsConfigure the settings to perform SSL communication with Interstage AR Processing Server using a self-certificate.
4.3.1 Account settingsConfigure an account for a server running Interstage AR Processing Server.
Note
- An account must be created for the AR server if performing client authoring or similar tasks.
- Multiple accounts cannot be configured for a single AR server.
- For information on how to configure accounts for overlay applications developed by a system developer, check with the developerdirectly.
Follow the procedure below to configure an account:
1. In the list of smart device applications, under InterstageAR, tap the Authoring or Dev icon to start the application.
2. At the top-right of the window, tap the Settings icon .
- 41 -

3. In the Account Setting window, select Add New Account.
4. In the Account Type Selection window, select AR server account.
5. Input the account information to the AR server, and then select Register.
- URLEnter the server URL, according to the server configuration.
Example
- Model A with SSL encryptionhttps://arServerName:httpsListenerPortForRestApi
- Model A without SSL encryptionhttp://arServerName:httpListenerPortForRestApi
- Model B, C, or D with SSL encryptionhttps://webServerName:webServerHttpsListenerPortForRestApi
- Model B, C, or D without SSL encryptionhttp://webServerName:webServerHttpListnerPortForRestApi
- ID and passwordIf the server uses basic authentication, then enter the account information. No input is required if basic authentication is not used.
6. If obtaining resources from a file management server other than Interstage AR Processing Server, configure the connectioninformation required for basic authentication. For servers with no basic authentication, this is not necessary, since there is no needto store the individual account settings. Create this in accordance with the system configuration.
1. Select Add New Account.
2. From the Account Type Selection window, select Other account. If an AR server account has already been created, there isno need to select the account type.
3. Enter the account information to a file management server other than an Interstage AR Processing Server and selectRegister.
- 42 -

Point
AR processing server account names are prefixed with an asterisk (*) in the Account List window.
Up to ten accounts can be configured as "other accounts".
Follow the procedure below to edit or delete information for registered AR server accounts or for other accounts (for overlay applicationsdeveloped by a system developer, check with the developer directly).
Editing account information
1. In the list of smart device applications, under InterstageAR, tap the Authoring or Dev icon to start the application.
2. At the top-right of the window, tap the Settings icon .
3. Information for registered accounts will be displayed - tap the account to be edited.
4. In the Account Information Input window, edit the account, and then tap Register.
Deleting account information
1. In the list of smart device applications, under InterstageAR, tap the Authoring or Dev icon to start the application.
2. At the top-right of the window, tap the Settings icon .
3. Tap and hold the account to be deleted from the registered account information.
4. Release your fingertip once the display effects render a rectangle around the account information.
5. In the confirmation dialog box, tap OK.
4.3.2 Recognition mode settingsSelect the recognition mode to use to achieve AR (for overlay applications developed by a system developer, check with the developerdirectly).
1. In the list of smart device applications, under InterstageAR, tap the Authoring or Dev icon to start the client authoring tool.
2. In the status bar, tap the menu icon, and then select Settings.
3. Select Recognition mode.
4. Select the recognition mode to be used.
- AR markerIdentifies the target using an AR marker.
- Location DataIdentifies the target using Location Data.
- BarcodeIdentifies the target using a barcode.
Note
- It is not possible to have all modes set to OFF - at least one mode must be set to ON to use AR.
- If using Location Data as the recognition mode, access to location services must be enabled in the settings on your smart device.
- If using Location Data as the recognition mode, the rear camera is the default one used for tilt information. If using the frontcamera or a USB camera, the tilt information may be different, so overlays may not be positioned as expected.
- The recognition mode cannot be changed while the camera is running.
4.3.3 Camera settings
The following settings can be changed.
- 43 -

Retrieve logs
Retrieves logs using the native application
Camera settings
Configures the camera to use with the native application (for information on how to configure settings for overlay applicationsdeveloped by a system developer, check with the system developer directly).
- Select cameraFollow the procedure below to select a smart device camera:
- Select Select camera, and from the list of camera names recognized by your device, select the camera to be used.
- Ensure that the selected camera name and preview are displayed correctly.
- Camera display for AR marker recognition
Select either Prioritize object tracking or Prioritize camera display to determine behavior when recognizing AR markers.
Note
- The application will select the first camera recognized by the device.
- Select camera cannot be selected during authoring or while the camera is being used by the overlay application.
- Front camera images are not displayed as mirror images.
Application data
Deletes the local data and web cache stored in the native application (for overlay applications developed by a system developer, checkwith the system developer directly).
- Delete local dataDeletes local data stored in your smart device. Tap OK.
- Delete web cacheDeletes the web cache stored in your smart device. Tap OK.
4.3.4 Certificate settingsFollow the procedure below to install a certificate on the client:
1. Click Start, in the search box type "certmgr.msc"", and then press Enter.
2. Click Trusted Root Certification Authorities > Certificates, then right-click Certificates and click All Tasks > Import.
3. Follow the steps in the wizard.
4. After completing the steps in the wizard, the imported certificate will be displayed in Trusted Root Certification Authorities.
- 44 -
Part 3 Setup removal
Chapter 5 Setup removal................................................................................................................................46
Chapter 6 Setup removal for smart devices...................................................................................................47
- 45 -
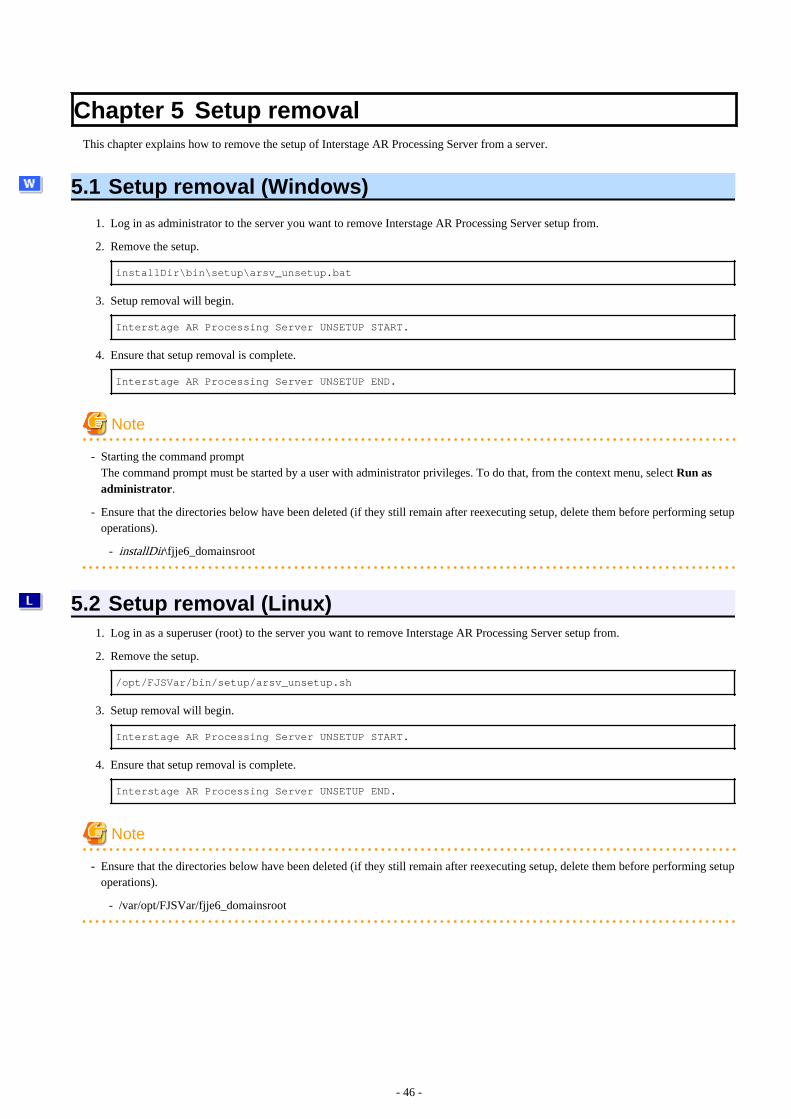
Chapter 5 Setup removalThis chapter explains how to remove the setup of Interstage AR Processing Server from a server.
5.1 Setup removal (Windows)
1. Log in as administrator to the server you want to remove Interstage AR Processing Server setup from.
2. Remove the setup.
installDir\bin\setup\arsv_unsetup.bat
3. Setup removal will begin.
Interstage AR Processing Server UNSETUP START.
4. Ensure that setup removal is complete.
Interstage AR Processing Server UNSETUP END.
Note
- Starting the command promptThe command prompt must be started by a user with administrator privileges. To do that, from the context menu, select Run asadministrator.
- Ensure that the directories below have been deleted (if they still remain after reexecuting setup, delete them before performing setupoperations).
- installDir\fjje6_domainsroot
5.2 Setup removal (Linux)1. Log in as a superuser (root) to the server you want to remove Interstage AR Processing Server setup from.
2. Remove the setup.
/opt/FJSVar/bin/setup/arsv_unsetup.sh
3. Setup removal will begin.
Interstage AR Processing Server UNSETUP START.
4. Ensure that setup removal is complete.
Interstage AR Processing Server UNSETUP END.
Note
- Ensure that the directories below have been deleted (if they still remain after reexecuting setup, delete them before performing setupoperations).
- /var/opt/FJSVar/fjje6_domainsroot
- 46 -

Chapter 6 Setup removal for smart devicesThere is no required procedure for removing the setup from smart devices.
- 47 -

Part 4 Uninstallation
Chapter 7 Uninstallation from a server...........................................................................................................49
Chapter 8 Smart devices................................................................................................................................56
- 48 -

Chapter 7 Uninstallation from a serverThis chapter explains how to uninstall Interstage AR Processing Server from a server.
Ensure that the setup is removed before uninstallation, otherwise uninstallation may fail, or unnecessary resources may remain.
See
Refer to the information below if uninstallation is accidentally performed before removing the setup.
- 7.1.3 Installation resources deletion
- 7.2.1 Uninstallation procedure
Uninstalling Interstage AR Processing Server also uninstalls other packages installed with it, unless they are used by other products.
7.1 Uninstallation (Windows)
7.1.1 Uninstallation procedureUninstallation should be performed by a computer administrator, or by a member of the Administrators group.
1. Log in as administrator to the server from which Interstage AR Processing Server will be uninstalled.
2. Select Uninstall (middleware).
- Windows Server 2008Select Start, All Programs, Fujitsu, and then Uninstall (middleware).
- Windows Server 2012Right-click the Start window and select All Apps, Fujitsu, and then Uninstall (middleware).
- Windows Server 2012 R2Left-click the arrow in the bottom left of the Start window. From the list of applications, select Fujitsu and then Uninstall(middleware).
3. Select Interstage AR Processing Server and then click Remove.
4. Click Uninstall to proceed, or Cancel to quit.
- 49 -
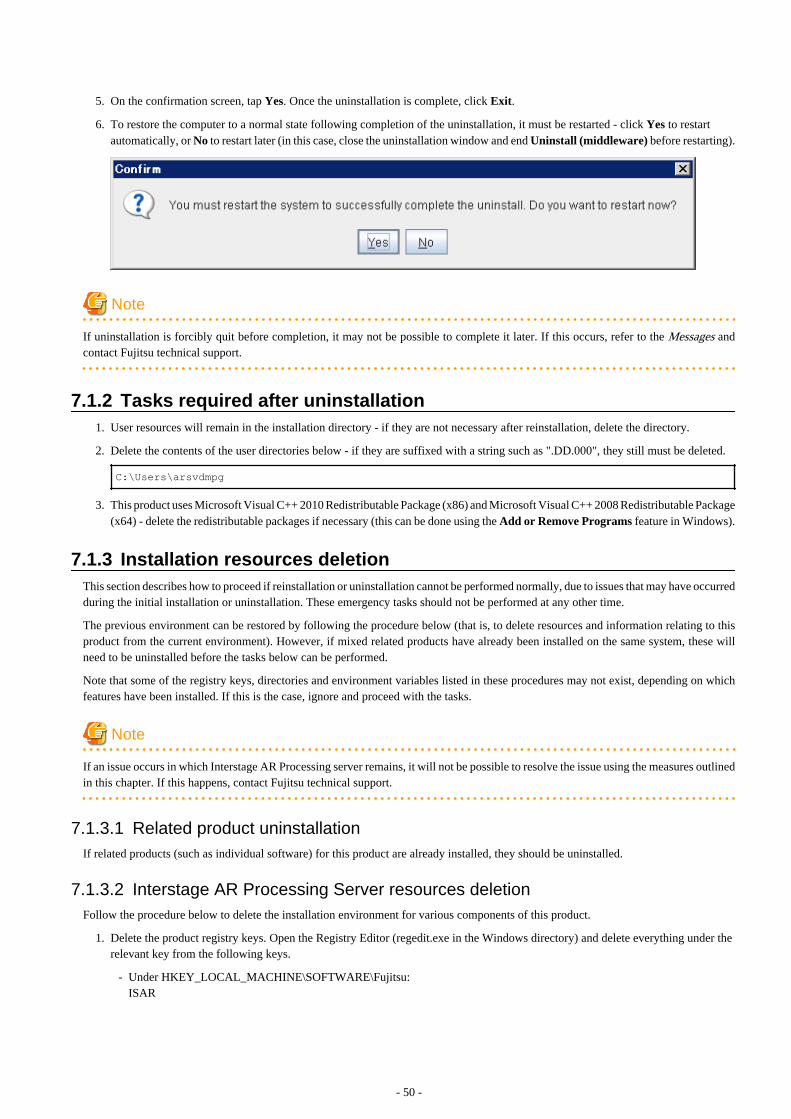
5. On the confirmation screen, tap Yes. Once the uninstallation is complete, click Exit.
6. To restore the computer to a normal state following completion of the uninstallation, it must be restarted - click Yes to restartautomatically, or No to restart later (in this case, close the uninstallation window and end Uninstall (middleware) before restarting).
Note
If uninstallation is forcibly quit before completion, it may not be possible to complete it later. If this occurs, refer to the Messages andcontact Fujitsu technical support.
7.1.2 Tasks required after uninstallation1. User resources will remain in the installation directory - if they are not necessary after reinstallation, delete the directory.
2. Delete the contents of the user directories below - if they are suffixed with a string such as ".DD.000", they still must be deleted.
C:\Users\arsvdmpg
3. This product uses Microsoft Visual C++ 2010 Redistributable Package (x86) and Microsoft Visual C++ 2008 Redistributable Package(x64) - delete the redistributable packages if necessary (this can be done using the Add or Remove Programs feature in Windows).
7.1.3 Installation resources deletionThis section describes how to proceed if reinstallation or uninstallation cannot be performed normally, due to issues that may have occurredduring the initial installation or uninstallation. These emergency tasks should not be performed at any other time.
The previous environment can be restored by following the procedure below (that is, to delete resources and information relating to thisproduct from the current environment). However, if mixed related products have already been installed on the same system, these willneed to be uninstalled before the tasks below can be performed.
Note that some of the registry keys, directories and environment variables listed in these procedures may not exist, depending on whichfeatures have been installed. If this is the case, ignore and proceed with the tasks.
Note
If an issue occurs in which Interstage AR Processing server remains, it will not be possible to resolve the issue using the measures outlinedin this chapter. If this happens, contact Fujitsu technical support.
7.1.3.1 Related product uninstallationIf related products (such as individual software) for this product are already installed, they should be uninstalled.
7.1.3.2 Interstage AR Processing Server resources deletionFollow the procedure below to delete the installation environment for various components of this product.
1. Delete the product registry keys. Open the Registry Editor (regedit.exe in the Windows directory) and delete everything under therelevant key from the following keys.
- Under HKEY_LOCAL_MACHINE\SOFTWARE\Fujitsu:ISAR
- 50 -

- Under HKEY_LOCAL_MACHINE\SOFTWARE\Fujitsu\Install:ISAR
2. Delete the environment variable.Follow the procedure below to edit or delete the environment variable ISAR_HOME defined in this product:
- In the Control Panel, select Systems, and then Advanced system settings - the System Properties window will be displayed.Click the Advanced tab, and then click Environment variables. In the System variables list, select the relevant environmentvariable, and then click Edit or Delete.
3. On Administrative Tools, select Services, and then stop the service below:
- Interstage AR Processing Server DB Service
- FUJITSU PCMI (isje6-STFISAR_HFJJE6)
4. Start the command prompt, and deleter the service below:
sc delete "FUJITSU PCMI(isje6-STFISAR_HFJJE6)"
5. Open the Registry Editor and delete everything under the relevant key from the following registry keys.
- Under HKEY_LOCAL_MACHINE\SYSTEM\CurrentControlSet\services:Interstage AR Processing Server DB Service
- Under HKEY_LOCAL_MACHINE\SYSTEM\CurrentControlSet\services\EventLog\Application:F3FMisje6-STFISAR_HFJJE6F3FMpcmi-STFISAR_HFJJE6
6. Delete the directory below:
installDir\fjje6_domainsroot
7. Delete permissions for the user:
1. In the Control Panel, select Administrative Tools, and then Local Security Policy.
2. In Security Settings, select Local Policies, and then User Rights Assignment.
3. In the Log on as a service list, select arsvdmpg, click Remove and then click OK.
4. In the right pane, under Policy heading, double-click Deny logon through Remote Desktop Services.
5. In the Deny logon through Remote Desktop Services, select arsvdmpg and arsvgfad, click Remove, and then OK.
8. Delete users. If user arsvdmpg remains, then delete it.
- Windows Server 2008 R2Select Start, Administrative Tools, and then Computer Management. In System Tools, select Local Users and Groups, andthen Users. In the right pane, under Name heading, right-click the user, and then Delete.
- Windows Server 2012 and Windows Server 2012 R2On Server Manager, select Tools, and then Computer Management. In the Systems Tools, select Local Users and Groups,and then Users. In the right pane, under Name heading, right-click the user, and then select Delete.
9. Restart the computer.
10. Delete the contents of the user directories below - if they are suffixed with a string such as ".DD.000", they still must be deleted.C:\Users\arsvdmpg
11. Delete the Start menu icons and groups.
- Windows Server 2008 R2
1. Delete the Start menu icons and groups. Click Start, All Programs, and then point to Interstage AR ProcessingServer and delete it.
2. Select Start, All Programs, FJQSS (Information Collection Tool), and then point to Information collection (InterstageAR Processing Server V1.0.0) and delete it.
- Windows Server 2012 and Windows Server 2012 R2
- 51 -

Delete the following directory from %ProgramData%\Microsoft\Windows\Start Menu\Programs: Interstage AR ProcessingServer
Interstage AR Processing Server
12. Delete the following file from the FJQSS installation directory:
C:\Program Files (x86)\Fujitsu\FJQSS\product\cnf_ISAR.txt
13. Uninstall Interstage AR Processing Server.
14. Delete the contents of the Interstage AR Processing Server installation directory.
7.2 Uninstallation (Linux)
7.2.1 Uninstallation procedure1. Log in as a superuser (root) to the server from which Interstage AR Processing Server will be uninstalled.
2. Execute the uninstallation command.
/opt/FJSVcir/cimanager.sh -c
3. Enter the number of the product to be uninstalled.For example, in the screen below, enter "1" (Interstage AR Processing Server Standard Edition V1.1.1). To uninstall multipleproducts, enter the number of each product separating by comma.
Loading Uninstaller...
Currently installed products
1. Interstage AR Processing Server Standard Edition V1.1.1
Type [number] to select the software you want to uninstall.
[number,q]
=>
4. The uninstallation confirmation screen will be displayed - enter "y" to proceed or "q" to quit. To return to the previous screen, enter"b".
Interstage AR Processing Server Standard Edition
Description: Interstage AR Processing Server
Version: V1.1.1
Company name: Fujitsu Limited.
Install directory: /opt/FJSVar
Date of install: 2015-1-10
Starting the uninstall of the software. Are you sure you want to continue?
[y,b,q]
=>
5. Uninstallation will begin - upon successful completion, the following screen will be displayed.
Uninstallating...
Interstage AR Processing Server Standard Edition is being uninstalled now.
100% ##############################
The following products have been uninstalled successfully:
Interstage AR Processing Server Standard Edition
You must restart the system to successfully complete the uninstall.
- 52 -
Do you want to restart now?
[y,n]
=>
6. To restore the computer to a normal state after uninstallation, it must be restarted - enter "y" to restart automatically, or "n" to restartlater.
7.2.2 Tasks required after uninstallation1. User resources will remain in /var/opt/FJSVar (note also that if a user has added files or directories to /opt/FJSVar or to /etc/opt/
FJSVar, then user resources will remain) - if they are not necessary after reinstallation, delete the directory.
2. Delete the contents of the user directories below.
/home/arsvdmpg
7.2.3 Installation resources deletionThis section describes how to proceed if reinstallation or uninstallation cannot be performed normally, due to issues that may have occurredduring the initial installation or uninstallation. These emergency tasks should not be performed at any other time.
The previous environment can be restored by following the procedure below (that is, to delete resources and information relating to thisproduct from the current environment). However, if mixed related products have already been installed on the same system, these willneed to be uninstalled before the tasks below can be performed.
Note
If an issue occurs in which Interstage AR Processing server remains, it will not be possible to resolve the issue using the measures outlinedin this chapter. If this happens, contact Fujitsu technical support.
7.2.3.1 Related product uninstallationIf related products (such as individual software) for this product are already installed, they should be uninstalled.
7.2.3.2 Interstage AR Processing Server resources deletion
Follow the procedure below to delete the installation environment for various components of this product.
1. Stop the web container process.
1. Check which PID is using the web container port - if default values were used for installation, use the command below to checkwhich PID is using the web container port. (If the port number was changed during setup, specify the new number in the grepcommand.)
RHEL 6:
netstat -nap|grep 91
RHEL 7:
ss -tap|grep 91
2. If an applicable PID is returned, then kill it.
kill pid
2. Stop the database process.
1. List the processes, and check if there is a process with PPID (parent process ID) "1".
ps -ef|grep postgres
- 53 -

2. If a process matches the criteria above, then kill it (note that it will also kill children processes).
kill pid
3. Delete the database user.
userdel arsvdmpg
4. Delete the service.
RHEL 6:
/sbin/chkconfig --del FJSVardb
rm -f /etc/rc.d/init.d/FJSVardb
rm -f /etc/init.d/FJSVpcmiisje6-STFISAR_HFJJE6
rm -f /etc/rc.d/rc0.d/K00FJSVpcmiisje6-STFISAR_HFJJE6
rm -f /etc/rc.d/rc1.d/K00FJSVpcmiisje6-STFISAR_HFJJE6
rm -f /etc/rc.d/rc2.d/S99FJSVpcmiisje6-STFISAR_HFJJE6
rm -f /etc/rc.d/rc3.d/S99FJSVpcmiisje6-STFISAR_HFJJE6
rm -f /etc/rc.d/rc4.d/S99FJSVpcmiisje6-STFISAR_HFJJE6
rm -f /etc/rc.d/rc5.d/S99FJSVpcmiisje6-STFISAR_HFJJE6
rm -f /etc/rc.d/rc6.d/K00FJSVpcmiisje6-STFISAR_HFJJE6
RHEL 7:
/usr/bin/systemctl stop FJSVardb.service
/usr/bin/systemctl stop FJSVpcmiisje6-STFISAR_HFJJE6_start.service
/usr/bin/systemctl stop FJSVpcmiisje6-STFISAR_HFJJE6_stop.service
/usr/bin/systemctl disable FJSVardb.service
/usr/bin/systemctl disable FJSVpcmiisje6-STFISAR_HFJJE6_start.service
/usr/bin/systemctl disable FJSVpcmiisje6-STFISAR_HFJJE6_stop.service
rm -f /usr/lib/systemd/system/FJSVardb.service
rm -f /usr/lib/systemd/system/FJSVpcmiisje6-STFISAR_HFJJE6_start.service
rm -f /usr/lib/systemd/system/FJSVpcmiisje6-STFISAR_HFJJE6_stop.service
5. Delete the service lock file.
rm -f /var/lock/subsys/FJSVardb
rm -f /var/lock/subsys/FJSVpcmiisje6-STFISAR_HFJJE6
6. Delete the domain root directory.
rm -rf /var/opt/FJSVar/fjje6_domainsroot
7. Uninstall Interstage AR Processing Server.Refer to 7.2.1 Uninstallation procedure for details.
8. Restart the computer.
9. Delete the installation directory.
rm -rf /opt/FJSVar /etc/opt/FJSVar /var/opt/FJSVar /home/arsvdmpg
7.3 Notes on Uninstall (middleware)The Uninstall (middleware) tool is a common tool for Fujitsu middleware products. It manages information about installed Fujitsumiddleware products, and launches the product uninstaller.
Note
- Use Uninstall (middleware) to uninstall Interstage AR Processing Server
- This tool manages information for other Fujitsu middleware products as well as for Interstage AR Processing Server. Do not uninstallthis tool unless it is absolutely necessary
- 54 -

If this tool is uninstalled accidentally, use the following procedure to install it again.
1. Log in to the machine to be installed using a user name belonging to the Administrators group, or switch to an account withadministrator privileges.
2. Insert the product media in the drive.
3. Execute the installation command.
\ISAR\CIR\cirinst.exe
1. Log in to the machine to be installed as a superuser, or switch to a user with administrator privileges.
2. Insert the product media in the drive.
3. Execute the installation command.
# dvdMountPoint/installer/CIR/cirinst.sh
- To uninstall this tool, follow the procedure below (if uninstallation fails, contact Fujitsu technical support).
1. Start Uninstall (middleware) and check whether there are any other Fujitsu middleware products left on the system.
Select Start, All Programs, Fujitsu, and then Uninstall (middleware).
/opt/FJSVcir/cir/bin/cimanager.sh -c
2. If no Fujitsu middleware products have been installed, execute the following uninstallation command.
C:\<Program Files (x86)>\Fujitsu\FujitsuF4CR\bin\cirremove.exe
# /opt/FJSVcir/bin/cirremove.sh
3. The message below will be displayed - enter "y" to continue (uninstallation will finish in a few seconds).
This tool is shared by all Fujitsu middleware products.
Delete? [y/n]:
- 55 -

Chapter 8 Smart devicesTo uninstall the native application or client authoring tools installed on a smart device, refer to the smart device manual and deleteaccordingly.
This section describes a typical uninstallation.
8.1 Deletion procedure (Android)Follow the procedure below to uninstall from the application management screen:
1. Tap Settings.
2. Tap Applications.
3. On the Applications menu, tap Manage applications.
4. Select the relevant application from the listed applications.
5. On the application management screen, tap Uninstall.
6. On the confirmation screen, tap OK.
Note
The display may differ depending on the smart device and version used.
8.2 Deletion procedure (iOS)Follow the procedure below to uninstall from the Home screen:
1. On the Home screen, tap and hold the application icon - the icons will start wiggling.
2. Tap X in the top-left corner of the icon.
3. On the confirmation dialog box, tap Delete.
8.3 Deletion procedure (Windows)Follow the procedure below to uninstall:
1. In the Control Panel, select Uninstall a program.
2. In the Programs and Features window, select the application and click Uninstall.
3. To delete the settings information or cache information used by the application, delete the directory below.% AppData%\Fujitsu\Interstage AR\applicationName
- 56 -

Part 5 Migration
Chapter 9 Migration........................................................................................................................................58
- 57 -

Chapter 9 MigrationThis chapter explains how to migrate from Interstage AR Processing Server V1.0.0 to V1.1.1, and provides notes on migration.
9.1 Notes on migrationNote the following when migrating Interstage AR Processing Server:
9.1.1 Version compatibility between the server and smart devicesThe table below lists the compatibility between different server and smart device versions of Interstage AR Processing Server.
Table 9.1 Compatibility between server and smart device versions
Server Smart device
V1.0.0 V1.1.1
V1.0.0 Y N
V1.1.1 Partial Y
- If the server uses V1.0.0 and the smart device uses V1.0.0Compatible.
- If the server uses V1.0.0 and the smart device uses V1.1.1Not compatible. The server must be upgraded to the same version as the smart device.
- If the server uses V1.1.1 and the smart device uses V1.0.0Partially compatible - this combination is compatible if using content created using the smart device version. To use GPS, barcode orbeacon recognition mode, the smart device must be upgraded to V1.1.1.
- If the server uses V1.1.1 and the smart device uses V1.1.1Compatible
9.1.2 ShapesNew shapes
The following shapes were added in V1.1.1 of Interstage AR Processing Server:
- 58 -

9.2 Migration procedureWhen migrating Interstage AR Processing Server, first migrate the server, and then the smart devices. Refer to the relevant manual fordetails on the procedure.
9.2.1 ServerThis section describes how to migrate Interstage AR Processing Server according to the server configuration.
Note
The server configuration in V1.1.1 has been changed as explained below. Note the port numbers and other settings when setting up theserver (refer to Chapter 3 Server for details on the setup procedure).
- The web container feature has been grouped into the following four categories:
- domain
- REST API
- Data management console
- The following port numbers in V1.0.0 were changed:
- HTTP listener port
- JMX connector listener port for operation management
- HTTPS listener port
- Connection port for the message broker
- IIOP (ORB) listener port
- IIOP/SSL listener port for mutual authentication
- IIOP/SSL listener port
Model A or B
1. Back up resources using the backup command.
2. Remove setup of the existing Interstage AR Processing Server.
3. Uninstall Interstage AR Processing Server.
4. Install Interstage AR Processing Server v1.1.1.
5. Set up Interstage AR Processing Server v1.1.1.
6. Restore the resources from the backup you created.
Model C or D
1. Undeploy the following web applications provided by Interstage AR Processing Server from the AP server:
- arsvdmc
- arsvdm
- arsvfdm
2. Delete the following libraries used by Interstage AR Processing Server from the web container library directory:
- arsvadmui.jar
- arsvcmn.jar
- arsvdm.jar
- arsvfdm.jar
- arsvnativelibloader.jar
- 59 -

3. Remove setup of the existing Interstage AR Processing Server.
4. Uninstall the existing Interstage AR Processing Server from the AP server.
5. Install Interstage AR Processing Server V1.1.1 to the AP server.
6. Set up Interstage AR Processing Server V1.1.1.
7. Copy the following libraries used by Interstage AR Processing Server V1.1.1 to the web container library directory:
- arsvadmui.jar
- arsvcmn.jar
- arsvdm.jar
- arsvfdm.jar
- arsvnativelibloader.jar
The library provided by Interstage AR Processing Server is installed in the directory below.
installDir\lib
/opt/FJSVar/lib
8. Modify the settings of the configuration file used by Interstage AR Processing Server V1.1.1 (arsvfdmwebapi.properties) to suitthe environment.
9. Move all configuration files used by Interstage AR Processing ServerV1.1.1 to the web container library directory.
- Copy source directory:
installDir\conf
/opt/FJSVar/conf
- Files to be moved:
- arsvadmui.properties
- arsvdmc.properties
- arsvfdm_mimetype.properties
- arsvfdmwebapi.properties
- arsvlogging.properties
- Copy destination directory:
webContainerDir\lib\classes
webContainerDir/lib/classes
10. Deploy the following war files, which are provided by Interstage AR Processing Server V1.1.1, to the AP server(s):
- installDir\webapps\arsvdmc.war
- installDir\webapps\arsvdm.war
- installDir\webapps\arsvfdm.war
- /opt/FJSVar/webapps/arsvdmc.war
- /opt/FJSVar/webapps/arsvdm.war
- /opt/FJSVar/webapps/arsvfdm.war
9.2.2 Smart devicesThis section explains how to migrate the Interstage AR Processing Server application installed on a smart device.
- 60 -

Note
The application must be uninstalled before performing a version upgrade. An overwrite installation of applications that use Interstage ARProcessing Server with the client authoring tool, can only be performed in the cases below:
- Android version
- If both the old and new versions are signed on the same certificate.
- iOS version
- If performed from an integrated development environment, such as Xcode (regardless of the version).
- If using an ipa installer such as iTunes and the new version of the ipa file to be installed is newer than the installed ipa file.Note that Japanese and English editions of an AR client application with the same version number are treated as the same version.
9.2.2.1 Migration procedure (Android)Follow the procedure below to migrate:
1. On the smart device, tap Settings, and the tap Applications - in the App info screen, confirm the name and version of the InterstageAR Processing Server application.
2. If an AR overlay definition has not yet been uploaded to the server yet, then upload one.
3. If required, back up the information below:
- Account information for AR servers
- Log files
4. Uninstall the V1.0.0 application.
5. Install the V1.1.1application.
6. Set up the installed application.
9.2.2.2 Migration procedure (iOS)Follow the procedure below to migrate:
1. In iTunes, in the Apps window, right-click Interstage AR Processing Server, and then select Properties - the version of theapplication will be displayed on the right side of the window.
2. If an AR overlay definition has not yet been uploaded to the server yet, then upload one.
3. If required, back up the information below:
- Account information for AR servers
4. Uninstall the V1.0.0 application.
5. Install the V1.1.1 application.
6. Set up the installed application.
7. Log file
- 61 -
Recommended