HP LaserJet 1160 or 1320 Top CoverReplacement
Written By: jrw01
HP LaserJet 1160 or 1320 Top Cover Replacement
© iFixit — CC BY-NC-SA www.iFixit.com Page 1 of 5
TOOLS:Metal Spudger Set (1)
Phillips #0 Screwdriver (1)
PARTS:HP LaserJet 1160 or 1320 Top Cover (1)
HP LaserJet 1160 or 1320 Top Cover Replacement
© iFixit — CC BY-NC-SA www.iFixit.com Page 2 of 5
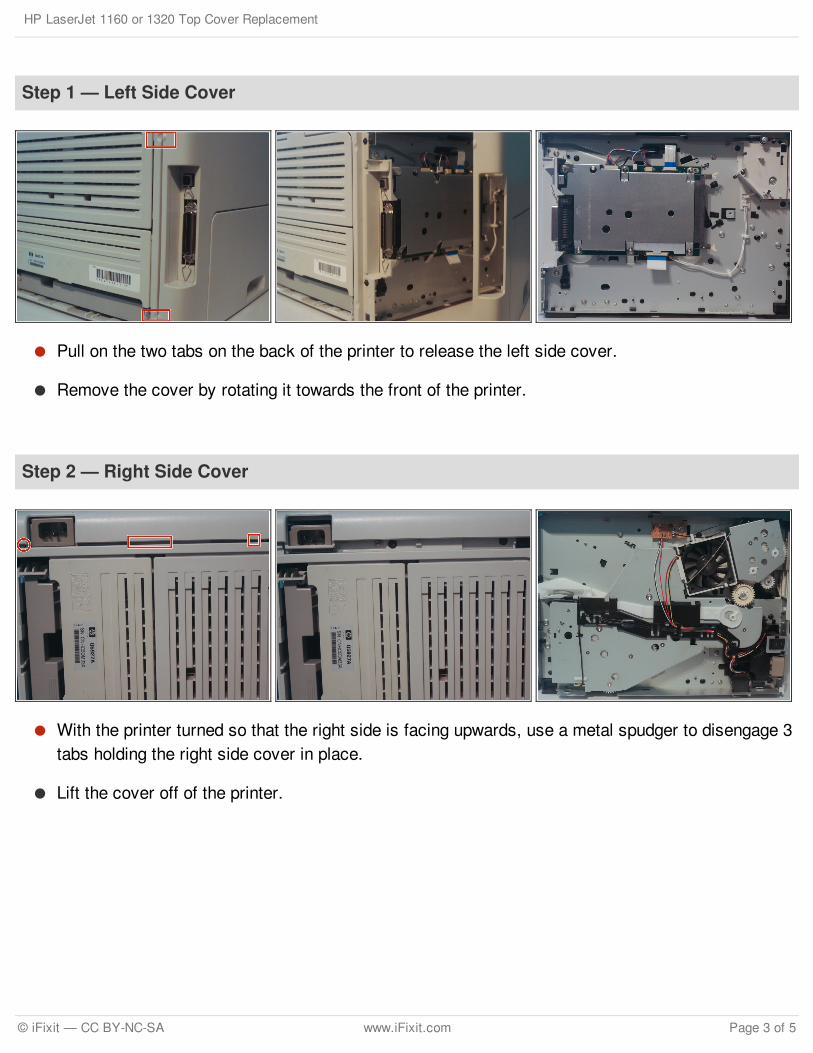
Step 1 — Left Side Cover
Pull on the two tabs on the back of the printer to release the left side cover.
Remove the cover by rotating it towards the front of the printer.
Step 2 — Right Side Cover
With the printer turned so that the right side is facing upwards, use a metal spudger to disengage 3tabs holding the right side cover in place.
Lift the cover off of the printer.
HP LaserJet 1160 or 1320 Top Cover Replacement
© iFixit — CC BY-NC-SA www.iFixit.com Page 3 of 5
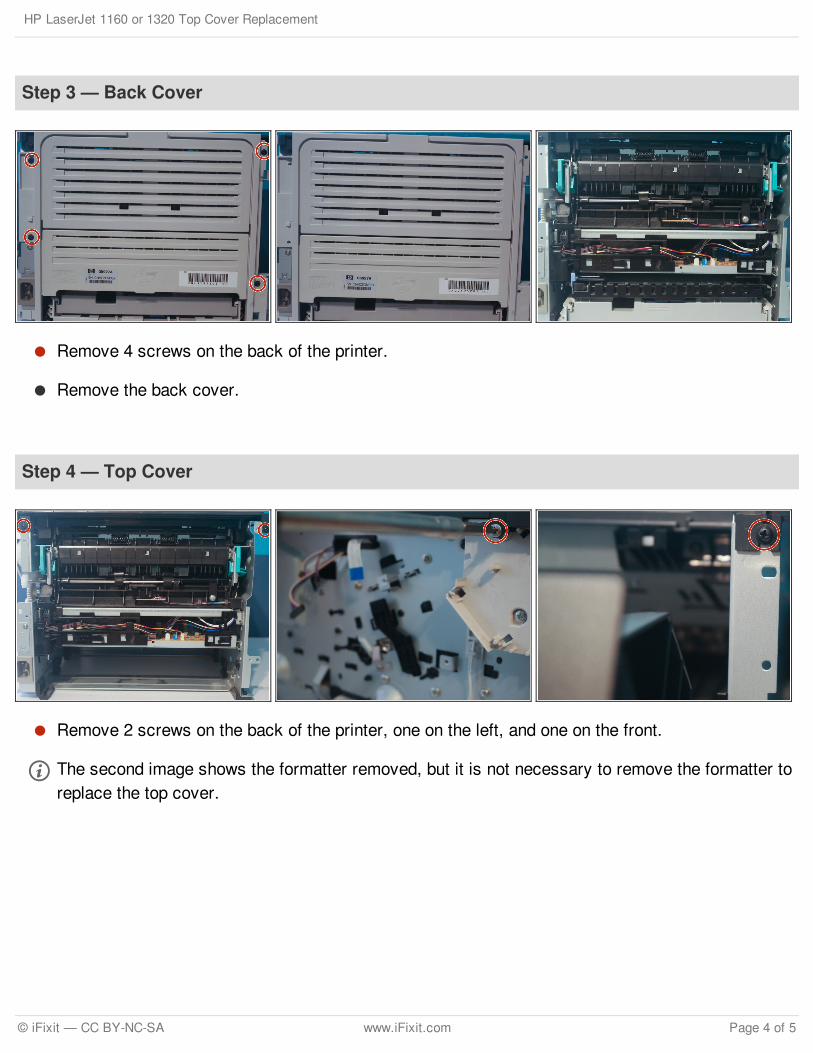
Step 3 — Back Cover
Remove 4 screws on the back of the printer.
Remove the back cover.
Step 4 — Top Cover
Remove 2 screws on the back of the printer, one on the left, and one on the front.
The second image shows the formatter removed, but it is not necessary to remove the formatter toreplace the top cover.
HP LaserJet 1160 or 1320 Top Cover Replacement
© iFixit — CC BY-NC-SA www.iFixit.com Page 4 of 5
To reassemble your device, follow these instructions in reverse order.
This document was last generated on 2017-06-17 08:26:43 PM.
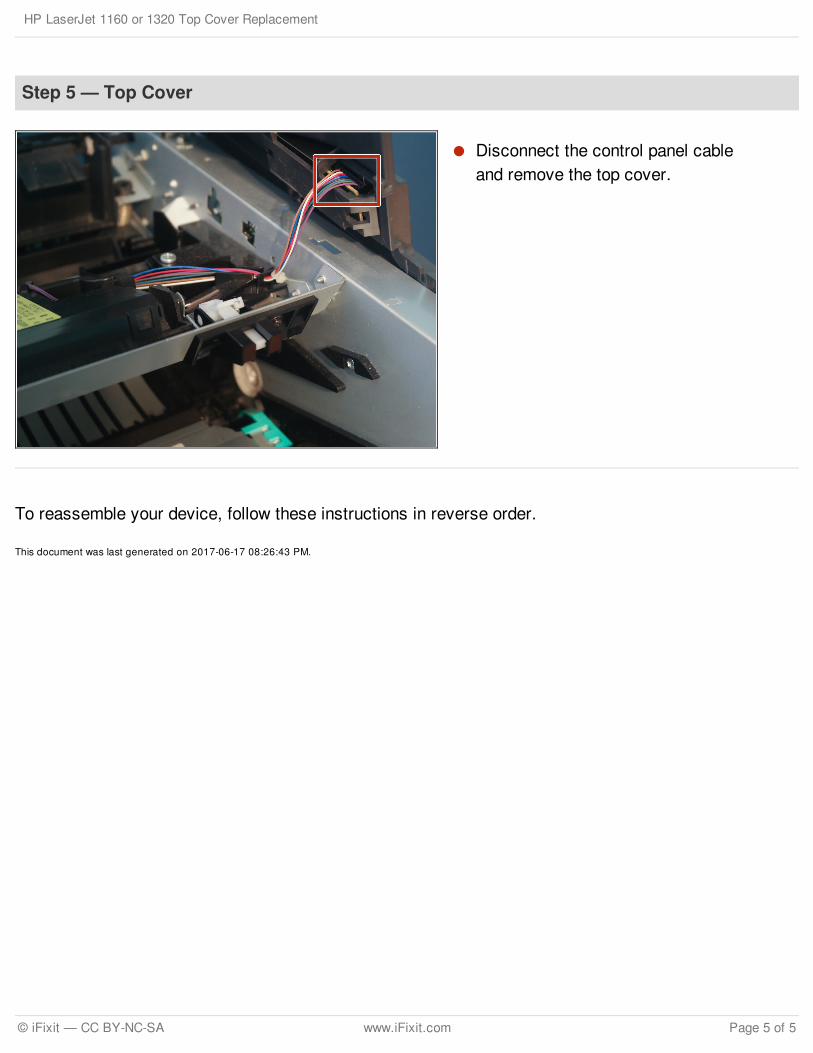
Step 5 — Top Cover
Disconnect the control panel cableand remove the top cover.
HP LaserJet 1160 or 1320 Top Cover Replacement
© iFixit — CC BY-NC-SA www.iFixit.com Page 5 of 5
Recommended