Embed Size (px)
DESCRIPTION
Word Tutorial 2: Editing and Formatting a Document. What You Will Do In Tutorial 2. Create bulleted and numbered lists Move text within a document Find and replace text Check spelling and grammar Format documents with themes and styles Review the MLA style for research papers - PowerPoint PPT Presentation
Citation preview
®
Microsoft Office 2010
Word Tutorial 2:Editing and Formatting a Document
XPXPXPWhat You Will Do In Tutorial 2• Create bulleted and numbered lists• Move text within a document• Find and replace text• Check spelling and grammar• Format documents with themes and styles• Review the MLA style for research papers• Indent paragraphs• Insert and modify page numbers• Create citations and a bibliography
2
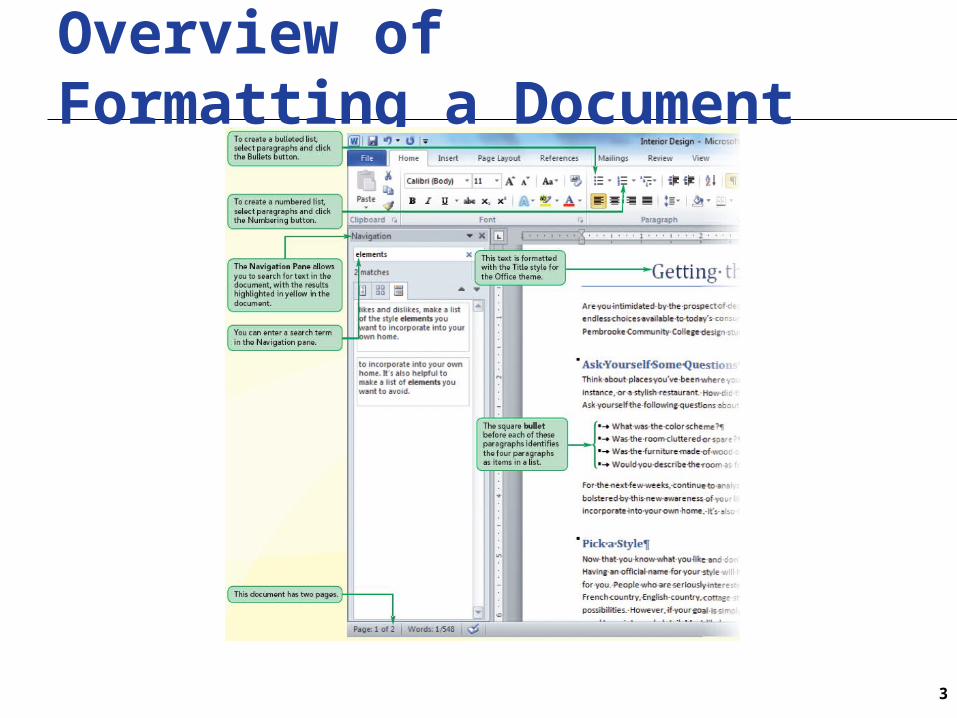
XPXPXPOverview of Formatting a Document
3
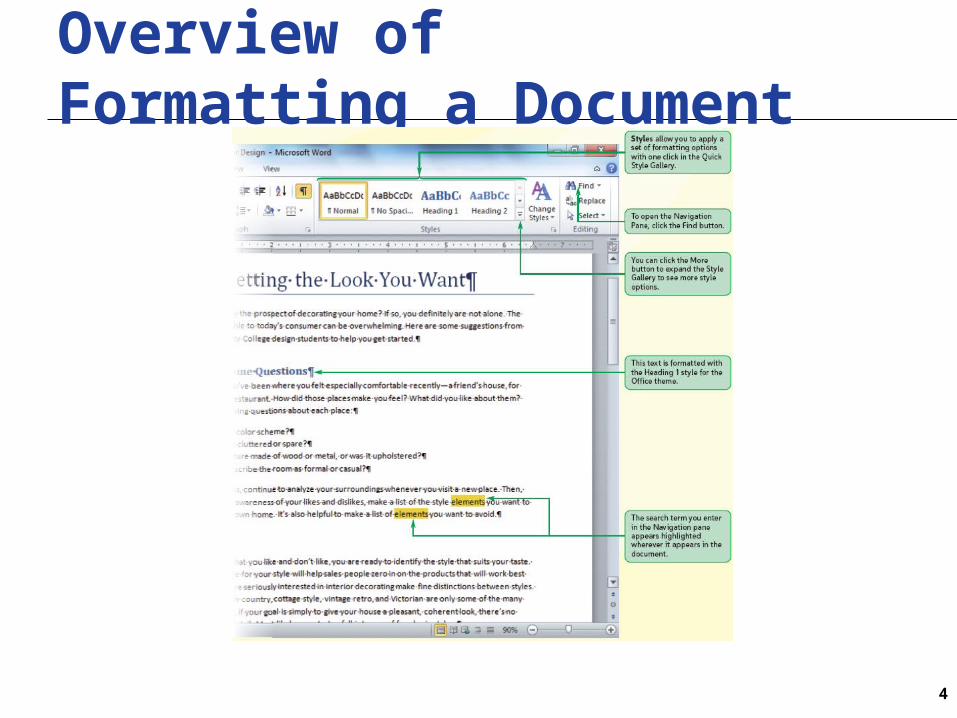
XPXPXPOverview of Formatting a Document
4
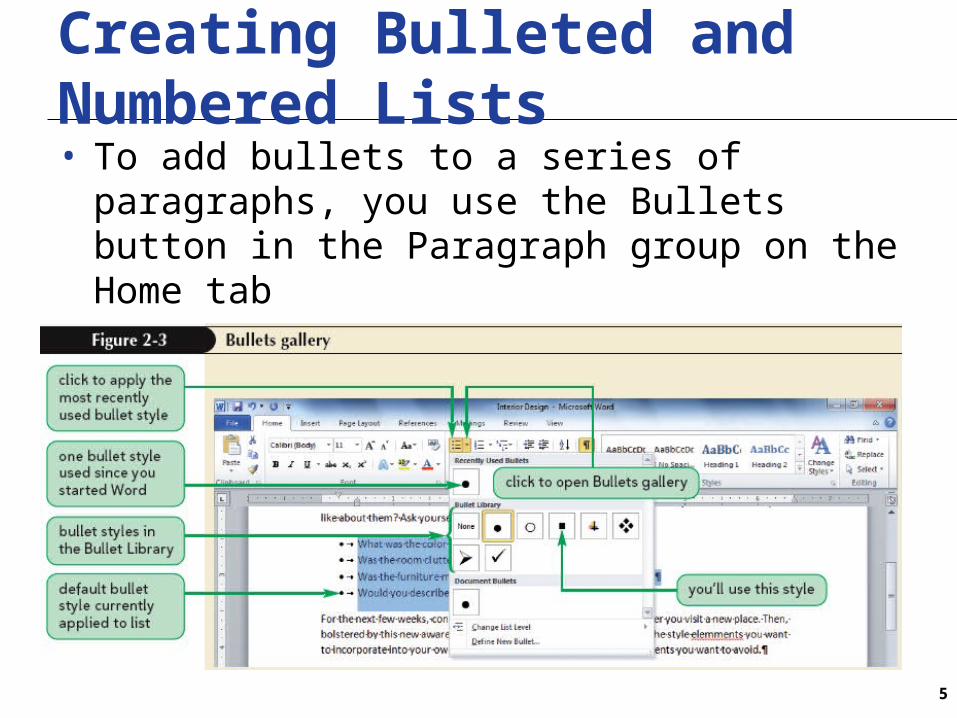
XPXPXPCreating Bulleted and Numbered Lists• To add bullets to a series of paragraphs, you use the
Bullets button in the Paragraph group on the Home tab• If you select the Bullets button arrow, you can select
from a gallery of bullet styles
5

XPXPXPCreating Bulleted andNumbered Lists• To create a numbered list, use the Numbering button
in the Paragraph group of the Home tab
6
XPXPXPMoving Text in a Document• Select the text you want to move• Dragging and Dropping– Press and hold down the mouse button until the
drag-and-drop pointer appears, and then drag the selected text to its new location
– Use the dotted insertion point as a guide to determine exactly where the text should be inserted
– Release the mouse button to “drop” the text at the insertion point
7
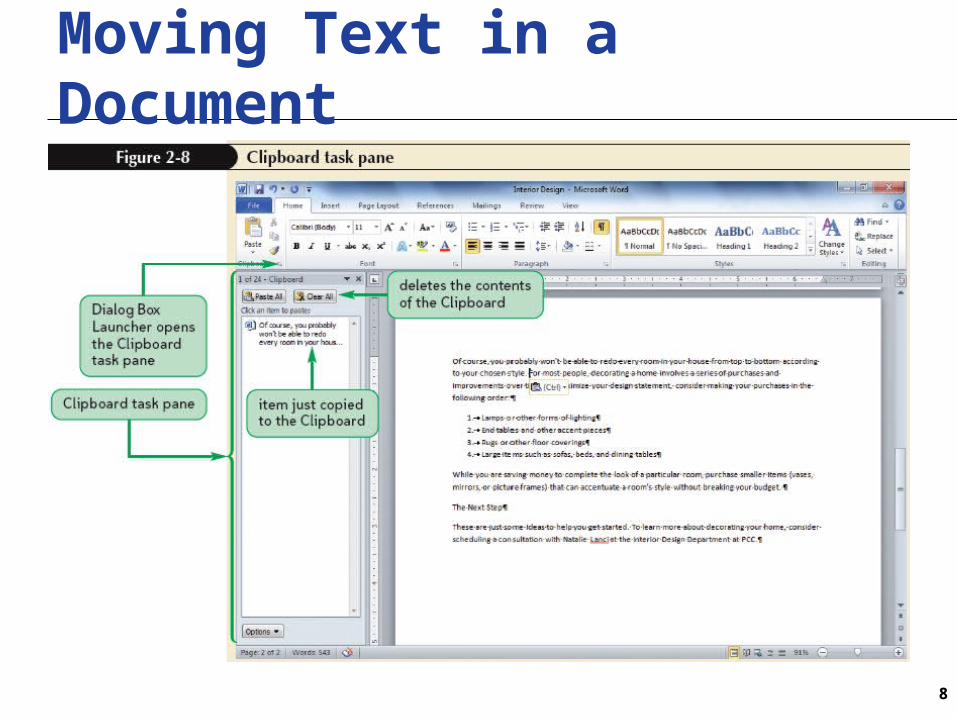
XPXPXPMoving Text in a Document
8
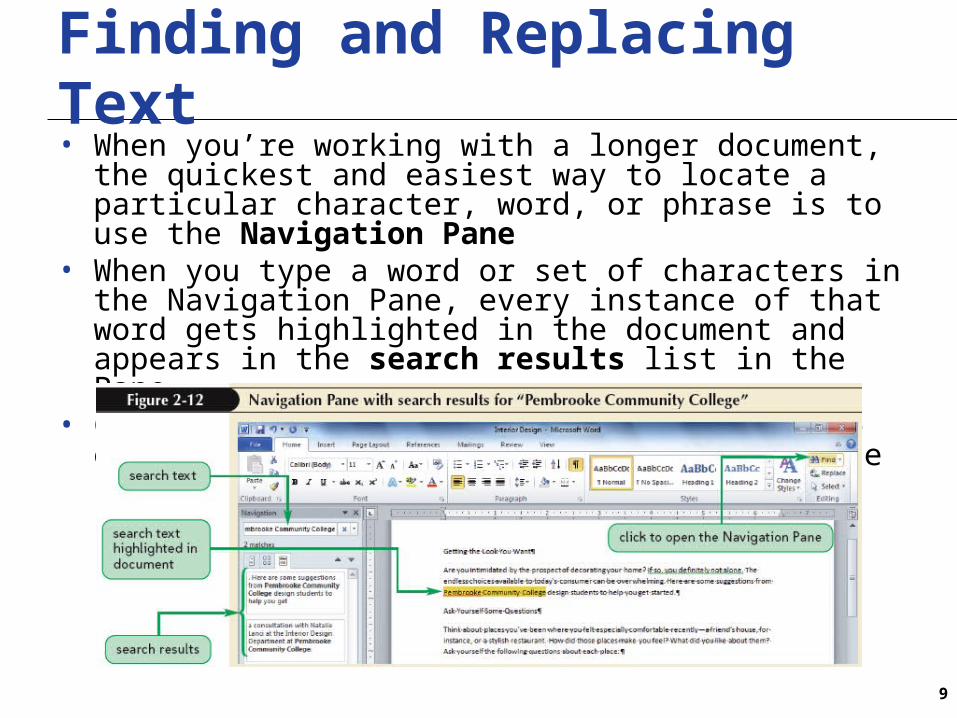
XPXPXPFinding and Replacing Text• When you’re working with a longer document, the quickest and
easiest way to locate a particular character, word, or phrase is to use the Navigation Pane
• When you type a word or set of characters in the Navigation Pane, every instance of that word gets highlighted in the document and appears in the search results list in the Pane
• Click the Find button in the Editing group on the Home tab to open the Navigation Pane
9
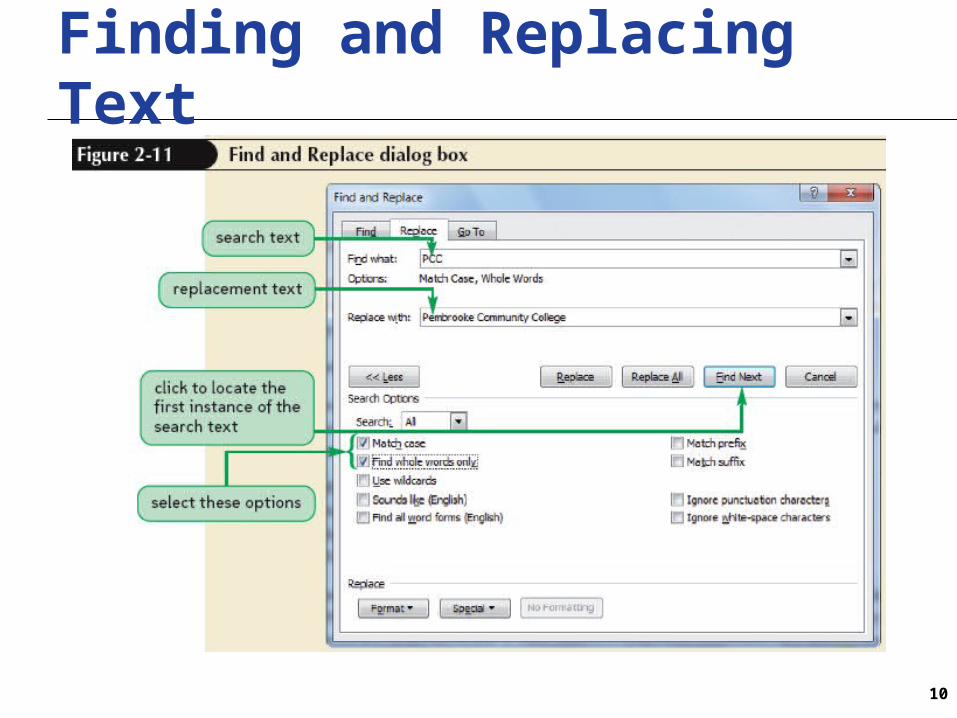
XPXPXPFinding and Replacing Text
10
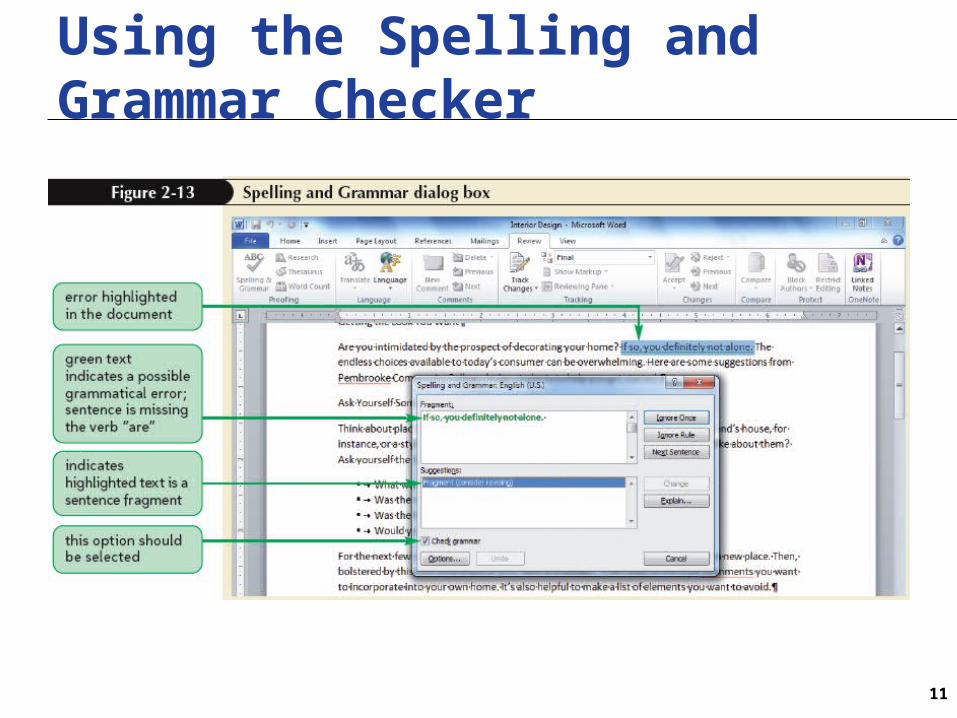
XPXPXPUsing the Spelling and Grammar Checker
11
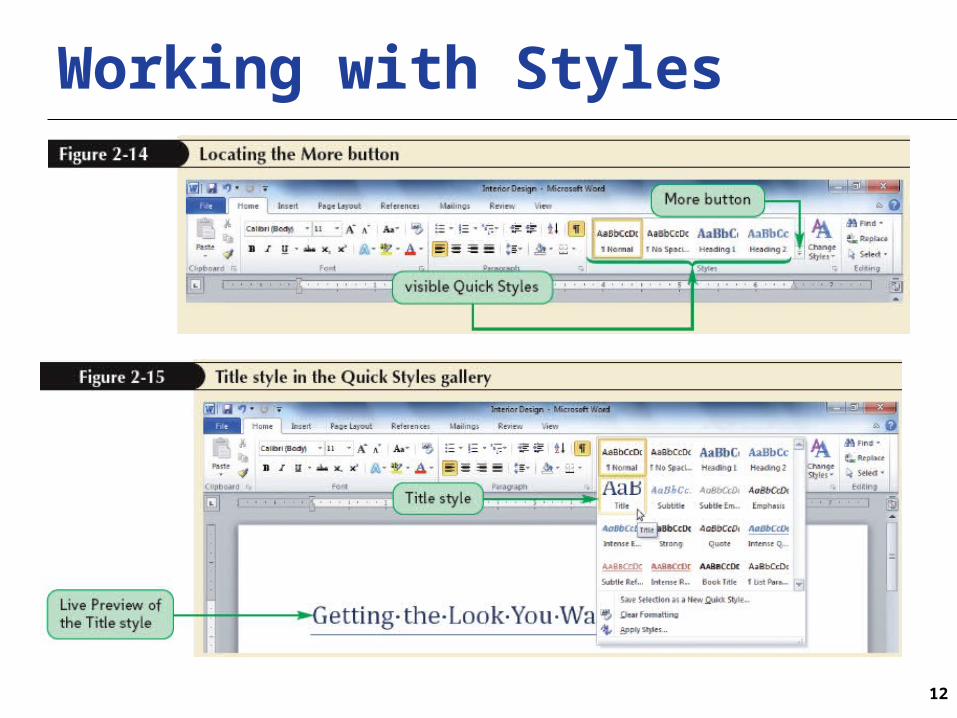
XPXPXPWorking with Styles
12
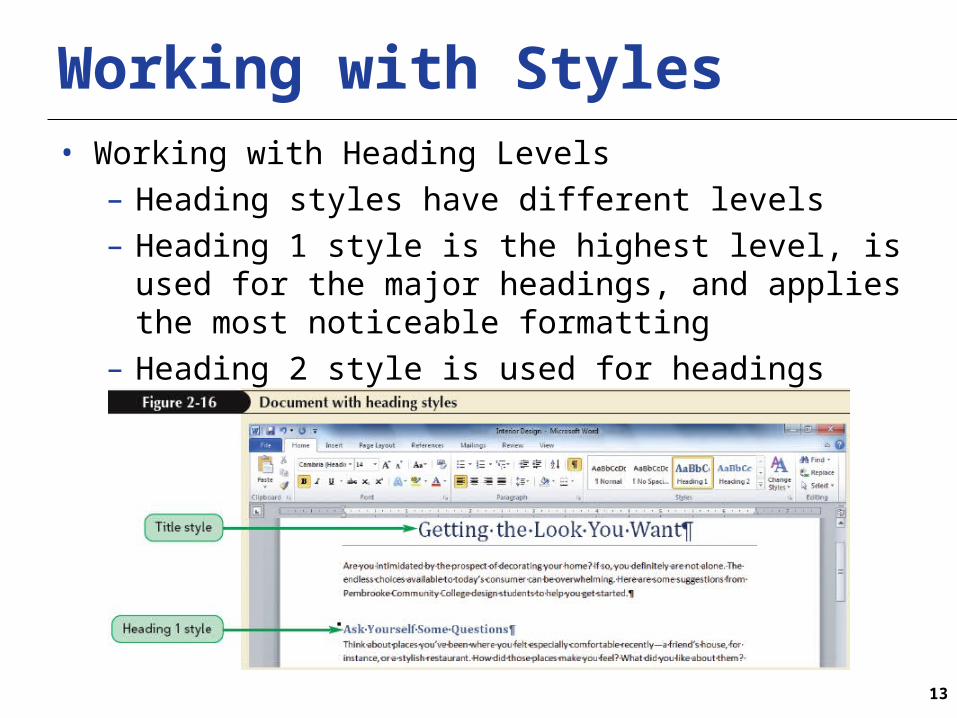
XPXPXPWorking with Styles• Working with Heading Levels– Heading styles have different levels– Heading 1 style is the highest level, is used for the major
headings, and applies the most noticeable formatting– Heading 2 style is used for headings that are under Heading
1; it applies slightly less dramatic formatting
13
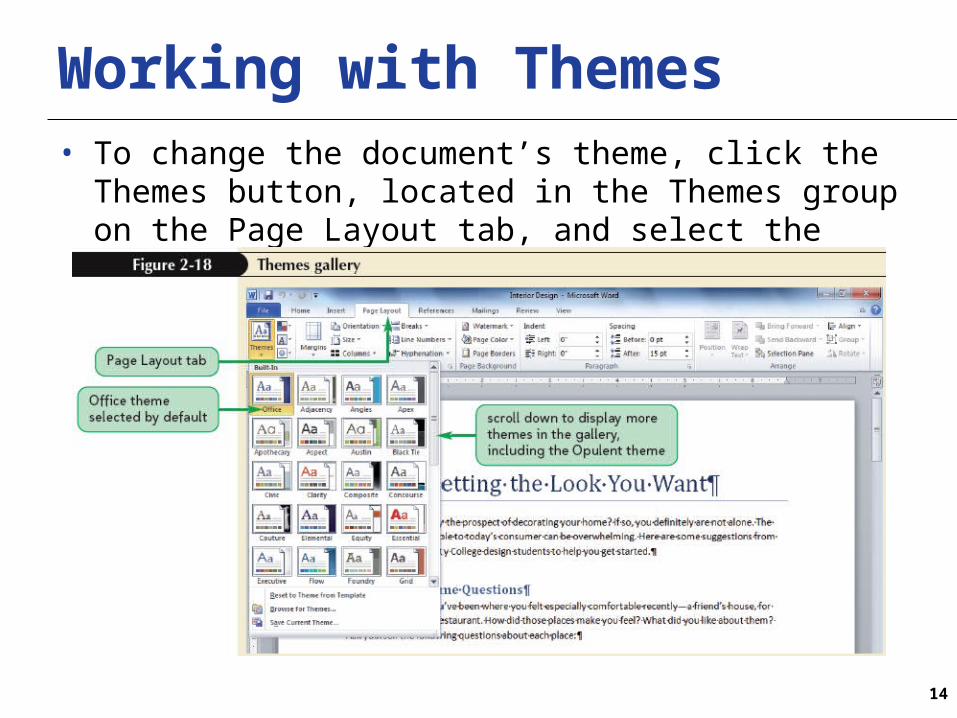
XPXPXPWorking with Themes• To change the document’s theme, click the Themes button,
located in the Themes group on the Page Layout tab, and select the theme you want.
14
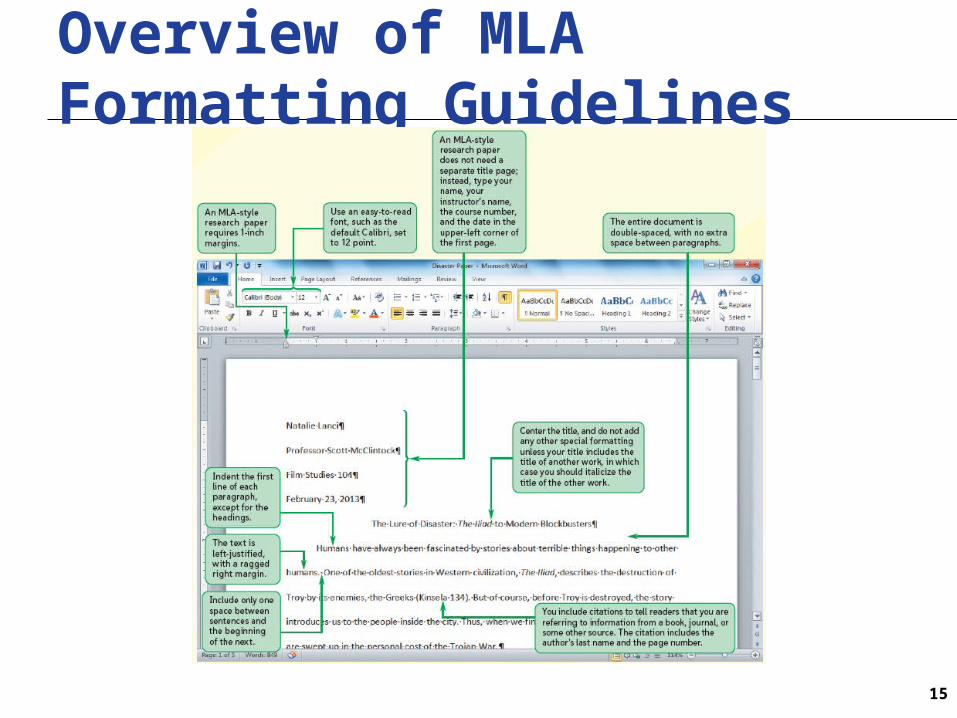
XPXPXPOverview of MLAFormatting Guidelines
15
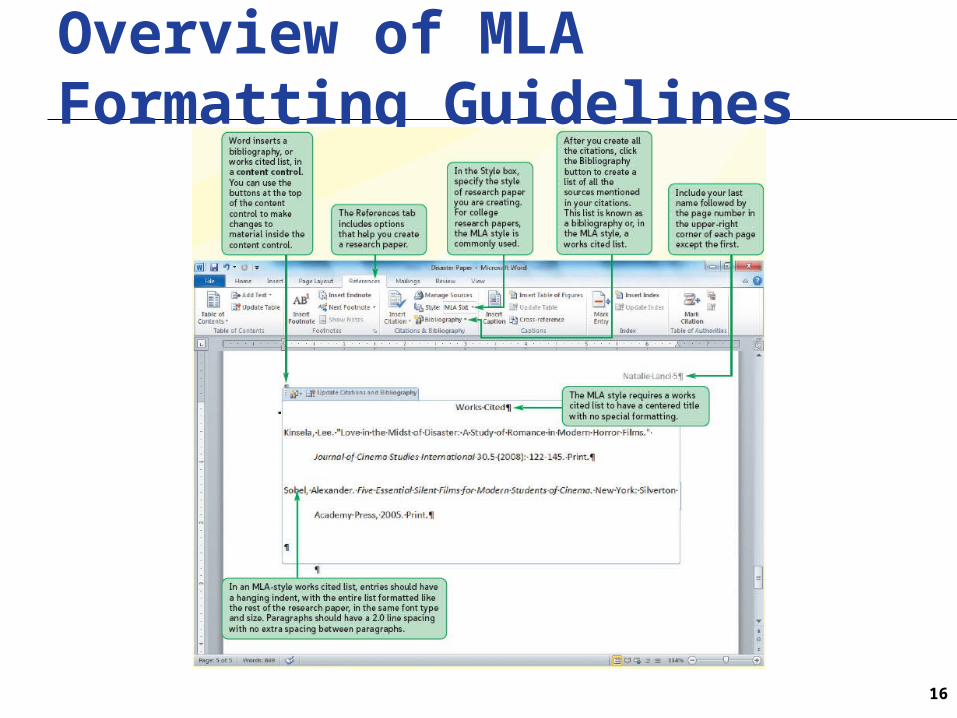
XPXPXPOverview of MLA Formatting Guidelines
16

XPXPXPIndenting a Paragraph
17
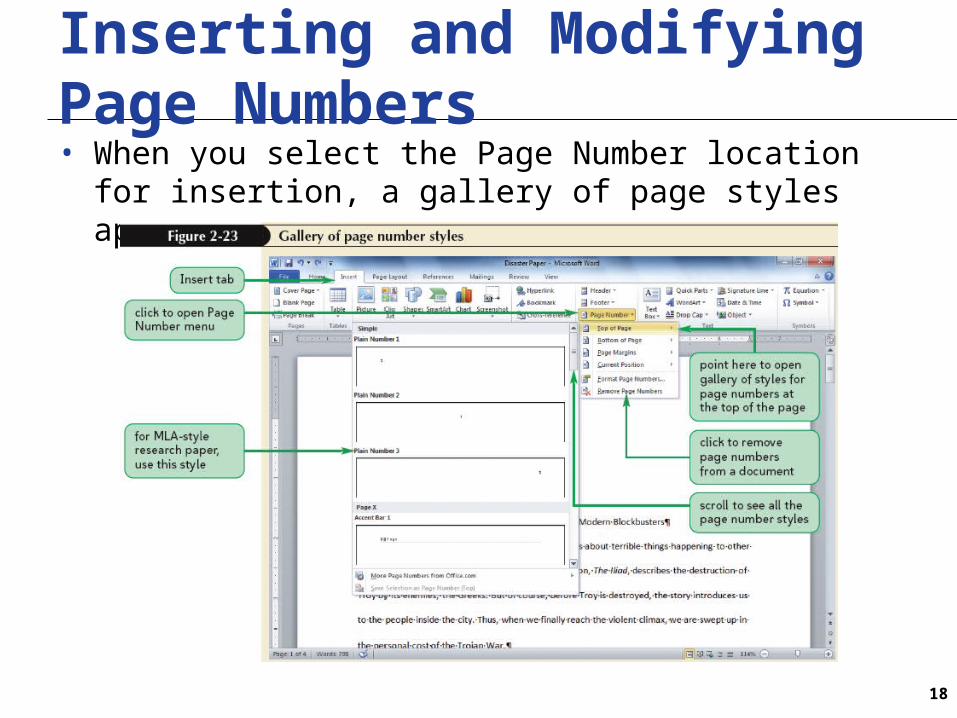
XPXPXPInserting and Modifying Page Numbers• When you select the Page Number location for insertion, a
gallery of page styles appears
18
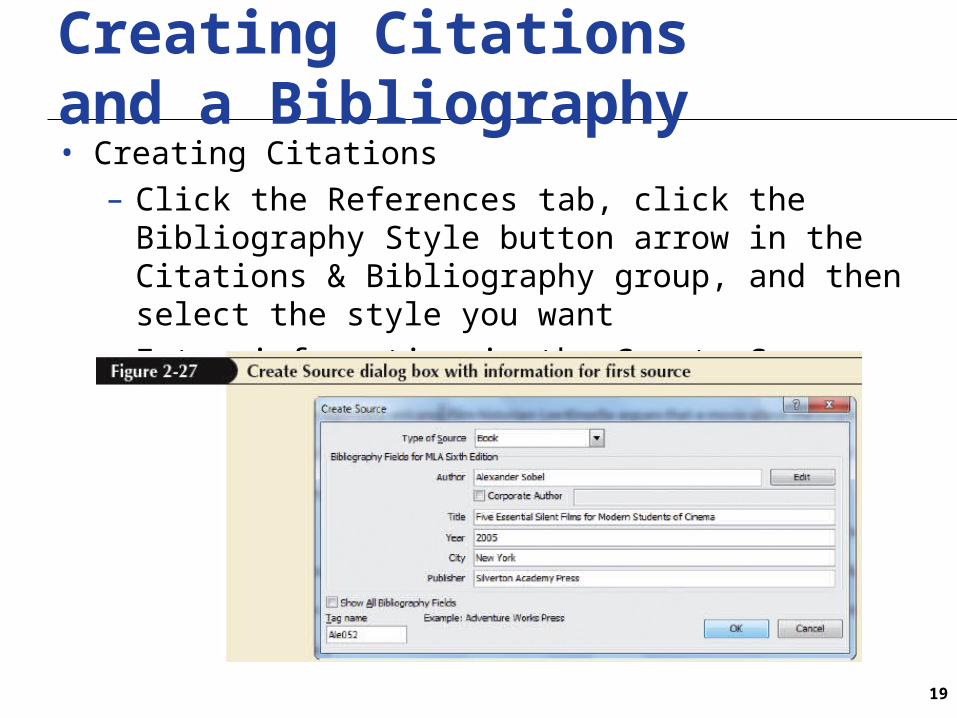
XPXPXPCreating Citations and a Bibliography• Creating Citations– Click the References tab, click the Bibliography Style button
arrow in the Citations & Bibliography group, and then select the style you want
– Enter information in the Create Source dialog box
19
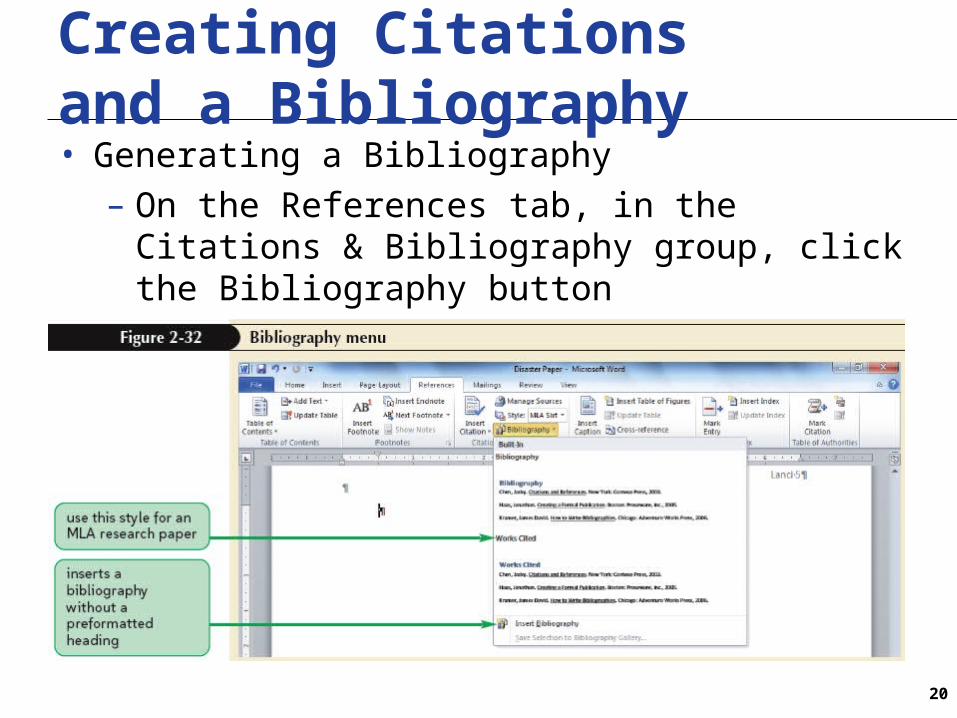
XPXPXPCreating Citations and a Bibliography• Generating a Bibliography– On the References tab, in the Citations & Bibliography
group, click the Bibliography button– Select Bibliography or Works Cited style
20