Embed Size (px)
Citation preview

VoiceRack Rental Access
GuideEditor: Stephen Satchell
Version 3.14
Voice Rack Rental Guide version 3.14 – i – Copyright © 2012 INE, Inc.

INE, Inc.500 108th Ave NE
Suite 510Bellevue, WA 98004
Voice Rack Rental Guide version 3.14 – ii – Copyright © 2012 INE, Inc.

Copyright InformationCopyright Information
Copyright © 2012 INE, Inc. All rights reserved.
This publication, Voice Rack Rental Access Guide, was developed by INE, Inc. All rights reserved. No part of this publication may be reproduced or distributed in any form or by any means without prior written permission from INE, Inc.
Cisco, Cisco Systems, the Cisco logo, and CCIE are registered trademarks of Cisco Systems, Inc. and/or its affiliates in the United States and certain other countries. All other products and company names mentioned in this Guide are the trademarks, registered trademarks, or service marks of their respective owners. Throughout this Guide, the authors have used their best efforts to distinguish proprietary trademarks from descriptive names by following the capitalization styles used by the manufacturer.
Voice Rack Rental Guide version 3.14 – iii – Copyright © 2012 INE, Inc.

DisclaimerDisclaimer
This publication, Voice Rack Rental Access Guide, is designed to assist candidates in their preparation for the Cisco Systems Voice Certification Exam.
The enclosed material is presented to you on an “as is” basis. Every effort has been taken to ensure that all material contained in this Guide is complete and accurate. The contributors, editor, and INE, Inc. assume no liability or responsibility to any person or entity with respect to loss or damages incurred by using the information contained in this Guide.
This Guide was developed by INE, Inc. and is an original work of the aforementioned editor and contributors. Any similarities between material presented in this guide and actual Cisco exam material is completely coincidental.
We apologize if this document contains any errors or omissions. Please send your comments and corrections to [email protected].
Voice Rack Rental Guide version 3.14 – iv – Copyright © 2012 INE, Inc.

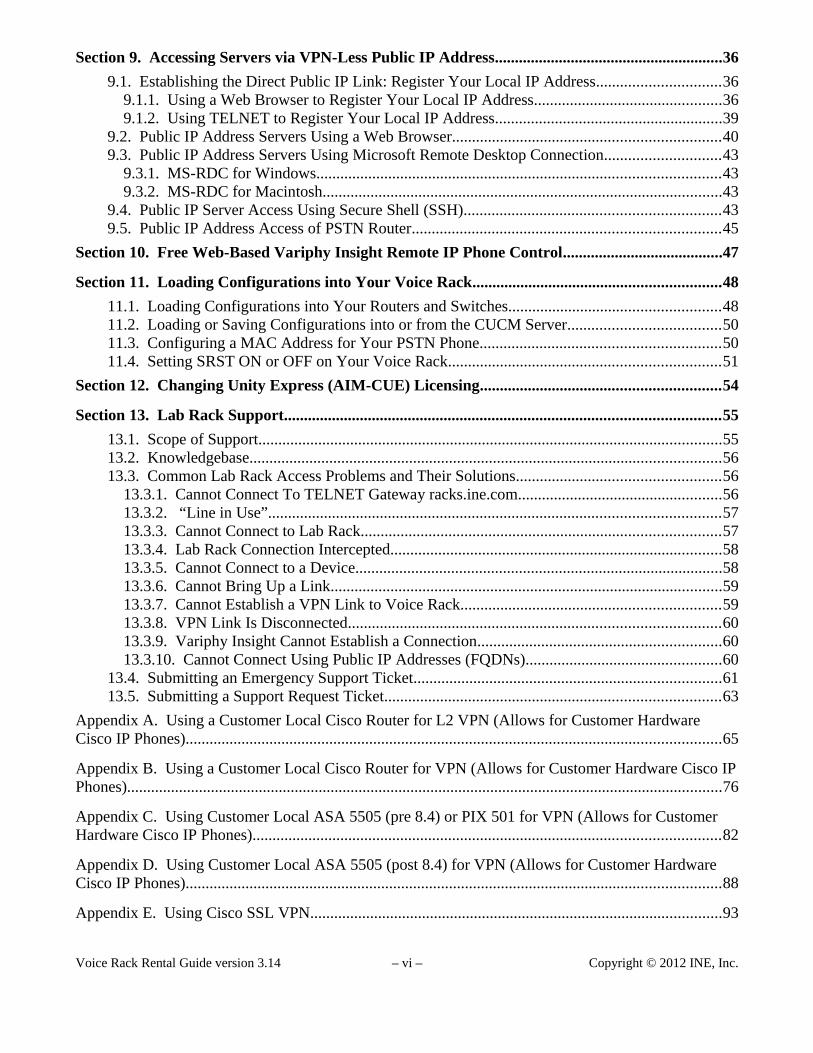
Table of ContentsSection 1. Introduction...........................................................................................................................1
1.1. Lab Rack Access Overview.......................................................................................................2 1.2. Session Activity Overview.........................................................................................................2 1.3. Passwords...................................................................................................................................2 1.4. IP Phone MAC addresses...........................................................................................................3
Section 2. Scheduling a Rack Session....................................................................................................4
2.1. Booking a Rack Session.............................................................................................................4 2.2. Have Automation Load Configuration Before Your Session....................................................7 2.3. Session Reminder Letter............................................................................................................8 2.4. Releasing a Previously Booked Session....................................................................................9
Section 3. Lab Rack Diagram..............................................................................................................10
Section 4. Getting Started at Your Location......................................................................................11
4.1. Minimum Necessary Equipment..............................................................................................11 4.2. Three Options for Using IP Phones.........................................................................................13
4.2.1. Option 1 – Using Hardware IP Phones at Your Location.................................................13 4.2.2. Option 2 – Remotely Controlling the IP Phones Attached to INE Racks.........................13 4.2.3. Option 3 – Using IP Softphones on Your PC...................................................................13
4.3. Five Options for Voice Rack Connectivity..............................................................................14 4.3.1. Option 1 - Hardware-Based Layer 2 VPN Using IOS Router and Catalyst Switch.........14 4.3.2. Option 2 - Hardware-Based Layer 3 VPN Using a Cisco Router, PIX, or ASA..............14 4.3.3. Option 3 – Software-Based Cisco SSL AnyConnect VPN Client....................................15 4.3.4. Option 4 – Software-Based Cisco IPSec EasyVPN Client...............................................15 4.3.5. Option 5 – VPN-Less Public-IP Connection....................................................................15
4.4. Firewall Information................................................................................................................16
Section 5. Linking Your Location to Ours via VPN..........................................................................17
5.1. Establishing the Layer 2 VPN (L2VPN) or Layer 3 VPN (L3VPN) Link..............................17 5.2. Verifying the VPN Link and Connectivity..............................................................................19
Section 6. Accessing Routers and EtherSwitches...............................................................................20
6.1. Single TELNET Connection to Multiple Devices...................................................................20 6.2. Multiple TELNET Connections to Console Lines...................................................................23 6.3. Clearing a Busy Console Line.................................................................................................24 6.4. TELNET over VPN to Rack Device Virtual Console.............................................................27
Section 7. Power-Cycling Your Lab Rack Devices............................................................................29
Section 8. Accessing Lab Rack Servers via VPN................................................................................30
8.1. Servers Accessed Using a Web Browser.................................................................................30 8.2. Servers Accessed Using a Microsoft Remote Desktop Connection (RDC)............................33
8.2.1. MS-RDC for Windows.....................................................................................................33 8.2.2. MS-RDC for Macintosh....................................................................................................33
8.3. Servers Accessed Using Secure Shell (SSH)...........................................................................34 8.4. Servers Without Administrative Access..................................................................................34 8.5. Resetting a Server to Its Initial State........................................................................................35
Voice Rack Rental Guide version 3.14 – v – Copyright © 2012 INE, Inc.
Section 9. Accessing Servers via VPN-Less Public IP Address.........................................................36
9.1. Establishing the Direct Public IP Link: Register Your Local IP Address...............................36 9.1.1. Using a Web Browser to Register Your Local IP Address...............................................36 9.1.2. Using TELNET to Register Your Local IP Address.........................................................39
9.2. Public IP Address Servers Using a Web Browser...................................................................40 9.3. Public IP Address Servers Using Microsoft Remote Desktop Connection.............................43
9.3.1. MS-RDC for Windows.....................................................................................................43 9.3.2. MS-RDC for Macintosh....................................................................................................43
9.4. Public IP Server Access Using Secure Shell (SSH)................................................................43 9.5. Public IP Address Access of PSTN Router.............................................................................45
Section 10. Free Web-Based Variphy Insight Remote IP Phone Control........................................47
Section 11. Loading Configurations into Your Voice Rack..............................................................48
11.1. Loading Configurations into Your Routers and Switches.....................................................48 11.2. Loading or Saving Configurations into or from the CUCM Server......................................50 11.3. Configuring a MAC Address for Your PSTN Phone............................................................50 11.4. Setting SRST ON or OFF on Your Voice Rack....................................................................51
Section 12. Changing Unity Express (AIM-CUE) Licensing............................................................54
Section 13. Lab Rack Support.............................................................................................................55
13.1. Scope of Support....................................................................................................................55 13.2. Knowledgebase......................................................................................................................56 13.3. Common Lab Rack Access Problems and Their Solutions...................................................56
13.3.1. Cannot Connect To TELNET Gateway racks.ine.com...................................................56 13.3.2. “Line in Use”.................................................................................................................57 13.3.3. Cannot Connect to Lab Rack..........................................................................................57 13.3.4. Lab Rack Connection Intercepted...................................................................................58 13.3.5. Cannot Connect to a Device............................................................................................58 13.3.6. Cannot Bring Up a Link..................................................................................................59 13.3.7. Cannot Establish a VPN Link to Voice Rack.................................................................59 13.3.8. VPN Link Is Disconnected.............................................................................................60 13.3.9. Variphy Insight Cannot Establish a Connection.............................................................60 13.3.10. Cannot Connect Using Public IP Addresses (FQDNs).................................................60
13.4. Submitting an Emergency Support Ticket.............................................................................61 13.5. Submitting a Support Request Ticket....................................................................................63
Appendix A. Using a Customer Local Cisco Router for L2 VPN (Allows for Customer Hardware Cisco IP Phones)......................................................................................................................................65
Appendix B. Using a Customer Local Cisco Router for VPN (Allows for Customer Hardware Cisco IP Phones).....................................................................................................................................................76
Appendix C. Using Customer Local ASA 5505 (pre 8.4) or PIX 501 for VPN (Allows for Customer Hardware Cisco IP Phones).....................................................................................................................82
Appendix D. Using Customer Local ASA 5505 (post 8.4) for VPN (Allows for Customer Hardware Cisco IP Phones)......................................................................................................................................88
Appendix E. Using Cisco SSL VPN.......................................................................................................93
Voice Rack Rental Guide version 3.14 – vi – Copyright © 2012 INE, Inc.

Appendix F. Using the Cisco IPSec EasyVPN Client............................................................................97
Appendix G. VPN and Public-IP-Address Support Configuration.......................................................101
Appendix H. Active Directory Schema, DNS Server Information.......................................................103
Appendix I. Router and Ethernet Port Tables.......................................................................................106
Appendix J. Device Connectivity – Quick Reference..........................................................................108
Voice Rack Rental Guide version 3.14 – vii – Copyright © 2012 INE, Inc.

This page intentionally left blank
Voice Rack Rental Guide version 3.14 – viii – Copyright © 2012 INE, Inc.

Section 1. Introduction
This manual describes how to access all the features of our Voice lab racks. Specifically, it describes how to establish a VPN connection between your location and our voice lab rack, and how to access each of the devices and servers described below within the lab rack from your location.
Your Voice lab rack consists of:
• Three routers• Two EtherSwitches• One PSTN/Frame Relay simulator (labeled “PSTN” in the diagram)• One Advanced Integration Module for Cisco Unity Express (AIM-CUE) voicemail• Six Cisco IP telephones directly connected to the Voice lab rack• Six (optional) Cisco IP telephones at your place of study—provided by you• One Windows XP Test/Utility server• One Cisco Unified Communications Manager (CUCM) Publisher server• One Cisco Unified Communications Manager (CUCM) Subscriber server• One Cisco Unity Connection (CUC or UC) server• One Cisco Unified Contact Center (CUCCX or UCCX) server• One Cisco Unified Presence (CUPS) server• One Microsoft Active Directory server (labeled “MS Win2K AD” in the diagram)• One access server (not shown in the diagram) for console port access to routers and switches• Additional infrastructure not visible to you, nor configurable by you, to connect your rack to
servers and the VPN
Section 3 shows how all these components, except the access server and infrastructure elements, are wired together.
Section 10 describes how to use free remote-control software to control the IP phones at our location.
Section 12 describes how to change the licensing for the AIM-CUE module in the Branch 2 (R3) router, if necessary, to either CUCM or CME.
Appendix G contains the summary tables of VLANs, IP subnets, router and EtherSwitch port connections, T1/E1 connection information, DSP resources, and PSTN codes.
Appendix J, at the end of this document, is a quick reference for rack access information.
Voice Rack Rental Guide version 3.14 – 1 – Copyright © 2012 INE, Inc.

1.1. Lab Rack Access Overview
• The routers, EtherSwitches, and the PSTN/Frame Relay simulator are accessed using TELNET connections to the console port, exposing a command-line interface (CLI) in each device.
• The AIM-CUE module, located in R3, is accessed by using R3’s Service Module connection capability in the router to link the module to the R3 console port.
• Servers use either web browser links (Call Manager, Unity Connection, Presence) or Microsoft Windows Remote Desktop Connection links (Contact Center, XP Utility); connections for both methods is over a Virtual Private Network (VPN) defined within the lab rack that links equipment at your location to the lab rack, as well as direct externally accessible IP addresses.
• Cisco also offers SSH access for CLI access to its servers for Unity Connection, Unified Presence, and Call Manager.
• The hardware IP phones we provide that are directly connected to our racks, are remotely controlled using the Variphy Insight Remote Phone Control software, which we have licensed and provide to you at no additional cost. More information on the use of this software can be found in Section 10, “Free Web-Based Variphy Insight Remote IP Phone Control”.
• Hardware IP phones that you may provide (in lieu of, or in addition to, our rack-connected remotely controlled phones), or IP softphones that you purchase and install onto your computer, are networked into the lab rack over the hardware or software VPN link between your location and ours.
More information on hardware and software VPN options can be found in Section 5, as well as in Appendices A through F. Lab rack configuration information to support VPN and public-IP access is found in Appendix G.
1.2. Session Activity Overview
Within a typical session, first establish the VPN link between your location (computer or extended network) and our lab rack. Load any initial configurations as directed by your workbook. Ensure that all devices have been configured: R1, R2, R3, SW1, SW2, PSTN.
Then, in any order:
1. Connect to the routers and EtherSwitches in the lab rack to set configuration. 2. Connect with the servers to set up the telephony services. 3. Test your set up by using the hardware IP phones at our location (using remote control
software), any hardware IP phones at your location, or any IP softphones you have installed on your computer.
Repeat these steps, as appropriate, to adjust and test your configurations to detect and fix problems and issues. Remember to save your configurations often.
1.3. Passwords
Unless otherwise directed in the workbook labs, if you need to set an enable password or vty password, use the user name “cisco” and password “cisco” , all lowercase.
Voice Rack Rental Guide version 3.14 – 2 – Copyright © 2012 INE, Inc.

Do not use any password other than “cisco” on the 3550 or 3560 EtherSwitches, because password recovery can only be done by our technicians physically manipulating the device.
1.4. IP Phone MAC addresses
When configuring the routers, switches, and the servers, you must collect the Media Access Control addresses (MAC addresses) of the IP phones you are using. For the phones provided by INE, you can use Cisco Discovery Protocol (CDP) in SW1 and SW2 to collect the information. For phones you use at your location, you can read the MAC addresses from the units.
Our automation will extract the MAC address of the lab rack’s PSTN phone (if present) and configure the PSTN router with that information when performing a rack reset or a configuration load. This eliminates the need for you to manually set up the PSTN phone’s MAC address when you are using our phone located in our rack room, as described in Section 11.3.
Voice Rack Rental Guide version 3.14 – 3 – Copyright © 2012 INE, Inc.

Section 2. Scheduling a Rack Session
2.1. Booking a Rack Session
You must book your rack at least 45 minutes before your desired session time. You cannot book a rack immediately before or during the session; booking must always occur in advance.
You schedule your Voice rack session through your Members account. When you sign in to the Members site, you will see a page like this:
When you click Rack Rentals on the left side of the page, you will see this:
Voice Rack Rental Guide version 3.14 – 4 – Copyright © 2012 INE, Inc.

Click Voice to see the list shown here:
Click Schedule/Re-schedule to see the rack session booking calendar:
On the calendar page, you will see the number of tokens in your account, any previously booked rack sessions, and the cursor (in light yellow) for the current day (U.S. Pacific Time). If you have set up a local time zone, a second column of time is displayed.
Voice Rack Rental Guide version 3.14 – 5 – Copyright © 2012 INE, Inc.

To book a session, click the white boxes for the day(s) and time(s) you would like to schedule:
In this example, I am booking a six-hour session block, which will give me 5.5 hours of working time—the other half hour is used by the system to prepare the rack for my use. If I click other selections not adjacent to the one I made, those will be separate sessions.
To finalize the booking, press the green Schedule Labs button. You will then see confirmation of your selection:
When the automation system prepares your rack for your use, it loads a default configuration, which, for Voice racks, is a minimum configuration so that the routers and EtherSwitches are as close to the factory configuration as practical.
Voice Rack Rental Guide version 3.14 – 6 – Copyright © 2012 INE, Inc.

2.2. Have Automation Load Configuration Before Your Session
The setting of your initial configuration, to be loaded before your session starts, must be completed at least 45 minutes before your session start time. Within 45 minutes of your session start time, the session parameters cannot be changed.
If you are using one of the INE CCIE Voice workbook products, we offer a way to use “our” time to load the initial configuration for the lab or technology topic you are working on. Close the scheduling window, refresh your web browser, and, if necessary, click Rack Rentals again. Scroll down to the list of upcoming rack rentals.
Click Control Panel next to the reservation you want to set, to open the Voice Control Panel:
Voice Rack Rental Guide version 3.14 – 7 – Copyright © 2012 INE, Inc.

Click the pull-down list to see your configuration options:
At the top of the list, you will see the product configurations for our workbook products. In this case, I want to select Workbook Volume I, Module 5.
When you have selected your configuration to be loaded before your session starts, click the Load Selected Config button. You will see a screen similar to this one:
Close the Rack Control Panel window.
2.3. Session Reminder Letter
When your lab rack has been set up, the automation system will send you a reminder message at the start of the session. The reminder message includes the assigned rack and the password for the rack.
Voice Rack Rental Guide version 3.14 – 8 – Copyright © 2012 INE, Inc.

2.4. Releasing a Previously Booked Session
Sessions can be canceled up to 45 minutes before the start time of your session. Within 45 of the start time, the session information cannot be changed and the session cannot be canceled.
To release a previously booked session, return to the scheduling calendar:
Click the reservation block you want to release; you will see a confirmation dialog box:
When you click Delete, your reservation will be removed from the calendar.
Voice Rack Rental Guide version 3.14 – 9 – Copyright © 2012 INE, Inc.

Section 3. Lab Rack Diagram
For the IP phones at your location, you may use 7961, 7962, 7965, or 7970 phones for any of the phones listed.
Voice Rack Rental Guide version 3.14 – 10 – Copyright © 2012 INE, Inc.
Section 4. Getting Started at Your Location
This section describes the minimum equipment you need to effectively complete the lab tasks in our Voice workbooks. This section also describes additional software and equipment that you can use to expand your studies of Cisco Unified Communications.
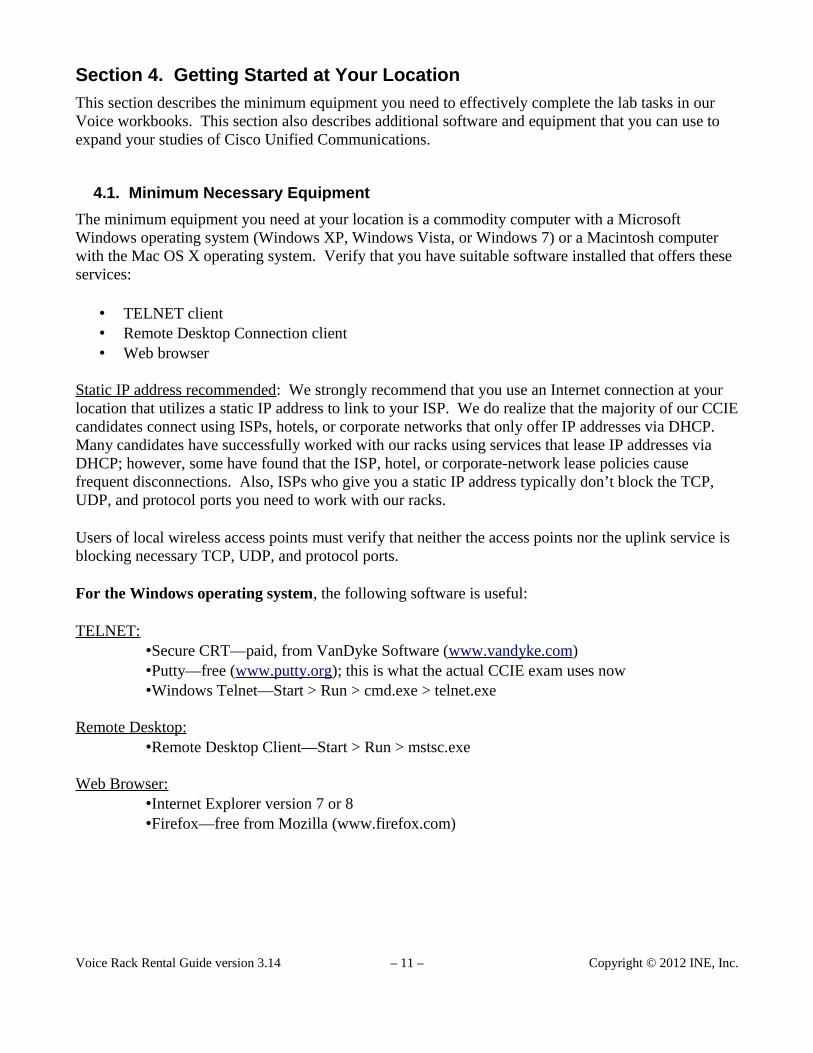
4.1. Minimum Necessary Equipment
The minimum equipment you need at your location is a commodity computer with a Microsoft Windows operating system (Windows XP, Windows Vista, or Windows 7) or a Macintosh computer with the Mac OS X operating system. Verify that you have suitable software installed that offers these services:
• TELNET client• Remote Desktop Connection client• Web browser
Static IP address recommended: We strongly recommend that you use an Internet connection at your location that utilizes a static IP address to link to your ISP. We do realize that the majority of our CCIE candidates connect using ISPs, hotels, or corporate networks that only offer IP addresses via DHCP. Many candidates have successfully worked with our racks using services that lease IP addresses via DHCP; however, some have found that the ISP, hotel, or corporate-network lease policies cause frequent disconnections. Also, ISPs who give you a static IP address typically don’t block the TCP, UDP, and protocol ports you need to work with our racks.
Users of local wireless access points must verify that neither the access points nor the uplink service is blocking necessary TCP, UDP, and protocol ports.
For the Windows operating system, the following software is useful:
TELNET:•Secure CRT—paid, from VanDyke Software (www.vandyke.com)•Putty—free (www.putty.org); this is what the actual CCIE exam uses now•Windows Telnet—Start > Run > cmd.exe > telnet.exe
Remote Desktop:•Remote Desktop Client—Start > Run > mstsc.exe
Web Browser:•Internet Explorer version 7 or 8•Firefox—free from Mozilla (www.firefox.com)
Voice Rack Rental Guide version 3.14 – 11 – Copyright © 2012 INE, Inc.

For the Macintosh operating system, the following software is useful:
TELNET:•ZOC—paid, from EmTec (www.emtec.com)•iTerm—free, from SourceForge (iterm.sourceforge.net)•Apple Terminal—Applications > Utilities > Terminal.app
Remote Desktop:•CoRD—free, from SourceForge (cord.sourceforge.net)•Remote Desktop Client for Mac—free, from Microsoft
(www.microsoft.com/mac/products/remote-desktop/default.mspx)
Web Browser:•Firefox—free, from Mozilla (www.firefox.com)•Internet Explorer version 7 or 8 running on VMWare Fusion
Voice Rack Rental Guide version 3.14 – 12 – Copyright © 2012 INE, Inc.

4.2. Three Options for Using IP Phones
4.2.1. Option 1 – Using Hardware IP Phones at Your Location
(Best option—use with one of two hardware-based VPNs)
To use your own hardware Cisco IP phones, you must implement one of the two Hardware Network Extension options, which will be described soon. You can then attach your own IP phones to the your-location portion of the lab rack network and register the phones with your rack directly.
More information about implementing this option is found in Section 5 and Appendices A, B, C, and D, describing how to use a Cisco router or Cisco ASA to create the VPN link.
4.2.2. Option 2 – Remotely Controlling the IP Phones Attached to INE Racks
(Next-best option—use with “VPN-less” or software-based SSL or IPSec VPN)
INE has a set of dedicated IP phones attached directly to each of our Voice lab racks; these phones are the same models we use when hosting a live CCIE Voice Bootcamp.
The IP phone complement consists of:• Two (2) 7961 phones attached to the CorpHQ switch (SW1)• One (1) 7961 phone attached to the Branch1 (R2) EtherSwitch module• Two (2) 7961 phones attached to the Branch2 switch (SW2)• One (1) 7960 PSTN phone attached to the CorpHQ switch (SW1)
These phones can be remotely controlled via any standard web browser on any Mac, PC, or Linux computer.
More information about IP phone placement can be found in the diagram in Section 3, and information (including a link to a video demo) about how to control these IP phones is found in Section 10.
4.2.3. Option 3 – Using IP Softphones on Your PC
(Less-desirable option—use with software-based SSL or IPSec VPN)
The last of the IP phone options is to install SCCP or SIP IP softphone software onto your computer. This option does not require the use of the hardware-based network extension method of establishing a VPN link. The major disadvantage of the IP softphone is that it doesn’t support many of the features needed to pass your CCIE exam, such as Globalization and many Softkeys. For product information about the SCCP IP softphone for Windows (only), check out http://www.ipblue.com. For the SIP IP softphone for both Windows and Macintosh, visit http://www.counterpath.com/x-lite.html.
To use the softphone option, you must use the Cisco IPSec EasyVPN client or the Cisco AnyConnect SSL VPN client, as described below.
Voice Rack Rental Guide version 3.14 – 13 – Copyright © 2012 INE, Inc.

4.3. Five Options for Voice Rack Connectivity
These five options are presented in order from most to least desirable.
4.3.1. Option 1 - Hardware-Based Layer 2 VPN Using IOS Router and Catalyst Switch
With INE’s Voice racks, you can work with the exact same setup that the actual CCIE Voice Lab uses at every location. In the real CCIE Voice lab, you have no physical interaction with any of your lab equipment, except for the candidate PC and the IP phones. All lab equipment resides in San Jose, California, regardless of the testing facility, and all IP phones are connected to the rack of equipment via Layer 2 VPN (even in San Jose, for uniformity of testing experience). This means that your IP phones appear directly connected to your switches in your INE Voice rack. (For example, if you do a “show cdp neighbor” on your rack-connected switches, they will show your IP phones as actually in front of you at your study location, and all Layer 2 broadcasts/multicasts will work just as they would if your phones were physically connected to those rack-connected switches.) INE gives you the option of using exactly the same configuration for your lab practice. This is also the option we use in each of our CCIE Voice Bootcamps.
You can extend your IP phones to INE’s lab rack via Layer 2 VPN by having and configuring both a Cisco IOS router and a Cisco Catalyst switch. The only occasion in which you would not use this option would be lack of both a (supported) Cisco IOS router and a Cisco Catalyst switch and/or IP phones of your own.
More information (including requirements for both router and switch) can be found in the next section “Establishing the VPN Link”, as well as Appendix A.
4.3.2. Option 2 - Hardware-Based Layer 3 VPN Using a Cisco Router, PIX, or ASA
With this option, you can use your own IP phones, but they will not appear directly connected to your switches in your INE Voice rack, as they do in Option 1. However, this option does allow you to extend the INE Voice rack network to your location by configuring a Cisco IOS router (with an Advanced Security IOS image installed), a Cisco PIX security appliance, or a Cisco ASA (Adaptive Security Appliance). You should only use this option if you don’t have a (supported) Cisco switch, or if you only have a PIX or ASA but not a (supported) IOS router.
More information can be found in the next section “Establishing the VPN Link”, as well as Appendices B and C.
Voice Rack Rental Guide version 3.14 – 14 – Copyright © 2012 INE, Inc.

4.3.3. Option 3 – Software-Based Cisco SSL AnyConnect VPN Client
With this option, you use INE’s rack-connected IP phones and our free, included remote phone control software. SSL AnyConnect VPN is convenient because it works for Mac, PC, and Linux, and because it doesn’t require you to download any software from Cisco―the web-based installer does this all automatically for you, and also updates the client automatically when we upgrade the software on our SSL VPN portal. You can use this option if you don’t have IP phones and an IOS router, PIX, or ASA of your own.
More information can be found in Appendix E.
4.3.4. Option 4 – Software-Based Cisco IPSec EasyVPN Client
With this option, you use INE’s rack-connected IP phones and our free, included remote phone control software. Cisco’s IPSec-based EasyVPN software client is available for Mac or PC. You must download this software on your own, and you must have a valid Cisco SMARTNet software licensing agreement to do so. We cannot provide the EasyVPN client for you because doing so would violate our licensing agreement with Cisco. You can use this option if you don’t have IP phones and an IOS router, PIX, or ASA of your own, and you also cannot use the SSL AnyConnect VPN option.
More information can be found in Appendix F.
4.3.5. Option 5 – VPN-Less Public-IP Connection
With this option, you use INE’s rack-connected IP phones and our free, included remote phone control software. Connecting to INE Voice racks is simple with this method: You simply browse to your rented rack’s authentication portal, authenticate yourself, and then browse, TELNET, SSH, or RDP to any machine in your rack that you need to access. This method does allow for full remote control of all the IP phones that we have attached to each Voice rack. You can use this option if you don’t have IP phones and an IOS router, PIX, or ASA of your own, and you cannot use the SSL AnyConnect or Cisco IPSec VPN options (for example, if you do not have administrative access to your laptop to install software—although the SSL AnyConnect option usually works in this scenario).
More information can be found in Section 9.
Voice Rack Rental Guide version 3.14 – 15 – Copyright © 2012 INE, Inc.
4.4. Firewall Information
This section is provided for people who have difficulty reaching our lab racks. In most cases, you should not need any of this information. The information here is extremely useful if you are behind a corporate or hotel firewall, are behind a personal firewall set to a mostly closed configuration, or are using an ISP with unusual characteristics.
TELNET access to our portal, racks.ine.com, uses port 23/TCP.1 If this port is blocked, establish a VPN link and TELNET directly to the devices using the addresses shown in Appendix J, or use the Public-IP method described in Section 9 to connect to the PSTN router, then through that to the rest of the routers and switches in your lab rack.
Remote Desktop Protocol (RDP) connections use port 3389/TCP. This is true when using our VPN-less access method (such as to util.vorack#.ine.com) or trying to connect over a VPN link.
The SSL VPN system uses 443/TCP for its connections. Because this port is used to access secure web pages, it should work when all else fails.
The Virtual Private Network (VPN) system uses several different combinations of protocols and ports to make a connection.
• The standard EzVPN connection uses 450/UDP (isakmp) plus two IP-level protocols, Encapsulating Security Payload (esp, IP protocol 50) and Authentication Header (ah, IP protocol 51).
• An alternate connection scheme uses two UDP ports, 500/UDP (isakmp) and 4500/UDP (ipsec-nat-t). If you are using a Cisco router, the IOS image software released where this feature was added was 12.2(13)T. This feature supports IPSec transparency over connections with Network Address Translation (NAT) or Port Address Translation (PAT) at any point.
• Finally, we support tunneling IPSec over 80/TCP and 8080/TCP.
If you have trouble connecting to our VPN server, you may want to try the following option to bypass any firewalls your company or ISP may provide. For Cisco routers, add this:
crypto ctcp keepalivecrypto ipsec client ezvpn INEVORACKcrypto ctcp port 80
For the Cisco ASA5505, add these commands to your configuration:
crypto ipsec df-bit clear-df outsidevpnclient ipsec-over-tcp port 80
Using tunneling over TCP/80 increases packet overhead, which can lead to fragmented packets and slow the connection speed—but that’s better than not being able to connect at all.
1 Access using an alternative port, such as 60023/TCP, is under development but not available at this time.
Voice Rack Rental Guide version 3.14 – 16 – Copyright © 2012 INE, Inc.

Section 5. Linking Your Location to Ours via VPN
Section 9 describes an alternative method for accessing the Voice lab servers when you are not using any phones at your location, eliminating the need to establish a VPN link from your location to ours.
Unlike the lab racks for other CCIE tracks, the Voice CCIE lab racks require you to not only access some of the components using TELNET, but also some components using a Web browser, some components using a Windows Remote Desktop Connection (MS-RDC) client, and some components using direct IP phone SCCP and/or SIP signaling as well as RTP media streaming. Our rack components are isolated from the Internet, so we provide a VPN portal to link your computer and phone equipment with our lab rack equipment. You then connect to the components via TELNET, web browser, MS-RDC, or direct IP phone signaling and RTP media streaming, all over the secure VPN link.
5.1. Establishing the Layer 2 VPN (L2VPN) or Layer 3 VPN (L3VPN) Link
We support five options to connect your equipment to our lab rack via VPN. But which method works best? That depends on the equipment you have at your study location.
If you have hardware IP phones, a Cisco router, and a Cisco Catalyst switch at your location, you may use the Layer 2 Hardware VPN option:
Use one of the supported Cisco routers with an Enterprise IOS image installed, along with one of the supported Cisco Catalyst switches to extend each of your INE rented rack’s 3 sites’ Layer 2 switched networks to your IP phones and study computer at your study location.
Supported Cisco IOS Enterprise feature-set routers:
• 2611XM (2611 non-XM will not support necessary L2TPv3)• 1841• 1941• 28xx• 29xx• 38xx• 39xx
Supported Cisco Catalyst switches:
• 3550 (Inline Power preferable, but PWR-CUBEs can be used for IP phones)• 3560 (PoE preferable, but PWR-CUBEs can be used for IP phones)• 3750 (PoE preferable, but PWR-CUBEs can be used for IP phones)
Voice Rack Rental Guide version 3.14 – 17 – Copyright © 2012 INE, Inc.

When connecting via this method, you will see that you connect both interfaces from your router to your switch. This is because one of the interfaces (Fa0/1 in our provided configuration) must be an L2-ONLY interface, leaving the other Fa0/0 interface to act as both the inside and outside L3 interface, pointing to your study computer and to the Internet, respectively. This is accomplished by breaking out the Fa0/0 interface of the router into two more Dot1Q VLAN sub-interfaces, and then connecting both your Internet connection and your study laptop or desktop to the switch as well. All of this is described in detail in the remarks above each section in the sample configurations that we provide for you.
For instructions and sample configurations on setting up our Layer 2 Hardware VPN option on both your Cisco router and switch, see Appendix A.
If you have hardware IP phones and a Cisco router or a Cisco ASA but not a Cisco switch at your location, you may use the Layer 3 Hardware VPN option
Use a Cisco router with an Advanced Security IOS image installed, Cisco PIX, or Cisco ASA to extend the lab rack internal network to all the devices and computers at your location.
For instructions on setting up VPN on Cisco routers, see Appendix B; see Appendix C for Cisco ASA and PIX instructions.
(Other Cisco-compatible VPN facilities may also be used, but they are not supported by our technicians, nor can we provide configuration instructions; use the information in Appendices B and C as guides to configuring such equipment.)
If you are using a single computer with no hardware phones at your location, you may use the Layer 3 Software VPN option
Use Cisco SSL VPN or Cisco IPSec EasyVPN software to establish the link between your location’s computer and our lab rack. Cisco SSL VPN uses a standard browser, whereas the IPSec EasyVPN software is a software package sold by Cisco that you install into your computer.
Your computer may use this VPN link to remotely control our rack-connected IP phones, or you can use software-based IP softphones purchased by you and installed on your PC.
Appendix E describes how to use your browser to build up an SSL VPN connection, and Appendix F describes how to use IPSec EasyVPN software to build the link.
Voice Rack Rental Guide version 3.14 – 18 – Copyright © 2012 INE, Inc.

5.2. Verifying the VPN Link and Connectivity
After you have established the Layer 3 Hardware or Software VPN link2 from your location to our lab racks, you should verify that your VPN link is working and that the basic routing and switching functions are satisfactory. Use a series of ping tests to points within the lab rack, in this order:
Test Command Path
ping 177.254.254.254 source Fa0/13 VPN to VPN-portal-resident loopback
ping 177.1.254.254 VPN to PSTN
ping 177.1.254.1 VPN to PSTN to R1
ping 177.1.11.20 VPN to PSTN to R1 to SW1
ping 177.1.10.10 VPN to PSTN, R1, SW1 to CUCM Publisher
At the first failure, use the diagram in Section 3 of this guide to trace the source of the connectivity problem in the last link of the path. For example, if the first three ping tests pass but the fourth fails, the problem is in R1, SW1, or the connection between them.
Failure of the ping test to 177.254.254.254 means that the VPN tunnel itself is not set up properly, or routing is not set up properly at your location. In particular, check the gateway IP setting, that you are sending all requests to Net 177 to your VPN device in the case of a router, PIX, or ASA configuration.
Failure of the ping test to 177.1.254.254 is special. This is the hop from our VPN access portal to your lab rack, through the PSTN router. Verify, using the TELNET portal (see Section 6), that the PSTN router interface has these two interfaces configured
interface Loopback0 ip address 177.1.254.254 255.255.255.255!interface FastEthernet0/0 description == VPN Uplink ip address 177.253.#.1 255.255.255.0 duplex auto speed auto!
where # is the Voice rack ID number: “1” for VORack1, “12” for VORack12.
If the PSTN router does not have these interfaces set up properly, we recommend using the Voice rack control panel to reload all the devices to the default state (“initial config”) or to the initial state for the lab on which you are working. See Section 11 of this guide for step-by-step instructions.
2 This verification will not work if you are connecting via the Layer 2 Hardware VPN option.3 Add “source Fa0/1” only if you are connecting via a hardware-based VPN solution; “Fa0/1” denotes your “inside”
interface. Pinging using the inside interface as the source is essential to getting a reply from the far side.
Voice Rack Rental Guide version 3.14 – 19 – Copyright © 2012 INE, Inc.

Section 6. Accessing Routers and EtherSwitches
Routers (including the PSTN/Frame Relay simulator) and EtherSwitches are accessed using TELNET connections to the command-line interface (CLI) of the devices. You have several options, which can be mixed and matched, with limitations:
• A single TELNET connection, accessing the lab rack access server’s console, and reverse telnet to each device
• Multiple TELNET connections, accessing the lab rack access server’s direct line to the device
• TELNET over the VPN to the device’s loopback IP address, as shown in the quick reference guide
• Single TELNET connection to the PSTN router using the public-IP addressing system (Section 9), and reverse-telnet to each of the other router and switch devices.
• Multiple TELNET connections to the PSTN router using the public-IP addressing system (Section 9), and reverse-telnet to one each of the other router and switch devices.
(You could enable the HTTP server in each device and use your web browser to connect to the device using the IP address shown in the quick reference guide. Not all devices have the HTTP support loaded onto them, so this may not work reliably. We recommend using the TELNET methods of working with the routers and EtherSwitches.)
6.1. Single TELNET Connection to Multiple D evices
You establish a single connection th rough our TELNET portal to the V oice rack access server:
host$ telnet racks.ine.comTrying 75.140.41.59...Connected to racks.ine.com.Escape character is '^]'.
User Access Verification
Username: vorack12Password: bc78ad
(You may need to press Enter a few times here.)
VORack12AS>
Voice Rack Rental Guide version 3.14 – 20 – Copyright © 2012 INE, Inc.

From here, you can access the console of almost any device in the rack. First, list the hosts available to you:
VORack12AS>show hostsDefault domain is not setName/address lookup uses static mappings
Codes: UN - unknown, EX - expired, OK - OK, ?? - revalidatetemp - temporary, perm - permanentNA - Not Applicable None - Not defined
Host Port Flags Age Type Address(es)R1 2001 (perm, OK) 59 IP 1.1.1.1R2 2002 (perm, OK) 64 IP 1.1.1.1PSTN 2003 (perm, OK) ** IP 1.1.1.1SW2 2004 (perm, OK) 59 IP 1.1.1.1R3 2005 (perm, OK) ** IP 1.1.1.1SW1 2006 (perm, OK) ** IP 1.1.1.1
Note the device names in the “Host” column: If you type any name from this list and press Enter, the access server will reverse-telnet to the specific device. Press Enter again to see the router prompt of the newly connected device.
VORack12AS>r1Trying R1 (1.1.1.1, 2001)... Open
VORack12R1#
Press Ctrl-Shift-6 (all at once) and then press x to return to the access server prompt. Enter the special “w” command (“where”), which shows you the currently open sessions:
VORack12AS>wConn Host Address Byte Idle Conn Name* 1 R1 1.1.1.1 0 4
R1
VORack12AS>
Voice Rack Rental Guide version 3.14 – 21 – Copyright © 2012 INE, Inc.

Now you can open connection to another router, using its hostname from the list you get using the show host command.
VORack12AS>r2Trying R2 (1.1.1.1, 2002)... Open
VORack12R2#
Press Ctrl-Shift-6 and then X to return to the access server prompt. Now the “w” command reveals two active connections:
VORack12AS>wConn Host Address Byte Idle Conn Name 1 R1 1.1.1.1 0 4 R1* 2 R2 1.1.1.1 0 1 R2
Note the numbers in the “Conn” column: These are the connection numbers for those connections. At the access-server prompt, you can enter the connection number to switch back to the respective router. For example, you can enter “1” or “2” to switch back to R1 or R2. If you simply press Enter at the access-server prompt, it resumes the last active connection (marked by the “*” sign in the “w” command output).
VORack12AS>1[Resuming connection 1 to R1 ... ]
VORack12R1#
When using the access server with a single TELNET connection from your location, we recommend opening connections to all devices in the rack and switching between them using Ctrl-Shift-6, X and then entering the connection number in the access-server prompt. When you finish opening all the connections, the output of the “w” command looks like this:
VORack12AS>wConn Host Address Byte Idle Conn Name 1 R1 1.1.1.1 0 0 R1 2 R2 1.1.1.1 0 6 R2 3 R3 1.1.1.1 0 0 R3 4 PSTN 1.1.1.1 0 0 PSTN 5 SW1 1.1.1.1 0 0 SW1* 6 SW2 1.1.1.1 0 0 SW2
When you instruct our automation to load an initial configuration, all the connections to all the devices will be forced closed; you must re-open the connections when the configuration loading is complete.
Voice Rack Rental Guide version 3.14 – 22 – Copyright © 2012 INE, Inc.

6.2. Multiple TELNET Connections to Console Lines
Alternating back and forth between devices using the access server to do the multiplexing can become tedious, especially when you try to make a configuration change that affects two ends of the same link. Windows, Mac, and Linux users can have multiple windows open, each with a TELNET session. Modern versions of programs like Secure CRT offer tabbing, so that changing the focus to another device is a single mouse-click.
If you prefer to work with multiple devices, you start an instance of TELNET for each device on your computer. Within each instance, you log in to the rack and the device with a single user ID for each device:
window1$ telnet racks.ine.comTrying 75.140.41.59...Connected to racks.ine.com.Escape character is '^]'.
User Access Verification
Username: vorack12r1Password: bc78ad
(You may need to press Enter a few times here.)
VORack12R1#
Now change to (or create) your second window or tab:
window2$ telnet racks.ine.comTrying 75.140.41.59...Connected to racks.ine.com.Escape character is '^]'.
User Access Verification
Username: vorack12r2Password: bc78ad
(You may need to press Enter a few times here.)
VORack12R2#
Voice Rack Rental Guide version 3.14 – 23 – Copyright © 2012 INE, Inc.

Now change to (or create) your third window or tab:
window3$ telnet racks.ine.comTrying 75.140.41.59...Connected to racks.ine.com.Escape character is '^]'.
User Access Verification
Username: vorack12r3Password: bc78ad
(You may need to press Enter a few times here.)
VORack12R3#
Continue the process, in additional windows or tabs, specifying the user names vorack12pstn, vorack12sw1, and vorack12sw2. You end up with six windows or tabs, one per device.
You can shift windows around so that you can see the contents of one window while keying configuration data into another. Another benefit of using multiple windows is that you can see error messages on multiple devices at the same time, so you can trace and debug problems such as connection flapping.
Alternatively, tabs require only one mouse movement plus one click to change focus, and you don't have to shift anything to see the entire output.
The method you use is a matter of personal style and preference.
When you instruct our automation to load an initial configuration, all the connections to all the devices will be forced closed; you must re-open the connections when the configuration loading is complete.
6.3. Clearing a Busy Console Line
This section applies to both styles of TELNET connections to your lab rack described in the previous two sections. Occasionally you may get disconnected from the access server as a result of a temporary network outage or your ISP’s DHCP changing your local IP address. You may find that the router refuses your attempt to log in again, issuing messages similar to this one:
Voice Rack Rental Guide version 3.14 – 24 – Copyright © 2012 INE, Inc.

host$ telnet racks.ine.comTrying 75.140.41.59...Connected to racks.ine.com.Escape character is '^]'.
User Access Verification
Username: vorack1r3Password: mn98ty
+------------------------------------------------------------+| || Line in use. Login to the access server using the || username clearvorack1 and manually clear the line. || |+------------------------------------------------------------+
Connection closed by foreign host.
To fix this problem, you must clear the access server’s connection to the console line for the router you want to access. To do this, you use a special login sequence to our TELNET gateway:
host$ telnet racks.ine.comTrying 75.140.41.59...Connected to racks.ine.com.Escape character is '^]'.
User Access Verification
Username: clearvorack1Password: bc78ad
Voice Rack Rental Guide version 3.14 – 25 – Copyright © 2012 INE, Inc.

When the authentication is successful, you will see this menu:
Server "VORack1AS" Line 171 Terminal-type (unknown)
+----------------------------+| || Access Server Menu || |+----------------------------+
0. Clear the Console connection 1. Clear R1 line 2. Clear R2 line 3. Clear PSTN line 4. Clear SW2 line 5. Clear R3 line
Exit Exit
Please enter your selection:
You key the menu number of the console line you want to clear, followed by ENTER. The access server will then clear the line. For example, to clear R3’s console line, press 5 followed by ENTER. You can repeat this for multiple devices. When you are finished, key Exit and then press ENTER.
Voice Rack Rental Guide version 3.14 – 26 – Copyright © 2012 INE, Inc.

An alternate way to clear a device console line is to use your Voice control panel:
1. Sign in to your Members account. 2. Click Rack Rentals on the left side of the page.3. Scroll down the page to find your current rental.4. Click Control Panel. You will see a page like this:
5. In the “Clear Line” section, click the button with the name of the device you wish to clear.
6.4. TELNET over VPN to Rack Device Virtual Console
When connecting to multiple console-based devices, having to key the rack/device user name and the password multiple times can become tedious. If the devices are configured correctly to allow virtual consoles (by default, our rack automation does configure all devices to allow for them), after establishing the VPN connection you can connect to the appropriate loopback address for the device. For example:
window9$ telnet 177.1.254.3Trying 177.1.254.3Escape character is '^]'.
VORack12R3#
Unlike using the console ports, utilizing RS-232 links between the access server and the router or EtherSwitch, this technique establishes a direct TCP-based virtual console connection to the device. This means that any banner defined for virtual consoles, and the prompt for input, is always displayed.
In the preceding example, the virtual console ports have been configured to use level 15 permissions instead of level 1 for CLI operations. Having the console ports configured in that way eliminates the need to enter the enable command each time you connect.
Voice Rack Rental Guide version 3.14 – 27 – Copyright © 2012 INE, Inc.

The table of lab rack device IP addresses for a default-configured Voice lab rack are in Appendix J
If, for any reason, a router or EtherSwitch was not properly configured by the lab rack automation system, you will not be able to establish a connection to it using the TELNET-over-VPN method. You must make a TELNET connection via TELNET to racks.ine.com , use your credentials to gain a link to the lab rack access server, and then connect to the router or switch to set up proper address—don’t forget VLAN setup when you do this.
Alternatively, you may use your rack control panel to reload a working initial configuration into your rack devices so that you can use a direct TELNET connection. This will reset all your rack devices to the specified configuration, so remember to first save all your work in the devices you have already configured.
Voice Rack Rental Guide version 3.14 – 28 – Copyright © 2012 INE, Inc.

Section 7. Power-Cycling Your Lab Rack Devices
Sometimes your configuration can cause a router or EtherSwitch to “blow out” like an out-of-control oil well; you can't stop its output or break it out of a frozen state. When that happens, we offer a way to power-cycle a specific device to recover it. Here's how:
1. Log in to your Members account.2. Click Rack Rentals on the left side of the page.3. Scroll down the page to find your current rental.4. Click Control Panel. You will see a page like this:
5. In the “Power Cycle” section, click the button with the name of the device.
The control panel will cause the automation to turn off the device for five seconds, then turn it back on. We recommend that you have a TELNET session to monitor the power-up and IOS image loading and starting. If your configuration, saved in NVRAM, caused the device to fail, you may want to force the device into ROMMON mode to bypass loading the problem configuration saved in the device. Use the device-specific method for clearing out the configuration from NVRAM, then let the device boot again.
Voice Rack Rental Guide version 3.14 – 29 – Copyright © 2012 INE, Inc.

Section 8. Accessing Lab Rack Servers via VPN
Section 9 describes how to use the VPN-less public IP method for accessing your servers. This is useful if there is no other reason to establish a VPN connection from your location to our location.
This following section describes how to access your servers over the VPN. The subsequent section describes how to access your Voice lab rack servers without using a VPN link.
8.1. Servers Accessed Using a Web Browser
Your rack has the following servers available for access via a web browser:
Device/Server IP Address User Name Password
CUCM Publisher https://177.1.10.10 admin cciecisco
CUCM Subscriber https://177.1.10.20 admin cciecisco
Cisco Unity Connection (CUC) https://177.1.10.30 admin cciecisco
Cisco Unified Presence (CUPS) https://177.1.10.50 admin cciecisco
Unified Contact Center Express (UCCX)
http://177.1.10.40/appadmin uccxadmin cisco
To access these servers:
1. Open a VPN connection to the Voice rack.2. Establish an HTTP connection, specifying the IP address from the table.
Voice Rack Rental Guide version 3.14 – 30 – Copyright © 2012 INE, Inc.

You will see an opening page, similar to this one4:
3. Click the link to access the Administration page. A warning will appear (like the one below) reporting a problem with the website’s security certificate. Click Continue to this website. You can safely disregard this warning; it will not affect your session or computer. The example here is for Microsoft Internet Explorer; for other browsers, follow the instructions to grant an exception for the website.
4 All servers will display this page except for the UCCX server. For the UCCX server, open your web browser and browse to: http://177.1.10.40/appadmin. (Notice that the rest of the servers use SSL with https, but this UCCX server only uses http.)
Voice Rack Rental Guide version 3.14 – 31 – Copyright © 2012 INE, Inc.

4. You then see an authentication entry page where you will use the username and password from the table at the beginning of this section: “admin”, “cciecisco” (without quotes).
You will see this login screen:
5. Use the user name and password from the table at the beginning of this section: “uccxadmin”, “cisco” (without quotes).
However, browsing to this page is best done by first RDP'ing into the UCCX server, to ensure maximum browser compatibility.
Voice Rack Rental Guide version 3.14 – 32 – Copyright © 2012 INE, Inc.

8.2. Servers Accessed Using a Microsoft Remote Desktop Connection (RDC)
Your rack has the following servers available for access via Microsoft RDC:
Device/Server IP User Name Password
XP Test/Utility 177.1.10.100 admin cciecisco
Unified Contact Center Express (UCCX) 177.1.10.40 admin cciecisco
We recommend using a screen resolution of 1280 x1024 or higher on your remote desktop client from your location. To bring up the Windows Task Manager inside a remote desktop session, press Ctrl-Alt-End on your keyboard or click the Task Manager icon on the lab machine desktops.
8.2.1. MS-RDC for Windows
For further instructions on using RDC in Windows, visit the following link:
http://www.microsoft.com/windowsxp/using/mobility/getstarted/remoteintro.mspx
To download the Windows Remote Desktop Connection client for Windows 95, Windows 98, Windows 98 Second Edition, Windows Me, Windows NT 4.0, or Windows 2000, visit:
http://www.microsoft.com/windowsxp/downloads/tools/rdclientdl.mspx
8.2.2. MS-RDC for Macintosh
For further instructions on using RDC to connect to Window systems, visit:
http://www.microsoft.com/windowsxp/using/mobility/getstarted/remoteintro.mspx
To download the Remote Desktop Connection client for Macintosh, visit:
http://www.microsoft.com/downloads/en/details.aspx?FamilyID=6573f9f1-8ae1-4da9-ab5c-f8457ecdaf2d&displaylang=en
Voice Rack Rental Guide version 3.14 – 33 – Copyright © 2012 INE, Inc.

8.3. Servers Accessed Using Secure Shell (SSH)
Four of the seven servers in your Voice lab rack offer command-line style access to their services. Those servers, and the credentials use to access them, are:
Device/Server Command Password
CUCM Publisher ssh [email protected] cciecisco
CUCM Subscriber ssh [email protected] cciecisco
Cisco Unity Connection (CUC) ssh [email protected] cciecisco
Cisco Unified Presence (CUPS) ssh [email protected] cciecisco
When using a package such as SecureCRT, the user name is “admin” and the password is “cciecisco” for all four servers. The domain name is the IP address.
To illustrate how to use the Unix or Macintosh tool “ssh” to access your servers, here is the sequence to access the CUCM Publisher server’s command-line interface:
$ ssh [email protected]@177.1.10.10's password:Last login: Fri May 27 02:16:41 2011 from 10.4.100.129
Welcome to the Platform Command Line Interface
WARNING, VMware Virtual Environment Detected!
VMware is NOT a supported platform!
admin:
The warning is expected and safe to ignore.
To access the other servers, simply replace “177.1.10.10” with the IP address of the server you want to access.
8.4. Servers Without Administrative Access
There is a Windows Active Directory server in your Voice Lab Rack. This server is accessible to you and to the rest of the lab rack only via Lightweight Directory Access Protocol (LDAP) transactions. You cannot RDP or HTTP into this machine.
The Active Directory server may be accessed by ping from the routers, but not from your location. This may be changed in the future.
Voice Rack Rental Guide version 3.14 – 34 – Copyright © 2012 INE, Inc.

8.5. Resetting a Server to Its Initial State
During the course of experimentation, your actions may leave the server completely useless, or even inaccessible. In real life this can be a considerable problem. In our lab environment, though, we provide a quick way for you to reset a given server to the same state it was in when your lab rack session started. Here's how to do it:
1. Log in to your Members account.2. Click Rack Rentals on the left side of the page.3. Scroll down the page to find your current rental.4. Click Control Panel. You will see a page like this:
5. In the “Wipe Clean” section, click the button corresponding to the server that you want to return to its initial state.
You will lose all configuration settings made on the server you select. This also includes previously activated services, so you will have to activate them again.
There is no button for the Active Directory server.
Voice Rack Rental Guide version 3.14 – 35 – Copyright © 2012 INE, Inc.

Section 9. Accessing Servers via VPN-Less Public IP Address
At the time of the publication of this edition of the Voice Rack Rental Access Guide, the VPN-less method of accessing servers is only available on VORacks 1 through 9. If you are assigned VORack 10, 11, or 12, this method of access is not available.
For a detailed video demonstration of the method to access Voice lab rack devices and servers, see:
http://ieclass.ine.com/p70126296/
9.1. Establishing the Direct Public IP Link: Register Your Local IP Address
To use the direct public IP address method of accessing your rack servers and PSTN router, you must register your IP address with our access portal. There are two ways to do this: by using a web browser link or by using TELNET to the PSTN address. After you have registered your IP address with our portal, future accesses will go straight through to the rack.
For public IP access to your lab rack servers to work, your configuration in the PSTN router, R1 router, and SW1 EtherSwitch must be set up properly for outside access and for connection to the server. If your routers and EtherSwitch are misconfigured, we strongly recommend that you use your rack control panel to initialize the configuration of all routers and EtherSwitches to the default configuration, or to the configuration of the lab you are doing, before starting a lab exercise.
See Section 11for instructions on loading configurations.
9.1.1. Using a Web Browser to Register Your Local IP Address
When you make initial contact with the Voice servers for a particular lab rack for a particular session, you will see a series of screens. The following example shows the steps involved when connecting to the CUCM Publisher server on VORack12 using this technique. The other servers connect in a similar way.
Voice Rack Rental Guide version 3.14 – 36 – Copyright © 2012 INE, Inc.

As you connect to servers, your browser may display multiple messages like this one, about an untrusted connection:
This is normal, because the certificates on the servers and in the VPN portal are self-signed. Use the option provided by your browser to indicate that connections to this server are OK.
1. Issue the request to the browser using the URL from the table in the next section. In this example, we use https://pub.vorack12.ine.com.
2. On the login page, enter the lab rack ID as your user name and the password provided in your lab rack reservation confirmation message; in this example, we use vorack12 and the password for our current session:
3. Click OK.
Voice Rack Rental Guide version 3.14 – 37 – Copyright © 2012 INE, Inc.

4. When you have successfully established the link, you will see this:
5. When you click Done, you will see the screen for the server whose URL you specified; in our example, it’s CUCM Publisher server screen:
6. In this case, we would click the Cisco Unified Communications Manager Administration link to gain access to the server login page. The link will be different for other servers.
Voice Rack Rental Guide version 3.14 – 38 – Copyright © 2012 INE, Inc.

9.1.2. Using TELNET to Register Your Local IP Address
One of the links, pstn.vorack#.ine.com, is used with TELNET to access your PSTN router via a public IP address. You can authenticate your public IP access using TELNET. In the following example, we use VORack12 again:
$ telnet pstn.vorack12.ine.comTrying 75.140.41.214...Connected to pstn.vorack12.ine.com (75.140.41.214).Escape character is '^]'.
Welcome to INE's Voice Rack Rental VPN-Less Access.
Please authenticate yourself with the credentials you received in yourrental confirmation email. After you authenticate yourself, you willbe disconnected. Simply reconnect to the same hostname and you willbe at your PSTN prompt.
Username:vorack12Password:Firewall authentication Success.Connection will be closed if remote server does not respondConnecting to remote server...Connection closed by foreign host.
$ telnet pstn.vorack12.ine.comTrying 75.140.41.214...Connected to pstn.vorack12.ine.com (75.140.41.214).Escape character is '^]'.
PSTN#show ver | include CiscoCisco IOS Software, 3700 Software (C3725-ADVENTERPRISEK9_IVS-M), Version 12.4(15)T13, RELEASE SOFTWARE (fc3)Copyright (c) 1986-2010 by Cisco Systems, Inc.use. Delivery of Cisco cryptographic products does not implyA summary of U.S. laws governing Cisco cryptographic products may be found at:Cisco 3725 (R7000) processor (revision 0.1) with 247808K/14336K bytes of memory.PSTN#
Voice Rack Rental Guide version 3.14 – 39 – Copyright © 2012 INE, Inc.

9.2. Public IP Address Servers Using a Web Browser
The following servers are available for your rack via web browser. Substitute the # symbol with the number of your rack. For example, “vorack#” would be “vorack1” for Voice rack 1.
Device/Server URL User Name Password
CUCM Publisher https://pub.vorack#.ine.com admin cciecisco
CUCM Subscriber https://sub.vorack#.ine.com admin cciecisco
Cisco Unity Connection (CUC) https://cuc.vorack#.ine.com admin cciecisco
Cisco Unified Presence (CUPS)
https://cups.vorack#.ine.com admin cciecisco
Unified Contact Center Express (UCCX)
http://uccx.vorack#.ine.com/appadmin uccxadmin cisco
Variphy Insight Remote Control
http://util.vorack#.ine.com admin cciecisco
To access these servers:
1. Open a VPN connection to the Voice rack.2. Establish an HTTP connection, specifying the IP address from the table.
You will see a page similar to this5:
5 All servers will display this page except for the UCCX server. For the UCCX server, open your web browser and browse to: http://177.1.10.40/appadmin. (Notice that the rest of the servers use SSL with https, but this UCCX server only uses http.)
Voice Rack Rental Guide version 3.14 – 40 – Copyright © 2012 INE, Inc.

3. Click the link to access the Administration page. A warning will appear (like the one below) reporting a problem with the website’s security certificate. Click Continue to this website. You can safely disregard this warning; it will not affect your session or computer. The example here is for Microsoft Internet Explorer; for other browsers, follow the instructions to grant an exception for the website.
You then see an authentication entry page.
4. Enter the username and password from the table at the beginning of this section: “admin”, “cciecisco” (without quotes).
Voice Rack Rental Guide version 3.14 – 41 – Copyright © 2012 INE, Inc.

You will see this login screen:
5. Use the user name and password from the table at the beginning of this section: “uccxadmin”, “cisco” (without quotes).
However, browsing to this page is best done by first RDP'ing into the UCCX server, to ensure maximum browser compatibility.
Voice Rack Rental Guide version 3.14 – 42 – Copyright © 2012 INE, Inc.

9.3. Public IP Address Servers Using Microsoft Remote Desktop Connection
The following servers are available for your rack via Microsoft RDC. Substitute the # symbol with the number of your rack. For example, “vorack#” would be “vorack1” for Voice rack 1.
Device/Server URL User Name Password
XP Test/Utility rdp://util.vorack#.ine.com admin cciecisco
Unified Contact Center Express (UCCX) rdp://uccx.vorack#.ine.com admin cciecisco
We recommend using a screen resolution of 1280 x1024 or higher on your remote desktop client from your location. To bring up the Windows Task Manager inside a remote desktop session, press Ctrl-Alt-End on your keyboard or click the Task Manager icon on the lab machine desktops.
9.3.1. MS-RDC for Windows
For further instructions on using RDC in Windows, visit the following link:
http://www.microsoft.com/windowsxp/using/mobility/getstarted/remoteintro.mspx
To download the Windows Remote Desktop Connection client for Windows 95, Windows 98, Windows 98 Second Edition, Windows Me, Windows NT 4.0, or Windows 2000, visit:
http://www.microsoft.com/windowsxp/downloads/tools/rdclientdl.mspx
9.3.2. MS-RDC for Macintosh
For further instructions on using RDC to connect to Window systems, visit:
http://www.microsoft.com/windowsxp/using/mobility/getstarted/remoteintro.mspx
To download the Remote Desktop Connection client for Macintosh, visit:
http://www.microsoft.com/downloads/en/details.aspx?FamilyID=6573f9f1-8ae1-4da9-ab5c-f8457ecdaf2d&displaylang=en
9.4. Public IP Server Access Using Secure Shell (SSH)
Four of the seven servers in your Voice lab rack offer command-line style access to their services. Those servers, and the credentials you use to access them, are:
Voice Rack Rental Guide version 3.14 – 43 – Copyright © 2012 INE, Inc.

Device/Server Command Password
CUCM Publisher ssh [email protected]#.ine.com cciecisco
CUCM Subscriber ssh [email protected]#.ine.com cciecisco
Cisco Unity Connection (CUC) ssh [email protected]#.ine.com cciecisco
Cisco Unified Presence (CUPS) ssh [email protected]#.ine.com cciecisco
When using a package such as SecureCRT, the user name is “admin” and the password is “cciecisco” for all four servers. The domain name is the IP address.
To illustrate how to use the Unix or Macintosh tool “ssh” to access your servers, her is the sequence to access the CUCM Publisher server’s command line interface on VORack3:
$ ssh [email protected]@pub.vorack3.ine.com's password:Last login: Fri May 27 02:16:41 2011 from 10.4.100.129
Welcome to the Platform Command Line Interface
WARNING, VMware Virtual Environment Detected!
VMware is NOT a supported platform!
admin:
The warning is expected and safe to ignore.
The same technique and display apply to all four servers.
You must establish a link to our VPN portal with your local IP address by using a browser or with TELNET. There is no way to do so using Secure Shell.
Voice Rack Rental Guide version 3.14 – 44 – Copyright © 2012 INE, Inc.

9.5. Public IP Address Access of PSTN Router
Your rack’s PSTN router is directly accessible via your TELNET program Substitute the # symbol with the number of your rack. For example, “vorack#” would be “vorack1” for Voice rack 1.
Device/Server FQDN User Name Password
PSTN pstn.vorack#.ine.com none none
A user name and password, or just a password, can be configured for the virtual console configuration of the PSTN router, but our standard default configuration does not configure either a user name or a password. The following is an example of connecting to the PSTN router on VORack12:
$ telnet pstn.vorack12.ine.comTrying 75.140.41.214...Connected to pstn.vorack12.ine.com (75.140.41.214).Escape character is '^]'.
PSTN#show ver | include PSTNPSTN uptime is 18 hours, 15 minutesPSTN#
This is more powerful than you might think. From the PSTN router, you can use the IOS TELNET command to connect to the other routers and EtherSwitches in your rack.
Even better, you can have multiple TELNET connections from your local computer to the PSTN router, connections which can then be used to TELNET to the other devices. This allows you to have multiple windows on the computer at your location, once for each of R1, R2, R3, PSTN, SW1, and SW2. Or, if you are using SecureCRT from Van Dyke software or another TELNET program that allows for multiple tabs, you can used the tab feature to switch from device to device.
Voice Rack Rental Guide version 3.14 – 45 – Copyright © 2012 INE, Inc.

Within the PSTN routers, these host definitions are already added; use the show hosts command to verify:
PSTN#show hostsDefault domain is not setName/address lookup uses static mappings
Codes: UN - unknown, EX - expired, OK - OK, ?? - revalidate temp - temporary, perm - permanent NA - Not Applicable None - Not defined
Host Port Flags Age Type Address(es)R1 None (perm, OK) 0 IP 177.1.254.1R2 None (perm, OK) 0 IP 177.1.254.2R3 None (perm, OK) 0 IP 177.1.254.3SW1 None (perm, OK) 0 IP 177.1.11.20SW2 None (perm, OK) 0 IP 177.3.11.20
So, to TELNET from the PSTN router to R1, simply type R1 and press Enter. The same is true for the other four devices. Indeed, the PSTN router now looks just like the access server accessed via racks.ine.com, so the instructions in Section 6 or using the PSTN router for navigating around the lab rack are the same as the instructions for using the access server.
The example below shows the output of the “w” command after opening connections to all the router and EtherSwitch devices in VORack12:
PSTN#wConn Host Address Byte Idle Conn Name 1 r1 177.1.254.1 0 0 r1 2 r2 177.1.254.2 0 0 r2 3 r3 177.1.254.3 0 0 r3 4 sw1 177.1.11.20 0 0 sw1* 5 sw2 177.3.11.20 0 0 sw2
Use the standard Cisco escape sequence (Ctrl-Shift-6, x) to return to the PSTN router, and then use the connection (“Conn”) number to select the device you want to talk with.
Voice Rack Rental Guide version 3.14 – 46 – Copyright © 2012 INE, Inc.

Section 10. Free Web-Based Variphy Insight Remote IP Phone Control
INE has licensed IP phone remote control software from Variphy to allow you to remotely control all of the Cisco hardware IP phones connected directly to our Voice racks via HTTP, using only a standard web browser.
To access the Variphy Insight web-based remote phone control software, open a browser using either of these URLs:
URL User Name Password
http://177.1.10.100 admin cciecisco
http://util.vorack#.ine.com admin cciecisco
For instructions on how to use Variphy Insight to remotely control the Cisco IP phones attached to our Voice racks, please watch the following video:
http://ieclass.ine.com/p33129732/
Please note that you will not be able to hear any RTP audio from these IP phones. This is because the remote control software is not a "softphone”; you are remotely controlling our rack-connected hardware IP phones.
The following notes are taken from the video above; we strongly recommend watching the video and taking your own notes.
•Variphy, Inc. strongly advises you to use the Firefox browser.•Java must be enabled for the software to work properly.•In CUCM Publisher, each phone you want to control must have a device association with the
user “variphy.”
Voice Rack Rental Guide version 3.14 – 47 – Copyright © 2012 INE, Inc.

Section 11. Loading Configurations into Your Voice Rack
11.1. Loading Configurations into Your Routers and Switches
When first connecting to your Voice rack, you may want to apply Initial configurations. Or, after having made some configurations, you may want to apply Final configurations to see how the instructor configured the routers and switches.
Make sure you have Java and JavaScript enabled in your browser for the domain ine.com.
To apply configurations to your routers and switches:
1. Log in to your Members account.2. Click Rack Rentals on the left side of the page.3. Scroll down the page to find your current rental.4. Click Control Panel. You will see a page like this:
Voice Rack Rental Guide version 3.14 – 48 – Copyright © 2012 INE, Inc.

5. Select the configuration you want to load from the list:
6. Click the Load Selected Config button.
Note that the configuration takes 15 minutes to load.
While the configuration is being installed into your lab rack, please do not try to access any of the router or EtherSwitch devices over your VPN link or by using the public IP address method. Doing so may interrupt our automation’s loading process and corrupt the configuration load.
Configurations are applied only to your rack’s PSTN, R1, R2, R3, SW1, and SW2 routers and switches, and not to any of your Voice servers or to the AIM CUE card in R3. This process will erase the current configuration on the router and EtherSwitch devices before applying the new Initial or Final configurations. If you want to preserve your existing configurations before applying the new ones, set up logging, or copy and paste the configurations off of those devices, prior to running this option.
If a lab doesn’t specify a configuration, tell our automation to load the configuration labeled “Workbook v3.0 Volume 1 & 2 Initial Configs,” which provides the basic infrastructure configuration.
Voice Rack Rental Guide version 3.14 – 49 – Copyright © 2012 INE, Inc.

11.2. Loading or Saving Configurations into or from the CUCM Server
To load or save Initial or Final configurations into or from your Unified Communications Manager server, follow the directions in these brief videos:
http://ieclass.ine.com/p98538031/
http://ieclass.ine.com/p20181521/
The control panel access to the utility has changed from the one shown in the video. To access the new facility, open your Voice control panel:
Use the link at the bottom of the page, under “CUCM Tar:” Follow the directions.
11.3. Configuring a MAC Address for Your PSTN Phone
You will undoubtedly be working with a PSTN phone of some type, whether it’s a hardware IP phone at your location or the rack-connected, remotely-controlled 79606. To determine the MAC address of the phone that will be your PSTN phone:
1. Log in to your Members account.2. Click Rack Rentals on the left side of the page.3. Scroll down the page to find your current rental.4. Click Control Panel. You will see a page like this:
6 Our automation detects and sets, in the PSTN router, the MAC address of the rack-room-located PSTN phone associated with your lab rack at the time that you reset the rack or load a configuration. If you want to use our PSTN phone, you can skip entering the PSTN IP phone MAC address using the control panel.
Voice Rack Rental Guide version 3.14 – 50 – Copyright © 2012 INE, Inc.

5. In the “PSTN Phone MAC Address” section, click PSTN Phone Mac Address.
6. Enter the MAC address of your phone in the window and click Submit. You may perform other tasks, but do not close the window or attempt to access the PSTN router during the few minutes that it takes to set the MAC address. The dialog box will inform you when the submission of your MAC address to the PSTN router is complete.
7. You must then set your PSTN phone’s TFTP address to7: 177.1.254.254
11.4. Setting SRST ON or OFF on Your Voice Rack
During your studies, you will inevitably need to study Cisco Unified Survivable Remote Site Telephony (SRST). To verify you have properly implemented SRST in the actual lab exam, simply shut down the Serial interface on a router at a site where you want to invoke SRST. This is possible because the phones in front of you are local to the router’s Ethernet subnet. However, when renting a Voice rack from INE, you are connecting your IP phones (hardware or software) remotely across a VPN connection, where the IP path of traffic flows through your remote site router’s Serial interface to be able to connect to it; shutting down that router’s Serial interface would result in a complete loss of remote phone, or remote phone control, connectivity.
7 You only need to input the TFTP address into the PSTN phone if it is one that you have direct contact with. For the INE-provided, rack-connected, remotely controlled 7960 IP phone, you do not need to do this, because the CorpHQ Switch (SW1) has a separate VLAN and DHCP pool laid out specifically for this purpose.
Voice Rack Rental Guide version 3.14 – 51 – Copyright © 2012 INE, Inc.

Our solution for this situation is to apply an access control list to your CorpHQ R1 to block certain types of traffic while allowing others. This is easily accomplished by following this procedure:
1. Log in to your Members account.
2. Click Rack Rentals on the left side of the page.
3. Scroll down the page to find your current rental.
4. Click Control Panel. You will see a page like this:
5. Click SRST Configuration. You will see the following dialog box:
Voice Rack Rental Guide version 3.14 – 52 – Copyright © 2012 INE, Inc.

6. Choose the Branch router you want, and whether you want to send that branch into SRST mode (ON), which applies a blocking ACL, or take that branch out of SRST mode (OFF), which removes the blocking.
If you choose to send either branch into SRST mode (ON), you may enter one or two IP addresses of a phone in front of you that you want to “fall back” to SRST, as shown here8:
If you choose to take a Branch out of SRST mode (OFF), you need not enter an IP address—simply click Save Changes.
In either case, allow the configuration to complete and the dialog box to close before attempting to connect to, or make any changes to, your CorpHQ R1.
If you are remotely controlling our 7961 IP phone directly connected to your Voice rack, you will still be able to fully control these phones after they go into fallback mode; however, please note that you may need to close your current remote control window and reestablish a “direct IP control” window. This procedure is outlined in Section 10, as well as demonstrated in the video demo link found there.
8 You need not enter the IP addresses of the phones attached to your voice rack, because they are automatically included in the fallback ACL. Enter IP addresses only if you have phones in front of you that you want to include in a fallback process.
Voice Rack Rental Guide version 3.14 – 53 – Copyright © 2012 INE, Inc.

Section 12. Changing Unity Express (AIM-CUE) Licensing
The XP Utility machine contains two license files for Cisco Unity Express, the AIM-CUE module located inside the Branch2 (R3) router, to integrate the CUE module with either CUCM or CME. If you need a different license than the one currently installed on the CUE module, first determine which software license is currently loaded. Connect to the CUE module, and get into global EXEC mode. Issue the following commands:
Branch2# service-module service-engine 0/0 sessionCUE#CUE# show software licenses
• To change from the CUCM to the CME license, connect to the CUE module and get into global EXEC mode. Issue the following commands:
Branch2# service-module service-engine 0/0 sessionCUE#CUE# software install clean url ftp://177.1.10.100/cue-cme.pkg user admin password ccieciscoCUE# reload
• To change from the CME to the CUCM license, connect to the CUE module and get into global EXEC mode. Issue the following commands:
Branch2# service-module service-engine 0/0 sessionCUE#CUE# software install clean url ftp://177.1.10.100/cue-ccm.pkg user admin password ccieciscoCUE# reload
DO NOT copy and paste these commands to the AIM-CUE module—it WILL NOT WORK. You must manually key the commands (just as you would have to in the actual CCIE Voice Lab Exam). This is because the AIM-CUE module does not let you set a line width, like a router or EtherSwitch does, so when you input a long line, it generates a large amount of output to make the text appear to scroll. If you get too far ahead of the AIM-CUE command processor, the sub-system will drop characters.
The FTP server at 177.1.10.100, at the beginning of your lab session, is configured properly. You need not do anything to this server.
Voice Rack Rental Guide version 3.14 – 54 – Copyright © 2012 INE, Inc.

Section 13. Lab Rack Support
Most of the time, for most people, the facilities we provide to support your rental of a Security lab rack are sufficient for productive lab exam preparation. However, if you experience any problems with your rack rental, we have a technical support staff on call to help you.
13.1. Scope of Support
Our technical staff are trained to:
• Perform repairs on (or, if necessary, perform replacement of) our routers, EtherSwitches, security appliances, and cabling within our lab racks and within our infrastructure.
• Identify in-the-cloud issues with your access to our TELNET and VPN gateways.• Fix authentication issues with your access to our TELNET and VPN gateways.• Use our cable and interface check reports, generated before your session starts, to speed repair
of your lab rack and verify that the repair was effective.• Fix problems with lab rack bookings.
The cable and interface check that is run before your session or sessions detects problems with the rack before you start and identifies the failures it detects. This facility eliminates the need for our technicians to perform diagnostic checking during your rack session to locate a failed cable or interface. Our automation also keeps extensive logs of its actions, and the results of those actions, to speed identification of the cause of a problem.
Our sales team can:
• Carry out purchase and accounting of lab rack tokens.• Perform bulk booking of lab rack sessions.• Resolve conflicts between Bootcamps and self-paced customer rentals.
INE staff also handles issues for its products via the INE Online Community (http://www.IEOC.com) for its products and related tasks and questions:
• INE workbooks• INE on-demand products• INE Bootcamps and workshops• INE purchases and discounts• Details on setting up Cisco equipment to implement a lab solution or scenario requirement• Operation of Cisco software• Technology questions, such as questions about CUCM, CUPS, IP phone, or AIM-CUE
configuration
Voice Rack Rental Guide version 3.14 – 55 – Copyright © 2012 INE, Inc.
13.2. Knowledgebase
INE maintains a Knowledgebase of information to help troubleshoot common issues, problems, and questions:
http://support.ine.com/index.php?_m=knowledgebase&_a=view
13.3. Common Lab Rack Access Problems and Their Solutions
This section provides quick troubleshooters for common issues.
13.3.1. Cannot Connect To TELNET Gateway racks.ine.com
The most common reasons that you cannot reach our TELNET gateway to access your lab rack:
• You are trying to use an SSH client, a web browser, or TELNET over SSL.• Port 23/TCP is firewalled in your computer or your local network.
The “Firewall Information” section of this document can help you with finding and opening the needed port to access our TELNET gateway.
If you determine that a firewall isn’t blocking port 23/TCP, generate a traceroute to racks.ine.com, follow the instructions in “Submitting an Emergency Support Ticket.” Include the traceroute report in your ticket. Our technicians will investigate the problem.
Voice Rack Rental Guide version 3.14 – 56 – Copyright © 2012 INE, Inc.

13.3.2. “Line in Use”
You can reach our gateway, but when you attempt to connect to your lab rack, you see a screen like this:
host$ telnet racks.ine.comTrying 75.140.41.59...Connected to racks.ine.com.Escape character is '^]'.
User Access Verification
Username: vorack1Password: mn98ty
+-----------------------------------------------------+| || Line in use. Login to the access server using the || username clearrsrack1 and manually clear the line. || |+-----------------------------------------------------+
Connection closed by foreign host.
See the section on “Clearing a Busy Console Line.” When trying to access the lab rack using the name, such as rsrack, select the menu item “0”. When trying to access a lab rack device directly, such as rsrack1r3, use the corresponding menu item to clear the device console connection; in this example, use menu item “3” for the device “r3”.
13.3.3. Cannot Connect to Lab Rack
You can reach our gateway, but your attempts to get to your lab rack appear to fail. Try using the Cisco escape sequence to determine whether the access server’s console is linked to a lab rack device console; if this is the problem, you will be returned to an access-server command prompt. If that fails, press ENTER a few times to see if you get a response. Usually, you will see something.
If all else fails, clear all the lines using the procedure in “Clearing a Busy Console Line” to clear the console connection (menu item “0”).
If you still don't get a response, follow the instructions in “Submitting an Emergency Trouble Ticket.” Our technicians will investigate the problem.
Voice Rack Rental Guide version 3.14 – 57 – Copyright © 2012 INE, Inc.

13.3.4. Lab Rack Connection Intercepted
In certain circumstances, when you try to connect to your lab rack via our TELNET gateway, you will see a screen that looks like this:
The current time is Wed Jan 12 13:20:34 PST (GMT-08) 2011
This is the INE Rack System. The password for this rack login has beentemporarily disabled. There are several possible reasons that the passwordwould be temporarily disabled:
1. Your session has not yet started. Our sessions start at 03:00 (GMT-08), 09:00 (GMT-08), 15:00 (GMT-08), and 21:00 Pacific time (GMT-08).2. Your session has already ended. Our sessions end at 02:30 am (GMT-08), 08:30 am (GMT-08), 14:30 pm (GMT-08), and 20:30 pm (GMT-08).3. Our rack automation is still preparing the rack for your session.4. You have requested the loading of a product configuration, or one of your saved configurations, and our rack automation is still working on your request.5. You are taking a Mock Lab and our rack automation is capturing your rack for grading, or preparing your rack for the next part.
Connection closed by foreign host.
In the first line, you see the current time in the INE local time zone. We follow the Daylight Saving Time rules for United States Pacific Time. If you see this message, it’s possible that you are trying too early (or too late) to connect to your lab rack.
When our automation system is performing a task on your rack, we disconnect you from your lab rack devices and the access server, and we also block you from logging in to your rack. This is so that you don’t accidentally corrupt your rack or the operation in progress. When the operation is complete, the system restores your ability to log in to your rack via the TELNET gateway.
This lockout is particularly important for Mock Labs, because the scoring is dependent on the automation being able to properly configure your rack for each part of the test and capture your settings when each part is completed. Disrupting your rack will cause you to receive a lower grade.
On very rare occasions, you may find that you don’t have proper access to your rack at the beginning of the session, and you haven’t asked the automation system to perform any tasks for you. In that case, wait 15 minutes and try again; if you continue to see the banner, submit an emergency ticket so our on-duty technician is paged and can rectify the problem.
13.3.5. Cannot Connect to a Device
You have trouble connecting to a device, either from the access server or by using the device-specific login sequence on our TELNET gateway. Try using the Cisco escape sequence first. If that fails, press ENTER a few times to see if you get a response.
Voice Rack Rental Guide version 3.14 – 58 – Copyright © 2012 INE, Inc.

If all else fails, try power-cycling the device as described in the section “Power-Cycling Your Lab Rack Devices.” We strongly recommend that, before you perform the power cycle, you have a TELNET window open to the device (either directly, or through the access server) so that you can watch the boot-up messages as they are output by the router. If you see a serious error message, follow the instructions in “Submitting an Emergency Support Ticket” and include the error message. Our technicians will investigate the problem.
13.3.6. Cannot Bring Up a Link
The vast majority of the time, problems with bringing up a link between two devices is a configuration issue, although on rare occasion an interface will die or a cable will be knocked loose. Before submitting a trouble ticket, enable CDP on both devices, configure the interface on each end of the link to its default, issue “no shutdown” commands to the interfaces, wait 60 seconds, and then use “show cdp neighbor” to verify that the cable is in place. Then use “show ip interface brief” to see if the link is reported as “up/up.”
In our Voice lab racks, we have several T1 and E1 interface cards. After the T1 and E1 interfaces are established, they work well, but getting them up takes some initial work. We find that we sometimes must power-cycle the device into which the T1 and E1 card is installed to make the T1 or E1 controller work again. Use the instructions in Section 7 to power-cycle devices with stuck T1 and E1 cards.
If the link will not come up after this procedure, follow the instructions in “Submitting an Emergency Support Ticket” and include the text of your testing on both ends of the link. Our technicians will investigate the problem.
13.3.7. Cannot Establish a VPN Link to Voice Rack
Most of the support tickets we receive regarding VPN failure involve ports blocked in the network at or near your location, or, for router, PIX, and ASA hardware VPN, a problem in the configuration with the local network or upstream link.
Ensure that your firewalls allow the TCP, UDP, and IP packets listed in Section 4.4, “Firewall Information.” Your checks need to include any wireless access points you may be using. You may need to talk to your local network administrator and your upstream network administrator to be sure all ports are open and usable for outbound connections.
The instructions in Section 5 and Appendices A-E provide instructions for verifying proper operation of your VPN link, which should usually occur before you rent your first Voice lab rack session9.
9 The exception to verification of VPN before you rent your first session is the L2VPN. At this time, only the EzVPN portion of the L2VPN solution is supported to test before your first rack rental. Unfortunately, the actual Layer 2 Tunnel that rides over the EzVPN cannot be set up (or at least will not connect) until your rack session begins.
Voice Rack Rental Guide version 3.14 – 59 – Copyright © 2012 INE, Inc.

13.3.8. VPN Link Is Disconnected
If you lose VPN connections, the path between your location and our location may pass through routers that are “in trouble.” If you do not have a static IP address, either on your local computer or on an access router to your upstream, you should determine whether your network or ISP is changing the IP address on DHCP lease renewal. Cable companies, trying to block servers, use short lease times with forced IP address changes.
When submitting a support ticket for VPN disconnect issues, include a traceroute from your computer to vorack-vpn.ine.com so that we can determine whether congestion or misrouting is causing the problem. Please include all information, such as IP addresses, so we can do reverse checking as part of our troubleshooting. Also include all error and debug logging information, which may provide additional clues.
13.3.9. Variphy Insight Cannot Establish a Connection
Determine whether you have associated the user “variphy” in CUCM to all the IP phones in your CUCM cluster. Phones in CME need not be associated with any user—the configuration should already be setup on your Branch2 R3 when you begin your rack session. This is all described in the video described in the section on remotely controlling your phones.
13.3.10. Cannot Connect Using Public IP Addresses (FQDNs)
It is likely that you have not registered the IP address at your location for access. In rare instances, when you haven’t made use of public IP connections, the registration can time out. This is more likely when you have booked consecutive sessions on the same rack. Simply re-authorize using the web or TELNET method.
Voice Rack Rental Guide version 3.14 – 60 – Copyright © 2012 INE, Inc.

Another possibility is that the configuration of your PSTN is incorrect. Using the TELNET portal (see Section 6 of this guide), verify that the PSTN router interface has these two interfaces configured,
interface Loopback0 ip address 177.1.254.254 255.255.255.255!interface FastEthernet0/0 description == VPN Uplink ip address 177.253.#.1 255.255.255.0 duplex auto speed auto!
where “#” is the Voice rack ID number.
13.4. Submitting an Emergency Support Ticket
An emergency ticket is warranted in the following situations:
• Hardware failure in any device of the lab rack• Can’t log in via racks.ine.com• Can’t connect to lab rack devices from the access server• Rack control panel failure• Can’t establish a VPN link to vorack-vpn.ine.com
If your issue is not one of these, see the next subsection, “Submitting a Support Request Ticket.”
We assume that, before you submit an emergency rack trouble ticket, you have tried the troubleshooting tips described in “Common Lab Rack Access Problems and Their Solutions” above, and that the tips didn’t solve the problem. We also assume that you have collected debugging information to show the problem and have include that information in your ticket. This is particularly important to debugging VPN portal access problems.
To submit a trouble ticket, first sign in to your INE Members account. Then go to the Active Rack Session Support page on the Members site:
http://members.ine.com/member/911_tickets/active_session_support.php
Voice Rack Rental Guide version 3.14 – 61 – Copyright © 2012 INE, Inc.

You will see the following screen:
If you have multiple rack reservations, select the lab rack that is the subject of the ticket under “Which rack do you want to send a ticket for?”
Select the type of problem (under “What type of problem do you wish to report?”) that best describes the nature of the problem. In the Details box, provide as much information as you can to show the nature of the problem and what you’ve done to resolve it. Then click the Submit Ticket button (not visible in the preceding image) to launch your ticket.
For problems connecting to our TELNET gateway, please include a traceroute report (not just a ping report) from your location to racks.ine.com so we can begin investigating the problem when we receive the ticket.
For problems connecting to our VPN gateway, please include the debugging information called out in the appropriate Appendix of Appendicies A-F of this document
Voice Rack Rental Guide version 3.14 – 62 – Copyright © 2012 INE, Inc.

You will then see confirmation that your ticket has been submitted:
Initial submission of an emergency ticket causes our system to page the on-duty technician. Additions to an emergency ticket do not cause the technician to be paged.
Our response time to emergency tickets is usually less than 30 minutes. If the problem can’t be fixed quickly, our on-duty technician will respond to your ticket, perform adjustments, and respond again when the work is completed.
13.5. Submitting a Support Request Ticket
You can submit support request tickets via email. The following addresses are used for non-emergency tickets, as described in the previous section. Tickets sent to these addresses are normally handled during United States Pacific Time business hours.
• Racks: [email protected]• Sales Issues: [email protected]• Customer Service: [email protected]• Support: [email protected]
When submitting tickets, include supporting information in addition to the statement of your problem so that we may start working on resolving the ticket when we receive it. Please use a descriptive subject line. When the ticket is regarding a specific rack session, please include the following in the body of your message:
• Identification of the rack (such as “VORack4”)• The password for the rack session• The starting time of the session (using Pacific Time)
Voice Rack Rental Guide version 3.14 – 63 – Copyright © 2012 INE, Inc.

The password and starting time can be found in your rack reservation confirmation message described in the Introduction; the information may also be found by clicking the Rack Access Info link to obtain the information shown here:
Voice Rack Rental Guide version 3.14 – 64 – Copyright © 2012 INE, Inc.

Appendix A. Using a Customer Local Cisco Router for L2 VPN (Allows for Customer Hardware Cisco IP Phones)
• PLEASE READ Section 5 first to understand the requirements and configurations. • Your router must be a supported router (see Section 5) with an Enterprise IOS feature set to
support these capabilities. INE cannot provide you with this software; you need a valid support contract with Cisco to download this software.
• For each lab rack session, you must adjust your configuration. The string “vorackX” is changed to “vorack1” for rack1, “vorack6” for rack 6, and “vorack12” for rack 12. The string “<password>” is changed to the password for your session, provided in your confirmation message. You must also adjust the VLANs on your switch according to the rack you are renting.
If you experience problems, be sure to collect the debug information described in sub-section 5 of this Appendix before submitting a ticket. Our technicians need this information to investigate your problem.
Voice Rack Rental Guide version 3.14 – 65 – Copyright © 2012 INE, Inc.

1. Sample IOS Router L2VPN ConfigurationThe following is a listing of our reference configuration for supported Cisco routers; you may need to change it to accommodate the needs of your network and uplink.
! ! This config can be downloaded from:! http://www.ine.com/downloads/voice-router-l2vpn-config.txt!!no ip domain-lookup!!! This is a DHCP Pool to serve your IP Phones and Laptop with IP's and TFTP address !ip dhcp excluded-address 192.168.10.1 192.168.10.10ip dhcp pool INE-VORACK-DHCP network 192.168.10.0 255.255.255.0 default-router 192.168.10.1 dns-server 8.8.8.8 4.2.2.2 lease 7 import all!!! This is a the EzVPN Configuration. Replace the "vorackX"! string with your rack ID (vorackX) and replace the <password> value! with the password you received in the registration email.! NOTE: You will need to replace this rackID and key every time you! schedule a lab rack and connect to a new session, using the new! ID and password. You will not need to change anything on this router! regarding L2VPN setup, however you will need to change VLANs on your! switchports where IP phones reside, based on the notes provided in! the configuration file for the switch.!crypto ipsec client ezvpn INEVORACK connect auto group vorackX key <password> mode network-extension peer 75.140.41.126 xauth userid mode interactive!!! This is a the 1st part of the L2VPN Configuration.! Do not change ANYTHING, regardless of rack assigned each session.!l2tp-class INE-VOICE-L2TP-CLASS authentication password cisco cookie size 4!pseudowire-class QinQ-XCONNECT encapsulation l2tpv3 protocol l2tpv3 INE-VOICE-L2TP-CLASS ip local interface Loopback0 ip pmtu!interface Loopback0 ip address 177.177.177.1 255.255.255.255 crypto ipsec client ezvpn INEVORACK INSIDE! !!! This is your outside interface, connected to your Internet/ISP router.!! If you have a static IP address, set that instead of using DHCP.! If static, be sure to also change the default route to your upstream router.!interface FastEthernet 0/0
Voice Rack Rental Guide version 3.14 – 66 – Copyright © 2012 INE, Inc.

description *** Internet and Study Computer - CONNECT to SWITCHPORT Fa0/23 *** no ip address duplex auto speed auto !interface FastEthernet 0/0.101 description *** Public Outside Internet DHCP Sub-Interface *** encapsulation dot1Q 101 ip address dhcp no ip unreachables ip nat outside ip virtual-reassembly crypto ipsec client ezvpn INEVORACK OUTSIDE!interface FastEthernet 0/0.102 description *** Connect to Switch for both Internet and Study Computer *** encapsulation dot1Q 102 ip address 192.168.10.1 255.255.255.0 ip nat inside crypto ipsec client ezvpn INEVORACK INSIDE!!! This is the inside interface, where your 3550 or 3560 Switch connects! Do not change anything. Do not try to assign an IP address.! This is a Layer 2 swtiched "psuedowire" now, NOT a routed interface!interface FastEthernet 0/1 description *** Inside Layer 2 Switched Interface - CONNECT to SWITCHPORT Fa0/24 *** mtu 1508 NO ip address dot1q tunneling ethertype 0x9100 xconnect 177.177.177.2 123 pw-class QinQ-XCONNECT !!! If using static IP, be sure to change the default route to your upstream router here.!ip route 0.0.0.0 0.0.0.0 dhcp!!! This is an ACL and NAT statement to allow your traffic! out to your ISP!ip access-list extended NAT deny ip 192.168.10.0 0.0.0.255 177.0.0.0 0.255.255.255 permit ip 192.168.10.0 0.0.0.255 any!ip nat inside source list NAT interface FastEthernet0/0.101 overload!!!!!! This next bit is to allow (only) INE to SSH to your router to help with any troubleshooting!ip domain name ine.comusername admin privilege 15 password ciscoinecrypto key generate rsa mod 1024!line vty 0 15 transport input ssh login local!
(end)
Voice Rack Rental Guide version 3.14 – 67 – Copyright © 2012 INE, Inc.

2. Sample Cisco IOS Catalyst Switch L2VPN ConfigurationThe following is a listing of our reference configuration for supported Cisco switches; you may need to change it to accommodate the needs of your network and uplink.
!! This config can be downloaded from:! http://www.ine.com/downloads/voice-switch-l2vpn-config.txt!!! This MTU change is neccessary to carry extra Dot1Q tags (Dot1Q-in-Q).! YOU MUST REBOOT your switch sometime after this command -! (you may finish the rest of the configuration, then reboot).!system mtu routing 1504!! YOU MUST REBOOT your switch sometime after this command -! (you may finish the rest of the configuration, then reboot).!! These VLANs are all of the possible VLANs used for each Voice Rack! You will only be using the 6 VLANs for the Voice Rack you are! assigned on any given session. The rest are simply here for a future! session where you may be assigned to a different rack.! Every VLAN is intuitively numbered (2XXY) and has been given a name,! so that you quickly see which VLAN belongs on which interface! based on two things: 1) Rack you are assigned (XX),! and 2) What IP Phone that port will connect to (Y).!! Be sure to change the VLAN on each of your 6 FastEthernet ports! connected to your 6 IP Phones, on every new rack session.! By the way, if you happen to assign the wrong VLAN to a port! (e.g. you assign a VLAN for the wrong rack),! you will NOT be able to connect to that rack. This is protected! by the EzVPN configuration on the router where you change the! VORACK# for each new session. This will protect you and others! from accidentally overwriting anyone else's rack configuration.!!vtp mode transparent!vlan 101 name Internet!vlan 102 name Computer!vlan 2011 name VORack01-CorpHQ-Ph1!vlan 2012 name VORack01-CorpHQ-Ph2!vlan 2013 name VORack01-PSTN-Ph!vlan 2014 name VORack01-Branch1-Ph1!vlan 2015 name VORack01-Branch2-Ph1!vlan 2016 name VORack01-Branch2-Ph2!vlan 2021 name VORack02-CorpHQ-Ph1!vlan 2022
Voice Rack Rental Guide version 3.14 – 68 – Copyright © 2012 INE, Inc.

name VORack02-CorpHQ-Ph2!vlan 2023 name VORack02-PSTN-Ph!vlan 2024 name VORack02-Branch1-Ph1!vlan 2025 name VORack02-Branch2-Ph1!vlan 2026 name VORack02-Branch2-Ph2!vlan 2031 name VORack03-CorpHQ-Ph1!vlan 2032 name VORack03-CorpHQ-Ph2!vlan 2033 name VORack03-PSTN-Ph!vlan 2034 name VORack03-Branch1-Ph1!vlan 2035 name VORack03-Branch2-Ph1!vlan 2036 name VORack03-Branch2-Ph2!vlan 2041 name VORack04-CorpHQ-Ph1!vlan 2042 name VORack04-CorpHQ-Ph2!vlan 2043 name VORack04-PSTN-Ph!vlan 2044 name VORack04-Branch1-Ph1!vlan 2045 name VORack04-Branch2-Ph1!vlan 2046 name VORack04-Branch2-Ph2!vlan 2051 name VORack05-CorpHQ-Ph1!vlan 2052 name VORack05-CorpHQ-Ph2!vlan 2053 name VORack05-PSTN-Ph!vlan 2054 name VORack05-Branch1-Ph1!vlan 2055 name VORack05-Branch2-Ph1!vlan 2056 name VORack05-Branch2-Ph2!vlan 2061 name VORack06-CorpHQ-Ph1
Voice Rack Rental Guide version 3.14 – 69 – Copyright © 2012 INE, Inc.

!vlan 2062 name VORack06-CorpHQ-Ph2!vlan 2063 name VORack06-PSTN-Ph!vlan 2064 name VORack06-Branch1-Ph1!vlan 2065 name VORack06-Branch2-Ph1!vlan 2066 name VORack06-Branch2-Ph2!vlan 2071 name VORack07-CorpHQ-Ph1!vlan 2072 name VORack07-CorpHQ-Ph2!vlan 2073 name VORack07-PSTN-Ph!vlan 2074 name VORack07-Branch1-Ph1!vlan 2075 name VORack07-Branch2-Ph1!vlan 2076 name VORack07-Branch2-Ph2!vlan 2081 name VORack08-CorpHQ-Ph1!vlan 2082 name VORack08-CorpHQ-Ph2!vlan 2083 name VORack08-PSTN-Ph!vlan 2084 name VORack08-Branch1-Ph1!vlan 2085 name VORack08-Branch2-Ph1!vlan 2086 name VORack08-Branch2-Ph2!vlan 2091 name VORack09-CorpHQ-Ph1!vlan 2092 name VORack09-CorpHQ-Ph2!vlan 2093 name VORack09-PSTN-Ph!vlan 2094 name VORack09-Branch1-Ph1!vlan 2095 name VORack09-Branch2-Ph1!vlan 2096 name VORack09-Branch2-Ph2!
Voice Rack Rental Guide version 3.14 – 70 – Copyright © 2012 INE, Inc.

vlan 2101 name VORack10-CorpHQ-Ph1!vlan 2102 name VORack10-CorpHQ-Ph2!vlan 2103 name VORack10-PSTN-Ph!vlan 2104 name VORack10-Branch1-Ph1!vlan 2105 name VORack10-Branch2-Ph1!vlan 2106 name VORack10-Branch2-Ph2!vlan 2111 name VORack11-CorpHQ-Ph1!vlan 2112 name VORack11-CorpHQ-Ph2!vlan 2113 name VORack11-PSTN-Ph!vlan 2114 name VORack11-Branch1-Ph1!vlan 2115 name VORack11-Branch2-Ph1!vlan 2116 name VORack11-Branch2-Ph2!vlan 2121 name VORack12-CorpHQ-Ph1!vlan 2122 name VORack12-CorpHQ-Ph2!vlan 2123 name VORack12-PSTN-Ph!vlan 2124 name VORack12-Branch1-Ph1!vlan 2125 name VORack12-Branch2-Ph1!vlan 2126 name VORack12-Branch2-Ph2!vlan 2511 name VORack51-CorpHQ-Ph1!vlan 2512 name VORack51-CorpHQ-Ph2!vlan 2513 name VORack51-PSTN-Ph!vlan 2514 name VORack51-Branch1-Ph1!vlan 2515 name VORack51-Branch2-Ph1!vlan 2516
Voice Rack Rental Guide version 3.14 – 71 – Copyright © 2012 INE, Inc.

name VORack51-Branch2-Ph2!vlan 2521 name VORack52-CorpHQ-Ph1!vlan 2522 name VORack52-CorpHQ-Ph2!vlan 2523 name VORack52-PSTN-Ph!vlan 2524 name VORack52-Branch1-Ph1!vlan 2525 name VORack52-Branch2-Ph1!vlan 2526 name VORack52-Branch2-Ph2!!interface FastEthernet0/1 description == Connected to Customer CorpHQ Phone 1 switchport access vlan 2011 switchport mode dot1q-tunnel l2protocol-tunnel cdp l2protocol-tunnel stp l2protocol-tunnel vtp no cdp enable!interface FastEthernet0/2 description == Connected to Customer CorpHQ Phone 2 switchport access vlan 2012 switchport mode dot1q-tunnel l2protocol-tunnel cdp l2protocol-tunnel stp l2protocol-tunnel vtp no cdp enable!interface FastEthernet0/3 description == Connected to Customer PSTN Phone switchport access vlan 2013 switchport mode dot1q-tunnel l2protocol-tunnel cdp l2protocol-tunnel stp l2protocol-tunnel vtp no cdp enable!interface FastEthernet0/4 description == Connected to Customer Branch 1 Phone 1 switchport access vlan 2014 switchport mode dot1q-tunnel l2protocol-tunnel cdp l2protocol-tunnel stp l2protocol-tunnel vtp no cdp enable!interface FastEthernet0/5 description == Connected to Customer Branch 2 Phone 1 switchport access vlan 2015 switchport mode dot1q-tunnel l2protocol-tunnel cdp l2protocol-tunnel stp l2protocol-tunnel vtp no cdp enable!interface FastEthernet0/6 description == Connected to Customer Branch 2 Phone 2 switchport access vlan 2016 switchport mode dot1q-tunnel
Voice Rack Rental Guide version 3.14 – 72 – Copyright © 2012 INE, Inc.

l2protocol-tunnel cdp l2protocol-tunnel stp l2protocol-tunnel vtp no cdp enable!!interface FastEthernet0/21 description == Connected to Customer Internet switchport mode access switchport access vlan 101 no cdp enable!!interface FastEthernet0/22 description == Connected to Customer Computer switchport mode access switchport access vlan 102!!interface FastEthernet0/23 description == Connected to Customer Router Fa0/0 for Internet and Computer switchport trunk encapsulation dot1q switchport trunk allowed vlan 101-102 switchport mode trunk!!interface FastEthernet0/24 description == Connected to Customer Router Fa0/1 for L2TPv3 switchport trunk encapsulation dot1q switchport trunk native vlan 2999 switchport trunk allowed vlan 2000-2999 switchport mode trunk!!
(end)
Voice Rack Rental Guide version 3.14 – 73 – Copyright © 2012 INE, Inc.

3. Testing Your Hardware VPN Prior to Your Lab Rack SessionAt this time, you cannot test all aspects of this particular option with the INE racks, due to resource limitations. However, you will get a good test on your first connection, which should serve as an indication of the success of your remaining rental sessions. We are working on establishing a pre-session testing environment.
4. Connecting Your IP PhonesAfter you have connected your Layer 2 VPN via your Cisco IOS router, you may connect all of your phones to your router-connected Cisco Catalyst switch.
• Connect an Ethernet cable from the router’s “Inside Layer 2 Switched Interface” FastEthernet port (FastEthernet 0/1 in our reference L2VPN-router configuration) to your supported Cisco Catalyst switchport (FastEthernet0/24 in our reference L2VPN-switch configuration).
• Connect Ethernet cables from each one of your IP phone’s "To Switch" ports to the appropriately marked Catalyst switchports per our reference L2VPN-switch configuration.
You must establish a separate VPN link from your computer to your INE Voice rack if you want to also have Internet access. If you do not need Internet access, you may "piggyback" on the VPN link that your phones are using back to the rental rack by connecting your computer to the “PC” port on the back of any of your (preferably) CorpHQ phones. If you choose the piggyback method, be aware that you must either configure a static IP address on your laptop in the same “Voice” VLAN that your IP phone is configured for at your CorpHQ switch, or have DHCP already set up for that VLAN and allow your laptop to receive an IP address in that same range.
For this option, the VPN path does not cross the PSTN router, but it does cross the R1 CorpHQ router (Voice VLAN to Server VLAN is routed through R1), as shown in the Voice Topology diagram. Thus, if you reload the PSTN router, no harm should result. However, if you reload the R1 CorpHQ router, you will lose connectivity to your lab rack via the VPN connection. As soon as the router reloads, you regain connectivity. There is no need to take down and re-establish your VPN links.
Voice Rack Rental Guide version 3.14 – 74 – Copyright © 2012 INE, Inc.

5. Troubleshooting Your Hardware IOS Router VPN ConnectionIf have problems with VPN device connection, make sure to perform the following tasks before submitting a support ticket:
• Log in with the same user name and password via SSL VPN. • Issue the following commands, attempt a connection, collect all output, and include the output
in your ticket:
show crypto ipsec client ezvpnshow l2tunshow crypto isakmpshow crypto ipsec sashow tech-support
debug crypto isakmpdebug crypto ipsecdebug l2tundebug xconnect
This information should provide enough detail to help us troubleshoot your case.
Voice Rack Rental Guide version 3.14 – 75 – Copyright © 2012 INE, Inc.

Appendix B. Using a Customer Local Cisco Router for VPN (Allows for Customer Hardware Cisco IP Phones)
• Your router must have an IOS image with either the Advanced Security or Enterprise feature set to support these capabilities. INE cannot provide you with this software; you need a valid support contract with Cisco to download this software.
• For each lab rack session, you must adjust your configuration. The string “vorackX” is changed to “vorack1” for rack1, “vorack6” for rack 6, and “vorack12” for rack 12. The string “<password>” is changed to the password for your session, provided in your confirmation message.
If you experience problems, be sure to collect the debug information described in sub-section 5 of this Appendix before submitting a ticket. Our technicians need this information to investigate your problem.
1. Sample IOS Router VPN ConfigurationThe following is a listing of our reference configuration for Cisco routers; you may need to change it to accommodate the needs of your network and uplink.
! This config can be downloaded from:! http://www.ine.com/downloads/voice-router-vpn-config.txt!! 23 Sep 2010 -- update access-list 101 (SS)! -- update access-list IOS-FW-IN (MS)! -- update access-list NAT (MS)! -- update crypto ipsec client ezvpn INEVORACK (MS)!! 27 Sep 2010 -- Remove all DNS references!! 3 Jan 2011 -- update crypto ipsec client ezvpn and troubleshooting (MS)!! 16 Feb 2011 -- add suggested PPPoE commands (commented out) (MS)!!no ip domain-lookup!! This is the first part of an IOS Firewall to help protect you.!ip inspect name IOS-FW-OUT tcp timeout 3600ip inspect name IOS-FW-OUT udp timeout 3600ip inspect name IOS-FW-OUT httpip inspect name IOS-FW-OUT https timeout 3600ip inspect name IOS-FW-OUT icmpip inspect name IOS-FW-OUT ddns-v3ip inspect name IOS-FW-OUT smtpip inspect name IOS-FW-OUT pop3ip inspect name IOS-FW-OUT pop3sip inspect name IOS-FW-OUT imapip inspect name IOS-FW-OUT ftpsip inspect name IOS-FW-OUT ntpip inspect name IOS-FW-OUT ftp timeout 3600!!! This is a DHCP Pool to serve your IP Phones and Laptop with IP's and TFTP address
Voice Rack Rental Guide version 3.14 – 76 – Copyright © 2012 INE, Inc.

!ip dhcp excluded-address 192.168.10.1 192.168.10.10ip dhcp pool INE-VORACK-DHCP network 192.168.10.0 255.255.255.0 option 150 ip 177.1.10.10 default-router 192.168.10.1 import all!! This is a the EzVPN Configuration. Replace the "vorackX"! string with your rack ID (vorackX) and replace the “key” value! with the password you received in the registration email.! NOTE: You will need to replace this rackID and key every time you! schedule a lab rack and connect to a new session, using the new! ID and password.!crypto ipsec client ezvpn INEVORACK connect auto group vorackX key <password> mode network-extension peer 75.140.41.126 xauth userid mode interactive!! This is your outside interface, connected to your Internet/ISP! It is already provisioned with a IOS Firewall with the "inspect"! and "access-group" statements!! If you have a static IP address (highly recommended), set that! instead of using DHCP. Also be sure to install the default! route to your upstream router!interface FastEthernet 0/0 description *** Outside Public Interface *** ip address dhcp ip access-group IOS-FW-IN in no ip unreachables ip nat outside ip inspect IOS-FW-OUT out no cdp enable crypto ipsec client ezvpn INEVORACK outside!! This is the inside interface, where your IP phones connect! Ensure that you use a 192.168.x.x address so that EzVPN Network! Extension Mode works properly!interface FastEthernet 0/1 description *** Inside Private Interface *** ip address 192.168.10.1 255.255.255.0 ip nat inside no keepalive crypto ipsec client ezvpn INEVORACK inside!ip route 0.0.0.0 0.0.0.0 dhcp!! This is the second part of the IOS Firewall to help keep protect you.!ip access-list extended IOS-FW-IN permit udp any any eq bootpc permit icmp host 75.140.41.126 any permit tcp host 75.140.41.126 any eq 22 permit esp host 75.140.41.126 any permit udp host 75.140.41.126 any eq isakmp permit udp host 75.140.41.126 any eq non500-isakmp deny ip any any log!! This is an ACL and NAT statement to allow your traffic! out to your ISP!ip access-list extended NAT deny ip 192.168.10.0 0.0.0.255 177.0.0.0 0.255.255.255
Voice Rack Rental Guide version 3.14 – 77 – Copyright © 2012 INE, Inc.

permit ip 192.168.10.0 0.0.0.255 any!ip nat inside source list NAT interface f0/0 overload!!! Only uncomment the next 35 lines if you are using PPPoE with DSL!! vpdn enable! vpdn-group 1! interface FastEthernet0/0! no ip address! no ip proxy-arp! no cdp enable! no mop enabled! no ip access-group IOS-FW-IN in! no ip nat outside! no ip inspect IOS-FW-OUT out! no crypto ipsec client ezvpn INEVORACK outside! pppoe enable group global! pppoe-client dial-pool-number 1!! interface Dialer1! mtu 1492! ip address negotiated! ip nat outside! ip virtual-reassembly! encapsulation ppp! load-interval 30! dialer pool 1! dialer-group 1! no cdp enable! ppp authentication pap callin! ppp pap sent-username <YOUR_ISP_USERNAME> password <YOUR_ISP_PASSWORD>! ppp ipcp address accept! crypto ipsec client ezvpn INEVORACK outside!! dialer-list 1 protocol ip permit! no ip route 0.0.0.0 0.0.0.0 dhcp! ip route 0.0.0.0 0.0.0.0 Dialer1! no ip nat inside source list NAT interface f0/0 overload! ip nat inside source list NAT interface Dialer1 overload!! This next bit is to allow (only) INE to SSH to your router to help with any troubleshooting!ip domain name ine.comusername admin privilege 15 password ciscoinecrypto key generate rsa mod 1024!line vty 0 15 transport input ssh login local!
Voice Rack Rental Guide version 3.14 – 78 – Copyright © 2012 INE, Inc.

2. Testing Your Hardware VPN Prior to Your Lab Rack SessionTo ensure that everything will work properly when your session begins, you may use an INE test Hardware VPN account to connect to our VPN portal prior to your Voice rack session.
The portion of the configuration that is different from the normal configuration is listed below; it basically consists of simply changing the group name and key in the “crypto ipsec client ezvpn” portion:
Please download the entire normal configuration here:http://www.ine.com/downloads/voice-router-vpn-config.txt
And use this as the group name and key:GROUP: voracktestKEY: voracktest
To result in the “crypto ipsec client ezvpn INEVORACK” section looking like this:
!crypto ipsec client ezvpn INEVORACK connect auto group voracktest key voracktest mode network-extension peer 75.140.41.126 xauth userid mode interactive!
After configuring this and connecting, you can verify that the VPN link itself is properly set up by pinging 177.254.254.254; this indicates that you have set up a VPN tunnel to our VPN portal.
ping 177.254.254.254 source fa0/1
To verify that you have full connectivity, ping the IP address of the CUCM Publisher, 177.1.10.10:
ping 177.1.10.10 source fa0/1
This test verifies that your VPN link was successfully established. When you use your configuration during a Voice lab rack session, simply change the group and key line to match the information you received in the rack reservation confirmation message.
On this test EasyVPN account, you will only be able to ping the CUCM Publisher at the IP address of 177.1.10.10. You also will not be able to connect to the CUCM Publisher via HTTP, because we only allow ICMP for this test account. You will not be able to ping any other devices on this test account, but you can, of course, ping all of the IP addresses when you connect with a normal Voice rack rental session.
Voice Rack Rental Guide version 3.14 – 79 – Copyright © 2012 INE, Inc.

3. Connecting Your IP PhonesAfter you have connected your VPN via your Cisco IOS router, you may connect all of your phones to the router. The easiest and least expensive way to do this is to daisy-chain your hardware IP phones:
• Connect an Ethernet cable from the router’s “Inside Private Interface” FastEthernet port (FastEthernet 0/1 in our reference configuration) to your first IP phone’s "10/100 SW" port.
• Connect another Ethernet cable from the same IP phone’s "10/100 PC" port to the next IP phone’s "10/100 SW" port.
• Keep repeating this until you have connected all of your IP phones together.• Connect an Ethernet cable from your last IP phone’s "10/100 PC" port to your Mac or PC’s
network port.
Using this daisy-chain technique, you will not need to establish a separate VPN link from your computer or computers; instead you will “piggyback” on the VPN link that your phones are using back to the rental rack.
If you use this method, you do not need to purchase an EtherSwitch that provides Power over Ethernet (PoE) converters. To provide power to your daisy-chained Cisco IP phones, you need Cisco Power “bricks” to power the phones. (Cisco Part# PWR-CUBE-3)
The VPN path crosses both the PSTN and R1 (HQ) routers, as shown in the Voice Topology diagram. Thus, if you reload either of these routers, you will temporarily lose connectivity to your lab rack via the VPN connection. As soon as the router reloads, you regain connectivity. There is no need to take down and re-establish your VPN links.
You may, of course, use a Cisco Catalyst PoE or (depending on which phones you have) Inline Power switch to connect your IP phones, and then connect that switch to the “Inside Private Interface” FastEthernet port on your IOS router—but if you have both the router and the switch, you should explore the previous Layer 2 VPN option (Appendix A) because the environment is an exact replica of the actual Cisco CCIE Voice Lab Exam.
Voice Rack Rental Guide version 3.14 – 80 – Copyright © 2012 INE, Inc.

4. Multicast Music-on-Hold Will Not Function Across Your VPN Link
IPSec does not support carriage of multicast packets. This does not mean that you cannot test Multicast Music-on-Hold (MMoH); rather, instead of trying to hear the MMoH from an IP phone in front of you (you won’t ever hear it there), you should:
• Place a call from your PSTN phone (in front of you) into the R2-BR1 gateway, into a Branch 1 phone.
• Have that Branch 1 phone place the call from the PSTN phone on hold.
You will now hear MoH on your remote PSTN phone because it has been converted into Unicast traffic. However, upon inspection you will find that MMoH is indeed flowing from the CUCM to your BR1 router.
Technical details: The multicast packets are sent from the CUCM Pub or Sub server, across R1-HQ, across the Serial Frame-Relay link, over to R2-BR1, and there converted from VoIP packets into a PCM DS0 stream to be sent out over the PRI link to PSTN. Then, at PSTN, it will be sent using unicast packets across the VPN to the IP phone in front of you. Remember, it is only multicast packets from your CUCM Server to the R2-BR1 router—then it becomes PCM DS0 signaling over TDM.
NOTE: The previous Layer 2 VPN option (Appendix A) does not have this multicast limitation.
5. Troubleshooting Your Hardware IOS Router VPN ConnectionIf you have problems with VPN device connection, make sure you perform the following tasks before submitting a trouble ticket:
• Log in with the same user name and password via SSL VPN. • Issue the following commands, attempt a connection, collect all output, and include the output
in your ticket:
show crypto ipsec client ezvpnshow crypto isakmpshow crypto ipsec sashow tech-supportdebug crypto isakmpdebug crypto ipsec
This information should provide enough detail to help us troubleshoot your case.
Voice Rack Rental Guide version 3.14 – 81 – Copyright © 2012 INE, Inc.

Appendix C. Using Customer Local ASA 5505 (pre 8.4) or PIX 501 for VPN (Allows for Customer Hardware Cisco IP Phones)
• For each session, you must adjust your configuration. The string “vorackX” is changed to “vorack1” for rack1, “vorack6” for rack 6, and “vorack12” for rack 12. The string “<password>” is changed to the password for your session, provided in your confirmation message.
If you experience problems, be sure to collect the debug information described in sub-section 5 of this Appendix before submitting a ticket. Our technicians need this information to investigate your problem.
The reference configuration we supply below also works for the PIX 501 or 515 if you have an IOS image of 7.0 or higher. If you have a PIX 501 or 515 with an earlier IOS image, we offer a reference configuration via download; you may need to change it to accommodate the needs of your specific appliance, network, and uplink:
http://www.ine.com/downloads/voice-pix63-vpn.config.txt
1. Sample ASA/PIX VPN ConfigurationThe instructions in this Appendix are specific to the Cisco ASA 5505; essentially the same configuration can also be used with a Cisco PIX 501.
! Reference configuration for ASA 5505. You may need to make! changes to this configuration to match your network requirements! and the particular device you are using.!! This configuration can also be used with the Cisco PIX v7.2 or higher.!! This config can be downloaded from! http://www.ine.com/downloads/voice-asa5505-pre8.4-vpn.config.txt!!! Network Extension Mode for EzVPN will ONLY work on INE's network if you use IP! addressing on your internal network in the range of 192.168.x.0/24!interface Vlan1 description *** Inside Private VLAN Interface *** nameif inside security-level 100 ip address 192.168.10.1 255.255.255.0!!interface Vlan2 description *** Outside Public VLAN Interface *** nameif outside security-level 0 ip address dhcp setroute!! If you happen to be connecting to DSL, then uncomment the 6 lines below
Voice Rack Rental Guide version 3.14 – 82 – Copyright © 2012 INE, Inc.

! and replace with your ISP-given username and password ! pppoe client vpdn group MYDSL ! ip address pppoe ! vpdn group MYDSL request dialout pppoe ! vpdn group MYDSL localname <username> ! vpdn group MYDSL ppp authentication pap ! vpdn username monavy82 password <password>!interface Ethernet0/0 description *** Outside Public Interface *** switchport access vlan 2!interface Ethernet0/1 description *** Inside Private Interface *** switchport access vlan 1!!! Setup NAT so that Inside traffic destined for Internet (not for VPN), has a routable IP! ACL to ensure that VPN traffic does not get NAT'd to the Outside interface!access-list nonat permit ip 192.168.10.0 255.255.255.0 177.0.0.0 255.0.0.0global (outside) 1 interfacenat (inside) 0 access-list nonatnat (inside) 1 0.0.0.0 0.0.0.0 0 0!!! 27 Sept 2010: DNS removed! This DNS information is necessary to resolve the INE VPN server hostname! dns domain-lookup outside! dns server-group DefaultDNS! name-server 8.8.8.8!!! This is a DHCP server for your Internal network devices including IP phones and laptop! PIX/ASA automatically add their own IP address as the default gateway!dhcpd address 192.168.10.20-192.168.10.200 insidedhcpd dns 8.8.8.8 4.2.2.2dhcpd lease 3600dhcpd ping_timeout 750dhcpd auto_config outsidedhcpd option 150 ip 177.1.10.10dhcpd enable inside!!!! This is the EzVPN client configuration with Network Extension Mode! Network Extension Mode for EzVPN will ONLY work on INE's network if you use IP! addressing on your internal network in the range of 192.168.x.0/24!! Replace 'XX' in 'vorackXX' with your Rack#, and replace '<password>' with your session password!vpnclient enablevpnclient vpngroup vorackXX password <password>vpnclient server 75.140.41.126vpnclient mode network-extension-modevpnclient nem-st-autoconnect!!! This is for INE technical support usage if we need to help you troubleshoot your
Voice Rack Rental Guide version 3.14 – 83 – Copyright © 2012 INE, Inc.

! VPN connection. You will need to have this enabled if you desire for us to assist you.! It only allows SSH access from 1 IP address at INE, via your Outside interface!password ciscoineenable password ciscoinessh 75.140.41.126 255.255.255.255 outside!
(end)
Voice Rack Rental Guide version 3.14 – 84 – Copyright © 2012 INE, Inc.

2. Testing Your ASA/PIX VPN Prior to Your Lab Rack SessionTo ensure that everything will work properly when your session begins, you may use an INE test Hardware account to connect to our VPN portal prior to your Voice rack session.
The portion of the configuration that is different from the normal configuration is listed below; it basically consists of simply changing the vpngroup and password parameters in the vpnclient line:
Please download the entire normal configuration here: http://www.ine.com/downloads/voice-asa5505-vpn.config.txt
And use these as the vpngroup and password:VPNGROUP: voracktestPASSWORD: voracktest
!vpnclient vpngroup voracktest password voracktest!
After configuring this and connecting, you can verify that the VPN link itself is properly set up by pinging 177.254.254.254; this indicates that you have set up a VPN tunnel to our VPN portal.
ping 177.254.254.254 source fa0/1
To verify that you have full connectivity, ping the IP address of the CUCM Publisher: 177.1.10.10:
ping 177.1.10.10 source fa0/1
This test verifies that your VPN link was successfully established. When you use your configuration during a Voice lab rack session, simply change the vpngroup and password parameters in the vpnclient line to match the information you received in the rack reservation confirmation message.
On this test EasyVPN account, you will only be able to ping the CUCM Publisher at the IP address of 177.1.10.10. You also will not be able to connect to the CUCM Publisher via HTTP, as we only allow ICMP for this test account. You will not be able to ping any other devices on this test account, however you will, of course, be able to ping all of the IP addresses when you connect with a normal, rented Voice rack session.
Voice Rack Rental Guide version 3.14 – 85 – Copyright © 2012 INE, Inc.

3. Connecting Your IP PhonesAfter you have connected your VPN via your ASA or PIX appliance, you may connect all of your phones to the ASA/PIX. The easiest and least expensive way to do this is to daisy-chain your hardware IP phones.
• Connect an Ethernet cable from the ASA or PIX appliance’s “Inside” FastEthernet port to your first IP phone’s "10/100 SW" port.
• Connect another Ethernet cable from the same IP phone’s "10/100 PC" port to the next IP phone’s "10/100 SW" port.
• Repeat this until you have connected all of your IP phones together.• Connect an Ethernet cable from your last IP phone’s "10/100 PC" port to your Mac or PC’s
network port.
Using this daisy-chain technique, you do not need to establish a separate VPN link from your computer or computers; instead, you will “ride in” the VPN link that your phones are using back to the rental rack.
If you use this method, you do not need to purchase an EtherSwitch that provides Power over Ethernet (PoE) converters. To provide power to your daisy-chained Cisco IP phones, you will need Cisco Power “bricks” to power the phones. (Cisco Part# PWR-CUBE-3)
The VPN path crosses both the PSTN and R1 (HQ) routers, as shown in the Voice Topology diagram. Thus, if you reload either of these routers, you will temporarily lose connectivity to your lab rack via the VPN connection. As soon as the router reloads, you regain connectivity. There is no need to try to take down and re-establish your VPN links.
4. Multicast Music-on-Hold Will Not Function Across Your VPN LinkIPSec does not support carriage of multicast packets. This does not mean that you cannot test Multicast Music-on-Hold (MMoH); rather, instead of trying to hear the MMoH from an IP phone in front of you (you won’t ever hear it there), you should:
• Place a call from your PSTN phone (in front of you) into the R2-BR1 gateway, into a Branch 1 phone.
• Have that Branch 1 phone place the call from the PSTN phone on hold.
You will not hear Music on Hold on your remote PSTN phone because it has been converted into Unicast traffic. However, upon inspection you will find that MMoH is indeed flowing from the CUCM to your BR1 router.
Voice Rack Rental Guide version 3.14 – 86 – Copyright © 2012 INE, Inc.

Technical details: The multicast packets are sent from the CUCM Pub or Sub server, across R1-HQ, across the Serial Frame-Relay link, over to R2-BR1, and there converted from VoIP packets into a PCM DS0 stream to be sent out over the PRI link to PSTN. Then, at PSTN, it will be sent using unicast packets across the VPN to the IP phone in front of you. Remember, it is only multicast packets from your CUCM Server to the R2-BR1 router—then it becomes PCM DS0 signaling over TDM.
5. Troubleshooting Your Hardware ASA/PIX VPN ConnectionIf you have problems with VPN device connection, make sure to perform the following tasks before submitting a support ticket:
• Log in with the same user name and password via SSL VPN. • Issue the following commands, attempt a connection, collect all output, and include the output
in your ticket:
show tech-supportdebug crypto isakmpdebug crypto ipsec
This information should provide enough details to help us troubleshoot your case.
Voice Rack Rental Guide version 3.14 – 87 – Copyright © 2012 INE, Inc.

Appendix D. Using Customer Local ASA 5505 (post 8.4) for VPN (Allows for Customer Hardware Cisco IP Phones)
• For each session, you will need to adjust your configuration. The string “vorackX” is changed to “vorack1” for rack1, “vorack6” for rack 6, and “vorack12” for rack 12. The string “<password>” is changed to the password for your session, provided in your confirmation message.
If you experience problems, be sure to collect the debug information described in sub-section 5 before submitting a ticket. Our technicians need this information to investigate your problem.
1. Sample ASA VPN ConfigurationThis is a reference configuration; you may need to change it to accommodate the needs of your specific appliance, network, and uplink. The instructions in this Appendix are specific to the Cisco ASA 5505 8.4 and higher.
! Reference configuration for ASA 5505. You may need to make! changes to this configuration to match your network requirements! and the particular device you are using.!! This config can be downloaded from! http://www.ine.com/downloads/voice-asa5505-post8.4-vpn.config.txt!!! Network Extension Mode for EzVPN will ONLY work on INE's network if you use IP! addressing on your internal network in the range of 192.168.x.0/24!interface Vlan1 description *** Inside Private VLAN Interface *** nameif inside security-level 100 ip address 192.168.10.1 255.255.255.0!!interface Vlan2 description *** Outside Public VLAN Interface *** nameif outside security-level 0 ip address dhcp setroute!! If you happen to be connecting to DSL, then uncomment the 6 lines below! and replace with your ISP-given username and password ! pppoe client vpdn group MYDSL ! ip address pppoe ! vpdn group MYDSL request dialout pppoe ! vpdn group MYDSL localname <username> ! vpdn group MYDSL ppp authentication pap ! vpdn username monavy82 password <password>!interface Ethernet0/0 description *** Outside Public Interface *** switchport access vlan 2!interface Ethernet0/1
Voice Rack Rental Guide version 3.14 – 88 – Copyright © 2012 INE, Inc.

description *** Inside Private Interface *** switchport access vlan 1!!! Setup NAT so that Inside traffic destined for Internet (not for VPN), has a routable IP! ACL to ensure that VPN traffic does not get NAT'd to the Outside interface!!object network obj_any subnet 0.0.0.0 0.0.0.0 nat (inside,outside) dynamic interface!!object network obj-177.0.0.0 subnet 177.0.0.0 255.0.0.0!nat (inside,any) source static any any destination static obj-177.0.0.0 obj-177.0.0.0 no-proxy-arp route-lookup!!!! 27 Sept 2010: DNS removed! This DNS information is necessary to resolve the INE VPN server hostname! dns domain-lookup outside! dns server-group DefaultDNS! name-server 8.8.8.8!!! This is a DHCP server for your Internal network devices including IP phones and laptop! PIX/ASA automatically add their own IP address as the default gateway!dhcpd address 192.168.10.20-192.168.10.200 insidedhcpd dns 8.8.8.8 4.2.2.2dhcpd lease 3600dhcpd ping_timeout 750dhcpd auto_config outsidedhcpd option 150 ip 177.1.10.10dhcpd enable inside!!!! This is the EzVPN client configuration with Network Extension Mode! Network Extension Mode for EzVPN will ONLY work on INE's network if you use IP! addressing on your internal network in the range of 192.168.x.0/24!! Replace 'XX' in 'vorackXX' with your Rack#, and replace '<password>' with your session password!vpnclient enablevpnclient vpngroup vorackXX password <password>vpnclient server 75.140.41.126vpnclient mode network-extension-modevpnclient nem-st-autoconnect!!! This is for INE technical support usage if we need to help you troubleshoot your! VPN connection. You will need to have this enabled if you desire for us to assist you.! It only allows SSH access from 1 IP address at INE, via your Outside interface!password ciscoineenable password ciscoine
Voice Rack Rental Guide version 3.14 – 89 – Copyright © 2012 INE, Inc.

ssh 75.140.41.126 255.255.255.255 outside!
(end)
2. Testing Your ASA/PIX VPN Prior to Your Lab Rack SessionTo ensure that everything will work properly when your session begins, you may use an INE test account to connect to our VPN portal prior to your Voice rack session.
The portion of the configuration that is different from the normal configuration is listed below; it basically consists of simply changing the vpngroup and password parameters in the vpnclient line:
Please download the entire normal configuration here: http://www.ine.com/downloads/voice-asa5505-vpn.config.txt
And use these as the vpngroup and password:VPNGROUP: voracktestPASSWORD: voracktest
!vpnclient vpngroup voracktest password voracktest!
After configuring this and connecting, you can verify that the VPN link itself is properly set up by pinging 177.254.254.254; this indicates that you have set up a VPN tunnel to our VPN portal.
ping 177.254.254.254 source fa0/1
To verify that you have full connectivity, ping the IP address of the CUCM Publisher: 177.1.10.10:
ping 177.1.10.10 source fa0/1
This test verifies that your VPN link was successfully established. When you use your configuration during a Voice lab rack session, simply change the vpngroup and password parameters in the vpnclient line to match the information you received in the rack reservation confirmation message.
On this test EasyVPN account, you can ping the CUCM Publisher only at the IP address 177.1.10.10. Also, you cannot connect to the CUCM Publisher via HTTP, because we only allow ICMP for this test account. You will not be able to ping any other devices on this test account; however, you can, of course, ping all of the IP addresses when you connect with a normal, rented Voice rack session.
Voice Rack Rental Guide version 3.14 – 90 – Copyright © 2012 INE, Inc.

3. Connecting Your IP PhonesAfter you have connected your VPN via your ASA or PIX appliance, you may connect all of your phones to the ASA/PIX. The easiest and least expensive way to do this is to daisy-chain your hardware IP phones.
• Connect an Ethernet cable from the ASA or PIX appliance's “Inside” FastEthernet port to your first IP phone’s "10/100 SW" port.
• Connect another Ethernet cable from the same IP phone’s "10/100 PC" port to the next IP phone’s "10/100 SW" port.
• Repeat this this until you have connected all of your IP phones together.• Connect an Ethernet cable from your last IP phone’s "10/100 PC" port to your Mac or PC’s
network port.
Using this daisy-chain technique, you do not need to establish a separate VPN link from your computer or computers; instead, you will "ride in" the VPN link that your phones are using back to the rental rack.
If you use this method, you do not need to purchase an Etherswitch that provides Power over Ethernet (PoE) converters. To provide power to your daisy-chained Cisco IP phones, you will need Cisco Power “bricks” to power the phones. (Cisco Part# PWR-CUBE-3)
The VPN path crosses both the PSTN and R1 (HQ) routers, as shown in the Voice Topology diagram. Thus, if you reload either of these routers, you will temporarily lose connectivity to your lab rack via the VPN connection. As soon as the router reloads, you regain connectivity. There is no need to try to take down and re-establish your VPN links.
4. Multicast Music-on-Hold Will Not Function Across Your VPN LinkIPSec does not support carriage of multicast packets. This does not mean that you cannot test Multicast Music-on-Hold (MMoH); rather, instead of trying to hear the MMoH from an IP phone in front of you (you won’t ever hear it there), you should:
1.Place a call from your PSTN phone (in front of you) into the R2-BR1 gateway, into a Branch 1 phone.2.Have that Branch 1 phone place the call from the PSTN phone on hold.
You will not hear Music on Hold on your remote PSTN phone because it has been converted into Unicast traffic. However, upon inspection you will find that MMoH is indeed flowing from the CUCM to your BR1 router.
Voice Rack Rental Guide version 3.14 – 91 – Copyright © 2012 INE, Inc.

Technical details: The multicast packets are sent from the CUCM Pub or Sub server, across R1-HQ, across the Serial Frame-Relay link, over to R2-BR1, and there converted from VoIP packets into a PCM DS0 stream to be sent out over the PRI link to PSTN. Then, at PSTN, it will be sent using unicast packets across the VPN to the IP phone in front of you. Remember, it is only multicast packets from your CUCM Server to the R2-BR1 router—then it becomes PCM DS0 signaling over TDM.
5. Troubleshooting Your Hardware ASA/PIX VPN ConnectionIf you have problems with VPN device connection, make sure to perform the following tasks before submitting a support ticket:
• Log in with the same user name and password via SSL VPN. • Issue the following commands, attempt a connection, collect all output, and include the output
in your ticket:
show tech-supportdebug crypto isakmpdebug crypto ipsec
This information should provide enough details to help us troubleshoot your case.
Voice Rack Rental Guide version 3.14 – 92 – Copyright © 2012 INE, Inc.

Appendix E. Using Cisco SSL VPN
If you experience problems, be sure to collect the debug information described below in sub-section 3 before sending in a ticket. Our technicians need this information to investigate your problem.
The SSL VPN server supports clients running Mac OS X, Windows 2000/XP/Vista/7 and Linux operating systems. To start a new SSL VPN session, point your browser to the following URL, where X is you rack number:
https://vorack-vpn.ine.com/vorackX
For example, if your rack number is 9, use the URL:
https://vorack-vpn.ine.com/vorack9
You may be prompted to accept a certificate. When you accept the certificate, the SSL VPN login window for your rack appears, similar to the one shown here:
Enter the credentials that you received in your rental rack registration message. After successful authentication, the Web Launch process starts. You may be required to download and install, or
Voice Rack Rental Guide version 3.14 – 93 – Copyright © 2012 INE, Inc.

activate, the new Java applet or ActiveX component (make sure your browser is set to prompt you to allow or disallow Java or ActiveX). Follow the on-screen instructions and install the required components.
Your browser may prompt you a few times about accepting certificates and running applications. Make sure you accept and install all of them. When the installation process and VPN link connection is successful, you will see a new icon in your tray, similar to the following:
After this, you should have access to any device that has an IP address inside your rack. Verify connectivity by pinging the IP address of the CUCM Publisher: 177.1.10.10:
host$ ping 177.1.10.10PING 177.1.10.10 (177.1.10.10): 56 data bytes64 bytes from 177.1.10.10: icmp_seq=0 ttl=125 time=45.243 ms64 bytes from 177.1.10.10: icmp_seq=1 ttl=125 time=32.706 ms64 bytes from 177.1.10.10: icmp_seq=0 ttl=125 time=38.713 ms64 bytes from 177.1.10.10: icmp_seq=1 ttl=125 time=35.596 ms
This test verifies that your VPN link was successfully established.
Your browser may cache the session information from a previous rental on a different Voice rack; you may need to close the browser and open it again to access the current Voice rack.
In some situations, if using a PC, you may need to reboot after the installation of the SSL VPN client software.
1. Testing Your SSL VPN Prior to Your Lab Rack SessionTo ensure that everything will work properly when your session begins, you may use an INE test SSL VPN account to install the SSL AnyConnect client and connect to our VPN portal prior to your Voice rack session.
To start this Test SSL VPN session, point your browser to the following URL and use the accompanying user name and password:
https://vorack-vpn.ine.com/voracktest
Username: voracktestPassword: voracktest
Voice Rack Rental Guide version 3.14 – 94 – Copyright © 2012 INE, Inc.

After this, you should be able to verify your connectivity by pinging the IP address of the CUCM Publisher: 177.1.10.10:
host$ ping 177.1.10.10PING 177.1.10.10 (177.1.10.10): 56 data bytes64 bytes from 177.1.10.10: icmp_seq=0 ttl=125 time=45.243 ms64 bytes from 177.1.10.10: icmp_seq=1 ttl=125 time=32.706 ms64 bytes from 177.1.10.10: icmp_seq=0 ttl=125 time=38.713 ms64 bytes from 177.1.10.10: icmp_seq=1 ttl=125 time=35.596 ms
This test verifies that your VPN link was successfully established. When you use your configuration during a Voice lab rack session, simply change the user name and password to match the information you received in the rack reservation confirmation message.
On this test SSL VPN account, you will be able to ping the CUCM Publisher only at the IP address 177.1.10.10. Also, you cannot connect to the CUCM Publisher via HTTP, because we only allow ICMP for this test account. You cannot ping any other devices on this test account; however, you can, of course, ping all of the IP addresses when you connect with a normal, rented Voice rack session.
2. Multicast Music-on-Hold Will Not Function Across Your VPN LinkAlthough SSL does support carriage of multicast packets, we don’t flood them throughout our network. This is so that customers who rent Voice and other CCIE track-related racks from us do not experience degraded network performance caused by the flooding of multicast IP Voice and other data packets. This does not mean that you cannot test Multicast Music-on-Hold (MMoH); rather, instead of trying to hear the MMoH from an IP phone in front of you (you won’t ever hear it there), you should:
• Place a call from your PSTN phone (in front of you) into the R2-BR1 gateway, into a Branch 1 phone.
• Have that Branch 1 phone place the call from the PSTN phone on hold.
You will not hear Music on Hold on your remote PSTN phone because it has been converted into Unicast traffic. However, upon inspection you will find that MMoH is indeed flowing from the CUCM to your BR1 router.
Technical details: The multicast packets are sent from the CUCM Pub or Sub server, across R1-HQ, across the Serial Frame-Relay link, over to R2-BR1, and there converted from VoIP packets into a PCM DS0 stream to be sent out over the PRI link to PSTN. Then, at PSTN, it will be sent using unicast packets across the VPN to the IP phone in front of you. Remember, it is only multicast packets from your CUCM Server to the R2-BR1 router—then it becomes PCM DS0 signaling over TDM.
Voice Rack Rental Guide version 3.14 – 95 – Copyright © 2012 INE, Inc.

3. Troubleshooting Your Cisco AnyConnect SSL VPN ConnectionIf you experience problems with your SSL AnyConnect VPN connecting or staying connected, make sure to do the following before submitting a trouble ticket:
• Click the Export button in the Cisco AnyConnect client to export a list of the statistics related to your VPN connection to a text file. This will help our technicians troubleshoot your case.
Voice Rack Rental Guide version 3.14 – 96 – Copyright © 2012 INE, Inc.

Appendix F. Using the Cisco IPSec EasyVPN ClientIn rare situations in which you cannot use the easy-to-use SSL VPN technology, you may want to try using Cisco’s IPSec-based EasyVPN Client. To do so, you must download the client software for your operating system and configure it as described below. You can download the software here:
http://www.cisco.com/cisco/software/navigator.html?mdfid=270636499&flowid=4466
INE cannot provide you with this software; you will need a valid Cisco SMARTNet support contract to download this software, or you will need to locate a Cisco reseller who can sell the software to you.
If you have problems, be sure to collect the debug information described below in sub-section 3 of this Appendix before sending in a ticket. Our technicians need this debug information to investigate your problem.
After you have downloaded and installed the VPN software, configure a new connection entry:
• Host: vorack-vpn.ine.com• On the Authentication properties page:
• Click the Group Authentication button.• Set Name to “vorackX” (such as “vorack1” or “vorack12”).• Set Password to the password specified in your confirmation message.• Set Confirm Password to the same password value.
• Click Save.
Voice Rack Rental Guide version 3.14 – 97 – Copyright © 2012 INE, Inc.

Here is an example for a session on VORack3:
After this, you should be able to access any device that has an IP address inside your rack. Verify connectivity by pinging the IP address of the CUCM Publisher: 177.1.10.10:
host$ ping 177.1.10.10PING 177.1.10.10 (177.1.10.10): 56 data bytes64 bytes from 177.1.10.10: icmp_seq=0 ttl=125 time=45.243 ms64 bytes from 177.1.10.10: icmp_seq=1 ttl=125 time=32.706 ms64 bytes from 177.1.10.10: icmp_seq=0 ttl=125 time=38.713 ms64 bytes from 177.1.10.10: icmp_seq=1 ttl=125 time=35.596 ms
This test verifies that your VPN link was successfully established.
1. Testing Your Cisco EasyVPN Client Prior to Your Lab Rack SessionTo ensure that everything will work properly when your session begins, you may use an INE test EasyVPN account to connect to our VPN portal prior to your Voice rack session beginning.
Voice Rack Rental Guide version 3.14 – 98 – Copyright © 2012 INE, Inc.

To start this Test EasyVPN session, you should temporarily configure your EasyVPN client with the following information:
• Host: vorack-vpn.ine.com• On the Authentication properties page:
• Click the Group Authentication button.• Set Name to “voracktest”• Set Password to “voracktest”• Set Confirm Password to “voracktest”
• Click Save.• Double-click the new entry to test.
After this, you should be able to verify your connectivity by pinging the IP address of the CUCM Publisher: 177.1.10.10:
host$ ping 177.1.10.10PING 177.1.10.10 (177.1.10.10): 56 data bytes64 bytes from 177.1.10.10: icmp_seq=0 ttl=125 time=45.243 ms64 bytes from 177.1.10.10: icmp_seq=1 ttl=125 time=32.706 ms64 bytes from 177.1.10.10: icmp_seq=0 ttl=125 time=38.713 ms64 bytes from 177.1.10.10: icmp_seq=1 ttl=125 time=35.596 ms
This test verifies that your VPN link was successfully established.
On this test EasyVPN account, you can ping the CUCM Publisher only at the IP address 177.1.10.10. Also, you cannot connect to the CUCM Publisher via HTTP, because we only allow ICMP for this test account. You cannot ping any other devices on this test account; however, you can, of course, ping all of the IP addresses when you connect with a normal, rented Voice rack session.
Voice Rack Rental Guide version 3.14 – 99 – Copyright © 2012 INE, Inc.

2. Multicast Music-on-Hold Will Not Function Across Your VPN LinkIPSec does not support carriage of multicast packets. This does not mean that you cannot test Multicast Music-on-Hold (MMoH); rather, instead of trying to hear the MMoH from an IP phone in front of you (you won’t ever hear it there), you should:
• Place a call from your PSTN phone (in front of you) into the R2-BR1 gateway, into a Branch 1 phone.
• Have that Branch 1 phone place the call from the PSTN phone on hold.
You will not hear Music on Hold on your remote PSTN phone because it has been converted into Unicast traffic; however, upon inspection you will find that MMoH is indeed flowing from the CUCM to your BR1 router.
Technical details: The multicast packets are sent from the CUCM Pub or Sub server, across R1-HQ, across the Serial Frame-Relay link, over to R2-BR1, and there converted from VoIP packets into a PCM DS0 stream to be sent out over the PRI link to PSTN. Then, at PSTN, it will be sent using unicast packets across the VPN to the IP phone in front of you. Remember, it is only multicast packets from your CUCM Server to the R2-BR1 router—then it becomes PCM DS0 signaling over TDM.
3. Troubleshooting Your Cisco IPSec EasyVPN ConnectionIf you experience problems with your Cisco IPSec EasyVPN client connecting or staying connected, make sure to perform the following tasks before submitting a trouble ticket:
•Go to the menu item where you find “Log” or “Logging” and perform the following:▪Choose Log Settings, and set all drop-down items to 3-High.▪Click Enable or Enable Log.▪Double-click the INE VPN entry to try connecting to our VPN server.▪If this fails, go back to the Log menu item and save the log file somewhere that is easy for you to locate.▪Create your trouble ticket, making sure to include the log file that you just saved.
This information provides additional details that will assist us in troubleshooting your case.
Voice Rack Rental Guide version 3.14 – 100 – Copyright © 2012 INE, Inc.

Appendix G. VPN and Public-IP-Address Support ConfigurationFor your reference, these are the configuration fragments that establish connectivity between the public IP addresses and the various servers in your lab rack; “X” is the number of the rack: “1” for VORack1, “12” for VORack12:
PSTN:interface Loopback0 ip address 177.1.254.254 255.255.255.255!interface FastEthernet0/0 description == VPN Uplink ip address 177.253.X.1 255.255.255.0 duplex auto speed auto no shutdown!interface FastEthernet0/1 description == To R1/HQ FastEthernet 0/1 ip address 177.1.19.1 255.255.255.0 duplex auto speed auto no shutdown!router ospf 1 log-adjacency-changes network 0.0.0.0 255.255.255.255 area 0!
R1:interface FastEthernet0/0 description == To SW1 no ip address duplex auto speed auto no shutdown!interface FastEthernet0/0.10 description == Server VLAN 10 encapsulation dot1Q 10 ip address 177.1.10.1 255.255.255.0 no shutdown!interface FastEthernet0/1 description === To PSTN FastEthernet0/1 ip address 177.1.19.254 255.255.255.0 duplex auto speed auto no shutdown!router ospf 1 log-adjacency-changes network 0.0.0.0 255.255.255.255 area 0!
SW1:vlan 10 name Servers!interface FastEthernet0/1 description == Server Uplink no shutdown switchport host switchport access vlan 10!interface FastEthernet0/5
Voice Rack Rental Guide version 3.14 – 101 – Copyright © 2012 INE, Inc.

description == R1/HQ FastEthernet 0/0 no shutdown switchport trunk encapsulation dot1q switchport mode trunk spanning-tree portfast trunk!
Voice Rack Rental Guide version 3.14 – 102 – Copyright © 2012 INE, Inc.

Appendix H. Active Directory Schema, DNS Server InformationThis information is for SIP SRV Call-Routing and Unity Connection/Unity Express VPIM Integration
Active Directory Schema
LDAP Server: 177.1.100.110
Voice Rack Rental Guide version 3.14 – 103 – Copyright © 2012 INE, Inc.

DNS Server Information for SIP SRV Call-Routing and CUC-CUE VPIM Integration (Note: VPIM license is already installed in the Unity Connection server)
DNS Server: 177.1.100.110
Zone: ine.comcucm7-pub A 177.1.10.10cucm7-sub A 177.1.10.20win2k8-dc1 A 177.1.100.110corphq CNAME corphqr1.ine.combranch1 CNAME branch1r2.ine.combranch2 CNAME branch2r3.ine.comcucm-pub CNAME cucm7-pub.ine.comcucm-sub CNAME cucm7-sub.ine.com_sip._tcp.ine.com SRV [0][100][5060] cucm7-pub.ine.com_sip._tcp.ine.com SRV [10][100][5060] cucm7-sub.ine.com
Zone: cucm.ine.com_sip._tcp.cucm.ine.com SRV [0][100][5060] cucm7-pub.ine.com_sip._tcp.cucm.ine.com SRV [10][100][5060] cucm7-sub.ine.com_sip._udp.cucm.ine.com SRV [0][100][5060] cucm7-pub.ine.com_sip._udp.cucm.ine.com SRV [10][100][5060] cucm7-sub.ine.com
Zone: corphqr1.ine.comcorphqr1.ine.com A 177.1.254.1_sip._tcp.corphqr1.ine.com SRV [0][100][5060] corphqr1.ine.com_sip._udp.corphqr1.ine.com SRV [0][100][5060] corphqr1.ine.com
Zone: branch1r2.ine.combranch1r2.ine.com A 177.1.254.2_sip._tcp.branch1r2.ine.com SRV [0][100][5060] branch1r2.ine.com_sip._udp.branch1r2.ine.com SRV [0][100][5060] branch1r2.ine.com
Zone: branch2r3.ine.combranch2r3.ine.com A 177.1.254.3_sip._tcp.branch2r3.ine.com SRV [0][100][5060] branch2r3.ine.com_sip._udp.branch2r3.ine.com SRV [0][100][5060] branch2r3.ine.com
Zone: corphq.ine.comuc1.corphq.ine.com A 177.1.10.30_sip._tcp.corphq.ine.com SRV [0][100][5060] corphqr1.ine.com_sip._udp.corphq.ine.com SRV [0][100][5060] corphqr1.ine.com
Zone: branch1.ine.com_sip._tcp.branch1.ine.com SRV [0][100][5060] branch1r2.ine.com_sip._udp.branch1.ine.com SRV [0][100][5060] branch1r2.ine.com
Voice Rack Rental Guide version 3.14 – 104 – Copyright © 2012 INE, Inc.

Zone: branch2.ine.comcue-lo5.branch2.ine.com A 177.3.254.2cue-vv.branch2.ine.com A 177.3.11.2_sip._tcp.branch2.ine.com SRV [0][100][5060] branch2r3.ine.com_sip._udp.branch2.ine.com SRV [0][100][5060] branch2r3.ine.com
Zone: att.comsip1 A 177.1.254.250sip2 A 177.1.254.251_sip._tcp.sip1.skype.com SRV [10][100][5060] sip1.skype.com_sip._tcp.sip2.skype.com SRV [10][100][5060] sip2.skype.com_sip._udp.sip1.skype.com SRV [10][100][5060] sip1.skype.com_sip._udp.sip2.skype.com SRV [10][100][5060] sip2.skype.com
Zone: skype.comsip A 177.1.254.250_sip._tcp.sip.skype.com SRV [10][100][5060] sip.skype.com_sip._udp.sip.skype.com SRV [10][100][5060] sip.skype.com
Voice Rack Rental Guide version 3.14 – 105 – Copyright © 2012 INE, Inc.

Appendix I. Router and Ethernet Port Tables
(DEFAULT) VLANs and IP Subnets (These may change from one lab to another.)VLAN Name VLAN # HQ Subnet BR1 Subnet BR2 Subnet
Server 10 177.1.10.0/24 N/A N/A
Voice 11 177.1.11.0/24 177.2.11.0/24 177.3.11.0/24
Data 12 177.1.12.0/24 177.2.12.0/24 177.3.12.0/24
Switch Port Allocation
Device Logical Location
Physical Port VLAN Description
CUCM Publisher HQ Site SW1 Fa 0/1 Server CCM Publisher
CUCM Subscriber HQ Site SW1 Fa 0/1 Server CCM Subscriber
Unity Connection HQ Site SW1 Fa 0/1 Server Cisco Unity VM
Unified Presence HQ Site SW1 Fa 0/1 Server Unified Presence
Contact Center Express HQ Site SW1 Fa 0/1 Server Contact Center Express
CorpHQ Phone 1* HQ Site SW1 Fa 0/2 Lab-Specific 7961 Phone*
CorpHQ Phone 2* HQ Site SW1 Fa 0/3 Lab-Specific 7961 Phone*
R1 Fa0/0 HQ Site SW1 Fa 0/5 Trunk HQ Router (R1)
Branch 1 Phone 1* BR1 Site R2 Fa 0/1/0 Lab-Specific 7961 Phone*
Branch 2 Phone 1* BR2 Site SW2 Fa 0/1 Lab-Specific 7961 Phone*
Branch 2 Phone 2* BR2 Site SW2 Fa 0/2 Lab-Specific 7961 Phone*
R3 Fa0/0 BR2 Site SW2 0/24 Trunk BR2 Router (R3)
PSTN Phone* PSTN SW1 Fa 0/4 Lab-Specific 7960 Phone
* These phones are the IP phones that are directly connected to the lab Voice rack that you can remotely control with our free, web-based Variphy Insight Remote Phone Control software. If you are connecting to INE using a Cisco hardware IOS router or ASA, so that you may use your own Cisco hardware IP phones at your local studying facility, your phones replace what is seen here, and you may ignore the phones attached directly to your rented Voice rack. It COMPLETELY depends on which set of phones you are using. For more information regarding how to access and use our free Variphy Insight Remote Phone Control software, see Section 10.
Voice Rack Rental Guide version 3.14 – 106 – Copyright © 2012 INE, Inc.

(DEFAULT) ISDN Digital Gateways (These may change from one lab to another.)
Name Port Type ISDN Switch Line Settings Timeslots
GW_HQ R1 T1 0/0 T1 PRI NI2 8BZS/ESF 1-3
GW_BR1 R2 T1 0/0/0 T1 PRI NI2 8BZS/ESF 1-3
GW_BR2 R3 E1 0/0/0 E1 PRI NET5 HDB3/CRC4 1-3
DSP Resources
Location Conference Transcode
CorpHQ (R1) N/A R1 PVDM2-16
Branch 1 (R2) N/A R2 PVDM2-16
Branch 2 (R3) R3 PVDM2-32 R3 PVDM2-32
Voice Rack Rental Guide version 3.14 – 107 – Copyright © 2012 INE, Inc.

Appendix J. Device Connectivity – Quick ReferenceDevice/Server IP Method User Name Password
R1 177.1.254.1 Telnet
R2 177.1.254.2 Telnet
R3 177.1.254.3 Telnet
Cisco Unity Express (CUE) Defined by Lab Session from R3
PSTN 177.1.254.254 Telnet
SW1 177.1.11.20 Telnet
SW2 177.3.11.20 Telnet
CUCM Publisher https://177.1.10.10 Web browser admin cciecisco
CUCM Subscriber https://177.1.10.20 Web browser admin cciecisco
Cisco Unity Connection (CUC)
https://177.1.10.30 Web browser admin cciecisco
Unified Contact Center Express (UCCX)
http://177.1.10.40/appadmin Web browser uccxadmin cisco
Unified Contact Center Express (UCCX)
177.1.10.40 Windows RDC admin cciecisco
Cisco Unified Presence (CUPS)
https://177.1.10.50 Web browser admin cciecisco
XP Test/Utility 177.1.10.100 Windows RDC admin cciecisco
Win2k8 Active Directory10 177.1.100.110 LDAP (only) admin cciecisco
Device/Server URL/Command User Name Password
CUCM Publisher https://pub.vorack#.ine.com admin cciecisco
CUCM Subscriber https://sub.vorack#.ine.com admin cciecisco
Cisco Unity Connection (CUC) https://cuc.vorack#.ine.com admin cciecisco
Cisco Unified Presence (CUPS) https://cups.vorack#.ine.com admin cciecisco
Unified Contact Center Express (UCCX)
http://uccx.vorack#.ine.com/appadmin uccxadmin cisco
XP Test/Utility rdp://util.vorack#.ine.com admin cciecisco
Unified Contact Center Express (UCCX)
rdp://uccx.vorack#.ine.com admin cciecisco
PSTN telnet pstn.vorack#.ine.com none none
Veriphy Insight Remote Control Software
URL User Name Password
http://177.1.10.100 admin cciecisco
10 The Active Directory server cannot be pinged from your location directly. You can ping it within the routers of your lab rack.
Voice Rack Rental Guide version 3.14 – 108 – Copyright © 2012 INE, Inc.