Embed Size (px)
Citation preview
Using Microsoft Virtual Labs in edX Courses
Accessing Microsoft Virtual Hands-on Labs from edX This document provides a guide to how you access and use the Virtual Labs provided for Microsoft courses hosted on edX.
How to Launch a Lab When studying a Microsoft provided edX course which includes Hands-on labs, the courseware index will include items titled “Lab Activity X.X”. To launch a lab environment for a specific exercise:
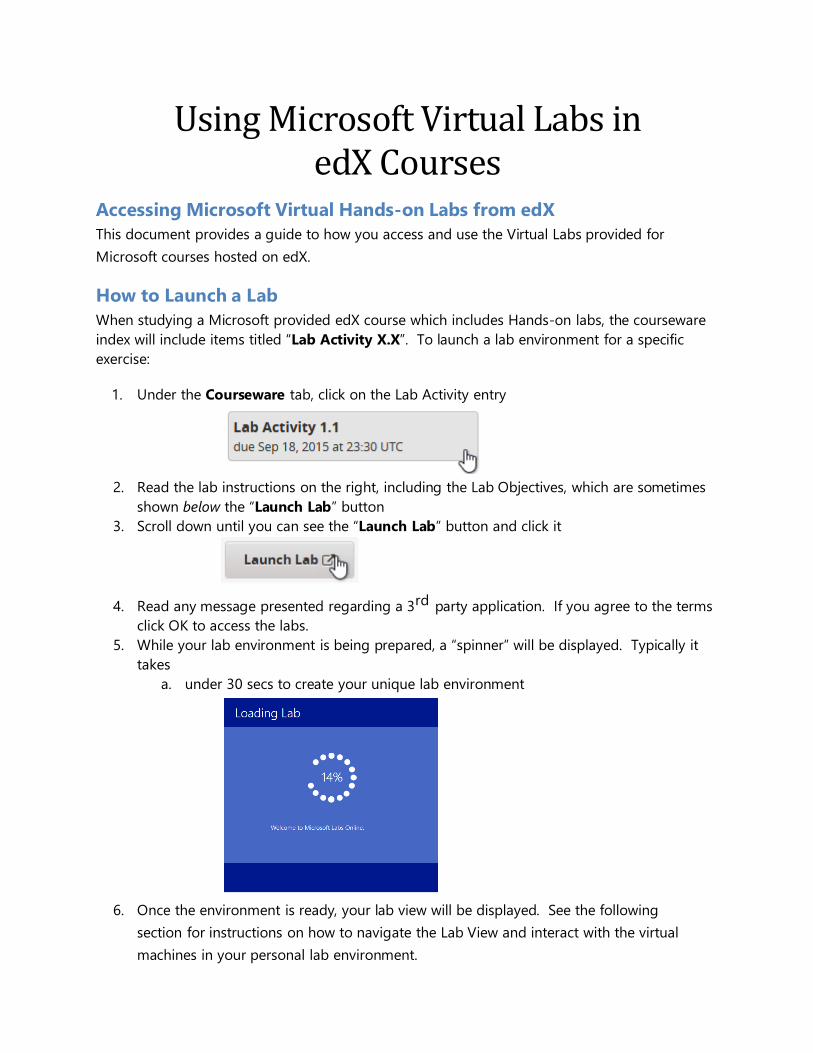
1. Under the Courseware tab, click on the Lab Activity entry
2. Read the lab instructions on the right, including the Lab Objectives, which are sometimes
shown below the “Launch Lab” button 3. Scroll down until you can see the “Launch Lab” button and click it
4. Read any message presented regarding a 3rd party application. If you agree to the terms
click OK to access the labs. 5. While your lab environment is being prepared, a “spinner” will be displayed. Typically it
takes a. under 30 secs to create your unique lab environment
6. Once the environment is ready, your lab view will be displayed. See the following
section for instructions on how to navigate the Lab View and interact with the virtual machines in your personal lab environment.
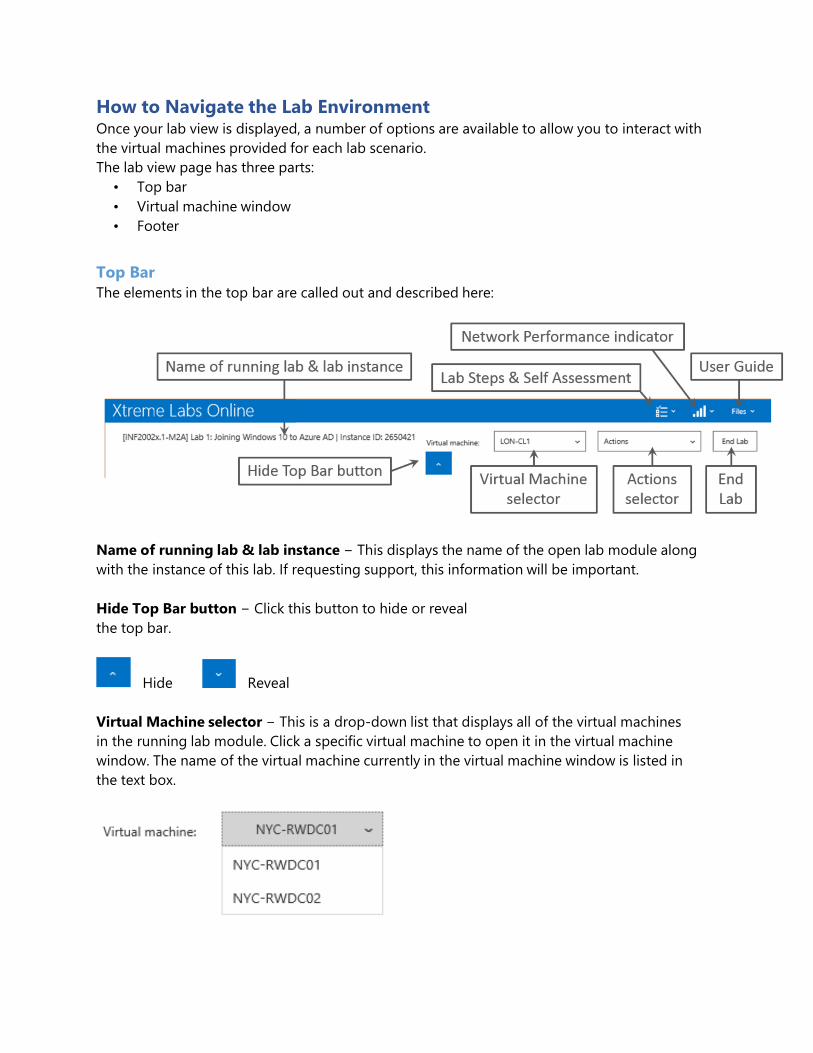
How to Navigate the Lab Environment Once your lab view is displayed, a number of options are available to allow you to interact with the virtual machines provided for each lab scenario. The lab view page has three parts:
• Top bar • Virtual machine window • Footer
Top Bar The elements in the top bar are called out and described here:
Name of running lab & lab instance − This displays the name of the open lab module along with the instance of this lab. If requesting support, this information will be important. Hide Top Bar button − Click this button to hide or reveal the top bar.
Hide Reveal Virtual Machine selector − This is a drop-down list that displays all of the virtual machines in the running lab module. Click a specific virtual machine to open it in the virtual machine window. The name of the virtual machine currently in the virtual machine window is listed in the text box.
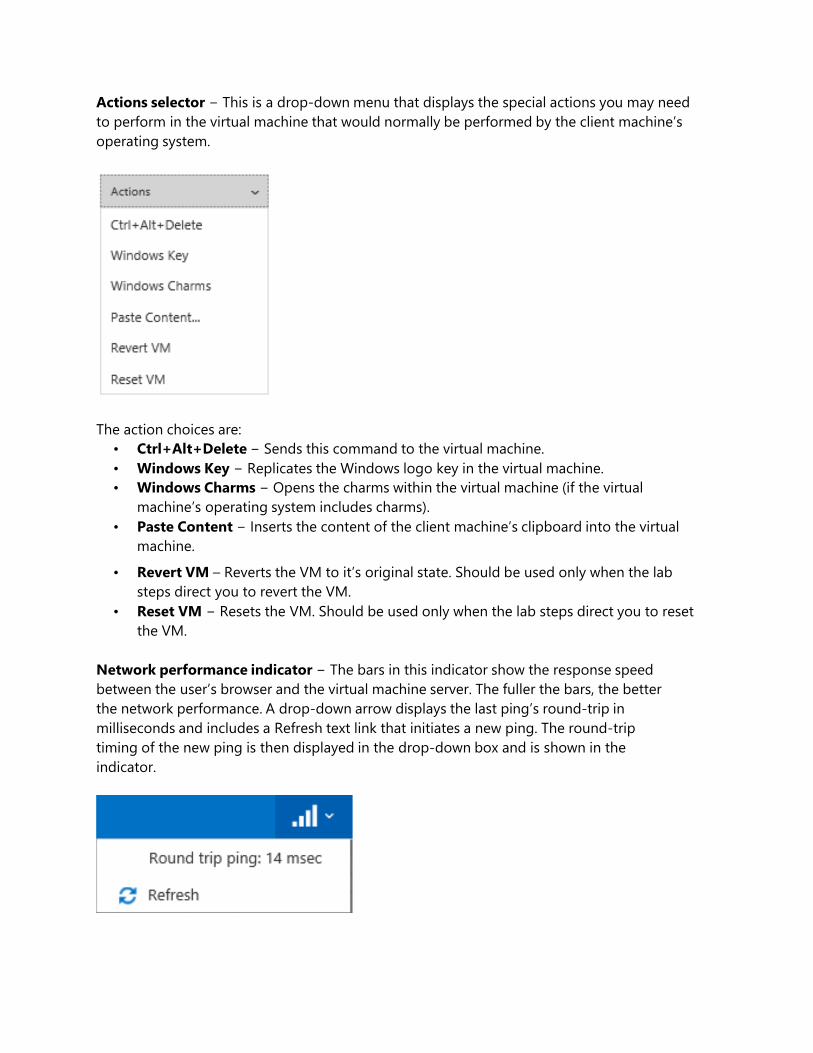
Actions selector − This is a drop-down menu that displays the special actions you may need to perform in the virtual machine that would normally be performed by the client machine’s operating system.
The action choices are:
• Ctrl+Alt+Delete − Sends this command to the virtual machine. • Windows Key − Replicates the Windows logo key in the virtual machine. • Windows Charms − Opens the charms within the virtual machine (if the virtual
machine’s operating system includes charms). • Paste Content − Inserts the content of the client machine’s clipboard into the virtual
machine.
• Revert VM – Reverts the VM to it’s original state. Should be used only when the lab steps direct you to revert the VM.
• Reset VM − Resets the VM. Should be used only when the lab steps direct you to reset the VM.
Network performance indicator − The bars in this indicator show the response speed between the user’s browser and the virtual machine server. The fuller the bars, the better the network performance. A drop-down arrow displays the last ping’s round-trip in milliseconds and includes a Refresh text link that initiates a new ping. The round-trip timing of the new ping is then displayed in the drop-down box and is shown in the indicator.
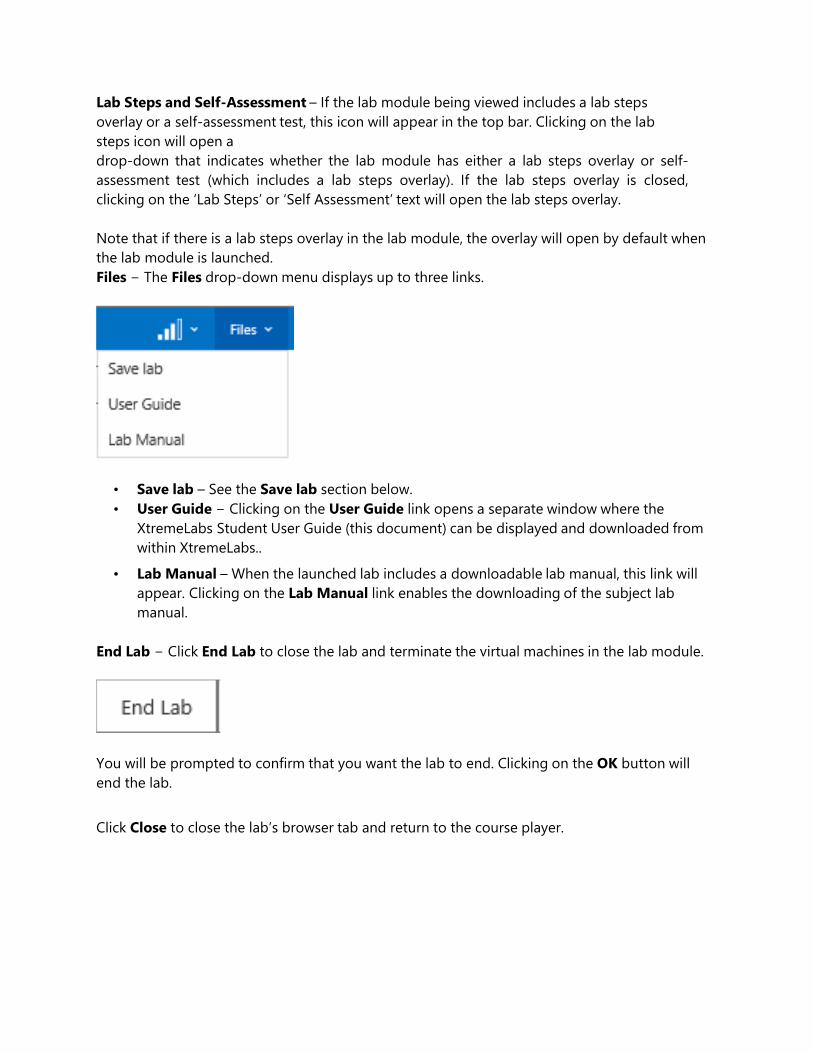
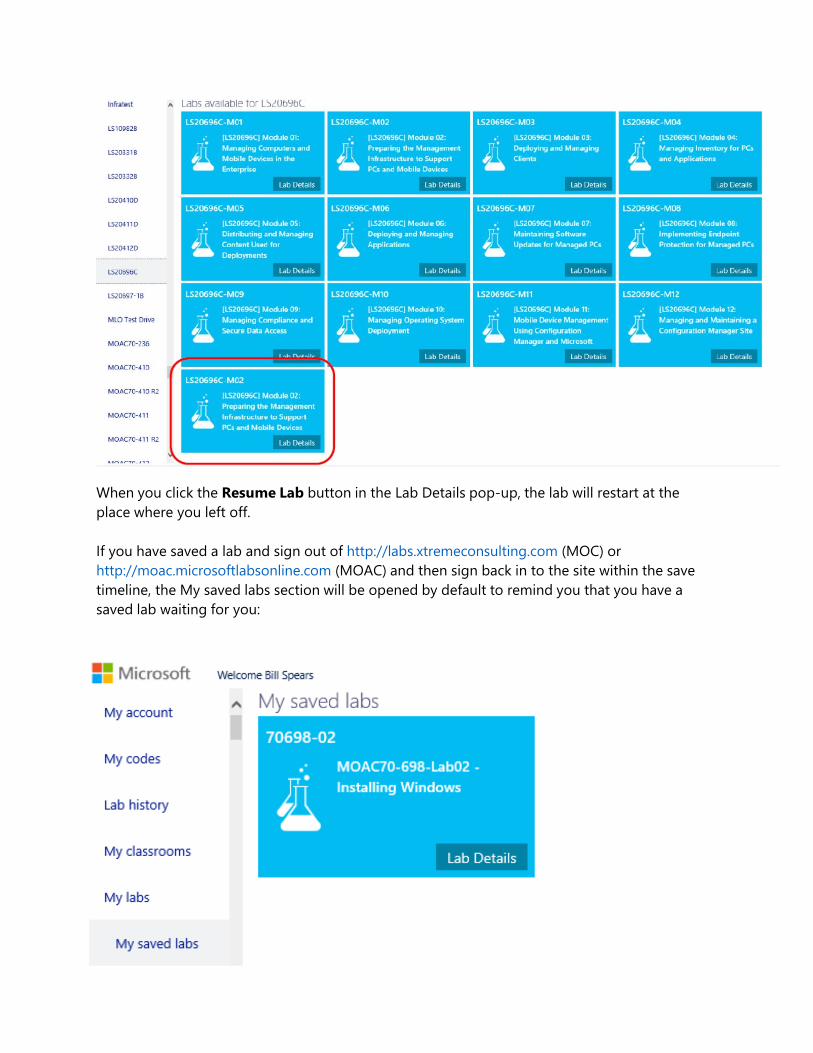
Lab Steps and Self-Assessment – If the lab module being viewed includes a lab steps overlay or a self-assessment test, this icon will appear in the top bar. Clicking on the lab steps icon will open a drop-down that indicates whether the lab module has either a lab steps overlay or self-assessment test (which includes a lab steps overlay). If the lab steps overlay is closed, clicking on the ‘Lab Steps’ or ‘Self Assessment’ text will open the lab steps overlay. Note that if there is a lab steps overlay in the lab module, the overlay will open by default when the lab module is launched. Files − The Files drop-down menu displays up to three links.
• Save lab – See the Save lab section below. • User Guide − Clicking on the User Guide link opens a separate window where the
XtremeLabs Student User Guide (this document) can be displayed and downloaded from within XtremeLabs..
• Lab Manual – When the launched lab includes a downloadable lab manual, this link will appear. Clicking on the Lab Manual link enables the downloading of the subject lab manual.
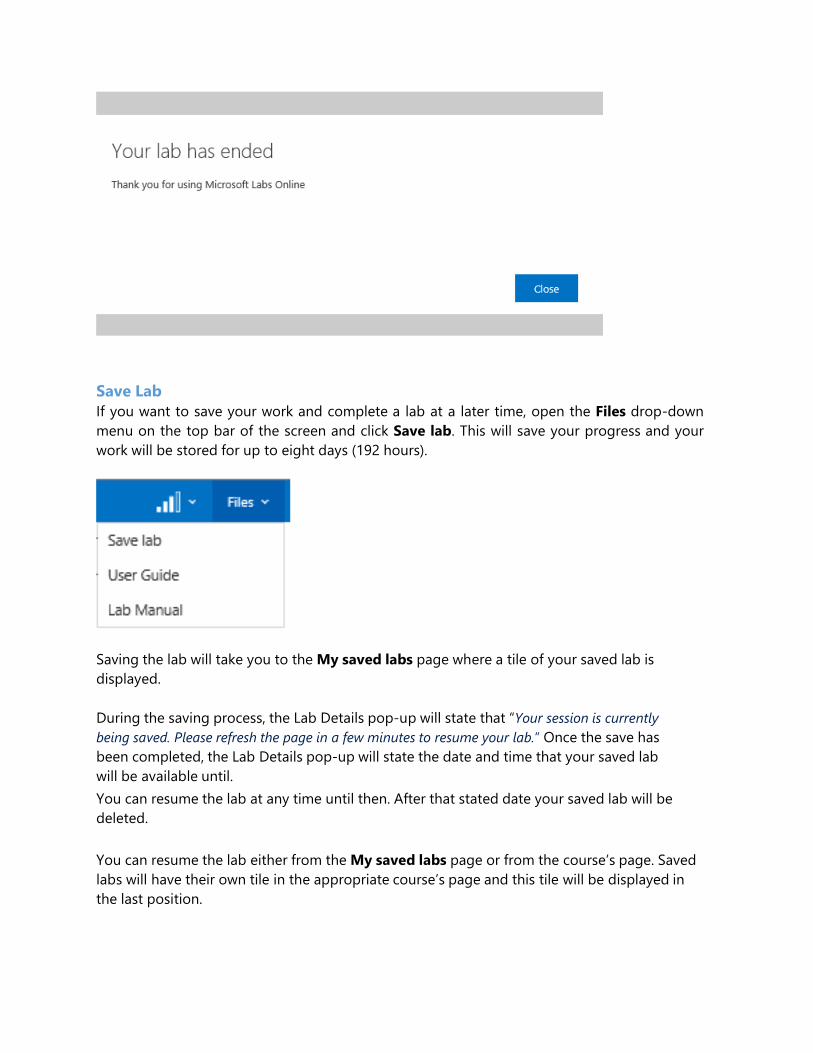
End Lab − Click End Lab to close the lab and terminate the virtual machines in the lab module.
You will be prompted to confirm that you want the lab to end. Clicking on the OK button will end the lab. Click Close to close the lab’s browser tab and return to the course player.
Save Lab If you want to save your work and complete a lab at a later time, open the Files drop-down menu on the top bar of the screen and click Save lab. This will save your progress and your work will be stored for up to eight days (192 hours).
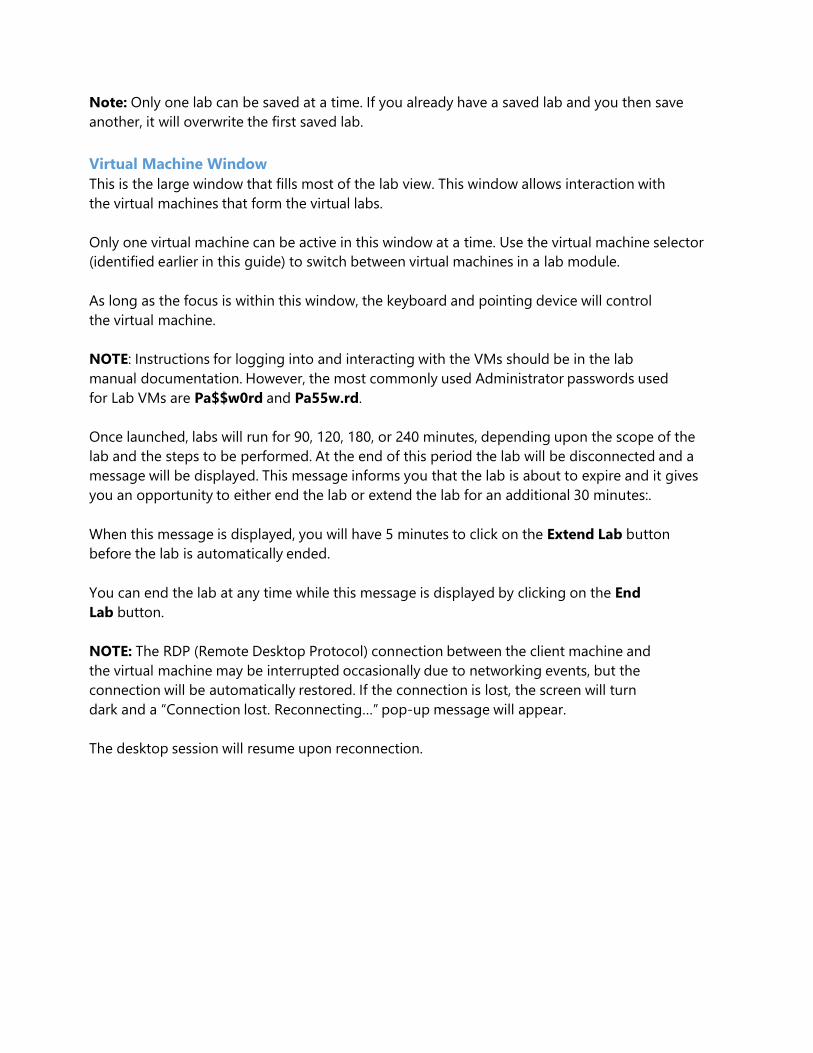
Saving the lab will take you to the My saved labs page where a tile of your saved lab is displayed. During the saving process, the Lab Details pop-up will state that “Your session is currently being saved. Please refresh the page in a few minutes to resume your lab.” Once the save has been completed, the Lab Details pop-up will state the date and time that your saved lab will be available until. You can resume the lab at any time until then. After that stated date your saved lab will be deleted. You can resume the lab either from the My saved labs page or from the course’s page. Saved labs will have their own tile in the appropriate course’s page and this tile will be displayed in the last position.
When you click the Resume Lab button in the Lab Details pop-up, the lab will restart at the place where you left off. If you have saved a lab and sign out of http://labs.xtremeconsulting.com (MOC) or http://moac.microsoftlabsonline.com (MOAC) and then sign back in to the site within the save timeline, the My saved labs section will be opened by default to remind you that you have a saved lab waiting for you:
Note: Only one lab can be saved at a time. If you already have a saved lab and you then save another, it will overwrite the first saved lab. Virtual Machine Window This is the large window that fills most of the lab view. This window allows interaction with the virtual machines that form the virtual labs. Only one virtual machine can be active in this window at a time. Use the virtual machine selector (identified earlier in this guide) to switch between virtual machines in a lab module. As long as the focus is within this window, the keyboard and pointing device will control the virtual machine. NOTE: Instructions for logging into and interacting with the VMs should be in the lab manual documentation. However, the most commonly used Administrator passwords used for Lab VMs are Pa$$w0rd and Pa55w.rd. Once launched, labs will run for 90, 120, 180, or 240 minutes, depending upon the scope of the lab and the steps to be performed. At the end of this period the lab will be disconnected and a message will be displayed. This message informs you that the lab is about to expire and it gives you an opportunity to either end the lab or extend the lab for an additional 30 minutes:. When this message is displayed, you will have 5 minutes to click on the Extend Lab button before the lab is automatically ended. You can end the lab at any time while this message is displayed by clicking on the End Lab button. NOTE: The RDP (Remote Desktop Protocol) connection between the client machine and the virtual machine may be interrupted occasionally due to networking events, but the connection will be automatically restored. If the connection is lost, the screen will turn dark and a “Connection lost. Reconnecting…” pop-up message will appear. The desktop session will resume upon reconnection.
Footer
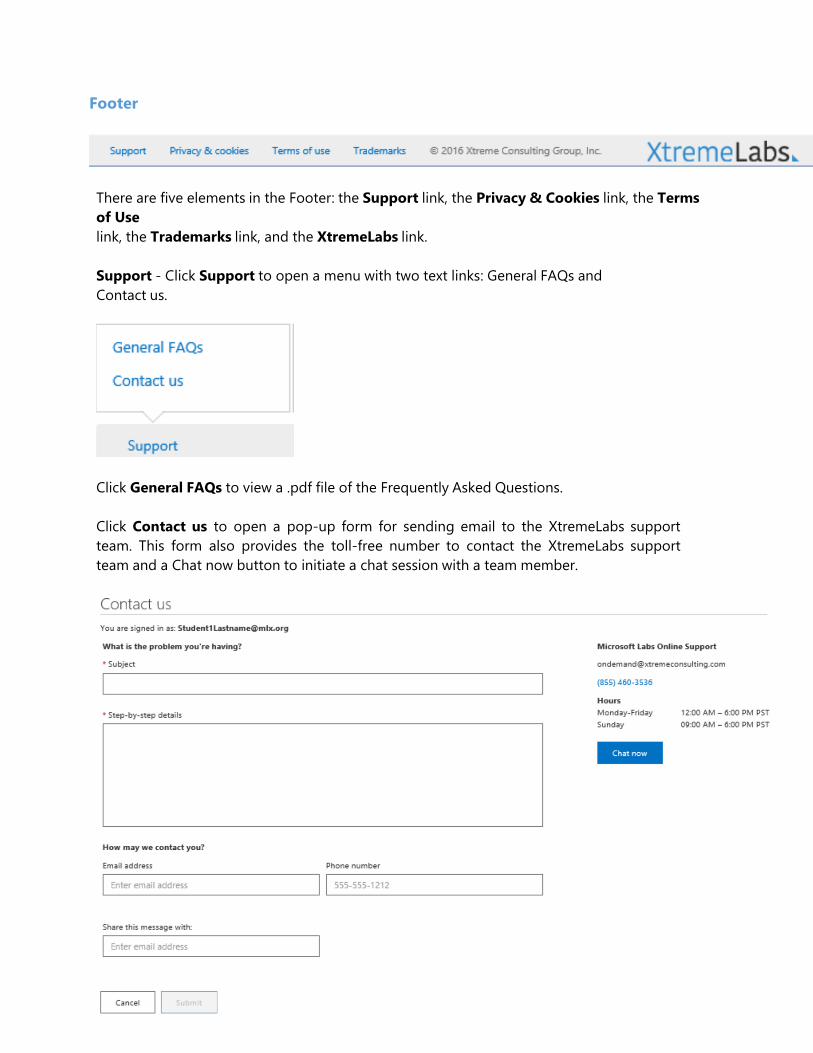
There are five elements in the Footer: the Support link, the Privacy & Cookies link, the Terms of Use link, the Trademarks link, and the XtremeLabs link. Support - Click Support to open a menu with two text links: General FAQs and Contact us.
Click General FAQs to view a .pdf file of the Frequently Asked Questions. Click Contact us to open a pop-up form for sending email to the XtremeLabs support team. This form also provides the toll-free number to contact the XtremeLabs support team and a Chat now button to initiate a chat session with a team member.
To send email to the XtremeLabs support team, fill in the text input boxes with the appropriate information and click Submit. Note that the text input boxes denoted with a red asterisk (*) cannot be left blank. After you click Submit, you will see an acknowledgment that the email has been sent. The XtremeLabs support team will contact you shortly. If an issue is urgent, call the XtremeLabs support team using the toll-free number provided on the form or click Chat now during the listed support hours. (The listed support hours are in the Pacific Time zone.) Privacy & Cookies – This links to the Microsoft Privacy Statement web page. Terms of Use – This open a page with the XtremeLabs Online EULA (End-user License Agreement). Trademarks – This links to the Microsoft Trademarks web page. XtremeLabs – This links to the home page of Xtreme Consulting Group, Inc., the fine people who bring you XtremeLabs – and much more.
System Requirements and Troubleshooting System Requirements To access the Microsoft Labs Online from the edX course your client computer system must meet the following requirements:
• Windows 7 or above • 32 bit Microsoft Internet Explorer 10.0 or higher • TCP Port 80 open with inbound/outbound access to the Internet • 15 kbps per user network bandwidth • Ideal screen resolutions are above 1280x1024
In addition, the labs may be accessed from other browsers and OS environments including:
• Chrome (most recent release) • Safari (most recent release) • Opera (most recent release)
Troubleshooting Connection Problems If a remote desktop session drop or fails to connect, the Lab View web page will attempt to reconnect automatically. If those attempts fail (possibly due to a network interruption) then a button will be displayed to initiate a manual session re-connection attempt.
If those mechanism do not succeed in reconnecting to the virtual machine desktop, the browser page can be refreshed. This will reconnect all of the virtual machines on that page and look for the best connection port to each VM session.


![Webcompany [Labs]: Realidade Virtual](https://img.dokumen.tips/doc/110x75/54575a78b1af9f39378b51d4/webcompany-labs-realidade-virtual.jpg)