Embed Size (px)
Citation preview

Tutorial for Basic Editing in Adobe Premiere Pro CS5
Interface Overview Highlighting Key Tools
- Project Files – This is where all the files you import into Premiere are located. This includes movie files, image sequences, Photoshop files (and all the layers), and sound files among others. At the bottom of the panel, there are tools to help you organize (such as creating folders).
- Effect Controls – This panel (which has tabs to switch between the active clip panel and the audio controls) contains the controls to any effects you add to your timeline. By default, the Motion control toggle includes the ability to keyframe position, scale, and rotation. There is also opacity controls, and time remapping, which allows you to adjust the speed of the clip.
- Timeline View – This panel shows your current point in the timeline. - Effects Panel – This tab is where you can find the effects you can use for transitions, such as
fades and cross-dissolves. - Keyframe Button – This button allows you to add and remove keyframes. - Scale Slider – This slider will scale the timeline, allowing you to zoom in and out. - Cut/Razor Tool – This tool will enable the ability to cut a clip into multiple pieces for editing. - Move/Select Tool – Select this to change to the default cursor.

Importing Files into Premiere
There are two ways to import files into premiere. The first is to go to file -> import, then select your file. Another way to import files is to double click in the project files panel, which brings up the import screen.
Note that to import image sequences, select the first image in the sequence, then make certain the “Numbered Stills” box is checked.
When importing a Photoshop file, you are given a few options. You can merge all the layers into a single image, bring in the layers as an image sequence, or bring in individual layers (and you are given the option to choose which layers to bring in).
Adding Effects
To add effects, such as transitions and fades, navigate to the Effects Tab.

Video Transitions contain effects such as Cross Dissolves and Wipes.
Video Effects contains some of the tools you might be familiar with in Photoshop or After Effects, including Gaussian Blur and Color Correction.
Audio Transitions is where you will find tools to fade in and out your audio.
Audio Effects contains advanced audio tools.

To apply effects, select the one you want to use and drag and drop to the appropriate place in the timeline. Note that to use cross dissolve, you should make sure the two clips you are transitioning between overlap.
To fine tune and keyframe effects, navigate to the Effects Controls panel, to the left of the main viewport. Here you will find the controls for each effect you have applied to the selected clip. You can adjust and keyframe these effects from here.
Adding keyframes
To add keyframes, use the Effect Controls panel. Make sure the time slider is positioned in the right place, then click the stopwatch icon to enable keyframing. This will also place your first keyframe. Just like in Maya, move the time slider, then make your adjustment. Do not re-click the stopwatch, as this will disable keyframing and all the keys you’ve already placed. To add subsequent keyframes, click the small diamond icon in the timeline.

Adding Text for Titles and Credits
To add text, navigate to the top of the screen and go to Title -> New Title -> Default Still (or for scrolling credits, Default Roll). A window will appear asking you to name your title (keep the video settings the same). Make sure to type in a descriptive title, especially if you will have a lot of them, to make it easier to find in the project files panel.
A new window will appear in which you can edit your title. Notice that a new file has been created in the project files panel. Options such as font and font size are located to the right. You can also scrub through the timeline so you can see what your text will look like at specific points. When you are finished editing your text, you can close the window (double click on the file in the project files panel to reopen it and continue editing). To place your text, drag and drop from the project files panel. If you place your text in a video slot above your clip, you can layer your text above your video. If there is nothing beneath, it will appear on a black background.
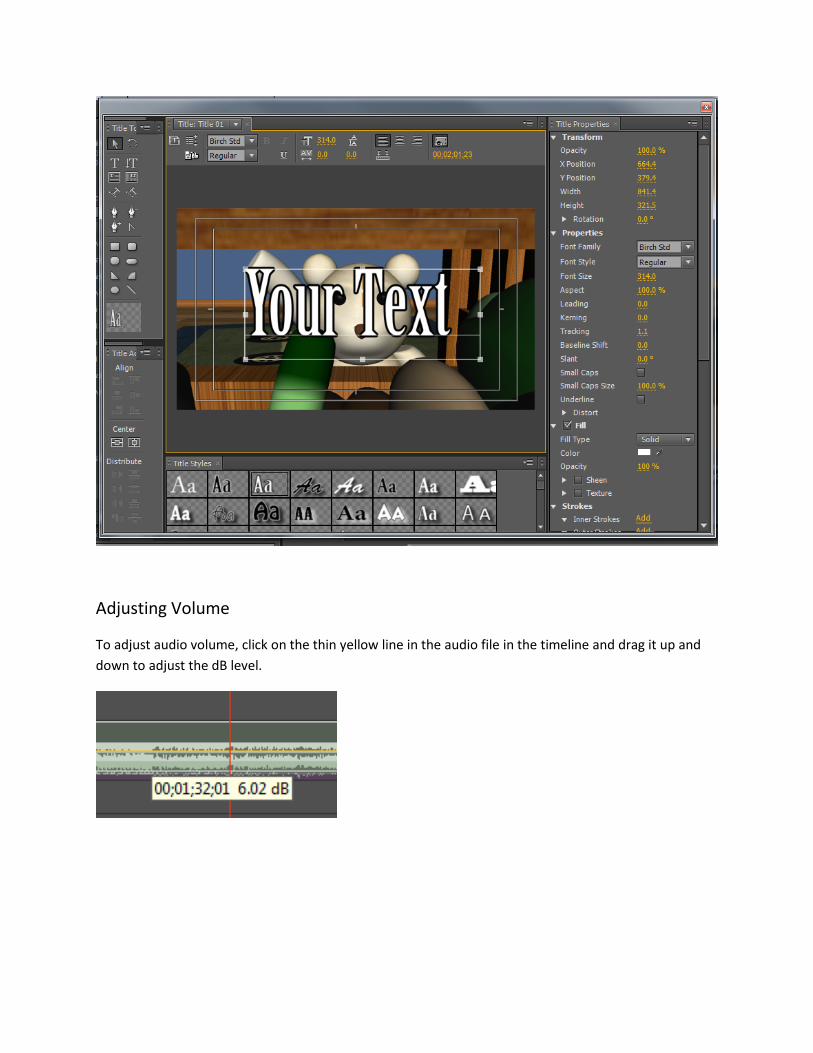
Adjusting Volume
To adjust audio volume, click on the thin yellow line in the audio file in the timeline and drag it up and down to adjust the dB level.