Embed Size (px)
Citation preview
TABC41 ABAP Development Workbench Basics 2/2 TABC41 2/2
R/3 System
Release 46B
17.06.2000
TABC41 ABAP Development Workbench Basics 2/2......................................................................................................0-1
Copyright...............................................................................................................................................................................0-2
Section Overview............................................................................................................................................................0-4
Section: Managing ABAP Development Projects..........................................................................................................1-1
Content: Managing ABAP Development Projects ....................................................................................................1-2
ABAP DevelopmentProjects and ASAP..........................................................................................................................2-1
ABAP Development Projects and ................................................................................................................................2-2
as a Component of...........................................................................................................................................................2-3
Includes.... .........................................................................................................................................................................2-4
ABAP Development Projects in ASAP.......................................................................................................................2-5
Tools and ASAP..............................................................................................................................................................2-6
Summary ...........................................................................................................................................................................2-7
Project Team.........................................................................................................................................................................3-1
Project Team.....................................................................................................................................................................3-2
Position on the ASAP Roadmap ...................................................................................................................................3-3
Roles in Customer Development Projects (1) ............................................................................................................3-4
Roles in Customer Development Projects (2) ............................................................................................................3-5
Roles in Customer Development Projects (3) ............................................................................................................3-6
Roles in Customer Development Projects (4) ............................................................................................................3-7
Roles in Customer Development Projects (5) ............................................................................................................3-8
Software Logistics................................................................................................................................................................4-1
Software Logistics...........................................................................................................................................................4-2
Position on the ASAP Roadmap ...................................................................................................................................4-3
Planning the System Landscape for Development ....................................................................................................4-4
Setting up the System Landscape.................................................................................................................................4-5
Maintaining the System Landscape..............................................................................................................................4-6
Change & Transport Organizer.....................................................................................................................................4-7
Differences between WBO and CO .............................................................................................................................4-8
Central and National Development ..............................................................................................................................4-9
Workbench Organizer and the Transport System....................................................................................................4-10
Change Levels ......................................................................................................................................................................5-1
Change Levels ..................................................................................................................................................................5-2
Change Levels ..................................................................................................................................................................5-3
Business Engineer ...........................................................................................................................................................5-4
Personalization.................................................................................................................................................................5-5
ABAP Workbench...........................................................................................................................................................5-6
-...........................................................................................................................................................................................5-8
ABAP Workbench Change Levels ...............................................................................................................................5-9
Classifying and Implementing Development Projects ............................................................................................5-10
Modifying vs. Copying.................................................................................................................................................5-11
The Amount of Work at Upgrade Increases... ..........................................................................................................5-13
Modification: Critical Repository Object Types......................................................................................................5-14
Summary .........................................................................................................................................................................5-15
Standardization .....................................................................................................................................................................6-1
Standardization ................................................................................................................................................................6-2
Position on the ASAP Roadmap ...................................................................................................................................6-3
Standardization Areas .....................................................................................................................................................6-4
Naming Conventions for Repository Objects.............................................................................................................6-5
Application Hierarchy and Development Classes .....................................................................................................6-6
Interface Style Guide ......................................................................................................................................................6-7
Documentation.................................................................................................................................................................6-8
Inline Documentation .....................................................................................................................................................6-9
Critical Factors for Successful Modification (1)......................................................................................................6-10
Critical Factors for Successful Modification (2)......................................................................................................6-11
Inline Modification Documentation...........................................................................................................................6-12
Modification Logbook..................................................................................................................................................6-13
Summary .........................................................................................................................................................................6-14
Section: ABAP Dictionary .................................................................................................................................................7-1
Content: ABAP Dictionary ............................................................................................................................................7-2
Introduction...........................................................................................................................................................................8-1
Function of the ABAP Dictionary ................................................................................................................................8-2
Database Objects in the ABAP Dictionary .................................................................................................................8-3
Type Definitions in the ABAP Dictionary ..................................................................................................................8-4
Services of the ABAP Dictionary .................................................................................................................................8-5
Linking to the Development and Runtime Environment..........................................................................................8-6
Unit Summary ..................................................................................................................................................................8-7
Tables in the ABAP Dictionary .........................................................................................................................................9-1
Tables and Fields.............................................................................................................................................................9-2
Basic Objects of the ABAP Dictionary .......................................................................................................................9-3
Two-Level Domain Concept: Example .......................................................................................................................9-4
Transparent Tables and Structures ...............................................................................................................................9-5
Include Structures............................................................................................................................................................9-6
Technical Settings ...........................................................................................................................................................9-7
Data Class.........................................................................................................................................................................9-8
Size Category ...................................................................................................................................................................9-9
Logging ...........................................................................................................................................................................9-10
Unit Summary ................................................................................................................................................................9-11
Exercise Data..................................................................................................................................................................9-12
Exercises: Tables in the ABAP Dictionary ...............................................................................................................9-13
Solutions: Tables in the ABAP Dictionary ...............................................................................................................9-16
Performance during Table Access...................................................................................................................................10-1
Structure of an Index.....................................................................................................................................................10-2
Access with Indexes......................................................................................................................................................10-3
Data Access using the Buffer ......................................................................................................................................10-4
Table Buffering..............................................................................................................................................................10-5
Full Buffering.................................................................................................................................................................10-6
Generic Buffering..........................................................................................................................................................10-7
Single -Record Buffering ..............................................................................................................................................10-8
Buffer Synchronization 1.............................................................................................................................................10-9
Buffer Synchronization 2...........................................................................................................................................10-10
Buffer Synchronization 3...........................................................................................................................................10-11
Buffer Synchronization 4...........................................................................................................................................10-12
Buffer Synchronization 5...........................................................................................................................................10-13
Buffer Synchronization 6...........................................................................................................................................10-14
Unit Summary ..............................................................................................................................................................10-15
Exercises: Performance during Table Access.........................................................................................................10-16
Solutions: Performance during Table Access.........................................................................................................10-18
Consistency through Input Checks..................................................................................................................................11-1
Fixed Values...................................................................................................................................................................11-2
Value Table ....................................................................................................................................................................11-3
Inserting a Data Record ................................................................................................................................................11-4
Violation of the Foreign Key Check ..........................................................................................................................11-5
Foreign Key Fields / Check Fields.............................................................................................................................11-6
Data Consistency through Foreign Keys...................................................................................................................11-7
Foreign Key Definitions in the Check Field .............................................................................................................11-8
Check Table not Equal to Value Table ......................................................................................................................11-9
Semantic Attributes.....................................................................................................................................................11-10
Text Table .....................................................................................................................................................................11-11
Summary .......................................................................................................................................................................11-12
Exercises: Consistency through Input Checks........................................................................................................11-13
Solutions: Consistency through Input Checks........................................................................................................11-15
Dependencies of ABAP Dictionary Objects .................................................................................................................12-1
Active and Inactive Versions .....................................................................................................................................12-2
Runtime Objects ............................................................................................................................................................12-3
Handling of Dependent Objects..................................................................................................................................12-4
Where-Used Lists ..........................................................................................................................................................12-5
The Repository Information System ABAP Dictionary .........................................................................................12-6
Unit Summary ................................................................................................................................................................12-7
Exercises: Dependencies of ABAP Dictionary Objects .........................................................................................12-8
Solutions: Dependencies of ABAP Dictionary Objects........................................................................................12-10
Changes to Database Tables.............................................................................................................................................13-1
Changes to Tables .........................................................................................................................................................13-2
How is the Structure Adjusted?...................................................................................................................................13-3
Conversion Process 1....................................................................................................................................................13-4
Conversion Process 2....................................................................................................................................................13-5
Conversion Process 3....................................................................................................................................................13-6
Conversion Process 4....................................................................................................................................................13-7
Conversion Process 5....................................................................................................................................................13-8
Possible Problems during Conversions......................................................................................................................13-9
Resuming Terminated Conversions.........................................................................................................................13-10
Append Structures 1....................................................................................................................................................13-11
Append Structures 2....................................................................................................................................................13-12
Append Structures 3....................................................................................................................................................13-13
Summary .......................................................................................................................................................................13-14
Exercises: Changes to Databas e Tables...................................................................................................................13-15
Solutions: Changes to Database Tables...................................................................................................................13-17
Views....................................................................................................................................................................................14-1
Why do you Need Views?...........................................................................................................................................14-2
Structure of a View - Starting Situation ....................................................................................................................14-3
Structure of a View - Join Condition .........................................................................................................................14-4
Structure of a View - Field Selection (Projection)...................................................................................................14-5
Structure of a View - Selection Condition ................................................................................................................14-6
How are Tables Linked to Views?.............................................................................................................................14-7
Structure of the View....................................................................................................................................................14-8
Data Selection with Views ...........................................................................................................................................14-9
Database Views............................................................................................................................................................14-10
Includes in Database Views .......................................................................................................................................14-11
Maintenance Views .....................................................................................................................................................14-12
Inner and Outer Joins..................................................................................................................................................14-13
Unit Summary ..............................................................................................................................................................14-14
Exercises: Views..........................................................................................................................................................14-15
Solutions: Views ..........................................................................................................................................................14-18
Search Helps .......................................................................................................................................................................15-1
R/3 Standard Function: Input Help.............................................................................................................................15-2
Requirements of the Input Help ..................................................................................................................................15-3
ABAP Dictionary Object Search Help ......................................................................................................................15-4
Selection Method of a Search Help ............................................................................................................................15-5
Description of the Dialog Behavior............................................................................................................................15-6
Interface of a Search Help ............................................................................................................................................15-7
How do you Use Search Helps?..................................................................................................................................15-8
Search Help Attachment in the ABAP Dictionary ..................................................................................................15-9
Overview: Mechanisms for the Input Help .............................................................................................................15-10
Performance of the Input Help ..................................................................................................................................15-11
Alternative Search Paths ............................................................................................................................................15-12
Collective Search Helps and Elementary Search Helps........................................................................................15-13
Append Search Helps..................................................................................................................................................15-14
Unit Summary ..............................................................................................................................................................15-15
Exercises: Search Helps .............................................................................................................................................15-16
Solutions: Search Helps..............................................................................................................................................15-20
Section: ABAP Programming Techniques ....................................................................................................................16-1
Content: ABAP Programming Techniques...............................................................................................................16-2
The ABAP Runtime Environment ..................................................................................................................................17-1
Components of an ABAP Program............................................................................................................................17-2
Structure of a Program..................................................................................................................................................17-3
Program Organization...................................................................................................................................................17-4
The Three-Tier Client/Server Architecture of the R/3 System..............................................................................17-5
Structure of a Work Process ........................................................................................................................................17-6
General ABAP Program Execution............................................................................................................................17-7
Dialog Transaction Execution.....................................................................................................................................17-8
Report Transaction Execution.....................................................................................................................................17-9
List Processing Events................................................................................................................................................17-10
Non-Executable Programs .........................................................................................................................................17-11
The ABAP Runtime EnvironmentUnit Summary .................................................................................................17-12
ABAP Runtime Environment: Exercises ................................................................................................................17-13
ABAP Runtime Environment: Solutions.................................................................................................................17-15
Data Types and Data Objects...........................................................................................................................................18-1
Data Types and Data Objects ......................................................................................................................................18-2
ABAP Data Types: Overview.....................................................................................................................................18-3
Constructing Data Types ..............................................................................................................................................18-4
Predefined ABAP Dictionary Types..........................................................................................................................18-5
Data Elements and Structures in the ABAP Dictionary .........................................................................................18-6
Attributes of Internal Table (Types)...........................................................................................................................18-7
Access Types: Overview..............................................................................................................................................18-8
Table Types in the ABAP Dictionary ........................................................................................................................18-9
Predefined ABAP Types ............................................................................................................................................18-10
Defining Elementary Types in a Program...............................................................................................................18-11
Defining Structured Types in a Program.................................................................................................................18-12
Defining Table Types in a Program.........................................................................................................................18-13
Declaring Fields and Structures................................................................................................................................18-14
Declaring Internal Tables ...........................................................................................................................................18-15
Input Fields on Selection Screens and Selection Tables.......................................................................................18-16
Constants and Literals .................................................................................................................................................18-17
Text Symbols ................................................................................................................................................................18-18
Passing Data To and From Screens..........................................................................................................................18-19
Passing Data To and From Logical Database Programs .......................................................................................18-20
Predefined Data Objects.............................................................................................................................................18-21
Field Symbols ...............................................................................................................................................................18-22
References and Field Symbols ..................................................................................................................................18-23

Example of Dynamic Type Casting .........................................................................................................................18-24
Declaring Data Objects Dynamically: Example ....................................................................................................18-25
Attributes of Data Objects..........................................................................................................................................18-26
Data Types and Data Objects:Unit Summary .........................................................................................................18-27
Data Types and Data Objects: Exercises.................................................................................................................18-28
Data Types and Data Objects: Solutions.................................................................................................................18-32
Statements ...........................................................................................................................................................................19-1
Initializing Data Objects...............................................................................................................................................19-2
Assigning Values...........................................................................................................................................................19-3
Compatibility and Conversion ....................................................................................................................................19-4
Conversion Rules for Elementary Types...................................................................................................................19-5
Conversion Rules for Structured Types.....................................................................................................................19-6
Overview: String Processing.......................................................................................................................................19-7
Searching in a String.....................................................................................................................................................19-8
Changing Strings ...........................................................................................................................................................19-9
Splitting and Joining Strings......................................................................................................................................19-10
Accessing Parts of Fields ...........................................................................................................................................19-11
Calculations: Syntax..................................................................................................................................................19-12
Calculations: Integers and Packed Numbers .........................................................................................................19-13
Calculations: Floating Point Numbers and Runtime Errors................................................................................19-14
Calculations: Date Fields ...........................................................................................................................................19-15
Logical Expressions....................................................................................................................................................19-16
Comparing Strings.......................................................................................................................................................19-17
Conditional Branching................................................................................................................................................19-18
Loops.............................................................................................................................................................................19-19
Overview: Leaving Processing Blocks ....................................................................................................................19-20
Catching Runtime Errors............................................................................................................................................19-21
Example: Catching Runtime Errors .........................................................................................................................19-22
Example: Solution - Part 1 .........................................................................................................................................19-23
Examp le: Solution - Part 2 .........................................................................................................................................19-24
Example: Solution - Part 3 .........................................................................................................................................19-25
Example: Solution - Part 4 .........................................................................................................................................19-26
Statements: Unit Summary ........................................................................................................................................19-27
Internal Table Operations.................................................................................................................................................20-1
Accessing Data Records...............................................................................................................................................20-2
Appending, Inserting, and Reading With Index Tables..........................................................................................20-3
Changing, Deleting and Looping in Index Tables ...................................................................................................20-4
Hashed Tables................................................................................................................................................................20-5
Inserting and Reading Using Key Access.................................................................................................................20-6
Changing, Deleting, and Loop Processing With Key Access................................................................................20-7
Example: Declaring Standard Tables.........................................................................................................................20-8
Example: Standard Table Operations.........................................................................................................................20-9

Example: Sorted Table ...............................................................................................................................................20-10
Example: Declaring Hashed Tables .........................................................................................................................20-11
Example: Hashed Table Operations.........................................................................................................................20-12
Internal Table With Header Line ..............................................................................................................................20-13
Internal Table with Cumulative Values ...................................................................................................................20-14
Access Using Field Symbols .....................................................................................................................................20-15
Example I - Declaring Nested Tables ......................................................................................................................20-16
Example II - Loop Access Using Field Symbols ...................................................................................................20-17
Example III - Loop Access Using Field Symbols ................................................................................................20-18
Internal Table Operations: Summary .......................................................................................................................20-19
Internal Tables: Unit Summary .................................................................................................................................20-20
Internal Table Operations: Exercises .......................................................................................................................20-21
Internal Table Operations: Solutions........................................................................................................................20-24
Subroutines..........................................................................................................................................................................21-1
Structure of a Subroutine..............................................................................................................................................21-2
Ways of Passing Data...................................................................................................................................................21-3
Typing Interface Parameters........................................................................................................................................21-4
Calling a Subroutine......................................................................................................................................................21-5
Visibility of Global and Local Data Objects.............................................................................................................21-6
Runtime Behavior I .......................................................................................................................................................21-7
Runtime Behavior II......................................................................................................................................................21-8
Runtime Behavior III ....................................................................................................................................................21-9
Runtime Behavior IV..................................................................................................................................................21-10
Runtime Behavior V...................................................................................................................................................21-11
Runtime Behavior VI..................................................................................................................................................21-12
Runtime Behavior VII ................................................................................................................................................21-13
Example: Local Modularization in Programs .........................................................................................................21-14
Example: Recursive Call I .........................................................................................................................................21-15
Example: Recursive Calls II .....................................................................................................................................21-16
Example: Recursive Calls III.....................................................................................................................................21-17
Subroutines: Unit Summary ......................................................................................................................................21-18
Subroutines: Exercises................................................................................................................................................21-19
Subroutines: Solutions................................................................................................................................................21-21
Function Groups and Function Modules ........................................................................................................................22-1
Function Modules vs Subroutines ..............................................................................................................................22-2
Attributes.........................................................................................................................................................................22-3
Interface...........................................................................................................................................................................22-4
Processing Logic............................................................................................................................................................22-5
Exceptions.......................................................................................................................................................................22-6
Documenting, Activating, and Testing......................................................................................................................22-7
Calling a Function Module ..........................................................................................................................................22-8
Function Groups............................................................................................................................................................22-9
Applied Example .........................................................................................................................................................22-10
Applied Example: Implementing the Functions I ..................................................................................................22-11
Applied Example: Implementing the Functions II.................................................................................................22-12
Applied Example: Implementing the Functions III ..............................................................................................22-13
Organization of a Function Group............................................................................................................................22-14
Function Groups and Function Modules: Unit Summary.....................................................................................22-15
Function Groups and Function Modules: Exercises..............................................................................................22-16
Function Groups and Function Modules: Solutions..............................................................................................22-20
Calling Programs and Passing Data................................................................................................................................23-1
Synchronous Program Calls ........................................................................................................................................23-2
Logical Memory Model................................................................................................................................................23-3
Inserting a Program I ...................................................................................................................................................23-4
Inserting a Program II ...................................................................................................................................................23-5
Terminating the Inserted Program..............................................................................................................................23-6
Starting a New Executable (Type 1) Program I .......................................................................................................23-7
Starting a New Executable (Type 1) Program II......................................................................................................23-8
Starting A Transaction I ...............................................................................................................................................23-9
Starting A Transaction II ............................................................................................................................................23-10
Calling Function Modules I .......................................................................................................................................23-11
Calling Function Modules II......................................................................................................................................23-12
Starting an Executable (Type 1) Program...............................................................................................................23-13
Calling a Transaction..................................................................................................................................................23-14
Passing Data Between Programs: Overview...........................................................................................................23-15
Passing Data Using the Program Interface..............................................................................................................23-16
Passing Values for Input Fields.................................................................................................................................23-17
ABAP Memory and SAP Memory ...........................................................................................................................23-18
Passing Data Using the ABAP Memory..................................................................................................................23-19
Passing Parameters using SAP Memory .................................................................................................................23-20
Preview: Passing Data Using an Internal Table .....................................................................................................23-21
Fields in the Global Type BDCDATA ....................................................................................................................23-22
Example: Passing Data Using an Internal Table ....................................................................................................23-23
Calling Programs and Passing Data: Unit Summary .............................................................................................23-24
Calling Programs and Passing Data: Exercises......................................................................................................23-25
Calling Programs and Passing Data: Solutions......................................................................................................23-26

SAP AG 1999
TABC41 ABAP Development Workbench Basics 2/2
TABC41 2/2TABC41 2/2ABAP DevelopmentWorkbench Basics
Part 2 of 2
ABAP DevelopmentWorkbench Basics
Part 2 of 2 SAP AG
n R/3 System
n Release 4.6B
n May 2000
n Material number 50039583
SAP AG 1999
Copyright 2000 SAP AG. All rights reserved.
Neither this training manual nor any part thereof maybe copied or reproduced in any form or by any means,or translated into another language, without the priorconsent of SAP AG. The information contained in thisdocument is subject to change and supplement without priornotice.
All rights reserved.
Copyright
n Trademarks:
n Microsoft ®, Windows ®, NT ®, PowerPoint ®, WinWord ®, Excel ®, Project ®, SQL-Server ®, Multimedia Viewer ®, Video for Windows ®, Internet Explorer ®, NetShow ®, and HTML Help ® are registered trademarks of Microsoft Corporation.
n Lotus ScreenCam ® is a registered trademark of Lotus Development Corporation.
n Vivo ® and VivoActive ® are registered trademarks of RealNetworks, Inc.
n ARIS Toolset ® is a registered Trademark of IDS Prof. Scheer GmbH, Saarbrücken
n Adobe ® and Acrobat ® are registered trademarks of Adobe Systems Inc.
n TouchSend Index ® is a registered trademark of TouchSend Corporation.
n Visio ® is a registered trademark of Visio Corporation.
n IBM ®, OS/2 ®, DB2/6000 ® and AIX ® are a registered trademark of IBM Corporation.
n Indeo ® is a registered trademark of Intel Corporation.
n Netscape Navigator ®, and Netscape Communicator ® are registered trademarks of Netscape Communications, Inc.
n OSF/Motif ® is a registered trademark of Open Software Foundation.
n ORACLE ® is a registered trademark of ORACLE Corporation, California, USA.
n INFORMIX ®-OnLine for SAP is a registered trademark of Informix Software Incorporated.
n UNIX ® and X/Open ® are registered trademarks of SCO Santa Cruz Operation.
n ADABAS ® is a registered trademark of Software AG
n The following are trademarks or registered trademarks of SAP AG; ABAP/4, InterSAP, RIVA, R/2,
R/3, R/3 Retail, SAP (Word), SAPaccess, SAPfile, SAPfind, SAPmail, SAPoffice, SAPscript, SAPtime, SAPtronic, SAP-EDI, SAP EarlyWatch, SAP ArchiveLink, SAP Business Workflow, and ALE/WEB. The SAP logo and all other SAP products, services, logos, or brand names included herein are also trademarks or registered trademarks of SAP AG.
n Other products, services, logos, or brand names included herein are trademarks or registered trademarks of their respective owners.

SAP AG 1999
Section Overview
Section Basis Technology Overview
Section ABAP Workbench Concepts and Tools
Section Managing ABAP Development ProjectsSection ABAP Dictionary
Section ABAP Programming Techniques
Section Techniques for List Creation and SAP Query
Section Transaction ProgrammingSection Programming Database Updates
Section Enhancements and Modifications
Section Data Transfer

SAP AG 1999
Section: Managing ABAP Development Projects
SAP AG 1999
Unit ABAP Development Projects with ASAP
Unit Project Team
Unit Software Logistics
Unit Change Levels
Unit Project Standards
Content: Managing ABAP Development Projects

SAP AG
R
ABAP DevelopmentProjects and ASAP
R/3 BasisImplementation
4.0
R/3 BasisImplementation
4.0
SAP AG
R
ABAP Development Projects and
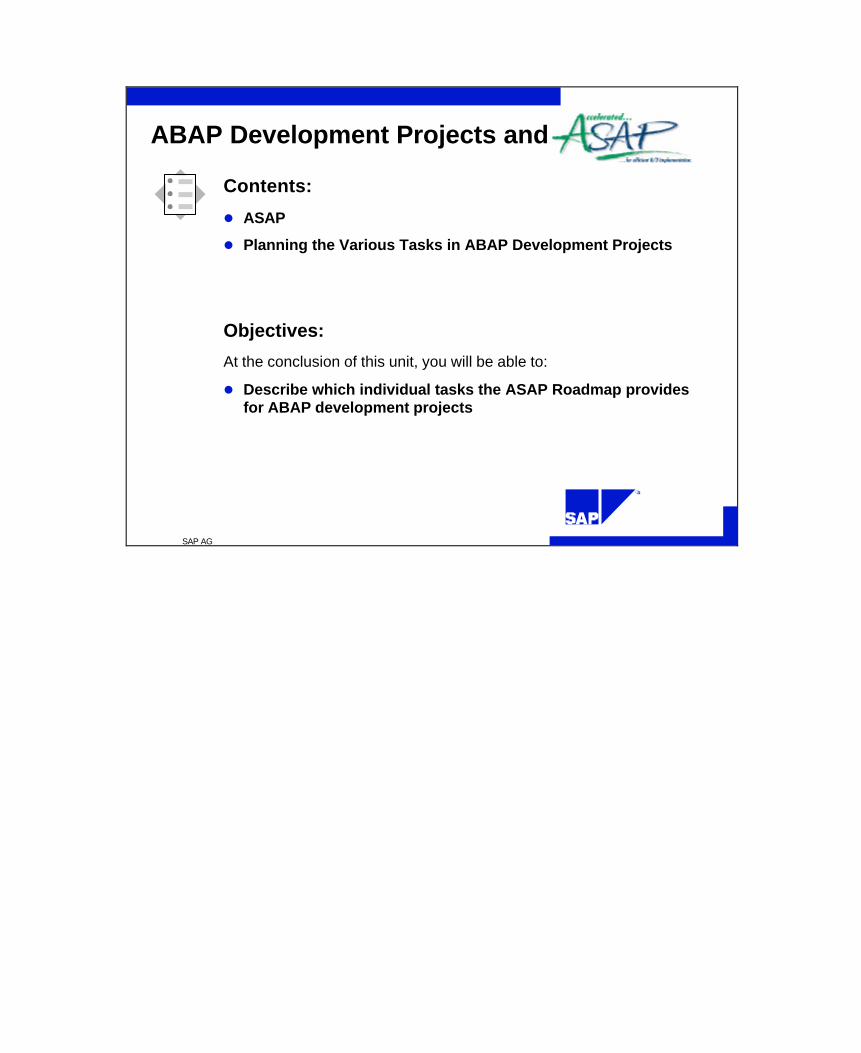
Contents:
l ASAP
l Planning the Various Tasks in ABAP Development Projects
Objectives:
At the conclusion of this unit, you will be able to:
l Describe which individual tasks the ASAP Roadmap providesfor ABAP development projects
SAP AG
R
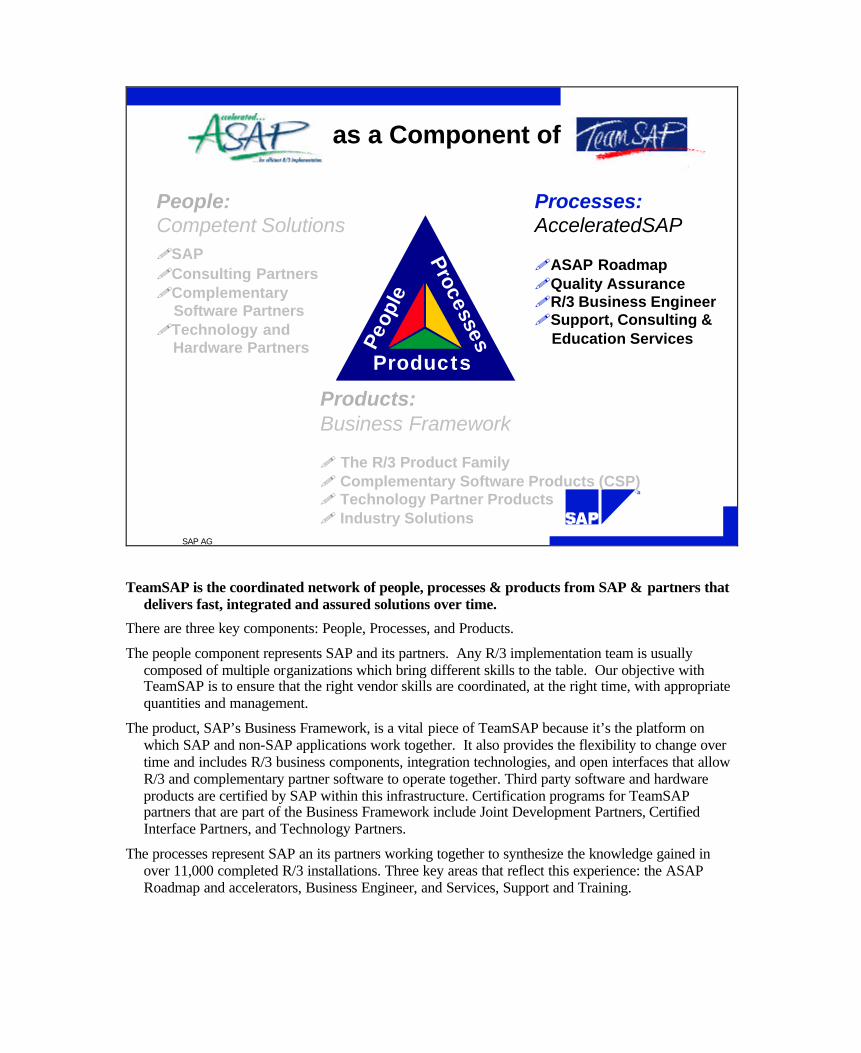
Products:Business Framework
! The R/3 Product Family! Complementary Software Products (CSP)! Technology Partner Products! Industry Solutions
People:Competent Solutions!SAP!Consulting Partners!Complementary
Software Partners!Technology and
Hardware Partners
as a Component of
Peop
leProcesses
Products
Processes:AcceleratedSAP
!ASAP Roadmap!Quality Assurance!R/3 Business Engineer!Support, Consulting &
Education Services
TeamSAP is the coordinated network of people, processes & products from SAP & partners that delivers fast, integrated and assured solutions over time.
There are three key components: People, Processes, and Products.
The people component represents SAP and its partners. Any R/3 implementation team is usually composed of multiple organizations which bring different skills to the table. Our objective with TeamSAP is to ensure that the right vendor skills are coordinated, at the right time, with appropriate quantities and management.
The product, SAP’s Business Framework, is a vital piece of TeamSAP because it’s the platform on which SAP and non-SAP applications work together. It also provides the flexibility to change over time and includes R/3 business components, integration technologies, and open interfaces that allow R/3 and complementary partner software to operate together. Third party software and hardware products are certified by SAP within this infrastructure. Certification programs for TeamSAP partners that are part of the Business Framework include Joint Development Partners, Certified Interface Partners, and Technology Partners.
The processes represent SAP an its partners working together to synthesize the knowledge gained in over 11,000 completed R/3 installations. Three key areas that reflect this experience: the ASAP Roadmap and accelerators, Business Engineer, and Services, Support and Training.
SAP AG
R
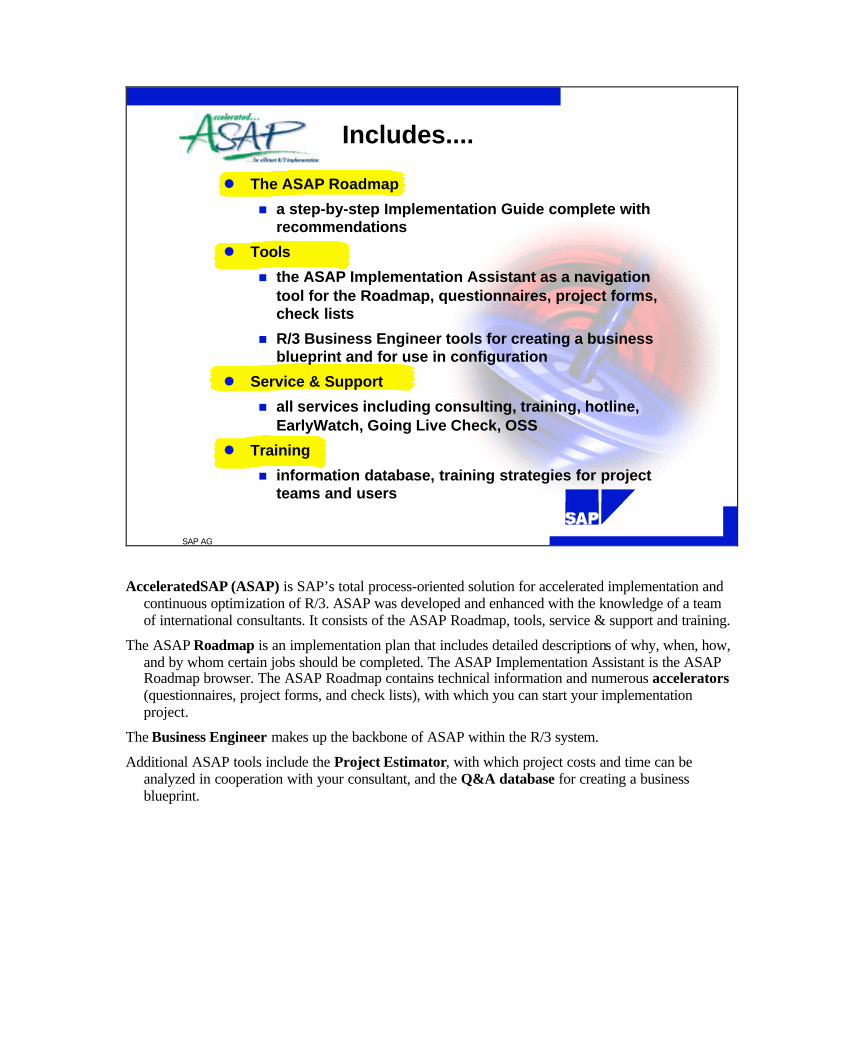
Includes....
l The ASAP Roadmap
n a step-by-step Implementation Guide complete withrecommendations
l Tools
n the ASAP Implementation Assistant as a navigationtool for the Roadmap, questionnaires, project forms,check lists
n R/3 Business Engineer tools for creating a businessblueprint and for use in configuration
l Service & Support
n all services including consulting, training, hotline,EarlyWatch, Going Live Check, OSS
l Training
n information database, training strategies for projectteams and users
AcceleratedSAP (ASAP) is SAP’s total process-oriented solution for accelerated implementation and continuous optimization of R/3. ASAP was developed and enhanced with the knowledge of a team of international consultants. It consists of the ASAP Roadmap, tools, service & support and training.
The ASAP Roadmap is an implementation plan that includes detailed descriptions of why, when, how, and by whom certain jobs should be completed. The ASAP Implementation Assistant is the ASAP Roadmap browser. The ASAP Roadmap contains technical information and numerous accelerators (questionnaires, project forms, and check lists), with which you can start your implementation project.
The Business Engineer makes up the backbone of ASAP within the R/3 system.
Additional ASAP tools include the Project Estimator, with which project costs and time can be analyzed in cooperation with your consultant, and the Q&A database for creating a business blueprint.
SAP AG
R
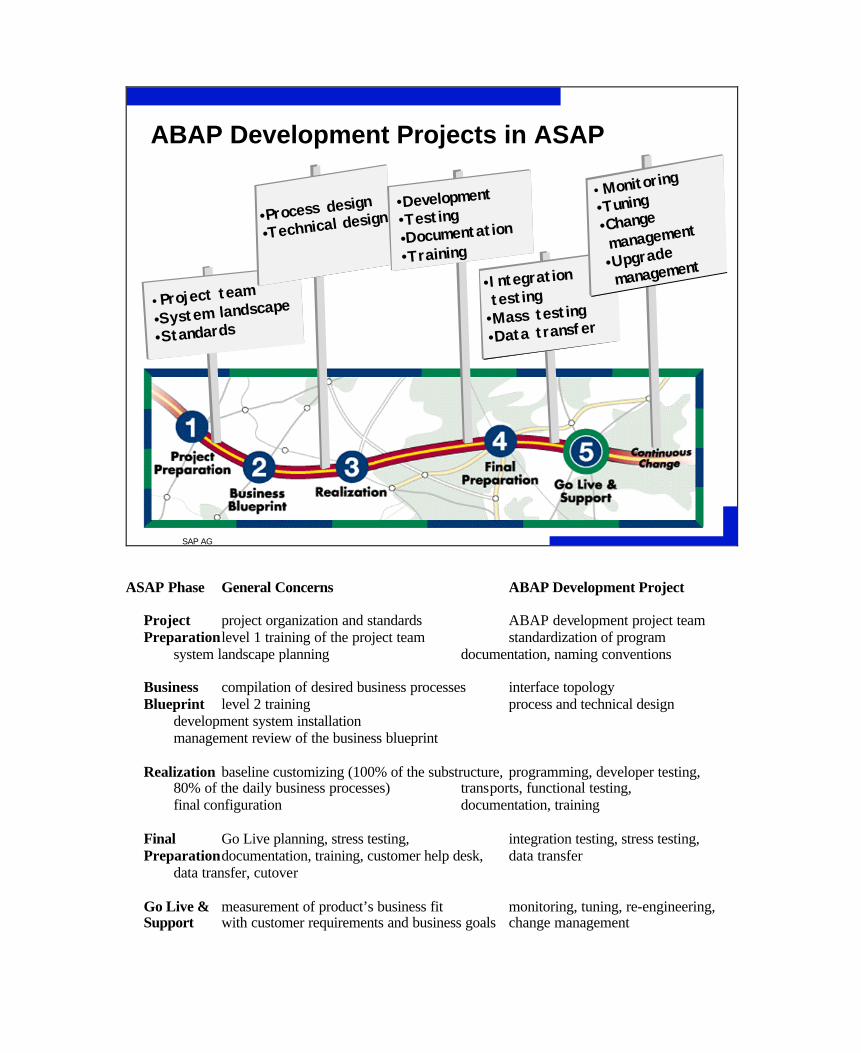
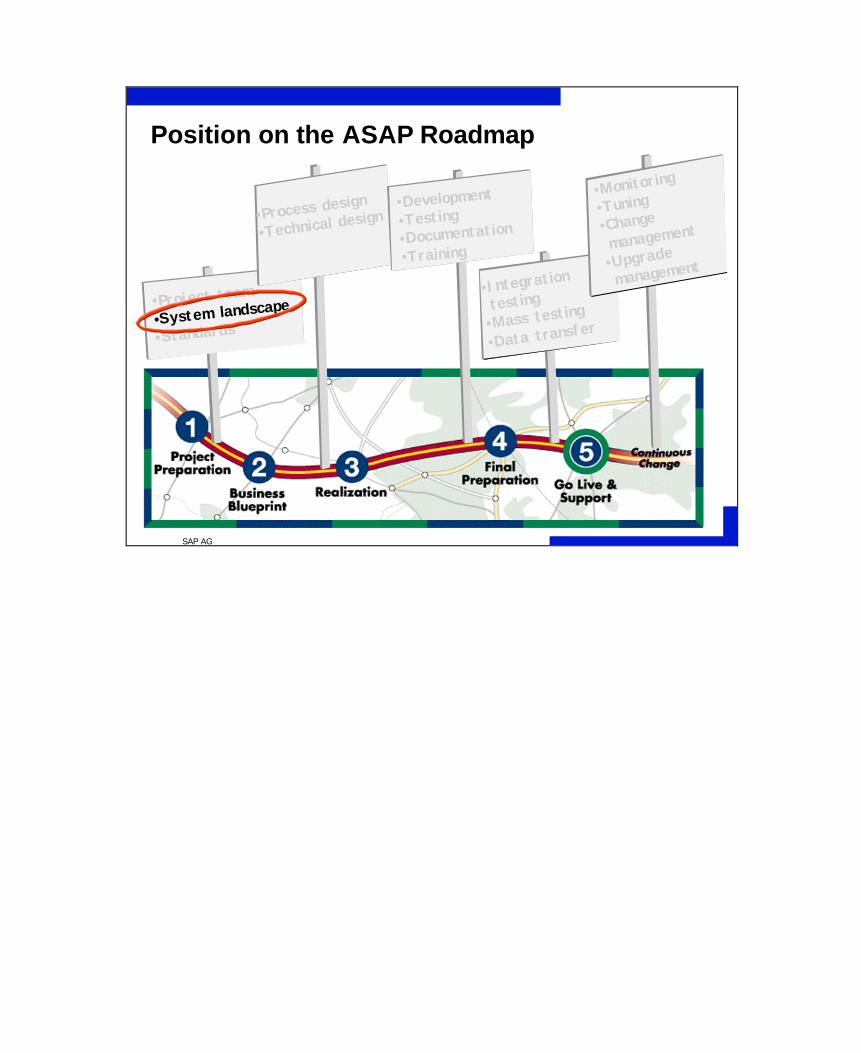
ABAP Development Projects in ASAP
• Project team
•System landscape
•Standards
•Process design
•Technical design
•Development•Testing•Documentation
•Training
•Integration testing•Mass testing
•Data transfer
• Monitoring
•Tuning•Change management
•Upgrade
management
ASAP Phase General Concerns ABAP Development Project Project project organization and standards ABAP development project team Preparation level 1 training of the project team standardization of program system landscape planning documentation, naming conventions Business compilation of desired business processes interface topology Blueprint level 2 training process and technical design development system installation management review of the business blueprint Realization baseline customizing (100% of the substructure, programming, developer testing, 80% of the daily business processes) transports, functional testing, final configuration documentation, training Final Go Live planning, stress testing, integration testing, stress testing, Preparation documentation, training, customer help desk, data transfer data transfer, cutover Go Live & measurement of product’s business fit monitoring, tuning, re-engineering, Support with customer requirements and business goals change management
SAP AG
R
Tools and ASAP
53
4
• Process design • Technical design• Data model• Screens, Interfaces
•• Templates• Data Modeler• Screen Painter• Menu Painter
2
• ABAP Dict.• ABAP Editor• Function Builder• ...
• Test Work- bench/CATT• Tuning Tools• LSM Workbench
Business Blueprint Realization Business Blueprint Realization Final Final PreparationPreparation Go Go Live Live
• Repository objects• Workbench requests• Manual• User Documentation• Training material
• Workload
• Test docu.• Live dates
• Production system
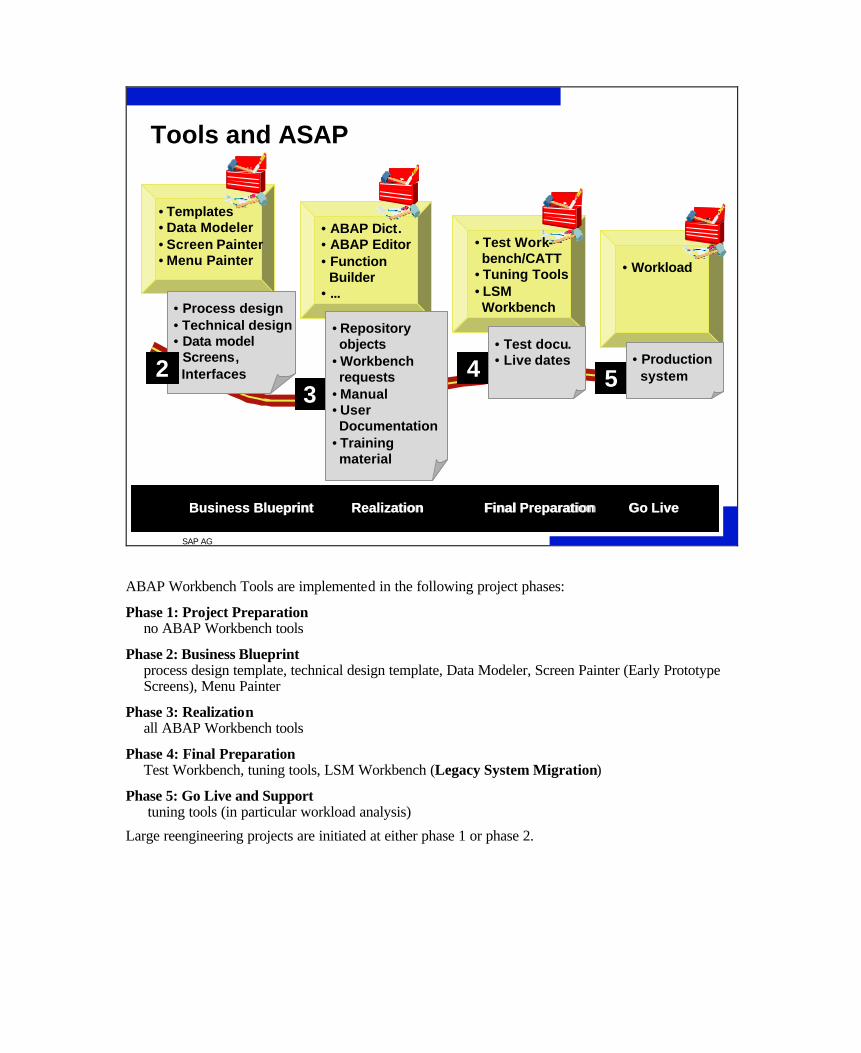
ABAP Workbench Tools are implemented in the following project phases:
Phase 1: Project Preparation no ABAP Workbench tools
Phase 2: Business Blueprint process design template, technical design template, Data Modeler, Screen Painter (Early Prototype Screens), Menu Painter
Phase 3: Realization all ABAP Workbench tools
Phase 4: Final Preparation Test Workbench, tuning tools, LSM Workbench (Legacy System Migration)
Phase 5: Go Live and Support tuning tools (in particular workload analysis)
Large reengineering projects are initiated at either phase 1 or phase 2.
SAP AG
R
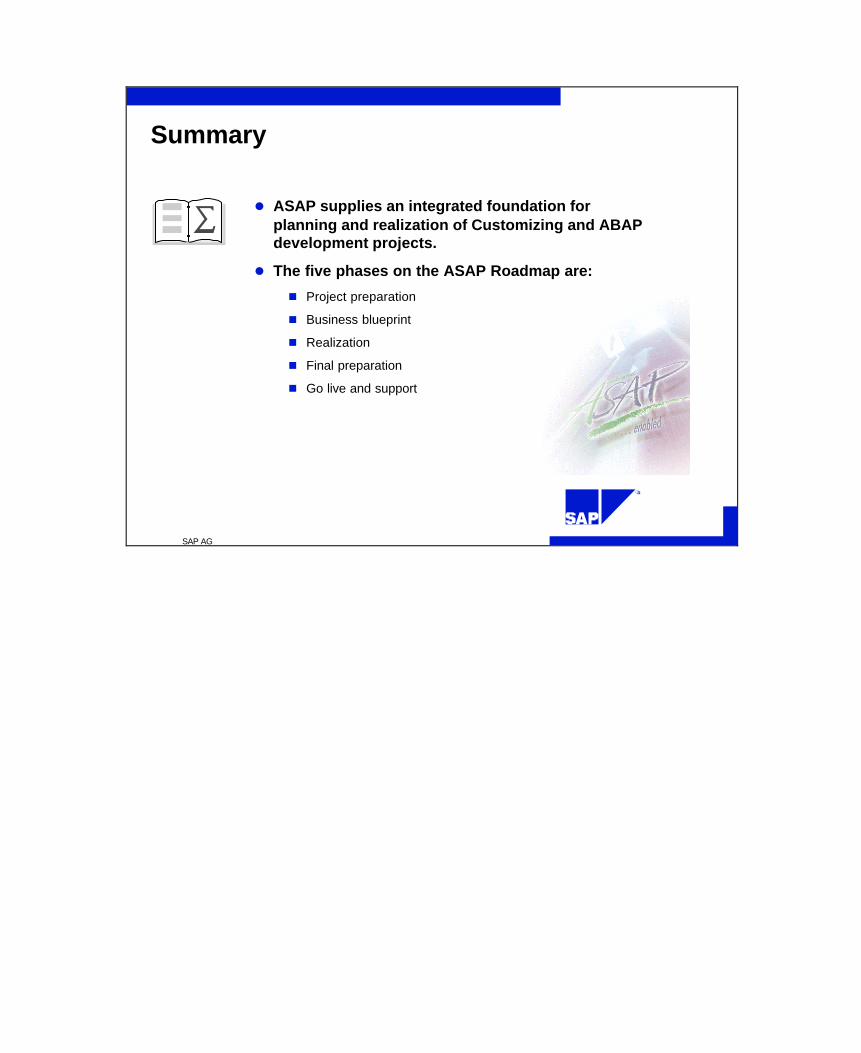
Summary
l ASAP supplies an integrated foundation forplanning and realization of Customizing and ABAPdevelopment projects.
l The five phases on the ASAP Roadmap are:
n Project preparation
n Business blueprint
n Realization
n Final preparation
n Go live and support

SAP AG
R
Project Team
R/3 BasisImplementation
4.0
R/3 BasisImplementation
4.0
SAP AG 1999
Project Team
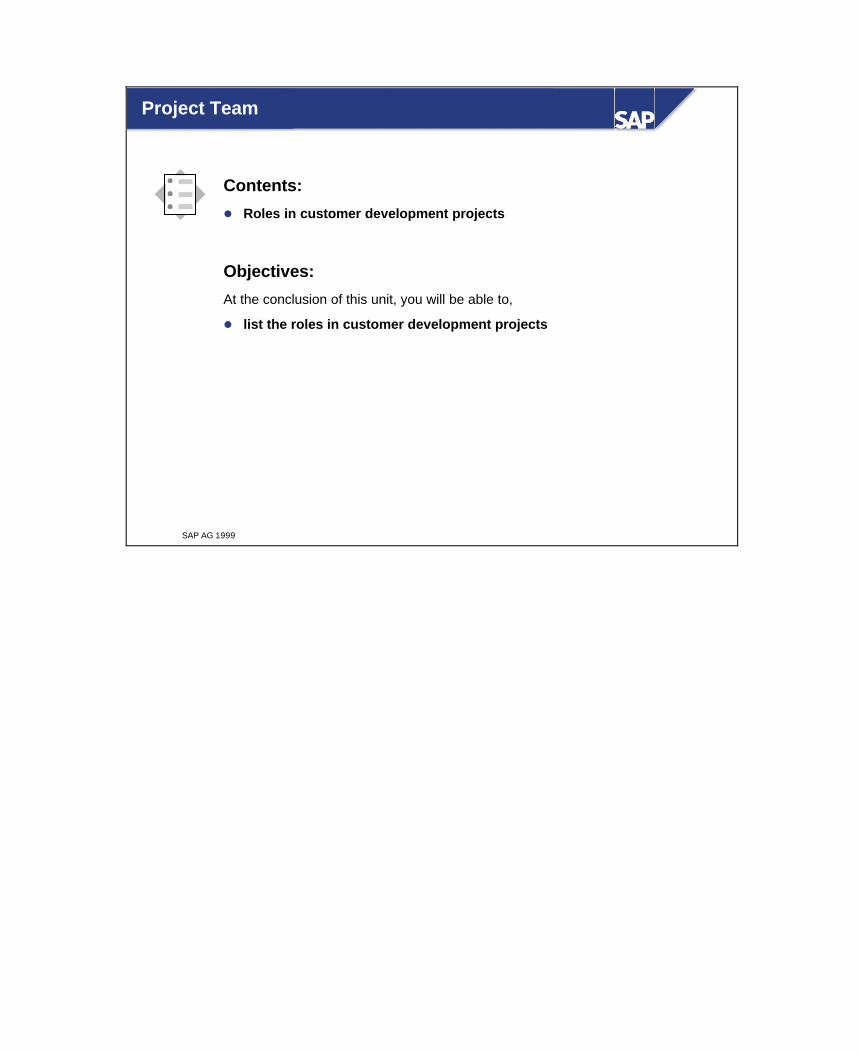
Contents:
l Roles in customer development projects
Objectives:
At the conclusion of this unit, you will be able to,
l list the roles in customer development projects
SAP AG
R
Position on the ASAP Roadmap
• Project team
•System landscape
•Standards
•Process design
•Technical design
•Development
•Testing•Documentation
•Training
•Integration
testing•Mass testin
g
•Data trensfer
•Monitoring
•Tuning•Change management
•Upgrade
management
SAP AG
R
Roles in Customer Development Projects (1)
TechnicalTechnical Support SupportQuality AssuranceQuality Assurance
DevelopmentDevelopmentProject CoordinationProject Coordination
ProjectProject Management Management
Steering CommitteeSteering Committee
Depending on the scope and complexity of your project the roles described below could fall to one and the same person.
The steering committee consists of those people from the board of directors initiating and sponsoring the project and the committee has ultimate authority over which direction the project takes.
Project management is responsible for the R/3 implementation project as a whole. Project management plans the project (budgets, deadlines, personnel, functions), resolves conflicts and delivers status reports to the steering committee.
Project coordination is responsible for standardization and marketing the project within the company. In addition, the responsibility for project logistics belongs to the project coordinators.
Development creates process and technical designs for the project in cooperation with the other areas and is responsible for actual implementation.
Planning, carrying out and reviewing testing all falls into the area of quality assurance.
Technical support is responsible for clearing away all technical obstacles to implementation (server downtime, transport problems, database problems, etc.).
SAP AG
R
Roles in Customer Development Projects (2)
l Process manager
l Marketing representative
l Standards coordinator
Project CoordinationProject Coordination
Process managers come from the department affected and are responsible for logistics within a subproject. They support development by creating process designs, drawing up integration plans together with quality assurance, and are responsible for CATT (Computer Aided Test Tool) test case input.
Marketing representatives coordinate all internal (company) activities in the areas of project marketing, training, and consulting. They are responsible for rollout of the subproject and report to project management (status reports).
Standards coordinators deal with more than one subproject and are responsible for establishing standards for project documentation and communication company wide. They are also responsible for customizing and development activities documentation (templates for process and technical design, naming conventions, programming guides, graphical user interface style guides).
SAP AG
R
DevelopmentDevelopment
Roles in Customer Development Projects (3)
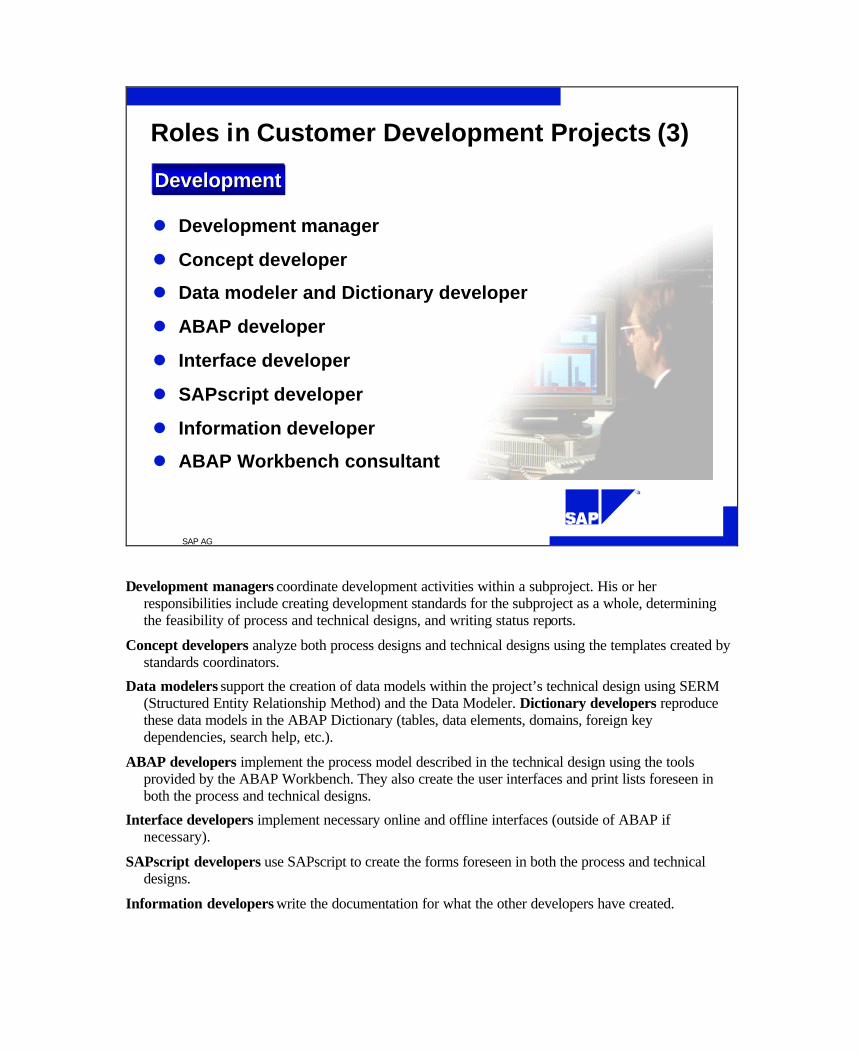
l Development manager
l Concept developer
l Data modeler and Dictionary developer
l ABAP developer
l Interface developer
l SAPscript developer
l Information developer
l ABAP Workbench consultant
Development managers coordinate development activities within a subproject. His or her responsibilities include creating development standards for the subproject as a whole, determining the feasibility of process and technical designs, and writing status reports.
Concept developers analyze both process designs and technical designs using the templates created by standards coordinators.
Data modelers support the creation of data models within the project’s technical design using SERM (Structured Entity Relationship Method) and the Data Modeler. Dictionary developers reproduce these data models in the ABAP Dictionary (tables, data elements, domains, foreign key dependencies, search help, etc.).
ABAP developers implement the process model described in the technical design using the tools provided by the ABAP Workbench. They also create the user interfaces and print lists foreseen in both the process and technical designs.
Interface developers implement necessary online and offline interfaces (outside of ABAP if necessary).
SAPscript developers use SAPscript to create the forms foreseen in both the process and technical designs.
Information developers write the documentation for what the other developers have created.
SAP AG
R
Roles in Customer Development Projects (4)
Quality AssuranceQuality Assurance
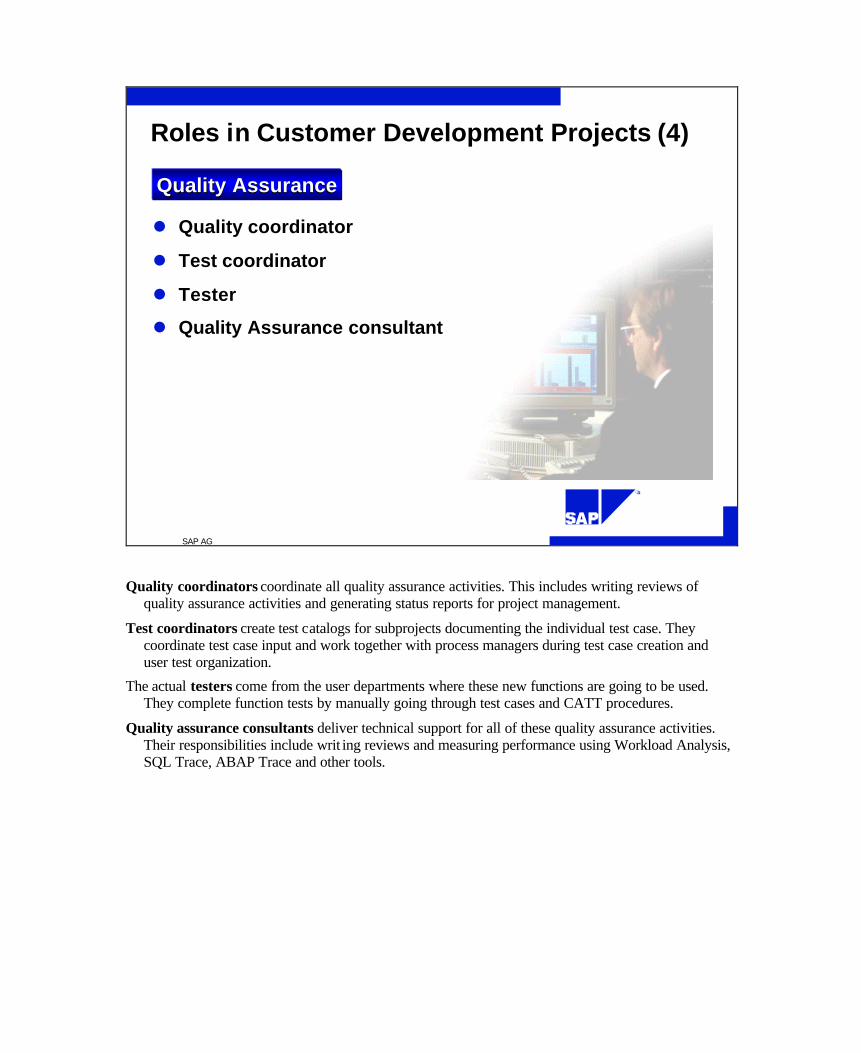
l Quality coordinator
l Test coordinator
l Tester
l Quality Assurance consultant
Quality coordinators coordinate all quality assurance activities. This includes writing reviews of quality assurance activities and generating status reports for project management.
Test coordinators create test catalogs for subprojects documenting the individual test case. They coordinate test case input and work together with process managers during test case creation and user test organization.
The actual testers come from the user departments where these new functions are going to be used. They complete function tests by manually going through test cases and CATT procedures.
Quality assurance consultants deliver technical support for all of these quality assurance activities. Their responsibilities include writ ing reviews and measuring performance using Workload Analysis, SQL Trace, ABAP Trace and other tools.

SAP AG
R
Roles in Customer Development Projects (5)
Technical SupportTechnical Support
l Transport coordinator
l System administrator
l Authorization administrator
l Technical consultant
Transport coordinators are responsible for setting up and maintaining correction and transport mechanisms. They determine in conjunction with the subproject management when and how transports should take place and are responsible for conducting them. Transport coordinators solve transport problems using CTS (Change and Transport System).
System administrators guarantee the availability of the system landscape for development and quality assurance. This includes administering operating systems, database systems, networks and R/3 systems. In addition, system administrators are responsible for regularly backing up data and for creating a recovery strategy.
Authorization administrators provide individual employees with authorizations for various R/3 systems depending on the roll they play (for database management systems and operating systems too, if necessary).
SAP AG
R
Software Logistics
R/3 BasisImplementation
4.0
R/3 BasisImplementation
4.0
SAP AG 1999
Software Logistics
Contents:
l Planning the system landscape
Objectives:
At the conclusion of this unit, you will be able to,
l Describe what you should take into account when planning a systemlandscape for ABAP development objects.
SAP AG
R
Position on the ASAP Roadmap
•Project team
•System landscape
•Standards
•Process design
•Technical design
•Development
•Testing•Documentation
•Training
•Monitoring
•Tuning•Change management
•Upgrade
management•Integratio
n
testing•Mass testing
•Data transfer
SAP AG
R
Planning the System Landscape for Development
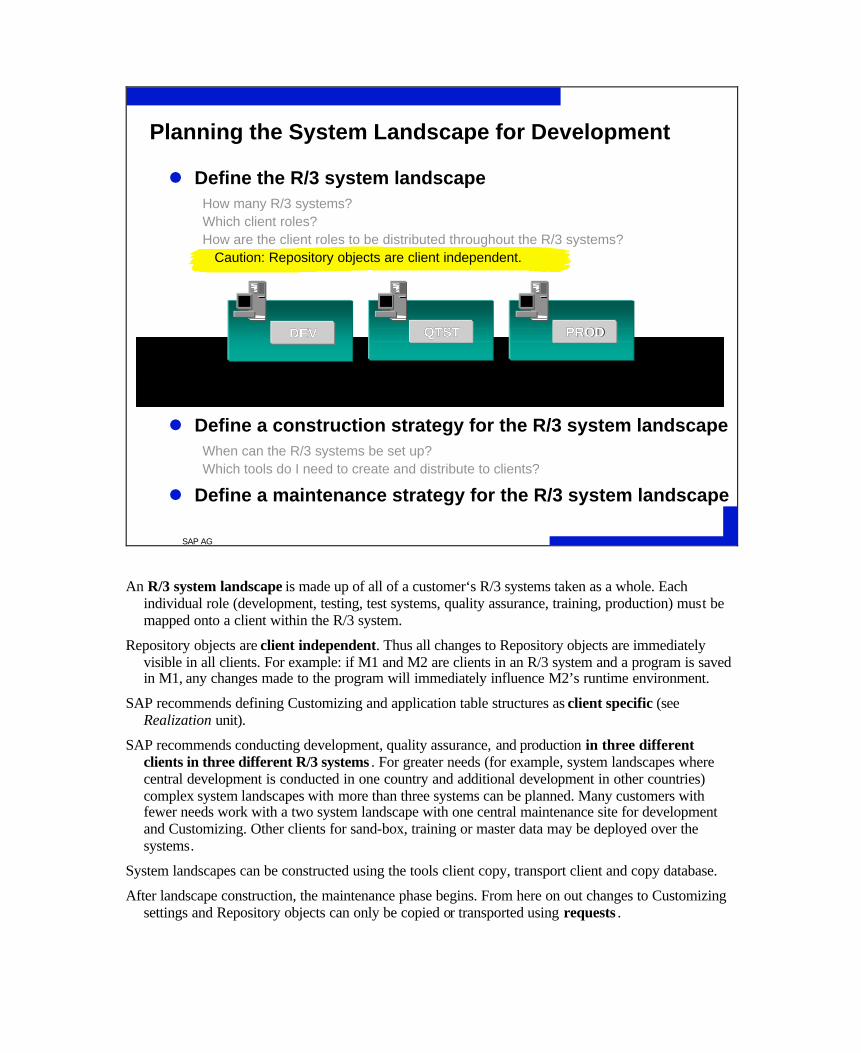
l Define the R/3 system landscapeHow many R/3 systems?Which client roles?How are the client roles to be distributed throughout the R/3 systems? Caution: Repository objects are client independent.
l Define a construction strategy for the R/3 system landscapeWhen can the R/3 systems be set up?Which tools do I need to create and distribute to clients?
l Define a maintenance strategy for the R/3 system landscape
DEVDEV QTSTQTST PRODPROD
Development(central maintenance)
Quality Assurance Production
An R/3 system landscape is made up of all of a customer‘s R/3 systems taken as a whole. Each individual role (development, testing, test systems, quality assurance, training, production) must be mapped onto a client within the R/3 system.
Repository objects are client independent. Thus all changes to Repository objects are immediately visible in all clients. For example: if M1 and M2 are clients in an R/3 system and a program is saved in M1, any changes made to the program will immediately influence M2’s runtime environment.
SAP recommends defining Customizing and application table structures as client specific (see Realization unit).
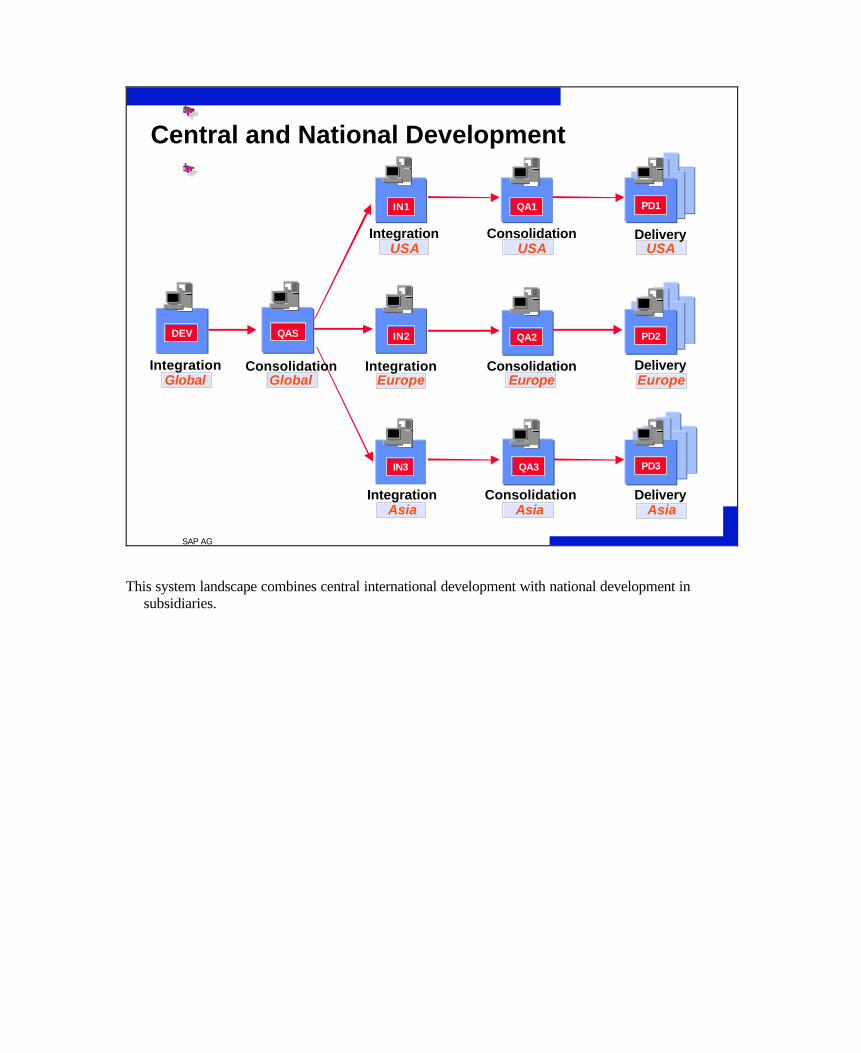
SAP recommends conducting development, quality assurance, and production in three different clients in three different R/3 systems . For greater needs (for example, system landscapes where central development is conducted in one country and additional development in other countries) complex system landscapes with more than three systems can be planned. Many customers with fewer needs work with a two system landscape with one central maintenance site for development and Customizing. Other clients for sand-box, training or master data may be deployed over the systems.
System landscapes can be constructed using the tools client copy, transport client and copy database.
After landscape construction, the maintenance phase begins. From here on out changes to Customizing settings and Repository objects can only be copied or transported using requests .
SAP AG
R
Setting up the System LandscapeQA system Productive systemDevelopment system
DEV
MAST
QTST
MAST
PROD
Client Transport
Workbench Request
ClientCopy
ClientCopy Client
Transport
Workbench RequestRepository
objects
SBOX TRAI
Client-indep.Customizjng
Repositoryobjects
Client-indep.Customizing
Repositoryobjects
Client-indep.Customizing
ClientCopy
ClientCopy
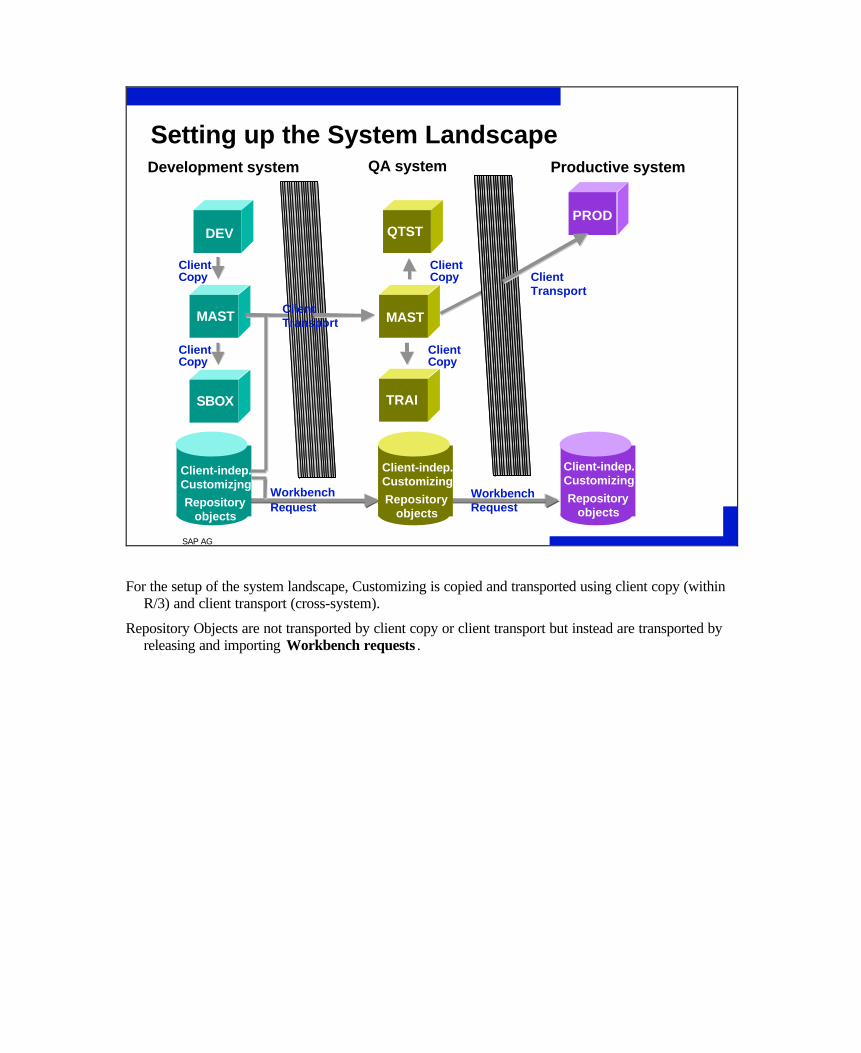
For the setup of the system landscape, Customizing is copied and transported using client copy (within R/3) and client transport (cross-system).
Repository Objects are not transported by client copy or client transport but instead are transported by releasing and importing Workbench requests .
SAP AG
R
Maintaining the System Landscape
DEV
MAST
QTST
MAST
PROD
Workbench request
Copyrequest
Workbench requestRepository
Objects
SBOX TRAI
Client-indep..Customizing
RepositoryObjects
Client-indep.Customizing
RepositoryObjects
Client-indep.Customizing
Copyrequest
Customizingrequest
Customizingrequest
Copyrequest
Copyrequest
QA system Productive systemDevelopment system
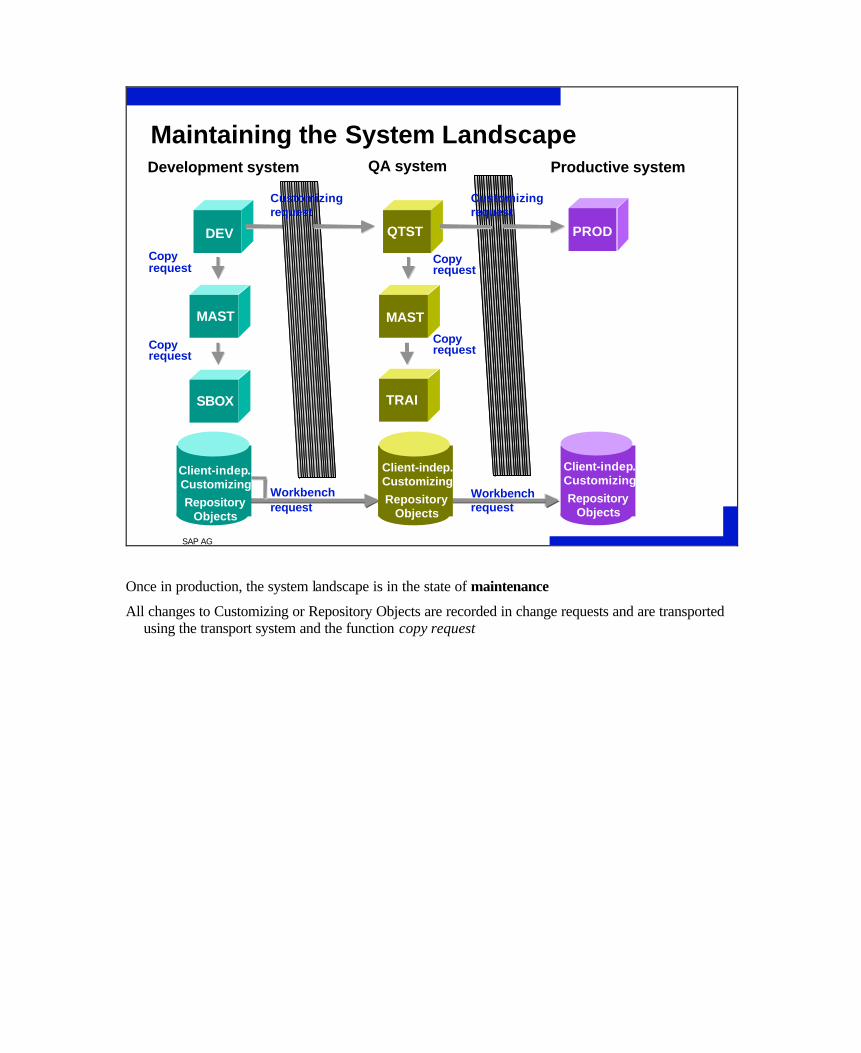
Once in production, the system landscape is in the state of maintenance
All changes to Customizing or Repository Objects are recorded in change requests and are transported using the transport system and the function copy request
SAP AG
R
Change & Transport Organizer
Workbench OrganizerWorkbench Organizer
Customizing OrganizerCustomizing Organizer
CustomizingRequests
WorkbenchRequests
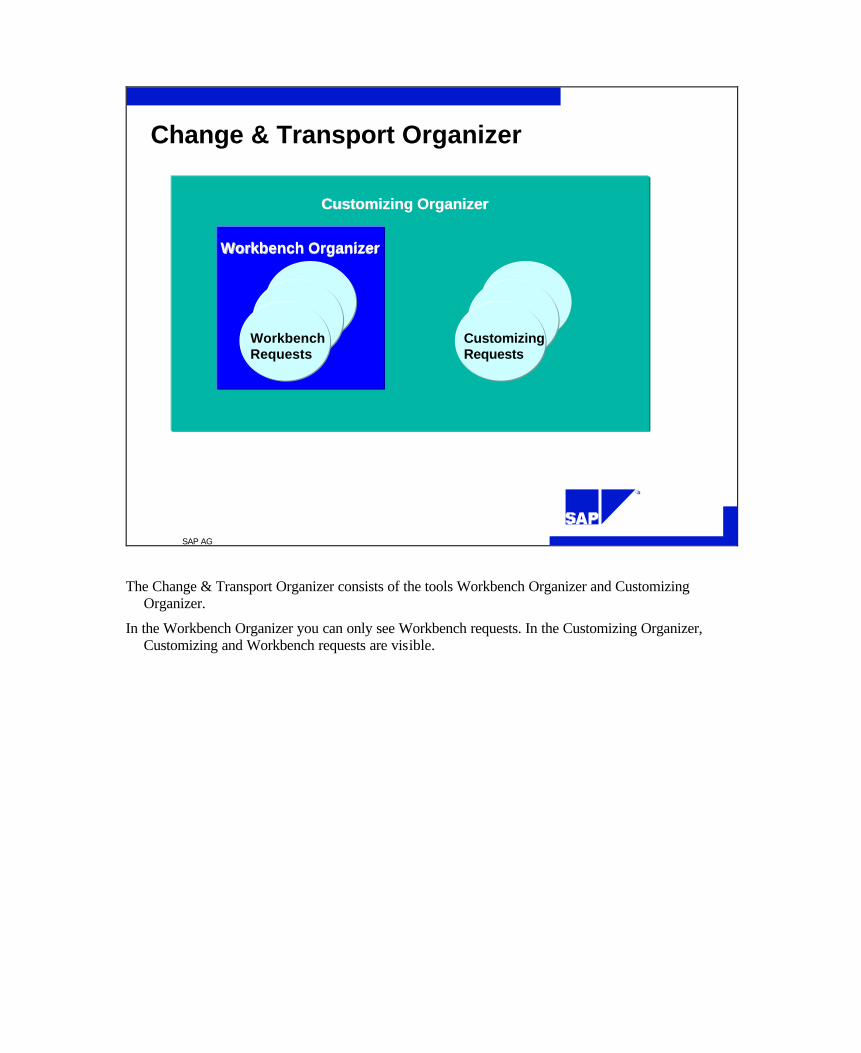
The Change & Transport Organizer consists of the tools Workbench Organizer and Customizing Organizer.
In the Workbench Organizer you can only see Workbench requests. In the Customizing Organizer, Customizing and Workbench requests are visible.
SAP AG
R
WorkbenchOrganizer
CustomizingOrganizer
l Coordinates Customizing Efforts
n Complete recording anddocumentation of changes
n Teamwork
l Connected to the Client Copy and Transport System
l Coordinates Development Efforts
n Complete recording anddocumentation of changes
n Teamwork
n Development Classes
n Version management
n Object locking
l Connected to the TransportSystem
Differences between WBO and CO
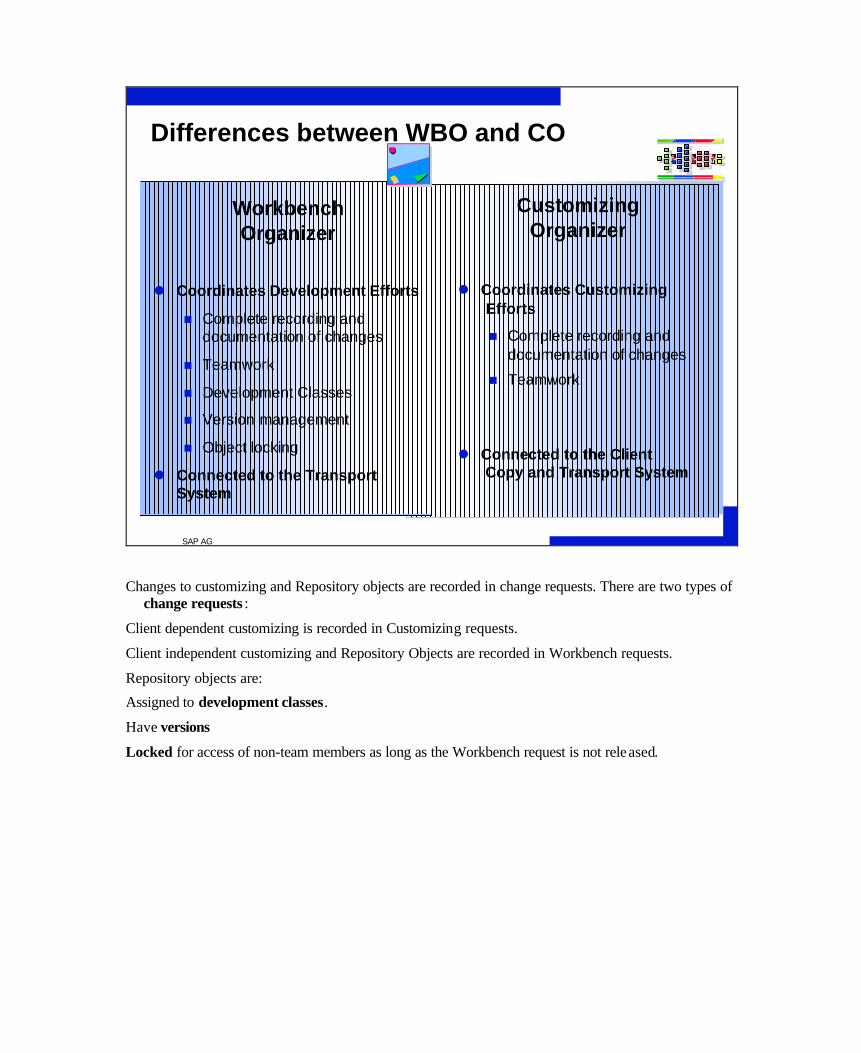
Changes to customizing and Repository objects are recorded in change requests. There are two types of change requests :
Client dependent customizing is recorded in Customizing requests.
Client independent customizing and Repository Objects are recorded in Workbench requests.
Repository objects are:
Assigned to development classes.
Have versions
Locked for access of non-team members as long as the Workbench request is not released.
SAP AG
R
Central and National Development
IntegrationGlobal
ConsolidationAsia
ConsolidationUSA
ConsolidationEurope
IntegrationEurope
IntegrationUSA
IntegrationAsia
DeliveryUSA
Europe
Asia
Delivery
Delivery
ConsolidationGlobal
DEV QAS PD2
PD3
PD1
QA2
QA3
QA1
IN2
IN3
IN1
This system landscape combines central international development with national development in subsidiaries.
The Workbench Organizer allows the user to develop software in an organized manner.
The transport system provides for transport execution and registration.
Repository objects are connected to the transport system by their development class and change request assignments. After a request has been released in a development system, it is then transported along pre-determined routes into a quality assurance system or a production system.

SAP AG
R
Change Levels
R/3 BasisImplementation
4.0
R/3 BasisImplementation
4.0

SAP AG
R
Change Levels
Contents:
l Change Levels
l Development Project Evaluation
Objectives:
At the conclusion of this unit, you will be able to:
l Explain which levels you can change the SAP standard
l Evaluate change levels
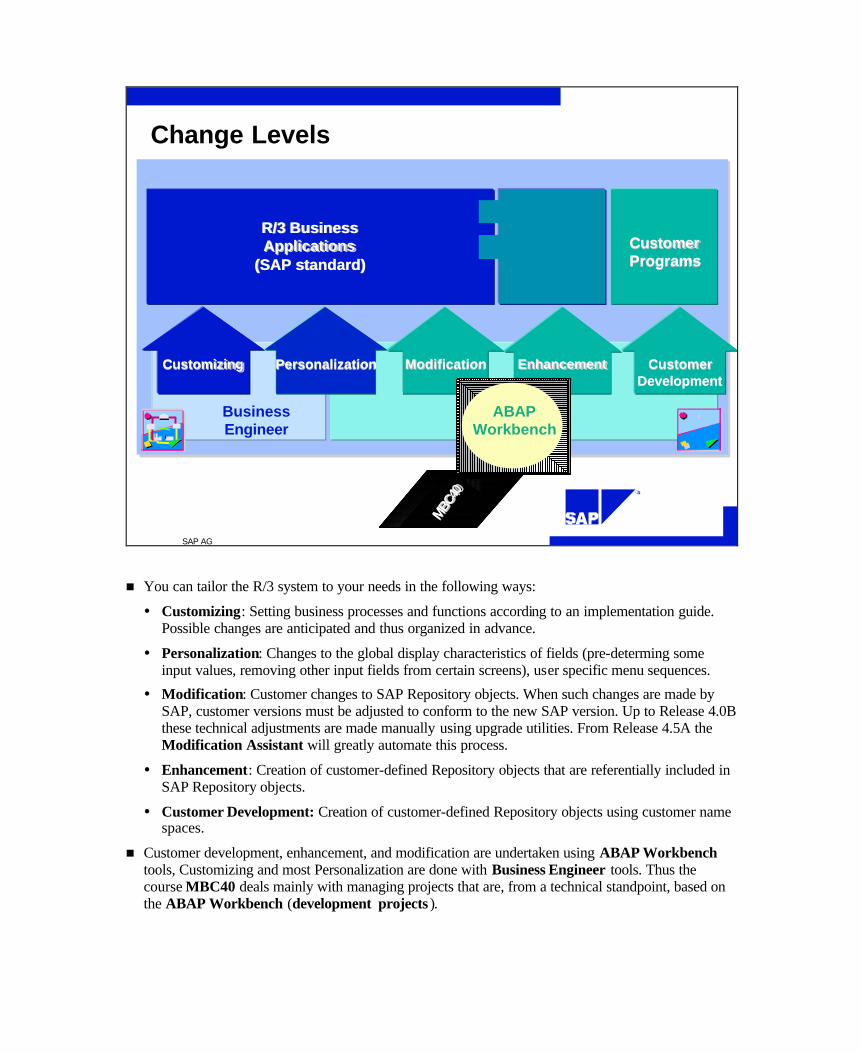
SAP AG
R
Change Levels
R/3 BusinessR/3 BusinessApplicationsApplications
(SAP standard)(SAP standard)CustomerCustomerProgramsPrograms
CustomerCustomerDevelopmentDevelopment
EnhancementEnhancementModificationModificationCustomizingCustomizing
BusinessEngineer
ABAPWorkbench
PersonalizationPersonalization
MBC40
MBC40
n You can tailor the R/3 system to your needs in the following ways:
� Customizing: Setting business processes and functions according to an implementation guide. Possible changes are anticipated and thus organized in advance.
� Personalization: Changes to the global display characteristics of fields (pre-determing some input values, removing other input fields from certain screens), user specific menu sequences.
� Modification: Customer changes to SAP Repository objects. When such changes are made by SAP, customer versions must be adjusted to conform to the new SAP version. Up to Release 4.0B these technical adjustments are made manually using upgrade utilities. From Release 4.5A the Modification Assistant will greatly automate this process.
� Enhancement: Creation of customer-defined Repository objects that are referentially included in SAP Repository objects.
� Customer Development: Creation of customer-defined Repository objects using customer name spaces.
n Customer development, enhancement, and modification are undertaken using ABAP Workbench tools, Customizing and most Personalization are done with Business Engineer tools. Thus the course MBC40 deals mainly with managing projects that are, from a technical standpoint, based on the ABAP Workbench (development projects ).
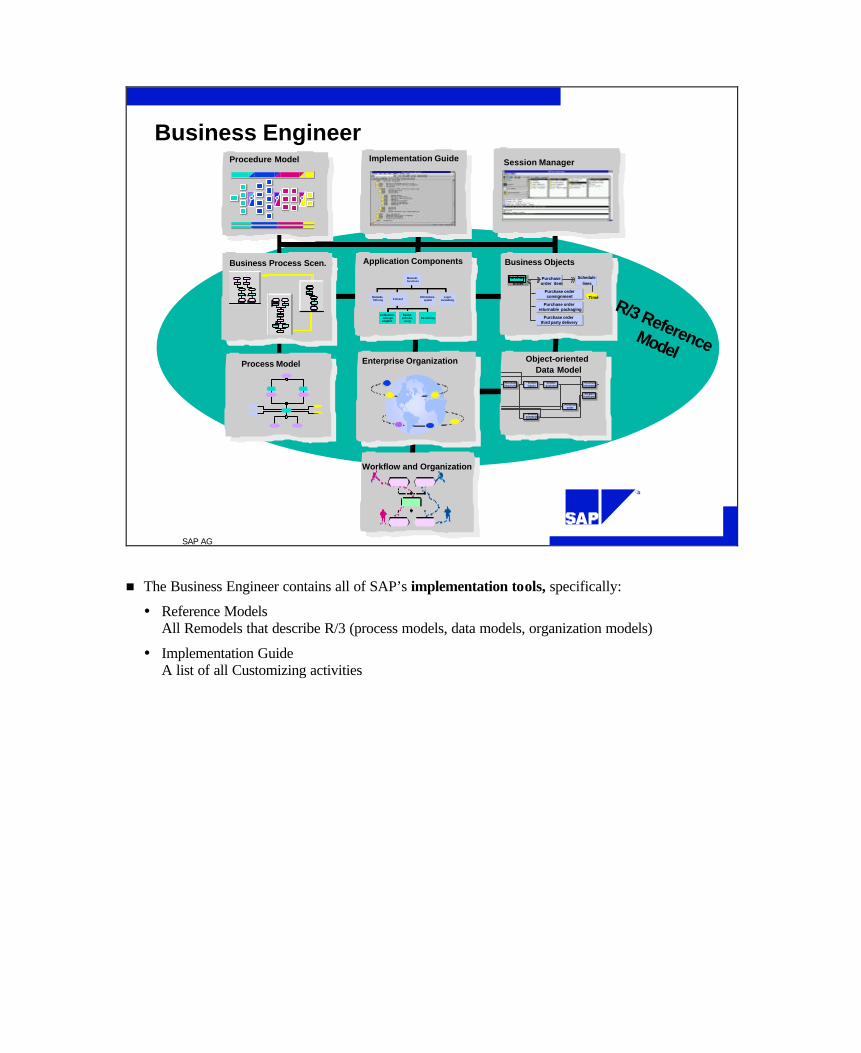
SAP AG
R
Business EngineerImplementation Guide
Business Objects
Purchaseorder
Purchaseorder item
Schedulelines
Purchase orderconsignment
Purchase orderreturnable packaging
Purchase orderthird party delivery
Time
Object-oriented Data Model
Purchase requisition
Vendorinquiry
Vendorquotation
Purchaseinformation
Shippingnotification
Vendorschedulingagreement
Purchase order
Process Model
Material-business
Bestands-führung Einkauf
Informations-system
Lager-verwaltung
Lieferanten-anfrage
/-angebot
Bestell-anforde-
rungBestellung
Application Components
Enterprise Organization
Session Manager
Workflow and Organization
Procedure Model
R/3 ReferenceModel
Business Process Scen.
n The Business Engineer contains all of SAP’s implementation tools, specifically:
� Reference Models All Remodels that describe R/3 (process models, data models, organization models)
� Implementation Guide A list of all Customizing activities

SAP AG
R
Personalization
l Global Field Display Characteristics
n SET/GET Parameters
n Global Values
n Variant Transactions
n Parameter Transactions
n Systemwide Table Control Settings
l Enterprise Specific Menus
n Area Menus
n Session Manager
n Shortcuts on the Desktop
n Report Trees
Simplifying and Personalizing an applicationis often possible outside of the ABAPWorkbench.
The goal of Personalization is to speed up and simplify the business transactions that are going to be processed within the R/3 System. Each individual application’s transactions are adjusted to the business needs of the company as a whole or of various user groups. All unnecessary information and functions are disabled.
The input values of fields on certain screens can be pre-determined using global display characteristics. Within transactions, individual fields and individual columns of table controls or even complete screens can be hidden.
Using area menus, the Session Manager (installed on a front end or transaction SESS) enables customized shortcuts, reporting trees and menu sequences to meet specific needs of different user groups within the company.
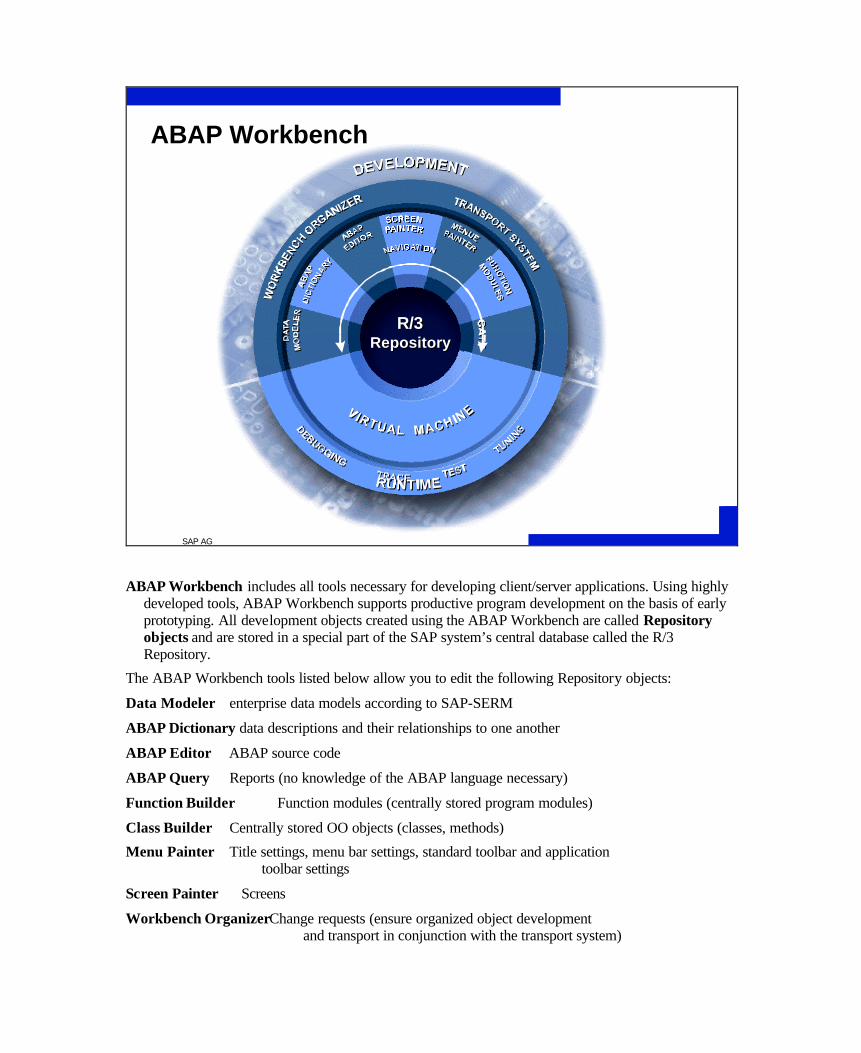
SAP AG
R
ABAP Workbench
®
R/3Repository
R/3Repository
®
ABAP Workbench includes all tools necessary for developing client/server applications. Using highly developed tools, ABAP Workbench supports productive program development on the basis of early prototyping. All development objects created using the ABAP Workbench are called Repository objects and are stored in a special part of the SAP system’s central database called the R/3 Repository.
The ABAP Workbench tools listed below allow you to edit the following Repository objects:
Data Modeler enterprise data models according to SAP-SERM
ABAP Dictionary data descriptions and their relationships to one another
ABAP Editor ABAP source code
ABAP Query Reports (no knowledge of the ABAP language necessary)
Function Builder Function modules (centrally stored program modules)
Class Builder Centrally stored OO objects (classes, methods)
Menu Painter Title settings, menu bar settings, standard toolbar and application toolbar settings
Screen Painter Screens
Workbench Organizer Change requests (ensure organized object development and transport in conjunction with the transport system)


SAP AG
R
ABAP Programming is Designed for:
ABAPABAP ABAPABAP
RDBMSRDBMS
Repository
l Business Tasks
l Client/Server Architecture
l Platform Independence
l Developing User Dialogs
l Database Access
l Openness
l International Use
l Team Development
ABAP stands for Advanced Business Application Programming and is the programming language developed by SAP for use in application development.
ABAP is designed to support the application development of business tasks (mass data processing, currency specific display, multilingual capability, etc.).
ABAP is also designed for developing user dialogs in a distributed R/3 system. Developers need not concern themselves with communication and distribution aspects of the system.
ABAP programs in conjunction with the SAP Basis are platform independent.
ABAP contains a special set of commands for database access called ABAP Open SQL.
ABAP application development can be done in project teams which is organized by using the Workbench Organizer.
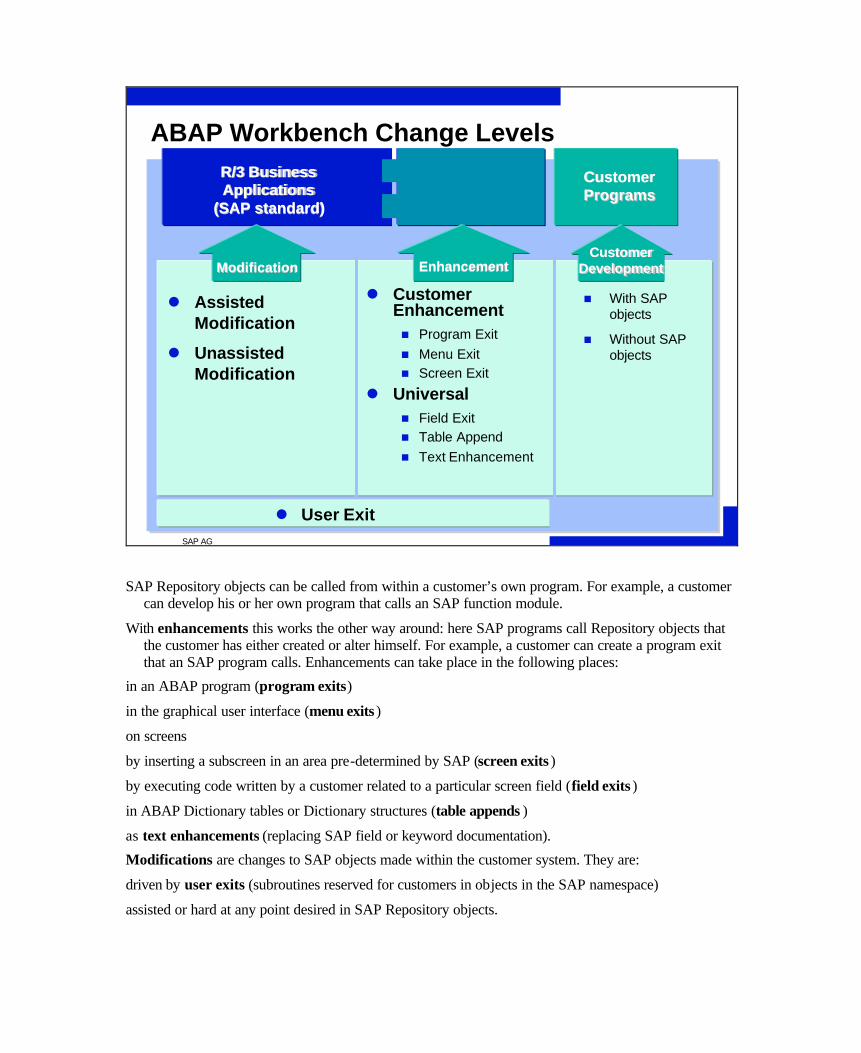
SAP AG
R
ABAP Workbench Change LevelsR/3 BusinessR/3 BusinessApplicationsApplications
(SAP standard)(SAP standard)
CustomerCustomerProgramsPrograms
CustomerCustomerDevelopmentDevelopmentEnhancementEnhancementModificationModification
l AssistedModification
l UnassistedModification
l CustomerEnhancementn Program Exitn Menu Exitn Screen Exit
l Universaln Field Exitn Table Appendn Text Enhancement
n With SAPobjects
n Without SAPobjects
l User Exit
SAP Repository objects can be called from within a customer’s own program. For example, a customer can develop his or her own program that calls an SAP function module.
With enhancements this works the other way around: here SAP programs call Repository objects that the customer has either created or alter himself. For example, a customer can create a program exit that an SAP program calls. Enhancements can take place in the following places:
in an ABAP program (program exits)
in the graphical user interface (menu exits )
on screens
by inserting a subscreen in an area pre-determined by SAP (screen exits )
by executing code written by a customer related to a particular screen field (field exits )
in ABAP Dictionary tables or Dictionary structures (table appends )
as text enhancements (replacing SAP field or keyword documentation).
Modifications are changes to SAP objects made within the customer system. They are:
driven by user exits (subroutines reserved for customers in objects in the SAP namespace)
assisted or hard at any point desired in SAP Repository objects.
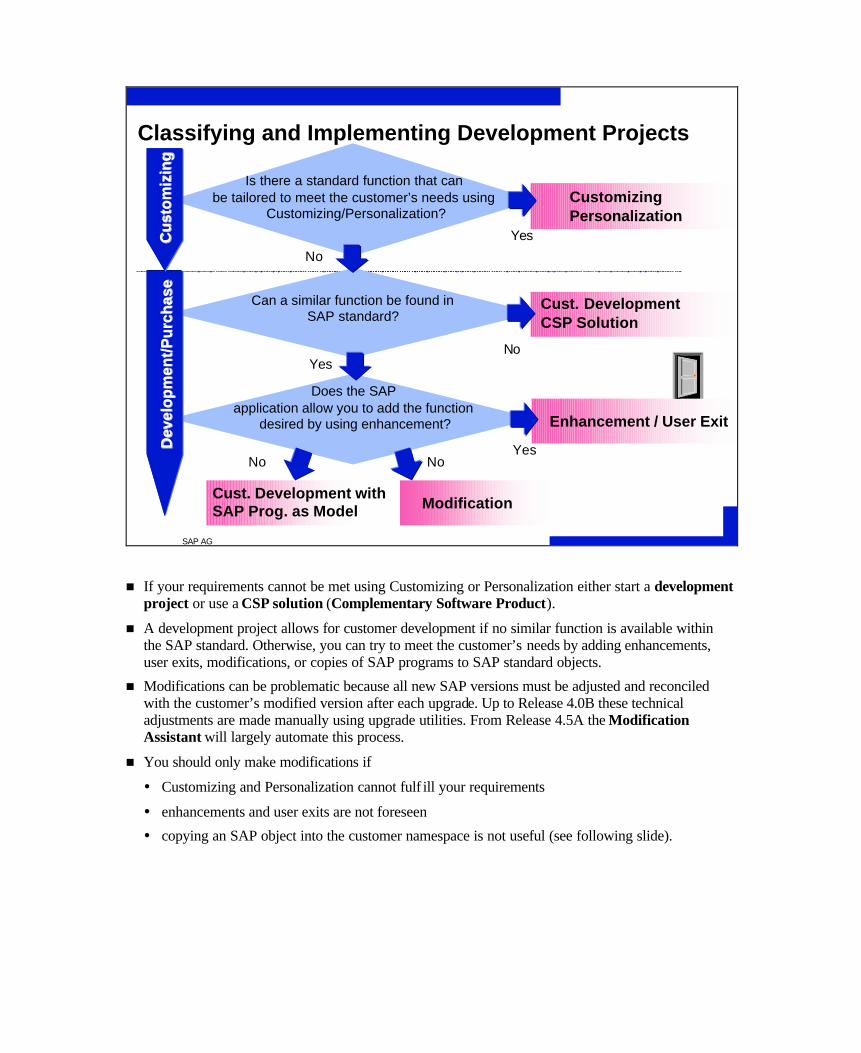
SAP AG
R
Classifying and Implementing Development Projects
No
No
Yes
Modification
Can a similar function be found inSAP standard?
No
Does the SAP application allow you to add the function
desired by using enhancement?
Yes
Enhancement / User Exit
Is there a standard function that can be tailored to meet the customer’s needs using
Customizing/Personalization?
Yes
CustomizingPersonalization
Cust. Development withSAP Prog. as Model
No
Cust. DevelopmentCSP Solution
Cu
sto
miz
ing
Cus
tom
izin
gD
evel
op
men
t/P
urc
has
eD
evel
op
men
t/P
urc
has
e
n If your requirements cannot be met using Customizing or Personalization either start a development project or use a CSP solution (Complementary Software Product).
n A development project allows for customer development if no similar function is available within the SAP standard. Otherwise, you can try to meet the customer’s needs by adding enhancements, user exits, modifications, or copies of SAP programs to SAP standard objects.
n Modifications can be problematic because all new SAP versions must be adjusted and reconciled with the customer’s modified version after each upgrade. Up to Release 4.0B these technical adjustments are made manually using upgrade utilities. From Release 4.5A the Modification Assistant will largely automate this process.
n You should only make modifications if
� Customizing and Personalization cannot fulf ill your requirements
� enhancements and user exits are not foreseen
� copying an SAP object into the customer namespace is not useful (see following slide).
Modifying has the advantage that your active Repository objects do not lose their connection to the SAP standard. Copying, on the other hand, has the advantage that no modification adjustments must be made to active Repository objects after an upgrade.
Choose copying instead of modifying if
you have to change numerous parts of the SAP program
your requirements are not going to be met by future R/3 release standards.
Pay attention to the dependent objects when copying. For example, the choice between modifying and copying must also be made for all of the includes attached to your base program. The same applies within function groups respectively function modules.
ABAP development projects can be evaluated according to the following criteria:
How costly is implementation, measured in man hours (creating, implementing, and testing the concept)?
How does the ABAP development project affect
performance
the amount of work at upgrade?
By calling SAP objects in your Repository object, you can greatly reduce the amount of work required to implement it. Repository object changes made by SAP can also make for additional work during an upgrade. For example, SAP might change the interface of a screen for which you have written a batch input program.
n The following Repository objects are normally only changed by SAP in an upwardly compatible manner and therefore, can be regarded safe for use in customer programs:
� function modules that have been released
� objects that are public in the ABAP Class Builder
� BAPIs (Business Application Programming Interface)
� user exit includes
� customer exits
n SAP guarantees BAPI stability for two functional releases.
n Customer developed programs that call SAP objects, as well as all objects displayed in the upgrade utility SPAU, must be tested for functionality and performance after an upgrade. The same holds true for those Repository objects automatically upgraded by the Modification Assistant (from Release 4.5A).
n For the adjustment of programs you need knowledge of the process logic of your individual application.
Modifications are especially critical when
they influence numerous other Repository objects (Dictionary objects, function modules)
adjustments are difficult (menu, pushbuttons, graphical user interfaces (GUIs) before 4.5A) or not supported by tools (transaction codes, messages, logical databases).
Without the help of the Modification Assistant (before 4.5A) modifying GUI statuses and GUI titles and assigning customer function modules to SAP function groups are considered critical.


SAP AG
R
Standardization
R/3 BasisImplementation
4.0
R/3 BasisImplementation
4.0

SAP AG
R
Standardization
Contents:
l Naming conventions
l Repository object documentation
l Incorporating modifications
Objectives:
At the conclusion of this unit, you will be able to:
l Create naming conventions for your project
l Document Repository objects
l List which standards SAP recommends for incorporatingmodifications

SAP AG
R
Position on the ASAP Roadmap
•Project team
•System landscape
•Standards
•Process design
•Technical design
•Development
•Testing•Documentation
•Training
•Monitoring
•Tuning•Change management
•Upgrade
management•Integration
testing•Mass testing
•Data transfer
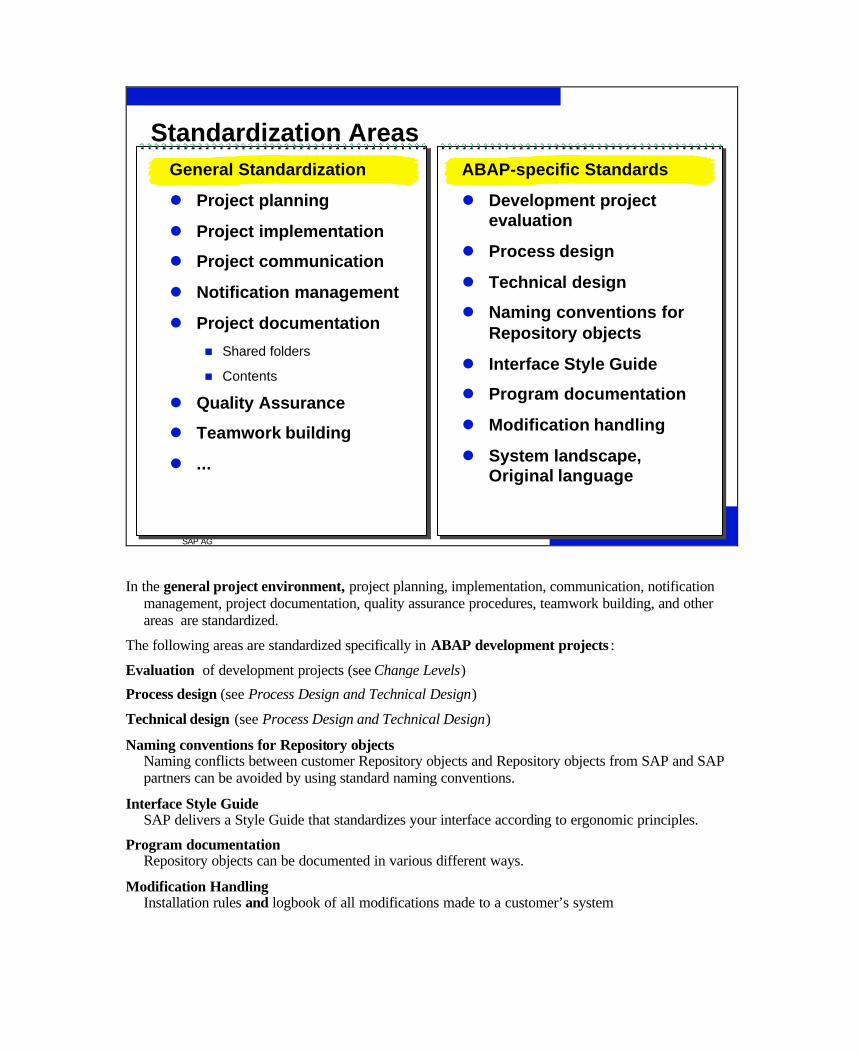
SAP AG
R
Standardization AreasGeneral Standardization
l Project planning
l Project implementation
l Project communication
l Notification management
l Project documentation
n Shared folders
n Contents
l Quality Assurance
l Teamwork building
l ...
ABAP-specific Standards
l Development projectevaluation
l Process design
l Technical design
l Naming conventions forRepository objects
l Interface Style Guide
l Program documentation
l Modification handling
l System landscape,Original language
In the general project environment, project planning, implementation, communication, notification management, project documentation, quality assurance procedures, teamwork building, and other areas are standardized.
The following areas are standardized specifically in ABAP development projects :
Evaluation of development projects (see Change Levels)
Process design (see Process Design and Technical Design)
Technical design (see Process Design and Technical Design)
Naming conventions for Repository objects Naming conflicts between customer Repository objects and Repository objects from SAP and SAP partners can be avoided by using standard naming conventions.
Interface Style Guide SAP delivers a Style Guide that standardizes your interface according to ergonomic principles.
Program documentation Repository objects can be documented in various different ways.
Modification Handling Installation rules and logbook of all modifications made to a customer’s system
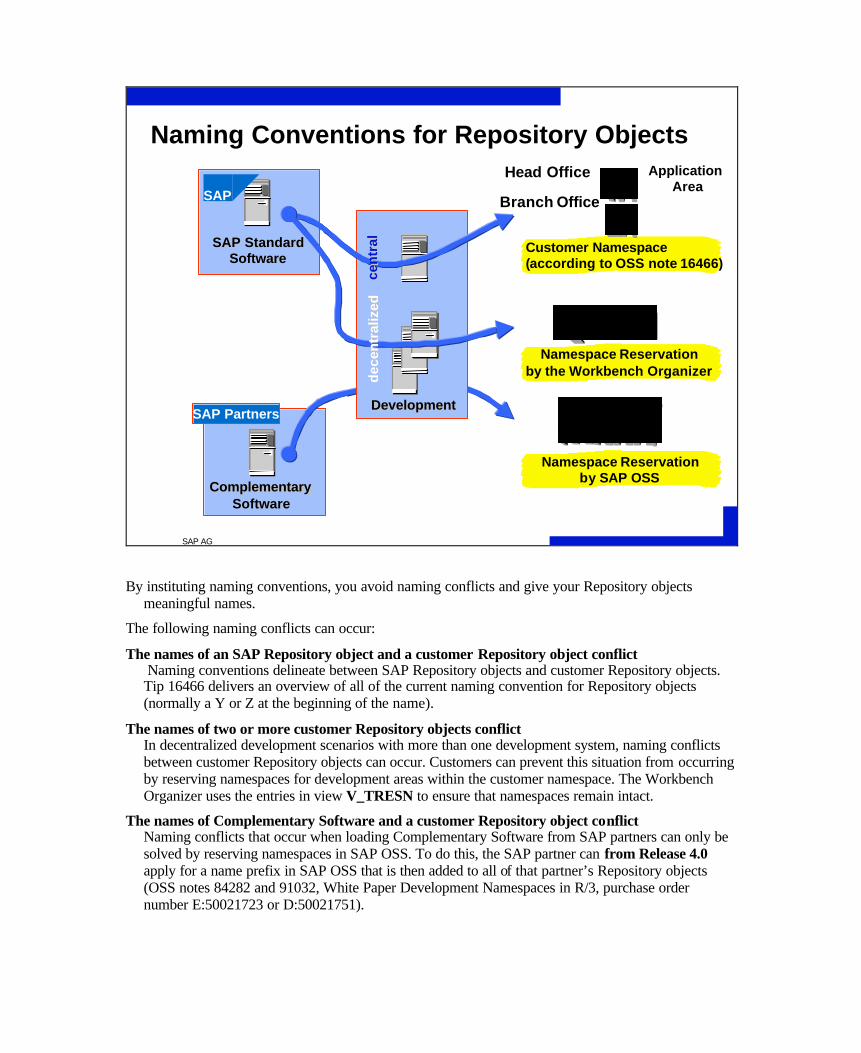
SAP AG
RComplementaryComplementarySoftwareSoftware
SAP Partners
Naming Conventions for Repository Objects
DevelopmentDevelopment
SAP StandardSAP StandardSoftwareSoftware
SAP
Namespace Reservationby SAP OSS
cent
ral
cen
tral
Namespace Reservationby the Workbench Organizerde
cent
raliz
edd
ecen
tral
ized
Head Office
Branch Office
Application Area
Customer Namespace(according to OSS note 16466)
By instituting naming conventions, you avoid naming conflicts and give your Repository objects meaningful names.
The following naming conflicts can occur:
The names of an SAP Repository object and a customer Repository object conflict Naming conventions delineate between SAP Repository objects and customer Repository objects. Tip 16466 delivers an overview of all of the current naming convention for Repository objects (normally a Y or Z at the beginning of the name).
The names of two or more customer Repository objects conflict In decentralized development scenarios with more than one development system, naming conflicts between customer Repository objects can occur. Customers can prevent this situation from occurring by reserving namespaces for development areas within the customer namespace. The Workbench Organizer uses the entries in view V_TRESN to ensure that namespaces remain intact.
The names of Complementary Software and a customer Repository object conflict Naming conflicts that occur when loading Complementary Software from SAP partners can only be solved by reserving namespaces in SAP OSS. To do this, the SAP partner can from Release 4.0 apply for a name prefix in SAP OSS that is then added to all of that partner’s Repository objects (OSS notes 84282 and 91032, White Paper Development Namespaces in R/3, purchase order number E:50021723 or D:50021751).
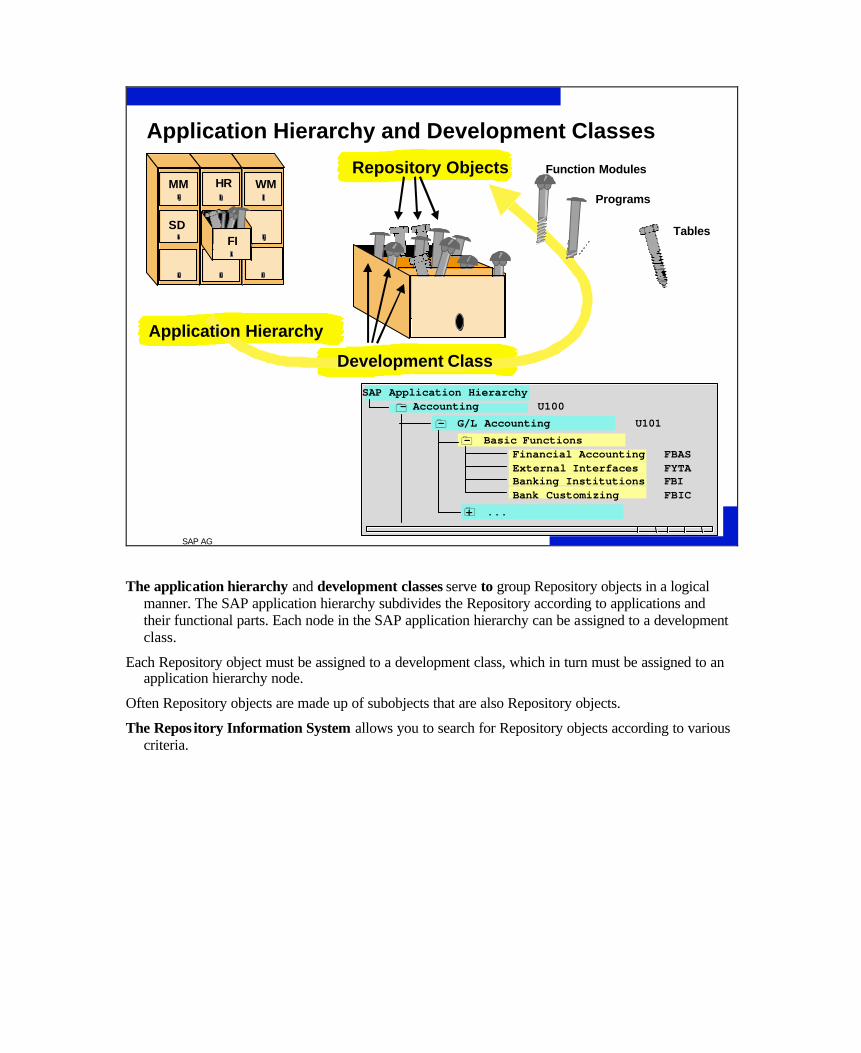
SAP AG
R
SAP Application Hierarchy- Accounting U100
– G/L Accounting U101– Basic Functions
00
0Financial Accounting FBASExternal Interfaces FYTABanking Institutions FBIBank Customizing FBIC
+0 ...
Application Hierarchy and Development Classes
MM HR
FI
WM
MM
Development Class
M M
Repository Objects Function Modules
Programs
Tables
Application Hierarchy
SD
The application hierarchy and development classes serve to group Repository objects in a logical manner. The SAP application hierarchy subdivides the Repository according to applications and their functional parts. Each node in the SAP application hierarchy can be assigned to a development class.
Each Repository object must be assigned to a development class, which in turn must be assigned to an application hierarchy node.
Often Repository objects are made up of subobjects that are also Repository objects.
The Repos itory Information System allows you to search for Repository objects according to various criteria.
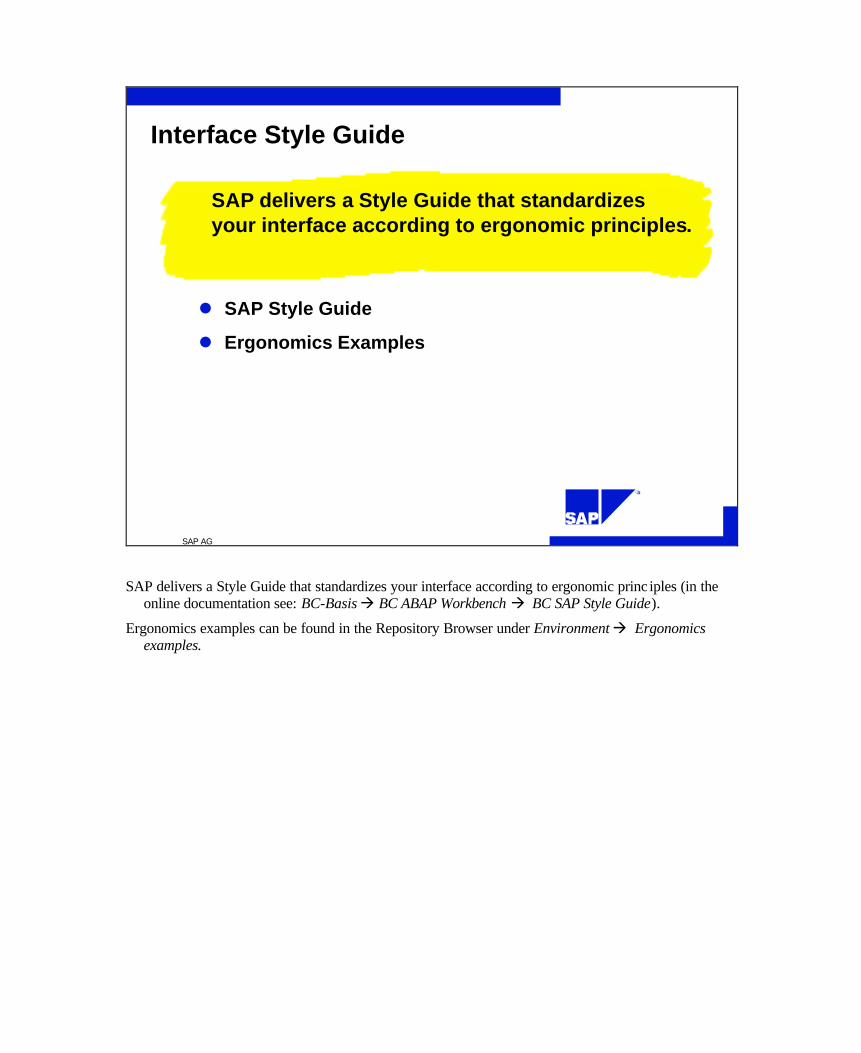
SAP AG
R
Interface Style Guide
l SAP Style Guide
l Ergonomics Examples
SAP delivers a Style Guide that standardizesyour interface according to ergonomic principles.
SAP delivers a Style Guide that standardizes your interface according to ergonomic princ iples (in the online documentation see: BC-Basis à BC ABAP Workbench à BC SAP Style Guide).
Ergonomics examples can be found in the Repository Browser under Environment à Ergonomics examples.
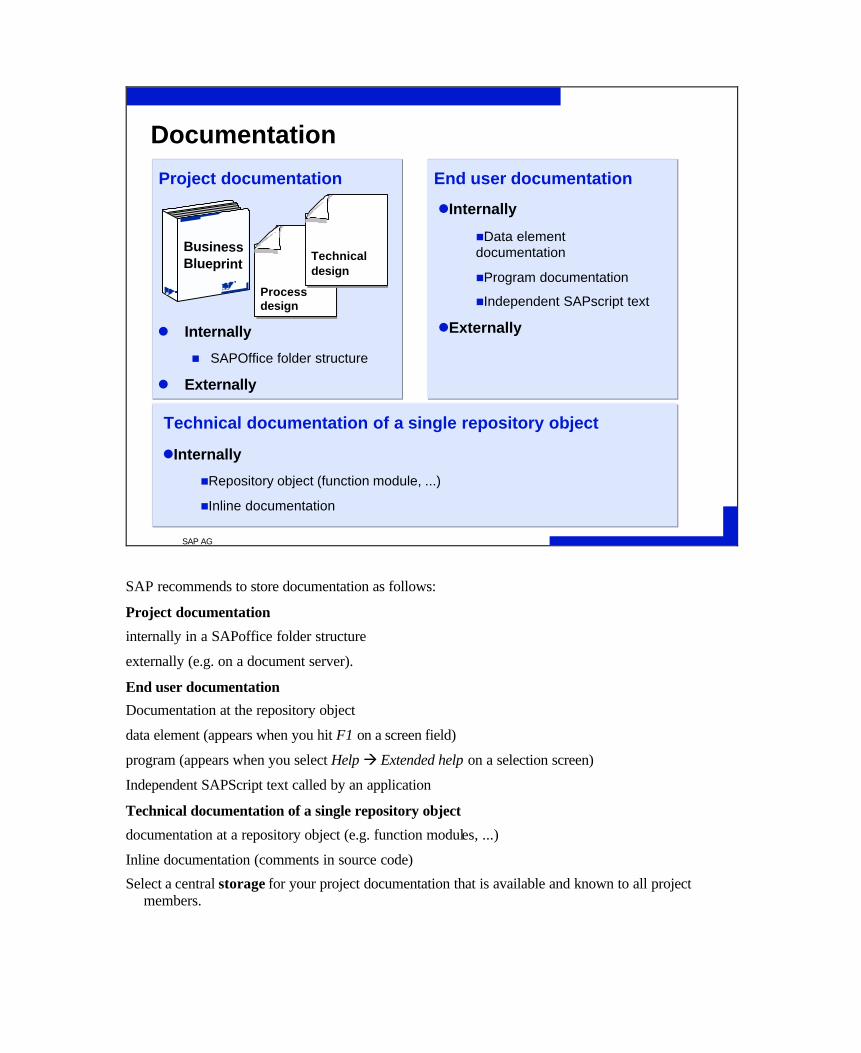
SAP AG
R
Documentation
Project documentation
Technical documentation of a single repository object
End user documentation
BusinessBlueprint
Technicaldesign
Processdesign
l Internally
n SAPOffice folder structure
l Externally
lInternally
nRepository object (function module, ...)
nInline documentation
lInternally
nData elementdocumentation
nProgram documentation
nIndependent SAPscript text
lExternally
SAP recommends to store documentation as follows:
Project documentation
internally in a SAPoffice folder structure
externally (e.g. on a document server).
End user documentation
Documentation at the repository object
data element (appears when you hit F1 on a screen field)
program (appears when you select Help à Extended help on a selection screen)
Independent SAPScript text called by an application
Technical documentation of a single repository object
documentation at a repository object (e.g. function modules, ...)
Inline documentation (comments in source code)
Select a central storage for your project documentation that is available and known to all project members.
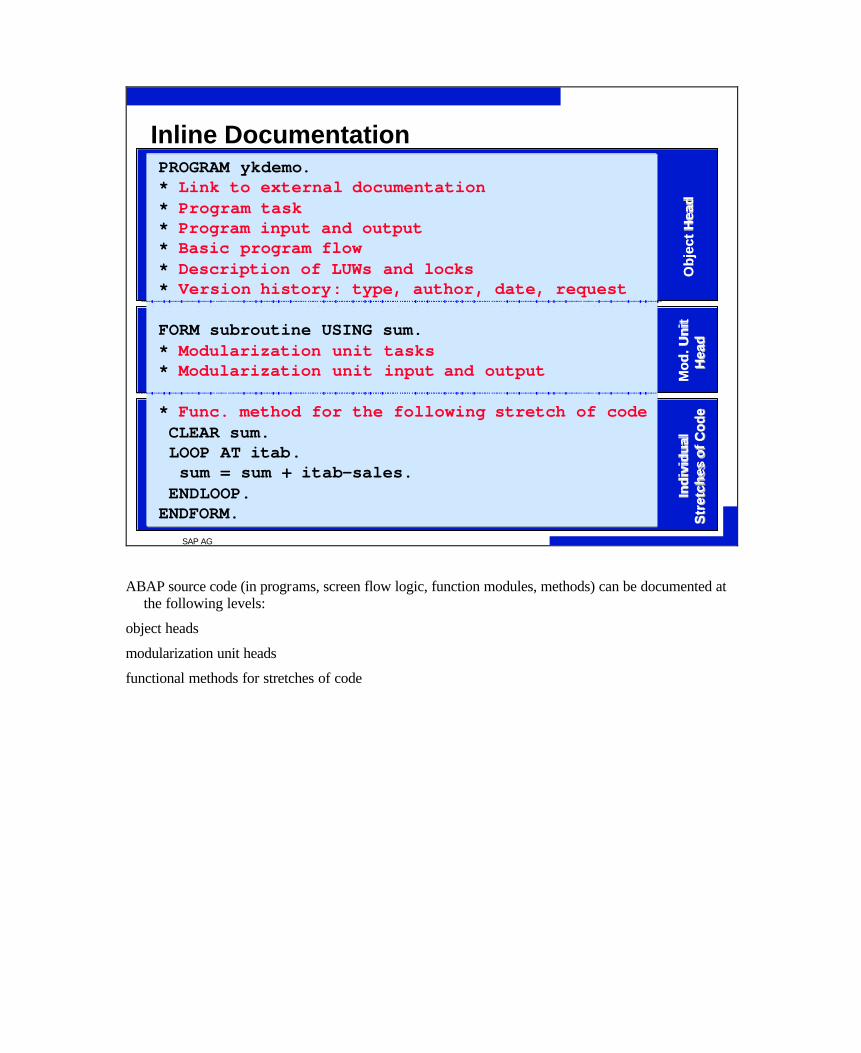
SAP AG
R
Inline DocumentationPROGRAM ykdemo.* Link to external documentation* Program task* Program input and output* Basic program flow* Description of LUWs and locks* Version history: type, author, date, request
FORM subroutine USING sum.* Modularization unit tasks* Modularization unit input and output
* Func. method for the following stretch of code CLEAR sum. LOOP AT itab. sum = sum + itab-sales. ENDLOOP.ENDFORM.
Ob
ject
Hea
dO
bje
ct H
ead
Mod
Mo
d.. U
nit
Un
itH
ead
Hea
d In
div
idu
alIn
div
idu
alS
tret
ches
of
Str
etch
es o
f Cod
e C
ode
ABAP source code (in programs, screen flow logic, function modules, methods) can be documented at the following levels:
object heads
modularization unit heads
functional methods for stretches of code

Customer generated source code should be encapsulated in modularization units instead of distributed throughout SAP source code (for example when calling customer function modules in program source code or calling customer subscreens for additional screen fields).

n Keep the interfaces with those parts of the program written by the customer (encapsules) compact.
n Define a company-wide standard for online documentation (see the following slides).
n Keep a list of all modifications (a modification logbook, see the following slides).
n All repairs and all requests that contain repairs must be confirmed and released before an upgrade is run.
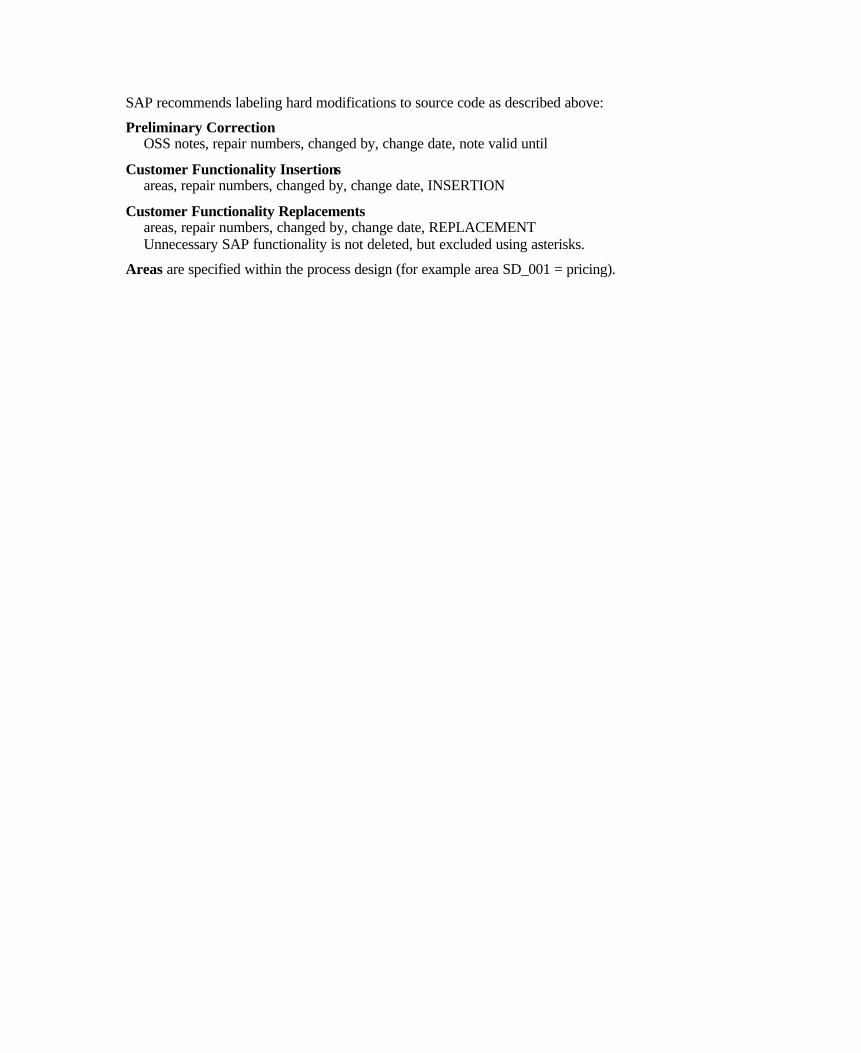
SAP recommends labeling hard modifications to source code as described above:
Preliminary Correction OSS notes, repair numbers, changed by, change date, note valid until
Customer Functionality Insertions areas, repair numbers, changed by, change date, INSERTION
Customer Functionality Replacements areas, repair numbers, changed by, change date, REPLACEMENT Unnecessary SAP functionality is not deleted, but excluded using asterisks.
Areas are specified within the process design (for example area SD_001 = pricing).
SAP recommends keeping a list of all modifications (of all changes made to Repository objects in the SAP namespace).
Such a list normally contains the following columns :
object type (programs, screens, GUI status, ...)
object name
routine (if necessary)
area according to process design or technical design
repair number
change date
changed by
preliminary correction (yes/no)
OSS note number, valid until Release x.y
estimated expense to reinstall the modification during adjustment (measured in hours).


SAP AG 1999
Section: ABAP Dictionary
SAP AG 1999
Unit Dependencies of ABAPDictionary Objects
Unit Changes to Tables
Unit Views
Unit Search Helps
Unit Introduction
Unit Tables in the ABAPDictionary
Unit Performance in TableAccess
Unit Consistency throughInput Check
Content: ABAP Dictionary

SAP AG 1999
l Function of the ABAP Dictionary in the R/3 System
l Definition of database objects
l User-defined types
l Services in the ABAP Dictionary
l Linking to the development and runtimeenvironments
Introduction
SAP AG 1999
Function of the ABAP Dictionary
DB table
Services
ScreenPoss. values
Type definitions
Structure
Table typeData elements
F4
DB objects
Table
n The ABAP Dictionary permits a central management of all the data definitions used in the R/3 System.
n In the ABAP Dictionary you can create user-defined types (data elements, structures and table types) for use in ABAP programs or in interfaces of function modules. Database objects such as tables and database views can also be defined in the ABAP Dictionary and created with this definition in the database.
n The ABAP Dictionary also provides a number of services that support program development. For example, setting and releasing locks, defining an input help (F4 help) and attaching a field help (F1 help) to a screen field are supported.
SAP AG 1999
Database
Database Objects in the ABAP Dictionary
Table 1
ABAP Dictionary
Table 2
View
Objects are automaticallycreated in the DB andadjusted to changes
n Tables and database views can be defined in the ABAP Dictionary.
n These objects are created in the underlying database with this definition. Changes in the definition of a table or database view are also automatically made in the database.
n Indexes can be defined in the ABAP Dictionary to speed up access to data in a table. These indexes are also created in the database.

SAP AG 1999
Type Definitions in the ABAP Dictionary
ZIP Town name Street House no.
Numbers
Employee
Name Address Telephone
First name Last name Town Address
n There are three different type categories in the ABAP Dictionary:
� Data elements: Describe an elementary type by defining the data type, length and possibly decimal places.
� Structures: Consist of components that can have any type.
� Table types: Describe the structure of an internal table.
n Any complex user-defined type can be built from these basic types.
n Example: The data of an employee is stored in a structure EMPLOYEE with the components NAME, ADDRESS and TELEPHONE. Component NAME is also a structure with components FIRST NAME and LAST NAME. Both of these components are elementary, i.e. their type is defined by a data element. The type of component ADDRESS is also defined by a structure whose components are also structures. Component TELEPHONE is defined by a table type (since an employee can have more than one telephone number).
n Types are used for example in ABAP programs or to define the types of interface parameters of function modules.
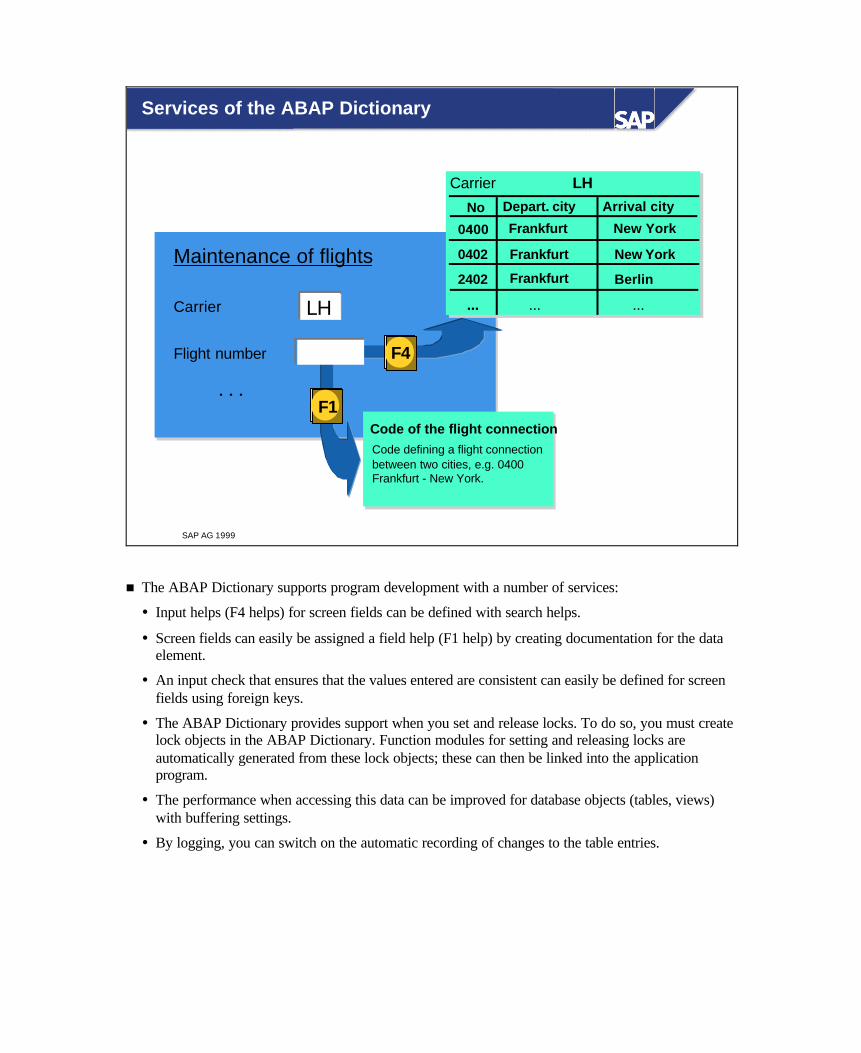
SAP AG 1999
Services of the ABAP Dictionary
Carrier
Flight number
. . .
Maintenance of flights
LH
No.
Depart. city Arrival city
Carrier
0400 Frankfurt New York
0402 Frankfurt New York
LH
2402 Frankfurt Berlin
... ... ...
Code of the flight connectionCode defining a flight connectionbetween two cities, e.g. 0400Frankfurt - New York.
F1
F4
n The ABAP Dictionary supports program development with a number of services:
� Input helps (F4 helps) for screen fields can be defined with search helps.
� Screen fields can easily be assigned a field help (F1 help) by creating documentation for the data element.
� An input check that ensures that the values entered are consistent can easily be defined for screen fields using foreign keys.
� The ABAP Dictionary provides support when you set and release locks. To do so, you must create lock objects in the ABAP Dictionary. Function modules for setting and releasing locks are automatically generated from these lock objects; these can then be linked into the application program.
� The performance when accessing this data can be improved for database objects (tables, views) with buffering settings.
� By logging, you can switch on the automatic recording of changes to the table entries.
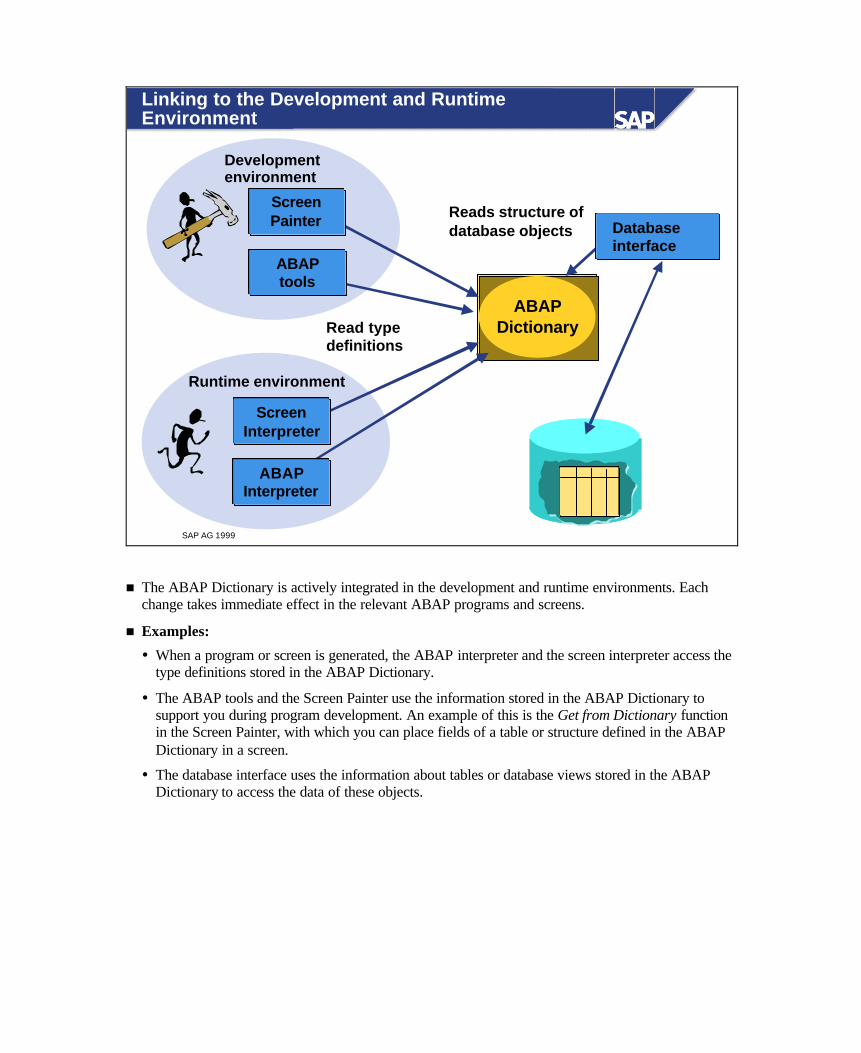
SAP AG 1999
Linking to the Development and RuntimeEnvironment
ABAPDictionaryRead type
definitions
Reads structure ofdatabase objects
Runtime environment
Development environment
ABAPInterpreter
ScreenInterpreter
ABAPtools
ScreenPainter Database
interface
n The ABAP Dictionary is actively integrated in the development and runtime environments. Each change takes immediate effect in the relevant ABAP programs and screens.
n Examples:
� When a program or screen is generated, the ABAP interpreter and the screen interpreter access the type definitions stored in the ABAP Dictionary.
� The ABAP tools and the Screen Painter use the information stored in the ABAP Dictionary to support you during program development. An example of this is the Get from Dictionary function in the Screen Painter, with which you can place fields of a table or structure defined in the ABAP Dictionary in a screen.
� The database interface uses the information about tables or database views stored in the ABAP Dictionary to access the data of these objects.
SAP AG 1999
Unit Summary
l The ABAP Dictionary manages data definitions.
l User-defined types can be created in the ABAP Dictionary.They can be used for example in ABAP programs.
l Tables and database views are defined in the ABAPDictionary and automatically created with this definition inthe underlying database.
l The ABAP Dictionary provides a number of services thatsupport program development.
l The ABAP Dictionary is actively integrated in thedevelopment and runtime environments.
SAP AG 1999
l Two-level domain concept
l Mapped in the relational database system
l Include structures
l Technical settings
n Data class
n Size category
n Buffering
n Logging
Tables in the ABAP Dictionary
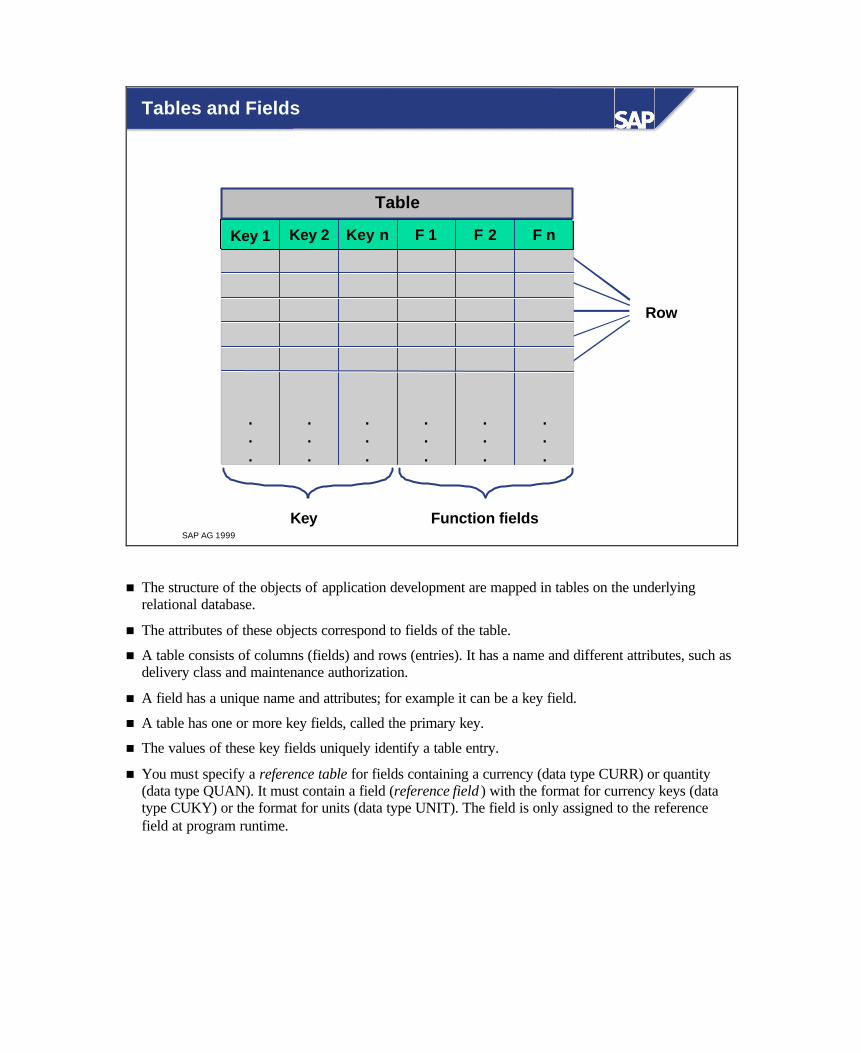
SAP AG 1999
Tables and Fields
Key Function fields
Row
Table
Key 1
.
.
.
Key 2
.
.
.
Key n
.
.
.
F 1
.
.
.
F 2
.
.
.
F n
.
.
.
n The structure of the objects of application development are mapped in tables on the underlying relational database.
n The attributes of these objects correspond to fields of the table.
n A table consists of columns (fields) and rows (entries). It has a name and different attributes, such as delivery class and maintenance authorization.
n A field has a unique name and attributes; for example it can be a key field.
n A table has one or more key fields, called the primary key.
n The values of these key fields uniquely identify a table entry.
n You must specify a reference table for fields containing a currency (data type CURR) or quantity (data type QUAN). It must contain a field (reference field ) with the format for currency keys (data type CUKY) or the format for units (data type UNIT). The field is only assigned to the reference field at program runtime.
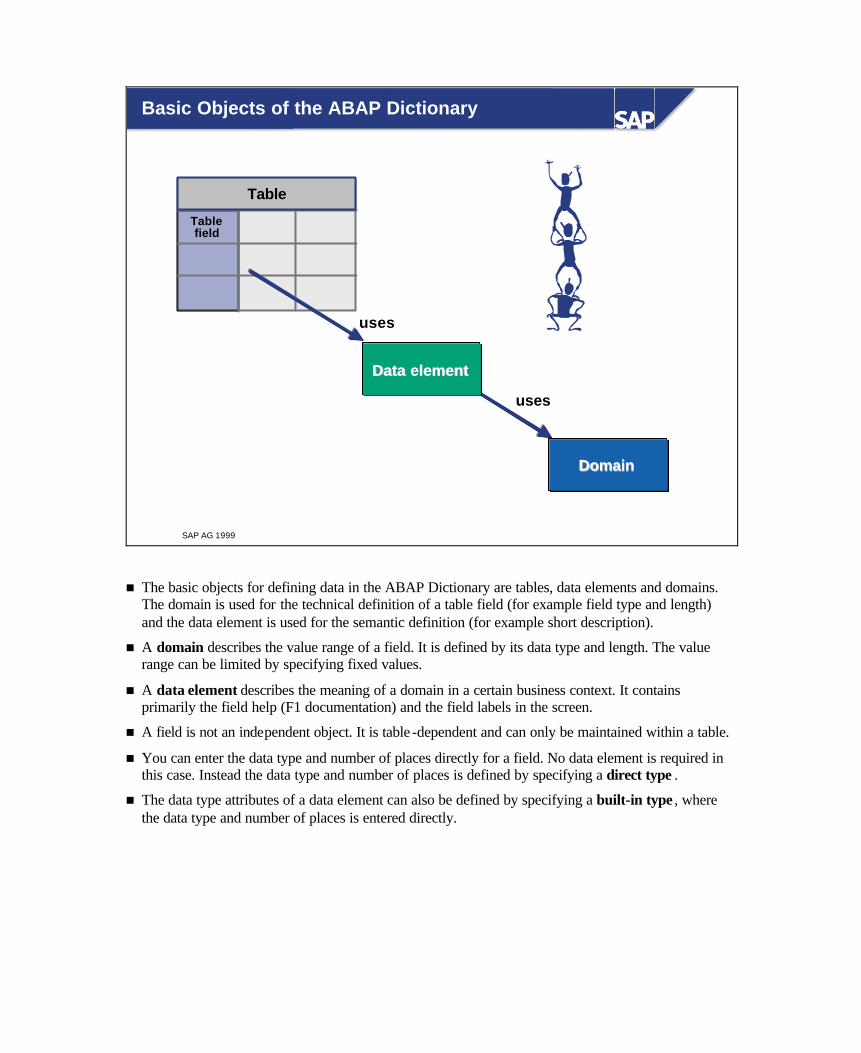
SAP AG 1999
Basic Objects of the ABAP Dictionary
uses
uses
Table
Tablefield
Data elementData element
DomainDomain
n The basic objects for defining data in the ABAP Dictionary are tables, data elements and domains. The domain is used for the technical definition of a table field (for example field type and length) and the data element is used for the semantic definition (for example short description).
n A domain describes the value range of a field. It is defined by its data type and length. The value range can be limited by specifying fixed values.
n A data element describes the meaning of a domain in a certain business context. It contains primarily the field help (F1 documentation) and the field labels in the screen.
n A field is not an independent object. It is table -dependent and can only be maintained within a table.
n You can enter the data type and number of places directly for a field. No data element is required in this case. Instead the data type and number of places is defined by specifying a direct type .
n The data type attributes of a data element can also be defined by specifying a built-in type , where the data type and number of places is entered directly.
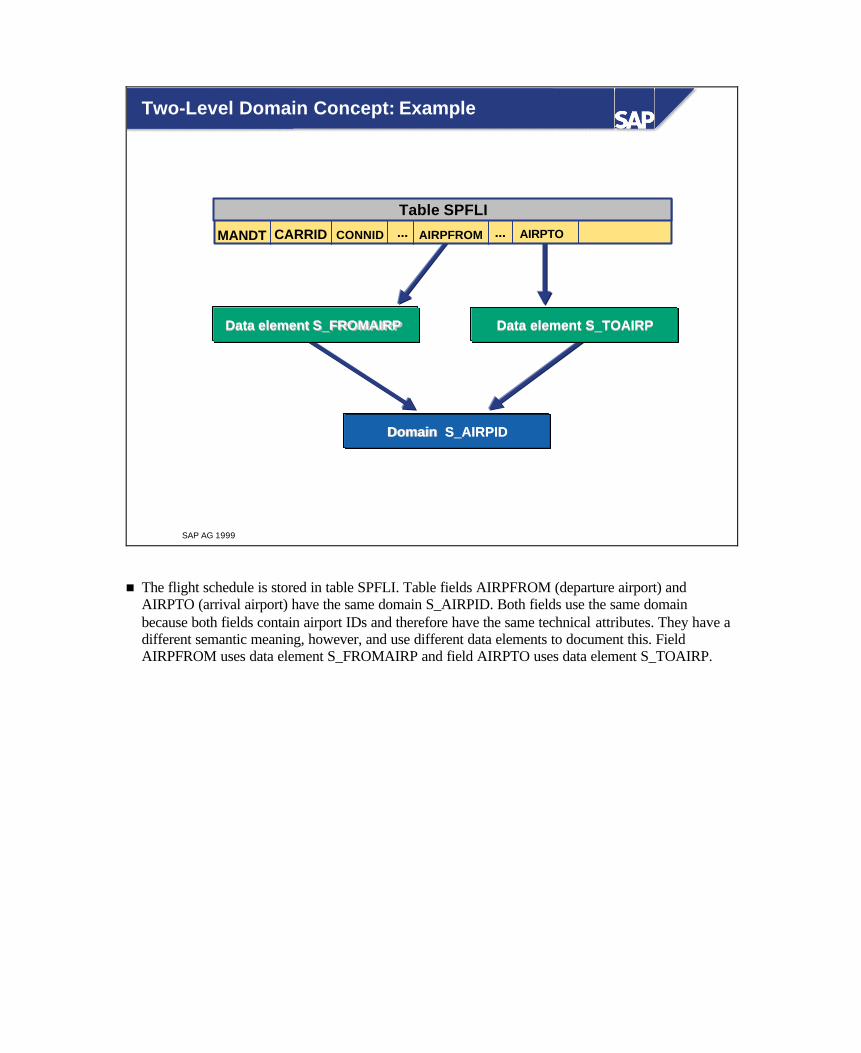
SAP AG 1999
Two-Level Domain Concept: Example
Table SPFLI
MANDT
Data element S_FROMAIRPData element S_FROMAIRP Data element S_TOAIRPData element S_TOAIRP
Domain S_AIRPIDDomain S_AIRPID
CARRID ... AIRPFROMCONNID ... AIRPTO
n The flight schedule is stored in table SPFLI. Table fields AIRPFROM (departure airport) and AIRPTO (arrival airport) have the same domain S_AIRPID. Both fields use the same domain because both fields contain airport IDs and therefore have the same technical attributes. They have a different semantic meaning, however, and use different data elements to document this. Field AIRPFROM uses data element S_FROMAIRP and field AIRPTO uses data element S_TOAIRP.
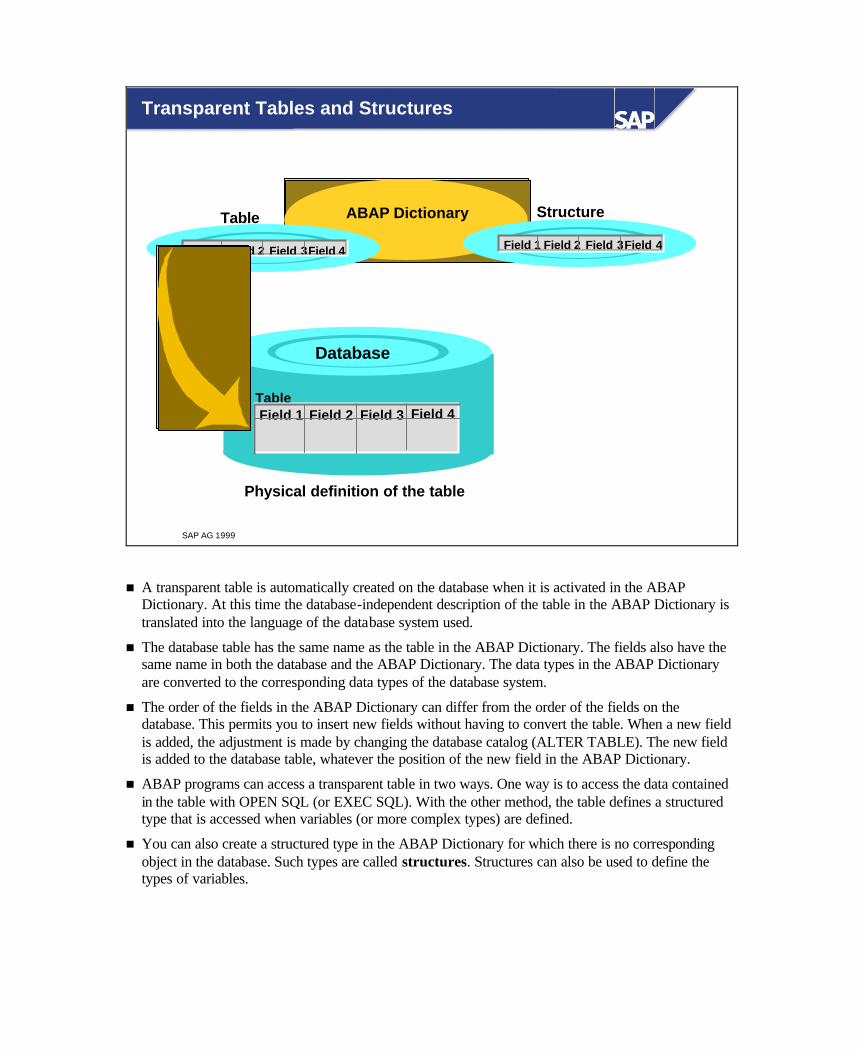
SAP AG 1999
Transparent Tables and Structures
Table
Field 1 Field 2 Field 3Field 4
Structure
Field 1 Field 2 Field 3Field 4
ABAP Dictionary
Physical definition of the table
TableField 1 Field 2 Field 3 Field 4
Database
n A transparent table is automatically created on the database when it is activated in the ABAP Dictionary. At this time the database-independent description of the table in the ABAP Dictionary is translated into the language of the database system used.
n The database table has the same name as the table in the ABAP Dictionary. The fields also have the same name in both the database and the ABAP Dictionary. The data types in the ABAP Dictionary are converted to the corresponding data types of the database system.
n The order of the fields in the ABAP Dictionary can differ from the order of the fields on the database. This permits you to insert new fields without having to convert the table. When a new field is added, the adjustment is made by changing the database catalog (ALTER TABLE). The new field is added to the database table, whatever the position of the new field in the ABAP Dictionary.
n ABAP programs can access a transparent table in two ways. One way is to access the data contained in the table with OPEN SQL (or EXEC SQL). With the other method, the table defines a structured type that is accessed when variables (or more complex types) are defined.
n You can also create a structured type in the ABAP Dictionary for which there is no corresponding object in the database. Such types are called structures. Structures can also be used to define the types of variables.
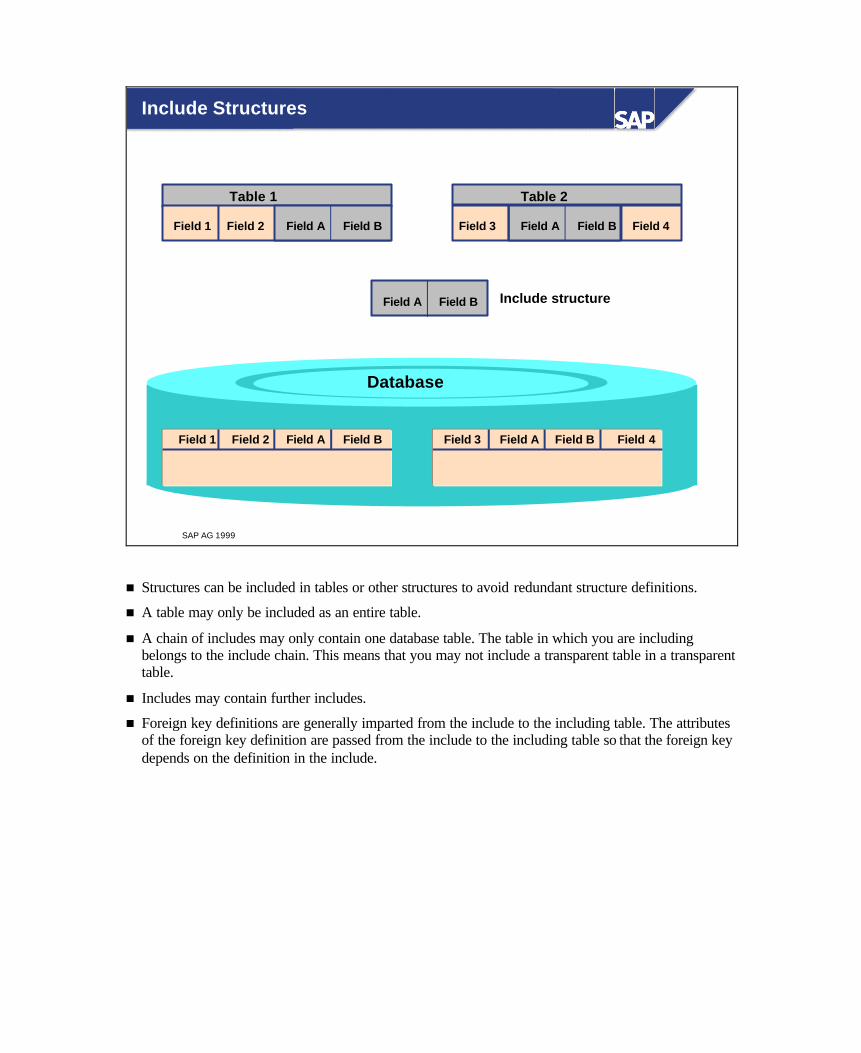
SAP AG 1999
Include Structures
Table 2Table 1
Field 1 Field 2 Field A Field B Field 4Field 3 Field A Field B
Field A Field B
Database
Field 1 Field 2 Field A Field BField A Field B Field 3 Field 4
Include structure
n Structures can be included in tables or other structures to avoid redundant structure definitions.
n A table may only be included as an entire table.
n A chain of includes may only contain one database table. The table in which you are including belongs to the include chain. This means that you may not include a transparent table in a transparent table.
n Includes may contain further includes.
n Foreign key definitions are generally imparted from the include to the including table. The attributes of the foreign key definition are passed from the include to the including table so that the foreign key depends on the definition in the include.

SAP AG 1999
Technical Settings
Buffering
Table buffer
R/3
In which physicalarea of the databaseshould the tablebe stored?
Logging
Should the recordsof the table be
buffered? Should changes tothe data records belogged?
How many recordswill the tableprobably contain?
Size category
Data class
Data base
Data base
n You must maintain the technical settings when you define a transparent table in the ABAP Dictionary.
n The technical settings are used to individually optimize the storage requirements and accessing behavior of database tables.
n The technical settings can be used to define how the table should be handled when it is created on the database, whether the table should be buffered and whether changes to entries should be logged.
n The table is automatically created on the database when it is activated in the ABAP Dictionary. The storage area to be selected (tablespace) and space allocation settings are determined from the settings for the data class and size category.
n The settings for buffering define whether and how the table should be buffered.
n You can define whether changes to the table entries should be logged.
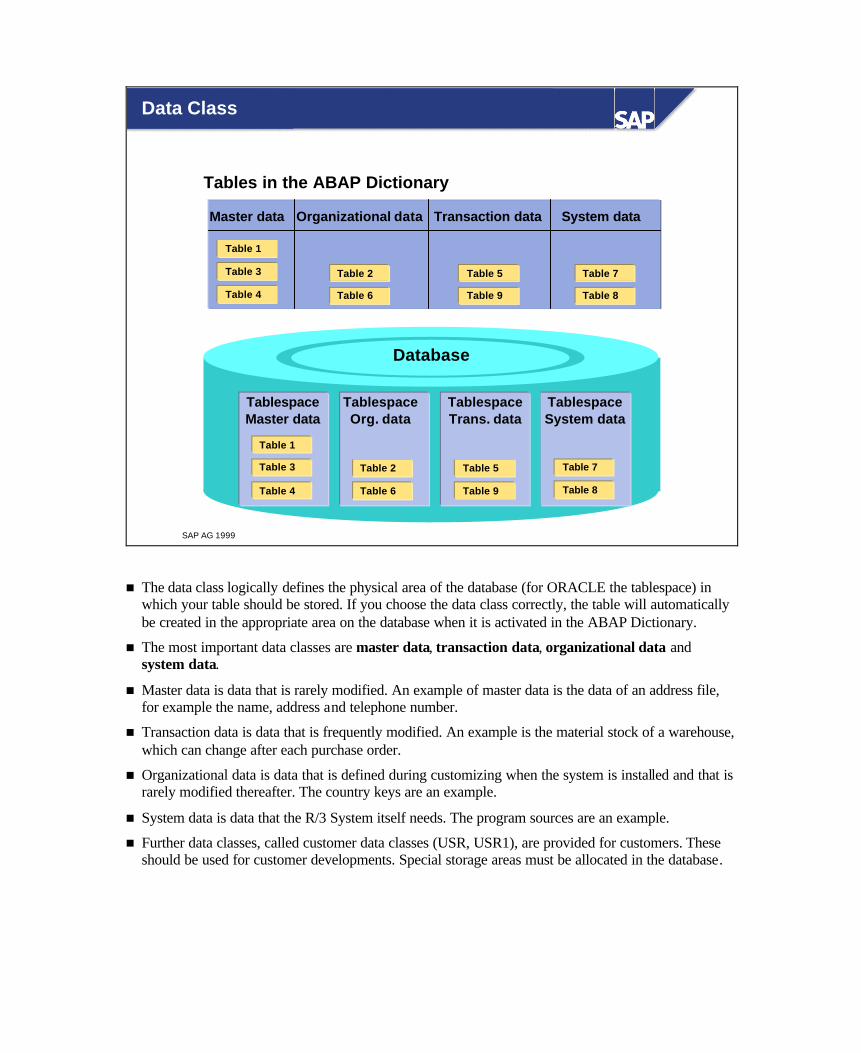
SAP AG 1999
Data Class
Tables in the ABAP Dictionary
TablespaceOrg. data
TablespaceMaster data
TablespaceTrans. data
TablespaceSystem data
Database
Organizational data Transaction data System dataMaster data
Table 1
Table 3
Table 4
Table 2
Table 6
Table 5
Table 9
Table 7
Table 8
Table 1
Table 3
Table 4
Table 2
Table 6
Table 5
Table 9
Table 7
Table 8
n The data class logically defines the physical area of the database (for ORACLE the tablespace) in which your table should be stored. If you choose the data class correctly, the table will automatically be created in the appropriate area on the database when it is activated in the ABAP Dictionary.
n The most important data classes are master data, transaction data, organizational data and system data.
n Master data is data that is rarely modified. An example of master data is the data of an address file, for example the name, address and telephone number.
n Transaction data is data that is frequently modified. An example is the material stock of a warehouse, which can change after each purchase order.
n Organizational data is data that is defined during customizing when the system is installed and that is rarely modified thereafter. The country keys are an example.
n System data is data that the R/3 System itself needs. The program sources are an example.
n Further data classes, called customer data classes (USR, USR1), are provided for customers. These should be used for customer developments. Special storage areas must be allocated in the database.
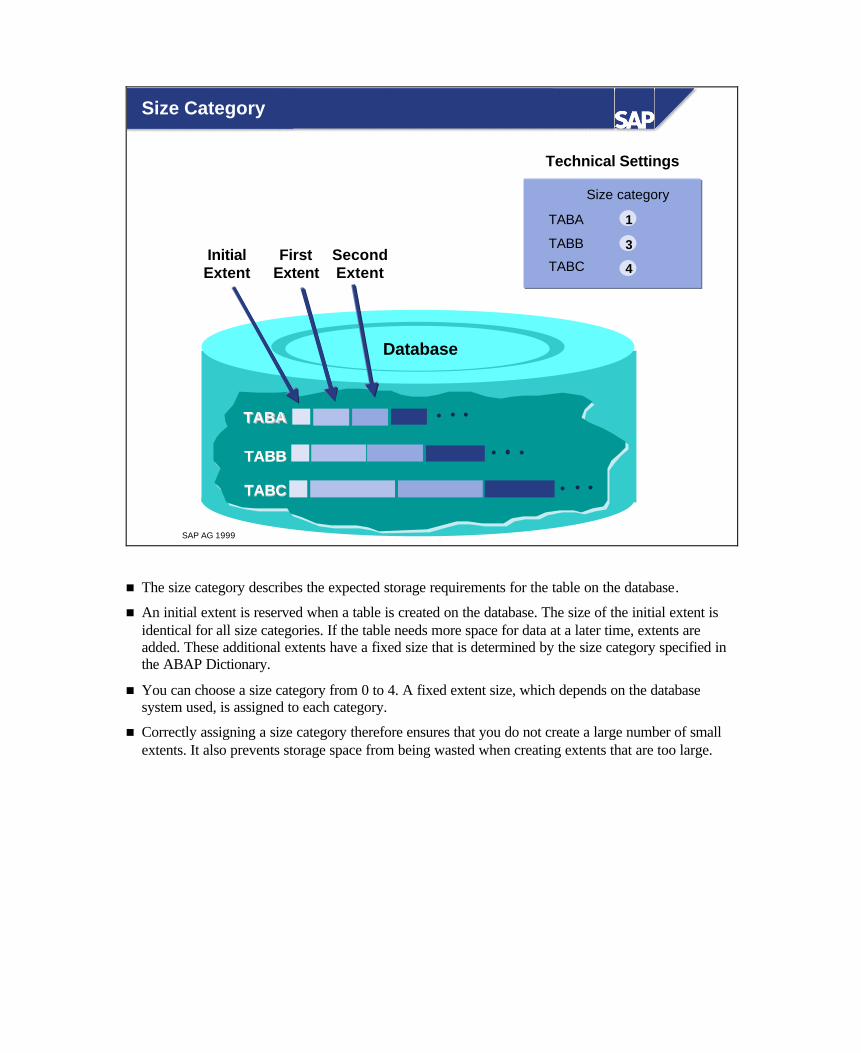
SAP AG 1999
Size Category
InitialExtent
FirstExtent
SecondExtent
Technical Settings
Size category
TABA
TABB
TABC
1
3
4
TABATABA
TABBTABB
TABCTABC
Database
n The size category describes the expected storage requirements for the table on the database.
n An initial extent is reserved when a table is created on the database. The size of the initial extent is identical for all size categories. If the table needs more space for data at a later time, extents are added. These additional extents have a fixed size that is determined by the size category specified in the ABAP Dictionary.
n You can choose a size category from 0 to 4. A fixed extent size, which depends on the database system used, is assigned to each category.
n Correctly assigning a size category therefore ensures that you do not create a large number of small extents. It also prevents storage space from being wasted when creating extents that are too large.
n Modifications to the entries of a table can be recorded and stored using logging.
n To activate logging, the corresponding field must be selected in the technical settings. Logging, however, only will take place if the R/3 System was started with a profile containing parameter 'rec/client'. Only selecting the flag in the ABAP Dictionary is not sufficient to trigger logging.
n Parameter 'rec/client' can have the following settings:
rec/client = ALL All clients should be logged.
rec/client = 000[...] Only the specified clients should be logged.
rec/client = OFF Logging is not enabled on this system.
n The data modifications are logged independently of the update. The logs can be displayed with the Transaction Table History (SCU3).
n Logging creates a 'bottleneck' in the system:
� Additional write access for each modification to tables being logged.
� This can result in lock situations although the users are accessing different application tables!

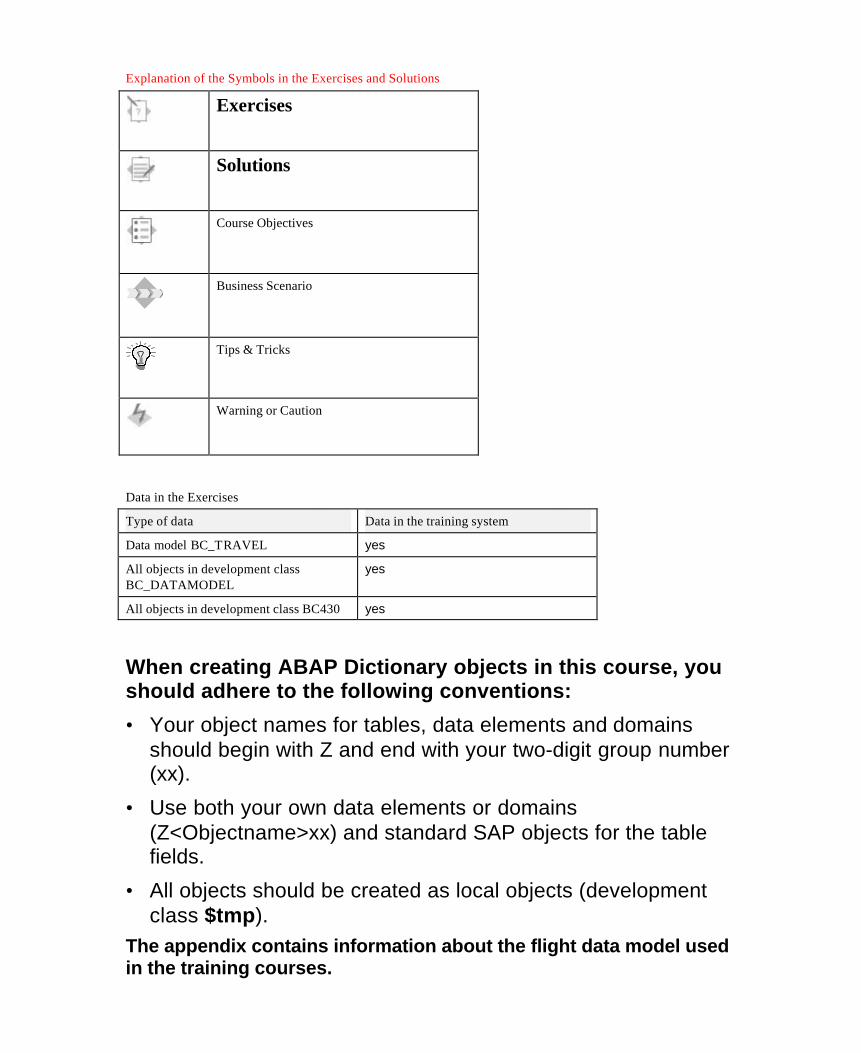
Explanation of the Symbols in the Exercises and Solutions
Exercises
Solutions
Course Objectives
Business Scenario
Tips & Tricks
Warning or Caution
Data in the Exercises
Type of data Data in the training system
Data model BC_TRAVEL yes
All objects in development class BC_DATAMODEL
yes
All objects in development class BC430 yes
When creating ABAP Dictionary objects in this course, you should adhere to the following conventions:
• Your object names for tables, data elements and domains should begin with Z and end with your two-digit group number (xx).
• Use both your own data elements or domains (Z<Objectname>xx) and standard SAP objects for the table fields.
• All objects should be created as local objects (development class $tmp).
The appendix contains information about the flight data model used in the training courses.
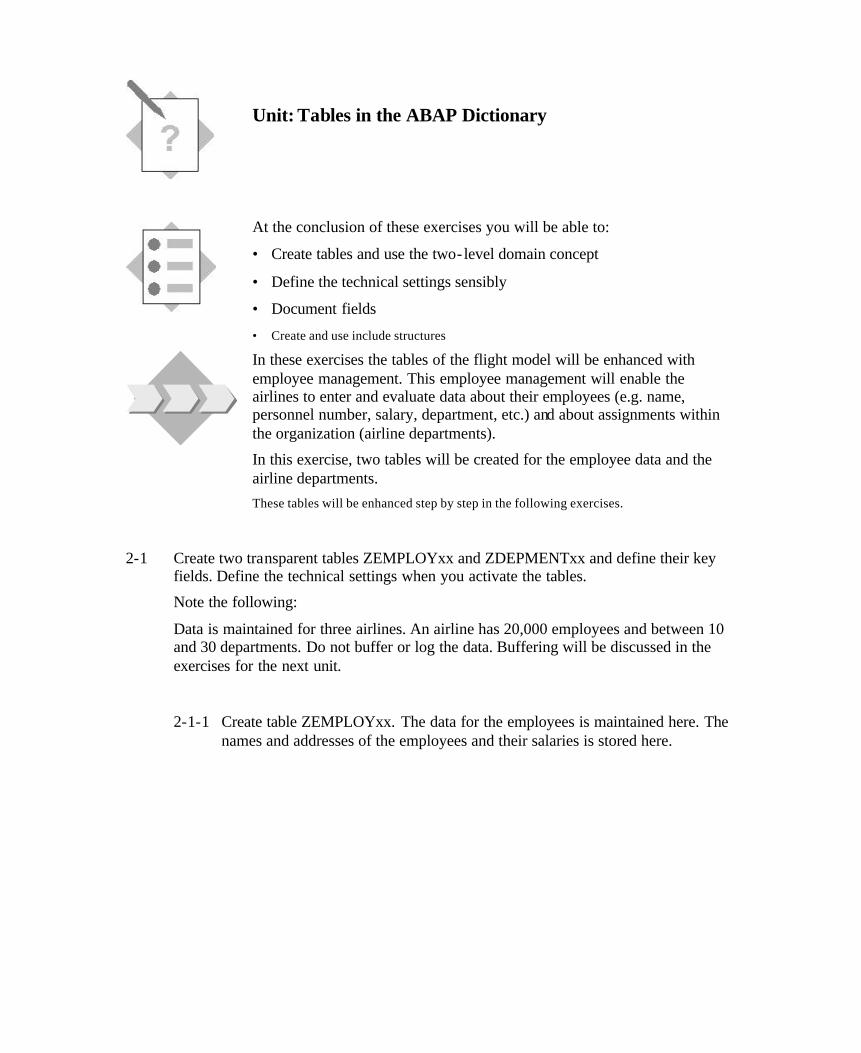
Unit: Tables in the ABAP Dictionary
At the conclusion of these exercises you will be able to:
• Create tables and use the two-level domain concept
• Define the technical settings sensibly
• Document fields
• Create and use include structures
In these exercises the tables of the flight model will be enhanced with employee management. This employee management will enable the airlines to enter and evaluate data about their employees (e.g. name, personnel number, salary, department, etc.) and about assignments within the organization (airline departments).
In this exercise, two tables will be created for the employee data and the airline departments. These tables will be enhanced step by step in the following exercises.
2-1 Create two transparent tables ZEMPLOYxx and ZDEPMENTxx and define their key fields. Define the technical settings when you activate the tables.
Note the following:
Data is maintained for three airlines. An airline has 20,000 employees and between 10 and 30 departments. Do not buffer or log the data. Buffering will be discussed in the exercises for the next unit.
2-1-1 Create table ZEMPLOYxx. The data for the employees is maintained here. The names and addresses of the employees and their salaries is stored here.
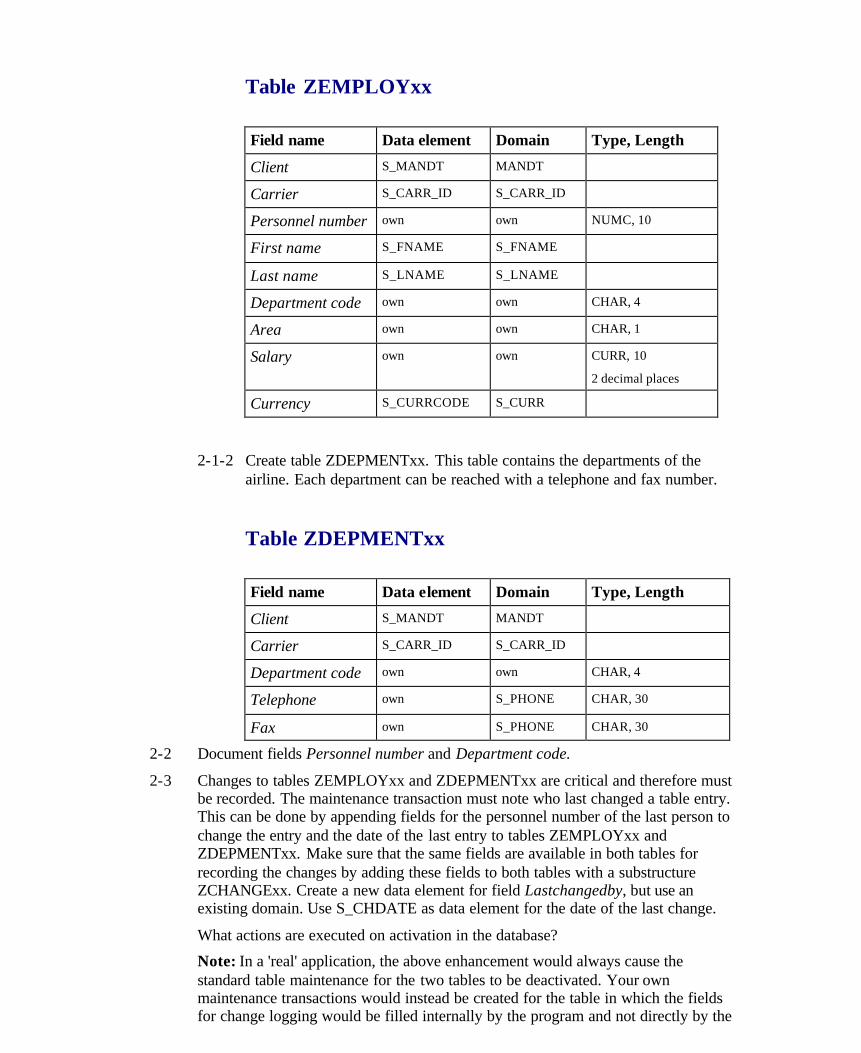
Table ZEMPLOYxx
Field name Data element Domain Type, Length
Client S_MANDT MANDT
Carrier S_CARR_ID S_CARR_ID
Personnel number own own NUMC, 10
First name S_FNAME S_FNAME
Last name S_LNAME S_LNAME
Department code own own CHAR, 4
Area own own CHAR, 1
Salary own own CURR, 10
2 decimal places
Currency S_CURRCODE S_CURR
2-1-2 Create table ZDEPMENTxx. This table contains the departments of the airline. Each department can be reached with a telephone and fax number.
Table ZDEPMENTxx
Field name Data element Domain Type, Length
Client S_MANDT MANDT
Carrier S_CARR_ID S_CARR_ID
Department code own own CHAR, 4
Telephone own S_PHONE CHAR, 30
Fax own S_PHONE CHAR, 30
2-2 Document fields Personnel number and Department code.
2-3 Changes to tables ZEMPLOYxx and ZDEPMENTxx are critical and therefore must be recorded. The maintenance transaction must note who last changed a table entry. This can be done by appending fields for the personnel number of the last person to change the entry and the date of the last entry to tables ZEMPLOYxx and ZDEPMENTxx. Make sure that the same fields are available in both tables for recording the changes by adding these fields to both tables with a substructure ZCHANGExx. Create a new data element for field Lastchangedby, but use an existing domain. Use S_CHDATE as data element for the date of the last change.
What actions are executed on activation in the database?
Note: In a 'real' application, the above enhancement would always cause the standard table maintenance for the two tables to be deactivated. Your own maintenance transactions would instead be created for the table in which the fields for change logging would be filled internally by the program and not directly by the user.
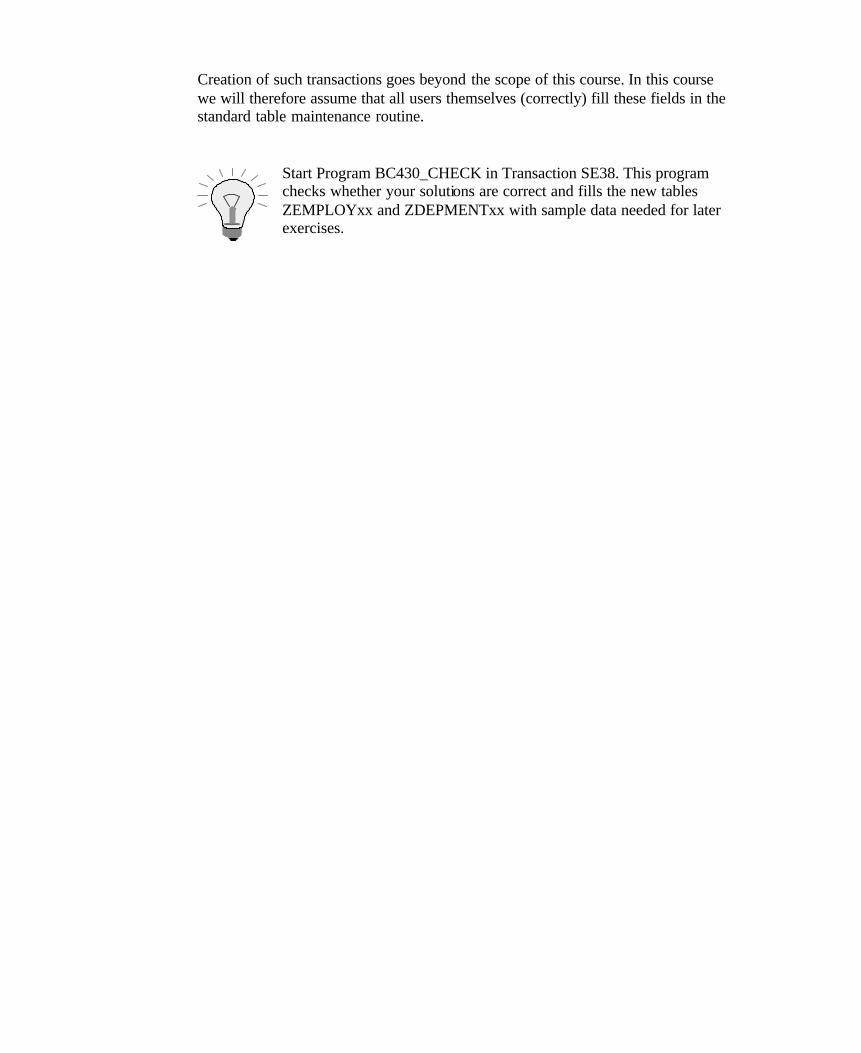
Creation of such transactions goes beyond the scope of this course. In this course we will therefore assume that all users themselves (correctly) fill these fields in the standard table maintenance routine.
Start Program BC430_CHECK in Transaction SE38. This program checks whether your solutions are correct and fills the new tables ZEMPLOYxx and ZDEPMENTxx with sample data needed for later exercises.
Unit: Tables in the ABAP Dictionary
2-1 The path
Tools à ABAP Workbench à Development à Dictionary or Transaction SE11 takes you to the overview screen of the ABAP Dictionary.
2-1-1 To create table ZEMPLOYxx:
1) Mark Database table and enter table name ZEMPLOYxx in the corresponding input field.
2) Choose Create.
3) Enter a short text in the maintenance screen for the table.
4) Choose delivery class A and mark Table maintenance allowed.
5) Now click on tab page Fields to go to the maintenance screen for the field definitions. Enter the field names there (they need not lie in the customer namespace).
6) Use the given data elements for fields Client, Carrier, First name, Last name and Currency by entering the names of the data elements in column Field type. Save your entries.
7) Create your own data elements for fields Personnel number, Department code, Area and Salary. Enter a name (Z<object>xx) for the data element in column Field type. Double-click on the name of the data element. The data element definition appears.
8) Enter a short text (component of the F1 help). Now click on tab page Field label and store the texts for the field labels there.
9) You also have to assign the data element a technical description (domain). Click on tab page Definition and enter a name (Z<object>xx) for your domain there. If the domain is predefined, activate the data element and return to the maintenance screen for the table fields (F3 or ß).. Otherwise double-click on the domain name. The domain definition appears.
10) Define the short description, data type (for example NUMC) and number of characters (for example 10) there. Activate the domain.
11) Navigate back one screen (F3 or ß ) to the data element definition and activate your data element.
12) Navigate back one more screen to the field definition. Start again there with 7) until all the table fields are defined. Save your table.
13) Define the reference table and reference field for the salary field. Double-click on the field name and enter the following in the next dialog box: Reference table: ZEMPLOYxx
Reference field: Currency
14) Define the key fields for table ZEMPLOYxx. Fields Client, Carrier and Personnel number uniquely identify an entry. They must therefore be marked as key fields. You can do this by marking the Key column following the field name. The key fields must be at the beginning of the field list in this order.
15) Activate the table. The maintenance screen for the technical settings appears automatically:
Since the contents of table ZEMPLOYxx do not change frequently, you must choose data class APPL0 (master data). The expected number of records in table ZEMPLOYxx is 60,000, so you must choose size category 2. The table should not be either buffered or logged.
ZEMPLOYxx
Data class APPL0 (master data)
Size category 2
Buffering Not allowed
Logging No logging
Save the technical settings. Go back to the maintenance screen of the table (F3 or ß). The table is activated.
2-1-2 To create table ZDEPMENTxx:
1) to 12) see Solution 2-1-1
13) Define the key fields for table ZDEPMENTxx. Fields Client, Carrier and Department code uniquely identify an entry. They must therefore be marked as key fields. You can do this by marking the Key column following the field name.
14) Activate your table and define the technical settings:
Since the contents of table ZDEPMENTxx do not change frequently, you must choose data class APPL0 (master data). The expected number of records in table ZDEPMENTxx is defined to be at most 90 entries, so you must choose size category 0. The table should not be either buffered or logged.
ZDEPMENTxx
Data class APPL0 (master data)
Size category 0
Buffering Not allowed
Logging No logging
2-2 To document fields Personnel number and Department code:
1) Double-click to go to the data element in the data element definition. With Display <-> Change switch to change mode. Press Documentation or choose Goto à Documentation.
2) Enter a text for the fields and save your entries.
2-3 Create structure ZCHANGExx as follows:
1) In the initial screen of the ABAP Dictionary, mark Data type and enter ZCHANGExx in the corresponding field. Choose Create.
2) Mark Structure in the next dialog box.
3) Enter the field names in column Component and the corresponding data elements in column Component type. Create one field for the personnel number and another one for the date of change. Use data element S_CHDATE for the second field. Create your own data element for the first field, as in Exercise 2-1. Use the domain you created for the personnel number in table ZEMPLOYxx.
4) Activate structure ZCHANGExx.
Now insert ZCHANGExx as an include in tables ZEMPLOYxx and ZDEPMENTxx as follows:
1) Go to the maintenance screen for table ZEMPLOYxx.
2) Choose New rows and position the cursor on the first new field.
3) Choose Edit à Include àInsert.
4) In the next dialog box, enter the name ZCHANGExx and choose Continue.
5) Activate the table.
6) You can display the actions that were performed in the database with Utilities ? Activation log.
7) Start with step 1) to insert substructure ZCHANGExx in table ZDEPMENTxx.
SAP AG 1999
l Indexesn Primary index and secondary index
n Structure of an indexn Data access using an index
l Table buffering
n Advantages of bufferingn Local table buffers
n Buffering typesn Buffer synchronization
n Which tables should be buffered?
Performance during Table Access
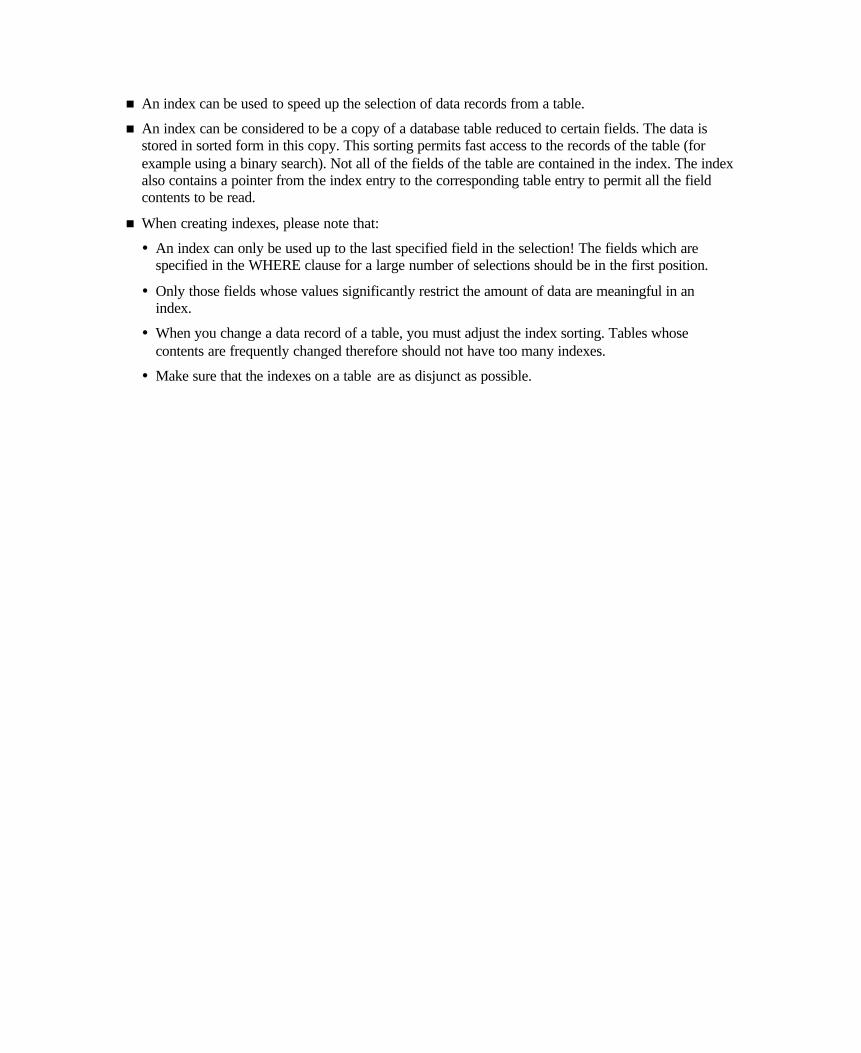
n An index can be used to speed up the selection of data records from a table.
n An index can be considered to be a copy of a database table reduced to certain fields. The data is stored in sorted form in this copy. This sorting permits fast access to the records of the table (for example using a binary search). Not all of the fields of the table are contained in the index. The index also contains a pointer from the index entry to the corresponding table entry to permit all the field contents to be read.
n When creating indexes, please note that:
� An index can only be used up to the last specified field in the selection! The fields which are specified in the WHERE clause for a large number of selections should be in the first position.
� Only those fields whose values significantly restrict the amount of data are meaningful in an index.
� When you change a data record of a table, you must adjust the index sorting. Tables whose contents are frequently changed therefore should not have too many indexes.
� Make sure that the indexes on a table are as disjunct as possible.
n The database optimizer decides which index on the table should be used by the database to access data records.
n You must distinguish between the primary index and secondary indexes of a table. The primary index contains the key fields of the table. The primary index is automatically created in the database when the table is activated. If a large table is frequently accessed such that it is not possible to apply primary index sorting, you should create secondary indexes for the table.
n The indexes on a table have a three-character index ID. '0' is reserved for the primary index. Customers can create their own indexes on SAP tables; their IDs must begin with Y or Z.
n If the index fields have key function, i.e. they already uniquely identify each record of the table, an index can be called a unique index. This ensures that there are no duplicate index fields in the database.
n When you define a secondary index in the ABAP Dictionary, you can specify whether it should be created on the database when it is activated. Some indexes only result in a gain in performance for certain database systems. You can therefore specify a list of database systems when you define an index. The index is then only created on the specified database systems when activated.
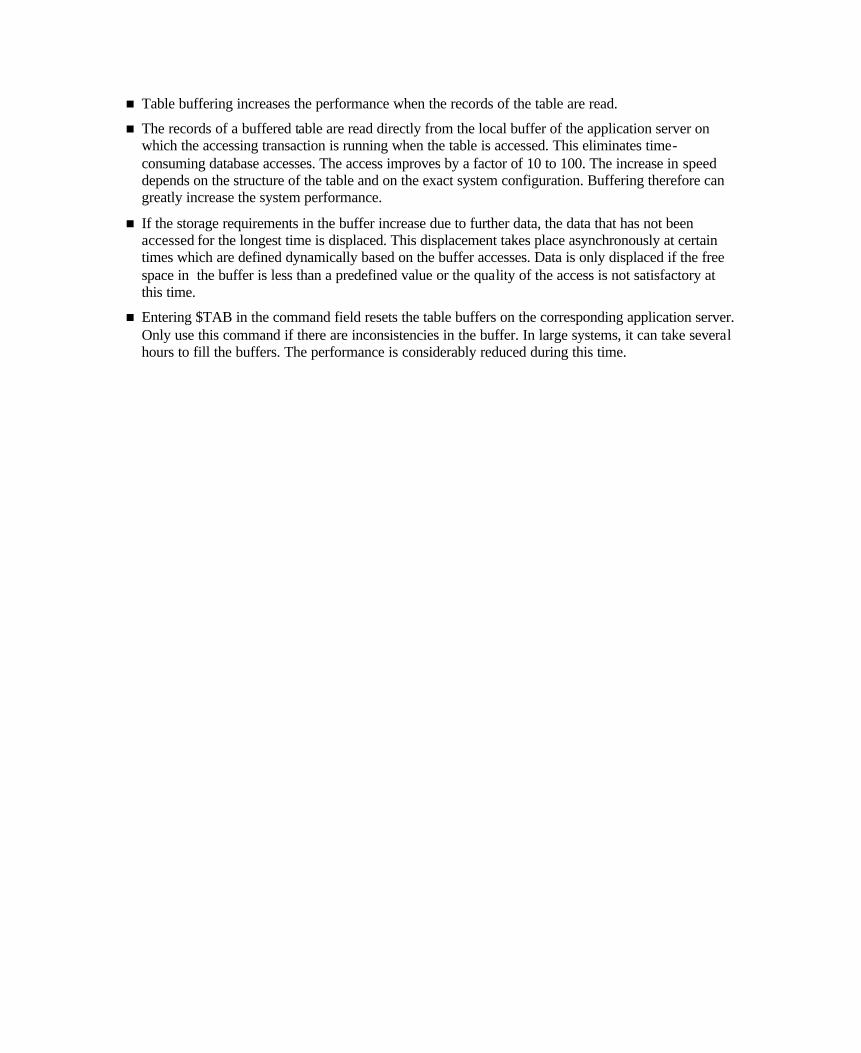
n Table buffering increases the performance when the records of the table are read.
n The records of a buffered table are read directly from the local buffer of the application server on which the accessing transaction is running when the table is accessed. This eliminates time-consuming database accesses. The access improves by a factor of 10 to 100. The increase in speed depends on the structure of the table and on the exact system configuration. Buffering therefore can greatly increase the system performance.
n If the storage requirements in the buffer increase due to further data, the data that has not been accessed for the longest time is displaced. This displacement takes place asynchronously at certain times which are defined dynamically based on the buffer accesses. Data is only displaced if the free space in the buffer is less than a predefined value or the quality of the access is not satisfactory at this time.
n Entering $TAB in the command field resets the table buffers on the corresponding application server. Only use this command if there are inconsistencies in the buffer. In large systems, it can take several hours to fill the buffers. The performance is considerably reduced during this time.
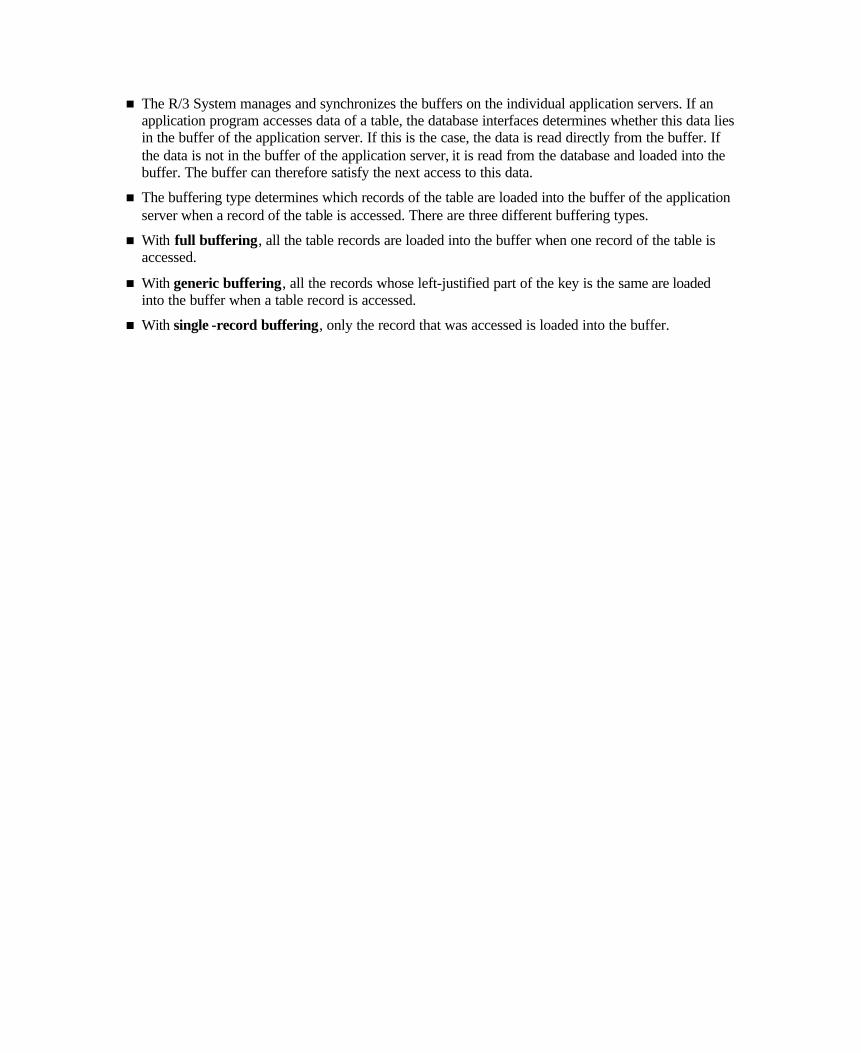
n The R/3 System manages and synchronizes the buffers on the individual application servers. If an application program accesses data of a table, the database interfaces determines whether this data lies in the buffer of the application server. If this is the case, the data is read directly from the buffer. If the data is not in the buffer of the application server, it is read from the database and loaded into the buffer. The buffer can therefore satisfy the next access to this data.
n The buffering type determines which records of the table are loaded into the buffer of the application server when a record of the table is accessed. There are three different buffering types.
n With full buffering, all the table records are loaded into the buffer when one record of the table is accessed.
n With generic buffering, all the records whose left-justified part of the key is the same are loaded into the buffer when a table record is accessed.
n With single -record buffering, only the record that was accessed is loaded into the buffer.
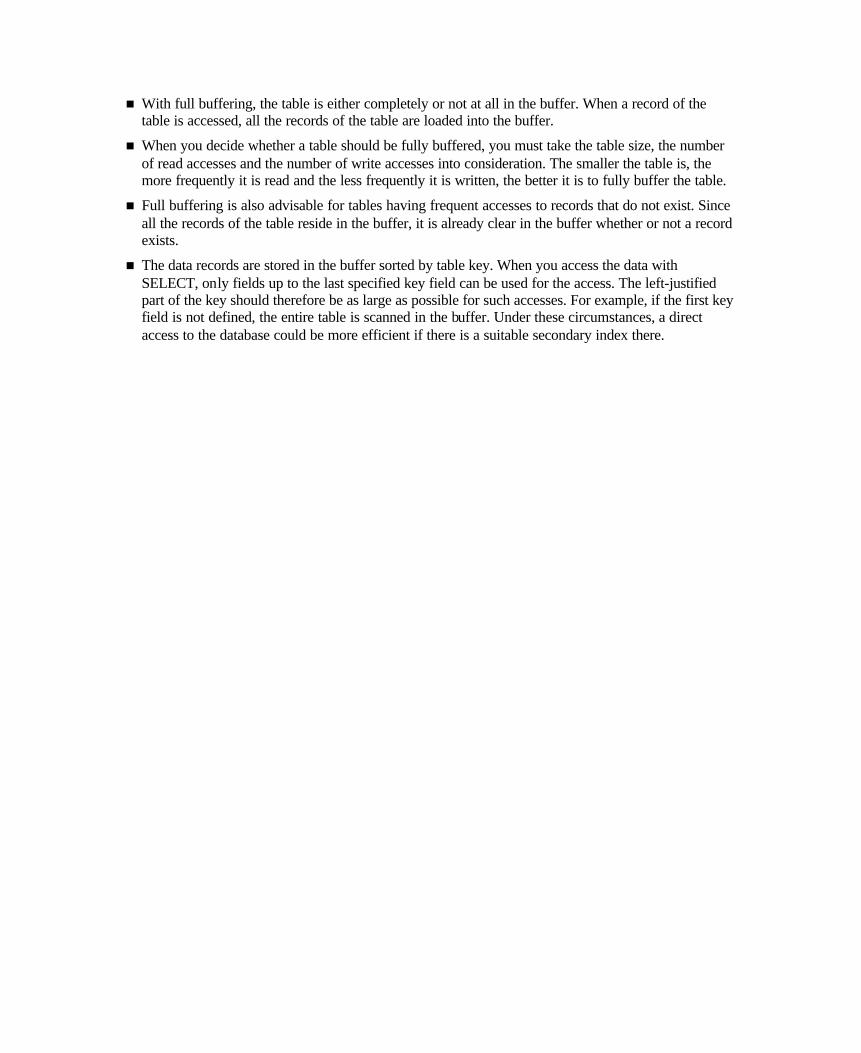
n With full buffering, the table is either completely or not at all in the buffer. When a record of the table is accessed, all the records of the table are loaded into the buffer.
n When you decide whether a table should be fully buffered, you must take the table size, the number of read accesses and the number of write accesses into consideration. The smaller the table is, the more frequently it is read and the less frequently it is written, the better it is to fully buffer the table.
n Full buffering is also advisable for tables having frequent accesses to records that do not exist. Since all the records of the table reside in the buffer, it is already clear in the buffer whether or not a record exists.
n The data records are stored in the buffer sorted by table key. When you access the data with SELECT, only fields up to the last specified key field can be used for the access. The left-justified part of the key should therefore be as large as possible for such accesses. For example, if the first key field is not defined, the entire table is scanned in the buffer. Under these circumstances, a direct access to the database could be more efficient if there is a suitable secondary index there.
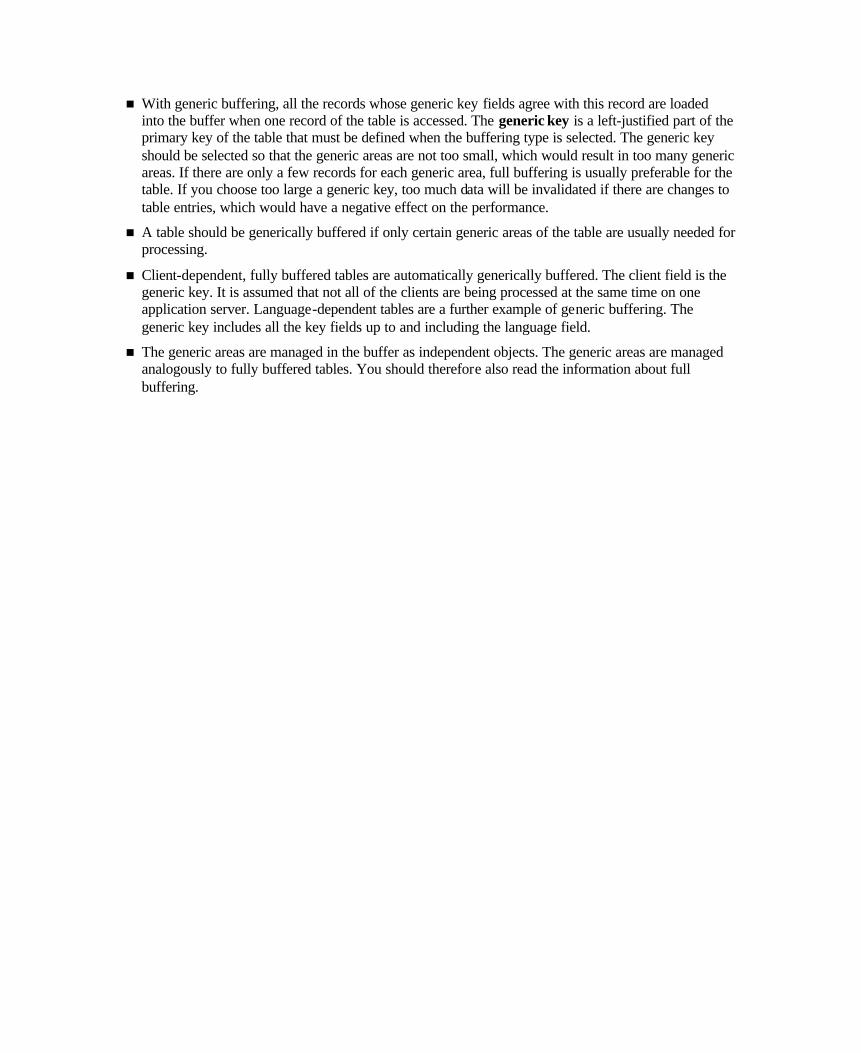
n With generic buffering, all the records whose generic key fields agree with this record are loaded into the buffer when one record of the table is accessed. The generic key is a left-justified part of the primary key of the table that must be defined when the buffering type is selected. The generic key should be selected so that the generic areas are not too small, which would result in too many generic areas. If there are only a few records for each generic area, full buffering is usually preferable for the table. If you choose too large a generic key, too much data will be invalidated if there are changes to table entries, which would have a negative effect on the performance.
n A table should be generically buffered if only certain generic areas of the table are usually needed for processing.
n Client-dependent, fully buffered tables are automatically generically buffered. The client field is the generic key. It is assumed that not all of the clients are being processed at the same time on one application server. Language-dependent tables are a further example of generic buffering. The generic key includes all the key fields up to and including the language field.
n The generic areas are managed in the buffer as independent objects. The generic areas are managed analogously to fully buffered tables. You should therefore also read the information about full buffering.
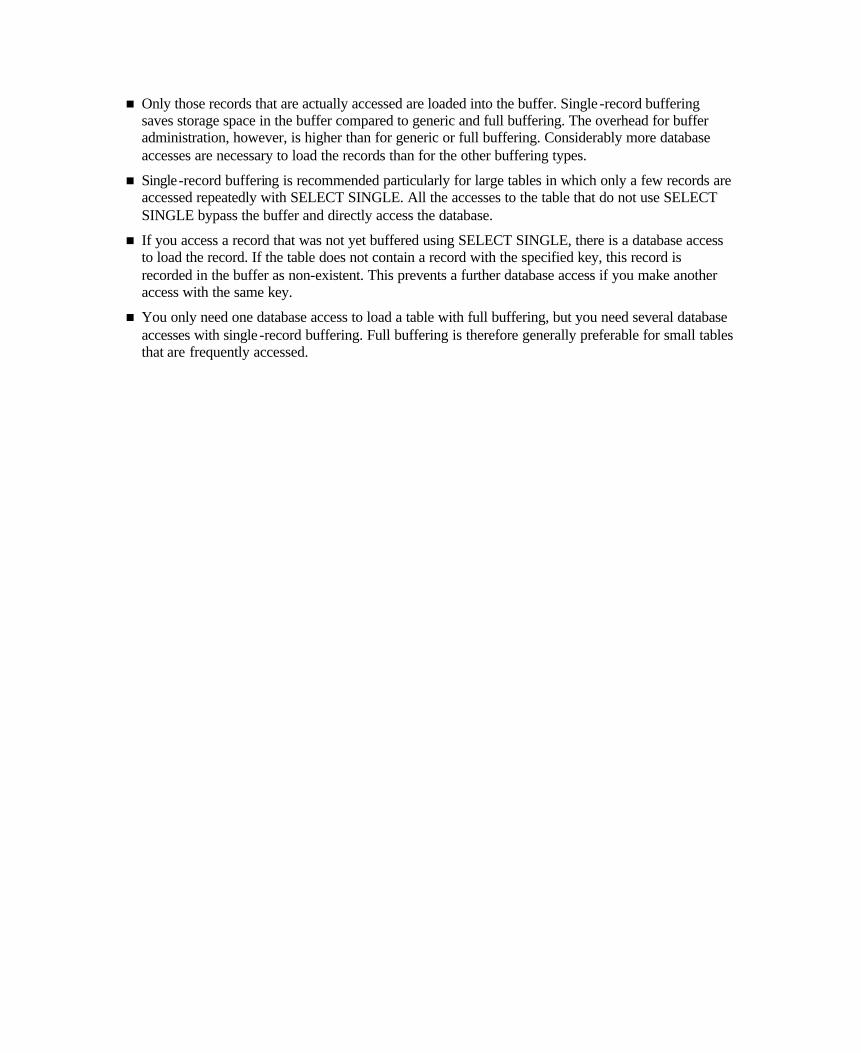
n Only those records that are actually accessed are loaded into the buffer. Single -record buffering saves storage space in the buffer compared to generic and full buffering. The overhead for buffer administration, however, is higher than for generic or full buffering. Considerably more database accesses are necessary to load the records than for the other buffering types.
n Single-record buffering is recommended particularly for large tables in which only a few records are accessed repeatedly with SELECT SINGLE. All the accesses to the table that do not use SELECT SINGLE bypass the buffer and directly access the database.
n If you access a record that was not yet buffered using SELECT SINGLE, there is a database access to load the record. If the table does not contain a record with the specified key, this record is recorded in the buffer as non-existent. This prevents a further database access if you make another access with the same key.
n You only need one database access to load a table with full buffering, but you need several database accesses with single -record buffering. Full buffering is therefore generally preferable for small tables that are frequently accessed.
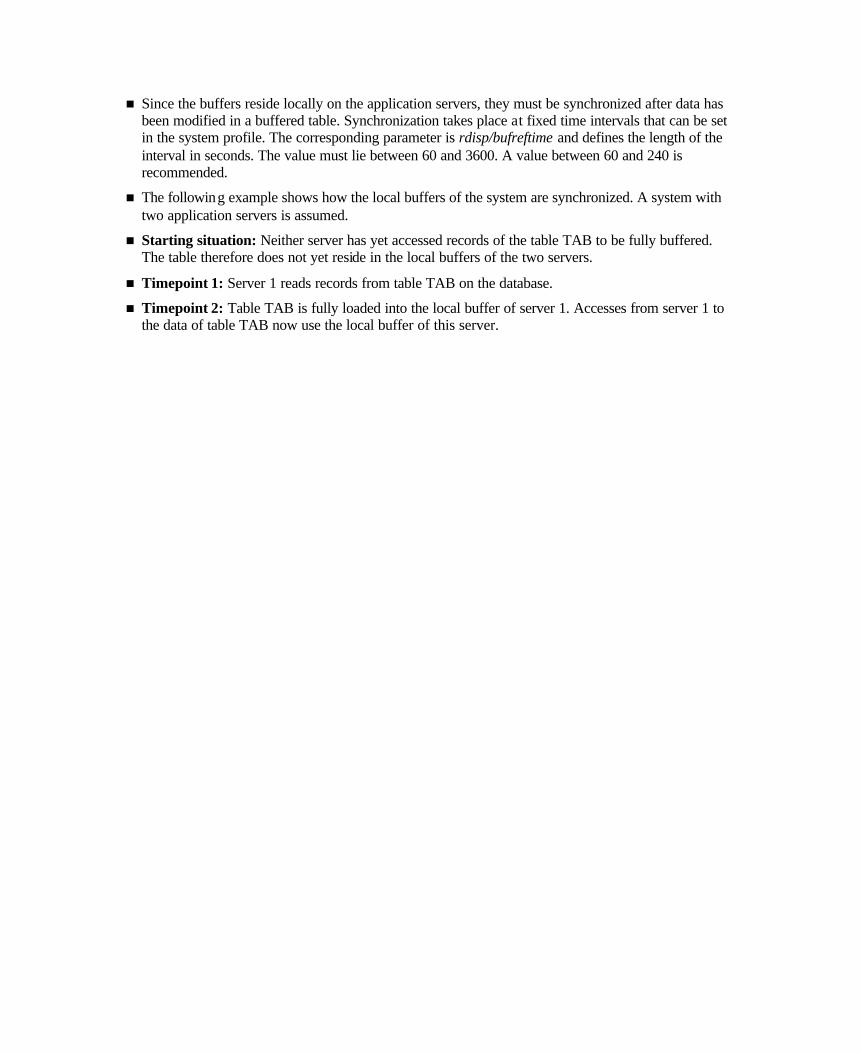
n Since the buffers reside locally on the application servers, they must be synchronized after data has been modified in a buffered table. Synchronization takes place at fixed time intervals that can be set in the system profile. The corresponding parameter is rdisp/bufreftime and defines the length of the interval in seconds. The value must lie between 60 and 3600. A value between 60 and 240 is recommended.
n The following example shows how the local buffers of the system are synchronized. A system with two application servers is assumed.
n Starting situation: Neither server has yet accessed records of the table TAB to be fully buffered. The table therefore does not yet reside in the local buffers of the two servers.
n Timepoint 1: Server 1 reads records from table TAB on the database.
n Timepoint 2: Table TAB is fully loaded into the local buffer of server 1. Accesses from server 1 to the data of table TAB now use the local buffer of this server.

n Timepoint 3: Server 2 accesses records of the table. Since the table does not yet reside in the local buffer of server 2, the records are read directly from the database.
n Timepoint 4: Table TAB is loaded into the local buffer of server 2. Server 2 therefore also uses its local buffer to access data of TAB the next time it reads.

n Timepoint 5: Server 1 dele tes records from table TAB and updates the database.
n Timepoint 6: Server 1 writes an entry in the synchronization table.
n Timepoint 7: Server 1 updates its local buffer.

n Timepoint 8: Server 2 accesses the deleted data records. Since table TAB resides in its local buffer, the access uses this local buffer.
n Server 2 therefore finds the records although they no longer exist in the database table.
n If the same access were made from an application program to Server 1, this program would recognize that the records no longer exist. At this time the behavior of an application program therefore depends on the server on which it is running.
n Timepoint 9: The moment of synchronization has arrived. Both servers look in the synchronization table to see if another server has modified one of the tables in its local buffer in the meantime.
n Timepoint 10: Server 2 finds that table TAB has been modified by Server 1 in the meantime. Server 2 therefore invalidates the table in its local buffer. The next access from Server 2 to data of table TAB therefore uses the database. Server 1 does not have to invalidate the table in its buffer since it itself is the only one to modify table TAB. Server 1 therefore uses its local buffer again the next time to access records of table TAB.
n Timepoint 11: Server 2 again accesses records of table TAB. Since TAB is invalidated in the local buffer of Server 2, the access uses the database.
n Timepoint 12: The table is again loaded into the local buffer of Server 2. The information about table TAB is now consistent again in both servers and the database.
n Advantages and disadvantages of this method of buffer synchronization:
� Advantage : The load on the network is kept to a minimum. If the buffers were to be synchronized immediately after each modification, each server would have to inform all other servers about each modification to a buffered table via the network. This would have a negative effect on the performance.
� Disadvantage : The local buffers of the application servers can contain obsolete data between the moments of synchronization.
n This means that:
� Only those tables which are written very infrequently (read mostly) or for which such temporary inconsistencies are of no importance may be buffered.
� Tables whose entries change frequently should not be buffered. Otherwise there would be a constant invalidation and reload, which would have a negative effect on the performance.

Unit: Performance during Table Access
At the conclusion of these exercises you will be able to:
• Create indexes
• Maintain the buffering attributes of a table
In their daily work, airline employees need fast access to the data in the employee administration tables. In this exercise, access to the data in these tables should be speeded up.
3-1 The combination of first and last names are often used to access the personnel data of an employee. The last name is more often known (i.e. specified in the access) than the first name.
Create an index that supports this access. Make sure that the index is created in the database.
3-2 To set up a flight crew, you have to assign employees (pilots and stewards) to flights. Create a table in which the employees involved and their functions can be entered for each flight.
A table with the corresponding structure already exists in the system. Copy this table SFLCREW to table ZFLCREWxx. Replace the existing data element for the employee number with your own data element.
Do not forget to activate table ZFLCREWxx.
3-3 Reconsider the settings you made for buffering tables ZDEPMENTxx and ZFLCREWxx. Keep the following information for using these tables in mind:
The carriers have between 10 and 30 departments. Only a few carriers (maximum 3) are administered in the tables. The data about the crews of completed flights are rolled out to an archive file every three months. Table ZFLCREWxx therefore has relatively few entries (at most 5,000 per carrier).
Tables ZDEPMENTxx and ZFLCREWxx are accessed very frequently. Data records are read repeatedly from these tables.
Administrative employees of only one airline work on one application server. The data about the flight crew is only of interest within the airline. Administrative employees of an airline, however, often have to access departmental data of other airlines, since the airlines share some services.
Start Program BC430_CHECK in Transaction SE38. This program checks whether your solutions are correct and fills the new table ZFLCREWxx with sample data needed for later exercises.
If you do the supplementary exercise, only start the program after completing the supplementary exercise.
3-4 Supplementary Exercise: Using an index on the areas might result in a gain in performance when accessing the employee data, for example if all pilots are frequently selected.
In performance measurements on different database systems, however, it was found there is only a gain in performance for the ADABAS and SQL Server database systems. Create an index and make sure that it is only created on the ADABAS and SQL Server database systems.
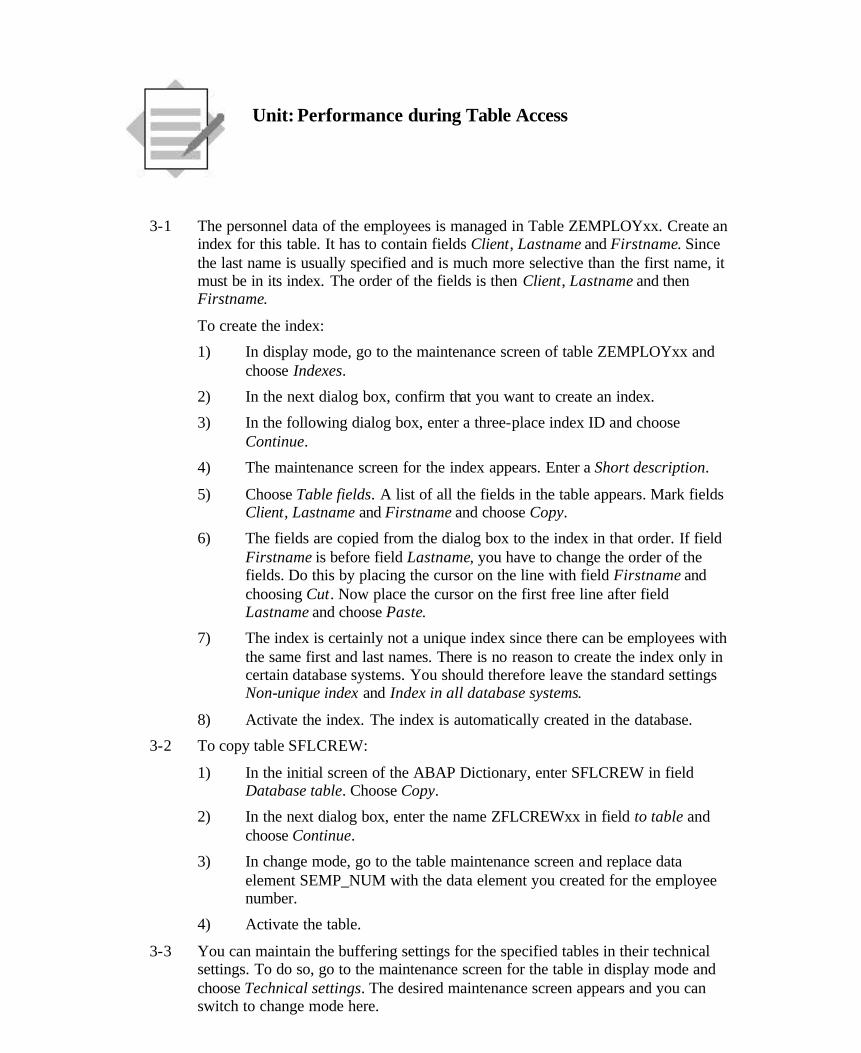
Unit: Performance during Table Access
3-1 The personnel data of the employees is managed in Table ZEMPLOYxx. Create an index for this table. It has to contain fields Client, Lastname and Firstname. Since the last name is usually specified and is much more selective than the first name, it must be in its index. The order of the fields is then Client, Lastname and then Firstname.
To create the index:
1) In display mode, go to the maintenance screen of table ZEMPLOYxx and choose Indexes.
2) In the next dialog box, confirm that you want to create an index.
3) In the following dialog box, enter a three-place index ID and choose Continue.
4) The maintenance screen for the index appears. Enter a Short description.
5) Choose Table fields. A list of all the fields in the table appears. Mark fields Client, Lastname and Firstname and choose Copy.
6) The fields are copied from the dialog box to the index in that order. If field Firstname is before field Lastname, you have to change the order of the fields. Do this by placing the cursor on the line with field Firstname and choosing Cut. Now place the cursor on the first free line after field Lastname and choose Paste.
7) The index is certainly not a unique index since there can be employees with the same first and last names. There is no reason to create the index only in certain database systems. You should therefore leave the standard settings Non-unique index and Index in all database systems.
8) Activate the index. The index is automatically created in the database.
3-2 To copy table SFLCREW:
1) In the initial screen of the ABAP Dictionary, enter SFLCREW in field Database table. Choose Copy.
2) In the next dialog box, enter the name ZFLCREWxx in field to table and choose Continue.
3) In change mode, go to the table maintenance screen and replace data element SEMP_NUM with the data element you created for the employee number.
4) Activate the table.
3-3 You can maintain the buffering settings for the specified tables in their technical settings. To do so, go to the maintenance screen for the table in display mode and choose Technical settings. The desired maintenance screen appears and you can switch to change mode here.
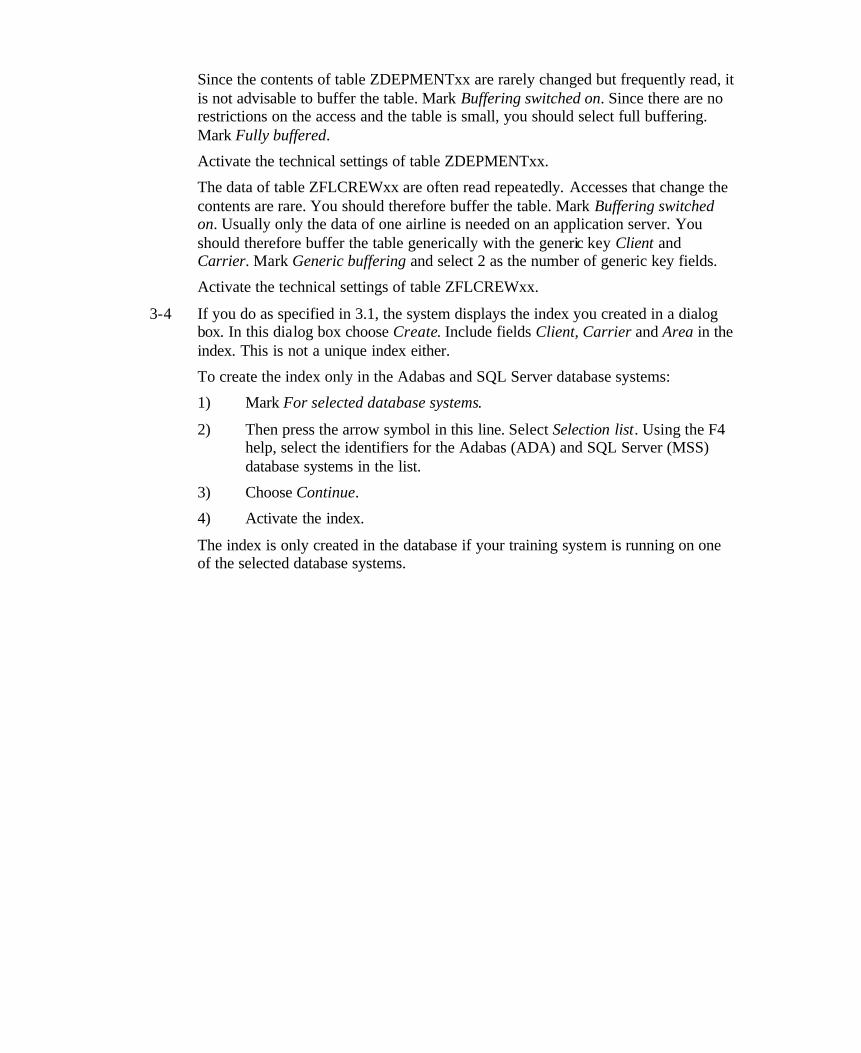
Since the contents of table ZDEPMENTxx are rarely changed but frequently read, it is not advisable to buffer the table. Mark Buffering switched on. Since there are no restrictions on the access and the table is small, you should select full buffering. Mark Fully buffered.
Activate the technical settings of table ZDEPMENTxx.
The data of table ZFLCREWxx are often read repeatedly. Accesses that change the contents are rare. You should therefore buffer the table. Mark Buffering switched on. Usually only the data of one airline is needed on an application server. You should therefore buffer the table generically with the generic key Client and Carrier. Mark Generic buffering and select 2 as the number of generic key fields.
Activate the technical settings of table ZFLCREWxx.
3-4 If you do as specified in 3.1, the system displays the index you created in a dialog box. In this dialog box choose Create. Include fields Client, Carrier and Area in the index. This is not a unique index either.
To create the index only in the Adabas and SQL Server database systems:
1) Mark For selected database systems.
2) Then press the arrow symbol in this line. Select Selection list. Using the F4 help, select the identifiers for the Adabas (ADA) and SQL Server (MSS) database systems in the list.
3) Choose Continue.
4) Activate the index.
The index is only created in the database if your training system is running on one of the selected database systems.
SAP AG 1999
l Fixed values
l Value table
l What is a foreign key?
l Field assignment using the check field
l Foreign key table / check table
l Semantic attributes of the foreign key
l Text table
Consistency through Input Checks

n The domain describes the value range of a field by specifying its data type and field length. If only a limited set of values is allowed, they can be defined as fixed values.
n Specifying fixed values causes the value range of the domain to be restricted by these values. Fixed values are immediately used as check values in screen entries. There is also an F4 help.
n Fixed values are only checked in screens. No check is made when data records are inserted in a table by an ABAP program.
n Fixed values can either be listed individually or defined as an interval.
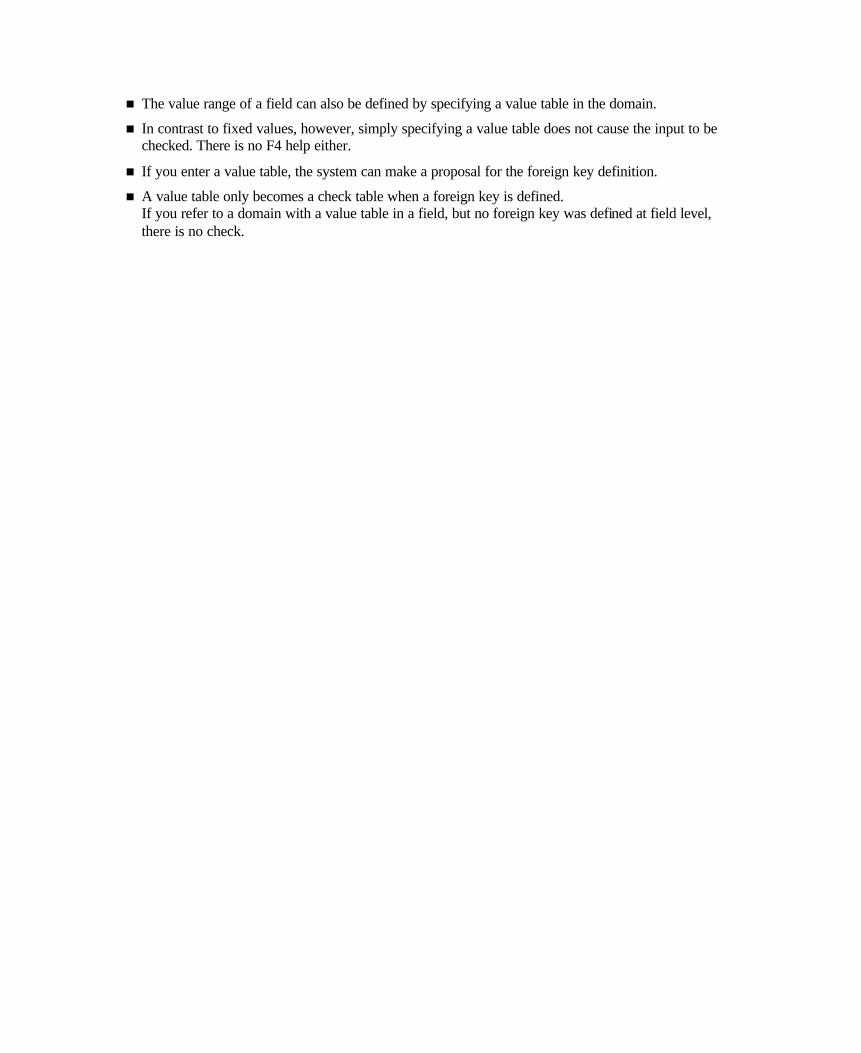
n The value range of a field can also be defined by specifying a value table in the domain.
n In contrast to fixed values, however, simply specifying a value table does not cause the input to be checked. There is no F4 help either.
n If you enter a value table, the system can make a proposal for the foreign key definition.
n A value table only becomes a check table when a foreign key is defined. If you refer to a domain with a value table in a field, but no foreign key was defined at field level, there is no check.
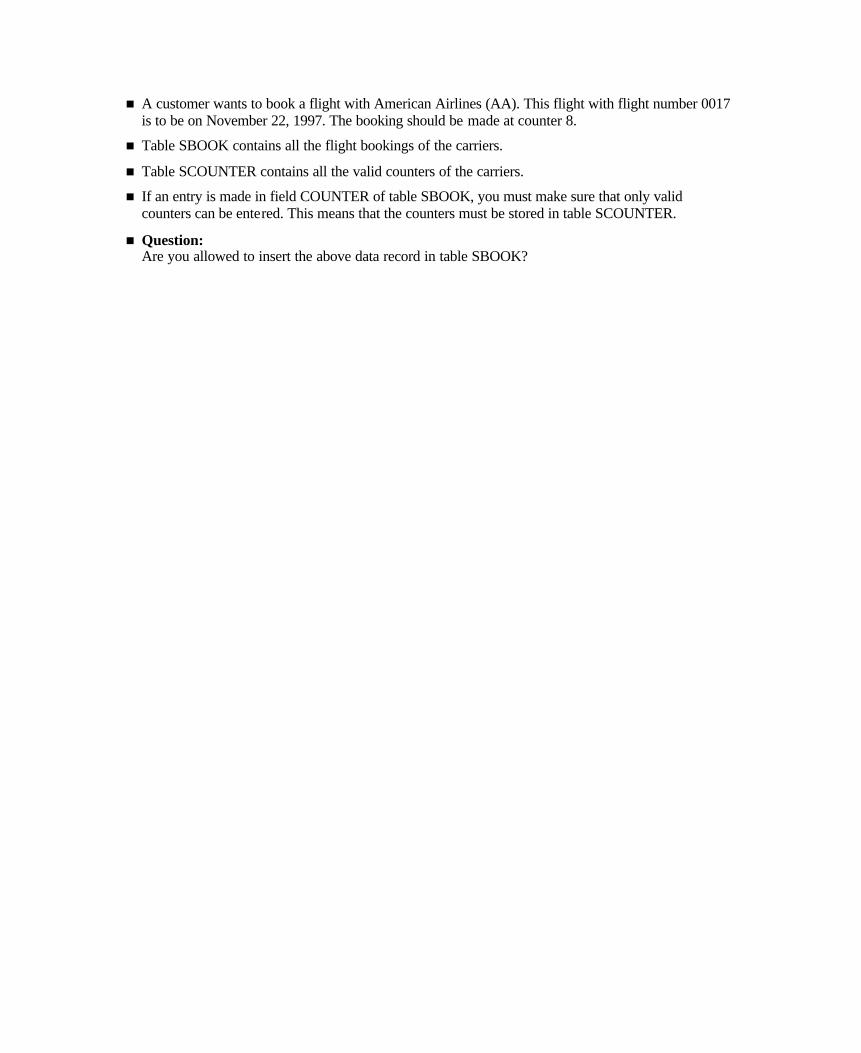
n A customer wants to book a flight with American Airlines (AA). This flight with flight number 0017 is to be on November 22, 1997. The booking should be made at counter 8.
n Table SBOOK contains all the flight bookings of the carriers.
n Table SCOUNTER contains all the valid counters of the carriers.
n If an entry is made in field COUNTER of table SBOOK, you must make sure that only valid counters can be entered. This means that the counters must be stored in table SCOUNTER.
n Question: Are you allowed to insert the above data record in table SBOOK?
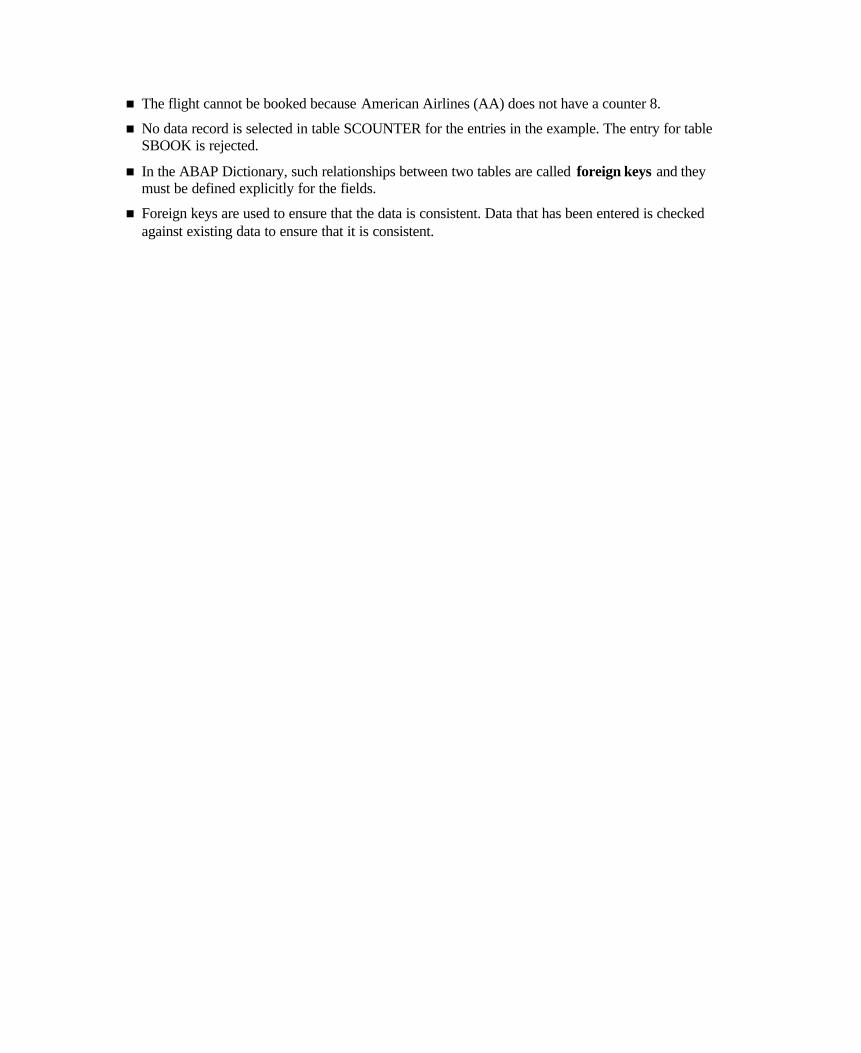
n The flight cannot be booked because American Airlines (AA) does not have a counter 8.
n No data record is selected in table SCOUNTER for the entries in the example. The entry for table SBOOK is rejected.
n In the ABAP Dictionary, such relationships between two tables are called foreign keys and they must be defined explicitly for the fields.
n Foreign keys are used to ensure that the data is consistent. Data that has been entered is checked against existing data to ensure that it is consistent.
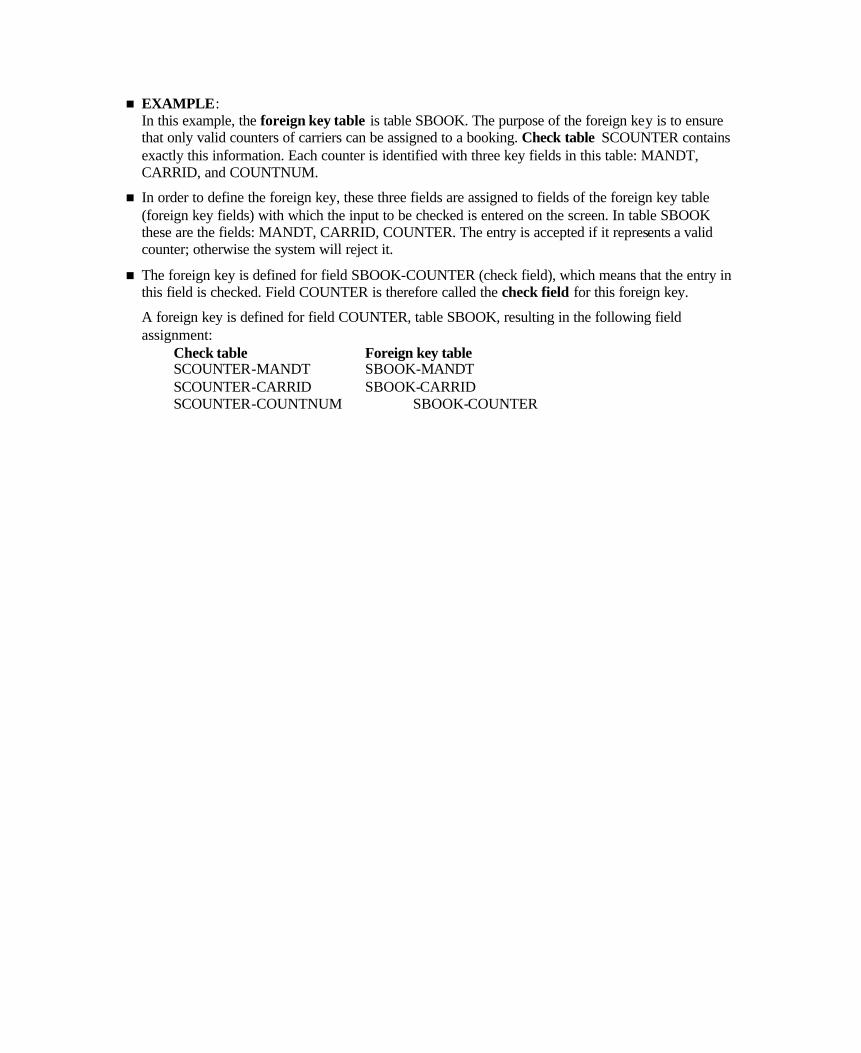
n EXAMPLE: In this example, the foreign key table is table SBOOK. The purpose of the foreign key is to ensure that only valid counters of carriers can be assigned to a booking. Check table SCOUNTER contains exactly this information. Each counter is identified with three key fields in this table: MANDT, CARRID, and COUNTNUM.
n In order to define the foreign key, these three fields are assigned to fields of the foreign key table (foreign key fields) with which the input to be checked is entered on the screen. In table SBOOK these are the fields: MANDT, CARRID, COUNTER. The entry is accepted if it represents a valid counter; otherwise the system will reject it.
n The foreign key is defined for field SBOOK-COUNTER (check field), which means that the entry in this field is checked. Field COUNTER is therefore called the check field for this foreign key.
A foreign key is defined for field COUNTER, table SBOOK, resulting in the following field assignment: Check table Foreign key table SCOUNTER-MANDT SBOOK-MANDT SCOUNTER-CARRID SBOOK-CARRID SCOUNTER-COUNTNUM SBOOK-COUNTER
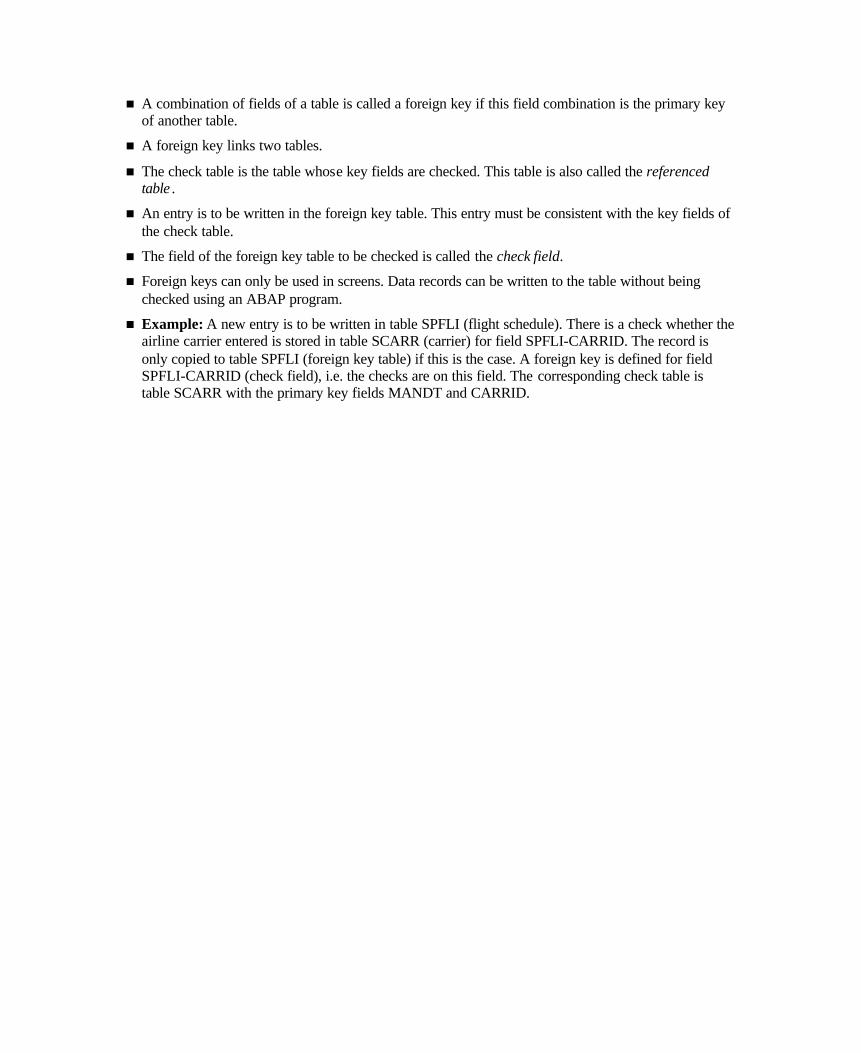
n A combination of fields of a table is called a foreign key if this field combination is the primary key of another table.
n A foreign key links two tables.
n The check table is the table whose key fields are checked. This table is also called the referenced table .
n An entry is to be written in the foreign key table. This entry must be consistent with the key fields of the check table.
n The field of the foreign key table to be checked is called the check field.
n Foreign keys can only be used in screens. Data records can be written to the table without being checked using an ABAP program.
n Example: A new entry is to be written in table SPFLI (flight schedule). There is a check whether the airline carrier entered is stored in table SCARR (carrier) for field SPFLI-CARRID. The record is only copied to table SPFLI (foreign key table) if this is the case. A foreign key is defined for field SPFLI-CARRID (check field), i.e. the checks are on this field. The corresponding check table is table SCARR with the primary key fields MANDT and CARRID.
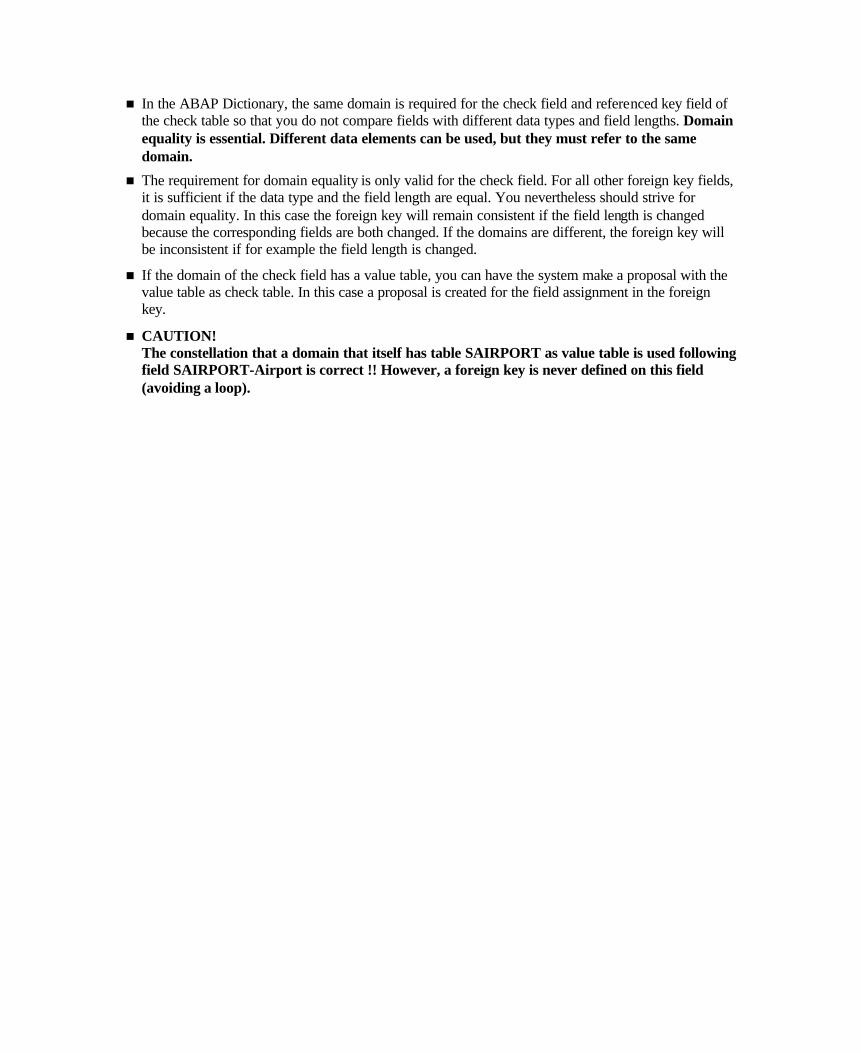
n In the ABAP Dictionary, the same domain is required for the check field and referenced key field of the check table so that you do not compare fields with different data types and field lengths. Domain equality is essential. Different data elements can be used, but they must refer to the same domain.
n The requirement for domain equality is only valid for the check field. For all other foreign key fields, it is sufficient if the data type and the field length are equal. You nevertheless should strive for domain equality. In this case the foreign key will remain consistent if the field length is changed because the corresponding fields are both changed. If the domains are different, the foreign key will be inconsistent if for example the field length is changed.
n If the domain of the check field has a value table, you can have the system make a proposal with the value table as check table. In this case a proposal is created for the field assignment in the foreign key.
n CAUTION! The constellation that a domain that itself has table SAIRPORT as value table is used following field SAIRPORT-Airport is correct !! However, a foreign key is never defined on this field (avoiding a loop).
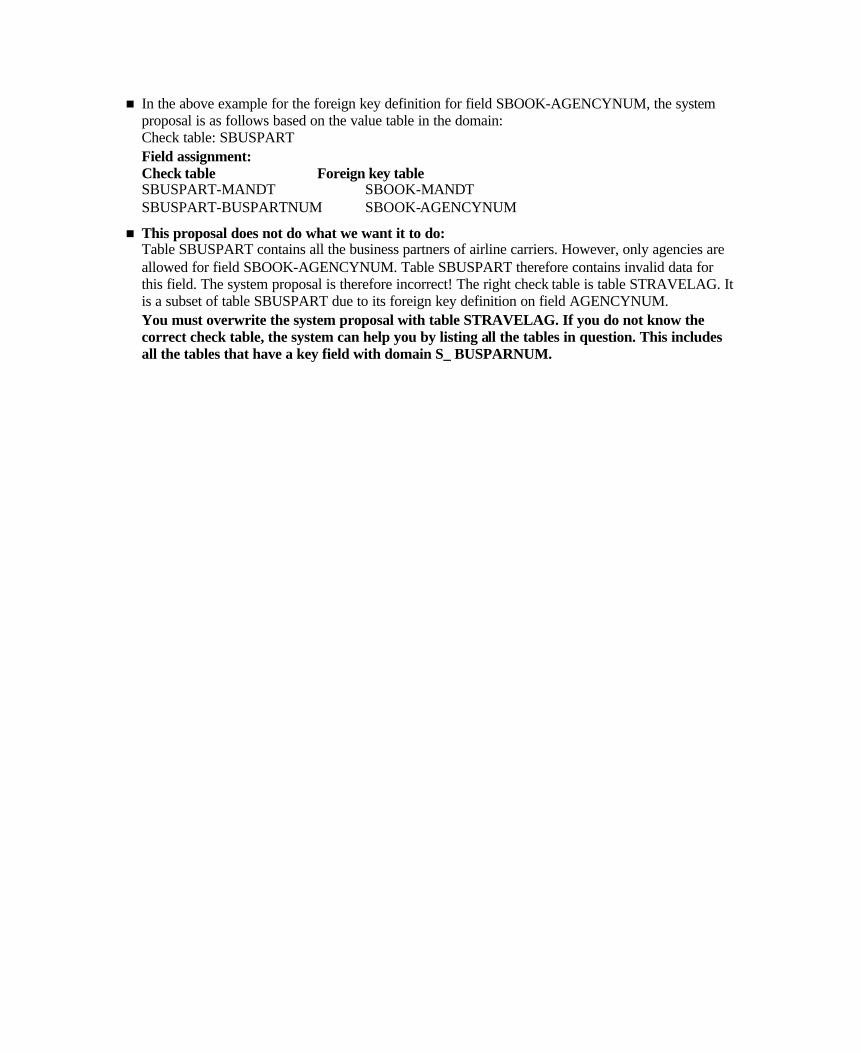
n In the above example for the foreign key definition for field SBOOK-AGENCYNUM, the system proposal is as follows based on the value table in the domain: Check table: SBUSPART Field assignment: Check table Foreign key table SBUSPART-MANDT SBOOK-MANDT SBUSPART-BUSPARTNUM SBOOK-AGENCYNUM
n This proposal does not do what we want it to do: Table SBUSPART contains all the business partners of airline carriers. However, only agencies are allowed for field SBOOK-AGENCYNUM. Table SBUSPART therefore contains invalid data for this field. The system proposal is therefore incorrect! The right check table is table STRAVELAG. It is a subset of table SBUSPART due to its foreign key definition on field AGENCYNUM. You must overwrite the system proposal with table STRAVELAG. If you do not know the correct check table, the system can help you by listing all the tables in question. This includes all the tables that have a key field with domain S_ BUSPARNUM.
n The cardinality describes the foreign key relationship with regard to how many records of the check table are assigned to records of the foreign key table. The cardinality is always defined from the point of view of the check table.
n The type of the foreign key field defines whether or not the foreign key field identifies a table entry. This means that the foreign key fields are either key fields or they are not key fields or they are a special case, namely the key fields of a text table.
n There are the following kinds of foreign key fields:
� not specified: No information about the kind of foreign key field can be given
� no key fields/candidates: The foreign key fields are neither primary key fields of the foreign key table nor do they uniquely identify a record of the foreign key table (key candidates). The foreign key fields therefore do not (partially) identify the foreign key table.
� Key fields/candidates: The foreign key fields are either primary key fields of the foreign key table or they uniquely identify a record of the foreign key table (key candidates). The foreign key fields therefore (partially) identify the foreign key table.
� Key fields of a text table : The foreign key table is a text table of the check table, i.e. the key of the foreign key table only differs from the key of the check table in an additional language key field. This is a special case of the category Key fields / candidates.
n Table SMEAL contains the meals served to the passengers during a flight. The meal names are maintained in table SMEALT.
n Table SMEALT is the text table for table SMEAL since the key of SMEALT consists of the key of SMEAL and an additional language key field (field with data type LANG).
n Table SMEALT can contain explanatory text in several languages for each key entry of SMEAL.
n To link the key entries with the text, the text table SMEALT must be linked with table SMEAL using a foreign key. Key fields of a text table must be chosen for the type of the foreign key fields.
n The foreign key relationship is defined from SMEALT to SMEAL.
n Only one text table can be created for a table.

Unit: Consistency through Input Checks
At the conclusion of these exercises you will be able to:
• Create fixed values
• Set value tables to the correct context
• Define foreign keys
• Use the above mechanism to ensure that the data is consistent
When you enter or change the employee master data, only consistent data, i.e. valid airline carriers, departments, areas, etc., should be allowed. This will be implemented in the next exercise.
4-1 The employees of the airlines are divided into administration personnel (A), flight personnel (F) and service personnel (S). They are assigned to activity areas A, F or S accordingly. Make sure that only valid activity areas can be entered in table ZEMPLOYxx.
4-2 Define suitable foreign keys for tables ZEMPLOYxx and ZDEPMENTxx. Use the tables of the flight model or tables T000 (client) and SCURX (currency code) as well as your tables to define the foreign keys. Define a foreign key check for each of the following fields:
ZEMPLOYxx-Client
ZEMPLOYxx-Carrier
ZEMPLOYxx-Department code
ZEMPLOYxx-Currency
and
ZDEPMENTxx-Client
ZDEPMENTxx-Carrier
Maintain the data for table ZEMPLOYxx and test the effect of your foreign key relationships.
4-3 Some employees of carriers work in travel agencies in order to sell flights for their companies there. Enhance table ZEMPLOYxx with a field that documents for each employee the travel agency in which he or she works. Enhance table ZEMPLOYxx accordingly and define the foreign key relationship.
The table of all travel agencies is called STRAVELAG.
4-4 Create a text table ZDEPMENTTxx for table ZDEPMENTxx to explain the department code for the employees of the carriers in all countries.
Create the corresponding table and use data elements SPRAS and S_TEXT for the field definition.
Define the required foreign key relationships.
Start Program BC430_CHECK in Transaction SE38. This program checks whether your solutions are correct and fills the new table ZDEPMENTTxx with sample data needed for later exercises.
Unit: Consistency through Input Checks
4-1 Call the domain maintenance screen for field ZEMPLOYxx-Area. You can do this by navigating from the table maintenance screen to the corresponding data element and from here to the domain (by double-clicking). Click on tab page Value range and enter the following fixed values:
Fixed value Short description
A Administration personnel
F Flight personnel
S Service personnel
Activate your domain.
4-2 To maintain the individual foreign keys, call the maintenance routine for the particular tables. Click on tab page Fields.
Create foreign key ZEMPLOYxx-Client as follows:
1) Place the cursor on field ZEMPLOYxx-Client. Press Foreign key or choose Goto à Foreign key.
2) Since you are using domain MANDT for field ZEMPLOY-Client, the system proposes value table T000 as check table.
3) Have the system make a proposal for the foreign key definition. Check the proposal. The following fields must be assigned:
Check table CkTabFld For. key table For. key fld
T000 MANDT ZEMPLOYxx Client
4) Enter a short text and define the semantic attributes as follows:
• Type of foreign key fields: key fields/candidates
• Cardinality: 1:CN
5) Save your foreign key.
Create foreign key ZEMPLOYxx-Carrier as follows:
1) Place the cursor on field ZEMPLOYxx-Carrier. Press Foreign key or choose Goto à Foreign key.
2) Since you are using domain S_CARR_ID for field ZEMPLOY-Carrier, you can use value table SCARR for the foreign key definition.
3) Have the system make a proposal for the foreign key definition. Check the proposal. The following fields must be assigned:

Check table ChkTablFld For. key table Foreign key field
SCARR MANDT ZEMPLOYxx Client
SCARR CARRID ZEMPLOYxx Carrier
4) Enter a short text and define the semantic attributes as follows:
• Type of foreign key fields: key fields/candidates
• Cardinality: 1:CN
5) Save your foreign key.
Create foreign key ZEMPLOYxx-Department code as follows:
1) To get a proposal for the foreign key definition, you must change the domain for field ZEMPLOYxx-Department code. This is not absolutely necessary for later foreign key definitions, but makes the definition easier. Enter value table ZDEPMENTxx in the domain for this field and activate the domain.
2) Place the cursor on field ZEMPLOYxx-Department code. Press Foreign key or choose Goto à Foreign key.
3) Since you are using the domain of field ZDEPMENTxx-Department code for field ZEMPLOY-Department code, you can use value table ZDEPMENTxx for the foreign key definition.
4) Have the system make a proposal for the foreign key definition. Check the proposal. The following fields must be assigned:
Check table ChkTablFld For. key table Foreign key field
ZDEPMENTxx Client ZEMPLOYxx Client
ZDEPMENTxx Carrier ZEMPLOYxx Carrier
ZDEPMENTxx Department code ZEMPLOYxx Department code
5) Enter a short text and define the semantic attributes as follows:
• Type of foreign key fields: non-key-fields/candidates
• Cardinality: 1:CN
6) Save your foreign key.
Create foreign key ZEMPLOYxx-Currency as follows:
1) Place the cursor on field ZEMPLOYxx-Currency. Press Foreign key or choose Goto à Foreign key.
2) Since you are using domain S_CURR for field ZEMPLOYxx-Currency, you can use value table SCURX for the foreign key definition.
3) Have the system make a proposal for the foreign key definition. Check the proposal. The following fields must be assigned:
Check table ChkTablFld For. key table For. key fld
SCURX CURRKEY ZEMPLOYxx Currency
4) Enter a short text and define the semantic attributes as follows:
• Type of foreign key fields: non-key-fields/candidates
• Cardinality: 1:CN
5) Save your foreign key.
Create foreign key ZDEPMENTxx-Client as follows:
See foreign key ZEMPLOYxx-Client.
Create foreign key ZDEPMENTxx-Carrier as follows:
See foreign key ZEMPLOYxx-Carrier.
In the maintenance screen for table ZEMPLOYxx choose Utilities à Table contents à Create entries.
Enter data and check whether your foreign key functions correctly using the F4 help.
4-3 Create a new field Agency in your table ZEMPLOYxx as follows:
1) Navigate to the field maintenance screen for table ZEMPLOYxx. Insert a new field Agency in the field list (press New rows). In the maintenance screen for table STRAVELAG you can see that the suitable data element is called S_AGNCYNUM. Assign this data element to your new field ZEMPLOYxx-Agency.
2) Position the cursor on the field Agency and have the system make a proposal for the foreign key definition.
3) Check the proposal. The check table is SBUSPART. This check table is not correct since it contains all the business partners of carriers and not only agencies.
4) The correct check table is STRAVELAG. It contains the agencies the carriers work with.
5) You can improve understanding by looking at the definition of table STRAVELAG in a second session. Field AGENCYNUM has a foreign key with check table SBUSPART. This means that table STRAVELAG is a subset of table SBUSPART. In the foreign key definition for ZEMPLOYxx-Agency, overwrite entry SBUSBART in the input field Check table with STRAVELAG.
6) Press Copy. The system recognizes the change in the check table and suggests that it create a proposal. Accept this offer and check the proposal. The following fields must be assigned:
Check table ChkTablFld For. key table For. key fld
STRAVELAG MANDT ZEMPLOYxx Client
STRAVELAG AGENCYNUM ZEMPLOYxx Agency
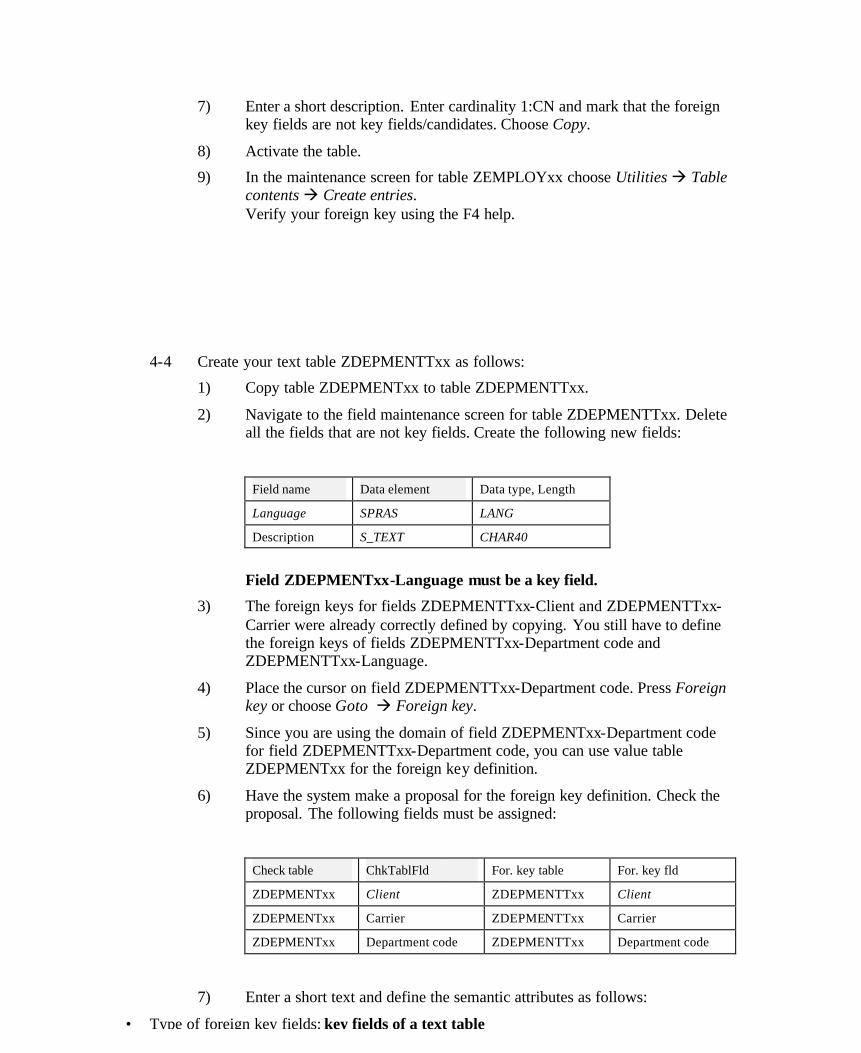
7) Enter a short description. Enter cardinality 1:CN and mark that the foreign key fields are not key fields/candidates. Choose Copy.
8) Activate the table.
9) In the maintenance screen for table ZEMPLOYxx choose Utilities à Table contents à Create entries. Verify your foreign key using the F4 help.
4-4 Create your text table ZDEPMENTTxx as follows:
1) Copy table ZDEPMENTxx to table ZDEPMENTTxx.
2) Navigate to the field maintenance screen for table ZDEPMENTTxx. Delete all the fields that are not key fields. Create the following new fields:
Field name Data element Data type, Length
Language SPRAS LANG
Description S_TEXT CHAR40
Field ZDEPMENTxx-Language must be a key field.
3) The foreign keys for fields ZDEPMENTTxx-Client and ZDEPMENTTxx-Carrier were already correctly defined by copying. You still have to define the foreign keys of fields ZDEPMENTTxx-Department code and ZDEPMENTTxx-Language.
4) Place the cursor on field ZDEPMENTTxx-Department code. Press Foreign key or choose Goto à Foreign key.
5) Since you are using the domain of field ZDEPMENTxx-Department code for field ZDEPMENTTxx-Department code, you can use value table ZDEPMENTxx for the foreign key definition.
6) Have the system make a proposal for the foreign key definition. Check the proposal. The following fields must be assigned:
Check table ChkTablFld For. key table For. key fld
ZDEPMENTxx Client ZDEPMENTTxx Client
ZDEPMENTxx Carrier ZDEPMENTTxx Carrier
ZDEPMENTxx Department code ZDEPMENTTxx Department code
7) Enter a short text and define the semantic attributes as follows:
• Type of foreign key fields: key fields of a text table
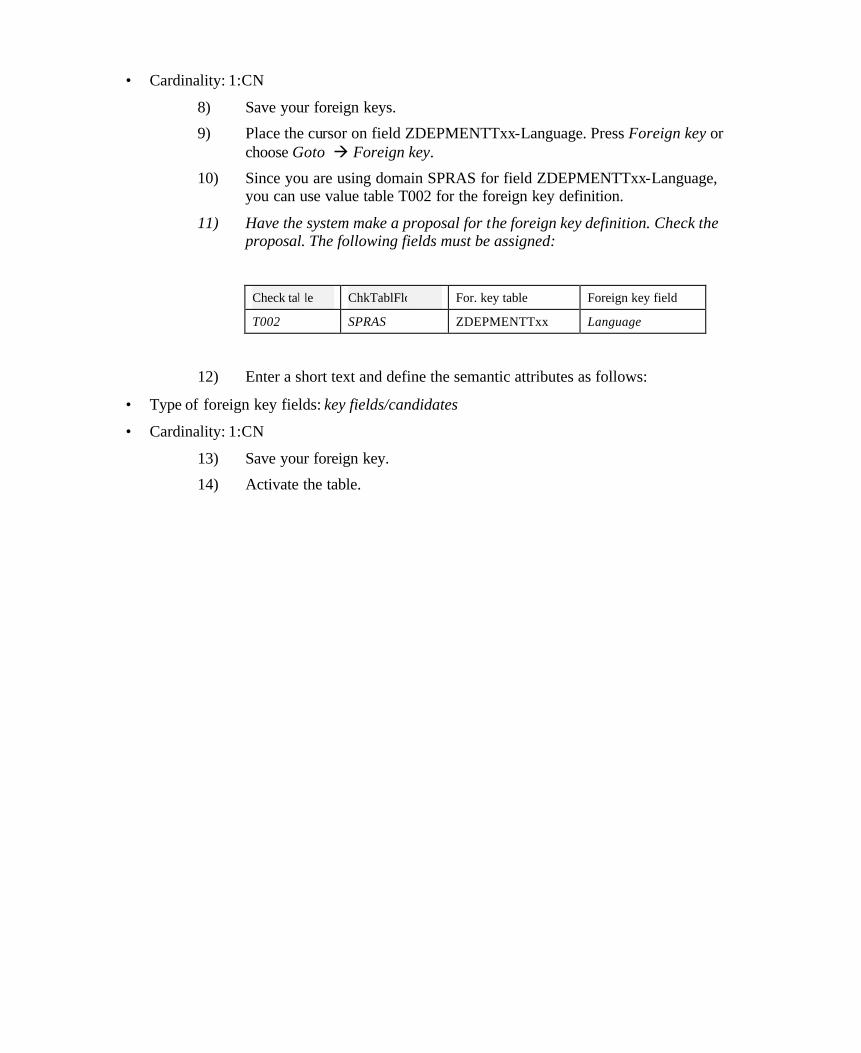
• Cardinality: 1:CN
8) Save your foreign keys.
9) Place the cursor on field ZDEPMENTTxx-Language. Press Foreign key or choose Goto à Foreign key.
10) Since you are using domain SPRAS for field ZDEPMENTTxx-Language, you can use value table T002 for the foreign key definition.
11) Have the system make a proposal for the foreign key definition. Check the proposal. The following fields must be assigned:
Check table ChkTablFld For. key table Foreign key field
T002 SPRAS ZDEPMENTTxx Language
12) Enter a short text and define the semantic attributes as follows:
• Type of foreign key fields: key fields/candidates
• Cardinality: 1:CN
13) Save your foreign key.
14) Activate the table.
SAP AG 1999
l Activation of ABAP Dictionary objects
l Handling of dependent objects
l Where-used list and R/3 Repository InformationSystem as seen by the ABAP Dictionary
Dependencies of ABAP Dictionary Objects

n During development, you sometimes need to change an (active) object already used by the system. Such changes are supported in the ABAP Dictionary by separating the active and inactive versions.
n The active version of an ABAP Dictionary object is the version that the components of the runtime environment (for example ABAP processor, database interface) access. This version is not initially changed.
n An inactive version is created when an active object is changed. The inactive version can be saved without checking. It has no effect on the runtime system.
n At the end of the development process, the inactive version can be made the active version. This is done by activation. The inactive version of the object is first checked for consistency. If it is consistent, the inactive version replaces the active one. From now on, the runtime system uses the new active version.
n The above example shows how the object status changes. An active structure contains three fields. A field is added to this structure in the ABAP Dictionary. After this action, there is an active version with three fields and an inactive version with four fields. During activation, the active version is overwritten with the inactive version. The inactive version thus becomes the active version. After this action there is only the active version with four fields.
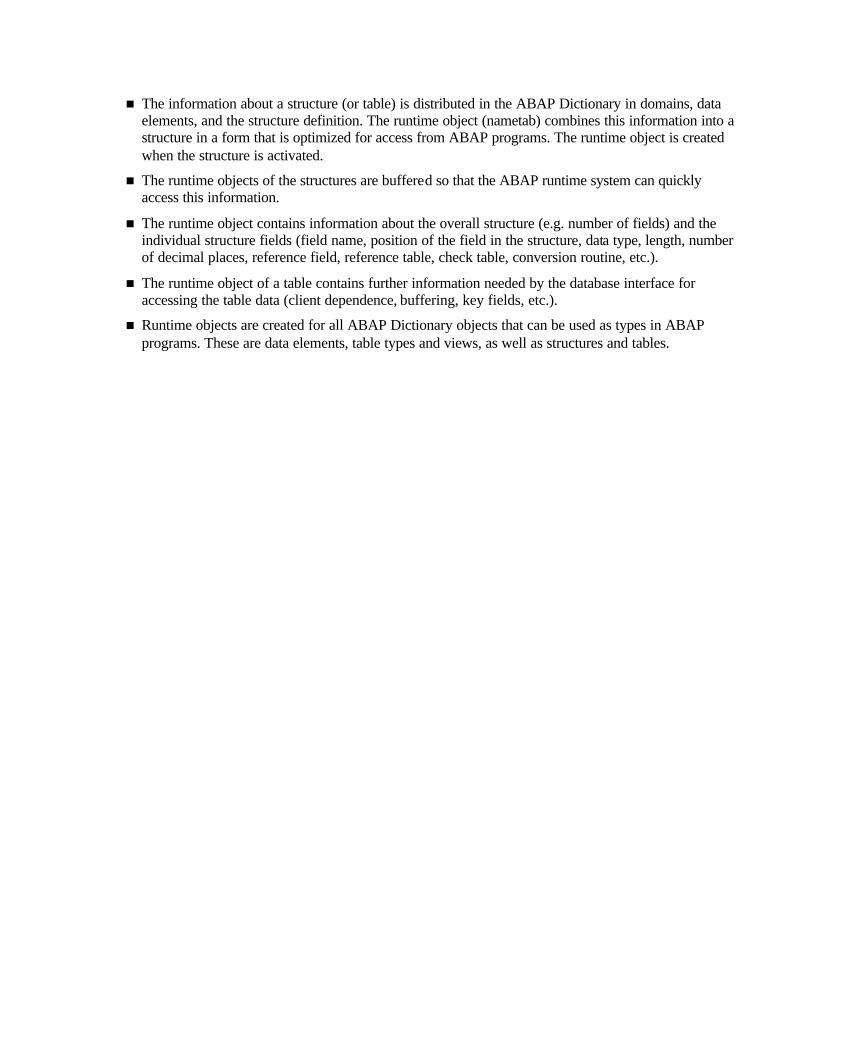
n The information about a structure (or table) is distributed in the ABAP Dictionary in domains, data elements, and the structure definition. The runtime object (nametab) combines this information into a structure in a form that is optimized for access from ABAP programs. The runtime object is created when the structure is activated.
n The runtime objects of the structures are buffered so that the ABAP runtime system can quickly access this information.
n The runtime object contains information about the overall structure (e.g. number of fields) and the individual structure fields (field name, position of the field in the structure, data type, length, number of decimal places, reference field, reference table, check table, conversion routine, etc.).
n The runtime object of a table contains further information needed by the database interface for accessing the table data (client dependence, buffering, key fields, etc.).
n Runtime objects are created for all ABAP Dictionary objects that can be used as types in ABAP programs. These are data elements, table types and views, as well as structures and tables.
n If an object that is already active is modified, this can affect other objects that use it (directly or indirectly). These objects using another object are called dependent objects. On the one hand, it might be necessary to adjust the runtime objects of these dependent objects to the changes. On the other hand, a change might sometimes make a dependent object inconsistent.
n For this reason, the dependent objects are determined and activated (if necessary) when an active object is activated. The active versions of the dependent objects are activated again. In particular, new and inactive versions of objects using the changed object are not changed.
n Example: When you change a domain, for example its data type, all the data elements, structures and tables referring to this domain must be activated again. This activation is automatically triggered when the domain is activated. This ensures that all affected runtime objects are adjusted to the changed type information.
n If an ABAP Dictionary object has a table as dependent object, its database object as well as its runtime object might have to be adjusted when the dependent object is activated. The method used here will be discussed in the next unit.
n Changing an ABAP Dictionary object might also affect its dependent objects. Before making a critical change (such as changing the data type or deleting a field) you should therefore define the set of objects affected in order to estimate the implications of the planned action.
n There is a where -used list for each ABAP Dictionary object with which you can find all the objects that refer to this object. You can call the where-used list from the maintenance transaction of the object.
n You can find direct and indirect usages of an ABAP Dictionary object with the where-used list. You also have to define which usage object types should be included in the search (e.g. all structures and tables using a data element). You can also search for usages that are not ABAP Dictionary objects (e.g. all programs using a table). The search can also be limited by development class or user namespace.
n If an object is probably used by several objects, you should perform the search in the background.
n The Repository Information System ABAP Dictionary is part of the general Repository Information System. It helps you search for ABAP Dictionary objects and their users.
n The where-used list for Repository objects can be called from the information system. The information system also enables you to search for objects by their attributes.
n In addition to the object-specific search criteria (e.g. buffering type for tables), you can search for all objects by development class, short description or author and date of last change.
n The object lists created by the Repository Information System are entirely integrated in the ABAP Workbench. They permit you to navigate directly to the maintenance transactions of the objects found.

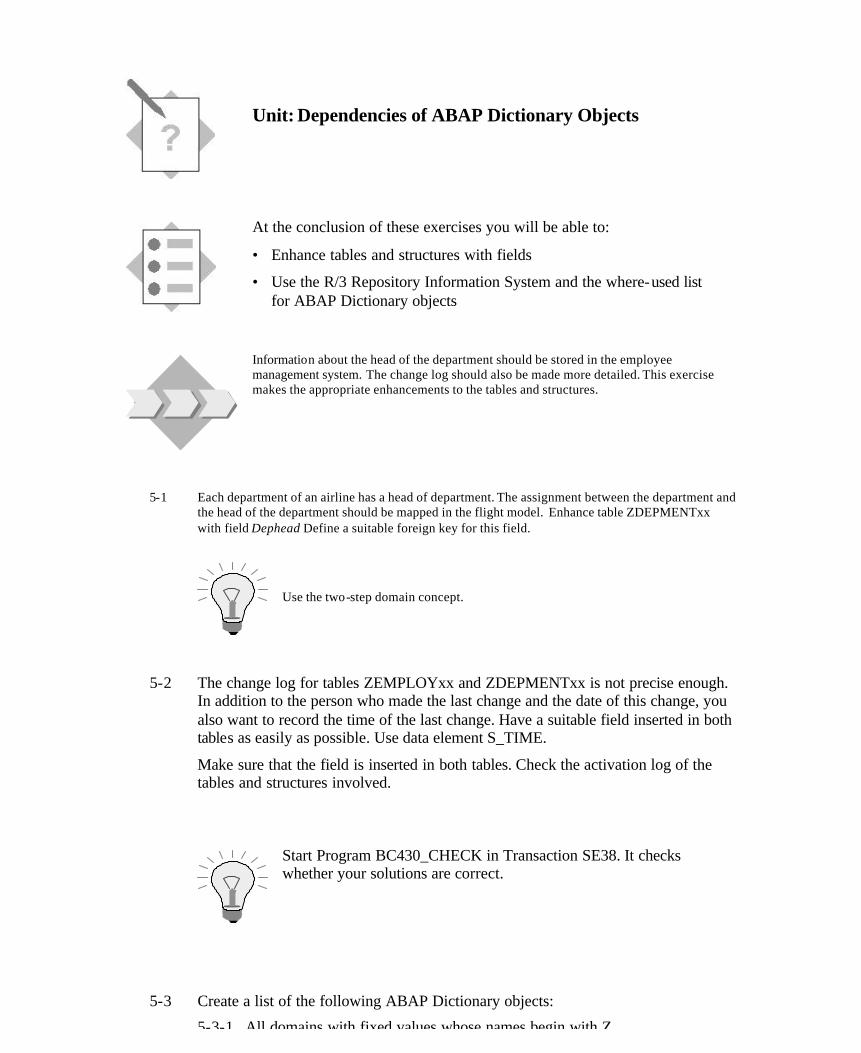
Unit: Dependencies of ABAP Dictionary Objects
At the conclusion of these exercises you will be able to:
• Enhance tables and structures with fields
• Use the R/3 Repository Information System and the where-used list for ABAP Dictionary objects
Information about the head of the department should be stored in the employee management system. The change log should also be made more detailed. This exercise makes the appropriate enhancements to the tables and structures.
5-1 Each department of an airline has a head of department. The assignment between the department and the head of the department should be mapped in the flight model. Enhance table ZDEPMENTxx with field Dephead Define a suitable foreign key for this field.
Use the two-step domain concept.
5-2 The change log for tables ZEMPLOYxx and ZDEPMENTxx is not precise enough. In addition to the person who made the last change and the date of this change, you also want to record the time of the last change. Have a suitable field inserted in both tables as easily as possible. Use data element S_TIME.
Make sure that the field is inserted in both tables. Check the activation log of the tables and structures involved.
Start Program BC430_CHECK in Transaction SE38. It checks whether your solutions are correct.
5-3 Create a list of the following ABAP Dictionary objects:
5-3-1 All domains with fixed values whose names begin with Z.

5-3-2 All table fields that use data element S_FNAME.
5-3-3 All tables of the flight model (development class BC_DATAMODEL) that have delivery class A.
5-4 Determine all the programs that use table SFLIGHT.
5-5 What are the data elements created by your neighbors called?
Unit: Dependencies of ABAP Dictionary Objects
5-1 In our model, people are identified by their personnel number. Therefore the new field to be added to table ZDEPMENTxx must contain personnel numbers (and not names). The field should therefore refer to the domain for personnel numbers that you created in the first exercise. Since the person to be managed in this case has a special role, you should create a new data element and not use the one already created for the personne l number. You can either first create the data element and then maintain the table, or create the data element from the table maintenance screen with forward navigation. The second way is described below:
1) Go to change mode in the maintenance screen for table ZDEPMENTxx. Click on tab page Fields.
2) Choose New rows.
3) Enter the new field directly following the existing fields by entering a suitable field name in the first column and entering a name for the data element to be created in column Field type.
4) Save the table definition.
5) Double click on the name of the new data element to be created. Confirm that you want to create a data element.
6) Enter a short text for the data element. Enter the domain name that you already created for the personnel number in field Domain.
7) Click on tab page Field label and enter the corresponding text there.
8) Activate the data element. Go back to the maintenance screen for table ZDEPMENTxx by choosing Back.
9) Create the foreign key for the new field in the usual manner. The check table is table ZEMPLOYxx. If you stored this table as a value table for the domain for the personnel number, the system will make this proposal. If not you have to enter it yourself. You can copy the system proposal in the field allocation of the foreign key. The cardinality is 1:CN and the foreign key fields are not foreign key fields/candidates.
10) Activate the table.
5-2 The fields for the change log can be found in the include structure ZCHANGExx. The new field should therefore be inserted in this structure. The field is automatically inserted in tables ZEMPLOYxx and ZDEPMENTxx using the include mechanism. Proceed as follows:
1) In the initial screen of the ABAP Dictionary, select Data type and enter ZCHANGExx in the corresponding field. Choose Change.
2) Click on tab page Components. Enter the name for the new field in the first free row of the component list and enter S_TIME in column Component type.
3) Activate the structure.
4) With Utilities → Activation log you can find the activation log of the structure. You can see here that tables ZEMPLOYxx and ZDEPMENTxx are activated as dependent objects and were enhanced with the new field.
5) Go to display mode in the maintenance screen for table ZEMPLOYxx (or ZDEPMENTxx). Choose Utilities → Table contents → Create entries. You can see here that the table was really enhanced with the corresponding field.
5-3 All the exercises can be solved with the Repository Information System. You can do this from the initial screen of the ABAP Dictionary with Environment → Repository Information System. Expand the nodes for the ABAP Dictionary.
1) Expand the node Basic objects. Double-click on Domains. In the selection screen, enter Z* in the first field. Choose All selections. In the enhanced selection screen, mark Only domains with fixed values. You can create the desired list with Execute.
2) Choose Back twice to return to the initial screen of the Repository Information System. Expand the Fields node. Double-click on Table fields. Choose All selections and enter S_FNAME in field Data element. You can create the desired list with Execute.
3) Choose Back twice to return to the initial screen of the Repository Information System. Node Basic objects is still expanded. Double-click on Database tables. Enter development class BC_DATAMODEL and (after choosing All selections) delivery class A in the selection screen. You can create the desired list with Execute.
5-4 Go to the initial screen of the ABAP Dictionary. Choose Database table and enter SFLIGHT in the corresponding field. Choose Where-used list. The usage in programs is already marked (alone) in the next dialog box. You can create the desired list with Execute.
5-5 You can create the desired list again in the Repository Information System ABAP Dictionary. Expand the node Basic objects and double-click on Data elements. You can define your neighbor's data elements with either a pattern search for the name (if your neighbors adhered to the given naming convention) or with Last changed by (after choosing All selections). If you have two groups of neighbors, you have to use Multiple selection. You can restrict the selection with the date of the last change (the last change should be no earlier than the beginning of the course) at least in the first case (naming convention).
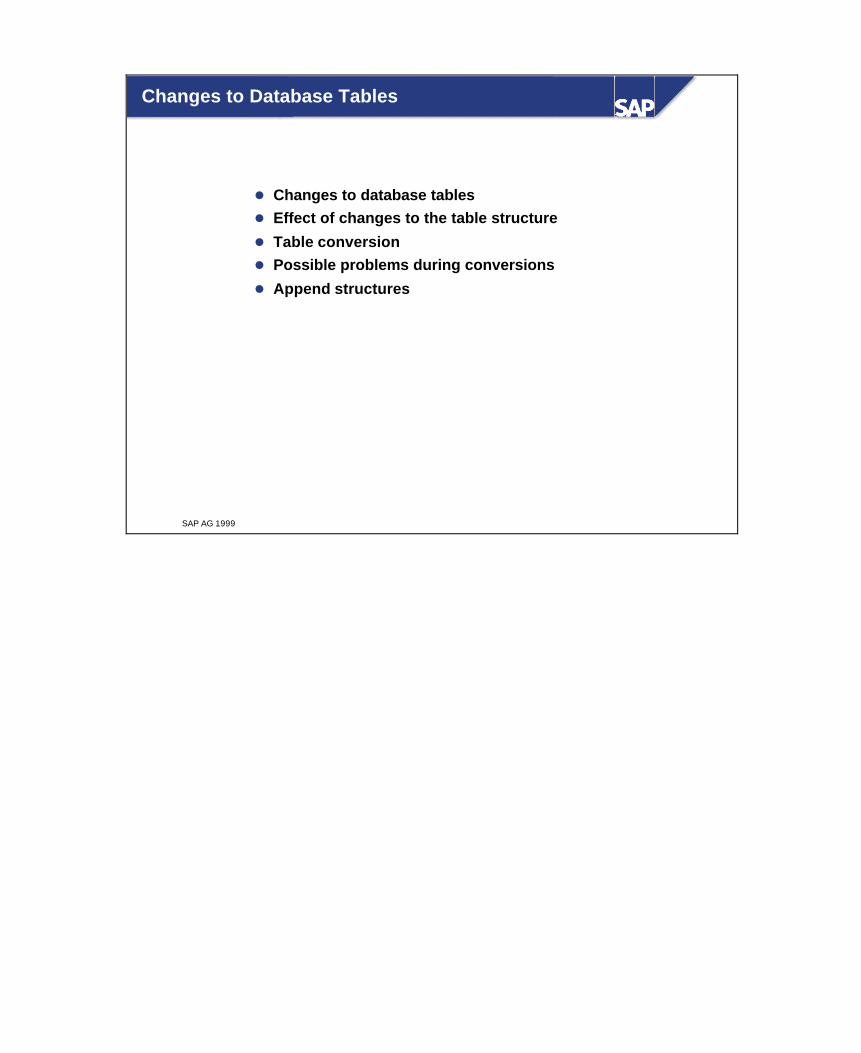
SAP AG 1999
l Changes to database tablesl Effect of changes to the table structure
l Table conversionl Possible problems during conversions
l Append structures
Changes to Database Tables
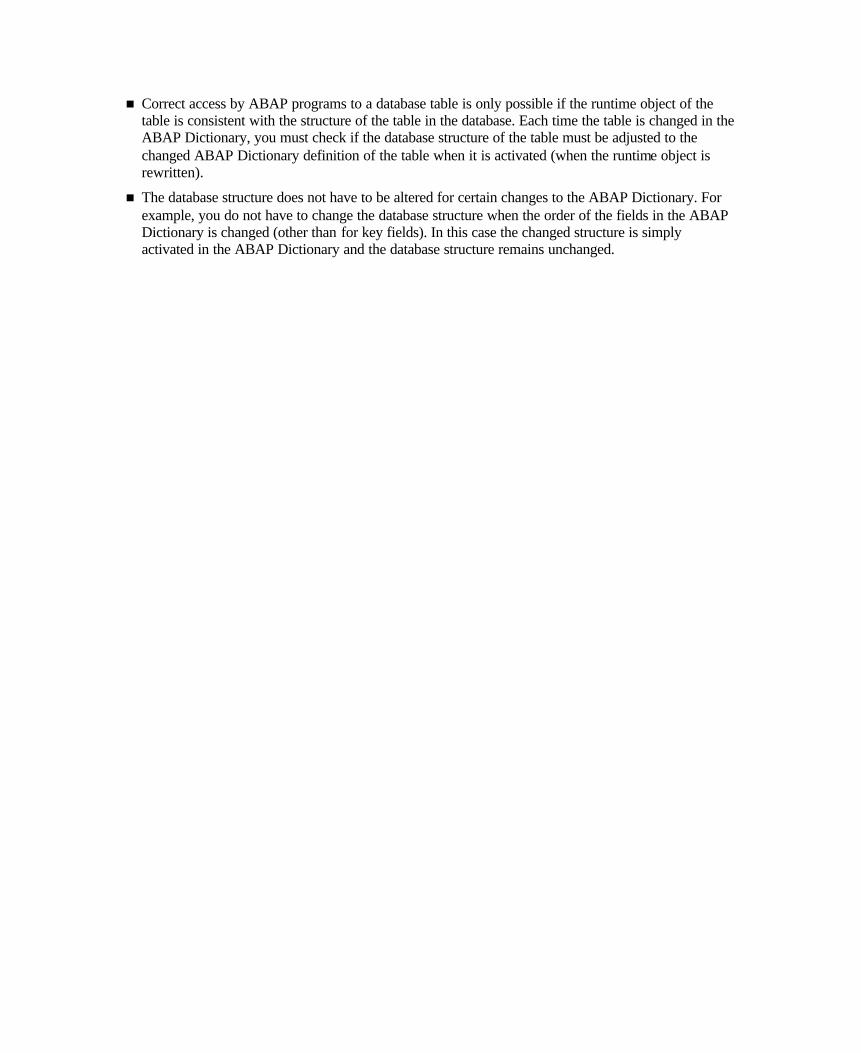
n Correct access by ABAP programs to a database table is only possible if the runtime object of the table is consistent with the structure of the table in the database. Each time the table is changed in the ABAP Dictionary, you must check if the database structure of the table must be adjusted to the changed ABAP Dictionary definition of the table when it is activated (when the runtime object is rewritten).
n The database structure does not have to be altered for certain changes to the ABAP Dictionary. For example, you do not have to change the database structure when the order of the fields in the ABAP Dictionary is changed (other than for key fields). In this case the changed structure is simply activated in the ABAP Dictionary and the database structure remains unchanged.
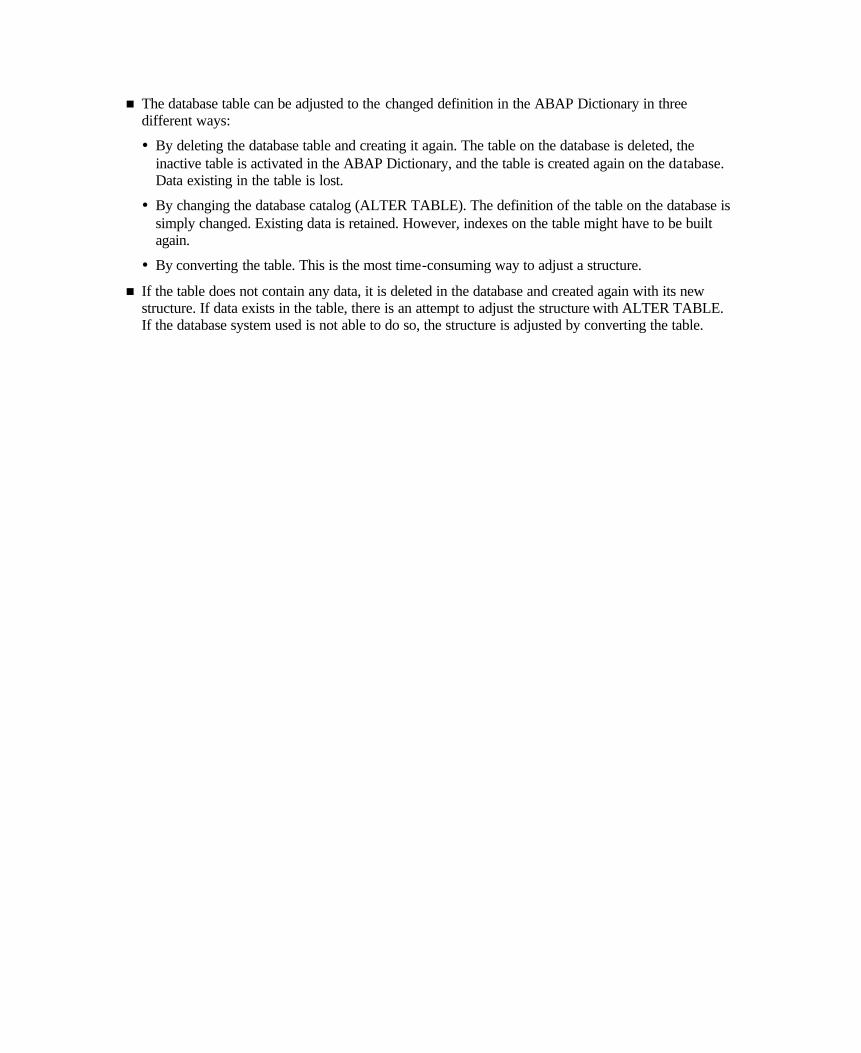
n The database table can be adjusted to the changed definition in the ABAP Dictionary in three different ways:
� By deleting the database table and creating it again. The table on the database is deleted, the inactive table is activated in the ABAP Dictionary, and the table is created again on the database. Data existing in the table is lost.
� By changing the database catalog (ALTER TABLE). The definition of the table on the database is simply changed. Existing data is retained. However, indexes on the table might have to be built again.
� By converting the table. This is the most time-consuming way to adjust a structure.
n If the table does not contain any data, it is deleted in the database and created again with its new structure. If data exists in the table, there is an attempt to adjust the structure with ALTER TABLE. If the database system used is not able to do so, the structure is adjusted by converting the table.

n The following example shows the steps necessary during conversion.
n Starting situation: Table TAB was changed in the ABAP Dictionary. The length of field 3 was reduced from 60 to 30 places.
n The ABAP Dictionary therefore has an active (field 3 has a length of 60 places) and an inactive (field 3 still has 30 places) version of the table.
n The active version of the table was created in the database, which means that field 3 currently has 60 places in the database. A secondary index with the ID A11, which was also created in the database, is defined for the table in the ABAP Dictionary.
n The table already contains data.

n Step 1: The table is locked against further structure changes. If the conversion terminates due to an error, the table remains locked. This lock mechanism prevents further structure changes from being made before the conversion has been completed correctly. Data could be lost in such a case.
n Step 2: The table in the database is renamed. All the indexes on the table are deleted. The name of the new (temporary) table is defined by the prefix QCM and the table name. The name of the temporary table for table TAB is therefore QCMTAB.
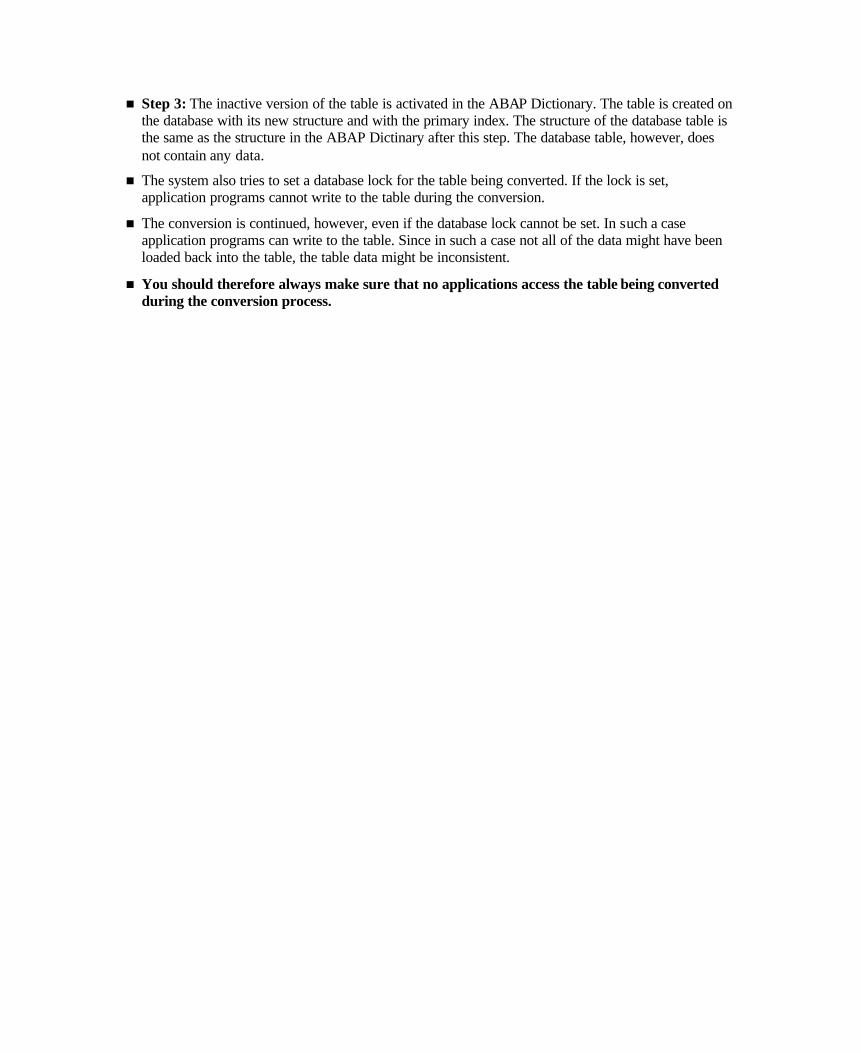
n Step 3: The inactive version of the table is activated in the ABAP Dictionary. The table is created on the database with its new structure and with the primary index. The structure of the database table is the same as the structure in the ABAP Dictinary after this step. The database table, however, does not contain any data.
n The system also tries to set a database lock for the table being converted. If the lock is set, application programs cannot write to the table during the conversion.
n The conversion is continued, however, even if the database lock cannot be set. In such a case application programs can write to the table. Since in such a case not all of the data might have been loaded back into the table, the table data might be inconsistent.
n You should therefore always make sure that no applications access the table being converted during the conversion process.

n Step 4: The data is loaded back from the temporary table (QCM table) to the new table (with MOVE-CORRESPONDING). The data exists in the database table and in the temporary table after this step. When you reduce the size of fields, for example, the extra places are truncated when you reload the data.
n Since the data exists in both the original table and temporary table during the conversion, the storage requirements increase during the process. You should therefore verify that sufficient space is available in the corresponding tablespace before converting large tables.
n There is a database commit after 16 MB when you copy the data from the QCM table to the original table. A conversion process therefore needs 16 MB resources in the rollback segment. The existing database lock is released with the Commit and then requested again before the next data area to be converted is edited.
n When you reduce the size of keys, only one record can be reloaded if there are several records whose key cannot be distinguished. It is not possible to say which record this will be. In such a case you should clean up the data of the table before converting.
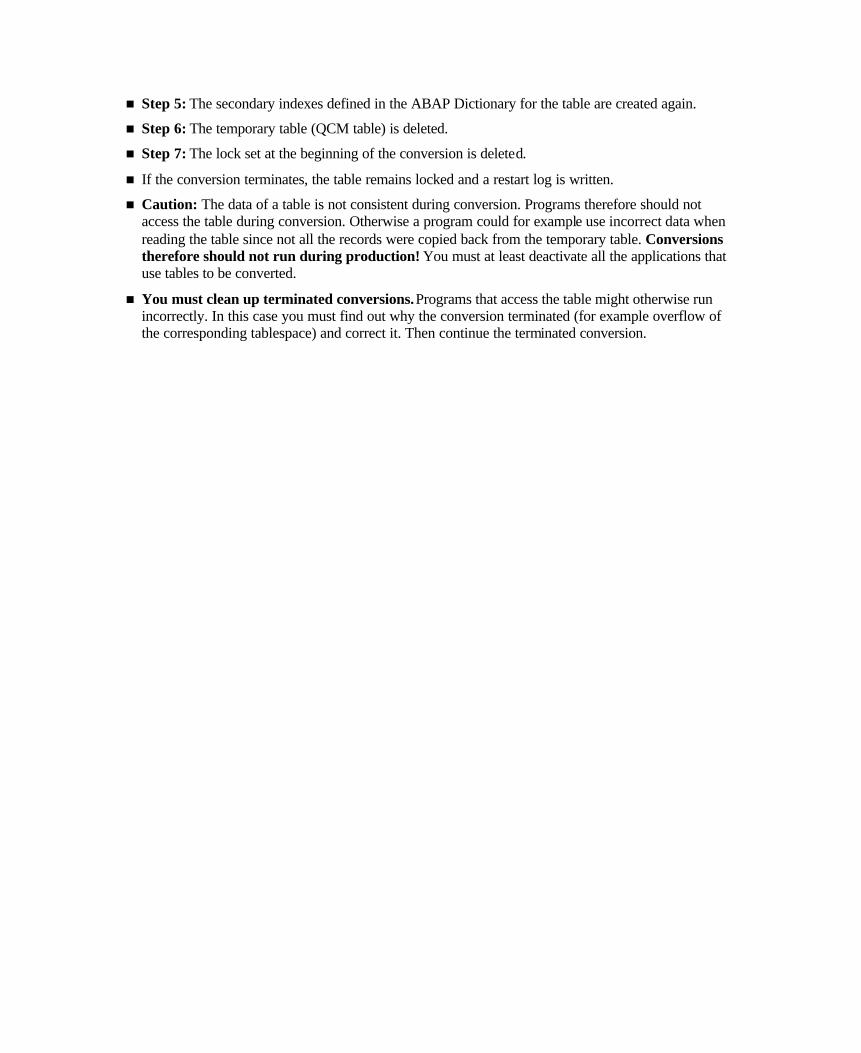
n Step 5: The secondary indexes defined in the ABAP Dictionary for the table are created again.
n Step 6: The temporary table (QCM table) is deleted.
n Step 7: The lock set at the beginning of the conversion is deleted.
n If the conversion terminates, the table remains locked and a restart log is written.
n Caution: The data of a table is not consistent during conversion. Programs therefore should not access the table during conversion. Otherwise a program could for example use incorrect data when reading the table since not all the records were copied back from the temporary table. Conversions therefore should not run during production! You must at least deactivate all the applications that use tables to be converted.
n You must clean up terminated conversions. Programs that access the table might otherwise run incorrectly. In this case you must find out why the conversion terminated (for example overflow of the corresponding tablespace) and correct it. Then continue the terminated conversion.
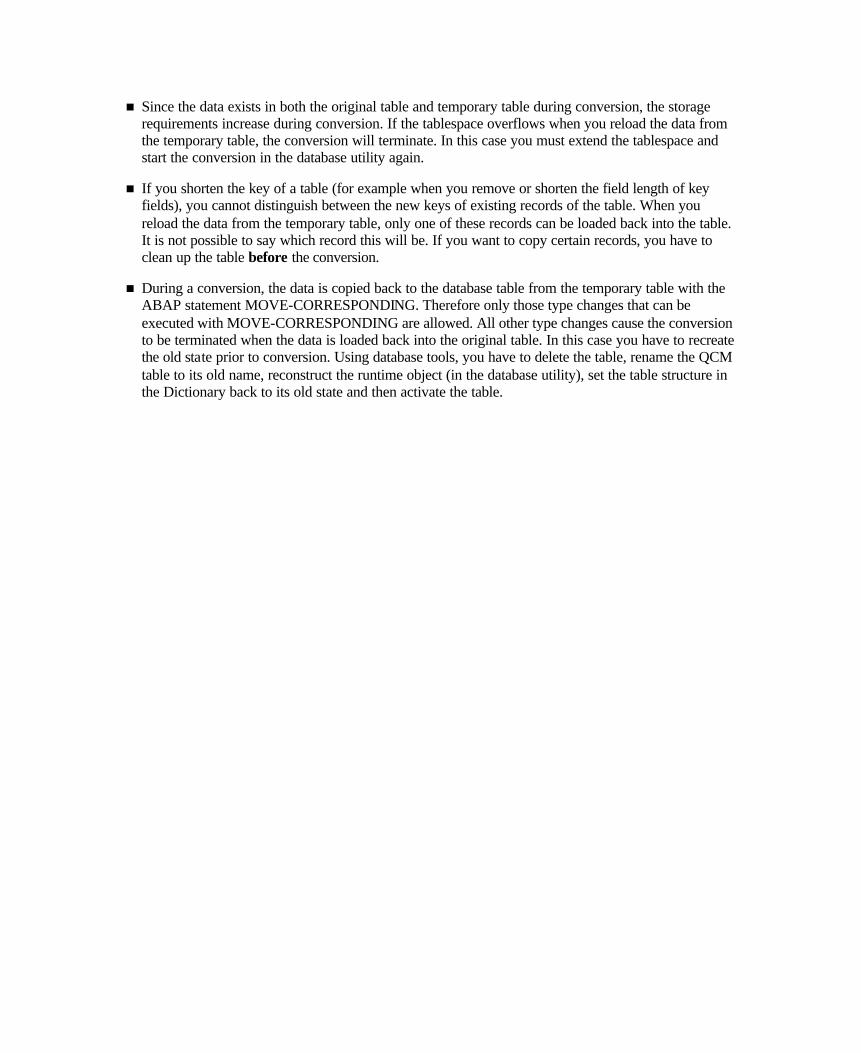
n Since the data exists in both the original table and temporary table during conversion, the storage requirements increase during conversion. If the tablespace overflows when you reload the data from the temporary table, the conversion will terminate. In this case you must extend the tablespace and start the conversion in the database utility again.
n If you shorten the key of a table (for example when you remove or shorten the field length of key fields), you cannot distinguish between the new keys of existing records of the table. When you reload the data from the temporary table, only one of these records can be loaded back into the table. It is not possible to say which record this will be. If you want to copy certain records, you have to clean up the table before the conversion.
n During a conversion, the data is copied back to the database table from the temporary table with the ABAP statement MOVE-CORRESPONDING. Therefore only those type changes that can be executed with MOVE-CORRESPONDING are allowed. All other type changes cause the conversion to be terminated when the data is loaded back into the original table. In this case you have to recreate the old state prior to conversion. Using database tools, you have to delete the table, rename the QCM table to its old name, reconstruct the runtime object (in the database utility), set the table structure in the Dictionary back to its old state and then activate the table.
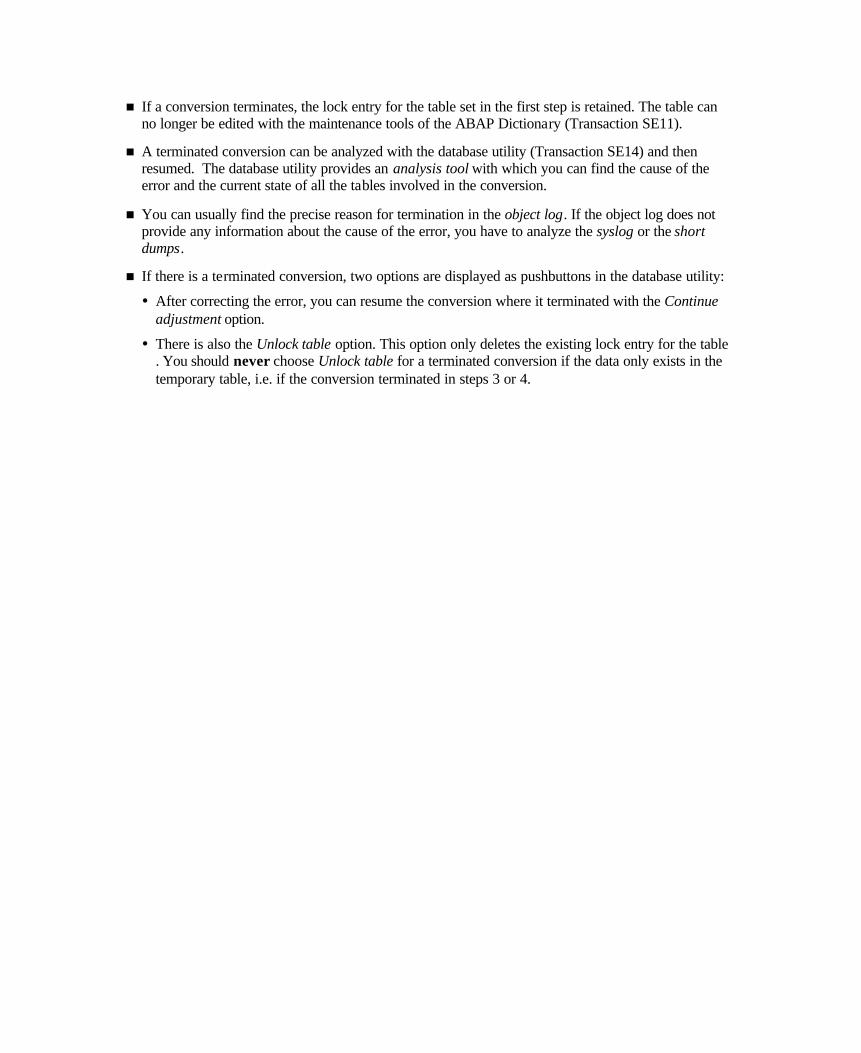
n If a conversion terminates, the lock entry for the table set in the first step is retained. The table can no longer be edited with the maintenance tools of the ABAP Dictionary (Transaction SE11).
n A terminated conversion can be analyzed with the database utility (Transaction SE14) and then resumed. The database utility provides an analysis tool with which you can find the cause of the error and the current state of all the tables involved in the conversion.
n You can usually find the precise reason for termination in the object log. If the object log does not provide any information about the cause of the error, you have to analyze the syslog or the short dumps.
n If there is a terminated conversion, two options are displayed as pushbuttons in the database utility:
� After correcting the error, you can resume the conversion where it terminated with the Continue adjustment option.
� There is also the Unlock table option. This option only deletes the existing lock entry for the table . You should never choose Unlock table for a terminated conversion if the data only exists in the temporary table, i.e. if the conversion terminated in steps 3 or 4.
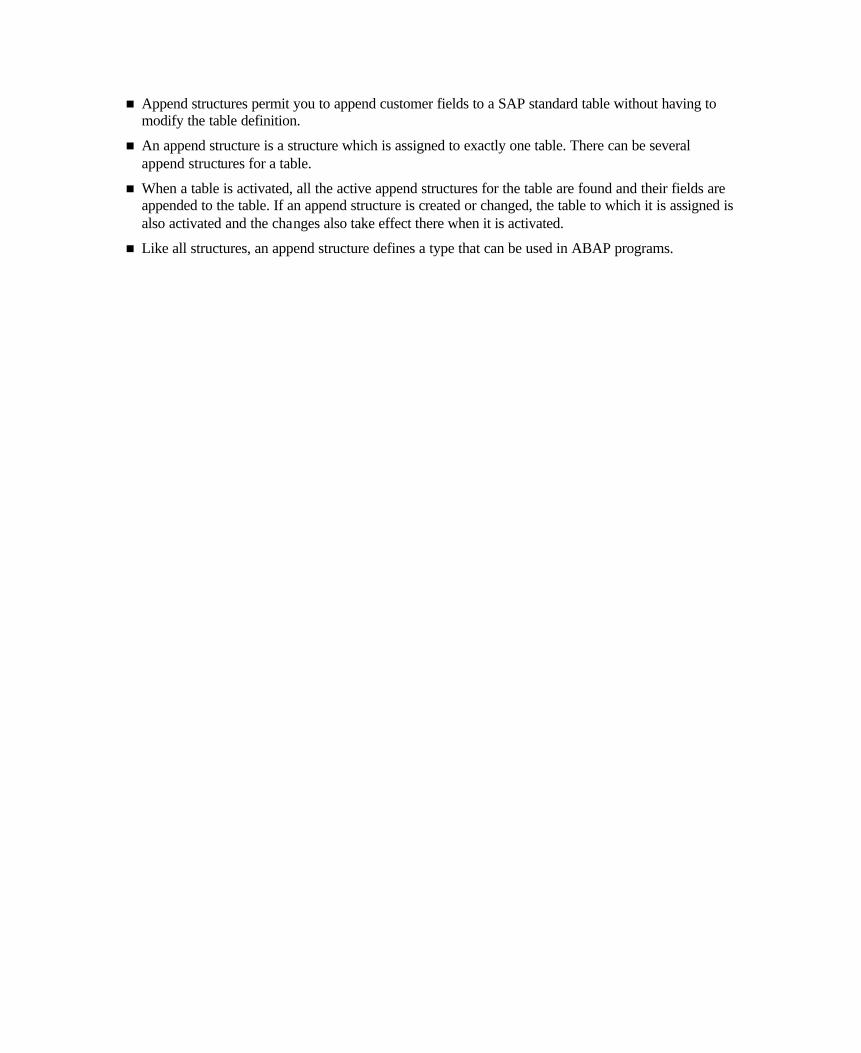
n Append structures permit you to append customer fields to a SAP standard table without having to modify the table definition.
n An append structure is a structure which is assigned to exactly one table. There can be several append structures for a table.
n When a table is activated, all the active append structures for the table are found and their fields are appended to the table. If an append structure is created or changed, the table to which it is assigned is also activated and the changes also take effect there when it is activated.
n Like all structures, an append structure defines a type that can be used in ABAP programs.
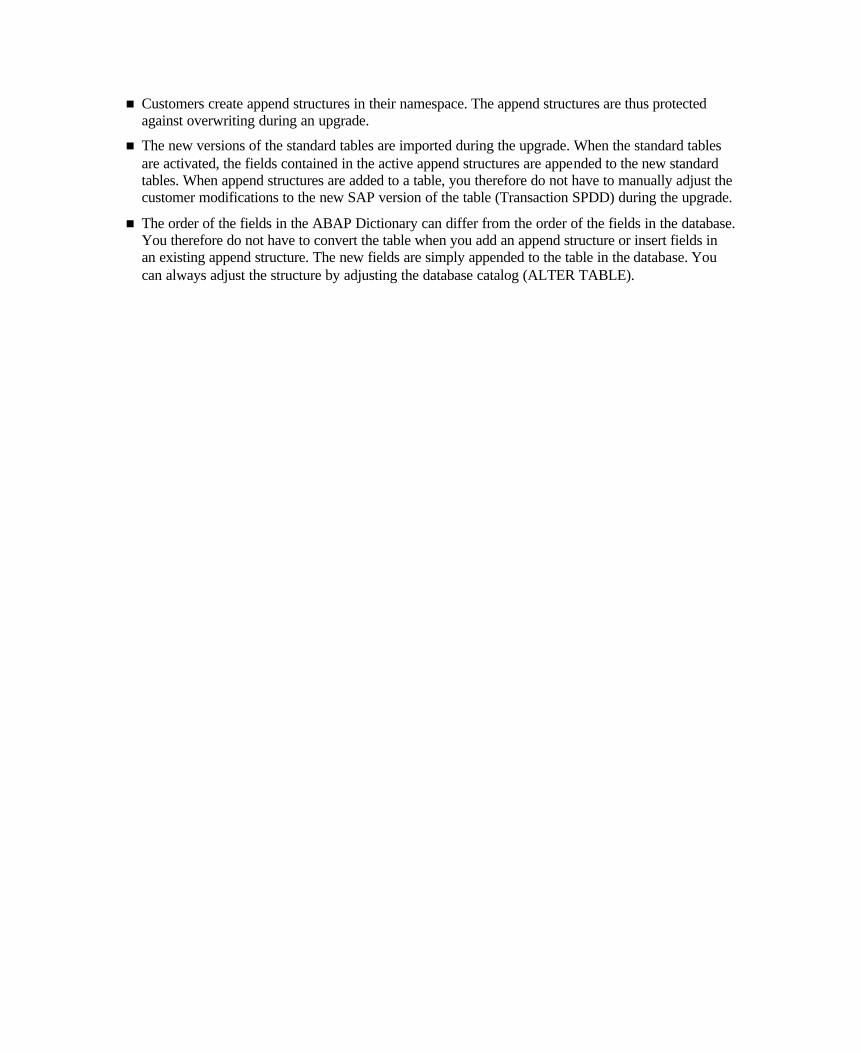
n Customers create append structures in their namespace. The append structures are thus protected against overwriting during an upgrade.
n The new versions of the standard tables are imported during the upgrade. When the standard tables are activated, the fields contained in the active append structures are appended to the new standard tables. When append structures are added to a table, you therefore do not have to manually adjust the customer modifications to the new SAP version of the table (Transaction SPDD) during the upgrade.
n The order of the fields in the ABAP Dictionary can differ from the order of the fields in the database. You therefore do not have to convert the table when you add an append structure or insert fields in an existing append structure. The new fields are simply appended to the table in the database. You can always adjust the structure by adjusting the database catalog (ALTER TABLE).
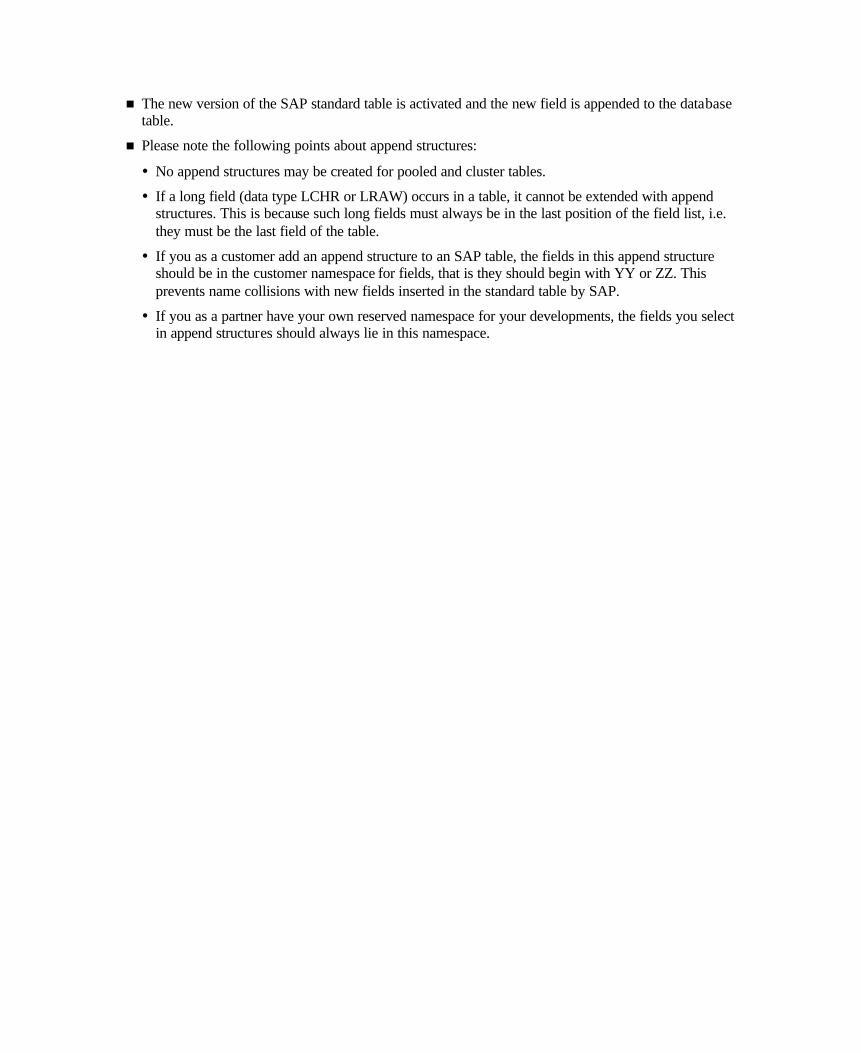
n The new version of the SAP standard table is activated and the new field is appended to the database table.
n Please note the following points about append structures:
� No append structures may be created for pooled and cluster tables.
� If a long field (data type LCHR or LRAW) occurs in a table, it cannot be extended with append structures. This is because such long fields must always be in the last position of the field list, i.e. they must be the last field of the table.
� If you as a customer add an append structure to an SAP table, the fields in this append structure should be in the customer namespace for fields, that is they should begin with YY or ZZ. This prevents name collisions with new fields inserted in the standard table by SAP.
� If you as a partner have your own reserved namespace for your developments, the fields you select in append structures should always lie in this namespace.

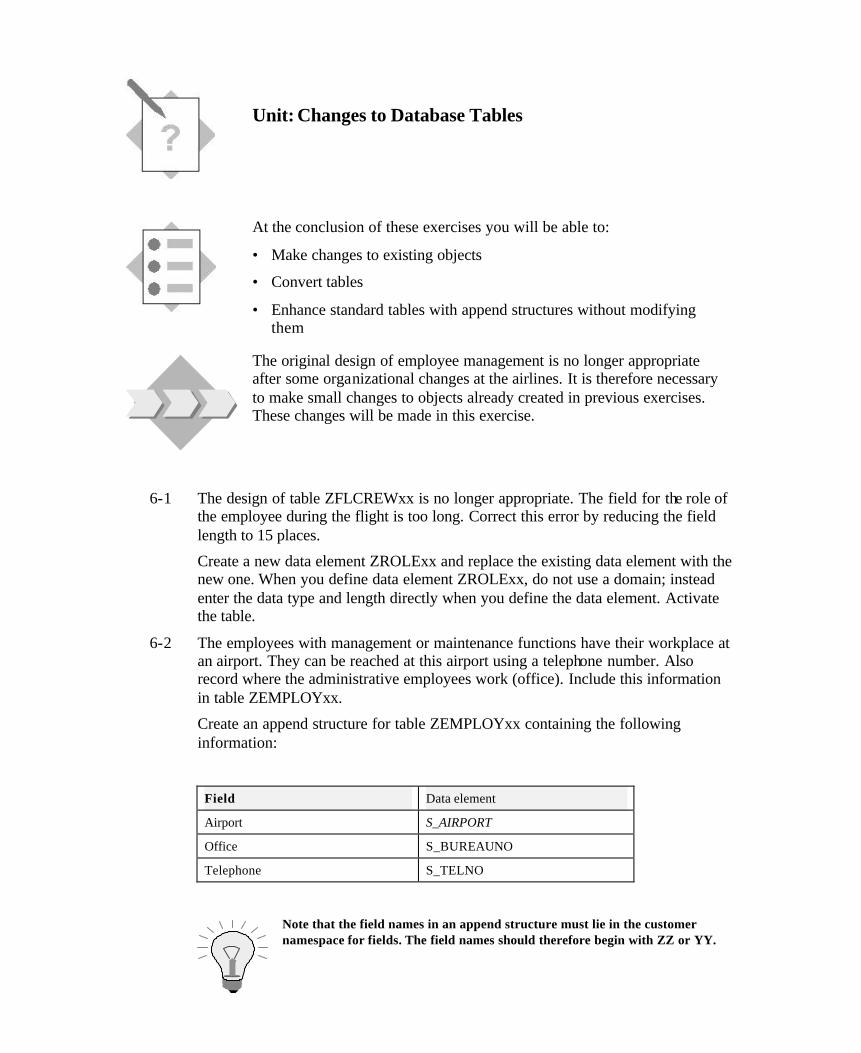
Unit: Changes to Database Tables
At the conclusion of these exercises you will be able to:
• Make changes to existing objects
• Convert tables
• Enhance standard tables with append structures without modifying them
The original design of employee management is no longer appropriate after some organizational changes at the airlines. It is therefore necessary to make small changes to objects already created in previous exercises. These changes will be made in this exercise.
6-1 The design of table ZFLCREWxx is no longer appropriate. The field for the role of the employee during the flight is too long. Correct this error by reducing the field length to 15 places.
Create a new data element ZROLExx and replace the existing data element with the new one. When you define data element ZROLExx, do not use a domain; instead enter the data type and length directly when you define the data element. Activate the table.
6-2 The employees with management or maintenance functions have their workplace at an airport. They can be reached at this airport using a telephone number. Also record where the administrative employees work (office). Include this information in table ZEMPLOYxx.
Create an append structure for table ZEMPLOYxx containing the following information:
Field Data element
Airport S_AIRPORT
Office S_BUREAUNO
Telephone S_TELNO
Note that the field names in an append structure must lie in the customer namespace for fields. The field names should therefore begin with ZZ or YY.
6-3 Create a suitable foreign key for field Airport of the append structure.
The table of all airports is called SAIRPORT.
For a complete definition of the foreign key you must also define a field of the appending table (ZEMPLOYxx).
Start Program BC430_CHECK with Transaction SE38 after this exercise. The program checks whether your solutions are correct.
Unit: Changes to Database Tables
6-1 Go to change mode in the maintenance screen for table ZFLCREWxx. Take the following steps.
1) Overwrite data element SEMP_ROLE in column Field type with the name of your data element ZROLExx. Save the change.
2) Double-click on the name ZROLExx. In the next dialog box, confirm that you want to create the data element.
3) The maintenance screen for data elements appears. Enter a short text.
4) Click on tab page Definition. Mark Built-in type. You can now enter values for fields Datatype, Length and Decplaces. Enter CHAR as data type and 15 as length.
5) On tab page Field label, maintain the text for the data element.
6) Activate the data element.
7) You go to the activation log. You are reminded that shortening the field requires a conversion of table ZFLCREWxx.
8) Go back to the table maintenance screen.
9) Navigate to the database utility with Utilities → Database utility.
10) Choose Activate and adjust database. Confirm the next security query. The system converts the table.
6-2 To define the append structure for table ZEMPLOYxx:
1) Go to display mode in the maintenance screen for table ZEMPLOYxx.
2) Choose Goto ? Append structure.
3) In the next dialog box, enter the required name for the append structure. It must satisfy the usual naming conventions. Choose Continue.
4) The maintenance screen for the append structure is displayed. Maintenance of the append structure is analogous to that for a structure.
5) Enter a short text and insert fields Airport, Office and Telephone with the specified data elements.
6) Note that all the fields of an append structure must lie in the customer namespace. The field names therefore must begin with ZZ or YY.
7) Activate the append structure. Display the activation log with Goto ? Activation log.
Table ZEMPLOYxx is automatically adjusted when the append structure is activated. The new fields are appended to the existing fields in the database.
6-3 The foreign key must be defined in the append structure maintenance routine. You can go there either by entering its name as data type in the initial screen of the

ABAP Dictionary and choosing Change or with Goto → Append structure in the maintenance screen for table ZEMPLOYxx. Take the following steps:
1) Place the cursor on field Airport. Choose the key icon. Copy the system proposal.
2) In a dialog box you are informed that the foreign key is not completely specified. Choose Continue.
The foreign key cannot be fully specified in the append structure since the key of check table SAIRPORT contains the client field and the field for the airport code, but the append structure does not contain the client field.
3) The maintenance screen for the foreign key appears. The check table and the field assignment are already filled due to the system proposal. Enter a suitable Short description.
4) You now have to complete the field assignment. Remove the marking for generic mapping. Then enter ZEMPLOYxx in column For. key table and the name of the client field of this table in column For. key field.
5) Choose Non-key-fields/candidates as the type of foreign key fields (since the Airport field is not a key field of table ZEMPLOYxx) and as cardinality C (since not every employee is assigned to an airport) to CN (since several employees can be assigned to the same airport).
6) Choose Copy and activate the append structure.
SAP AG 1999
l Why do you need views?l Creating a view by join, projection and selection
l Join conditions and foreign keysl Selection of data with views
l Database views
l Maintenance viewsl Inner and outer joins
Views
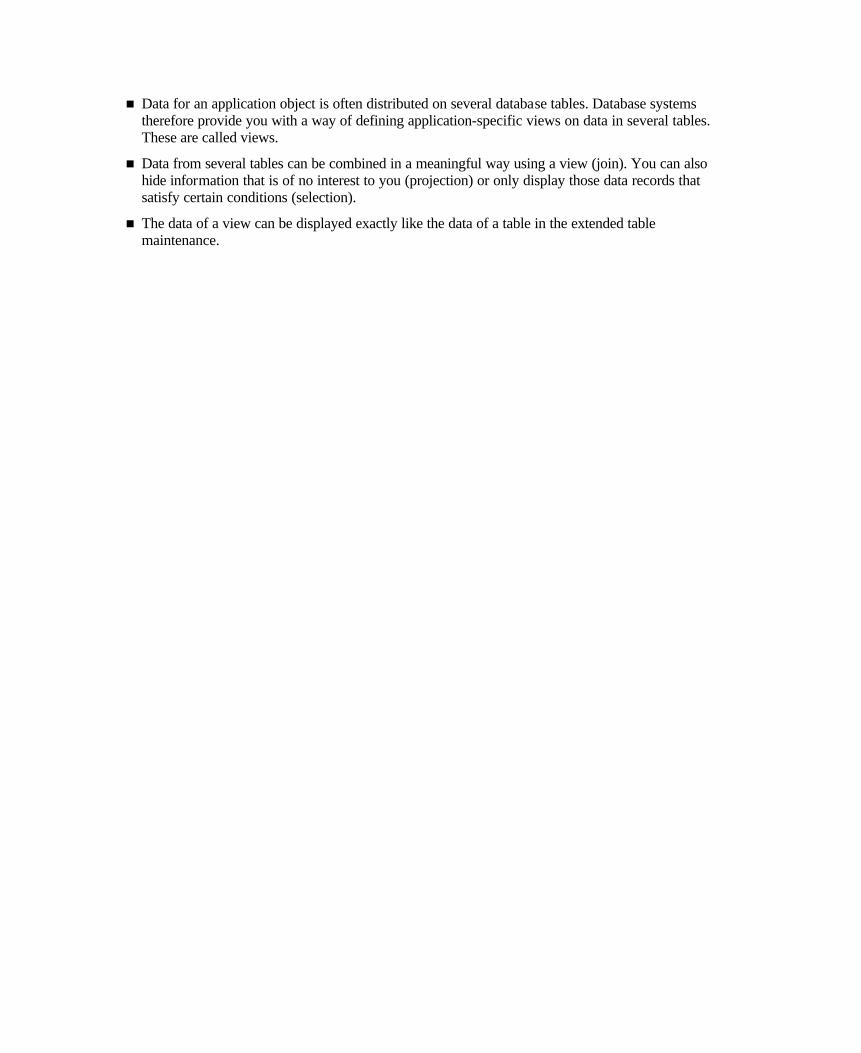
n Data for an application object is often distributed on several database tables. Database systems therefore provide you with a way of defining application-specific views on data in several tables. These are called views.
n Data from several tables can be combined in a meaningful way using a view (join). You can also hide information that is of no interest to you (projection) or only display those data records that satisfy certain conditions (selection).
n The data of a view can be displayed exactly like the data of a table in the extended table maintenance.

n The structure of a view and selection of the data using this view will be shown with an example.
n Given two tables TABA and TABB. Table TABA contains 2 entries and table TABB 4 entries.
n The tables are first appended to one another. This results in the cross-product of the two tables, in which each record of TABA is combined with each record of TABB.
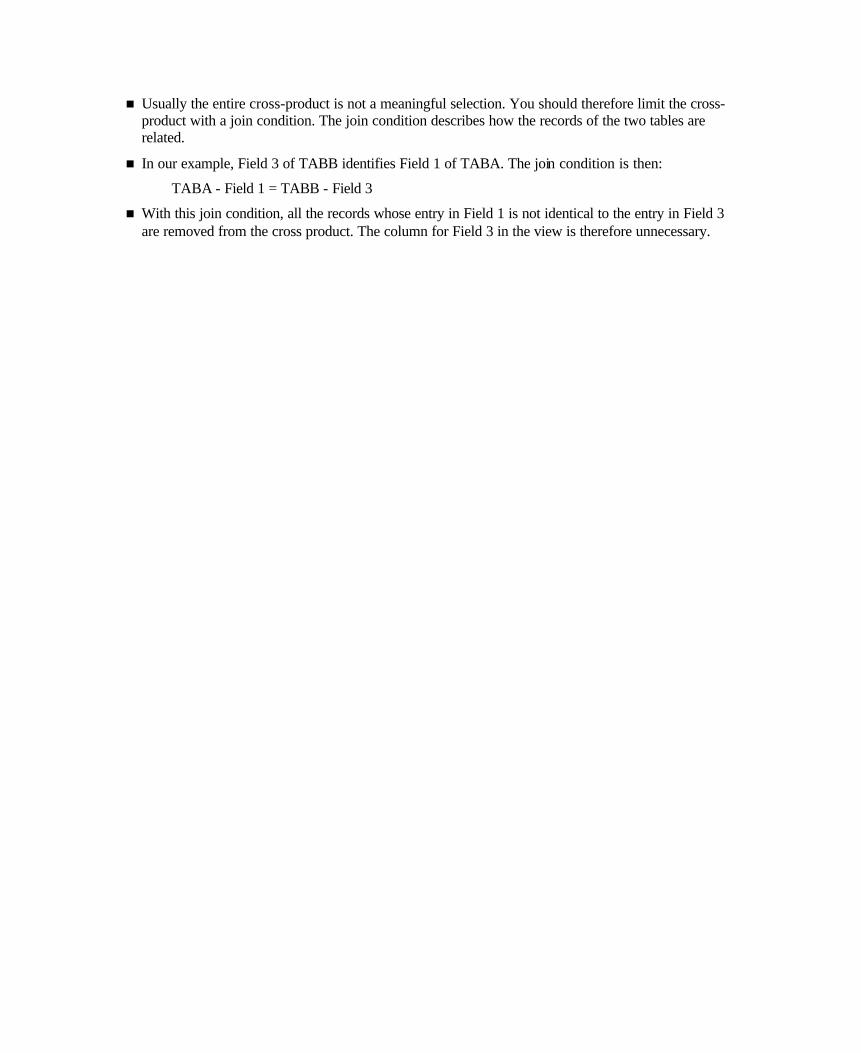
n Usually the entire cross-product is not a meaningful selection. You should therefore limit the cross-product with a join condition. The join condition describes how the records of the two tables are related.
n In our example, Field 3 of TABB identifies Field 1 of TABA. The join condition is then:
TABA - Field 1 = TABB - Field 3
n With this join condition, all the records whose entry in Field 1 is not identical to the entry in Field 3 are removed from the cross product. The column for Field 3 in the view is therefore unnecessary.

n Often some of the fields of the tables involved in a view are of no interest. You can explicitly define the set of fields to be included in the view (projection).
n In our example, Field 4 is of no interest and can therefore be hidden.

n The set of records that can be displayed with the view can be further restricted with a selection condition.
n In our example, only those records with value 'A' in Field 4 should be displayed with the view.
n A selection condition therefore can also be formulated with a field that is not contained in the view.
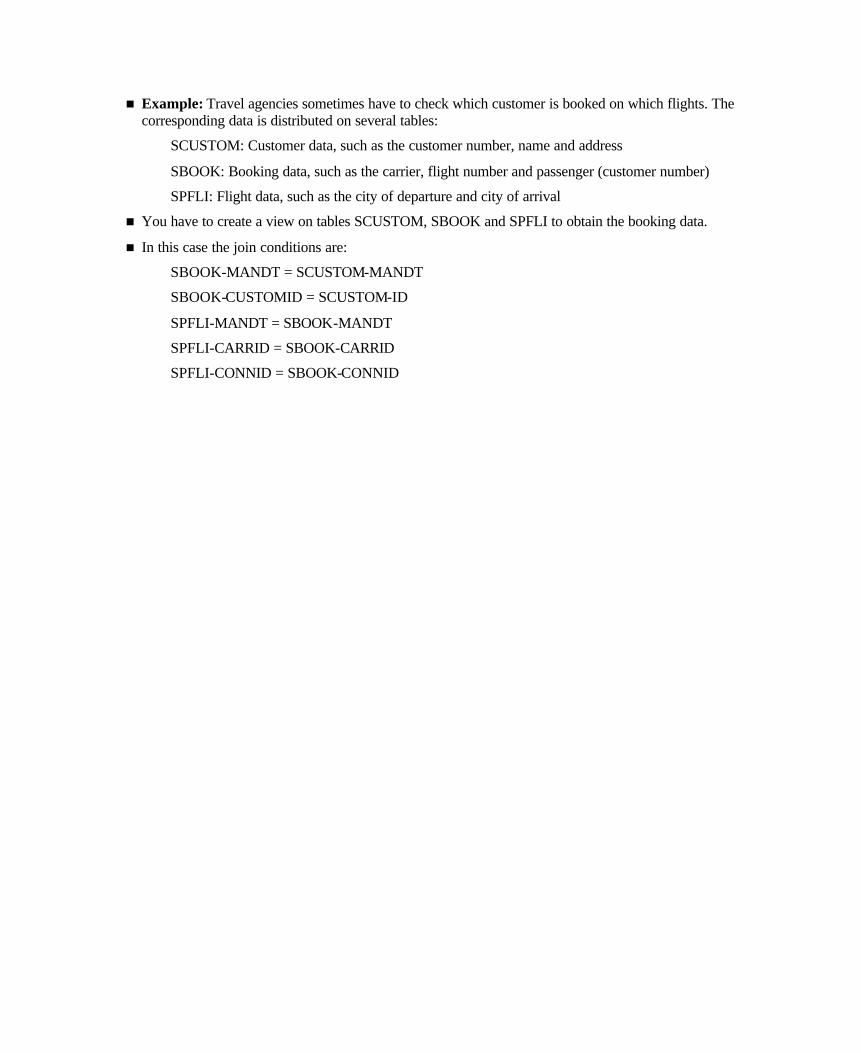
n Example: Travel agencies sometimes have to check which customer is booked on which flights. The corresponding data is distributed on several tables:
SCUSTOM: Customer data, such as the customer number, name and address
SBOOK: Booking data, such as the carrier, flight number and passenger (customer number)
SPFLI: Flight data, such as the city of departure and city of arrival
n You have to create a view on tables SCUSTOM, SBOOK and SPFLI to obtain the booking data.
n In this case the join conditions are:
SBOOK-MANDT = SCUSTOM-MANDT
SBOOK-CUSTOMID = SCUSTOM-ID
SPFLI-MANDT = SBOOK-MANDT
SPFLI-CARRID = SBOOK-CARRID
SPFLI-CONNID = SBOOK-CONNID
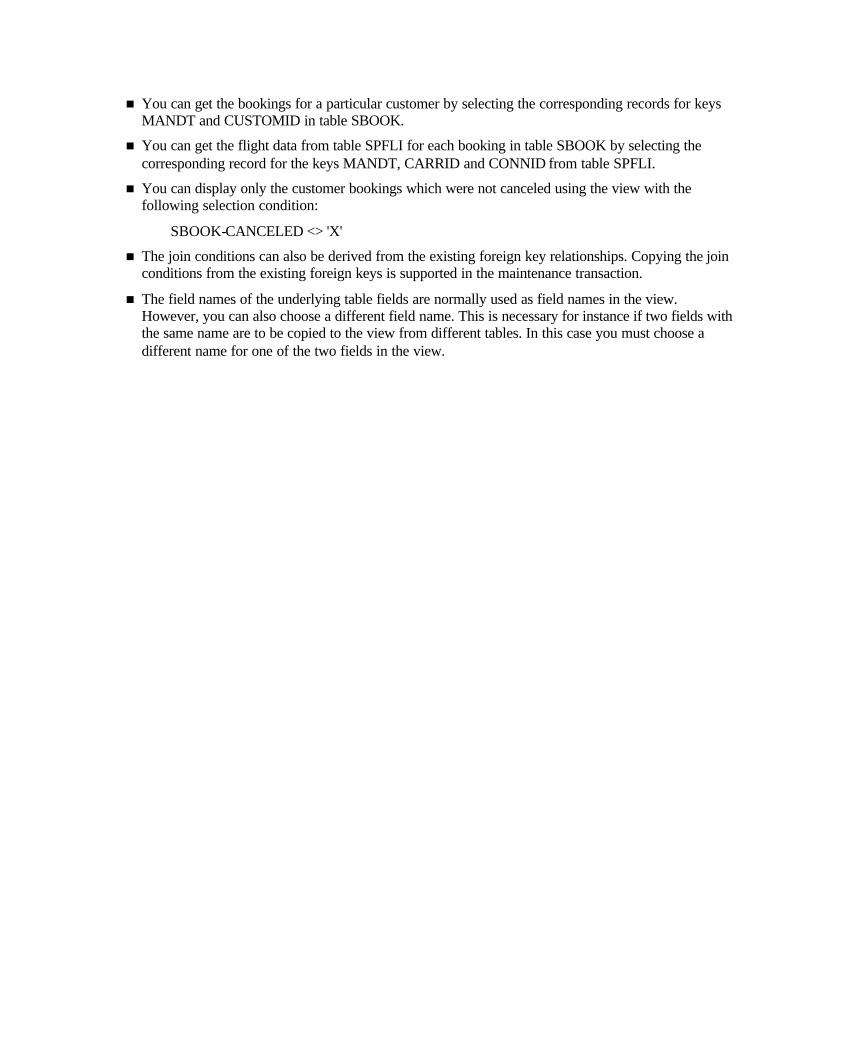
n You can get the bookings for a particular customer by selecting the corresponding records for keys MANDT and CUSTOMID in table SBOOK.
n You can get the flight data from table SPFLI for each booking in table SBOOK by selecting the corresponding record for the keys MANDT, CARRID and CONNID from table SPFLI.
n You can display only the customer bookings which were not canceled using the view with the following selection condition:
SBOOK-CANCELED <> 'X'
n The join conditions can also be derived from the existing foreign key relationships. Copying the join conditions from the existing foreign keys is supported in the maintenance transaction.
n The field names of the underlying table fields are normally used as field names in the view. However, you can also choose a different field name. This is necessary for instance if two fields with the same name are to be copied to the view from different tables. In this case you must choose a different name for one of the two fields in the view.
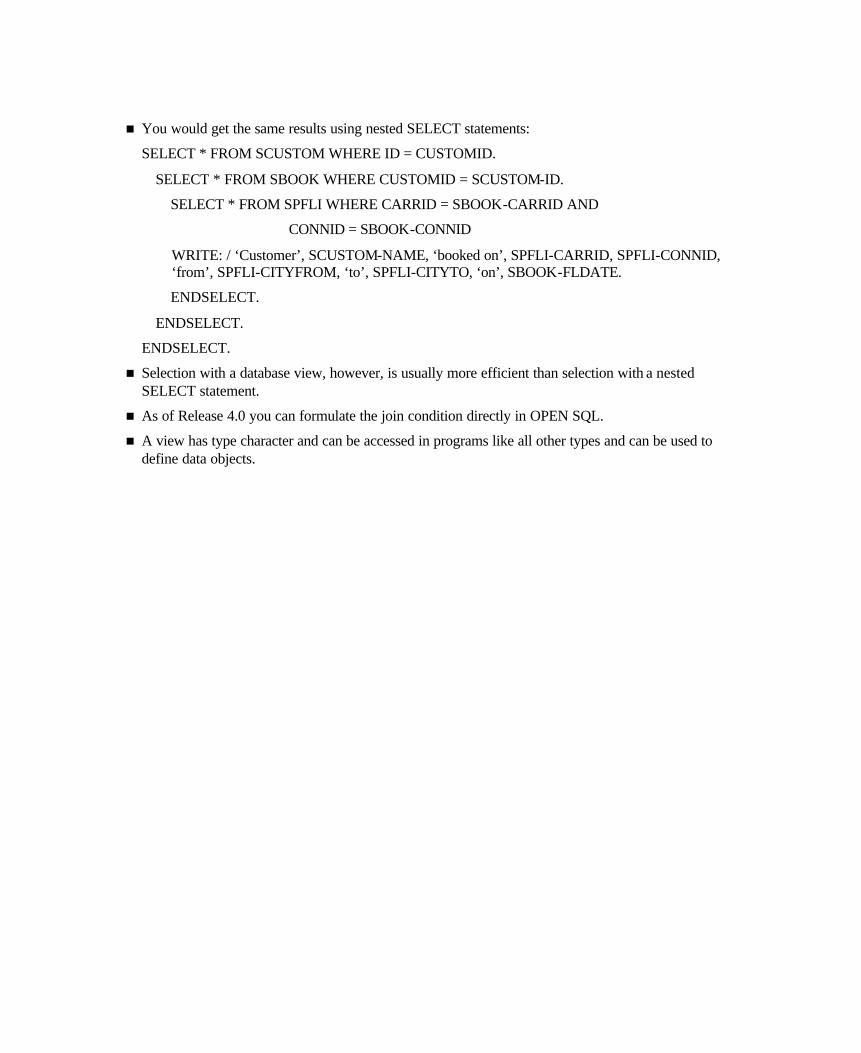
n You would get the same results using nested SELECT statements:
SELECT * FROM SCUSTOM WHERE ID = CUSTOMID.
SELECT * FROM SBOOK WHERE CUSTOMID = SCUSTOM-ID.
SELECT * FROM SPFLI WHERE CARRID = SBOOK-CARRID AND
CONNID = SBOOK-CONNID
WRITE: / ‘Customer’, SCUSTOM-NAME, ‘booked on’, SPFLI-CARRID, SPFLI-CONNID, ‘from’, SPFLI-CITYFROM, ‘to’, SPFLI-CITYTO, ‘on’, SBOOK-FLDATE.
ENDSELECT.
ENDSELECT.
ENDSELECT.
n Selection with a database view, however, is usually more efficient than selection with a nested SELECT statement.
n As of Release 4.0 you can formulate the join condition directly in OPEN SQL.
n A view has type character and can be accessed in programs like all other types and can be used to define data objects.
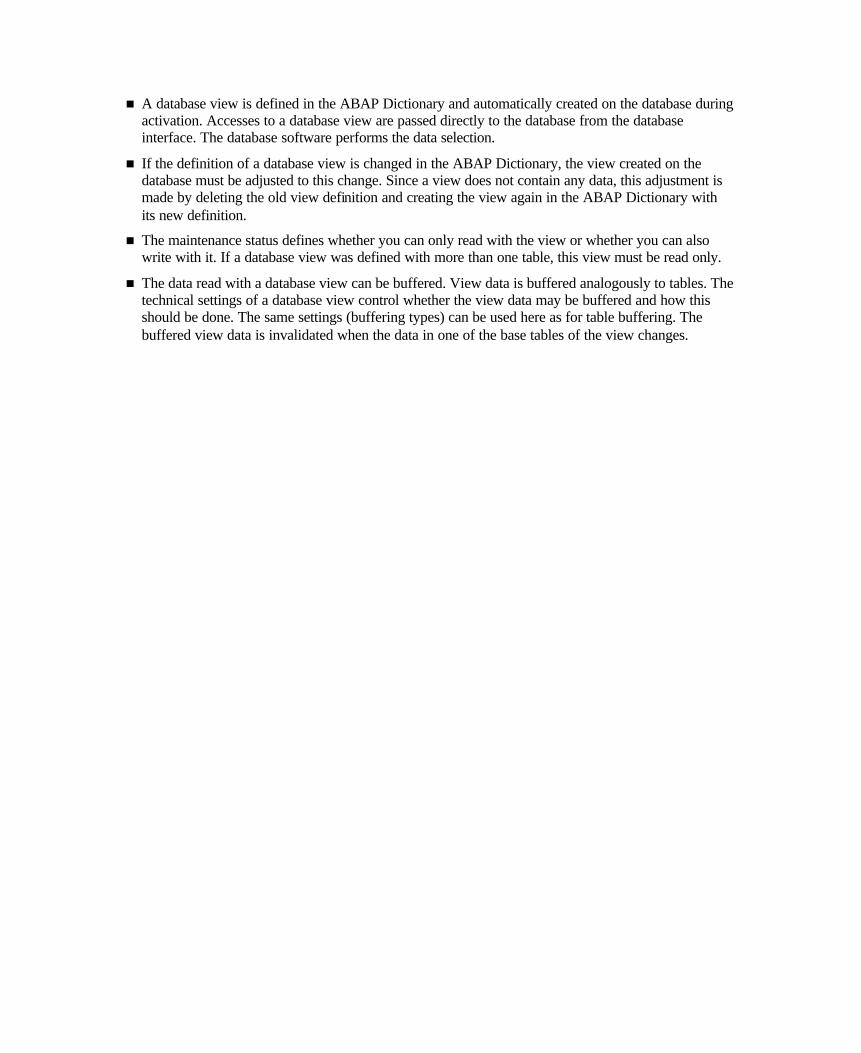
n A database view is defined in the ABAP Dictionary and automatically created on the database during activation. Accesses to a database view are passed directly to the database from the database interface. The database software performs the data selection.
n If the definition of a database view is changed in the ABAP Dictionary, the view created on the database must be adjusted to this change. Since a view does not contain any data, this adjustment is made by deleting the old view definition and creating the view again in the ABAP Dictionary with its new definition.
n The maintenance status defines whether you can only read with the view or whether you can also write with it. If a database view was defined with more than one table, this view must be read only.
n The data read with a database view can be buffered. View data is buffered analogously to tables. The technical settings of a database view control whether the view data may be buffered and how this should be done. The same settings (buffering types) can be used here as for table buffering. The buffered view data is invalidated when the data in one of the base tables of the view changes.
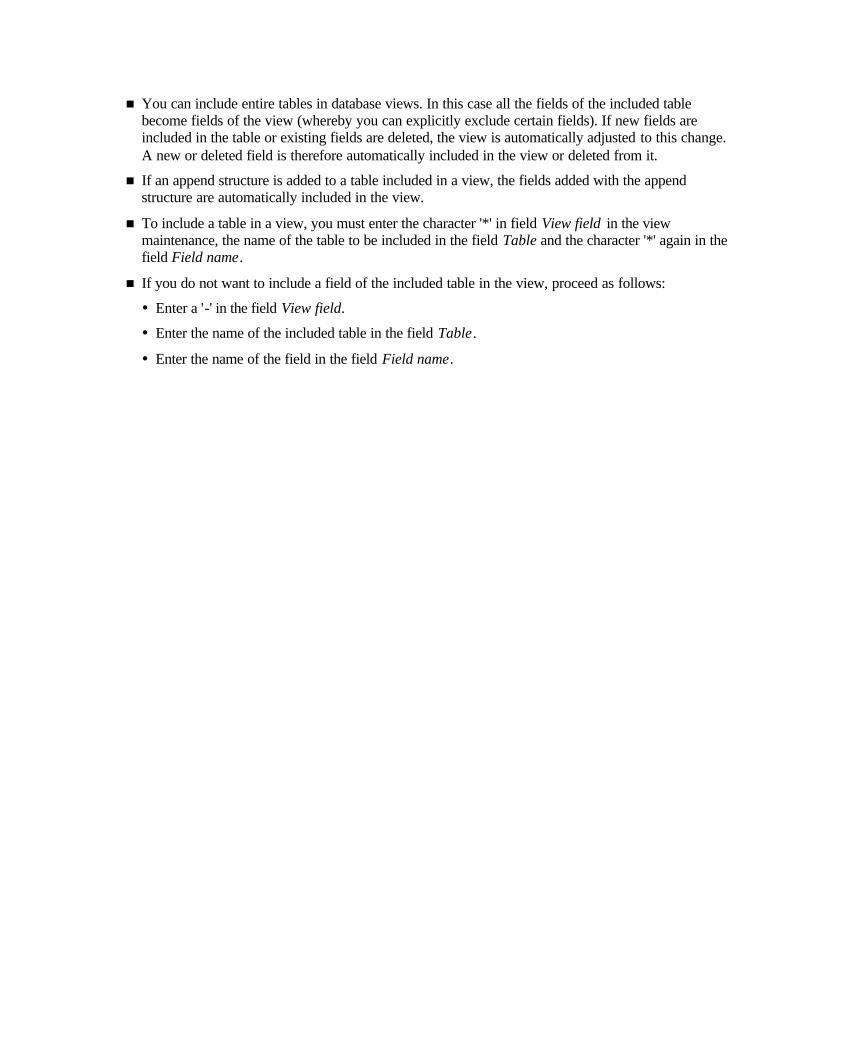
n You can include entire tables in database views. In this case all the fields of the included table become fields of the view (whereby you can explicitly exclude certain fields). If new fields are included in the table or existing fields are deleted, the view is automatically adjusted to this change. A new or deleted field is therefore automatically included in the view or deleted from it.
n If an append structure is added to a table included in a view, the fields added with the append structure are automatically included in the view.
n To include a table in a view, you must enter the character '*' in field View field in the view maintenance, the name of the table to be included in the field Table and the character '*' again in the field Field name.
n If you do not want to include a field of the included table in the view, proceed as follows:
� Enter a '-' in the field View field.
� Enter the name of the included table in the field Table.
� Enter the name of the field in the field Field name.
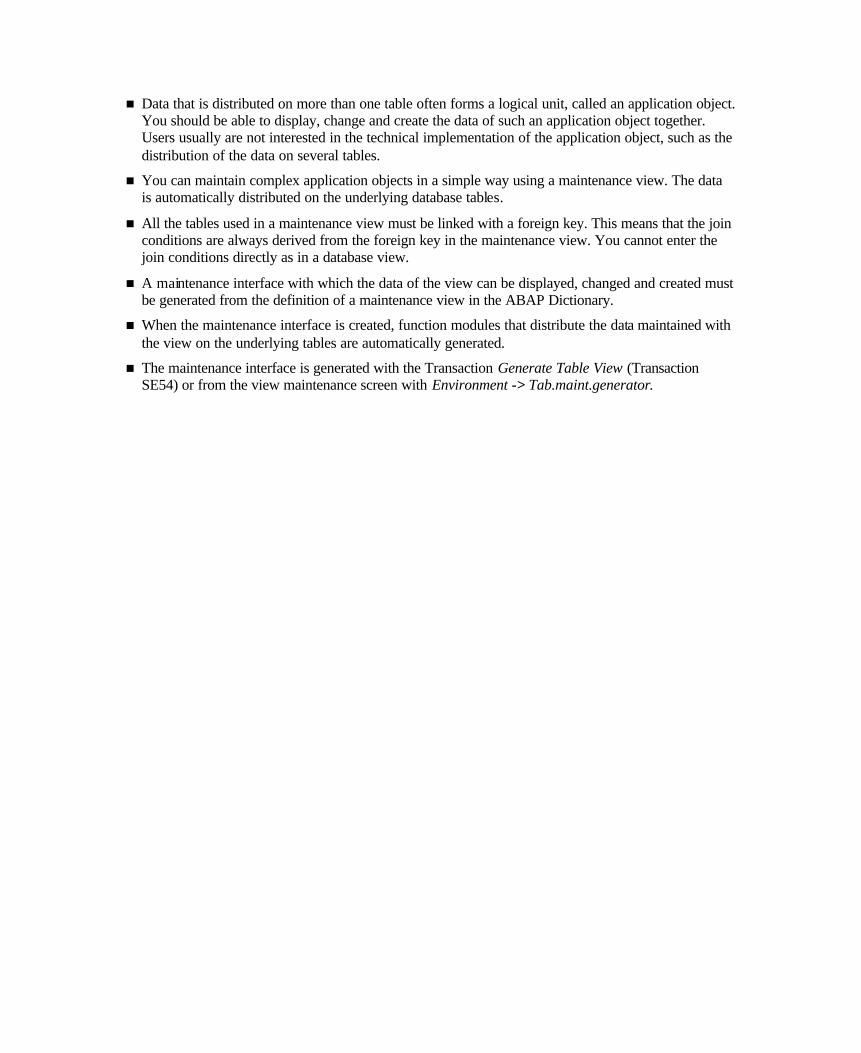
n Data that is distributed on more than one table often forms a logical unit, called an application object. You should be able to display, change and create the data of such an application object together. Users usually are not interested in the technical implementation of the application object, such as the distribution of the data on several tables.
n You can maintain complex application objects in a simple way using a maintenance view. The data is automatically distributed on the underlying database tables.
n All the tables used in a maintenance view must be linked with a foreign key. This means that the join conditions are always derived from the foreign key in the maintenance view. You cannot enter the join conditions directly as in a database view.
n A maintenance interface with which the data of the view can be displayed, changed and created must be generated from the definition of a maintenance view in the ABAP Dictionary.
n When the maintenance interface is created, function modules that distribute the data maintained with the view on the underlying tables are automatically generated.
n The maintenance interface is generated with the Transaction Generate Table View (Transaction SE54) or from the view maintenance screen with Environment -> Tab.maint.generator.
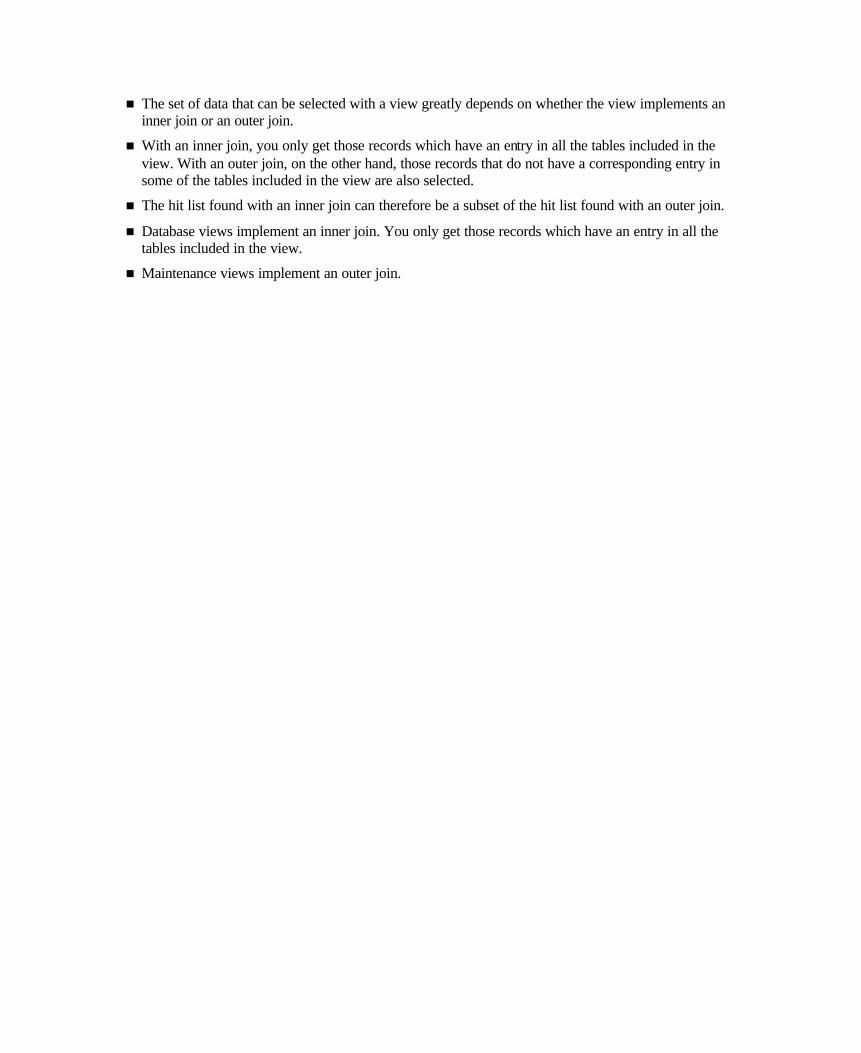
n The set of data that can be selected with a view greatly depends on whether the view implements an inner join or an outer join.
n With an inner join, you only get those records which have an entry in all the tables included in the view. With an outer join, on the other hand, those records that do not have a corresponding entry in some of the tables included in the view are also selected.
n The hit list found with an inner join can therefore be a subset of the hit list found with an outer join.
n Database views implement an inner join. You only get those records which have an entry in all the tables included in the view.
n Maintenance views implement an outer join.

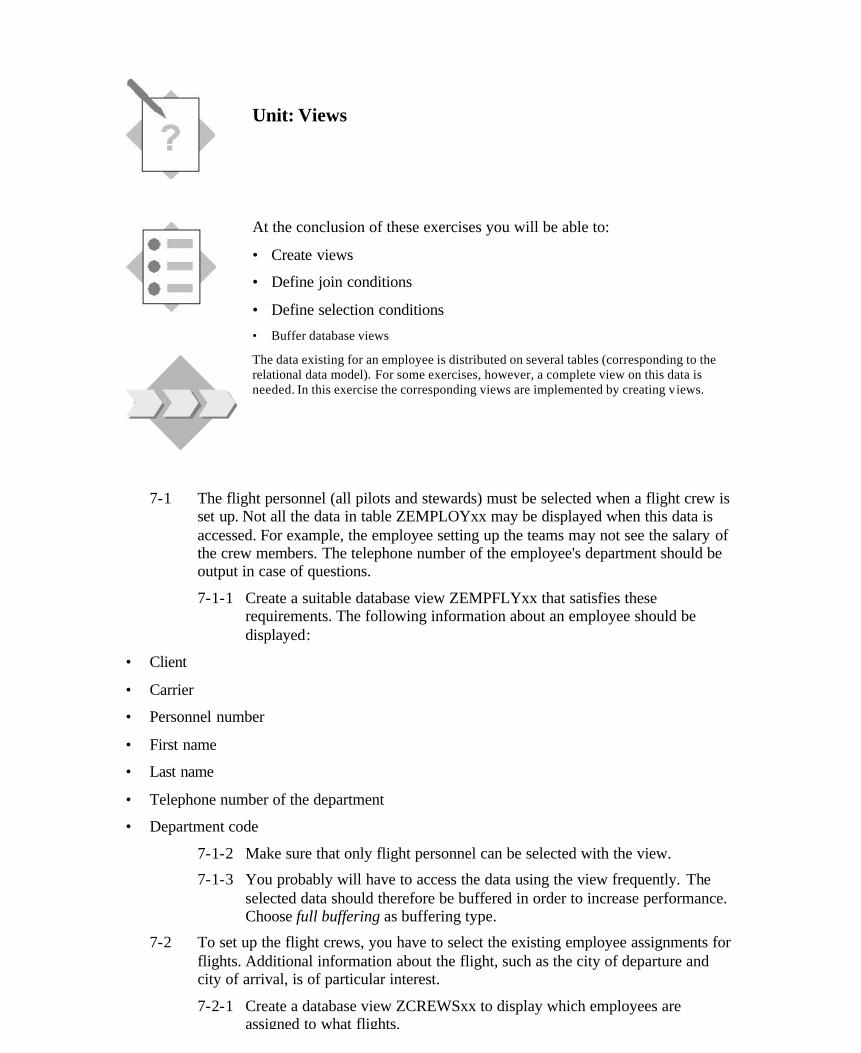
Unit: Views
At the conclusion of these exercises you will be able to:
• Create views
• Define join conditions
• Define selection conditions
• Buffer database views
The data existing for an employee is distributed on several tables (corresponding to the relational data model). For some exercises, however, a complete view on this data is needed. In this exercise the corresponding views are implemented by creating views.
7-1 The flight personnel (all pilots and stewards) must be selected when a flight crew is set up. Not all the data in table ZEMPLOYxx may be displayed when this data is accessed. For example, the employee setting up the teams may not see the salary of the crew members. The telephone number of the employee's department should be output in case of questions.
7-1-1 Create a suitable database view ZEMPFLYxx that satisfies these requirements. The following information about an employee should be displayed:
• Client
• Carrier
• Personnel number
• First name
• Last name
• Telephone number of the department
• Department code
7-1-2 Make sure that only flight personnel can be selected with the view.
7-1-3 You probably will have to access the data using the view frequently. The selected data should therefore be buffered in order to increase performance. Choose full buffering as buffering type.
7-2 To set up the flight crews, you have to select the existing employee assignments for flights. Additional information about the flight, such as the city of departure and city of arrival, is of particular interest.
7-2-1 Create a database view ZCREWSxx to display which employees are assigned to what flights.
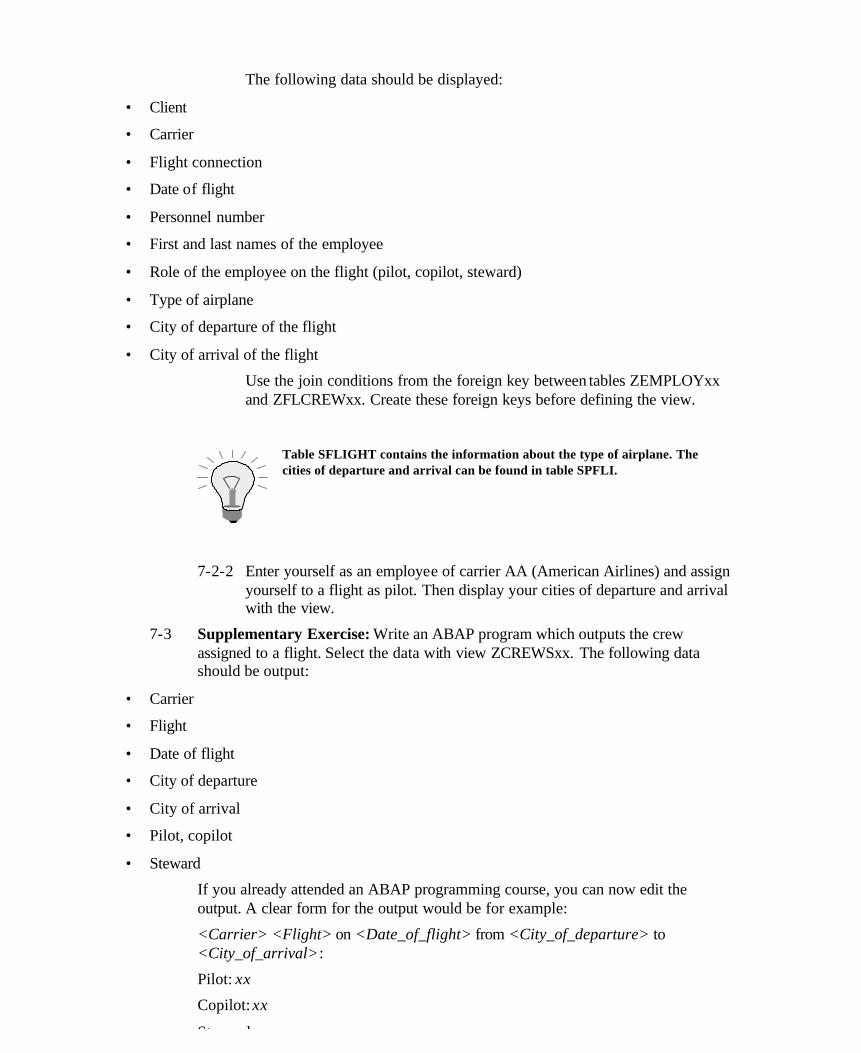
The following data should be displayed:
• Client
• Carrier
• Flight connection
• Date of flight
• Personnel number
• First and last names of the employee
• Role of the employee on the flight (pilot, copilot, steward)
• Type of airplane
• City of departure of the flight
• City of arrival of the flight
Use the join conditions from the foreign key between tables ZEMPLOYxx and ZFLCREWxx. Create these foreign keys before defining the view.
Table SFLIGHT contains the information about the type of airplane. The cities of departure and arrival can be found in table SPFLI.
7-2-2 Enter yourself as an employee of carrier AA (American Airlines) and assign yourself to a flight as pilot. Then display your cities of departure and arrival with the view.
7-3 Supplementary Exercise: Write an ABAP program which outputs the crew assigned to a flight. Select the data with view ZCREWSxx. The following data should be output:
• Carrier
• Flight
• Date of flight
• City of departure
• City of arrival
• Pilot, copilot
• Steward
If you already attended an ABAP programming course, you can now edit the output. A clear form for the output would be for example:
<Carrier> <Flight> on <Date_of_flight> from <City_of_departure> to <City_of_arrival>:
Pilot: xx
Copilot: xx
Stewards: xx, xx, xx
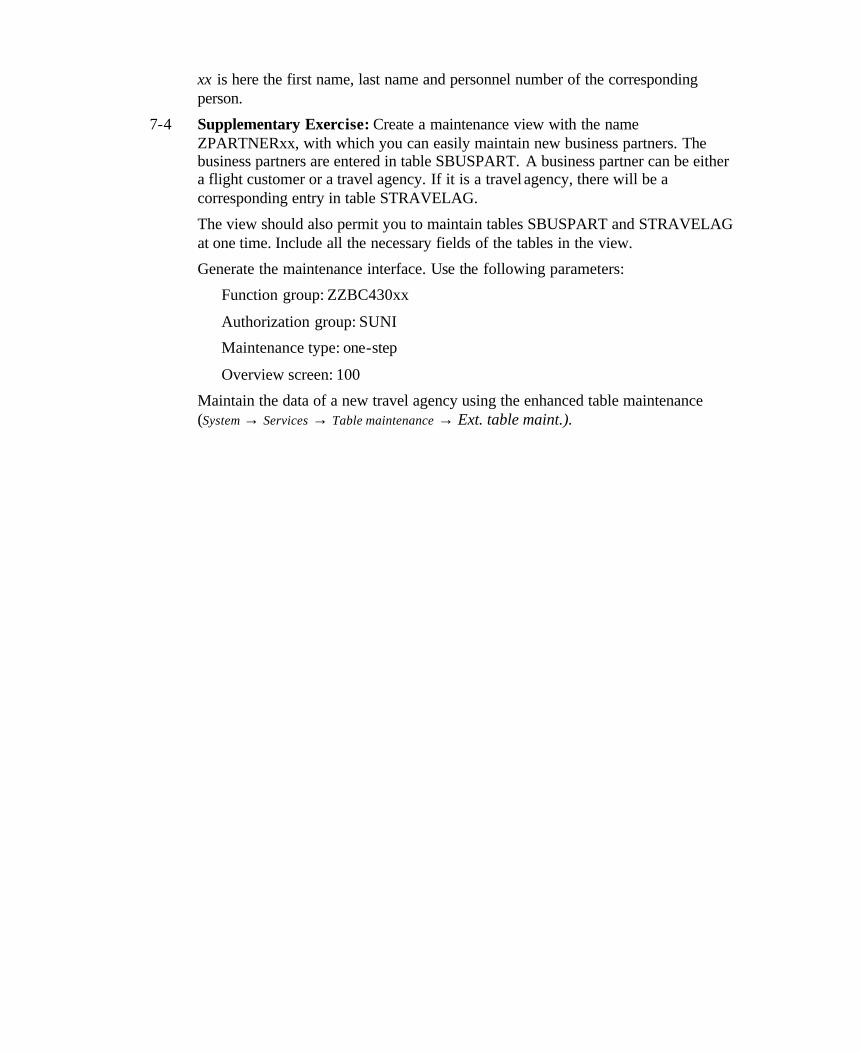
xx is here the first name, last name and personnel number of the corresponding person.
7-4 Supplementary Exercise: Create a maintenance view with the name ZPARTNERxx, with which you can easily maintain new business partners. The business partners are entered in table SBUSPART. A business partner can be either a flight customer or a travel agency. If it is a travel agency, there will be a corresponding entry in table STRAVELAG.
The view should also permit you to maintain tables SBUSPART and STRAVELAG at one time. Include all the necessary fields of the tables in the view.
Generate the maintenance interface. Use the following parameters:
Function group: ZZBC430xx
Authorization group: SUNI
Maintenance type: one-step
Overview screen: 100
Maintain the data of a new travel agency using the enhanced table maintenance (System → Services → Table maintenance → Ext. table maint.).
Unit: Views
7-1 The view should permit a view on data in tables ZEMPLOYxx and ZDEPMENTxx. To create the view:
1) In the initial screen of the ABAP Dictionary, mark object type View, enter the object name ZEMPFLYxx and choose Create.
2) A dialog box appears in which you should select the view type. Mark Database view and press Choose.
3) Enter a short text in the next screen.
The view should display data about employees (from table ZEMPLOYxx) and departments (from table ZDEPMENTxx).
4) First enter table ZEMPLOYxx in field Tables.
5) Choose Relationships. All the foreign key relationships of table ZEMPLOYxx to other tables are listed. Mark the relationship to table ZDEPMENTxx and choose Copy.
6) The join conditions are copied from the foreign key. In a different mode, display the foreign key between the two tables and notice the relationship between the foreign key and the join conditions.
7) You now have to copy fields from the tables to the view. Click on tab page View fields.
8) Choose Table fields. In the next dialog box, mark table ZEMPLOYxx and choose Choose.
9) All the fields of table ZEMPLOYxx are listed. Mark fields Client, Carrier, Personnel number, First name, and Last name. Choose Copy. The fields are now inserted in the view.
10) Again choose Table fields. In the dialog box, choose table ZDEPMENTxx and insert fields Department telephone and Department code in the view as described above.
Only flight personnel should be selected with the view. You can define this restriction with a selection condition.
11) Click on tab page Selection conditions.
12) The restriction whether an employee belongs to the flight personnel is contained in field ZEMPLOYxx-Area. Enter it in columns Table and Field name.
13) Flight personnel is identified by the value 'F' in field Area. Enter EQ in the column Operator and 'F' (including the apostrophes) in column Compar. value.
You now have to buffer the view.
14) Choose Goto ? Technical settings. The maintenance screen for the technical settings of the view appears. With the exception of some attributes that are meaningless for views and which are therefore not displayed, the screen is analogous to the corresponding maintenance screen for tables.
15) Mark Buffering switched on and Fully buffered.
16) Save the technical settings and return to the view maintenance screen.
17) Activate the view.
7-2 The view should permit a common view on data in tables ZFLCREWxx, ZEMPLOYxx, SFLIGHT and SPFLI. To create the view:
1) First create the foreign key. To do this, go to the maintenance screen for table ZFLCREWxx. Define a foreign key with check table ZEMPLOYxx for field EMP_NUM. Use the field assignment proposed by the system. The cardinality of the rela tionship is 1:CN and the foreign key fields are key fields.
2) Select object type View in the initial screen of the ABAP Dictionary, enter the object name ZCREWSxx and choose Create.
3) A dialog box appears in which you should select the view type. Mark Database view and press Choose.
4) Enter a short text in the next screen.
The view should display data about the assignment of employees to flights (in table ZFLCREWxx), about employee data (in table ZEMPLOYxx) and about flight data (in table SFLIGHT). The information about the cities of departure and arrival are in the flight schedule (table SPFLI) and not directly in table SFLIGHT.
5) First enter table ZFLCREWxx in field Tables.
6) Now include table ZEMPLOYxx in the view and link it with table ZFLCREWxx. You can create the join conditions from the foreign key between the tables.
7) Position the cursor on ZFLCREWxx and choose Relationships.
8) A dialog box appears listing all existing foreign key relationships of table ZFLCREWxx to other tables. Mark the relationship to table ZEMPLOYxx and choose Copy.
9) Table ZEMPLOYxx is entered in field Tables and the join conditions are created from the foreign key between the two tables.
Create the following join conditions:
ZEMPLOYxx-Client = ZFLCREWxx-CLIENT
ZEMPLOYxx-Carrier = ZFLCREWxx-CARRID
ZEMPLOYxx-Personnel number = ZFLCREWxx-EMP_NUM
10) Include table SFLIGHT in the view in the same way. Create the join conditions from the foreign key between tables ZFLCREWxx and SFLIGHT. The join condition should have the following form:
SFLIGHT-MANDT = ZFLCREWxx-CLIENT
SFLIGHT-CARRID = ZFLCREWxx-CARRID
SFLIGHT-CONNID = ZFLCREWxx-CONNID
SFLIGHT-FLDATE = ZFLCREWxx-FLDATE
11) Include table SPFLI in the view (as described above). The join conditions can be created from the foreign key between tables SFLIGHT and SPFLI. The join condition should have the following form:
SPFLI-MANDT = SFLIGHT-MANDT
SPFLI-CARRID = SFLIGHT-CARRID
SPFLI-CONNID = SFLIGHT-CONNID
12) Now include the following fields in the view (see the solution to Exercise 1):
From table ZFLCREWxx fields MANDT, CARRID, CONNID, FLDATE, EMP_NUM and ROLE.
From table ZEMPLOYxx fields Last name and First name.
From table SFLIGHT field PLANETYPE.
From table SPFLI fields CITYFROM and CITYTO.
13) Activate the view.
To enter yourself as an employee, call Utilities → Table contents → Create entries from the maintenance screen of table ZEMPLOYxx. You can maintain the data record here. Enter yourself in table ZFLCREWxx for a flight in the same way. You can then search for the information from the maintenance screen for view ZFLCREWxx with Utilities → Content.
7-3 Look at program SVIEW_CREW as a sample solution.
7-4 Proceed as follows:
1) In the initial screen of the ABAP Dictionary, mark object type View, enter the object name ZPARTNERxx and choose Create.
2) A dialog box appears in which you should select the view type. Mark Maintenance view and choose Choose.
3) Enter a short text in the next screen.
You want to maintain the data in tables SBUSPART and STRAVELAG together in the maintenance view. If you wanted to enter a new partner directly, you would first have to enter it in table SBUSPART. Only then could you enter the corresponding data in table STRAVELAG (because of the existing foreign key check between SBUSPART and STRAVELAG). You therefore first have to include table SBUSPART in the definition of the maintenance view.
4) Enter table SBUSPART in the field Tables. The key fields of this table are automatically included in the view as fields.
5) Place the cursor in field Tables on entry SBUSPART. Choose Relationships.
6) A dialog box appears listing all existing foreign key relationships of table SBUSPART to other tables. Mark the foreign key relationship to table STRAVELAG and choose Copy.
7) The join conditions are created from the foreign key. The join conditions have the following form:
SBUSPART-MANDANT = STRAVELAG-MANDT
SBUSPART-BUSPARTNUM = STRAVELAG-AGENCYNUM
8) You now have to include the fields of both tables in the view. Go to tab page View fields. Position the cursor on table SBUSPART and choose Table fields. A list of all the fields of the table appears. Choose Select all and then press Copy.
9) Include all the fields of table STRAVELAG with the exception of fields MANDT and AGENCYNUM in the view in the same way. These fields are linked to the corresponding fields of table SBUSPART with the join conditions and therefore should not appear in the view.
10) Activate the view.
Now generate a maintenance interface for the view.
11) Choose Utilities → Table maintenance generator.
12) Enter authorization group SUNI and function group ZZBC430xx in the next screen.
13) Mark maintenance type one-step. Select number 0100 as maintenance screen number of the overview screen.
14) Choose Create. The development class of the function group and the generated maintenance objects are prompted. In both cases choose Local object.
15) Call the extended table maintenance with the given menu path and enter the data of a new travel agency. With the Data Browser (in the menu environment of the initial screen of the ABAP Dictionary), verify that the data of the new travel agency was written in tables SBUSPART and STRAVELAG.
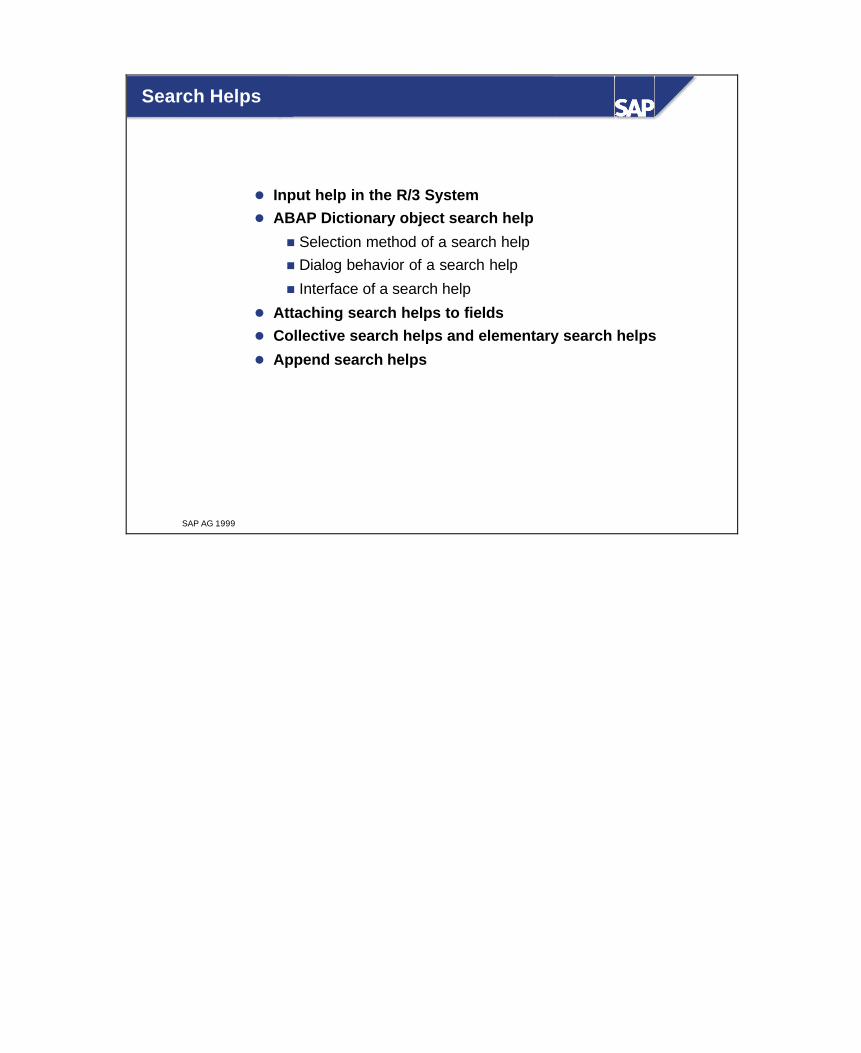
SAP AG 1999
l Input help in the R/3 Systeml ABAP Dictionary object search help
n Selection method of a search helpn Dialog behavior of a search help
n Interface of a search help
l Attaching search helps to fieldsl Collective search helps and elementary search helps
l Append search helps
Search Helps
n The input help (F4 help) is a standard function of the R/3 System. It permits the user to display a list of possible values for a screen field. A value can be directly copied to an input field by list selection.
n The fields having an input help are shown in the R/3 System by the input help key to the right of the field. This key appears as soon as the cursor is positioned on the corresponding screen field. The help can be started either by clicking on this screen element or with function key F4.
n If the number of possible entries for a field is very large, you can limit the set of displayed values by entering further restrictions.
n The display of the possible entries is enhanced with further useful information about the displayed values. This feature is especially useful if the field requires the entry of a formal key.
n Since the input help is a standard function, it should look and behave the same throughout the entire R/3 System. The development environment therefore provides tools for assigning a standardized input help to a screen field.
n The precise description of the input help for a field is usually defined by its semantics. For this reason, the input help for a field is normally defined in the ABAP Dictionary.

n A number of requirements must be met for the input help of a screen field (search field):
n Information (about the context) known to the system must be taken into consideration in the input help. This includes entries the user already made in the current input template as well as information obtained in previous dialog steps. Normally the input help uses the context to limit the set of possible values.
n The input help must determine the values that can be offered to the user for selection. The data to be displayed as supplementary information in the list of possible values must also be determined. When the possible values are determined, the restrictions resulting from the context and from further search conditions specif ied by the user must also be taken into consideration.
n The input help must hold a dialog with the user. This dialog always contains the presentation of the possible values (with supplementary information) in list form and the possibility to select a value from this list. A search template in which the user can define conditions for the values to be displayed is also sometimes required .
n If the user selects a value, the input help must return it to the search field. The input template often contains more fields (often only display fields) containing further explanatory information about the search field. The input help should also update the contents of these fields in this case.
n The ABAP Dictionary object search help is used to describe an input help. The definition of a search help contains the information the system needs to satisfy the described requirements.
n The interface of the search help controls the data transfer from the input template to the F4 help and back. The interface defines the context data to be used and the data to be returned to the input template when a value is selected.
n The internal behavior of the search help describes the F4 process itself. This includes the selection method with which the values to be displayed should be determined as well as the dialog behavior describing the interaction with the user.
n As with a function module, search helps distinguish between the interface with which it exchanges data with other software components and the internal behavior (for function modules, the latter is defined by the source text).
n It only makes sense to define a search help if there is a mechanism available with which the search help can be accessed from a screen. This mechanism is called the search help attachment and will be described later.
n Like the editor for function modules, the editor for search helps also enables you to test an object. You can thus test the behavior of a search help without assigning it to a screen field.
n The possible values displayed for a field by the input help are determined at runtime by a selection from the database. When a search help is defined, you must define the database object from which the data should be selected by specifying a table or a view as the selection method.
n It makes sense to use a view as selection method if the data about the possible values that is relevant for the input help is distributed on several tables. If this data is all in one table or in the corresponding text table, you can use the table as a selection method. The system automatically ensures that the text of the text table is used in the user's logon language.
n If there is not yet a view that combines the data that is relevant for an input help, you must first create it in the ABAP Dictionary.
n Maintenance views may not be used as the selection method for search helps. Normally a database view is used. However, you should note that database views (in the R/3 System) are always created with an inner join. As a result, only those values having an entry in each of the tables involved are offered in the input help. Sometimes the values should be determined with an outer join. In this case you should choose a help view as the selection method. You can find more information about help views in the appendix.
n If the selection method of a search help is client-dependent, the possible values are only selected in the user's logon client.
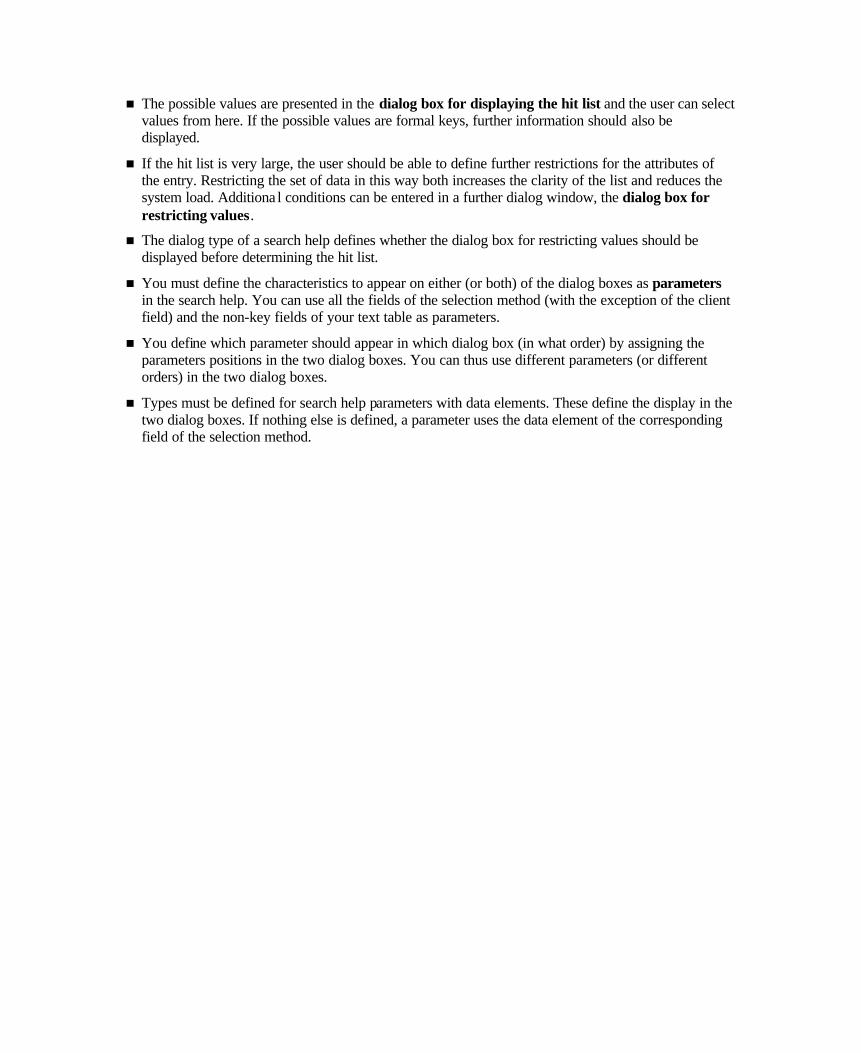
n The possible values are presented in the dialog box for displaying the hit list and the user can select values from here. If the possible values are formal keys, further information should also be displayed.
n If the hit list is very large, the user should be able to define further restrictions for the attributes of the entry. Restricting the set of data in this way both increases the clarity of the list and reduces the system load. Additiona l conditions can be entered in a further dialog window, the dialog box for restricting values.
n The dialog type of a search help defines whether the dialog box for restricting values should be displayed before determining the hit list.
n You must define the characteristics to appear on either (or both) of the dialog boxes as parameters in the search help. You can use all the fields of the selection method (with the exception of the client field) and the non-key fields of your text table as parameters.
n You define which parameter should appear in which dialog box (in what order) by assigning the parameters positions in the two dialog boxes. You can thus use different parameters (or different orders) in the two dialog boxes.
n Types must be defined for search help parameters with data elements. These define the display in the two dialog boxes. If nothing else is defined, a parameter uses the data element of the corresponding field of the selection method.
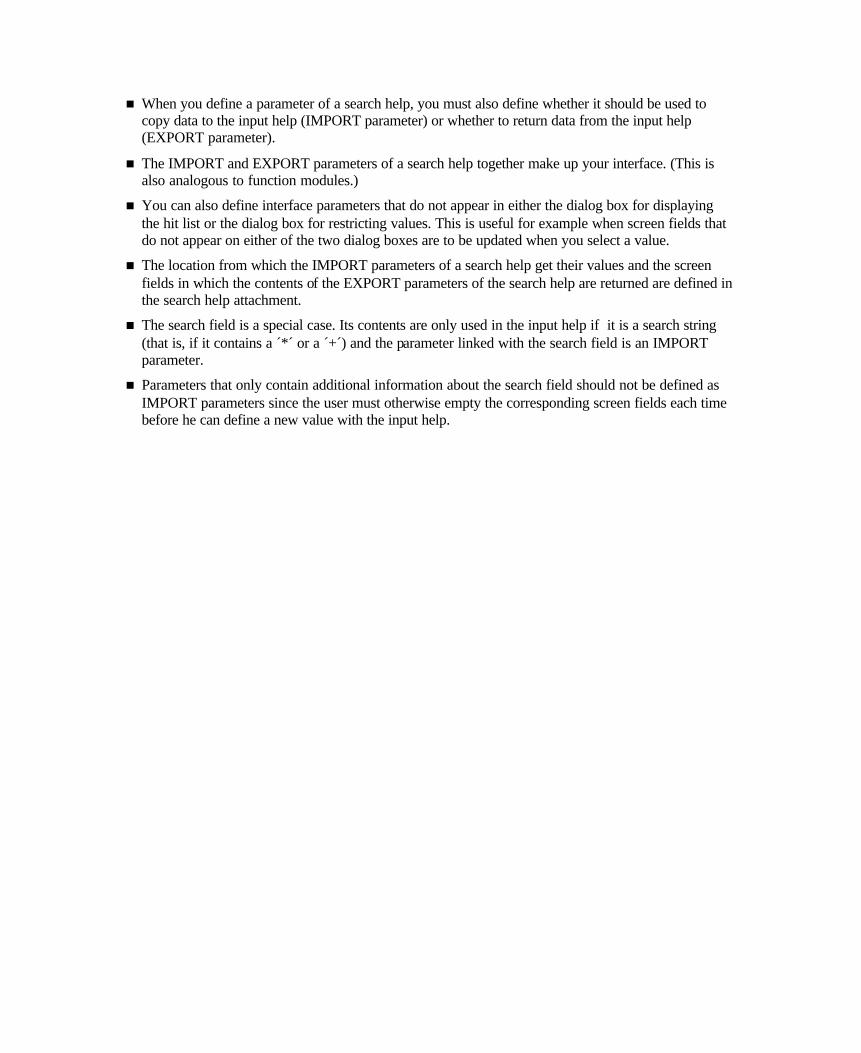
n When you define a parameter of a search help, you must also define whether it should be used to copy data to the input help (IMPORT parameter) or whether to return data from the input help (EXPORT parameter).
n The IMPORT and EXPORT parameters of a search help together make up your interface. (This is also analogous to function modules.)
n You can also define interface parameters that do not appear in either the dialog box for displaying the hit list or the dialog box for restricting values. This is useful for example when screen fields that do not appear on either of the two dialog boxes are to be updated when you select a value.
n The location from which the IMPORT parameters of a search help get their values and the screen fields in which the contents of the EXPORT parameters of the search help are returned are defined in the search help attachment.
n The search field is a special case. Its contents are only used in the input help if it is a search string (that is, if it contains a ´*´ or a ´+´) and the parameter linked with the search field is an IMPORT parameter.
n Parameters that only contain additional information about the search field should not be defined as IMPORT parameters since the user must otherwise empty the corresponding screen fields each time before he can define a new value with the input help.
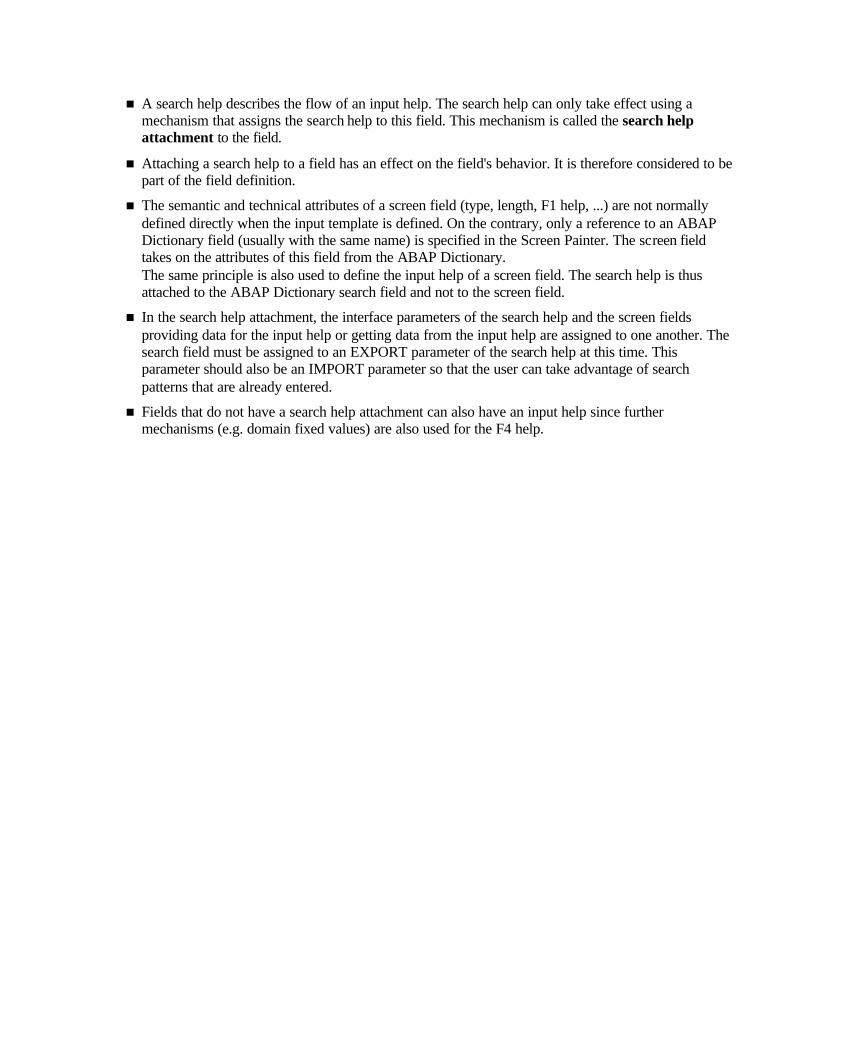
n A search help describes the flow of an input help. The search help can only take effect using a mechanism that assigns the search help to this field. This mechanism is called the search help attachment to the field.
n Attaching a search help to a field has an effect on the field's behavior. It is therefore considered to be part of the field definition.
n The semantic and technical attributes of a screen field (type, length, F1 help, ...) are not normally defined directly when the input template is defined. On the contrary, only a reference to an ABAP Dictionary field (usually with the same name) is specified in the Screen Painter. The screen field takes on the attributes of this field from the ABAP Dictionary. The same principle is also used to define the input help of a screen field. The search help is thus attached to the ABAP Dictionary search field and not to the screen field.
n In the search help attachment, the interface parameters of the search help and the screen fields providing data for the input help or getting data from the input help are assigned to one another. The search field must be assigned to an EXPORT parameter of the search help at this time. This parameter should also be an IMPORT parameter so that the user can take advantage of search patterns that are already entered.
n Fields that do not have a search help attachment can also have an input help since further mechanisms (e.g. domain fixed values) are also used for the F4 help.
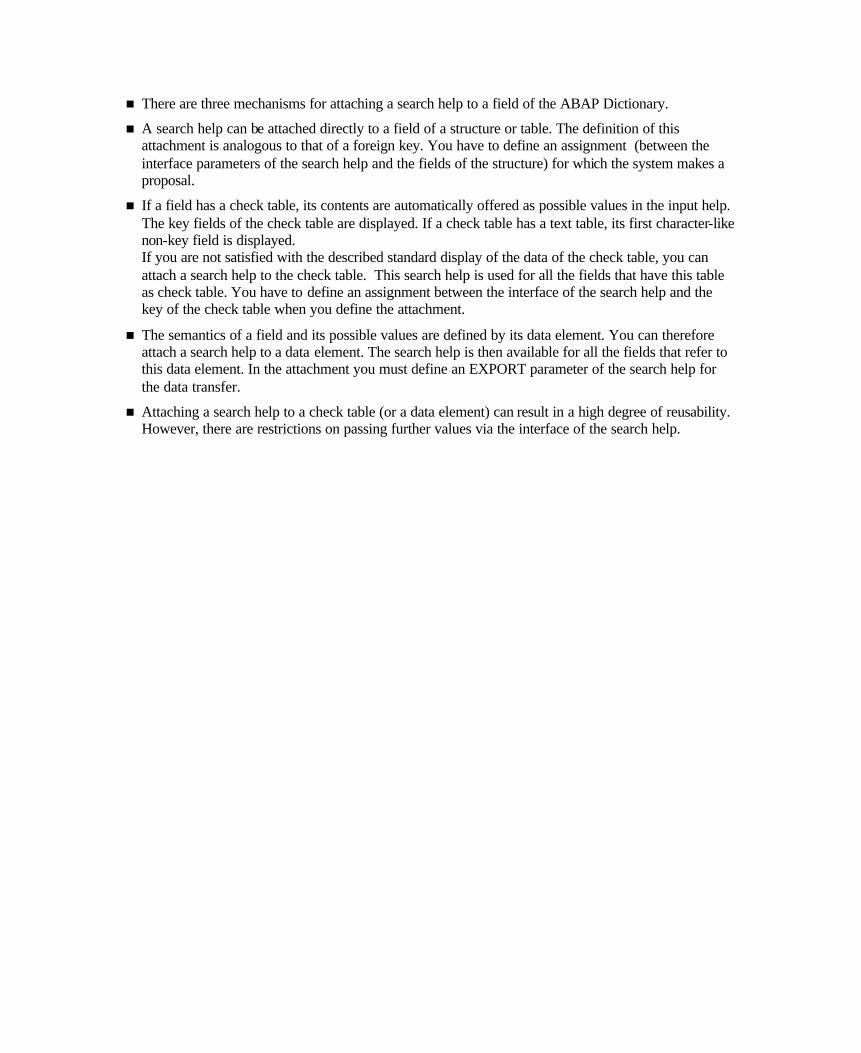
n There are three mechanisms for attaching a search help to a field of the ABAP Dictionary.
n A search help can be attached directly to a field of a structure or table. The definition of this attachment is analogous to that of a foreign key. You have to define an assignment (between the interface parameters of the search help and the fields of the structure) for which the system makes a proposal.
n If a field has a check table, its contents are automatically offered as possible values in the input help. The key fields of the check table are displayed. If a check table has a text table, its first character-like non-key field is displayed. If you are not satisfied with the described standard display of the data of the check table, you can attach a search help to the check table. This search help is used for all the fields that have this table as check table. You have to define an assignment between the interface of the search help and the key of the check table when you define the attachment.
n The semantics of a field and its possible values are defined by its data element. You can therefore attach a search help to a data element. The search help is then available for all the fields that refer to this data element. In the attachment you must define an EXPORT parameter of the search help for the data transfer.
n Attaching a search help to a check table (or a data element) can result in a high degree of reusability. However, there are restrictions on passing further values via the interface of the search help.
n In order to be able to offer a meaningful input help for as many screen fields as possible, the R/3 System uses a number of mechanisms. If there is more than one such mechanism available for a field, the one that is furthest left or at the top of the above hierarchy is used.
n In addition to the options described above for defining the input help of a field in the ABAP Dictionary, you can also define it in the screen field. The disadvantage, however, is that there is no automatic reuse.
n With the screen event POV you can program the input help of a field by yourself. You can adjust the design of the help to the standard help using the function modules F4IF_FIELD_VALUE_REQUEST or F4IF_INT_TABLE_VALUE_REQUEST. However, you should check to see if the part of the input help that you programmed yourself should be implemented as a search help exit instead (see appendix).
n You can also attach a search help to a screen field in the Screen Painter. There are some functional restrictions on this kind of attachment as compared with attachment in the Dictionary.
n You should no longer use the input checks defined directly in the flow logic of the screen, from which it is also possible to derive input helps.
n The function Technical info is offered in the hit list in the menu of the right mouse key. It can be used to find out which of the specified mechanisms is being used.
n You sometimes have to search a large amount of data with an input help. This means that you might have to wait a long time for the possible entries to be displayed, and can also result in a significant increase in the load on the system.
n When you define a search help, you should therefore check whether you should take measures to optimize the accessing behavior for the selection method. This is especially true if the selection uses a view and thus more than one physical table.
n If the number of entries in the selection method is very large, you should restrict the hit list with further conditions. This also increases the clarity of the hit list. The additional conditions can directly result from the context, or can be entered in the dialog box for restricting values by the user. The performance of the input help can frequently be significantly improved by creating an index on the fields used to formulate the restrictions.
n If the number of entries in the selection method is relatively small, you should always check whether the selection method can be buffered.
n In the relational data model, entities are usually represented by formal keys. In real life, however, these entities are often identified by one or more of their attributes. For example, the key for a person is the personnel number. A person will generally describe another with his name and possibly his address.
n The attributes used to identify an entity can differ from one user to the next and from situation to situation. A user wants to use these attributes in an input help to define a value for a field that requires that a formal key be entered.
n We therefore need search paths permitting access to the data using non-key fields. Several different search paths should be possible for one field.
n A search path for a field can be implemented with a search help having the form described above. To describe an input help with more than one alternative search path, a set of search helps can be combined into a new object in the R/3 System. Since this object is the description of the input help for a field, it is also called a search help.
n In contrast to the elementary search helps described above, the search helps that combine several search paths are called collective search helps .
n Collective search helps are sometimes used to map the distribution of the possible entries for a field into several (disjunct) datasets.
n Like an elementary search help, a collective search help has an interface of IMPORT and EXPORT parameters with which it exchanges data. Using this interface, the collective search help can be attached to fields, tables and data elements exactly like an elementary search help. Only one search help can be attached to a field, table or data element. Several search paths are therefore attached with a collective search help.
n You can omit the components for describing the dialog behavior and data selection when you define a collective search help. The included search helps are listed here. You must assign the parameters of the collective search help to the interface parameters of the included search help for each inclusion.
n A search help can also be included in several collective search helps and at the same time itself be attached to fields, tables and data elements. A collective search help can also be included in another collective search help.
n When you use a collective search help, you are offered the elementary search helps contained in the collective search help as parallel tab pages. If you repeatedly use a collective search help, the tab page that was last used is automatically active. This is because most users always use the same search path.
n The set of search paths that are meaningful for an object greatly depends on the particular circumstances of the SAP customer. The customer often would like to enhance the standard SAP collective search helps with his own elementary search helps. Release 4.6 provides an append technique that permits the enhancement of collective search helps without modifications.
n An append search help is a collective search help that is assigned to another collective search help (its appending object) and that enhances it with the search helps it includes. The append search help uses the interface of its appending objects.
n The append search help lies in the customer namespace. Normally the search helps included in the append search help are also created by the customer and lie in the customer's namespace. However, the required elementary search help might already be provided by SAP, in which case the customer only has to add it to his own append search help.
n Append search helps are used with SAP to improve component separation. Some SAP collective search helps therefore already have one or more append search helps in the standard search help. Customer enhancements should always be made by creating a separate append search help.
n SAP collective search helps often contain elementary search helps that are not required by all customers. The search helps you do not need can be hidden using an append search help. To do this, the corresponding search help must be included in the append search help and the hidden flag must be set.

Unit: Search Helps
At the conclusion of these exercises you will be able to:
• Implement input helps with elementary search helps
• Apply the different features of search help attachments in the ABAP Dictionary
• Define input helps with more than one search path using collective search helps
• Add or remove search paths for collective search helps without modifications
Many management tasks require that you search for employee data. Suitable search options are needed to do this. Such search options will be implemented in this exercise.
8-1 Go to the display screen for table ZDEPMENTxx and call Utilities → Table contents →?Create entries. An input template appears in which you can create new entries for table ZDEPMENTxx (i.e. new departments). The head of the new department should also be defined here. Make this entry in field Department head. Maintenance of this field should be supported with an input help that displays the (personnel number of the) employee.
Verify that the field already has an input help. Find out which input help mechanism is used here.
The objective is to make the input help for check table ZEMPLOYxx more user-friendly. Check your success by calling the input help again.
To do this, create an elementary search help ZEMPLOYxx.
The following attributes should appear in the specified order in the hit list:
• Carrier
• First name
• Last name
• Personnel number
• Department code
Because of the large number of employees, you should restrict the displayed values by specifying the first and/or last names of the person wanted before displaying the hit list.
Keep in mind that the last name is used more frequently as a restriction than the first name.
If a carrier was already specified before the input help was called, only its employees are offered. Otherwise an input field on the input template for the carrier will be filled when the employee is selected.
Make sure that the search help defined for the check table help of table ZEMPLOYxx is used and check your success as described above.
8-2 Verify that the input help for field ZFLCREWxx-EMP_NUM is defined with the search help you just created by calling Create entries for table ZFLCREWxx. Understand the underlying mechanism.
The input help for field ZFLCREWxx-EMP_NUM shows all employees. However, you only want to look at flight personnel for the given field. The objective is to correct this.
You should therefore create a search help ZEMPLOY_FLYxx that only displays flight personnel. The display attributes of the search help should be identical to those of search help ZEMPLOYxx. However, since the group of flight personnel is not too large, the hit list can be displayed immediately in this case. The user should be able to limit the employees with their first and last names from this list.
Using a suitable search help attachment, make sure that the search help is used for the given field and check your success as described.
Consider whether you can use work from previous exercises here. Is it necessary or sensible to create your own view for this exercise?
8-3 Supplementary Exercise: With Create entries, verify that the fields containing the personnel number of the last person to make the change in tables ZEMPLOYxx and ZDEPMENTxx do not have their own input help.
The objective here is to define a suitable input help for these two fields. The two search helps defined so far cannot be used because table changes can only be made by administrative employees. The input help to be defined should therefore display only these.
Define search help ZEMPLOY_ADMxx that displays the administrative employees of the airlines. The search help should have the same display attributes as ZEMPLOY_FLYxx. However, it is not easy to estimate the number of administrative employees. Make sure that the search help directly displays the values found if there are no more than 100. Otherwise you should first offer a search template in which you can define the employee's airline as well as the first and last names.
Attach the search help to the data element. Verify that the search help is now used both in ZEMPLOYxx and in ZDEPMENTxx for the input help of field Lastchangedby.
Check whether the requirements for field Carrier specified in Exercise 1 are satisfied. How do you explain this effect? Can you get better results by using a different type of attachment?
8-4 You might want to offer further search paths for finding employees. To do this, take the following steps:
• Copy search help ZEMPLOYxx to search help ZEMPLOY_SIMPLExx.
• Convert search help ZEMPLOYxx to a collective search help.
• Include search help ZEMPLOY_SIMPLExx in search help ZEMPLOYxx.
Check if the input help of field ZDEPMENTxx-Supervisor changed due to these operations.
8-5 You really have to enhance the input help for the employees with another search path: This search path should give you an overview of all the employees involved in a flight.
To do this, create another elementary search help ZEMPLOY_FLIGHTxx. When you use this search help, the user can limit the search to the flight personnel for certain flights before displaying the possible values. The flight should be identified by its cities of arrival and departure and by its flight date. The carrier should be defined as in Exercise 1. The following information should appear in the hit list for the search help:
• Carrier
• First name
• Last name
• Personnel number
• Flight
• Date of flight Make sure that the search help you created is available as an alternative search path for finding employees and verify your results.
Use your solutions from previous units.
8-6 Your system has special requirements when searching for employees:
8-6.1.1 An additional search path that only offers flight personnel should be offered.
8-6.1.2 The search path with which employees can be found by their flights is not required.
Change the input help for field ZDEPMENTxx-Department head accordingly without modifying search help ZEMPLOYxx (or a table that is involved).
8-7 Supplementary Exercise: Call the function Create entries for table ZEMPLOYxx. Verify that the check table help for table ZDEPMENTxx is used for field Department code. Find out where the displayed text field comes from. Check the behavior of the input help for field Carrier on the input template. Now enhance the check table help just tested so that the telephone number of the
department appears in the hit list in addition to the information already displayed. Take the necessary steps and check your success as usual.
8-8 Supplementary Exercise: This exercise demonstrates the use of help views (see appendix).
Enhance the search help defined in Exercise 7 so that the last name of the head of the department also appears in the hit list. Make sure that those departments that have no description in the user's logon language or for which the Department head field is empty are also displayed.
Make sure that the column header with the last names of the department heads is called 'Department head' and not 'Last name' in the hit list. Use data element S_HEAD.
Check your success in the usual manner.
Unit: Search Helps
8-1 Starting with the maintenance transaction for table ZDEPMENTxx, call the F4 help as described. Choose Techn. info (with the right mouse button) in the hit list. In Search help you can find out that the input help is the check table help for table ZEMPLOYxx and that it is a pure check table help (without a search help and without a text table).
To create search help ZEMPLOYxx:
1) Choose Search help in the initial screen of the ABAP Dictionary and enter ZEMPLOYxx in the corresponding field.
2) Choose Create. In the next dialog box, confirm that you want to create an elementary search he lp.
3) Enter a short text for your search help.
4) The search help should support the search for employees. These are managed in table ZEMPLOYxx. You therefore have to select this table (or a view on this table) as selection method. The table is sufficient for this exercise. Enter it in field Selection method.
5) To obtain the required behavior, choose dialog type Complex dialog with value restriction.
6) Choose the search help parameters using the F4 help. You should retain the hit list with the possible search help parameters by selecting Hold list, since you don't have to call the help again in this case. Select fields Carrier, First name, Last name, Personnel number and Department code as parameters.
7) Mark all parameters as EXPORT parameters (column EXP). Mark the attribute to be searched for (i.e. Personnel number) and the hierarchically higher Carrier as IMPORT parameters (Column IMP). This ensures that a corresponding entry in the input template is taken into consideration (as described in the exercise).
8) You can define the hit list by assigning the corresponding position numbers (e.g. 1, 2, 3, 4, 5) in column LPos.
9) You can define the dialog box for restricting values by assigning position numbers in column SPos. You should therefore enter positive numbers in these columns for parameters First name and Last name, where the value of Last name should be smaller than that of First name.
10) Activate your search help. The search help is not yet effective for field ZDEPMENTxx-Department head. However, you can try out the search help immediately with the Test function.
The search help you just created can only improve the check table help of table ZEMPLOYxx (and thus the input help of field ZDEPMENTxx-Department head) if it was attached to table ZEMPLOYxx. You can do this as follows:
1) Go to change mode in the maintenance screen for this table. Choose Goto → Search help → For table. In the next dialog box, enter the name of search help ZEMPLOYxx. Choose Continue.
2) The proposal created by the system for assigning the search help parameters to the key fields of the table is probably correct. Check this and copy the definition. Activate table ZEMPLOYxx.
3) Call the Create entries function for table ZDEPMENTxx again. The input help of field Department head should now behave as desired. If you call Techn. info again, you can confirm that the search help you just defined is in effect.
8-2 Call the input help as described. With Techn. info you can verify that search help ZEMPLOYxx is really in effect and that this is because table ZEMPLOYxx is also check table of field ZFLCREWxx-EMP_NUM. The search help to be created for the flight personnel should be very similar to the search help for all employees. It would therefore make sense to copy search help ZEMPLOYxx to search help ZEMPLOY_FLYxx and then modify it. Alternatively. search help ZEMPLOY_FLYxx can be created analogously to the method described above, also making the following changes:
• The short text for search help ZEMPLOY_FLYxx should be adjusted to suit its meaning.
• Change the dialog type to Immediate value display (Dropdown).
The two changes, however, do not solve the main problem in this exercise, namely that the search help should display only flight personnel. You can do this by selecting a view that only contains flight personnel as selection method. You already defined such a view in Exercise 7-1. Entering this view as selection method and activating the search help will solve the problem. However, this assumes that you named the view fields the same as the underlying fields of table ZEMPLOYxx. Otherwise you have to adjust the names of the search help parameters to the names of the view fields. The solution just described, however, has one disadvantage. View ZEMPFLYxx is defined with a join on tables ZEMPLOYxx and ZDEPMENTxx. However, only information from table ZEMPLOYxx is needed for the search help. An unnecessarily complex database query is therefore created when you use search help ZEMPLOY_FLYxx. This can have a negative effect on the performance of the input help. You should therefore create a new view having only base table ZEMPLOYxx. This view can be obtained for example by copying it from view ZEMPFLYxx. You then have to remove base table ZDEPMENTxx from this copy. Join conditions and view fields referring to this table are also deleted. This view should now be entered as selection method for search help ZEMPLOY_FLYxx. The search help only becomes effective for field ZFLCREWxx-EMP_NUM when it has been attached. Go to change mode in the maintenance screen for table ZFLCREWxx. Position the cursor on field EMP_NUM. Choose Goto → Search help → For field. In the next dialog box, enter the name of search help ZEMPLOY_FLYxx. Choose
Continue. The proposal created by the system for assigning the search help parameters to the fields of the table is probably correct. Check this and copy the definition. Activate table ZFLCREWxx. Check your success as described. Note: Of course you are not recommended to attach search help ZEMPLOY_FLYxx to table ZEMPLOYxx. This would have the desired effect for field ZFLCREWxx-EMP_NUM. However, only flight personnel would be offered for all other fields to be checked against table ZEMPLOYxx as well. This, however, is a senseless restriction for example for field ZDEPMENTxx-Department head
Note: Using the default values for search help parameters described in the appendix, you can also define the required search help ZEMPLOY_FLYxx without using a view at all. Keep selection method ZEMPLOYxx. Include Area as an additional parameter in the search help. Leave columns IMP, EXP, LPos and SPos empty for this parameter. Enter the value 'F' (including the apostrophes) in column Default value. The search help thus defined also does what you desire. There is also a way to modify search help ZEMPLOYxx so that it can be used for the desired function without detracting from the results of Exercise 1. Parameter Area must be added to search help ZEMPLOYxx here. It must be marked as an IMPORT parameter (mark column IMP, leave all other columns empty). You can now attach search help ZEMPLOYxx to field ZFLCREWxx-EMP_NUM. When you assign the fields to the search help parameters, you have to assign the constant 'F' (including the apostrophes) to parameter Area. After these actions, the input help of field ZFLCREWxx-EMP_NUM will function as desired, whereas the input help of field ZDEPMENTxx-Department head is not affected by these changes. This solution, however, would not result in a search help for the flight personnel. You would have to do this again when you solve Exercise 8-6.
8-3 Check if an input help exists for the fields as described. If it does not exist, it is possible that no foreign key was defined for these fields. Search help ZEMPLOY_ADMxx to be defined should be very similar to search help ZEMPLOY_FLYxx. You should therefore create it by copying and then make the following changes:
• The short text for search help ZEMPLOY_ADMxx should be adjusted to suit its meaning.
• Change the dialog type to Dialog depends on set of values.
• Since the airline should also appear in the dialog box for restricting values, there must be an entry in column SPos for the corresponding parameters. This parameter must be lower than both existing parameters. If necessary, increment them.
You also have to make sure that the search help only displays administrative employees. It is best if you copy the view created in the previous exercise and replace the value 'F' in the copy with 'A' in the selection condition. After activating this view you can enter it as selection method for search help ZEMPLOY_ADMxx. Activate the search help. The search help will be effective for the two fields if you go in change mode to the maintenance transaction of the data element you created in Exercise 2-3 for Last
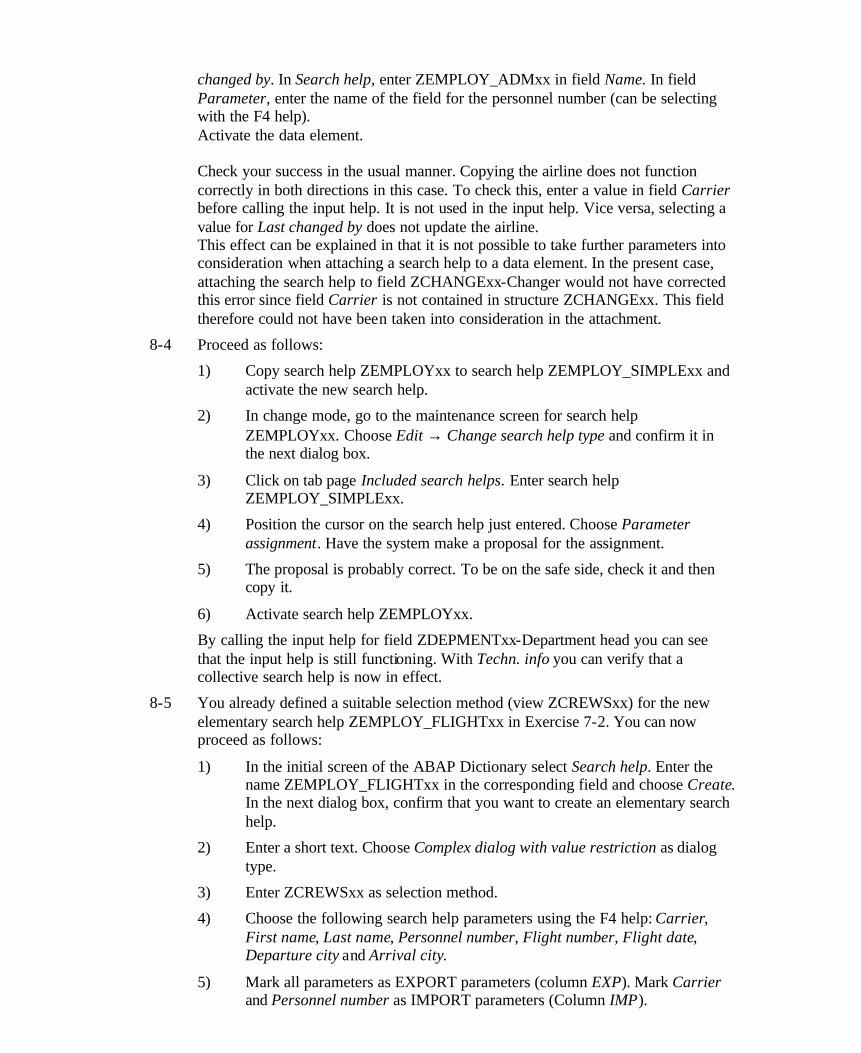
changed by. In Search help, enter ZEMPLOY_ADMxx in field Name. In field Parameter, enter the name of the field for the personnel number (can be selecting with the F4 help). Activate the data element. Check your success in the usual manner. Copying the airline does not function correctly in both directions in this case. To check this, enter a value in field Carrier before calling the input help. It is not used in the input help. Vice versa, selecting a value for Last changed by does not update the airline. This effect can be explained in that it is not possible to take further parameters into consideration when attaching a search help to a data element. In the present case, attaching the search help to field ZCHANGExx-Changer would not have corrected this error since field Carrier is not contained in structure ZCHANGExx. This field therefore could not have been taken into consideration in the attachment.
8-4 Proceed as follows:
1) Copy search help ZEMPLOYxx to search help ZEMPLOY_SIMPLExx and activate the new search help.
2) In change mode, go to the maintenance screen for search help ZEMPLOYxx. Choose Edit → Change search help type and confirm it in the next dialog box.
3) Click on tab page Included search helps. Enter search help ZEMPLOY_SIMPLExx.
4) Position the cursor on the search help just entered. Choose Parameter assignment. Have the system make a proposal for the assignment.
5) The proposal is probably correct. To be on the safe side, check it and then copy it.
6) Activate search help ZEMPLOYxx.
By calling the input help for field ZDEPMENTxx-Department head you can see that the input help is still functioning. With Techn. info you can verify that a collective search help is now in effect.
8-5 You already defined a suitable selection method (view ZCREWSxx) for the new elementary search help ZEMPLOY_FLIGHTxx in Exercise 7-2. You can now proceed as follows:
1) In the initial screen of the ABAP Dictionary select Search help. Enter the name ZEMPLOY_FLIGHTxx in the corresponding field and choose Create. In the next dialog box, confirm that you want to create an elementary search help.
2) Enter a short text. Choose Complex dialog with value restriction as dialog type.
3) Enter ZCREWSxx as selection method.
4) Choose the following search help parameters using the F4 help: Carrier, First name, Last name, Personnel number, Flight number, Flight date, Departure city and Arrival city.
5) Mark all parameters as EXPORT parameters (column EXP). Mark Carrier and Personnel number as IMPORT parameters (Column IMP).
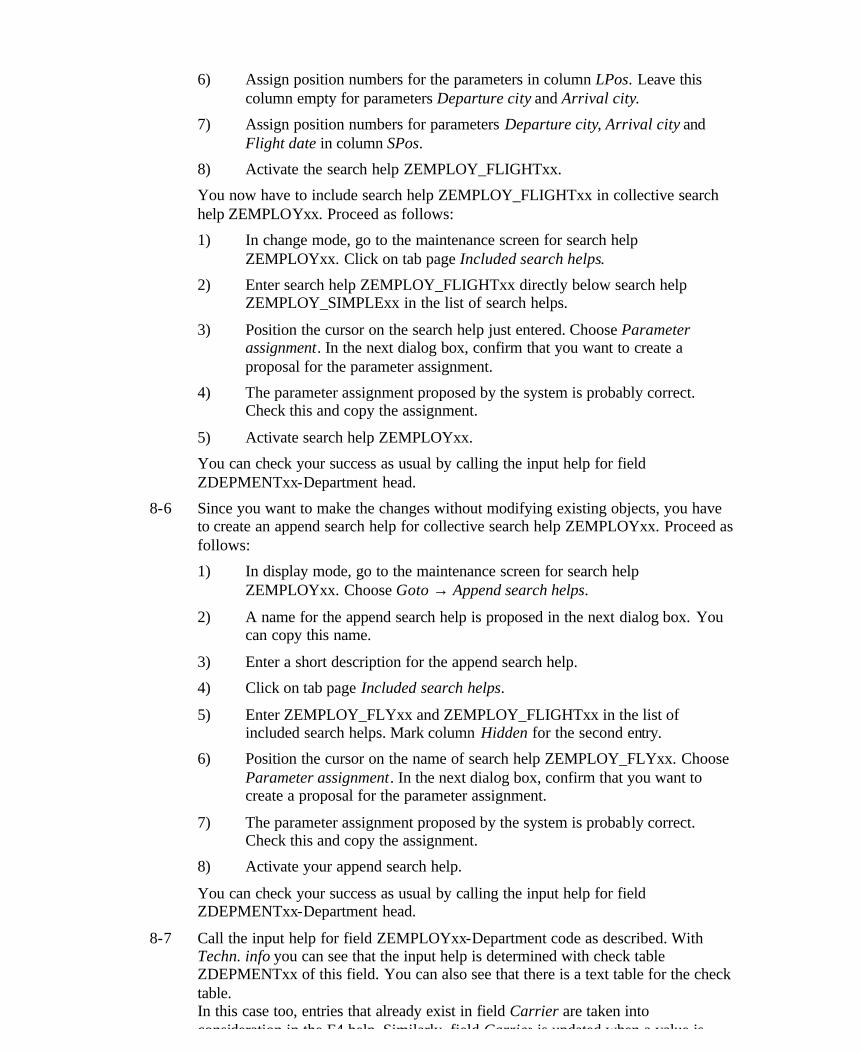
6) Assign position numbers for the parameters in column LPos. Leave this column empty for parameters Departure city and Arrival city.
7) Assign position numbers for parameters Departure city, Arrival city and Flight date in column SPos.
8) Activate the search help ZEMPLOY_FLIGHTxx.
You now have to include search help ZEMPLOY_FLIGHTxx in collective search help ZEMPLOYxx. Proceed as follows:
1) In change mode, go to the maintenance screen for search help ZEMPLOYxx. Click on tab page Included search helps.
2) Enter search help ZEMPLOY_FLIGHTxx directly below search help ZEMPLOY_SIMPLExx in the list of search helps.
3) Position the cursor on the search help just entered. Choose Parameter assignment. In the next dialog box, confirm that you want to create a proposal for the parameter assignment.
4) The parameter assignment proposed by the system is probably correct. Check this and copy the assignment.
5) Activate search help ZEMPLOYxx.
You can check your success as usual by calling the input help for field ZDEPMENTxx-Department head.
8-6 Since you want to make the changes without modifying existing objects, you have to create an append search help for collective search help ZEMPLOYxx. Proceed as follows:
1) In display mode, go to the maintenance screen for search help ZEMPLOYxx. Choose Goto → Append search helps.
2) A name for the append search help is proposed in the next dialog box. You can copy this name.
3) Enter a short description for the append search help.
4) Click on tab page Included search helps.
5) Enter ZEMPLOY_FLYxx and ZEMPLOY_FLIGHTxx in the list of included search helps. Mark column Hidden for the second entry.
6) Position the cursor on the name of search help ZEMPLOY_FLYxx. Choose Parameter assignment. In the next dialog box, confirm that you want to create a proposal for the parameter assignment.
7) The parameter assignment proposed by the system is probably correct. Check this and copy the assignment.
8) Activate your append search help.
You can check your success as usual by calling the input help for field ZDEPMENTxx-Department head.
8-7 Call the input help for field ZEMPLOYxx-Department code as described. With Techn. info you can see that the input help is determined with check table ZDEPMENTxx of this field. You can also see that there is a text table for the check table. In this case too, entries that already exist in field Carrier are taken into consideration in the F4 help. Similarly, field Carrier is updated when a value is
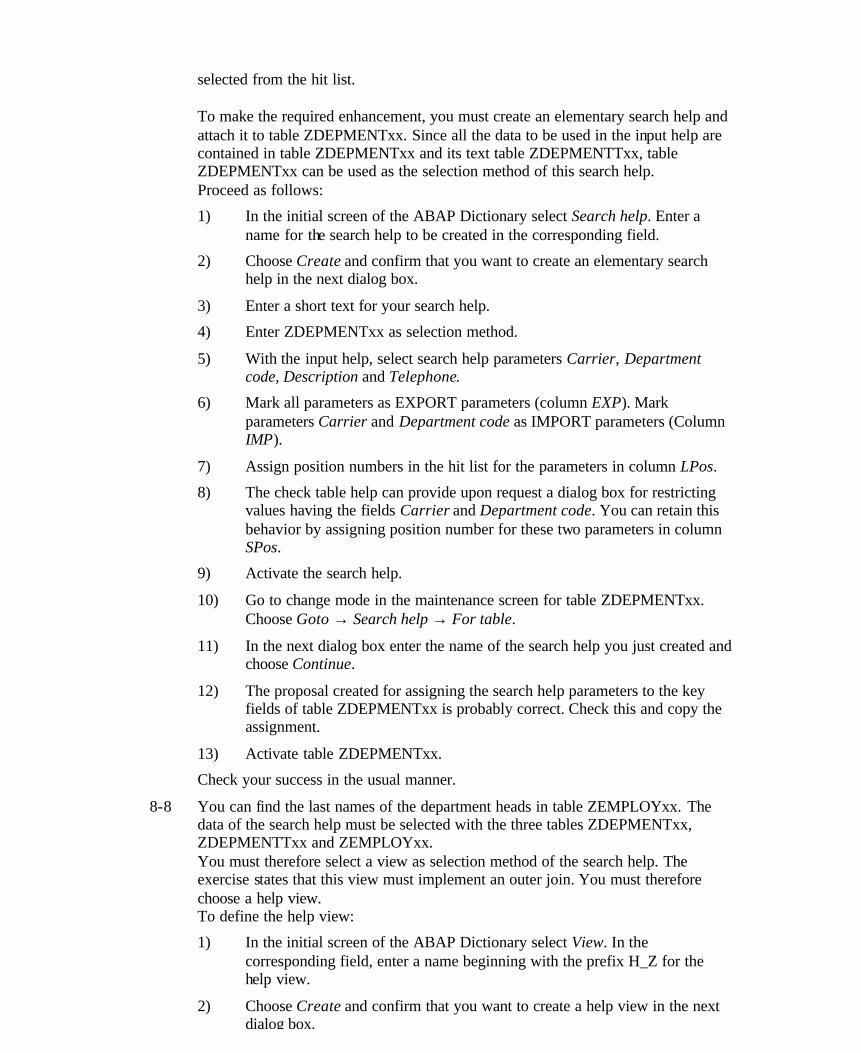
selected from the hit list. To make the required enhancement, you must create an elementary search help and attach it to table ZDEPMENTxx. Since all the data to be used in the input help are contained in table ZDEPMENTxx and its text table ZDEPMENTTxx, table ZDEPMENTxx can be used as the selection method of this search help. Proceed as follows:
1) In the initial screen of the ABAP Dictionary select Search help. Enter a name for the search help to be created in the corresponding field.
2) Choose Create and confirm that you want to create an elementary search help in the next dialog box.
3) Enter a short text for your search help.
4) Enter ZDEPMENTxx as selection method.
5) With the input help, select search help parameters Carrier, Department code, Description and Telephone.
6) Mark all parameters as EXPORT parameters (column EXP). Mark parameters Carrier and Department code as IMPORT parameters (Column IMP).
7) Assign position numbers in the hit list for the parameters in column LPos.
8) The check table help can provide upon request a dialog box for restricting values having the fields Carrier and Department code. You can retain this behavior by assigning position number for these two parameters in column SPos.
9) Activate the search help.
10) Go to change mode in the maintenance screen for table ZDEPMENTxx. Choose Goto → Search help → For table.
11) In the next dialog box enter the name of the search help you just created and choose Continue.
12) The proposal created for assigning the search help parameters to the key fields of table ZDEPMENTxx is probably correct. Check this and copy the assignment.
13) Activate table ZDEPMENTxx.
Check your success in the usual manner.
8-8 You can find the last names of the department heads in table ZEMPLOYxx. The data of the search help must be selected with the three tables ZDEPMENTxx, ZDEPMENTTxx and ZEMPLOYxx. You must therefore select a view as selection method of the search help. The exercise states that this view must implement an outer join. You must therefore choose a help view. To define the help view:
1) In the initial screen of the ABAP Dictionary select View. In the corresponding field, enter a name beginning with the prefix H_Z for the help view.
2) Choose Create and confirm that you want to create a help view in the next dialog box.
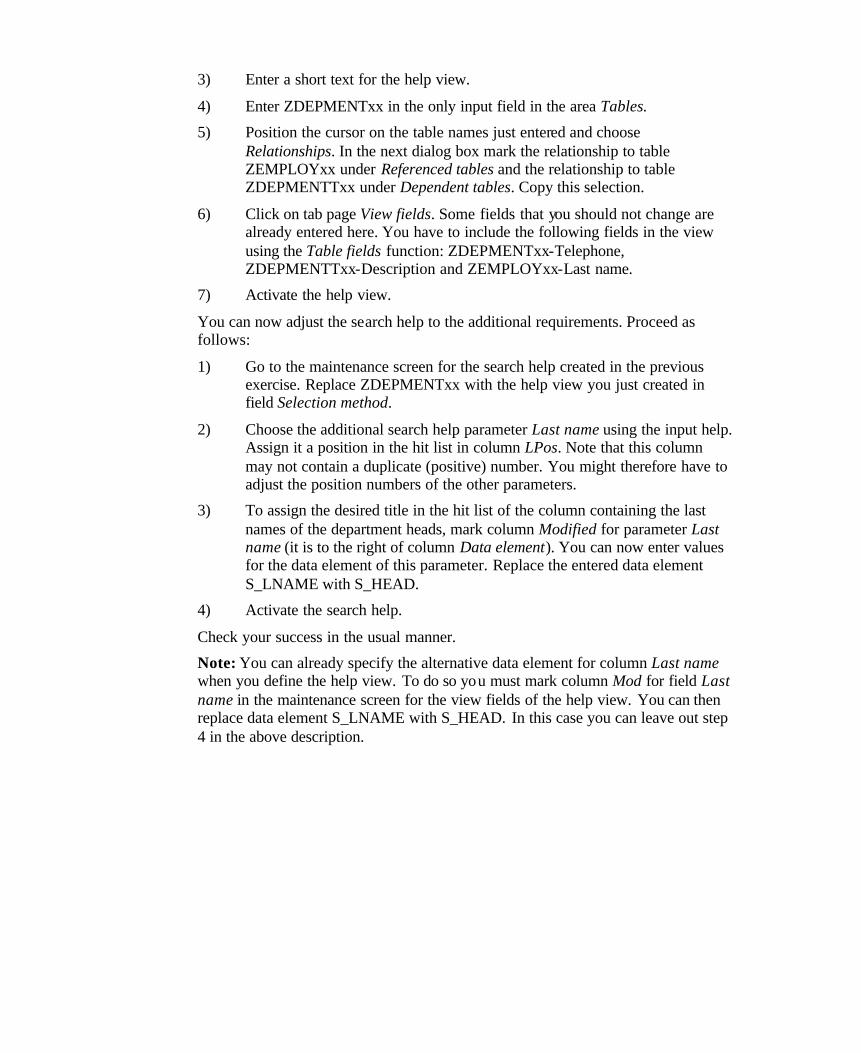
3) Enter a short text for the help view.
4) Enter ZDEPMENTxx in the only input field in the area Tables.
5) Position the cursor on the table names just entered and choose Relationships. In the next dialog box mark the relationship to table ZEMPLOYxx under Referenced tables and the relationship to table ZDEPMENTTxx under Dependent tables. Copy this selection.
6) Click on tab page View fields. Some fields that you should not change are already entered here. You have to include the following fields in the view using the Table fields function: ZDEPMENTxx-Telephone, ZDEPMENTTxx-Description and ZEMPLOYxx-Last name.
7) Activate the help view.
You can now adjust the search help to the additional requirements. Proceed as follows:
1) Go to the maintenance screen for the search help created in the previous exercise. Replace ZDEPMENTxx with the help view you just created in field Selection method.
2) Choose the additional search help parameter Last name using the input help. Assign it a position in the hit list in column LPos. Note that this column may not contain a duplicate (positive) number. You might therefore have to adjust the position numbers of the other parameters.
3) To assign the desired title in the hit list of the column containing the last names of the department heads, mark column Modified for parameter Last name (it is to the right of column Data element). You can now enter values for the data element of this parameter. Replace the entered data element S_LNAME with S_HEAD.
4) Activate the search help.
Check your success in the usual manner.
Note: You can already specify the alternative data element for column Last name when you define the help view. To do so you must mark column Mod for field Last name in the maintenance screen for the view fields of the help view. You can then replace data element S_LNAME with S_HEAD. In this case you can leave out step 4 in the above description.

SAP AG 1999
Section: ABAP Programming Techniques

SAP AG 1999
l Components of an ABAP program
l Processors within a work process
l ABAP programs: Types and execution methods
Contents
The ABAP Runtime Environment
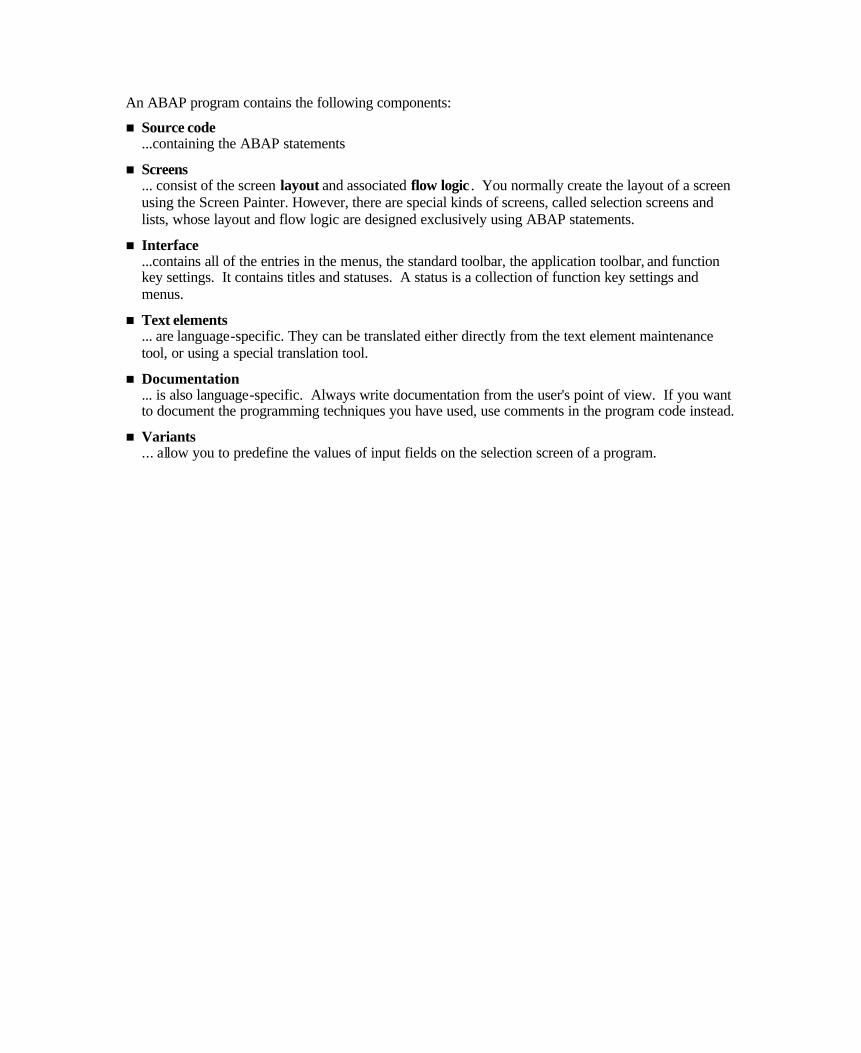
An ABAP program contains the following components:
n Source code ...containing the ABAP statements
n Screens ... consist of the screen layout and associated flow logic . You normally create the layout of a screen using the Screen Painter. However, there are special kinds of screens, called selection screens and lists, whose layout and flow logic are designed exclusively using ABAP statements.
n Interface ...contains all of the entries in the menus, the standard toolbar, the application toolbar, and function key settings. It contains titles and statuses. A status is a collection of function key settings and menus.
n Text elements ... are language-specific. They can be translated either directly from the text element maintenance tool, or using a special translation tool.
n Documentation ... is also language-specific. Always write documentation from the user's point of view. If you want to document the programming techniques you have used, use comments in the program code instead.
n Variants ... allow you to predefine the values of input fields on the selection screen of a program.
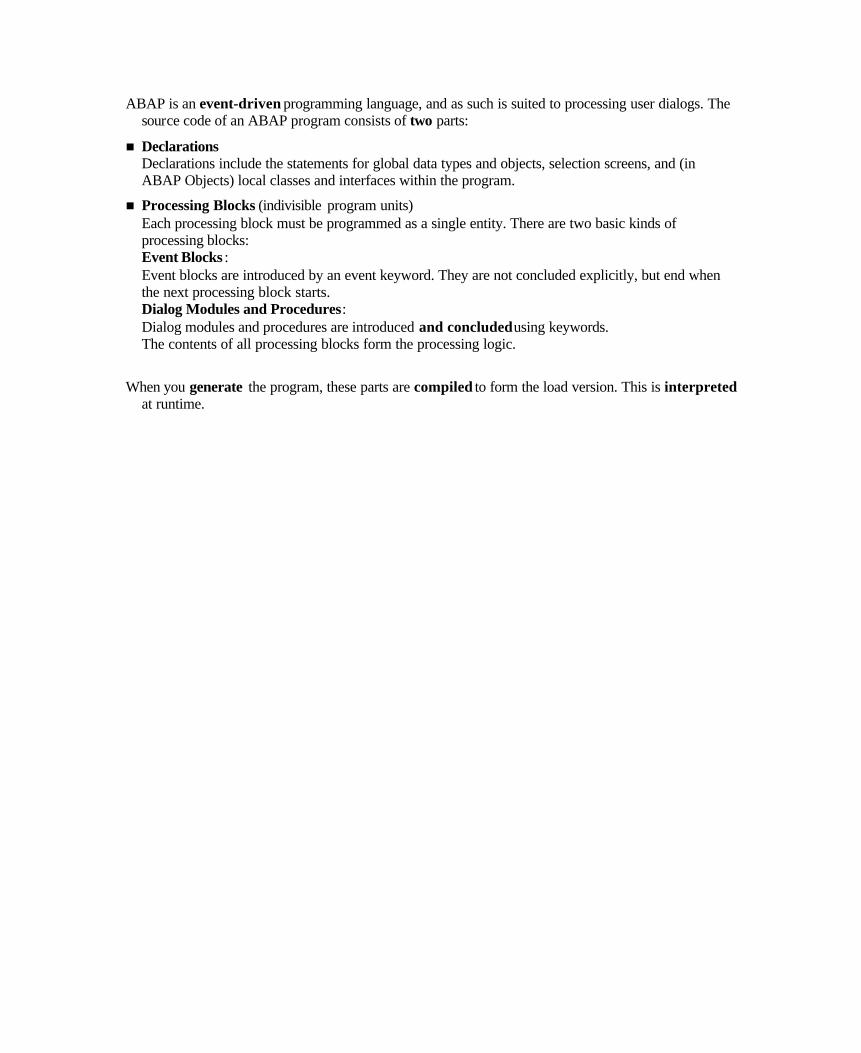
ABAP is an event-driven programming language, and as such is suited to processing user dialogs. The source code of an ABAP program consists of two parts:
n Declarations Declarations include the statements for global data types and objects, selection screens, and (in ABAP Objects) local classes and interfaces within the program.
n Processing Blocks (indivisible program units) Each processing block must be programmed as a single entity. There are two basic kinds of processing blocks: Event Blocks : Event blocks are introduced by an event keyword. They are not concluded explicitly, but end when the next processing block starts. Dialog Modules and Procedures: Dialog modules and procedures are introduced and concluded using keywords. The contents of all processing blocks form the processing logic.
When you generate the program, these parts are compiled to form the load version. This is interpreted at runtime.
In the simplest case, your program will consist of a single source code unit that contains all of the relevant processing blocks. To make your programs easier to understand, and to increase the degree to which your programs can be reused, you should use include programs.
When you create a program from the Object Navigator, the system proposes to create a TOP include for the program. This option is particularly useful when you create module pools.
n When you create a processing block, the system always asks in which include program it should insert the relevant ABAP code.
n If the include program does not exist, the system creates it and inserts an INCLUDE statement for it in the main program.
n If you name your program according to the naming convention SAPM{Y|Z}<rem_name> and then create a new processing block, the system proposes the name of the new include using the following convention: M{Y|Z}<rem_name><abbrev><num>.
n When you create further processing blocks, the system automatically proposes the appropriate include program.
In this way, the system helps you to create programs whose structures are easy to understand. The standardized naming convention will help you to find your way around other people's programs.
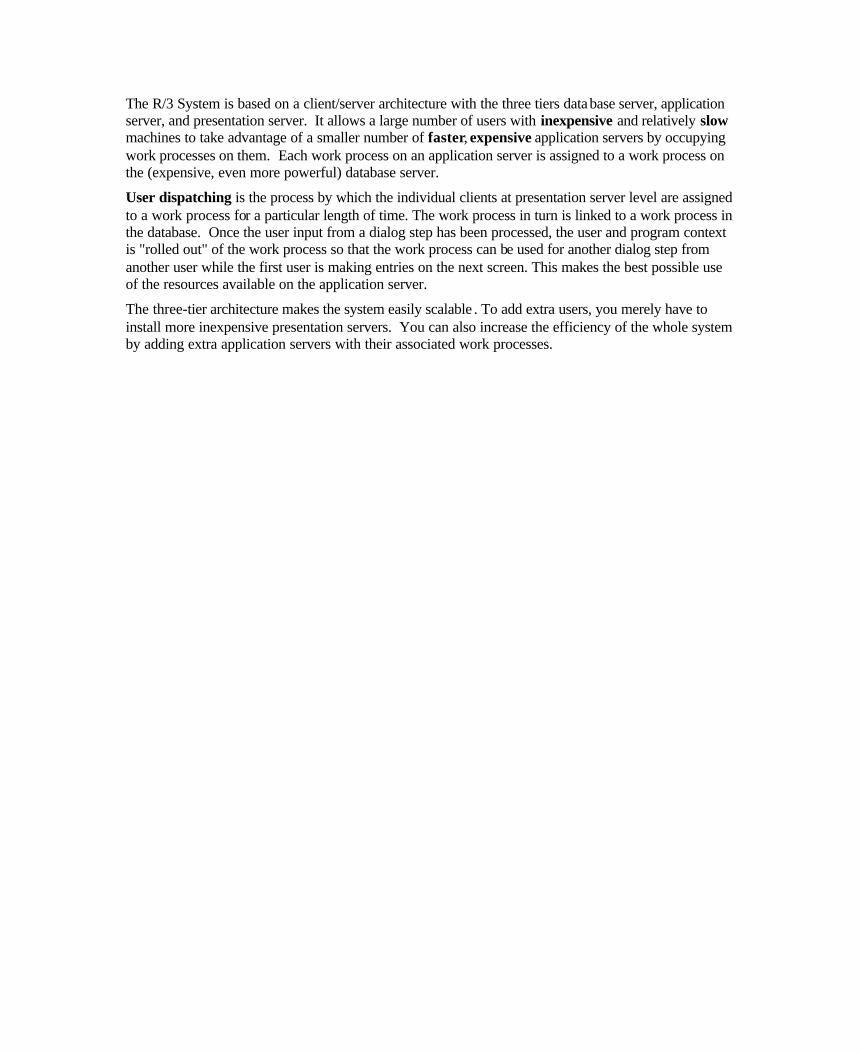
The R/3 System is based on a client/server architecture with the three tiers database server, application server, and presentation server. It allows a large number of users with inexpensive and relatively slow machines to take advantage of a smaller number of faster, expensive application servers by occupying work processes on them. Each work process on an application server is assigned to a work process on the (expensive, even more powerful) database server.
User dispatching is the process by which the individual clients at presentation server level are assigned to a work process for a particular length of time. The work process in turn is linked to a work process in the database. Once the user input from a dialog step has been processed, the user and program context is "rolled out" of the work process so that the work process can be used for another dialog step from another user while the first user is making entries on the next screen. This makes the best possible use of the resources available on the application server.
The three-tier architecture makes the system easily scalable . To add extra users, you merely have to install more inexpensive presentation servers. You can also increase the efficiency of the whole system by adding extra application servers with their associated work processes.
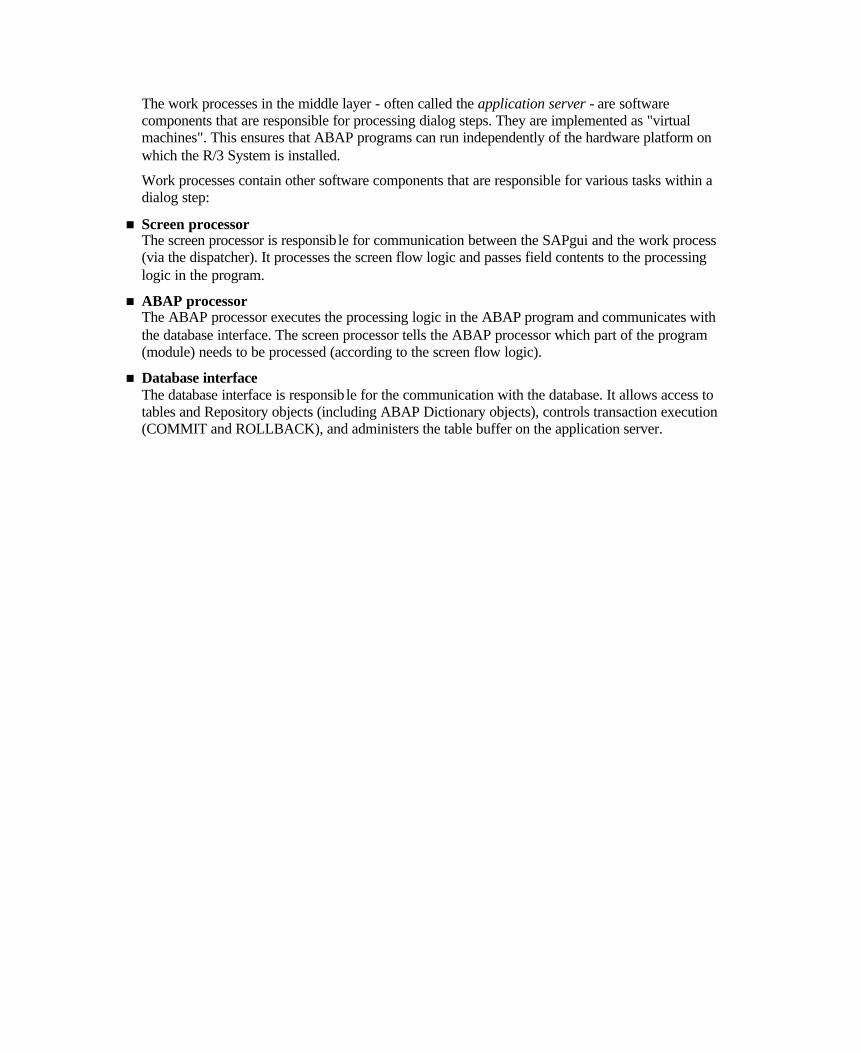
The work processes in the middle layer - often called the application server - are software components that are responsible for processing dialog steps. They are implemented as "virtual machines". This ensures that ABAP programs can run independently of the hardware platform on which the R/3 System is installed.
Work processes contain other software components that are responsible for various tasks within a dialog step:
n Screen processor The screen processor is responsib le for communication between the SAPgui and the work process (via the dispatcher). It processes the screen flow logic and passes field contents to the processing logic in the program.
n ABAP processor The ABAP processor executes the processing logic in the ABAP program and communicates with the database interface. The screen processor tells the ABAP processor which part of the program (module) needs to be processed (according to the screen flow logic).
n Database interface The database interface is responsib le for the communication with the database. It allows access to tables and Repository objects (including ABAP Dictionary objects), controls transaction execution (COMMIT and ROLLBACK), and administers the table buffer on the application server.
The individual processing blocks are called in a predetermined sequence at runtime, regardless of the position in which they occur in the program. Once a processing block has been called, the statements within it are processed seqeuentially.
n Event block If the system program or a user triggers an event for which the corresponding event block has been written in the processing logic, that event block is processed. The program flow is controlled either by the system or the user.
n Modularization unit When the system encounters a modularization unit call within a processing block, it calls the corresponding processing block. In this case, the program flow is controlled by the programmer.
Assigning transaction codes To allow a module pool to be executed, you must assign a transaction code to it. You can (but do not have to) assign a transaction code to an executable (type 1) program.

You assign a dialog transaction to a module pool. The following steps occur when you run a dialog transaction:
n First, the LOAD-OF-PROGRAM event is triggered. Once this event block has been executed, the ABAP processor passes control to the screen processor. For an example of how to use this new event, refer to the example in the Function Groups and Function Modules unit.
n The screen processor processes the intial screen specified in the transaction definition. The initial screen can be a selection screen (regardless of the program type). The PROCESS BEFORE OUTPUT event is triggered and control passes to the ABAP processor, which processes the first PBO module.
n The ABAP processor executes the processing block and returns control to the screen processor. Once all PBO modules have been processed, the contents of any ABAP fields with identically-named corresponding fields on the screen are transported to the relevant screen fields. Then the screen is displayed (screen contents, active title, active status).
n Once the user has chosen a dialog function (such as ENTER), the contents of the screen fields are transported back to the corresponding identically-named fields in the ABAP program, and the processing blocks that belong to the PROCESS AFTER INPUT event are processed. The system then continues by processing the next screen.
The only processing logic that is processed in a dialog transaction are the statements belonging to the LOAD-OF-PROGRAM event and those occurring in the various modules. However, you can also use the statement LEAVE TO LIST-PROCESSING. This makes all of the list processing events available to you.
You can only assign a report transaction to an executable (type 1) program. In a report transaction, the system calls particular events in a fixed sequence, and calls a series of standard screens. The following steps occur when you run a report transaction:
n First, the LOAD-OF-PROGRAM event is triggered.
n Then the INITIALIZATION event is triggered.
n Next, the standard selection screen is called (if you have declared one), and its corresponding events are triggered: AT SELECTION-SCREEN OUTPUT and AT SELECTION-SCREEN.
n Next, the START-OF-SELECTION event is triggered. (This is the default event block. If you omit this event keyword, all statements that are not assigned to another processing block are treated as though they belong to it.)
n If you have attached a logical database to your program, the system triggers the GET <node> and GET <node> LATE events.
n Then the END-OF-SELECTION event is triggered.
n You can also include screen processing (as in module pools) by using the CALL SCREEN statement.
You can start executable (type 1) programs without using a transaction code. You can also run them in the background.
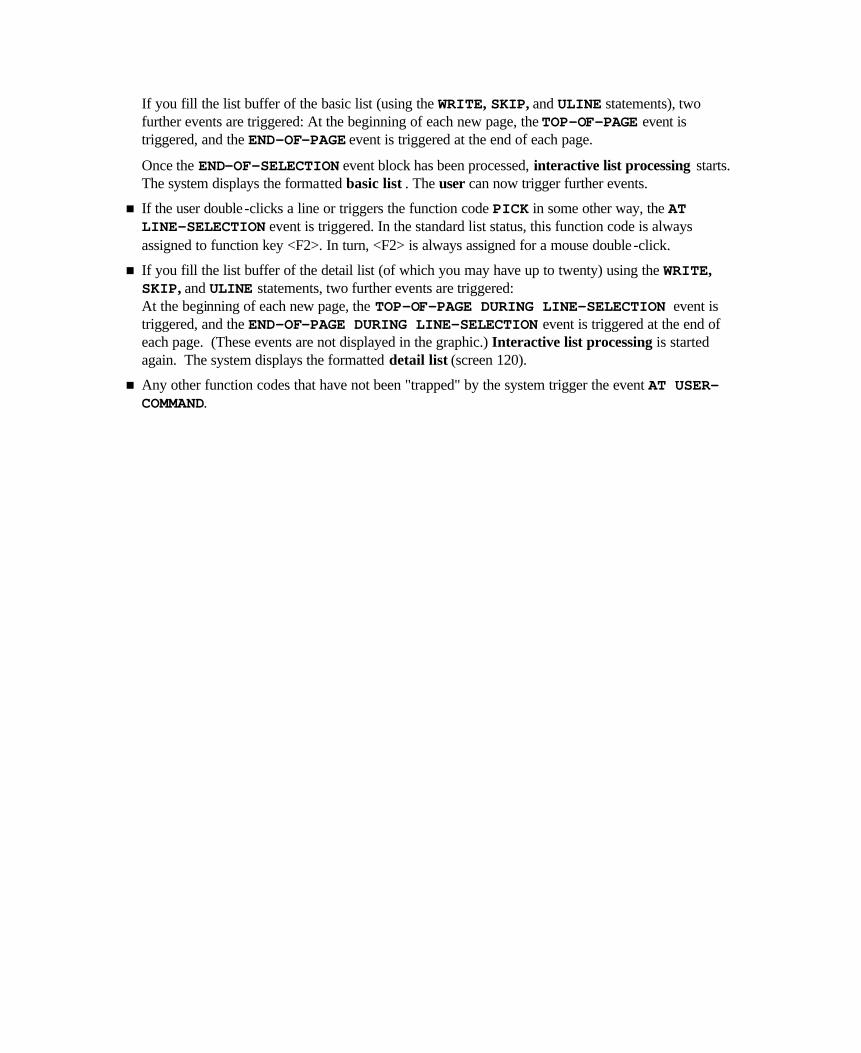
If you fill the list buffer of the basic list (using the WRITE, SKIP, and ULINE statements), two further events are triggered: At the beginning of each new page, the TOP-OF-PAGE event is triggered, and the END-OF-PAGE event is triggered at the end of each page.
Once the END-OF-SELECTION event block has been processed, interactive list processing starts. The system displays the formatted basic list . The user can now trigger further events.
n If the user double-clicks a line or triggers the function code PICK in some other way, the AT LINE-SELECTION event is triggered. In the standard list status, this function code is always assigned to function key <F2>. In turn, <F2> is always assigned for a mouse double -click.
n If you fill the list buffer of the detail list (of which you may have up to twenty) using the WRITE, SKIP, and ULINE statements, two further events are triggered: At the beginning of each new page, the TOP-OF-PAGE DURING LINE-SELECTION event is triggered, and the END-OF-PAGE DURING LINE-SELECTION event is triggered at the end of each page. (These events are not displayed in the graphic.) Interactive list processing is started again. The system displays the formatted detail list (screen 120).
n Any other function codes that have not been "trapped" by the system trigger the event AT USER-COMMAND.
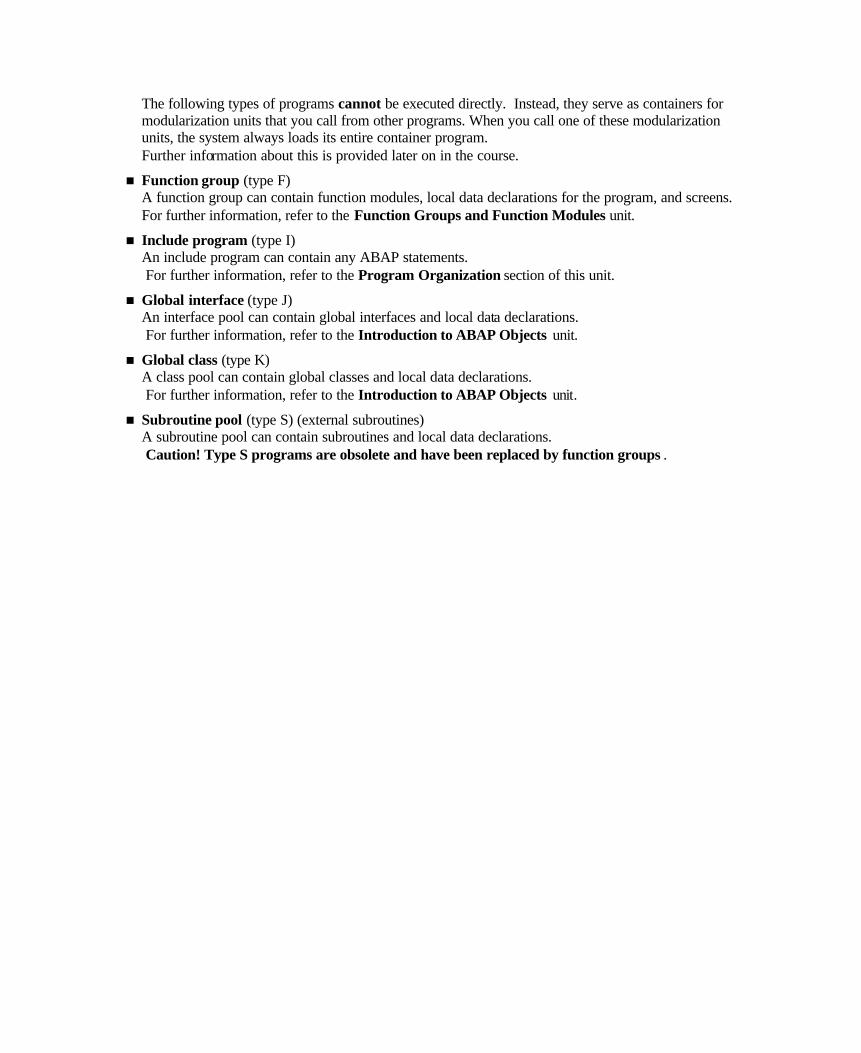
The following types of programs cannot be executed directly. Instead, they serve as containers for modularization units that you call from other programs. When you call one of these modularization units, the system always loads its entire container program. Further information about this is provided later on in the course.
n Function group (type F) A function group can contain function modules, local data declarations for the program, and screens. For further information, refer to the Function Groups and Function Modules unit.
n Include program (type I) An include program can contain any ABAP statements. For further information, refer to the Program Organization section of this unit.
n Global interface (type J) An interface pool can contain global interfaces and local data declarations. For further information, refer to the Introduction to ABAP Objects unit.
n Global class (type K) A class pool can contain global classes and local data declarations. For further information, refer to the Introduction to ABAP Objects unit.
n Subroutine pool (type S) (external subroutines) A subroutine pool can contain subroutines and local data declarations. Caution! Type S programs are obsolete and have been replaced by function groups .


Unit: ABAP Runtime Environment Topic: Creating Repository Objects
At the conclusion of these exercises, you will be able to:
• Create development classes
• Create programs
You are a programmer for an airline consortium, and it is your job to write analysis programs for several airlines.
1. Log onto the operating system and then to the R/3 training system (your instructor will tell you its name) with the user name BC402-##. Enter a new password. ## is your two-digit group number.
2. You need to create a development class as a container for your Repository objects. The development class must be assigned to a change request. You also need to create two programs. ## is your two-digit group number. Model solutions: BC402 SAPBC402_TYPS_COUNTERLIST1 SAPBC402_TYPS_FLIGHTLIST1
2-1 Create the development class Z##_BC402.
2-2 Create an executable (type 1) program Z##_BC402_COUNTERLIST1 without a TOP include.
2-3 Create an executable program Z##_BC402_FLIGHTLIST1 without a TOP include.
From this point onwards, you should always work with the Object Navigator. This provides you with an overview of all of the Repository objects in your development class. From here, you can select objects you want to work on.

Unit: ABAP Runtime Environment Topic: Creating Repository objects
2-2 Model solution SAPBC402_TYPS_COUNTERLIST1 *&-----------------------------------------------------------* *& Report SAPBC402_TYPS_COUNTERLIST1 * *& * *&-----------------------------------------------------------* *& solution to exercise 1 data types and data objects . * *& * *&-----------------------------------------------------------* REPORT sapbc402_typs_counterlist1.
2-3 Model solution SAPBC402_TYPS_FLIGHTLIST1 *&-----------------------------------------------------------* *& Report SAPBC402_TYPS_FLIGHTLIST1 * *& * *&-----------------------------------------------------------* *& solution of exercise 2 datatypes and dataobjects * *& * *&-----------------------------------------------------------* REPORT sapbc402_typs_flightlist1.

SAP AG 1999
l Kinds of data types
l Defining data types
l Kinds of data objects and how to declare them
l Field symbols and references
Contents
Data Types and Data Objects
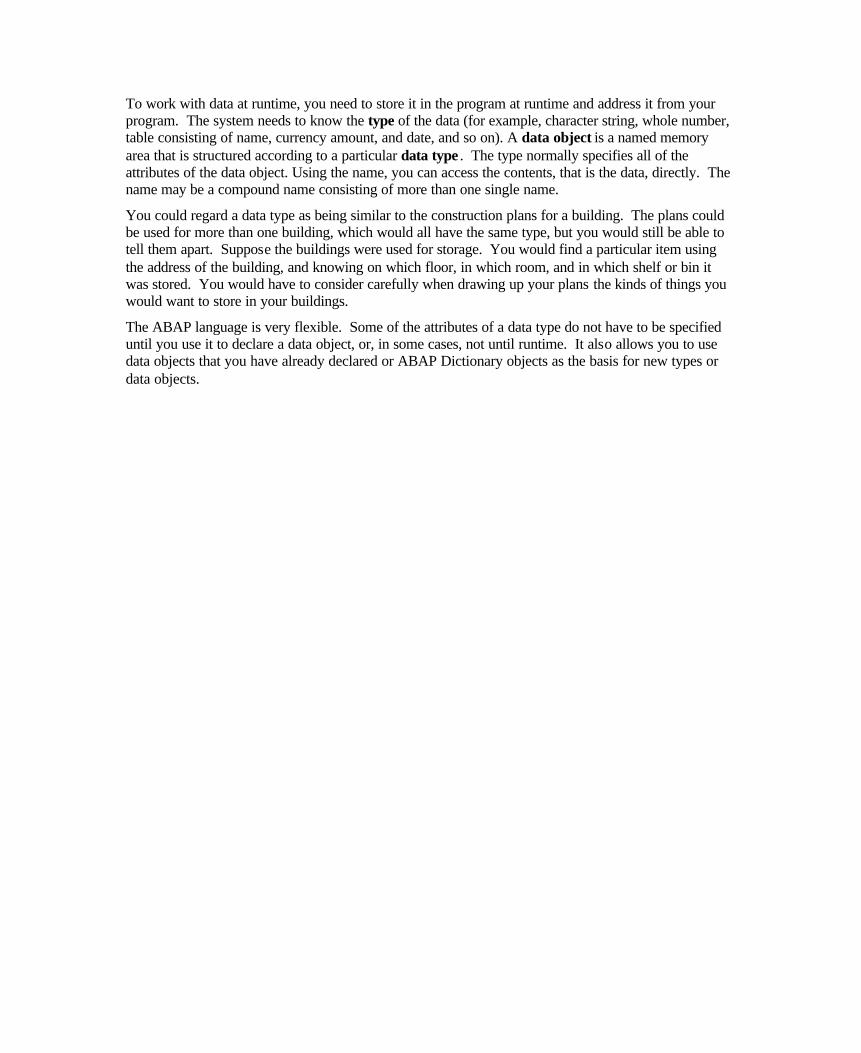
To work with data at runtime, you need to store it in the program at runtime and address it from your program. The system needs to know the type of the data (for example, character string, whole number, table consisting of name, currency amount, and date, and so on). A data object is a named memory area that is structured according to a particular data type . The type normally specifies all of the attributes of the data object. Using the name, you can access the contents, that is the data, directly. The name may be a compound name consisting of more than one single name.
You could regard a data type as being similar to the construction plans for a building. The plans could be used for more than one building, which would all have the same type, but you would still be able to tell them apart. Suppose the buildings were used for storage. You would find a particular item using the address of the building, and knowing on which floor, in which room, and in which shelf or bin it was stored. You would have to consider carefully when drawing up your plans the kinds of things you would want to store in your buildings.
The ABAP language is very flexible. Some of the attributes of a data type do not have to be specified until you use it to declare a data object, or, in some cases, not until runtime. It also allows you to use data objects that you have already declared or ABAP Dictionary objects as the basis for new types or data objects.
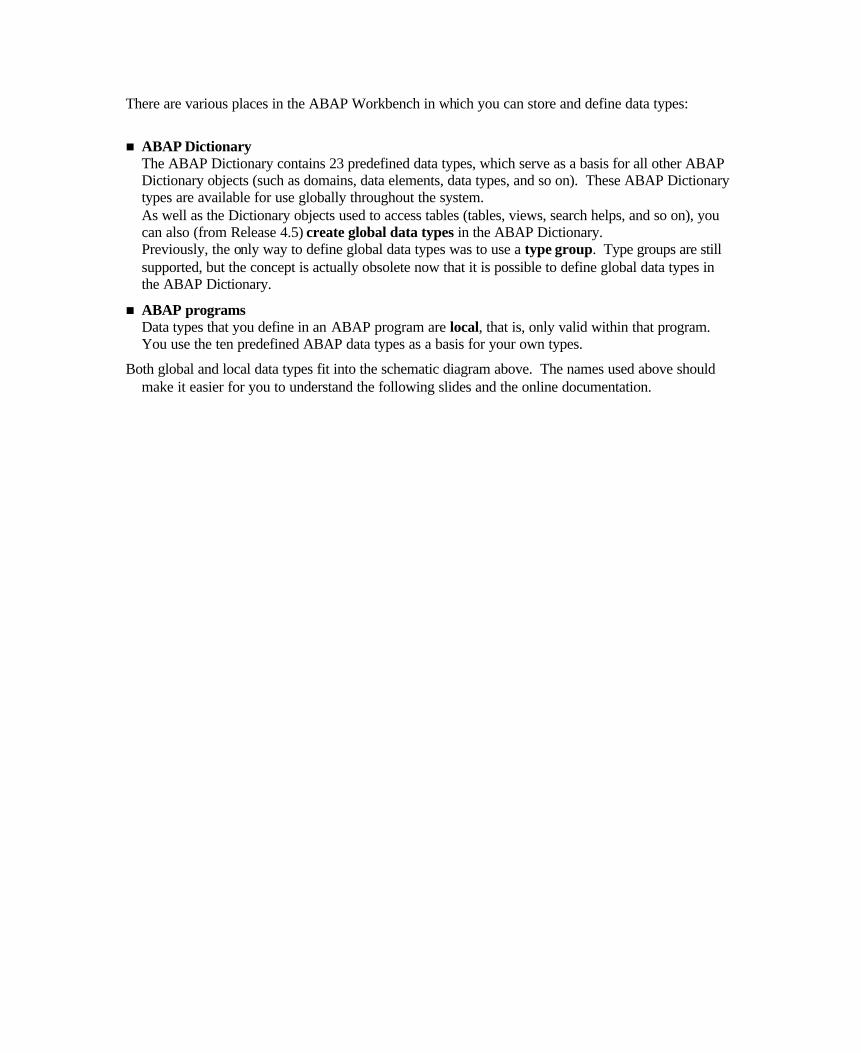
There are various places in the ABAP Workbench in which you can store and define data types:
n ABAP Dictionary The ABAP Dictionary contains 23 predefined data types, which serve as a basis for all other ABAP Dictionary objects (such as domains, data elements, data types, and so on). These ABAP Dictionary types are available for use globally throughout the system. As well as the Dictionary objects used to access tables (tables, views, search helps, and so on), you can also (from Release 4.5) create global data types in the ABAP Dictionary. Previously, the only way to define global data types was to use a type group. Type groups are still supported, but the concept is actually obsolete now that it is possible to define global data types in the ABAP Dictionary.
n ABAP programs Data types that you define in an ABAP program are local, that is, only valid within that program. You use the ten predefined ABAP data types as a basis for your own types.
Both global and local data types fit into the schematic diagram above. The names used above should make it easier for you to understand the following slides and the online documentation.
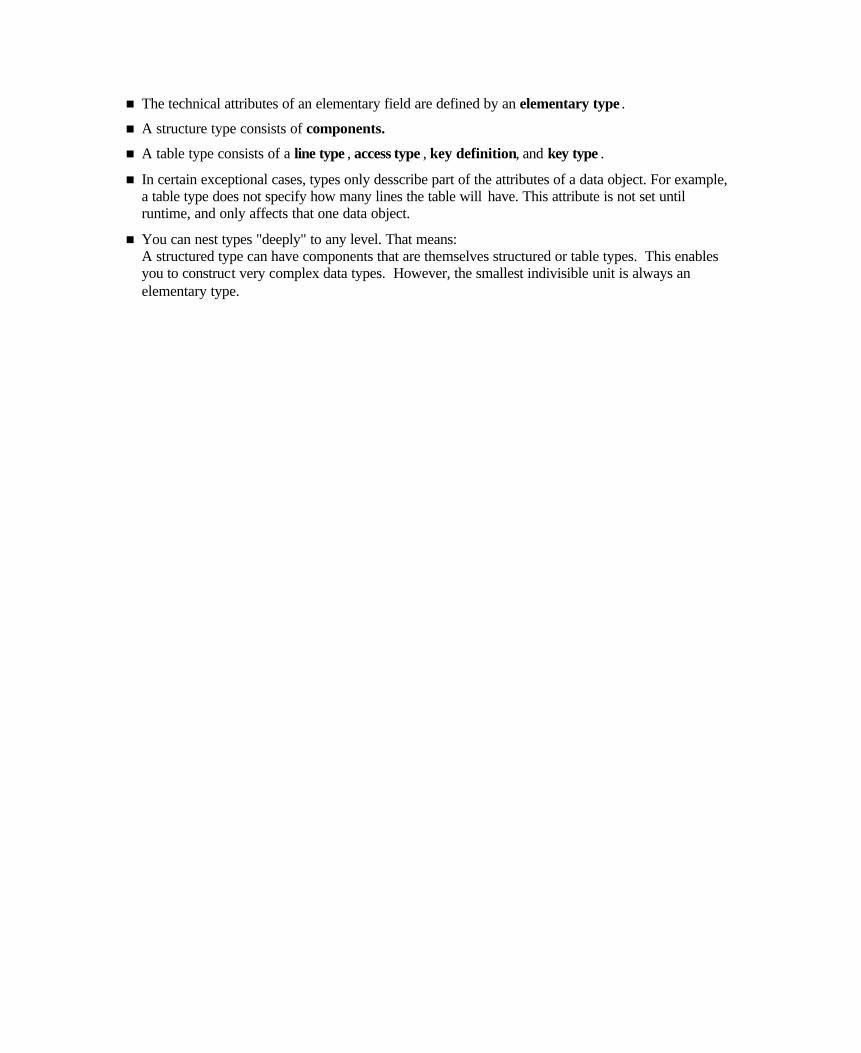
n The technical attributes of an elementary field are defined by an elementary type .
n A structure type consists of components.
n A table type consists of a line type , access type , key definition, and key type .
n In certain exceptional cases, types only desscribe part of the attributes of a data object. For example, a table type does not specify how many lines the table will have. This attribute is not set until runtime, and only affects that one data object.
n You can nest types "deeply" to any level. That means: A structured type can have components that are themselves structured or table types. This enables you to construct very complex data types. However, the smallest indivisible unit is always an elementary type.
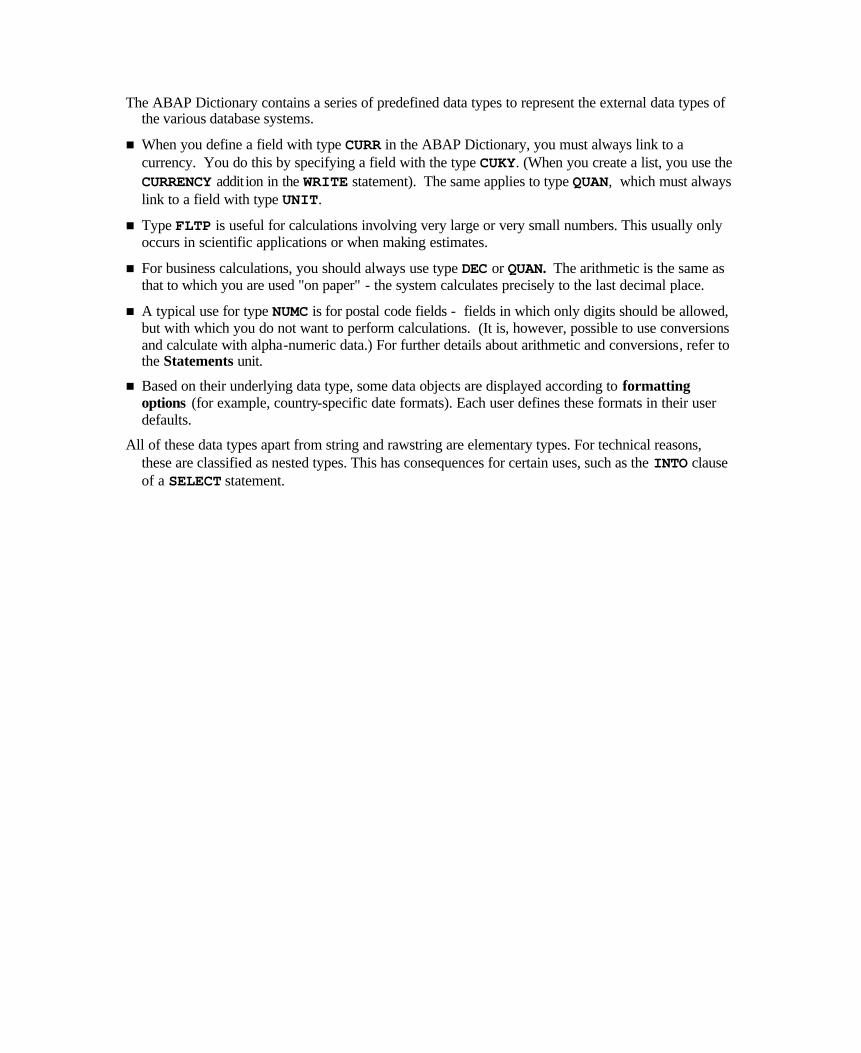
The ABAP Dictionary contains a series of predefined data types to represent the external data types of the various database systems.
n When you define a field with type CURR in the ABAP Dictionary, you must always link to a currency. You do this by specifying a field with the type CUKY. (When you create a list, you use the CURRENCY addit ion in the WRITE statement). The same applies to type QUAN, which must always link to a field with type UNIT.
n Type FLTP is useful for calculations involving very large or very small numbers. This usually only occurs in scientific applications or when making estimates.
n For business calculations, you should always use type DEC or QUAN. The arithmetic is the same as that to which you are used "on paper" - the system calculates precisely to the last decimal place.
n A typical use for type NUMC is for postal code fields - fields in which only digits should be allowed, but with which you do not want to perform calculations. (It is, however, possible to use conversions and calculate with alpha-numeric data.) For further details about arithmetic and conversions, refer to the Statements unit.
n Based on their underlying data type, some data objects are displayed according to formatting options (for example, country-specific date formats). Each user defines these formats in their user defaults.
All of these data types apart from string and rawstring are elementary types. For technical reasons, these are classified as nested types. This has consequences for certain uses, such as the INTO clause of a SELECT statement.
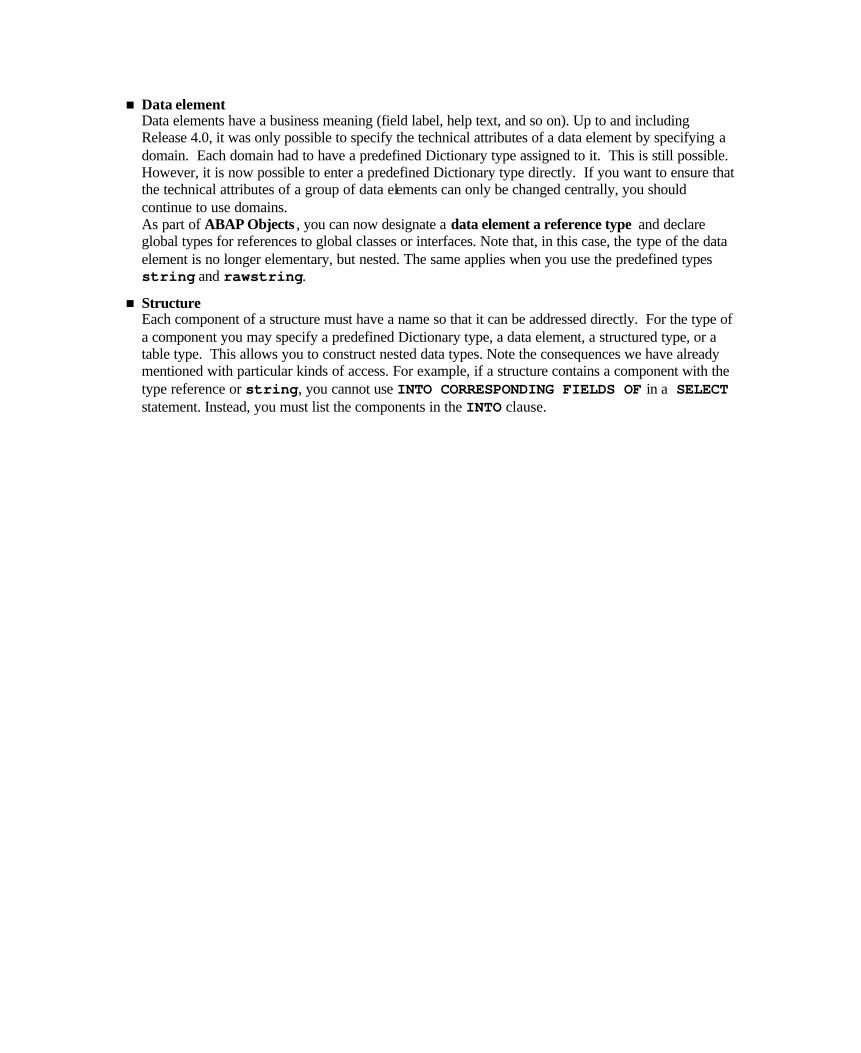
n Data element Data elements have a business meaning (field label, help text, and so on). Up to and including Release 4.0, it was only possible to specify the technical attributes of a data element by specifying a domain. Each domain had to have a predefined Dictionary type assigned to it. This is still possible. However, it is now possible to enter a predefined Dictionary type directly. If you want to ensure that the technical attributes of a group of data elements can only be changed centrally, you should continue to use domains. As part of ABAP Objects , you can now designate a data element a reference type and declare global types for references to global classes or interfaces. Note that, in this case, the type of the data element is no longer elementary, but nested. The same applies when you use the predefined types string and rawstring.
n Structure Each component of a structure must have a name so that it can be addressed directly. For the type of a component you may specify a predefined Dictionary type, a data element, a structured type, or a table type. This allows you to construct nested data types. Note the consequences we have already mentioned with particular kinds of access. For example, if a structure contains a component with the type reference or string, you cannot use INTO CORRESPONDING FIELDS OF in a SELECT statement. Instead, you must list the components in the INTO clause.

The data type of an internal table is fully specified by its:
n Line type The line type defines the attributes of the individual fields. You can specify any ABAP data type.
n Key definition The key fields and their sequence determine the criteria by which the system identifies table lines.
n Key type You can define the key as either unique or non-unique . The uniqueness of the key must be compatible with the access type you have chosen for the table. If the key is unique, there can be no duplicate entries in the table.
n Access type Unlike database tables, the system assigns line numbers to certain kinds of internal tables. This means that you can use the index to access lines as well as the key. We sometimes use the term "table type " to refer to this.

We can also divide up internal table types into three kinds by their access type:
n Standard tables. In a standard table, you can access data using either the table index or the key. Since the key of a standard table always has to be non-unique for compatibility reasons, the system searches the whole table each time you access it using the key. Consequently, you should always use the index to access a standard table whenever possible.
n Sorted tables. In a sorted table, the system automatically stores the entries and inserts new entries sorted by the table key. The system uses a binary search on the table when you access it using the key. You can specify the key of a sorted table as unique. You will often use the key to access a sorted table, but it is also possible to use the index. Standard tables and sorted tables are generically known as index tables.
n Hashed tables. You can only access a hashed table using the key. There are certain conditions under which you can considerably reduce the access times to large tables by using a hashed table. The key of a hashed table must always be unique.
You do not have to specify the access type fully. You can either omit it altogether, or specify it partially (index table). The table type is then generic, and, by omitting certain attributes, we can use it to specify the types of interface parameters.
To find out the access type of an internal table at runtime, use the statement DESCRIBE TABLE <itab> KIND <charfield>.
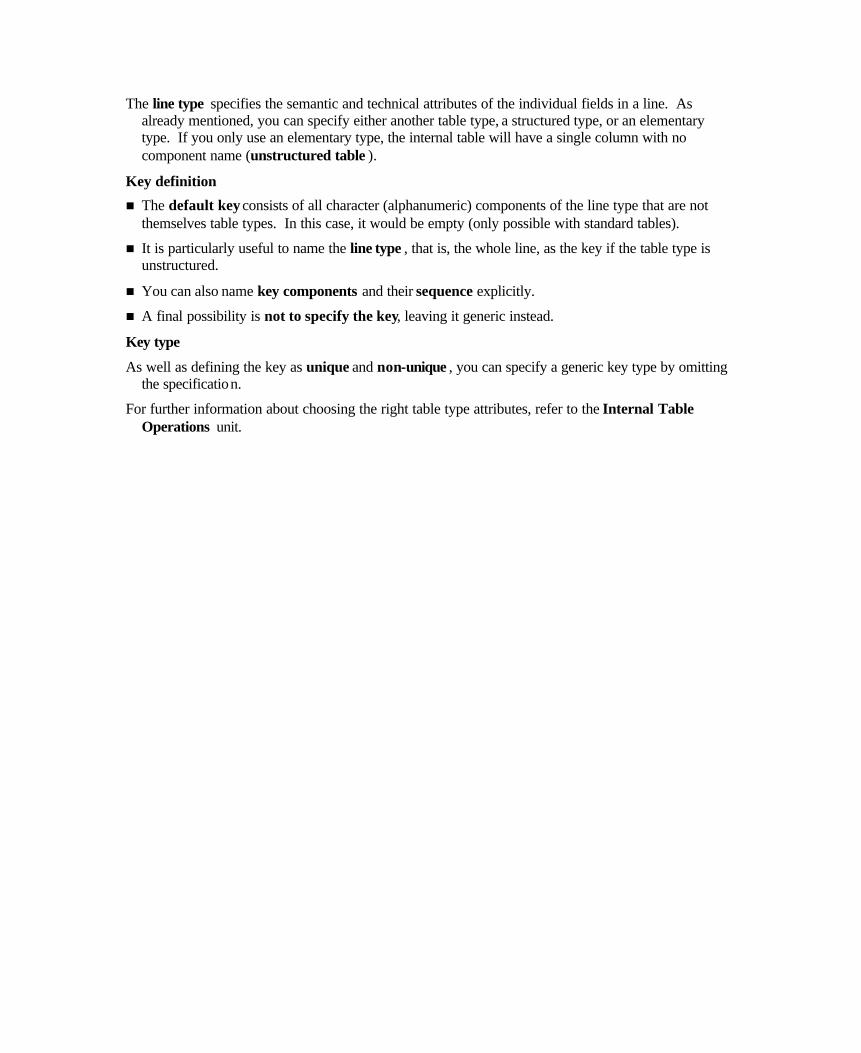
The line type specifies the semantic and technical attributes of the individual fields in a line. As already mentioned, you can specify either another table type, a structured type, or an elementary type. If you only use an elementary type, the internal table will have a single column with no component name (unstructured table ).
Key definition
n The default key consists of all character (alphanumeric) components of the line type that are not themselves table types. In this case, it would be empty (only possible with standard tables).
n It is particularly useful to name the line type , that is, the whole line, as the key if the table type is unstructured.
n You can also name key components and their sequence explicitly.
n A final possibility is not to specify the key, leaving it generic instead.
Key type
As well as defining the key as unique and non-unique , you can specify a generic key type by omitting the specification.
For further information about choosing the right table type attributes, refer to the Internal Table Operations unit.
n Type F is useful for calculations involving very large or very small numbers. This usually only occurs in scientific applications or when making estimates.
n For business calculations, you should always use type P. The arithmetic is the same as that to which you are used "on paper" - the system calcualtes precisely to the la st decimal place.
n A typical use for type N is for postal code fields - fields in which only digits should be allowed, but with which you do not want to perform calculations. (It is, however, possible to use conversions and calculate with alpha-numeric data.) For further details about arithmetic and conversions, refer to the Statements unit.
n Unlike type C, N, or X fields, the length of a string or hexadecimal string is not statically defined. Instead, it is variable, and, at runtime, will always take the length of its current contents. The memory is managed dynamically by the system. Strings and hexadecimal strings can have any length.
n You cannot currently use STRING or XSTRING to specify the type of a screen field.
You can only define a new data type based on an existing type. Use the TYPE addition to refer to data types, that is, predefined ABAP types, user-defined local types, predefined ABAP Dictionary types, user-defined ABAP Dictionary types, or fields or entire lines from database tables. If you refer to an ABAP Dictionary type, changes to the global type are automatically passed on to your type. This ensures that your type is always compatible with the corresponding ABAP Dictionary object. Types that refer to the ABAP Dictionary also have the advantages of formatting options, field help, and possible entries help. The underlying ABAP Dictionary data type is converted into the corresponding ABAP data type when the program is generated. For further information, refer to the ABAP syntax documentation for the TABLES statement. If a global and a local data type both have the same name, the system uses the local type . Use the LIKE addition to refer to the type of a data object that you have already declared. This also applies to the next slides.
Elementary types The length specification after the type name for ABAP data types C, N, and X specifies the number of characters in the type. For type P fields, you can also set the number of decimal places. If you omit these specifications, the system uses the default values (refer to the chart under Predefined ABAP Types).
Structured types Use the statements TYPES BEGIN OF <structype>. and TYPES END OF <structype>. to enclose the list of components in your structure. Any type definitions may appear between the two statements. You can also construct nested data types. To refer to the line type of a table type or an internal table, use the additions TYPE LINE OF <itabtype> or LIKE LINE OF <itab> respectively.
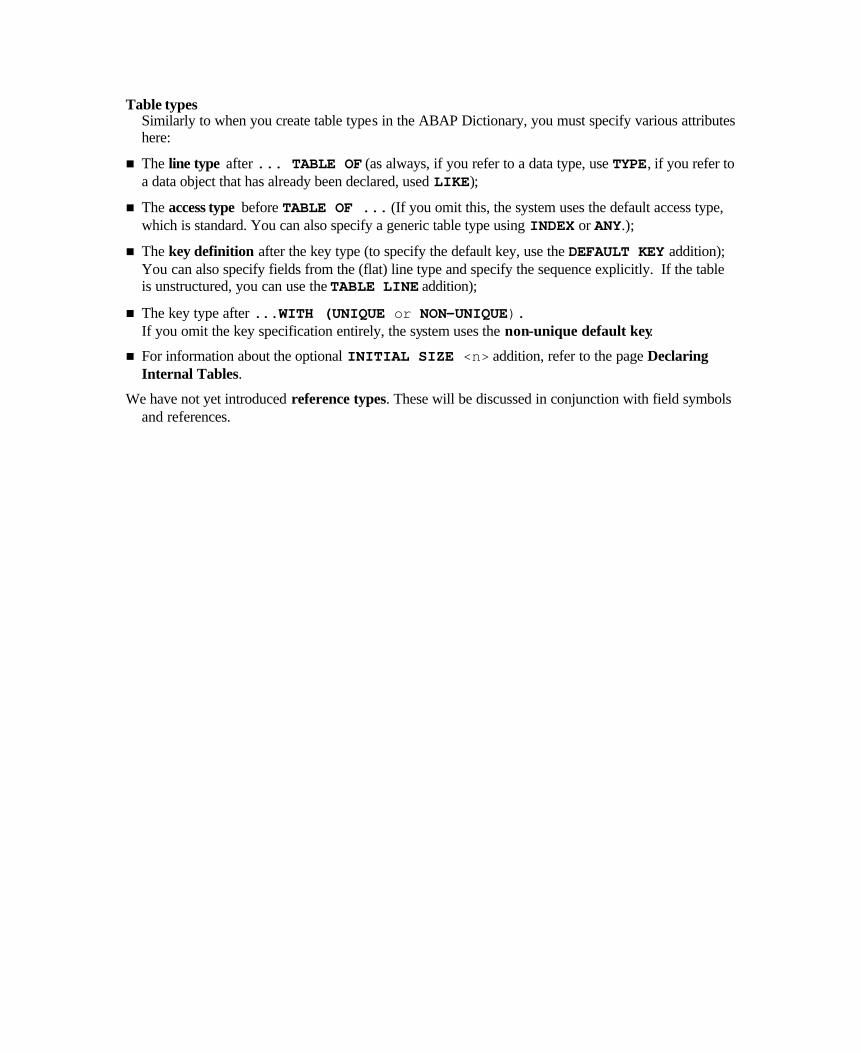
Table types Similarly to when you create table types in the ABAP Dictionary, you must specify various attributes here:
n The line type after ... TABLE OF (as always, if you refer to a data type, use TYPE, if you refer to a data object that has already been declared, used LIKE);
n The access type before TABLE OF ... (If you omit this, the system uses the default access type, which is standard. You can also specify a generic table type using INDEX or ANY.);
n The key definition after the key type (to specify the default key, use the DEFAULT KEY addition); You can also specify fields from the (flat) line type and specify the sequence explicitly. If the table is unstructured, you can use the TABLE LINE addition);
n The key type after ...WITH (UNIQUE or NON-UNIQUE). If you omit the key specification entirely, the system uses the non-unique default key.
n For information about the optional INITIAL SIZE <n> addition, refer to the page Declaring Internal Tables.
We have not yet introduced reference types. These will be discussed in conjunction with field symbols and references.
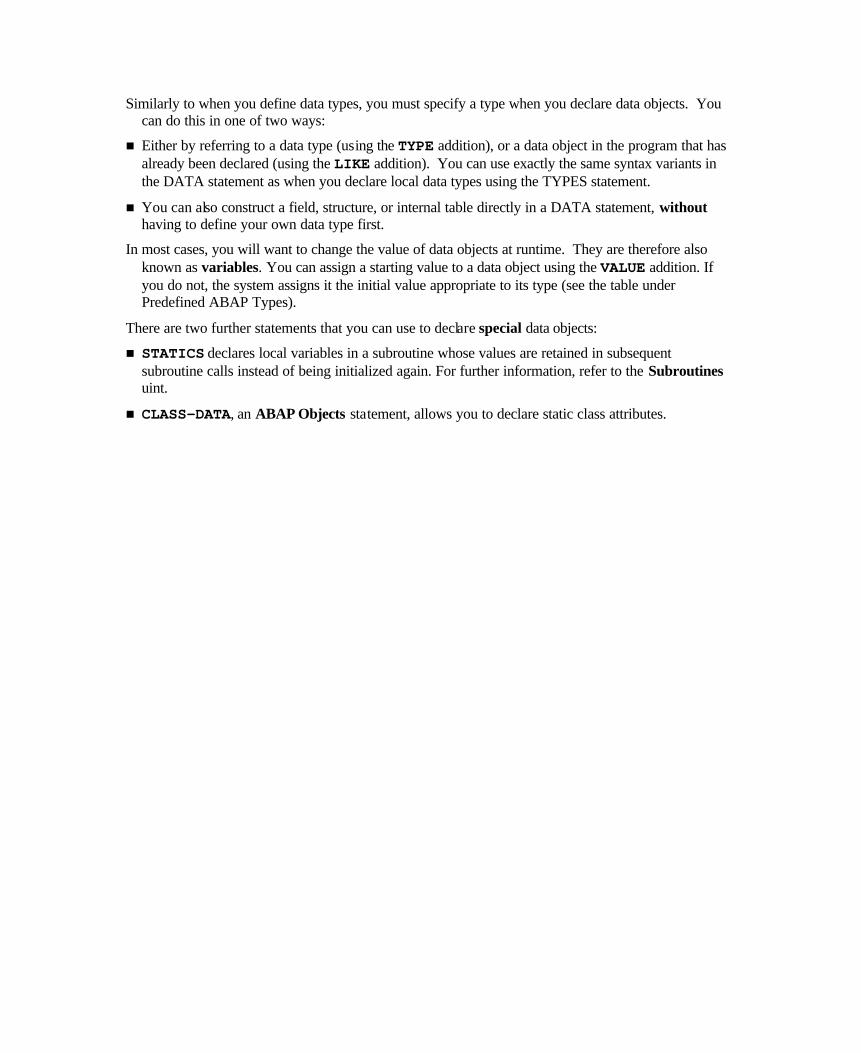
Similarly to when you define data types, you must specify a type when you declare data objects. You can do this in one of two ways:
n Either by referring to a data type (using the TYPE addition), or a data object in the program that has already been declared (using the LIKE addition). You can use exactly the same syntax variants in the DATA statement as when you declare local data types using the TYPES statement.
n You can also construct a field, structure, or internal table directly in a DATA statement, without having to define your own data type first.
In most cases, you will want to change the value of data objects at runtime. They are therefore also known as variables. You can assign a starting value to a data object using the VALUE addition. If you do not, the system assigns it the initial value appropriate to its type (see the table under Predefined ABAP Types).
There are two further statements that you can use to declare special data objects:
n STATICS declares local variables in a subroutine whose values are retained in subsequent subroutine calls instead of being initialized again. For further information, refer to the Subroutines uint.
n CLASS-DATA, an ABAP Objects statement, allows you to declare static class attributes.
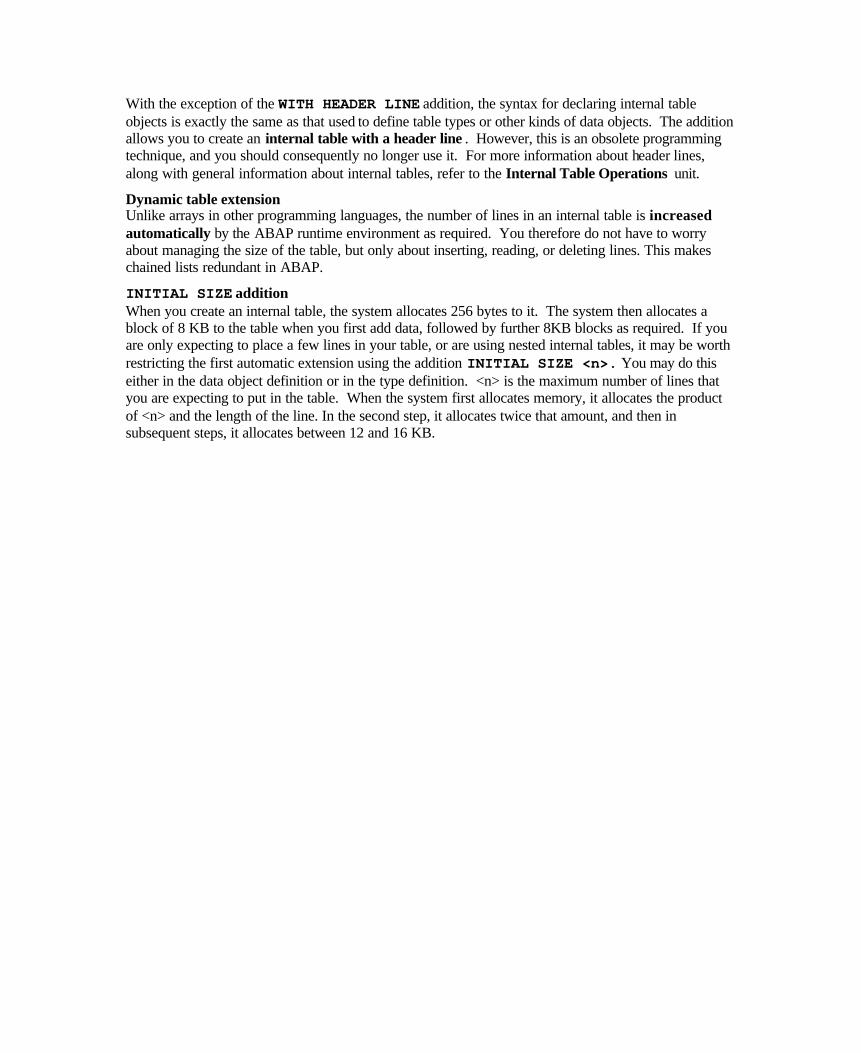
With the exception of the WITH HEADER LINE addition, the syntax for declaring internal table objects is exactly the same as that used to define table types or other kinds of data objects. The addition allows you to create an internal table with a header line . However, this is an obsolete programming technique, and you should consequently no longer use it. For more information about header lines, along with general information about internal tables, refer to the Internal Table Operations unit.
Dynamic table extension Unlike arrays in other programming languages, the number of lines in an internal table is increased automatically by the ABAP runtime environment as required. You therefore do not have to worry about managing the size of the table, but only about inserting, reading, or deleting lines. This makes chained lists redundant in ABAP.
INITIAL SIZE addition When you create an internal table, the system allocates 256 bytes to it. The system then allocates a block of 8 KB to the table when you first add data, followed by further 8KB blocks as required. If you are only expecting to place a few lines in your table, or are using nested internal tables, it may be worth restricting the first automatic extension using the addition INITIAL SIZE <n>. You may do this either in the data object definition or in the type definition. <n> is the maximum number of lines that you are expecting to put in the table. When the system first allocates memory, it allocates the product of <n> and the length of the line. In the second step, it allocates twice that amount, and then in subsequent steps, it allocates between 12 and 16 KB.
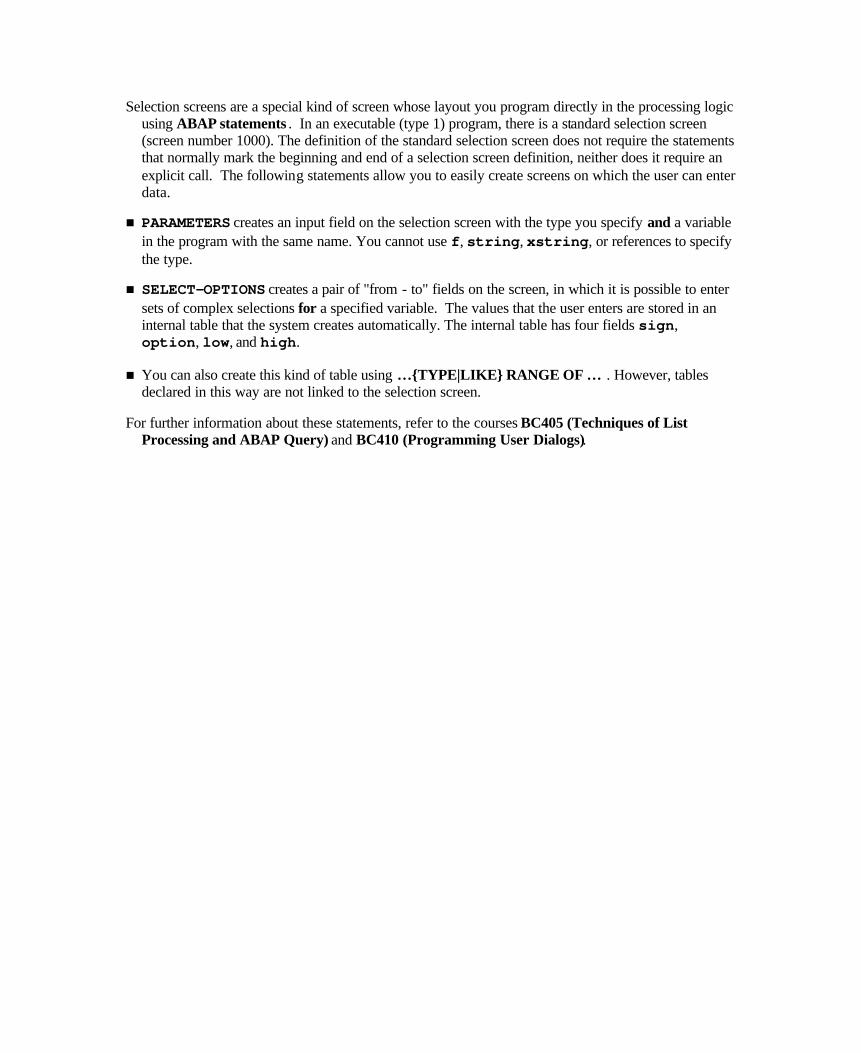
Selection screens are a special kind of screen whose layout you program directly in the processing logic using ABAP statements . In an executable (type 1) program, there is a standard selection screen (screen number 1000). The definition of the standard selection screen does not require the statements that normally mark the beginning and end of a selection screen definition, neither does it require an explicit call. The following statements allow you to easily create screens on which the user can enter data.
n PARAMETERS creates an input field on the selection screen with the type you specify and a variable in the program with the same name. You cannot use f, string, xstring, or references to specify the type.
n SELECT-OPTIONS creates a pair of "from - to" fields on the screen, in which it is possible to enter sets of complex selections for a specified variable. The values that the user enters are stored in an internal table that the system creates automatically. The internal table has four fields sign, option, low, and high.
n You can also create this kind of table using …{TYPE|LIKE} RANGE OF … . However, tables declared in this way are not linked to the selection screen.
For further information about these statements, refer to the courses BC405 (Techniques of List Processing and ABAP Query) and BC410 (Programming User Dialogs).
Constants and literals are fixed data objects - you cannot change their values at runtime.
n You define constants using the ABAP keyword CONSTANTS. In it, you must use the VALUE addition to assign a value to your constant. Recommendation: Avoid using literals wherever possible. Use constants instead. Your programs will then be easier to maintain.
n Literals allow you to specify a value directly in an ABAP statement. There are two kinds of literals - numeric literals and text literals. Text literals must always be enclosed in single quotes. Integers (including a minus sign if appropriate) can be represented as numeric literals. They are mapped to the data types i and p (based on the interval that each data type can represent). Example : DATA: result1 TYPE i, result2 LIKE result1. result1 = -1000000000 / 300 * 3. "result1: 999.999- result2 = -10000000000 / 300 * 3. "result2: 10.000.000- A numeric literal can contain up to 31 digits. All other values (decimal and floating point numbers, strings, and so on) must be given as text literals. The system converts the data type if necessary. A text literal can contain up to 255 characters. If you want a single quote to appear in a text literal, you must use two single quotes in order for it to be interpreted as part of the literal and not the closing single quote.
Text symbols are a special form of text literals.
You can create a set of text symbols for any program. These can be used for output in various ways. The advantage of text symbols over normal text literals is that they can be translated. Furthermore, text elements are stored separately from the program source code, making your program easier to understand.
Text symbols are often used to create lists that are not language-specific. You can also use them to assign texts dynamically to screen objects. (Static text elements for screen objects are a special case, and can be translated).
You can display text symbols in two different ways using the WRITE statement:
n WRITE text-<ts1>. (where <ts1> can be any three-character ID).
n WRITE '<default text>'(<ts2>). (where <ts2> can be any three-character ID). In this case, <ts2> is displayed if there is a text for it in the current logon language. If there is not, the default text is displayed.
When you use screens, the system automatically transports field contents from the processing logic to the screen and back, but only where screen fields and ABAP fields have the same names. Restriction: If you use screen fields with a reference to the ABAP Dictionary (Get from Dictionary function in the Screen Painter), you must use the TABLES statement to declare a data object with the same name as the ABAP Dictionary object in order for the field transport to work. Structures you declare like this are often referred to as work areas .
There are numerous advantages to using an ABAP Dictionary reference: Dictionary objects normally include foreign key checks, field help, possible entries, and the necessary error dialogs. Consequently you can catch inconsistent data as soon as the user enters it and before you even leave the screen.
If you program your own field checks, the field contents must already have been transported to the program. If you forget to reset the field when a check fails, an unwanted value may remain in the work area. You also face the same danger if you are not sure whether work areas are shared by more than one program.
To avoid these dangers, you should regard TABLES work areas as an interface between the screen and program, and only use them in this context. They provide data for the screen at the end of the PBO event, and receive it again when the values are transported from the screen.
Logical databases are special ABAP programs that you can attach to an executable (type 1) program. They read data from the database and pass it to the executable program. Because the task of reading the data has been passed to the logical database, your own ABAP program becomes considerably simpler.
The logical database passes the data to your program using interface work areas that you declare using the NODES <node> statement. The statement creates a variable <node> that refers to the data type in the ABAP Dictionary with the same name.
The data is passed to your program record by record. Each time the logical database makes a record available to your program, the corresponding GET <node> or GET <node> LATE event is triggered. In your program, you can code the relevant event blocks.
You can determine the type of the data record returned by the logical database using the TYPE addition. However, you are restricted to types that are supported by the logical database. For further information about this statement, refer to the online documentation or course BC405 (Techniques of List Processing and ABAP Query).
The data object SPACE is a constant with type C and length 1. It contains a single space.
The system automatically creates a structure called sy for each program, based on the ABAP Dictionary structure syst. The individual components of the structure are known as system fields . They contain values that inform you about the current state of the system. The values are updated automatically by the ABAP runtime environment.
You can access individual system fields using the notation sy-<system field>.
System fields are variables, so you can change them in your programs. However, you should only do this in cases where it is explicitly recommended in the documentation (for example, navigating between list levels by manipulating sy-lsind). In all other cases, you should only read the contents of system fields, since by changing them you might overwrite information that is important for subsequent steps in the program.
The online documentation contains a list of all system fields with notes on their use. You can also display the structure syst in the ABAP Dictionary.
n You declare field symbols using the FIELD-SYMBOLS <<fs>> statement. The brackets (<>) are part of the syntax. Field symbols allow you symbolic access to an existing data object. All of the changes that you make to the field symbol are applied to the data object assigned to it. If the field symbol is not typed (TYPE ANY), it adopts the type of the data object. By specifying a type for the field symbol, you can ensure that only compatible objects are assigned to it. Field symbols are similar to dereferenced pointers .
n You use the ASSIGN statement to assign a data object to the field symbol <<fs>>. To lift a type restriction, use the CASTING addition. The data object is then interpreted as though it had the data type of the field symbol. You can also do this with untyped field symbols using the CASTING TYPE <type> addition.
n Use the expression <<fs>> IS ASSIGNED to find out whether the fie ld symbol <<fs>> is assigned to a field.
n The statement UNASSIGN <<fs>>. sets the field symbol <<fs>> so that it points to nothing. The logical expression <<fs>> IS ASSIGNED is then false. An untyped field symbol that does not have a data object assigned to it behaves (for compatibility reasons) like a constant with type C and length 1.
n The statement TYPES <reftype> TYPE REF TO data. *) defines a reference type to a data object. DATA... defines the corresponding reference itself. Such a reference is a field in which an address can be stored.
n The GET REFERENCE OF <data object> INTO <reference> statement writes the address of the data object (already declared) into the reference variable. In other words, the reference points to the data object in memory. Thus ABAP uses reference semantics (changes apply to the address) as well as value semantics, as used in field symbols (where changes apply to the data objects). However, in ABAP, reference semantics is restricted to assignments.
n The dereferencing operator ->* in the ASSIGN statement allows you to assign the data object to which the reference points to a field symbol. You can then access the value of the data object.
n You can create a data object with a specified type at runtime using the CREATE DATA <reference> statement. This data object has no name, but the reference points to its address. (See also GET REFERENCE OF...)
n For further information about using references in ABAP Objects, refer to the Introduction to ABAP Objects unit.
n __________________________
n *) Note : Data in this context is not a keyword, but rather a predefined name like space or p.
You can use type casting dynamically when you assign a data object to a field symbol. The graphic presents an example of this.
The name of the database table is not known until runtime (and consequently, neither is the line type). Since you cannot specify a dynamic INTO clause in the SELECT statement, the system writes the data records into the long character field line.
The assignment to field symbol <fs_wa> and the type casting then make it possible to access the field as though it were a flat structure. All type attributes are inherited from the database table. (You can also refer to the line type of an ABAP Dictionary object using the TYPE addition.) If you knew the component names, you could display the fields directly using WRITE <fs_wa>-... .
However, you will not normally know the names of the components. In this case, you must use the ASSIGN COMPONENT variant, in which the components of the structure <fs_wa> are assigned one-by-one to the field symbol <fs_comp> and then displayed. When the loop runs out of components, the program reads the next data record.
Problem The address of line must satisfy the same address rules as a table structure (address must be divisible by four with no remainder). You can force this by declaring an integer field dummy directly before declaring line. (Integers are always stored at addresses that are divisible by four.)
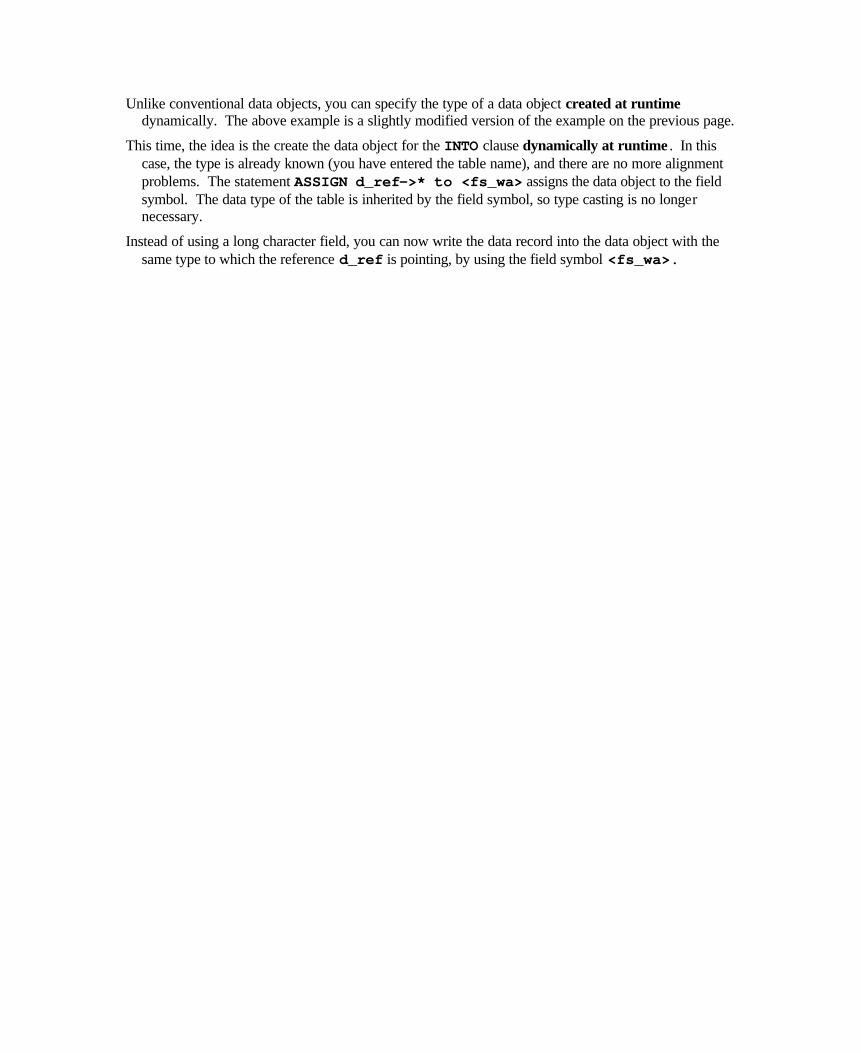
Unlike conventional data objects, you can specify the type of a data object created at runtime dynamically. The above example is a slightly modified version of the example on the previous page.
This time, the idea is the create the data object for the INTO clause dynamically at runtime . In this case, the type is already known (you have entered the table name), and there are no more alignment problems. The statement ASSIGN d_ref->* to <fs_wa> assigns the data object to the field symbol. The data type of the table is inherited by the field symbol, so type casting is no longer necessary.
Instead of using a long character field, you can now write the data record into the data object with the same type to which the reference d_ref is pointing, by using the field symbol <fs_wa>.
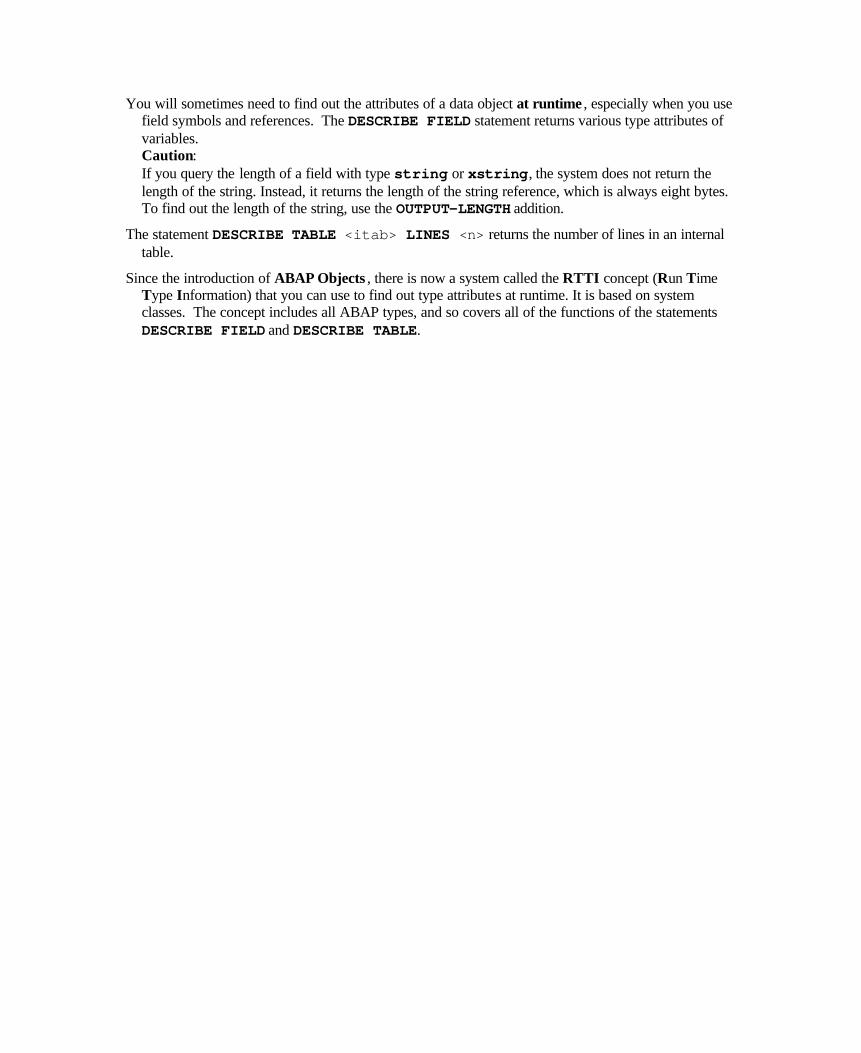
You will sometimes need to find out the attributes of a data object at runtime , especially when you use field symbols and references. The DESCRIBE FIELD statement returns various type attributes of variables. Caution: If you query the length of a field with type string or xstring, the system does not return the length of the string. Instead, it returns the length of the string reference, which is always eight bytes. To find out the length of the string, use the OUTPUT-LENGTH addition.
The statement DESCRIBE TABLE <itab> LINES <n> returns the number of lines in an internal table.
Since the introduction of ABAP Objects , there is now a system called the RTTI concept (Run Time Type Information) that you can use to find out type attributes at runtime. It is based on system classes. The concept includes all ABAP types, and so covers all of the functions of the statements DESCRIBE FIELD and DESCRIBE TABLE.

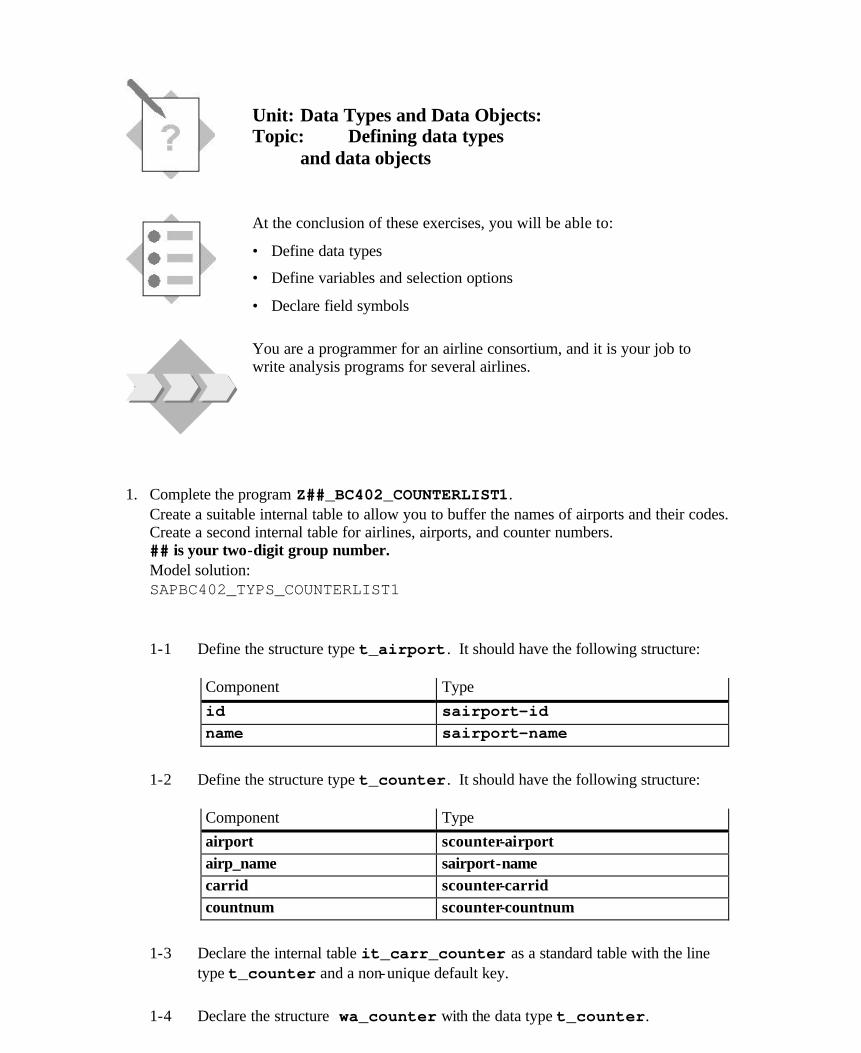
Unit: Data Types and Data Objects: Topic: Defining data types and data objects
At the conclusion of these exercises, you will be able to:
• Define data types
• Define variables and selection options
• Declare field symbols
You are a programmer for an airline consortium, and it is your job to write analysis programs for several airlines.
1. Complete the program Z##_BC402_COUNTERLIST1. Create a suitable internal table to allow you to buffer the names of airports and their codes. Create a second internal table for airlines, airports, and counter numbers. ## is your two-digit group number. Model solution: SAPBC402_TYPS_COUNTERLIST1
1-1 Define the structure type t_airport. It should have the following structure: Component Type id sairport-id name sairport-name
1-2 Define the structure type t_counter. It should have the following structure: Component Type airport scounter-airport airp_name sairport-name carrid scounter-carrid countnum scounter-countnum
1-3 Declare the internal table it_carr_counter as a standard table with the line type t_counter and a non-unique default key.
1-4 Declare the structure wa_counter with the data type t_counter.
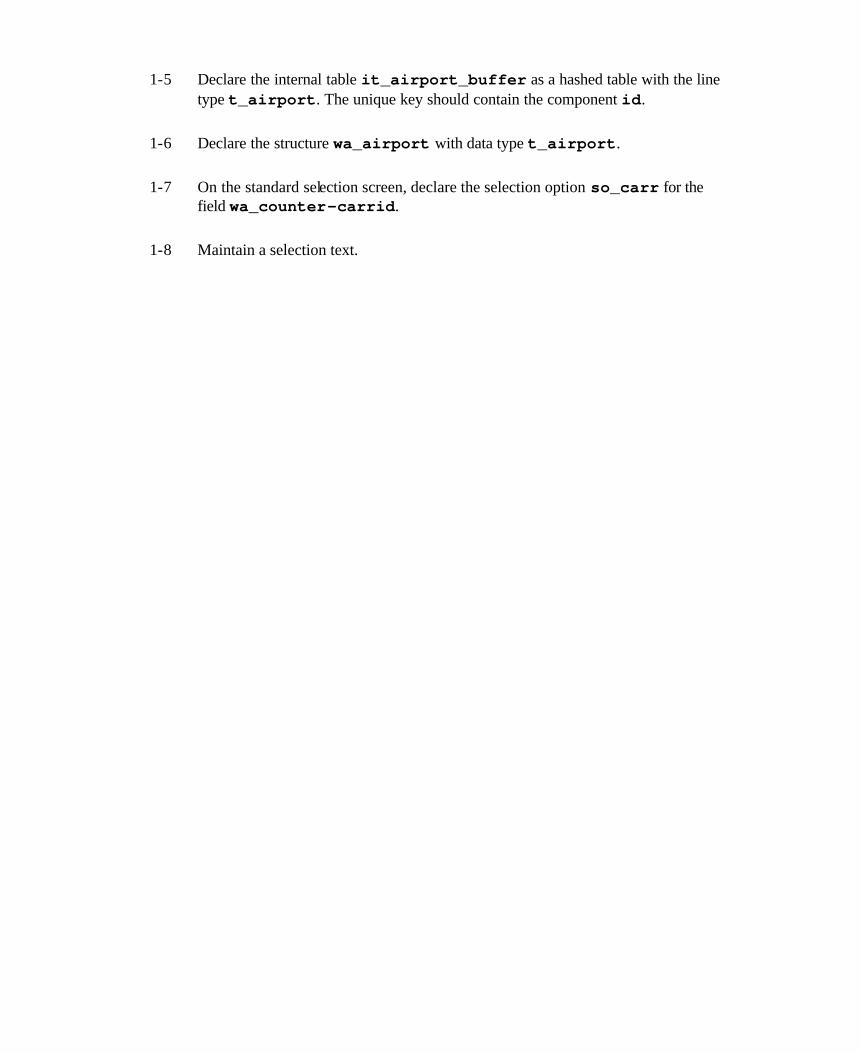
1-5 Declare the internal table it_airport_buffer as a hashed table with the line type t_airport. The unique key should contain the component id.
1-6 Declare the structure wa_airport with data type t_airport.
1-7 On the standard selection screen, declare the selection option so_carr for the field wa_counter-carrid.
1-8 Maintain a selection text.
2. Complete the program Z##_BC402-FLIGHTLIST1: Declare an internal table to hold flight timetable data for various airlines. It should later be possible to assign one or more available aircraft types to each airline. This should be implemented as a second internal table, nested in the line type of the original table. To type the inner internal table, you will first create two ABAP Dictionary objects. You should also declare a selection table for the set of airlines for which the authorization check was successful. ## is your two-digit group number. Model solutions: BC402_TYPS_PLANE BC402_TYPS_PLANETAB SAPBC402_TYPS_FLIGHTLIST1
2-1 In the ABAP Dictionary, create the global structure Z##_BC402_PLANE. It should have the following structure (remember that you must relate a currency field to the amount field): Component Type using data element PLANETYPE S_PLANETYE SEATSMAX S_SEATSMAX AVG_PRICE S_PRICE CURRENCY S_CURRCODE
2-2 In the ABAP Dictionary, create the global structure Z##_BC402_PLANETAB. For the line type, use the global structure Z##_BC402_PLANE. Define the internal table as a standard table with a non-unique key consisting of the component PLANETYPE.
2-3 In the program, define the structure type t_flight. It should have the following structure: (Note that the last component has a global table type.) Component Type carrid sflight-carrid connid sflight-connid fldate sflight-fldate cityfrom spfli-cityfrom cityto spfli-cityto seatsocc sflight-seatsocc paymentsum sflight-paymentsum currency sflight-currency it_planes z##_bc402_planetab
2-4 Define the internal table type t_flighttab with line type t_flight. It should be a sorted table with the unique key carrid connid fldate.
2-5 Declare a structure wa_flight with the data type t_flight.
2-6 Declare an internal table it_flights with the data type t_flighttab.
2-7 On the standard selection screen, declare the selection option so_carr for the field wa_flight-carrid.
2-8 Declare a selection table allowed_carriers for fields with type t_flight-carrid.
... TYPE RANGE OF ...
2-9 Declare a work area wa_allowed_carr for the selection table allowed_carriers.
2-10 Maintain the selection texts.
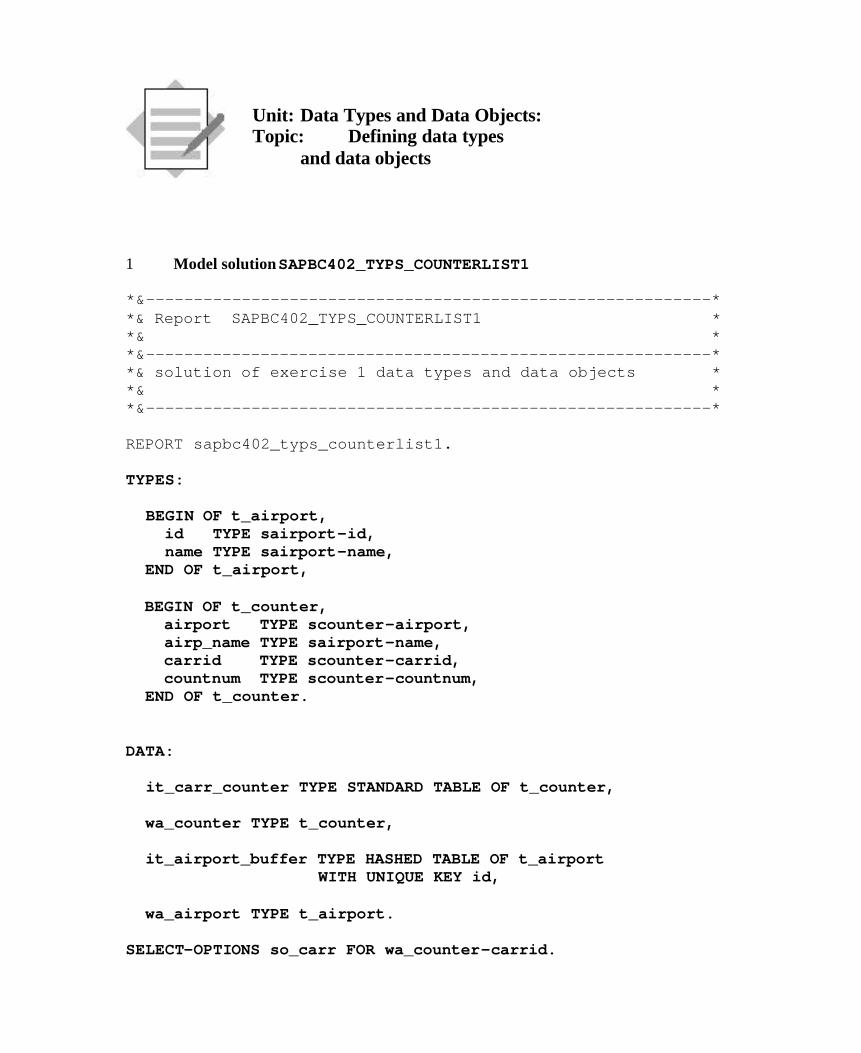
Unit: Data Types and Data Objects: Topic: Defining data types and data objects
1 Model solution SAPBC402_TYPS_COUNTERLIST1 *&-----------------------------------------------------------* *& Report SAPBC402_TYPS_COUNTERLIST1 * *& * *&-----------------------------------------------------------* *& solution of exercise 1 data types and data objects * *& * *&-----------------------------------------------------------* REPORT sapbc402_typs_counterlist1. TYPES: BEGIN OF t_airport, id TYPE sairport-id, name TYPE sairport-name, END OF t_airport, BEGIN OF t_counter, airport TYPE scounter-airport, airp_name TYPE sairport-name, carrid TYPE scounter-carrid, countnum TYPE scounter-countnum, END OF t_counter. DATA: it_carr_counter TYPE STANDARD TABLE OF t_counter, wa_counter TYPE t_counter, it_airport_buffer TYPE HASHED TABLE OF t_airport WITH UNIQUE KEY id, wa_airport TYPE t_airport. SELECT-OPTIONS so_carr FOR wa_counter-carrid.
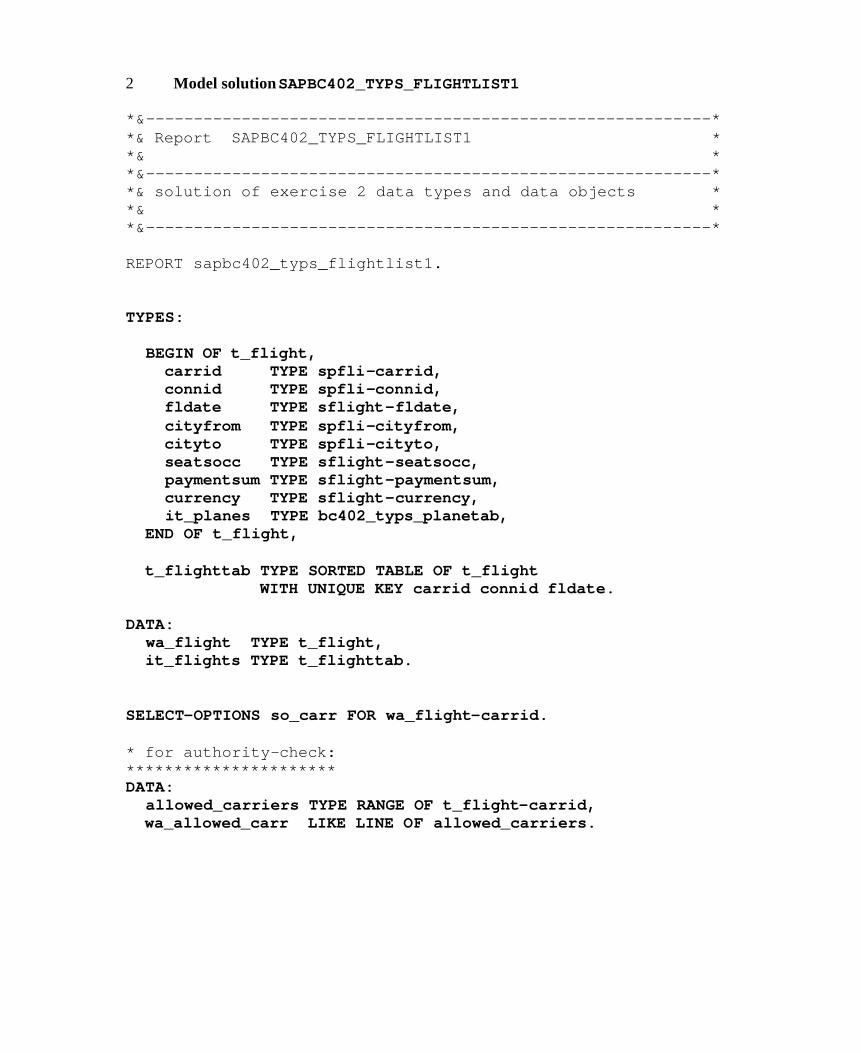
2 Model solution SAPBC402_TYPS_FLIGHTLIST1 *&-----------------------------------------------------------* *& Report SAPBC402_TYPS_FLIGHTLIST1 * *& * *&-----------------------------------------------------------* *& solution of exercise 2 data types and data objects * *& * *&-----------------------------------------------------------* REPORT sapbc402_typs_flightlist1. TYPES: BEGIN OF t_flight, carrid TYPE spfli-carrid, connid TYPE spfli-connid, fldate TYPE sflight-fldate, cityfrom TYPE spfli-cityfrom, cityto TYPE spfli-cityto, seatsocc TYPE sflight-seatsocc, paymentsum TYPE sflight-paymentsum, currency TYPE sflight-currency, it_planes TYPE bc402_typs_planetab, END OF t_flight, t_flighttab TYPE SORTED TABLE OF t_flight WITH UNIQUE KEY carrid connid fldate. DATA: wa_flight TYPE t_flight, it_flights TYPE t_flighttab. SELECT-OPTIONS so_carr FOR wa_flight-carrid. * for authority-check: ********************** DATA: allowed_carriers TYPE RANGE OF t_flight-carrid, wa_allowed_carr LIKE LINE OF allowed_carriers.
SAP AG 1999
l Assigning values
l Processing strings and parts of fields
l Numeric operations
l Program flow control
Contents
Statements

Use CLEAR to reset any variable data object to the initial value appropriate to its type .
n In a structure, each component is reset individually.
n In an internal table w ithout a header line, all of the lines are deleted.
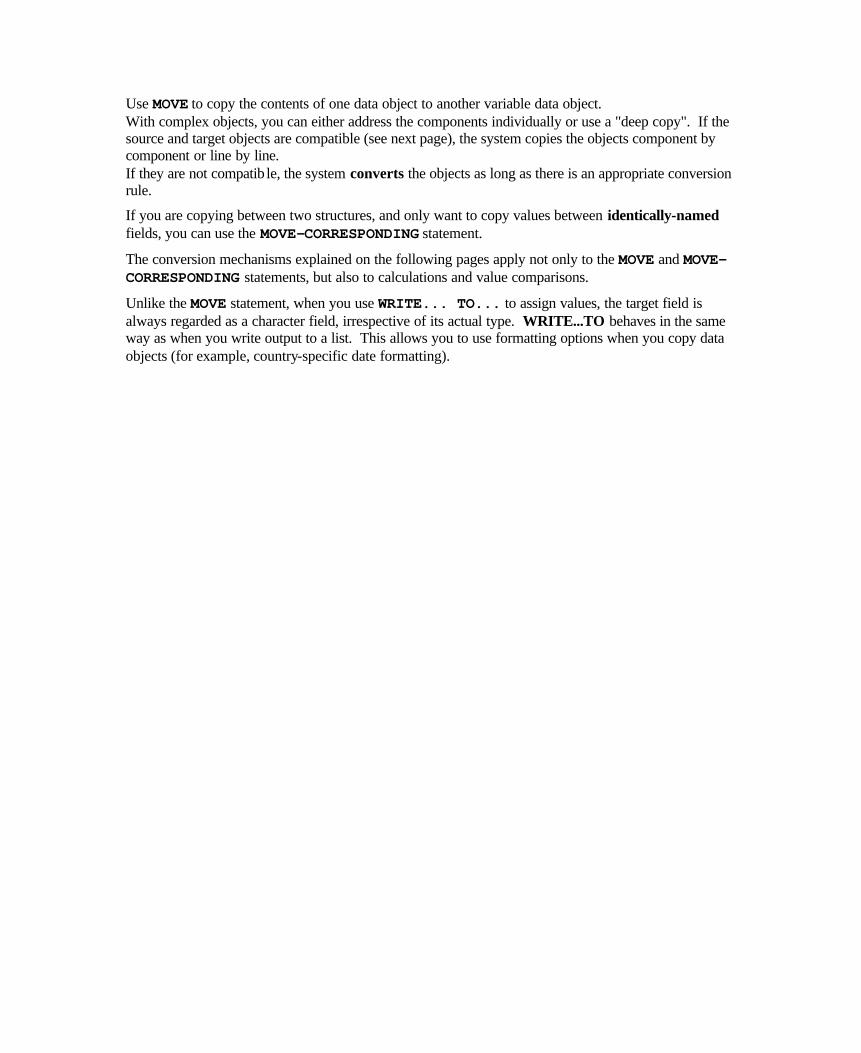
Use MOVE to copy the contents of one data object to another variable data object. With complex objects, you can either address the components individually or use a "deep copy". If the source and target objects are compatible (see next page), the system copies the objects component by component or line by line. If they are not compatib le, the system converts the objects as long as there is an appropriate conversion rule.
If you are copying between two structures, and only want to copy values between identically-named fields, you can use the MOVE-CORRESPONDING statement.
The conversion mechanisms explained on the following pages apply not only to the MOVE and MOVE-CORRESPONDING statements, but also to calculations and value comparisons.
Unlike the MOVE statement, when you use WRITE... TO... to assign values, the target field is always regarded as a character field, irrespective of its actual type. WRITE...TO behaves in the same way as when you write output to a list. This allows you to use formatting options when you copy data objects (for example, country-specific date formatting).
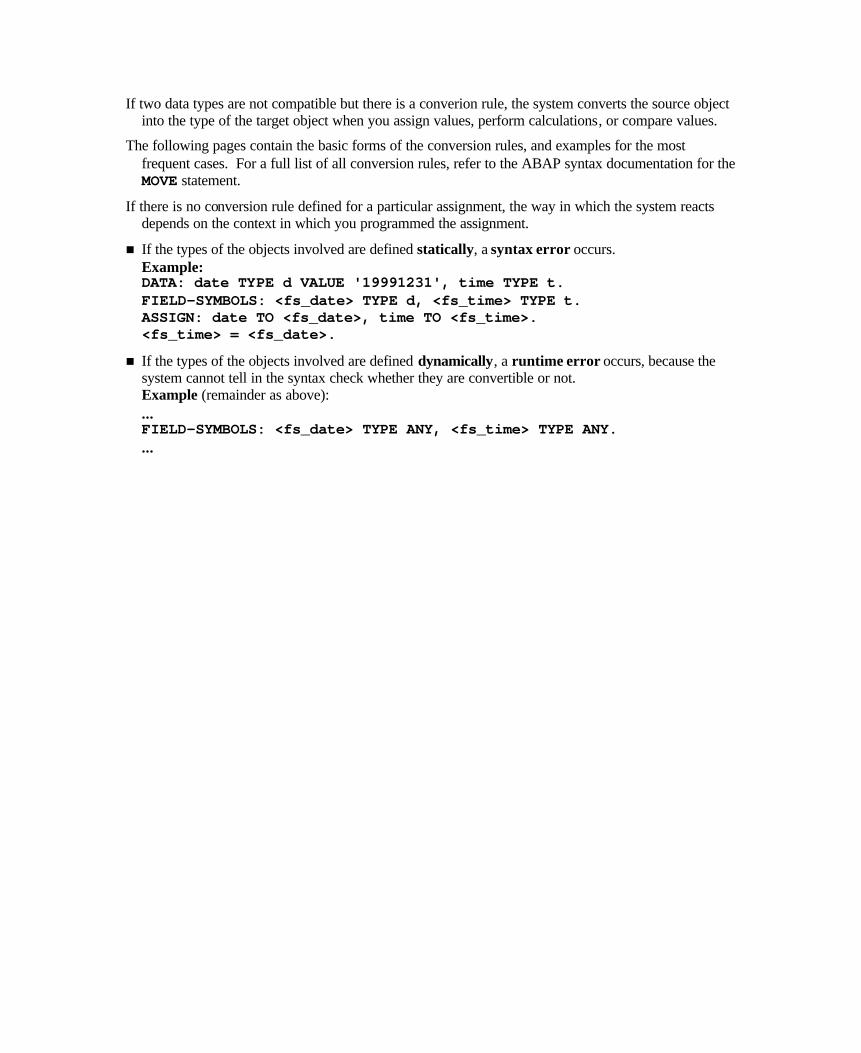
If two data types are not compatible but there is a converion rule, the system converts the source object into the type of the target object when you assign values, perform calculations, or compare values.
The following pages contain the basic forms of the conversion rules, and examples for the most frequent cases. For a full list of all conversion rules, refer to the ABAP syntax documentation for the MOVE statement.
If there is no conversion rule defined for a particular assignment, the way in which the system reacts depends on the context in which you programmed the assignment.
n If the types of the objects involved are defined statically, a syntax error occurs. Example: DATA: date TYPE d VALUE '19991231', time TYPE t. FIELD-SYMBOLS: <fs_date> TYPE d, <fs_time> TYPE t. ASSIGN: date TO <fs_date>, time TO <fs_time>. <fs_time> = <fs_date>.
n If the types of the objects involved are defined dynamically, a runtime error occurs, because the system cannot tell in the syntax check whether they are convertible or not. Example (remainder as above): ... FIELD-SYMBOLS: <fs_date> TYPE ANY, <fs_time> TYPE ANY. ...
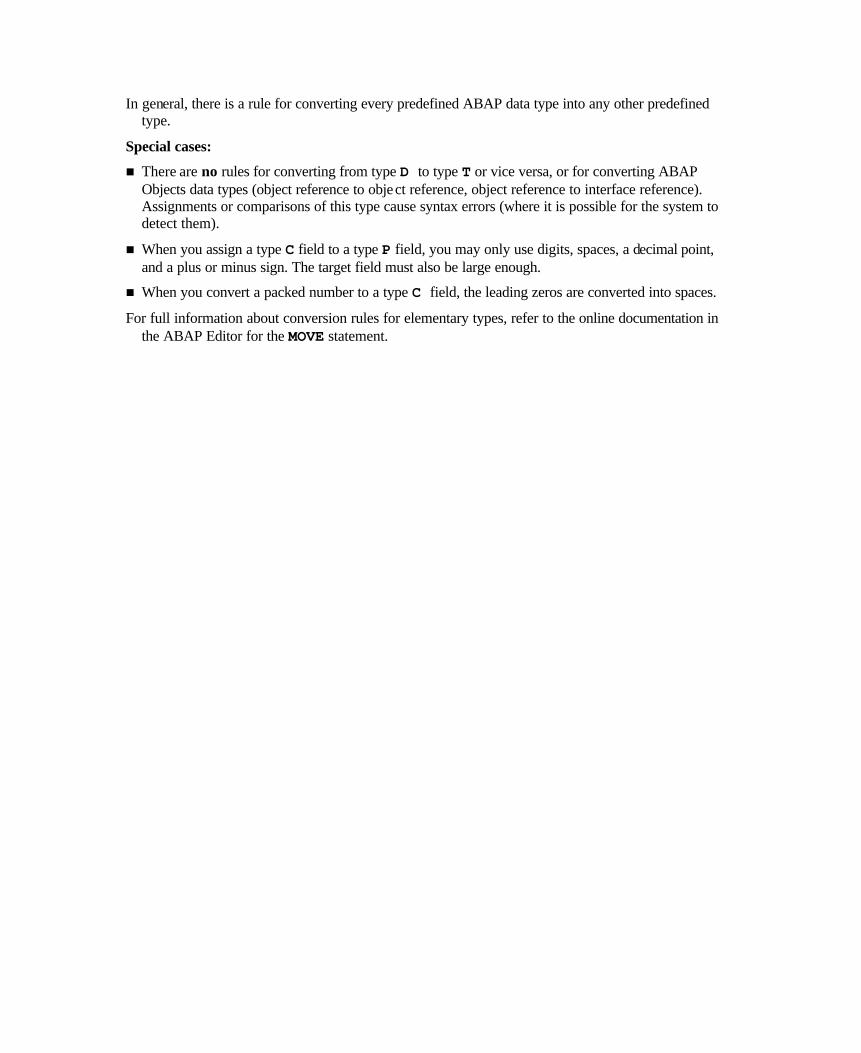
In general, there is a rule for converting every predefined ABAP data type into any other predefined type.
Special cases:
n There are no rules for converting from type D to type T or vice versa, or for converting ABAP Objects data types (object reference to object reference, object reference to interface reference). Assignments or comparisons of this type cause syntax errors (where it is possible for the system to detect them).
n When you assign a type C field to a type P field, you may only use digits, spaces, a decimal point, and a plus or minus sign. The target field must also be large enough.
n When you convert a packed number to a type C field, the leading zeros are converted into spaces.
For full information about conversion rules for elementary types, refer to the online documentation in the ABAP Editor for the MOVE statement.
The ABAP runtime environment has rules for converting
n Structures to non-compatible structures
n Elementary fields to structures
n Structures to elementary fields
In each case, the system converts the source variables to character fields and fills the target structures byte by byte. The relevant conversion rules for elementary fields then apply.
Internal tables can only be converted into other internal tables. The system converts the lines types according to the relevant rule for structures.
The example above shows that copying between non-compatible types may result in the target fields containing values that cannot be interpreted properly. To avoid this problem, you should copy values field by field in these cases. This ensures that the system applies the correct conversion rule for elementary fields. If you want to manipulate strings, it is better to use the statements expressly intended for this purpose.
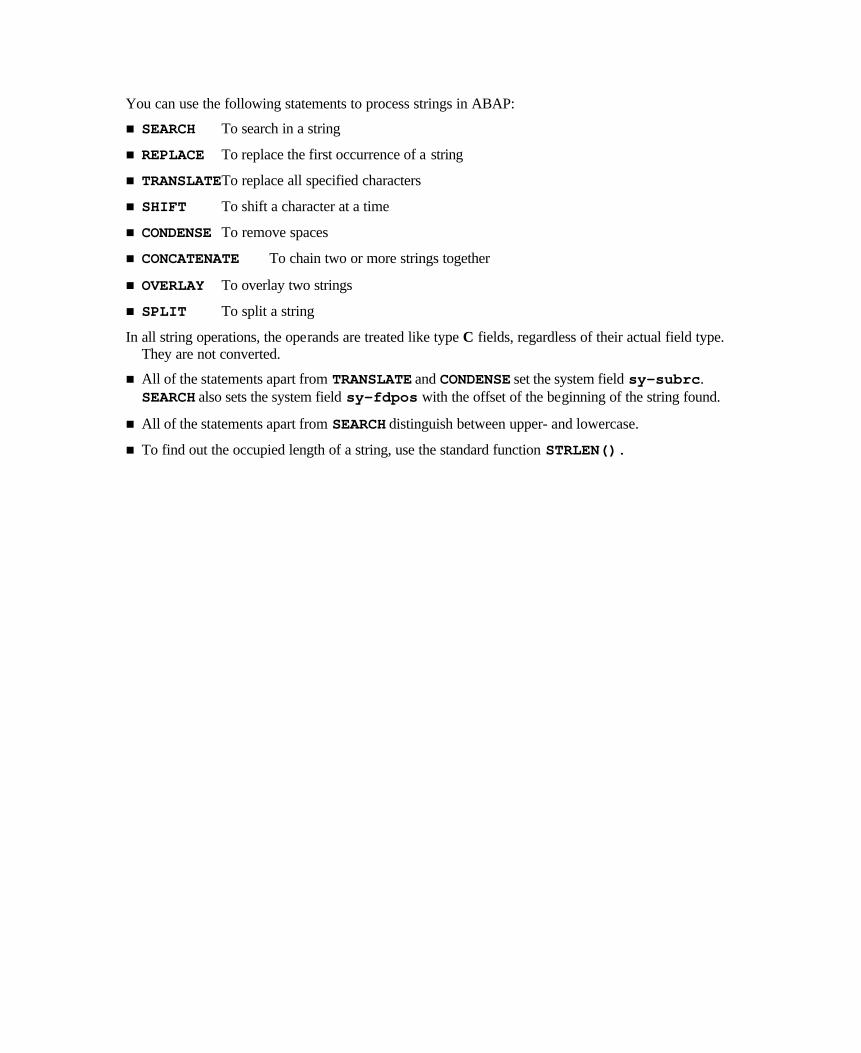
You can use the following statements to process strings in ABAP:
n SEARCH To search in a string
n REPLACE To replace the first occurrence of a string
n TRANSLATE To replace all specified characters
n SHIFT To shift a character at a time
n CONDENSE To remove spaces
n CONCATENATE To chain two or more strings together
n OVERLAY To overlay two strings
n SPLIT To split a string
In all string operations, the operands are treated like type C fields, regardless of their actual field type. They are not converted.
n All of the statements apart from TRANSLATE and CONDENSE set the system field sy-subrc. SEARCH also sets the system field sy-fdpos with the offset of the beginning of the string found.
n All of the statements apart from SEARCH distinguish between upper- and lowercase.
n To find out the occupied length of a string, use the standard function STRLEN().
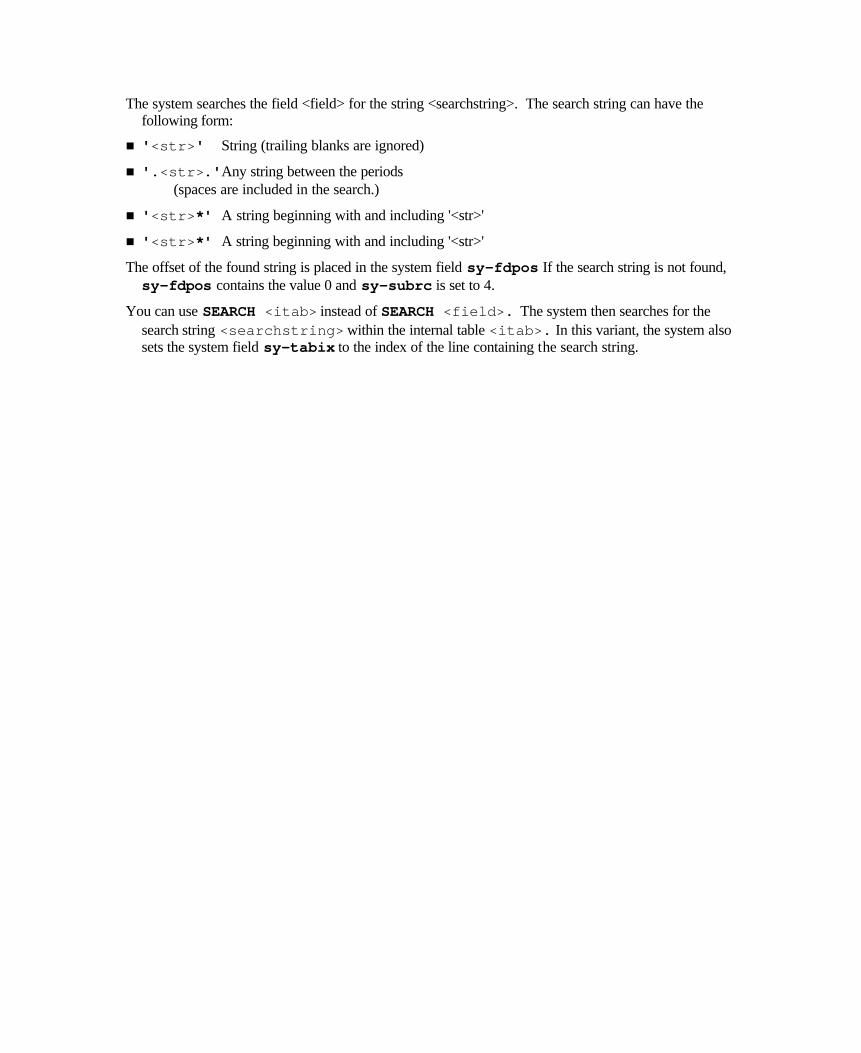
The system searches the field <field> for the string <searchstring>. The search string can have the following form:
n '<str>' String (trailing blanks are ignored)
n '.<str>.' Any string between the periods (spaces are included in the search.)
n '<str>*' A string beginning with and including '<str>'
n '<str>*' A string beginning with and including '<str>'
The offset of the found string is placed in the system field sy-fdpos If the search string is not found, sy-fdpos contains the value 0 and sy-subrc is set to 4.
You can use SEARCH <itab> instead of SEARCH <field>. The system then searches for the search string <searchstring> within the internal table <itab>. In this variant, the system also sets the system field sy-tabix to the index of the line containing the search string.

n REPLACE <str1> WITH <str2> INTO <field>. Replaces the first occurrence of <str1> in <field> with <str2>.
n TRANSLATE <field> USING <str>. Replaces all letters in <field> according to <str>. <str> contains the search and replacement characters in pairs. For the example: TRANSLATE ... USING 'AB'.
n TRANSLATE <field> TO UPPER|LOWER CASE Replaces all lowercase letters in <field> with uppercase (or vice versa).
n SHIFT <field> [<var>] [RIGHT] [CIRCULAR]. <var> can be one of the following: BY <n> PLACES Shifts <field> by <n> characters UP TO <str> Shifts <field> up to the beginning of <str> The additions have the following effect: RIGHT Shifts to the right CIRCULAR Shifts to the right - characters shifted off the right-hand edge of the field reappear on the left.
n CONDENSE <field> [NO-GAPS]. Consecutive spaces are replaced by a single space or are deleted. Note: You can delete leading or trailing spaces using SHIFT <field> LEFT DELETING LEADING SPACE or SHIFT <field> RIGHT DELETING TRAILING SPACE.
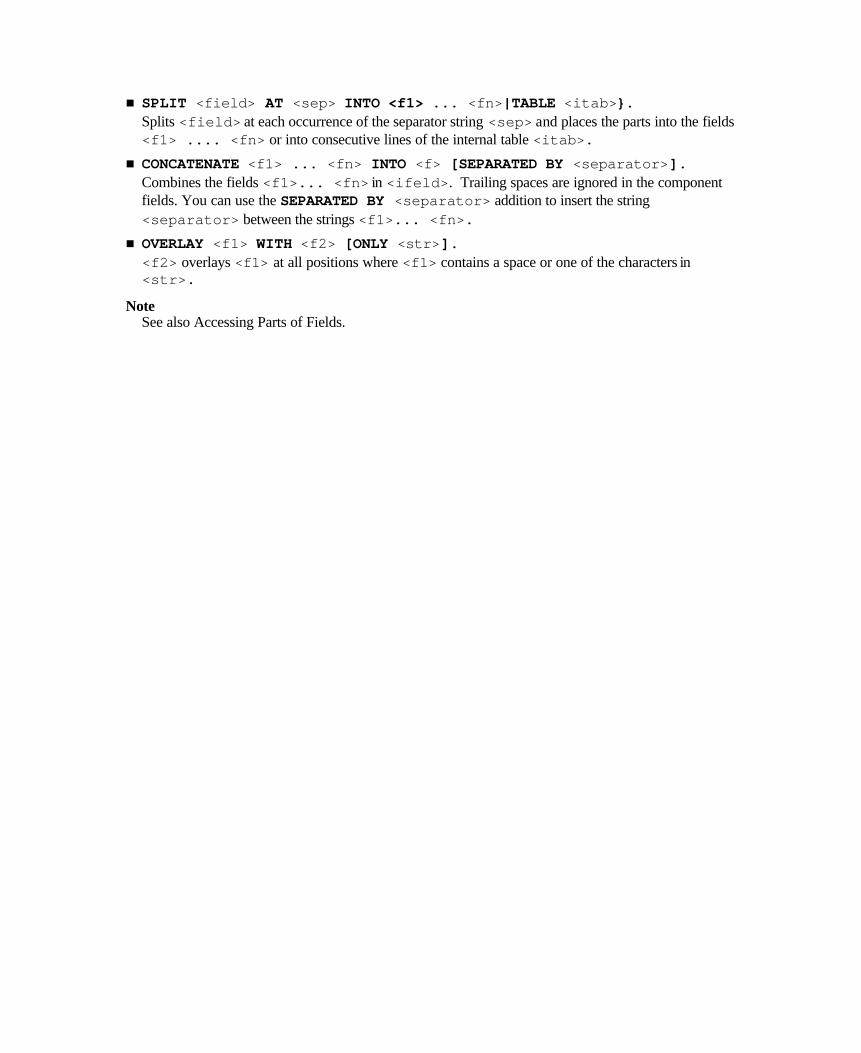
n SPLIT <field> AT <sep> INTO <f1> ... <fn>|TABLE <itab>}. Splits <field> at each occurrence of the separator string <sep> and places the parts into the fields <f1> .... <fn> or into consecutive lines of the internal table <itab>.
n CONCATENATE <f1> ... <fn> INTO <f> [SEPARATED BY <separator>]. Combines the fields <f1>... <fn> in <ifeld>. Trailing spaces are ignored in the component fields. You can use the SEPARATED BY <separator> addition to insert the string <separator> between the strings <f1>... <fn>.
n OVERLAY <f1> WITH <f2> [ONLY <str>]. <f2> overlays <f1> at all positions where <f1> contains a space or one of the characters in <str>.
Note See also Accessing Parts of Fields.
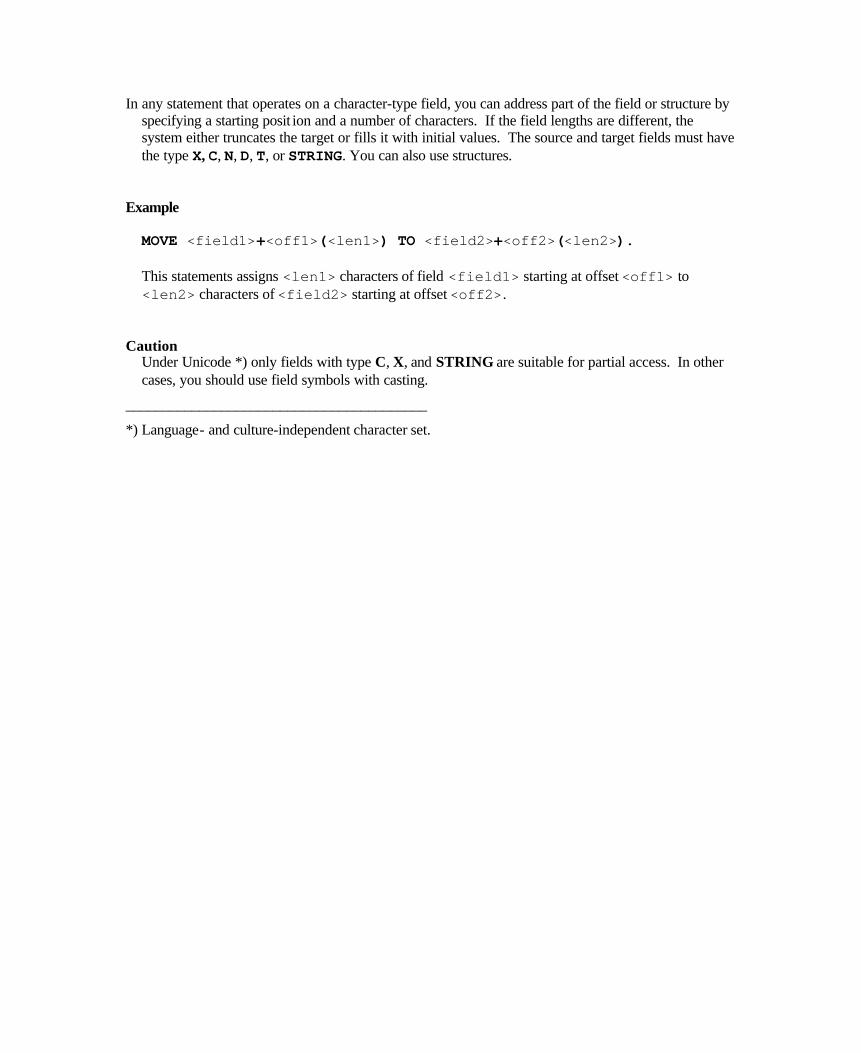
In any statement that operates on a character-type field, you can address part of the field or structure by specifying a starting posit ion and a number of characters. If the field lengths are different, the system either truncates the target or fills it with initial values. The source and target fields must have the type X, C, N, D, T, or STRING. You can also use structures.
Example MOVE <field1>+<off1>(<len1>) TO <field2>+<off2>(<len2>). This statements assigns <len1> characters of field <field1> starting at offset <off1> to <len2> characters of <field2> starting at offset <off2>.
Caution Under Unicode *) only fields with type C, X, and STRING are suitable for partial access. In other cases, you should use field symbols with casting.
_________________________________________
*) Language- and culture-independent character set.
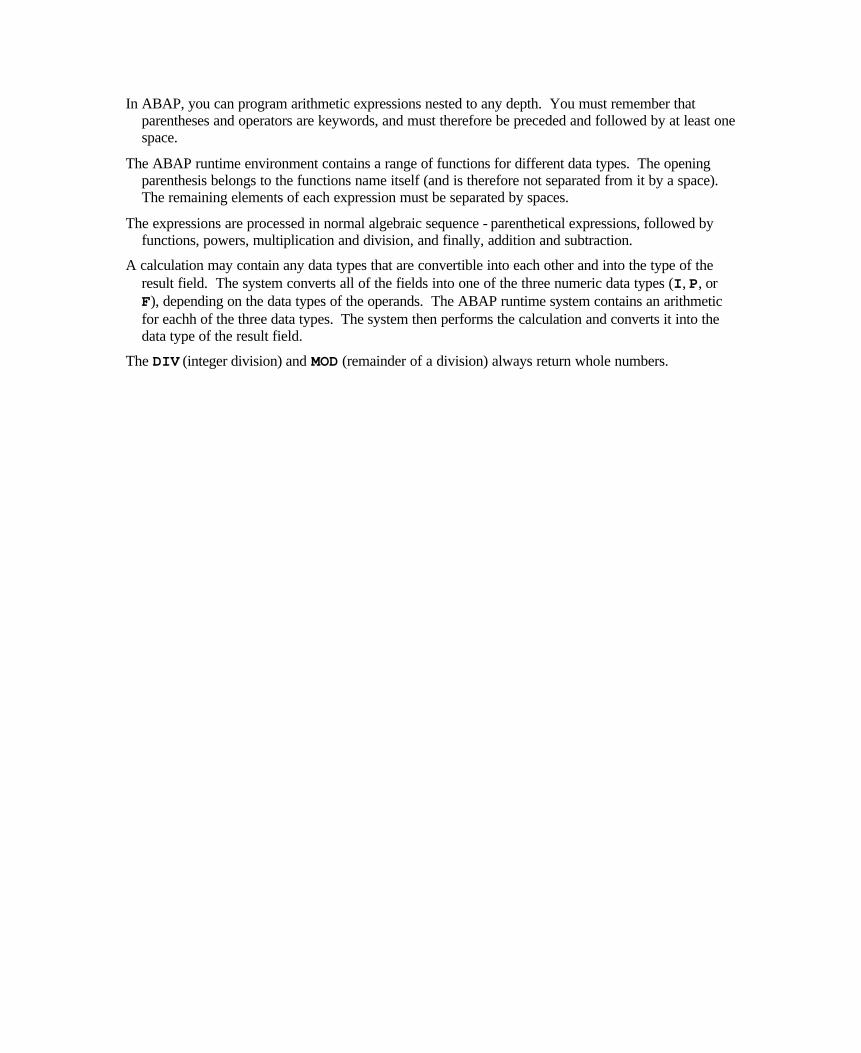
In ABAP, you can program arithmetic expressions nested to any depth. You must remember that parentheses and operators are keywords, and must therefore be preceded and followed by at least one space.
The ABAP runtime environment contains a range of functions for different data types. The opening parenthesis belongs to the functions name itself (and is therefore not separated from it by a space). The remaining elements of each expression must be separated by spaces.
The expressions are processed in normal algebraic sequence - parenthetical expressions, followed by functions, powers, multiplication and division, and finally, addition and subtraction.
A calculation may contain any data types that are convertible into each other and into the type of the result field. The system converts all of the fields into one of the three numeric data types (I, P, or F), depending on the data types of the operands. The ABAP runtime system contains an arithmetic for eachh of the three data types. The system then performs the calculation and converts it into the data type of the result field.
The DIV (integer division) and MOD (remainder of a division) always return whole numbers.
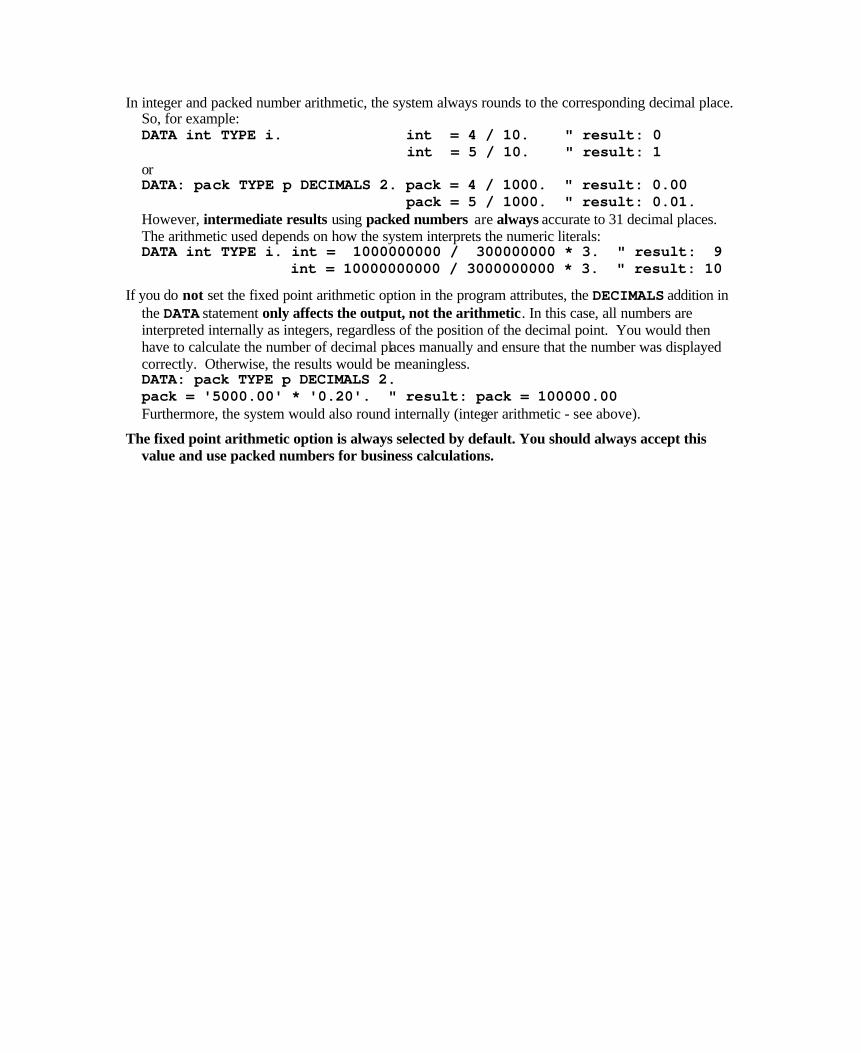
In integer and packed number arithmetic, the system always rounds to the corresponding decimal place. So, for example: DATA int TYPE i. int = 4 / 10. " result: 0 int = 5 / 10. " result: 1 or DATA: pack TYPE p DECIMALS 2. pack = 4 / 1000. " result: 0.00 pack = 5 / 1000. " result: 0.01. However, intermediate results using packed numbers are always accurate to 31 decimal places. The arithmetic used depends on how the system interprets the numeric literals: DATA int TYPE i. int = 1000000000 / 300000000 * 3. " result: 9 int = 10000000000 / 3000000000 * 3. " result: 10
If you do not set the fixed point arithmetic option in the program attributes, the DECIMALS addition in the DATA statement only affects the output, not the arithmetic. In this case, all numbers are interpreted internally as integers, regardless of the position of the decimal point. You would then have to calculate the number of decimal places manually and ensure that the number was displayed correctly. Otherwise, the results would be meaningless. DATA: pack TYPE p DECIMALS 2. pack = '5000.00' * '0.20'. " result: pack = 100000.00 Furthermore, the system would also round internally (integer arithmetic - see above).
The fixed point arithmetic option is always selected by default. You should always accept this value and use packed numbers for business calculations.
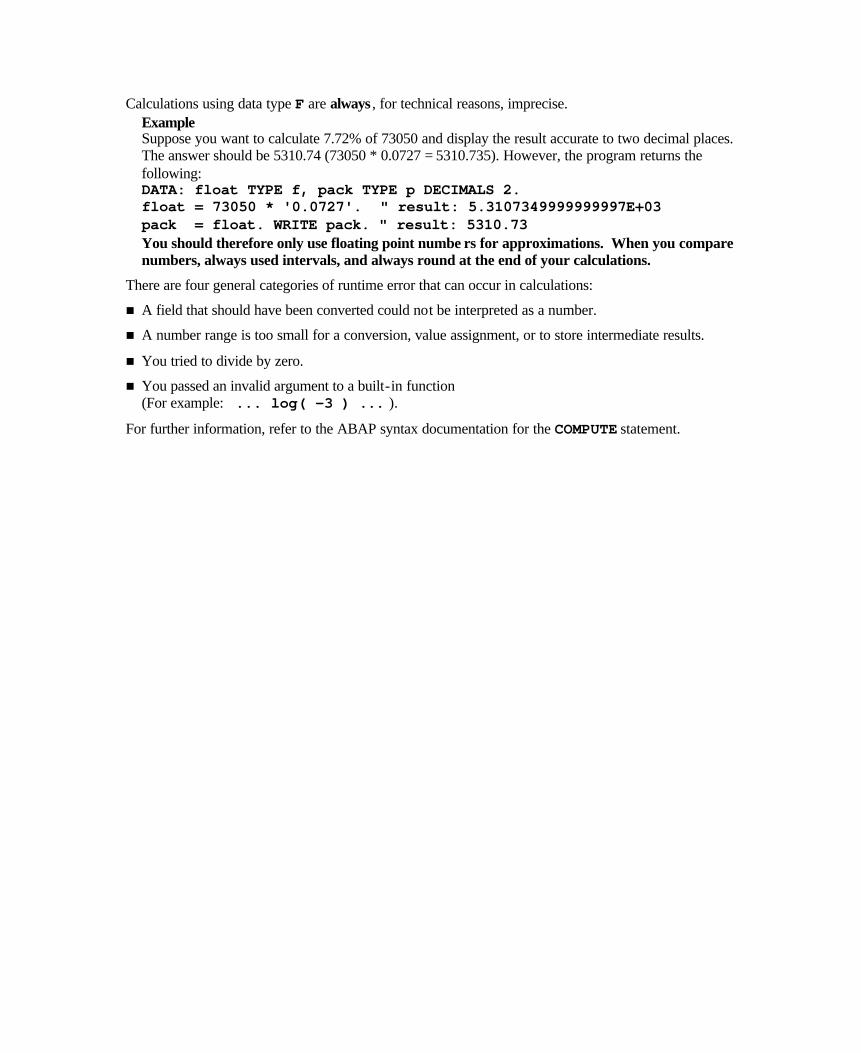
Calculations using data type F are always , for technical reasons, imprecise. Example Suppose you want to calculate 7.72% of 73050 and display the result accurate to two decimal places. The answer should be 5310.74 (73050 * 0.0727 = 5310.735). However, the program returns the following: DATA: float TYPE f, pack TYPE p DECIMALS 2. float = 73050 * '0.0727'. " result: 5.3107349999999997E+03 pack = float. WRITE pack. " result: 5310.73 You should therefore only use floating point numbe rs for approximations. When you compare numbers, always used intervals, and always round at the end of your calculations.
There are four general categories of runtime error that can occur in calculations:
n A field that should have been converted could not be interpreted as a number.
n A number range is too small for a conversion, value assignment, or to store intermediate results.
n You tried to divide by zero.
n You passed an invalid argument to a built-in function (For example: ... log( -3 ) ... ).
For further information, refer to the ABAP syntax documentation for the COMPUTE statement.
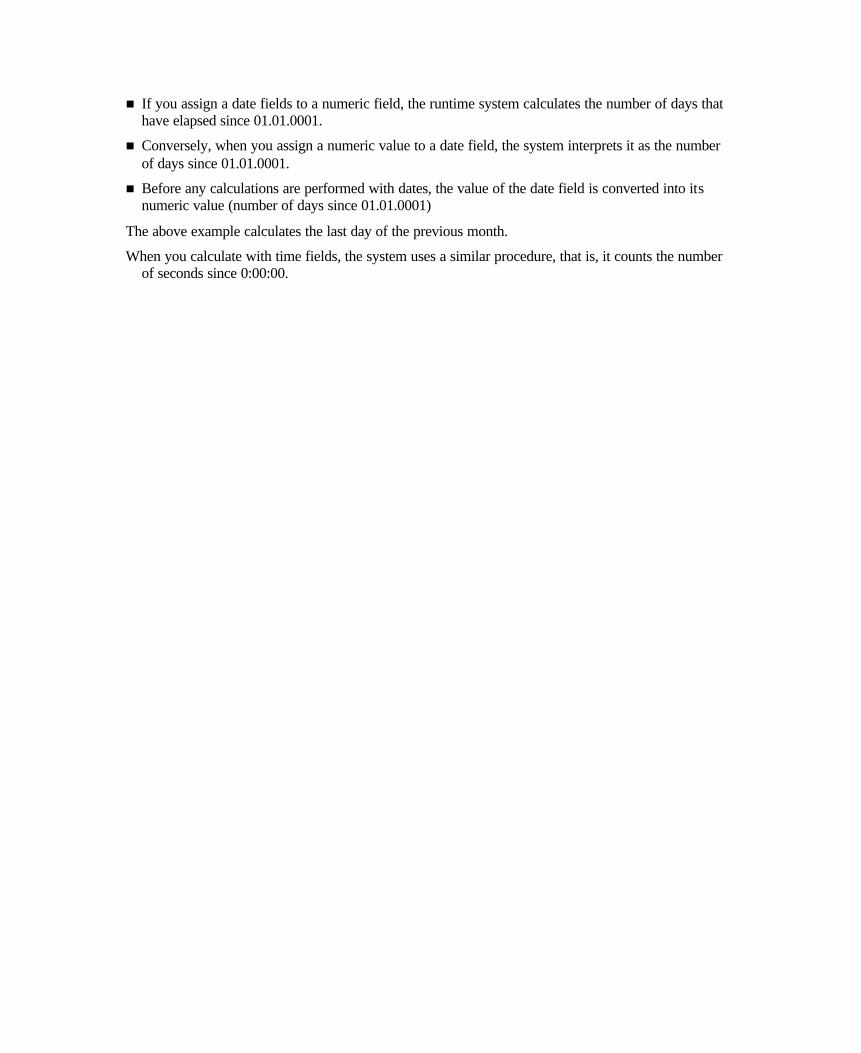
n If you assign a date fields to a numeric field, the runtime system calculates the number of days that have elapsed since 01.01.0001.
n Conversely, when you assign a numeric value to a date field, the system interprets it as the number of days since 01.01.0001.
n Before any calculations are performed with dates, the value of the date field is converted into its numeric value (number of days since 01.01.0001)
The above example calculates the last day of the previous month.
When you calculate with time fields, the system uses a similar procedure, that is, it counts the number of seconds since 0:00:00.
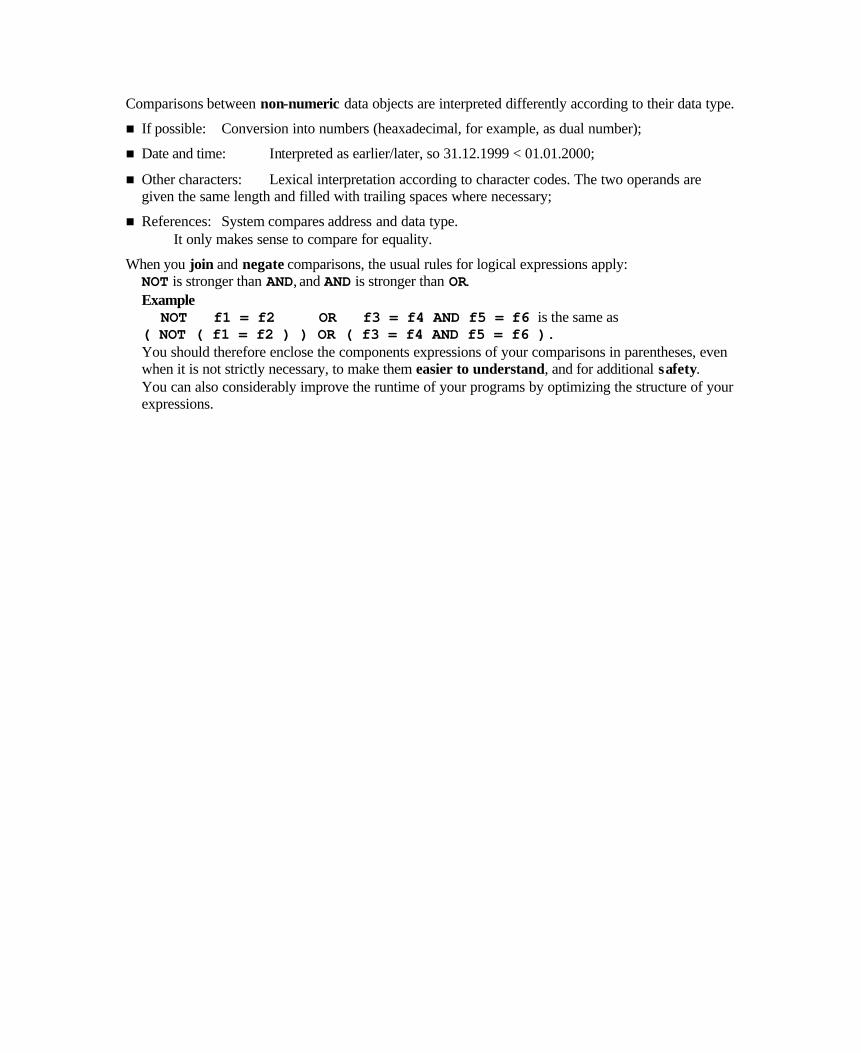
Comparisons between non-numeric data objects are interpreted differently according to their data type.
n If possible: Conversion into numbers (heaxadecimal, for example, as dual number);
n Date and time: Interpreted as earlier/later, so 31.12.1999 < 01.01.2000;
n Other characters: Lexical interpretation according to character codes. The two operands are given the same length and filled with trailing spaces where necessary;
n References: System compares address and data type. It only makes sense to compare for equality.
When you join and negate comparisons, the usual rules for logical expressions apply: NOT is stronger than AND, and AND is stronger than OR. Example NOT f1 = f2 OR f3 = f4 AND f5 = f6 is the same as ( NOT ( f1 = f2 ) ) OR ( f3 = f4 AND f5 = f6 ). You should therefore enclose the components expressions of your comparisons in parentheses, even when it is not strictly necessary, to make them easier to understand, and for additional safety. You can also considerably improve the runtime of your programs by optimizing the structure of your expressions.
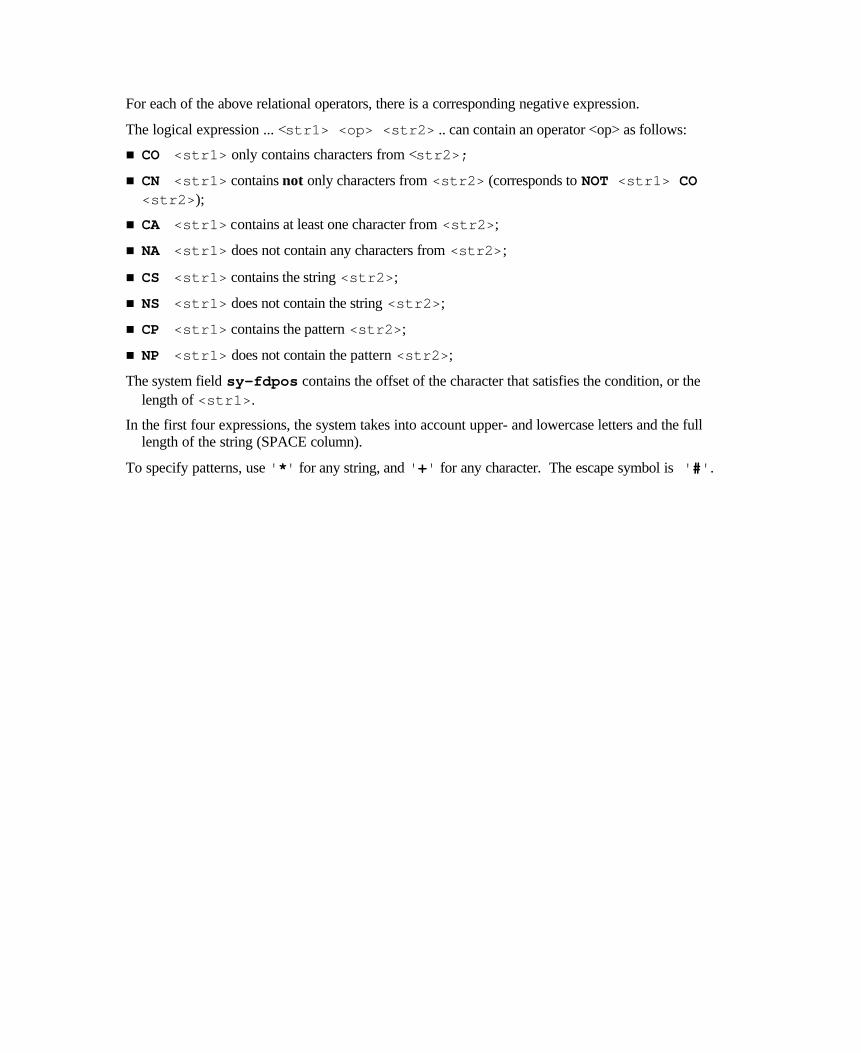
For each of the above relational operators, there is a corresponding negative expression.
The logical expression ... <str1> <op> <str2> .. can contain an operator <op> as follows:
n CO <str1> only contains characters from <str2>;
n CN <str1> contains not only characters from <str2> (corresponds to NOT <str1> CO <str2>);
n CA <str1> contains at least one character from <str2>;
n NA <str1> does not contain any characters from <str2>;
n CS <str1> contains the string <str2>;
n NS <str1> does not contain the string <str2>;
n CP <str1> contains the pattern <str2>;
n NP <str1> does not contain the pattern <str2>;
The system field sy-fdpos contains the offset of the character that satisfies the condition, or the length of <str1>.
In the first four expressions, the system takes into account upper- and lowercase letters and the full length of the string (SPACE column).
To specify patterns, use '*' for any string, and '+' for any character. The escape symbol is '#'.
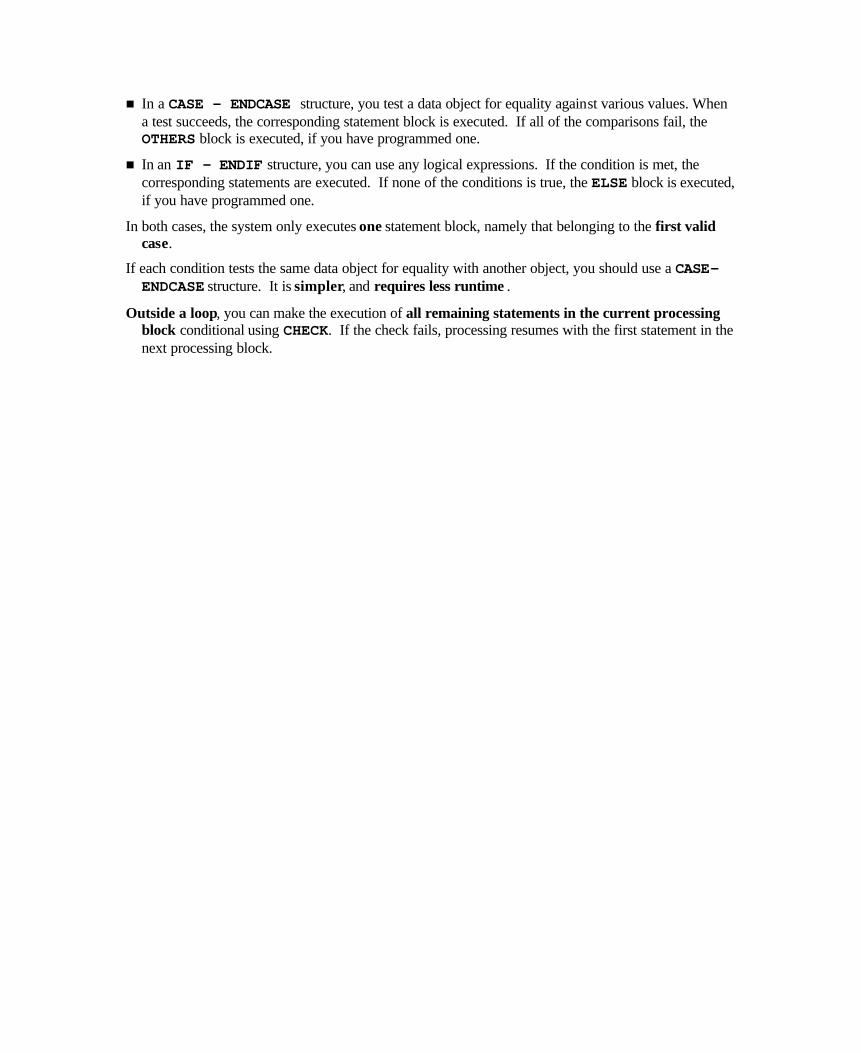
n In a CASE - ENDCASE structure, you test a data object for equality against various values. When a test succeeds, the corresponding statement block is executed. If all of the comparisons fail, the OTHERS block is executed, if you have programmed one.
n In an IF - ENDIF structure, you can use any logical expressions. If the condition is met, the corresponding statements are executed. If none of the conditions is true, the ELSE block is executed, if you have programmed one.
In both cases, the system only executes one statement block, namely that belonging to the first valid case.
If each condition tests the same data object for equality with another object, you should use a CASE-ENDCASE structure. It is simpler, and requires less runtime .
Outside a loop, you can make the execution of all remaining statements in the current processing block conditional using CHECK. If the check fails, processing resumes with the first statement in the next processing block.
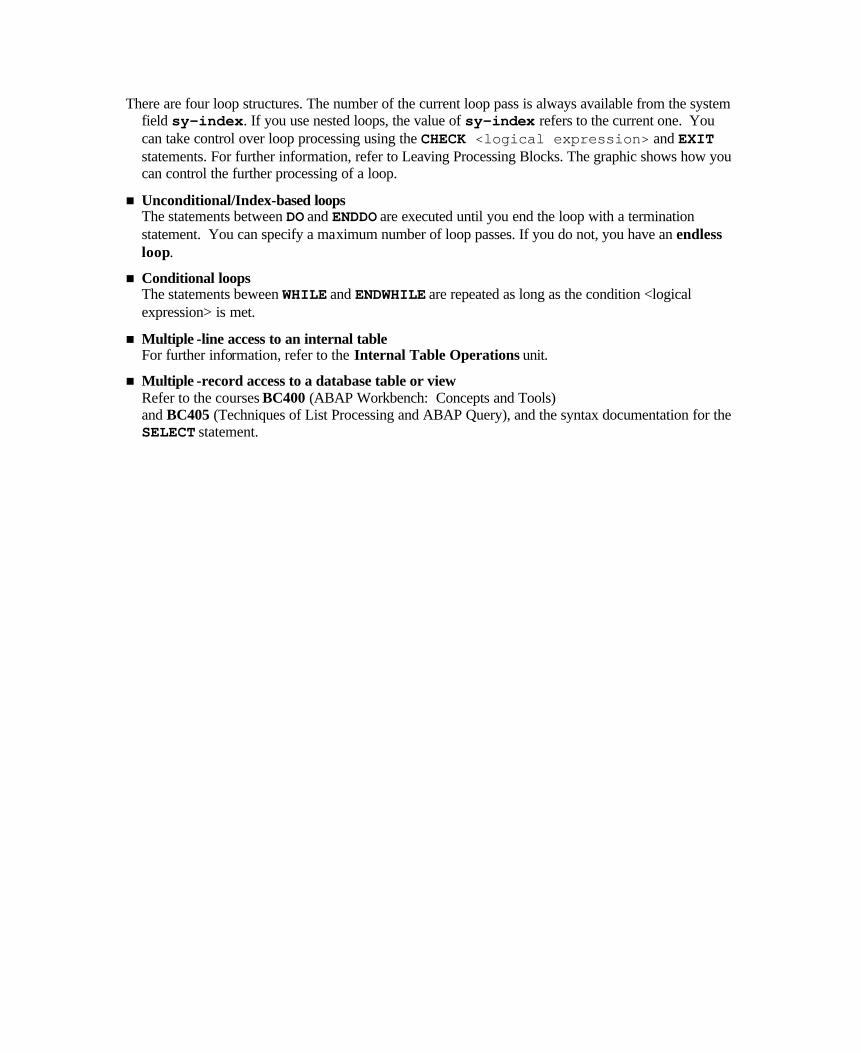
There are four loop structures. The number of the current loop pass is always available from the system field sy-index. If you use nested loops, the value of sy-index refers to the current one. You can take control over loop processing using the CHECK <logical expression> and EXIT statements. For further information, refer to Leaving Processing Blocks. The graphic shows how you can control the further processing of a loop.
n Unconditional/Index-based loops The statements between DO and ENDDO are executed until you end the loop with a termination statement. You can specify a maximum number of loop passes. If you do not, you have an endless loop.
n Conditional loops The statements beween WHILE and ENDWHILE are repeated as long as the condition <logical expression> is met.
n Multiple -line access to an internal table For further information, refer to the Internal Table Operations unit.
n Multiple -record access to a database table or view Refer to the courses BC400 (ABAP Workbench: Concepts and Tools) and BC405 (Techniques of List Processing and ABAP Query), and the syntax documentation for the SELECT statement.
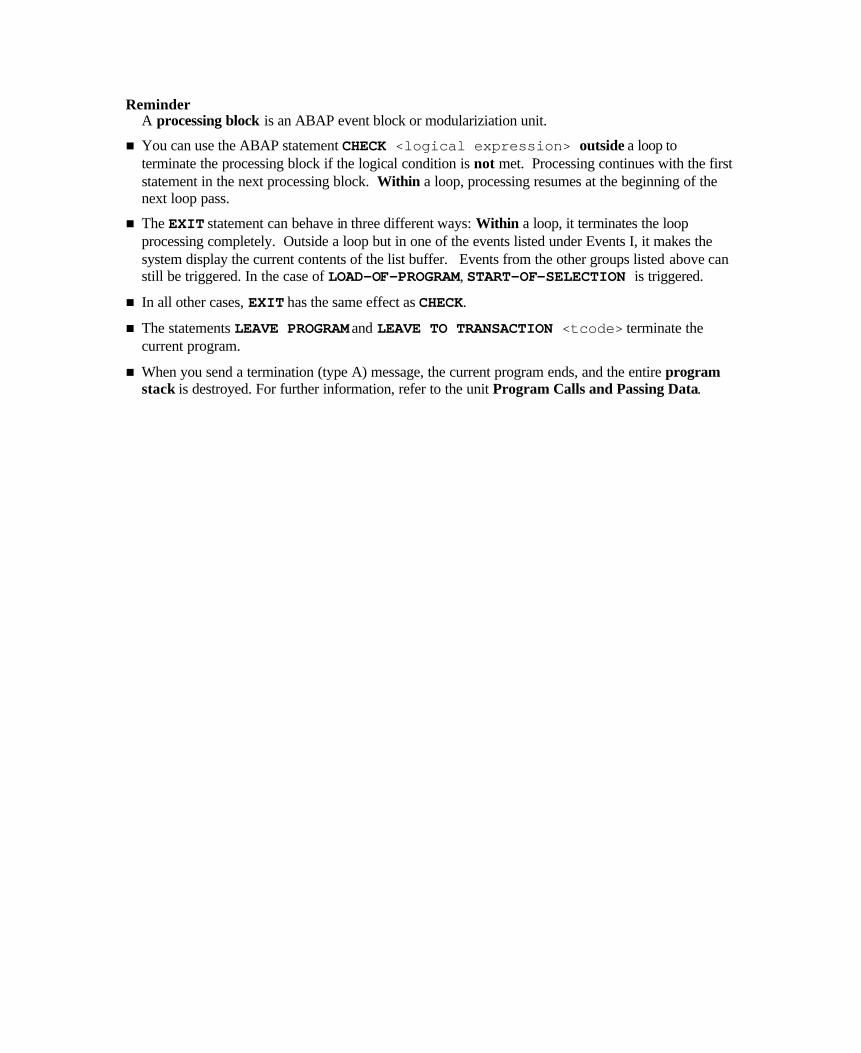
Reminder A processing block is an ABAP event block or modulariziation unit.
n You can use the ABAP statement CHECK <logical expression> outside a loop to terminate the processing block if the logical condition is not met. Processing continues with the first statement in the next processing block. Within a loop, processing resumes at the beginning of the next loop pass.
n The EXIT statement can behave in three different ways: Within a loop, it terminates the loop processing completely. Outside a loop but in one of the events listed under Events I, it makes the system display the current contents of the list buffer. Events from the other groups listed above can still be triggered. In the case of LOAD-OF-PROGRAM, START-OF-SELECTION is triggered.
n In all other cases, EXIT has the same effect as CHECK.
n The statements LEAVE PROGRAM and LEAVE TO TRANSACTION <tcode> terminate the current program.
n When you send a termination (type A) message, the current program ends, and the entire program stack is destroyed. For further information, refer to the unit Program Calls and Passing Data.
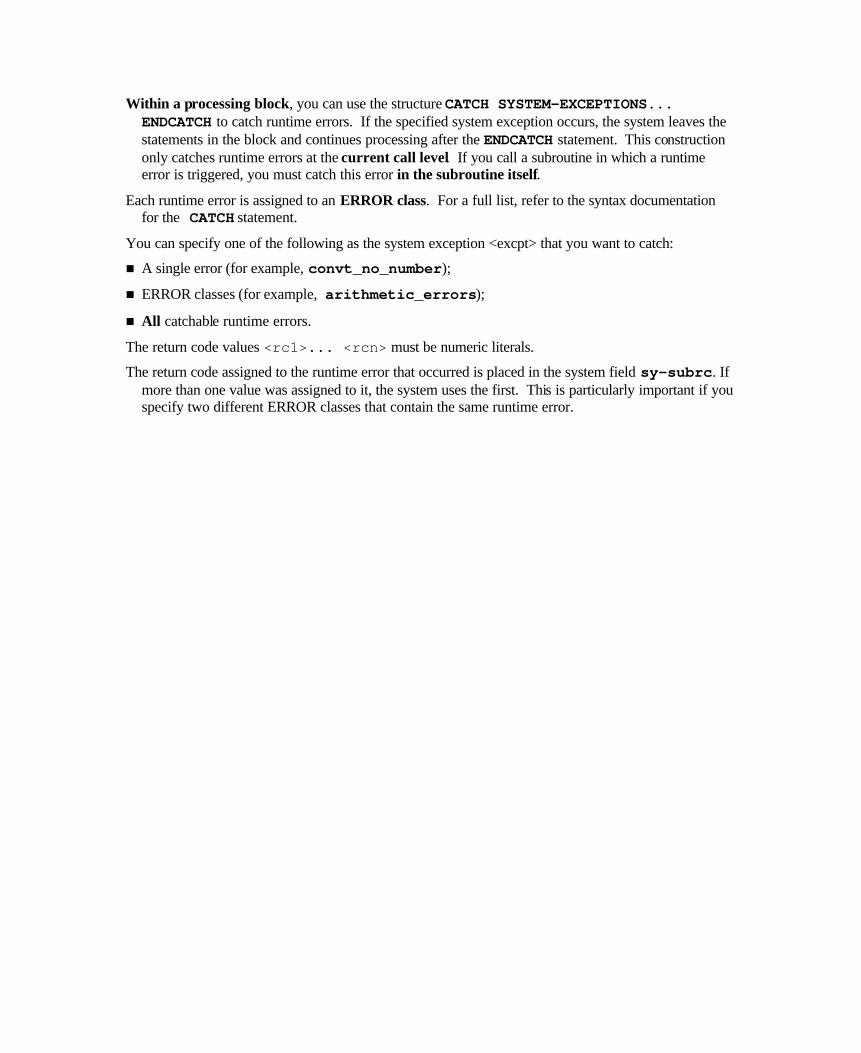
Within a processing block, you can use the structure CATCH SYSTEM-EXCEPTIONS... ENDCATCH to catch runtime errors. If the specified system exception occurs, the system leaves the statements in the block and continues processing after the ENDCATCH statement. This construction only catches runtime errors at the current call level. If you call a subroutine in which a runtime error is triggered, you must catch this error in the subroutine itself.
Each runtime error is assigned to an ERROR class. For a full list, refer to the syntax documentation for the CATCH statement.
You can specify one of the following as the system exception <excpt> that you want to catch:
n A single error (for example, convt_no_number);
n ERROR classes (for example, arithmetic_errors);
n All catchable runtime errors.
The return code values <rc1>... <rcn> must be numeric literals.
The return code assigned to the runtime error that occurred is placed in the system field sy-subrc. If more than one value was assigned to it, the system uses the first. This is particularly important if you specify two different ERROR classes that contain the same runtime error.
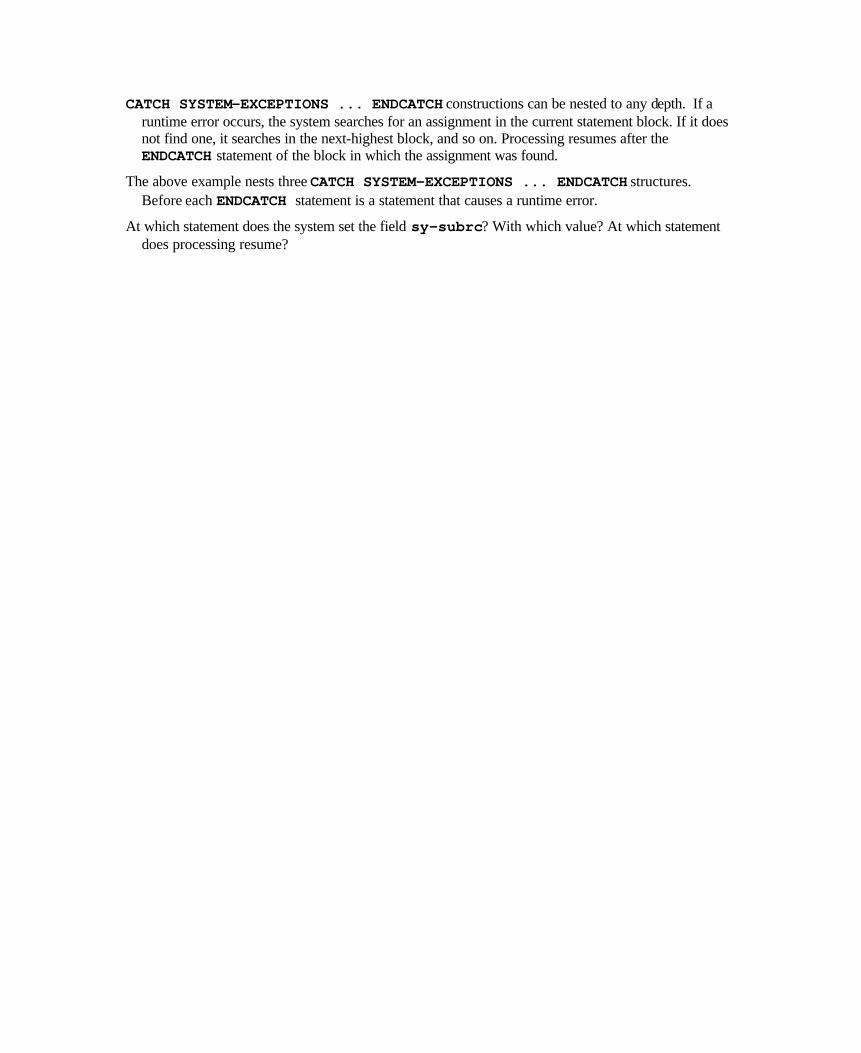
CATCH SYSTEM-EXCEPTIONS ... ENDCATCH constructions can be nested to any depth. If a runtime error occurs, the system searches for an assignment in the current statement block. If it does not find one, it searches in the next-highest block, and so on. Processing resumes after the ENDCATCH statement of the block in which the assignment was found.
The above example nests three CATCH SYSTEM-EXCEPTIONS ... ENDCATCH structures. Before each ENDCATCH statement is a statement that causes a runtime error.
At which statement does the system set the field sy-subrc? With which value? At which statement does processing resume?

The division by zero in the innermost block triggers the runtime error bcd_zerodivide. However, there is no assignment for the error in this block.
Consequently, the system looks in the next-highest block for the error, where it is assigned. sy-subrc is set to 4.

The system resumes processing at the first statement after the middle ENDCATCH statement. The assignment of a string (which cannot be interpreted as a packed number) to a packed number field is therefore not executed, even though we would have caught the ensuing runtime error convt_no_number in our program.

Finally, we trigger the runtime error convt_overflow by assigning a number to the packed field that is too big for it. A return code is assigned to this error in the outer block.
sy-subrc is set to 2.

The system resumes processing after the corresponding ENDCATCH statement.

SAP AG 1999
l General information
l Access using the index
l Access using the key
l Access using field symbols
l Applied example
Contents
Internal Table Operations

There are two ways of accessing the records in an internal table:
n By copying individual records into a work area. The work area must be compatible with the line type of the internal table. You can access the work area in any way, as long as the component you are trying to access is not itself an internal table. If one of the components is an internal table, you must use a further work area, whose line type is compatible with that of the nested table. When you change the internal table, the contents of the work area are either written back to the table or added as a new record.
n By assigning the individual data records to an appropriate field symbol. Once the system has read an entry, you can address its components directly via its address. There is no copying to and from the work area. This method is particularly appropriate for accessing large or complex tables.
If you want to read more than one record, you must use a LOOP... ENDLOOP structure. You can then change or delete the line that has just been read, and the system applies the change to the table body. You can also change or delete lines using a logical condition.
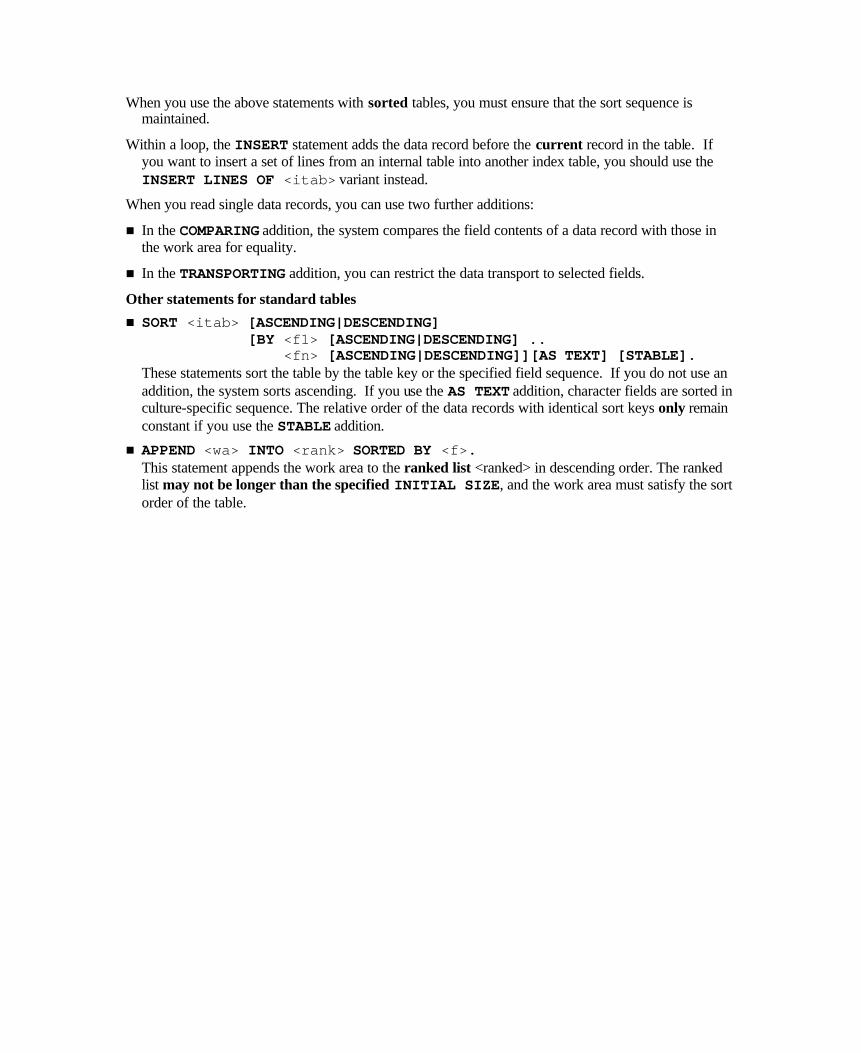
When you use the above statements with sorted tables, you must ensure that the sort sequence is maintained.
Within a loop, the INSERT statement adds the data record before the current record in the table. If you want to insert a set of lines from an internal table into another index table, you should use the INSERT LINES OF <itab> variant instead.
When you read single data records, you can use two further additions:
n In the COMPARING addition, the system compares the field contents of a data record with those in the work area for equality.
n In the TRANSPORTING addition, you can restrict the data transport to selected fields.
Other statements for standard tables
n SORT <itab> [ASCENDING|DESCENDING] [BY <f1> [ASCENDING|DESCENDING] .. <fn> [ASCENDING|DESCENDING]][AS TEXT] [STABLE]. These statements sort the table by the table key or the specified field sequence. If you do not use an addition, the system sorts ascending. If you use the AS TEXT addition, character fields are sorted in culture-specific sequence. The relative order of the data records with identical sort keys only remain constant if you use the STABLE addition.
n APPEND <wa> INTO <rank> SORTED BY <f>. This statement appends the work area to the ranked list <ranked> in descending order. The ranked list may not be longer than the specified INITIAL SIZE, and the work area must satisfy the sort order of the table.
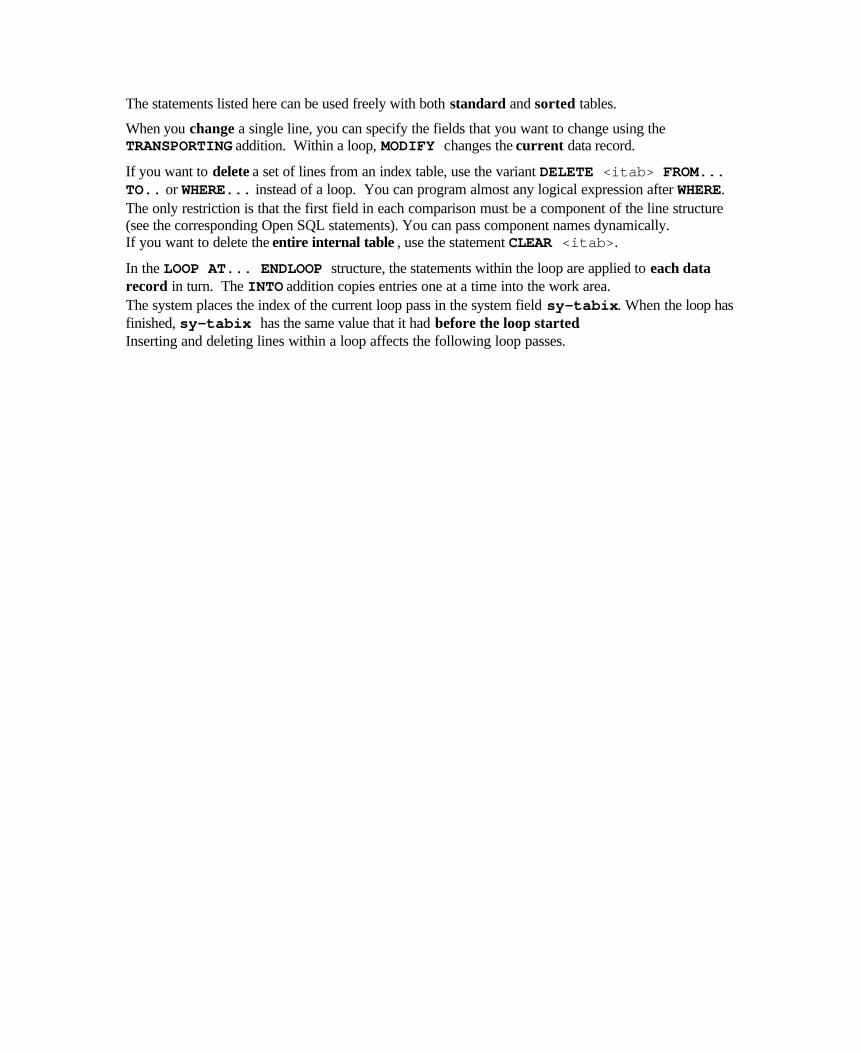
The statements listed here can be used freely with both standard and sorted tables.
When you change a single line, you can specify the fields that you want to change using the TRANSPORTING addition. Within a loop, MODIFY changes the current data record.
If you want to delete a set of lines from an index table, use the variant DELETE <itab> FROM... TO.. or WHERE... instead of a loop. You can program almost any logical expression after WHERE. The only restriction is that the first field in each comparison must be a component of the line structure (see the corresponding Open SQL statements). You can pass component names dynamically. If you want to delete the entire internal table , use the statement CLEAR <itab>.
In the LOOP AT... ENDLOOP structure, the statements within the loop are applied to each data record in turn. The INTO addition copies entries one at a time into the work area. The system places the index of the current loop pass in the system field sy-tabix. When the loop has finished, sy-tabix has the same value that it had before the loop started. Inserting and deleting lines within a loop affects the following loop passes.
Access to a hashed table is implemented using a hash algorithm. Simplified, this means that the data records are distributed randomly but evenly over a particular memory area.. The addresses are stored in a special table called the hashing table . There is a hash function, which determines the address at which the pointer to a data record with a certain key can be found. The function is not injective, that is, there can be several data records stored at a single address. This is implemented internally as a chained list. Therefore, although the system still has to search sequentially within these areas, it only has to read a few data records (usually no more than three). The graphic illustrates the simplest case, that is, in which there is only one data record stored at each address.
Using a hash technique means that the access time no longer depends on the total number of entries in the table. On the contrary, it is always very fast. Hash tables are therefore particularly useful for large tables with which you use predominantly read access.
Data records are not inserted into the table in a sorted order. As with standard tables, you can sort hashed tables using the SORT statement: SORT <itab> [ASCENDING|DESCENDING] [BY <f1> [ASCENDING|DESCENDING] .. <fn> [ASCENDING|DESCENDING]][AS TEXT].
Sorting the table can be useful if you later want to use a loop to access the table.
You can use the statements listed here with tables of all three types. Apart from a few special cases, you can recognize the statements from the extra keyword TABLE. The technical implementation of the statements varies slightly according to the table type.
As a rule, index access to an internal table is quickest. However, it sometimes makes more sense to access data using key values. A unique key is only possible with sorted and hashed tables. If you use the syntax displayed here, your program coding is independent of the table type (generic type specification, easier maintenance).
With a standard table, inserting an entry has the same effect as appending. With sorted tables with a non-unique key, the entry is inserted before the first (if any) entry with the same key.
To read individual data records using the first variant, all fields of <wa1> that are key fields of <itab> must be filled. <wa1> and <wa2> can be identical. If you use the WITH TABLE KEY addition in the second variant, you must also specify the key fully. Otherwise, the system searches according to the sequence of fields that you have specified, using a binary search where possible. You can force the system to use a binary search with a standard table using the BINARY SEARCH addition. In this case, you must sort the table by the corresponding fields first. The system returns the first entry that meets the selection criteria.
Similarly to when you read entries, when you change and delete entries using the key and a work area, you must specify all of the key fields.
You can prevent fields from being transported into the work area during loop processing by using the TRANSPORTING NO FIELDS addition in the WHERE condition. (You can use this to count the number of a particular kind of entry.)
Other statements for all table types
n DELETE ADJACENT DUPLICATES FROM <itab> [COMPARING <f1> .. <fn>| A L L F I E L <fn>}|ALL FIELDS}]. The system deletes all adjacent entries with the same key field contents apart from the first entry. You can prevent the system from only comparing the key field using the COMPARING addition. If you sort the table by the required fields beforehand, you can be sure that only unique entries will remain in the table after the DELETE ADJACENT DUPLICATES statement.
n Searches all lines of the table <itab> for the string . If the search is successful, the system sets the fields sy-tabix and sy-fdpos.
n FREE <itab>. Unlike CLEAR, which only deletes the contents of the table, FREE releases the memory occupied by it as well.
If you want to access your data using the index and do not need your table to be kept in sorted order or to have a unique key, that is, when the sequence of the entries is the most important thing, not sorting by key or having unique entries, you should use standard tables. (If you decide you need to sort the table or access it using the key or a binary search, you can always program these functions by hand.)
This example is written to manage a waiting list. Typical functions are:
n Adding a single entry,
n Deleting individual entries according to certain criteria,
n Displaying and then deleting the first entry from the list,
n Displaying someone's position in the list.
For simplicity, the example does not encapsulate the functions in procedures.
The first thing we do in the example is to declare line and table type, from which we can then declare a work area and our internal table. We also require an elementary field for passing explicit index values.
This example omits the user dialogs and data transport, assuming that you understand the principles involved. We really only want to concentrate on the table access:
n Adding new entries The data record for a waiting customer is only added to the table if it does not already exist in it. If the table had a unique key, you would not have had to have programmed this check yourself.
n Deleting s ingle entries according to various criteria The criterion is the key field. However, other criteria would be possible - for example, deleting data records older than a certain insertion date reg_date .
n Displaying and deleting the first entry from the list Once a customer comes to the top of the waiting list, you can delete his or her entry. If the waiting list is empty, such an action has no effect. Consequently, you do not have to check whether there are entries in the list before attempting the deletion.
n Displaying the position of a customer in the waiting list As above, you do not need to place any data in the work area. We are only interested in the values of sy-subrc and sy-tabix. If the entry is not in the table, sy-tabix is set to zero.
At this stage, let us return to the special case of the restricted ranked list:
DATA <rank> {TYPE|LIKE} STANDARD TABLE OF ... INITIAL SIZE <n>. ...
APPEND <wa> INTO <rank> SORTED BY <f>.
When you choose to use a sorted table, it will normally be because you want to define a unique key. The mere fact that the table is kept in sorted order is not that significant, since you can sort any kind of internal table. However, with sorted tables (unlike hashed tables), new data records are inserted in the correct sort order. If you have a table with few entries but lots of accesses that change the contents, a sorted table may be more efficient than a hashed table in terms of runtime.
The aim of the example here is to modify the contents of a database table. The most efficient way of doing this is to create a local copy of the table in the program, make the changes to the copy, and then write all of its data back to the database table. When you are dealing with large amounts of data, this method both saves runtime and reduces the load on the database server.
Since the internal table represents a database table in this case, you should ensure that its records have unique keys. This is assured by the key definition. Automatic sorting can also bring further advantages.
When you change a group of data records, only the fields price and currency are copied from the work area.
For information about changing database tables (data consistency, authorization and locking issues), refer to course BC414 (Programming Database Updates) and the online documentation.
The hash algorithm calculates the address of an entry based on the key. This means that, with larger tables, the access time is reduced significantly in comparison with a binary search. In a loop, however, the hashed table has to search the entire table (full table scan). Since the table entries are stored unsorted, it would be better to use a sorted table if you needed to run a loop through a left-justified portion of the key. It can also be worth using a hashed table but sorting it.
A typical use for hashed tables is to buffer detailed information that you need repeatedly and can identify using a unique key. You should bear in mind that you can also set up table buffering for a table in the ABAP Dictionary to cover exactly the same case. However, whether the tables are buffered on the application table depends on the size of the database table. Buffering in the program using hashed tables also allows you to restrict the dataset according to your own needs, or to buffer additional data as required.
In this example, we want to allow the user to enter the name of a city, and the system to display its geographical coordinates.
First, we fill our "buffer table" city_list with values from the database table sgeocity.
Then, we read an entry from the hashed table, specifying the full key.
The details are displayed as a simple list.
At this point, it is worth repeating that you should only use this buffering technique if you want to keep large amounts of data locally in the program. You must ensure that you design your hashed table so that it is possible to specify the full key when you access it from your program.
You can define internal tables either with (WITH HEADER LINE addition) or without header lines. An internal table with header line consists of a work area (header line) and the actual table body. You address both objects using the same name. The way in which the system interprets the name depends on the context. For example, the MOVE statement applies to the header line, but the SEARCH statement applies to the body of the table.
To avoid confusion, you are recommended to use internal tables without header lines. This is particularly important when you use nested tables. However, internal tables with header line do offer a shorter syntax in several statements (APPEND, INSERT, MODIFY, COLLECT, DELETE, READ, LOOP). Within ABAP Objects, you can only use internal tables without a header line.
You can always address the body of an internal table <itab> explicitly by using the following syntax: <itab>[]. This syntax is always valid, whether the internal table has a header line or not. Example DATA itab1 TYPE TABLE OF i WITH HEADER LINE. DATA itab2 TYPE TABLE OF i WITH HEADER LINE. itab1 = itab2. " Only header lines will be copied itab1[] = itab2[]. " Copies table body
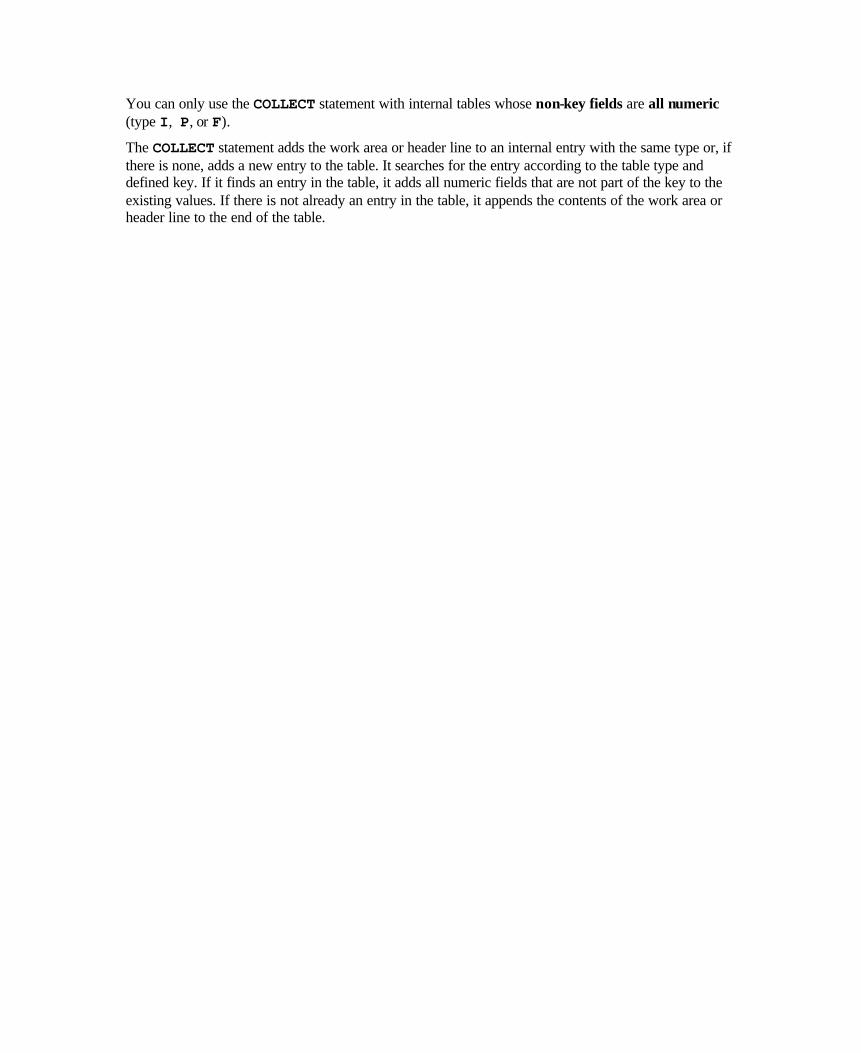
You can only use the COLLECT statement with internal tables whose non-key fields are all numeric (type I, P, or F).
The COLLECT statement adds the work area or header line to an internal entry with the same type or, if there is none, adds a new entry to the table. It searches for the entry according to the table type and defined key. If it finds an entry in the table, it adds all numeric fields that are not part of the key to the existing values. If there is not already an entry in the table, it appends the contents of the work area or header line to the end of the table.
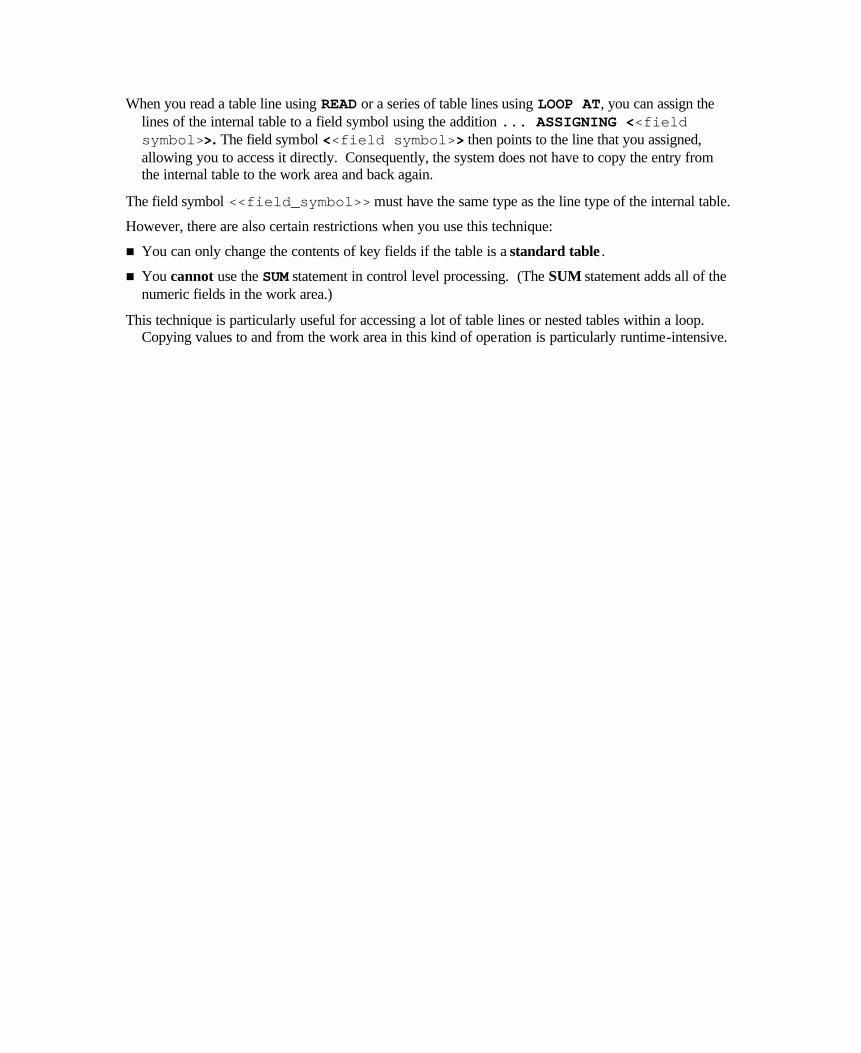
When you read a table line using READ or a series of table lines using LOOP AT, you can assign the lines of the internal table to a field symbol using the addition ... ASSIGNING <<field symbol>>. The field symbol <<field symbol>> then points to the line that you assigned, allowing you to access it directly. Consequently, the system does not have to copy the entry from the internal table to the work area and back again.
The field symbol <<field_symbol>> must have the same type as the line type of the internal table.
However, there are also certain restrictions when you use this technique:
n You can only change the contents of key fields if the table is a standard table .
n You cannot use the SUM statement in control level processing. (The SUM statement adds all of the numeric fields in the work area.)
This technique is particularly useful for accessing a lot of table lines or nested tables within a loop. Copying values to and from the work area in this kind of operation is particularly runtime-intensive.
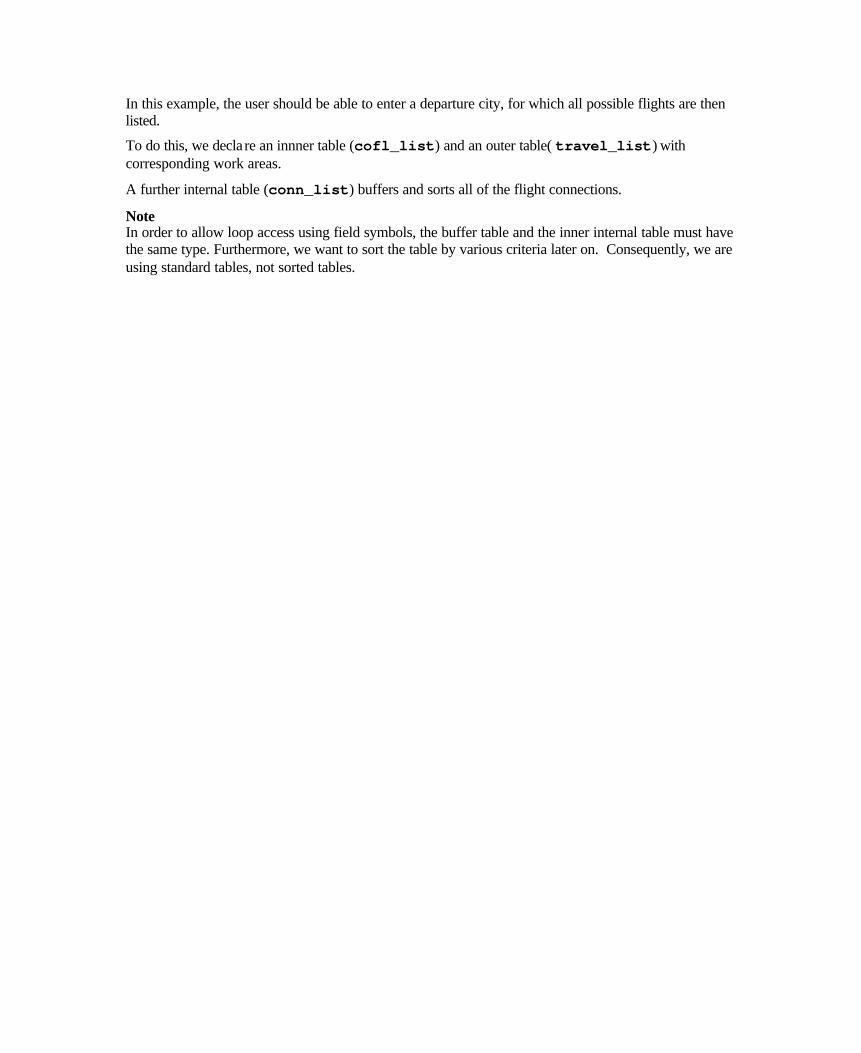
In this example, the user should be able to enter a departure city, for which all possible flights are then listed.
To do this, we decla re an innner table (cofl_list) and an outer table( travel_list) with corresponding work areas.
A further internal table (conn_list) buffers and sorts all of the flight connections.
Note In order to allow loop access using field symbols, the buffer table and the inner internal table must have the same type. Furthermore, we want to sort the table by various criteria later on. Consequently, we are using standard tables, not sorted tables.
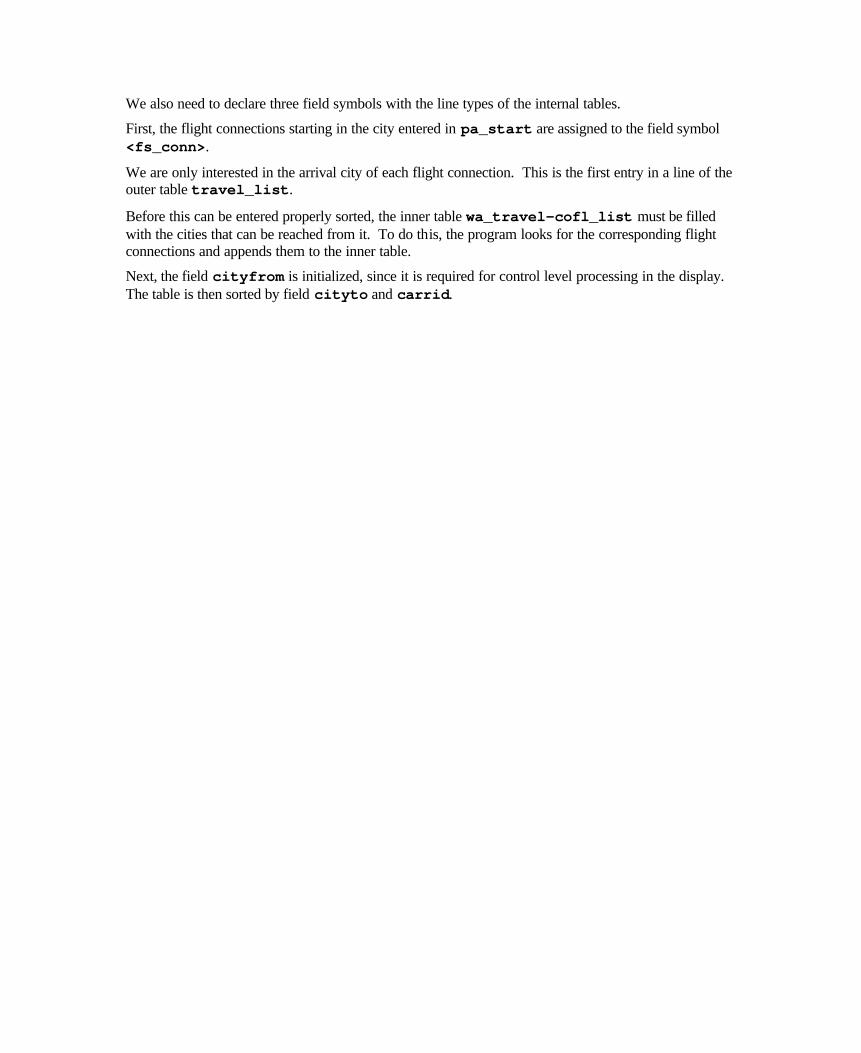
We also need to declare three field symbols with the line types of the internal tables.
First, the flight connections starting in the city entered in pa_start are assigned to the field symbol <fs_conn>.
We are only interested in the arrival city of each flight connection. This is the first entry in a line of the outer table travel_list.
Before this can be entered properly sorted, the inner table wa_travel-cofl_list must be filled with the cities that can be reached from it. To do this, the program looks for the corresponding flight connections and appends them to the inner table.
Next, the field cityfrom is initialized, since it is required for control level processing in the display. The table is then sorted by field cityto and carrid.

Because of the control level processing used here, only new arrival cities are written in the list.
Note It would have been possible to solve this problem using nested SELECT statements. However, this is not a realistic proposition because of the excessive load that we would then place on the database server.
Index access (APPEND, INSERT ... INDEX, LOOP ... FROM TO and so on) is possible for standard and sorted tables. A possible consequence of this is that you may cause a runtime error by violating the sort sequence if you use INSERT with an index or APPEND on a sorted table.
SORT can only apply to standard and hashed tables. It has no positive effect in a sorted table, and can lead to a syntax or runtime error if the attempted sort violates the key sequence.
You can use key access for any table type, but the runtime required varies according to the table type. The runtime depends on whether the values are part of the key (so the sequence in which you pass them is also significant). INSERT for a standard table or hashed table using the key has the same effect as the APPEND statement.
The system supports control level processing for all table types. Hashed and standard tables must be sorted beforehand.
Preview If you want to process data records with different structures, you can use extracts . For further information about control level processing and extracts, refer to course BC405 (Techniques of List Processing and ABAP Query).

Unit: Internal table operations Topic: Filling internal tables and accessing their entries
At the conclusion of these exercises, you will be able to:
• Fill internal tables
• Access their entries
You are a programmer for an airline consortium, and it is your job to write analysis programs for several airlines.
1. Extend your program from task 1 of the previous exercises: You should fill the table with the list of airport names, and then the other table with the assignment of airlines to airports and counter numbers. You should then display the second table in a list. ## is your two-digit group number. Model solution: SAPBC402_TABS_COUNTERLIST2
1-1 Copy your solution to exercise 1 from the last unit (or the model solution) to the new program Z##_BC402_COUNTERLIST2.
1-2 Fill the internal table it_airport_buffer with the codes of the airports and their names from the transparent table SAIRPORT.
1-3 Use a loop to select data from the transparent table SCOUNTER for all of the airlines in the user’s selection. You can fill the fields carrid, countnum, and airport in the work area wa_counter directly. To fill airp_name, you must use a single-record access to the internal table it_airport_buffer. Once you have filled the work area, append it to the internal table it_carr_counter.
1-4 Display the internal table it_carr_counter sorted by the fields airport and carrid in ascending order.
2. Extend your program from section 2 of the previous exercises: You should now run an authorization check to see if the user is authorized to see the data for the airlines that he or she included in the selection on the selection screen. You should then place the airlines that the user chose and for which he or she has authorization in a suitable internal table. You will then display the output in a list. ## is your two-digit group number. Model solution: SAPBC402_TABS_FLIGHTLIST2
2-1 Copy your solution to exercise 2 from the last unit (or the model solution) to the new program Z##_BC402_FLIGHTLIST2.
2-2 Event block AT SELECTION-SCREEN: Use a loop on the transparent table SCARR to fill the low field of work area wa_allowed_carr. Now perform an authorization check against the authorization object S_CARRID for this airline and the activity ‘Display’ (use the Pattern function in the ABAP Editor). Only if the check is successful should you fill the sign and option fields of the work area and append it to the selection table.
2-3 Event block START-OF-SELECTION: Use the view BC402_FLIGHTS to fill the elementary fields of the internal table it_flights. However, at this stage, leave the inner internal table it_planes initial. You cannot use the “array fetch” variant of the SELECT statement with nested internal tables. You must therefore program a loop with the target fields listed in the INTO clause, and insert the work area into the table in the correct sort order.
2-4 Then, display the contents of the internal table it_flights as a list. To do this, use a field symbol <fs_flight>, appropriately typed. Display only those flights for which there is at least one booking. When you display the amount, remember the currency addition.
2-5 Maintain appropriate list headers.
You can run the program and then maintain the list headers from the displayed list.

Unit: Internal table operations Topic: Filling internal tables and accessing their entries
1 Model solution SAPBC402_TABS_COUNTERLIST2 *&-----------------------------------------------------------* *& Report SAPBC402_TABS_COUNTERLIST2 * *& * *&-----------------------------------------------------------* *& solution of exercise 1 operations on internal tables * *& * *&-----------------------------------------------------------* REPORT sapbc402_tabs_counterlist2. TYPES: BEGIN OF t_airport, id TYPE sairport-id, name TYPE sairport-name, END OF t_airport, BEGIN OF t_counter, airport TYPE scounter-airport, airp_name TYPE sairport-name, carrid TYPE scounter-carrid, countnum TYPE scounter-countnum, END OF t_counter. DATA: it_carr_counter TYPE STANDARD TABLE OF t_counter, wa_counter TYPE t_counter, it_airport_buffer TYPE HASHED TABLE OF t_airport WITH UNIQUE KEY id, wa_airport TYPE t_airport. SELECT-OPTIONS so_carr FOR wa_counter-carrid. START-OF-SELECTION. * buffer the airport names: ***************************
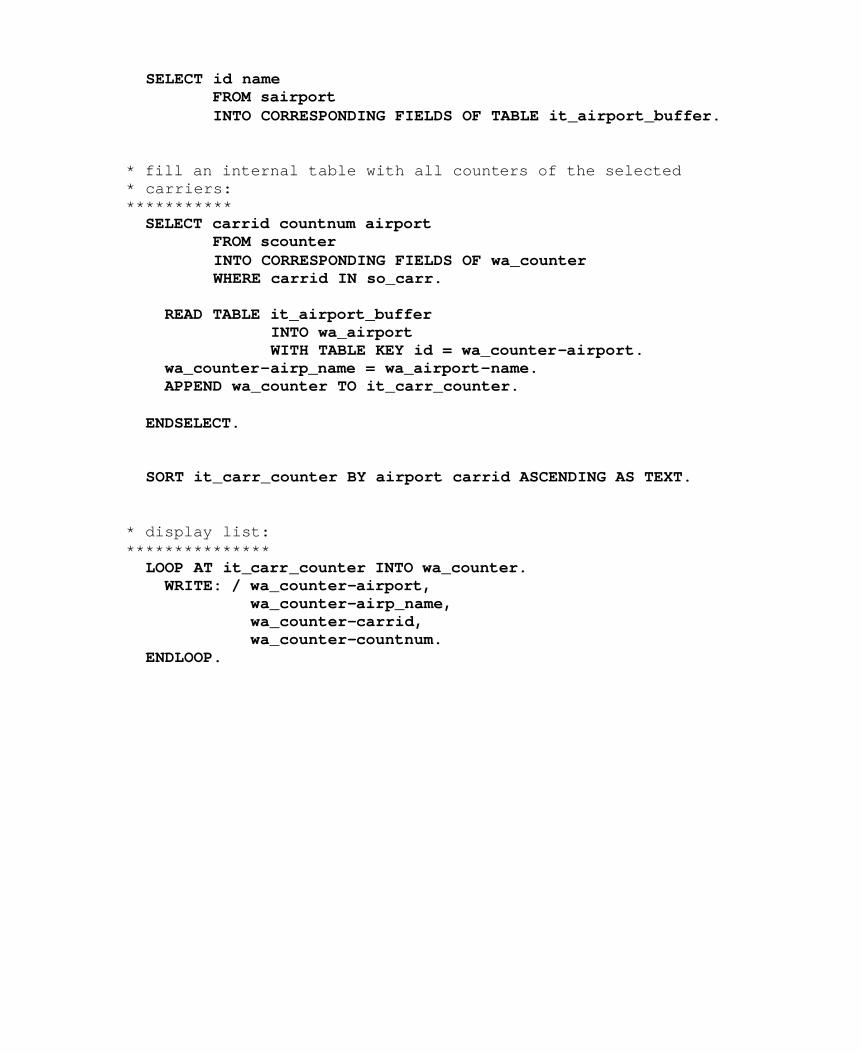
SELECT id name FROM sairport INTO CORRESPONDING FIELDS OF TABLE it_airport_buffer. * fill an internal table with all counters of the selected * carriers: *********** SELECT carrid countnum airport FROM scounter INTO CORRESPONDING FIELDS OF wa_counter WHERE carrid IN so_carr. READ TABLE it_airport_buffer INTO wa_airport WITH TABLE KEY id = wa_counter-airport. wa_counter-airp_name = wa_airport-name. APPEND wa_counter TO it_carr_counter. ENDSELECT. SORT it_carr_counter BY airport carrid ASCENDING AS TEXT. * display list: *************** LOOP AT it_carr_counter INTO wa_counter. WRITE: / wa_counter-airport, wa_counter-airp_name, wa_counter-carrid, wa_counter-countnum. ENDLOOP.
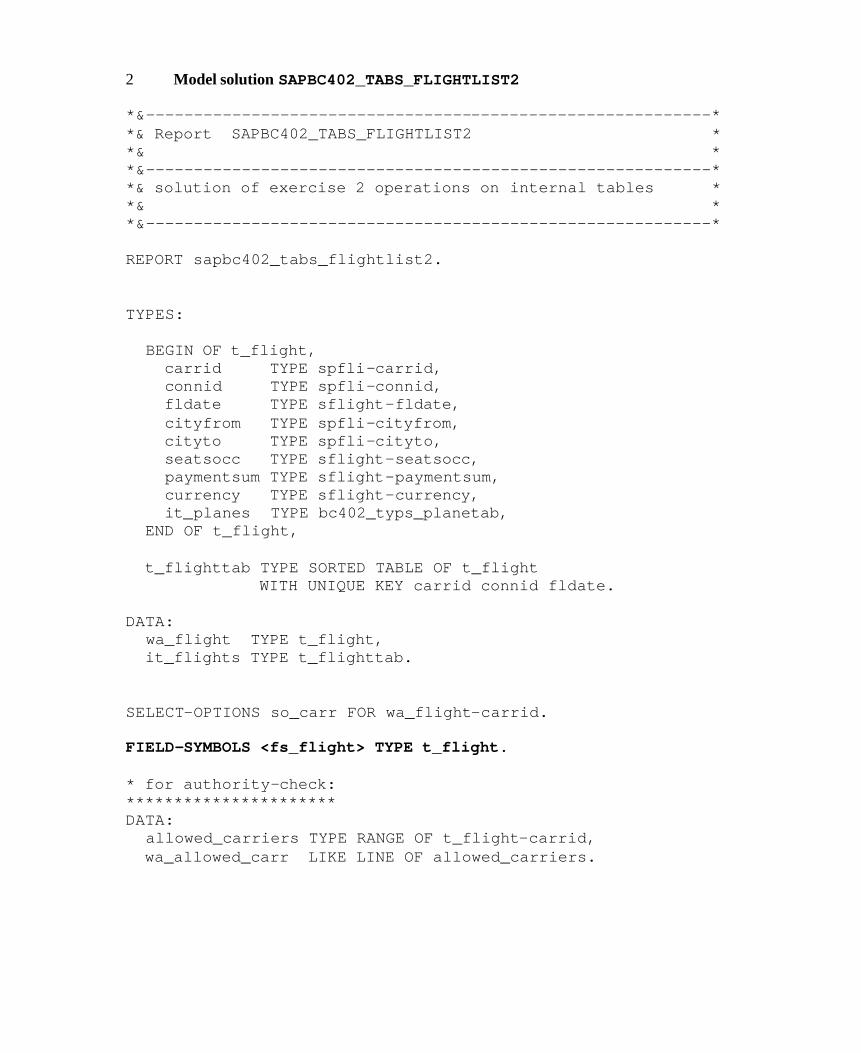
2 Model solution SAPBC402_TABS_FLIGHTLIST2 *&-----------------------------------------------------------* *& Report SAPBC402_TABS_FLIGHTLIST2 * *& * *&-----------------------------------------------------------* *& solution of exercise 2 operations on internal tables * *& * *&-----------------------------------------------------------* REPORT sapbc402_tabs_flightlist2. TYPES: BEGIN OF t_flight, carrid TYPE spfli-carrid, connid TYPE spfli-connid, fldate TYPE sflight-fldate, cityfrom TYPE spfli-cityfrom, cityto TYPE spfli-cityto, seatsocc TYPE sflight-seatsocc, paymentsum TYPE sflight-paymentsum, currency TYPE sflight-currency, it_planes TYPE bc402_typs_planetab, END OF t_flight, t_flighttab TYPE SORTED TABLE OF t_flight WITH UNIQUE KEY carrid connid fldate. DATA: wa_flight TYPE t_flight, it_flights TYPE t_flighttab. SELECT-OPTIONS so_carr FOR wa_flight-carrid. FIELD-SYMBOLS <fs_flight> TYPE t_flight. * for authority-check: ********************** DATA: allowed_carriers TYPE RANGE OF t_flight-carrid, wa_allowed_carr LIKE LINE OF allowed_carriers.

START-OF-SELECTION. * fill a range table with the allowed carriers: *********************************************** SELECT carrid FROM scarr INTO wa_allowed_carr-low WHERE carrid IN so_carr. AUTHORITY-CHECK OBJECT 'S_CARRID' ID 'CARRID' FIELD wa_allowed_carr-low ID 'ACTVT' FIELD '03'. " display IF sy-subrc <> 0. CLEAR wa_allowed_carr. ELSE. wa_allowed_carr-sign = 'I'. wa_allowed_carr-option = 'EQ'. APPEND wa_allowed_carr TO allowed_carriers. ENDIF. ENDSELECT. * fill an internal table with connection and flight data * for the allowed carriers: *************************** SELECT carrid connid fldate cityfrom cityto seatsocc paymentsum currency FROM bc402_flights INTO (wa_flight-carrid, wa_flight-connid, wa_flight-fldate, wa_flight-cityfrom, wa_flight-cityto, wa_flight-seatsocc, wa_flight-paymentsum, wa_flight-currency) WHERE carrid IN allowed_carriers. INSERT wa_flight INTO TABLE it_flights. ENDSELECT.
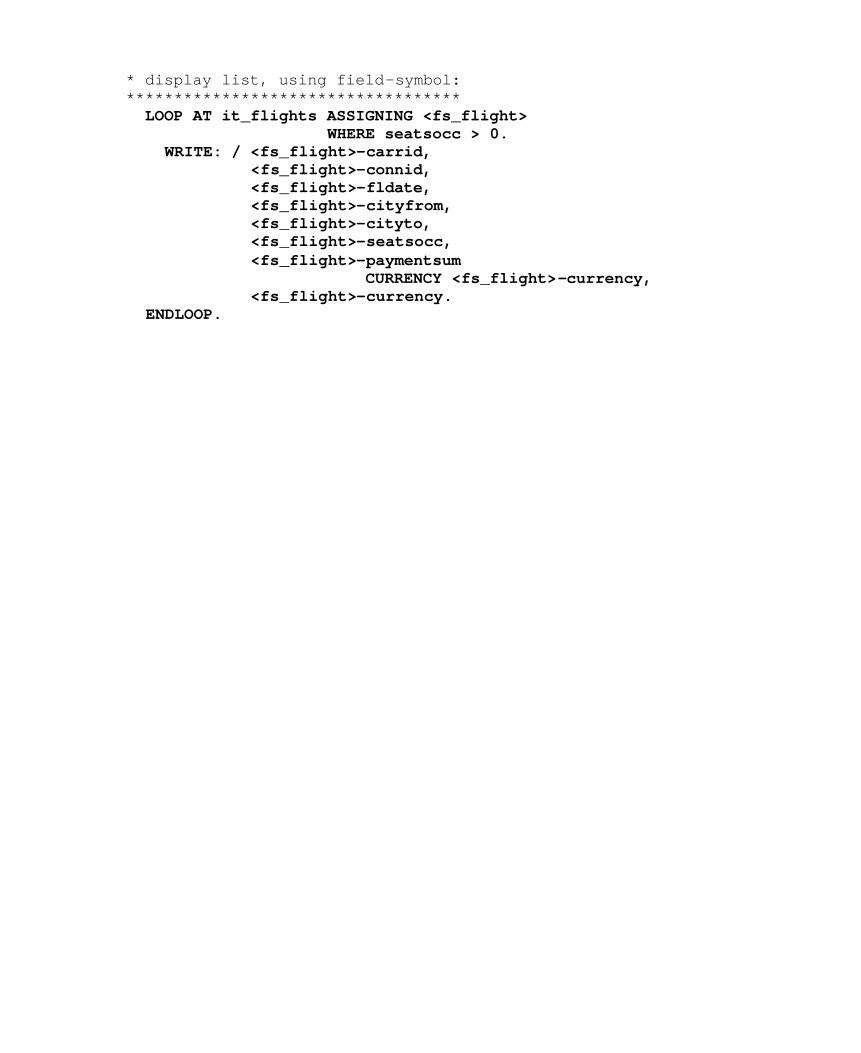
* display list, using field-symbol: *********************************** LOOP AT it_flights ASSIGNING <fs_flight> WHERE seatsocc > 0. WRITE: / <fs_flight>-carrid, <fs_flight>-connid, <fs_flight>-fldate, <fs_flight>-cityfrom, <fs_flight>-cityto, <fs_flight>-seatsocc, <fs_flight>-paymentsum CURRENCY <fs_flight>-currency, <fs_flight>-currency. ENDLOOP.
SAP AG 1999
l Defining the interface
l Calling subroutines
l Lifetime and visibility
l Use
Contents
Subroutines

A subroutine is an internal modularization unit within a program, to which you can pass data using an interface. You use subroutines to encapsulate parts of your program, either to make the program easier to understand, or because a particular section of coding is used at several points in the program. Your program thus becomes more function-oriented, with its task split into different constituent functions, and a different subroutine responsible for each one.
As a rule, subroutines also make your programs easier to maintain. For example, you can execute them "invisibly" in the Debugger, and only see the result. Consequently, if you know that there are no mistakes in the subroutine itself, you can identify the source of the error faster.
Structure of a Subroutine
n A subroutine begins with the FORM statement and ends with ENDFORM.
n After the subroutine name, you program the interface. In the FORM statement, you specify the formal parameters , and assign them types if required. The parameters must occur in a fixed sequence - first the importing parameters, then the importing/exporting parameters. Within the subroutine, you address the data that you passed to it using the formal parameters.
n You can declare local data in a subroutine.
n After any local data declarations, you program the statements that are executed as part of the subroutine.
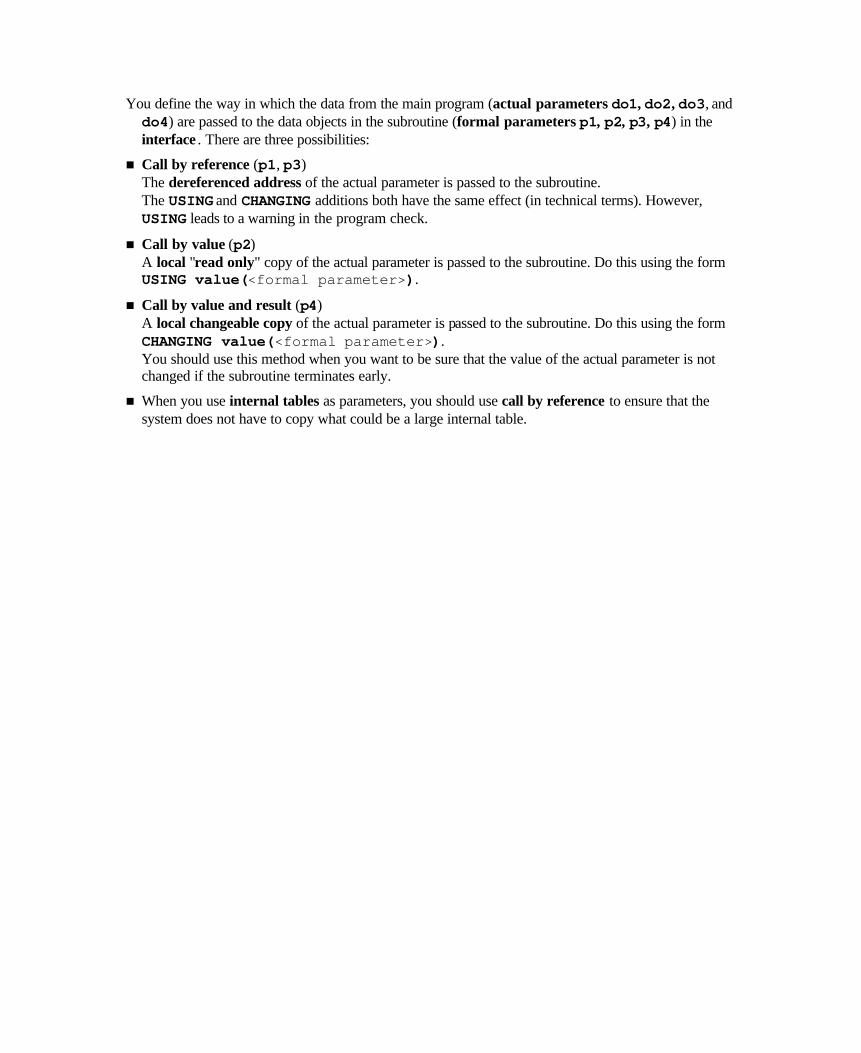
You define the way in which the data from the main program (actual parameters do1, do2, do3, and do4) are passed to the data objects in the subroutine (formal parameters p1, p2, p3, p4) in the interface . There are three possibilities:
n Call by reference (p1, p3) The dereferenced address of the actual parameter is passed to the subroutine. The USING and CHANGING additions both have the same effect (in technical terms). However, USING leads to a warning in the program check.
n Call by value (p2) A local "read only" copy of the actual parameter is passed to the subroutine. Do this using the form USING value(<formal parameter>).
n Call by value and result (p4) A local changeable copy of the actual parameter is passed to the subroutine. Do this using the form CHANGING value(<formal parameter>). You should use this method when you want to be sure that the value of the actual parameter is not changed if the subroutine terminates early.
n When you use internal tables as parameters, you should use call by reference to ensure that the system does not have to copy what could be a large internal table.
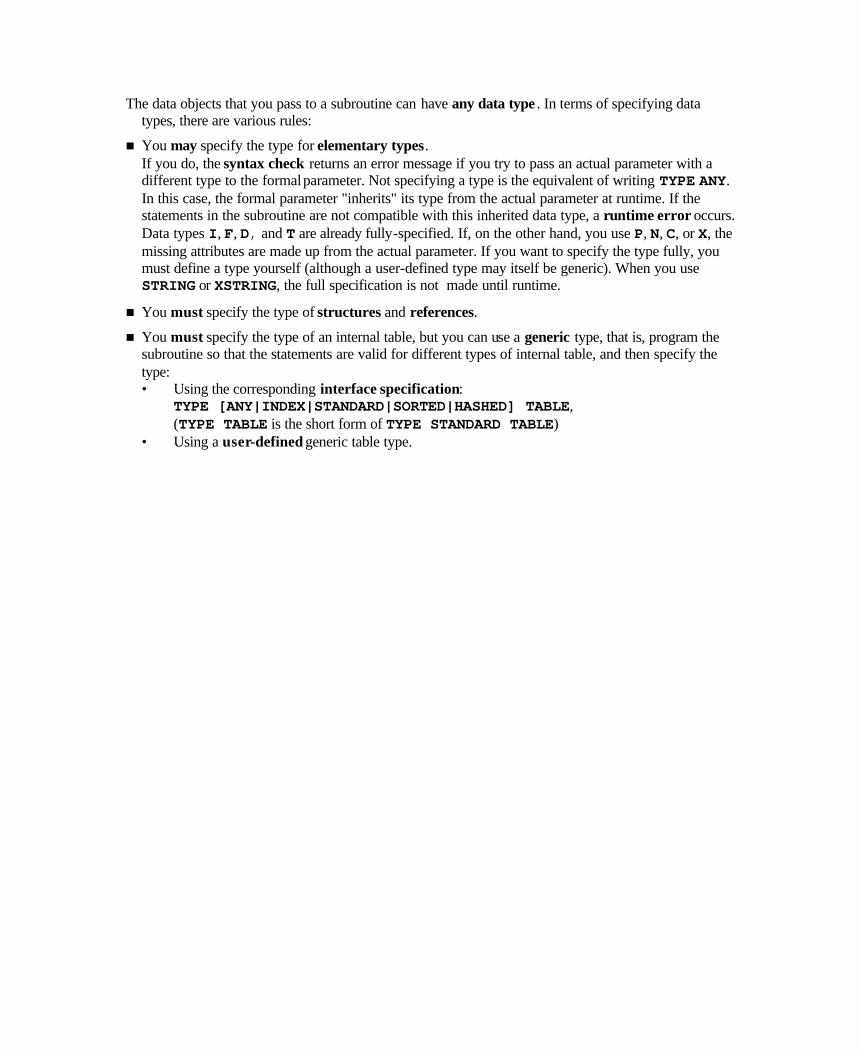
The data objects that you pass to a subroutine can have any data type . In terms of specifying data types, there are various rules:
n You may specify the type for elementary types. If you do, the syntax check returns an error message if you try to pass an actual parameter with a different type to the formal parameter. Not specifying a type is the equivalent of writing TYPE ANY. In this case, the formal parameter "inherits" its type from the actual parameter at runtime. If the statements in the subroutine are not compatible with this inherited data type, a runtime error occurs. Data types I, F, D, and T are already fully-specified. If, on the other hand, you use P, N, C, or X, the missing attributes are made up from the actual parameter. If you want to specify the type fully, you must define a type yourself (although a user-defined type may itself be generic). When you use STRING or XSTRING, the full specification is not made until runtime.
n You must specify the type of structures and references.
n You must specify the type of an internal table, but you can use a generic type, that is, program the subroutine so that the statements are valid for different types of internal table, and then specify the type: • Using the corresponding interface specification: TYPE [ANY|INDEX|STANDARD|SORTED|HASHED] TABLE, (TYPE TABLE is the short form of TYPE STANDARD TABLE) • Using a user-defined generic table type.
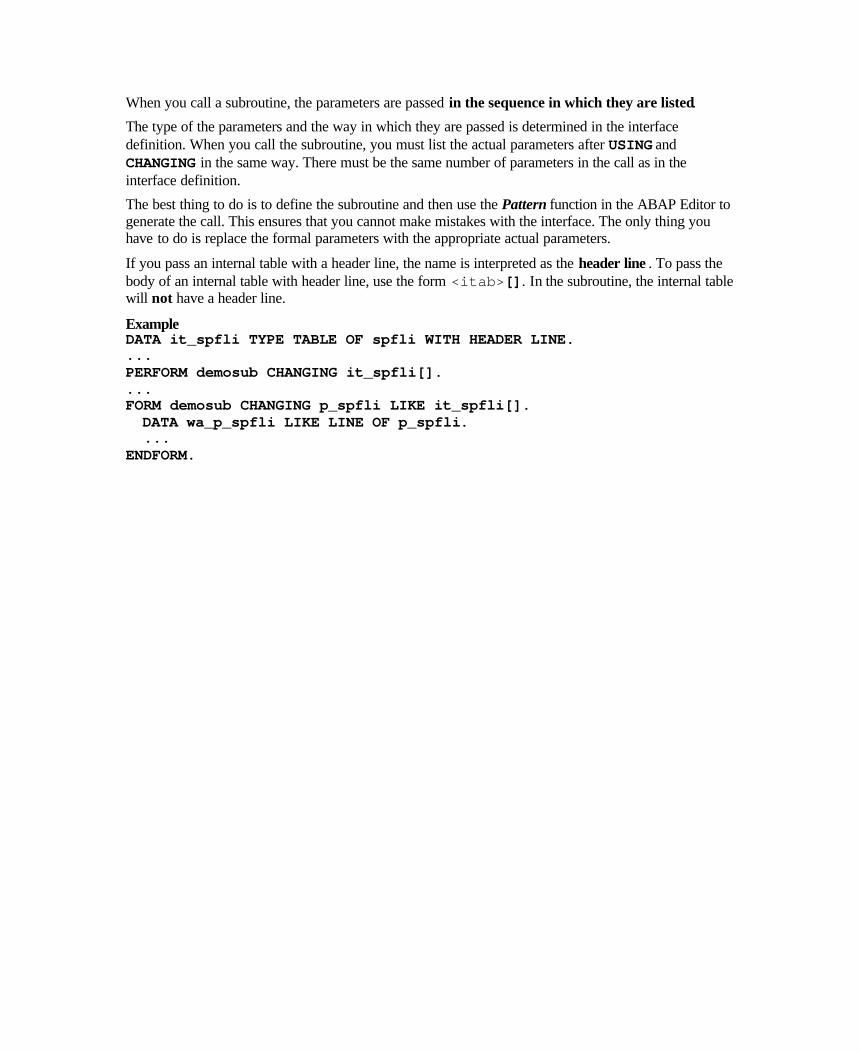
When you call a subroutine, the parameters are passed in the sequence in which they are listed.
The type of the parameters and the way in which they are passed is determined in the interface definition. When you call the subroutine, you must list the actual parameters after USING and CHANGING in the same way. There must be the same number of parameters in the call as in the interface definition.
The best thing to do is to define the subroutine and then use the Pattern function in the ABAP Editor to generate the call. This ensures that you cannot make mistakes with the interface. The only thing you have to do is replace the formal parameters with the appropriate actual parameters.
If you pass an internal table with a header line, the name is interpreted as the header line . To pass the body of an internal table with header line, use the form <itab>[]. In the subroutine, the internal table will not have a header line.
Example DATA it_spfli TYPE TABLE OF spfli WITH HEADER LINE. ... PERFORM demosub CHANGING it_spfli[]. ... FORM demosub CHANGING p_spfli LIKE it_spfli[]. DATA wa_p_spfli LIKE LINE OF p_spfli. ... ENDFORM.
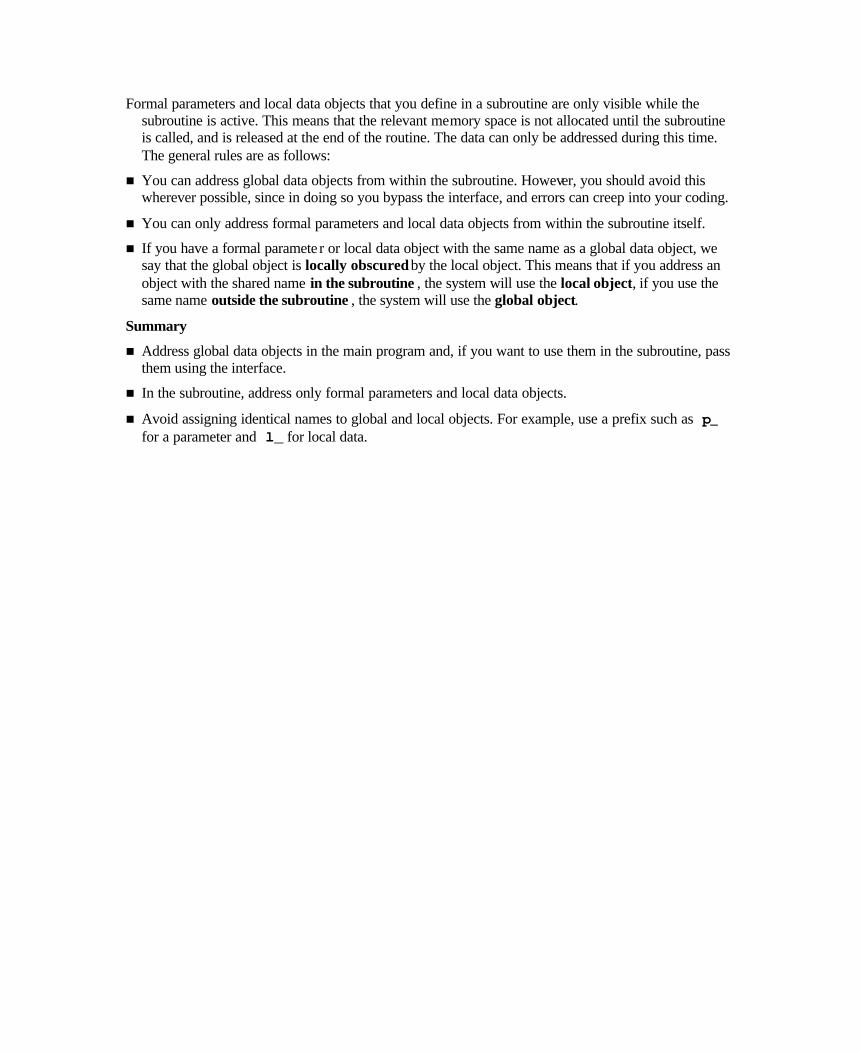
Formal parameters and local data objects that you define in a subroutine are only visible while the subroutine is active. This means that the relevant memory space is not allocated until the subroutine is called, and is released at the end of the routine. The data can only be addressed during this time. The general rules are as follows:
n You can address global data objects from within the subroutine. However, you should avoid this wherever possible, since in doing so you bypass the interface, and errors can creep into your coding.
n You can only address formal parameters and local data objects from within the subroutine itself.
n If you have a formal paramete r or local data object with the same name as a global data object, we say that the global object is locally obscured by the local object. This means that if you address an object with the shared name in the subroutine , the system will use the local object, if you use the same name outside the subroutine , the system will use the global object.
Summary
n Address global data objects in the main program and, if you want to use them in the subroutine, pass them using the interface.
n In the subroutine, address only formal parameters and local data objects.
n Avoid assigning identical names to global and local objects. For example, use a prefix such as p_ for a parameter and l_ for local data.

This example calls the subroutine demosub. It contains a local data object with a starting value, and alters the four formal parameters.

The system allocates two memory areas p2 and p4 for the two call by value parameters d2 and d4, and fills them with the respective values. It also allocates memory for the local data object l_do, and fills it with the starting value.
There is no VALUE addition for p1 or p3, This means that changes at runtime affect the actual parameters directly, and you can address do1 directly via p1.

Here, the change to p1 directly affects the contents of do1.
The formal parameter p2 is declared as a local copy with read access. This means that any changes will not affect the actual parameter do2 at all.

The same applies to p3 as to p1. If you do not use the VALUE addition, USING and CHANGING have the same effect.

The contents of do3 are affected directly by the changes to p3.
As for p2, we have created a local copy for p4. Consequently, the changes to the formal parameter do not affect the actual parameter while the subroutine is running.

The changes are not written back to the actual parameters until the ENDFORM statement.

If demosub is interrupted for any reason, do4 would have the same value afterwards as it had before the call.
Now that demosub has finished running, the memory occupied by its local data objects is released. You now cannot address these data objects any more.
Note that do2 still has its old value, even though p2 was changed in the subroutine.
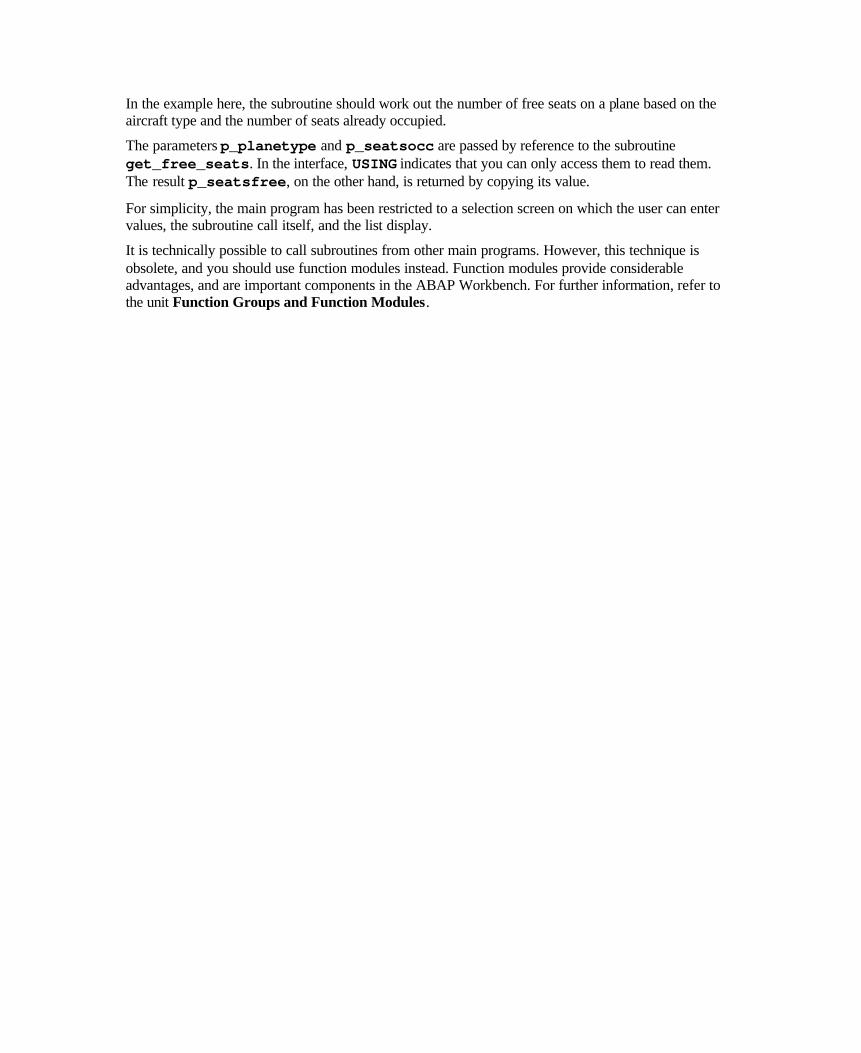
In the example here, the subroutine should work out the number of free seats on a plane based on the aircraft type and the number of seats already occupied.
The parameters p_planetype and p_seatsocc are passed by reference to the subroutine get_free_seats. In the interface, USING indicates that you can only access them to read them. The result p_seatsfree, on the other hand, is returned by copying its value.
For simplicity, the main program has been restricted to a selection screen on which the user can enter values, the subroutine call itself, and the list display.
It is technically possible to call subroutines from other main programs. However, this technique is obsolete, and you should use function modules instead. Function modules provide considerable advantages, and are important components in the ABAP Workbench. For further information, refer to the unit Function Groups and Function Modules.

Another typical use of subroutines is recursive calls. Although all other modularization units can, in principle, be called recursively, the runtime required is often excessive for small easily-programmed recursions.
This example uses a recursive solution to find a connection between two cities. To find a connection between A and Z, the program looks for a flight from A to B, and then from B to Z. The subroutine find_conn calls itself.
n If there is no direct connection, the program uses the current city (p_pos) to compile a list of all cities that can be reached (l_poss_list), that are not yet in the route list (p_step_list). The route list is defined as a standard table so that the sequence of the cities on the route is retained.
For simplicity, the system removes duplicate entries from the list of cities. This means that the subroutine ends up with only one possible connection. However, it would also be possible to suppress this, and examine all of the possible connections, for example, for the number of stopovers, total distance, and so on.
n If it is not possible to reach any cities other than those already visited on the same journey, the current city on the route is marked as a "dead end".
n Otherwise, the cities to which it is possible to travel are processed in a loop. Each city is included in the route list, so that the program can continue searching from here. However, before that, the program has to check whether the city has already been marked as a dead end in a previous search.
n Once the destination is reached, we can terminate the processing. Any further search from this point would be unsuccessful anyway. The city is marked in the route list, and the search carries on with the next reachable city.
n The processing logic for this subroutine is contained in the function group LBC402_SURD_RECURSION, include program LBC402_SURD_RECURSIONF01. The subroutine is called from function module BC402_SURD_TRAVEL_LIST, which is itself called from the executable program SAPBC402_SURD_RECURSION. This program lists all of the possible flights in the flight data mode, and in particular those with stopovers.

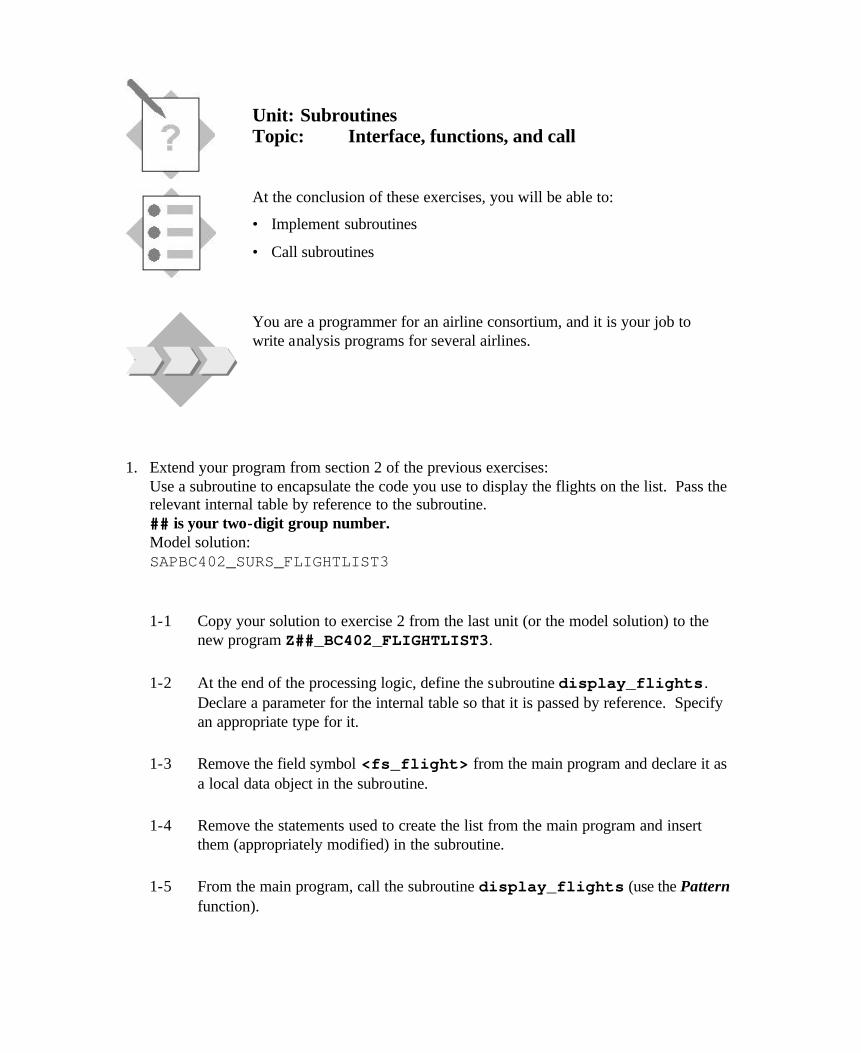
Unit: Subroutines Topic: Interface, functions, and call
At the conclusion of these exercises, you will be able to:
• Implement subroutines
• Call subroutines
You are a programmer for an airline consortium, and it is your job to write analysis programs for several airlines.
1. Extend your program from section 2 of the previous exercises: Use a subroutine to encapsulate the code you use to display the flights on the list. Pass the relevant internal table by reference to the subroutine. ## is your two-digit group number. Model solution: SAPBC402_SURS_FLIGHTLIST3
1-1 Copy your solution to exercise 2 from the last unit (or the model solution) to the new program Z##_BC402_FLIGHTLIST3.
1-2 At the end of the processing logic, define the subroutine display_flights. Declare a parameter for the internal table so that it is passed by reference. Specify an appropriate type for it.
1-3 Remove the field symbol <fs_flight> from the main program and declare it as a local data object in the subroutine.
1-4 Remove the statements used to create the list from the main program and insert them (appropriately modified) in the subroutine.
1-5 From the main program, call the subroutine display_flights (use the Pattern function).

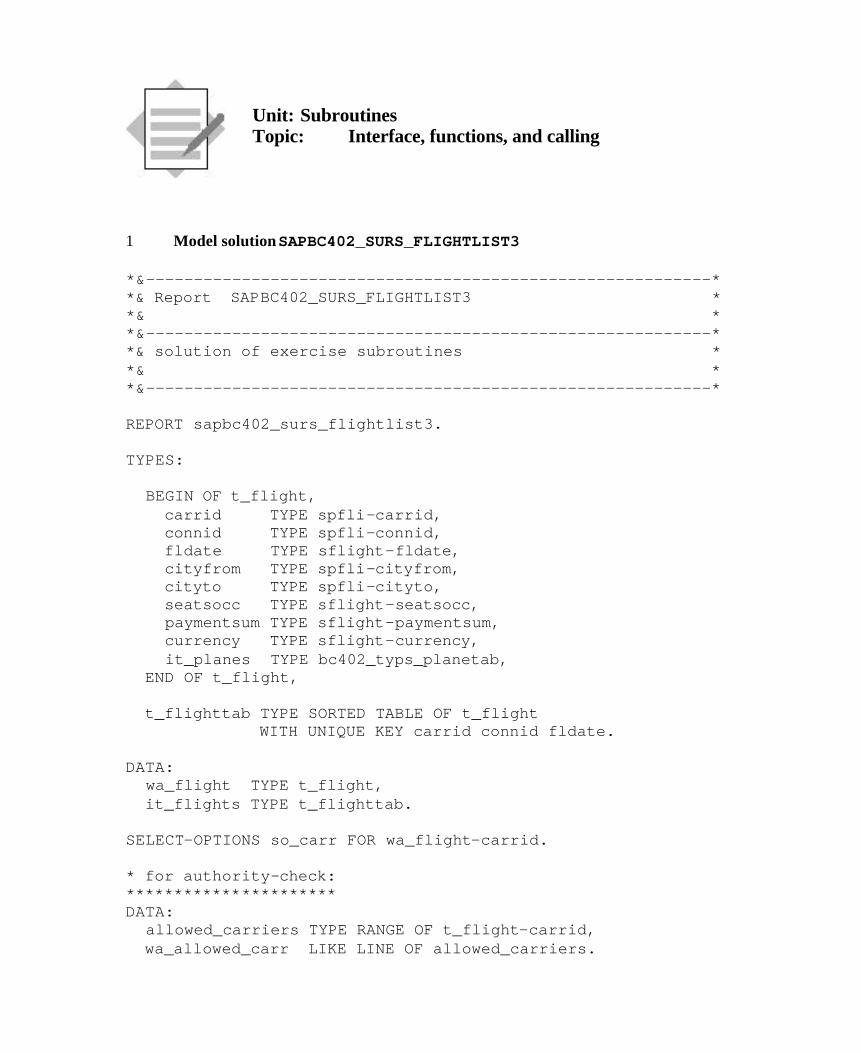
Unit: Subroutines Topic: Interface, functions, and calling
1 Model solution SAPBC402_SURS_FLIGHTLIST3
*&-----------------------------------------------------------* *& Report SAPBC402_SURS_FLIGHTLIST3 * *& * *&-----------------------------------------------------------* *& solution of exercise subroutines * *& * *&-----------------------------------------------------------* REPORT sapbc402_surs_flightlist3. TYPES: BEGIN OF t_flight, carrid TYPE spfli-carrid, connid TYPE spfli-connid, fldate TYPE sflight-fldate, cityfrom TYPE spfli-cityfrom, cityto TYPE spfli-cityto, seatsocc TYPE sflight-seatsocc, paymentsum TYPE sflight-paymentsum, currency TYPE sflight-currency, it_planes TYPE bc402_typs_planetab, END OF t_flight, t_flighttab TYPE SORTED TABLE OF t_flight WITH UNIQUE KEY carrid connid fldate. DATA: wa_flight TYPE t_flight, it_flights TYPE t_flighttab. SELECT-OPTIONS so_carr FOR wa_flight-carrid. * for authority-check: ********************** DATA: allowed_carriers TYPE RANGE OF t_flight-carrid, wa_allowed_carr LIKE LINE OF allowed_carriers.
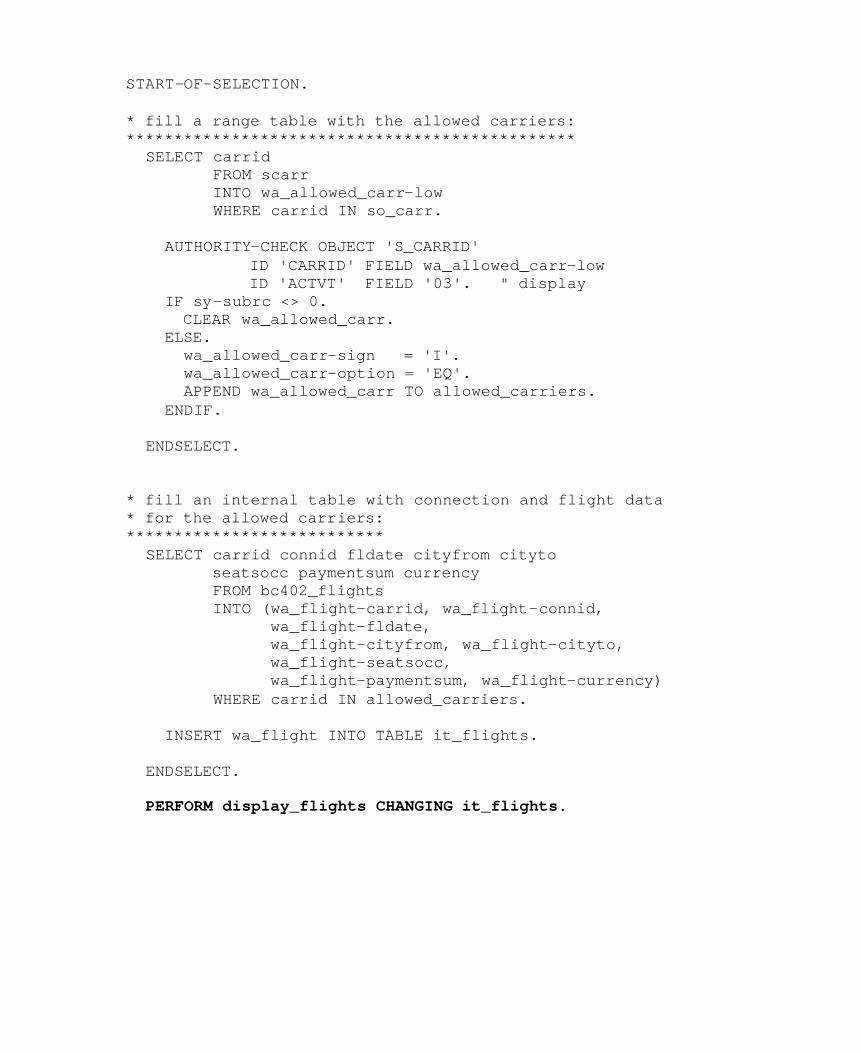
START-OF-SELECTION. * fill a range table with the allowed carriers: *********************************************** SELECT carrid FROM scarr INTO wa_allowed_carr-low WHERE carrid IN so_carr. AUTHORITY-CHECK OBJECT 'S_CARRID' ID 'CARRID' FIELD wa_allowed_carr-low ID 'ACTVT' FIELD '03'. " display IF sy-subrc <> 0. CLEAR wa_allowed_carr. ELSE. wa_allowed_carr-sign = 'I'. wa_allowed_carr-option = 'EQ'. APPEND wa_allowed_carr TO allowed_carriers. ENDIF. ENDSELECT. * fill an internal table with connection and flight data * for the allowed carriers: *************************** SELECT carrid connid fldate cityfrom cityto seatsocc paymentsum currency FROM bc402_flights INTO (wa_flight-carrid, wa_flight-connid, wa_flight-fldate, wa_flight-cityfrom, wa_flight-cityto, wa_flight-seatsocc, wa_flight-paymentsum, wa_flight-currency) WHERE carrid IN allowed_carriers. INSERT wa_flight INTO TABLE it_flights. ENDSELECT. PERFORM display_flights CHANGING it_flights.
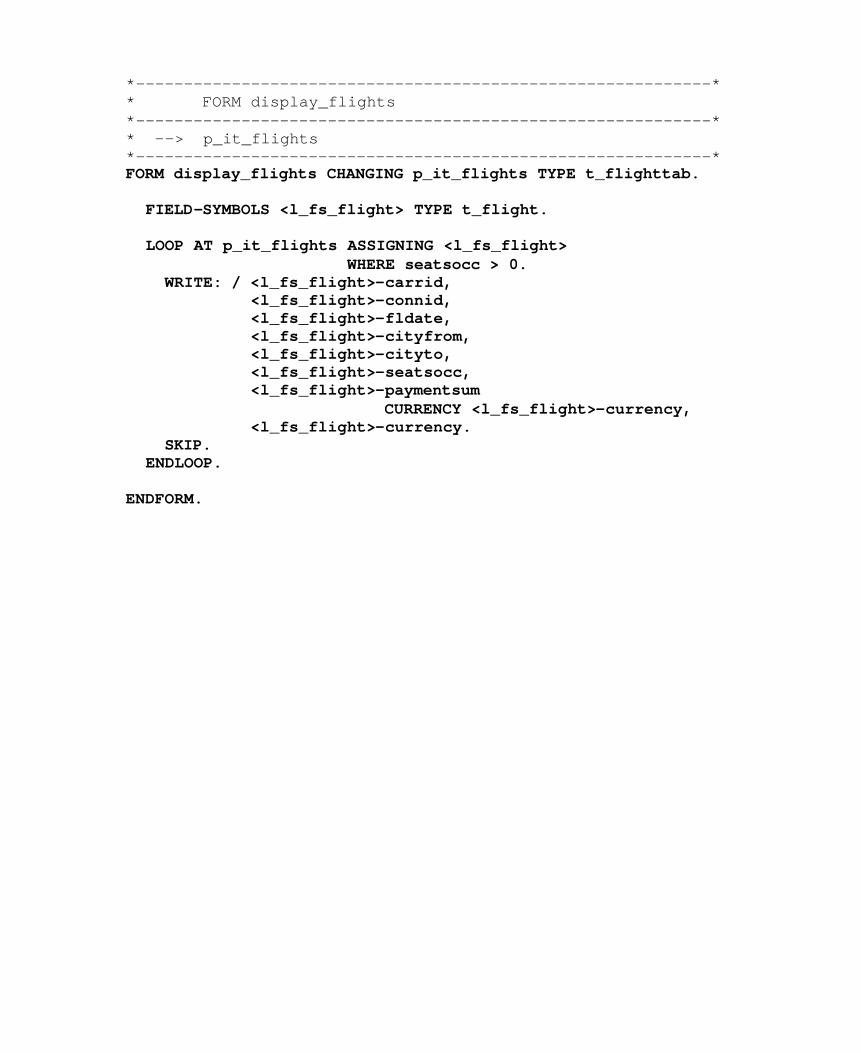
*------------------------------------------------------------* * FORM display_flights *------------------------------------------------------------* * --> p_it_flights *------------------------------------------------------------* FORM display_flights CHANGING p_it_flights TYPE t_flighttab. FIELD-SYMBOLS <l_fs_flight> TYPE t_flight. LOOP AT p_it_flights ASSIGNING <l_fs_flight> WHERE seatsocc > 0. WRITE: / <l_fs_flight>-carrid, <l_fs_flight>-connid, <l_fs_flight>-fldate, <l_fs_flight>-cityfrom, <l_fs_flight>-cityto, <l_fs_flight>-seatsocc, <l_fs_flight>-paymentsum CURRENCY <l_fs_flight>-currency, <l_fs_flight>-currency. SKIP. ENDLOOP. ENDFORM.

SAP AG 1999
l Defining the interface
l Function modules in function groups
l Calling a function module
l Runtime behavior
Contents:
Function Groups and Function Modules
Function modules are more comfortable to use than subroutines, and have a wider range of uses. The following list, without claiming to be complete, details the essential role that function modules play in the ABAP Workbench:
Function modules ...
n Are actively integrated in the ABAP Workbench. You create and manage them using the Function Builder.
n Can have optional importing and changing parameters, to which you can assign default values.
n Can trigger exceptions through which the return code field sy-subrc is filled.
n Can be remote-enabled.
n Can be executed asynchronously, allowing you to run parallel processes.
n Can be enabled for updates.
n Play an important role in the SAP enhancement concept.
As an example, we are going to calculate the number of free seats on an aircraft. The following slides illustrate the individual steps involved in creating a function module.

In the Attributes of a function module, you specify its general adminstrative data and the processing type :
n Remote-enabled function modules can be called asynchronously in the same system, and can also be called from other systems (not just R/3 Systems). To call a function module in another system, there must be a valid system connection. For further information, refer to the course BC415 (Communications Interfaces in ABAP).
n Update function modules contain additional functions for bundling database changes. For further information, refer to the course BC414 (Programming Database Updates) and the online documentation.
The online documentation also details the interface restrictions that apply to remote-enabled and update function modules.
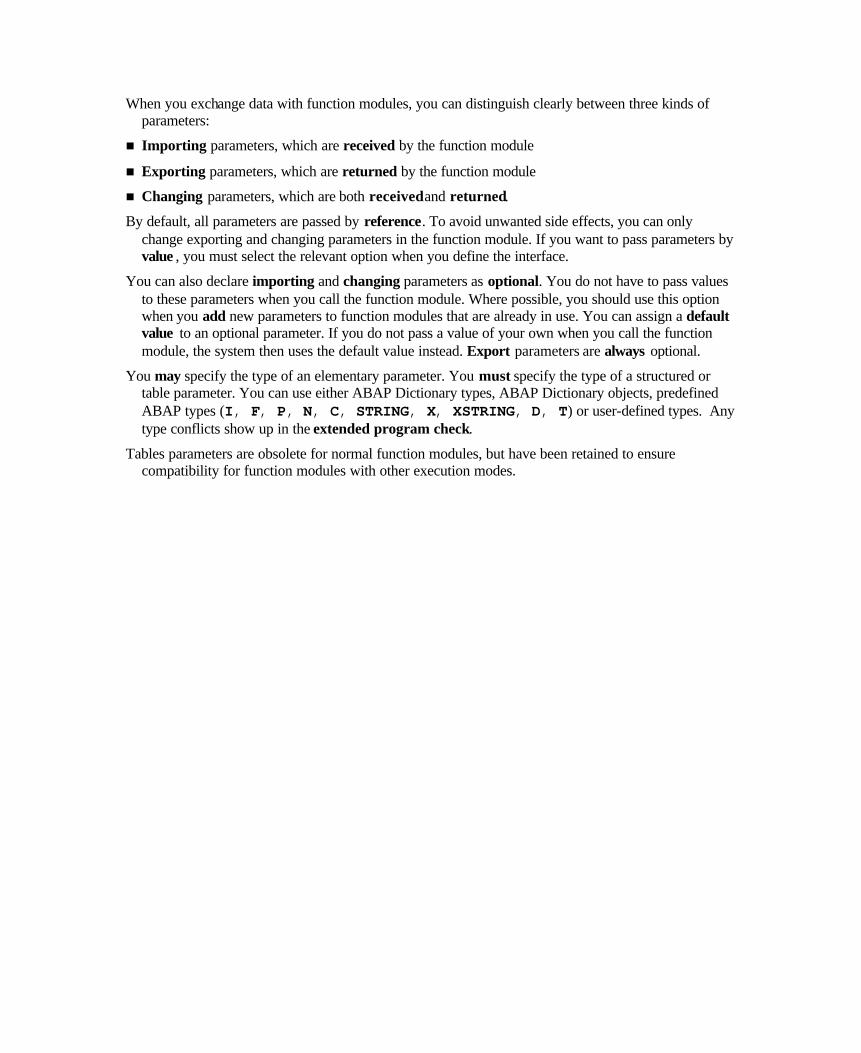
When you exchange data with function modules, you can distinguish clearly between three kinds of parameters:
n Importing parameters, which are received by the function module
n Exporting parameters, which are returned by the function module
n Changing parameters, which are both received and returned.
By default, all parameters are passed by reference. To avoid unwanted side effects, you can only change exporting and changing parameters in the function module. If you want to pass parameters by value , you must select the relevant option when you define the interface.
You can also declare importing and changing parameters as optional. You do not have to pass values to these parameters when you call the function module. Where possible, you should use this option when you add new parameters to function modules that are already in use. You can assign a default value to an optional parameter. If you do not pass a value of your own when you call the function module, the system then uses the default value instead. Export parameters are always optional.
You may specify the type of an elementary parameter. You must specify the type of a structured or table parameter. You can use either ABAP Dictionary types, ABAP Dictionary objects, predefined ABAP types (I, F, P, N, C, STRING, X, XSTRING, D, T) or user-defined types. Any type conflicts show up in the extended program check.
Tables parameters are obsolete for normal function modules, but have been retained to ensure compatibility for function modules with other execution modes.
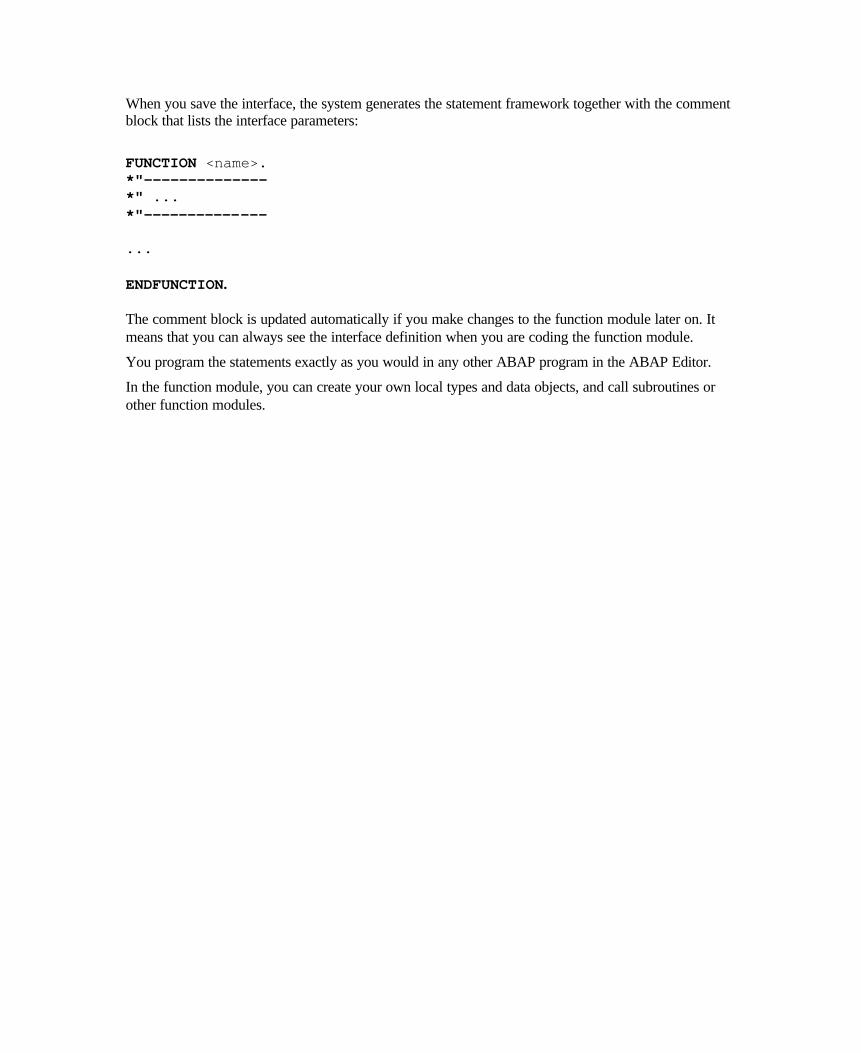
When you save the interface, the system generates the statement framework together with the comment block that lists the interface parameters:
FUNCTION <name>. *"-------------- *" ... *"-------------- ... ENDFUNCTION. The comment block is updated automatically if you make changes to the function module later on. It means that you can always see the interface definition when you are coding the function module.
You program the statements exactly as you would in any other ABAP program in the ABAP Editor.
In the function module, you can create your own local types and data objects, and call subroutines or other function modules.
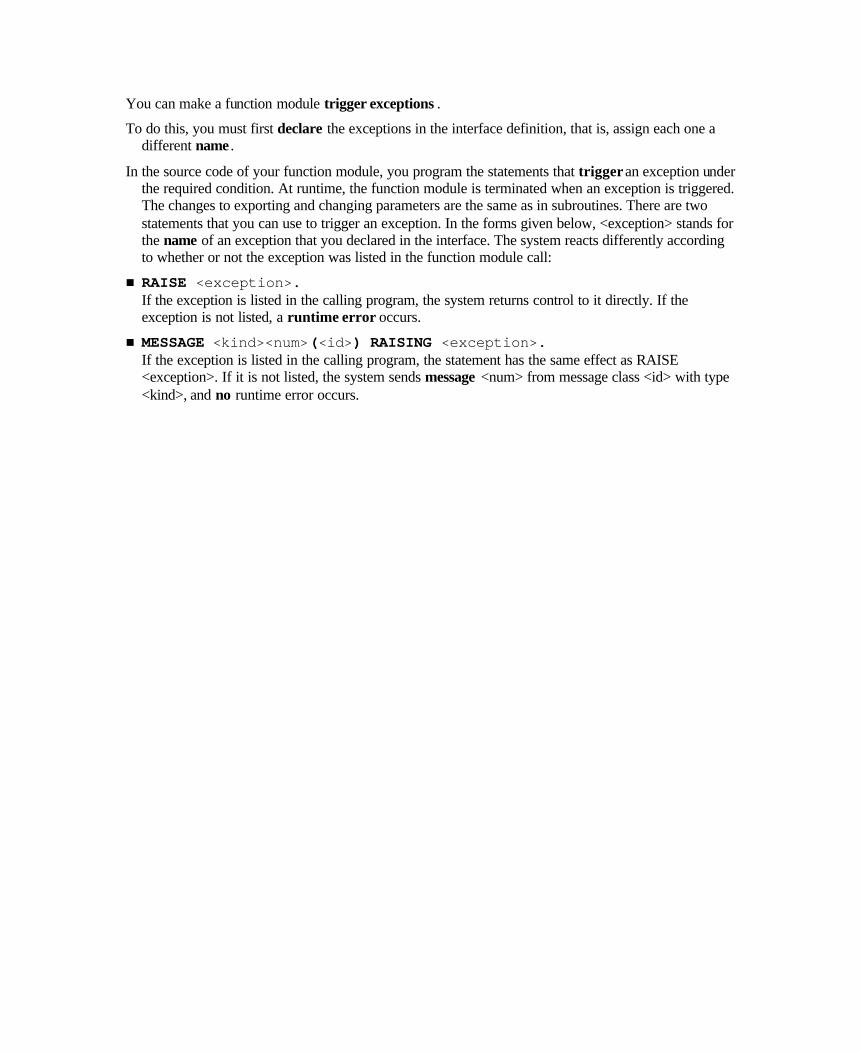
You can make a function module trigger exceptions .
To do this, you must first declare the exceptions in the interface definition, that is, assign each one a different name .
In the source code of your function module, you program the statements that trigger an exception under the required condition. At runtime, the function module is terminated when an exception is triggered. The changes to exporting and changing parameters are the same as in subroutines. There are two statements that you can use to trigger an exception. In the forms given below, <exception> stands for the name of an exception that you declared in the interface. The system reacts differently according to whether or not the exception was listed in the function module call:
n RAISE <exception>. If the exception is listed in the calling program, the system returns control to it directly. If the exception is not listed, a runtime error occurs.
n MESSAGE <kind><num>(<id>) RAISING <exception>. If the exception is listed in the calling program, the statement has the same effect as RAISE <exception>. If it is not listed, the system sends message <num> from message class <id> with type <kind>, and no runtime error occurs.
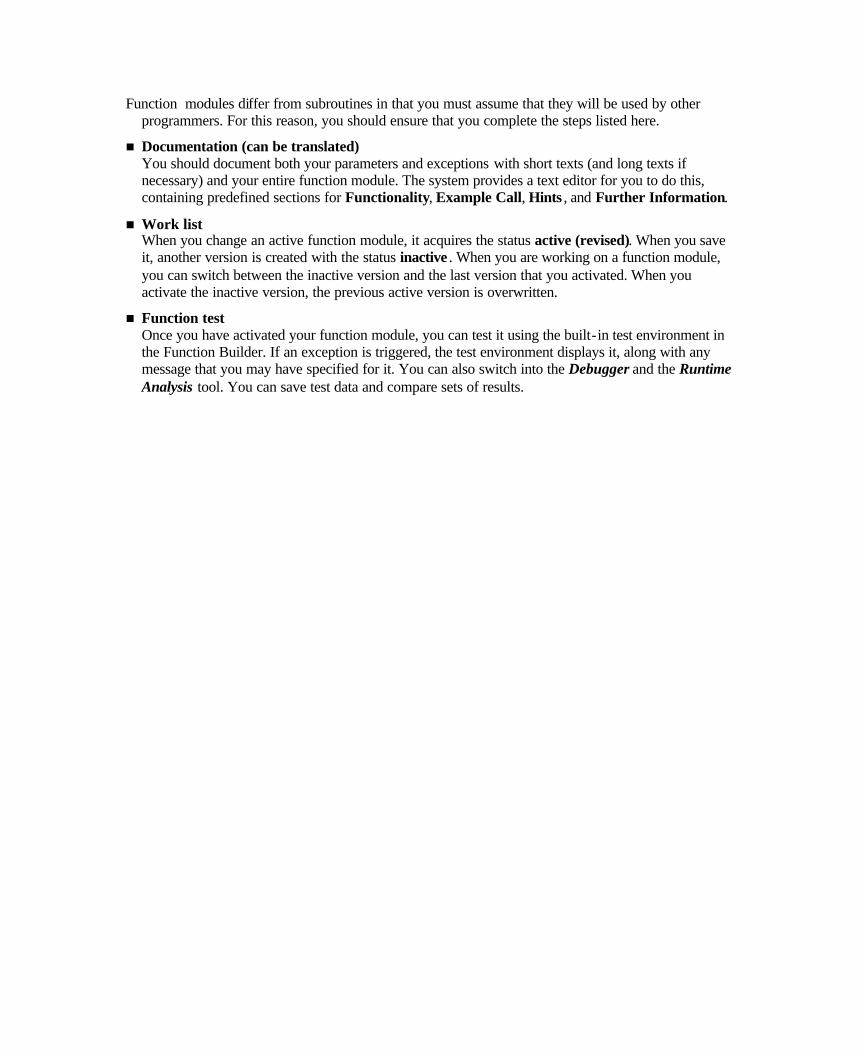
Function modules differ from subroutines in that you must assume that they will be used by other programmers. For this reason, you should ensure that you complete the steps listed here.
n Documentation (can be translated) You should document both your parameters and exceptions with short texts (and long texts if necessary) and your entire function module. The system provides a text editor for you to do this, containing predefined sections for Functionality, Example Call, Hints , and Further Information.
n Work list When you change an active function module, it acquires the status active (revised). When you save it, another version is created with the status inactive . When you are working on a function module, you can switch between the inactive version and the last version that you activated. When you activate the inactive version, the previous active version is overwritten.
n Function test Once you have activated your function module, you can test it using the built-in test environment in the Function Builder. If an exception is triggered, the test environment displays it, along with any message that you may have specified for it. You can also switch into the Debugger and the Runtime Analysis tool. You can save test data and compare sets of results.

When you insert a function module call in your program, you should use the Pattern function. Then, you only need to enter the name of the function module (input help is available). The system then inserts the call and the exception handling (MESSAGE statement) into your program.
You assign parameters by name. The formal parameters are always on the left-hand side of the expressions:
n Exporting parameters are passed by the program. If a parameter is optional, you do not need to pass it. Default values are displayed if they exist.
n Importing parameters are received by the program. All importing parameters are optional.
n Changing parameters are both passed and received. You do not have to list optional parameters. Default values are displayed if they exist.
The system assigns a value to each exception, beginning at one, and continuing to number them sequentially in the order they are declared in the function module definition. You can assign a value to all other exceptions that you have not specifically listed using the special exception OTHERS.
If you list the exceptions and one is triggered in the function module, the corresponding value is placed in the return code field sy-subrc. If you did not list the exception in the function call, a runtime error or a message occurs, depending on the statement you used in the function module to trigger the exception.
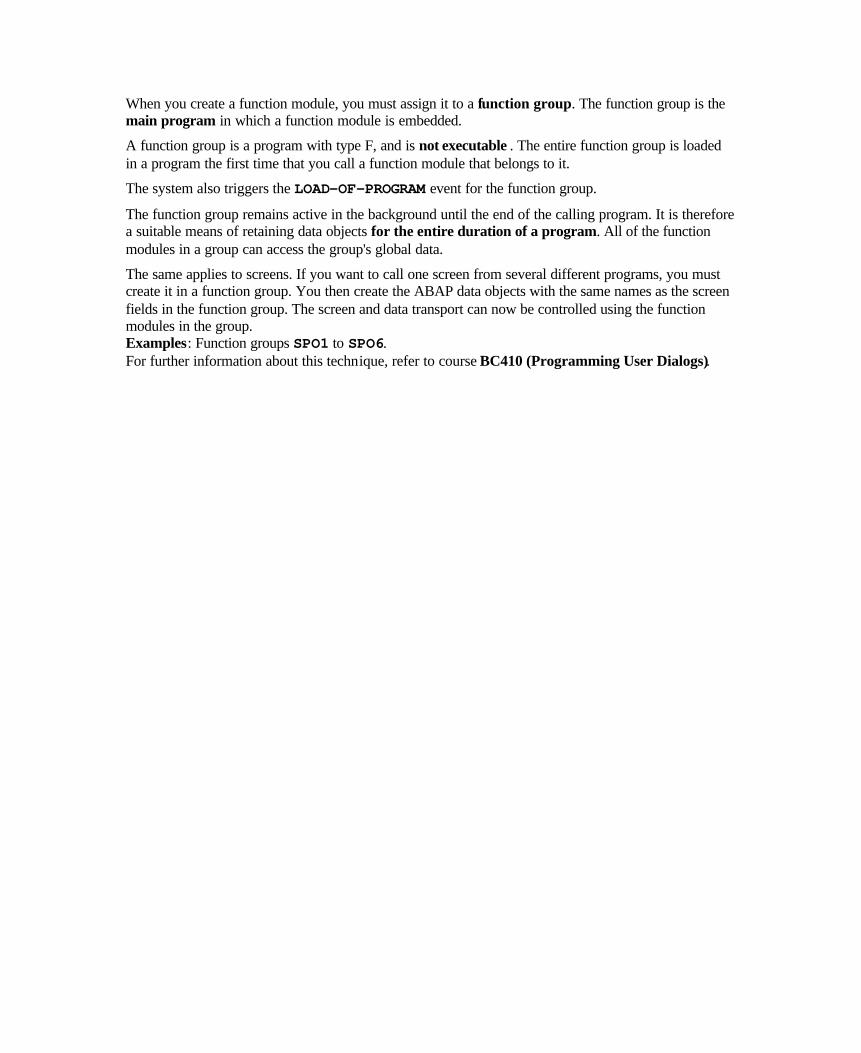
When you create a function module, you must assign it to a function group. The function group is the main program in which a function module is embedded.
A function group is a program with type F, and is not executable . The entire function group is loaded in a program the first time that you call a function module that belongs to it.
The system also triggers the LOAD-OF-PROGRAM event for the function group.
The function group remains active in the background until the end of the calling program. It is therefore a suitable means of retaining data objects for the entire duration of a program. All of the function modules in a group can access the group's global data.
The same applies to screens. If you want to call one screen from several different programs, you must create it in a function group. You then create the ABAP data objects with the same names as the screen fields in the function group. The screen and data transport can now be controlled using the function modules in the group. Examples: Function groups SPO1 to SPO6. For further information about this technique, refer to course BC410 (Programming User Dialogs).

Let us return to our waiting list example from the Operations on Internal Tables unit. Maintaining a waiting list using subroutines would be subject to errors, since the list would be a global object and could be changed within the main program.
Furthermore, waiting lists are a common application, and it is likely that if you write a solution, it can be used by other developers. You should therefore make it available centrally in the ABAP Workbench so that other programmers do not have to do the same work over again. If, for example, they know that a function module wait_get_first will return the name of the customer at the top of the waiting list, they only need to worry about the required parameters and possible exceptions.
In the example, the waiting list is implemented as an internal table in the global data declarations of the function group. This means that it cannot be changed using any means other than the function modules in that group. You can call these from any program.

The implementation of the individual function modules is similar to the examples in the Internal Table Operations unit. To save space, we have only listed the ABAP coding that is relevant for the actual functions.
The types of the parameters and global data objects have been specified by referring to appropriate types in the ABAP Dictionary.

Screen 100 belongs to the function group. It is a container screen for list processing that is processed invisibly. It allows the user to display the current contents of the waiting list in a modal dialog box.
For simplicity, we have not used a table control in the example. Had we done so, it would have been possible to encapsulate the entire navigation in the function group. For further information about using screen objects such as table controls, refer to course BC410 (Programming User Dialogs).

To move an entry in the waiting list, we first delete the existing entry. Then, we enter a new one at position ip_new_pos.
This is only possible if the new index is positive, and not greater than the total number of lines in the list (last_pos). We determine the value of last_pos using the DESCRIBE TABLE … LINES statement. If you specify an index that is too large, the entry is appended to the internal table.
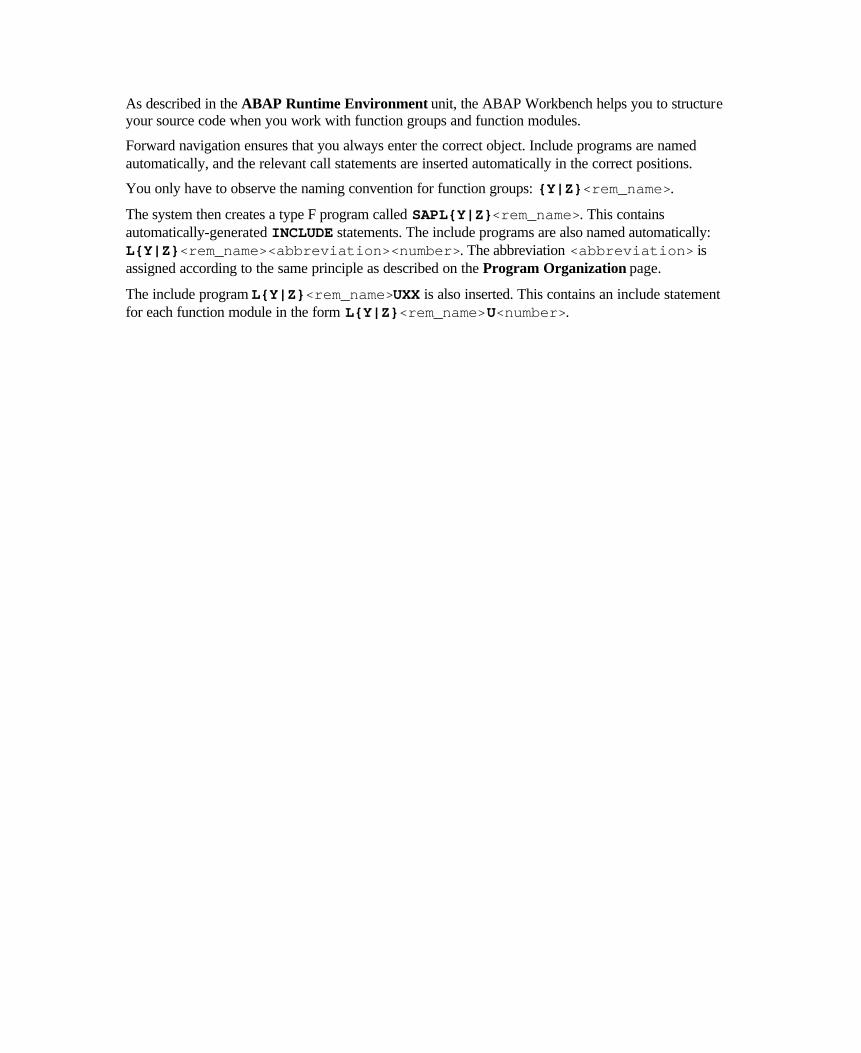
As described in the ABAP Runtime Environment unit, the ABAP Workbench helps you to structure your source code when you work with function groups and function modules.
Forward navigation ensures that you always enter the correct object. Include programs are named automatically, and the relevant call statements are inserted automatically in the correct positions.
You only have to observe the naming convention for function groups: {Y|Z}<rem_name>.
The system then creates a type F program called SAPL{Y|Z}<rem_name>. This contains automatically-generated INCLUDE statements. The include programs are also named automatically: L{Y|Z}<rem_name><abbreviation><number>. The abbreviation <abbreviation> is assigned according to the same principle as described on the Program Organization page.
The include program L{Y|Z}<rem_name>UXX is also inserted. This contains an include statement for each function module in the form L{Y|Z}<rem_name>U<number>.

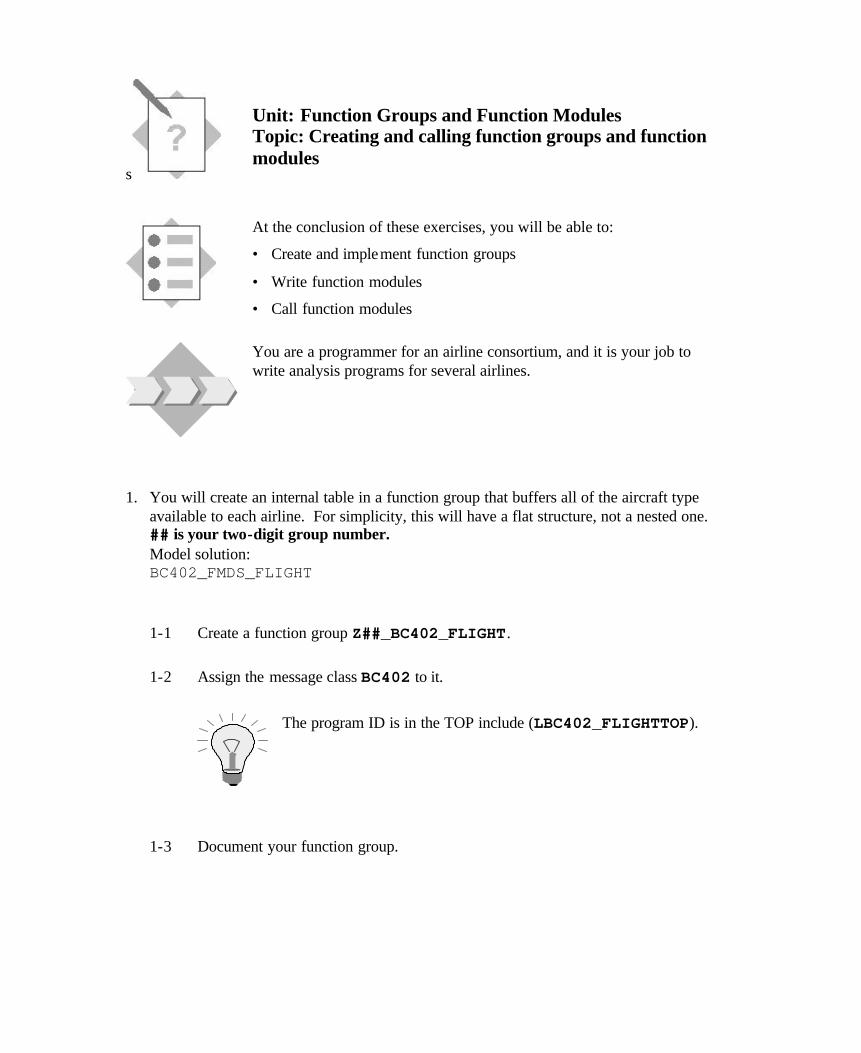
s
Unit: Function Groups and Function Modules Topic: Creating and calling function groups and function modules
At the conclusion of these exercises, you will be able to:
• Create and implement function groups
• Write function modules
• Call function modules
You are a programmer for an airline consortium, and it is your job to write analysis programs for several airlines.
1. You will create an internal table in a function group that buffers all of the aircraft type available to each airline. For simplicity, this will have a flat structure, not a nested one. ## is your two-digit group number. Model solution: BC402_FMDS_FLIGHT
1-1 Create a function group Z##_BC402_FLIGHT.
1-2 Assign the message class BC402 to it.
The program ID is in the TOP include (LBC402_FLIGHTTOP).
1-3 Document your function group.
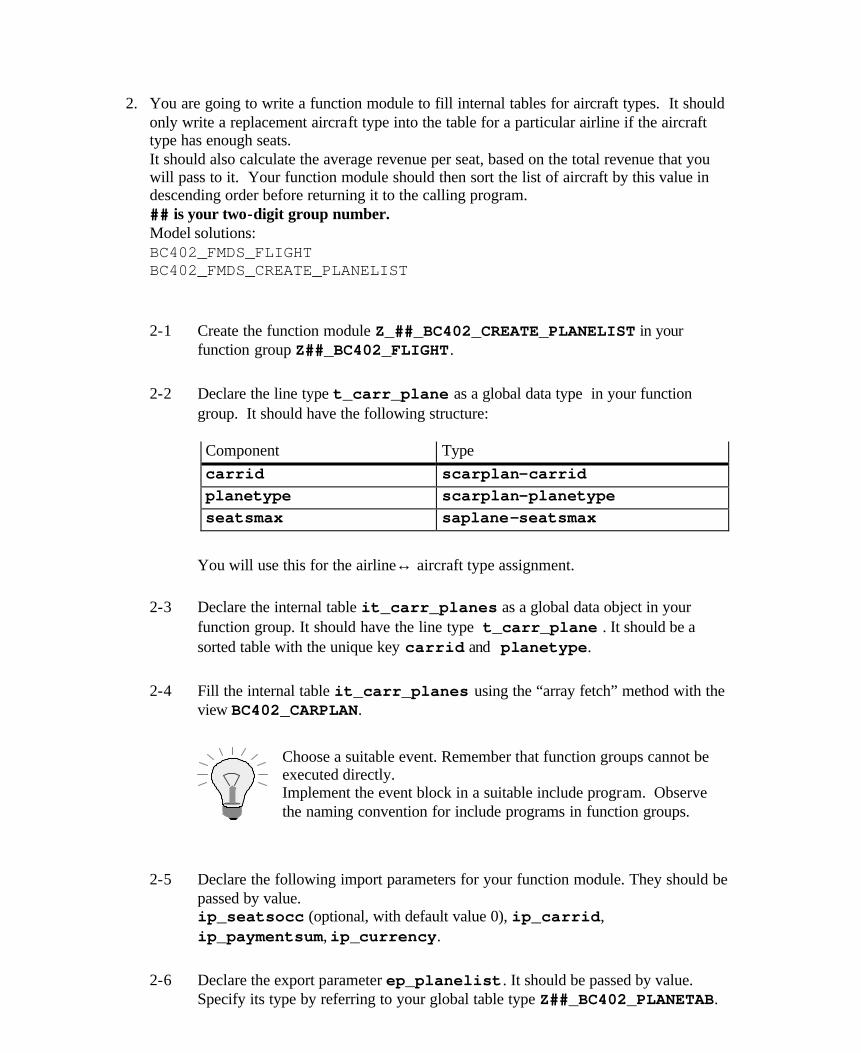
2. You are going to write a function module to fill internal tables for aircraft types. It should only write a replacement aircraft type into the table for a particular airline if the aircraft type has enough seats. It should also calculate the average revenue per seat, based on the total revenue that you will pass to it. Your function module should then sort the list of aircraft by this value in descending order before returning it to the calling program. ## is your two-digit group number. Model solutions: BC402_FMDS_FLIGHT BC402_FMDS_CREATE_PLANELIST
2-1 Create the function module Z_##_BC402_CREATE_PLANELIST in your function group Z##_BC402_FLIGHT.
2-2 Declare the line type t_carr_plane as a global data type in your function group. It should have the following structure: Component Type carrid scarplan-carrid planetype scarplan-planetype seatsmax saplane-seatsmax
You will use this for the airline↔ aircraft type assignment.
2-3 Declare the internal table it_carr_planes as a global data object in your function group. It should have the line type t_carr_plane . It should be a sorted table with the unique key carrid and planetype.
2-4 Fill the internal table it_carr_planes using the “array fetch” method with the view BC402_CARPLAN.
Choose a suitable event. Remember that function groups cannot be executed directly. Implement the event block in a suitable include program. Observe the naming convention for include programs in function groups.
2-5 Declare the following import parameters for your function module. They should be passed by value. ip_seatsocc (optional, with default value 0), ip_carrid, ip_paymentsum, ip_currency.
2-6 Declare the export parameter ep_planelist. It should be passed by value. Specify its type by referring to your global table type Z##_BC402_PLANETAB.
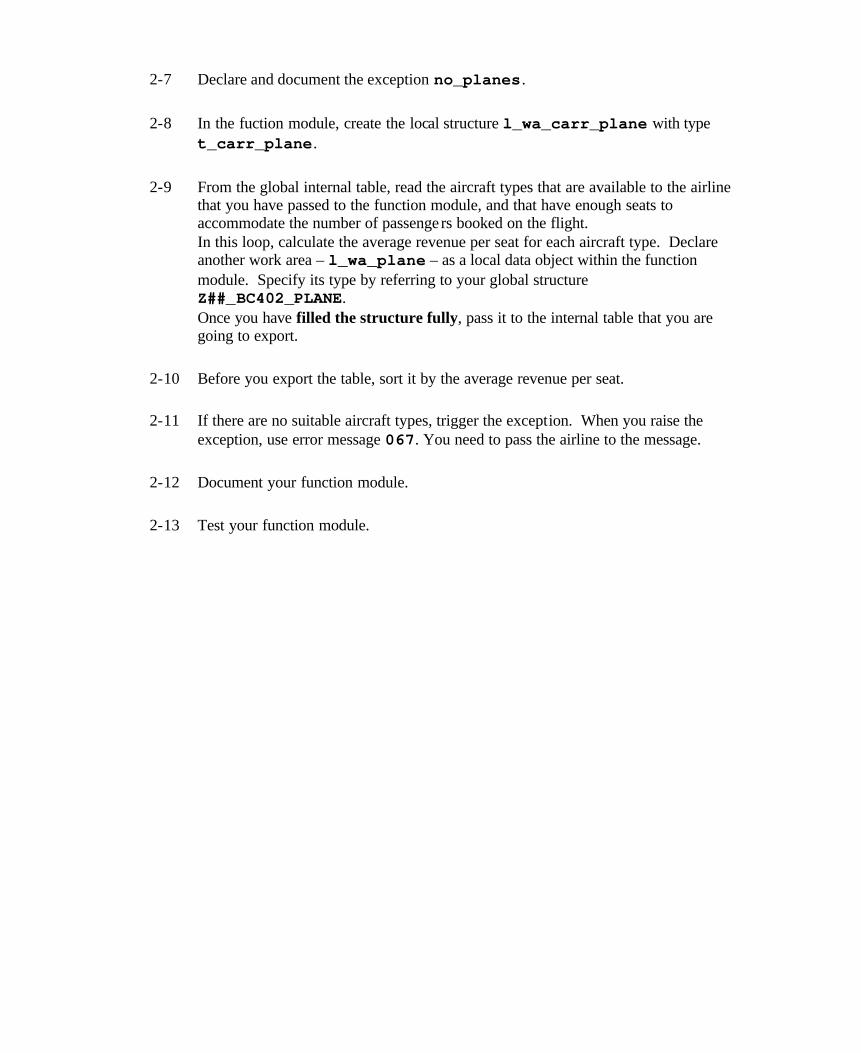
2-7 Declare and document the exception no_planes.
2-8 In the fuction module, create the local structure l_wa_carr_plane with type t_carr_plane.
2-9 From the global internal table, read the aircraft types that are available to the airline that you have passed to the function module, and that have enough seats to accommodate the number of passengers booked on the flight. In this loop, calculate the average revenue per seat for each aircraft type. Declare another work area – l_wa_plane – as a local data object within the function module. Specify its type by referring to your global structure Z##_BC402_PLANE. Once you have filled the structure fully, pass it to the internal table that you are going to export.
2-10 Before you export the table, sort it by the average revenue per seat.
2-11 If there are no suitable aircraft types, trigger the exception. When you raise the exception, use error message 067. You need to pass the airline to the message.
2-12 Document your function module.
2-13 Test your function module.
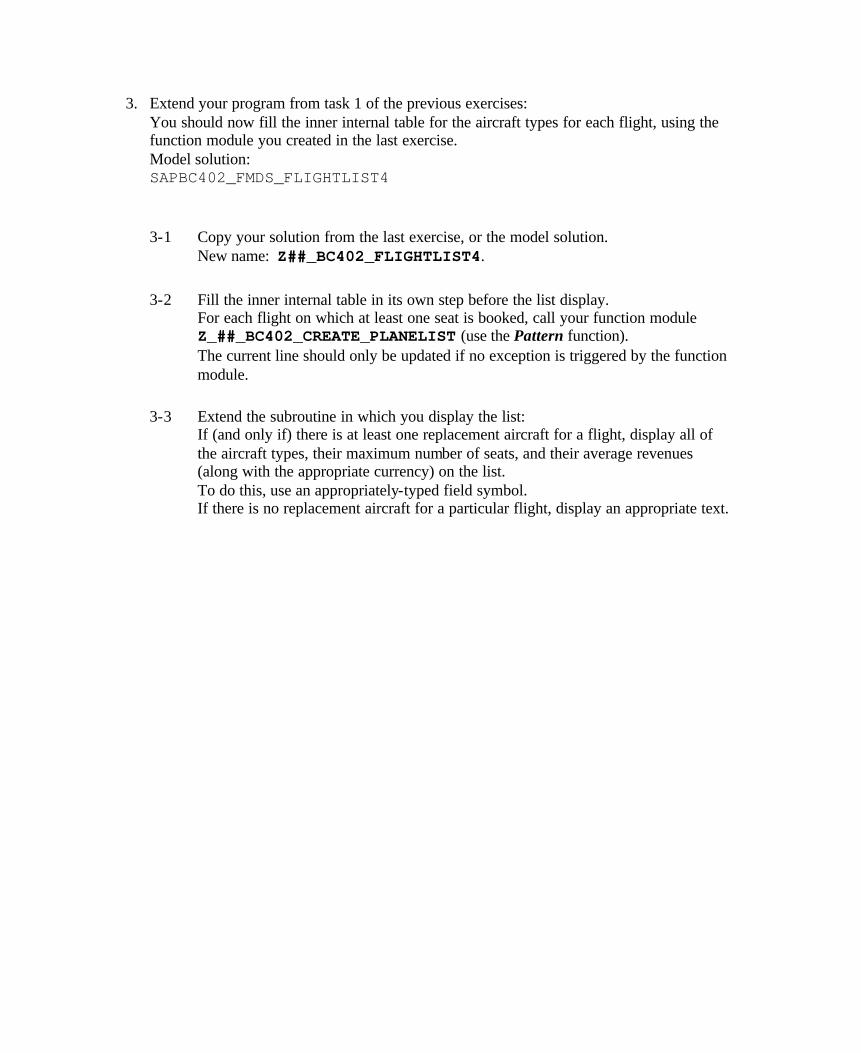
3. Extend your program from task 1 of the previous exercises: You should now fill the inner internal table for the aircraft types for each flight, using the function module you created in the last exercise. Model solution: SAPBC402_FMDS_FLIGHTLIST4
3-1 Copy your solution from the last exercise, or the model solution. New name: Z##_BC402_FLIGHTLIST4.
3-2 Fill the inner internal table in its own step before the list display. For each flight on which at least one seat is booked, call your function module Z_##_BC402_CREATE_PLANELIST (use the Pattern function). The current line should only be updated if no exception is triggered by the function module.
3-3 Extend the subroutine in which you display the list: If (and only if) there is at least one replacement aircraft for a flight, display all of the aircraft types, their maximum number of seats, and their average revenues (along with the appropriate currency) on the list. To do this, use an appropriately-typed field symbol. If there is no replacement aircraft for a particular flight, display an appropriate text.

Unit: Function Groups and Function Modules Topic: Creating and calling function groups and function modules
1-1, 2-4 Model solution SAPLBC402_FMDS_FLIGHT
************************************************************** * System-defined Include-files. * ************************************************************** INCLUDE lbc402_fmds_flighttop. " Global Data INCLUDE lbc402_fmds_flightuxx. " Function Modules ************************************************************** * User-defined Include-files (if necessary). * ************************************************************** * INCLUDE LBC402_FMDS_FLIGHTF... " Subprograms * INCLUDE LBC402_FMDS_FLIGHTO... " PBO-Modules * INCLUDE LBC402_FMDS_FLIGHTI... " PAI-Modules INCLUDE lbc402_fmds_flighte01. " Events 1-2, 2-2, 2-3 Model solution LBC402_FMDS_FLIGHTTOP FUNCTION-POOL bc402_fmds_flight MESSAGE-ID bc402. TYPES: BEGIN OF t_carr_plane, carrid TYPE scarplan-carrid, planetype TYPE scarplan-planetype, seatsmax TYPE saplane-seatsmax, END OF t_carr_plane. DATA: it_carr_planes TYPE SORTED TABLE OF t_carr_plane WITH UNIQUE KEY carrid planetype.
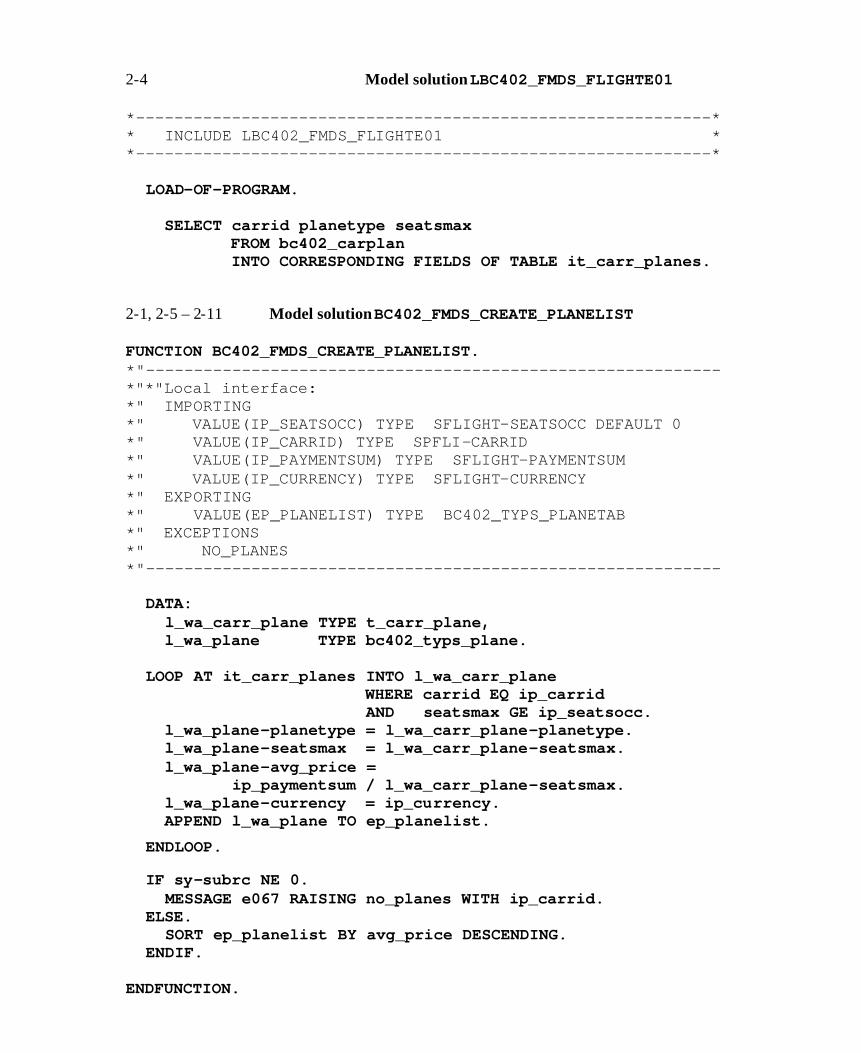
2-4 Model solution LBC402_FMDS_FLIGHTE01
*------------------------------------------------------------* * INCLUDE LBC402_FMDS_FLIGHTE01 * *------------------------------------------------------------* LOAD-OF-PROGRAM. SELECT carrid planetype seatsmax FROM bc402_carplan INTO CORRESPONDING FIELDS OF TABLE it_carr_planes. 2-1, 2-5 – 2-11 Model solution BC402_FMDS_CREATE_PLANELIST
FUNCTION BC402_FMDS_CREATE_PLANELIST. *"------------------------------------------------------------ *"*"Local interface: *" IMPORTING *" VALUE(IP_SEATSOCC) TYPE SFLIGHT-SEATSOCC DEFAULT 0 *" VALUE(IP_CARRID) TYPE SPFLI-CARRID *" VALUE(IP_PAYMENTSUM) TYPE SFLIGHT-PAYMENTSUM *" VALUE(IP_CURRENCY) TYPE SFLIGHT-CURRENCY *" EXPORTING *" VALUE(EP_PLANELIST) TYPE BC402_TYPS_PLANETAB *" EXCEPTIONS *" NO_PLANES *"------------------------------------------------------------ DATA: l_wa_carr_plane TYPE t_carr_plane, l_wa_plane TYPE bc402_typs_plane. LOOP AT it_carr_planes INTO l_wa_carr_plane WHERE carrid EQ ip_carrid AND seatsmax GE ip_seatsocc. l_wa_plane-planetype = l_wa_carr_plane-planetype. l_wa_plane-seatsmax = l_wa_carr_plane-seatsmax. l_wa_plane-avg_price = ip_paymentsum / l_wa_carr_plane-seatsmax. l_wa_plane-currency = ip_currency. APPEND l_wa_plane TO ep_planelist. ENDLOOP. IF sy-subrc NE 0. MESSAGE e067 RAISING no_planes WITH ip_carrid. ELSE. SORT ep_planelist BY avg_price DESCENDING. ENDIF. ENDFUNCTION.
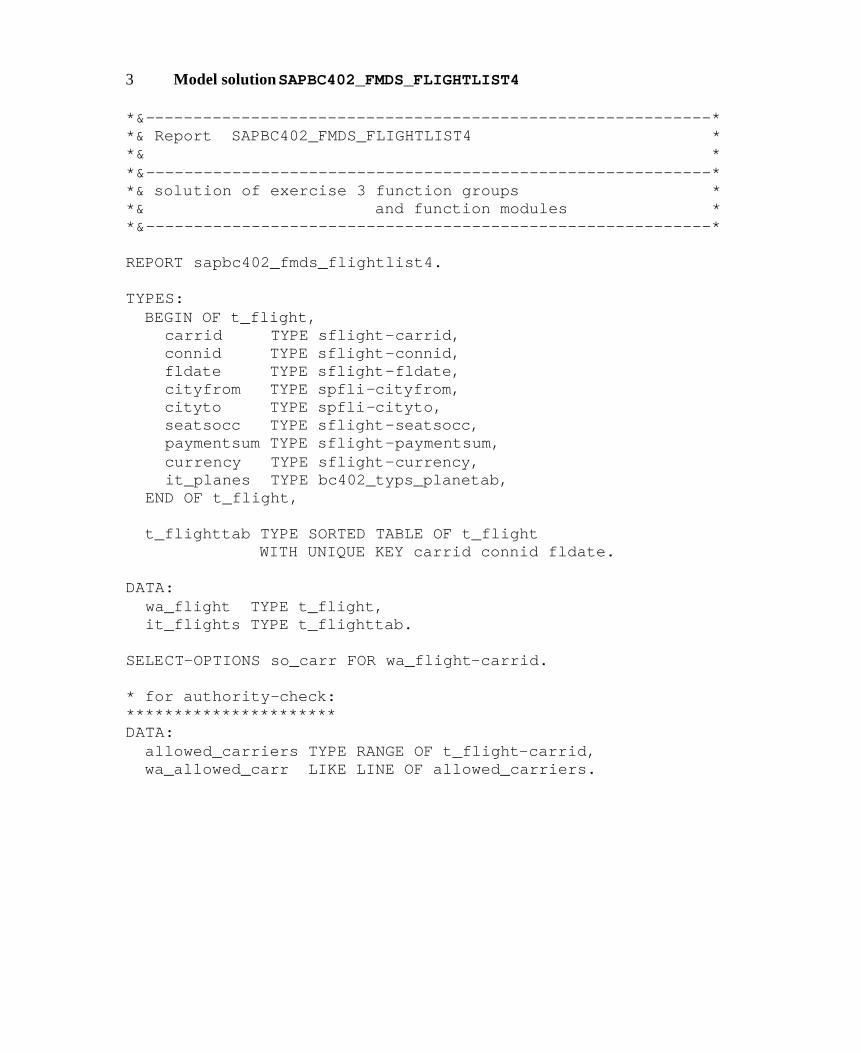
3 Model solution SAPBC402_FMDS_FLIGHTLIST4
*&-----------------------------------------------------------* *& Report SAPBC402_FMDS_FLIGHTLIST4 * *& * *&-----------------------------------------------------------* *& solution of exercise 3 function groups * *& and function modules * *&-----------------------------------------------------------* REPORT sapbc402_fmds_flightlist4. TYPES: BEGIN OF t_flight, carrid TYPE sflight-carrid, connid TYPE sflight-connid, fldate TYPE sflight-fldate, cityfrom TYPE spfli-cityfrom, cityto TYPE spfli-cityto, seatsocc TYPE sflight-seatsocc, paymentsum TYPE sflight-paymentsum, currency TYPE sflight-currency, it_planes TYPE bc402_typs_planetab, END OF t_flight, t_flighttab TYPE SORTED TABLE OF t_flight WITH UNIQUE KEY carrid connid fldate. DATA: wa_flight TYPE t_flight, it_flights TYPE t_flighttab. SELECT-OPTIONS so_carr FOR wa_flight-carrid. * for authority-check: ********************** DATA: allowed_carriers TYPE RANGE OF t_flight-carrid, wa_allowed_carr LIKE LINE OF allowed_carriers.
AT SELECTION-SCREEN. ... * fill a range table with the allowed carriers: *********************************************** ... ... START-OF-SELECTION. * fill an internal table with connection and flight data * for the allowed carriers: *************************** ... ... * fill all the inner internal tables with alternate planetypes: *********** LOOP AT it_flights INTO wa_flight WHERE seatsocc > 0. CALL FUNCTION 'BC402_FMDS_CREATE_PLANELIST' EXPORTING ip_seatsocc = wa_flight-seatsocc ip_carrid = wa_flight-carrid ip_paymentsum = wa_flight-paymentsum ip_currency = wa_flight-currency IMPORTING ep_planelist = wa_flight-it_planes EXCEPTIONS no_planes = 1 OTHERS = 2. IF sy-subrc = 0. MODIFY TABLE it_flights FROM wa_flight TRANSPORTING it_planes. ENDIF. ENDLOOP. PERFORM display_flights CHANGING it_flights.
*------------------------------------------------------------* * FORM display_flights *------------------------------------------------------------* * --> p_it_flights *------------------------------------------------------------* FORM display_flights CHANGING p_it_flights TYPE t_flighttab. FIELD-SYMBOLS: <l_fs_flight> TYPE t_flight, <l_fs_plane> TYPE bc402_typs_plane. LOOP AT p_it_flights ASSIGNING <l_fs_flight> WHERE seatsocc > 0. WRITE: / <l_fs_flight>-carrid, <l_fs_flight>-connid, <l_fs_flight>-fldate, <l_fs_flight>-cityfrom, <l_fs_flight>-cityto, <l_fs_flight>-seatsocc, <l_fs_flight>-paymentsum CURRENCY <l_fs_flight>-currency, <l_fs_flight>-currency. * * display filled inner internal tables only: ************************************************ IF <l_fs_flight>-it_planes IS INITIAL. WRITE: /29 'no alternate planes available'(npa). ELSE. LOOP AT <l_fs_flight>-it_planes ASSIGNING <l_fs_plane>. WRITE: /29 <l_fs_plane>-planetype, <l_fs_plane>-seatsmax, <l_fs_plane>-avg_price CURRENCY l_fs_plane>-currency, <l_fs_plane>-currency. ENDLOOP. ENDIF. SKIP. ENDLOOP. ENDFORM.
SAP AG 1999
l Techniques for calling programs
l Memory model
l Techniques for passing data
l Uses
Contents:
Calling Programs and Passing Data
There are two ways of starting an ABAP program from another ABAP program that is already running:
n By interrupting the current program to run the new one - the called program is executed, and afterwards, processing returns to the program that called it.
n By terminating the current program and then running the new one.
Complete ABAP programs within a single user session can only run sequentially. We refer to this technique as using synchronous calls.
If you want to run functions in parallel, you must use function modules. For further information about this technique, refer to course BC415 (Communication Interfaces in ABAP), and the documentation for the CALL FUNCTION … STARTING NEW TASK… statement.
The way in which main memory is organized from the program's point of view can be represented easily in the above model. There is a distinction between internal and external sessions:
n Generally, an external session corresponds to an R/3 window. You create new external sessions by choosing System → Create session or entering /o<tcode> in the command field. You can have up to six external sessions open simultaneously in one terminal session.
n External sessions are subdivided into internal sessions . Each program that you run occupies its own internal session. Each external session can contain up to nine internal sessions.
The data in a program is only visible within that internal session, so it is only visible to the program.
The following pages illustrate how the stack inside an external session changes with various program calls.


When you insert a program, the system creates a new internal session, which contains the new program context.
The new session is placed on the stack The program context of the calling program also remains on the stack.

When the called program finishes, its internal session (the top one in the stack) is deleted.
Processing is resumed in the next-highest internal session in the stack.

When you end a program and start a new one, there is a difference between calling an executable program and calling a transaction.

If you start an executable program using its program name , the internal session of the program you are ending (the top one) is removed.
The system creates a new internal session, which contains the program context of the called program.
The new session is placed on the stack. Any program contexts that already existed are retained. The topmost internal session on the stack is replaced.


If you start a program using its transaction code (if one is assigned), all of the existing internal sessions are removed from the stack.
The system creates a new internal session, which contains the program context of the called program.
After the call, the ABAP memory is reset.

When you call a function module, the ABAP runtime system checks whether you have already called a function module from the same function group in the current program.
n If this is not the case, the system loads the relevant function group into the internal session of the calling program. Its global data is initialized and the LOAD-OF-PROGRAM event is triggered.
n If your program had already used a function module from the same function group before the call, the function group is already resident in the internal session, and the new call can access the same global data. We say that the function group remains active until the end of the program that called it.
The data is only visible in the corresponding program - each program can only address its own data, even if there are identically-named objects in both programs. The same applies when the stack is extended. If a program is added to the stack that calls a function module from a function group already called by another program, the function group is loaded again into the new internal session. The system creates new copies of its data objects, initializes them, and, as before, they are only visible within the function group, and only in the internal session in which the function group was loaded.
The graphic shows the first call to a function module in a particular function group.
To start an executable (type 1) program, use the SUBMIT statement.
If you use the VIA SELECTION-SCREEN addition, the system displays the standard selection screen of the program (if one has been defined).
If you use the AND RETURN addition, the system resumes processing with the first statement after the SUBMIT statement once the called program has finished.
For further information, refer to the documentation for the SUBMIT statement.
When you use the LEAVE TO TRANSACTION '<T_CODE>' statement, the system terminates the current program and starts the transaction with transaction code <T_CODE>. The statement is the equivalent of entering /n<T_CODE> in the command field.
CALL TRANSACTION '<T_CODE>' allows you to insert an ABAP program with a transaction code into the call chain.
To terminate an ABAP program, use the LEAVE PROGRAM statement. If the statement occurs in a program that you called using CALL TRANSACTION '<T_CODE>' or SUBMIT <prog_name> AND RETURN, the system resumes processing at the next statement after the call in the calling program. In all other cases, the user returns to the application menu from which he or she started the program.
If you use the …AND SKIP FIRST SCREEN addition, the system does not display the screen contents of the first screen in the transaction. However, it does process the flow logic.
If you started a transaction using CALL TRANSACTION that uses update techniques, you can use the UPDATE… addition to specify the update technique (asynchronous (default), synchronous, or local) that the program should use. For further information, refer to course BC414 (Programming Database Updates) and the online documentation.
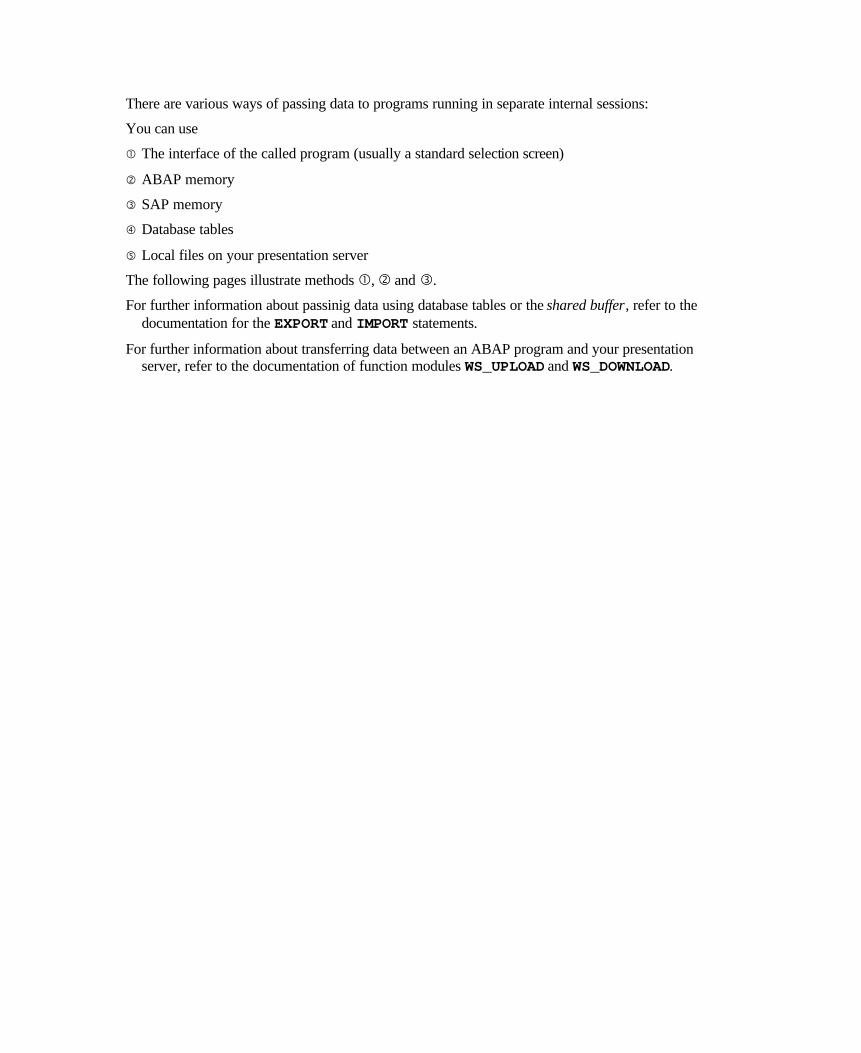
There are various ways of passing data to programs running in separate internal sessions:
You can use
� The interface of the called program (usually a standard selection screen)
� ABAP memory
� SAP memory
� Database tables
� Local files on your presentation server
The following pages illustrate methods �, � and �.
For further information about passinig data using database tables or the shared buffer, refer to the documentation for the EXPORT and IMPORT statements.
For further information about transferring data between an ABAP program and your presentation server, refer to the documentation of function modules WS_UPLOAD and WS_DOWNLOAD.

Function modules have an interface that the calling program and the function module use to exchange data. Subroutines also use a similar technique. Certain restrictions apply to the interfaces of remote-enabled function modules.
When you call ABAP programs that have a standard selection screen, you can pass data for the input fields in the call. There are two ways to do this:
n By specifying a variant for the selection screen when you call the program.
n By specifying values for the input fields when you call the program.
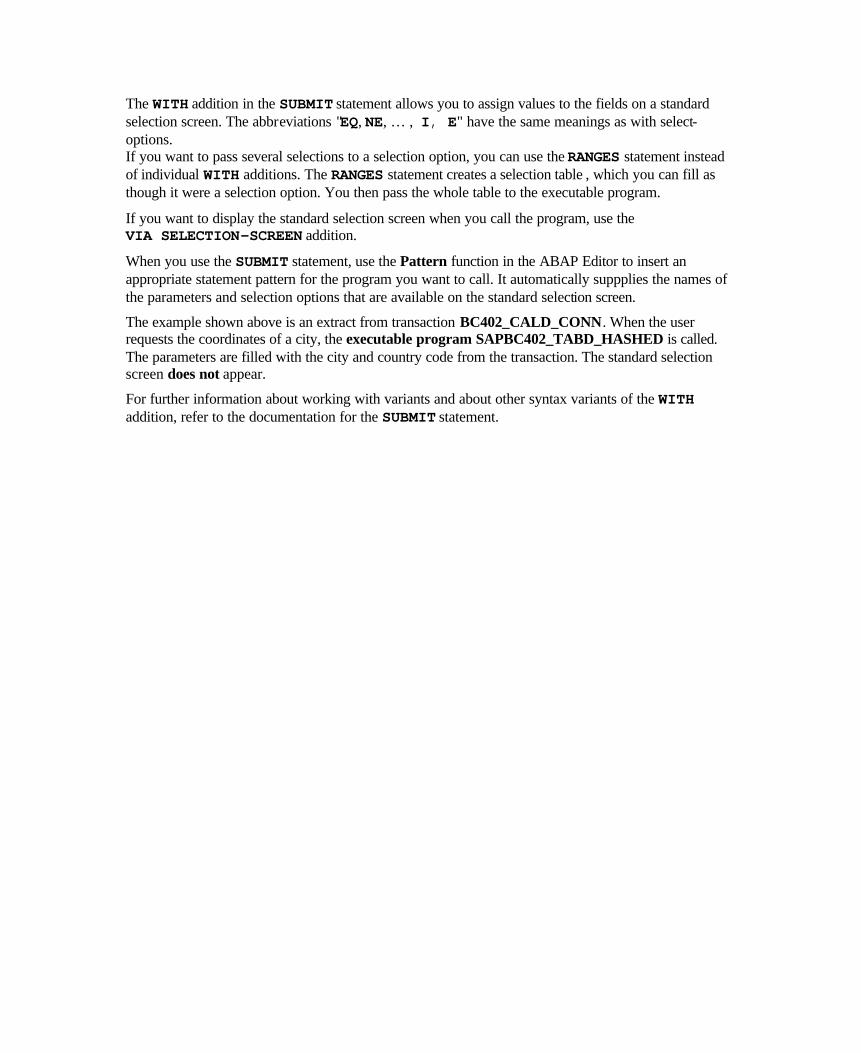
The WITH addition in the SUBMIT statement allows you to assign values to the fields on a standard selection screen. The abbreviations "EQ, NE, … , I, E" have the same meanings as with select-options. If you want to pass several selections to a selection option, you can use the RANGES statement instead of individual WITH additions. The RANGES statement creates a selection table , which you can fill as though it were a selection option. You then pass the whole table to the executable program.
If you want to display the standard selection screen when you call the program, use the VIA SELECTION-SCREEN addition.
When you use the SUBMIT statement, use the Pattern function in the ABAP Editor to insert an appropriate statement pattern for the program you want to call. It automatically suppplies the names of the parameters and selection options that are available on the standard selection screen.
The example shown above is an extract from transaction BC402_CALD_CONN. When the user requests the coordinates of a city, the executable program SAPBC402_TABD_HASHED is called. The parameters are filled with the city and country code from the transaction. The standard selection screen does not appear.
For further information about working with variants and about other syntax variants of the WITH addition, refer to the documentation for the SUBMIT statement.
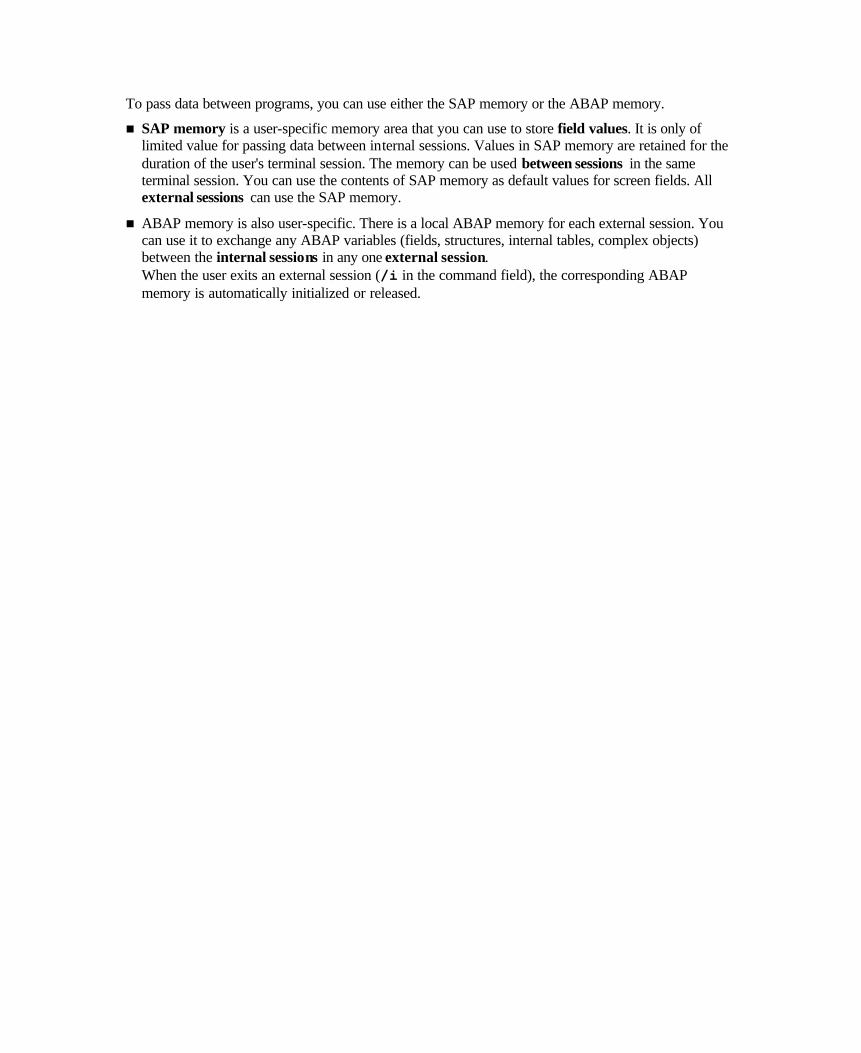
To pass data between programs, you can use either the SAP memory or the ABAP memory.
n SAP memory is a user-specific memory area that you can use to store field values. It is only of limited value for passing data between internal sessions. Values in SAP memory are retained for the duration of the user's terminal session. The memory can be used between sessions in the same terminal session. You can use the contents of SAP memory as default values for screen fields. All external sessions can use the SAP memory.
n ABAP memory is also user-specific. There is a local ABAP memory for each external session. You can use it to exchange any ABAP variables (fields, structures, internal tables, complex objects) between the internal sessions in any one external session. When the user exits an external session (/i in the command field), the corresponding ABAP memory is automatically initialized or released.
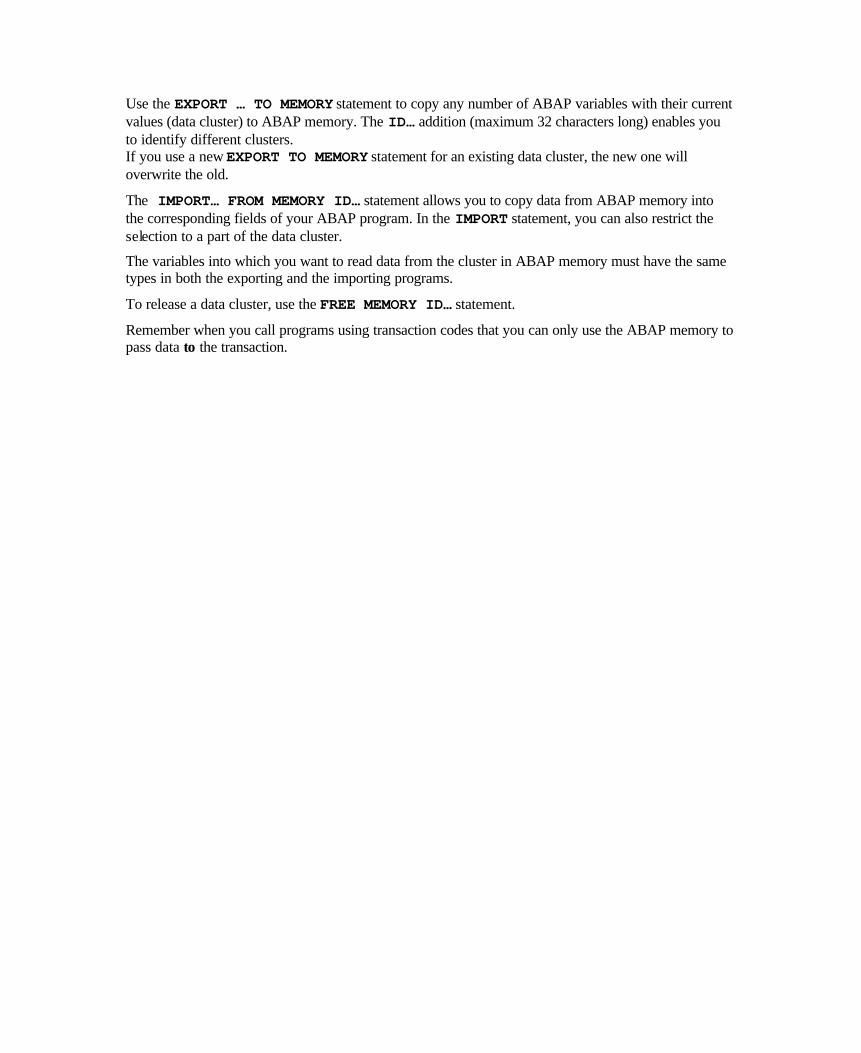
Use the EXPORT … TO MEMORY statement to copy any number of ABAP variables with their current values (data cluster) to ABAP memory. The ID… addition (maximum 32 characters long) enables you to identify different clusters. If you use a new EXPORT TO MEMORY statement for an existing data cluster, the new one will overwrite the old.
The IMPORT… FROM MEMORY ID… statement allows you to copy data from ABAP memory into the corresponding fields of your ABAP program. In the IMPORT statement, you can also restrict the selection to a part of the data cluster.
The variables into which you want to read data from the cluster in ABAP memory must have the same types in both the exporting and the importing programs.
To release a data cluster, use the FREE MEMORY ID… statement.
Remember when you call programs using transaction codes that you can only use the ABAP memory to pass data to the transaction.
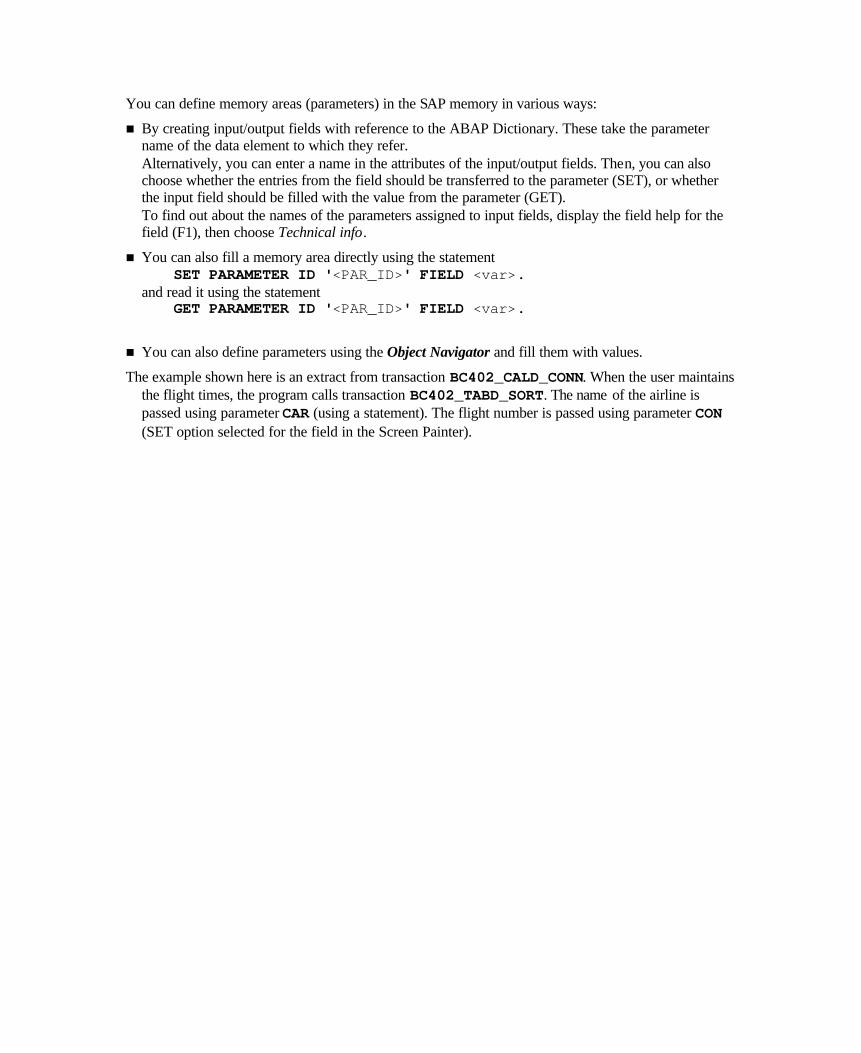
You can define memory areas (parameters) in the SAP memory in various ways:
n By creating input/output fields with reference to the ABAP Dictionary. These take the parameter name of the data element to which they refer. Alternatively, you can enter a name in the attributes of the input/output fields. Then, you can also choose whether the entries from the field should be transferred to the parameter (SET), or whether the input field should be filled with the value from the parameter (GET). To find out about the names of the parameters assigned to input fields, display the field help for the field (F1), then choose Technical info.
n You can also fill a memory area directly using the statement SET PARAMETER ID '<PAR_ID>' FIELD <var>. and read it using the statement GET PARAMETER ID '<PAR_ID>' FIELD <var>.
n You can also define parameters using the Object Navigator and fill them with values.
The example shown here is an extract from transaction BC402_CALD_CONN. When the user maintains the flight times, the program calls transaction BC402_TABD_SORT. The name of the airline is passed using parameter CAR (using a statement). The flight number is passed using parameter CON (SET option selected for the field in the Screen Painter).
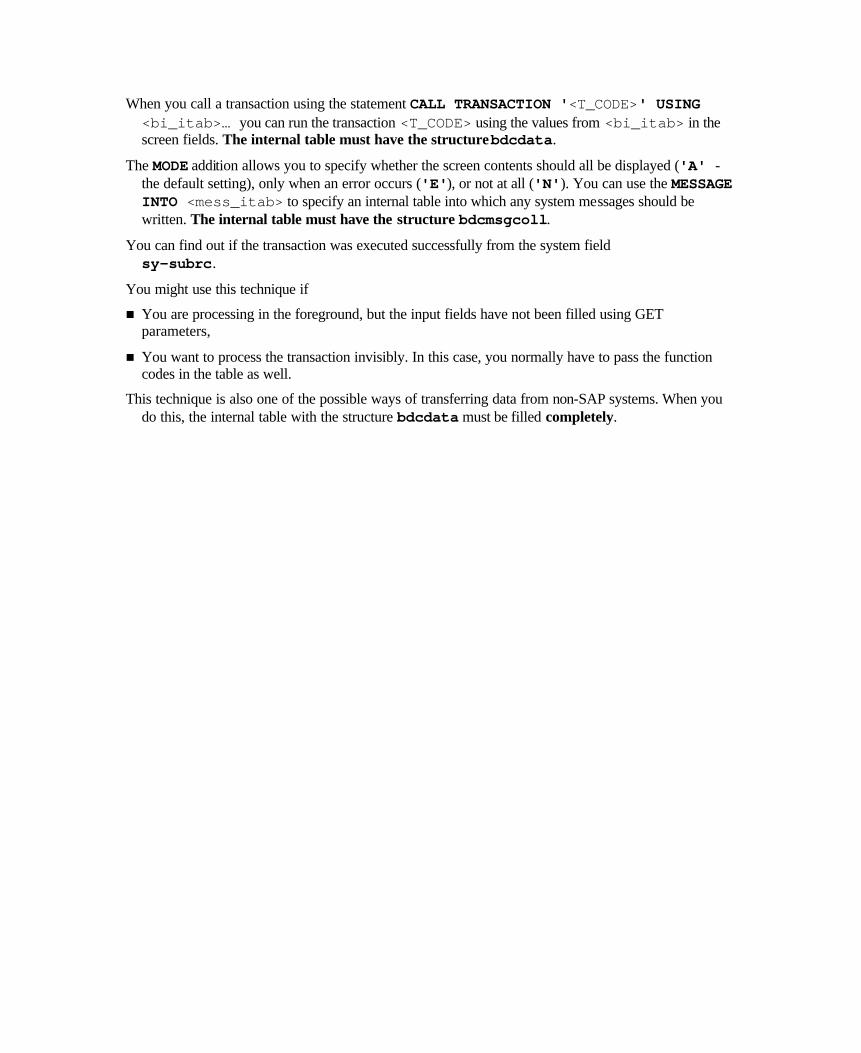
When you call a transaction using the statement CALL TRANSACTION '<T_CODE>' USING <bi_itab>… you can run the transaction <T_CODE> using the values from <bi_itab> in the screen fields. The internal table must have the structure bdcdata.
The MODE addition allows you to specify whether the screen contents should all be displayed ('A' - the default setting), only when an error occurs ('E'), or not at all ('N'). You can use the MESSAGE INTO <mess_itab> to specify an internal table into which any system messages should be written. The internal table must have the structure bdcmsgcoll.
You can find out if the transaction was executed successfully from the system field sy-subrc.
You might use this technique if
n You are processing in the foreground, but the input fields have not been filled using GET parameters,
n You want to process the transaction invisibly. In this case, you normally have to pass the function codes in the table as well.
This technique is also one of the possible ways of transferring data from non-SAP systems. When you do this, the internal table with the structure bdcdata must be filled completely.

Filling the internal table in batch input format:
n Each screen that you want to process automatically in the transaction must be identified by a line in which only the fields program, dynpro, and dynbegin are filled.
n After the record that identifies the screen, use a new bdcdata record for each field you want to fill. These records use the fields fnam and fval. You can fill the following fields: • Input/output fields (with data) • The command field bdc_okcode, (with a function code) • The cursor positioning field, bdc_cursor (with a field name)
For information about how to use this technique for data transfer, refer to course BC420 (Data Transfer) or the online documentation.
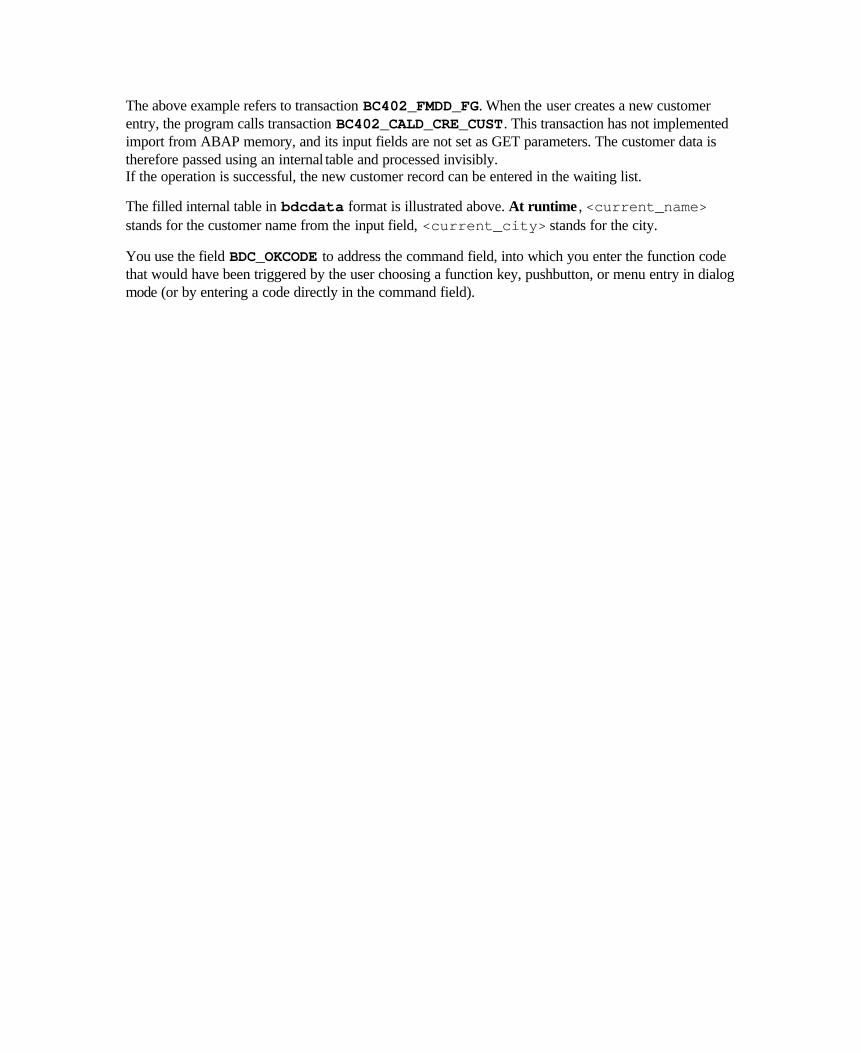
The above example refers to transaction BC402_FMDD_FG. When the user creates a new customer entry, the program calls transaction BC402_CALD_CRE_CUST. This transaction has not implemented import from ABAP memory, and its input fields are not set as GET parameters. The customer data is therefore passed using an internal table and processed invisibly. If the operation is successful, the new customer record can be entered in the waiting list.
The filled internal table in bdcdata format is illustrated above. At runtime , <current_name> stands for the customer name from the input field, <current_city> stands for the city.
You use the field BDC_OKCODE to address the command field, into which you enter the function code that would have been triggered by the user choosing a function key, pushbutton, or menu entry in dialog mode (or by entering a code directly in the command field).

Unit: Calling Programs and Passing Data: Topic: Calling an executable program
At the conclusion of these exercises, you will be able to:
• call an executable program from another program
• Preassign values to its selection options
You are a programmer for an airline consortium, and it is your job to write analysis programs for several airlines.
1. Extend your program from task 3 of the previous exercises: The user should be able to display a list of all sales counters of the airlines entered on the selection screen, as long as he or she is authorized to see the data. ## is your two-digit group number. Model solution: SAPBC402_CALS_FLIGHTLIST5
1-1 Copy your solution from the last exercise, or the model solution. New name: Z##_BC402_FLIGHTLIST5.
1-2 For simplicity, the function should be triggered when the user double-clicks a line or single-clicks it and presses <F2>. Add an appropriate event block to your program.
1-3 Program a call to your executable program Z##_BC402_COUNTLIST2 or the model solution SAPBC402_TABS_COUNTLIST2 (use the Pattern function). Ensure that the standard selection screen of the called program is not displayed. Once the program has finished running, the user should be able to return to the original program.
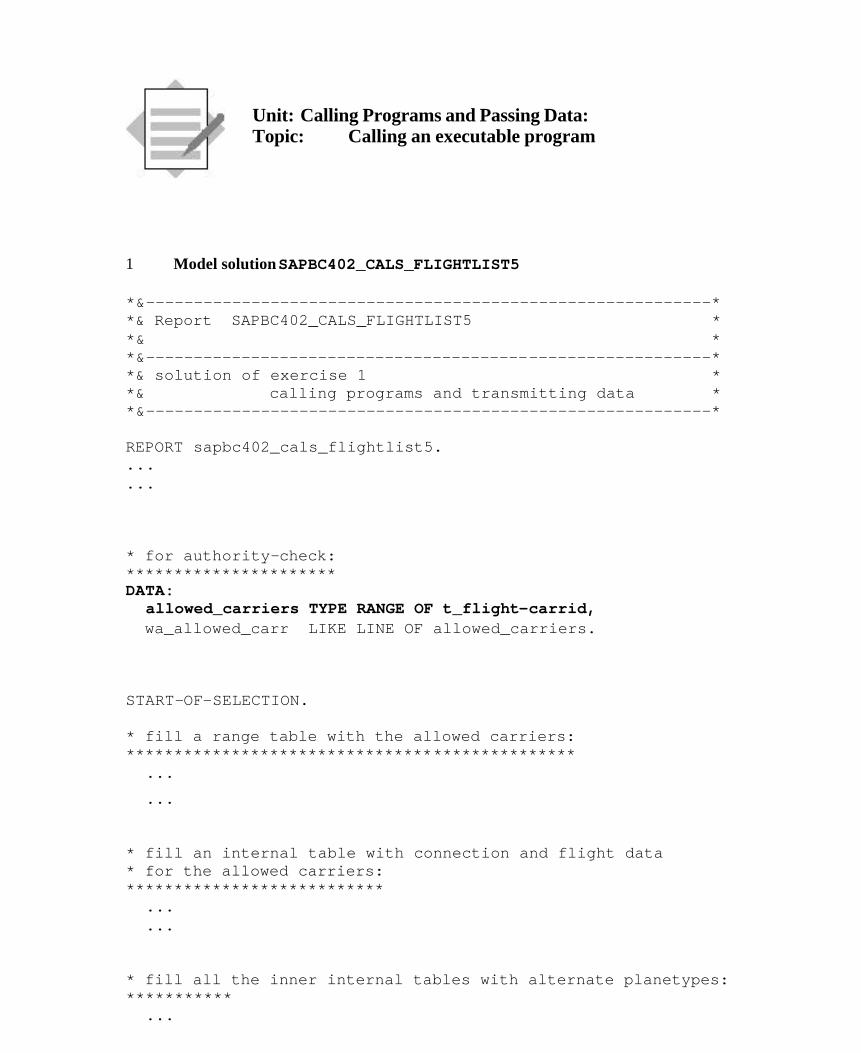
Unit: Calling Programs and Passing Data: Topic: Calling an executable program
1 Model solution SAPBC402_CALS_FLIGHTLIST5
*&-----------------------------------------------------------* *& Report SAPBC402_CALS_FLIGHTLIST5 * *& * *&-----------------------------------------------------------* *& solution of exercise 1 * *& calling programs and transmitting data * *&-----------------------------------------------------------* REPORT sapbc402_cals_flightlist5. ... ... * for authority-check: ********************** DATA: allowed_carriers TYPE RANGE OF t_flight-carrid, wa_allowed_carr LIKE LINE OF allowed_carriers. START-OF-SELECTION. * fill a range table with the allowed carriers: *********************************************** ...
... * fill an internal table with connection and flight data * for the allowed carriers: *************************** ... ... * fill all the inner internal tables with alternate planetypes: *********** ... ...
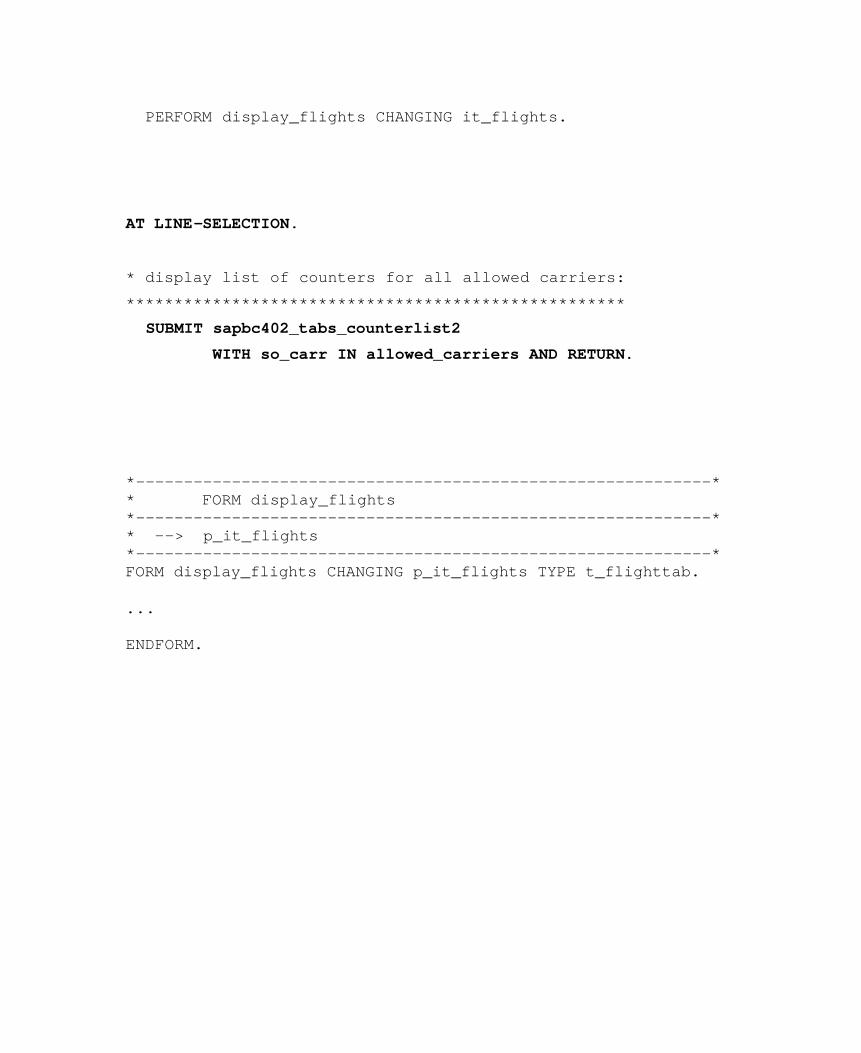
PERFORM display_flights CHANGING it_flights. AT LINE-SELECTION.
* display list of counters for all allowed carriers: **************************************************** SUBMIT sapbc402_tabs_counterlist2 WITH so_carr IN allowed_carriers AND RETURN. *------------------------------------------------------------* * FORM display_flights *------------------------------------------------------------* * --> p_it_flights *------------------------------------------------------------* FORM display_flights CHANGING p_it_flights TYPE t_flighttab. ... ENDFORM.