Embed Size (px)
Citation preview
Sunshade Palazzo Royal / E
Service Manual Palazzo Royal / E
Sunshade Palazzo Royal / E
Glatz AG 2013_Servicemanual Royal_en.docx Pfad:K:\Marketing\Drucksachen\Service Manual\Palazzo Royal_E\Word Dateien\2013_Servicemanual Royal_en.docx
Created: Dino Aeschbacher/29.09.2013 Updated: Franziska Breitenmoser/04.10.2013 Released: hon_mg/22.11.2013
This Service Manual describes the following tasks:
1. Replace top ........................................................................................................ 3
2. Change cover ..................................................................................................... 4
3. Disassemble the rods ......................................................................................... 5
4. Loosen cable wires ............................................................................................. 6
5. Disassemble castor supports (2 pcs) (for change of cable wire or telescopic
tube) ........................................................................................................................... 7
6. Remove torsional bearing (for change of cable wire or telescopic tube) ............ 8
7. Telescopic tube (including gear) ......................................................................... 9
8. Replace motor with spindle ...............................................................................10
9. Assembly after change of cable wire or telescopic tube ....................................10
10. Replacing illumination, lamp glass, light source ................................................11
We accept no liability for technical changes. © Glatz AG 11/2013 GLATZ AG . Neuhofstrasse 12 . 8500 Frauenfeld . Switzerland . www.glatz.ch
Sunshade Palazzo Royal / Royal E
Glatz AG 2013_Servicemanual Royal_en.docx 3 Pfad:K:\Marketing\Drucksachen\Service Manual\Palazzo Royal_E\Word Dateien\2013_Servicemanual Royal_en.docx
Created: Dino Aeschbacher/29.09.2010 Updated: Franziska Breitenmoser/04.10.2013 Released: hon_mg/22.11.2013
Preparation: Lay out a clean sheet to place the sunshade on Tools: Hex key with wrench size 4.5 and 6 mm (or cordless drill), open-end
wrench with wrench size 10 mm and 19 mm Cross-head screwdriver
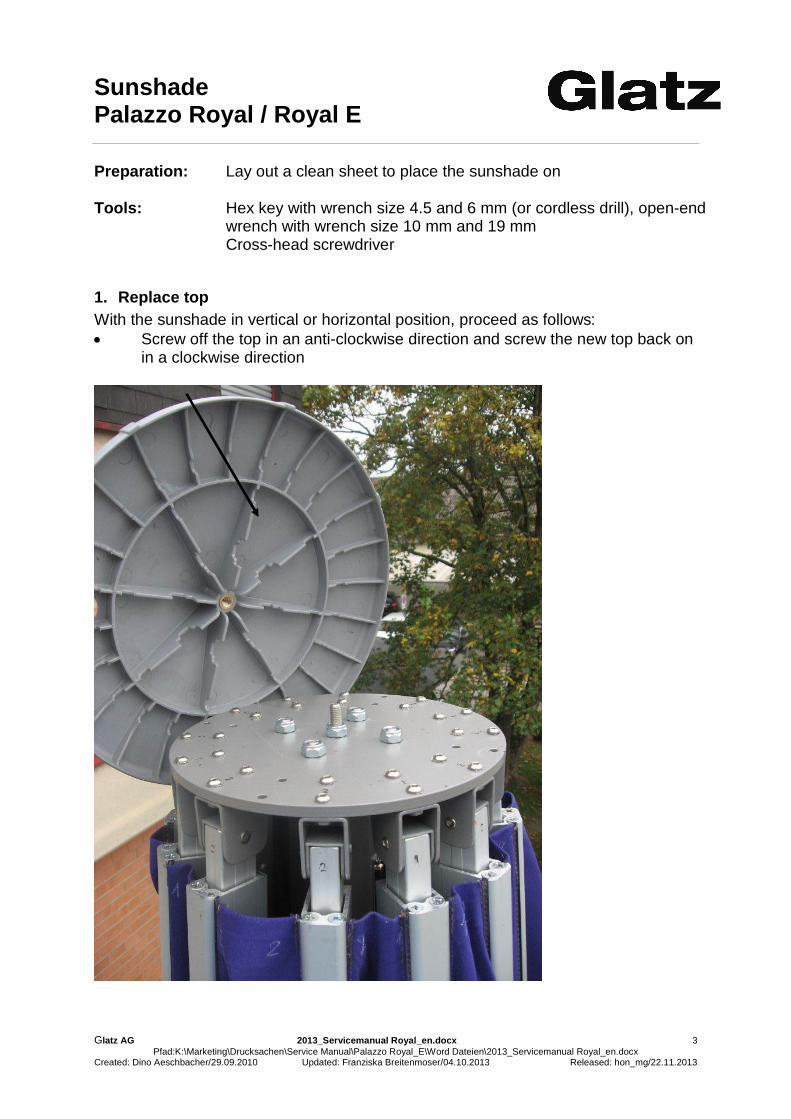
1. Replace top With the sunshade in vertical or horizontal position, proceed as follows: • Screw off the top in an anti-clockwise direction and screw the new top back on
in a clockwise direction
Sunshade Palazzo Royal / Royal E
Glatz AG 2013_Servicemanual Royal_en.docx 4 Pfad:K:\Marketing\Drucksachen\Service Manual\Palazzo Royal_E\Word Dateien\2013_Servicemanual Royal_en.docx
Created: Dino Aeschbacher/29.09.2010 Updated: Franziska Breitenmoser/04.10.2013 Released: hon_mg/22.11.2013
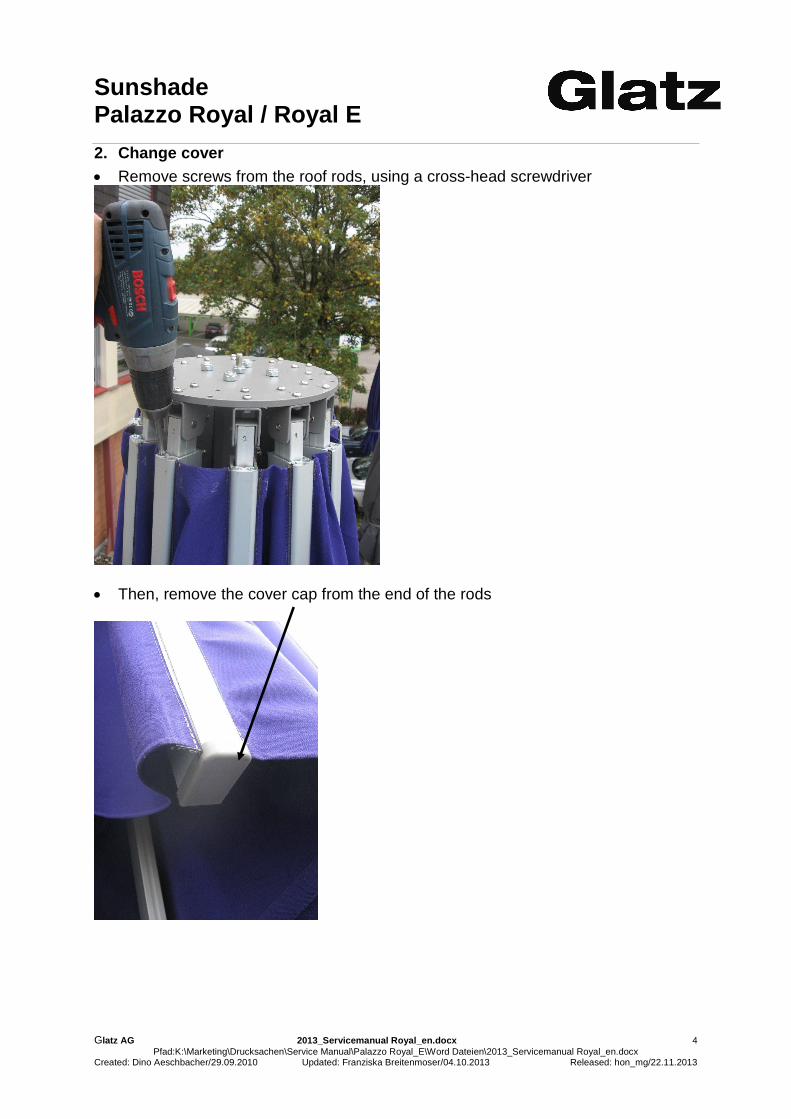
2. Change cover • Remove screws from the roof rods, using a cross-head screwdriver
• Then, remove the cover cap from the end of the rods
Sunshade Palazzo Royal / Royal E
Glatz AG 2013_Servicemanual Royal_en.docx 5 Pfad:K:\Marketing\Drucksachen\Service Manual\Palazzo Royal_E\Word Dateien\2013_Servicemanual Royal_en.docx
Created: Dino Aeschbacher/29.09.2010 Updated: Franziska Breitenmoser/04.10.2013 Released: hon_mg/22.11.2013
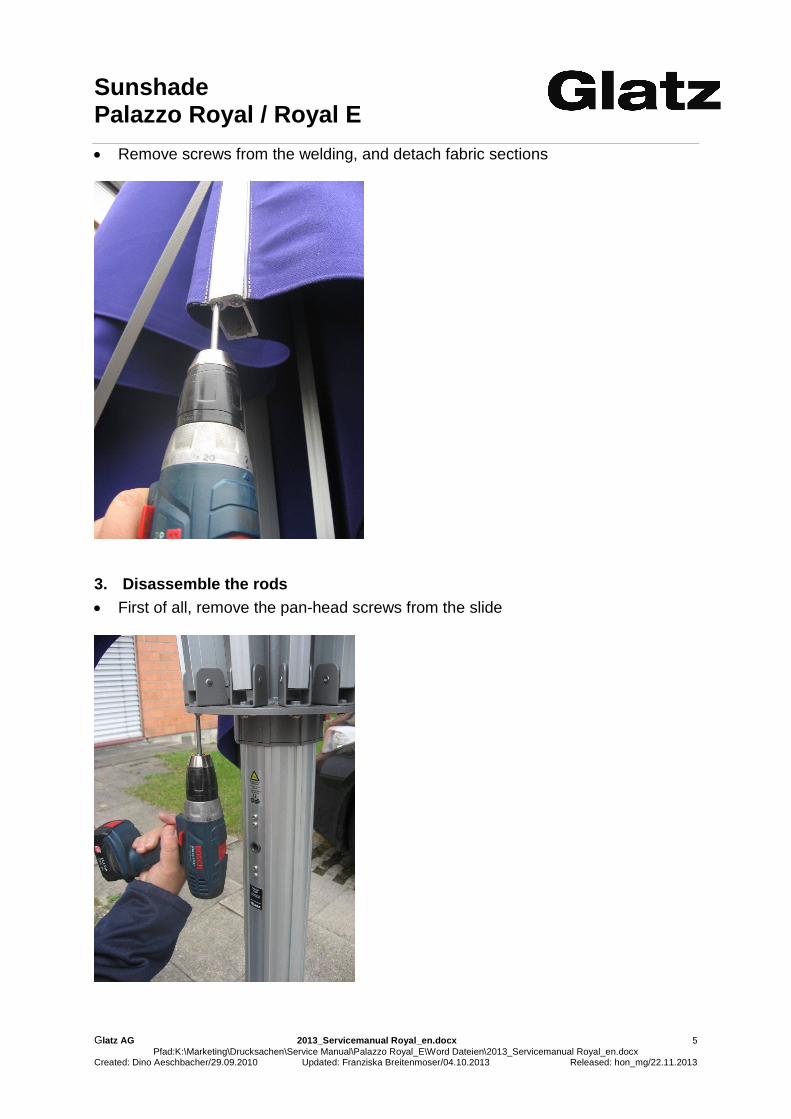
• Remove screws from the welding, and detach fabric sections
3. Disassemble the rods • First of all, remove the pan-head screws from the slide
Sunshade Palazzo Royal / Royal E
Glatz AG 2013_Servicemanual Royal_en.docx 6 Pfad:K:\Marketing\Drucksachen\Service Manual\Palazzo Royal_E\Word Dateien\2013_Servicemanual Royal_en.docx
Created: Dino Aeschbacher/29.09.2010 Updated: Franziska Breitenmoser/04.10.2013 Released: hon_mg/22.11.2013
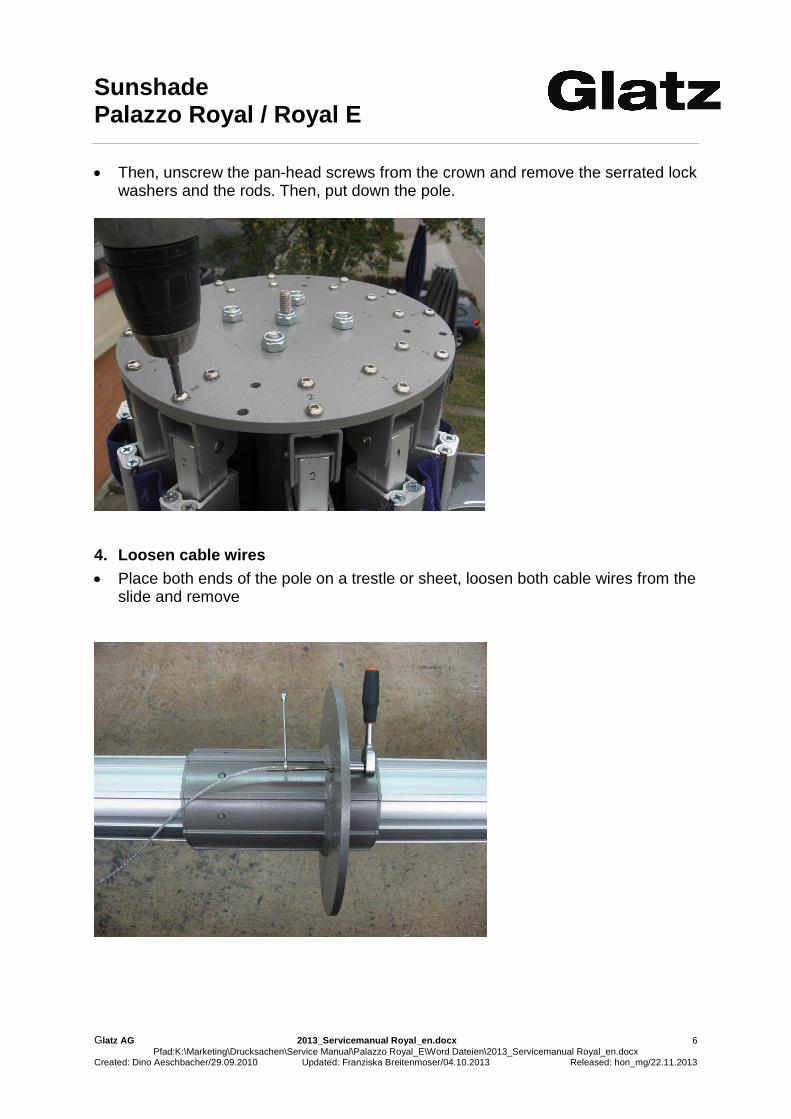
• Then, unscrew the pan-head screws from the crown and remove the serrated lock
washers and the rods. Then, put down the pole.
4. Loosen cable wires • Place both ends of the pole on a trestle or sheet, loosen both cable wires from the
slide and remove

Sunshade Palazzo Royal / Royal E
Glatz AG 2013_Servicemanual Royal_en.docx 7 Pfad:K:\Marketing\Drucksachen\Service Manual\Palazzo Royal_E\Word Dateien\2013_Servicemanual Royal_en.docx
Created: Dino Aeschbacher/29.09.2010 Updated: Franziska Breitenmoser/04.10.2013 Released: hon_mg/22.11.2013
5. Disassemble castor supports (2 pcs) (for change of cable wire or telescopic tube) • Remove screws from castor support und remove cable wire
• Disassemble castor support on both sides and slide wire out • Remove the four fillister head screws (6-kt M 6 x 40, with Tuflok coating) from
the gear fastening.
Sunshade Palazzo Royal / Royal E
Glatz AG 2013_Servicemanual Royal_en.docx 8 Pfad:K:\Marketing\Drucksachen\Service Manual\Palazzo Royal_E\Word Dateien\2013_Servicemanual Royal_en.docx
Created: Dino Aeschbacher/29.09.2010 Updated: Franziska Breitenmoser/04.10.2013 Released: hon_mg/22.11.2013
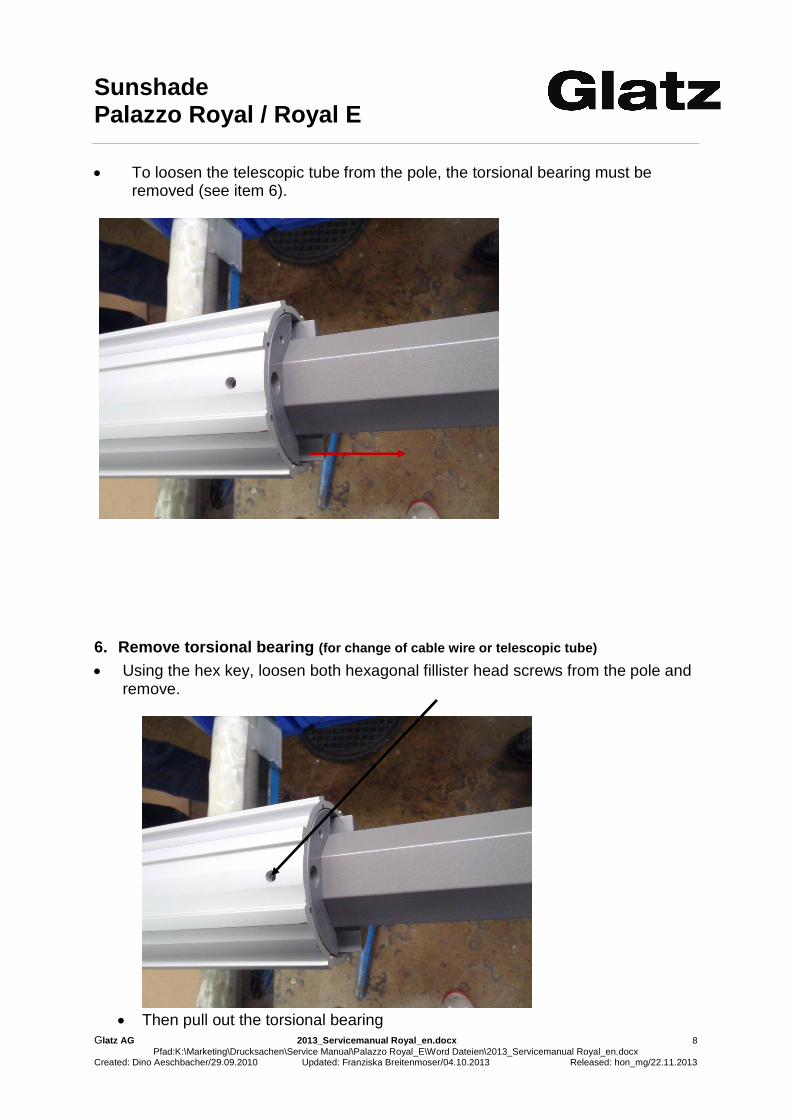
• To loosen the telescopic tube from the pole, the torsional bearing must be
removed (see item 6).
6. Remove torsional bearing (for change of cable wire or telescopic tube) • Using the hex key, loosen both hexagonal fillister head screws from the pole and
remove.
• Then pull out the torsional bearing
Sunshade Palazzo Royal / Royal E
Glatz AG 2013_Servicemanual Royal_en.docx 9 Pfad:K:\Marketing\Drucksachen\Service Manual\Palazzo Royal_E\Word Dateien\2013_Servicemanual Royal_en.docx
Created: Dino Aeschbacher/29.09.2010 Updated: Franziska Breitenmoser/04.10.2013 Released: hon_mg/22.11.2013
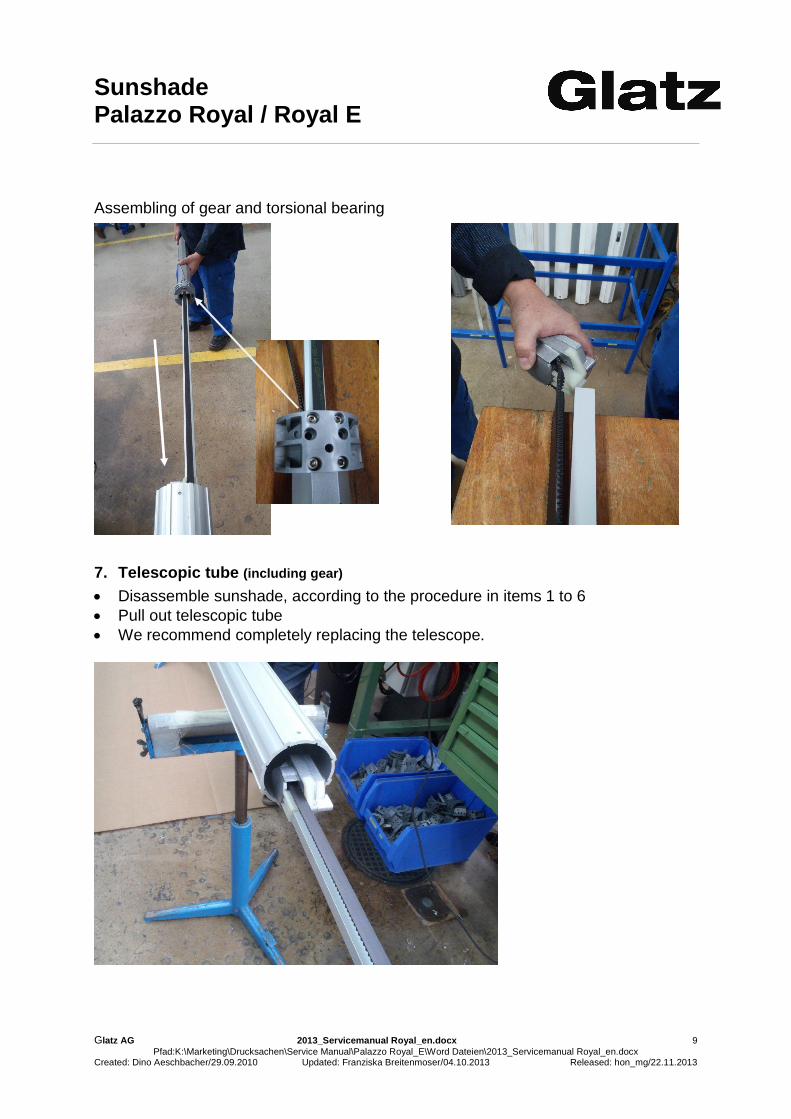
Assembling of gear and torsional bearing
7. Telescopic tube (including gear) • Disassemble sunshade, according to the procedure in items 1 to 6 • Pull out telescopic tube • We recommend completely replacing the telescope.
Sunshade Palazzo Royal / Royal E
Glatz AG 2013_Servicemanual Royal_en.docx 10 Pfad:K:\Marketing\Drucksachen\Service Manual\Palazzo Royal_E\Word Dateien\2013_Servicemanual Royal_en.docx
Created: Dino Aeschbacher/29.09.2010 Updated: Franziska Breitenmoser/04.10.2013 Released: hon_mg/22.11.2013
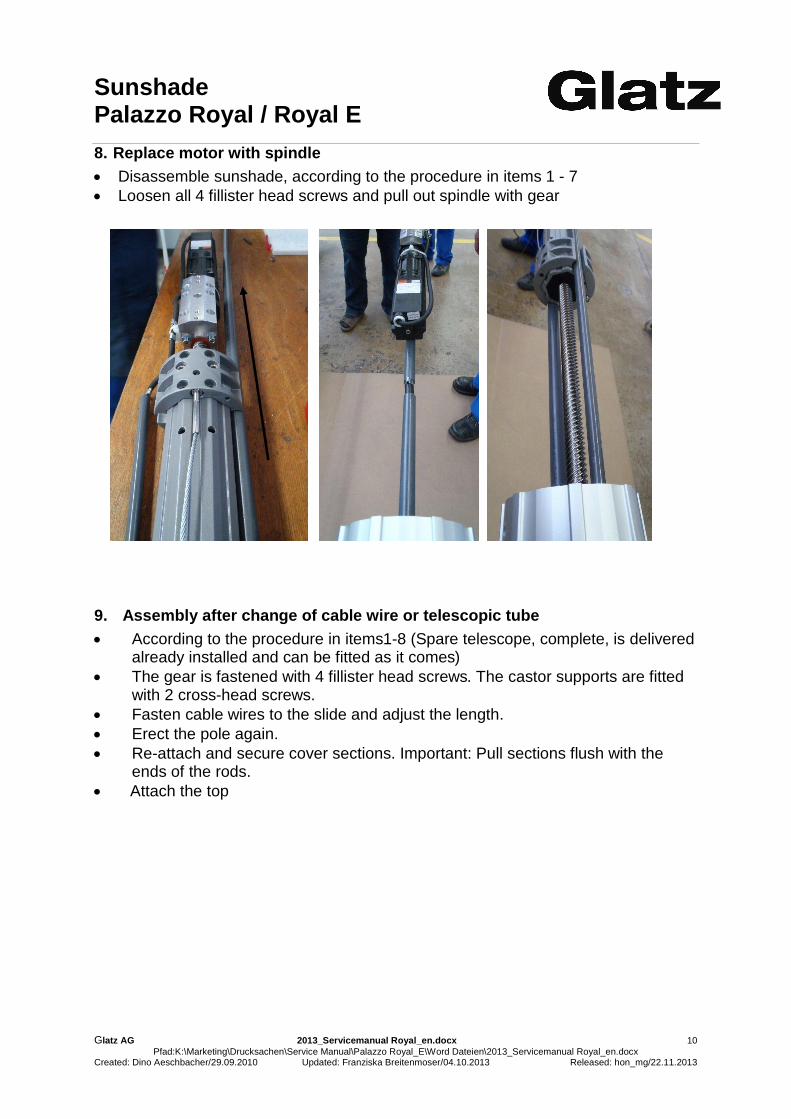
8. Replace motor with spindle • Disassemble sunshade, according to the procedure in items 1 - 7 • Loosen all 4 fillister head screws and pull out spindle with gear
9. Assembly after change of cable wire or telescopic tube • According to the procedure in items1-8 (Spare telescope, complete, is delivered
already installed and can be fitted as it comes) • The gear is fastened with 4 fillister head screws. The castor supports are fitted
with 2 cross-head screws. • Fasten cable wires to the slide and adjust the length. • Erect the pole again. • Re-attach and secure cover sections. Important: Pull sections flush with the
ends of the rods. • Attach the top
Sunshade Palazzo Royal / Royal E
Glatz AG 2013_Servicemanual Royal_en.docx 11 Pfad:K:\Marketing\Drucksachen\Service Manual\Palazzo Royal_E\Word Dateien\2013_Servicemanual Royal_en.docx
Created: Dino Aeschbacher/29.09.2010 Updated: Franziska Breitenmoser/04.10.2013 Released: hon_mg/22.11.2013
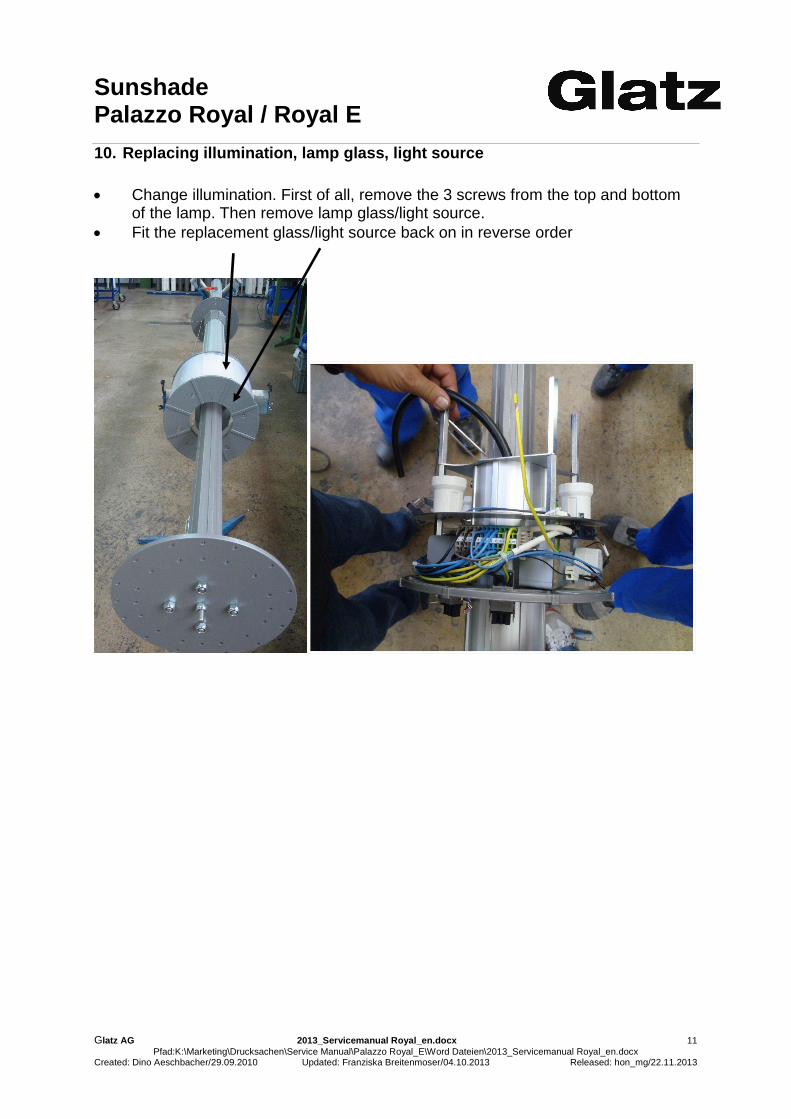
10. Replacing illumination, lamp glass, light source • Change illumination. First of all, remove the 3 screws from the top and bottom
of the lamp. Then remove lamp glass/light source. • Fit the replacement glass/light source back on in reverse order