Embed Size (px)
Citation preview

STEP 2: CREATE USER PROFILE
You must create a user profile to access the application functions within the On-Line Grants Application (OLGA). If your user profile has already been created in OLGA you do not need to complete “Step 2” again.
Step 1 – In the “Home" page, click “Create User Profile”.
This action will display the screen in Step 2.
Step 2 – Complete the required fields in the "User Setup" screen to create your user profile and OLGA login.
Note: • " * " denotes a required field
• User Names and Passwords are alphanumeric
• User Names must have a minimum length of 3 characters and a maximum length of 10 characters.
• Passwords must have a minimum length of 5 characters and a maximum of 15 characters.
For the “Designation/Title” field, click the 'Show Lookup' button.
This action will display the screen in Step 3.
Page 1 of 6 STEP 2: CREATE USER PROFILE
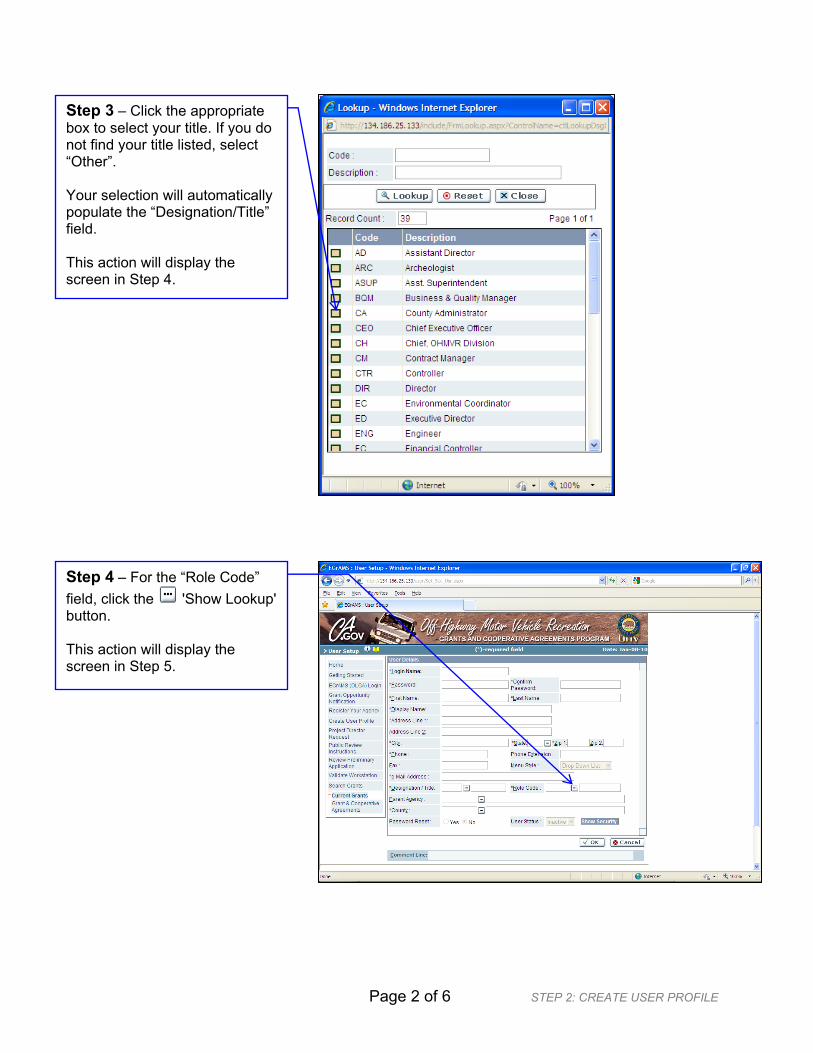
Step 3 – Click the appropriate box to select your title. If you do not find your title listed, select “Other”.
Your selection will automatically populate the “Designation/Title” field.
This action will display the screen in Step 4.
Step 4 – For the “Role Code” field, click the 'Show Lookup' button.
This action will display the screen in Step 5.
Page 2 of 6 STEP 2: CREATE USER PROFILE

Step 5 – Click the box for “GRANTE Grant Applicant”.
Your selection will automatically populate the “Role Code” field.
This action will display the screen in Step 6.
Step 6 – For the “Parent Agency” field, click the 'Show Lookup' button.
This action will display the screen in Step 7.
Page 3 of 6 STEP 2: CREATE USER PROFILE
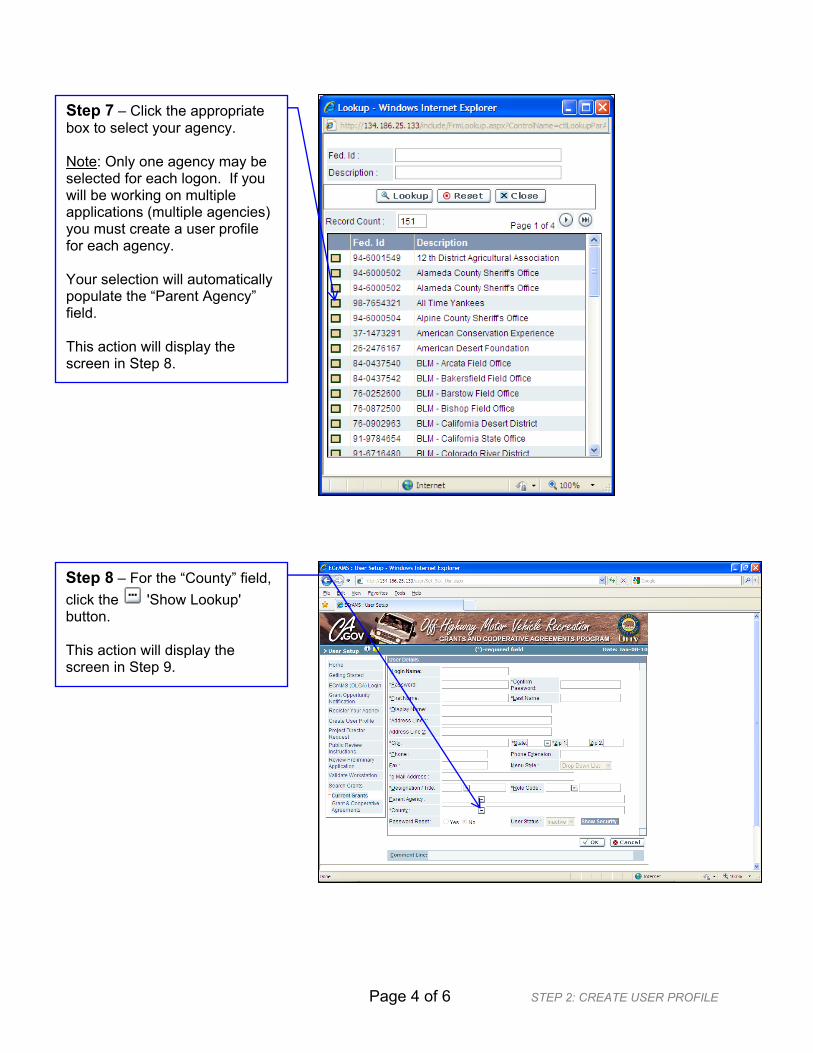
Step 7 – Click the appropriate box to select your agency.
Note: Only one agency may be selected for each logon. If you will be working on multiple applications (multiple agencies) you must create a user profile for each agency.
Your selection will automatically populate the “Parent Agency” field.
This action will display the screen in Step 8.
Step 8 – For the “County” field, click the 'Show Lookup' button.
This action will display the screen in Step 9.
Page 4 of 6 STEP 2: CREATE USER PROFILE
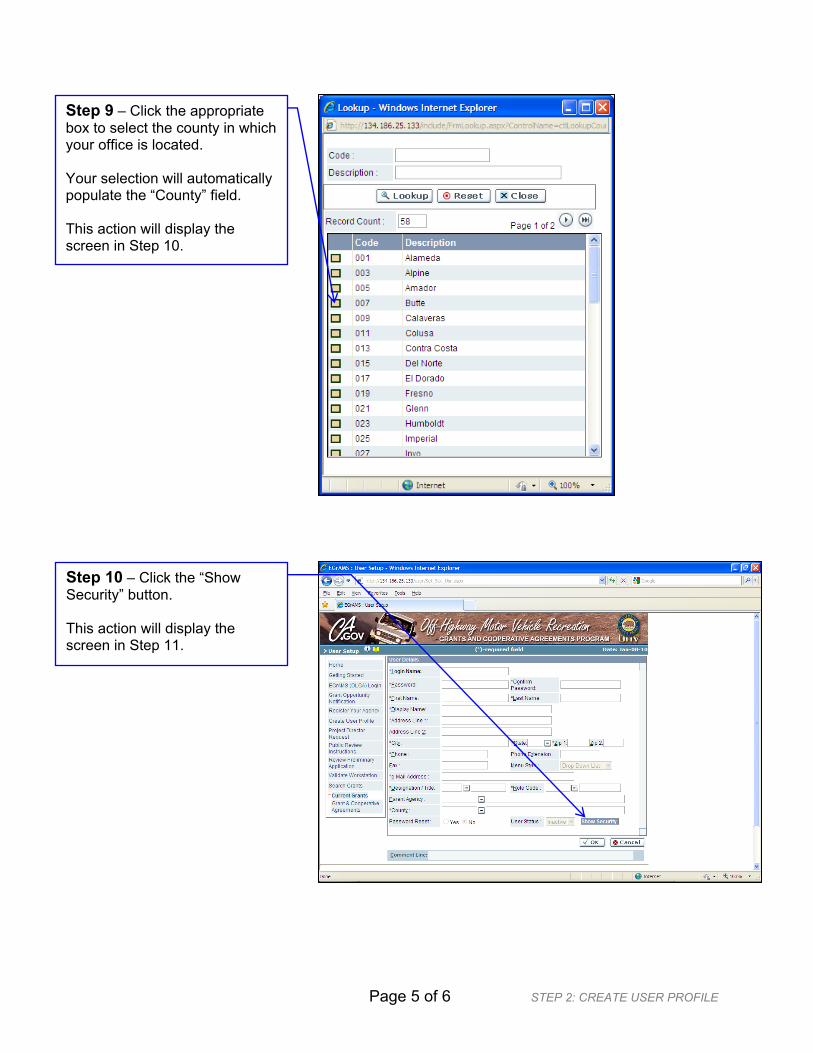
Step 9 – Click the appropriate box to select the county in which your office is located.
Your selection will automatically populate the “County” field.
This action will display the screen in Step 10.
Step 10 – Click the “Show Security” button.
This action will display the screen in Step 11.
Page 5 of 6 STEP 2: CREATE USER PROFILE
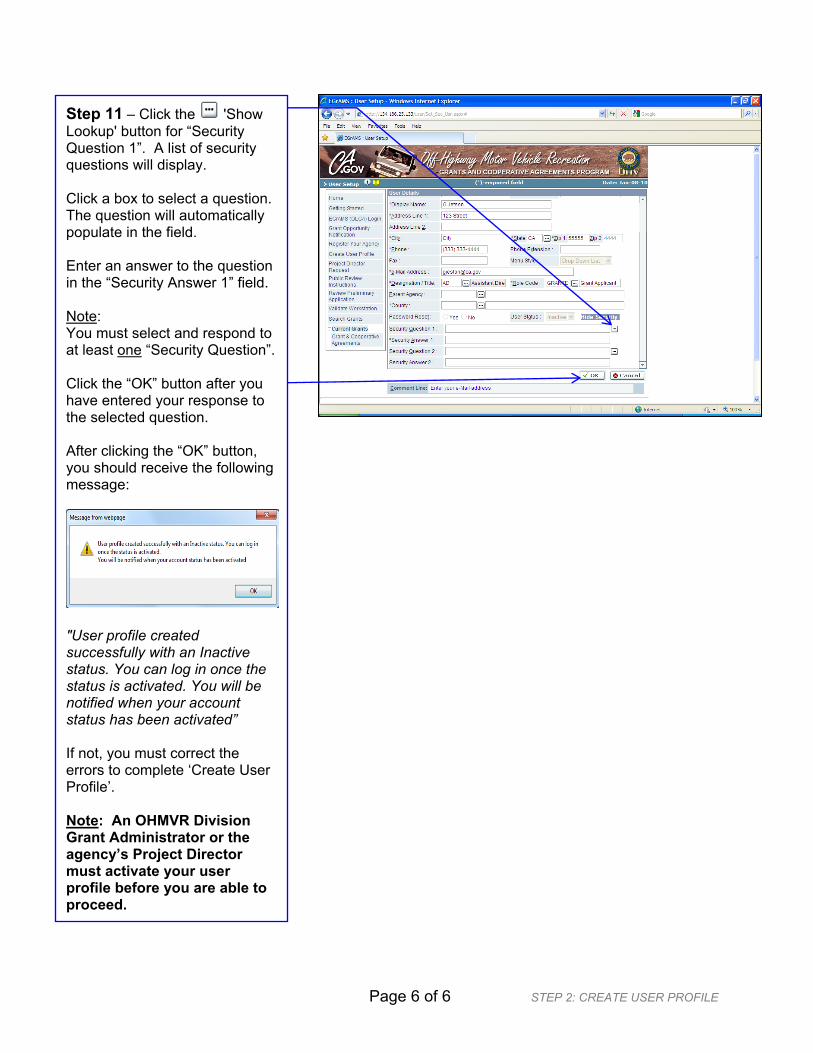
Step 11 – Click the 'Show Lookup' button for “Security Question 1”. A list of security questions will display.
Click a box to select a question. The question will automatically populate in the field.
Enter an answer to the question in the “Security Answer 1” field.
Note: You must select and respond to
at least one “Security Question”.
Click the “OK” button after you have entered your response to the selected question.
After clicking the “OK” button, you should receive the following message:
"User profile created successfully with an Inactive status. You can log in once the status is activated. You will be notified when your account status has been activated”
If not, you must correct the errors to complete ‘Create User Profile’.
Note: An OHMVR Division Grant Administrator or the agency’s Project Director must activate your user profile before you are able to proceed.
Page 6 of 6 STEP 2: CREATE USER PROFILE