Embed Size (px)
Citation preview

Steinway Upright Restoration Project
Day 1

The raison d'etre behind this project:
For a number of years the Steinway upright pictured on these pages has sat quietly
in my shop, unheard and unplayed, under a protective moving cover, waiting for
its day in the sun to be restored while piano after piano rudely butted in line in
front of it. The piano was given to me by a church, and I simply hadn't thought of
a good purpose for it. Three thoughts on how this instrument might be put to good
use recently converged, resulting in this project getting underway.
First, at the September meeting of the Central Iowa Chapter of the Piano
Technician Guild which I hosted at my shop, I was asked by several members if I
would be willing to let them help out if certain projects came up which they might
learn from. Not everyone has the good fortune to have a shop to tackle big jobs,
and it really struck home to me that sharing what I am so fortunate to have in my
shop would be something I would love to be able to do. The old Steinway in the
corner came to mind. Why not restore the elderly and neglected instrument into a
lovely piano once more, doing everything that could be done within the capability
of my shop? Everyone, including myself (there are always new things to try)
could learn in the process. The more I thought about this idea, the more I liked it.
Secondly, in that I write technical articles for both the Piano Technician
Journal and Schaff Piano Supply, any new idea for a topic to explore appeals to
me. I had become aware of a high quality pinblock that Schaff had begun to stock,
and the thought occurred to me that we could do a side-to-side pinblock replace-
ment in the Steinway, removing the sides of the piano in order to cut out pretty
much the entire original block for replacement. In 2008 I wrote an article for the
Journal about a simpler procedure involving routering out of just the pin fields on
an upright piano, but this would be a much more complete job. Why not write a
how-to article for the Schaff product, and at the same time expand upon the topic
to include other makers of premium pinblocks, and write a detailed series of arti-
cles for the Journal? I liked the idea so much I immediately contacted my editors,
who gave a tentative green light to the idea, Schaff and the suppliers of two other
top quality pinblocks, who also gave a initial thumbs up. I've been thinking exten-
sively about these articles, and am convinced it will be great thing to bring such a
note-worth product into the limelight. I'm excited to begin writing.
Finally, on a more reflective note, I thought about what to do with the piano
once it was completed. Being a Steinway, and being given the type of
restoration I intend for it to have, complete with my own personal refinishing of
the case, it should be of a significant commercial value when complete. The idea
of personal enrichment from a project that has both materials and labor donated
seemed wrong on all counts.

Why not, I thought, give the proceeds from the sale of the piano to a worthy
cause? Of course, there are many causes to consider, but one which seems to be
gaining a lot of momentum as of late is the Breast Cancer Foundation. It makes
sense to me to support this cause. With all the people involved in finding a cure, if
everyone pitches in, maybe we can beat this thing once and for all.
I have a wonderful wife, two great daughters and a five year old grand-
daughter who is the apple of her grandfather's eye. This is something I can do for
them. For the next piano we tackle in the shop, there might be another cause to
support, but for this one, I believe this is the direction to take.
So we begin. Owing to the last minute announcement of the first work day,
the initial tear-down was accomplished by myself and two other chapter members.
My intent is to dedicate one day every two weeks in the shop (with more timely
forewarning given to chapter members in the future) until the project is complete.
I will put together a set of photos to send out to all interested parties upon the
completion of each work day. Feel free to forward this photo set to anyone who
might be interested in the project. If they would thereupon wish to be on the list of
recipients, have them contact me at ([email protected]) and they will re-
ceive all future installments.
Thank you so much to all the well-wishers who have extended their
thoughts and best wishes for this project. We're all in this life together, and it feels
so good to be doing something that might make a difference.
Chuck Behm

Restoration Project Photo Essay - Steinway upright Page 4
Photo 1: An inauspicious beginning for the project. Subject, please turn to the left.
Photo 2: Now to the right. No better on this side, that's for sure.
It's early Thursday morning, day 1 of the Steinway Upright Restoration Project for our chapter of the Piano
Technician Guild (Central Iowa), and I'm ready to get things going.
Restoration Project Photo Essay - Steinway upright Page 5
Photos 3 – 8: No sense of waiting around for laggards to arrive, I always say. The coffee pot is burbling in the background. Daylight's
burning. Let the teardown of the piano begin.

Restoration Project Photo Essay - Steinway upright Page 6
Photo 9: With the keys out of the way, the screws holding the keyframe down are removed.
Photo 10: The keyframe and end blocks all come out as one unit.

Restoration Project Photo Essay - Steinway upright Page 7
Photo 11: Keys are returned to the keyframe and the whole works are put on a bench for the time being out of the
way. The coffee is hot, the sun is up, and life is good. For me, piano restoration is where it's at.
Photo 12: Likewise, the action is put into an action cradle, and put on another bench. The keys and the action are
not to be the focus of today's effort.

Restoration Project Photo Essay - Steinway upright Page 8
Photo 13: Chapter member Steve Haag, RPT from Des Moines, arrives at the shop. I crack the whip and
immediately put him to work helping with further disassembly of the case. Here, Steve removes the piano hinge
holding the split lid together.
Photo 14: Screws are always stored in muffin tins in our shop. We have so many muffin tins in the shop that if hard
times ever befalls the piano restoration business, the plan is to open a bakery. "Muffins R Us."

Restoration Project Photo Essay - Steinway upright Page 9
Photo 15: Dozens of photos are taken during the disassembly process of details which are easy to forget. This
type of picture can save one from a lot of grief when it comes time to reassemble everything.
Photo 16: Labeling parts on an inside surface is also an important step to remembering where everything goes.

Restoration Project Photo Essay - Steinway upright Page
Photo 17: Having gone as far as we can with the piano in the vertical position, it's time to put it on its back.
(Doing this without a shop repair truck is not recommended.)
Photo 18: Steve removes two small bracket screws and the legs easily slide off.
Restoration Project Photo Essay - Steinway upright Page
Photo 19: The arms also come off effortlessly. Usually these are screwed and glued to the sides. On this piano,
when the screws are removed, the arms come right off. Cool!
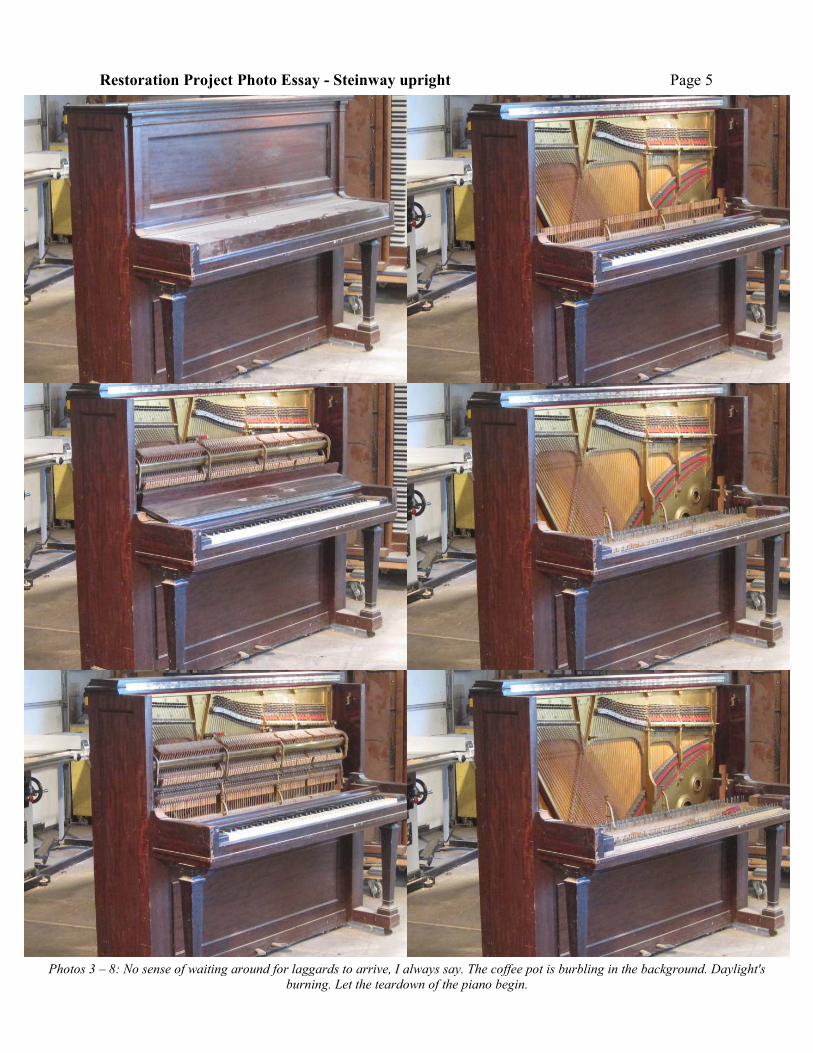
Photo 20: Off comes the keybed as well. Do you ever have the feeling that things are going too smoothly?
More on that later.

Restoration Project Photo Essay - Steinway upright Page
Photo 21: Rap, rap, rap . . ..
Photo 22: . . and the entire lower portion of the piano comes off.
.

Restoration Project Photo Essay - Steinway upright Page
Photo 23: More photos are taken as we go for future reference. The method for braiding the non-speaking length
of the strings is documented.
Photo 24: Also, the location of singleton treble strings is made note of.

Restoration Project Photo Essay - Steinway upright Page
Photo 25: The tension is now removed from the bass strings.
Photo 26: On the lower end of the piano, the bass strings are pulled loose from their hitch pins and bundled
together with a copper wire.

Restoration Project Photo Essay - Steinway upright Page
Photo 27: They are then wrapped into a loop.
Photo 28: Ready to send off for duplication.

Restoration Project Photo Essay - Steinway upright Page
Photo 29: Tom Russell, RPT from Ames, stops by in time for lunch at Jimmy's, and then volunteers to give a hand
for a short time. Here, he uses a drill to back out the old tuning pins. Back in the day I always did this job with a
brace and bit. Isn't electricity a great thing?
Photo 30: We next turn our attention to the treble strings. Steve backs up each pin about 3/4 of a turn to
loosen the coils..
Restoration Project Photo Essay - Steinway upright Page
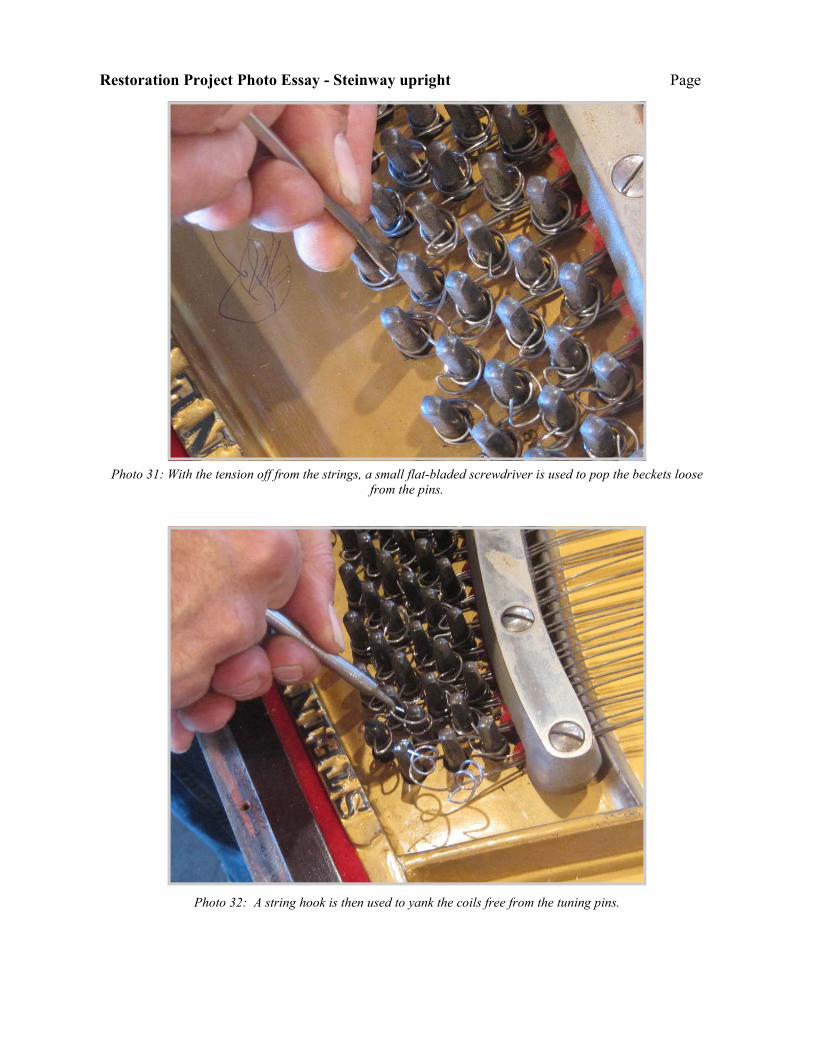
Photo 31: With the tension off from the strings, a small flat-bladed screwdriver is used to pop the beckets loose
from the pins.
Photo 32: A string hook is then used to yank the coils free from the tuning pins.

Restoration Project Photo Essay - Steinway upright Page
Photo 33: A pair of cutters are then used to snip each wire.
Photo 34: The loose ends are pulled free and tossed in the recycling box.

Restoration Project Photo Essay - Steinway upright Page
Photo 35: Before pulling the strings loose on the bass end, the wire sizes may be miked, although on this piano the
gauges were stamped on the plate at the factory.
Photo 36: At this point, the remaining wire is pulled from the bridges and off of the hitchpins, removed and added
to the recycling box.
Restoration Project Photo Essay - Steinway upright Page
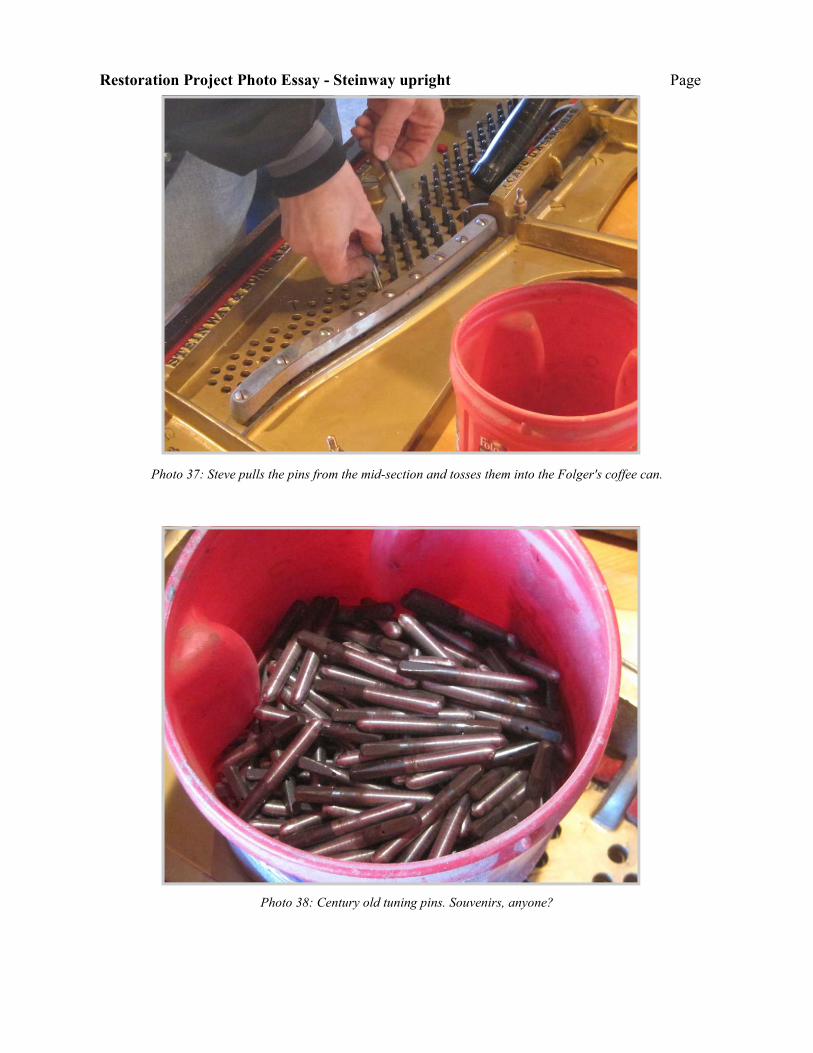
Photo 37: Steve pulls the pins from the mid-section and tosses them into the Folger's coffee can.
Photo 38: Century old tuning pins. Souvenirs, anyone?

Restoration Project Photo Essay - Steinway upright Page
Photo 39: A storage board is drawn up for all the plate screws and bolts. It is essential that each plate screw be
returned to the correct position. Sizes vary dramatically.
Photo 40: Holes are drilled in the storage board large enough that the plate screws will easily drop through to the
head of the screw.

Restoration Project Photo Essay - Steinway upright Page
Photo 41: Using a large squared-shanked, flat-bladed screwdriver, the plate screws are removed. The wrench
helps to get reluctant screws started (in most cases).
Photo 42: All screws which go down through the plate must be removed and stored.

Restoration Project Photo Essay - Steinway upright Page
Photo 43: With action bracket bolts, it is important to measure the distance that they protrude from the plate.
When these are eventually screwed back into place, the amount that they are turned down will be duplicated.
Photo 44: The height of each action bracket bolt is labeled right on the storage board. Post-It Notes have been
known to peel off and blow away.

Restoration Project Photo Essay - Steinway upright Page
Photo 45: Perhaps because things had been coming apart too easily all day, 6 plate screws were absolutely frozen
in place, defying our every attempt to turn them. After actually having a large screwdriver break trying to turn one
of the screws, the last case option was resorted to - drilling out the head. The remainder of the screws will be
removed later using an Easyout.
Photo 46: Not a sight one likes to see during a tear-down.

Restoration Project Photo Essay - Steinway upright Page
Photo 47: A particularly nice looking soundboard for a century-old instrument.
Photo 48: Steve positions the piano under the hoist. Being the manly men that we are (or think we are, at any rate),
I'm sure that we could lift it out on our own, but if one of us trips, that would be all she wrote.

Restoration Project Photo Essay - Steinway upright Page
Photo 49: Straps are tied on and double-knotted.
Photo 50: The last time that these two objects were not together, the Lincoln head penny was just one year old. My
dad was a four year old.

Restoration Project Photo Essay - Steinway upright Page
Photo 51: With the piano rolled out from underneath, the plate hangs in mid-air for a moment, before being
lowered to the ground. Once untied from the straps, it's tilted on end to be moved to a safe spot for storage.
Photo 52: Typically, I like to keep plates in between two uprights which are back-to-back like a pair of bookends.
Unfortunately, we're low on uprights at the moment, so until I decide on a better spot, the plate will lean against
an unused bench for the time being.

Restoration Project Photo Essay - Steinway upright Page
Photo 53: The pinblock is more complicated than what I anticipated. A curved cut inside a fitting bead will be
necessary. More work than I was thinking, but very doable.
Photo 54: With that much out of the way, and the sun getting low on the horizon, we decide to call it a day. Until
next time then, enjoy life.
Chuck Behm