Embed Size (px)
DESCRIPTION
Sss Skin Shader Tutorial 3D MAx
Citation preview
mental ray fast subsurface scattering tutorial
Document version 1.21Dec 3, 2004
Copyright Information
Copyright c© 1986-2004 mental images GmbH, Berlin, Germany.
All rights reserved.
This document is protected under copyright law. The contents of this document may not betranslated, copied or duplicated in any form, in whole or in part, without the express writtenpermission of mental images GmbH.
The information contained in this document is subject to change without notice. mental imagesGmbH and its employees shall not be responsible for incidental or consequential damagesresulting from the use of this material or liable for technical or editorial omissions madeherein.
mental images Rc, incremental imagesTM, mental ray Rc, mental matter Rc, mental ray PhenomenonRc, mental ray PhenomenaTM, PhenomenonTM, PhenomenaTM, Phenomenon CreatorTM,Phenomenon EditorTM, Photon MapTM, mental ray RelayTM Library, RelayTM Library, SPMRc, Shape-by-ShadingTM, Internet Rendering PlatformTM, iRPTM, Reality Rc, Reality Server Rc,Reality PlayerTM, Reality DesignerTM, iray Rc, imatter Rc, and neurayTM are trademarks or, insome countries, registered trademarks of mental images GmbH, Berlin, Germany.
All other product names mentioned in this document may be trademarks or registeredtrademarks of their respective companies and are hereby acknowledged.

Table of Contents
1 Subsurface scattering skin shader tutorial 1
1.1 Introduction . . . . . . . . . . . . . . . . . . . . . . . . . . . . . . . . . . . . . . . . . . . . . . . . 1
1.2 Realistic skin . . . . . . . . . . . . . . . . . . . . . . . . . . . . . . . . . . . . . . . . . . . . . . . . 4
1.3 Tuning scattering “on your own” . . . . . . . . . . . . . . . . . . . . . . . . . . . . . . . . 10
1.3.1 “Subdermal” scattering - the meaty stuff . . . . . . . . . . . . . . . . . . 10
1.3.2 “Epidermis” - the top layer . . . . . . . . . . . . . . . . . . . . . . . . . . . . . 13
1.3.3 The layers in context and with textures . . . . . . . . . . . . . . . . . . . . 15
1.3.4 Sweet specularity . . . . . . . . . . . . . . . . . . . . . . . . . . . . . . . . . . . . . 19
1.3.5 It’s in the eyes . . . . . . . . . . . . . . . . . . . . . . . . . . . . . . . . . . . . . . . 23
1.4 Advanced methods . . . . . . . . . . . . . . . . . . . . . . . . . . . . . . . . . . . . . . . . . . . 26
1.4.1 Environment lighting of Globulous . . . . . . . . . . . . . . . . . . . . . . . 26
1.5 Technical considerations . . . . . . . . . . . . . . . . . . . . . . . . . . . . . . . . . . . . . . . . 30
1.5.1 Application of the shader . . . . . . . . . . . . . . . . . . . . . . . . . . . . . . . 30
1.5.2 Parameters, names and useage . . . . . . . . . . . . . . . . . . . . . . . . . . 30
1.5.3 Shader declaration . . . . . . . . . . . . . . . . . . . . . . . . . . . . . . . . . . . . 31
1.6 Inspirational Gallery . . . . . . . . . . . . . . . . . . . . . . . . . . . . . . . . . . . . . . . . . . 33
1.6.1 Standard lighting . . . . . . . . . . . . . . . . . . . . . . . . . . . . . . . . . . . . . 33
1.6.2 Environment Lighting . . . . . . . . . . . . . . . . . . . . . . . . . . . . . . . . . . 36
1.6.3 Displacement . . . . . . . . . . . . . . . . . . . . . . . . . . . . . . . . . . . . . . . . 38
1.7 Thank you for listening . . . . . . . . . . . . . . . . . . . . . . . . . . . . . . . . . . . . . . . . 39

Chapter 1
Subsurface scattering skin shadertutorial
1.1 Introduction
Welcome to the mental ray fast subsurface scattering skin shader tutorial!
Before we begin, we should talk a little about what subsurface scattering (“sss” for short)actually is, and what it looks like, and how it enhances the apparent smoothness of a surface.
2 1 Subsurface scattering skin shader tutorial
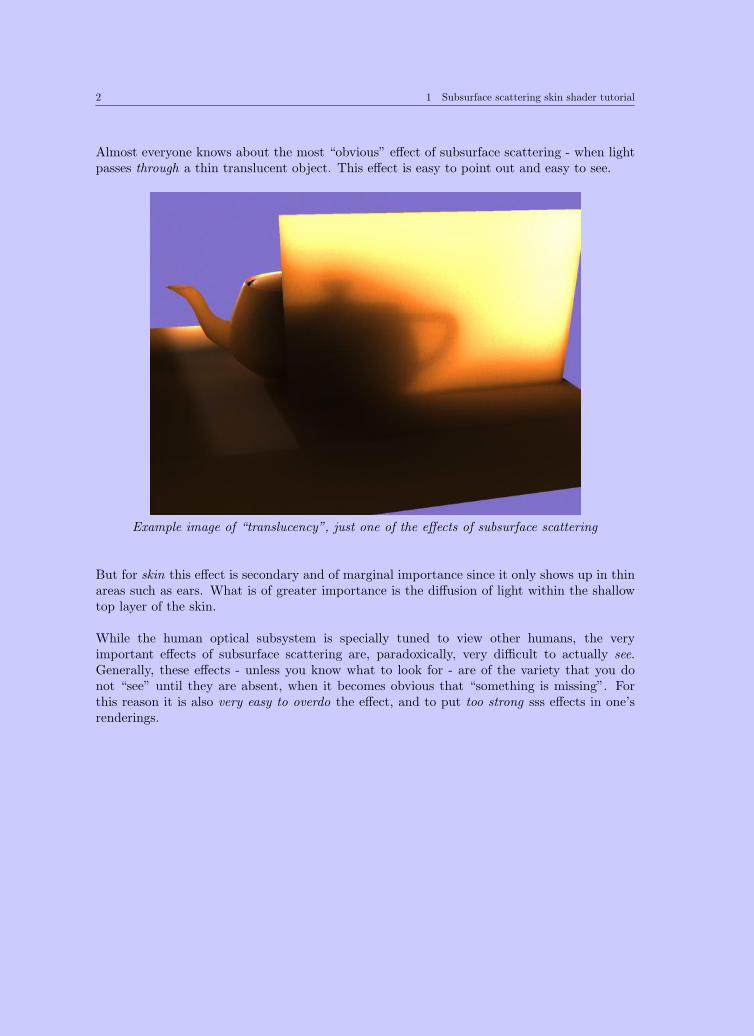
Almost everyone knows about the most “obvious” effect of subsurface scattering - when lightpasses through a thin translucent object. This effect is easy to point out and easy to see.
Example image of “translucency”, just one of the effects of subsurface scattering
But for skin this effect is secondary and of marginal importance since it only shows up in thinareas such as ears. What is of greater importance is the diffusion of light within the shallowtop layer of the skin.
While the human optical subsystem is specially tuned to view other humans, the veryimportant effects of subsurface scattering are, paradoxically, very difficult to actually see.Generally, these effects - unless you know what to look for - are of the variety that you donot “see” until they are absent, when it becomes obvious that “something is missing”. Forthis reason it is also very easy to overdo the effect, and to put too strong sss effects in one’srenderings.

1.1 Introduction 3
Two things to look for are the apparent “softening” of bumps and small structures, and aslight “bleed” of light into shadow areas, diffusing the otherwise sharp shadow edges.
Left: No subsurface scattering vs. Right: Subsurface scattering
Notice how the bumps on the left object are very harsh, and how the shadow edge is completelysharp, whereas, on the right, the bumps feel softer and there is a slight color bleed into theshadow area.
4 1 Subsurface scattering skin shader tutorial
1.2 Realistic skin
This tutorial will be about putting a realistic skin on our friend Globulous.
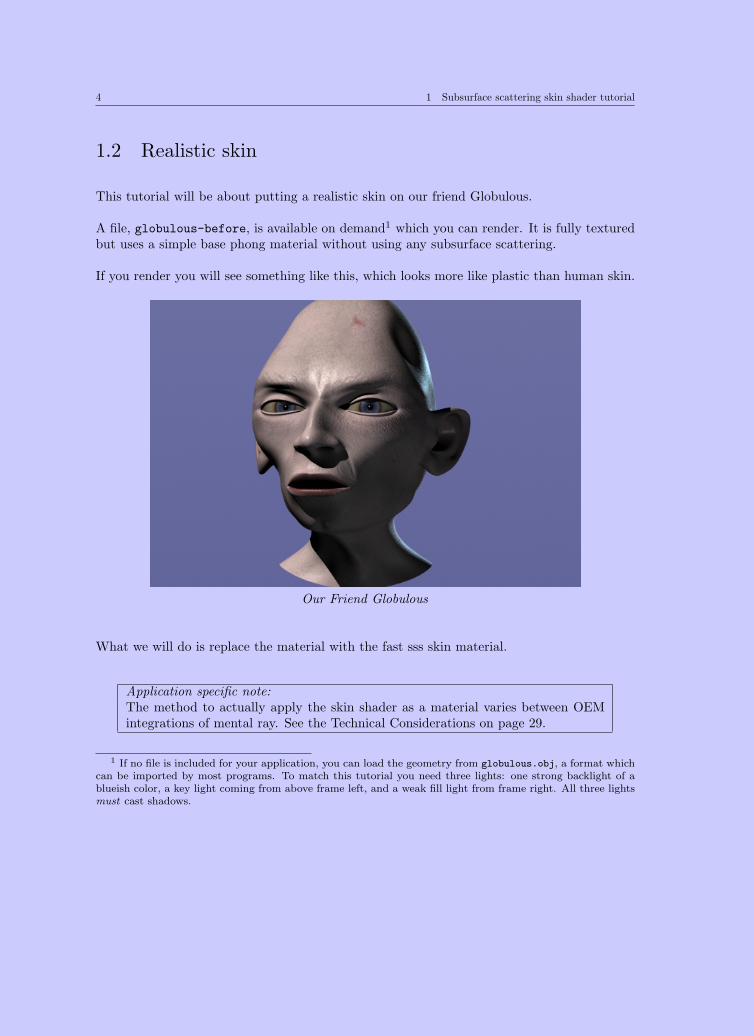
A file, globulous-before, is available on demand1 which you can render. It is fully texturedbut uses a simple base phong material without using any subsurface scattering.
If you render you will see something like this, which looks more like plastic than human skin.
Our Friend Globulous
What we will do is replace the material with the fast sss skin material.
Application specific note:The method to actually apply the skin shader as a material varies between OEMintegrations of mental ray. See the Technical Considerations on page 29.
1 If no file is included for your application, you can load the geometry from globulous.obj, a format whichcan be imported by most programs. To match this tutorial you need three lights: one strong backlight of ablueish color, a key light coming from above frame left, and a weak fill light from frame right. All three lightsmust cast shadows.
1.2 Realistic skin 5
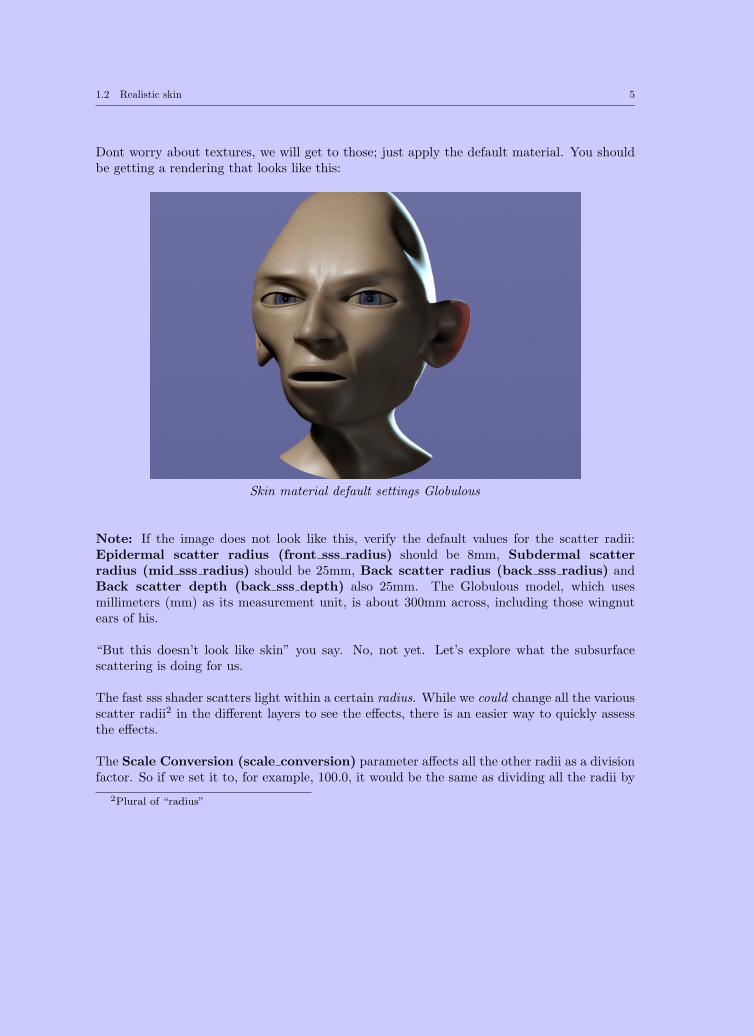
Dont worry about textures, we will get to those; just apply the default material. You shouldbe getting a rendering that looks like this:
Skin material default settings Globulous
Note: If the image does not look like this, verify the default values for the scatter radii:Epidermal scatter radius (front sss radius) should be 8mm, Subdermal scatterradius (mid sss radius) should be 25mm, Back scatter radius (back sss radius) andBack scatter depth (back sss depth) also 25mm. The Globulous model, which usesmillimeters (mm) as its measurement unit, is about 300mm across, including those wingnutears of his.
“But this doesn’t look like skin” you say. No, not yet. Let’s explore what the subsurfacescattering is doing for us.
The fast sss shader scatters light within a certain radius. While we could change all the variousscatter radii2 in the different layers to see the effects, there is an easier way to quickly assessthe effects.
The Scale Conversion (scale conversion) parameter affects all the other radii as a divisionfactor. So if we set it to, for example, 100.0, it would be the same as dividing all the radii by
2Plural of “radius”
6 1 Subsurface scattering skin shader tutorial
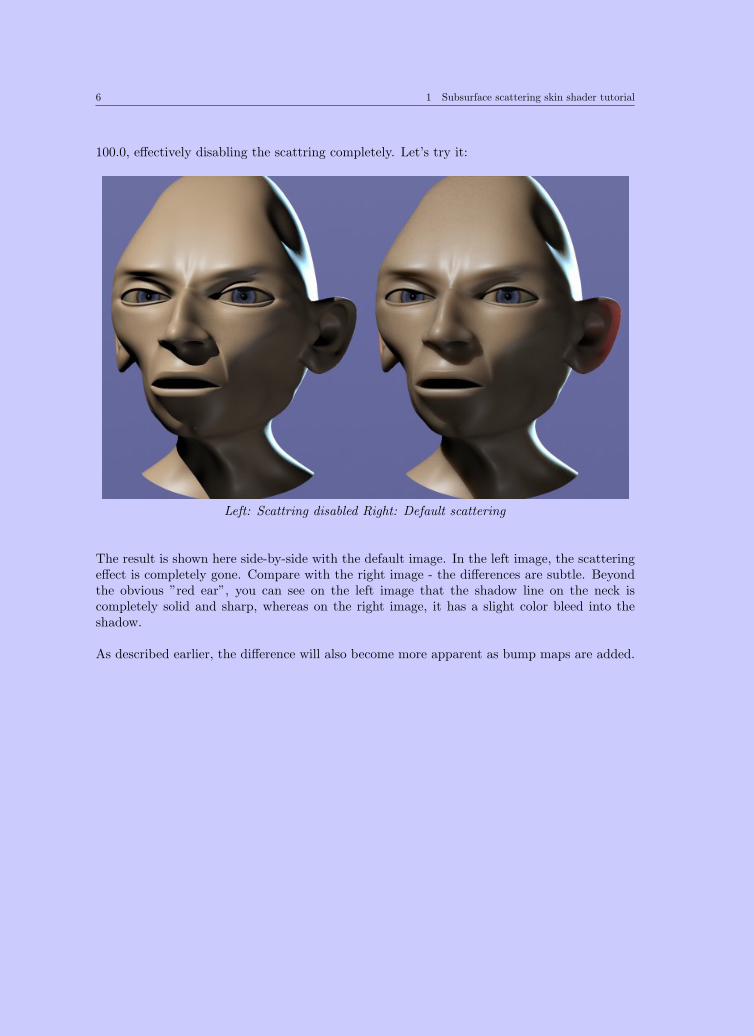
100.0, effectively disabling the scattring completely. Let’s try it:
Left: Scattring disabled Right: Default scattering
The result is shown here side-by-side with the default image. In the left image, the scatteringeffect is completely gone. Compare with the right image - the differences are subtle. Beyondthe obvious ”red ear”, you can see on the left image that the shadow line on the neck iscompletely solid and sharp, whereas on the right image, it has a slight color bleed into theshadow.
As described earlier, the difference will also become more apparent as bump maps are added.
1.2 Realistic skin 7
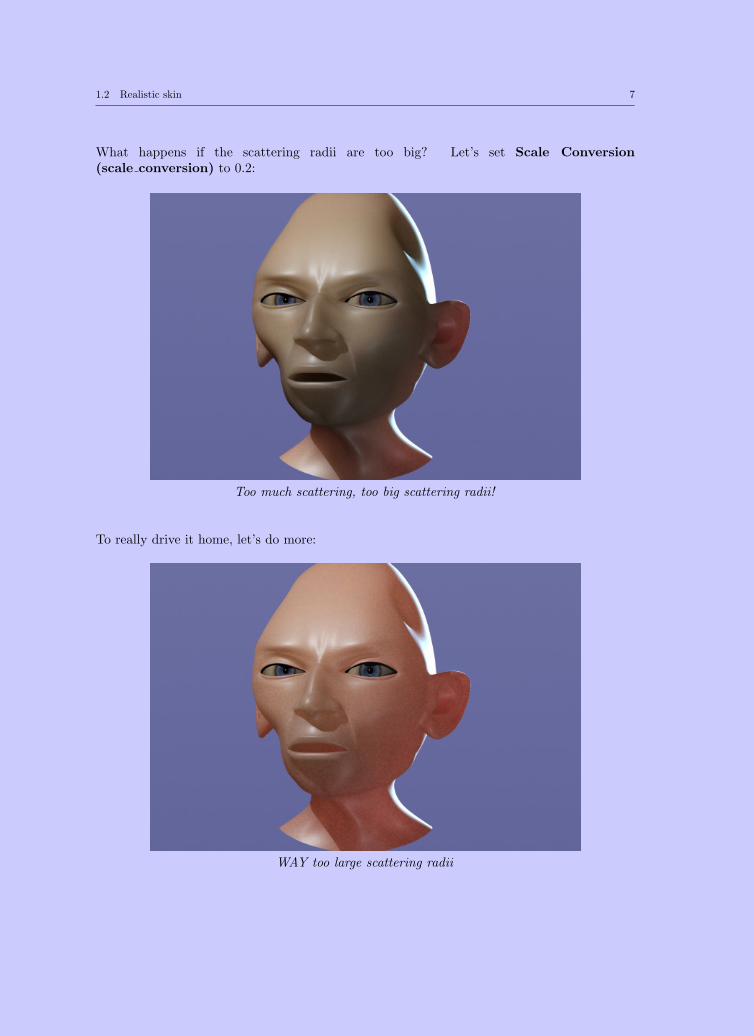
What happens if the scattering radii are too big? Let’s set Scale Conversion(scale conversion) to 0.2:
Too much scattering, too big scattering radii!
To really drive it home, let’s do more:
WAY too large scattering radii

8 1 Subsurface scattering skin shader tutorial
See how the entire head looks like a balloon filled with red gas? Also note the graininess thatappeared. The current sample count (64, in this case, the default) is simply too little for sucha gigantic scatter radius as we have here.
So, if you have an existing model (that is perhaps not made to scale or not in real worldunits) and apply the skin shader, and the result is a red blob with noise in it, the reason isyour scattering radii are way too big. If the result looks like hard plastic, the scattering radiiare too small. Tweak with Scale Conversion (scale conversion) or by tweaking the radiiseparately.
Let’s change it to something more sensible ... but to be able to see the effect, we stick ScaleConversion (scale conversion) at 0.5 to be able to “see” the effect a bit more.
Globulous w. a sensible scale for scatter radii
But it still doesn’t look like skin, does it? Sure, it has a bit of a waxy quality due to thescattering, but the surface is way too shiny and smooth. Let’s add some bump mapping andsee where that leads us.
We will add a simple perlin noise map for bumps.
Application specific note:Consult your application specific documentation about how to do it.
1.2 Realistic skin 9
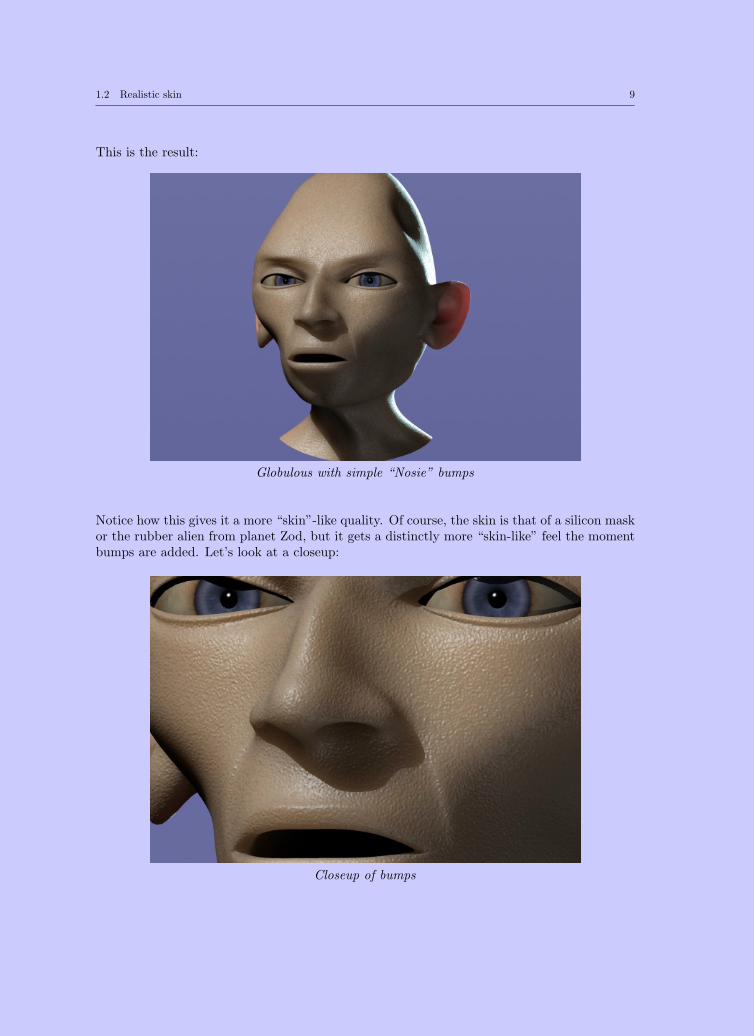
This is the result:
Globulous with simple “Nosie” bumps
Notice how this gives it a more “skin”-like quality. Of course, the skin is that of a silicon maskor the rubber alien from planet Zod, but it gets a distinctly more “skin-like” feel the momentbumps are added. Let’s look at a closeup:
Closeup of bumps
10 1 Subsurface scattering skin shader tutorial
Now this isn’t pretty, but it illustrates a point: The scattering “fills in” the tiny crevicesbetween bumps and makes bumpmapping less “harsh”. Feel free to turn Scale Conversion(scale conversion) back to 100 temporarily and see the difference. Without scattering, allthe bumps would be very harsh, with shading as dark as that of Globulous’s cheek.
1.3 Tuning scattering “on your own”
1.3.1 “Subdermal” scattering - the meaty stuff
So far, we have been using the standard settings. But let’s look at how we can arrive at aresult independently.
To do this, we will look at all scattering contributions separately. So:
• Set Scale Conversion (scale conversion) back to 1.0
• Set Unscattered diffuse weight (diffuse weight) to 0.0
• Set Epidermal scatter weight (front sss weight) to 0.0
• Set Subdermal scatter weight (mid sss weight) to 0.0
• Set Back scatter weight (back sss weight) to 1.0
• Set Overall specular weight (overall weight) to 0.0
• Remove the ”noise” bump map we added

1.3 Tuning scattering “on your own” 11
This turns everything off, except the back scattering light - the stuff most people think aboutwhen you say “subsurface scattering”. As you can see, it’s not really much to look at:
Globulous with back surface (through) scattering only
Now set Subdermal scatter weight (mid sss weight) to 1.0 as well, to turn on thesubdermal scattering. What we call here the “subdermal” or “middle” layer is all the meatystuff under the top layer of the skin, which contributes the famous red glow effects. Yourrender should now look like this:
Globulous with a default subdermal scatter radius of 25mm
12 1 Subsurface scattering skin shader tutorial
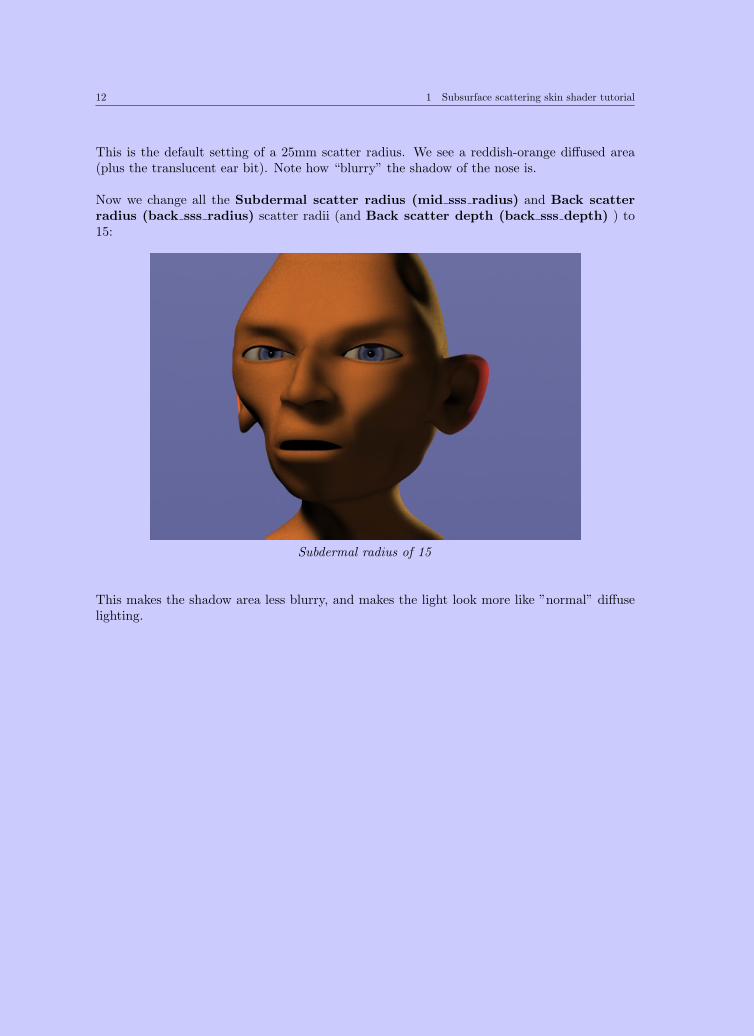
This is the default setting of a 25mm scatter radius. We see a reddish-orange diffused area(plus the translucent ear bit). Note how “blurry” the shadow of the nose is.
Now we change all the Subdermal scatter radius (mid sss radius) and Back scatterradius (back sss radius) scatter radii (and Back scatter depth (back sss depth) ) to15:
Subdermal radius of 15
This makes the shadow area less blurry, and makes the light look more like ”normal” diffuselighting.
1.3 Tuning scattering “on your own” 13
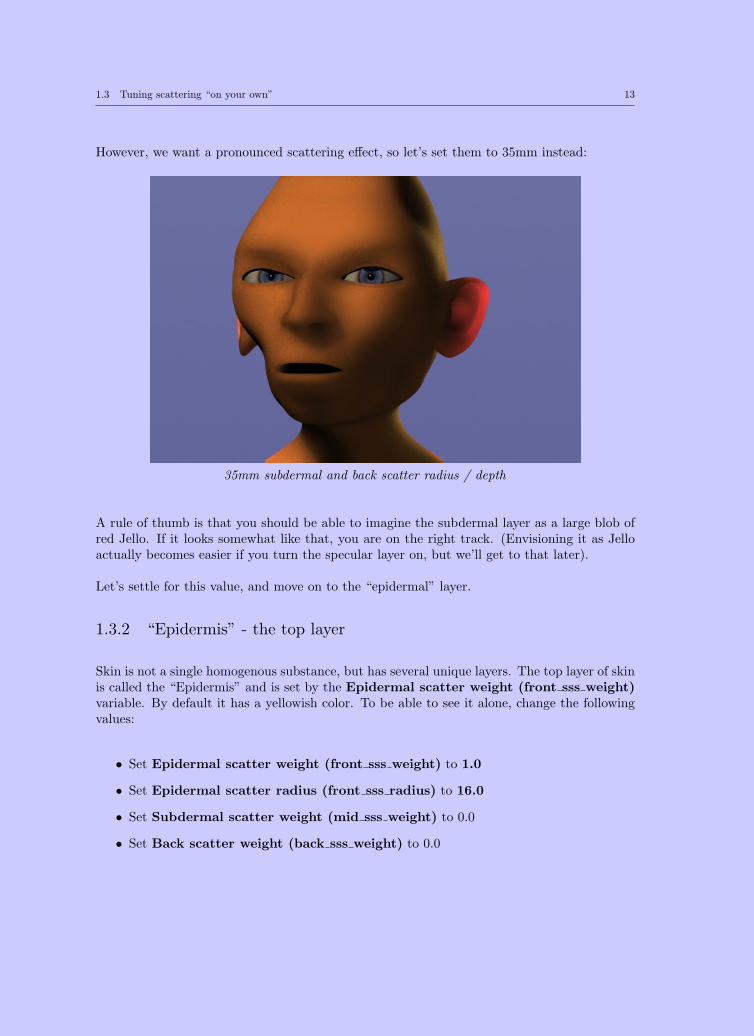
However, we want a pronounced scattering effect, so let’s set them to 35mm instead:
35mm subdermal and back scatter radius / depth
A rule of thumb is that you should be able to imagine the subdermal layer as a large blob ofred Jello. If it looks somewhat like that, you are on the right track. (Envisioning it as Jelloactually becomes easier if you turn the specular layer on, but we’ll get to that later).
Let’s settle for this value, and move on to the “epidermal” layer.
1.3.2 “Epidermis” - the top layer
Skin is not a single homogenous substance, but has several unique layers. The top layer of skinis called the “Epidermis” and is set by the Epidermal scatter weight (front sss weight)variable. By default it has a yellowish color. To be able to see it alone, change the followingvalues:
• Set Epidermal scatter weight (front sss weight) to 1.0
• Set Epidermal scatter radius (front sss radius) to 16.0
• Set Subdermal scatter weight (mid sss weight) to 0.0
• Set Back scatter weight (back sss weight) to 0.0
14 1 Subsurface scattering skin shader tutorial
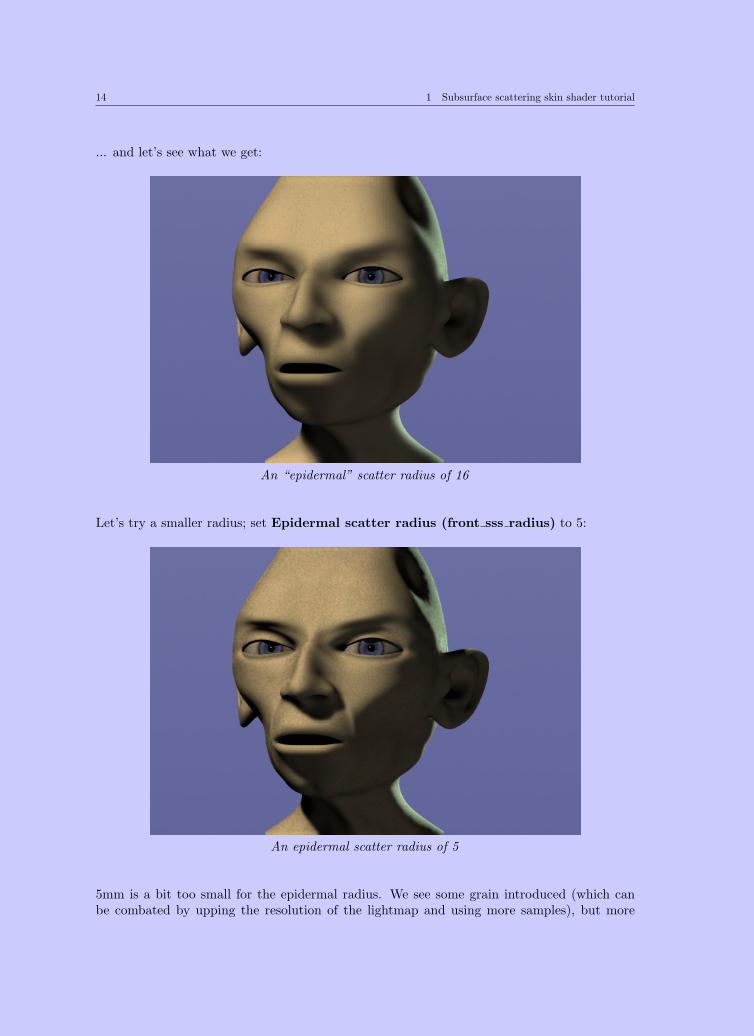
... and let’s see what we get:
An “epidermal” scatter radius of 16
Let’s try a smaller radius; set Epidermal scatter radius (front sss radius) to 5:
An epidermal scatter radius of 5
5mm is a bit too small for the epidermal radius. We see some grain introduced (which canbe combated by upping the resolution of the lightmap and using more samples), but more
1.3 Tuning scattering “on your own” 15
importanty we are not really seeing much scattering happening. Look at the shadow of thenose, it is nearly sharp, and this small scatter radii would not be very different to standarddiffuse lighting.
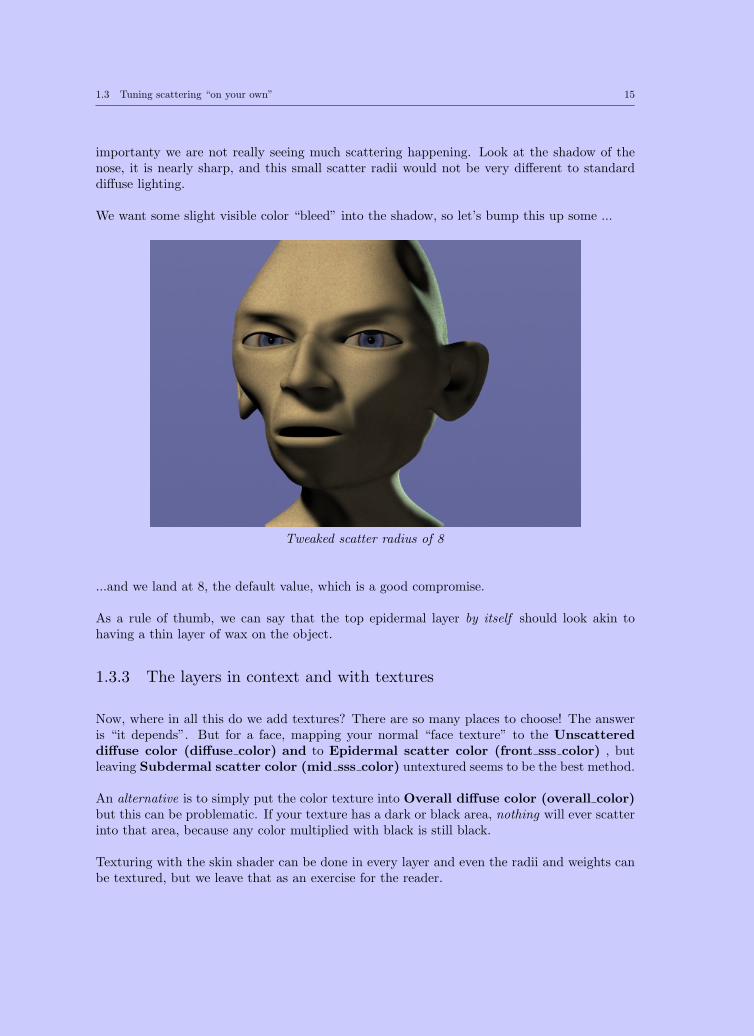
We want some slight visible color “bleed” into the shadow, so let’s bump this up some ...
Tweaked scatter radius of 8
...and we land at 8, the default value, which is a good compromise.
As a rule of thumb, we can say that the top epidermal layer by itself should look akin tohaving a thin layer of wax on the object.
1.3.3 The layers in context and with textures
Now, where in all this do we add textures? There are so many places to choose! The answeris “it depends”. But for a face, mapping your normal “face texture” to the Unscattereddiffuse color (diffuse color) and to Epidermal scatter color (front sss color) , butleaving Subdermal scatter color (mid sss color) untextured seems to be the best method.
An alternative is to simply put the color texture into Overall diffuse color (overall color)but this can be problematic. If your texture has a dark or black area, nothing will ever scatterinto that area, because any color multiplied with black is still black.
Texturing with the skin shader can be done in every layer and even the radii and weights canbe textured, but we leave that as an exercise for the reader.
16 1 Subsurface scattering skin shader tutorial
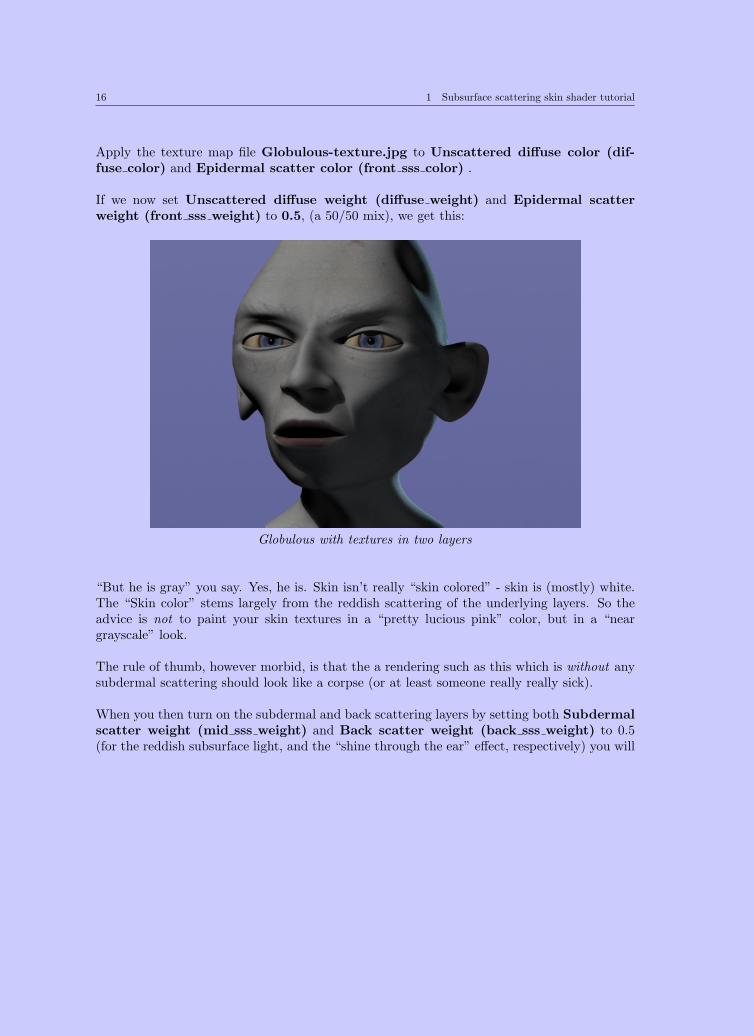
Apply the texture map file Globulous-texture.jpg to Unscattered diffuse color (dif-fuse color) and Epidermal scatter color (front sss color) .
If we now set Unscattered diffuse weight (diffuse weight) and Epidermal scatterweight (front sss weight) to 0.5, (a 50/50 mix), we get this:
Globulous with textures in two layers
“But he is gray” you say. Yes, he is. Skin isn’t really “skin colored” - skin is (mostly) white.The “Skin color” stems largely from the reddish scattering of the underlying layers. So theadvice is not to paint your skin textures in a “pretty lucious pink” color, but in a “neargrayscale” look.
The rule of thumb, however morbid, is that the a rendering such as this which is without anysubdermal scattering should look like a corpse (or at least someone really really sick).
When you then turn on the subdermal and back scattering layers by setting both Subdermalscatter weight (mid sss weight) and Back scatter weight (back sss weight) to 0.5(for the reddish subsurface light, and the “shine through the ear” effect, respectively) you will

1.3 Tuning scattering “on your own” 17
see the blood return to the face, and you get:
Subdermal scattering turned on
Now we are getting somewhere! But there are still things missing. Let’s apply the bump map.
Apply the globulous-bump.jpg file as a bump map.
Application specific note:Consult application-specific documentation for details
We now have bumps. The trick now is to tune the bumps so the skin translucency is ata “good” level. What is “good” depends largely on your bumpmap and how your colortextures are set. But in general, you tweak the balance between the Unscattered diffuseweight (diffuse weight) and Epidermal scatter weight (front sss weight) until yousee “enough” bump, but not too much.
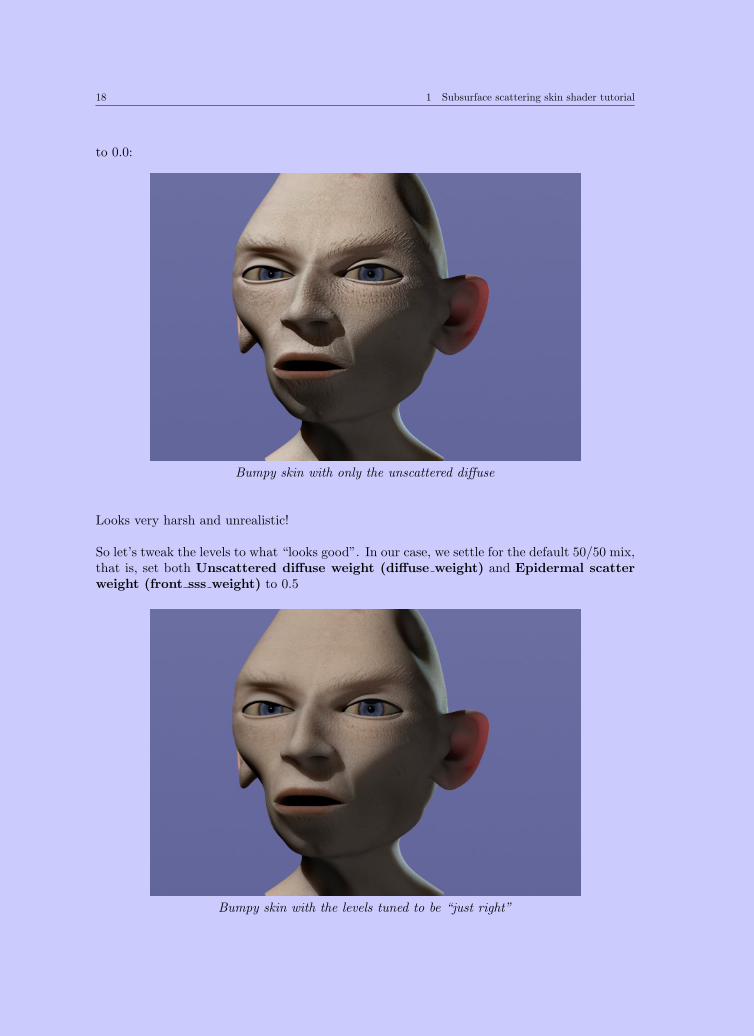
Let’s look at what happens when we use the unscattered diffuse only. Set Unscattered dif-fuse weight (diffuse weight) to 1.0 and Epidermal scatter weight (front sss weight)
18 1 Subsurface scattering skin shader tutorial
to 0.0:
Bumpy skin with only the unscattered diffuse
Looks very harsh and unrealistic!
So let’s tweak the levels to what “looks good”. In our case, we settle for the default 50/50 mix,that is, set both Unscattered diffuse weight (diffuse weight) and Epidermal scatterweight (front sss weight) to 0.5
Bumpy skin with the levels tuned to be “just right”
1.3 Tuning scattering “on your own” 19
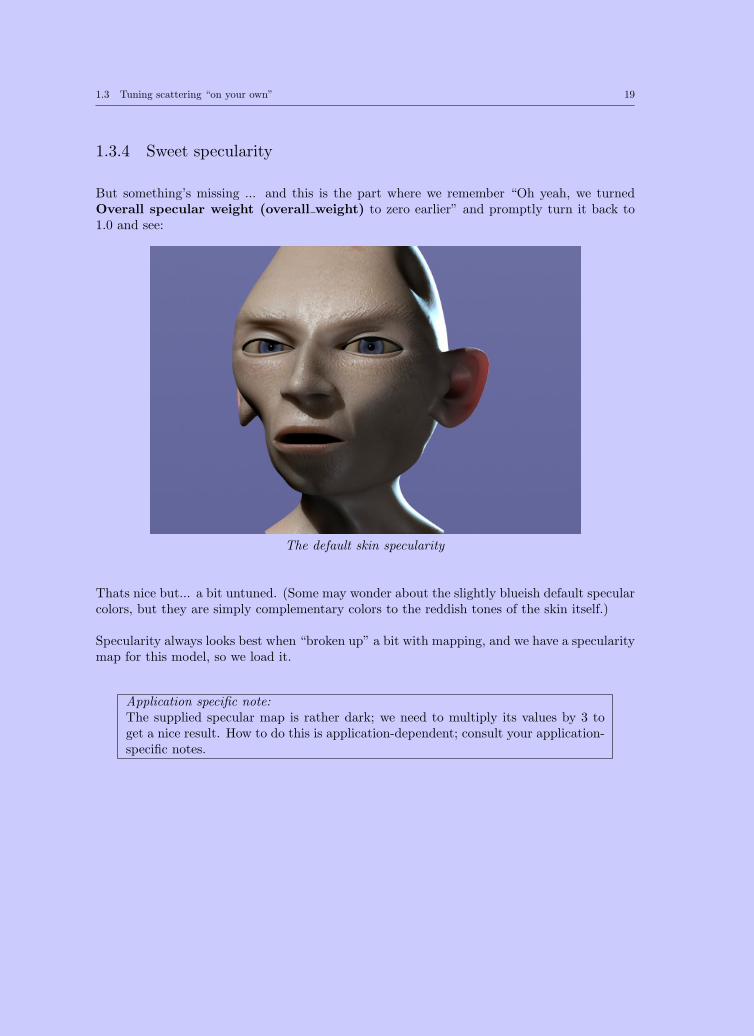
1.3.4 Sweet specularity
But something’s missing ... and this is the part where we remember “Oh yeah, we turnedOverall specular weight (overall weight) to zero earlier” and promptly turn it back to1.0 and see:
The default skin specularity
Thats nice but... a bit untuned. (Some may wonder about the slightly blueish default specularcolors, but they are simply complementary colors to the reddish tones of the skin itself.)
Specularity always looks best when “broken up” a bit with mapping, and we have a specularitymap for this model, so we load it.
Application specific note:The supplied specular map is rather dark; we need to multiply its values by 3 toget a nice result. How to do this is application-dependent; consult your application-specific notes.

20 1 Subsurface scattering skin shader tutorial
Globulous with specularity map
This looks better, now let’s try to play with the various specular layers. By default, twolayers are set up. One (#1, the “primary”) for a broad and soft specular highlight which isaccentuated quite a bit along the edges, and a second (#2. the “secondary”) much narrowerspecularity for detail sheen.
Let’s set Specular Weight #2 (secondary weight) to 1.0 and try:
Sweaty Globulous

1.3 Tuning scattering “on your own” 21
This greatly accentuates the sheen layer and makes Globulous sweaty! Nice, but we are aftera dryer look.
Tune down the level, and play with the various specularity settings. A good tip is the old“less is more”. Here is what we arrived at:
Globulous with tuned specularity
But Globulous is not living in a void; he is, apparently, in a blue room. Well, at leastthe background is blue! So, let’s give his skin some well-needed reflectivity. The skinshader supports full raytraced glossy reflections. The drawback with these is that they arecomputationally expensive (since multiple reflection rays are cast). So we will employ a trick.
Set Reflection Weight (reflection weight) to 0.1 and Reflection Edge Weight(reflection edge weight) to 1.0. (Skin reflects a lot more when viewed “from the side” thanwhen viewed “head on” — known as a fresnel effect to the guys with the particle accelerators.We just call it “edge enhancement”.)
Now turn on Only reflect environment (reflect environment only) . This will save ussome precious render time (because the raytraced glossy reflections are skipped and replaced
22 1 Subsurface scattering skin shader tutorial
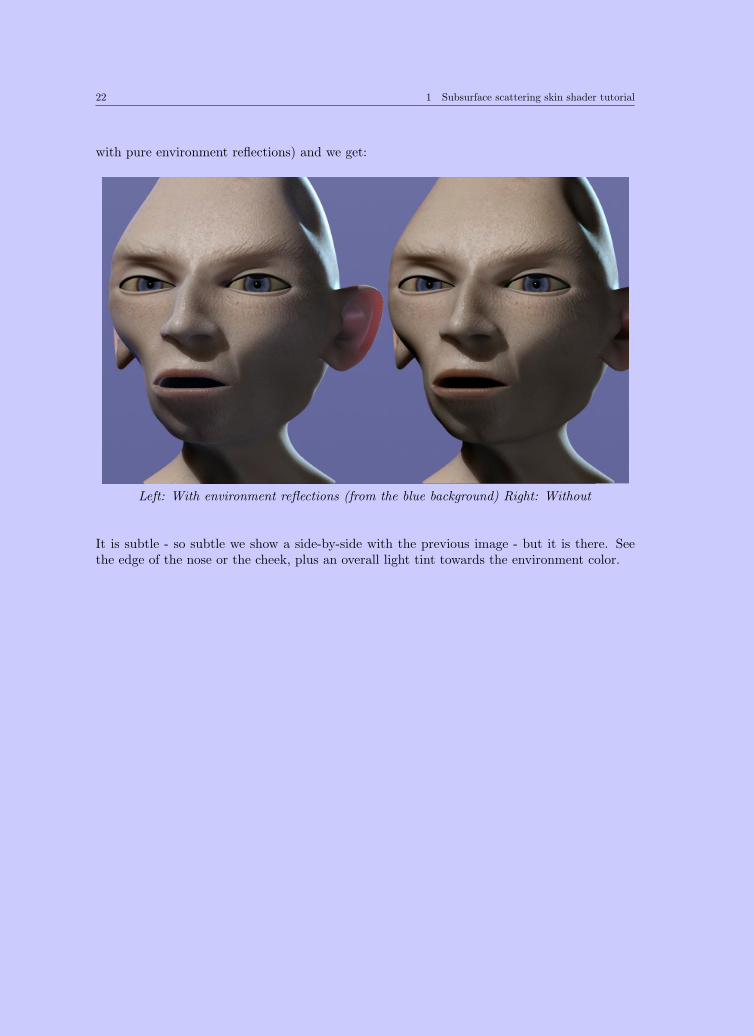
with pure environment reflections) and we get:
Left: With environment reflections (from the blue background) Right: Without
It is subtle - so subtle we show a side-by-side with the previous image - but it is there. Seethe edge of the nose or the cheek, plus an overall light tint towards the environment color.

1.3 Tuning scattering “on your own” 23
We enabled Only reflect environment (reflect environment only) and opted out of trueraytracing. What were the tradeoffs? Let’s study the difference; turn it off:
Left: With true glossy reflections. Right: Only reflecting environment.
The difference is even more subtle and again shown side-by-side with the previous result. Onthe right image there are some false reflections on the lips which are reflecting some backgroundblue, which in reality, they would not. On the left, the edge of the nose reflects skin color,instead of blue background.
Turning Only reflect environment (reflect environment only) off causes real, multi-sampled ray traced glossy reflections to be generated. These can be computationally expensive,especially in a scene with a lot of complex geometry.
The right image rendered in 30 seconds3 and the left image in 1 minute 35 seconds. Inproduction use, one must determine, on a case-by-case basis, whether or not true raytracedreflections are necessary. For the remainder of this tutorial we choose the impatient route andset Only reflect environment (reflect environment only) on again.
1.3.5 It’s in the eyes
By now, it’s becoming apparent that something is wrong with the eyes. We have nice skin butspooky eyes from netherworld. Interestingly, eyes do a lot of subsurface scattering on theirown. Let’s fix that.
3Render times measured on a 3.06 GHz P4 CPU with 1 Gb RAM
24 1 Subsurface scattering skin shader tutorial
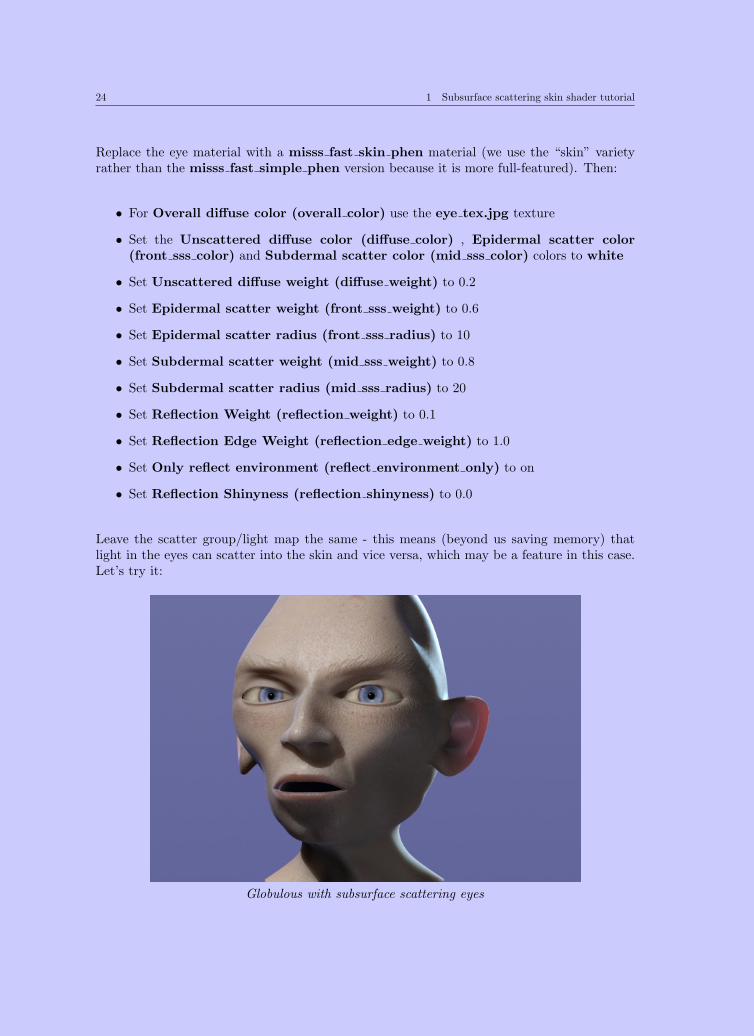
Replace the eye material with a misss fast skin phen material (we use the “skin” varietyrather than the misss fast simple phen version because it is more full-featured). Then:
• For Overall diffuse color (overall color) use the eye tex.jpg texture
• Set the Unscattered diffuse color (diffuse color) , Epidermal scatter color(front sss color) and Subdermal scatter color (mid sss color) colors to white
• Set Unscattered diffuse weight (diffuse weight) to 0.2
• Set Epidermal scatter weight (front sss weight) to 0.6
• Set Epidermal scatter radius (front sss radius) to 10
• Set Subdermal scatter weight (mid sss weight) to 0.8
• Set Subdermal scatter radius (mid sss radius) to 20
• Set Reflection Weight (reflection weight) to 0.1
• Set Reflection Edge Weight (reflection edge weight) to 1.0
• Set Only reflect environment (reflect environment only) to on
• Set Reflection Shinyness (reflection shinyness) to 0.0
Leave the scatter group/light map the same - this means (beyond us saving memory) thatlight in the eyes can scatter into the skin and vice versa, which may be a feature in this case.Let’s try it:
Globulous with subsurface scattering eyes
1.3 Tuning scattering “on your own” 25
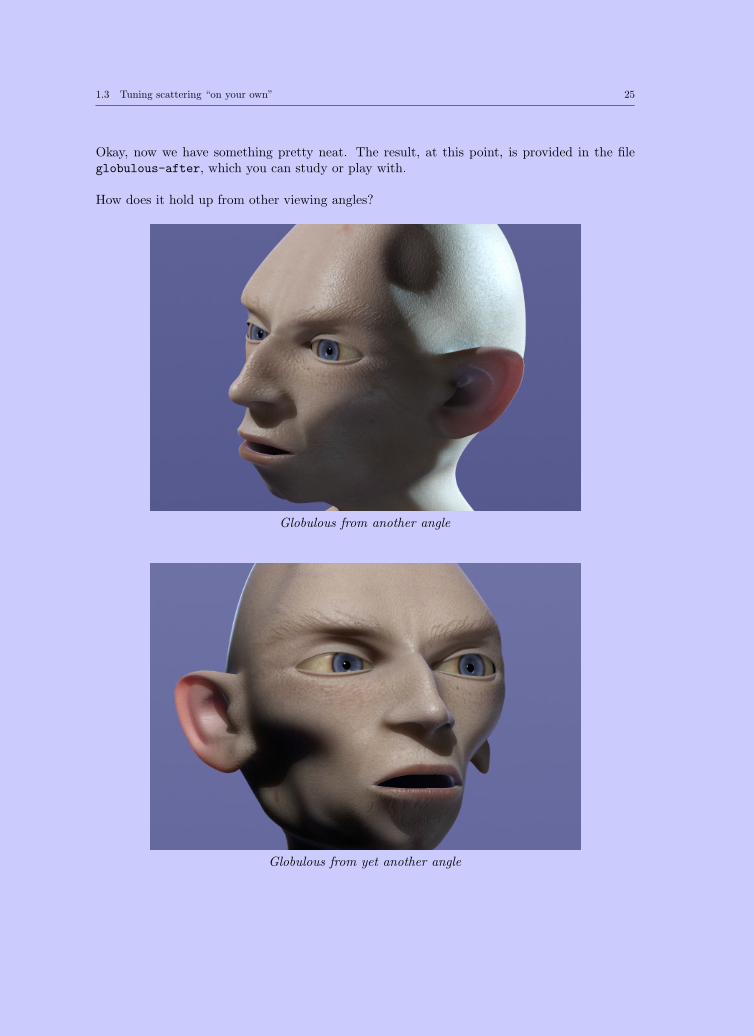
Okay, now we have something pretty neat. The result, at this point, is provided in the fileglobulous-after, which you can study or play with.
How does it hold up from other viewing angles?
Globulous from another angle
Globulous from yet another angle
26 1 Subsurface scattering skin shader tutorial
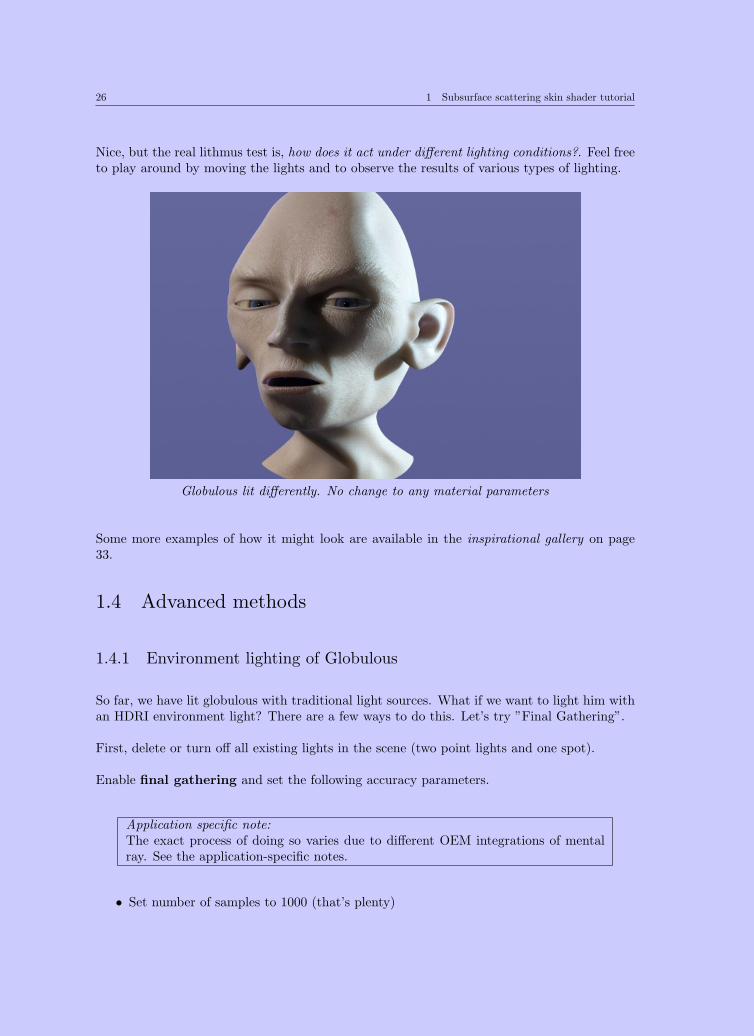
Nice, but the real lithmus test is, how does it act under different lighting conditions?. Feel freeto play around by moving the lights and to observe the results of various types of lighting.
Globulous lit differently. No change to any material parameters
Some more examples of how it might look are available in the inspirational gallery on page33.
1.4 Advanced methods
1.4.1 Environment lighting of Globulous
So far, we have lit globulous with traditional light sources. What if we want to light him withan HDRI environment light? There are a few ways to do this. Let’s try ”Final Gathering”.
First, delete or turn off all existing lights in the scene (two point lights and one spot).
Enable final gathering and set the following accuracy parameters.
Application specific note:The exact process of doing so varies due to different OEM integrations of mentalray. See the application-specific notes.
• Set number of samples to 1000 (that’s plenty)

1.4 Advanced methods 27
• The maximum radius to 10
• The minimum radius to 5
Let’s start out by making an intentional mistake. In both the “Skin” and “Eye” materials,make sure the Scatter indirect illumination (indirect) parameter is off, and render:
Hey, this looks strange.... can’t be right?
Something is seriously wrong - he is all gray! What happened?
The answer is that by setting Scatter indirect illumination (indirect) to off, the skinshader does not scatter indirect illumination. In most cases, indirect illumination is weak,and whether or not it is scattered is visually insignificant. Since accumulating indirect lightduring the lightmapping phase can be computationally expensive, one can save rendering timeby setting Scatter indirect illumination (indirect) to off.
But we are using indirect illumination only, and definitely want this to be scattered. So turnon the Scatter indirect illumination (indirect) option on in both your “Skin” and “Eye”
28 1 Subsurface scattering skin shader tutorial
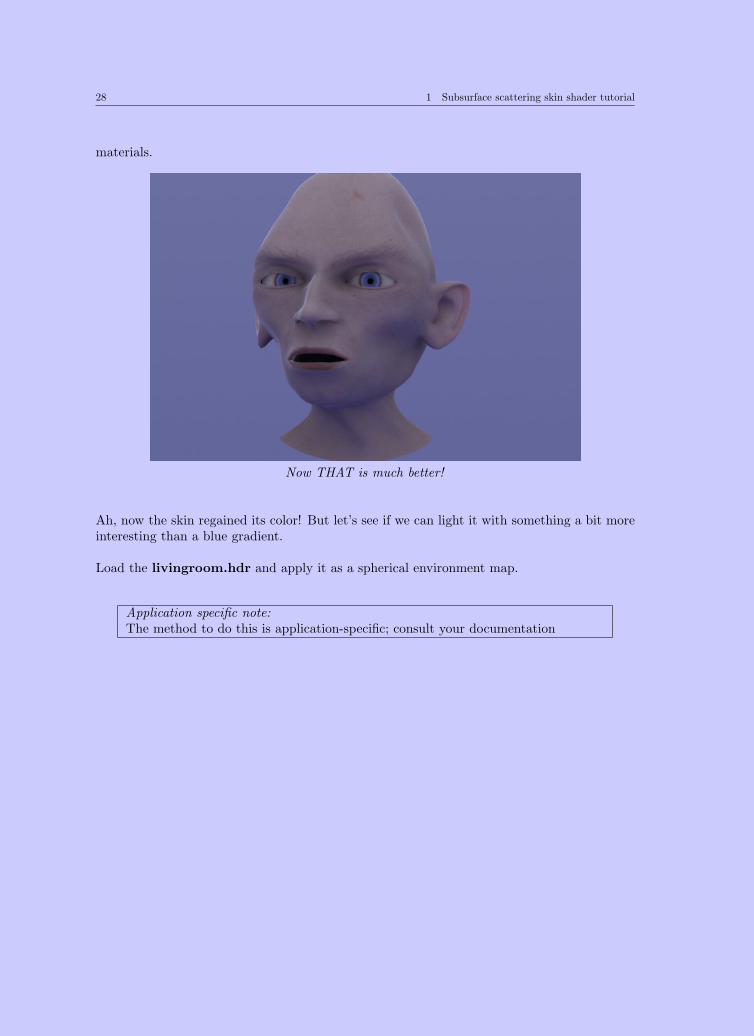
materials.
Now THAT is much better!
Ah, now the skin regained its color! But let’s see if we can light it with something a bit moreinteresting than a blue gradient.
Load the livingroom.hdr and apply it as a spherical environment map.
Application specific note:The method to do this is application-specific; consult your documentation

1.4 Advanced methods 29
Globulous lit by HDRI environment
The result, at this point, is available as globulous-after2.
This concludes the tutorial for the skin shader, hope it was enjoyable.

30 1 Subsurface scattering skin shader tutorial
1.5 Technical considerations
1.5.1 Application of the shader
The skin shader is an advanced shader utilizing the bleeding edge of the latest and mostadvanced mental ray shader technology with automatically created lightmaps, self-modifyingparameters and multi-component sub-shader based feature set.
To simplify its use, it is implemented as material Phenomenon misss fast skin phen, whichsets up all these features automatically and appears to the user as a single unit.
Due to the fact that a material Phenomenon “takes over” the entire definition of a material(surface shader, shadow shader, photon shader, lightmap shader, displacement shader etc.),different OEM integrations handle material phenomena differently. Various applications donot support them fully or do not support them in certain situations.
In these cases, application-specific phenomena are supplied, often separated into twoPhenomena, one to apply as the surface shader, and one to apply as the lightmap shader.In some cases, one has to add a writable lightmap manually.
For this reason, you need to consult your application-specific documentation about the exactprocess of applying the material to an object.
1.5.2 Parameters, names and useage
Different OEM integrations of mental ray display more user friendly names for the parametersin their user interface. The names shown in this document are the suggested names, with theactual shader parameter names as exposed in the .mi declaration file following in parenthesis.What is shown on screen in dialog boxes may be different; consult your application-specificdocumentation.
These Phenomena use structures to group the input parameters in logical groups, which areautomatically grouped by the user interface of different OEM integrations of mental ray. Thegroups are “d” for “diffuse”, “s” for “specular” and “a” for advanced. Since these are materialPhenomena they are applied directly to an object instance using a material statement. In a

1.5 Technical considerations 31
.mi file for standalone mental ray, this would look as follows (code fragment):
link "subsurface.so"
$include <subsurface.mi>
shader "myskin" "misss_fast_skin_phen" (
"d" {
"diffuse_weight" 0.3,
"front_sss_color" 0.8 0.5 0.3,
"front_sss_radius" 0.5,
"front_sss_weight" 0.8
},
"s" {
"primary_spec_color" 0.4 0.4 0.9
}
)
object "myMesh"
...
end object
instance "myObject"
"myMesh"
material "myskin"
...
end instance
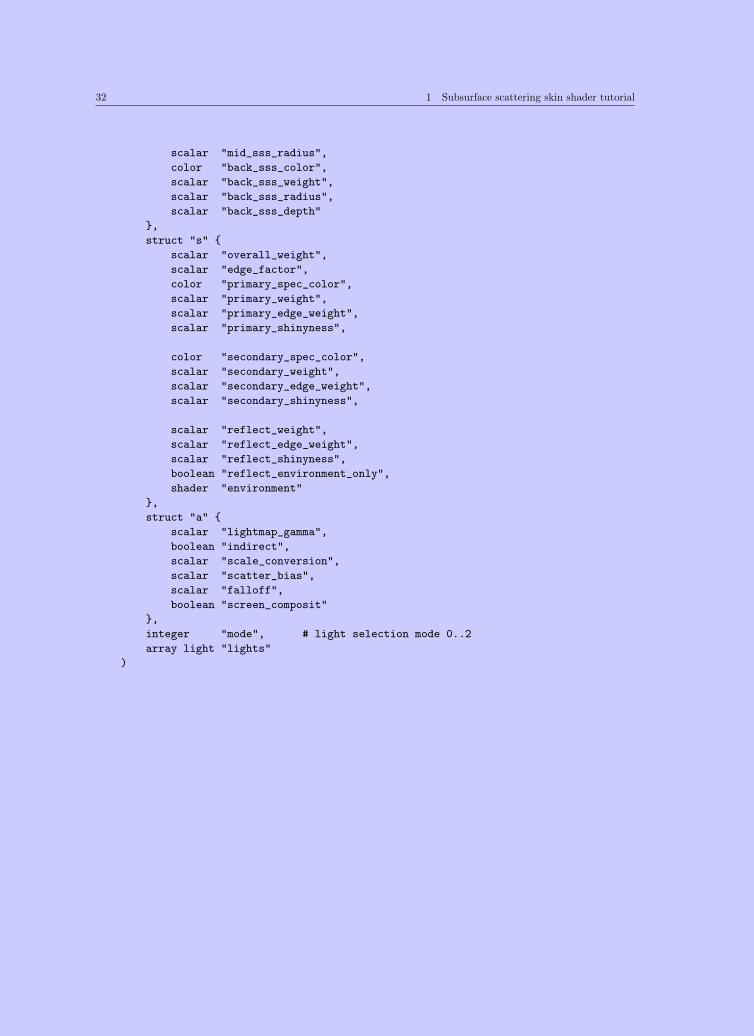
1.5.3 Shader declaration
The subsurface.mi declaration of misss fast skin phen looks like this:
material "misss_fast_skin_phen" (
color texture "lightmap",
color texture "depthmap",
string "lightmap_group",
scalar "lightmap_size",
integer "samples",
shader "bump",
struct "d" {
color "ambient",
color "overall_color",
color "diffuse_color",
scalar "diffuse_weight",
color "front_sss_color",
scalar "front_sss_weight",
scalar "front_sss_radius",
color "mid_sss_color",
scalar "mid_sss_weight",
32 1 Subsurface scattering skin shader tutorial
scalar "mid_sss_radius",
color "back_sss_color",
scalar "back_sss_weight",
scalar "back_sss_radius",
scalar "back_sss_depth"
},
struct "s" {
scalar "overall_weight",
scalar "edge_factor",
color "primary_spec_color",
scalar "primary_weight",
scalar "primary_edge_weight",
scalar "primary_shinyness",
color "secondary_spec_color",
scalar "secondary_weight",
scalar "secondary_edge_weight",
scalar "secondary_shinyness",
scalar "reflect_weight",
scalar "reflect_edge_weight",
scalar "reflect_shinyness",
boolean "reflect_environment_only",
shader "environment"
},
struct "a" {
scalar "lightmap_gamma",
boolean "indirect",
scalar "scale_conversion",
scalar "scatter_bias",
scalar "falloff",
boolean "screen_composit"
},
integer "mode", # light selection mode 0..2
array light "lights"
)
1.6 Inspirational Gallery 33
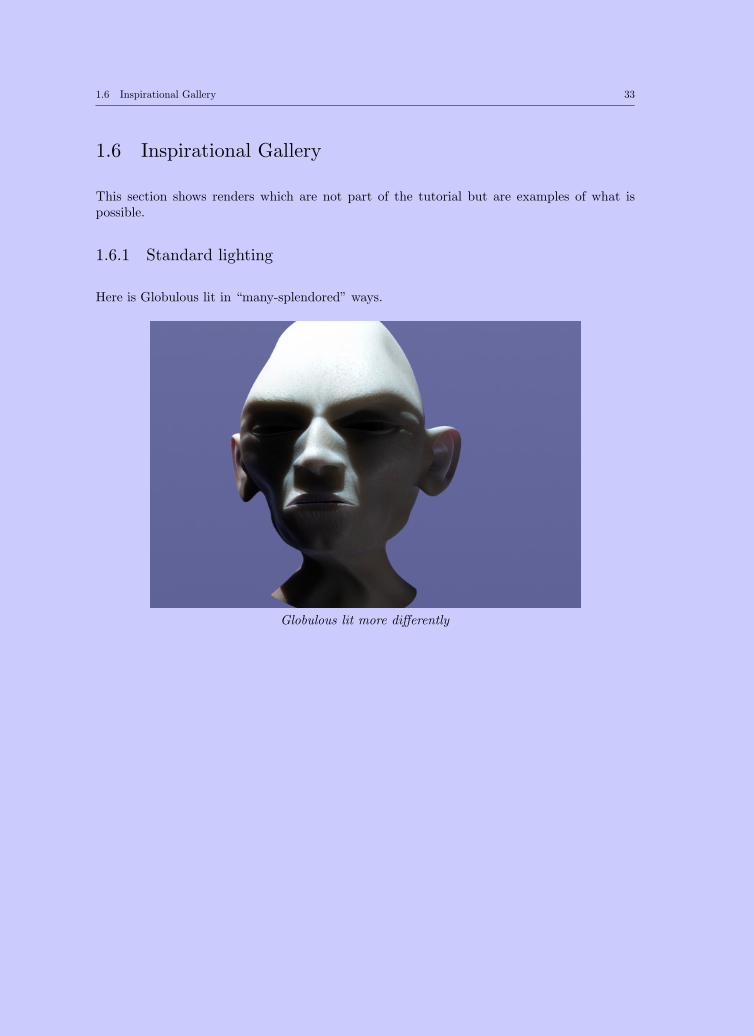
1.6 Inspirational Gallery
This section shows renders which are not part of the tutorial but are examples of what ispossible.
1.6.1 Standard lighting
Here is Globulous lit in “many-splendored” ways.
Globulous lit more differently

34 1 Subsurface scattering skin shader tutorial
Globulous lit even more differently
Grrrrr....
1.6 Inspirational Gallery 35
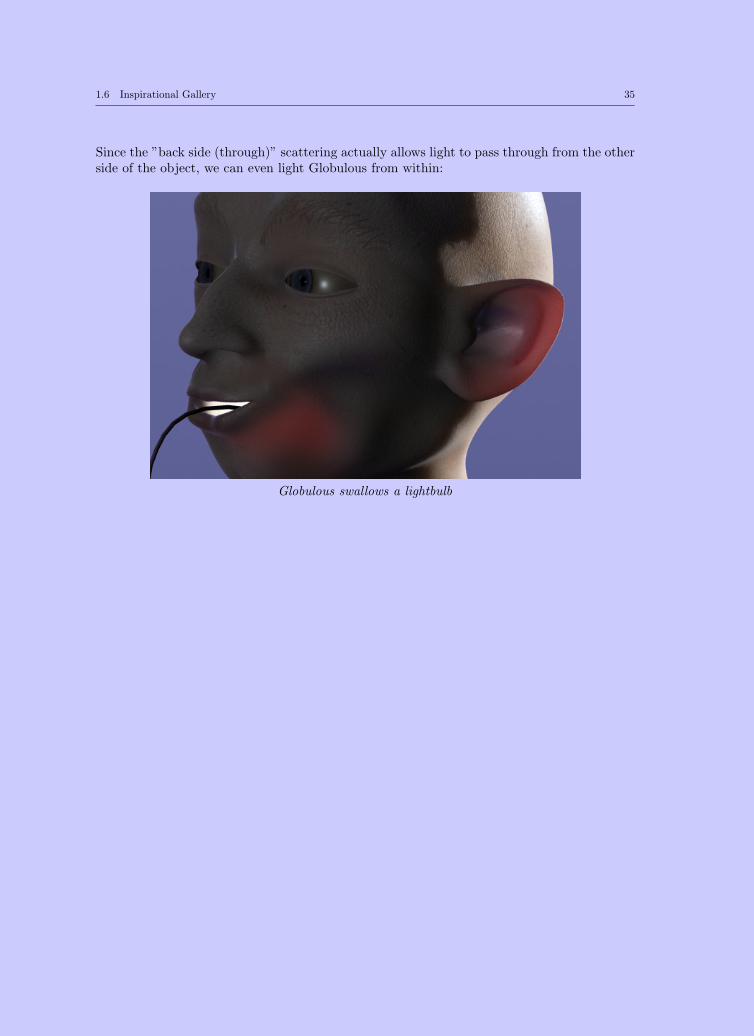
Since the ”back side (through)” scattering actually allows light to pass through from the otherside of the object, we can even light Globulous from within:
Globulous swallows a lightbulb
36 1 Subsurface scattering skin shader tutorial
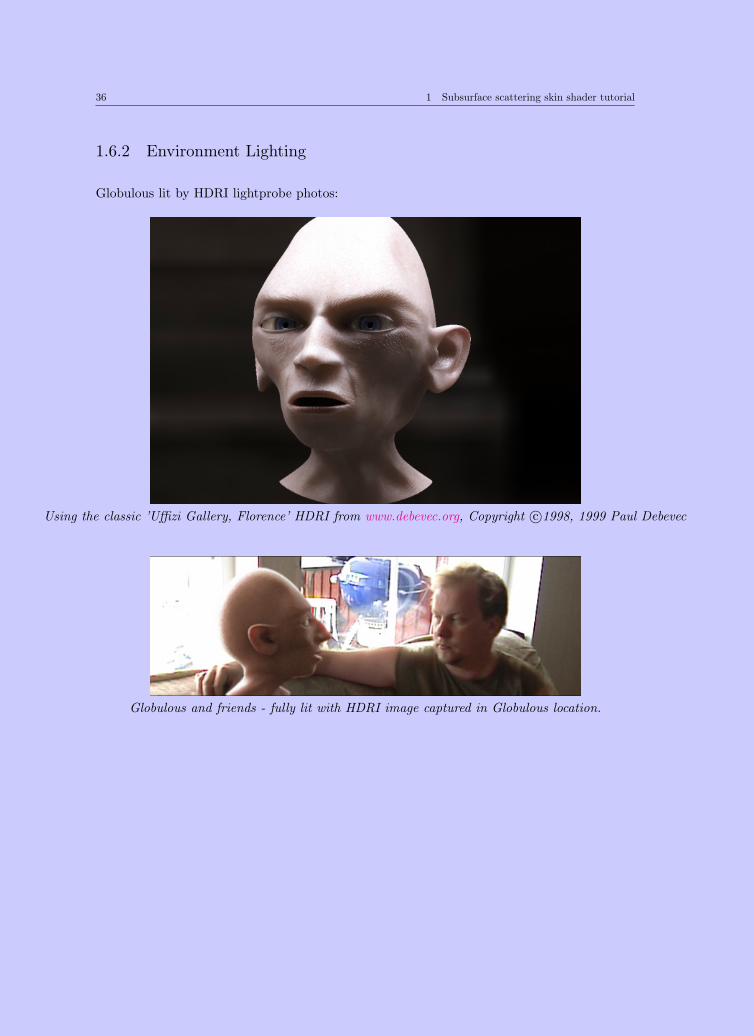
1.6.2 Environment Lighting
Globulous lit by HDRI lightprobe photos:
Using the classic ’Uffizi Gallery, Florence’ HDRI from www.debevec.org, Copyright c©1998, 1999 Paul Debevec
Globulous and friends - fully lit with HDRI image captured in Globulous location.
1.6 Inspirational Gallery 37
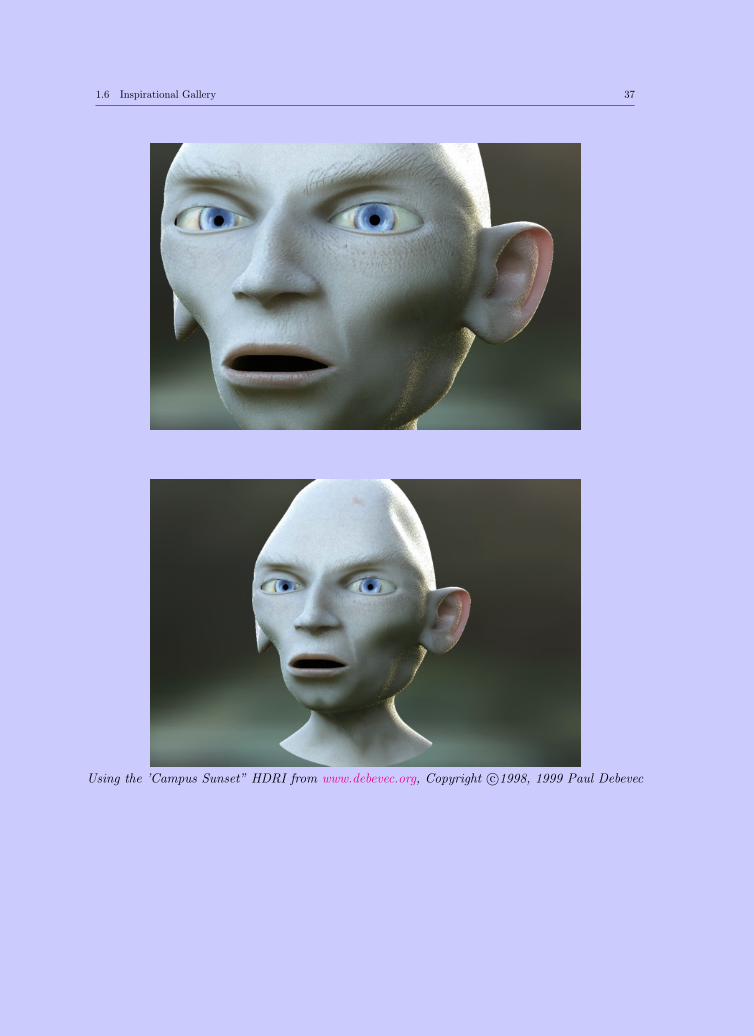
Using the ’Campus Sunset” HDRI from www.debevec.org, Copyright c©1998, 1999 Paul Debevec
38 1 Subsurface scattering skin shader tutorial
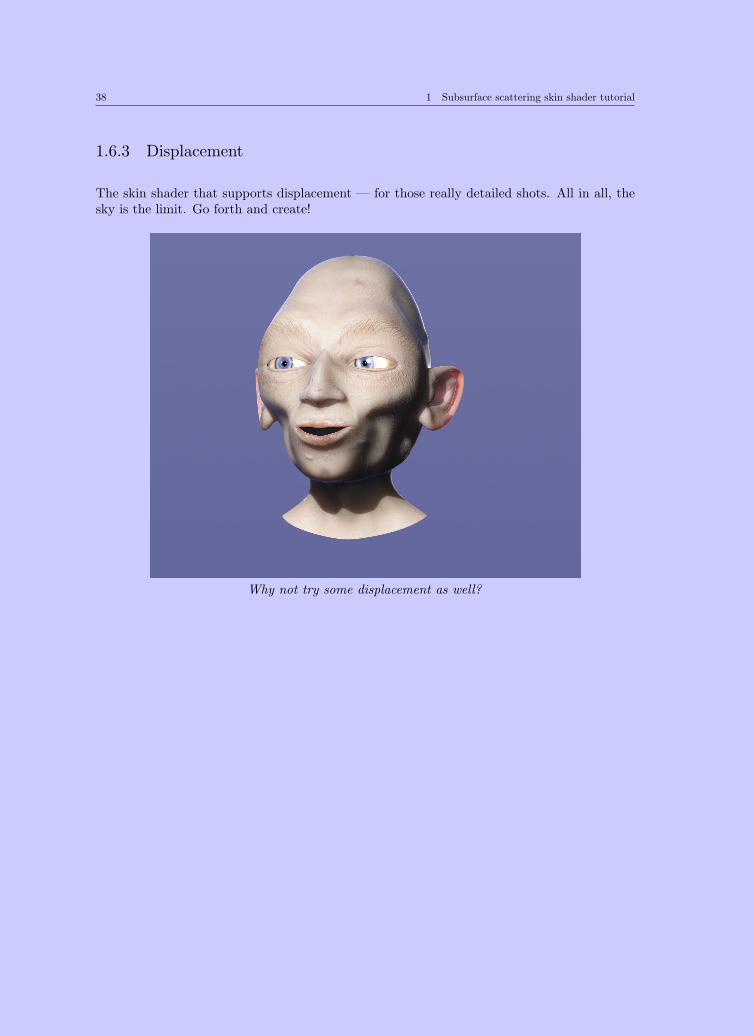
1.6.3 Displacement
The skin shader that supports displacement — for those really detailed shots. All in all, thesky is the limit. Go forth and create!
Why not try some displacement as well?
1.7 Thank you for listening 39
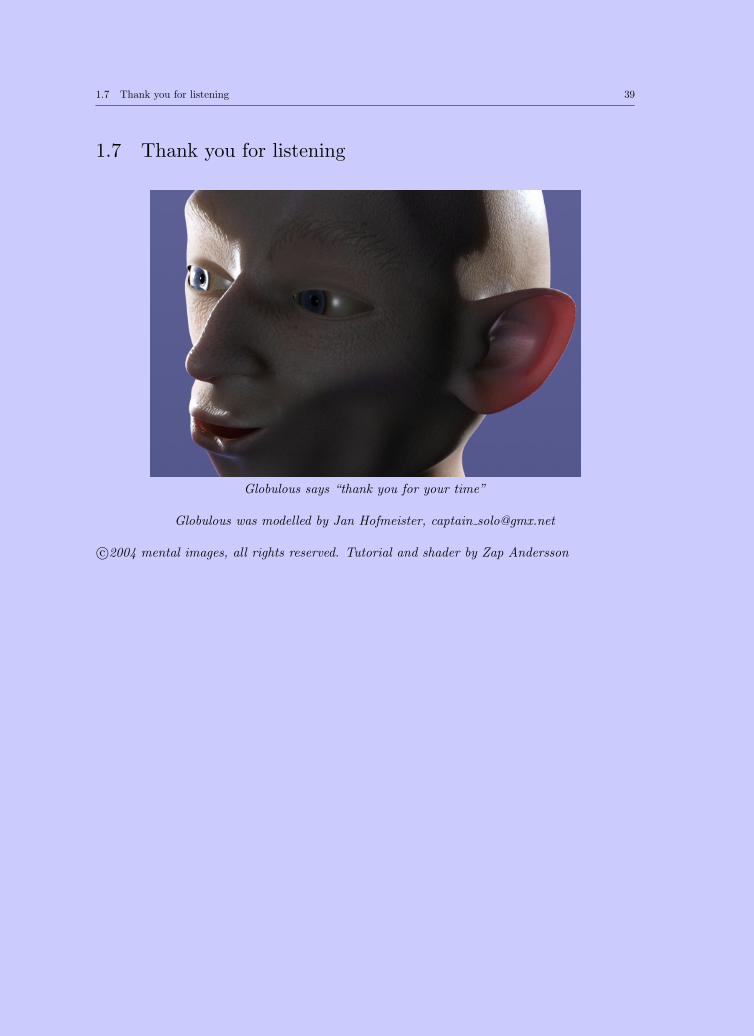
1.7 Thank you for listening
Globulous says “thank you for your time”
Globulous was modelled by Jan Hofmeister, captain [email protected]
c©2004 mental images, all rights reserved. Tutorial and shader by Zap Andersson