Embed Size (px)
Citation preview

Setting up an Image Swap Webpage in Dreamweaver CS6 Your photos and thumbnails are in your local website images folder . Your local website is open in Dreamweaver, the site files are shown in the right Files panel. Lets go.

First create a new file in your website, call it photos.html or anything you like. Next you’ll add some AP Divs . (Dreamweaver used to call them layers.) AP Divs can be sized and moved anywhere on a webpage, they can be filled with various types of content, such as photos, or text, or both. To create your first AP Div go to Insert> Layout object> AP Div. You can adjust size and location later. Click inside to add your title text inside this AP Div. Don’t worry about size or location, you’ll adjust this later.
This picture shows an AP Div (layer) on the web page and placeholder text has been added. The blue outline indicates the AP Div is selected. You can grab it and move the AP Div anywhere you want on the webpage. Just make sure your AP Divs don’t overlap each other.

For each of the thumbnails, create a new AP Div at any location in your webpage since you will reposition them later. Do not overlap the AP Divs.
Here are the five empty AP Divs that will each hold one of the thumbnail images.

Next is to add the thumbnails inside the AP Divs. You can click inside an AP Div to set an insertion bar then drag the image file from the right side file list and drop it into the AP Div. Then resize the AP Div to exactly fit the thumbnail.

Each time you add a thumbnail photo you’ll get the Image Tag window, this is also called Alt Text or Alt Tag. This window is where you enter a word or two or short phrase to describe the photo contents. This is part of Accessibility requirements for screen readers, for visually impaired viewers. All photos and graphics in your website must have alt text descriptions.
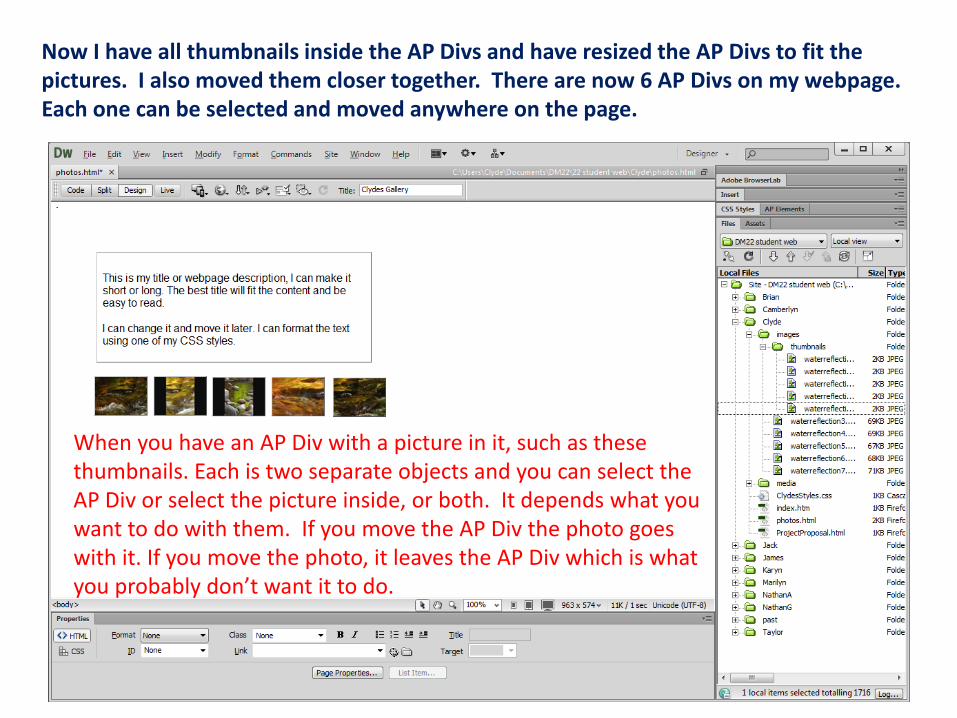
Now I have all thumbnails inside the AP Divs and have resized the AP Divs to fit the pictures. I also moved them closer together. There are now 6 AP Divs on my webpage. Each one can be selected and moved anywhere on the page.
When you have an AP Div with a picture in it, such as these thumbnails. Each is two separate objects and you can select the AP Div or select the picture inside, or both. It depends what you want to do with them. If you move the AP Div the photo goes with it. If you move the photo, it leaves the AP Div which is what you probably don’t want it to do.

The next step is to add a new AP Div and move one of my big pictures into it. Don’t worry about the blue line going through it, that will not show in the webpage. Now there are 7 AP Divs on the page.

Now I have to give the big picture an ID. Select the big photo inside the AP Div and look at the bottom panel, see the field for ID, enter an ID name here. You’ll see why later. I entered “water3”, it can be any name I want.

Next I select one of the thumbnails, the left one in this demonstration. After selecting it I open the Behaviors panel (Window>Behaviors not Server Behaviors) . Click the + sign in the Behaviors panel for a menu and select Swap Image. This will apply a behavior to the selected thumbnail.

This window will appear when setting up a Swap Image behavior. Every thumbnail will select the same “water3” when setting up the behaviors because all the swaps take place at this original large picture that I gave the “water3” ID. The ID is not the file name.
Preload Images will cause the webpage to load a little slower at the beginning but once preloaded, each picture will appear very quickly when rolled over. Your choice. Restore images onMouseOut makes the big image turn back into water3 whenever viewers move the cursor off one of the thumbnails. I don’t really like this effect so I usually uncheck this option. Your choice.

Next you have to Browse to your images folder in your local website and select the big picture that you want to show when the thumbnail is rolled over. In this case it is my photo inside my images folder, named “waterreflection3.jpg”. The Browse window is shown next.

This is the Browse window where I am locating my large photo that is associated with the thumbnail.

Repeat the procedure for each thumbnail, giving each the Swap Image behaviors. Each thumbnail will change the big picture when viewers roll over the thumbnail. The behaviors are JavaScript. Dreamweaver is writing the code for you. Look at it in Split view. The big picture doesn’t change in the working view, it will change with the webpage is in a browser. See the little globe at the top, you can use this to view your page in a browser.
There are many different ways you can use this behavior in your web pages and once you understand how it works, it is very easy to set up in Dreamweaver.
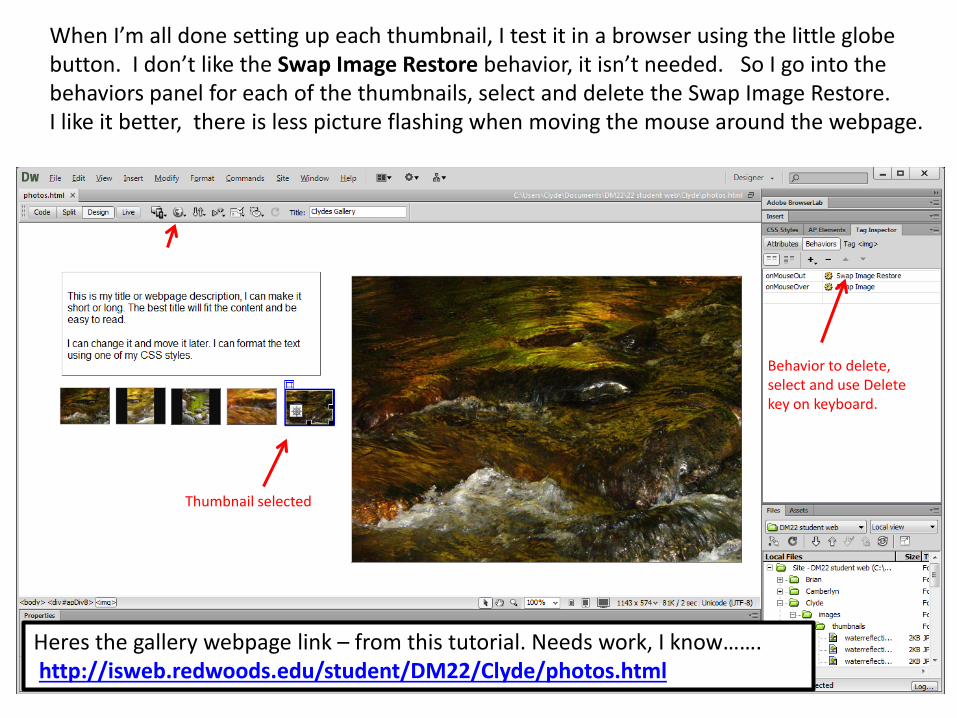
When I’m all done setting up each thumbnail, I test it in a browser using the little globe button. I don’t like the Swap Image Restore behavior, it isn’t needed. So I go into the behaviors panel for each of the thumbnails, select and delete the Swap Image Restore. I like it better, there is less picture flashing when moving the mouse around the webpage.
Thumbnail selected
Behavior to delete, select and use Delete key on keyboard.
Heres the gallery webpage link – from this tutorial. Needs work, I know……. http://isweb.redwoods.edu/student/DM22/Clyde/photos.html

Some info about AP Divs. Different browsers may show AP Divs differently – this used to be a caution, still is but not as much. There is a great technique with Dreamweaver for converting AP Divs to tables at the click of a button. Tables are the old standby for webpage layout and still widely used in today's web world. You can try it. With your swap image webpage open in Dreamweaver go to Modify>Convert>AP Divs to Table
Your page might do weird things, might not. Here is mine converted. The blue lines go away in browser view. It’s a table with cells. I might leave it this way. I can change it back to AP Divs too.

Buena suerte. Have some fun with this. Maybe you can even adapt and push the techniques even more. Be sure to put a link to your gallery on your homepage.