Embed Size (px)
Citation preview

5513
Division 26 - Electrical 26 05 00-1
SECTION 26 05 00 - BASIC ELECTRICAL REQUIREMENTS
1. GENERAL
1.1 WORK INCLUDED
A. Applicable provisions of Division 01 - General Requirements govern the work under this
section.
B. Basic Electrical Requirements.
1.2 REFERENCES
A. ANSI/IEEE C2 - National Electrical Safety Code.
B. ANSI/NFPA 70 - National Electrical Code.
C. NECA - Standard of Installation.
D. NEMA Standards.
1.3 SCOPE
A. Furnish and install a complete building electrical system as per drawings and enclosed
specifications. Provide a competent supervisor, foreman, etc., to expedite all phases of the
Electrical Project.
B. Requirements specified herein shall govern applicable portions of all electrical work sections,
whether so stated therein or not. Where items specified in electrical work sections conflict with
requirements in this specification, the former shall govern.
C. Job site to be seen to ascertain existing field conditions. Failure to visit the job site does not limit the contractual responsibility of any aspect of the Electrical Project.
D. The Contractor is responsible for reviewing the documents of the other trades to coordinate
dimensions, locations, and requirements.
1.4 CODES, PERMITS AND FEES
A. All Electrical work shall conform to the Electrical Code Volume 2, Comm. 16, Wisconsin
Administrative Code, and all Federal, State and Local Codes and Regulations. If codes or
regulations conflict, the most stringent shall apply. Permits and inspection fees are to be
secured in fulfilling the requirements of these Specifications.
1.5 CUTTING AND PATCHING, HOLES AND SLEEVES
A. See Cutting and Patching requirements in Division 01.
1.6 PAINTING
A. Electrical equipment and supports exposed to the outdoors shall be given one (1) coat of
Rustoleum or equivalent rust-free type paint. Galvanized supports do not require paint, except
where the galvanizing is damaged from welding, drilling, etc.
1.7 TRENCHING & BACKFILLING
A. Provide all trenching and backfilling to facilitate the installation of electrical equipment.
B. Provide excavations of sufficient width and with enough clearance from other construction to
permit proper placing completion and inspection of the work.
C. All excavations shall be open trench work unless otherwise permitted by local ordinance or
accepted by local inspector.
D. Carefully cut the bottom of the trench to the required grade, remove all loose and disturbed soil
and tamp with a hand tamper to receive the concrete or other work. Excavate a minimum of 3"
below the grade of the pipe and provide tamped sand fill in bottom of trench.

26 05 00-2 BASIC ELECTRICAL R E Q U I R E M E N T S
E. Where mucky or unstable condition is encountered, stable conditions shall be provided by
permanently driven sheathing 48" below trench bottom and removal of 24" of wet material.
Replace the wet material with limestone screenings or pea gravel to provide a bed under the
pipe. In lieu of the excavation of wet material, provide a 3" thick longitudinally reinforced concrete
slab under the pipe.
F. Proximity to foundation and footings shall be avoided. No excavation shall be made which will impair
bearing or footings.
G. Provide underpinning, shoring, sheet piling and bracing to prevent earth, utility lines and adjacent
improvements from caving or washing into the excavation.
H. Provide equipment necessary to drain and keep all excavation pits and trenches free f r o m water
under any and all circumstances that may arise.
I. After inspection, backfill with clean sand on both sides and to a point 2'-0" above all electrical
work. Place sand in 6" layers, compacting each layer as it is placed. Do not move, injure or disturb
the electrical installation. Except where installation occurs beneath walks, drives or parking areas,
the remainder of the backfill may be excavated material free of o r g a n i c material. Place this fill
in 1'-0" layers, compacting each layer as it is placed.
J. Backfill in areas of walks, drives and parking areas and all backfill around manholes or catch basins
shall be granular fill as specified in Section 31 23 00 and place as "compacted fill" as required in
that section.
K. Level off all waste disposal areas and clean up all areas used for the storage of materials or
the temporary deposit of excavated earth.
L. Provide any adequately compacted base to support concrete.
1.8 OPERATING TEST
A. General:
1. Each Contractor shall perform tests as outlined below and submit test results to the
Architect before Owner operates equipment.
2. Equipment shall be complete with all components connected before making tests.
3. Make adjustments, repairs, and alterations, as required to meet specified test results.
Correct defects disclosed by tests or inspection; replace defective parts when directed.
4. In replacing defective parts use only new materials.
5. Repeat tests after defects have been corrected and parts replaced, as directed, until
pronounced satisfactory.
6. Tests all alarms, flow switches, level controls and all other safety devices, or as indicated
On drawings. Test results submittal shall list items tested.
7. Bear costs of repairs and restoration of work of other trades damaged by the tests or cutting
that had to be done in connection with the tests.
1.9 RECORD DRAWINGS
A. See Section 01 78 39 for requirements.
B. Two (2) complete sets of Electrical drawings shall be provided as record drawings.
1.10 SUBMITTALS
A. Submit inspection and permit certificates.
B. Include certificate of final inspection and acceptance from authority having jurisdiction.
1.11 OPERATION AND MAINTENANCE MANUALS
A. Submit manuals in the quantity and format as specified in Section 01 77 00.
5513

5513
BASIC ELECTRICAL REQUIREMENTS 26 05 00-3
1.12 DRAWING SCHEDULES AND DETAILS
A. The electrical drawings include a number of standard and job specific details. These details
may be referenced specifically on the drawings and in the specification, however such details
may not be specifically referenced. The Contractor shall assume that even if such details are
not specifically referenced, that such details shall apply to this project. As an example, if a
detail is shown for the exterior mounted receptacles, but the detail is not referenced from the
plan sheets, the Contractor shall assume that all exterior mounted receptacles shall be installed
per the detail.
B. Review of Schedules and Details: Details and schedules are shown as a means to aid the
Electrical Contractor and are NOT meant to be all inclusive of all devices. The Electrical
Contractor shall provide equipment required, (i.e., additional circuit breakers, motor
connections, etc.) and ancillary equipment and appurtenances as necessary as part of contract,
for a complete connection or circuit. Contractors shall verify all sizes of electrical equipment
with shop drawings and nameplate rating of the equipment served by the electrical equipment.
C. the Contractor shall connect all circuits as shown on floor plans to the panel indicated, using
the floor plan circuits.
1.13 FLOOR MOUNTED EQUIPMENT
A. Contractor shall provide final/approved shop drawing equipment dimensions for equipment
housekeeping pads. Dimensions shall be verified prior to installation. Coordinate work with
other trades.
2. PRODUCTS
2.1 MATERIALS AND EQUIPMENT
A. Materials and Equipment: Acceptable to the authority having jurisdiction as suitable for the use
intended.
3. EXECUTION
3.1 WORKMANSHIP
A. Install work using procedures defined in NECA Standard of Installation.
B. Roughing in positions of fixtures and equipment shall be verified with Architect or the Architect's
representative. Each Contractor shall verify location of other mechanical and electrical work
before locating their work. Failure to do so may result in relocation following priority listing set
forth below. (Items indicated on top of list relocate first).
1. Conduit 8. Ductwork
2. Hot and Cold Water Piping 9. Equipment (Electrical)
3. Plumbing Vent Lines 10. Equipment (Plumbing)
4. Gas Piping 11. Equipment (Heating)
5. Heating and Refrigeration Piping 12. Equipment (Ventilating) 6. Sewer Piping 13. Equipment (Refrigeration)
7. Automatic Sprinkler Piping 14. Equipment (Automatic Sprinklers)
END OF SECTION

5513
Division 26 - Electrical 26 05 02- 1
SECTION 26 05 02 - MINOR ELECTRICAL DEMOLITION FOR REMODELING
1. . GENERAL
1.1 WORK INCLUDED
A. Applicable provisions of Division 01 apply to work under this section.
B. Electrical demolition.
1.2 RELATED WORK
A. Section 26 05 00 - Basic Electrical Requirements
2. PRODUCTS
2.1 MATERIALS AND EQUIPMENT
A. Materials and equipment for patching and extending work: As specified in individual Sections.
3. EXECUTION
3.1 EXAMINATION
A. Verify field measurements and circuiting arrangements are as shown on Drawings.
B. Verify that abandoned wiring and equipment serve only abandoned facilities.
C. Demolition Drawings or descriptions are based on casual field observation, and existing record
documents. Review the Demolition Drawings and field conditions carefully and report
discrepancies to Architect/Engineer before disturbing existing installation.
D. Beginning of demolition means installer accepts existing conditions.
3.2 PREPARATION
A. Disconnect electrical systems in walls, floors, and ceilings scheduled for removal.
B. Provide temporary wiring and connections to maintain existing systems in service during
construction. When work must be performed on energized equipment or circuits, use personnel
experienced in such operations.
3.3 DEMOLITION AND EXTENSION OF EXISTING ELECTRICAL WORK
A. Remove, relocate, and extend existing installations to accommodate new construction.
B. Remove abandoned wiring to source of supply.
C. Remove exposed abandoned conduit, including abandoned conduit above accessible ceiling
finishes. Cut conduit flush with walls and floors, and patch surfaces.
D. Disconnect abandoned outlets/switches and remove devices. Remove abandoned outlets if
conduit servicing them is abandoned and removed. Provide blank cover for abandoned outlets,
which are not removed.
E. Disconnect and remove abandoned panelboards and distribution equipment.
F. Disconnect and remove electrical devices and equipment serving utilization equipment that
has been removed.
G. Disconnect and remove abandoned luminaires. Remove brackets, stems, hangers, and other
accessories.
H. Maintain access to existing electrical installations, which remain active. Modify installation or
provide access panel as appropriate.
I . Extend existing installations using materials and methods compatible with existing electrical
installations, or as specified.

26 05 02-2 MINOR ELECTRICAL DEMOLITION FOR REMODELING
J. Refer to demolition description on electrical drawings for description and quantities o f equipment
and devices to be turned over to Owner.
K. All lamps and ballasts shall be properly removed and disposed of according to all Federal, State
and Local requirements.
3.4 CLEANING AND REPAIR
A Clean and repair existing materials and equipment, which are to be reused.
B. Panelboards: Clean exposed surfaces and check tightness of electrical connections. Replace
damaged circuit breakers and provide closure plates for vacant positions. Provide typed circuit
directory showing revised circuiting arrangement.
C. Luminaires: Clean and revamp existing fixtures, which are relocated. Use mild detergent to clean all exterior and interior surfaces; rinse with clean water and wipe dry.
3.5 INSTALLATION
A Install relocated materials and equipment under the provisions of Division 01.
END OF SECTION
5513

Division 26 - Electrical 26 05 26-1
SECTION 26 05 26 ·SECONDARY GROUNDING
1. GENERAL
1.1 WORK INCLUDED
A. Applicable provisions of Division 01 apply to work under this section.
B. Power system grounding.
C. Communication system grounding.
D. Electrical equipment and raceway grounding and bonding.
1.2 SYSTEM DESCRIPTION
A. Bond the electrical service system neutral to the system grounding point in the service entrance
equipment. Building steel, metallic water service and supplementary grounding electrodes shall
be bonded to the system grounding point.
B. Ground each separately derived system neutral to the system grounding point at the service
entrance equipment.
C. Provide communications system-grounding conductor from equipment to system grounding point at the point of service entrance.
D. Bond together all system neutrals, service equipment enclosures, exposed non-current carrying
metal parts of electrical equipment, metal raceway systems, grounding conductor in raceways
and cables, receptacle ground connectors, plumbing and gas system metal piping.
E. All grounding, bonding, etc. conductors shall be terminated to the same point. Provide
grounding terminal blocks in equipment, switchgear, panels, transformers, etc. to insure the
conductors are connected as close together as physically possible.
1.3 RELATED WORK
A. Section 26 05 00 - Basic Electrical Requirements.
2. PRODUCTS
2.1 MATERIALS
A. Ground Rods: Copper-encased steel, %" diameter, minimum length 1O'.
B. Copper conductors, clamps, and lugs as required.
3. EXECUTION
3.1 INSTALLATION
A. Provide a separate, insulated equipment grounding conductor for all feeders and branch
circuits. Terminate each end on a grounding lug, bus, or bushing.
B. Provide an insulated equipment grounding conductor connected from lighting fixtures to
grounding bar of associated panelboard.
C. Grounded Convenience and Receptacle Outlets: Provide an insulated equipment grounding
conductor connected from grounding terminals of convenience receptacles to grounding bar in
associated panelboard.
D. Isolated ground receptacle outlets: Provide an identified insulated grounding conductor, which
runs to the insulated grounding bar in associated branch circuit panelboard, thence directly to
the isolated grounding electrode system. A separate insulated conductor shall be provided for
each circuit. An equipment grounding conductor shall also be connected from the ground bar
in the associated panel to the device box and device frame.
E. Connect grounding electrode conductors to metal water pipe using a suitable ground clamp.
Make connections to flanged piping at street side of flange. Provide bonding jumper around
water meter and valves to provide continuity.
F. Supplementary Grounding Electrode: Use driven copper ground rod.
5513
26 05 26-2 SECONDARY GROUNDING
3.2 FIELD QUALITY CONTROL
A. Inspect grounding and bonding system conductors and connections for tightness and proper
installation.
B. Measure ground resistance from system neutral connection at service entrance to ground
reference point using suitable ground testing equipment. Resistance shall not exceed 10 ohms.
If resistance exceeds 10 ohms, provide additional grounding electrodes, listed grounding
enhancement materials or other means approved by the Engineer.
C. Provide ground resistance report to Engineer prior to Substantial Completion for review.
END OF SECTION
5513

5513
Division 26 - Electrical 26 05 29-1
SECTION 26 05 29 - SUPPORTING DEVICES
1. GENERAL
1.1 WORK INCLUDED
A. Applicable provisions of Division 01 apply to work under this section.
B. Conduit and equipment supports.
C. Fastening hardware.
1.2 RELATED WORK
A. Division 03 - Cast-in-Place Concrete. Concrete equipment pads.
B. Section 26 05 00 - Basic Electrical Requirements.
1.3 QUALITY ASSURANCE
A. Support systems shall be adequate for weight of equipment and conduit, including wiring, which
they carry.
2. PRODUCTS
2.1 MATERIAL
A. Support Channel: Galvanized or painted steel.
B. Hardware: Corrosion resistant.
3. EXECUTION
3.1 INSTALLATION
A. Fasten hanger rods, conduit clamps, and outlet and junction boxes to building structure using
expansion anchors, beam.
B. Use toggle bolts or hollow wall fasteners in hollow masonry, plaster, or gypsum board partitions
and walls; expansion anchors or preset inserts in solid masonry walls; self-drill in anchors or
expansion anchor on concrete surfaces; sheet metal screws in sheet metal studs; and wood
screws in wood construction .
C. Do not fasten supports to piping, ductwork, mechanical equipment, or conduit or on any
system not related to the building structure.
D. Do not use power-actuated anchors.
E. Do not drill structural steel members.
F. Fabricate supports from structural steel or steel channel, rigidly welded or bolted to present a
neat appearance. Use hexagon head bolts with spring lock washers under all nuts.
G. In wet locations install free-standing electrical equipment on concrete pads.
H. Install surface-mounted cabinets and panelboards with minimum of four anchors. Provide
steel channel supports to stand cabinet 1" off wall.
I. Bridge studs top and bottom with channels to support flush-mounted cabinets and
p a n e l b o a r d s in stud walls.
END OF SECTION

5513
Division 26 - Electrical
SECTION 26 05 33 - BOXES
1. GENERAL
1.1 WORK INCLUDED
A. Applicable provisions of Division 01 apply to work under this section.
B. Wall and ceiling outlet boxes.
C. Pull and junction boxes.
D. Floor boxes.
E. Poke thru service fittings.
F. Underground service boxes.
1.2 RELATED WORK
A. Division 8: Wall and ceiling access doors.
B. Section 26 05 00 - Basic Electrical Requirements.
C. Section 26 27 27 - Wiring Devices.
26 05 33-1
2. PRODUCTS
2.1 OUTLET BOXES
A. All outlet and switch boxes used for interior dry locations shall be galvanized sheet steel
compatible with wiring method. Plastic boxes shall not be used.
1. Junction boxes in concealed work
only; outlet box for single or double
device in other than masonry walls.
2. Outlet boxes for lighting fixtures in
ceilings and walls.
3. Outlet boxes for multiple gang
assemblies of devices not in
masonry.
4. . Junction boxes and outlet
boxes for lighting fixtures for
concrete construction.
5. Outlet boxes for single or ganged
assemblies of devices in masonry.
6. Recessed boxes with devices.
7. Surface boxes with devices.
Box, 4" square, min. 1-1/2" deep
Box, 4" square, min. 1-1/2" deep with
3/8" fixture stud and lapped ears.
Gang boxes 4-1/2" high, 1-5/8" deep
width to suit No. 2G thru 9G
Concrete box 4" octagon 3" or 4"
deep with mounting lugs and back
plate.
Masonry gang box 3-3/4" high, 3-1/2"
deep length to suit gang.
Cover, raised 3/4" for 4" sq. Boxes or
13/16" for gang boxes.
Cover, surface 1/2" for 4" sq. boxes
B. Cast Boxes: FS/FD, cast ferroalloy, deep type, gasketed cover, threaded hubs.
2.2 PULL AND JUNCTION BOXES
A. Sheet Metal Boxes: Galvanized steel.
B. Sheet Metal Boxes larger than 12" in Any Dimension: Hinged enclosure.
C. Cast Metal Boxes for Outdoor and Wet Location Installations: NEMA Type 4 and NEMA Type
6, flat-flanged, surface-mounted junction box, UL listed as rain-tight. Galvanized cast iron box
and cover with ground flange, neoprene gasket, and stainless steel cover screws. Provide
explosion- proof boxes where connecting to rigid metallic conduit in hazardous areas.

26 05 33-2 BOXES
3. EXECUTION
3.1 COORDINATION OF BOX LOCATIONS
A. Provide electrical boxes as shown on Drawings, and as required for splices, taps, wire pulling,
equipment connections, and code compliance.
B. Electrical box locations shown on Contract Drawings are approximate unless dimensioned.
Verify location of floor boxes and outlets in offices and work areas prior to rough-in.
C. Locate and install boxes to allow access. Where installation is inaccessible, coordinate locations
and sizes of required access doors with Division 8.
D. Locate and install to maintain headroom and to present a neat appearance.
3.2 BOX INSTALLATION
A. Do not install boxes back-to-back in walls. Provide minimum 6" separation, except provide
minimum 24" separation in fire and acoustic-rated walls.
B. Where boxes are installed in fire rated walls, a highly intumescent fire stopping pad insert shall
be installed in the box. The pad shall meet UL 263 ANSI E-119 and other applicable
requirements. Provide Metacaulk Box Guard by Rectorseal or approved equal.
C. Locate boxes in masonry walls to require cutting of masonry unit corner only. Coordinate
masonry cutting to achieve neat openings for boxes.
D. Provide knockout closures for unused openings.
E. Support boxes independently of conduit.
F. Use multiple -gang boxes where more than one device are mounted together; do not use
sectional boxes. Provide barriers to separate wiring of different voltage systems.
G. Install boxes in walls without damaging wall insulation.
H. Coordinate mounting heights and locations of outlets mounted above counters, benches, and
backsplashes.
I. Position outlets to locate luminaires as shown on plans.
J. In inaccessible ceiling areas, position outlets and junction boxes within 6" of recessed luminaire,
to be accessible through luminaire ceiling opening .
K. Provide recessed outlet boxes in finished areas; secure boxes to interior wall and p a r t i t i o n studs,
accurately positioning to allow for surface finish thickness. Use stamped steel s tud bridges for
flush outlets in hollow stud wall, and adjustable steel channel fasteners for flush ceiling outlet
boxes.
L. Align wall-mounted outlet boxes for switches, thermostats, and similar devices.
M. Provide cast outlet boxes in exterior locations exposed to the weather and wet locations.
N. Provide a weatherproof cover for receptacles that are installed in damp or wet locations. The cover
shall be designed to provide rainproof protection (NEMA 3R) while the receptacle is in use.
0. Locate pull boxes and junction boxes above accessible ceilings or in unfinished area.
P. Support pull and junction boxes independent of conduit.
Q. Location of outlets and equipment as shown on Drawings are approximate, and exact locat ion to
be verified and coordinated with all trades.
R. Minor modification in location of outlet and equipment considered incidental up to a distance of
1O' with no additional compensation, provided necessary instructions are given prior to roughing
in of outlet.
END OF SECTION
5513
Division 26 - Electrical 26 05 33.01-1
SECTION 26 05 33.01 ·.CONDUIT
1. GENERAL
1.1 WORK INCLUDED
A. Applicable provisions of Division 01 apply to work under this section.
B. Rigid metal conduit and fittings.
C. Electrical metallic tubing and fittings.
D. Flexible metal conduit and fittings. E. Liquidtight flexible metal conduit and fittings.
F. Non-metallic conduit and fittings.
1.2 RELATED WORK
A. Section 26 05 00 - Basic Electrical Requirements.
2. PRODUCTS
2.1 RIGID METAL CONDUIT AND FITTINGS
A. Rigid Metal Conduit: Galvanized Steel.
B. Fittings and Conduit Bodies: Threaded type, material to match conduit.
2.2 ELECTRICAL METALLIC TUBING (EMT) AND FITTINGS
A. EMT: Galvanized tubing.
B. Fittings and Conduit Bodies: Steel or malleable iron, compression type. Indenter and die cast
type shall not be used.
2.3 FLEXIBLE METAL CONDUIT AND FITTINGS
A. Conduit: Galvanized steel.
B. Fittings and Conduit Bodies: Screw-clamp squeeze type to match conduit.
2.4 LIQUIDTIGHT FLEXIBLE CONDUIT AND FITTINGS
A. Conduit: Flexible metal conduit with PVC jacket.
B. Fittings and Conduit Bodies: To match conduit.
2.5 PLASTIC CONDUIT AND FITTINGS
A. Conduit: Schedule 40 PVC.
B. Fittings and Conduit Bodies: To match conduit.
2.6 CONDUIT SUPPORTS
A. Conduit Clamps, Straps, and Supports: Steel or malleable iron.
2.7 PENETRATION OF BUILDING SURFACES
A. Fire and/or Smoke Rated Surfaces: 3M CP 25N/S or CP 25S/L caulk, 3M FS 195 wrap/strip
with restricting collar, 3M CS 195 composite sheet, Proset Systems fire rated floor and wall
penetrations, lnsta-Foam Products lnsta-Fire Seal Firestop Foam, Dow Corning Fire Stop
Systems, or approved equal.
B. Non-Rated Surfaces: Provide a sealant material around the conduits to close the opening. The
sealant shall be made of a material similar to the wall or floor's construction. If sleeves are
provided for future penetrations, the sleeves shall be capped.
C. Route conduit through roof openings for piping and ductwork where possible; otherwise, route
through roof using portal having acrylic clad ABS thermoplastic cap.
D. Stuffing Insulation: Mineral wool fiber type, non-combustible.
5513

26 05 33.01-2 CONDUIT
3. EXECUTION
3.1 CONDUIT SIZING, ARRANGEMENT, AND SUPPORT
A. Size conduit for conductor type installed or for Type THW conductors, whichever is larger; 3/4"
minimum size unless otherwise noted.
B. Arrange conduit to maintain headroom and present a neat appearance.
C. Route exposed conduit parallel and perpendicular to walls and adjacent piping.
D. Maintain minimum 6" clearance between conduit and piping. Maintain 12" clearance between
conduit and heat sources such as flues, steam pipes, and heating appliances.
E. Arrange conduit supports to prevent distortion of alignment by wire pulling operations. Fasten conduit
using galvanized straps, lay-in adjustable hangers, clevis hangers, or bolted split stamped galvanized
hangers.
F. Group conduit in parallel runs where practical and use conduit rack constructed of steel channel
with conduit straps or clamps. Provide space for 25% additional conduit.
G. Do not fasten conduit with wire or perforated pipe straps. Remove all wire used for temporary
conduit support during construction, before conductors are pulled.
H. Provide conduit support where 1-1/4" and larger conduit passes vertically through a floor.
3.2 CONDUIT INSTALLATION
A. Cut conduit square using a saw or pipecutter; de-burr cut ends.
B. Bring conduit to the shoulder of fittings and couplings and fasten securely.
C. Use conduit hubs or sealing locknuts for fastening conduit to cast boxes, and for fastening
conduit to sheet metal boxes in damp or wet locations.
D. Install no more than the equivalent of four 90-degree bends between boxes.
E. Use conduit bodies to make sharp changes in direction, as around beams.
F. Use hydraulic one-shot conduit bender or factory elbows for bends in conduit larger than 2" size.
G. Avoid moisture traps where possible; where unavoidable, provide junction box with drain fitting at
conduit low point.
H. Use suitable conduit caps to protect installed conduit against entrance of dirt and moisture.
I. Provide No. 12 AWG insulated conductor or suitable pull wire in empty conduit, except sleeves and
nipples.
J. Install expansion joints where conduit crosses building expansion joints.
K. Conduits shall not be attached to wires or cables, which support a ceiling system. Conduits
above a suspended ceiling system shall be supported from the building structure a minimum
distance of 12" above the ceiling system.
L. Maximum size conduit in slabs above grade: 3/4". Do not route conduits to cross each other in
slabs above grade.
M. Use PVC-coated rigid steel factory elbows for bends in plastic conduit runs longer than 100’ or in
plastic conduit runs, which have more than two bends regardless of length.
N. Wipe plastic conduit clean and dry before joining. Apply full even coat of cement to entire area that
will be inserted into fitting. Let joint cure for 20 minutes minimum.
0. For conduit runs in concrete slabs parallel to support beams below, maintain a minimum
separation of 6" from studs welded to beams in composite floor construction.
P. Provide protection for penetrations of building made by the Contractor on surfaces as
described in this section.
5513

5513
CONDUIT 26 05 33.01-3
3.3 CONDUIT INSTALLATION SCHEDULE
A. Conduit types specifically indicated on drawings or in other sections of specifications take
precedence over scheduled items below.
B. Underground installations more than five feet from exterior of foundation wall: Rigid galvanized steel
conduit.
C. Under concrete slabs or within five feet from exterior of foundation wall: Rigid galvanized steel
conduit. Schedule 40 PVC conduit. Nonmetallic conduits used for service e n t r a n c e conductors
shall be concrete encased.
D. Within concrete slabs: Rigid galvanized conduit, 3/4" maximum size.
E. Exposed outdoor locations: Rigid metal conduit.
F. Wet interior locations: Rigid metal conduit.
G. Concealed dry interior locations: Rigid metal conduit. Electrical metallic tubing.
H. Exposed dry interior locations: Electrical metallic tubing, unless conduit is subject to physical
damage, then rigid metal conduit must be used.
I. Liquid tight, flexible metal conduit in lengths not to exceed 30", with electro-galvanized single strip
steel armor, PVC jacket and separate grounding conductor, shall be used for final connections to
all equipment subject to vibration or movement or with isolation mountings including transformers
and motors.
END OF SECTION

5513
Division 26 - Electrical 26 05 36-1
SECTION 26 05 36 - CABLE TRAYS 1. GENERAL
1.1 WORK INCLUDED
A. Applicable provisions of Division 01 apply to work under this section.
B. Cable trays.
C. Cable tray accessories.
1.2 RELATED WORK
A. Section 26 05 00 - Basic Electrical Requirements.
2. PRODUCTS
2.1 WIRE BASKET CABLE SUPPORT SYSTEM
A. General: Provide wire basket of types and sizes indicated; with connector assemblies, clamp
assemblies, connector plates, splice plates and splice bars. Construct units with rounded edges
and smooth -surfaces, in compliance with applicable standards and with the following additional
construction features.
B. Materials and Finishes: Material and finish specifications for each wire basket runway shall be
made from steel meeting the minimum mechanical properties of ASTM A510 and shall be
electro-plated yellow zinc dichromate in accordance with ASTM 8633 SC2.
C. All straight section longitudinal wires shall be straight (with no bends).
D. Wire basket system shall be made of high strength steel wires and formed into a standard 2 inch
by 4 inch wire mesh pattern with intersecting wires welded together. All wire ends along
systems' sides (flanges) shall be rounded during manufacturing for safety of cables and
installers.
E. Wire basket sizes shall have 4 inch usable loading depth by 12 inches wide. Straight sections
shall be furnished in standard 118 inch lengths.
F. All fittings shall be field formed as needed.
G. All splicing assemblies shall be the bolted type using serrated flange locknuts. Hardware shall
be either yellow zinc dichromate in accordance with ASTM 8633 SC2 or AISI Type 304 Stainless
Steel.
H. Wire basket system supports shall be either center support hangers, trapeze hangers or wall
brackets as manufactured by B-Line Systems, Inc. (or engineer approved equal).
I. Trapeze hangers or center support hangers shall be supported by either 1/4" or 3/8" diameter rods.
J. Special accessories shall be furnished as required to protect, support and install a wire basket
runway system.
2.2 WARNING SIGNS
A. Engraved Nameplates: 1/2 high black letters on yellow laminated plastic nameplate, engraved
with the following wording:
WARNING! DO NOT USE CABLE TRAY AS WALKWAY, LADDER, OR SUPPORT? USE
ONLY AS MECHANICAL SUPPORT FOR CABLES AND TUBING I
3. EXECUTION
3.1 INSTALLATION
A. Install cable tray in accordance with manufacturer's instructions.
26 05 36-2 CABLE TRAYS
B. Support cable tray at manufacturers recommended spacing intervals, at the end of each run ,
and at other points to maintain spacing between supports of 6 ft. maximum, or as indicated on
prints.
C. Use expansion connectors where cable tray crosses building expansion joints or in accordance
with manufacturer’s instructions.
D. Cut standard straight sections to length in field.
E. Install warning signs at 50 foot centers along route of cable tray, located to be visible.
F. Provide bonding continuity between cable tray sections and fittings in accordance with
manufacturer's instructions.
END OF SECTION
5513
Division 26 - Electrical 26 05 53-1
SECTION 26 05 53 - ELECTRICAL IDENTIFICATION
1. GENERAL
1.1 WORK INCLUDED
A. Applicable provisions of Division 01 apply to work under this section.
B. Nameplates.
1.2 RELATED WORK
A. Section 26 05 00 - Basic Electrical Requirements.
2. PRODUCTS
2.1 MATERIALS
A. Nameplates: Engraved three-layer laminated plastic, “white letters on a black background
unless otherwise noted.
B. Stenciling: Black paint, “letter height unless otherwise noted.
C. Adhesive label: Clear, tape type, crimp-style label.
3. EXECUTION
3.1 GENERAL
A. Where more than one distribution voltage is used in a building, each system must be labeled
for voltage in addition to other requirements listed herein.
B. Identify branch circuit and power panels with the same symbol used in circuit directory in the main distribution center.
C. Where more than one service is used in the building, fill the equipment that is part of the
additional service shall be identified by W white letters on a blue background or stenciled with blue paint as listed herein.
D. Where emergency systems are used in the building, fill the equipment that is part of the emergency system shall be identified by %" white letters on a red background or stenciled with red paint as listed herein.
E. The adhesive label shall identify the circuit from which the device is fed or ballast location and
type as applicable.
F. Provide nameplates at pushbuttons that are used to remotely operate equipment,
acknowledge alarms, etc. The nameplate shall be engraved describing the pushbuttons
function.
G. All junction boxes, pull boxes, etc. shall be painted red inside, outside and on covers that are
part of the emergency system. Also identify the box with %" white letters on an engraved
nametag or stencil identifying the box with "EM PWR".
3.2 INSTALLATION
A . Provide nameplates or stenciling to identify fill electrical distribution, control equipment, and loads served (i.e.: Starters, Disconnects, Transformers, Panels, Contactors, Relays Cabinets, Special Systems Pull Boxes, etc.).
B . Degrease and clean surfaces to receive nameplates or stenciling.
C . Install nameplates parallel to equipment lines.
D . Secure nameplates to equipment fronts using screws or rivets.
E . Apply identification to inside face of recessed panelboards in finished locations.
5513

26 05 53-2 ELECTRICAL IDENTIFICATION
F . Provide a crimp type clear adhesive label to the faceplate of all devices (i.e. receptacles and
switches) to identify the panel/circuit feeding the device.
G . Provide a clear adhesive label on the door frame of the recessed light fixture to identify which
fixture contains the master/slave ballast. The label shall identify the two (2) lamp ballast as "82"
and the four (4) lamp ballast as "84". The label shall be placed in the same location on all
fixtures.
H . Paint emergency system junction boxes as described elsewhere in this specification or on the
drawings.
END OF SECTION
5513

5513
Division 26 - Electrical 26 05 63-1
SECTION 26 05 63 - MECHANICAL EQUIPMENT CONTROLS
1. GENERAL
1.1 WORK INCLUDED
A. Applicable provisions of Division 01 apply to work under this section.
B. Mechanical equipment controls.
1.2 RELATED WORK
A. Section 26 05 00 - Basic Electrical Requirements.
B. Section 26 05 33.01 - Conduit.
C. Section 26 05 19 - Wires and Cables.
D. Section 26 24 19 - Motor Control.
E. All automatic control devices to be provided by Divisions 22 and 23.
F. Connection from control terminal cabinet to control devices by Divisions 22 and 23.
G. Control connections from control terminal cabinet to individual starters by Division 23 unless otherwise specifically noted.
2. PRODUCTS
Not Used
3. EXECUTION
3.1 INSTALLATION
A. Cooperate with Division 23 in connection of control conduit into control terminal cabinet.
END OF SECTION

5513
Division 26 - Electrical 26 09 13.02-1
SECTION 26 09 13.02 - ELECTRICAL CONTROLS
1. GENERAL
1.1 WORK INCLUDED
A. Applicable provisions of Division 01 apply to work under this section.
B. Time Switch.
C. Photo
control.
D. Selector switch.
1.2 RELATED WORK
A. Section 26 05 00 - Basic Electrical Requirements.
B. Section 26 27 30 - Contactors.
1.3 SUBMITTALS
A. Submit product data under provisions of Division 01.
B. Include electrical ratings adjustment ranges, enclosure type, outline dimensions, mounting
dimensions and terminal connection information for each item.
2. PRODUCTS
2.1 TIME SWITCH
A. Description: Electronic driven 7-day timer with the capability of having different operating
periods each day. Manual ON-OFF levers.
B. Switch Rating: 35 amperes, 277 volts AC maximum.
C. Terminals: Accommodate up to 8 AWG wire.
D. Paragon EC71/305 or equal.
E. Enclosure shall be NEMA Type 1 surface mounting type having beige or gray enamel finish.
2.2 PHOTOCONTROL
A. Description: Photoelectric control to close contact when daylight diminishes, then open
contact at sunrise.
B. Light level selector for ON/OFF adjustment to range from 2 foot-candles to 50 foot-candles.
Turn OFF approximately three times turn ON.
C. Two minute delay to prevent false switching.
D. 120 volt input, power consumption approximately one watt.
E. Temperature range of -40° F to +104° F.
F. Contacts: SPST normally closed, snap action.
G. Capacity: 2000 watts tungsten at 120, 240, 277 volts.
H. Enclosure: Die cast zinc, weatherproof gasketing.
I. Mounting: 1/2" conduit nipple.
2.3 SELECTOR SWITCH
A. Description: Three-position selector switch, rotary bar knob operator.
B. Legend Plate: Marked ON-OFF-AUTO.
C. Contacts: · Rated 120 volts, 60 amperes. Make and 6 amperes break inductive load, 10
amperes continuous. Arrangement as required for indicated application.

26 09 13.02-2
ELECTRICAL CONTROLS
3. EXECUTION
3.1 INSTALLATION
A. Install time switch near panelboard supplying power to exterior fixtures.
B. Install photo control on conduit stubbed 6" above roof, facing north.
C. Provide interconnecting conduit and wiring with switch and contactor and demonstrate proper
operation.
END OF SECTION
5513

Division 26 - Electrical 26 09 23-1
SECTION 26 09 23 ·LIGHTING CONTROLS
1. GENERAL
1.1 WORK INCLUDED
A. Applicable provisions of Division 01 apply to work under this section.
B. Dimming system.
C. Occupancy sensors.
1.2 RELATED WORK
A. Section 26 05 00 - Basic Electrical Requirements.
B. Section 26 05 33.01 - Conduit.
C. Section 26 05 19 - Wire and Cable.
1.3 QUALIFICATIONS
A. Manufacturer: Company specializing in lighting control systems with a minimum of three-(3)
years’ experience.
1.4 SYSTEM DESCRIPTION
A. Occupancy Sensors: The devices shall be solid state type, capable of controlling electronic
and "PL" lamp ballasts. The devices must comply with and be approved by State of Wisconsin
Code ILHR 63.
1.5 SUBMITTALS
A. Submit shop drawings and product data.
B. Device specifications, ratings, dimensions and finishes of the occupancy sensors.
2. PRODUCTS
2.1 ACCEPTABLE MANUFACTURERS - OCCUPANCY SENSING DEVICES
A. The Watt Stopper
B. Hubbell (Mytech and Unenco)
C. Substitutions: Under provisions of Section 01 25 00
2.2 OCCUPANCY SENSING DEVICES
A. Wall Switch Type: Passive infrared type, adjustable sensitivity and time delay, compatible with
electronic and "PL" lamp ballasts and have a manual override switch . A 3-way switching model
shall also be available. Minimum of 1200W load at 277V. Hubbell No. IWSZP3P or equal.
B. Ceiling Mounted Sensors:
1. Ceiling Corridor: Ultrasonic type, fully adjustable 24VDC operation with UL approved
power pack Hubbell Cat. No. (OMNI-US500) (509 sq. ft.) (or) (OMNI-US1000) (1000 sq.
ft.) (or) (OMNI-US2000).
2. Ceiling Office Private and Open: Multi-Technology, fully adjustable 24VDC operation with
UL approved power pack Hubbell Cat. No. (OMNI-DT500) (500 sq. ft.) (or) (OMNI
DT1000) (1000 sq. ft.).
3. Ceiling Storage Area: Multi-Technology, fully adjustable 24VDC operation with UL
approved power pack Hubbell Cat. No. OMNI-DIA.
4. Ceiling Computer Room: Multi-Technology, fully adjustable 24VDC operation with UL
approved power pack Hubbell Cat. No. CAD1000.
5. Ceiling Restroom: Ultrasonic type, fully adjustable 24VDC operation with UL approved
power pack Hubbell Cat. No. (OMNI-US500) (500 sq. ft.) (or) (OMNI-US100 (1000 sq. ft.).
C. Wall Switch Type: Passive infrared type, adjustable sensitivity and time delay, compatible with
electronic and "PL" lamp ballasts and have a manual override switch. A 3-way switching model
shall also be available. Minimum of 1200W load at 277V. Mytech No. LP-2 or equal.
5513
26 09 23-2 LIGHTING CONTROLS
D. Verify with construction documents for 180° and 360° device locations.
3. EXECUTION
3.1 INSTALLATION
A. Install system in accordance with manufacturer’s instructions.
B. Install the control station at 48" to top of box, or as indicated on plans.
C. Provide system operation and maintenance manuals under the provisions of Division 01.
D. Provide power and signal wiring as required. All signal wiring installed in air ducts and
plenums without conduit shall be UL listed for such use.
E. Wall mount dimmer rack at 5'-0" A.F.F. to top of rack, or as required for field conditions, or as
indicated on plans.
F. Provide a typed directory card indicating lighting controlled by each dimmer.
G. Install the wall switch occupancy sensor at 48" to top of box.
H. Install the ceiling mounted sensor on the ceiling. Do not suspend the unit from the acoustic ceiling.
Provide junct ion box and support hardware as required.
I. The wall-mounted sensor shall be mounted to the wall as high as possible and as s h o w n . Mount
with an approved bracket. Aim the unit as directed.
3.2 FIELD QUALITY CONTROL
A. Visual and Mechanical Inspection: Inspect dimmers for proper alignment and installation.
Check proper installation and tightness of all connections.
B. The dimming system shall be completely commissioned out by a factory authorized/trained field
service engineer. This engineer’s checkout shall be performed after all load and control wires
have been installed and tested in accordance with the manufacturer’s instructions. A
representative for the Electrical Contractor shall be present during this checkout.
C. The occupancy sensors shall be adjusted, aimed and coordinated with the loads. A
performance inspection shall be conducted and demonstrated to the Owner.
D. Upon completion of the checkout, the Factory Engineer and Electrical Contractor shall
demonstrate operation and maintenance of the system to the Owner.
END OF SECTION
5513

Division 26 - Electrical 26 22 00-1
SECTION 26 22 00 - DRY TYPE TRANSFORMERS
1. GENERAL
1.1 WORK INCLUDED
A. Applicable provisions of Division 01 apply to work under this section.
B. Dry type two winding transformers.
C. Dry type autotransformers.
D. Dry type buck and boost transformers.
E. Dry type isolation transformers.
F. Dry type harmonic rated transformers.
1.2 SUBMITTALS
A. Submit product data under provisions of Division 01.
B. Include outline and support point dimensions of enclosures and accessories, unit weight, voltage,
'r0./A, and impedance ratings and characteristics, loss data, efficiency at rated load, sound level,
tap configurations, insulation system type, and rated temperature rise.
1.3 DELIVERY, STORAGE, AND HANDLING
A. Store and protect products under provisions of Division 01.
B. Store in a warm, dry location with uniform temperature. Cover ventilating openings to keep out dust.
C. Handle transformers using only lifting eyes and brackets provided for that purpose. Protect units against entrance of rain, sleet, or snow if handled in inclement weather.
1.4 RELATED WORK
A. Section 26 05 00 - Basic Electrical Requirements.
2. PRODUCTS
2.1 ACCEPTABLE MANUFACTURERS - DRY TYPE TWO WINDING TRANSFORMERS
A. Square D
B. Westinghouse
C. General Electric
D. Cutler Hammer
E. Substitutions: Under provisions of Section 01 25 00.
2 .2 DRY TYPE TWO WINDING TRANSFORMERS
A . Dry Type Transformers: Factory-assembled, air cooled dry type transformers; ratings as
shown on the Drawings.
B . Insulation system and average winding temperature rise for rated 'r0./A as follows:
'r0. /A Insulation Temperature
Rating Class Rise (degree C)
1- 15 185 115 16-500 220 150
C . Case temperature shall not exceed 65° C rise above 30° C ambient.
D . Winding Taps, Single Phase Transformers: In accordance with NEMA standards, unless
otherwise indicated on drawings.
E . Winding Taps, Three Phase Transformers: In accordance with NEMA standards, unless
otherwise indicated on drawings.
F . Sound Levels: In accordance with NEMA standards.
5513
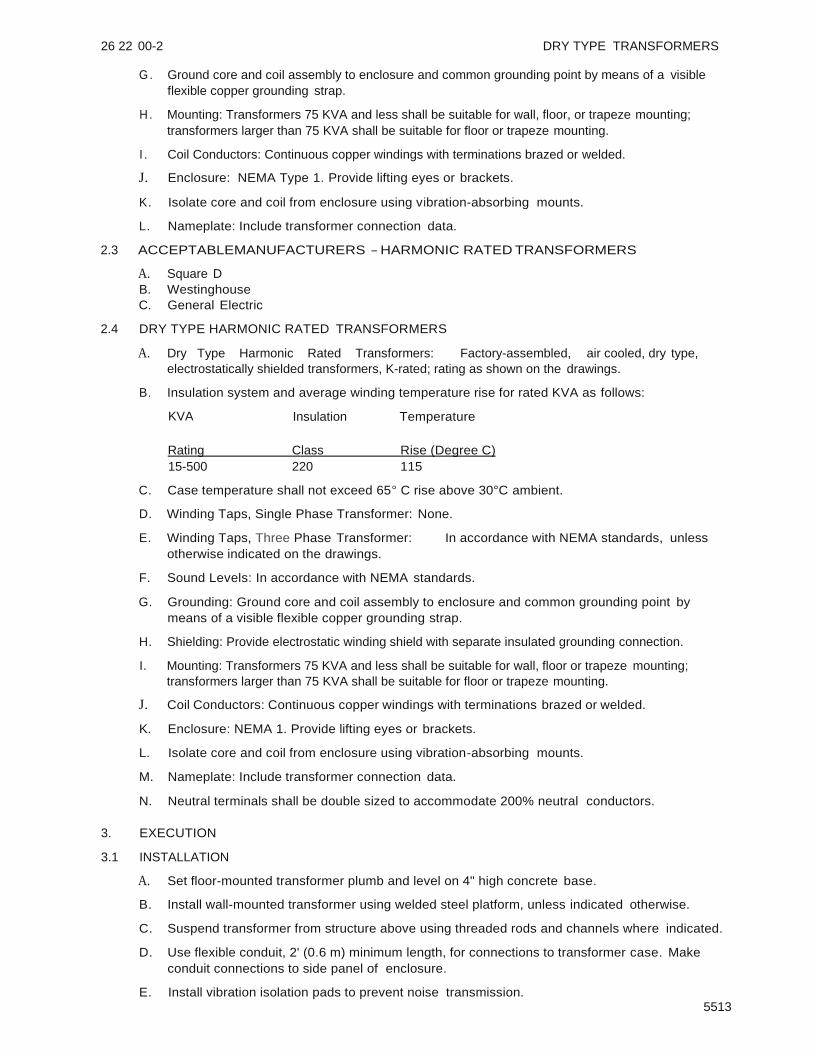
26 22 00-2 DRY TYPE TRANSFORMERS
G. Ground core and coil assembly to enclosure and common grounding point by means of a visible
flexible copper grounding strap.
H . Mounting: Transformers 75 KVA and less shall be suitable for wall, floor, or trapeze mounting;
transformers larger than 75 KVA shall be suitable for floor or trapeze mounting.
I . Coil Conductors: Continuous copper windings with terminations brazed or welded.
J. Enclosure: NEMA Type 1. Provide lifting eyes or brackets.
K. Isolate core and coil from enclosure using vibration-absorbing mounts.
L. Nameplate: Include transformer connection data.
2.3 ACCEPTABLEMANUFACTURERS - HARMONIC RATED TRANSFORMERS
A. Square D
B. Westinghouse
C. General Electric
2.4 DRY TYPE HARMONIC RATED TRANSFORMERS
A. Dry Type Harmonic Rated Transformers: Factory-assembled, air cooled, dry type,
electrostatically shielded transformers, K-rated; rating as shown on the drawings.
B. Insulation system and average winding temperature rise for rated KVA as follows:
KVA Insulation Temperature
Rating Class Rise (Degree C)
15-500 220 115
C. Case temperature shall not exceed 65° C rise above 30°C ambient.
D. Winding Taps, Single Phase Transformer: None.
E. Winding Taps, Three Phase Transformer: In accordance with NEMA standards, unless
otherwise indicated on the drawings.
F. Sound Levels: In accordance with NEMA standards.
G. Grounding: Ground core and coil assembly to enclosure and common grounding point by
means of a visible flexible copper grounding strap.
H. Shielding: Provide electrostatic winding shield with separate insulated grounding connection.
I. Mounting: Transformers 75 KVA and less shall be suitable for wall, floor or trapeze mounting;
transformers larger than 75 KVA shall be suitable for floor or trapeze mounting.
J. Coil Conductors: Continuous copper windings with terminations brazed or welded.
K. Enclosure: NEMA 1. Provide lifting eyes or brackets.
L. Isolate core and coil from enclosure using vibration-absorbing mounts.
M. Nameplate: Include transformer connection data.
N. Neutral terminals shall be double sized to accommodate 200% neutral conductors.
3. EXECUTION
3.1 INSTALLATION
A. Set floor-mounted transformer plumb and level on 4" high concrete base.
B. Install wall-mounted transformer using welded steel platform, unless indicated otherwise.
C. Suspend transformer from structure above using threaded rods and channels where indicated.
D. Use flexible conduit, 2' (0.6 m) minimum length, for connections to transformer case. Make
conduit connections to side panel of enclosure.
E. Install vibration isolation pads to prevent noise transmission. 5513

5513
DRY TYPE TRANSFORMERS 26 22 00-3
F. Transformers shall be bonded to the grounding bar in the panel which supplies power for that
transformer. Provide an equipment grounding conductor.
3.2 FIELD QUALITY CONTROL
A. Check for damage and tight connections prior to energizing transformer.
B. Measure primary and secondary voltages and make appropriate tap adjustments.
END OF SECTION

5513
Division 26 - Electrical 26 24 13-1
SECTION 26 24 13 - SWITCHBOARDS
1. GENERAL
1.1 WORK INCLUDED
A. Applicable provisions of Division 01 apply to work under this section.
B. Main distribution switchboard.
1.2 RELATED WORK
A. Section 09 91 00 - Painting: Touch-up of painted surfaces.
B. Section 26 05 00 - Basic Electrical Requirements.
C. Section 26 27 00 - Service Entrance
1.3 SUBMITTALS
A. Submit product data under provisions of Division 01.
B. Include front and side views of enclosures with overall dimensions shown; conduit entrance
locations and requirements; nameplate legends; size and number of bus bars per phase,
neutral, and ground; instructions for handling and installation of switchboard; and electrical
characteristics including voltage, ratings, withstand ratings, of all equipment and components.
1.4 OPERATION AND MAINTENANCE DATA
A. Submit operation and maintenance data under provisions of Division 01.
B. Include spare parts data listing; source and current prices of replacement parts and supplies;
and recommended maintenance procedures and intervals.
1.5 DELIVERY, STORAGE, AND HANDLING
A. Deliver products to the site under provisions of Division 01.
B. Store and protect products under provisions of Division 01.
C. Store in a clean, dry space. Maintain factory wrapping or provide an additional heavy canvas
or heavy plastic cover to protect units from dirt, water, construction debris, and traffic.
D. Handle in accordance with manufacturer's written instructions. Lift only with lugs provided for
the purpose. Handle carefully to avoid damage to switchboard internal components, enclosure,
and finish.
1.6 SPARE PARTS
A. Fuses: Furnish to Owner 3 spare fuses of each type and rating installed.
B. Fuse Pullers: Furnish one fuse puller to Owner.
2. PRODUCTS
2.1 ACCEPTABLE MANUFACTURERS - SWITCHBOARDS
A. Square-D
B. Siemens ITE
C. Cutler Hammer/Westinghouse
D. General Electric
E. Substitutions: Under provisions of Section 01 25 00.
2.2 SWITCHBOARD CONSTRUCTION AND RATINGS
A. Factory-assembled, dead f r o n t , m e t a l -enclosed, front accessible, and self-
supporting switchboard assembly, complete from incoming line terminals to load-side
terminations.
B. Switchboard electrical ratings and configurations as shown on Drawings.
C. Line and Load Terminations: Accessible from the front only of the switchboard, suitable for the
conductor materials used.

26 24 13-2 SWITCHBOARDS
D. Main Section Devices: Individually mounted.
E. Distribution Section Devices: Group mounted.
F. Bus Connections: Accessible from front for maintenance.
G. All buses shall be copper and sized in accordance with NEMA standards. Provide a full length
vertical bus for the entire length of the switchboard.
H. Provide a ground bus through the length of the switchboard.
I. Provide metering transformer compartment for Utility Company's use. Compartment size, bus
spacing and drilling, door, and locking and sealing shall be in accordance with utility requirements.
J. Enclosure shall be NEMA Type 1 with sections aligning at front and rear.
K. Dimensions: 92" maximum height, excluding floor sills, lifting members and pull boxes. 36"
maximum depth, front to rear. Length compatible with room dimensions.
L. Finish: Manufacturer's standard light gray enamel over external surfaces.
M. Pull Section: Same construction as switchboard, size as shown on Drawings.
N. Future Provisions: Fully equip spaces for future devices with bussing and bus connections,
suitably insulated and braced for short circuit currents. Continuous current rating as indicated
on Drawings. Each switchboard shall be designed to accept an additional distribution section.
2.3 SWITCHING AND OVERCURRENT PROTECTIVE DEVICES
A Fusible Switch Assemblies: 600 A maximum, quick-make, quick-break, load interrupter enclosed
knife switch with externally operable handle. Provide interlock to prevent opening front cover
with switch in ON position. Handle lockable in OFF position. Fuse Clips: Designed to
accommodate Class R fuses.
B. Fusible Switch Assemblies, 800 Amperes and Larger: Bolted pressure contact switches.
Fuse Clips: Designed to accommodate Class KRP-C fuses.
C. Molded Case Circuit Breakers: Provide circuit breakers with integral thermal and instantaneous
magnetic trip in each pole.
D. Current Limiting Molded Case Circuit Breakers: Provide molded case circuit breakers with
integral thermal and instantaneous magnetic trip in each pole, coordinated with automatically
resetting current limiting elements in each pole. Interrupting rating as required for the indicated
integrated short circuit rating for the switchboard. Selected circuit breakers shall have additional
requirement for series rating with panelboards as scheduled.
2.4 ACCEPTABLE MANUFACTURERS - FUSES
A Buss
B. Shawmit
C. Reliance
D. Substitutions: Under provisions of Section 01 25 00.
2.5 FUSES
A. Fuses 600 Amperes and Less: Current limiting, time delay, one-time fuse, 250 or 600 volt as
applicable, UL Class RK1.
B. Fuses 601 Amperes and Larger: Current limiting, time delay one time fuse, 250 or 600 volt as
applicable, UL Class L.
C. Interrupting Rating: 200,000 amperes RMS symmetrical.
2.6 INSTRUMENTS AND SENSORS
A. Electronic Meters: Electronic meter with digital display, three phase electronic type rated 5 amperes
and 120 or 277 volts as needed for the application, at 60 Hertz. Meter suitable for connection
to 4 wire circuits. Meter shall be capable of measuring volts, power factor ,
5513

5513
SWITCHBOARDS 26 24 13-3
kilowatts, kilowatt demand, amperes and thermal ampere demand. Meter output shall have a
minimum of one (1) pulse output for kWH accumulation, and a minimum of three (3) field
selectable 4-20 milliamp analog outputs. Meters shall have a semi-flush mounted case with
matching cover. Square D Power Logic, GE Multilin PQM, Westinghouse IQ Analyzer or
approved equal.
B. Metering Test Switch: Provide ten-position test switch with cover (4 potetial and 6 current) ABB
Type FT-1, or approved equal with each new metering installation.
C. Current Tranformers: 5 ampere secondary, bar or window type, with single secondary winding
and secondary shorting device, primary I secondary ratio as required, burden and accuracy
consistent with connected metering and relay devices, 60 Hertz.
D. Potential Transformers: 120 volt single secondary, disconnecting type with integral fuse
mountings, primary I secondary ratio as required, burden and accuracy consistent with
connected metering and relay devices, 60 Hertz.
On 1OOOA and above 480/277
E. Ground Fault Sensor: Ground return type.
On 1OOOA and above 480/277
F. Ground Fault Relay: Adjustable ground fault sensitivity from 200 to 1200 amperes, time delay
adjustable from O to 15 seconds. Provide monitor panel with lamp to indicate relay operation,
TEST and RESET control switches.
G. Provide phase loss monitoring with audible alarm in switchboard and remote audible alarm in
Room 8114.
H. Ground Fault Relay: Adjustable ground fault sensitivity from 200 to 2000 amperes, time delay
adjustable from O to 15 seconds. Provide monitor panel with lamp to indicate relay operation,
TEST and RESET control switches.
3. EXECUTION
3.1 INSTALLATION
A. Install switchboard in locations shown on Drawings, in accordance with manufacturer's
instructions.
B. Tighten accessible bus connections and mechanical fasteners after placing switchboard.
C. Install fuses in each switch.
3.2 FIELD QUALITY CONTROL
A. Inspect completed installation for physical damage, proper alignment, anchorage, and
grounding.
B. Measure insulation resistance of each bus section phase to phase and phase to ground for one
minute each. Test voltage shall be 1000 volts, and minimum acceptable value for insulation
resistance is 2 megohms.
C. Check tightness of accessible bolted bus joints using a calibrated torque wrench. Tightness
shall be in accordance with manufacturer's recommended values.
D. Physically test key interlock systems to insure proper function.
3.3 ADJUSTING AND CLEANING
A. Adjust all operating mechanisms for free mechanical movement.
B. Touch up scratched or marred surfaces to match original finish.
C. Adjust trip and time delay settings to values as instructed by the Architect/Engineer.
END OF SECTION
5513
Division 26 - Electrical 26 24 16-1
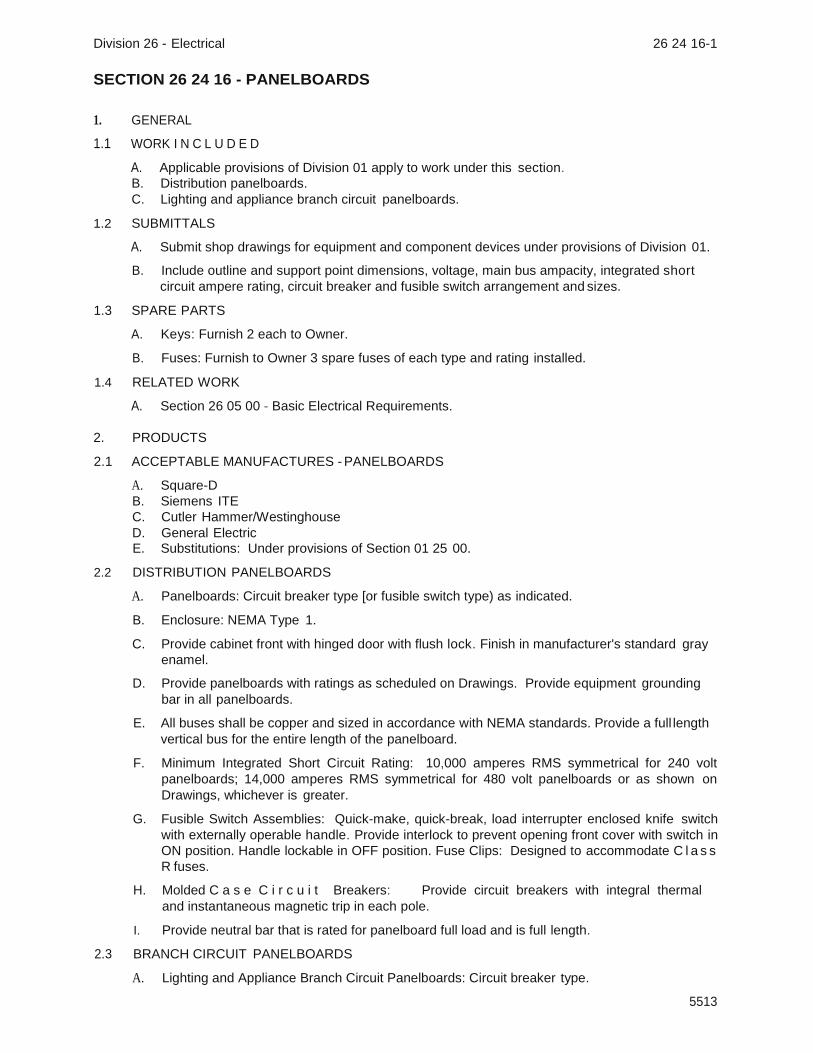
SECTION 26 24 16 - PANELBOARDS
1. GENERAL
1.1 WORK I N C L U D E D
A. Applicable provisions of Division 01 apply to work under this section.
B. Distribution panelboards.
C. Lighting and appliance branch circuit panelboards.
1.2 SUBMITTALS
A. Submit shop drawings for equipment and component devices under provisions of Division 01.
B. Include outline and support point dimensions, voltage, main bus ampacity, integrated short
circuit ampere rating, circuit breaker and fusible switch arrangement and sizes.
1.3 SPARE PARTS
A. Keys: Furnish 2 each to Owner.
B. Fuses: Furnish to Owner 3 spare fuses of each type and rating installed.
1.4 RELATED WORK
A. Section 26 05 00 - Basic Electrical Requirements.
2. PRODUCTS
2.1 ACCEPTABLE MANUFACTURES - PANELBOARDS
A. Square-D
B. Siemens ITE
C. Cutler Hammer/Westinghouse
D. General Electric E. Substitutions: Under provisions of Section 01 25 00.
2.2 DISTRIBUTION PANELBOARDS
A. Panelboards: Circuit breaker type [or fusible switch type) as indicated.
B. Enclosure: NEMA Type 1.
C. Provide cabinet front with hinged door with flush lock. Finish in manufacturer's standard gray
enamel.
D. Provide panelboards with ratings as scheduled on Drawings. Provide equipment grounding
bar in all panelboards.
E. All buses shall be copper and sized in accordance with NEMA standards. Provide a full length
vertical bus for the entire length of the panelboard.
F. Minimum Integrated Short Circuit Rating: 10,000 amperes RMS symmetrical for 240 volt
panelboards; 14,000 amperes RMS symmetrical for 480 volt panelboards or as shown on
Drawings, whichever is greater.
G. Fusible Switch Assemblies: Quick-make, quick-break, load interrupter enclosed knife switch
with externally operable handle. Provide interlock to prevent opening front cover with switch in
ON position. Handle lockable in OFF position. Fuse Clips: Designed to accommodate C l a s s
R fuses.
H. Molded C a s e C i r c u i t Breakers: Provide circuit breakers with integral thermal
and instantaneous magnetic trip in each pole.
I. Provide neutral bar that is rated for panelboard full load and is full length.
2.3 BRANCH CIRCUIT PANELBOARDS
A. Lighting and Appliance Branch Circuit Panelboards: Circuit breaker type.

26 24 16 PANELBOARDS
B. Enclosure: NEMA Type 1, unless otherwise indicated.
C. Cabinet Size: 5" deep minimum; 20" wide minimum.
D. Provide cabinet front with concealed trim clamps, concealed hinge and flush lock all keyed
alike. Finish in manufacturer's standard gray enamel.
E. Provide a typed circuit directory contained in a steel frame on inside of door trim and covered by a
clear plastic sheet.
F. Provide panelboards with ratings as scheduled on Drawings. Provide equipment g rounding bar
in all panelboards.
G. Provide an isolated equipment grounding bar in all panels that serve isolated g r o u n d
receptacles.
H. All buses shall be copper and full length to accept the maximum number of devices that can be
installed.
I. Minimum Integrated Short Circuit Rating: 10,000 amperes RMS symmetrical for 240 volt
panelboards; 14,000 amperes RMS symmetrical for 480 volt panelboards, or as shown on Drawings,
whichever is greater.
J. Where series rating with a line side breaker is indicated, interrupting rating requirement shall
be that of the line side equipment.
K. Molded Case Circuit Breakers: Bolt-on type thermal magnetic trip circuit breakers, with common
trip handle for all poles. Provide circuit breakers UL listed as Type SWD for lighting circuits when
indicated. Provide UL Class A ground fault interrupter circuit breakers where scheduled on
Drawings.
2.4 LOAD CENTERS
A. Load Centers: Circuit breaker load center.
B. Enclosure: General-purpose.
C. Provide box, with door, with pull ring and latch on door. Finish in manufacturer's standard gray
enamel.
D. Provide load centers with bus ratings as shown on Drawings.
E. Minimum Integrated Short Circuit Rating: 10,000 amperes RMS symmetrical.
F. Molded Case Circuit Breakers: Plug-on type thermal magnetic trip circuit breakers, w i th common
trip handle for all poles. Provide circuit breakers UL listed as Type SWD for lighting circuits when
indicated. Provide UL Class A ground fault interrupter circuit breakers where indicated on Drawings.
G. Do not use tandem circuit breakers.
2.5 ACCEPTABLE MANUFACTURERS - FUSES
A. Buss
B. Shawmut
C. Reliance
D. Substitutions: Under provisions of Section 01 25 00.
2.6 FUSES
A. Fuses 600 Amperes and Less: Current limiting, time delay, 250 volt or 600 volt, as indicated, UL
Class RK1.
B. Fuses 601 Amperes and Larger: Current limiting time delay one time fuse, 250 volt or 600
volt, as indicated, UL Class L.
C. Interrupting Rating: 200,000 amperes RMS symmetrical.
5513

5513
PANELBOARDS 26 24 16-3
3. EXECUTION
3.1 INSTALLATION
A. Install panelboards in conformance with NEMA standards.
B. Height: 6' to top for branch circuit panelboard.
C. Provide filler plates for unused spaces in panelboards.
D. Provide typed circuit directory for each branch circuit panelboard.
E. Stub three (3) empty 1" conduits to accessible location above ceiling or down through floor
depending on installation, out of each recessed panelboard.
F. Where panelboards are recessed in an exterior wall, insulation and vapor barrier shall be installed as described elsewhere in this specification.
3.2 FIELD QUALITY CONTROL
A. Measure steady state load currents at each new panelboard feeder. Should the difference at
any panelboard between phases exceed 5%, rearrange circuits in the panelboard to balance
the phase loads within 5% or as close to 5% as possible. Take care to maintain proper phasing.
Provide a load balance report for each panelboard that is new or revised as part of this work.
Provide the report to the Engineer/Architect prior to Substantial Completion.
B. Visual and Mechanical Inspection: Inspect for physical damage, proper alignment, anchorage,
and grounding. Check proper installation and tightness of connections for circuit breakers,
fusible switches, and fuses.
END OF SECTION

5513
Division 26 - Electrical 26 24 19- 1
SECTION 26 24 19 - MOTOR CONTROL
1. GENERAL
1.1 WORK INCLUDED
A. Applicable provisions of Division 01 apply to work under this section.
B. Manual motor starters.
C. Magnetic motor starters.
D. Combination magnetic motor starters.
E. Motor control centers.
F. The Contractor furnishing the electrically operated equipment shall provide all motors. Starters,
controllers, and disconnects which are an integral part of unit equipment shall be provided with
that equipment. Starters, controllers and disconnects which are not included as part of the
equipment shall be provided as a separate item as part of the electrical work of Division 16,
unless otherwise indicated. All control devices and sensors associated with the electrically
operated equipment shall be provided as part of the work of Division 15, unless otherwise
indicated.
1.2 RELATED WORK
A. Section 26 05 00 - Basic Electrical Requirements.
B. Section 26 05 29 - Supporting Devices.
1.3 SUBMITTALS
A. Submit shop drawings and product data under provisions of Division 01.
B. Provide product data on motor starters, relays, pilot devices, and switching and overcurrent
protective devices.
1.4 OPERATION AND MAINTENANCE DATA
A. Submit operation and maintenance data under provisions of Division 01.
B. Include spare parts data listing; source and current prices of replacement parts and supplies;
and recommended maintenance procedures and intervals.
1.5 DELIVERY, STORAGE, AND HANDLING
A. Deliver products to site under provisions of Division 01.
B. Store and protect products under provisions of Division 01.
C. Store in a clean, dry space. Maintain factory wrapping or provide an additional heavy canvas
or heavy plastic cover to protect units from dirt, water, construction debris, and traffic.
1.6 SPARE PARTS
A. Keys: Furnish two (2) each to Owner.
B. Fuses: Furnish to Owner three (3) spare fuses of each type and rating installed.
C. Fuse Pullers: Furnish one (1) fuse puller to Owner.
2. PRODUCTS
2.1 ACCEPTABLE MANUFACTURERS - MOTOR STARTERS
A. Square-D
B. Siemens ITE
C. General Electric
D. Cutler Hammer/Westinghouse

26 24 19-2 MOTOR CONTROL
2.2 MANUAL MOTOR STARTERS
A Manual Motor Starter: Size M-0 3 pole, AC general-purpose Class A manually operated non-
reversing full-voltage controller for induction motors rated in horsepower, with overload relay,
red pilot light, one NO auxiliary contact, and toggle operator.
B. Fractional Horsepower Manual Starter: AC general-purpose Class A manually operated, full voltage controller for fractional horsepower induction motors, with thermal overload unit, red
pilot light, and toggle operator.
C. Motor Starting Switch: AC general-purpose Class A manually operated full-voltage controller
for fractional horsepower induction motors, without thermal overload unit, and toggle operator.
D. Enclosure: NEMA Type 1.
2.3 MAGNETIC MOTOR STARTERS
A Magnetic Motor Starters: AC general-purpose Class A magnetic controller for i n d u c t i o n motors
rated in horsepower.
B. Full Voltage Starting: Non-reversing type, unless otherwise indicated on drawings.
C. Two Speed Starting: Separate contactor and overloads for each of two separate windings.
Compelling relay to require that motor be started at low speed. Deceleration relay and timer
for transfer from high to low speed.
D. Coil Operating Voltage: 120 volts, 60 Hertz.
E. Size: Size as required, size 0, minimum.
F. Overload Relay: Melting alloy.
G. Enclosure: NEMA Type 1.
H. Combination Motor Starters: Combine motor starters with disconnect in common enclosure. A
magnetic starter and motor switch disconnect in separate enclosures may be provided for single
phase motors.
I. Auxiliary Contacts: One field convertible contact, unless otherwise indicated on drawings.
J. Indicating Lights: RUN: red in front cover. For a two-speed starter, HIGH to be green and LOW
to be red.
K. Selector Switches: HAND/OFF/AUTO in front cover.
L. Relays: NEMA standards.
M. Control Power Transformers: 120 volt secondary, 50 VA minimum, in each three-phase motor
starter. A control transformer is not required for a 120 volt single phase starter.
2.4 CONTROLLER OVERCURRENT PROTECTION AND DISCONNECTING MEANS
A No fusible Switch Assemblies, Unless Otherwise Specified: Quick-make, quick-break, load
interrupter enclosed knife switch with externally operable handle. Provide interlock to prevent
opening front cover with switch in ON position. Handle lockable in OFF position.
B. Fusible Switch Assemblies, Unless Otherwise Specified: Quick-make, quick-break, load
interrupter enclosed knife switch with externally operable handle. Provide interlock to prevent
opening front cover with switch in ON position. Handle lockable in OFF position. Fuse Clips:
Designed to accommodate Class R fuses.
C. Thermal-magnetic circuit breakers, unless otherwise specified.
D. Motor circuit protectors, unless otherwise specified.
2.5 ACCEPTABLE MANUFACTURERS - FUSES
A Buss
B. Shawmut
C. Reliance D. Substitutions: Under provisions of Section 01 25 00.
5513

5513
MOTOR CONTROL 26 24 19-3
2.6 FUSES
A. Fuses: Class RK1; current limiting, time delay, one-time fuse, 250 volt or 600 volt, as applicable.
B. Interrupting Rating: 200,000 amperes RMS Symmetrical.
2.7 ACCEPTABLE MANUFACTURERS - MOTOR CONTROL CENTER
A. Square-0
B. General Electric
C. Substitutions: Under provisions of Section 01 25 00.
3. EXECUTION
3.1 INSTALLATION
A. For motors shown on the drawings for which no starters are scheduled, mount and wire the starters,
which will be furnished by others. Check the overload devices for correct size.
B . Horsepower figures in the schedule and on the drawings are to be considered to be approximate.
Verify the ampere ratings of the motors when they are delivered on the site, and provide heater
elements of proper size.
C . Make connections to all motors and power equipment and leave equipment in proper working
order. Check all motors for proper rotation.
D . Make connections to control devices as indicated in the Drawings. Install all control devices in
starter covers unless indicated otherwise. For remote mounted control devices and manual
starter switches, surface mount devices in unfinished areas and flush mount devices i n finished
areas.
E . Power and/or control wiring for roof mounted equipment shall extend to the equipment within
the unit curb. Separate roof penetrations are not allowed.
F . Install time switch near the equipment it controls unless otherwise noted.
G. Provide interconnecting conduit and wiring for time switch and demonstrate proper operation
H. Measure the full load current and provide motor overload elements accordingly. Indicate the
overload element manufacturer, type, and size on the inside cover of each starter.
I . Install motor control equipment in accordance with manufacturer's instructions.
J. Select and install heater elements in motor starters to match installed motor characteristics.
K. Motor Data: Provide a neatly typed label inside each motor starter enclosure door identifying
motor served, nameplate horsepower, full load amperes, code letter, service factor, and
voltage/phase r a t i n g .
END OF SECTION
5513
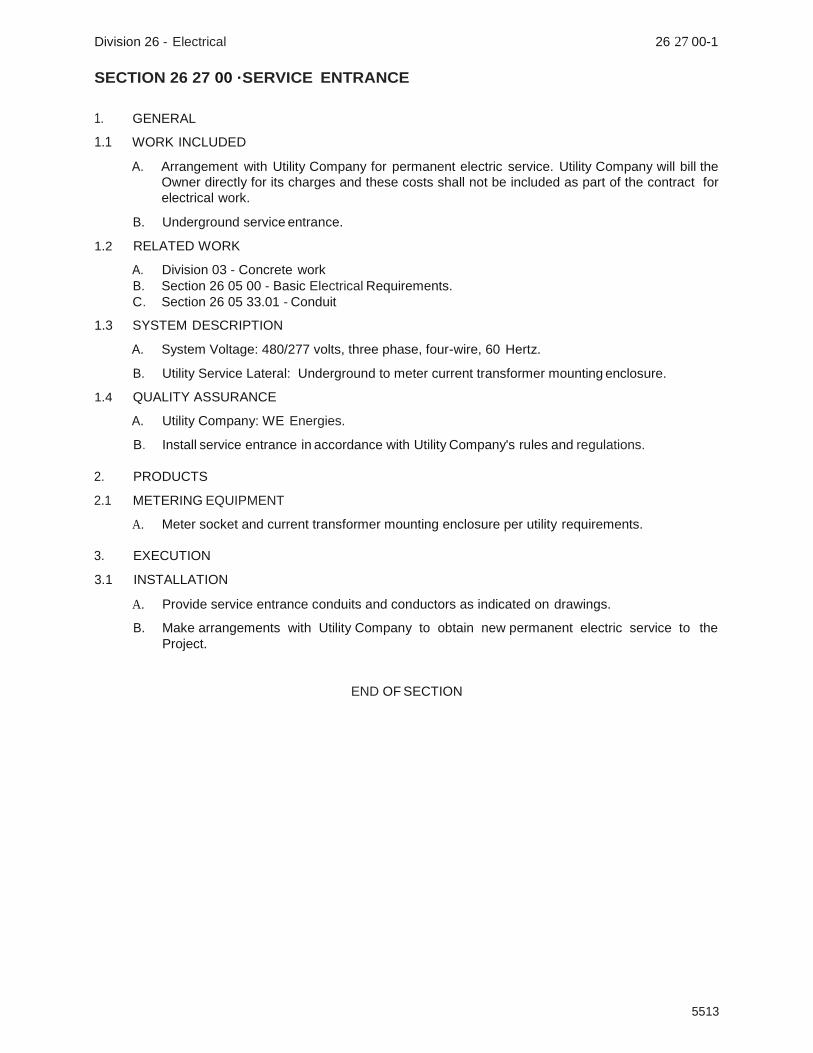
Division 26 - Electrical 26 27 00-1
SECTION 26 27 00 ·SERVICE ENTRANCE
1. GENERAL
1.1 WORK INCLUDED
A. Arrangement with Utility Company for permanent electric service. Utility Company will bill the
Owner directly for its charges and these costs shall not be included as part of the contract for
electrical work.
B. Underground service entrance.
1.2 RELATED WORK
A. Division 03 - Concrete work
B. Section 26 05 00 - Basic Electrical Requirements.
C. Section 26 05 33.01 - Conduit
1.3 SYSTEM DESCRIPTION
A. System Voltage: 480/277 volts, three phase, four-wire, 60 Hertz.
B. Utility Service Lateral: Underground to meter current transformer mounting enclosure.
1.4 QUALITY ASSURANCE
A. Utility Company: WE Energies.
B. Install service entrance in accordance with Utility Company's rules and regulations.
2. PRODUCTS
2.1 METERING EQUIPMENT
A. Meter socket and current transformer mounting enclosure per utility requirements.
3. EXECUTION
3.1 INSTALLATION
A. Provide service entrance conduits and conductors as indicated on drawings.
B. Make arrangements with Utility Company to obtain new permanent electric service to the
Project.
END OF SECTION

5513
Division 26 - Electrical 26 27 26-1
SECTION 26 27 26 - WIRING DEVICES
1. GENERAL
1.1 WORK INCLUDED
A. Applicable provisions of Division 01 apply to work under this section.
B. Wall switches.
C. Receptacles.
D. Device plates and box covers.
E. Wall box dimmers.
1.2 REGULATORY REQUIREMENTS
A. Conform to applicable local and state codes.
B. Conform to ADA rules and regulations.
1.3 RELATED WORK
A. Section 26 05 00 - Basic Electrical Requirements.
2. PRODUCTS
2.1 ACCEPTABLE MANUFACTURERS - WALL SWITCHES.
A. Pass & Seymour
B. Cooper Wiring Devices
C. Hubbell
D. Eagle E. Leviton
F. Substitutions: Under provisions of Section 01 25 00.
2.2 WALL SWITCHES
A. Wall Switches for Lighting Circuits and Motor Loads Under 1/2 HP: AC general use snap
switch with toggle handle, rated 20 amperes and 120-277 volts AC. Handle: Ivory plastic.
Specification grade, equivalent to Hubbell No. 1221-1 Series.
2.3 ACCEPTABLE MANUFACTURERS - RECEPTACLES
A. Pass & Seymour
B. Cooper Wiring Devices
C. Hubbell
D. Eagle
E. Leviton
F. Substitutions: Under provisions of Section 01 25 00.
2.4 RECEPTACLES
A. Convenience Receptacle Outlets: Duplex, straight blade grounding type, 125 volt, and ivory in
color. Receptacles connected to an emergency power source shall be red in color. Use
receptacles rated 20A. (NEMA 5-20R) Hubbell 5362 or equal, in corridors and in utility areas
such as kitchens, shops, and laboratories; receptacles in other areas may be rated 15A (NEMA
5-15R), Hubbell 5262 or equal.
B. Specific-use Receptacle Configuration: NEMA standards; type as indicated on Drawings.
C. Ground Fault Circuit Interrupters: Specification Grade.
1. Receptacles: 20 amp, 125 volt feed through rating shall be Hubbell GFR53521A or equal.
2. Circuit Breakers: 20 amp, 120 volt, bolt-on, molded case, non-adjustable. Provide UL Class
A (4-6MA) single or multi-pole breakers as indicated. Breakers shall be of the same
manufacturer and type as the panel.
3. Provide ground fault circuit interrupters as indicated on the plans.
D. Tamper Resistant Receptacles: Duplex, 20A, 125V AC, straight blade type, ivory in color, also
called a Pediatric Receptacle. The receptacle shall be a Hubbell HBLSG63HI or equal.

26 27 26-2 WIRING DEVICES
2.6 ACCEPTABLE MANUFACTURERS - WALL DIMMERS
A. Lutron
B. Leviton
C. Substitutions: Under provisions of Section 01 25 00.
2.7 WALL DIMMERS
A. Wall Dimmers: Linear slide type with integral preset switch.
B. Rating: 600 Watts minimum, larger size to accommodate load shown on Contract Drawings.
2.8 WALL PLATES
A. Interior Area Cover Plates: Impact resistant ivory nylon in finished areas. Galvanized steel in mechanical rooms and similar unfinished areas.
B. Weatherproof Cover Plates: Corrosion-resistant wet location cover, which is NEMA 3R rated
when the receptacle is in use. Materials shall be similar to covers manufactured by Red Dot,
Carlon, or Taymac.
3. EXECUTION
3.1 INSTALLATION
A. Install wall switches 48" to top of box, OFF position down.
B. Install wall dimmers 48" to top of box; derate ganged dimmers as instructed by manufacturer;
do not use common neutral.
C. Install convenience receptacles and ground fault interrupters 18" above floor to centerline, 8"
above counters to centerline, grounding pole on bottom, in finished areas unless otherwise
indicated.
D. Install convenience receptacles and ground fault interrupters 48" to top of box in unfinished
and work and storage areas.
E. Switches controlling equipment, operation of which is not evident from switch position, shall
include flush neon pilot light in conjunction with proper switch. Each switch shall be complete
with engraved plate to identify equipment being controlled (white letters on black, 1/8" high
minimum).
F. Install specific-use receptacles at heights shown on Contract Drawings.
G. Convenience outlets on walls with fin tube radiation shall be mounted horizontally in the base
below radiation or as indicated on drawings.
H. Install decorative plates on switch, receptacle, and blank outlets in finished areas, using jumbo
size plates for outlets installed in masonry walls.
I. Install galvanized steel plates on outlet boxes and junction boxes in unfinished areas, above
accessible ceilings, and on surface-mounted outlets.
J. Install devices and wall plates flush and level.
K. Do not use terminals on wiring devices (hot or neutral) for feeding through connections, looped
or otherwise. Make circuit connections via wire connectors and pigtails.
3.2 FIELD QUALITY CONTROL
A. Inspect each wiring device for defects.
B. Operate each wall switch with circuit energized and verify proper operation.
C. Verify that each receptacle device is energized.
D. Test each receptacle device for proper polarity.
E. Test each GFCI receptacle device for proper operation.
5513

5513
WIRING DEVICES 26 27 26-3
3.3 ADJUSTING
A. Adjust devices and wall plates to be flush and level.
END OF SECTION

5513
Division 26 - Electrical 26 27 27-1
SECTION 26 27 27 - EQUIPMENT WIRING SYSTEMS
1. GENERAL
1.1 WORK INCLUDED
A. Applicable provisions of Division 01 apply to work under this section.
B. Electrical connections to equipment specified under other Sections or furnished by Owner.
1.2 RELATED WORK
A. Division 23 - Motors.
B. Division 22 - Plumbing Equipment. C. Division 23 - Heating, Ventilation, and Air Conditioning Equipment.
D. Section 26 05 00 - Basic Electrical Requirements.
1.3 RESPONSIBILITIES
A. Division 26 shall provide dedicated circuits from the nearest panel, or as shown on the prints,
for the following Divisions 22 and 23 items, but not limited to:
1. VAV boxes.
2. Division 23 control panels.
3. Sump pump and alarm.
4. Sanitary ejector and alarm.
5. Roof top units.
6. Electric heaters.
7. Other miscellaneous Divisions 22 and 23 equipment.
B. Division 26 shall provide line power wiring to all starters and wiring from separately furnished
starters to associated motors. Divisions 22 and 23 shall. Provide interlock wiring, unless
otherwise described on drawings.
C. Divisions 22 and 23 shall install control devices and sensors and provide associated wiring,
unless otherwise described on drawings.
2. PRODUCTS
2.1 MATERIALS
A. Conduit, wire, and boxes per applicable sections.
B. Attachment Plug Conf igura t ion : Match receptacles configuration at outlet provided for
equipment.
C. Cord Construction: Oil-resistant insulated Type SJO multiconductor flexible cord with identified
equipment grounding conductor, suitable for hard usage in damp locations.
D. Cord Size: Suitable for connected load of equipment and rating of branch circuit overcurrent
protection.
3. EXECUTION
3.1 INSPECTION
A. Verify that equipment is ready for electrical connection, wiring, and energization.
3.2 PREPARATION
A. Review equipment submittals prior to installation and electrical rough-in. Verify location, size, and
type of connections. Coordinate details of equipment connections with supplier and installer.
26 27 27-2 EQUIPMENT WIRING SYSTEMS
3.3 INSTALLATION
A. Use wire and cable with insulation suitable for temperatures encountered in heat-producing
equipment.
B. Make conduit connections to equipment using flexible conduit. Use liquidtight flexible conduit in
damp or wet locations.
C. Install pre-finished cord set where connection with attachment plug is indicated or specified, or
use attachment plug with suitable strain-relief clamps.
D. Provide suitable strain-relief clamps for cord connections to outlet boxes and equipment
connection boxes.
E. Make wiring connections in control panel or in wiring compartment of pre-wired equipment in
accordance with manufacturer's instructions. Provide interconnecting wiring where indicated.
F. Install disconnect switches, controllers, control stations, and control devices such as limit switches
and temperature switches as indicated. Connect with conduit and wiring as indicated.
G. Coordinate the location of equipment with all other trades.
END OF SECTION
5513

5513
Division 26 - Electrical 26 27 30- 1
SECTION 26 27 30 - CONTACTORS
1. GENERAL
1.1 WORK INCLUDED
A. Applicable provisions of Division 01 apply to work under this section.
B. Lighting contactors.
C. General-purpose contactors.
1.2 SUBMITTALS
A. Submit product data under provisions of Division 01.
B. Include outline drawings with dimensions, and equipment ratings for voltage, capacity, and
poles.
1.3 RELATED WORK .
A. Section 26 05 00 - Basic Electrical Requirements.
2. PRODUCTS
2.1 ACCEPTABLE MANUFACTURERS - CONTACTORS
A. Square-D
B. Siemens ITE
C. General Electric
D. Cutler Hammer/Westinghouse
E. Substitutions: Under provisions of Section 01 25 00.
2.2 LIGHTING CONTACTORS
A. Contactors: Electrically held or mechanically held, as indicated on drawings.
B. Coil Operating Voltage: 120 volts, 60 Hertz, unless otherwise indicated on drawings.
C. Contacts: 20 ampere, 8 pole, 600 volt, 60 Hertz unless otherwise indicated on Drawings.
D. Enclosure: NEMA Type 1.
E. Provide solderless pressure wire terminals.
F. Lighting contactors shall be Square D, Class 8903 series.
2.3 GENERAL PURPOSE CONTACTORS
A. Contactors: Electrically held or mechanically held, as indicated on drawings.
B. Coil Operating Voltage: 120 volts, 60 Hertz.
C. Size: Size 1 unless otherwise indicated on Drawings.
D. Contacts: 3 pole, 600 volt, 60 Hertz.
E. Enclosure: NEMA Type 12.
F. Provide solderless pressure wire terminals.
3. EXECUTION
3.1 INSTALLATION
A. Install contactors in accordance with manufacturer's instructions.
END OF SECTION

5513
Division 26 - Electrical 26 28 28-1
SECTION 26 28 28 - DISCONNECT SWITCHES
1. GENERAL
1.1 WORK INCLUDED
A. Applicable provisions of Division 01 apply to work under this section.
B. Disconnect switches.
C. Fuses.
D. Enclosures.
1.2 SUBMITTALS
A. Submit product data under provisions of Division 01.
B. Include outline drawings with dimensions, and equipment r a t i n g s for voltage, capacity,
horsepower, and short circuit rating.
1.3 RELATED WORK
A. Section 26 05 00 - Basic Electrical Requirements.
2. PRODUCTS
2.1 ACCEPTABLE MANUFACTURERS - DISCONNECT SWITCHES
A. Square D
B. Siemens ITE
C. General Electric
D. Cutler Hammer/Westinghouse
E. Substitutions: Under provisions of Section 01 25 00.
2.2 DISCONNECT SWITCHES
A. Fusible Switch Assemblies: Heavy-duty, quick-make, quick-break, load interrupter enclosed
knife switch with externally operable handle interlocked to prevent opening front cover with
switch in ON position. Handle lockable in OFF position. Fuse Clips: Designed to accommodate
Class R fuses, including rejection feature.
B. Nonfusible Switch Assemblies: Heavy duty, quick-make, quick-break, load interrupter
enclosed knife switch with externally operable handle interlocked to prevent opening front cover
with switch in ON position. Handle lockable in OFF position.
C. Enclosures: NEMA Type 1, unless indicated otherwise on Drawings.
2.3 ACCEPTABLE MANUFACTURERS - FUSES
A. Buss
B. Shawmut
C. Reliance
D. Substitutions: Under provisions of Section 01 25 00.
2.4 FUSES
A. Fuses 600 Amperes and Less: Class RK1; current limiting, time delay, one-time fuse, 250
v o l t or 600 volt as applicable.
B. Interrupting Rating: 200,000 amperes RMS symmetrical.
3. EXECUTION
3.1 INSTALLATION
A. Install disconnect switches where indicated on Drawings.
B. Install fuses in each fusible disconnect switch.
END OF SECTION

5513
Division 26 - Electrical 26 32 13.13-1
SECTION 26 32 13.13 ·GENERATOR SET (DIESEL)
1. GENERAL
1.1 SUBMITTAL
A. The submittal shall include prototype test certification and specification sheets showing all
standard and optional accessories to be supplied, schematic wiring diagrams, dimension
drawings, and interconnection diagrams identifying by terminal number, each required
interconnection between the generator set, the transfer switch, and the remote annuciator panel
if it is included elsewhere in these specifications.
1.2 CODES AND STANDARDS
A. The generator set shall conform to the requirements of the following codes and standards :
1. CSA C22.2, No. 14 - M91 Industrial Control Equipment.
2. EN50082-2, Electromagnetic Compatibility - Generic Immunity Requirements, Part
2: Industrial.
3. EN55011, Limits and Methods of Measurement of Ratio Interference Characteristics of Industrial, Scientific and Medical Equipment.
4. IEC8528, Part 4: Controls Systems for Generator Sets.
5. IEC Standard 801.2, 801.3 and 801.5 for susceptibility, conducted, and radiated
electromagnetic emissions.
6. IEEE446 - Recommended Practice for Emergency and Standby Power Systems for
Commercial and Industrial Applications.
7. MIL Standard 461 D-1993 Military Standard, Electromagnetic Interference
Characteristics.
8. MIL S t a n d a r d 4 6 2 0 -1993 - M i l i t a r y S t a n d a r d ; Measurement of
Electromagnetic Interference Characteristics.
9. NFPA70 - National Electrical Code; Equipment shall be suitable for use in systems in
compliance to Article 700, 701 and 702.
10. NFPA99 - Essential Electrical Systems for Health Care Facilities.
11. NFPA110 - Emergency and Standby Power Systems; the generator set shall meet all
requirements for Level 1, Type 10 systems. Level 1 prototype tests required by this
standard shall have been performed on a complete and functional unit, component level
type tests will not substitute for this requirement.
12. UL2200 - The generator set shall be listed to UL2200 or submit to an independent third
party certification process to verify compliance as installed.
1.3 TESTING
A. To assure that the equipment has been designed and built to the highest reliability and quality
standards, the manufacturer and/or local representative shall be responsible for three separate
tests: design prototype test, final production tests and site tests.
1. Design Prototype Tests: Components of the emergency system such as the
engine/generator set, transfer switch, and accessories shall not be subjected to prototype
tests since the tests are potentially damaging. Rather, similar design prototypes and
preproduction models shall be subject to the following tests:
a. Maximum power (kW)
b. Maximum motor starting
c. Alternator temperature rise by embedded thermocouple and/or by resistance method
per NEMA MG1-32.40.
d. Governor speed regulation and generator transient response.
e. Harmonic analysis, voltage waveform deviation, and telephone influence factor. f. Three-phase short circuit tests. g. Alternator cooling air flow. h. Torsional analysis to verify that the generator set is free if harmful torsional stresses. i. Endurance testing.
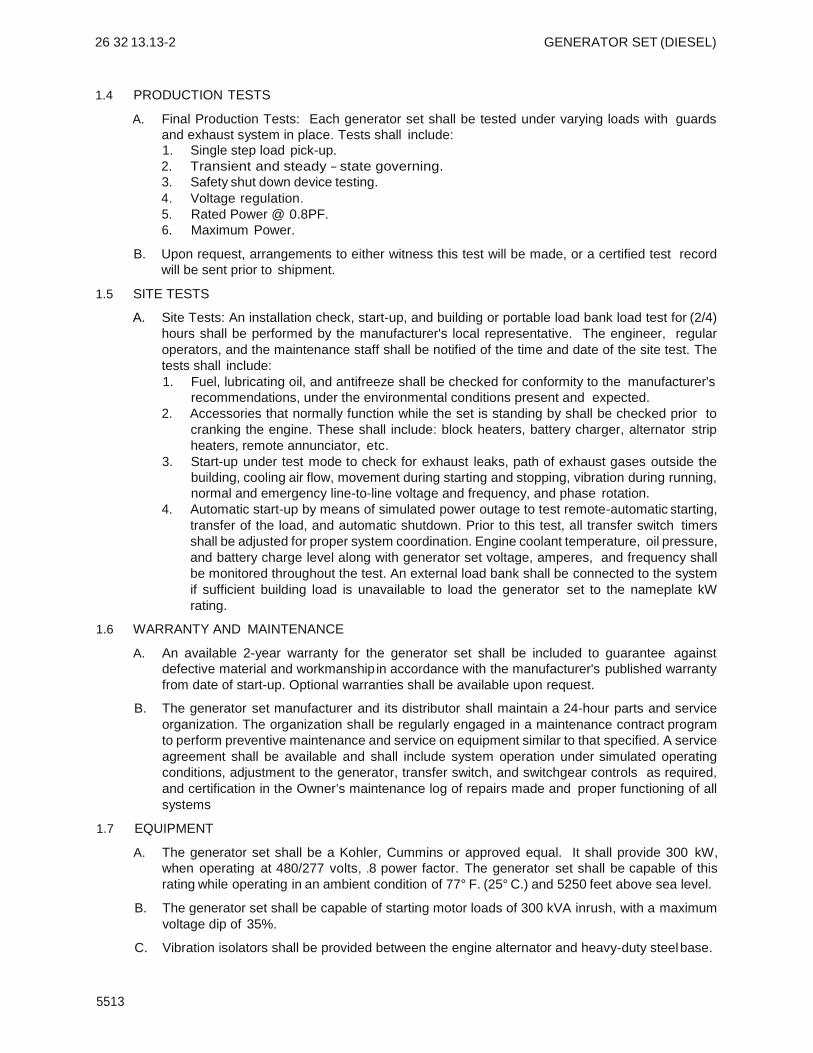
5513
26 32 13.13-2 GENERATOR SET (DIESEL)
1.4 PRODUCTION TESTS
A. Final Production Tests: Each generator set shall be tested under varying loads with guards
and exhaust system in place. Tests shall include: 1. Single step load pick-up.
2. Transient and steady - state governing.
3. Safety shut down device testing.
4. Voltage regulation.
5. Rated Power @ 0.8PF.
6. Maximum Power.
B. Upon request, arrangements to either witness this test will be made, or a certified test record
will be sent prior to shipment.
1.5 SITE TESTS
A. Site Tests: An installation check, start-up, and building or portable load bank load test for (2/4)
hours shall be performed by the manufacturer's local representative. The engineer, regular
operators, and the maintenance staff shall be notified of the time and date of the site test. The
tests shall include:
1. Fuel, lubricating oil, and antifreeze shall be checked for conformity to the manufacturer's
recommendations, under the environmental conditions present and expected.
2. Accessories that normally function while the set is standing by shall be checked prior to
cranking the engine. These shall include: block heaters, battery charger, alternator strip
heaters, remote annunciator, etc.
3. Start-up under test mode to check for exhaust leaks, path of exhaust gases outside the
building, cooling air flow, movement during starting and stopping, vibration during running,
normal and emergency line-to-line voltage and frequency, and phase rotation.
4. Automatic start-up by means of simulated power outage to test remote-automatic starting,
transfer of the load, and automatic shutdown. Prior to this test, all transfer switch timers
shall be adjusted for proper system coordination. Engine coolant temperature, oil pressure,
and battery charge level along with generator set voltage, amperes, and frequency shall
be monitored throughout the test. An external load bank shall be connected to the system
if sufficient building load is unavailable to load the generator set to the nameplate kW
rating.
1.6 WARRANTY AND MAINTENANCE
A. An available 2-year warranty for the generator set shall be included to guarantee against
defective material and workmanship in accordance with the manufacturer's published warranty
from date of start-up. Optional warranties shall be available upon request.
B. The generator set manufacturer and its distributor shall maintain a 24-hour parts and service
organization. The organization shall be regularly engaged in a maintenance contract program
to perform preventive maintenance and service on equipment similar to that specified. A service
agreement shall be available and shall include system operation under simulated operating
conditions, adjustment to the generator, transfer switch, and switchgear controls as required,
and certification in the Owner's maintenance log of repairs made and proper functioning of all
systems
1.7 EQUIPMENT
A. The generator set shall be a Kohler, Cummins or approved equal. It shall provide 300 kW,
when operating at 480/277 volts, .8 power factor. The generator set shall be capable of this
rating while operating in an ambient condition of 77° F. (25° C.) and 5250 feet above sea level.
B. The generator set shall be capable of starting motor loads of 300 kVA inrush, with a maximum
voltage dip of 35%.
C. Vibration isolators shall be provided between the engine alternator and heavy-duty steel base.

5513
GENERATOR SET (DIESEL) 26 32 13.13-3
1.8 ENGINE
A. The engine shall be equipped with the following:
1. An electronic isochronous governor capable of +0.25% steady-state frequency regulation.
2. 12 or 24 volt positive engagement solenoid shift-starting motor.
3. 65 ampere minimum automatic battery charging alternator with solid-state voltage
regulation.
4. Positive displacement, full pressure lubrication oil pump, cartridge oil filters, dipstick and
oil drain.
5. Dry-type replaceable air cleaner elements for normal applications.
6. Engine-driven or electric fuel transfer pump capable of lifting fuel 3 feet, fuel filters, and
electric solenoid fuel shut-off valve.
B. The engine shall be fueled with No.2 diesel.
C. The engine shall be liquid-cooled by a unit mounted radiator, blower fan, water pump and
thermostats. This system shall properly cool the engine with up to 0.5 inches H2o static pressure
on the fan in an ambient temperature up to 122° F. / 50° C.
D. The engine shall be EPA certified.
1.9 ALTERNATOR
A. The alternator shall be a Fast Response™ II permanent magnet brushless design.
B. The alternator shall be salient-pole, brushless, 12-lead reconnectable, self-ventilated of drip
proof construction with amortisseur rotor windings and skewed stator for smooth voltage
waveform. The insulation shall meet the NEMA standard (MG1-33.40) for Class H and be
insulated with epoxy varnish to be fungus resistant per MIL 1-24092. Temperature rise of the
rotor and stator shall be limited to 130° C. The excitation system shall be of brushless
construction controlled by a solid state voltage regulator capable of maintaining voltage within
+/- .2% at any constant load from 0% to 100% of rating. The regulator must be isolated to
prevent tracking when connected to SCR loads, and provide individual adjustments for voltage
range, stability and volts-per-hertz operations; and be protected from the environment by
conformal coating.
C. The generator set shall meet the transient performance requirements of ISO 8528-5, Level G 2.
D. The alternator excitation shall be of a permanent magnet exciter design.
E. The generator shall be inherently capable of sustaining at least 250% of rated current for at
least 1O seconds under a 3-phase symmetrical short circuit without the addition of separate
current support devices.
F. The alternator having a single maintenance-free bearing, shall be directly connected to the
flywheel housing with a semi-flexible coupling between the rotor and the flywheel.
1.10 CONTROLLER
A. Set mounted controller capable of facing right, left or rear shall be vibration isolated on the
alternator enclosure. The controller shall be capable of being remote-mounted. The
microprocessor control board shall be moisture proof and capable of operation from -40° C. to
85° C. Relays will only be acceptable in high-current circuits.
B. Circuitry shall be of plug-in design for quick replacement. Controller shall be equipped to
accept a plug-in device capable of allowing maintenance personnel to test controller
performance without operating the engine. The controller shall include the following features:
1. Fused DC circuit.
2. Complete 2-wire start/stop control, which shall operate on closure of a remote contact.
3. Speed sensing and a second independent starter motor disengagement systems shall
protect against starter engagement with a moving flywheel. Battery charging alternator
voltage will not be acceptable for this purpose.
4. The starter system shall be designed for restarting in the event of a false engine start,
by permitting the engine to completely stop and then re-engage the starter.

5513
26 32 13.13-4 GENERATOR SET (DIESEL)
5. Cranking cycler with 15-second ON and OFF cranking periods.
6. Overcrank protection designed to open the cranking circuit after 75 seconds if the engine
fails to start.
7. Circuitry to shut down the engine when signal for high coolant temperature, low oil
pressure or overspeed are received.
8. Engine cool down timer factory set at 5 minutes to permit unloaded running of the standby set after the transfer of the load to normal.
9. 3-position (Automatic-OFF-TEST) selector switch. In the TEST position, the engine shall
start and run regardless of the position of the remote starting contacts. In the Automatic
position, the engine shall start when contacts in the remote control circuit close and stop 5
minutes after those contacts open. In the OFF position, the engine shall not start even
though the remote start contacts close. This position shall also provide an immediate
shutdown in case of an emergency. Reset of any fault shall also be accomplished by
putting the switch to the OFF position.
10. Alarm horn with silencer switch per NFPA 110.
C. Standard indicating lights to signal the following shall be included:
1. Not-in-Auto (flashing red)
2. Overcrank (red)
3. Emergency Stop (red)
4. High Engine Temperature (red)
5. Overspeed (red)
6. Low Oil Pressure (red)
7. Battery Charger Malfunction (red)
8. Low Battery Voltage (red)
9. Low Fuel (red)
10. Auxiliary Pre-Alarm (yellow)
11. Auxiliary Fault (red)
12. System Ready (green)
D. Test buttons for indicating lights.
E. Terminals shall be provided for each indicating light above, plus additional terminals for
common fault and common pre-alarm.
1.11 INSTRUMENT PANEL
A. The instrument panel shall include the following.
1. Dual range voltmeter 3-1/2" +/- 2% accuracy.
2. Dual range ammeter 3-1/2" +/- 2% accuracy.
3. Voltmeter-ammeter phase selector switch.
4. Lights to indicate high or low meter scale.
5. Direct reading pointer-type frequency meter 3-1/2", 0.5% accuracy, 45 to 65 Hz scale.
6. Panel illuminating lights.
7. Battery charging voltmeter.
8. Coolant temperature gauge.
9. Oil pressure gauge.
10. Running-time meter.
11. Voltage adjust rheostat.
1.12 ACCESSORIES
A. An 80% or 100% rated line circuit breaker of 450 amperes, 600 volt rated, molded case
type, generator mounted.
B. Engine block heater. Thermostatically controlled and sized to maintain manufacturer's
recommended engine coolant temperature to meet the start-up requirements of NFPA-99 and
NFPA-110, Level 1.
C. A resettable line current sensing circuit breaker with inverse time versus current response shall
be furnished which protects the generator from damage due to its own high current capability.
This breaker shall not trip within the 10 seconds specified above to allow selective tripping of

5513
GENERATOR SET (DIESEL) 26 32 13.13-5
Down-stream fuses or circuit breakers under a fault condition. This breaker shall not
automatically reset, preventing restoration of voltage if maintenance is being performed. A
field current-sensing breaker will not be acceptable.
D. Weather housing shall be as follows: 1. All enclosures are to be constructed from G60 galvanized high strength, low alloy steel.
2. The enclosure shall be primed with BASF urethane and finish coated with BASF Superl
System paint. Enclosures will be finished in the manufacturer's standard color.
3. The enclosures must allow the generator set to operate at full load in an ambient of 40° C.
with no additional derating of the electrical output.
4. The enclosures must meet all of the requirements of UL-2200.
5. Enclosures must be equipped with sufficient side and end doors to allow access for
operation, inspection, and service of the unit and all options. Minimum requirements are
two doors per side. When the generator set controller faces the rear of the generator set,
an additional rear facing door is required. Access to the controller and main line circuit
breaker must meet the requirements of the National Electric Code.
6. Doors must be hinged with stainless steel hinges and hardware and be removable.
7. Doors must be equipped with lockable latches. Locks must be keyed alike.
8. Enclosures must be mounted to the generator set skid.
9. The enclosure roof must be pitched to prevent accumulation of water.
10. A duct between the radiator and air outlet must be provided to prevent recirculation of hot
air.
11. The complete exhaust system shall be internal to the enclosure. Enclosures with roof
mounted or externally exposed silencers are not acceptable.
12. The silencer shall be an insulated critical silencer with a tailpipe and rain cap.
E. 10-ampere automatic float and equalize battery charger with +/- 1% constant voltage
regulation from no load to full load over +/- 10% AV input line variation, current limited during
engine cranking and short circuit conditions, temperature compensated for ambient
temperatures from -40° C. to +60° C., 5% accurate voltmeter and ammeter, fused, reverse
polarity and transient protected. Note: 10-amp has alarm contacts for remote annunciation).
F. Gas-proof, seamless, stainless steel, flexible exhaust bellows with threaded NPT connection.
G. Two flexible fuel lines rated at a minimum of 257° F. and 100 psi ending in pipe thread.
Installed and sized by Mechanical Contractor.
H. The 10-relay dry contact kit provides normally open and normally closed contacts in a form C
configuration to activate warning devices and other customer provided accessories allowing
remote monitoring of the generator set. Typically, lamps, audible alarms, or other devices
signal faults or status conditions
1.13 REMOTE SERIAL ANNUNCIATOR
A. Annunciator must meet the following specifications:
1. Enclosure NEMA 2
2. Power Supply; 12- or 24- VDC
3. Power Draw; 200mA
B. Standards:
1. NFPA 110, Level 1
2. NFPA 99
3. UL 508 recognized
1.14 HARDWARE REQUIREMENTS
A. LED's required to activate for the following shut down and/or warning conditions:
1. Overcrank
2. Low Coolant Temperature
3. High Engine Temperature
4. Low Oil Pressure
5. Overspeed
6. Emergency Stop
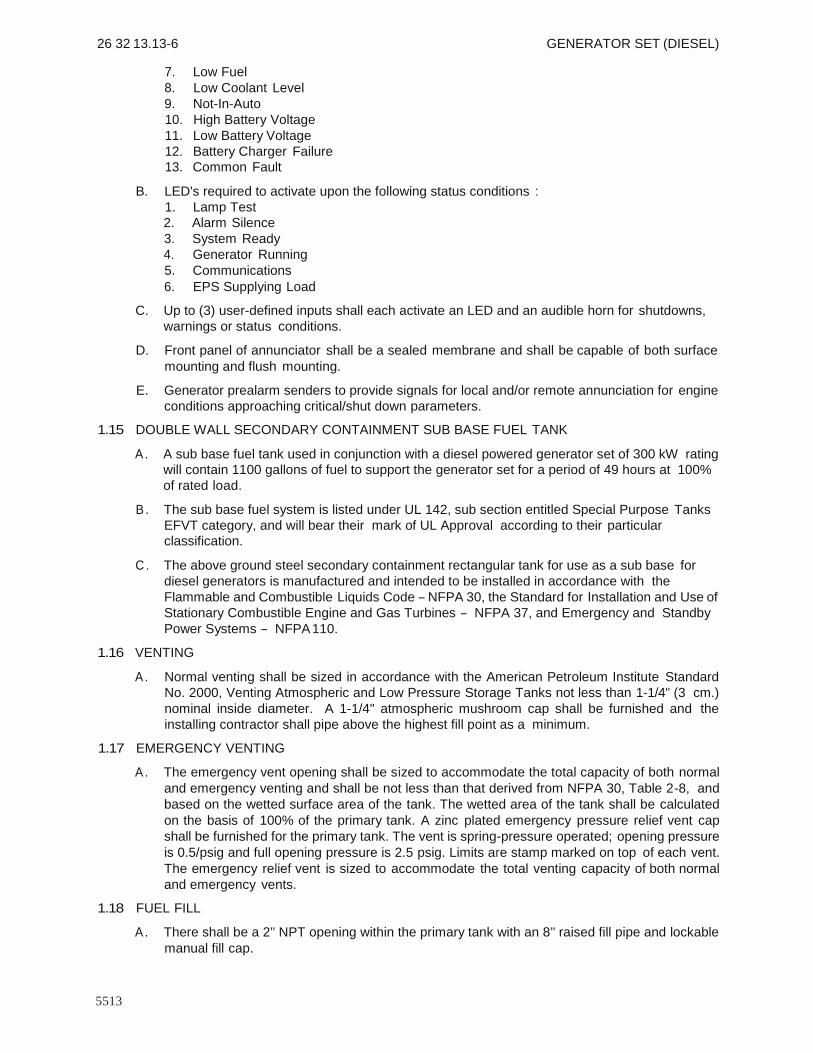
5513
26 32 13.13-6 GENERATOR SET (DIESEL)
7. Low Fuel
8. Low Coolant Level
9. Not-In-Auto
10. High Battery Voltage
11. Low Battery Voltage
12. Battery Charger Failure
13. Common Fault
B. LED's required to activate upon the following status conditions :
1. Lamp Test
2. Alarm Silence
3. System Ready
4. Generator Running
5. Communications
6. EPS Supplying Load
C. Up to (3) user-defined inputs shall each activate an LED and an audible horn for shutdowns,
warnings or status conditions.
D. Front panel of annunciator shall be a sealed membrane and shall be capable of both surface
mounting and flush mounting.
E. Generator prealarm senders to provide signals for local and/or remote annunciation for engine
conditions approaching critical/shut down parameters.
1.15 DOUBLE WALL SECONDARY CONTAINMENT SUB BASE FUEL TANK
A . A sub base fuel tank used in conjunction with a diesel powered generator set of 300 kW rating
will contain 1100 gallons of fuel to support the generator set for a period of 49 hours at 100%
of rated load.
B . The sub base fuel system is listed under UL 142, sub section entitled Special Purpose Tanks
EFVT category, and will bear their mark of UL Approval according to their particular
classification.
C . The above ground steel secondary containment rectangular tank for use as a sub base for
diesel generators is manufactured and intended to be installed in accordance with the
Flammable and Combustible Liquids Code - NFPA 30, the Standard for Installation and Use of
Stationary Combustible Engine and Gas Turbines - NFPA 37, and Emergency and Standby
Power Systems - NFPA 110.
1.16 VENTING
A . Normal venting shall be sized in accordance with the American Petroleum Institute Standard
No. 2000, Venting Atmospheric and Low Pressure Storage Tanks not less than 1-1/4" (3 cm.)
nominal inside diameter. A 1-1/4" atmospheric mushroom cap shall be furnished and the
installing contractor shall pipe above the highest fill point as a minimum.
1.17 EMERGENCY VENTING
A . The emergency vent opening shall be sized to accommodate the total capacity of both normal
and emergency venting and shall be not less than that derived from NFPA 30, Table 2-8, and
based on the wetted surface area of the tank. The wetted area of the tank shall be calculated
on the basis of 100% of the primary tank. A zinc plated emergency pressure relief vent cap
shall be furnished for the primary tank. The vent is spring-pressure operated; opening pressure
is 0.5/psig and full opening pressure is 2.5 psig. Limits are stamp marked on top of each vent.
The emergency relief vent is sized to accommodate the total venting capacity of both normal
and emergency vents.
1.18 FUEL FILL
A . There shall be a 2" NPT opening within the primary tank with an 8" raised fill pipe and lockable
manual fill cap.

5513
GENERATOR SET (DIESEL) 26 32 13.13-7
1.19 FUEL LEVEL
A. A direct reading, UL listed, magnetic fuel level gauge with a hermetically sealed vacuum tested
dial shall be provided to eliminate fogging.
1.20 LOW FUEL LEVEL SWITCH
A. Consists of a 50-watt float switch for remote or local annunciation of a (50% standard) low fuel
level condition.
8. Tanks that exceed 110-gallons will need to be certified to Wisconsin Comm. 10 Statute and
permit approval is required prior to initial filling of tank.
C. Contract with state licensed individual certified to assess the fuel tank and grant certification to
place it in operation will be the responsibility of the General Contractor.
END OF SECTION

Division 26 - Electrical 26 36 00-1
SECTION 26 36 00 • TRANSFER SWITCH
1. GENERAL
1.1 SUBMITTAL
A. The submittal shall include prototype test certification and specification sheets showing all
standard and optional accessories to be supplied, schematic wiring diagrams, dimension
drawings, and interconnection diagrams identifying by terminal number, each required
interconnection between the generator set and the transfer switch if it is included elsewhere in
these specifications.
1.2 TESTING
A. To assure that the equipment had been designed and built to the highest reliability and quality
standards, the manufacturer and/or local representative shall be responsible for three separate
tests: design prototype tests, final production tests, and site tests.
1. Design Prototype Tests: Components of the emergency system such as the
engine/generator set, transfer switch, and accessories shall not be subjected to prototype
tests since the tests are potentially damaging. Rather, similar design prototypes and
preproduction models, which will not be sold, shall have been used for the following tests.
1.3 PRODUCTION TESTS
A. Final Production Tests: Each transfer switch shall be tested under load with all guards in place.
Tests shall include:
1. The complete automatic transfer switch shall be tested to ensure proper operation of the
individual components and correct overall sequence of operation and to ensure that the
operating transfer time, voltage, frequency, and time delay settings are in compliance with
the specification requirements.
2. . The complete automatic transfer switch shall be subjected to dielectric strength tes t per
NEMA Standard ICS 1- 109.05.
3. The control panel shall meet or exceed the voltage surge withstand capability in
accordance with ANSI C37.90a-2978 and the impulse withstand voltage tests in
accordance with NEMA Standard ICS 1-109.
a. Upon request, arrangements to either witness this test will be made, or a certified test
record will be sent prior to shipment.
1.4 SITE TESTS
A. Site Tests: The manufacturer's local representative shall perform an installation check, start
up, and building load test. The engineer, regular operators, and the maintenance staff shall be
notified of the time and date of the site test.
1.5 WARRANTY AND MAINTENANCE
A. Available 2-year warranty for the automatic transfer switch shall be included to guarantee
against defective material and workmanship in accordance with the manufacturer's published
warranty from date to start-up. Optional warranties shall be available upon request.
B. The automatic transfer switch manufacturer and its distributor shall maintain a 24-hour parts
and service organization. The organization shall be regularly engaged in a maintenance
contract program to perform preventive maintenance and service on equipment similar to that
specified. A service agreement shall be available and shall include system operation under
simulated operating conditions, adjustment to the generator, transfer switch, and switchgear
controls as required, and certification in the Owner's maintenance log of repairs made and
proper functioning of all systems.
1.6 COMPLIANCE WITH CODES AND STANDARDS
A. The ATS shall conform to the requirements of:
1. UL 1008-Standard for Automatic Transfer Switches
2. NFPA 70-National Electrical Code, including use in emergency and standby systems in
accordance with Articles 517, 700
5513

26 36 00-2 TRANSFER SWITCH
3. NFPA 99-Essential Electrical Systems for Health Care Facilities
4. NFPA 110-Standard for Emergency and Standby Power Systems
5. IEEE Standard 446-Recommended Practice for Emergency and Standby Power Systems (Orange Book)
6. IEEE Standard 241-Recommended Practice for Electric Power Systems in Commercial Buildings (Gray Book)
7. NEMA Standard IC10 (formerly ICS 2-447) Automatic Transfer Switches
8. UL 508-Standard for Industrial Control Equipment
9. EN61000-4-5 Surge Immunity Class 4 (Voltage Sensing and Programmable Inputs only). 10. EN61000-4-4 Fast Transient Immunity Severity Level 4
11. CISPR 1 Radiated Emissions
12. IEC 1000-4-2 Electrostatic Discharge
1.7 ELECTRICAL REQUIREMENTS
A. Automatic transfer switches not intended for continuous duty or repetitive load transfer switching are not acceptable.
B. The automatic transfer switch shall be rated in amperes for total system transfer including
control of motors, electric-discharge lamps, electric heating, and tungsten-filament lamp load.
Switches rated 400 amperes and below shall be suitable for 100% tungsten-filament lamp load.
Switches rated above 400 ampere shall be suitable for 30% tungsten-filament load.
C. The automatic transfer switch shall be rated to withstand the rms symmetrical short c ircu it
current available at the automatic transfer switch terminals, with the type of over current
protection shown on the plans.
1.8 EQUIPMENT
A. The automatic transfer switch shall be: Kohler, Asco or approved equal.
B. The transfer switch shall have the following characteristics:
1. amp current rating: As shown on drawings 2. 3 pole or 4 pole
3. 4 wire, 3 phase
4. Volt-60Hz: As shown on drawings 5. Solid Neutral
6. The withstand and closing ratings with a current limiting fuse shall be 200,000 amps.
7. The withstand and closing ratings with any over current protective device shall be 35,000
amps.
C. The ATS shall be furnished in a NEMA 1 enclosure.
D. The switch shall be a 600 volt class.
1.9 MECHANICAL REQUIREMENTS
A. All main contacts shall be of silver composition. The main contacts shall be protected by arcing
contacts in sizes 400 amperes and above. The main contacts shall be of the blow-on
configuration and of segmented construction in ratings 600 amperes and above.
B. All contacts, coils, springs, and control elements shall be conveniently removable from the front
of the transfer switch without major disassembly or disconnection of power conductors.
C. The contact transfer time shall not exceed one-sixth of a second.
D. All moveable parts of the operating mechanism shall remain in positive mechanical contact
with the main contacts during the transfer operation without the use of separate mechanical
interlocks.
E. The neutral conductor shall be solidly connected as shown on the plans; a neutral conductor
terminal plate with fully rated AL-CU pressure connectors shall be provided.
1.10 TRANSFER SWITCH CONTROL SYSTEM
A. The control module shall direct the operation of the transfer switch. The module's sensing and
logic shall be a built-in microprocessor-based system for maximum reliability, minimum
5513
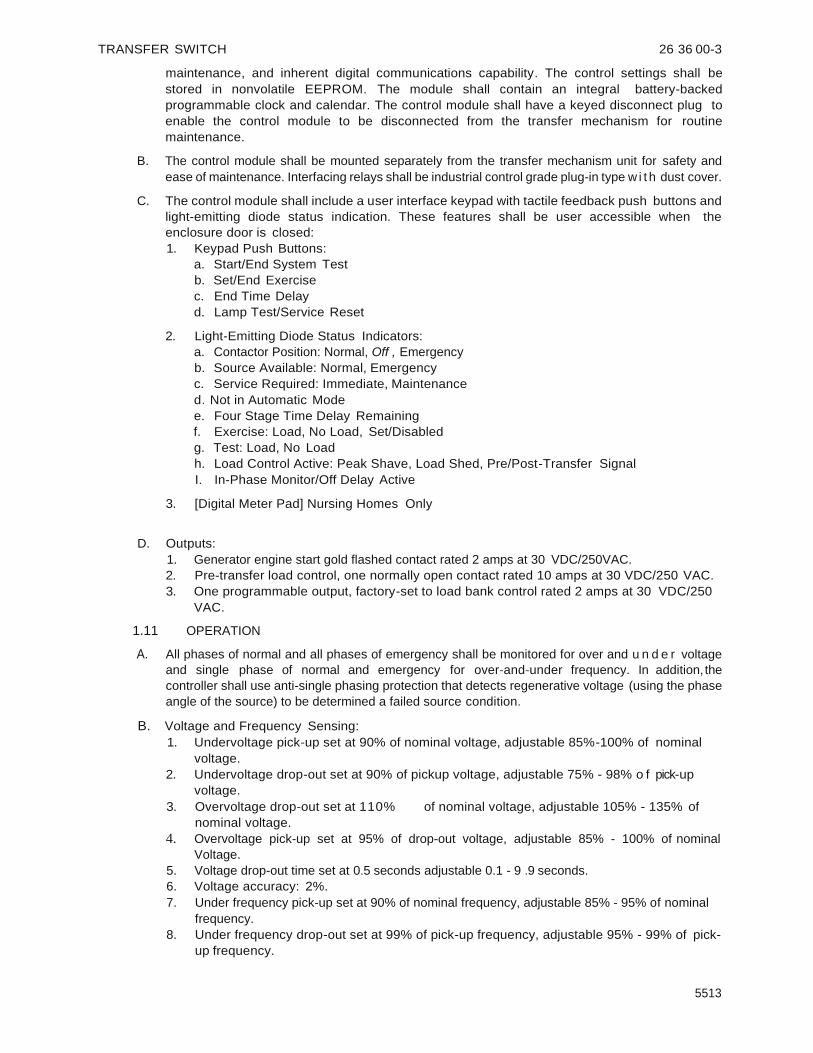
TRANSFER SWITCH 26 36 00-3
maintenance, and inherent digital communications capability. The control settings shall be
stored in nonvolatile EEPROM. The module shall contain an integral battery-backed
programmable clock and calendar. The control module shall have a keyed disconnect plug to
enable the control module to be disconnected from the transfer mechanism for routine
maintenance.
B. The control module shall be mounted separately from the transfer mechanism unit for safety and
ease of maintenance. Interfacing relays shall be industrial control grade plug-in type w i t h dust cover.
C. The control module shall include a user interface keypad with tactile feedback push buttons and
light-emitting diode status indication. These features shall be user accessible when the
enclosure door is closed:
1. Keypad Push Buttons:
a. Start/End System Test
b. Set/End Exercise
c. End Time Delay
d. Lamp Test/Service Reset
2. Light-Emitting Diode Status Indicators:
a. Contactor Position: Normal, Off , Emergency
b. Source Available: Normal, Emergency
c. Service Required: Immediate, Maintenance
d. Not in Automatic Mode
e. Four Stage Time Delay Remaining
f. Exercise: Load, No Load, Set/Disabled
g. Test: Load, No Load
h. Load Control Active: Peak Shave, Load Shed, Pre/Post-Transfer Signal
I. In-Phase Monitor/Off Delay Active
3. [Digital Meter Pad] Nursing Homes Only
D. Outputs:
1. Generator engine start gold flashed contact rated 2 amps at 30 VDC/250VAC.
2. Pre-transfer load control, one normally open contact rated 10 amps at 30 VDC/250 VAC.
3. One programmable output, factory-set to load bank control rated 2 amps at 30 VDC/250
VAC.
1.11 OPERATION
A. All phases of normal and all phases of emergency shall be monitored for over and u n d e r voltage
and single phase of normal and emergency for over-and-under frequency. In addition, the
controller shall use anti-single phasing protection that detects regenerative voltage (using the phase
angle of the source) to be determined a failed source condition.
B. Voltage and Frequency Sensing:
1. Undervoltage pick-up set at 90% of nominal voltage, adjustable 85%-100% of nominal
voltage.
2. Undervoltage drop-out set at 90% of pickup voltage, adjustable 75% - 98% o f pick-up
voltage.
3. Overvoltage drop-out set at 110% of nominal voltage, adjustable 105% - 135% of
nominal voltage.
4. Overvoltage pick-up set at 95% of drop-out voltage, adjustable 85% - 100% of nominal
Voltage.
5. Voltage drop-out time set at 0.5 seconds adjustable 0.1 - 9 .9 seconds.
6. Voltage accuracy: 2%.
7. Under frequency pick-up set at 90% of nominal frequency, adjustable 85% - 95% of nominal
frequency.
8. Under frequency drop-out set at 99% of pick-up frequency, adjustable 95% - 99% of pick
up frequency.
5513

26 36 00-4 TRANSFER SWITCH
9. Over frequency drop-out set at 101% of pick-up frequency, adjustable 101% - 105% of
nominal frequency.
10. Over frequency pick-up set at 110% of pick-up frequency, adjustable 105% - 120% of
nominal frequency.
11. Frequency accuracy: 1%.
C. Time Delays
1. Time delay for engine start to delay initiation of transfer for momentary source outages:
Range 0-6 seconds. Factory set at 3 seconds.
2. Time delay for transfer to standby: Range 0-60 minutes. Factory set at 1 second.
3. Time delay for transfer back to normal: Range 0-60 minutes. Factory set at 15 minutes.
4. Time delay for engine cool down: Range 0-60 minutes. Factory set at O minutes.
5. Failure to acquire standby source: Range 0-60 minutes. Factory set at 1 minute.
6. Pre-transfer to normal signal: Range 0-60 minutes. Factory set at 3 seconds.
7. Pre-transfer to standby signal: Range 0-60 minutes. Factory set at 3 seconds.
8. Post-transfer to normal signal: Range 0-60 minutes. Factory set at O seconds.
9. Post-transfer to standby signal: Range 0-60 minutes. Factory set at O minutes.
D. User terminals shall be available to connect a normally open contact that, when closed, signals
the control module to start and transfer load to the engine generator. Opening these contacts
shall initiate a retransfer and engine cool down sequence. The load shall be transferred to an
available utility source immediately if the generator source shall fail.
E. The following features shall be built into the control module logic. These features shall be
enabled at the factory or in the field.
1. Phase rotation sensing programmable ABC or CBA.
2. In-phase monitoring shall continuously monitor the contactor transfer times, source
voltage, frequency and phase angle to provide a self-adjusting, zero crossing contactor
transfer signal. A flashing LED on the user interface panel shall indicate active in-phase
monitoring.
3. Plant Exerciser: Programmable seven day or fourteen day exerciser with user selectable
load or no-load operation. A LED, on the user interface, shall indicate the type of exercise
(load or no-load). The time remaining on the exercise shall be indicated. The exercise
time may be reset at any time with a single keystroke. The engine shall be allowed to run
when exercise period is terminated. The exerciser may be disabled for maintenance
purposes. An amber LED shall flash on the user interface if the exerciser has been disabled.
The exerciser shall have the capability of being programmed, using up to twenty-one (21)
event for a calendar mode.
The controller shall have provisions for disconnecting a load bank (during exercise) if
there is a loss of normal power.
1.12 MONITORING, PROGRAMMING AND COMMUNICATIONS:
A. Modbus® link:
1. Industry standard Modbus® RTU communication shall be available with network and setup
connections.
END OF SECTION
5513

Division 26 - Electrical 26 43 00-1
SECTION 26 43 00 - TRANSIENT SURGE SUPPRESSION
1. GENERAL
1.1 WORK INCLUDED
A. Applicable provisions of Division 01 apply to work under this section.
8. Transient surge suppression equipment.
1.2 QUALIFICATIONS
A. Company specializing in transient surge suppression equipment with three years’ experience.
1.3 SU8MITTALS
A. Submit shop drawings and product data under provisions of Division 01.
8. Provide wiring diagrams, data sheets, and equipment ratings layout and dimensions.
1.4 OPERATION AND MAINTENANCE DATA
A. Submit data under provisions of Division 01.
1.5 RELATED WORK
A. Section 26 05 00 - Basic Electrical Requirements.
2. PRODUCTS
2.1 MANUFACTURERS
A. Liebert Corp.
B. Northern Technology
C. Substitutions: Under provisions of Section 01 25 00.
2.2 FACILITY PROTECTION EQUIPMENT
A. System Description: The system shall be constructed using multiple surge current diversion
modules utilizing metal oxide varistors (MOV) computer matched to 1% variance and tested for
manufacturer's defects. The modules shall be designed and constructed in a manner that
ensures surge current sharing. Use of gas tubes, silicon avalanche diodes, or selenium cells are
unacceptable unless documentation from a nationally recognized laboratory demonstrates
current sharing of all dissimilar components at all surge current levels.
B. Nominal System Operating Voltage: 277/480 VAC, WYE configuration, 3-phase, 4-wire plus
ground.
C. Maximum Continuous Operating Voltage (MCOV): The TVSS and all components in the
suppression path (including all MOV's, SAD's, and selenium cells} maximum continuous
operating voltage shall be greater than 115% of the normal system operating voltage to ensure
the ability of the system to withstand temporary RMS overvoltage (swell conditions).
D. Operating Frequency: The operating frequency range of the system shall be at least 47 - 63
Hertz.
E. Life Cycle Testing: The TVSS system shall be duty life cycle tested to survive 20KV, 1OkA,
and IEEE C62.41 Category C3 surge current with less than 5% degradation of clamping
voltage.
F. Overcurrent Protection: All components, including suppression, filtering, and monitoring
components, shall be individually fused and rated to allow maximum specified surge current
capacity. For every 100 KAmps of Surge Current Capacity, 120 amps RMS of internal, integral
fusing shall be required. Individual surge components shall be sand packed and fused at a
maximum of 7-1/2 amps to prevent violent failure. The fusing shall be UL listed to be capable of
interrupting up to 300 KA symmetrical fault current with 600VAC applied. Replaceable fusing is
unacceptable. Overcurrent protection that limits specified surge currents is not acceptable.
5513

26 43 00-2 TRANSIENT SURGE SUPPRESSION
G. Protection Modes: The TVSS shall provide protection as follows: All modes, L-N or L-L, L-G
and N-G.
H. Surge Ratings: The maximum UL 1449 listed surge ratings for each and/or all of the specified
protection modes shall not exceed 400 volts in any mode of protection.
I. Noise Attenuation: The unit shall be UL 1283 Listed as an electromagnetic interference filter.
The filter shall provide inserting loss with a maximum of 60dB from 100 Khz to 100 Mhz per 50-
0hm Inserting Loss Methodology from MIL 220A. The system shall provide up to 120-dB insertion
loss from 100 Khz to 100 Mhz when used in a coordinated facility system.
J. Surge Current Capacity: The minimum TVSS surge current capacity, per NEMA LS-1 1992 shall
be 1OOkA surge rating per mode and 200kA surge rating per phase (L-N + L-G).
K. Environmental Requirements:
1. Storage Temperature: -55° to +85° C (-67° to +187° F)
2. Operating Temperature: -40° to +60° C (-40° to 140° F)
3. Relative Humidity: 0% to 95%
4. Audible Noise: Less than 45d8a at 5 feet
5. Operating Altitude: 0 to 18,000 feet above sea level
L. Warranty: The manufacturer shall provide a full five (5) year parts and labor warranty from date
of shipment against any part failure when installed in compliance with manufacturer's written
instructions, UL Listing requirements, and any applicable national, state or local electrical codes.
Direct, factory trained, ISO 9001 certified employees must be available for 48-hour assessment.
A 24 hour 800 number must be available to support warranty.
M. Enclosure: The specified system shall be provided in a heavy duty NEMA 12 dust-tight, drip
tight enclosure with no ventilation openings. All monitoring indication must be visible without
opening the door.
N. Internal Connections and Serviceability: All surge current diversion module i n t r a -unit connections
shall be by way of low impedance copper plates. Surge current diversion modules shall use bolted
connections to the plates for reliable, low impedance connections. A qualified electrician shall
design the system for simple change out of any or all TVSS component modules. Designs that
require factory service are not a c c e p t a b l e . All connections, conductors, and terminals must
be appropriately sized for specified surge capacity.
O. Unit Status Indicators: Red and green solid state indicators with printed labels shall be provided
in the hinged front cover to redundantly indicate on-line unit status. The absence of the green
light and the presence of the red light shall reliably indicate that surge protection is reduced
and service is needed to restore full operation.
P. Dry Contacts for Remote Monitoring: Electrically isolated Form C dry contacts, one normally
open and one normally closed set standard on all units for remote monitoring.
Q. Undervoltage Detection: Unit shall be equipped with 75% undervoltage detection capability.
R. Phase Loss Monitoring: Unit shall be equipped with phase loss monitoring.
S. Power Loss Monitoring: Unit shall be equipped with power loss monitoring.
T. Audible Alarm (optional): The specified system shall be equipped with an audible alarm that
shall be activated when summary alarm contacts are activated. In conjunction with alarm, an
alarm on/off switch shall be provided to silence the alarm and an alarm push-to-test switch shall
be provided to test the alarm function. A visible LED will confirm whether alarm is on or
disabled. Both switches and the audible alarm shall be located on the unit’s hinged front cover.
U. Transient Counters (optional): Dual, adjustable transient counters shall be available to totalize
transient voltage surges in both normal and common modes. The readout shall be at least a
seven digit LCD located on the unit's hinged front cover. The counter reset switches may be
inhibited and must be remotely located. Counter must utilize lithium batteries with a 10-year
nominal life to maintain accurate counts in the event of total power loss.
5513

5513
TRANSIENT SURGE SUPPRESSION 26 43 00-3
V. Remote Monitor Panel (optional): A self-contained, UL Listed, monitoring panel shall be provided
to allow remote annunciation of the system status. Input power to the monitoring panel shall be
equipped with a 6' long input power cord with a NEMA 5-15 plug. The monitor panel shall have
an audible alarm, red and green LED's, an alarm on/off switch to silence, and a push to test
alarm switch.
W. Component Testing and Monitoring: Unit shall include an on-line circuit, which tests and
redundantly monitors individual components in all protection modes including neural to ground.
Units that require external test sets or equipment is unacceptable.
X. External Test Capability: External testing demonstrating surge suppression capability and/or
degradation shall be available.
Y. The unit shall be Liebert Model S277/480Y222.
2.3 LOCAL PANEL PROTECTION UNIT
A. Transient voltage surge protection unit designed to be connected in parallel with electrical power
feeder operating at [120/208] volts, 3-phase, 4-wire to [225] amperes.
B. Electrical Characteristics: Maximum surge current per phase, 8 x 20 microsec waveform;
80,000 A. UL-1449 rating; 400 volt. Reaction Time; less than .5 nanoseconds.
C. Enclosure: 7" x 4" x 4.25", NEMA Type 12.
D. Power on and fault indicators.
E. The unit shall be Model ACV120Y111 R.
F. Provide distribution and branch panel transient voltage surge suppression units as shown on
the drawings and rated as shown.
3. EXECUTION
3.1 INSTALLATION
A. The Electrical Contractor shall install the parallel TVSS with short and straight conductors as
practically possible. The Contractor shall twist the TVSS input conductors together to reduce
input conductor inductance. The Contractor shall follow the TVSS manufacturer's
recommended installation practices a found in the installation, operation and maintenance
manual and comply with all applicable codes.
B. Mount facility protection unit and panel protection unit on wall within 5' and adjacent to panelboard.
3.2 FIELD QUALITY CONTROL
A. Field inspection and testing will be performed under the provisions of Division 01.
B. Test in accordance with manufacturer's instructions.
END OF SECTION
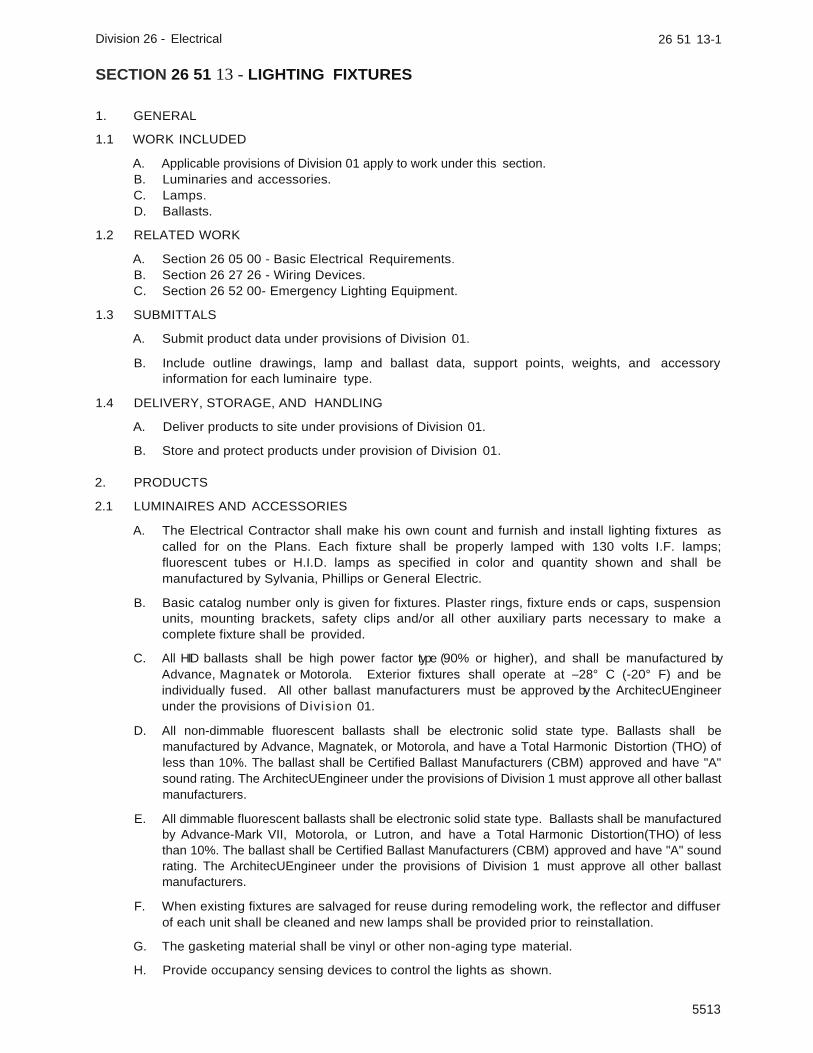
5513
Division 26 - Electrical 26 51 13-1
SECTION 26 51 13 - LIGHTING FIXTURES
1. GENERAL
1.1 WORK INCLUDED
A. Applicable provisions of Division 01 apply to work under this section.
B. Luminaries and accessories.
C. Lamps.
D. Ballasts.
1.2 RELATED WORK
A. Section 26 05 00 - Basic Electrical Requirements.
B. Section 26 27 26 - Wiring Devices.
C. Section 26 52 00- Emergency Lighting Equipment.
1.3 SUBMITTALS
A. Submit product data under provisions of Division 01.
B. Include outline drawings, lamp and ballast data, support points, weights, and accessory
information for each luminaire type.
1.4 DELIVERY, STORAGE, AND HANDLING
A. Deliver products to site under provisions of Division 01.
B. Store and protect products under provision of Division 01.
2. PRODUCTS
2.1 LUMINAIRES AND ACCESSORIES
A. The Electrical Contractor shall make his own count and furnish and install lighting fixtures as
called for on the Plans. Each fixture shall be properly lamped with 130 volts I.F. lamps;
fluorescent tubes or H.I.D. lamps as specified in color and quantity shown and shall be
manufactured by Sylvania, Phillips or General Electric.
B. Basic catalog number only is given for fixtures. Plaster rings, fixture ends or caps, suspension
units, mounting brackets, safety clips and/or all other auxiliary parts necessary to make a
complete fixture shall be provided.
C. All HID ballasts shall be high power factor type (90% or higher), and shall be manufactured by
Advance, Magnatek or Motorola. Exterior fixtures shall operate at -28° C (-20° F) and be
individually fused. All other ballast manufacturers must be approved by the ArchitecUEngineer
under the provisions of Division 01.
D. All non-dimmable fluorescent ballasts shall be electronic solid state type. Ballasts shall be
manufactured by Advance, Magnatek, or Motorola, and have a Total Harmonic Distortion (THO) of
less than 10%. The ballast shall be Certified Ballast Manufacturers (CBM) approved and have "A"
sound rating. The ArchitecUEngineer under the provisions of Division 1 must approve all other ballast
manufacturers.
E. All dimmable fluorescent ballasts shall be electronic solid state type. Ballasts shall be manufactured
by Advance-Mark VII, Motorola, or Lutron, and have a Total Harmonic Distortion (THO) of less
than 10%. The ballast shall be Certified Ballast Manufacturers (CBM) approved and have "A" sound
rating. The ArchitecUEngineer under the provisions of Division 1 must approve all other ballast
manufacturers.
F. When existing fixtures are salvaged for reuse during remodeling work, the reflector and diffuser
of each unit shall be cleaned and new lamps shall be provided prior to reinstallation.
G. The gasketing material shall be vinyl or other non-aging type material.
H. Provide occupancy sensing devices to control the lights as shown.

26 51 13-2 LIGHTING FIXTURES
I. Provide multi-level I dimming ballasts as indicated by the switching.
2.2 EMERGENCY LIGHTING EQUIPMENT
A. Provide emergency lighting equipment as described on drawings.
3. EXECUTION
3.1 INSTALLATION
A. All fixtures must be installed in a workmanlike manner. Care must be taken in the p lacement
of outlets, surface-mounted, recessed or semi- recessed fixtures to maintain the alignment,
spacing’s, layout and general arrangement shown on the plans. The Contractor may v a r y
these dimensions slightly too clear obstructions. The Architect must approve any major changes
in the arrangement.
B. Where recessed fixtures are installed in ceilings finished in a tile pattern or grid-system, the
fixtures shall conform to the tile patterns or layouts. The Electrical Contractor shall cooperate
with the ceiling contractor in locating, supporting and framing fixtures. Description of ceiling
materials and suspension system must be included with fixture order for all recessed fixtures.
C. Recessed lay-in fluorescent fixtures shall be connected by means of a 6' length of flexible
conduit to a junction box or UL approved modular wiring system such that the fixture may later
be repositioned laterally or longitudinally a distance of 2'.
D. All fixtures must have safety clips installed and be supported by ceiling suspension or a structural
system, not from ceiling material. Provide support wires from the building structure to the
fixtures as needed to ensure the integrity of the ceiling suspension system or as required by
local codes or officials. All stem-mounted fixtures shall be suspended with swivel hangers.
E. Should any parts of the fixtures be found to be bent or not in accord with their designed position,
the Contractor shall adjust, repair or replace the affected items as required and subject to
Architect's approval.
F. Conduits shall not be attached to wires or cables, which support a ceiling system. Conduits
above a suspended ceiling system shall be supported from the building structure a minimum
distance of 12" above the ceiling system.
G. Manufactured cables furnished for use with recessed fixtures as part of a flexible wiring system
may be attached to a ceiling system per manufacturer's instructions.
H. Additional knockouts must be made by a knockout punch or hole saw. Debur the hole as
required.
I. Provide additional gasketing if required to prevent light leaks.
J. Adjustable exterior fixtures shall be night aimed.
K. Replace the lamps that are burned out or noticeably dim at the time of substantial completion.
L. The occupancy sensing devices shall be aimed, adjusted, and coordinated to operate with the
lighting system. The occupancy sensing devices shall be commissioned and operating
properly with the required time delays, as instructed by the Owner/Engineer.
M. The fixture and all metal accessories shall be bonded to the branch circuit equipment grounding
conductor.
N. Contractor shall replace ballasts that are "Humming/Noisy'' at the time of Engineer's final walk
through.
O. In areas where lighting fixtures are installed where there are not suspended ceilings, the Electrical Contractor is responsible for furnishing all mounting hardware. The Contractor shall assume the following
1. In areas where lighting fixtures are mounted end-to-end in ceiling joist area, the
Contractor shall furnish support strut to solidly support the fixtures. Strut shall be supported
8' on center using pendant hangers with swivels mounted on 4" square boxes.
5513

5513
LIGHTING FIXTURES 26 51 13-3
The Electrical Contractor is responsible for having all mounting hardware installed prior to
the ceiling being painted. If it is not installed prior to that time, the Contractor shall be
responsible for painting the support hardware. Contractor shall assume that lighting fixtures
shall be mounted to maintain maximum head clearance height and that the bottom of the
fixtures shall be even with the bottom of the ceiling joists. The Contractor shall assume
that the fixtures shall be mounted between the joists unless otherwise shown on the floor
plans. If fixtures are mounted perpendicular to joist, the Contractor shall assume that the
fixtures are attached to the bottom of the joist and shall furnish steel support struts to the
bottom of the fixture joists for fixture support.
2. Mechanical Rooms: The light fixtures in the Mechanical Rooms are shown to indicate
number of fixtures only. The Contractor shall locate the lighting fixtures to coordinate with
the mechanical equipment installation. If required, these fixtures may be supported using
chain with a cord connection. If fixture cannot be mounted on the ceiling, lighting fixture
shall be mounted on the wall using an adjustable wall bracket.
P. Parabolic and louvered type lighting fixture shall not have the fixture lenses installed until after
the carpeting or final floor finish has been installed and all dust has been cleaned out of the
area. The Contractor should exercise care in handling of the lenses and keep them in their
original plastic enclosures until it is time to install the lens. The Contractor shall be responsible
for cleaning the lenses if installed prior to final clean-up time. All parabolic louvers to be low
iridescent, semi-specular type.
END OF SECTION
G:\Projects\5513\Specs\Final\26 51 13.doc • 6/ 15/06
5513
Division 26 - Electrical 26 52 00-1
SECTION 26 52 00 - EMERGENCY LIGHTING EQUIPMENT
1. GENERAL
1.1 WORK INCLUDED
A. Applicable provisions of Division 01 apply to work under this section.
B. Incandescent emergency lighting units.
C. Self-contained emergency exit signs.
D. Emergency powered exit signs.
E. Emergency fluorescent lamp power supplies.
1.2 SUBMITTALS
A. Submit product data under provisions of Division 01.
B. Provide product data on emergency lighting units, exit signs, and emergency fluorescent lamp
power supply units.
1.3 RELATED WORK
A. Section 26 05 00 - Basic Electrical Requirements.
2. PRODUCTS
2.1 ACCEPTABLE MANUFACTURERS - INCANDESCENT EMERGENCY LIGHTING UNITS
A. Chloride Systems
B. Exide
C. Dual-Lite
D. Lithonia E. Emergi-Lite
F. Lightalarms
G. Emergency Lighting and Systems (E.L.S.)
H. Substitutions: Under provisions of Section 01 25 00.
2.2 INCANDESCENT EMERGENCY LIGHTING UNITS
A. Emergency Lighting Unit: Self-contained unit with rechargeable storage batteries, charger, and
lampheads. Designed for mounting to wall, or into laying ceiling structure as indicated.
B. Battery: 12 volt, lead calcium type, with 1.5-hour capacity to supply the connected lamp load.
C. Charger: Charger, capable of maintaining the battery in a full-charge state during normal
conditions, and capable of recharging discharged battery to full charged within 12 hours.
D. Lamps: 12-Watt minimum, sealed beam type in plastic or plated steel housing.
E. Remote Lamps: Match lamps on unit.
F. Indicators: Provide lamps to indicate AC ON and RECHARGING. Provide voltmeter.
G. Provide a switch integral with the unit to transfer the unit from normal supply to battery supply.
H. Accessories: Provide capability of operating remote lampheads and exit signs w h e r e
indicated.
I. Electrical Connection: Knockout for conduit connection.
J. Unit Voltage: 120 volts, 60 Hertz.
K. Provide emergency lighting equipment as scheduled on drawings.
2.3 ACCEPTABLE MANUFACTURERS - SELF-CONTAINED EMERGENCY POWER EXIT SIGNS
A. Chloride Systems
B. Exide
C. Dual-Lite
D. Lithonia

26 52 00-2 EMERGENCY LIGHTING EQUIPMENT
E. Emergi-Lite
F. Lightalarms
G. Emergency Lighting and Systems (E.L.S.}
H. Substitutions: Under provisions of Section 01 25 00.
2.4 SELF-CONTAINED EMERGENCY POWER EXIT SIGNS
A. Type: Exit signs with integral battery-operated emergency power supply, including power failure relay, test switch, AC ON pilot light, battery, and fully-automatic two-rate charger.
B. Battery: Sealed lead acid, lead calcium cell, or nickel cadmium requiring no maintenance or replacement for 10 years under normal conditions.
2.5 ACCEPTABLE MANUFACTURERS - EMERGENCY POWER EXIT SIGNS.
A. Dual-Lite B. Lithonia ·
C. Emergi-Lite
D. Lightalarms
E. Substitutions: Under provisions of Section 01 25 00.
2.6 EMERGENCY POWER EXIT SIGNS
A. Type: Exit signs with LED type light source, red in color and diffused lamp source.
Emergency power is provided by an external source.
2.7 ACCEPTABLE MANUFACTURERS - EMERGENCY FLUORESCENT LAMP POWER SUPPLY
A. Chloride Systems B. Exide
C. Dual-Lite
D. Lithonia
E. Substitutions: Under provisions of Section 01 25 00.
2.8 EMERGENCY FLUORESCENT LAMP POWER SUPPLY
A. Unit: Self-contained, with automatic transfer to battery supply on power failure, including test
switch , AC ON pilot light, fully-automatic two-rate charger, battery, and power supply capable
of operating an F032 lamp with a minimum output of 600 lumens.
B. Battery: Nickel cadmium requiring no maintenance or replacement for 10 years under
n o rm a l conditions.
3. EXECUTION
3.1 INSTALLATION
A. Install the emergency fluorescent units per manufacturer requirements.
B. Install wall mounted emergency lighting units at 1O' in plant areas, and with lamp heads 2"
down from ceiling in office areas. Install laying ceiling units per manufacturer's instructions.
C. Aim directional lampheads as indicated on drawings.
D. Install wall mount exit signs above exit doorways, and ceiling mount elsewhere as shown.
Provide directional arrows as shown.
END OF SECTION
5513