Embed Size (px)
Citation preview

Quick Start Tutorial
The following hands-on tutorial provides a very brief overview of the basic usage of PAUP* 4.0. The tutorial will take you step-by-step through an analysis of one of the sample data files included on your distribution disk and also available on the world wide web at http://paup.csit.fsu.edu/data/primate-mtDNA-interleaved.nex. This tutorial was designed for people with no prior experience using PAUP*. If you are already familiar with PAUP* then you will probably wish to skip this tutorial. We assume that users are familiar with basic phylogenetic terminology and operating system specific issues. For DOS and Unix users, we assume that the PAUP* binary is in your path and that the command "paup" is linked to the PAUP* executable. As you become more experienced using PAUP* 4.0, you will discover that there are many alternative ways to execute the operations described below. For obvious reasons, we have chosen not to describe all the possibilities in this tutorial; however, we encourage you to explore other menu and command-line options as your time permits.
Several versions of PAUP* 4.0 are currently available. These versions fall under three general interface types: Macintosh, Windows, and Portable. In general, the Macintosh interface allows you to execute commands via menus and the command-line, while the Windows and Portable (DOS and Unix) interfaces are almost entirely command-line driven. Some menu functions are available in the Windows interface; however, these functions mostly include file and edit operations. This tutorial will use both menu options and command-line syntax to demonstrate the different environments under which PAUP* may be run.
Throughout this tutorial we follow several typographical conventions. First, menus, menu items, and items contained in dialog boxes or elsewhere on the screen are given in a bold san serif font. For example, the text File > Open means click "File" from the main menu and then select "Open" from the menu items under "File." Second, text that is intended to be typed by the user at the command-line prompt or into a dialog box is given in a plain fixed-width font. For example, the instructions "Type: weights 2:1stpos" mean that everything after "Type:" should be entered exactly as it appears. Finally, interface specific instructions are offset and bulleted, whereas all other text pertains to all of the PAUP* interfaces.
DRAFT --- PAUP* 4.0 QUICK START TUTORIAL 1/9/02 -1

Starting PAUP* Quick Start Tutorial
Starting PAUP*
1 Examine the data file
Mac and Windows • Double-click the PAUP application icon.
• PAUP* will automatically launch the open dialog box when it is first started.
• Select the file named primate-mtDNA-interleaved.nex in the Sample NEXUS data folder.
• Open the file in PAUP*’s editor by changing the initial mode from Execute to Edit and click Edit.
Portable • Change directories to Sample-NEXUS-files included in the PAUP archive.
• Chose your favorite text editor (e.g., vi or emacs) to open the sample file named primate-mtDNA-interleaved.nex.
In the editor, scroll through the sample file. Notice that the file is divided into blocks of text, delimited by the words "begin" and "end". The word following "begin" defines the block-type. In this example, the following types of blocks are used: taxa, characters, assumptions, and paup. There are, however, numerous other NEXUS block-types. In fact, one of the advantages of the NEXUS format is that
-2 January 9, 2002 1:10 pm DRAFT --- PAUP* 4.0 QUICK START TUTORIAL

Quick Start Tutorial Starting PAUP*
applications will simply skip over blocks that they do not recognize. For a more detailed discussion of the NEXUS format see Maddison, et al. (1997). For this example, you will not need to modify the original sample file.
2 Execute the data file
Close the sample file and do the following:
Mac and Windows • Select File > Execute "primate-mtDNA-interleaved.nex"
Portable • Type paup at your system prompt. PAUP* will display general information about the program and leave you at a paup-prompt.
• Type: execute primate-mtDNA-interleaved.nex;
After executing the sample file, PAUP* will display comments and some general information about the data. For this example, the source of the data set is given, followed by a section reporting the dimensions of the data matrix, the type of data, etc. As of yet, no analyses have been conducted; PAUP* has simply processed the data and is now waiting to be told what to do next.
DRAFT --- PAUP* 4.0 QUICK START TUTORIAL 1/9/02 -3

Logging results Quick Start Tutorial
Logging results
Ordinarily, you will want to log the results of a PAUP* session to a disk file to have a record of the results of your analyses.
1 Start logging
Mac and Windows • Select File > Log Output to Disk...
Mac • Under Log subsequent output to: type practice.log and click Start Saving
Windows • Under Filename: type practice.log and click Start
Portable • Type: log start file=practice.log;
2 Stop logging
Logging can be started and stopped anytime during your PAUP* session. To stop logging do the following:
Mac • Select File > Log Output to Disk... and click Stop Saving
Windows • Select File > Log Output to Disk...
Portable • Type: log stop;
-4 January 9, 2002 1:10 pm DRAFT --- PAUP* 4.0 QUICK START TUTORIAL

Quick Start Tutorial Summarizing the data
Summarizing the data
Now that the data matrix has been processed, you can use PAUP* to obtain basic summary information about the data set. To start, you will display information about the characters included in sample data set.
Mac • Select Data > Show Character Status...
• Do not change the default settings and click OK.
Portable andWindows
• Type: cstatus;
PAUP* will display a summary of the current character status (i.e., types, weights, etc.). Remember, if logging was turned on, the summary information displayed to your screen will also be saved to the log file. You may also choose to display a summary of the taxa (tstatus), the entire data matrix (showmatrix), and more. All of these commands are located under the Data menu.
DRAFT --- PAUP* 4.0 QUICK START TUTORIAL 1/9/02 -5
Managing the data Quick Start Tutorial
Managing the data
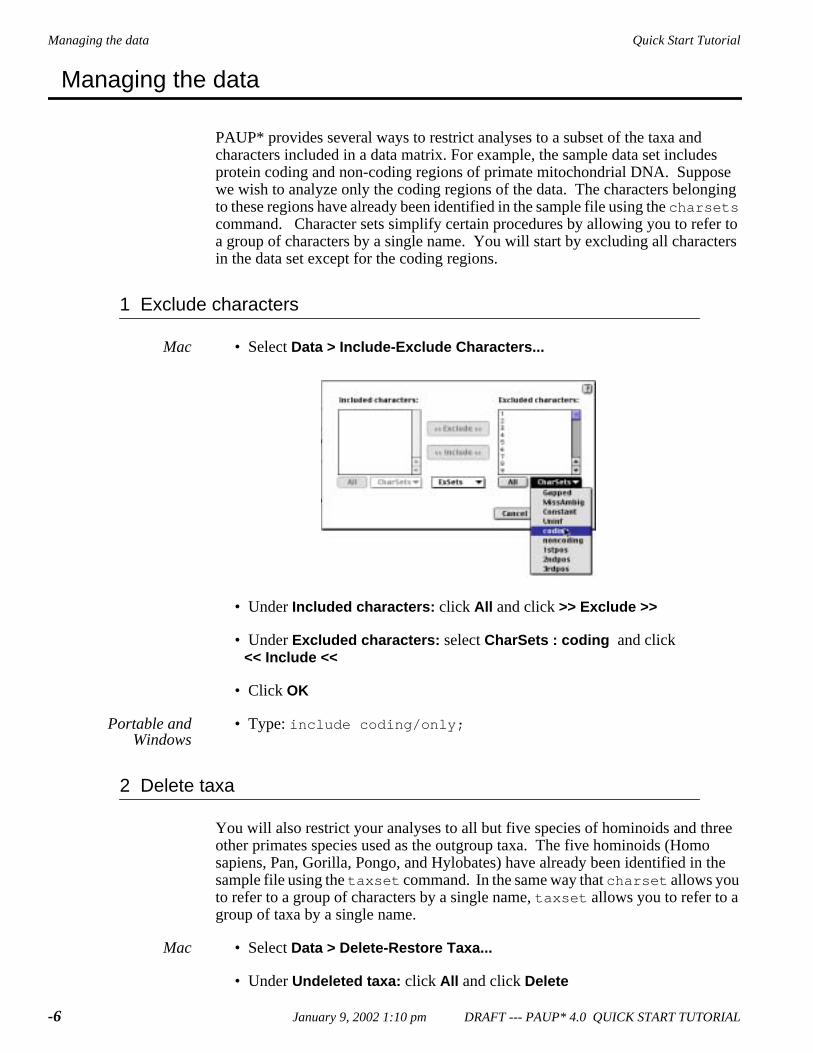
PAUP* provides several ways to restrict analyses to a subset of the taxa and characters included in a data matrix. For example, the sample data set includes protein coding and non-coding regions of primate mitochondrial DNA. Suppose we wish to analyze only the coding regions of the data. The characters belonging to these regions have already been identified in the sample file using the charsets command. Character sets simplify certain procedures by allowing you to refer to a group of characters by a single name. You will start by excluding all characters in the data set except for the coding regions.
1 Exclude characters
Mac • Select Data > Include-Exclude Characters...
• Under Included characters: click All and click >> Exclude >>
• Under Excluded characters: select CharSets : coding and click<< Include <<
• Click OK
Portable andWindows
• Type: include coding/only;
2 Delete taxa
You will also restrict your analyses to all but five species of hominoids and three other primates species used as the outgroup taxa. The five hominoids (Homo sapiens, Pan, Gorilla, Pongo, and Hylobates) have already been identified in the sample file using the taxset command. In the same way that charset allows you to refer to a group of characters by a single name, taxset allows you to refer to a group of taxa by a single name.
Mac • Select Data > Delete-Restore Taxa...
• Under Undeleted taxa: click All and click Delete
-6 January 9, 2002 1:10 pm DRAFT --- PAUP* 4.0 QUICK START TUTORIAL

Quick Start Tutorial Managing the data
• Under Deleted taxa: select Taxsets and then hominoids
• Holding down the apple command key (") select Lemur catta, Macaca fuscata and Saimiri sciureus
• Click Restore and OK
Portable andWindows
• Type: undelete hominoids lemur_catta macaca_fuscata saimiri_sciureus/only;
Notice that spaces in taxon names must be replaced with an "_" (underscore character) or enclosed in single quotes when entered at the command-line. Also, PAUP* does not pay attention to the character case in taxa labels. Finally, be aware that when you exclude characters or delete taxa using the exclude and delete commands respectively (or the menu equivalents) you do not actually modify the data file. That is, the next time you execute the sample data set all of the characters and taxa will be included.
DRAFT --- PAUP* 4.0 QUICK START TUTORIAL 1/9/02 -7

Defining assumptions Quick Start Tutorial
Defining assumptions
Before you begin an analysis there is a good chance that you know something about the characters in your data matrix, which might suggest that the characters should be differentially weighted. For example, we know that substitutions at the first codon position generally occur less frequently than substitutions at third positions. The simple explanation for this is that substitutions at first position codons usually result in an amino acid substitution; whereas, third-position changes can occur without changing the amino acid translation. You will incorporate this information into the following analysis by applying a higher weight to substitutions occurring at first position codons. Codon positions have already been identified in the sample file using the charset command.
1 Add character weights
Mac • Select Data > Set Character Weights...
• Under the CharSets menu select 1stpos
• In the Assign weight box type 2 and click Apply and then Done
Portable andWindows
• Type: weights 2:1stpos;
2 Set character types
By default, PAUP* considers all transformation costs to be equal. In this section, you will invoke a character type that will assign a higher weight to transversions than to transitions. More specifically, we will assume that transversions, changes from a purine (A or G) to pyrimidine (C or T), are two times the cost of transitions, changes from a purine to a purine and pyrimidine to a pyrimidine. One way to incorporate this assumption into the analysis is to set up a transition/transversion "step matrix”. Such a step matrix has already been defined in the sample file. To apply the transformation cost to all of the characters currently being considered, do the following:
-8 January 9, 2002 1:10 pm DRAFT --- PAUP* 4.0 QUICK START TUTORIAL

Quick Start Tutorial Defining assumptions
Mac • Select Data > Set Character Types...
• Under Characters: click the All button
• Under the User-Defined menu select 2 1 and click Done
Portable andWindows
• Type: ctype 2_1:all;
3 Save current assumptions
Up to this point you have excluded characters, deleted taxa, weighted characters, and defined character transformation types. If for some reason you had to abandon your analyses and close PAUP*, you would have to select all of the menu options or repeat the commands previously entered to get back to where you are now. One way to avoid this potentially time-consuming task is to save your assumptions to a file that can be recalled at a later time.
Mac • Select Data > Save Current Assumptions...
• Type in the filename tutorial.dat and click Save
Portable andWindows
• Type: saveassum file=tutorial.dat;
4 Recall assumptions
Restart PAUP* and execute the file primate-mtDNA-interleaved.nex as you did in the beginning of the tutorial. Do the following to recall the previous set of assumptions:
DRAFT --- PAUP* 4.0 QUICK START TUTORIAL 1/9/02 -9

Defining assumptions Quick Start Tutorial
Mac and Windows • Select File : Open... and select tutorial.dat
• Change the Initial mode from Edit to Execute and click Execute
Portable • Type: execute tutorial.dat;
You should now be back to where you started. To be sure the assumptions are in effect, select Show Character Status... from the Data menu or issue the command cstatus from the command-line. You should get the following output:
-10 January 9, 2002 1:10 pm DRAFT --- PAUP* 4.0 QUICK START TUTORIAL
Quick Start Tutorial Searching for Trees
Searching for Trees
1 Define optimality criterion
PAUP* 4.0 has the advantage of being able to analyze data using several different optimality criteria; parsimony, likelihood, and distance. Several chapters in this manual and a plethora of published literature are devoted to comparing the performance of optimality criteria. Rather than spend time here discussing the relative merits of the available optimality criteria, we will just say that each criterion has its strengths and limitations. To begin with, you will use the default criterion, maximum parsimony, to search for optimal trees. Later in this tutorial you will search under the other criteria.
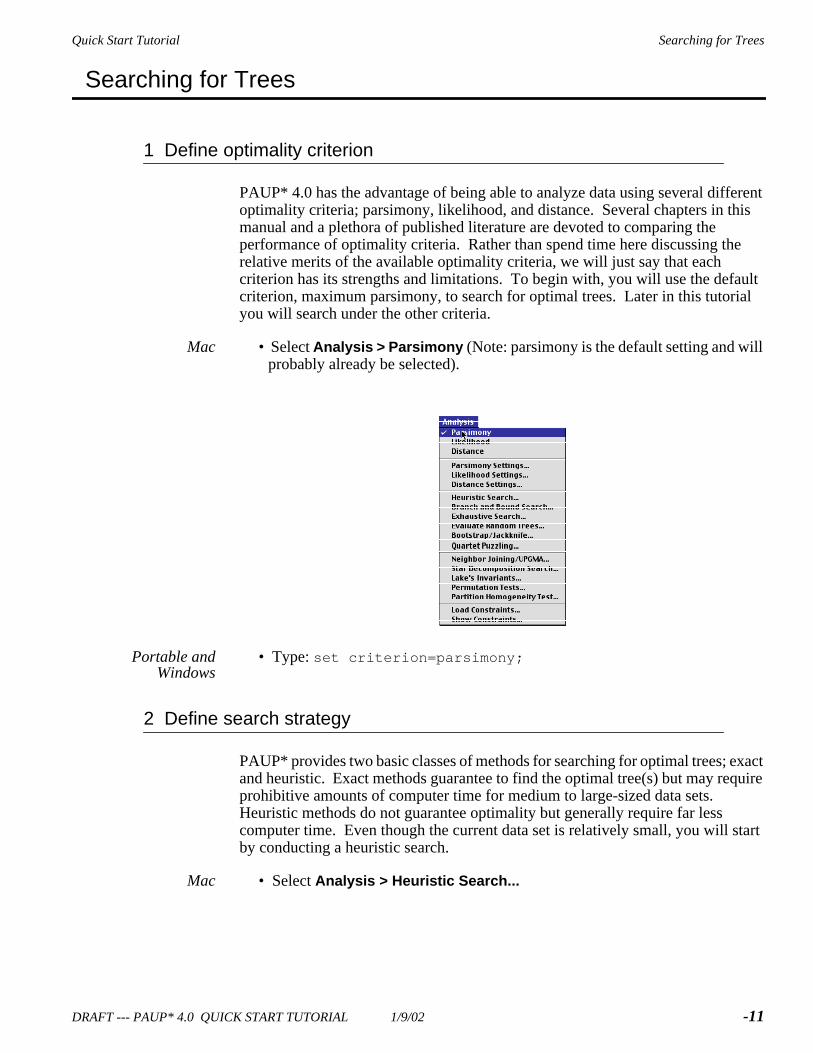
Mac • Select Analysis > Parsimony (Note: parsimony is the default setting and will probably already be selected).
Portable andWindows
• Type: set criterion=parsimony;
2 Define search strategy
PAUP* provides two basic classes of methods for searching for optimal trees; exact and heuristic. Exact methods guarantee to find the optimal tree(s) but may require prohibitive amounts of computer time for medium to large-sized data sets. Heuristic methods do not guarantee optimality but generally require far less computer time. Even though the current data set is relatively small, you will start by conducting a heuristic search.
Mac • Select Analysis > Heuristic Search...
DRAFT --- PAUP* 4.0 QUICK START TUTORIAL 1/9/02 -11

Searching for Trees Quick Start Tutorial
• Under the options menu chose Stepwise-Addition Options
• Change Addition sequence from Simple to Random and click Search
Portable andWindows
• Type: hsearch addseq=random;
Once the search is started, PAUP* will display general information about the options and assumptions being used during the search. If you were logging results, this information would be saved to the log file. When the search completes, PAUP* will display general information about the results of the search.
Mac and Windows • Click Close to dismiss the search status dialog box
-12 January 9, 2002 1:10 pm DRAFT --- PAUP* 4.0 QUICK START TUTORIAL

Quick Start Tutorial Printing trees
Printing trees
1 Display trees
According to the output on your screen, there is a single tree currently in memory. To display the tree do the following:
Mac • Select Trees > Show Trees...
• Click OK and the single most parsimonious tree is printed to the display.
Portable andWindows
• Type: showtrees;
2 Describe trees
The showtrees command draws a simple picture of the branching order of the taxa. Say for example, you want to know something about the branch lengths of the tree. To get a more detailed picture of the tree do the following:
Mac • Select Trees > Describe Trees...
• Under Output select branch-length table
• Under Plot type deselect cladogram and select phylogram
• Click Describe
DRAFT --- PAUP* 4.0 QUICK START TUTORIAL 1/9/02 -13

Printing trees Quick Start Tutorial
Portable andWindows
• Type: describetrees 1/plot=phylogram brlens=yes;
3 Print low-resolution trees
Mac and Windows • One way to get a quick paper copy of the tree shown on your display is to print the contents of the display buffer. Printing the display buffer, however, will print the tree as well as everything else output to the screen before the tree was displayed. Therefore, we recommend that you first clear the contents of the display buffer and then display the tree again using the showtrees or describetrees command.
• Select File > Print Display Buffer...
Portable • To get a print out from the portable versions you can either print the console window after the showtrees command is issued or you may print a selected portion of the log file. Remember that if you are logging output to a file, any tree that is printed to your screen is also saved to the log file.
4 Print high-resolution trees
Only the Macintosh interface is capable of printing high-resolution trees.
Mac • Select Trees > Print Trees...
• Select Plot type > CircleTree ...
• Click the Show branch lengths check box and click Preview
• Select Done and then Print if you wish to print the selected tree.
Portable andWindows
If you are using either the Windows or Portable versions of PAUP* and need to print a high-resolution tree you must use a third party tree-printing software package. The program TreeView by Rod Page can print and save high-resolution trees from NEXUS formatted tree files. TreeView will run on a Macintosh or PC and may be downloaded for free at http://taxonomy.zoology.gla.ac.uk/rod/treeview.html.
-14 January 9, 2002 1:10 pm DRAFT --- PAUP* 4.0 QUICK START TUTORIAL

Quick Start Tutorial Saving results
Saving results
PAUP* can save trees in several different formats: PICT (Mac only), NEXUS, Freqpars, Phylip, and Hennig86. To save the tree in NEXUS format:
Mac • Select Trees > Save Trees to File...
• In the Save Trees as: dialog box type the file name mp.tre and click Save
Portable andWindows
• Type: savetrees file=mp.tre;
DRAFT --- PAUP* 4.0 QUICK START TUTORIAL 1/9/02 -15

Setting the optimality criterion to distance Quick Start Tutorial
Setting the optimality criterion to distance
PAUP* provides a wide range of pairwise distant measures, from simple absolute differences to more complicated model-based corrected distances. Pairwise distances can be summarized in a table or used to construct UPGMA and neighbor joining trees. In addition, PAUP* can use the minimum evolution and least-squares functions to evaluate trees under the distance criterion. The following section will introduce you to some of these methods.
1 Set the optimality criterion
Mac • Select Analysis > Distance
Portable andWindows
• Type: set criterion=distance;
2 Display distances
First you will need to choose among the distance measures that PAUP* can calculate. For this tutorial, you will chose the Hasegawa, Kishino, and Yano (1985) distance, which estimates a transition/tranversion ratio and base frequencies.
Mac • Select Analysis > Distance Settings...
• In the distance settings dialog box change DNA/RNA distances from Uncorrected ("p") to HKY85 and click OK
• Select Data > Show Pairwise Distances
Portable andWindows
• Type: dset distance=hky85;
• Type: showdist;
-16 January 9, 2002 1:10 pm DRAFT --- PAUP* 4.0 QUICK START TUTORIAL

Quick Start Tutorial Setting the optimality criterion to distance
3 Build a neighbor joining tree
Next, you will construct a neighbor joining tree using the HKY85 distances.
Mac • Select Analysis > Neighbor Joining/UPGMA...
• Click OK
Portable andWindows
• Type: nj;
4 Build a least squares tree
Mac • Select Analysis > Distance Settings...
• Change Other options: to Objective function
• Select Weighted least squares
DRAFT --- PAUP* 4.0 QUICK START TUTORIAL 1/9/02 -17

Setting the optimality criterion to distance Quick Start Tutorial
• Inverse-squared weighting (power=2) should be the default setting under Weighted least squares. If it is not, then select it now and click OK.
• Start the least squares search by selecting Analysis > Heuristic Search...
• Click Search in the heuristic search dialog box.
Portable andWindows
• Type: dset objective=lsfit power=2;
• Type: hsearch;
-18 January 9, 2002 1:10 pm DRAFT --- PAUP* 4.0 QUICK START TUTORIAL
Quick Start Tutorial Setting the optimality criterion to likelihood
Setting the optimality criterion to likelihood
To complete this tutorial, you will search for optimal trees using the maximum likelihood criterion. Under maximum likelihood, an explicit model of nucleotide substitution is used to evaluate trees. Selecting an appropriate model of nucleotide substitution is an important step in a likelihood analysis but is beyond the scope of this tutorial. To save time, we have chosen an appropriate model; however, you are encouraged to see Swofford et al. (1996) for a discussion of model selection under the maximum likelihood criterion. You will use the parsimony tree, saved earlier in this tutorial, to obtain an optimal set of model parameters given the data. Later you will use the same model and set of parameter estimates to search for a maximum likehood tree.
1 Set the optimality criterion
Mac • Select Analysis > Likelihood
Portable andWindows
• Type: set criterion=likelihood;
2 Evaluate the parsimony tree
We have chosen the Hasegawa, Kishino, and Yano (1985) model of sequence evolution with gamma distributed rates. Given the parsimony topology and the data we will use PAUP* to estimate the optimal transition/tranversion rate ratio, base frequencies, and among-site rate heterogeniety.
Mac • Select Trees > Get Trees from File...
• Click Yes to dismiss the dialog box warning you that there are unsaved trees.
• Select the file mp.tre and click Get Trees
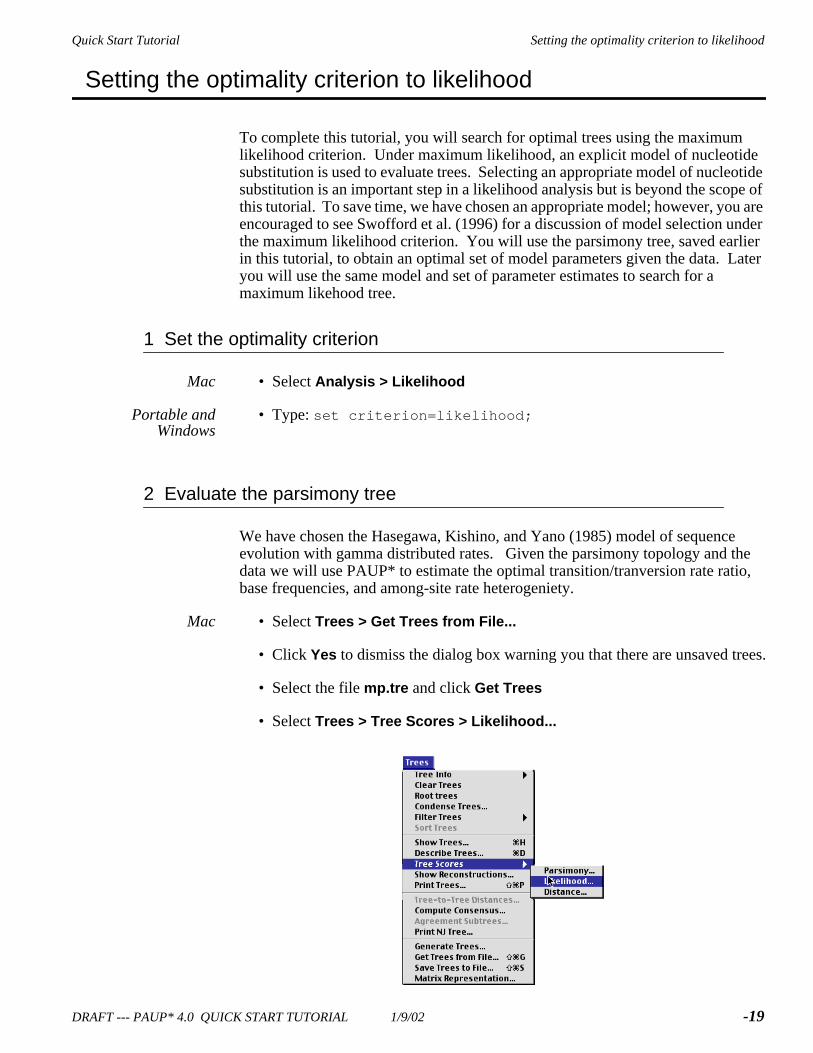
• Select Trees > Tree Scores > Likelihood...
DRAFT --- PAUP* 4.0 QUICK START TUTORIAL 1/9/02 -19

Setting the optimality criterion to likelihood Quick Start Tutorial
• In the trees scores dialog box click Likelihoods settings...
• Under the Maximum likelihood options: select Substitution model
• Change the Ti/tv ratio: from Set to: to Estimate
• Under the Maximum likelihood options: select Among-site rate variation
• Under Variable sites select Gamma distribution
• Under Shape parameter change the rate from Set to: to Estimate
• Clike OK
-20 January 9, 2002 1:10 pm DRAFT --- PAUP* 4.0 QUICK START TUTORIAL

Quick Start Tutorial Setting the optimality criterion to likelihood
• Return to the Maximum likelihood option: menu and select Miscellaneous
• Select Ignore character weights (if relevant) and click OK
• Click OK again in the trees scores dialog box
Portable andWindows
• Type: gettrees file=mp.tre;
• Hit Enter to dismiss the warning that there are unsaved trees.
• Type: lscores 1 / wts=ignore nst=2 tratio=estimate rates=gamma shape=estimate;
Depending on the computer you are using it may take a few seconds to several minutes for PAUP* to optimize branch lengths and substitution model parameters on the tree currently in memory. When PAUP* finishes it will output the negative log likelihood of the tree topology found by the parsimony search and give the estimated model parameters values.
3 Set likelihood model parameters
Before starting the heuristic search, you will fix the model parameters to those estimated in the previous step. If the options are left to estimate, PAUP* will estimate the parameters on each topology rearrangement made during the heuristic search. Because PAUP* may make thousands of topology rearrangements during a heuristic search, leaving options set to estimate will dramatically increase the time required to complete the search. In general, a more efficient method of estimating model parameters and tree topologies under maximum likelihood is by successively estimating model parameters on novel trees generated by the tree search (Swofford et al. 1996). More specifically, if the topology found under the likelihood criterion differs from that on which the parameters were estimated, then you reestimate parameters on the new topology and search again using the new set of parameters. For this tutorial, you will complete one iteration of estimating parameters on a topology and applying the parameters to a subsequent search. In principle, you would continue until you converged on the same topology.
Mac • Select Analysis > Likelihood Settings...
• Under the Maximum likelihood options: select Substitution model
DRAFT --- PAUP* 4.0 QUICK START TUTORIAL 1/9/02 -21

Setting the optimality criterion to likelihood Quick Start Tutorial
• Set the Ti/tv ratio: to the value estimated in the previous step by clicking the Previous button.
• Under the Maximum likelihood option: select Among -site rate variation
• Set the Shape parameter to the value estimated in the previous step by clicking the Previous button
• Click OK
Portable andWindows
• Type: lset tratio=previous shape=previous;
4 Start the tree search
Mac • Select Analysis > Heuristic Search...
• Under the Heuristic Search pull-down menu select Step-wise addition options
• Under Addition sequence change random to asis and click Search
Portable andWindows
• Type: hsearch addseq=asis;
Again, the time required to complete the search will depend on the computer you are using.
-22 January 9, 2002 1:10 pm DRAFT --- PAUP* 4.0 QUICK START TUTORIAL

Quick Start Tutorial Submitting commands in batch file
Submitting commands in batch file
Analyses can also be conducted using a non-interactive batch method. This is especially useful when you know your analyses will require a great deal of time to complete. In the example below, all the instructions required to complete the sample analyses described above are contained in a "paup" block. A set command was added at the beginning of the paup block to suppress the dialog box indicating that the heuristic search has completed and several other warnings (Mac and Windows only). To run the block in batch mode, copy the text given below to a file and save the file in the same directory as the primate-mtDNA-interleaved.nex file. Now execute the file as you did the primate-mtDNA-interleaved.nex file.
Begin paup; set autoclose=yes warntree=no warnreset=no; log start file=practice.log replace; execute primate-mtDNA-interleaved.nex; cstatus; include coding/only; undelete hominoids lemur_catta macaca_fuscata saimiri_sciureus/only; weight 2:1stpos; ctype 2_1:all; Set criterion=parsimony; hsearch addseq=random; Showtree; describetrees 1/ plot=phylogram brlens=yes; savetrees file=mp.tre replace; set criterion=distance; dset distance=hky85; showdist; nj; dset objective=lsfit power=2; hsearch; gettrees file=mp.tre; lscore 1/wts=ignore nst=2 tratio=est rates=gamma shape=estimate; set criterion=likelihood; lset tratio=previous shape=previous; hsearch addseq=asis;end;
DRAFT --- PAUP* 4.0 QUICK START TUTORIAL 1/9/02 -23

Moving on Quick Start Tutorial
Moving on
This concludes the brief overview of the basic usage of PAUP* 4.0. A list and brief descriptions of all the commands and options available in PAUP* is given in the Command Reference documentation. From here we encourage you to explore your own data sets or some of the other sample data sets included with PAUP*. You can also find information on how to use PAUP* on-line at our web site:http://paup.csit.fsu.edu/.
-24 January 9, 2002 1:10 pm DRAFT --- PAUP* 4.0 QUICK START TUTORIAL