Embed Size (px)
Citation preview
About the PLC series:
Welcome to an adventure! If you are a teacher who is interested in developing a
professional learning community to develop your classroom repertoire and increase
your students’ achievement and motivation, you are in for a treat. A professional
learning community (PLC) is a small group of teachers or administrators that meets
regularly and works between meetings to accomplish shared goals. PLCs are vehicles
for connecting teacher practice and student outcomes, improving both.
About this book:
Protocols for Professional Learning is your guide to helping PLCs successfully explore
any topic. You’ll find step-by-step instructions for implementing 16 different protocols
that can be used to examine student work or professional practice, address problems
with students or among faculty, and facilitate effective discussions.
Education
BROWSE EXCERPTS FROM ASCD BOOKS:www.ascd.org/memberbooks
Alexandria, Virginia USA
Lois Brown Easton
PROTOCOLSfor Professional Learning

ASCD cares about Planet Earth. This book has been printed on environmentally friendly paper.
Lois Brown Easton
Alexandria, Virginia USA
PROTOCOLSfor Professional Learning
1703 N. Beauregard St. • Alexandria, VA 22311-1714 USAPhone: 800-933-2723 or 703-578-9600 • Fax: 703-575-5400Web site: www.ascd.org • E-mail: [email protected] guidelines: www.ascd.org/write
Gene R. Carter, Executive Director; Nancy Modrak, Publisher; Julie Houtz, Director of Book Editing & Production; Ernesto Yermoli, Project Manager; Reece Quiñones, Senior Graphic Designer; Mike Kalyan, Production Manager; Valerie Younkin, Desktop Publishing Specialist
Copyright © 2009 by ASCD. All rights reserved. No part of this publication may be reproduced or transmitted in any form or by any means, electronic or mechanical, including photocopy, record-ing, or any information storage and retrieval system, without permission from ASCD. Readers who wish to duplicate material copyrighted by ASCD may do so for a small fee by contacting the Copy-right Clearance Center (CCC), 222 Rosewood Dr., Danvers, MA 01923, USA (phone: 978-750-8400; fax: 978-646-8600; Web: www.copyright.com). For requests to reprint rather than photocopy, contact ASCD’s permissions office: 703-575-5749 or [email protected]. Translation inquiries: [email protected].
Printed in the United States of America. Cover art copyright © 2009 by ASCD. ASCD publications present a variety of viewpoints. The views expressed or implied in this book should not be inter-preted as official positions of the Association.
All Web links in this book are correct as of the publication date below but may have become inac-tive or otherwise modified since that time. If you notice a deactivated or changed link, please e-mail [email protected] with the words “Link Update” in the subject line. In your message, please specify the Web link, the book title, and the page number on which the link appears.
PAPERBACK ISBN: 978-1-4166-0837-0 ASCD product #109037 n5/09
Also available as an e-book through ebrary, netLibrary, and many online booksellers (see Books in Print for the ISBNs).
Quantity discounts for the paperback edition only: 10–49 copies, 10%; 50+ copies, 15%; for 1,000 or more copies, call 800-933-2723, ext. 5634, or 703-575-5634. For desk copies: [email protected].
Library of Congress Cataloging-in-Publication DataEaston, Lois Brown. Protocols for professional learning / Lois Brown Easton. p. cm—(The professional learning community series) Includes bibliographical references and index. ISBN 978-1-4166-0837-0 (pbk. : alk. paper) 1. Teachers—In-service training—United States.2. Professional learning communities—United States. I. Association for Supervision and CurriculumDevelopment. II. Title. LB1731.E16 2009 370.71’55—dc22
2009003021
20 19 18 17 16 15 14 13 12 11 10 09 1 2 3 4 5 6 7 8 9 10 11 12
This book is dedicated to all of the teachers
who have challenged themselves to engage
in teaching as inquiry—and to the
organizations that have supported them.

Acknowledgments . . . . . . . . . . . . . . . . . . . . . . . . . . . . . . . . . . . . .ix
Introduction . . . . . . . . . . . . . . . . . . . . . . . . . . . . . . . . . . . . . . . . . . 1
Chapter 1: What Protocols Are and Why to Use Them . . . . . . . . . . . 5
Chapter 2: The Nuts and Bolts of Using Protocols . . . . . . . . . . . . . 17
Chapter 3: Protocols for Examining Student Work . . . . . . . . . . . . . 33
Chapter 4: Protocols for Examining Professional Practice . . . . . . . . 49
Chapter 5: Protocols for Addressing Issues and Problems . . . . . . . 63
Chapter 6: Protocols for Effective Discussions . . . . . . . . . . . . . . . . 77
Online Resources . . . . . . . . . . . . . . . . . . . . . . . . . . . . . . . . . . . . . 87
References . . . . . . . . . . . . . . . . . . . . . . . . . . . . . . . . . . . . . . . . . . 89
About the Author . . . . . . . . . . . . . . . . . . . . . . . . . . . . . . . . . . . . . 91
Protocols forProfessionalLearning
i x
Acknowledgments
These individuals and organizations have been instrumental in changing the way educators think about professional learning and its connection to student learning. In alphabetical order: David Allen, The Annenberg Institute for School Reform, The ATLAS Project, Bay Area Coalition of Equitable Schools, Tina Blythe, California Cen-ter for School Reform, Pat Carini, Center for Collaborative Education, The Coalition of Essential Schools (both participating schools and participants in the coalition’s Fall Forum sessions related to protocols), Columbia University Teachers College, Linda Darling-Hammond, Alan Dichter, Faith Dunne, Paula Evans, Exhibitions Proj-ect at Harvard Project Zero, Steve Jubb, Ann Lieberman, Elizabeth C. McDonald, Joseph M. McDonald, Nancy Mohr, National School Reform Faculty, National Writing Project, Barbara Powell, The Prospect Archive and Center for Education and Research, Stevi Quate, Catherine Rubin, Steve Seidel, Katherine Simon, Theodore Sizer, Southern Maine Partnership, Steven Strull, Gene Thompson-Grove, and Alexandra Weinbaum.
Special thanks to David Allen, Joseph McDonald, and Steven Strull, who reviewed the manuscript for me.
1
Introduction
Part of your adventure in becoming a professional learning community (PLC) is the opportunity to use a variety of protocols. You’ll find them an ideal vehicle for hold-ing the professional conversations that need to occur in PLCs—conversations that will lead to increased student achievement and motivation. You’ll be delighted to discover that the protocols themselves serve as a kind of cofacilitator (along with you) for these professional conversations. They will animate your professional learn-ing community.
A few descriptors will help you get started on your adventure. Protocols are
• Processes that help groups achieve deep understanding through dialogue.• Structures for groups that allow them to explore ideas deeply through stu-
dent work, artifacts of educator practice, texts relating to education, or prob-lems and issues that surface during the day-to-day lives of educators.
• Guidelines for conversation based on norms that everyone agrees upon in order to make the dialogue safe and effective.
• A facilitated set of steps which everyone understands and has agreed to that permits a kind of conversation that people don’t usually have when they dis-cuss things.
• A constructivist approach to discussion that allows for deep development of ideas as certain people talk while others listen and then the talkers lis-ten and the listeners talk, with each round characterized by reflection and exploration.
• A way for educators to build collaborative communities, sometimes called critical friends groups (CFGs) or professional learning communities (PLCs).
Protocols help educators achieve trust and create a culture that is essential for col-laborative work on issues of substance. You can’t wait until the culture is “perfect” to engage in protocols; it is through their use that the culture will develop and trust will emerge. The structure and norms, such as warm and cool feedback, of the protocols, combined with actions that are in accordance with the assumptions that
Protocols for Profess ional Learn ing2
undergird protocols, lead to a collaborative culture willing to engage in substantive dialogue.
As with PLCs, you begin to engage in protocols with people who are most ready to take the journey with you. Your fellow travelers are the early adopters, the scouts in the adventure—they’ll want to answer your invitation to the journey with a hearty “yes!” Let the word spread—share at faculty, department, and grade-level meetings what you are learning through the protocols. Model at meetings. Create a blog. Send out e-mails. Issue direct invitations.
As you think about your journey toward becoming a PLC that uses protocols, you’ll want to consider logistics:
• Protocols can be done by as few as 3–4 people or as many as 30–40. A group of about 6–8 is ideal to ensure a diversity of ideas and sufficient air time for all participants. Alternatively, a group of 3 can engage in the Triad Protocol, where each participant is a presenter, discussant, and observer in turn. A large number of participants can be handled through protocols such as the Vertical Slice, or by arranging for several concurrent protocols.
• Some protocols can be accomplished in as little as 20–30 minutes; others require as much as half a day. Steps may be shortened or lengthened to fit desired time periods, but all of the steps must be included in a protocol for it to be effective.
• Protocols are suitable for both mixed and job-alike groups. Administrators can engage in their own protocols or join mixed-group protocols as equals. Some protocols are enriched by the presence of students or community members.
• Protocols work best when the same group meets regularly, with everyone expecting to be a presenter at some point. However, don’t overlook the opportunities for impromptu protocol groups—great insights can occur when people who don’t usually work together engage in a deep discussion of problems, ideas, and issues through examining student work and educa-tor practice.
• Protocols can be varied. PLCs can use the Tuning Protocol to examine stu-dent work for a semester, then the Success Analysis Protocol to look at edu-cator practice for a while, and then the SWOT Protocol to review a plan for PLCs for the next year.
• Protocols endure past the time they are engaged in as PLC members ask each other questions (e.g., “How are you doing in terms of addressing the issue brought up through the Probing Protocol we used on Tuesday?”).
• At first, protocols need to be facilitated, either by an outside facilitator or by one from within the group who can also, with knowledge of the group, choose to be a regular participant. As groups mature in their use of

Int roduct ion 3
protocols, group members can divvy up the facilitating responsibilities and enjoy being participants as well.
You have in protocols the vehicle for great work in PLCs—the covered wagon that will carry you across the plains, the ship that seeks new lands, the rocket that explores galaxies far away. Enjoy!
5
What Protocols Are and Why to Use Them
Protocols in ActionDave, a science teacher, brought several science portfolios for his interdisciplinary team to examine. Though each portfolio was more than 30 pages long and bulky with drawings and charts, Dave assured us that we didn’t have to read them all in depth. Nor did we have to assess them. He requested that we use the Tuning Proto-col for our discussion—a process for fine tuning what we do as educators by exam-ining student work or artifacts of teacher practice (such as lesson plans).
Because we knew each other well and met regularly, we indulged only in “checking in” as a starting activity. Dave began with these words:
“I’m really proud of these portfolios. I think that—at last—I’ve found a way to link curriculum, instruction, and assessment, all in this one format, the portfolio. Things make sense to me, and also to my students. I’d like to take you through one portfo-lio while you look through the others. They follow the same format.”
Dave opened the portfolio he had kept and took us through it as we looked at the ones in front of us.
“Here’s the problem: I’m not sure that portfolios stimulate students to think at the highest levels. I’m not sure what levels of Bloom’s taxonomy are represented in these portfolios, but I suspect that only the three lowest are. I definitely want sci-ence students to be analyzing, synthesizing, and evaluating. So my key questions are these: What can you tell me about the levels of thinking in these portfolios, and how can I be sure that student work reflects the higher levels of thinking?”
Dave gave the group the remaining 8 minutes of his 15-minute time period to pore through the portfolios. We did so quietly, although we had questions and were beginning to test some hypotheses. We knew that during this part of our process, we were to say nothing; Dave had the floor, even though he was staying quiet so we
1
Protocols for Profess ional Learn ing6
could examine the portfolios. Janelle, who was serving as facilitator and timekeeper, told us when Dave’s time was up. “Let’s go on to clarifying questions,” Janelle said.
Raul asked the first question. “How long have you been doing portfolios in science, Dave?” Dave replied that he started on them in February of last year. Other group members asked clarifying questions until the time was up. We knew that we would never have all the information we needed, but we would have enough to tune what Dave had brought us.
After five minutes for asking clarifying questions, we had five minutes to write. Dave repeated his key questions, and all of us, including Dave, began our writing with these in mind. Sometimes writing about the clarifying questions takes a group in a direction different from the one established by the presenter; in this case, I thought Dave’s questions were on target and wrote steadily on them until the five minutes were up.
Next it was time for our 15-minute dialogue about the questions. Dave pulled back from the group slightly and turned aside so that we couldn’t make eye contact with him. His doing so helped us focus on what he had brought us to tune rather than on him. It helped us “own” the task. We would be less likely to say “you” than “it” or “he.” Dave was like a fly on the wall, listening to brilliant dialogue among his trusted colleagues! He took notes so that he could respond later in the process.
It didn’t take us long to establish that Dave’s concern was on target. Students were not demonstrating that they were thinking at higher levels in their portfolios. We pointed to examples in the portfolios. At last, Desmond captured the problem: “What the students are writing about is not what they think or what they learned, but what they did—time after time.” We checked out his assertion, and true enough, the port-folios reflected a “reporting” level of student thinking.
Dave was rapidly taking notes, writing what he heard us say on one side of his paper and his thoughts and reflections about what we said on the other. Eventually, we switched our focus to what Dave could do to help his students think about what they were doing. We generated quite a list, ranging from the simple (“Provide a time at the end of each science activity for students to reflect on what they have done and what they learned”) to the more elaborate (“Teach students Bloom’s taxonomy and have students write about what they have done in a way that matches each level of Bloom”).
Midway through our dialogue, Janelle asked us how we were doing with warm and cool feedback. We realized that we had become so engrossed in what Dave had brought us to work on and in our own interests in using portfolios that we might not have given Dave enough warm feedback. We quickly made up for our omission, letting Dave listen in as we talked about how impressed we were that he was using
What Protocols Are and Why to Use Them 7
portfolios and how big a jump that was from typical ways of assessing science. We affirmed that we each wanted to use portfolios ourselves. We shared our excitement about the integrity of the portfolio process, and our belief that it aligns curriculum, instruction, and assessment. Janelle checked on how we were doing with Dave’s key questions, and we all agreed that we were addressing them almost to the exclusion of other questions that might have come up. “But that’s okay,” said Janelle, “As long as we do address them.” Finally, she checked whether everyone was getting enough air time. We quickly decided that no one was dominating the dialogue and everyone was getting a chance to contribute. Then we resumed talking until time was up.
Dave, who had been silent during our work, entered the group again, with a big grin on his face. He talked to us about what he had heard—processing it out loud in front of us, pushing our ideas deeper. He corrected some of our observations about the portfolio but concentrated on the fact, now so obvious, that the students were simply representing what they had done, not what they had learned, in their port-folios. He exulted over the ideas for remedying the situation and added a few other ideas. We were quiet during Dave’s reflection time.
Now it was time for open conversation, first about the content and then about the process. Some of us averred that we had learned immensely, even though the focus was on science and, more specifically, assessment in science. In fact, each of us declared our intent to try portfolios sometime before the end of the year. Alison asked if Dave wanted to coach the rest of us in designing portfolios for different purposes in our content areas.
When we began to focus on the process, we agreed that, once again, it had worked.
It protected the presenter—who, after all, had taken some risk bringing student
work to be examined—and it drove the thinking deeper. Dave summarized: “I think
that if we had just begun to talk about this in a discussion, we wouldn’t have gotten
this far.”
As happens in such processes, our conversation continued far after our meeting had
adjourned. In the hallways and at lunch, the eight of us continued to talk about lev-
els of thinking; integrity of curriculum, instruction, and assessment; and portfolios.
Faculty who hadn’t attended our meeting were curious about what we were doing
and asked if they could join us next time or even form their own groups. “Sure,”
Desmond said. “You’re welcome to join our group, but we don’t want it to get too
big. Why don’t I help you form your own groups?”
What Protocols AreDave and his group were engaging in professional learning using the Tuning Protocol—one of many protocols that educators have been using for substantive conversation since the late 1980s. In general, protocols are processes that help
Protocols for Profess ional Learn ing8
groups achieve deep understanding through dialogue that may lead to effective decision making (although decision making and problem solving are not typically the end goals of protocols). Protocols allow groups to explore ideas deeply through student work, artifacts of educator practice, texts relating to education, or problems and issues that surface during the day-to-day lives of educators.
Allen (1998) notes that, even if protocols focus on student work, their purpose is to
“move beyond grading and evaluation of the work to discussion that contributes to
teachers’ understandings of students’ learning and their own instructional practice”
(p. 3). The National School Reform Faculty (NSRF), which developed and helped
people learn many of the protocols in use today, suggests that protocols “consist of
guidelines for conversation” (“Why Protocols?,” n.d., ¶ 1). According to NSRF, the
structure of a protocol that “everyone understands and has agreed to” permits “a cer-
tain kind of conversation . . . [that] people are not in the habit of having” (¶ 1).
People may at first be put off by the word “protocol.” As McDonald (1996) says,
“Some readers . . . may think protocol a pretentious word.” He declares, however, that
he likes the word, as “its two principal meanings reflect some deep dynamics.” First
there is the diplomatic meaning of the word, where a protocol “provides a way for
people with different interests, even deeply antagonistic interests, to interact pro-
ductively and respectfully while protecting those interests. . . . A protocol in the dip-
lomatic sense is a kind of treaty governing a particular realm of interactions.” Then
there is the scientific meaning, as “a plan for inquiry” (p. 205).
Allen (1998) more specifically describes protocols as follows:
– They are facilitated. The facilitator may be from inside or outside the school.
– They are structured. Time is allotted for different activities and for different par-
ticipants to speak—and listen.
– All those taking part share norms for participation, for example, respect for the
student whose work is being discussed. (pp. 85–86)
Allen and Blythe (2004) elaborate: “While different protocols vary in significant fea-
tures, they all do two things: (1) provide a structure for conversation—a series of
steps that a group follows in a fixed order, and (2) specify the roles different people
in the group will play (typically, a facilitator, a presenter, and participants)” (p. 9).
Above all, protocols provide the means for professional discussion, unlike that usu-
ally found in a faculty lounge (or even typical faculty meetings!). The issue or text
being discussed anchors professional conversation to the realities of educators’ lives.
Protocols help educators build collaborative communities, sometimes called critical
friends groups (CFGs) or professional learning communities (PLCs). According to
the NSRF, “protocols are vehicles for building the skills—and culture—necessary for
What Protocols Are and Why to Use Them 9
collaborative work. Thus, using protocols often allows groups to build trust by actu-
ally doing substantive work together” (“Why Protocols?,” n.d., ¶ 1).
Aspects of a ProtocolAllen and Blythe (2004) maintain that “a well-designed protocol is more than the sum of its steps” (p. 20). They point out that protocols have a certain feel or spirit to them due to a series of tensions between
• Talking and listening,• Discipline and play,• Safety and risk, and• Individual learning and group learning.
Protocols are also affected by the experiences, backgrounds, skills, and self-concepts of those involved in them; by the student work or professional practice that they are working on; and by the protocol facilitator. They are not as simple as they seem initially.
Some aspects of protocols make them difficult for some people to engage in right away. For example, according to Allen (1998), staff in traditional schools may find protocols challenging because, according to the culture in those schools, people
• Avoid controversy if at all possible.• Seek autonomy and isolate themselves (i.e., privatize their work).• Guard what they do and what their students do, or share only in the form of
“show and tell.”• Prefer to share “tips and tricks” rather than student work or deeper aspects
of their professional practice.
We can, of course, continue to engage in the same kind of professional development we’ve always engaged in (sage-on-the-stage) and continue to get the same results we’ve always gotten (see Allen’s list above), or we can change culture by working with each other in different ways. As I note in Powerful Designs for Professional Learning (Easton, 2008), “schools and districts cannot wait until the context [cul-ture] for professional learning is perfect. Having assessed context and made as many changes in context as possible, schools and districts should engage in professional learning [such as protocols]. These professional learning opportunities themselves will improve the context for powerful professional learning” and the potential for real change for all the learners in our school systems (p. 11).
Origins of ProtocolsThe word “protocol” is derived from the Greek protokollon, which in turn is derived partly from the Greek word kolla, meaning “glue.” That’s an apt word to describe
Protocols for Profess ional Learn ing1 0
what a protocol does in education—it glues together people in a group as well as diverse ideas through a process.
The origin of protocols owes something to the innovation of directly assessing stu-dent writing rather than looking at a proxy (e.g., multiple-choice questions on a test), which revolutionized writing instruction in the 1970s. Cooper (1977) described a scoring process that involves setting anchors, establishing a rubric, and double-blind (sometimes triple-blind) scoring of each student piece. He declared that this process made writing assessment less subjective than ordinary classroom evaluation of student work. Elbow (1981), Graves (1983), Calkins (1986), Shaughnessy (1977), and the National Writing Project (Lieberman & Wood, 2002) all contributed to the creation of protocols by sharing what they learned from directly examining student work. Looking directly at art portfolios and work samples from the business world also had an impact on the development of protocols.
McDonald (1996) describes how protocols migrated from his classroom to a Boston meeting sponsored by IBM in 1991. He and others planning the meeting asked five schools they were studying to supply student work “generated by their exhibition systems.” This was risky business; as McDonald noted, “most teachers and princi-pals are not used to talking about such matters as the vision of performance that prompted the design of their assessments, the standards they use in evaluating per-formance, or the mechanisms they employ to reflect on their assessment systems” (p. 211). McDonald and his colleagues conceptualized the protocol as a tuning—“a kind of inquiry that schools might best tune up their standards and tune into others’ values by engaging in joint investigations of the qualities of actual student perfor-mance” (pp. 211–212). They decided that, if participants took turns, it “would make the seminar safe for honesty and risk taking” (p. 212). They also decided that “dur-ing the response turn” they would ask “for a balance between warm and cool com-ments but without blending” them (p. 213). They discovered that “the freedom lent by turn-taking without interruption to ask, think, and prioritize responses” enriched the dialogue (p. 216).
The above characteristics are still vital in the many protocols that have been devel-oped since 1992, notably by the participants in the 1992 Fall Forum of the Coali-tion of Essential Schools; the California Center for School Restructuring (CCSR), led by Maggie Szabo, Joel Shawn, and Steve Jubb; a school network in the Bronx, New York, including the famed Central Park East Secondary School, the principal of which was Deborah Meier; and through the development of the Bronx Protocol by Paul Allison of University Heights High School in the Bronx and David Allen of the Annenberg Institute, who brought the California and Bronx protocols together. One key decision the CCSR made was about whether protocols were to be used as “show and tell,” during which schools bragged of their work and expected praise, or as a learning process that involved candid confessions of reality and earnest assistance
What Protocols Are and Why to Use Them 1 1
through warm and cool feedback towards improvement and learning. The latter approach won.
At about the same time as these early protocols were developed and refined,
Steve Seidel and colleagues at Harvard Project Zero were developing the Collab-
orative Assessment Conference, which “invites teachers to look at, describe, and
ask questions about pieces of work in order to develop a deeper understanding
of the student who created it, of that student’s interests and strengths, and of the
teaching/learning environment” (Blythe, Allen, & Powell, 2007, pp. 11–12). Similarly,
Patricia Carini and colleagues at the Prospect Center in Vermont were developing
The Descriptive Review of a Child, which focuses on collaborative observation and
description. According to Allen (1998), Carini and others “have led us away from
making judgments about the quality of a child’s work to describing the multiple
qualities that inhere in every product of human effort” (p. 8).
All of these people and others continued to refine protocols and create new ones.
Some protocols were used for fine tuning; others involved looking at teacher prac-
tice or problems and issues. I apologize in advance if I have not named all the prac-
titioners and researchers who influenced the creation and refinement of protocols
discussed in this book.
Reasons for Using Protocols
Why would educators want to use protocols? The main reason is that they do not
want to be isolated in their own classrooms. They know the value of collaborating
with others. They know they can learn from others and, in turn, help others. They
are educators for all of the children, not just those in their classes. They know that
the success of all children in a school depends on the efforts of all of the teachers.
Protocols give them a productive way to collaborate.
More specifically, according Blythe, Allen, and Powell (2007), educators might want
to use protocols because they
– Already use projects, exhibitions, or portfolios, and [they] want to make them
more effective learning tools for . . . students.
– Are trying a new teaching approach or learning activity in . . . classroom(s) and
want to look more closely at its impact on . . . students’ work.
– Are looking for ways to talk more often and thoughtfully with . . . colleagues
about teaching, learning, and assessment.
– Are looking for ways to reflect on, discuss with others, and revise [their] own
practice.
– Are looking for ways to talk with the broader community outside the school
about the teaching, learning, and assessment going on inside [their] school. (p. 2)
Protocols for Profess ional Learn ing1 2
It’s important to note that teachers have always looked at student work and engaged in professional conversations. These are not new activities for educators. However, teachers have usually examined student work for the purpose of grading, and they have usually done so in isolation. And although educators regularly engage in pro-fessional conversations, these have often been “catch as catch can” and informal, with little expectation of a result or outcome from the conversation.
Why Protocols WorkWhy not just have conversations or discussions? Those new to protocols often ask this question. At first, they may find protocols awkward and constraining. Weinbaum and colleagues (2004) acknowledge that “while it may feel somewhat unnatural at first (it is!) to use a protocol to structure a conversation, participants quickly realize that without an explicit structure, conversations about teaching and learning tend to drift, go in many directions at once, or become so abstract that they are unlikely to lead to any useful learning” (p. 47).
As groups meet regularly and begin to know and trust each other, they may find that they can loosen up the structure somewhat, but it’s important that any group experience a protocol as it was intended in order to derive optimal effects from it before modifying it in any way.
Protocols work for a number of reasons, but chiefly because they protect the pre-senter and the participants (the diplomatic nature of the protocol) and push the conversation deep (the scientific nature of the protocol). They are also excellent strategies for professional learning.
Protecting the Presenter and Participants
Educational wags have described today’s schools as egg cartons or side-by-side caves, with each teacher isolated from the others. Historically, schools have been places where teachers (and principals) shut the door, paper the windows, and do their own things. For a long time it was mostly unheard of for a teacher to open his or her classroom to other adults, inviting them in to give feedback or learn about something that works. Teachers did not ask for help that would take them into oth-ers’ classrooms to see how something was done. Schools have been “privatized” in this way for years; in some schools, even today, doors are still closed and windows shuttered. McDonald, Mohr, Dichter, and McDonald (2003) describe this phenome-non clearly: “We project such confidence in the directions we set that we conceal the choices, hunches, and inescapable uncertainty and arbitrariness that underlie them. Over time, this habit can insulate us from the gaps and faults of our own expertise, and seal us off from new expertise. Dangerously for both ourselves and our stu-dents, it can also mask the real dynamics of learning” (p. 5).

What Protocols Are and Why to Use Them 1 3
Today’s changing world requires that educators deprivatize (Kruse, Louis, & Bryk, 1994). As so many leading educators say, we cannot keep doing the same, just more of it, if we really want to improve schools. However, the old culture, created over time and manifested by those closed doors and papered windows, still pervades in public schools and classrooms. This culture makes it somewhat risky for educators to share their work and learn from their colleagues. Protocols make sharing with and learning from each other somewhat easier.
Most protocols protect participants in two main ways: through warm and cool feed-back (mandatory in most protocols) and through group continuity. Participants in most protocols agree to give warm and cool feedback. Warm feedback tells the pre-senter what should be kept or enhanced. Cool feedback, by contrast, is a statement of wonder: “I wonder what would happen if . . . .” It is not negative; it is not a slam; it is cool, not cruel. It promotes rich thinking and substantive discourse, and protects the presenter from being verbally beaten up, which is what educators who bring their practice to their peers fear most.
Although random groups can engage productively in protocols, many schools have groups of educators who regularly work together, which fosters a sense of continu-ity. They know that they, too, will be taking risks as presenters, and they are not about to jeopardize the kind of treatment they want by treating other presenters unkindly. This does not mean that they “go soft” on presenters; not at all! In fact, as groups become more comfortable with each other, presenters may even stipulate that warm feedback be limited so that the cool feedback can be expanded.
Many groups using protocols check assumptions and establish norms in order to work together. The following three assumptions apply to all schoolwide collabora-tions, whether protocols are used or not:
1. We all want to improve the work we do as educators.
2. We all want to be kind and courteous; to fulfill assumption #1, we also need to be thoughtful, insightful, and provocative.
3. We need to remember that we are all in this together. The effect of our work will be felt far beyond the realm of the educator whose work we happen to be exam-ining; it is our work that we are exploring, and the outcome will be improved learning for all of us and our students. Using protocols is truly a collaborative process.
Some groups draft specific norms, such as avoiding side conversations or putting cell phones on vibrate. Groups often decide that commitment to these norms means initialing them at the beginning of work together and reviewing how well they were
Protocols for Profess ional Learn ing1 4
met at the end of each meeting. Time spent considering assumptions and norms is time well spent for any group hoping to do substantive work together.
Deepening Discourse
We have all been in discussions that sink into a debate between two people with
no one else able to get a word in. The two verbal combatants prevent others from
contributing their ideas, and the discussion stalls at a very shallow level. Dialogue
allows people to suspend their need to make a decision. Participants take a “balcony
view” of the issue at hand, as if they were looking it over from some objective dis-
tance. People engaged in discussion are right in the middle of the issue—“in the pit,”
so to speak. They are invested in making a decision and may be ready to fight for
the one they think is best.
Dialogue is an appropriate way to initiate thinking and collaboration. Dialogue
alone may be enough, or when participants are finished sharing and building on
ideas, they may decide to engage in discussion to find a solution or make a decision.
Protocols are primarily dialogue. The steps in a protocol establish that there is no
decision to be reached (at least, not until after the protocol). Uninterrupted pre-
senter and participant time prevents the pro-versus-con, attack-and-counterattack
processes that are typical of debate.
Promoting Inquiry
Dialogue can help educators engage in pure inquiry by freeing them from the
responsibility of making a decision, solving a problem, or reaching consensus. Wein-
baum and colleagues (2004) recommend an inquiry stance to “call into question
customary ways of doing things, not only procedures or operations, but also core
values and beliefs. . . . Without this challenge, organizational learning cannot occur”
(p. 26).
Weinbaum and colleagues further note that the inquiry stance allows professionals
to “account for their performance,” much as doctors do in their rounds. Educators
“have so little practice in explaining their choices, actions, and assessments that they
are often uncomfortable when called upon to do so” (p. 26). Protocols help them
delve into the key questions of the profession: “Why do we do what we do? Why do
we do it in the way we do it? How might be we do better?” (p. 148).
Carini suggests that when educators get in the habit of seeing the “familiar—what
they always look for—they miss the true meaning of what is before them and
important clues that can help them address individual needs” and general issues (in
Langer, Colton, & Goff, 2003, p. 33). Similarly, protocols help participants expose
their assumptions to others’ experiences. As Langer and colleagues (2003) maintain,
What Protocols Are and Why to Use Them 1 5
their “a-has” may be “private [and] internal. For example, they [teachers] may realize
that they don’t have a thorough understanding of a crucial concept in math or that
a particular assessment does not really get at the target learning area or standards.
And some teachers awaken to the uncomfortable fact that they have prematurely
given up on a student” (p. 22). Assumptions that surface even privately during a pro-
tocol lose their power to block deep learning.
Protocols as Professional LearningIn the June 2008 issue of Phi Delta Kappan, I made the following observations about the importance of professional learning for educators:
Once it was called training: what educators underwent before and sometimes during
and after the school year. They were trained. For some, the word brought to mind a
factory employee being told precisely how to turn a widget as products rolled by on
the assembly line. The word training fit the factory model of education. To others, the
word evoked what one does to animals—getting them to sit, roll over, and play dead.
[Although training is essential for specific skill acquisition (think CPR),] few educators
now describe their learning experiences as training.
The word development evokes images of what one does to someone else. In educa-
tion, professional development has, in fact, often been what someone does to others.
The back-to-school speaker holds forth in order to motivate the teaching staff for the
coming year. The trainer arrives from the capital to increase teacher knowledge about
standards. The university professor advances the career of educators through courses
which offer credits that elevate educators on a salary scale. The workshop presenter
provides an event designed to improve the leadership skills of principals.
Development activities such as these are neither bad nor wrong. In some cases they
are vital to professional and organizational growth. But they are not sufficient. If
all educators needed to do is develop—grow, expand, increase, advance, progress,
mature, enlarge, or improve—perhaps development would be enough. Development
suggests linearity—doing the same thing, just more and better. However, educators
often find that more and better are not enough. They find they need to change what
they do, on a daily basis, sometimes hourly, as they respond to the needs of the learn-
ers they serve. This takes learning.
Why isn’t it good enough to keep doing what we’re doing, just more and better?
Schlecty (1997) puts it well: “Change in schools is much more urgently needed than
most teachers and school administrators seem to realize. Indeed, I believe that if
schools are not changed in dramatic ways very soon, public schools will not be a vital
component of America’s system of education in the 21st century” (p. xi).¹
Protocols are an example of powerful professional learning.
¹Easton, L. (2008, June). From professional development to professional learning. Phi Delta Kappan, 89(10), 755–776. Material reprinted with permission.
Protocols for Profess ional Learn ing1 6
Protocols and PLCsSimply stated, PLCs are structures, ways of grouping people for the purpose of pro-fessional learning. Protocols are one of the most powerful processes that people in PLCs can use for learning. Many educational structures have come and gone with lit-tle impact, because what happens within them is misunderstood. For example, many schools adopted the block system—a promising and still exciting structure—without addressing what it is that teachers can do differently when they have a longer time period to work with students. Small schools—also promising and still exciting—may suffer from the same affliction. People need to know what to do differently when they work in small schools, or they may behave just as they do in large schools and end up writing off small schools as one more structure that failed.
PLCs should not represent business as usual. They should not be used to decide when to hold the prom or how to reorganize the supply closet. I like to tell people that if their PLCs are structured like traditional faculty meetings, based on an agenda and a series of decisions that need to be made, then they are not really PLCs. Proto-cols are what help keep “professional learning” in the name.
1 7
2The Nuts and Bolts of Using Protocols
Protocols vary in terms of purpose, context provided, types of questions asked, and type of grouping.
Purpose. Some protocols are superb for purposes of inquiry; others are more useful for addressing specific issues and even problem solving. In some protocols, partici-pants are engaged simply in observation; in others, they may be engaged in inter-pretation or evaluation.
Context provided. In some protocols, presenters share information about a stu-dent or the conditions under which the work being examined was executed (e.g., instruction leading up to the assignment, whether students worked individually or in groups). In other cases, the work stands by itself, and participants are asked simply to describe the work or generalize about what a student knows and can do versus what he or she needs to know and do.
When discussing student work, presenters may not want to name or describe the student. Partly this is out of respect for the student, but there is also a more practi-cal reason: If a group knows the student, the protocol may focus more on the stu-dent than on the work itself and on the instruction and assignment that produced it. Although some protocols do focus on students (the Vertical Slice Protocol, for exam-ple), knowing the student may be distracting. If a presenter does decide to share a student’s name, he or she may want to gain the student’s permission first. Students often want to hear the results of a protocol for which they or their work is the focus.
Types of questions asked. There are three main types of questions that distinguish protocols:
Focusing/key questions. These questions are asked by the presenter in order to focus the protocol. They are important (that is, they represent what the presenter really wants to know), engaging to others, and related to student work or professional
Protocols for Profess ional Learn ing1 8
practice. Some protocols do not have focusing/key questions; they are more con-structivist in nature, relying on the participants to decide what to pay attention to.
Clarifying questions. These questions are asked by the participants and answered by the presenter, and are fact-seeking in nature. Groups need to be aware that opinions can sometimes be disguised as clarifying questions. For example, a question such as, “Why didn’t you try the assessment with a small group before using it with the whole class?” should either be rephrased (“Did you try the assessment with a small group before using it with the whole class?”) or saved for the participant discussion part of the protocol.
Probing questions. These questions are often “cool” in nature because participants ask them to help the presenter think more deeply about what is being examined. Good starters for a probing question include the following:
• What would happen if . . . ?• How would X be different if . . . ?• What’s another way you might . . . ?• What do you assume to be true about . . . ?
According to Allen and Blythe (2004), probing questions
– Are open-ended (rather than yes/no), allowing for multiple responses.
– Elicit a slower or more considered response.
– Move thinking from reaction to reflection.
– Encourage taking a different perspective.
– Help create a “paradigm shift” in the presenting teacher’s (and, possibly, the
group’s) thinking.
– Assist the presenter to explore and address her own question/dilemma (rather
than deferring to someone with greater or different expertise).
– May be general and widely applicable.
– Don’t place blame on anyone.
– Are usually brief (although weighty). (p. 71)
Type of grouping. Different protocols allow for either an individual or a group to present, and most provide for a group to respond to the presenter. Some protocols allow for groups to both present and respond, and others allow the groups to trade places (i.e., the presenters become the responders, and the responders becoming the presenters).
Choosing Protocols for Particular PurposesOne way to choose a protocol is to begin with a vital question that the presenter has. This leads to identification of student or teacher work that can illuminate that question and to appropriate protocols. Another way to choose is to begin with the work itself, which generates a key question and then a likely protocol; alternatively,
The Nuts and Bol ts of Using Protocols 1 9
one can begin with a possible protocol and match its features either to student work or educator practice.
The chart in Figure 2.1 shows possible artifacts and protocols that can be used to address different types of questions.
The protocols in this book have been grouped as follows:
• Chapter 3: Protocols for examining student work• Chapter 4: Protocols for examining educator practice• Chapter 5: Protocols for addressing problems and issues• Chapter 6: Protocols for discussions
As you may have noticed in Figure 2.1, some protocols can be used for a variety of purposes (tuning, for example). At Eagle Rock School and Professional Development Center, an alternative high school and teacher learning center where I served as the first director of professional development, we used the tuning protocol to figure out the budget process, improve a plan for intramurals, and make policy decisions, as well as to examine student work and educator practice.
Figure 2.1 Artifacts and Protocols for Different Types of Questions
Focus of QuestionAppropriate Student
Work to ExamineAppropriate Teacher
Work to ExamineAppropriate Protocols
to Use
Effectiveness of a task, assignment, or prompt
3–5 samples at different levels of achievement
Copies of the task, assignment, or prompt
Tuning, refl ecting on learning expedition plans
Individual student’s strengths, defi cits, understanding, etc.
Single sample or multiple samples from an individual student
(Focus is not on teacher work, but relevant pieces may be brought in as references)
Collaborative assessment conference, modifi ed collaborative assessment conference
Effectiveness of an assessment tool
3–5 samples at different levels of achievement
Copies of rubric, scoring guide, or criteria
Tuning
Alignment of curriuclum, instruction, or assessment with standards
3–5 samples at different levels of achievement
Copies of standards and curriculum task or assessment instrument
Tuning, standards in practice
Teaching issues (Samples of student work as appropriate to illustrate issue)
Written/oral description of issue and other documents as appropriate
Consultancy
Equity issues Class set or samples from students in different subgroups (e.g., gender, race)
Copies of standards, task, assignment, rubric, etc. that relate to issue
Tuning, slice, consultancy
Note: Reprinted by permission of the publisher. From A. Weinbaum, D. Allen, T. Blythe, K. Simon, S. Seidel, and C. Rubin, Teaching as Inquiry: Asking Hard Questions to Improve Practice and Student Achievement. New York: Teachers College Press. Copyright © 2004 by Weinbaum, Allen, and Blythe. All rights reserved.

Protocols for Profess ional Learn ing2 0
Who Can Participate in Protocols?Everyone and anyone can participate in protocols, including any of the following:
• Classroom teachers
• Specialists
• Building administrators
• Paraprofessionals
• School staff
• Students
• Parents• Community members• District board members• District administrators• State board members
• District staff
• State department of education staff
• Policymakers
• U.S. Department of Education staff
• Educators from other countries
• University and college faculty• Staff from organizations that support educators (e.g., Boards of Cooperative
Education Services [BOCES]) and teacher centers
Protocol groups can either be impromptu or regularly scheduled. In an impromptu protocol, the facilitator may want to devote time at the beginning for group mem-bers to get to know each other.
Most (but not all) protocols involve 5–10 people. If you have fewer than 5 people,
you may not have enough diversity of ideas; if you have more than 10, you may find
that people do not have enough time to air their ideas and therefore become frus-
trated. When you choose a protocol, look closely at the number of people for which
that particular protocol is appropriate.
Groups can be job-alike or job-different. Rich dialogue can occur when people from
across the system are brought together. At the same time, members of grade-level
or subject-level groups can zero in on their common concerns and understand each
other without much explanation. Vertical learning teams can profit from protocols,
as can interdisciplinary teams. Subject-alike or grade-alike groups made up of par-
ticipants from across a district or from several districts can be stimulating.
What the Presenter Does in ProtocolsHere are the things that the presenter needs to do before the protocol begins (work-ing with the facilitator, if possible).
The Nuts and Bol ts of Using Protocols 2 1
1. Decide what artifact is needed. If student work is to be used, it could be one of the following:
• Any form of writing (e.g., essay, creative writing, test, portfolio)• A performance, interview, presentation, or demonstration on videotape or
audiotape• A piece of art in any form• A computer multimedia presentation (consider showing on a screen rather
than a monitor)• A display (e.g., collage, poster, diorama)
If some aspect of professional practice is to be used, it could be one of the following:
• Curriculum designs, units, lessons• Assessments and rubrics• Policies (from district to class)• Practices (e.g., grouping students)
If possible, the presenter should make available a written description of the curricu-lum, assessment, policy, or practice to be considered.
2. Choose the piece(s). In the case of student work, the presenter should do the following:
• Make sure that the work can be viewed, read, or listened to by all partici-pants during the presenter time. For written forms, the presenter will need as many copies as there are participants in the group.
• Choose any of the following:– One piece from one student.– One piece from several students.– Multiple pieces from the same student.– Drafts of a single piece from a single student over time.
• Consider whether the piece should– Represent the best.– Represent the worst.– Represent the average.– Be randomly chosen.
• Consider whether the piece will be a rough or final draft.
In most (but not all) protocols, the presenter explains to the group how the work was chosen. Also, the presenter may want to explain how the work came to be—the assignment, the instruction that preceded the assignment, what students did after they completed the assignment, whether students were encouraged to make multiple drafts, whether students worked in groups or alone, whether students were encouraged to seek help from peers or instructors, and so forth.

Protocols for Profess ional Learn ing2 2
3. Devise key questions (for both student work and professional practice). In a one-hour protocol, no more than two to three key questions are appropriate, in order to allow time for deep dialogue. In a longer protocol, more questions are pos-sible; in a shorter protocol, one or two are best. Key questions for student work can be any of the following:
• Factual—“What does this work tell us about what this student knows and is able to do?”
• Focused on quality—“Is this piece good enough for students at our school?”
The question can be more specific (“Is this piece good enough for 8th grad-
ers at our school?” “How well does this work meet X standard?”) or broader
(“Is this piece good enough for any 8th grader in the United States?”). When
focusing on quality, participants should also ask, “What is good enough?”
• Follow-up—“How can we help this student (and all students) improve their
work?”
• Focused on understanding and learning—“What can we say about this stu-
dent as a learner?” “How does what we can say about this student apply to
other students?” “How well does the student understand the content? How
do we know?” “What’s next for this student in terms of deepening learning
and understanding?”
• Focused on instruction—“What does this work tell us about the effectiveness
of the instruction that preceded the assignment?” “What does it tell us about
how either the instruction or the assignment might be improved?” “How
could the instruction help students execute a better outcome?”
• Focused on curriculum—“Is this an important thing for students to do at
our school?” “Does it get at what students should know and are able to do?”
“Does it offer us a chance to look at student achievement of standards?”
• Focused on assessment—“How can I assess this piece?” “What kind of a
rubric would help me assess it?”• Focused on classroom and school conditions for learning—“What changes
might be made in the classroom that would help students learn better and produce better results?” “What changes might be made in the school to sup-port student learning in the classroom?”
Key questions for professional practice are similar: “How can I make this project bet-
ter?” “How can I make sure this policy will bring about the desired result?” “What
should my team do next?”
According to Allen and Blythe (2004), key questions need to be important to the
presenter, relevant to others, and have “a close connection to student learning”
(p. 67).
The Nuts and Bol ts of Using Protocols 2 3
Finding Time for ProtocolsExcellent strategies for finding time for protocols can be found in Finding Time for Professional Learning (VonFrank, 2008). Powerful Designs for Professional Learning (Easton, 2008c) provides the following suggestions:
– Convert staff meetings to powerful professional learning (use e-mail and voice
mail, as well as paper memos, to convey the usual staff meeting agenda items).
If not every staff meeting, once a month?
– Use department and grade-level meetings for profes sional learning.
– Provide community-based activities for students one afternoon a week so educa-
tors have professional learn ing time.
– Invite staff to bag breakfasts or lunches to extend time.
– Add paid days periodically throughout the school year for professional learning,
not just at year’s end or begin ning.
– Write grants for summer work.
– Arrange internships with teachers’ colleges that allow regular staff to meet
together in the building.
– Begin school early or end early once a week.
– Bank hours by working extra time and then use that time for professional learn-
ing (Pardini, 1999).
– Offer students special block classes once in awhile—half-day or whole day
events in art, music, the library, or computer—to release teachers for profes-
sional learning (Pardini, 1999).
– Have teacher aides conduct class on certain days so departments or grade levels
can meet (Pardini, 1999). (pp. 2–3)
Most protocols can be done in an hour. Some can be done in less time, others require more time. Sometimes protocols can be modified to allow for more or less time. The amount of time each protocol requires is included in the description of the protocol itself. The wrong way to shorten a protocol is to cut a few steps; the right way is to proportionally modify each step.
When and Where to Use ProtocolsAlthough most protocols take place in schools, they can also be effective at the dis-trict and state levels, and at educational organizations such as BOCES. A round table that seats 8–10 people is best for most protocols. When setting up a protocol, be cognizant of the needs of teachers and others after a full day of teaching or other work—refreshments have never dampened a group’s enthusiasm!
Facilitating ProtocolsGroups that are just starting up and those with members who have never worked together need a facilitator. Once a group has become familiar with a protocol, members of the group may facilitate the work themselves. According to Allen
Protocols for Profess ional Learn ing2 4
and Blythe (2004), a facilitator’s three responsibilities are learning, logistics, and longevity:
• Learning—the facilitator works to make sure that the whole group learns.• Logistics—the facilitator handles the “who, what, where, and when” of the
protocol and communicates the relevant details to group members.• Longevity—the facilitator ensures that participants relate their protocol work
to what they are doing to help students learn, become committed to the pro-cess and to each other, invite others to join the work, and communicate the importance of the work (Allen & Blythe, 2004).
Allen and Blythe also describe some “thinking dispositions” that facilitators need. For example, they argue that facilitators need to be able to “read” groups and deter-mine what needs to happen next. This involves intense observation and listening as well as “just in time” action. (For example, when a group gets stuck, the facilita-tor needs to have a variety of approaches at his or her disposal to get the group unstuck “just in time.”) Sometimes, facilitators stop a group to do a “process check” (i.e., getting the group’s read on what’s happening and what to do). Other times, facilitators decide not to do a process check and sharpen their listening and observ-ing instead, remaining ready to act if necessary.
Some actions (or “moves,” in Allen and Blythe’s formulation) help facilitators get a protocol started (e.g., those that set the stage and tone of the protocol), others occur during the protocol (e.g., those that set the pace and tone of the protocol), and still others occur during the debriefing (e.g., those that invite reflection, maintain focus on reflection, and support documenting the conversation).
Here are some moves facilitators can take when they perceive a need to alter the protocol:
• Allow more time for a particular step.• Decrease time for a particular step.• Allow someone to speak when he or she is slated to be silent, in order to
ensure that the group has important information.• Repeat a part of the process that seems to need additional work.• Change the order of the steps.
According to Allen and Blythe, the facilitator should explain any of the above moves to the group, and should only make a move if the group agrees to it. During the debriefing following the protocol, the group should discuss why particular moves needed to be made. Some moves get a protocol started (e.g., those that set the stage and tone of the protocol), others occur during the protocol (e.g., those that set the pace and encourage depth), and still others occur during the debriefing (e.g., those that invite reflection, maintain focus on reflection, and support documenting the conversation).
The Nuts and Bol ts of Using Protocols 2 5
Good facilitators get better by reflecting on what happened during a protocol and what they can learn about facilitating. They need to ask their groups for feedback. Facilitators can also improve their facilitation by watching other facilitators, as well as by experimenting “consciously with different approaches” and being “aware of the impact those different approaches have on the group’s work” (Allen & Blythe, 2004, p. 43).
Before the Protocol
Before the protocol, the facilitator may help the presenter decide on the work to
be examined, the appropriate protocol to use, and the key questions to be asked.
The facilitator and presenter may want to discuss the type of feedback the presenter
wants: a balance of warm and cool? More warm than cool? More cool than warm?
If there are any special considerations the presenter wants the facilitator to be
aware of—whether student work should be presented with or without context, for
example—they should discuss this beforehand as well.
The facilitator should also take care of the following logistics in advance of the protocol:
• Arrange the date, time, and place of the protocol.• Inform the entire group of the date, time, and place.• Let participants know which protocol is being used and advise them of
any special considerations related to the protocol or to the work being examined.
During the Protocol
If the group has never met, the facilitator begins the protocol by having participants
introduce themselves. The facilitator announces and describes the protocol being
used, and reiterates any special considerations related to use of that protocol. If
many participants are unfamiliar with the protocol, the facilitator elaborates on the
steps involved. The facilitator also works out the timing of the steps so that all steps
are included within the allocated time. (The integrity of a protocol is seriously com-
promised if a step is omitted.) If the time allocated for each step is to be adjusted, it
should be done so proportionally—thus, if a 15-minute step is shortened to 8 min-
utes, a 5-minute step in the same protocol should be shortened to 3 minutes.
The facilitator should introduce steps in the protocol by naming them and remind-
ing the participants of each step’s key features. For example, a facilitator might
say, “It’s time for us to move along to Participant Discussion. We have 15 minutes.
Remember that the presenter doesn’t speak during this step; the participants now
‘own’ the student work and need to address the presenter’s key questions. Also,
remember to give a balance of warm and cool feedback. Let’s start.”
Protocols for Profess ional Learn ing2 6
A facilitator must step in if group members are violating the premises of the proto-
col. For example, if someone begins to ask a question while the presenter is talking,
the facilitator might say, “Could you please hold that? This is the time for the pre-
senter to speak uninterrupted. You can ask your question during the time allotted
for clarifying questions, or save it for participant discussion.” Similarly, if the pre-
senter wants to interrupt the participant discussion to correct a misunderstanding,
the facilitator must remind the presenter to wait until the reflection time to do so.
Here are the facilitator’s other responsibilities during the protocol:
• Keeping time and signaling movement from one step to another.• Checking for the appropriate balance of warm and cool feedback.• Protecting the presenter if comments are directed toward him or her rather
than to the work or are otherwise inappropriate.• Ensuring that all participants have equal airtime.• Ensuring that participants address the presenter’s key questions.
A facilitator can help participants become self-managing by calling for a “process check” midway through the participants’ discussion to let them discuss how they are doing in terms of balancing warm and cool feedback, distributing airtime equally, and addressing key questions.
The facilitator can sometimes participate in the discussion as a participant, but must announce his or her intention to do so in advance and gain approval of the group. The facilitator must also clarify when he or she is serving as a facilitator and when he or she is serving as a participant. According to Blythe, Allen, and Powell (2007), one problem with the facilitator acting as a participant is that it becomes “very easy to get caught up in a discussion and lose track of facilitation duties.” They recom-mend that the facilitator “maintain a nonjudgmental attitude. . . . Even comments that imply a positive assessment (‘Excellent point’) are judgments” (p. 18).
After the Protocol
The facilitator should do the following at the end of the protocol:
• Thank the presenter (and perhaps lead the group in a little applause).• Thank the participants (and perhaps lead the group in a little applause).• Ask the presenter to reflect on how well the process worked and what was
learned.• Ask the participants to reflect on how well the process worked and what
they learned.• Invite the group to continue the discussion openly.• Make arrangements for the next protocol (where, when, who will present,
what will be examined, etc.).

The Nuts and Bol ts of Using Protocols 2 7
Preparing to Be a Facilitator
You will be able to facilitate protocols better if you have experienced one as a par-ticipant. As you participate in a protocol, notice what the facilitator does (and does not do). Many people advocate keeping double-entry or “T” notes, with one side focused on what the facilitator does and the other side focused on understanding reasons for the actions:
Actions Reasons
Become completely comfortable with the rationale for having structured protocols rather than free-for-all discussions. Understanding the structure and reasons for it will help you determine when to depart from the structure.
Be sure you understand the difference between probing, clarifying, and key or focusing questions. Also, rehearse what you might say to help a participant revise a question or to encourage a participant to ask a question at a more appropriate time. For example, “Why didn’t you involve parents before the field trip?” may be a probing question disguised as a clarifying question. If the presenter has already announced that parents were not consulted, then the question could be clarifying; the asker simply wants to know the reasons the presenter had in mind. However, if the presenter hasn’t announced that parents were not consulted, then the asker should rephrase the question: “Did you consult parents before the field trip?” Deter-mining whether or not a question is clarifying ultimately depends on how the pre-senter feels. If the presenter feels somewhat uncomfortable, the question is likely judgmental and needs to be rephrased or saved until later. If it seems as if the asker is speaking on the basis of an opinion (e.g., either for or against consulting with parents prior to field trips), then the question is probably not clarifying. A good facilitator will probably err on the side of the presenter, helping the person who asked the question to rephrase the question as clarifying or requesting that it be held for later.
Above all, facilitators need to be aware that facilitating is “a unique and unpredict-
able event,” like a basketball game or a jazz concert (Allen & Blythe, 2004). Facili-
tators should be ready to go with what needs to happen. They need “a sense of
adventure—indeed a sense of humor!—and the willingness to embrace ambiguity
and uncertainty” (p. 122).
Protocols for Profess ional Learn ing2 8
Questions to Ask and Suggestions to FollowAlthough each protocol is slightly different, protocols in general work better when groups answer the following questions:
• Is a protocol the best learning strategy for the purpose at hand?• Does the purpose at hand match the chosen protocol?• Have you selected the right people for the protocol? If this is an impromptu
protocol, should anyone else be involved? If so, who?• Has everybody involved read the protocol?• Is the presenter aware of how to choose material for the protocol?• Has the facilitator walked through the protocol in his or her mind, trying to
imagine how it will unfold? (If participants are sharing the facilitator roles, they should all try to imagine how the protocol works.)
• Has the group set norms and explored assumptions?• If time is tight during the protocol, have steps been shortened rather than
eliminated?
If an outside facilitator is not involved, participants should be sure to fulfill the fol-lowing roles:
• Timekeeper• Feedback checker• Key questions checker (if applicable)• Airtime checker
Your protocol may require additional participant roles. The time for these “checkers” to do their job is in the middle of participant discussions. The whole group should take a process break so that the checkers can lead participants in brief discussions.
The debriefing should never be omitted—there should always be enough time to thank the participants and get their feedback on how the protocol went. Did the participants get anything out of it? And a little applause, please, for their effort!
Evaluating the Effectiveness of Protocols
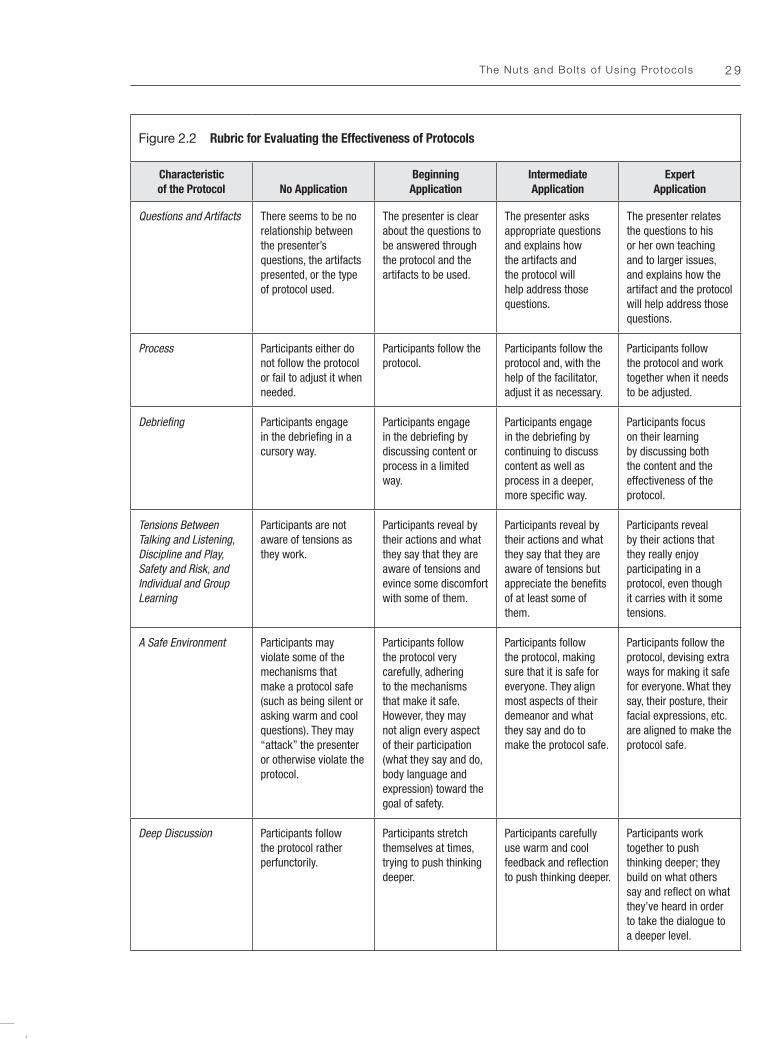
Protocols can be evaluated both during the debriefing and later on, to discern long-term effects. Participants can use the rubric in Figure 2.2 to do so. More advanced groups will want to customize the rubric to fit their needs.
Immediate Effects
Immediate evaluation can occur during the debriefing part of most protocols. Pre-senters and participants might address the following questions:
• What did we learn?
The Nuts and Bol ts of Using Protocols 2 9
Figure 2.2 Rubric for Evaluating the Effectiveness of Protocols
Characteristic of the Protocol No Application
BeginningApplication
IntermediateApplication
ExpertApplication
Questions and Artifacts There seems to be no relationship between the presenter’s questions, the artifacts presented, or the type of protocol used.
The presenter is clear about the questions to be answered through the protocol and the artifacts to be used.
The presenter asks appropriate questions and explains how the artifacts and the protocol will help address those questions.
The presenter relates the questions to his or her own teaching and to larger issues, and explains how the artifact and the protocol will help address those questions.
Process Participants either do not follow the protocol or fail to adjust it when needed.
Participants follow the protocol.
Participants follow the protocol and, with the help of the facilitator, adjust it as necessary.
Participants follow the protocol and work together when it needs to be adjusted.
Debriefi ng Participants engage in the debriefi ng in a cursory way.
Participants engage in the debriefi ng by discussing content or process in a limited way.
Participants engage in the debriefi ng by continuing to discuss content as well as process in a deeper, more specifi c way.
Participants focus on their learning by discussing both the content and the effectiveness of the protocol.
Tensions BetweenTalking and Listening,Discipline and Play,Safety and Risk, andIndividual and Group Learning
Participants are not aware of tensions as they work.
Participants reveal by their actions and what they say that they are aware of tensions and evince some discomfort with some of them.
Participants reveal by their actions and what they say that they are aware of tensions but appreciate the benefi ts of at least some of them.
Participants reveal by their actions that they really enjoy participating in a protocol, even though it carries with it some tensions.
A Safe Environment Participants may violate some of the mechanisms that make a protocol safe (such as being silent or asking warm and cool questions). They may “attack” the presenter or otherwise violate the protocol.
Participants follow the protocol very carefully, adhering to the mechanisms that make it safe. However, they may not align every aspect of their participation (what they say and do, body language and expression) toward the goal of safety.
Participants follow the protocol, making sure that it is safe for everyone. They align most aspects of their demeanor and what they say and do to make the protocol safe.
Participants follow the protocol, devising extra ways for making it safe for everyone. What they say, their posture, their facial expressions, etc. are aligned to make the protocol safe.
Deep Discussion Participants follow the protocol rather perfunctorily.
Participants stretch themselves at times, trying to push thinking deeper.
Participants carefully use warm and cool feedback and refl ection to push thinking deeper.
Participants work together to push thinking deeper; they build on what others say and refl ect on what they’ve heard in order to take the dialogue to a deeper level.
Protocols for Profess ional Learn ing3 0
• How effective was the process? What worked? What could be changed?• What do we want to do next in terms of our learning?
Groups that meet regularly might want to keep a protocol journal in which a recorder notes participants’ answers to the above questions, and in which participants can write their reflections. These groups may also want to keep a portfolio of the artifacts they used during protocols and the conclusions they arrived at during the protocol.
Long-Term Effects
Protocol journals and portfolios can also be used to record long-term effects. The first effect to document is changed teacher practice. This can be documented through self-reports as well as through walkthroughs. The effect of changed teacher practice can be reported in terms of changed student behavior and student learning (knowledge, skills, attitudes) and, finally, test scores (if applicable).
Along the way toward change resulting in improved test scores, groups need to doc-ument whether and how the following aspects of the system have changed:
• School administration• The school itself• District administration• The district itself• Organizations that support professional learning (such as BOCES)• State rules, regulations, and support
It is unfair and unrealistic to expect teacher changes to have a direct effect on test scores without systemic changes that support that change.
Presenting ResultsWhen presenting the results of a protocol focused on student work, it is important to acknowledge the following caveats:
• Looking at student work is valid, because the process involves looking at what students have actually done, but not reliable, because the group is not scoring the work; participants may reach consensus about the work, but that doesn’t indicate that their evaluation is reproducible by other groups.
• The process involves looking at one student’s work, a sample of work from a class, or a sample of one student’s work over time—not a whole school’s work.
• The conclusions reached about a student’s work can be generalized infor-mally to apply to others students as well as to other classes and schools, but no cause-effect relationship can be drawn. (This is true of most research in education, which usually points toward correlation rather than cause and effect.)
The Nuts and Bol ts of Using Protocols 3 1
Protocol groups can prepare a formal report of what they learned through their work by considering the appropriate audience for the report and addressing the needs of the audience, which could include any of the following:
• Students• Other teachers in the building• Building administrators• Parents and community• Other schools• District administrators• School board or committee
In addition to the caveats noted above, the report should include the following:
• An explanation of the protocol used• The results obtained• A comparison of the results of this protocol with other sources of data• The implications of the results• Any commitments that teachers are ready to make in terms of desired
changes• Next steps, and how participants will help each other make changes
* * *
Educators who wait until the school culture is ready for serious collaborative work will never reach that nirvana state; the culture will never be completely ready as people join and leave the staff, administrators change, and conditions become ever more complex. A school that uses protocols to build a collaborative culture can be prepared for the environmental changes that can sometimes stymie progress. Proto-cols are culture-building processes as well as sophisticated ways to focus on teach-ing and learning that benefit both adult and student learners.
3 3
Protocols for Examining Student Work
The protocols in this chapter are especially useful for examining student work, which usually leads to considering the professional practice that affected the work. The following protocols are featured:
• Tuning Protocol• Rounds Protocol• Vertical Slice Protocol• Collaborative Assessment Conference Protocol
3
Protocols for Profess ional Learn ing3 4
1Tuning Protocol
Source: Joseph McDonald, David Allen, and others; the National School Reform Fac-ulty (NSRF), which grants permission for its use.
Overview: This is the classic protocol upon which most of the others are based. It is also the most frequently used protocol for examining student work. The Tuning Pro-tocol features time for the presenter to talk while participants are silent, and time for the participants to talk while the presenter is silent. It provides three levels of depth: presentation, participant discussion, and presenter reflection, finalized by a general debriefing that can extend the conversation.
Other Uses: This protocol can be used for examining teacher/educator practice; classroom, school, district, and other policies and practice; and plans, proposals, or ideas that are fairly well thought out and represented in written form.
Number of Participants: 8–10 participants, a presenter, and a facilitator
Time Required: Typically 1 hour; can range from 30 minutes to 2 hours
Steps (suggested times based on a 60-minute session):
Step 1: Introduction (first time only, 5 minutes)
• If participants don’t usually work together, they briefly introduce them-selves.
• Facilitator briefly introduces information about and guidelines for protocols, and establishes time limits for steps.
• Participants explore the assumptions that are important to making protocols work.
Step 2: Presentation (15 minutes)
• Presenter sets the context, describing the teaching/learning situation, while participants remain quiet and take notes.
• Presenter shares materials related to the teaching/learning situation described, including student work. The presenter should be prepared to use part of the presentation time to let participants examine what is being presented.
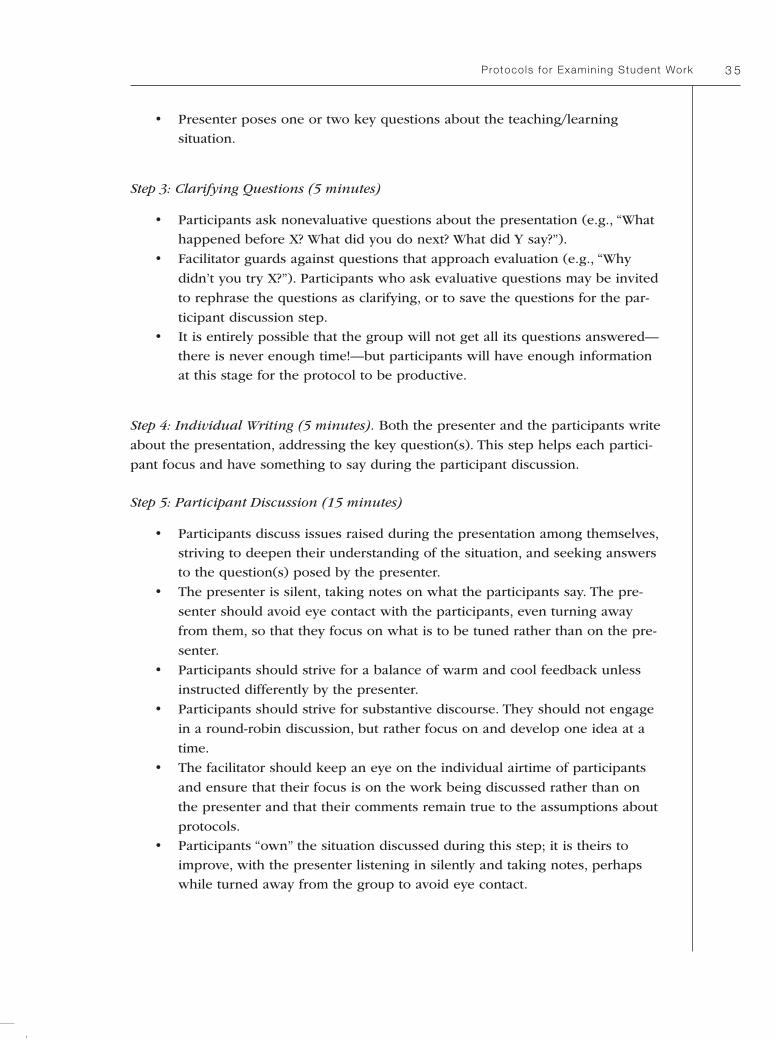
Protocols for Examin ing Student Work 3 5
• Presenter poses one or two key questions about the teaching/learning situation.
Step 3: Clarifying Questions (5 minutes)
• Participants ask nonevaluative questions about the presentation (e.g., “What happened before X? What did you do next? What did Y say?”).
• Facilitator guards against questions that approach evaluation (e.g., “Why
didn’t you try X?”). Participants who ask evaluative questions may be invited
to rephrase the questions as clarifying, or to save the questions for the par-
ticipant discussion step.• It is entirely possible that the group will not get all its questions answered—
there is never enough time!—but participants will have enough information at this stage for the protocol to be productive.
Step 4: Individual Writing (5 minutes). Both the presenter and the participants write
about the presentation, addressing the key question(s). This step helps each partici-
pant focus and have something to say during the participant discussion.
Step 5: Participant Discussion (15 minutes)
• Participants discuss issues raised during the presentation among themselves, striving to deepen their understanding of the situation, and seeking answers to the question(s) posed by the presenter.
• The presenter is silent, taking notes on what the participants say. The pre-
senter should avoid eye contact with the participants, even turning away
from them, so that they focus on what is to be tuned rather than on the pre-
senter.
• Participants should strive for a balance of warm and cool feedback unless
instructed differently by the presenter.
• Participants should strive for substantive discourse. They should not engage
in a round-robin discussion, but rather focus on and develop one idea at a
time.
• The facilitator should keep an eye on the individual airtime of participants
and ensure that their focus is on the work being discussed rather than on
the presenter and that their comments remain true to the assumptions about
protocols.• Participants “own” the situation discussed during this step; it is theirs to
improve, with the presenter listening in silently and taking notes, perhaps while turned away from the group to avoid eye contact.
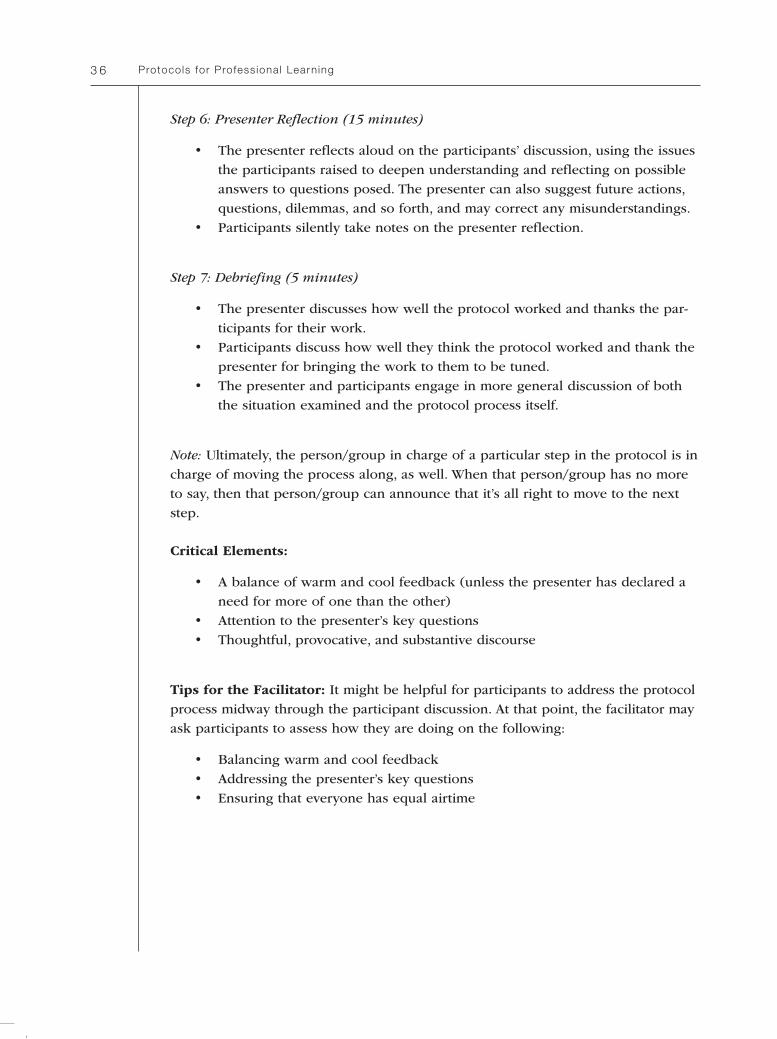
Protocols for Profess ional Learn ing3 6
Step 6: Presenter Reflection (15 minutes)
• The presenter reflects aloud on the participants’ discussion, using the issues the participants raised to deepen understanding and reflecting on possible answers to questions posed. The presenter can also suggest future actions, questions, dilemmas, and so forth, and may correct any misunderstandings.
• Participants silently take notes on the presenter reflection.
Step 7: Debriefing (5 minutes)
• The presenter discusses how well the protocol worked and thanks the par-ticipants for their work.
• Participants discuss how well they think the protocol worked and thank the presenter for bringing the work to them to be tuned.
• The presenter and participants engage in more general discussion of both the situation examined and the protocol process itself.
Note: Ultimately, the person/group in charge of a particular step in the protocol is in charge of moving the process along, as well. When that person/group has no more to say, then that person/group can announce that it’s all right to move to the next step.
Critical Elements:
• A balance of warm and cool feedback (unless the presenter has declared a need for more of one than the other)
• Attention to the presenter’s key questions• Thoughtful, provocative, and substantive discourse
Tips for the Facilitator: It might be helpful for participants to address the protocol process midway through the participant discussion. At that point, the facilitator may ask participants to assess how they are doing on the following:
• Balancing warm and cool feedback• Addressing the presenter’s key questions• Ensuring that everyone has equal airtime
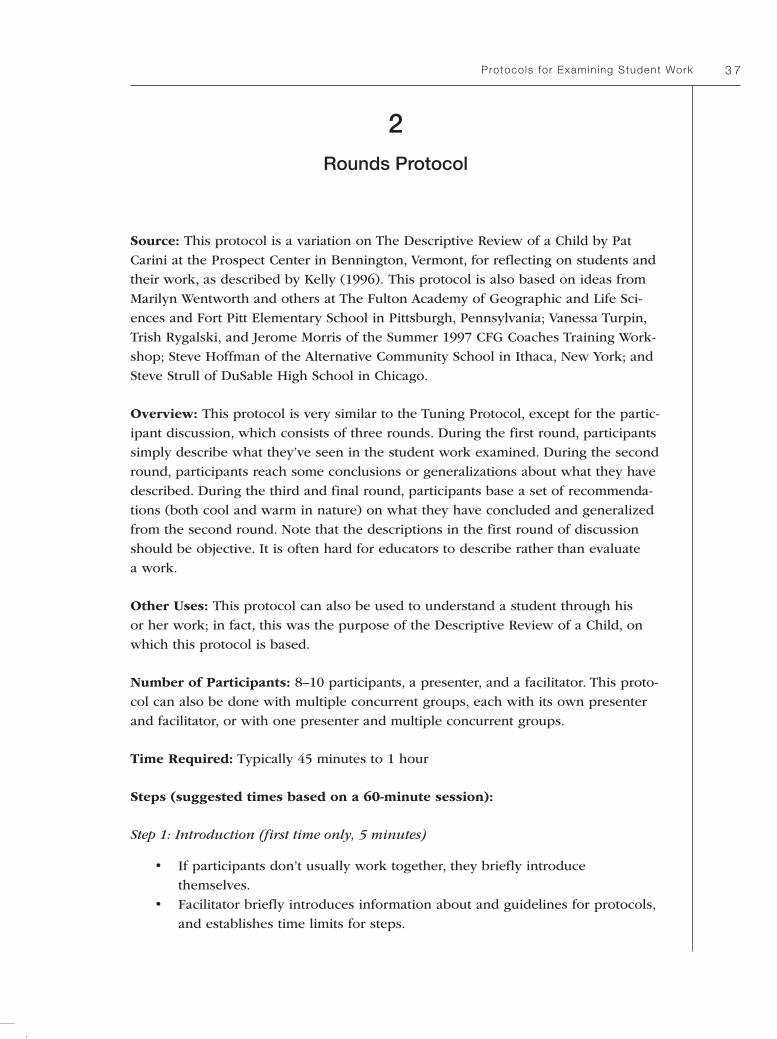
Protocols for Examin ing Student Work 3 7
2Rounds Protocol
Source: This protocol is a variation on The Descriptive Review of a Child by Pat Carini at the Prospect Center in Bennington, Vermont, for reflecting on students and their work, as described by Kelly (1996). This protocol is also based on ideas from Marilyn Wentworth and others at The Fulton Academy of Geographic and Life Sci-ences and Fort Pitt Elementary School in Pittsburgh, Pennsylvania; Vanessa Turpin, Trish Rygalski, and Jerome Morris of the Summer 1997 CFG Coaches Training Work-shop; Steve Hoffman of the Alternative Community School in Ithaca, New York; and Steve Strull of DuSable High School in Chicago.
Overview: This protocol is very similar to the Tuning Protocol, except for the partic-ipant discussion, which consists of three rounds. During the first round, participants simply describe what they’ve seen in the student work examined. During the second round, participants reach some conclusions or generalizations about what they have described. During the third and final round, participants base a set of recommenda-tions (both cool and warm in nature) on what they have concluded and generalized from the second round. Note that the descriptions in the first round of discussion should be objective. It is often hard for educators to describe rather than evaluate a work.
Other Uses: This protocol can also be used to understand a student through his or her work; in fact, this was the purpose of the Descriptive Review of a Child, on which this protocol is based.
Number of Participants: 8–10 participants, a presenter, and a facilitator. This proto-col can also be done with multiple concurrent groups, each with its own presenter and facilitator, or with one presenter and multiple concurrent groups.
Time Required: Typically 45 minutes to 1 hour
Steps (suggested times based on a 60-minute session):
Step 1: Introduction (first time only, 5 minutes)
• If participants don’t usually work together, they briefly introduce themselves.
• Facilitator briefly introduces information about and guidelines for protocols, and establishes time limits for steps.
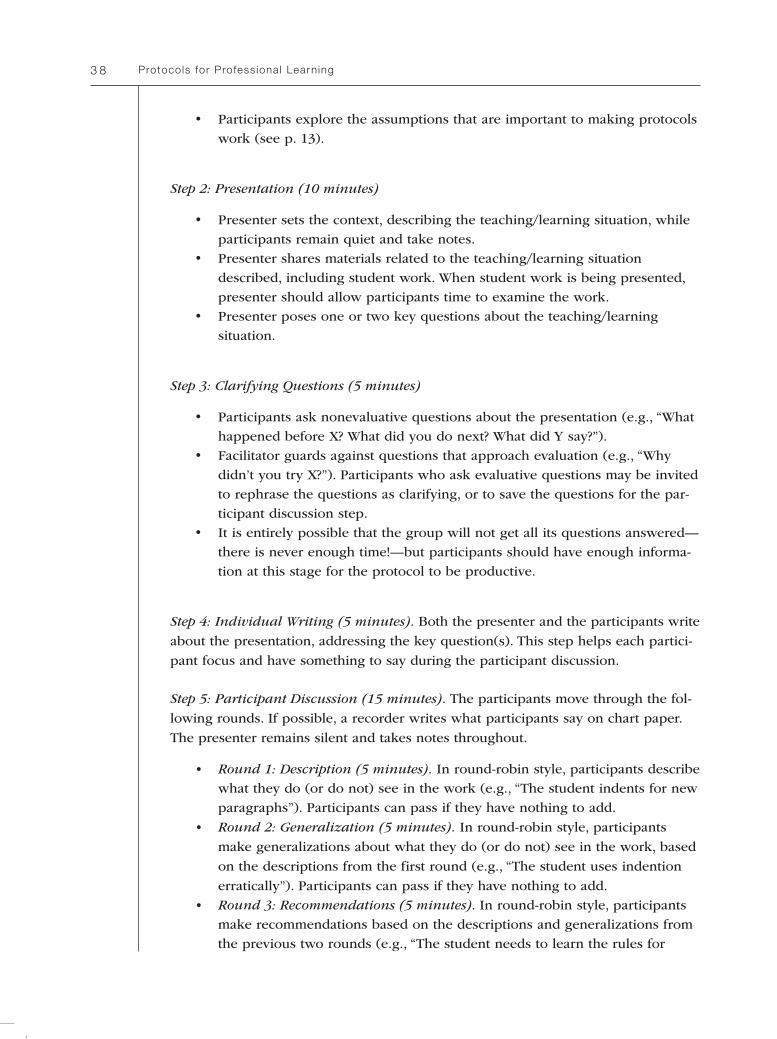
Protocols for Profess ional Learn ing3 8
• Participants explore the assumptions that are important to making protocols work (see p. 13).
Step 2: Presentation (10 minutes)
• Presenter sets the context, describing the teaching/learning situation, while participants remain quiet and take notes.
• Presenter shares materials related to the teaching/learning situation described, including student work. When student work is being presented, presenter should allow participants time to examine the work.
• Presenter poses one or two key questions about the teaching/learning situation.
Step 3: Clarifying Questions (5 minutes)
• Participants ask nonevaluative questions about the presentation (e.g., “What happened before X? What did you do next? What did Y say?”).
• Facilitator guards against questions that approach evaluation (e.g., “Why didn’t you try X?”). Participants who ask evaluative questions may be invited to rephrase the questions as clarifying, or to save the questions for the par-ticipant discussion step.
• It is entirely possible that the group will not get all its questions answered—there is never enough time!—but participants should have enough informa-tion at this stage for the protocol to be productive.
Step 4: Individual Writing (5 minutes). Both the presenter and the participants write
about the presentation, addressing the key question(s). This step helps each partici-
pant focus and have something to say during the participant discussion.
Step 5: Participant Discussion (15 minutes). The participants move through the fol-
lowing rounds. If possible, a recorder writes what participants say on chart paper.
The presenter remains silent and takes notes throughout.
• Round 1: Description (5 minutes). In round-robin style, participants describe what they do (or do not) see in the work (e.g., “The student indents for new paragraphs”). Participants can pass if they have nothing to add.
• Round 2: Generalization (5 minutes). In round-robin style, participants
make generalizations about what they do (or do not) see in the work, based
on the descriptions from the first round (e.g., “The student uses indention
erratically”). Participants can pass if they have nothing to add.• Round 3: Recommendations (5 minutes). In round-robin style, participants
make recommendations based on the descriptions and generalizations from the previous two rounds (e.g., “The student needs to learn the rules for
Protocols for Examin ing Student Work 3 9
forming paragraphs”). Participants can pass if they have nothing to add. The group should make every effort to offer warm and cool recommendations; warm recommendations indicate what works and should be continued, and cool recommendations indicate what needs improvement. The group should also make every effort to address the presenter’s key questions about the work.
Step 6: Presenter Reflection (15 minutes)
• The presenter reflects aloud on the participants’ discussion, using the issues the participants raised to deepen understanding and reflecting on possible answers to questions posed. The presenter can also suggest future actions, questions, dilemmas, and so forth, and may correct any misunderstandings.
• Participants silently take notes on the presenter reflection.
Step 7: Debriefing (5 minutes)
• The presenter discusses how well the protocol worked and thanks the par-ticipants for their work.
• Participants discuss how well they think the protocol worked and thank the presenter for bringing the work to them to be tuned.
• The presenter and participants engage in more general discussion of both the situation examined and the protocol process itself.
• The facilitator engages participants in discussion of the three rounds and why they are important.
Critical Elements:
• A balance of warm and cool feedback (unless the presenter has declared a need for more of one than the other)
• Attention to the presenter’s key questions• Thoughtful, provocative, and substantive discourse
During the participant discussion, the facilitator may also help the participants to stick to nonevaluative descriptions in the first round, and base both generalizations and recommendations on these descriptions. If participants make generalizations or recommendations that are not based on previously made descriptions, the facilitator should encourage them to come up with relevant descriptions.
Tips for the Facilitator: One of the best activities the facilitator can engage par-ticipants in before starting this protocol is practice with description. For example, the facilitator could start by asking participants to describe the room they are in. If a participant says, “It’s crowded,” the facilitator could gently point out that this is a
Protocols for Profess ional Learn ing4 0
generalization. Participants should simply describe the size of the room, its furnish-ings, the number of people in it, and so forth before concluding that it’s crowded. Similarly, if participants say that the room is cold, they should first establish the temperature; if they volunteer that the room is noisy, they should first describe all the noises in the room. As further practice, they might then try describing a piece of student work that is not being used for the protocol.
Protocols for Examin ing Student Work 4 1
3Vertical Slice Protocol
Source: In 1996, the Bush Educational Leadership Program at the University of Min-nesota worked with the Prairieville, Minnesota, school district to create the Vertical Slice (also known as the Minnesota Slice), which it used to capture student data for use in analyzing the purposes of education. Variations on this process include the Albuquerque Slice, created by school coaches from the National School Reform Fac-ulty of the Annenberg Institute for the 1996 Fall Forum of the Coalition of Essential Schools; the Longfellow Slice; the Columbus Family Academy Slice; the “Day in the Life” Slice; the South Bend Slice; and the Hempstead Slice.
Overview: This protocol focuses on an examination of all the student work pro-duced during a narrow time period by a sample of students in a particular school or district.
Other Uses: The Vertical Slice Protocol can be used for a variety of purposes, depending entirely on what the group engaged in the slice wants to know. It can be used to help educators understand students’ perceptions of the school, some aspect of a problem or issue, how rigorous classroom work is, how interdisciplinary cur-riculum functions, and so forth.
Number of Participants: Any number of people can participate in this protocol, but groups of 20 or more might work better if broken into groups of 10 or so. If groups are broken up, it is important for them to consolidate their learning. The Vertical Slice can involve a single grade level or adjacent grade levels; subject area teach-ers; an entire school staff, including counselors and administrators; educators across schools, alongside district administrators; and parents and community members.
Time Required: Typically 1–2 hours for the planning meeting and 3–4 hours for analysis.
Steps:
Part 1—Planning Meeting: The planning meeting involves either the entire group that will be participating in analysis or a representative group. The steps for the planning meeting are as follows:
Step 1: Determining the Purpose of the Slice (up to 15 minutes)
Protocols for Profess ional Learn ing4 2
Step 2: Determining a Guiding Question Related to the Purpose of the Slice (up to 15 minutes)
Step 3: Determining How Student Work Is to Be Obtained (up to 15 minutes). Each group will need to think of its own needs and design its own type of student work to collect. Here are some examples:
• One student’s work throughout one day• A sample of work from randomly chosen students in one grade on one day• A sample of work from randomly chosen students across grades on one day• A sample of work from one randomly selected student in the same grade in
each of several schools• Samples reflecting work from students at certain socioeconomic levels or
levels of English fluency• Samples of work from students enrolled in special education courses, AP
courses, art classes, and so forth
Step 4: Identifying Other Aspects of the Work to Be Collected (up to 15 minutes). These aspects include the following:
• What the sample will consist of (e.g., work on paper, videos, artwork, pho-tos, journals, audiotapes, student logs/reflections)
• Whether the context of the work will be examined in addition to the work itself (e.g., the assignment, the instruction leading up to the assignment, whether or not students worked together or individually)
• Whether the work will be anonymous or identified
Step 5: Deciding on the Duration of the Slice (up to 15 minutes). Although slices usually consist of a day’s worth of work, consider collecting during a particular hour or a certain period of the day; alternatively, consider examining work that has been collected over a longer period of time (a week, for example) and then randomly selected for the analysis. Be careful not to collect too much work.
Step 6: Attending to the Logistics of the Collection Process (up to 15 minutes)
• Answer these critical questions: Who will collect the work? If random selec-tions are to be made, who will make them? How will parents be informed of the process? Do they need to give permission for the school to analyze their students’ work, even if the students remain anonymous?
• Organize the collection. If selecting at random from the collection, do so at this point.
• Make copies of the work so that everyone has the same final collection.• Establish a time and place for the analysis and distribute this information to
those involved.
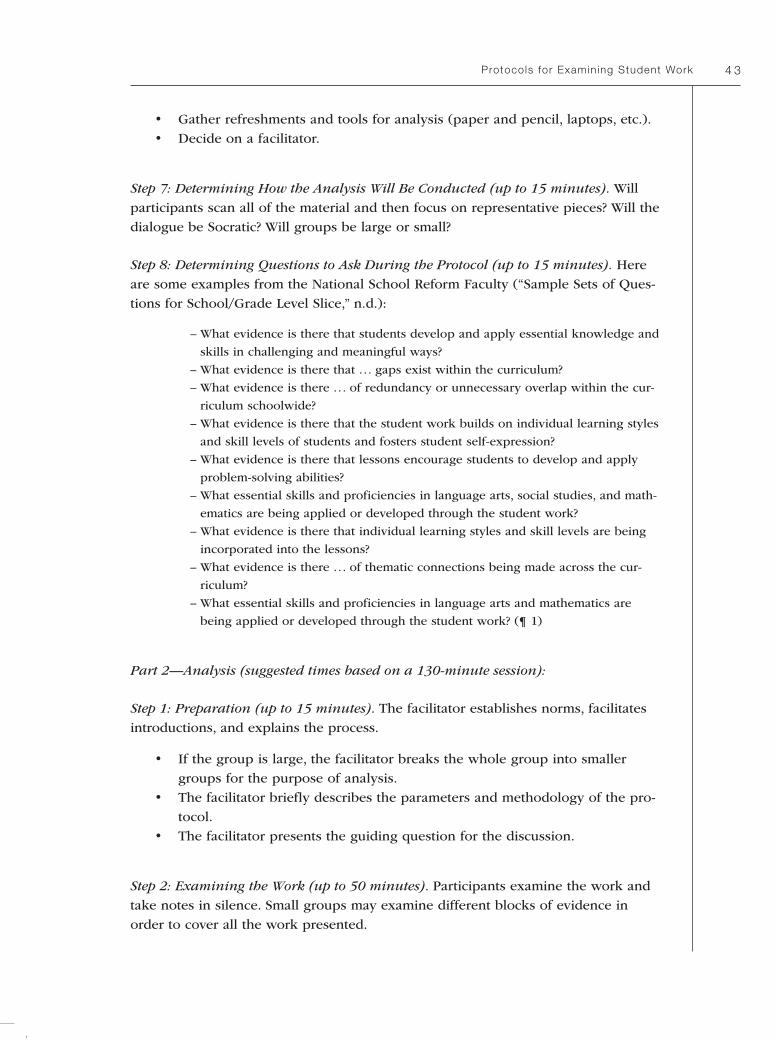
Protocols for Examin ing Student Work 4 3
• Gather refreshments and tools for analysis (paper and pencil, laptops, etc.).• Decide on a facilitator.
Step 7: Determining How the Analysis Will Be Conducted (up to 15 minutes). Will participants scan all of the material and then focus on representative pieces? Will the dialogue be Socratic? Will groups be large or small?
Step 8: Determining Questions to Ask During the Protocol (up to 15 minutes). Here are some examples from the National School Reform Faculty (“Sample Sets of Ques-tions for School/Grade Level Slice,” n.d.):
– What evidence is there that students develop and apply essential knowledge and
skills in challenging and meaningful ways?
– What evidence is there that . . . gaps exist within the curriculum?
– What evidence is there . . . of redundancy or unnecessary overlap within the cur-
riculum schoolwide?
– What evidence is there that the student work builds on individual learning styles
and skill levels of students and fosters student self-expression?
– What evidence is there that lessons encourage students to develop and apply
problem-solving abilities?
– What essential skills and proficiencies in language arts, social studies, and math-
ematics are being applied or developed through the student work?
– What evidence is there that individual learning styles and skill levels are being
incorporated into the lessons?
– What evidence is there . . . of thematic connections being made across the cur-
riculum?
– What essential skills and proficiencies in language arts and mathematics are
being applied or developed through the student work? (¶ 1)
Part 2—Analysis (suggested times based on a 130-minute session):
Step 1: Preparation (up to 15 minutes). The facilitator establishes norms, facilitates introductions, and explains the process.
• If the group is large, the facilitator breaks the whole group into smaller groups for the purpose of analysis.
• The facilitator briefly describes the parameters and methodology of the pro-tocol.
• The facilitator presents the guiding question for the discussion.
Step 2: Examining the Work (up to 50 minutes). Participants examine the work and take notes in silence. Small groups may examine different blocks of evidence in order to cover all the work presented.
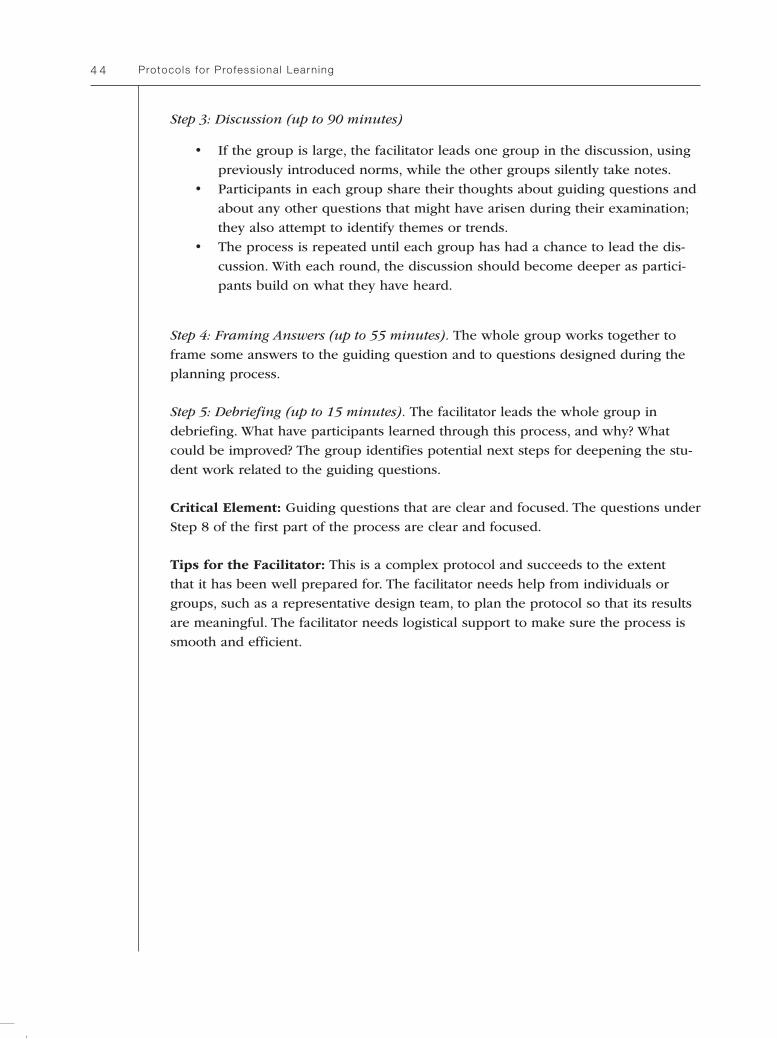
Protocols for Profess ional Learn ing4 4
Step 3: Discussion (up to 90 minutes)
• If the group is large, the facilitator leads one group in the discussion, using previously introduced norms, while the other groups silently take notes.
• Participants in each group share their thoughts about guiding questions and about any other questions that might have arisen during their examination; they also attempt to identify themes or trends.
• The process is repeated until each group has had a chance to lead the dis-cussion. With each round, the discussion should become deeper as partici-pants build on what they have heard.
Step 4: Framing Answers (up to 55 minutes). The whole group works together to frame some answers to the guiding question and to questions designed during the planning process.
Step 5: Debriefing (up to 15 minutes). The facilitator leads the whole group in debriefing. What have participants learned through this process, and why? What could be improved? The group identifies potential next steps for deepening the stu-dent work related to the guiding questions.
Critical Element: Guiding questions that are clear and focused. The questions under Step 8 of the first part of the process are clear and focused.
Tips for the Facilitator: This is a complex protocol and succeeds to the extent that it has been well prepared for. The facilitator needs help from individuals or groups, such as a representative design team, to plan the protocol so that its results are meaningful. The facilitator needs logistical support to make sure the process is smooth and efficient.
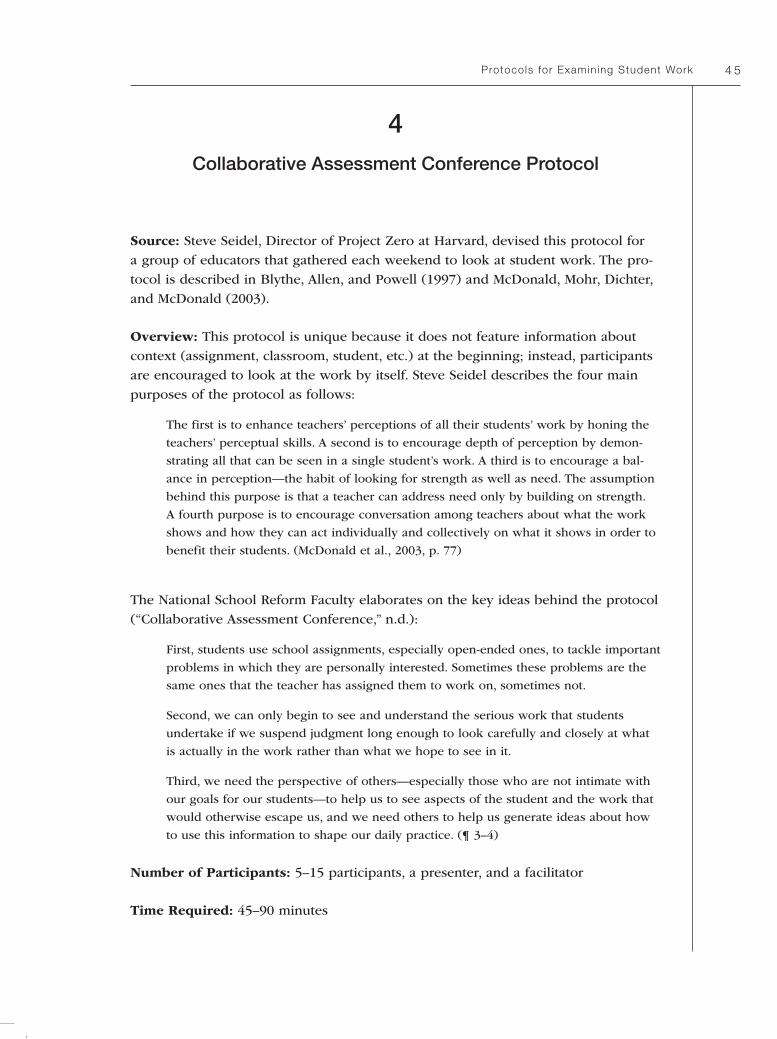
Protocols for Examin ing Student Work 4 5
4Collaborative Assessment Conference Protocol
Source: Steve Seidel, Director of Project Zero at Harvard, devised this protocol for a group of educators that gathered each weekend to look at student work. The pro-tocol is described in Blythe, Allen, and Powell (1997) and McDonald, Mohr, Dichter, and McDonald (2003).
Overview: This protocol is unique because it does not feature information about context (assignment, classroom, student, etc.) at the beginning; instead, participants are encouraged to look at the work by itself. Steve Seidel describes the four main purposes of the protocol as follows:
The first is to enhance teachers’ perceptions of all their students’ work by honing the
teachers’ perceptual skills. A second is to encourage depth of perception by demon-
strating all that can be seen in a single student’s work. A third is to encourage a bal-
ance in perception—the habit of looking for strength as well as need. The assumption
behind this purpose is that a teacher can address need only by building on strength.
A fourth purpose is to encourage conversation among teachers about what the work
shows and how they can act individually and collectively on what it shows in order to
benefit their students. (McDonald et al., 2003, p. 77)
The National School Reform Faculty elaborates on the key ideas behind the protocol (“Collaborative Assessment Conference,” n.d.):
First, students use school assignments, especially open-ended ones, to tackle important
problems in which they are personally interested. Sometimes these problems are the
same ones that the teacher has assigned them to work on, sometimes not.
Second, we can only begin to see and understand the serious work that students
undertake if we suspend judgment long enough to look carefully and closely at what
is actually in the work rather than what we hope to see in it.
Third, we need the perspective of others—especially those who are not intimate with
our goals for our students—to help us to see aspects of the student and the work that
would otherwise escape us, and we need others to help us generate ideas about how
to use this information to shape our daily practice. (¶ 3–4)
Number of Participants: 5–15 participants, a presenter, and a facilitator
Time Required: 45–90 minutes
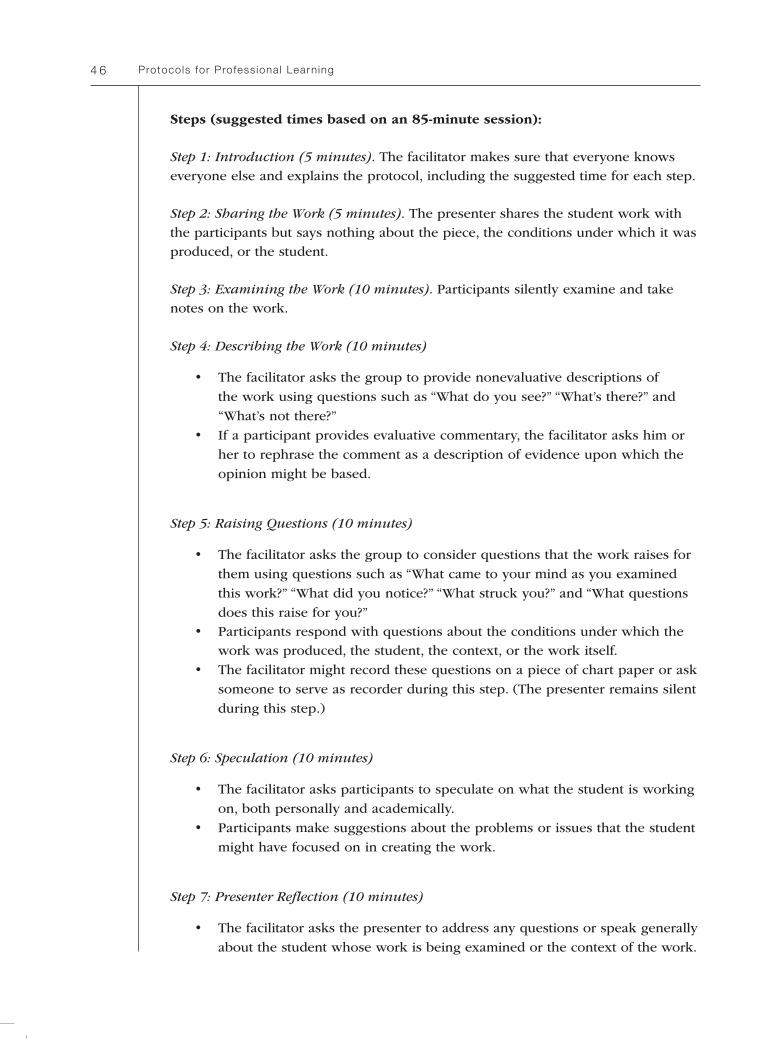
Protocols for Profess ional Learn ing4 6
Steps (suggested times based on an 85-minute session):
Step 1: Introduction (5 minutes). The facilitator makes sure that everyone knows everyone else and explains the protocol, including the suggested time for each step.
Step 2: Sharing the Work (5 minutes). The presenter shares the student work with the participants but says nothing about the piece, the conditions under which it was produced, or the student.
Step 3: Examining the Work (10 minutes). Participants silently examine and take notes on the work.
Step 4: Describing the Work (10 minutes)
• The facilitator asks the group to provide nonevaluative descriptions of the work using questions such as “What do you see?” “What’s there?” and “What’s not there?”
• If a participant provides evaluative commentary, the facilitator asks him or her to rephrase the comment as a description of evidence upon which the opinion might be based.
Step 5: Raising Questions (10 minutes)
• The facilitator asks the group to consider questions that the work raises for them using questions such as “What came to your mind as you examined this work?” “What did you notice?” “What struck you?” and “What questions does this raise for you?”
• Participants respond with questions about the conditions under which the work was produced, the student, the context, or the work itself.
• The facilitator might record these questions on a piece of chart paper or ask someone to serve as recorder during this step. (The presenter remains silent during this step.)
Step 6: Speculation (10 minutes)
• The facilitator asks participants to speculate on what the student is working on, both personally and academically.
• Participants make suggestions about the problems or issues that the student might have focused on in creating the work.
Step 7: Presenter Reflection (10 minutes)
• The facilitator asks the presenter to address any questions or speak generally about the student whose work is being examined or the context of the work.
Protocols for Examin ing Student Work 4 7
• The presenter may offer a perspective that relates to the work, including what he or she sees in it. However, the presenter does not need to answer any or all of the questions.
• Some presenters share what they found surprising about the participants’ comments during steps 4–6.
Step 8: Implications of the Work (15 minutes)
• The facilitator invites everyone (including the presenter) to address the implications of the work and their analysis of it. A typical facilitator question at this point might be, “What have we learned by examining this work that can help us in our own teaching?”
• Participants can discuss their own teaching, how people learn, or how the student whose work was examined can be supported in the future.
Step 9: Debriefing (10 minutes). The facilitator invites the whole group to debrief the experience—both the content of the conference as well as the process—after thanking the presenter and offering him or her a chance to reflect.
Critical Elements: Participants may have difficulty sticking to nonevaluative descrip-
tions of the work and may need help rephrasing their comments. Similarly, they may
be unsure about what kinds of questions they can raise; almost any question about
the work, its context, or the student is appropriate. Finally, it is extremely important
for participants to see beyond the particular student and work being examined to
general teaching and learning strategies.
Tips for the Facilitator: The facilitator plays a very active role in this protocol;
steps 4–6 in particular require the facilitator to provide prompts and probably exam-
ples. The facilitator may need to have participants practice making nonevaluative
descriptions before the process begins by surveying the room (see the tips for the
facilitator under the Rounds Protocol) or analyzing a piece of writing or artwork.
The facilitator may also need to reassure participants that they can, indeed, do this
protocol without knowing the context of the student work.
MacDonald and colleagues (2003) suggest that facilitators also need to “press partici-
pants to go deeply into the work, to raise more questions and make more specula-
tions collectively than any one member imagined possible” (p. 79). Facilitators need
to help participants surmount superficiality. For example, when asked what a stu-
dent seems to be working on, a participant might say, “a math problem.” The facilita-
tor should prod the speaker to think about the learning the student is going through
to do the math problem.
Protocols for Profess ional Learn ing4 8
Although some approximate times are given above, the facilitator must have a keen sense of when a group is finished and ready to move on or needs to stay on a step and push thinking deeper.
4 9
4Protocols for Examining
Professional Practice
The protocols in this chapter can be used to examine any aspect of professional practice, from what teachers do in the classroom to the policy decisions of district administrators. (In addition to the protocols below, the Tuning Protocol in Chapter 3 can be used to examine professional practice.) The protocols discussed here are as follows:
• Consultancy Protocol• Standards in Practice Protocol• Success Analysis Protocol• Triad Protocol
Protocols for Profess ional Learn ing5 0
1Consultancy Protocol
Source: This protocol was developed by Gene Thompson-Grove as part of the Coali-tion of Essential Schools’ National Re:Learning Faculty Program, and further adapted and revised by the National School Reform Faculty Project (NSRF). Nancy Mohr originated the Descriptive Consultancy, which is similar to the protocol discussed here but does not include the probing questions (see McDonald, Mohr, Dichter, and McDonald, 2003).
Overview: One purpose of this protocol is to learn how others understand a dilemma and frame responses to it. The protocol may help the presenter address the dilemma or solve a problem, and the discourse may sound like asking for and getting advice, but the primary purpose of the Consultancy Protocol is to open up people’s minds to new ways of thinking about problems and issues related to teach-ing and learning.
Number of Participants: It’s important to have participants who do not share the presenter’s dilemma. They need to bring diverse outside perspectives to bear on the problem. A single group of 8–10 participants plus the presenter and facilitator is ideal. Larger groups can be broken into subgroups small enough so that everyone gets sufficient airtime.
Time Required: There are two time periods required for this protocol. The first is individual, during which anyone who is thinking about presenting a dilemma writes about that dilemma before coming to the protocol. This time will vary according to the participant. The second time period is devoted to participant discussion of the dilemma. The time required for the discussion is 45–60 minutes.
Steps:
Part 1—Writing About the Dilemma: This portion is usually completed individually before coming to the protocol group. (The time required for each step varies from case to case.)
Step 1: Considering the Dilemma. It should be an issue with which people are struggling, that has a way to go before being resolved, that is up to them to control, and that it is critical to their work.
Protocols for Examin ing Profess ional Pract ice 5 1
Step 2: Writing About the Dilemma. The NSRF offers these questions to guide the writing:
– Why is this a dilemma for you? Why is this dilemma important to you?
– If you could take a snapshot of this dilemma, what would you/we see?
– What have you done already to try to remedy or manage the dilemma?
– What have been the results of those attempts?
– Who do you hope changes? Who do you hope will take action to resolve this
dilemma? If your answer is not you, you need to change your focus. You will
want to present a dilemma that is about your practice, actions, behaviors, beliefs,
and assumptions, and not someone else’s.
– What do you assume to be true about this dilemma, and how have these
assumptions influenced your thinking about the dilemma? (“Consultancy Proto-
col,” n.d., ¶ 4)
Step 3: Stating the Dilemma as a Focusing Question That Gets to the Heart of the Matter. Here is an example offered by the NSRF: Dilemma: Teachers love doing projects with students, but the projects never seem to connect to one another or have very coherent educational goals or focus; they are just fun. Question: How do I work with teachers so they move to deep learning about important concepts while still staying connected to hands-on learning?
Part 2—The Consultancy Process (suggested times based on a 50-minute session)
Step 1: Presenter Overview (10 minutes)
• The presenter gives an overview of the dilemma along with a focus question for the group to consider.
• The presenter may provide participants with a paper one page or shorter in length describing the dilemma, and should allow sufficient time for them to read it.
Step 2: Clarifying Questions (5 minutes)
• Participants ask clarifying questions of the presenter—questions that can be answered with facts.
• If the questions are not clarifying, they should be rephrased so that they are or saved until later discussion.
Step 3: Probing Questions (5 minutes)
• The group asks probing questions that help the presenter expand thinking about the dilemma. The purpose of the questions at this point is to help the
Protocols for Profess ional Learn ing5 2
presenter learn more about the question in order to begin analysis of the dilemma.
• The presenter does not have to respond to the questions. If the presenter does respond, the participants do not discuss the answers.
Step 4: Participant Discussion (15 minutes)
• The presenter withdraws from the group, taking notes on the participants’ discussion but not making eye contact with them.
• Participants might describe possible actions that the presenter might take, but they should not decide on a solution. Their job is simply to refine the issues for the presenter.
• The NSRF suggests the following questions to get the discussion going:
– What did we hear?
– What didn’t we hear that we think might be relevant?
– What assumptions seem to be operating?
– What questions does the dilemma raise for us?
– What do we think about the dilemma?
– What might we do or try if faced with a similar dilemma? What have we done in
similar situations? (“Consultancy Protocol,” n.d., ¶ 7)
Step 5: Presenter Reflection (10 minutes)
• Referring to notes taken during the participant discussion, the presenter reflects on what the participants said and how their comments have affected his or her thinking.
• It is particularly important for the presenter to share new insights that the discussion has provided. The presenter might even discover that the ques-tion offered at the end of the presentation is not the “real” question after all!
Step 6: Debriefing (5 minutes). The facilitator leads the group in discussion of the protocol process and invites the presenter and participants to continue refining the dilemma.
Critical Elements: The dilemma needs to be truly of importance to the presenter. It must also be authentic and fresh—that is, not already solved or nearly solved. The work of the participants needs to be thoughtful rather than judgmental. As McDonald and colleagues (2003) maintain, “An assumption behind the use of the protocol is that framing and reframing a complex problem is an especially valuable step in moving toward creative, focused problem solving” (p. 54). However, it is not the participants’ role to come up with a solution.
Protocols for Examin ing Profess ional Pract ice 5 3
The NSRF maintains that the presenter must “listen in a nondefensive manner. Listen for new ideas, perspectives, and approaches. Listen to the group’s analysis of your question/issues. Listen for assumptions—both your own and the group’s—implicit in the conversation. Don’t listen for judgment of you by the group. This is not sup-posed to be about you, but about a question you have raised. Remember that you asked the group to help you with this dilemma” (“Consultancy Protocol,” n.d., ¶ 5).
Tips for the Facilitator: The facilitator needs to be sure that the group does not pass judgment on the presenter’s situation and discusses it in a purely descriptive way. The facilitator also needs to be sure that the presenter does not take a combat-ive stance during reflection, but simply uses the occasion to go deeper and consider alternative “takes” on the dilemma.
Protocols for Profess ional Learn ing5 4
2Standards in Practice Protocol
Source: This protocol originated with the Education Trust. I have modified the pro-tocol and added the rubric for rigor.
Overview: This protocol focuses on teacher assignments according to the belief that students can do no better than the assignments they are given.
Other Uses: This protocol can also be used to analyze assessment prompts and instructional tasks. If the assignment has not actually been given, the process can be used to analyze instructional planning. If the assignment has been given, the student work might be scored according to the rubric criteria generated in step 7. Alterna-tively, the group might conduct a Tuning Protocol in step 8.
Number of Participants: 6–8 is ideal, along with a facilitator and a presenter
Time Required: Once the group understands the protocol, it can be accomplished in about an hour
Steps (suggested times based on a 60-minute session):
Step 1: Choosing the Assignment
• Although the presenter should accomplish this step before the protocol gets under way, the facilitator and protocol participants should help him or her to choose a “workable” assignment. This is not necessarily a good assign-ment; it simply has to have enough to it that it can be used in this protocol.
• A worksheet with single right answers is not workable; the presenter might be asked to rethink the purpose of the worksheet and devise an assignment that is meatier (both for the group and for students) than a worksheet. This meatier assignment can then be brought to the protocol.
• The assignment can be one that has not been given yet; if it has been given, the presenter will want to bring student work that resulted from the assignment. (This step helps encourage educators to give more substantive assignments in the first place.)
Step 2: Presenting the Assignment (5 minutes)
• The presenter can present as much context for the assignment as he or she wants, but the assignment should stand on its own for examination.

Protocols for Examin ing Profess ional Pract ice 5 5
• If the assignment has been given, the presenter may describe the instruc-
tion involved and the processes students followed once they received the
assignment.• The presenter may also want to explain how the assignment fits within the
context of a unit and of the class.
Step 3: Trying the Assignment (5 minutes; more if there is time)
• The presenter steps outside the process at this point, taking notes but not participating.
• Participants should try the assignment themselves, if possible with the time, space, and materials provided; if not, they should “rehearse” the assignment by imagining the steps students would take.
Step 4: Analyzing the Assignment (10 minutes). Participants brainstorm what the
assignment requires of students. They might assess the following characteristics,
known collectively as KASAB (Killion, 2007):
• Knowledge (what students need to know)
• Attitude (how students should feel about the assignment to be successful)
• Skills (what students need to be able to do)
• Aspiration (what students believe they can do in terms of the assignment)• Behavior (what students actually do to complete the assignment)
Step 5: Determining the Cognitive Level of the Assignment (5 minutes). Participants
discuss the levels of Bloom’s Taxonomy that apply to the assignment.
Step 6: Assessing the Assignment’s Rigor (10 minutes). Participants judge the
rigor of the assignment for the target group of students and determine if the
assignment is appropriately rigorous. The following indicators may be used to
complete this step:
• Basic vs. deep knowledge
• Concrete vs. abstract
• Simple vs. complex
• Single facet vs. multiple facets
• Small leap vs. great leap
• Structured vs. open
• Clearly defined vs. fuzzy
• Less independence required vs. more independence required
• Slower vs. quicker• Basic development vs. substantive development
Protocols for Profess ional Learn ing5 6
Step 7: Developing Scoring Criteria (5 minutes). Participants develop a list of criteria that they might use to score student work resulting from the given assignment. They do not develop a complete rubric (with descriptions for each criterion for each scor-ing level), only the criteria for a rubric.
Step 8: Scoring Student Work (5 minutes; step only applies if student work is provided)
• If the assignment has been given and student work is available, participants apply the scoring criteria from step 7 to the work, determining how well the work fulfills the criteria as well as how well the criteria describe the actual work.
• If the assignment has not been given, participants move to the next step.
Step 9: Discussing Revision of the Assignment (5 minutes)
• Based on their work in the preceding steps, participants determine how they might improve the assignment, acting upon the belief that student work is influenced by the quality of the assignment.
• If the assignment has not been given, participants might also discuss the appropriate instruction that would lead up to the assignment as well as the conditions under which students might best work through the assignment.
Step 10: Presenter Reflection (5 minutes). The presenter, who has been taking notes during this process, reflects aloud about what the participants have accomplished.
Step 11: Debriefing (5 minutes). The presenter and the participants, led by the facili-tator, discuss how well the process worked. They also continue discussion of the content of this protocol and decide who will bring an assignment the next time.
Critical Elements: The most important element in this protocol is making sure that the assignment is workable. Judging the workability of the assignment before the protocol starts can be of help to teachers who want to move beyond using work-sheets in class; the group can help the presenter think of how to fashion more in-depth assignments. As the presenter listens to the participants, he or she needs to be open-minded about what they say; reflection, therefore, should include comments on the new ideas that have come forth as a result of the participants’ work.
Tips for the Facilitator: This protocol can be deepened and extended during steps 4–9, thus requiring more time. If the presenter has not given the assignment to stu-dents yet, a good follow-up meeting can engage the presenter and the participants in designing instruction around the assignment.
Protocols for Examin ing Profess ional Pract ice 5 7
3Success Analysis Protocol
Source: This protocol was designed by Daniel Baron, who was codirector of the National School Reform Faculty (NSRF). Baron expressed appreciation to Vivian Johnson, who inspired this protocol.
Overview: Sometimes protocols focus overmuch on dilemmas or problems, so this
protocol is a nice way to celebrate successes without the vapidity of “show and tell.”
Participants work to understand why something is successful and create cases of
professional practice that demonstrate successful decision making or problem solv-
ing. They collectively gain an understanding of reasons for success in order to apply
these strategies to future work.
Number of Participants: Any number of people can participate in this protocol,
working in groups of 3 or 4. A facilitator is needed to keep all subgroups working
smoothly. No one person is a presenter; several people are.
Time Required: 45 minutes to 2 hours
Steps (suggested times based on a 60-minute session):
Step 1: Preparing Cases (can be done ahead of time; otherwise, add 15 minutes)
• Each participant prepares a “case” by reflecting on something that has gone right. The case should be specific about all of the facts and reflective about what might have contributed to the success (including what the participant did).
• Participants may welcome a definition of success as they prepare, either before coming to the group or as part of the group’s process. “Success” can be defined as effectiveness in achieving the intended outcome.
Step 2: Getting into Groups (5 minutes)
• The facilitator has the entire group divide into equal groups of 3 to 4 (more in each group if there is time, as each person will be presenting in the group, and more people means more presentations and more time required).
• These groups can be self-selected, randomly assigned, job-alike, or purpose-fully diverse.
Protocols for Profess ional Learn ing5 8
Step 3: Sharing (5 minutes). One of the participants in each group agrees to go first, sharing his or her case orally and in writing (optional) while the rest of the group listens and takes notes.
Step 4: Clarifying Questions (5 minutes). Participants in each group ask the pre-senter questions to help them gain more understanding about the case. These are clarifying questions only (i.e., those that can be answered by facts).
Step 5: Analysis and Discussion (10 minutes)
• While the presenter in each group listens quietly and takes notes, the others discuss the case, venturing their insights about why the case was successful. They should discuss what the presenter did to make the situation successful, as well as other factors.
• Participants may want to describe how what was done is different from typi-cal practice.
• In a variation of this protocol, the presenter converses with the others, answering questions and offering opinions.
Step 6: Reflection (10 minutes)
• The presenter lists the factors that have contributed to the success of the case. If the presenter has been involved in the discussion in step 4, everyone works together to summarize the factors.
• Participants can help the presenter reflect by using the following question prompts, courtesy of NSRF:
– Why do you think . . . ?– What was different about . . . ?– Why did you decide to . . . ? (“Success Analysis Protocol with Reflective
Questions,” n.d., ¶ 5).
Steps 3–6 are repeated until each group member has had a chance to present a case. Before going from one case to another, participants should take a moment to acknowledge the success of the presenter.
Step 7: Compilation (5 minutes). Each group writes the factors that contributed to success on a piece of chart paper. Then, groups do a “gallery tour” of the pieces of chart paper, noticing what’s similar and what’s distinctive about each small group’s list of factors.
Step 8: Discussion (10 minutes). The larger group discusses both factors that are common to all cases and those that are unusual. They may also discuss aspects that

Protocols for Examin ing Profess ional Pract ice 5 9
were surprising to them and elements that undergird the factors of success (e.g., the culture of a school, the philosophy of an administrator, the leadership of a teacher).
Step 9: Debriefing (5 minutes). The facilitator invites participants to reflect on the utility of the protocol and continue their discussion of the content.
Critical Elements: It is very easy to turn this protocol into a shallow show-and-tell session. The group must commit to probing deeply the factors that led to each suc-cess. Compiling and discussing these factors is critical.
Tips for the Facilitator: A whole-group facilitator might focus on keeping the groups on track. Each small group might also have one of its members serve as small-group facilitator, watching the time and attending to the steps. In fact, with an experienced group, it might be easier for each group to facilitate itself, working within a given and sufficient overall timeline. As the NSRF maintains, “The facilita-tor’s role is to help the groups keep focused on how the success described by the presenter is different from more routine work. The analysis of what made this so successful is the purpose of the protocol” (“Success Analysis Protocol,” ¶ 1). If each group has its own facilitator, that person is also a presenter and a participant; there-fore, it might be more appropriate for participants to take turns facilitating.
Protocols for Profess ional Learn ing6 0
4Triad Protocol
Source: The origin of this protocol is unknown.
Overview: This protocol works much like the Success Analysis Protocol, except the subject is not necessarily a success. In fact, this protocol is quite useful for getting and giving feedback on work in progress (e.g., revising curriculum, constructing assessments, developing policies).
Other Uses: Like the Tuning Protocol, this protocol can have multiple purposes. It can be used in discussions to help people process ideas and issues, and it can help participants discuss texts. Groups can conduct the Triad Protocol on almost any aspect of education.
Number of Participants: Any number of participants divided into groups of three (hence “triad”) can conduct this protocol. Groups can be job-alike, random, self-selected, or carefully constructed to ensure diversity in each group.
Time Required: Each round of steps is 10–15 minutes long, so for each group of three, the total time required is 30–45 minutes.
Steps (suggested times based on a 45-minute session):
Step 1: Forming Groups (5 minutes). Participants form groups of three, with one participant being A, one being B, and one being C for the first round.
Step 2: Round 1 (15 minutes). Participant A serves as the presenter, describing an aspect of professional practice; Participant B serves as the discussant, building on what participant A is saying with a comment, question, example, or detail; and par-ticipant C is the observer, listening quietly, saying nothing, and taking notes. After A and B have talked, C summarizes what they have said, adds comments, and presents some conclusions.
Step 3: Round 2 (15 minutes). Step 1 is repeated, with the presenter, discussant, and observer switching places.
Step 4: Round 3 (15 minutes). Step 2 is repeated, with the presenter, discussant, and observer switching places once more.
Protocols for Examin ing Profess ional Pract ice 6 1
Critical Element: The only critical element to this protocol is the seriousness of those involved. Participants must be willing to focus on the topic or professional practice being discussed. If there is time and the whole group desires, the triads may want to report out to the larger group. In this case, the facilitator can lead the discussion of what the small groups learned, and a recorder can collect that informa-tion on chart paper.
Tips for the Facilitator: A facilitator can help establish the groups and set up the timing, announcing when groups should start and finish steps and when each per-son should begin and end his or her role. If the whole group is quite large, yielding many groups of three, the facilitator might want to have each group agree to moni-tor itself, adhering to the times for starting and stopping each round or for the pro-tocol as a whole. If it’s important to capture what each group learned, the facilitator can provide chart paper or ask the observers to take notes.
6 3
5Protocols for Addressing
Issues and Problems
The following protocols in this chapter are particularly helpful for addressing issues and problems:
• Probing Protocol• Inside/Outside Protocol (Fishbowl)• Peeling the Onion Protocol• SWOT Protocol
A few of the protocols already described in this book, such as the Tuning, Rounds, Consultancy, and Triad protocols, can also be used.
Protocols for Profess ional Learn ing6 4
1Probing Protocol
Source: JoAnne Dowd and John D’Anieri of Poland High School, Poland, Maine; the National School Reform Faculty (NSRF)
Overview: The main differences between this protocol and others are its purpose and the type of questions that it features. As the NSRF maintains, probing ques-tions “are tricky questions as people tend to ask more detailed clarifying questions or questions that pertain to what the speaker wishes to say or know, rather than questions clearly for the benefit of the presenter” (“Probing Questions Exercise,” n.d., ¶ 1).
Other Uses: Probing questions can be used in other protocols when the group determines that they are needed. They can help educators look at student work, pro-fessional practice, and text.
Number of Participants: Ideally 6–10 participants, a presenter, and a facilitator. If the group is any larger, each member may not get to share a problem or issue or contribute questions to the protocol.
Time Required: 30–60 minutes
Steps (suggested times based on a 50-minute session):
Step 1: Introduction (first time only; 10 minutes)
• The facilitator introduces the concept of probing questions and invites par-ticipants to introduce themselves if necessary.
• This definition from the NSRF is helpful: “Probing Questions are meant to help the presenter think more deeply, challenge his or her assumptions or consider ways to rethink some aspect of their practice. Probing Questions are for the presenter, not the one asking the question. They should be genu-ine questions, not judgments or advice, though sometimes ideas to consider are either implicit or explicit in the question” (“Pocket Guide to Probing Questions,” n.d., ¶ 3).
• The facilitator may want to share the list of possible questions at the end of this protocol.
Step 2: Writing Dilemmas (5 minutes). The facilitator asks everyone to describe in writing a dilemma that is real for them. This dilemma can be schoolwide or limited

Protocols for Address ing Issues and Problems 6 5
to the classroom; it can be about curriculum, instruction, or assessment; or it can be about a specific student, as long as he or she is kept anonymous.
Step 3: Sharing the First Dilemma (12 minutes)
• The facilitator asks for a volunteer to read his or her problem or issue.• Anyone in the group asks a clarifying question, and the presenter answers.
As the NSRF notes, “This is to help [establish] the difference between clarify-ing and probing questions” (“Probing Questions Exercise,” n.d., ¶ 5).
• Anyone in the group asks a probing question. The presenter writes it down, but does not respond. The others in the group also ask a probing question and the presenter writes each question down without yet responding to any of them.
• The presenter considers each probing question and decides which one was most on target in terms of deepening his or her thinking about the dilemma. The presenter may take a couple of minutes to reflect aloud on the meaning of the question in relation to the dilemma.
• The group may want to take a minute or two to determine why the selected question was particularly effective. The group may also want to begin a list of qualities of effective probing questions.
Step 4: Sharing Additional Dilemmas (time will vary). Step 3 can be repeated using dilemmas for as many participants as possible, for as long as there is time.
Step 5: Debriefing (5 minutes). The group discusses what everyone now understands about probing questions. If the group considered the qualities of effective probing questions in Step 3, these can be reviewed at this stage.
Critical Elements: The most important aspect of this protocol is the formulation of probing questions that will help the presenter. This is a real art, an intellectual feat requiring plenty of empathy, and a valuable skill to learn.
Tips for the Facilitator: The facilitator needs to be sure that the difference between clarifying questions and probing questions is clear and may want to practice creat-ing probing questions or turning a clarifying question into a probing question.
Here are some tips about probing questions from the NSRF:
Probing questions are intended to help the presenter think more deeply about the
issue at hand. If a probing question doesn’t have that effect, it is either a clarifying
question or a recommendation with an upward inflection at the end. If you find your-
self saying “Don’t you think you should . . . ?” you’ve gone beyond probing questions.
The presenter often doesn’t have a ready answer to a genuine probing question.
Since probing questions are the hardest to create productively, we offer the following
suggestions:
Protocols for Profess ional Learn ing6 6
• Check to see if you have a “right” answer in mind. If so, delete the judgment
from the question, or don’t ask it.
• Refer to the presenter’s original question/focus point. What did s/he ask for
your help with? Check your probing questions for relevance.
• Check to see if you are asserting your own agenda. If so, return to the present-
er’s agenda.
• Sometimes a simple “why . . . ?” asked as an advocate for the presenter’s success
can be very effective, as can several why questions asked in a row.
• Try using verbs: What do you fear? Want? Get? Assume? Expect?
• Think about the concentric circles of comfort, risk and danger. Use these as a
barometer. Don’t avoid risk, but don’t push the presenter into the “danger zone.”
• Think of probing questions as being on a continuum, from recommendation to
most effective probing question:
– Could you have students use the rubric to assess their own papers? (recom-
mendation restated as a question)
– What would happen if students used the rubric to assess their own work?
(recommendation restated as a probing question)
– What do the students think is an interesting math problem? (good probing
question)
– What would have to change for students to work more for themselves and less
for you? (better probing question)
• In summary, good probing questions
– Are general and widely useful.
– Don’t place blame on anyone.
– Allow for multiple responses.
– Help create a paradigm shift.
– Empower the person with the dilemma to solve his or her own problem
(rather than deferring to someone with greater or different expertise).
– Avoid yes/no responses.
– Are usually brief.
– Elicit a slow response.
– Move thinking from reaction to reflection.
– Encourage taking another party’s perspective. (“Pocket Guide to Probing
Questions,” n.d., ¶ 3)
Protocols for Address ing Issues and Problems 6 7
2Inside/Outside Protocol (Fishbowl)
Source: This protocol works much the way a fishbowl does. It also resembles the California Protocol, developed for the California Center for School Restructuring (CCSR) in 1996 by Steve Jubb and Joel Shawn.
Overview: This protocol involves groups that share the same problem or need to address the same issue. The groups take turns playing an analysis role and a reflec-tor role, deepening the discussion each time they switch. Participants sit, fishbowl-style, in two concentric circles, both facing inward. There is no single presenter because everyone knows the problem or issue; there may, however, be a facilitator for each group.
The purpose of the protocol is not to solve the problem or resolve the issue, but rather to simply illuminate it so that people have greater understanding and can move toward solutions or resolutions.
Other Uses: This protocol can be used to deepen discussion on student work or professional practice, as long as all participants understand and have a stake in what is being presented. This protocol can also be modified so that groups can pres-ent plans, gain feedback from each other, and reflect on feedback before switching places and repeating.
Number of Participants: The number of participants can vary from 8 (two groups of 4) to about 30 (two groups of 15). If there are more than 30 participants, the amount of airtime for each is reduced.
Time Required: 30–60 minutes
Steps (suggested times based on a 60-minute session):
Step 1: Introducing the Protocol (first time only; 5 minutes)
• The facilitator welcomes the entire group and explains the steps of the protocol.
• The facilitator reminds the participants that the purpose of the protocol is not to solve the problem or resolve the issue, but rather to dig deeply into the issue or problem for better understanding that can lead to solution or resolution.
Protocols for Profess ional Learn ing6 8
Step 2: Framing the Issue or Problem (10 minutes)
• The facilitator states the problem or issue as succinctly as possible (or asks a participant to do so).
• The facilitator restates the problem or issue as a key question for the group (or asks a participant to do so).
• Though the group may not entirely agree on the problem or issue or on the key question, the protocol needs to proceed, as it is likely that the problem or issue or key question will be clarified. If absolutely necessary, the facilita-tor may invite clarification from participants before starting the dialogue, but the group should trust that the protocol itself will help them achieve clarifi-cation and be willing to proceed.
• The facilitator should have the group divide into two relatively equal groups, A and B. These groups should be constructed randomly (e.g., through num-bering off) unless group similarity or diversity is desired, whereupon the whole group should decide the makeup of the two groups (e.g., “Let’s have all the elective teachers in group A and all the core teachers in group B to discuss a new schedule.”). Group A forms the inner circle, and group B forms the outer circle.
Step 3: Group A Discussion (15 minutes)
• Group A discusses the problem or issue and the key question while Group B listens and takes notes.
• At the end of the specified time, Groups A and B switch seats with each other.
Step 4: Group B Discussion (15 minutes)
• Group B discusses the problem or issue and the key question while Group A listens and takes notes.
• Members of Group B may want to build on what Group A has said, bring up their own topics, or do both.
• At the end of the specified time, Groups A and B return to their original places.
Step 5: Group A Reflection (10 minutes)
• Group A reflects aloud on what Group B said in step 4, and may also reflect on their own discussion in step 3.
• If someone from Group B wishes to enter the inner circle to contribute or ask a question, he or she may but must return to the outer circle after hav-ing done so.
Protocols for Address ing Issues and Problems 6 9
• It is also possible for someone from Group B to “tap out” a fellow Group B member from the inner circle if he or she has stayed there too long or if someone else from Group B wants to follow up with a question or comment.
• At the end of the specified time, Groups A and B switch places.
Step 6: Group B Reflection (10 minutes)
• Group B reflects aloud on what Group A has said so far, and may also reflect on their own discussion in step 4.
• Members of Group A may comment on the reflection in the same way that members of Group B may in step 5.
Step 7: Reaching Consensus (10 minutes)
• Group B (inside circle) turns to face Group A (outside circle). Participants talk to each other, trying to determine the points on which the two groups have reached some kind of consensus.
• The facilitator should begin round-robin reporting, during which each pair contributes a point of consensus. If possible, these points should be recorded on chart paper, perhaps by the facilitator or a volunteer from either group.
• Each time a point is repeated, a checkmark should be made next to that item on the chart paper, to show that more than one person felt it was a point of consensus.
Step 8: Open Discussion (10 minutes). The facilitator should begin the open discus-sion with any of these questions:
• Have we properly defined the issue or problem?• On what points have we reached consensus?• What is left for us to do regarding this issue or problem?
Step 9: Debriefing (5 minutes). The facilitator should prompt the participants to debrief the process: What went well? What could have gone better? What did we learn? What do we know? What do we still want to know?
Critical Elements: One critical element for this protocol is the grouping of partici-pants. They should be grouped so that they feel they can both listen to each other and have a chance to say something. Sometimes this works best if grouping is entirely random; at other times, grouping should be purposeful, related to the issue or problem. The group as a whole needs to make the determination, prompted per-haps by the facilitator.
Protocols for Profess ional Learn ing7 0
Another critical element is reaching clarity about the problem or issue. If groups delay reaching step 3 before reaching absolute clarity, they might never begin. So, they have to trust the process to bring them closer to clarity and to reveal some points about a solution or resolution for which there is a consensus.
Finally, a group may not reach consensus about many items, and that’s OK. Solving the problem or resolving the issue can begin with whatever points everyone can agree on.
Tips for the Facilitator: The facilitator plays a relatively major role in this protocol, especially in steps 7–9. The facilitator may find it helpful to take notes during the group discussions and reflections, searching for consensus points. Then, to illustrate the possibility of consensus in step 7, the facilitator might say something like, “I was listening to what you were talking about in steps 3–6. I heard X frequently and think it might represent some kind of consensus.”
Protocols for Address ing Issues and Problems 7 1
3Peeling the Onion Protocol
Source: This protocol originated with the National School Reform Faculty (NSRF). I have modified it here.
Overview: This protocol is good to use when someone has an issue that needs to be addressed. The presenter does not necessarily need to be the one who is dealing with the issue directly, but merely someone who wants to engage in the discussion. He or she should prepare to share as much as possible about the issue with others—history, context, impact, and so forth—and come up with one or two key questions that focus the issue. A pair or group of people may function as the presenter. The presentation and the focusing question(s) become the “text” of the protocol.
Number of Participants: 6–10, plus a presenter and facilitator
Time Required: About 55 minutes (not counting the initial introduction and orientation)
Steps (suggested times based on a 55-minute session):
Step 1: Introductions and Orientation (first time only; 5 minutes). If the participants don’t know each other, be sure they introduce themselves. Make a copy of this pro-tocol and share it with participants, going through the steps and noting the times for each.
Step 2: Describing the Issue (10 minutes)
• The presenter describes the issue as fully as possible while participants are silent and take notes.
• The presenter distributes any written materials related to the problem or issue.
• The presenter asks one or two key questions, which the participants write down.
Step 3: Writing (3 minutes). The participants and presenter free-write on the issue and the key question(s). The presenter then withdraws from the group to listen and take notes as the participants discuss the issue, making it their own and wrestling with it.
Protocols for Profess ional Learn ing7 2
Step 4: Discussion (10 minutes)
• The facilitator (or a participant; it’s up to the group) selects one of the dis-cussion prompts below.
• Participants respond to the prompt, but not in round-robin style; instead, they thoroughly discuss each response to the prompt before moving on to the next response. They may concur, differ, offer comments, ask questions, suggest examples, or provide details.
• The presenter remains silent and takes notes.• This step is then repeated using other prompts for as long as there is time.
Here are some prompts for use during this step:
• What I heard [the presenters say] is . . .• One assumption that seems to be part of the problem is . . .• One thing I assume to be true about this problem is . . .• A question this raises for me is . . .• Further questions this raises for me are . . .• What if . . . ?• Have we thought about . . . ?• I wonder . . . ?
Step 6: Presenter Reflection (10 minutes)
• The presenter reflects aloud on the discussion, not defensively but thought-fully, trying to build on the ideas that were generated.
• Participants are silent and take notes.
Step 7: Debriefing (5 minutes). The whole group debriefs both on the content and the process of the protocol, and continues open discussion.
Critical Elements: Each of the prompts in step 4 is like a layer of an onion; the more the layers are peeled, the deeper the participants get into the issue. The first prompt listed in step 4 is the most likely to come first in the discussion, as it asks the participants to reframe what they heard so far before continuing.
This protocol is not about solving the problem or resolving an issue. It is, like the other protocols in this section, oriented toward deeper understanding of the prob-lem or issue, which can itself lead to good solutions and resolutions.
Tips for the Facilitator: The facilitator does not need to choose the prompts; they can be chosen by the participants. However, very little time should be spent choos-ing them, so as to reserve plenty of time for the ensuing dialogue. Participants will
Protocols for Address ing Issues and Problems 7 3
naturally want to jump to solutions or resolutions, which is something the facilitator should prevent by reminding them that clarity and insight, not solutions or resolu-tions, are the intended outcomes of the protocol.
Protocols for Profess ional Learn ing7 4
4SWOT Protocol
Source: I have developed this protocol from Albert Humphrey’s Strengths, Weak-nesses, Opportunities, Threats (SWOT) concept, which he originated at Stanford Uni-versity in the 1960s and 1970s using data from Fortune 500 companies.
Overview: SWOT is a strategic planning method that can be used to evaluate an organization’s objectives or to analyze its problems. The four dimensions of SWOT enable a group to understand internal and external factors that are favorable or unfavorable. The process is very similar to that of the Tuning protocol.
Other Uses: This protocol can also be used to analyze a plan.
Number of Participants: The number of participants can range from 6 to 60, plus a presenter or presenting team and a facilitator. In large groups, the presenter or pre-senting team presents to the whole group, which then breaks into smaller groups of 8–10 to discuss the problem or issue.
Time Required: 30 minutes or more
Steps (suggested times based on a 60-minute session):
Step 1: Introduction (first time only; 5 minutes). If participants don’t usually work together, they should briefly introduce themselves. The facilitator should also distrib-ute copies of this protocol and give participants time to study it.
Step 2: Presentation (15 minutes)
• The presenter describes and sets the context for the problem or issue while the participants quietly take notes.
• The presenter shares materials related to the practice being described, including student work, and allows participants time to examine it.
• The presenter then poses one or two key questions to be answered about the problem or issue.
Step 3: Clarifying Questions (5 minutes)
• Participants ask nonevaluative questions about the presentation (e.g., “What happened before X?” “What did you do next?” “What did Y say?”). The pre-senter answers with facts.
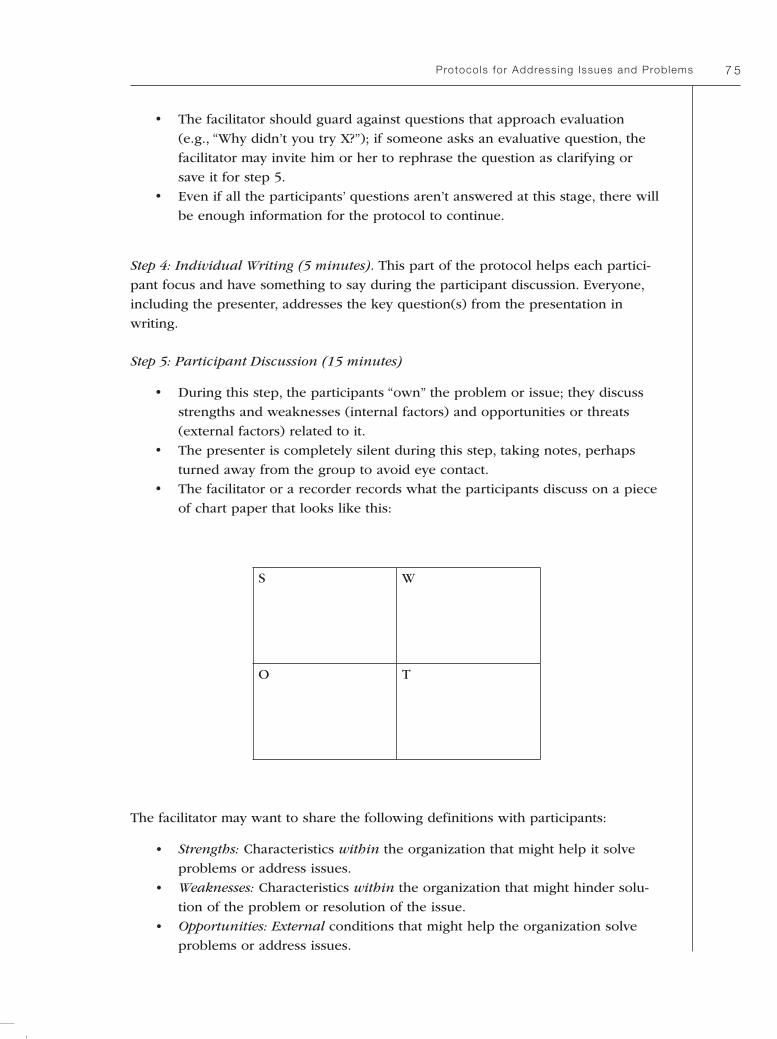
Protocols for Address ing Issues and Problems 7 5
• The facilitator should guard against questions that approach evaluation (e.g., “Why didn’t you try X?”); if someone asks an evaluative question, the facilitator may invite him or her to rephrase the question as clarifying or save it for step 5.
• Even if all the participants’ questions aren’t answered at this stage, there will be enough information for the protocol to continue.
Step 4: Individual Writing (5 minutes). This part of the protocol helps each partici-pant focus and have something to say during the participant discussion. Everyone, including the presenter, addresses the key question(s) from the presentation in writing.
Step 5: Participant Discussion (15 minutes)
• During this step, the participants “own” the problem or issue; they discuss strengths and weaknesses (internal factors) and opportunities or threats (external factors) related to it.
• The presenter is completely silent during this step, taking notes, perhaps turned away from the group to avoid eye contact.
• The facilitator or a recorder records what the participants discuss on a piece of chart paper that looks like this:
S W
O T
The facilitator may want to share the following definitions with participants:
• Strengths: Characteristics within the organization that might help it solve problems or address issues.
• Weaknesses: Characteristics within the organization that might hinder solu-tion of the problem or resolution of the issue.
• Opportunities: External conditions that might help the organization solve problems or address issues.

Protocols for Profess ional Learn ing7 6
• Threats: External conditions that might hinder solution of the problem or resolution of the issue.
Participants may discover that what they suggest for one category has a bearing on other categories.
Step 6: Presenter Reflection (15 minutes)
• The presenter reflects aloud on the participants’ discussion, using the SWOT analysis to deepen understanding and reflecting on implications of the anal-ysis on possible solution of the problem or resolution of the issue.
• The presenter can also project future actions, questions, dilemmas, and so forth.
• If the presenter wishes, he or she may correct any misunderstanding the participants may have at this stage.
• While the presenter reflects, participants take notes silently.
Step 7: Debriefing (5 minutes). The presenter discusses how well the protocol worked and thanks the participants. Then, the participants discuss how well they think the protocol worked and thank the presenter. The presenter and participants then engage in more general discussion of the content of the protocol as well as the process itself.
Critical Elements: The SWOT categories should not limit the discussion. If the participants can’t agree on where on the chart a comment should go, they should “park” it on another piece of chart paper so it won’t be lost.
Tips for the Facilitator: It needs to be clear in this protocol that the topic is not the presenter, but rather the problem or issue that the presenter has brought. If neces-sary, the facilitator should remind participants of this. The function of warm feed-back in this protocol is taken care of through the S and the O parts of SWOT, and cool feedback taken care of through the W and T parts.
The key question is not as essential in this protocol as it is in others; it simply indi-cates what the presenter feels is significant about the issue or problem.

7 7
6Protocols for Effective Discussions
This chapter contains both text-based and non–text-based protocols for effective discussions. Text-based protocols can be used to examine writing, video, audio, per-formances, broadcasts, and so forth. Non–text-based protocols are good for discus-sion or processing in general, but can also be used to examine texts. The protocols included in this chapter are as follows:
• Three Levels of Text Protocol• The Four As Protocol• The Last Word Protocol• Chalk Talk Protocol
Protocols for Profess ional Learn ing7 8
1Three Levels of Text Protocol
Source: This protocol is a variation on the text-based protocols of the National School Reform Faculty (NSRF).
Overview: In this protocol, participants reflect on a text of some sort. (The text can be in the form of print, audio, video, or artwork.) The purpose of this protocol is to clarify, construct meaning collaboratively, and expand thinking about the text.
Number of Participants: The ideal group size is 6–10 participants, so if the whole group is larger, it should be broken into subgroups. There is no presenter in this protocol, but there should be a facilitator. It is also helpful to have a recorder who will chart what people say.
Time Required: This protocol can be done is a few as 20 minutes, and can be extended for as long as there is time. In fact, the protocol should be extended if the text being examined is long and complex or if there are more than 10 people in a group.
Steps (suggested times based on a 45-minute session):
Step 1: Introducing the Text (time depends on length and complexity of text). This step may occur before the participants meet or at the beginning of the session. Par-ticipants read, view, or listen to the text and take notes.
Step 2: Sentences (10 minutes). Each member of the group selects a sentence that he or she finds significant from the text (if the text is written) or from notes (if the text is aural or visual). The other participants listen and take notes on what each person says, but there is no discussion.
Step 2: Phrases (10 minutes). Each member of the group selects a phrase that he or she finds significant from the text (if the text is written) or from notes (if the text is aural or visual). The other participants listen and take notes on what each person says, but there is no discussion.
Step 3: Words (10 minutes). Each member of the group selects a word that he or she finds significant from the text (if the text is written) or from notes (if the text is aural or visual). The other participants listen and take notes on what each person says, but there is no discussion.
Protocols for Effect ive Discussions 7 9
Step 4: Discussion (10 minutes). Participants discuss what they heard and what they’ve learned about the text being studied.
Step 5: Debriefing (5 minutes). The group debriefs the process.
Variation: A variation on this protocol calls for participants to follow the above sequence for as many rounds as time allows, with each round consisting of one participant reading aloud the passage he or she has selected, saying what he or she thinks about the passage, and saying what the implications of the passage on his or her work might be. Each round should be no longer than three minutes. Following each round, the group responds as a whole for up to two minutes.
Instead of working from sentences to words, a group might work from a play to a scene to a speech, or from an entire work of art to a part of the art to a detail. Some groups may want to reexamine the text following the protocol; most likely they’ll discover that their understanding of it has considerably improved.
Critical Elements: Group members may not be sure what a sentence or phrase is, so the facilitator needs to accept whatever is offered that is more than one word. What is critical is to winnow away all words but one, so that the last step focuses on the essence of the text in a single word.
Participants must take notes on visual or aural texts in order to be able to share a sentence, phrase, and single word. Notes can be descriptive, summative, or evalua-tive.
Tips for the Facilitator: The most common problem with this protocol is that people want to do more than share a sentence, phrase, or word. They may also want to deviate from the text being considered to share from their own experiences. The facilitator should explain that participants can do so during discussion in the fourth step, which may need to be extended if many participants want to go beyond the text being considered.
Protocols for Profess ional Learn ing8 0
2The Four As Protocol
Source: This protocol was adapted by the NSRF from the work of Judith Gray.
Overview: This protocol uses four words beginning with the same letter as the inspiration for discussion of any kind of text.
Other Uses: Can be used to look at student work or professional practice
Number of Participants: The ideal group size is 6–10 participants, so if the whole group is larger, it should be broken into subgroups. There is no presenter in this protocol, but there should be a facilitator. (If there are subgroups, there should be both a room facilitator and subgroup facilitators.) It is also helpful to have a recorder who will chart what people say.
Time Required: 30 minutes for a small group; up to 60 minutes for a large group
Steps (suggested times based on a 60-minute session):
Step 1: Introducing the Text (time depends on length and complexity of text)
This step should occur before the participants meet or at the beginning of the session.
The facilitator chooses a letter and words that might prompt a reaction from readers.
Participants read, view, or listen to the text and take notes, focusing on the following questions (in the case of the letter A and these four “A” words):
• What assumptions does the author of the text hold?• What do you agree with in the text?• What do you want to argue with in the text?• What aspirations do you have that relate to the text?
(Note: The facilitator can substitute different letters and words for the ones sug-gested above. Different letters can lead to words that are equally inspiring and conducive to examining a text. For example, the letter D may lead to the words defi-nition, dynamic, disappointing, and delectable. The facilitator might choose words of the same letter that seem to relate to the text, although in fact almost any ran-domly chosen word can relate to any text.)
Protocols for Effect ive Discussions 8 1
Step 2: Assumptions (10 minutes). Each participant identifies one assumption in the text (citing page numbers if appropriate). There is no discussion at this stage.
Step 3: Agreements (10 minutes). Each participant identifies one area of the text with which he or she agrees (citing page numbers if appropriate). There is no discussion at this stage.
Step 4: Arguments (10 minutes). Each participant identifies one area of the text with which he or she would argue (citing page numbers if appropriate). There is no dis-cussion at this stage.
Step 5: Aspirations (10 minutes). Each participant identifies one aspiration he or she has related to the text (citing page numbers if appropriate). There is no discussion at this stage.
Step 6: Discussion (15 minutes). Participants have an open discussion about their findings, moving from one “A” word to another.
Step 7: Debriefing (5 minutes). Participants discuss how well the protocol worked, and continue the discussion from step 6.
Variation: If desired, participants can have open discussion reserved for step 6 following each of the previous four steps, so that the findings for each word are discussed one at a time. The only possible problem with this strategy is that partici-pants may not be willing to move on to the next “A” word!
Critical Elements: This protocol may seem rather lightweight in comparison to the others, but the four words—especially if they are seemingly unrelated to the text—may inspire an insightful and provocative discussion, with participants exclaiming, “Wow, I never thought of it that way!”
Tips for the Facilitator: If participants want to elaborate on their findings during steps 2–5, the facilitator can open up the discussion at that point. Otherwise, partici-pants need to trust the process—they’ll get to the discussion later.
Protocols for Profess ional Learn ing8 2
3The Last Word Protocol
Source: This protocol, also known as Save the Last Word for Me, was developed by Patricia Averette.
Overview: This protocol has multiple uses. It is great for processing ideas, bring-ing closure to a discussion, examining student work and professional practice, and addressing problems or issues. As Averette notes, “The process is designed to [allow people to] build on each other’s thinking, and not to enter into a dialogue. Partici-pants may decide to have an open dialogue about the text at the end of the 30 min-utes” (“Save the Last Word for ME,” n.d., ¶ 2).
Number of Participants: The ideal group size is 3–4 participants, so if the whole group is larger, it should be broken into subgroups. If possible, the number of people in each group should be the same (either 3 or 4) so that no group finishes before others. A single group does not need a facilitator, only a timekeeper to move the process along; if there are multiple subgroups, a room facilitator is needed for the same purpose.
Time Required: One or more groups of three can complete this protocol in 30 min-utes; larger groups will need more time.
Steps (suggested times based on a 30-minute session):
Step 1: Identifying Significant Ideas (3 minutes). Each participant silently identifies what he or she considers to be the most significant idea addressed in whatever is being examined (e.g., student work, a discussion, a problem or issue, etc.).
Step 2: Sharing, Round 1 (4 minutes)
• One member of the group shares his or her significant idea but does not elaborate on it.
• The other participants each have one minute to respond. They can agree or disagree, offer examples, raise a question, contribute details, or otherwise share their thoughts.
• The first participant then has two or three minutes to respond to and build on what the others in the group said, thereby getting “the last word.”
Step 3: Sharing, Round 2 (4 minutes). Step 2 is repeated, but with a different partici-pant initiating and ending the dialogue.
Protocols for Effect ive Discussions 8 3
Step 4: Sharing, Round 3 (4 minutes). Step 2 is repeated again, with a different par-ticipant initiating and ending the dialogue.
Step 5 (Optional): Open Discussion (as long as desired). If participants wish, they can have an open discussion about what came up during steps 2–4. (If there are subgroups, they can convene as one at this stage.)
Step 6: Debriefing (5 minutes). Participants discuss how well the protocol worked.
Critical Element: Listening well is critical for this protocol. Participants should be encouraged to listen to the very end of the initiating person’s statement before beginning to frame a response. Participants who are afraid they’ll forget key ideas should be encouraged to jot down reminders. Participants should also be encour-aged to pause before they respond and perhaps restate what they heard before pro-ceeding.
Tips for the Facilitator: Except for timekeeping for multiple subgroups, this proto-col is relatively self-facilitating. A facilitator may want to have the subgroups develop some norms for self-facilitation, such as adhering to time frames, avoiding side con-versations, and resisting the impulse to break into discussion during step 2.

Protocols for Profess ional Learn ing8 4
3Chalk Talk Protocol
Source: This protocol was developed by the National School Reform Faculty (NSRF).
Overview: This unusual protocol is entirely silent. Despite this (or maybe because of it), the “discussion” is deep and exciting. As the NSRF notes, “Chalk Talk is a silent way to do reflection, generate ideas, check on learning, develop projects or solve problems. It can be used productively with any group—students, faculty, workshop participants, committees. Because is it done completely in silence, it gives groups a change of pace and encourages thoughtful contemplation. It can be an unforgettable experience. . . . Chalk Talk can be an uncomplicated silent reflection or a spirited, but silent, exchange of ideas. It has been known to solve vexing problems, surprise everyone with how much is collectively known about something, get an entire proj-ect planned, or give a committee everything it needs to know without any verbal sparring” (“Chalk Talk,” n.d., ¶ 1). Three to four pieces of chart paper hung in a row provide the template for the silent discussion.
Other Uses: This protocol can be used for processing ideas, bringing closure to an activity, and delving into problems and issues.
Number of Participants: There is no ideal number of participants for this protocol, but fewer than 10 might not yield many diverse ideas, and more than 30 may cause too much of a crowd around the chart paper. If there are more than 20 participants, additional chart paper placed at a distance from the first set is a good idea. A facili-tator is necessary.
Time Required: The time frame can vary. If the activity at the chart paper stops for more than five minutes, it may be time for the protocol to end. However, inaction does not necessarily signal that people are not participating; they may just be think-ing about what to add to the chart paper.
Steps:
Step 1: Preparation (5 minutes). The facilitator puts up three or four pieces of chart paper (or about six feet of butcher paper) and places colored markers nearby. In the center of the paper(s), the facilitator writes down a topic and circles it. The NSRF suggests the following possible topics:
• What did you learn today?• Now what?
Protocols for Effect ive Discussions 8 5
• What do you think about social responsibility and schooling?• How can we involve the community in the school, and the school in the
community?• How can we keep the noise level down in this room?• What do you want to tell the scheduling committee?
The facilitator then beckons participants to approach the chart paper.
Step 2: Explanation (5 minutes). The facilitator explains very briefly that Chalk Talk is a completely silent activity, and that participants must express themselves by writ-ing on the topic on the chart paper. If they wish to comment on what others have written, they must do so on the chart paper. Once the facilitator has explained the rules, he or she should back away and let participants get to work.
Step 3: It Happens (as much time as it takes). Participants write on the chart paper as they feel moved. The facilitator should keep in mind that long silences are natu-ral and often followed by bursts of activity. He or she can choose to interact with participants by contributing to what’s on the chart paper, but should recognize that doing so may influence the outcome of the protocol. The NSRF suggests the follow-ing facilitator actions as appropriate:
• Circling interesting ideas, thereby inviting comments to broaden• Writing questions about a participant comment• Adding personal reflections or ideas• Connecting two interesting comments together with a line• Adding a question mark to a comment
By interacting in these ways, the facilitator invites participants to do the same kinds of expansions.
Step 4: It Ends (whenever it’s done). At this point, participants may want to debrief the protocol or discuss important ideas raised during the protocol. In some cases, they may want to talk about what to do next.
Critical Elements: Obviously, complete silence is a critical element of this protocol. Participants may respect that mandate while close to the chart paper, but they might violate it while at distance. The facilitator must firmly remind them of the rule of silence.
Another critical element is the facilitator’s “read” of the group: Are participants ready to end the activity, or just pausing the process to get their next ideas? The facilitator might make a move to end the work at the chart paper but must be willing to recon-sider if someone seems ready to add something.
Protocols for Profess ional Learn ing8 6
Tips for the Facilitator: Letting go and trusting a process can be as hard for a facil-itator as it is for participants, but the Chalk Talk protocol really works. It requires trusting that participants can be self-organizing—and they can.
8 7
Online Resources
Here are some Web sites worth investigating before your PLC embarks on a protocol:
Annenberg Institute for School Reform: www.annenberginstitute.orgAssociation for Supervision and Curriculum Development: www.ascd.orgCoalition of Essential Schools: www.essentialschools.orgColorado Critical Friends Group: www.coloradocfg.orgLooking at Student Work: www.lasw.orgNational School Reform Faculty: www.nsrfharmony.orgNational Staff Development Council: www.nsdc.org

8 9
References
Allen, D. (Ed.). (1998). Assessing student learning: From grading to understanding. New York: Teachers College Press.
Allen, D., & Blythe, T. (2004). The facilitator’s book of questions: Tools for looking together at student and teacher work. New York: Teachers College Press.
Blythe, T., Allen, D., & Powell, B. S. (2007). Looking together at student work: A companion guide to Assessing student learning (2nd ed.). New York: Teachers College Press.
Calkins, L. M. (1986). The art of teaching writing. Portsmouth, NH: Heinemann.
Chalk Talk. (n.d.). Retrieved January 6, 2009, from http://www.nsrfharmony.org/protocol/doc/chalk_talk.pdf
Collaborative Assessment Conference. (n.d.). Retrieved January 6, 2009, from http://www. nsrfharmony.org/protocol/doc/cac.pdf.
Consultancy Protocol. (n.d.). Retrieved January 6, 2009, from http://www.nsrfharmony.org/protocol/doc/consultancy_protocol.pdf
Cooper, C. R. (1977). Holistic evaluation of writing. In C. R. Cooper & L. Odell (Eds.), Evalu-ating writing: Describing, measuring, judging (pp. 3–31). Urbana, IL: National Council of Teachers of English.
Darling-Hammond, L. (1998, February). Teacher learning that supports student learning. Edu-cational Leadership, 55(5), 6–11.
Easton, L. B. (1999, Summer). Tuning protocols. Journal of Staff Development, 20(3), 55–56.
Easton, L. B. (2002, March). Collaboratively examining student work. Educational Leadership, 59(6), 28–30.
Easton, L. B. (2008a). Engaging the disengaged: How schools can help struggling students suc-ceed. Thousand Oaks, CA: Corwin Press.
Easton, L. B. (2008b, June). From professional development to professional learning. Phi Delta Kappan, 89(10), 755–776.
Easton, L. B. (Ed.). (2008c). Powerful designs for professional learning (2nd ed.). Oxford, OH: National Staff Development Council.
Education Trust. (2005, June 23). Getting honest about grad rates: Too many states hide behind false data [press release]. Available: http://www2.edtrust.org/EdTrust/Press+Room/HSGradRate2005.htm
Elbow, P. (1981). Writing with power: Techniques for mastering the writing process. New York: Oxford University Press.
Garmston, R. J., & Wellman, B. M. (1999). The adaptive school: A sourcebook for developing collaborative groups. Norwood, MA: Christopher-Gordon Publishers.
Graves, D. H. (1983). Writing: Teachers and children at work. Portsmouth, NH: Heinemann.
Protocols for Profess ional Learn ing9 0
Jubb, S., & Shawn, J. (1996, February/March). Protocol for restructuring. Thrust for Educa-tional Leadership, 25(5), 18–21.
Kelly, K. (1996, November). Making the whole student visible: The descriptive review of a child. Horace, 13(2), 7.
Killion, J. (2007). Assessing impact: Evaluating staff development (2nd ed.). Thousand Oaks, CA: Corwin Press.
Kruse, S., Louis, K. S., & Bryk, A. (1994, Spring). Building professional community in schools. Issues in Restructuring Schools, 6, 3–6.
Langer, G. M., Colton, A. B., & Goff, L. S. (2003). Collaborative analysis of student work: Improving teaching and learning. Alexandria, VA: ASCD.
Lieberman, A., & Wood, D. R. (2002). Inside the National Writing Project: Connecting network learning and classroom teaching. New York: Teachers College Press.
McDonald, J. P. (1996). Redesigning school: Lessons from the 21st century. San Francisco: Jossey-Bass.
McDonald, J. P., Mohr, N., Dichter, A., & McDonald, E. G. (2003). The power of protocols: An educator’s guide to better practice. New York: Teachers College Press.
Newmann, F. M., Secada, W. G., & Wehlage, G. G. (1995). A guide to authentic instruction and assessment: Vision standards and scoring. Madison, WI: Wisconsin Center for Educa-tion Research.
Pardini, P. (1999, Spring). Making time for adult learning. Journal of Staff Development, 20(2), 37–41.
Pocket guide to probing questions. (n.d.). Retrieved January 6, 2009, from http://www. nsrfharmony.org/protocol/doc/probing_questions_guide.pdf
Probing questions exercise. (n.d.). Retrieved January 6, 2009, from http://www.nsrfharmony.org/protocol/doc/probing_questions.pdf
Sample sets of questions for school/grade level slice. (n.d.). Retrieved January 6, 2009, from http://www.nsrfharmony.org/protocol/doc/slice_sample_questions.pdf
Save the last word for ME. (n.d.). Retrieved January 6, 2009, from http://www.nsrfharmony.org/protocol/doc/save_last_word.pdf
Schlecty, P. (1997). Inventing better schools: An action plan for educational reform. San Fran-cisco: Jossey-Bass.
Shaughnessy, M. (1977). Errors and expectations: A guide for the teacher of basic writing. New York: Oxford University Press.
Success analysis protocol with reflective questions. (n.d.). Retrieved January 6, 2009, from http://www.nsrfharmony.org/protocol/doc/success_analysis_reflective.pdf
Sweeney, D. (2003). Learning along the way: Professional development by and for teachers. Portland, ME: Stenhouse.
Tomlinson, C. A. (1999). The differentiated classroom: Responding to the needs of all learners. Alexandria VA: ASCD.
VonFrank, V. (Ed.). (2008). Finding time for professional learning. Oxford, OH: National Staff Development Council.
Weinbaum, A., Allen, D., Blythe, T., Simon, K., Seidel, S., & Rubin, C. (2004). Teaching as inquiry: Asking hard questions to improve practice and student achievement. New York: Teachers College Press.
Why protocols? (n.d.). Retrieved January 6, 2009, from http://www.nsrfharmony.org/protocol/doc/why_protocols.pdf
York-Barr, J., Sommers, W., Ghere, G., & Montie, J. (2001). Reflective practice to improve schools. Thousand Oaks, CA: Corwin Press.
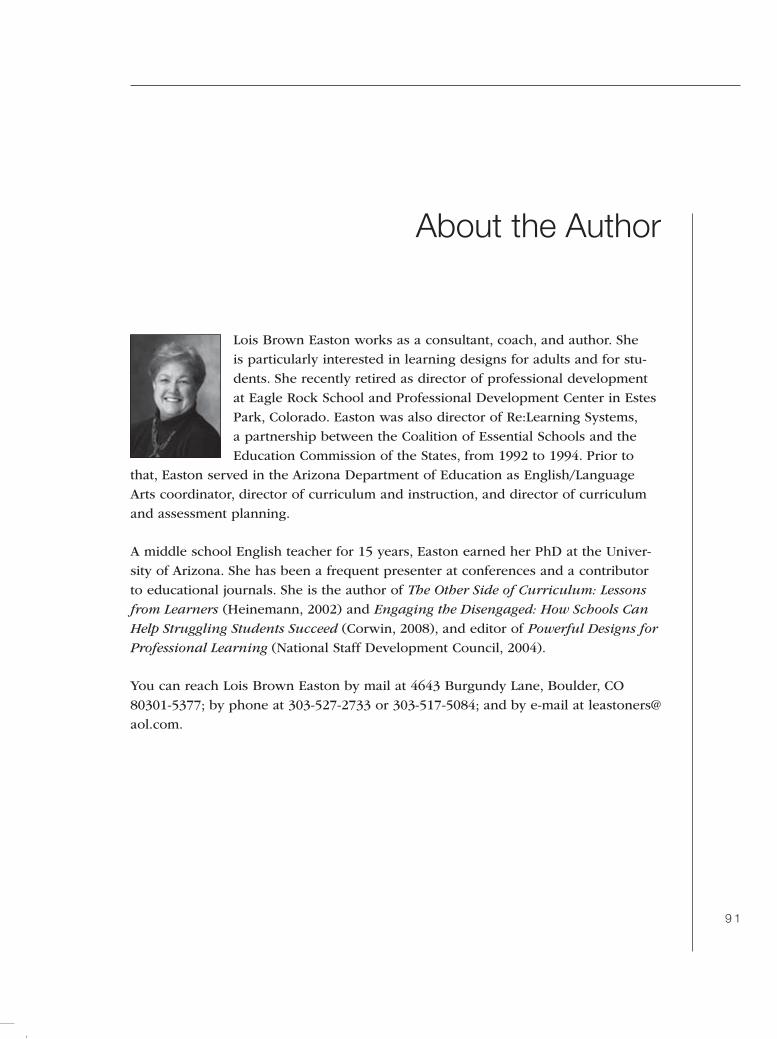
9 1
About the Author
Lois Brown Easton works as a consultant, coach, and author. She is particularly interested in learning designs for adults and for stu-dents. She recently retired as director of professional development at Eagle Rock School and Professional Development Center in Estes Park, Colorado. Easton was also director of Re:Learning Systems, a partnership between the Coalition of Essential Schools and the Education Commission of the States, from 1992 to 1994. Prior to
that, Easton served in the Arizona Department of Education as English/Language Arts coordinator, director of curriculum and instruction, and director of curriculum and assessment planning.
A middle school English teacher for 15 years, Easton earned her PhD at the Univer-sity of Arizona. She has been a frequent presenter at conferences and a contributor to educational journals. She is the author of The Other Side of Curriculum: Lessons from Learners (Heinemann, 2002) and Engaging the Disengaged: How Schools Can Help Struggling Students Succeed (Corwin, 2008), and editor of Powerful Designs for Professional Learning (National Staff Development Council, 2004).
You can reach Lois Brown Easton by mail at 4643 Burgundy Lane, Boulder, CO 80301-5377; by phone at 303-527-2733 or 303-517-5084; and by e-mail at [email protected].