Embed Size (px)
Citation preview
Presentation Skills Workbook
Presentation Skills Workbook
This e-book is published by Mind Tools Ltd.
Copyright © Mind Tools Ltd, 2007-2014. All rights reserved.
Version 1.0.
This e-book is protected by international copyright law. You may only use it if you have downloaded it directly from MindTools.com, or if you have been provided with it under a corporate license.
If you have received this from any other source please contact [email protected].
Cover image © iStockphoto/bobbieo.
iiiPresentation Skills Workbook | Mind Tools
Introduction 1
1. Planning 2
2. Developing Your Content 10
3. Preparing for Your Presentation 26
4. Presenting With Style 34
5. Taking Your Skills to the Next Level 44
6. Moving On... 49
Appendices and Templates
Presentation Planning Template 50
Equipment Checklist 62
Presentation Planning Checklist 63
Exercises Reminder Sheet 66
Presentation Tip Sheet 68
Presentation Feedback Questionnaire 69
Contents
ivPresentation Skills Workbook | Mind Tools
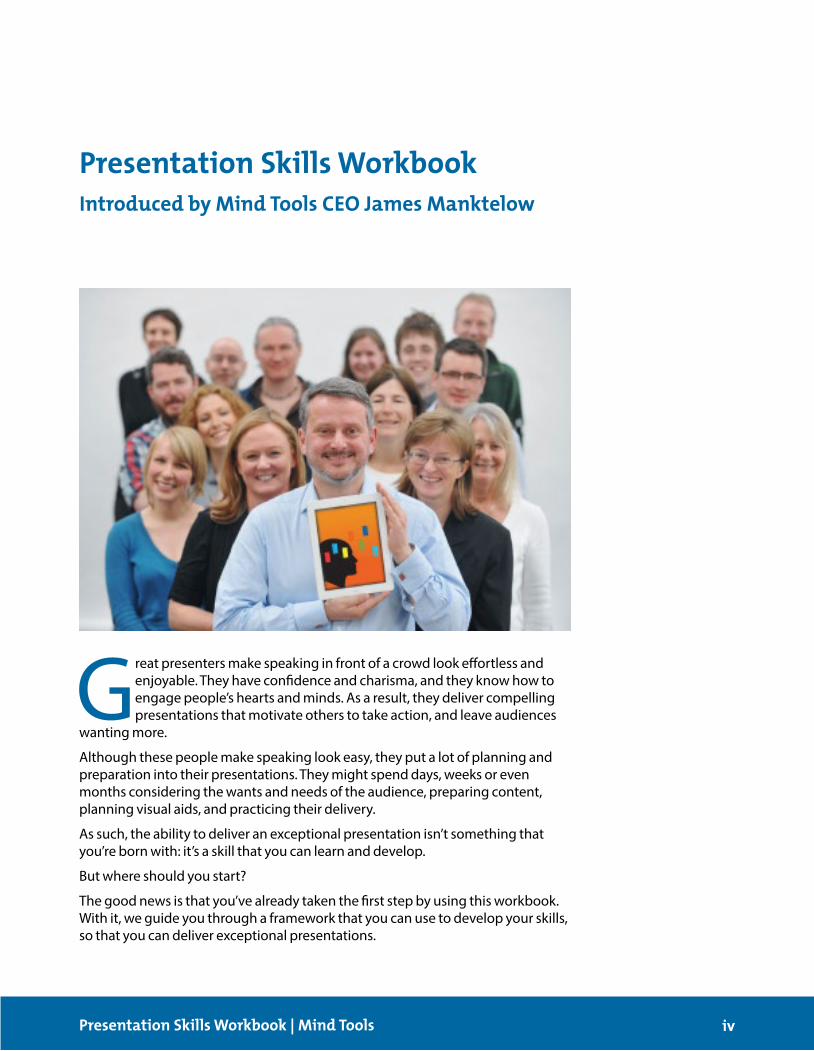
Presentation Skills WorkbookIntroduced by Mind Tools CEO James Manktelow
Great presenters make speaking in front of a crowd look effortless and enjoyable. They have confidence and charisma, and they know how to engage people’s hearts and minds. As a result, they deliver compelling presentations that motivate others to take action, and leave audiences
wanting more.
Although these people make speaking look easy, they put a lot of planning and preparation into their presentations. They might spend days, weeks or even months considering the wants and needs of the audience, preparing content, planning visual aids, and practicing their delivery.
As such, the ability to deliver an exceptional presentation isn’t something that you’re born with: it’s a skill that you can learn and develop.
But where should you start?
The good news is that you’ve already taken the first step by using this workbook. With it, we guide you through a framework that you can use to develop your skills, so that you can deliver exceptional presentations.
vPresentation Skills Workbook | Mind Tools
James ManktelowCEOMindTools.com
First, we discuss how to choose your subject and define the purpose of your presentation. We then look at how to structure it, and how to develop content and visual aids.
In the next module, we show you how to prepare for your presentation. We review how to develop notes and cue cards and how to get to know the venue, so that you’re well-set for presentation day. We also learn what you can do to answer your audience’s questions with confidence.
Then, we see how to deliver your presentation with style by speaking clearly and using your body language to make the impact you want. And, we explore how you can use presentation-day nerves to your advantage.
In the final module, we look at how to take your presentation skills to the next level by finding opportunities to speak, asking for feedback, and connecting with your audience off-stage.
When you put what you learn in this workbook into action, you’ll be able to use presentations to sell your ideas effectively, share your expertise, and influence others. This will enhance your reputation and provide countless opportunities in your career.
It can make a major difference to your career when you put in the time and effort to become a great presenter, and the strategies we outline in this workbook will give you a great start in developing your skills in this area.
Enjoy using it!

1Presentation Skills Workbook | Mind Tools
Introduction
No matter what you do, you’ve probably had to speak in front of a crowd at least once (and chances are high that you’ll have to do so again).
Whether you have to talk about your latest project in a team meeting or deliver the keynote address at your industry’s trade conference, the
ability to speak and present with confidence and conviction is a valuable skill that can lead to great opportunities in your career.
However, while good presentation skills can open doors, poor presentation skills can close them.
For example, your boss might decide against promoting you after sitting through a poorly delivered presentation. You might lose a valuable new contract by failing to connect with a prospect during a sales pitch. Or, you could make a poor impression with your new team members, because you trip over your words and don’t look people in the eye when you present them with your new ideas.
This workbook guides you through five key skill areas that you need to develop to deliver exceptional presentations:
1. Planning your presentation. 2. Developing content. 3. Preparing for your presentation. 4. Delivering your presentation with style. 5. Taking your skills to the next level.
Once you have completed this workbook, you’ll have the tools you need to feel comfortable “on stage” and deliver an engaging and successful presentation.
How to use This Workbook
This workbook will take a few hours to complete. You can either type your answers directly into this PDF or print the workbook out and work though it on paper.
Either way, use it as the place to record your answers to each of the exercises. (If you type your answers directly into the PDF, you’ll be able to save them and come back to them easily in the future.)
Like all learning opportunities, the effort you put in will determine how much you get out of the process. Try to schedule plenty of time to work on the material, and set yourself up in an environment where others won’t disturb you.
2Presentation Skills Workbook | Mind Tools
Sometimes, the thought of preparing and delivering a presentation can feel overwhelming. And although it might be tempting to dive right in and start creating slides, it’s important to spend some time thinking about your message and your objectives.
A presentation is a reflection of you and your work. It’s your opportunity to showcase your expertise, demonstrate your professionalism, and communicate information that will make a positive impact on your audience. There’s a lot at stake here, and the time you spend up-front, organizing your thoughts and creating a plan, will pay big dividends later on.
This first module of the workbook shows you how to develop a clear plan for your presentation. This ensures that you meet your objectives and that you deliver a presentation that is meaningful for your audience.
To do this, we’ll look at three key areas:
1. Choosing the subject of your presentation. 2. Understanding your audience. 3. Understanding the purpose of your presentation.
The work you do in this first module will build a strong foundation for your presentation. So, let’s get started!
1.1. Choosing Your SubjectWhen planning a presentation, it’s useful to start with a wide focus and then drill down to specific details that define your purpose and objectives. Otherwise, you won’t know what areas to focus on, and you’ll end up with a “watered-down” presentation that tries to achieve too much.
Therefore, your first step is to identify the subject of your presentation. Your aim is to be able to explain this in one concise sentence. For example, your subject could be:
• Improvingprocessesinthesalesdepartment. • Howexecutivescanmanagestress. • Recruitingcustomerservicestaff.
At this stage, don’t be too concerned if your subject is quite broad, as you’ll refine it later.
1. Planning

The subject of my presentation is...
3Presentation Skills Workbook | Mind Tools
Tip:If you’re not sure what to do a presentation on, think about a project that you’ve worked on recently, or consider the work-related subjects that you’re competent in. Would any of these make a good presentation topic?
1.2. Understanding Your AudienceYou now know the subject of your presentation. Next, it's time to think about the people who will watch and hear it: your audience.
Why is this so important?
Imagine that you haven't thought about what your audience wants to see and hear in your presentation. Several minutes into your speech, you start to notice people looking bored. Halfway through, some people start playing with their smartphones and reading other documents. Your self-confidence drops, and you decide to wind up your presentation early just to get out of the room.
No presenter wants to experience this! You can avoid similar situations by thinking about who your audience members are, why they have shown up to hear you speak, and what they want to learn from you.
Remember,eachaudienceisdifferent,whichiswhyyoucan'ttakea"onesizefitsall"approachtoyourpresentations.Themoreyoutailoryourpresentationtofitthe wants, needs and expectations of your audience, the more successful you'll be.
Action:Answer the following questions to get a better understanding of your audience. (If you don’t know your audience yet, choose a group who you can gear your presentation towards, such as your team, senior managers or members of your community.)
Action:Think about a presentation that you may have to give (or one that you could give to develop and practice your presentation skills) and write the subject in the box below.

Who are your audience members?
What is the common element that unites everyone in your audience? For instance, do people all do the same job, or do they need the same information?
What is the knowledge level of your audience members? Are they familiar with your topic, or will it be entirely new to them? Will some know as much or more than you about this topic?
Are there any cultural differences between you and your audience? How might this affect the delivery and scope of your presentation?
4Presentation Skills Workbook | Mind Tools
What are the unique needs of your audience members? Why is this topic important to them? What do they need to know after they’ve watched your presentation?
Will your audience members be skeptical about this information, or will they be open-minded and accepting of what you have to say? How might their attitudes and beliefs influence how you communicate with them?
How do you think your audience members would like to receive information? For instance, would they appreciate graphs and statistics, images and inspirational quotes, slides, a hands-on demonstration, or cartoons and amusing stories?
Do your audience members know that you’re competent to speak about your topic? Will you need to explain who you are and why you’re an authority on the subject?
5Presentation Skills Workbook | Mind Tools

How can you appeal to your audience’s emotions? How do you think your message will affect your audience? What new emotions might it instill?
What are your audience’s expectations in terms of content and length? Is it important that you stick to a particular time frame?
Will there be an opportunity for the audience to ask questions at the end of your presentation? How does that affect the timing of your presentation?
6Presentation Skills Workbook | Mind Tools
Tip:Keep in mind that it’s always easier to talk about topics that excite and interest you.
If you’re not very interested in your topic, think about how your presentation will enrich or benefit your audience. Or, use a tool such as the 5 Whys technique to discover the deeper meaning behind the subject.
My general purpose is to:
7Presentation Skills Workbook | Mind Tools
Tip:It might seem as though some presentations have more than one purpose.
For instance, a motivational speaker might also use humor to entertain her audience. This doesn’t mean that she had two general purposes (to motivate and to entertain); she simply used humor to make her presentation more engaging.
Action:Write the general purpose of your presentation in the box below:
1.3. Identifying the General and Specific PurposeOnce you’ve identified your subject and better understand your audience, you can determine the purpose of your presentation. What do you want to achieve and why?
Every presentation needs a purpose. You decided to give it for a reason, and it’s important to understand what this reason is. After all, if you’re unsure why you need to talk to your audience, your presentation won’t be as effective and informative as it could be.
Here, it’s best first to identify the general purpose of your presentation. From there, you can develop a specific purpose that narrows down your objectives.
Common general purposes include the following:
• Tomotivate. • Toinform. • Topersuade. • Todemonstrate. • Toteach. • Toentertain.
For example, imagine that someone asked you to open your organization’s town hall meeting. Your general purpose might be to inform the audience members about the program for the day so that they know what to expect and when.
Or, maybe you have planned a presentation to your team about a new process. Here, your general purpose might be to demonstrate how the system works.
After seeing my presentation...
8Presentation Skills Workbook | Mind Tools
Action:Write the specific purpose for your presentation in the box below. Use these questions to guide you:
• Whatdoyouwantyouraudiencememberstolearnordo? • Whatbehaviorsorattitudesdoyouwantthemtoadopt? • Howdoyouwantyouraudiencetofeelbytheendof
your presentation? • Whatarethenextstepsonceyou’vefinishedthepresentation?
Now, you need to identify the specific purpose of your presentation. This explains precisely what you want your audience to get from it. You need to word it from the audience’s perspective. It also needs to be specific and realistic.
For instance, if the subject of your presentation is how workers can manage stress, and your general purpose is to teach, it wouldn’t be helpful to have the following specific purpose:
After seeing my presentation, workers in my organization will know how to manage all the stress in their life.
That’s too general to be of any use. Here is a more specific and realistic purpose:
After seeing my presentation, workers in my organization will know how to use three time-management strategies to manage stress more effectively.
Other specific purposes could include the following:
After seeing my presentation, the board will approve my project proposal.
After seeing my presentation, team members will feel excited about the organization’s strategy.
Presentation time:
Time allocated for audience questions:
Total time:
9Presentation Skills Workbook | Mind Tools
1.4. Concluding This ModuleYou now have a thorough understanding of your audience, and you know the general and specific purposes of your presentation. This puts you in a great place to develop content that makes the greatest possible impact on your audience.
We’ll look at how you can do this in the next module.
Action:Look back at your answers to the exercises you have completed so far, and identify the main points that you need to consider as you develop your content in the next module. Note these in the box below.
Action:How long will your presentation be (including audience questions)? Write these details in the box below.

10Presentation Skills Workbook | Mind Tools
2. Developing Your Content
Have you ever sat through a presentation where the speaker covered so much information, and showed so many slides, that you felt overwhelmed?
Or, have you sat through a speech where the presenter took so long to get to his main point that you lost interest in what he had to say?
When you give a presentation, the only way to satisfy your audience’s wants and expectations is to deliver the content people need, in a way that’s easy to understand.
If you give the right information in the wrong sequence, you might leave the audience confused, frustrated or bored.
Similarly, if you give people too much information, or present it in a way that makes it difficult for them to understand your main points, you’ll fail to deliver your message effectively.
Once you’ve worked through this module of the workbook, you’ll be well-equipped to avoid issues like these.
We start by looking at how you can structure your presentation. We then explore a useful process for developing the specific sections of it, including how you can come up with a powerful introduction and a memorable conclusion.
Importantly, we also look at how to develop effective visual aids – an area where many presenters fail miserably.
2.1. Structuring Your PresentationYour first step when you develop your content is to think about how to structure your presentation.
When you provide information in a well-structured format, and you use appropriate techniques to keep audience members engaged and interested, then they’ll remember what you said and they’ll remember you – for the right reasons.
There is no “best” structure to use, as this will depend on the type of presentation that you need to give, and your level of experience.
That said, it’s often most effective to structure a presentation in three distinct but simple stages:
1. Introduction. 2. Body. 3. Conclusion.
11Presentation Skills Workbook | Mind Tools
This structure gives you the opportunity to tell a simple story with a defined beginning and ending. It also allows you to reinforce the main points of your presentation at each stage, so that people go away having heard the most important parts of your message three times.
As such, people often call this the “tell ‘em” approach, because you do the following:
• Tellthemwhatyouplantotellthem(introduction). • Tellthem(body). • Tellthemwhatyoutoldthem(conclusion).
Let’s look at each stage in more detail (starting with the “body” section, as the introduction and conclusion are based on this).
Body
The body consists of the key points that you will make. It is the main part of your presentation.
Clearly, the body comes after the introduction. However, it’s useful to plan it first, so that you can summarize your main points in your introduction.
When you plan the body of your presentation, it’s important to remember that the more points you make, the less information your audience is likely to remember. Therefore, it’s best to cover just three to five main ideas or points, if possible. This concept stems from the Chunking principle, which says that information is easier to understand when you present it in small, well-organized units.
It’s important to present your points in a logical order so that you don’t confuse your audience.
How you structure the body depends on what you want to achieve. If the purpose of your presentation is to persuade or motivate, it’s useful to structure the body of your presentations so that you convince your audience members that they need to deal with a problem, before you tell them about the solution.
For instance, if your specific purpose is to excite team members about your organization’s new strategy, your main points might be as follows:
• Problemswithcurrentstrategy(currentproblem). • Descriptionofthenewstrategy(solution). • Advantages • Disadvantages. • Nextactions.
Tip:For more on creating persuasive communications, see our article on Monroe’s Motivated Sequence.
1.
2.
3.
4.
5.
12Presentation Skills Workbook | Mind Tools
IntroductionNow that you’ve identified what you want to cover in your presentation, you can develop your introduction.
Your introduction establishes the overall mood of your speech. This impression stays with the audience throughout your presentation.
Ways to create a strong first impression with your introduction include the following:
• Askingarhetoricalquestion(aquestionthatyouasktomakeapointratherthan to solicit an answer).
• Makingaverystrong,startlingorunexpectedstatement. • Usingaquote. • Tellingastory. • Usinganexampleorillustration. • Issuingachallengeorappeal. • Requestingaspecificaction. • Referringtoarecentincident. • Usingsuspense. • Appealingtotheaudience’sself-interest.
Your introduction should give an overview or a short summary of your presentation. You can also explain what the topic is and why you want to cover it, and you can highlight what you hope to accomplish with your presentation.
Tip:If you intend to allow your audience members to ask questions at the end of your presentation, it’s worth mentioning this in your introduction so that people aren’t tempted to ask questions while you deliver your content.
Action:Using your answers from the exercises in the previous module, identify up to five main points that you want to make in your presentation. Write these points in the box below.
13Presentation Skills Workbook | Mind Tools
ConclusionAlong with a strong introduction, you also need to end your presentation on a high note, with a powerful conclusion that sums up what you’ve said.
In your conclusion, you should summarize your main points one last time. Research suggests that people only remember about 25 percent of what they hear or read, so you increase the chance of people retaining information when you highlight the key message again at the end of your presentation.
Your conclusion should also make it clear to your audience members what they should do next, regardless of whether this is a specific action or a change in their outlook.
Tip:It’s sometimes useful to think about your conclusion before you begin planning your presentation. When you start with your final message in mind, you can ensure that everything else flows to the natural conclusion that you want.
To come up with a strong conclusion, you can use the same methods that you use to create a strong introduction. For instance, it can be very effective to end your presentation with a quote, an example or an amusing story.
Action:Write an introduction for your presentation in the box below. Again, use your answers from the exercises in the last module, so that you create an introduction that appeals to your audience.

If you want to convince your audience to do something, what will your call to action be?
How could you use your conclusion to inspire your audience?
It can be effective to end your presentation with an inspiring quote or thought-provoking rhetorical question that relates to your main topic. What quote or question might work well in your conclusion?
What are the advantages or benefits for your audience members when they adopt your point of view? How could you highlight these in your conclusion?
14Presentation Skills Workbook | Mind Tools
Action:To prepare your conclusion, answer the following questions:
15Presentation Skills Workbook | Mind Tools
Action:Now,writetheconclusionforyourpresentationintheboxbelow.Rememberto summarize your main points. As before, your answers to the exercises in the previous module will allow you to craft a conclusion that resonates with your audience.
2.2. Supporting Your Main PointsYou now have an introduction and a conclusion for your presentation, as well as an outline of what you want to cover.
Next, you need to develop the body of your presentation so that your main points are clear, compelling and convincing – you can’t just list your points and hope that the audience will understand your point of view.
This means that you must back up each of your main points with further information that explains, highlights or supports it.
This can include the following:
• Data,factsandstatistics. • Images,charts,objects,anddiagrams. • Testimonyorquotesfromexpertsorindustryleaders. • Stories and examples. (These can be reality-based, or you can create your
own stories to support your point.)
Main Point Possible Supporting Information
1.
2.
3.
16Presentation Skills Workbook | Mind Tools
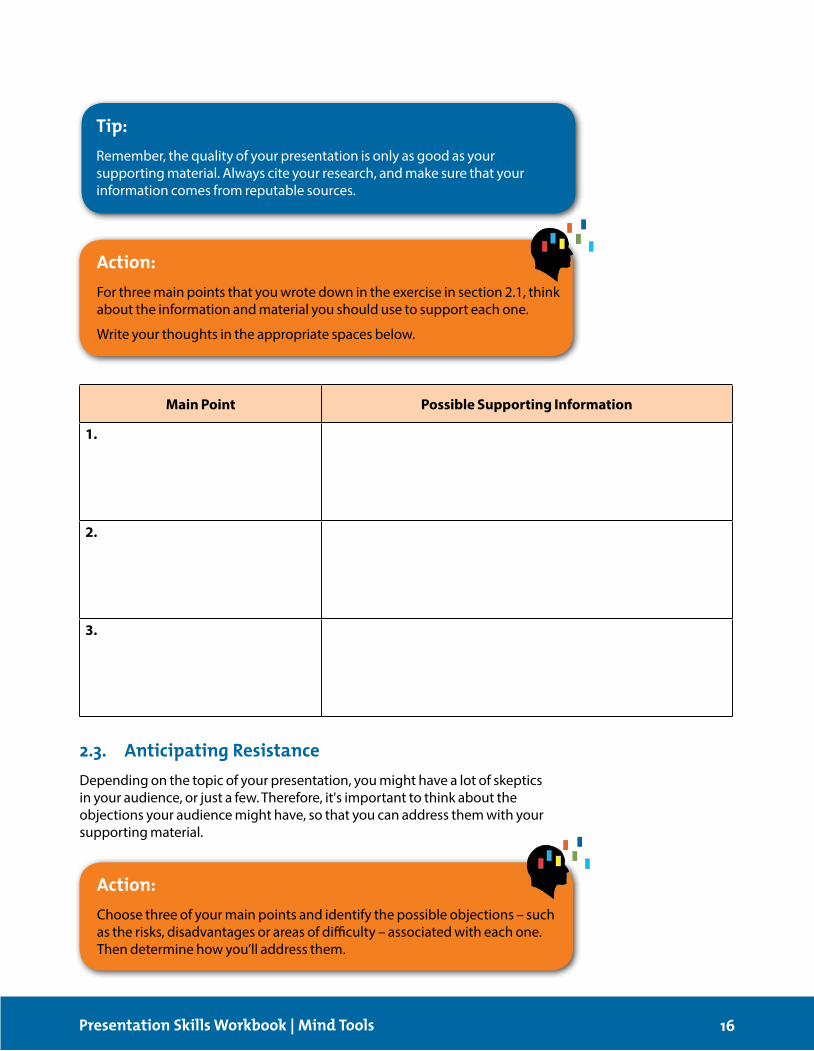
Action:For three main points that you wrote down in the exercise in section 2.1, think about the information and material you should use to support each one.
Write your thoughts in the appropriate spaces below.
2.3. Anticipating Resistance Depending on the topic of your presentation, you might have a lot of skeptics in your audience, or just a few. Therefore, it's important to think about the objections your audience might have, so that you can address them with your supporting material.
Action:Choose three of your main points and identify the possible objections – such as the risks, disadvantages or areas of difficulty – associated with each one. Then determine how you’ll address them.
Tip:Remember,thequalityofyourpresentationisonlyasgoodasyoursupporting material. Always cite your research, and make sure that your information comes from reputable sources.
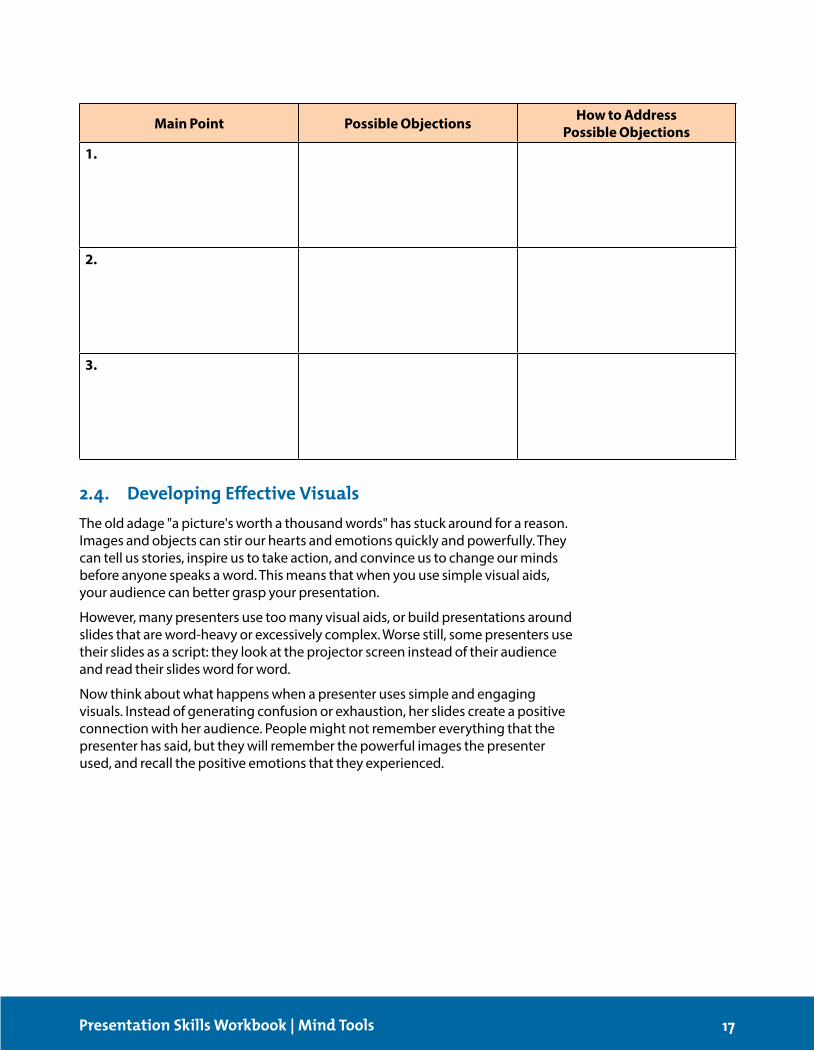
Main Point Possible Objections How to Address Possible Objections
1.
2.
3.
17Presentation Skills Workbook | Mind Tools
2.4. Developing Effective VisualsTheoldadage"apicture'sworthathousandwords"hasstuckaroundforareason.Images and objects can stir our hearts and emotions quickly and powerfully. They can tell us stories, inspire us to take action, and convince us to change our minds before anyone speaks a word. This means that when you use simple visual aids, your audience can better grasp your presentation.
However, many presenters use too many visual aids, or build presentations around slides that are word-heavy or excessively complex. Worse still, some presenters use their slides as a script: they look at the projector screen instead of their audience and read their slides word for word.
Now think about what happens when a presenter uses simple and engaging visuals. Instead of generating confusion or exhaustion, her slides create a positive connection with her audience. People might not remember everything that the presenter has said, but they will remember the powerful images the presenter used, and recall the positive emotions that they experienced.
18Presentation Skills Workbook | Mind Tools
Action:Now think about presentations that you’ve seen where the presenters used slides or visual aids well. How did this make their presentations more effective? Write your observations below.
So, how can you create effective slides for your presentation? Follow these guidelines.
Keep Things SimpleYour visual aids should support your presentation, not be your presentation.
Focus each slide on one idea or concept. This allows your audience to grasp quickly what you want to communicate.
Action:Think back to some presentations you’ve watched where the presenters used slides or other visual aids badly. How could they have improved the way in which they used their slides? Write your thoughts in the box below.

19Presentation Skills Workbook | Mind Tools
According to Nancy Duarte, author of “slide:ology: The Art and Science of Creating Great Presentations,” each slide should take no more than three seconds for the audience to process. If it takes longer, the slide is probably too complex.
Use Text SparinglyKeep your text to a bare minimum (10 words or fewer if possible), and, where you can, use an image to convey a message rather than words. For example, consider using a graph instead of a list to show changing trends.
Avoid Bulleted ListsAvoid bulleted lists whenever possible; they make it too easy to put several ideas on one slide, which can overwhelm your audience.
If you do need to use bullets, don't use sentences; instead, simply list the fact, statistic or idea that you want to communicate. Then, use your narrative to educate the audience about what the bullets mean.
Use a Plain BackgroundAim to use a plain background and plenty of blank space: this will focus audience members' eyes on your message. Avoid decorating slides with background pictures, logos or patterns that could distract attention.
Consider using blank slides when you need the audience's complete focus; they are equivalent to a pause, and this will add drama, tension and focus to your words.
Use Colors IntelligentlyPresenters often make the mistake of using different colors and fonts for each slide. This can confuse the audience and divert attention from the main message. Stay consistent with your slides, so that they form part of a seamless whole.
First, choose colors carefully, as they will affect your presentation’s mood and tone. Also, think about the space that you’ll present in. If the room will be dark (with lights off), choose a darker background color, such as dark blue, black or gray, with white or light-colored text. If the room will be light (with lights on or plenty of ambient light), choose a white or light-colored background, with black or dark-colored text.
You also need to match color with the tone and message of your presentation. Bright colors convey energy and excitement, while darker colors may seem more conservative and serious. Align your color palette with your subject matter.
Tip:Consider using similar slide designs to reinforce your main points. For instance, you could use a specific text size or a similar image each time you introduce a main point. Your audience will then find it easier to remember what these points are.
20Presentation Skills Workbook | Mind Tools
Consider CultureBefore you create your visuals, think about your audience. This is especially true if you plan to present to a culturally diverse group.
For example, not everyone reads from left to right, and people from some cultures may consider a particular color offensive or bad luck in business settings.
When you design your visuals, use images and photographs that reflect the culture of your audience. If your audience is culturally diverse, use pictures and images that reflect this diversity.
And keep graphics and phrases simple. Whenever possible, use images to replace bullet points and sentences.
Use Images IntelligentlyYour audience has probably seen plenty of bad clip-art, and we’ve all seen too many stock pictures of business people in suits.
Brainstorm creative, clever approaches with your imagery, and look for photographs or illustrations that tell a story in a less obvious way. Thoughtful images will keep your audience engaged, reinforce your professionalism, and make a lasting impression.
Tip:Bear in mind that, while you can source free images from sites like Photopin, you may need to buy them from an image library such as iStockphoto or Shutterstock.
Whichever method you use, be sure to read the licensing terms carefully, as you may need to give credit to photographers.
Break Down Complex Data When you have to communicate complex data or large chunks of information, avoid putting it all on one slide, as your audience may struggle to take in all of the details. Instead, either summarize the information or split it up over several slides.
You can also use handouts to communicate complex information. Handouts allow your audience to look at data in more depth. This is especially important when you must present to analytical people, such as engineers, scientists or finance professionals. They are trained to be skeptical about data, and a handout will give them a closer look. Once again, this attention to the needs of your audience will highlight your professionalism, and support your message.
Other Visual AidsDon’t forget that slides aren’t the only option when using visual aids in a presentation.
Main Point Ideas
1.
2.
21Presentation Skills Workbook | Mind Tools
Flip charts and whiteboards are useful when you need to display lists, diagrams and other simple information. You can prepare them in advance, or write on them as you make each point.
Props can also be effective. They can be any objects that allow you to make your point. For example, for a presentation about saving money in your department, you could use real money to show how much cash your department will save every minute, once your boss accepts your idea.
Videos are another option if they support your message, and they can provide a welcome rest from speaking in longer presentations. Make sure that the audience can see and hear videos clearly, if you go down this route.
Action:Think of some ways that you could use slides and other visual aids to complement two of the main points from the body of your presentation. Write your thoughts and ideas below.
Remember,youcanusemorethanonevisualperpoint,aslongasyoufollowthe guidelines above.
Slide Template 1
Slide Template 2
22Presentation Skills Workbook | Mind Tools
Action:Now, on the templates below, think about how two of your slides could look. Write in any text that’s required, and describe the images that you could use. (If you’re completing this workbook on your computer, you may need to print this page out to do this.)
23Presentation Skills Workbook | Mind Tools
Tip:Avoid using jargon in your presentation, including complicated terms, industry-specific acronyms, or confusing metaphors that can stop your audience understanding your message.
Jargon can creep into your presentation for a number of reasons. You might want to impress your audience, or you might not think about the problems it could cause. Jargon does have its place, but your audience will probably understand more about your subject if you avoid it.
Action:Choose two of your main points and write down what you will say for each point in the boxes on the next page.
Remembertouseappropriatesupportingmaterialtobackupyourpointsandto identify and address possible objections.
2.5. Concluding This Module In this module, we have looked at how to structure your presentation, how to craft a compelling introduction and conclusion, and how to anticipate any resistance to your message from your audience. We’ve also looked at how you can use visual aids to support your message.
The next module guides you through a process for preparing for your presentation. We look at how to use notes and cue cards, and how to prepare effectively for questions from your audience. We also see how to get to know the venue where you will speak, and how to prepare for things that could go wrong on the day.
Main Point 1
Main Point 2
24Presentation Skills Workbook | Mind Tools
Date:
Time:
25Presentation Skills Workbook | Mind Tools
Action:You’ve now drafted your introduction, conclusion and two of your main points.
Schedule a time and date to develop the rest of the content for your presentation. Use our Presentation Planning Template on page 50 to guide you with this.
26Presentation Skills Workbook | Mind Tools
Once you’ve developed your content, it’s time to prepare for your presentation, so that you can deliver it with confidence.
Part of this involves planning for the little emergencies that often manifest themselves on presentation day: you forget your USB drive
with your slides, you lose your cue cards, or the venue doesn’t have an essential connector cord, making it impossible to link your laptop with the digital projector.
Although you can’t plan for every emergency, the time you spend analyzing risks and coming up with contingency plans can make it likely that the setbacks you do experience on presentation day won’t catch you off-guard.
Let’s begin this module by looking at how you can use notes and cue cards to deliver a presentation effectively.
3.1. Notes and Cue CardsSo now comes the big question: should you use notes or cue cards, or should you memorize your presentation?
Ideally, you’d memorize your entire presentation and deliver it without any notes. But this takes a lot of preparation and practice, even if you’re an experienced presenter.
A better option is to memorize the opening and closing lines of your speech so that you can start and finish strongly, and then use notes or cue cards to guide you through the rest of your presentation. With enough practice, you may then find that you’re able to do the whole thing from memory.
Keep in mind that it can be easy to use notes and cue cards as a crutch. Giving too much time and attention to them will make your presentation sound flat, and it can disconnect you from your audience.
Therefore, it’s important that you think of them as tools – their purpose is to give you cues about your material. You shouldn’t read them word for word!
Some presenters like to use cue cards, because they’re small and easy to flip through as the presentation progresses. Others like to keep their notes easily accessible on a lectern or table, so that they can glance at them discreetly. If you use small cards, stick to one main point per card, and only write out the key words or phrases you need to keep yourself on track.
3. Preparing for Your Presentation

Main Point 1
Main Point 2
27Presentation Skills Workbook | Mind Tools
Action:Look back at what you wrote for each of the main points at the end of the last module. For each main point, write the key words and phrases in the boxes below.
Then, practice delivering that part of your presentation using only what you’ve written.
28Presentation Skills Workbook | Mind Tools
Action:Now, look back at your introduction from section 2.1 in module 2. Write some notes in the box below that will help you as you memorize the opening lines. Then, look away from your notes and practice saying it from memory. See if you can recite the first few sentences without any notes.
3.2. Preparing for QuestionsIf you plan to give your audience members the opportunity to ask questions at the end of your presentation, you must be prepared to answer their questions and address their concerns intelligently and in a timely manner.
The best way to do this is to try to predict the most common questions that your audience will ask, and the most common issues that they will raise, so that you can prepare for them.
In section 2.3, you identified your audience’s possible objections to your points, so you may have already dealt with some of the issues that they may raise within your presentation.
However, it’s unlikely that you’ll be able to deal with every possible objection. Your audience may have other, more general questions about your presentation, too.
Here are some tips that you can use to anticipate your audience’s questions:
• Researchbackgroundinformationthoroughly. • Askyourself,“Whatistheflipsideofthisstatementorargument?” • Askcolleaguestoassessyourmaterial. • Trytoidentifyquestionerswhomayhavepersonalagendas,andprepare
for these.
Action:In the following table, identify three questions or issues that you should prepare for. Then write down how you’ll address each one.
Possible Question/Issue Response
1.
2.
3.
29Presentation Skills Workbook | Mind Tools
3.3. Getting to Know the VenueImagine walking into your venue for the first time on the day of your presentation. To your horror, you discover that there's no electrical outlet near the stage, and you don't have an extension cord (making it impossible to use your laptop and digital projector). The room also doesn’t seat enough people, and no one is on hand to find extra chairs.
The lesson here is easy: get to know the presentation area or venue well in advance of the event.
Action:Think about the venue where you’ll deliver your presentation. (If you don’t know the location yet, think of a room in your office building or a venue in your town or city.) Then answer the following questions.
Are there electrical outlets near the stage or area where you will present? If not, will you need an extension cord?
Is there a blank wall or a screen that you can use for your slides?
How many people will the venue seat? Can you move the chairs? Will everyone be able to see you and your slides?
Will the windows let in too much light, or not enough? How can you deal with this?
Will the host or venue provide you with equipment, such as a computer, remote/pointer, whiteboard, or flip chart with paper? What equipment will you need to supply?
30Presentation Skills Workbook | Mind Tools
Is the room large enough to require a microphone and speakers? If so, where will you get this equipment?
Could any security restrictions or requirements in the venue delay attendees?
How is the temperature? Can you adjust it? If so, where is the thermostat?
Will refreshments be available, or will you need to supply your own?
31Presentation Skills Workbook | Mind Tools
3.4. When Things go WrongDespite your best preparations, things can go wrong before and during a presentation. A quick online search can bring up horror stories that no presenter would ever want to suffer. You might even have experienced similar situations yourself!
Although you can't anticipate every emergency, you can go a long way toward avoiding disaster with a little planning and preparedness. Consider these tips:
32Presentation Skills Workbook | Mind Tools
Tip:If your presentation is very important or highly technical, consider using a technical support professional to help you on the day. This person can also manage any technical emergencies during the presentation.
• Checkthatyourpresentationmakessensewithoutyourslides,justincaseyou have a problem with equipment.
• Makesurethatyourlaptopisfullychargedandthatyou'vepackedyourpower cord, and if necessary, a power adapter for the country that you’re presenting in.
• CarryabackupofyourslidesonaUSBdrive,sothatyoucanuseadifferentdevice if necessary.
• Bringalonganextrasetofbatteriesifyouplantousearemotetochange slides.
It can also be beneficial to talk to experienced presenters in your organization. What strategies do they use to prepare for risks and emergencies?
3.5. RehearsingYou’ve prepared your content and your notes, and familiarized yourself with the venue. Now it’s time to practice your presentation, so that you deliver it with confidence and conviction.
Great presenters make giving a speech look effortless. On stage, they seem to be having an easy, engaging conversation with their audience.
Although they look as if they were born with the ability to talk to an audience, it takes a lot of work to appear this effortless. If you want to project confidence, grace and power on stage, you will have to practice your presentation – a lot!
How much practice you need varies – everyone is different! You want to practice enough so that you feel very comfortable with your material, but not so much that you lose heart and passion in your performance.
Also, try to re-create the environment where you will deliver the presentation. For example, you could set the room up in the same way, and use the same equipment. (You might be able to get permission to do some run-throughs at the venue itself.)
Remembertokeepaneyeontimingwhenyoupractice.Makesurethatyoucandeliver your presentation within the allotted time. If in doubt, aim to finish early rather than late; you’ll likely find that it takes longer when you do the real thing.
3.6. Concluding This ModuleAmericanphilosopherWayneBurgraffoncesaid,"Ittakesonehourofpreparationforeachminuteofpresentationtime."
If you subscribe to this point of view, a 20-minute presentation will require 20 hours of prep and practice.
Date:
Time:
Date:
Time:
33Presentation Skills Workbook | Mind Tools
Action:If you know where you will deliver your presentation, schedule a date and time to visit the venue so that you can get to know it. Write this information in the box below.
Action:Schedule a date and time to write your notes/cue cards and to prepare for questions that your audience may ask at the end of your presentation. Use our Presentation Planning Template on page 50 to guide you.
Content development will take up much of this time. But you’ll need to put in ample preparation and practice to ensure that your presentation looks polished and professional, and that you're well equipped to handle any last-minute emergencies that may crop up.
Next, we’ll focus on how you can deliver your presentation with style, and manage your nerves.
34Presentation Skills Workbook | Mind Tools
4. Presenting With Style
Stop and think about some of the great speeches and presentations you’ve experienced in your life. Chances are, these speeches were memorable not only because of what the speaker said, but also because of how the speaker said it. The speaker’s charisma, confidence and speaking style greatly
influenced the audience’s experience.
Great delivery can turn an ordinary speech into a rich, stimulating event. Likewise, great content delivered poorly won’t make for a memorable speech.
Delivery encompasses many elements: your appearance, body language and speaking style, as well as less tangible elements that are more difficult to develop, such as charisma and self-confidence. You need to practice or strengthen these elements before your performance, if you want to impress your audience.
Let’s begin this module by looking at how you can speak clearly in your presentation.
4.1. Speaking ClearlyWhen people feel stressed or nervous, they can mumble or speak too quickly, which can spell disaster for a presentation. Your audience needs to be able to understand what you say. This is why it’s important that you speak slowly and clearly during your speech. Each word needs to have a beginning and an end!
You also need to pay attention to the beginning and ending of your sentences, while you practice your presentation. Many people “fade away” at the end of a sentence, like they’ve run out of gas. Finish each sentence strongly!
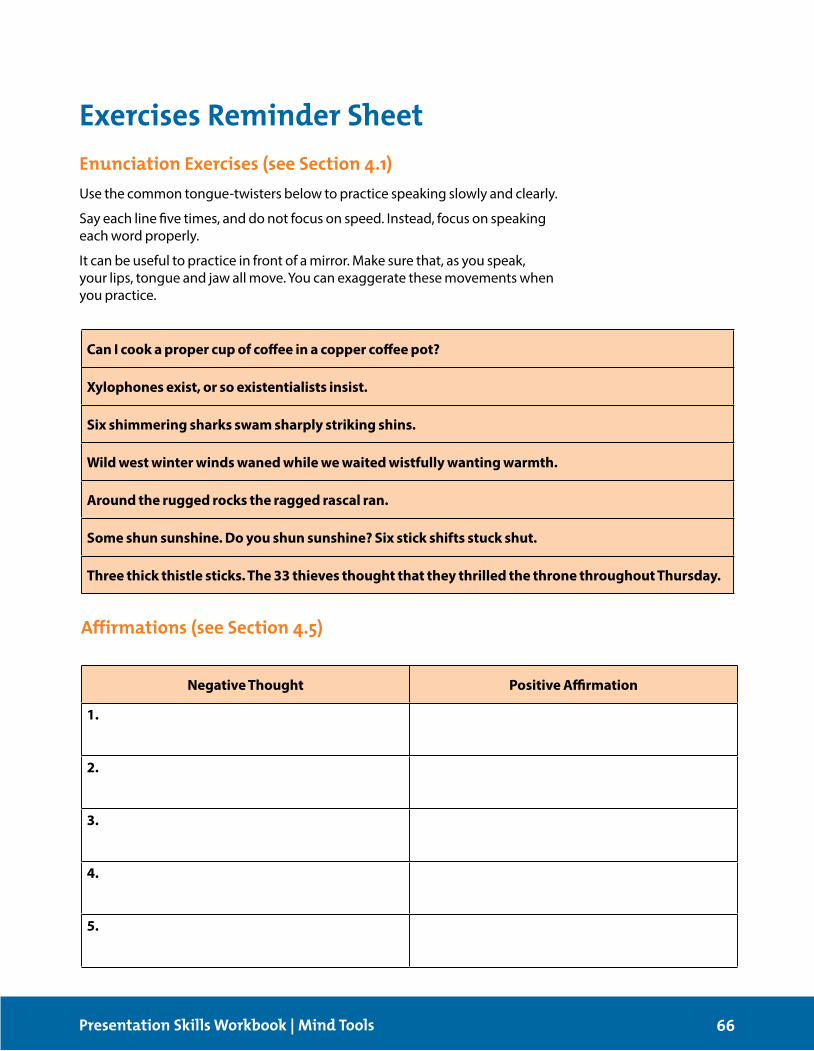
Action:Use the following common tongue-twisters to practice speaking slowly and clearly.
Say each line five times, and do not focus on speed. Instead, focus on speaking each word properly.
It can help to practice in front of a mirror. Make sure that, as you speak, your lips, tongue and jaw all move. You can exaggerate these movements when you practice.
1. Can I cook a proper cup of coffee in a copper coffee pot?
2. Xylophones exist, or so existentialists insist.
3. Six shimmering sharks swam sharply striking shins.
4. Wild west winter winds waned while we waited wistfully wanting warmth.
5. Around the rugged rocks the ragged rascal ran.
6. Some shun sunshine. Do you shun sunshine? Six stick shifts stuck shut.
7. Three thick thistle sticks. The 33 thieves thought that they thrilled the throne throughout Thursday.
35Presentation Skills Workbook | Mind Tools
Tip:You can also use this exercise to warm up your vocal cords before a presentation or speech.
“Nothing strengthens authority so much as silence.”
– Leonardo da Vinci.
4.2. The Power of Silence
Silence can be a powerful tool during presentations.
However, many presenters are afraid of silence, and they plow ahead to make sure thatthereisno"deadair"intheirspeech.
A thoughtful, measured pause can give your audience an important opportunity to reflect on a meaningful passage, or a significant statistic. This time facilitates learning, retention and awareness.
As you practice your elocution and pacing, pause at intervals where you've made a significant point or want the audience to think about something you've just said. Use silence each time you practice, so that you become comfortable with this technique.
Tip:You can also control your use of “filler words” such as “like,” “um,” and “you know” by embracing silence. We often use these words to fill pauses.
36Presentation Skills Workbook | Mind Tools
Action:How could you use the power of silence in your presentation? At what stages of your presentation could you use silence to reinforce your message? Write your thoughts below.
4.3. Making a Great ImpressionHuman beings are hardwired to make instant judgments about the people we meet; after all, thousands of years ago, our ability to judge quickly who was safe and who was a threat may have meant the difference between life and death.
When you give a presentation, you have a mere fraction of a second to make a great first impression with your audience. And, like it or not, your audience members will likely never forget the impact you make on them during those first crucial moments.
You have to strike a fine balance when making a first impression. Although it's something you want to pay careful attention to, you also need to be authentic. Trying too hard to impress or trying to be someone you're not will make a poor first impression.
Use the following tips to make a great first impression:
• Stayhealthy:goodhealthnotonlyallowsyoutolookfitandstrong,butitalso increases your energy and confidence levels.
• Smile:anauthenticsmileputsothersatease. • Beontime:youwon’tmakeagoodimpressionifyou’relate! • Beinterested:showaninterestinotherpeoplebeforeandafterthe
presentation, and show passion for your subject matter. • Presentyourselfwell:dressandgroomyourselfappropriatelyforthe
audience and for the environment where you will present.
Tip:Your self-confidence also has a major influence on the impression you make with others. When your confidence is high, you believe in yourself, and your audience will immediately pick up on that.

Think about what you’ll wear to your presentation. What do these clothes say about your professionalism and personality? How could you enhance your clothing choices to make a better impression with your audience?
Make a list of the accessories (watch, jewelry, shoes, briefcase, handbag, and so on) you’ll wear or bring on presentation day. What do these items say about you? Are they appropriate for your audience?
Think about your hairstyle, makeup and nails. Do you need to get a haircut or manicure before your presentation?
37Presentation Skills Workbook | Mind Tools
Action:Answer the questions below to evaluate how you’ll present yourself at your presentation.
4.4. Using Your BodyNonverbal signals, such as posture, gestures and vocal tone, influence your audience and the success of your presentation in a big way.
For example, imagine a presenter who stands still with his hands in his pockets and his head down as he speaks. It might look as though he doesn’t care about his subject, so why should you?
Now imagine a speaker who uses hand gestures to emphasize her points. She makes eye contact with people in the audience, and she walks around the stage as she speaks. Chances are, she’d come across as more credible than the presenter who stood still.
Your body language influences how you feel about yourself as well. Think about how you feel when your head is down and your shoulders and back are slumped. You might feel slightly lethargic or even uninspired. But when you straighten your spine, throw your shoulders back, and lift your head, you likely feel confident and more energized.
Section Gestures
38Presentation Skills Workbook | Mind Tools
You can use your body language to enhance your presentation in several ways.
Eye ContactEye contact is an important part of your presentation. In most cultures, eye contact engages the audience and builds trust.
When you make eye contact with your audience, single out one person and speak only to that person for two to three seconds. Then, move your eyes to someone else, and give that person two to three seconds of your time. You can also look one person in the eye until you finish expressing an idea.
Making eye contact with your audience not only pulls people into your presentation, but it can also serve as an important reminder that your audience consists of individuals. As you talk, pretend to talk to each person alone, and try to forget about the audience as a whole. This can lower stress and improve your connection with the people you’re speaking to.
GesturesGestures are body movements that add emphasis to what you say. Gestures with your hands and arms are especially effective in presentations.
For instance, as you explain the similarities between two ideas, you could move both of your hands in unison. Similarly, you could use an upward arm movement to emphasize an increase in turnover or sales.
However, they must complement what you say. Avoid using forced gestures that don’t look natural.
Action:Identify a section of your presentation where you could use gestures to emphasize your points. Write down how you’ll do this in the table below.
Section Movement
39Presentation Skills Workbook | Mind Tools
MovementWhen you move around during your presentation, you provide variety for the people in the audience. You also encourage them to get more involved, as they have to move their heads and eyes to see you.
You can use movement to emphasize your points too. For instance, as you highlight the pros and cons of an idea, you could use one side of the stage to speak about the positives and then move to the other side to talk about the negatives.
Action:Identify a section of your speech where you could use movement to emphasize your points. Write down how you’ll do this in the table below.
StanceEven though it can be useful to move around during your presentation, you’ll likely stand in one spot for large parts of it. Show confidence and authority by standing straight with your head up and eyes forward.
Also, watch out for mannerisms and habits that could detract from your message: for example, swaying or rocking on the spot, putting your hands in your pockets, or leaning on a table or the lectern.
Action:Think back to the last time you spoke in front of a group. Identify three ways that you could have used your body language better, and write them in the table on the next page.
1.
2.
3.
40Presentation Skills Workbook | Mind Tools
Tip:Different cultures have different attitudes about eye contact, gestures and body language in general.
For instance, some cultures can view prolonged eye contact as a threat. Some hand gestures, such as a “thumbs up,” also have different meanings in different cultures – this is a warm gesture in some cultures but very rude in others.
Our “Managing Around the World” series of articles has strategies and tips that you can use when you communicate with people from specific cultures.
4.5. Calming Your Nerves and Staying Positive
“Speaking in front of a crowd is considered the number one fear of the average person. I found that amazing – number two was death! That means to the average person, if you have to be at a funeral, you would rather be in a
casket than doing the eulogy.”
– Jerry Seinfeld, comedian.
It doesn't matter if you've given hundreds of presentations or never spoken in front of a group: chances are, you’ll feel nervous before you step out in front of an audience.
The fear of public speaking is common and understandable. But the good news is that it's entirely possible to overcome much of the stress and nervousness that can go along with giving a presentation.
However, keep in mind that some nervousness is actually beneficial. You can use the energy from the adrenaline pumping through your body to communicate enthusiastically, convincingly and passionately. The key is to decrease your level of nervousness so that you can use your energy on these positive activities, not on trying to control your nerves.
Negative Thought Positive Affirmation
1.
2.
3.
4.
5.
41Presentation Skills Workbook | Mind Tools
Fortunately, you’ve already taken several steps that can make you feel less nervous about your presentation. For example, you already know your audience well, you’ve thought about how much practice you need to do, and you’ve rehearsed thoroughly. You’ve also learned how to use body language to your advantage, and this is a great way to expend nervous energy.
Let’s look at two further techniques that you can use to think positively, feel confident and put on a great performance: use of affirmations, and centering.
Using AffirmationsAffirmations are positive, specific statements that can overcome self-sabotaging, negative thoughts. They allow you to visualize and believe in what you affirm to yourself, encouraging you to make positive changes to your life and career.
Don'tpermityourselftothinknegativethoughtslike"I'mgoingtomessup"or"Ihavenothingvaluabletosay."Theyjustdiminishyourconfidenceandloweryourenergy levels.
Instead,usepositiveaffirmationstobuildyourconfidence,suchas"I'mgoingtogiveagreatperformance,"“Iknowmypresentationinsideout,”or"Mypresentationcanreallyhelpmyaudience."
Action:Below, list the negative, self-defeating thoughts you commonly have before a performance or big event. Then write a positive affirmation for each thought to counter your negative feelings.
Then, remind yourself about these positive affirmations before you deliver your presentation.
Step 1:
First, focus on your breathing. Breathe in deeply using your abdomen, and exhale slowly. Step 2:
Next, find your “center.” Your center is your physical center of gravity, usually just below your waist. This area stabilizes you. When you start to feel stressed, focusing on your center helps you feel that you’re grounded, balanced and in control.
When you’ve found your center, breathe deeply at least five times. Experience feeling grounded and stabilized. Step 3:
Imagine collecting all of your negative energy and thoughts in a ball in your center.
Visualize this energy moving up from your center toward your eyes. Step 4:
As you inhale, say “let.” As you exhale, say “go.”
Then, imagine throwing your “ball” of negative energy across the room away from you.
Let go of everything that is causing you stress. Imagine your center filling with calm.
42Presentation Skills Workbook | Mind Tools
CenteringAnother technique you can use before the start of a performance to control your nerves is centering. This originated in Aikido, one of the Japanese martial arts. (Aikidoliterallymeans"thewayofunifyinglifeenergy.")
Action:Go through the Centering exercise below to learn how to use this technique.
Action:After you complete the exercise above, take a moment to think about how you feel. Did it help you relax and de-stress? Write your thoughts below.
1.
2.
3.
4.
5.
43Presentation Skills Workbook | Mind Tools
Other Ways to Control NervesHere are some more ways that you can control your nerves before and during a presentation:
• Drinkwater.Adrenalinecancauseadrymouth,whichcanleadyouto becoming tongue-tied. Have a glass of water handy, and take sips occasionally.
• Smile:thisnaturalrelaxantsendspositivechemicalsthroughyourbody.(Try it – it really does work!)
• Pause,makeeyecontactandsmilebeforeyoubeginspeaking.Thislastmoment of peace is relaxing, and it gives you time to adjust to being the center of attention.
• Speakmoreslowlythanyouwouldinaconversation,andleavelongerpauses between sentences. This slower pace will calm you down and make it easier for people to hear you, especially from the back of a large room.
• Usetheaffirmation,“It’sallaboutthem”justbeforeyoustartspeakingtoremind yourself that you should be focusing on conveying information to your audience, not on your own nerves.
4.6. Concluding the ModulePoor delivery can ruin a great presentation. The time you spend practicing your elocution, thinking about your body language, and learning to control your nerves will pay off tenfold when you step on stage. You'll appear confident, empowered and excited to talk to your audience!
Action:In the table below, describe five techniques to practice, so that you can deliver your presentation with style.
44Presentation Skills Workbook | Mind Tools
5. Taking Your Skills to the Next Level
So far in this workbook, we’ve looked at the key principles that you need to work on to deliver a great presentation.
However, there’s still a lot more that you can do to build your skills and expertise and become a truly engaging speaker.
In this last module, we’ll look at some ways to take your presentation skills to the next level.
5.1. Looking for Opportunities to Speak
“Take advantage of every opportunity to practice your communication skills so that when important occasions arise, you will have the gift, the style, the
sharpness, the clarity, and the emotions to affect other people.”
–JimRohn,U.S.entrepreneurandmotivationalspeaker.
The best way to strengthen your skills as a public speaker is to look for opportunities to practice. After all, you can't master a musical instrument without practice, and the same holds true for public speaking. The more you speak in front of others, the more comfortable you'll be, and the more confidence and charisma you’ll have.
There are many organizations that can help you develop your public-speaking skills. One of the most widely known is Toastmasters International. Toastmasters has clubs in 122 countries. Its aim is to improve members’ public-speaking skills through regular workshops.
You could also volunteer for public-speaking opportunities within your organization or offer to present at conferences and other events. It doesn't matter whether you speak in front of your team during a meeting or deliver your budget report to the board of directors: any opportunity to present in front of others will make you a better speaker.
Action:Identify two potential opportunities to present or speak in front of a group, then write down what you’ll do next to explore each of them.
Potential Opportunity Next Steps
1.
2.
45Presentation Skills Workbook | Mind Tools
5.2. Developing Impromptu Speaking SkillsOften you'll have plenty of time to prepare for a public-speaking event. However, there might be some opportunities that are last-minute, when you'll have little or no time to prepare.
For example, imagine that a key speaker at an industry trade conference falls ill a few hours before her presentation. Since you are also an expert on the topic, someone asks you to take her place. While this might sound like a terrifying experience, the opportunities it could open up for your career are tremendous!
This is why it's important to build the skills you'll need to deliver unplanned speeches. These skills will also help you navigate other situations successfully, such as interviewing for a job or delivering an elevator pitch.
You can learn more about impromptu speaking in this article.
5.3. Getting FeedbackFeedback is an important part of becoming a better public speaker, and you likely won't get any unless you ask for it.
Constructive criticism from a trusted friend or colleague, or feedback from your audience, can be invaluable to your improvement.
We’ve created a short questionnaire on page 69 that you can print and give to people to get their feedback on your presentations.
Name of Friend or Colleague:
Date:
Time:
46Presentation Skills Workbook | Mind Tools
Action:Schedule a date and time to practice your presentation in front of a trusted colleague or friend, and write this information in the box below.
Then, use our questionnaire to get feedback on your performance.
5.4. Connecting With Your AudienceMany presenters only think about the presentation itself. However, great presenters know how to connect with their audience before, during and after their presentation.
Use these tips to connect with your audience:
• Get to know the audience: show up early and chat with audience membersastheyarrive.Then,wheneverpossible,workthis"inside"informationintoyourpresentation.Refertoaudiencemembersbyname.Mention their questions and personal stories, and make eye contact with them when you do so.
• Listen to others: if you're one among many speakers, arrive early to hear their presentations. Then refer to them positively in your own presentation. This is a great way to build relationships with other speakers.
• Stay late: don't rush to pack up your materials after your question and answer session. Stick around and answer questions one-on-one, and ask people for feedback on your speech. This extra attention will again allow you to connect with audience members on an individual level. If you have to leave the stage for another speaker, let your audience members know that you can meet them in the lobby or other public area.
• Stay in touch: if someone has a question that you cannot answer, offer to get back to him or her later (and make sure that you follow through). You can also stay in touch by giving people your contact details or business card.
1.
2.
3.
4.
5.
47Presentation Skills Workbook | Mind Tools
Action:Brainstorm ways to connect with your audience before and after your next presentation. Use the strategies above and tailor them to your unique situation. Try to come up with some creative ideas of your own, as well!
5.5. Concluding the Module By now, you have probably realized that your presentation involves a lot more than just how you perform when you're on stage.
Great presenters understand that the time before and after the presentation is a valuable opportunity to connect with the audience and reinforce their message. They also look for opportunities to speak, so that they can continue to develop their skills, and they ask for feedback. Make sure that you do the same!
Action:List five actions below that you’ll take to continue developing your presentation skills, once you’ve completed this workbook.
Deadline Date:
48Presentation Skills Workbook | Mind Tools
Action:Give yourself a deadline to finish creating and preparing for your presentation. Use the Presentation Planning Template on page 50 and the Presentation Planning Checklist on page 63 to guide you.
49Presentation Skills Workbook | Mind Tools
6. Moving On
Congratulations! If you’ve done the exercises in this workbook, you’re now well on your way to becoming an exceptional presenter and speaker.
However, it’s important that you continue to develop these skills in the weeks and months to come. The only way to be the best you can be is to
practice them regularly.
At Mind Tools, we’ve worked hard to make this workbook as informative, practical and easy to use as possible. If you have any suggestions on how we can improve it for the future, then please let us know at [email protected].
We hope that you enjoy using what you’ve learned in this workbook and that the skills you’ve developed here will continue to serve you well throughout your career.
Enjoy using them, and enjoy being “an exceptional presenter.”
James ManktelowCEOMindTools.comMind Tools – Essential skills for an excellent career!
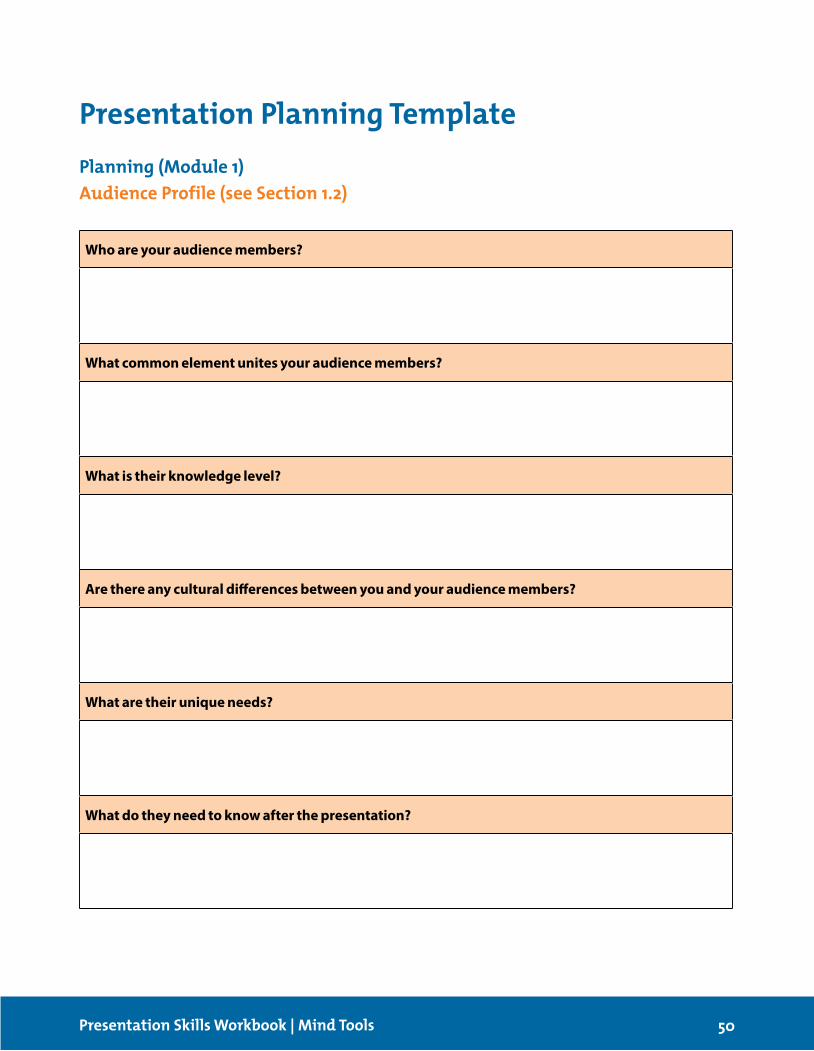
Who are your audience members?
What common element unites your audience members?
What is their knowledge level?
Are there any cultural differences between you and your audience members?
What are their unique needs?
What do they need to know after the presentation?
50Presentation Skills Workbook | Mind Tools
Presentation Planning TemplatePlanning (Module 1)Audience Profile (see Section 1.2)
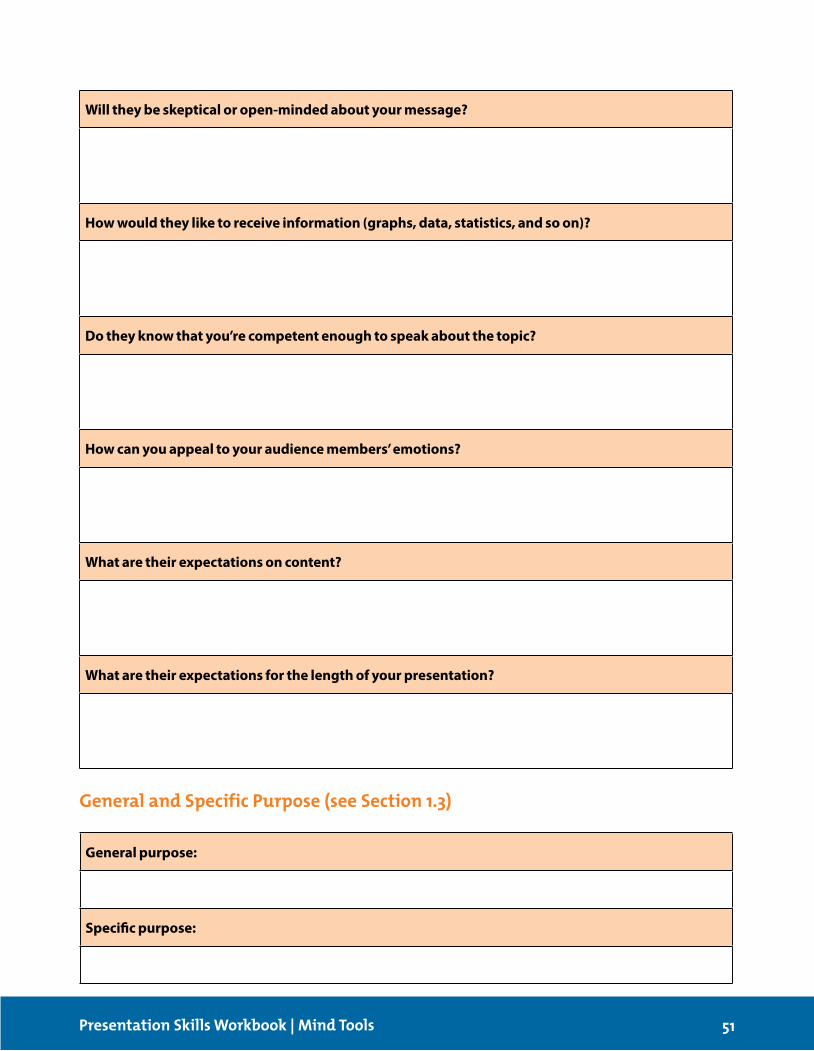
Will they be skeptical or open-minded about your message?
How would they like to receive information (graphs, data, statistics, and so on)?
Do they know that you’re competent enough to speak about the topic?
How can you appeal to your audience members’ emotions?
What are their expectations on content?
What are their expectations for the length of your presentation?
General purpose:
Specific purpose:
51Presentation Skills Workbook | Mind Tools
General and Specific Purpose (see Section 1.3)

Presentation time:
Time allocated for audience questions:
Total time:
Introduction
52Presentation Skills Workbook | Mind Tools
Timings (see sections 1.2 and 1.4)
Content Development (Module 2)Presentation Structure (see Sections 2.1 to 2.4)

Point 1:
Supporting information:
Possible objections and how to address them:
Description of visual aids:
Full outline:
53Presentation Skills Workbook | Mind Tools

Point 2:
Supporting information:
Possible objections and how to address them:
Description of visual aids:
Full outline:
54Presentation Skills Workbook | Mind Tools

Point 3:
Supporting information:
Possible objections and how to address them:
Description of visual aids:
Full outline:
55Presentation Skills Workbook | Mind Tools

Point 4:
Supporting information:
Possible objections and how to address them:
Description of visual aids:
Full outline:
56Presentation Skills Workbook | Mind Tools

Point 5:
Supporting information:
Possible objections and how to address them:
Description of visual aids:
Full outline:
57Presentation Skills Workbook | Mind Tools
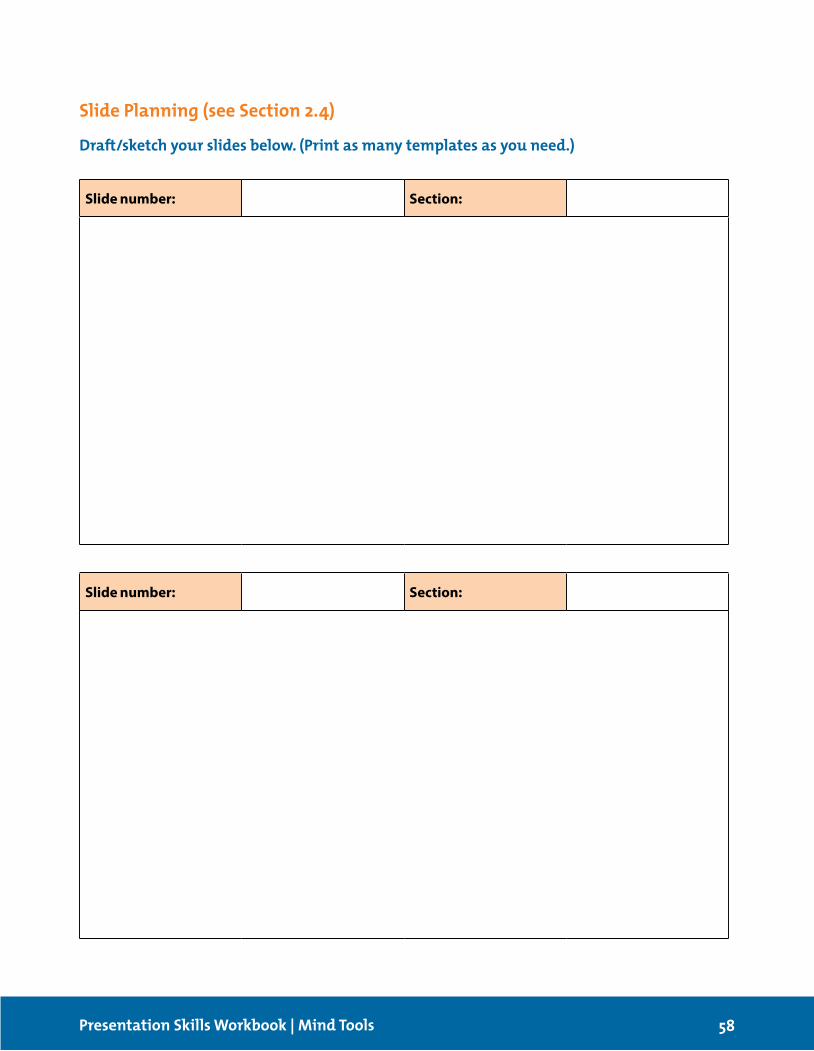
Slide number: Section:
Slide number: Section:
58Presentation Skills Workbook | Mind Tools
Slide Planning (see Section 2.4)
Draft/sketch your slides below. (Print as many templates as you need.)
Slide number: Section:
Slide number: Section:
59Presentation Skills Workbook | Mind Tools

Slide number: Section:
Slide number: Section:
60Presentation Skills Workbook | Mind Tools
Possible Question/issue Response
1.
2.
3.
61Presentation Skills Workbook | Mind Tools
Audience Questions (see Section 3.2)
Projector
Projector Screen
Laptop/Tablet/Smartphone
Remote/Pointer (and Spare Batteries)
Flip Chart
Flip Chart Paper
Flip Chart Pens
Whiteboard Pens
Microphone
Speakers
Refreshments
Power Supply/Extension Cord
Power Adapter (if Presenting in Another Country)
USB Drive for Slides
Additional Connectors (for Example, Mini DisplayPort to VGA)
62Presentation Skills Workbook | Mind Tools
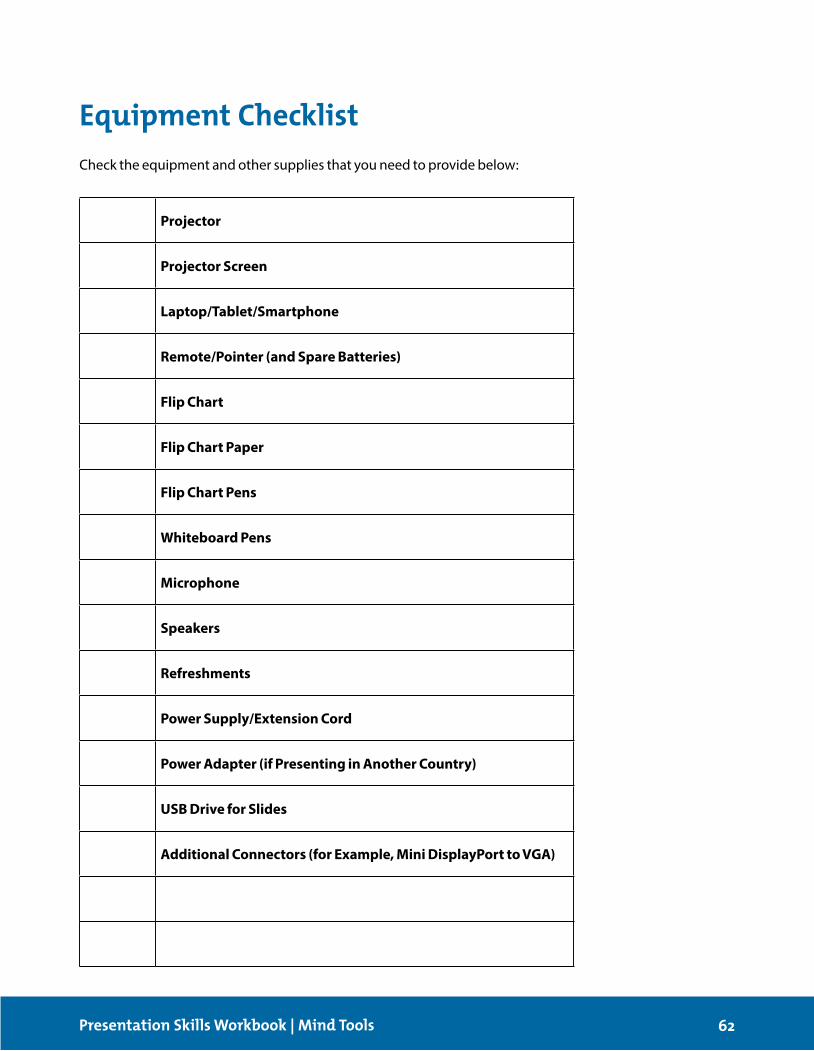
Equipment ChecklistCheck the equipment and other supplies that you need to provide below:
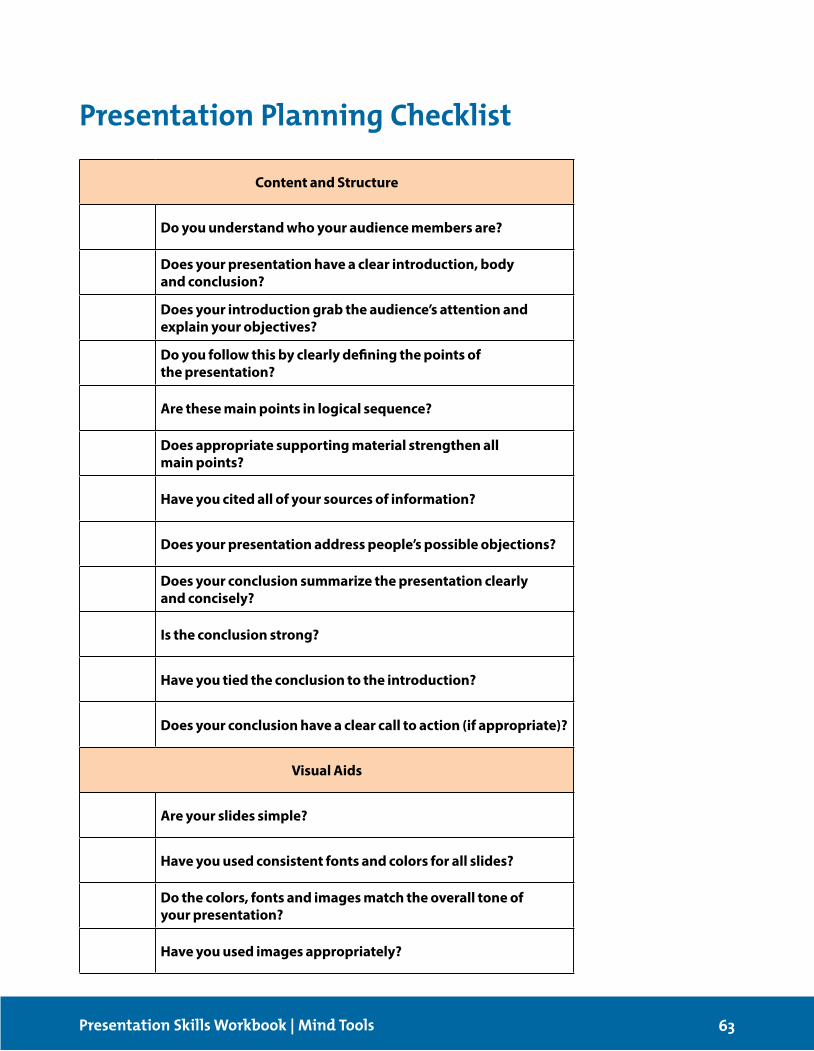
Content and Structure
Do you understand who your audience members are?
Does your presentation have a clear introduction, body and conclusion?
Does your introduction grab the audience’s attention and explain your objectives?
Do you follow this by clearly defining the points of the presentation?
Are these main points in logical sequence?
Does appropriate supporting material strengthen all main points?
Have you cited all of your sources of information?
Does your presentation address people’s possible objections?
Does your conclusion summarize the presentation clearly and concisely?
Is the conclusion strong?
Have you tied the conclusion to the introduction?
Does your conclusion have a clear call to action (if appropriate)?
Visual Aids
Are your slides simple?
Have you used consistent fonts and colors for all slides?
Do the colors, fonts and images match the overall tone of your presentation?
Have you used images appropriately?
63Presentation Skills Workbook | Mind Tools
Presentation Planning Checklist
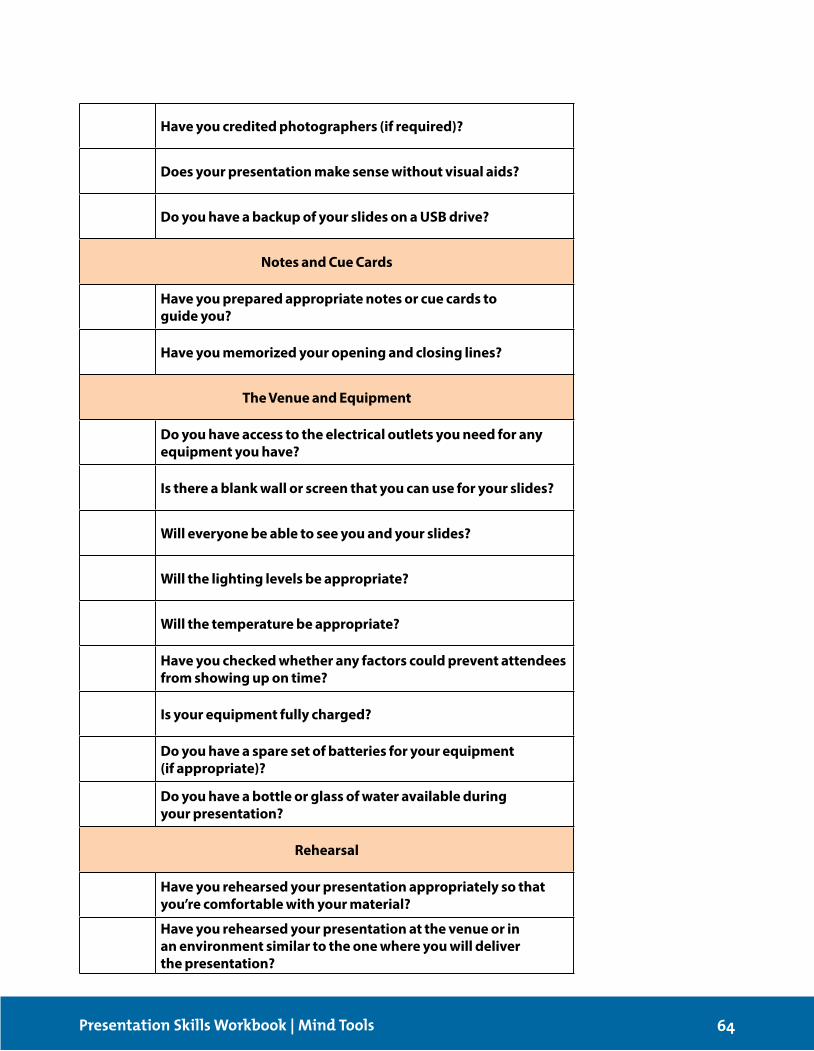
Have you credited photographers (if required)?
Does your presentation make sense without visual aids?
Do you have a backup of your slides on a USB drive?
Notes and Cue Cards
Have you prepared appropriate notes or cue cards to guide you?
Have you memorized your opening and closing lines?
The Venue and Equipment
Do you have access to the electrical outlets you need for any equipment you have?
Is there a blank wall or screen that you can use for your slides?
Will everyone be able to see you and your slides?
Will the lighting levels be appropriate?
Will the temperature be appropriate?
Have you checked whether any factors could prevent attendees from showing up on time?
Is your equipment fully charged?
Do you have a spare set of batteries for your equipment (if appropriate)?
Do you have a bottle or glass of water available during your presentation?
Rehearsal
Have you rehearsed your presentation appropriately so that you’re comfortable with your material?
Have you rehearsed your presentation at the venue or in an environment similar to the one where you will deliver the presentation?
64Presentation Skills Workbook | Mind Tools

Does your presentation fit within the allotted time frame?
Have you left enough time for audience questions (if applicable)?
Making a Good Impression
Are your clothes and accessories appropriate for your audience and situation?
Are your hairstyle, makeup and nails appropriate?
65Presentation Skills Workbook | Mind Tools
Can I cook a proper cup of coffee in a copper coffee pot?
Xylophones exist, or so existentialists insist.
Six shimmering sharks swam sharply striking shins.
Wild west winter winds waned while we waited wistfully wanting warmth.
Around the rugged rocks the ragged rascal ran.
Some shun sunshine. Do you shun sunshine? Six stick shifts stuck shut.
Three thick thistle sticks. The 33 thieves thought that they thrilled the throne throughout Thursday.
Negative Thought Positive Affirmation
1.
2.
3.
4.
5.
66Presentation Skills Workbook | Mind Tools
Enunciation Exercises (see Section 4.1)Use the common tongue-twisters below to practice speaking slowly and clearly.
Say each line five times, and do not focus on speed. Instead, focus on speaking each word properly.
It can be useful to practice in front of a mirror. Make sure that, as you speak, your lips, tongue and jaw all move. You can exaggerate these movements when you practice.
Affirmations (see Section 4.5)
Exercises Reminder Sheet
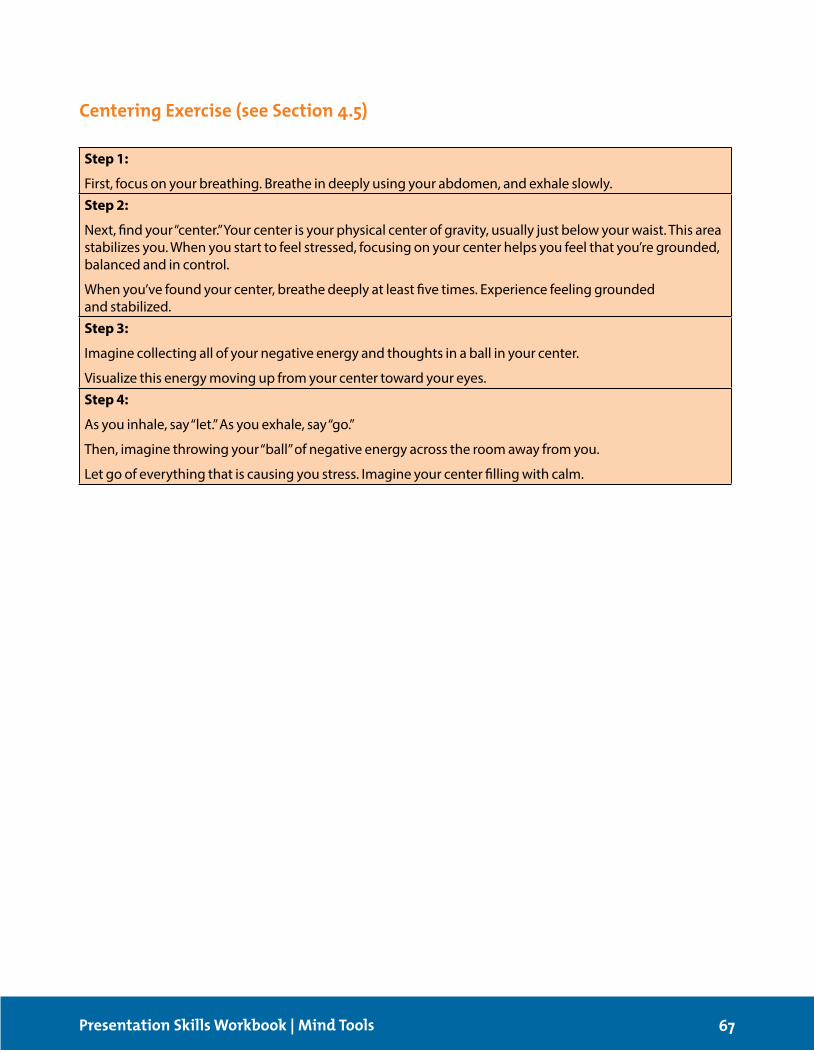
Step 1:
First, focus on your breathing. Breathe in deeply using your abdomen, and exhale slowly. Step 2:
Next, find your “center.” Your center is your physical center of gravity, usually just below your waist. This area stabilizes you. When you start to feel stressed, focusing on your center helps you feel that you’re grounded, balanced and in control.
When you’ve found your center, breathe deeply at least five times. Experience feeling grounded and stabilized. Step 3:
Imagine collecting all of your negative energy and thoughts in a ball in your center.
Visualize this energy moving up from your center toward your eyes. Step 4:
As you inhale, say “let.” As you exhale, say “go.”
Then, imagine throwing your “ball” of negative energy across the room away from you.
Let go of everything that is causing you stress. Imagine your center filling with calm.
67Presentation Skills Workbook | Mind Tools
Centering Exercise (see Section 4.5)
68Presentation Skills Workbook | Mind Tools
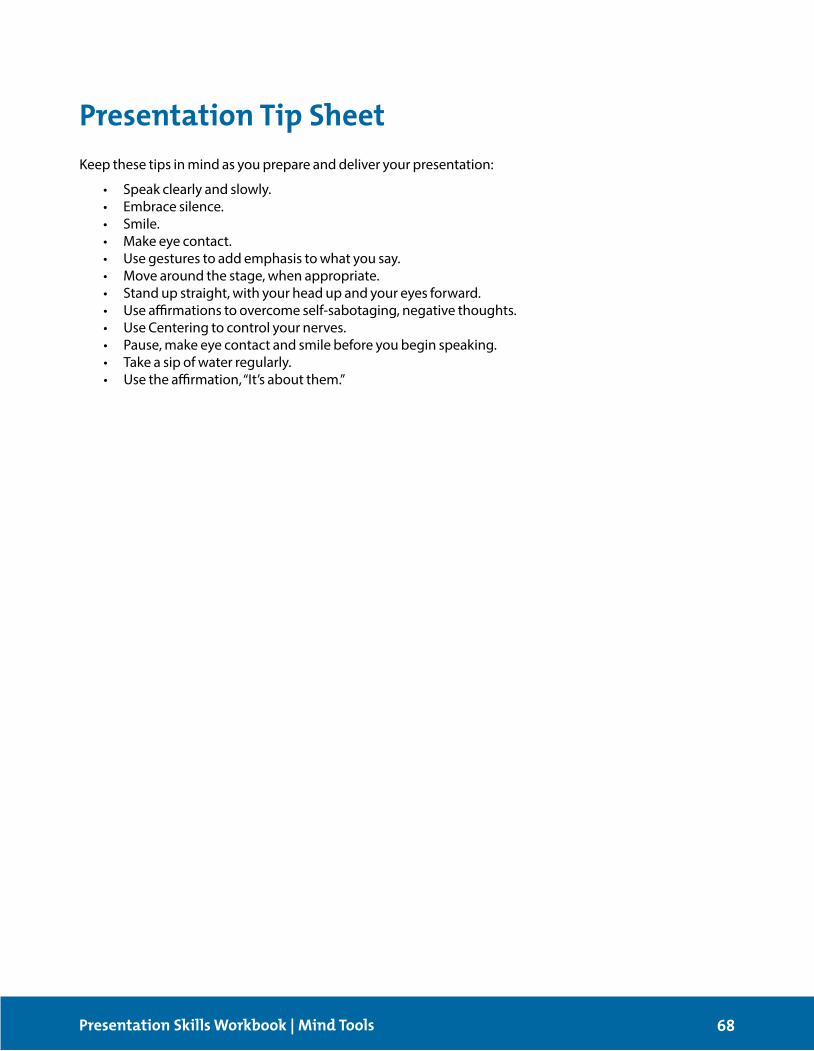
Keep these tips in mind as you prepare and deliver your presentation:
• Speakclearlyandslowly. • Embracesilence. • Smile. • Makeeyecontact. • Usegesturestoaddemphasistowhatyousay. • Movearoundthestage,whenappropriate. • Standupstraight,withyourheadupandyoureyesforward. • Useaffirmationstoovercomeself-sabotaging,negativethoughts. • UseCenteringtocontrolyournerves. • Pause,makeeyecontactandsmilebeforeyoubeginspeaking. • Takeasipofwaterregularly. • Usetheaffirmation,“It’saboutthem.”
Presentation Tip Sheet
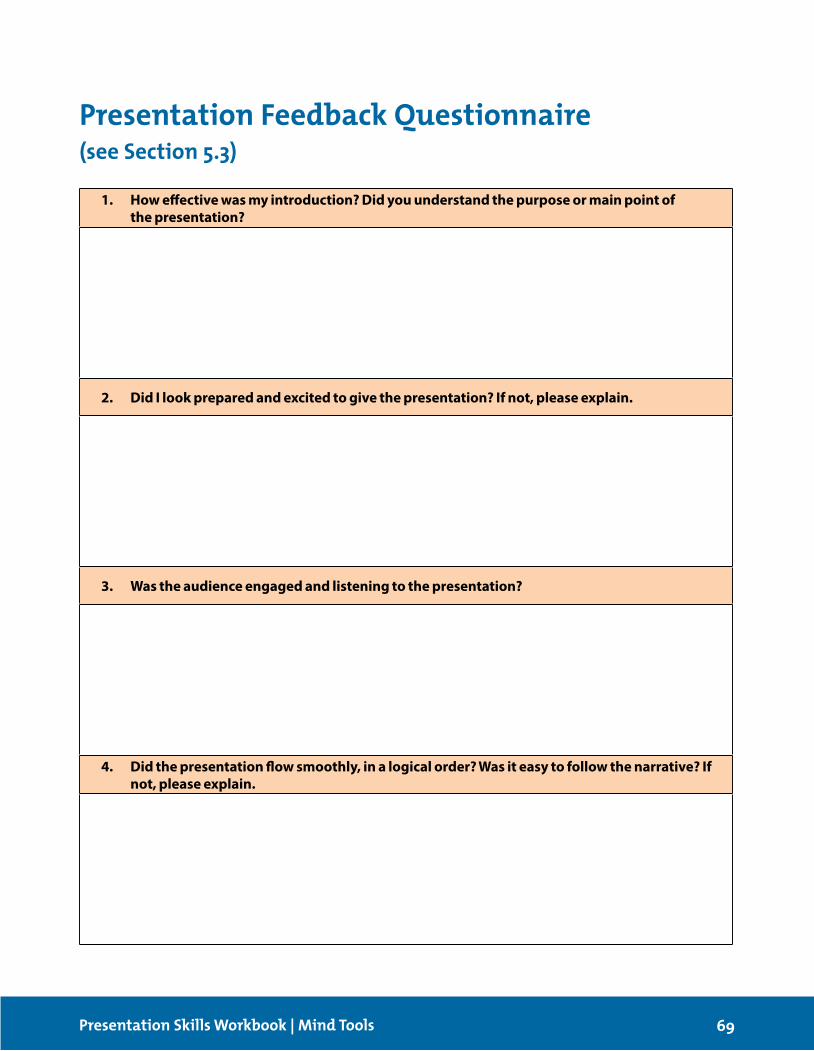
1. How effective was my introduction? Did you understand the purpose or main point of the presentation?
2. Did I look prepared and excited to give the presentation? If not, please explain.
3. Was the audience engaged and listening to the presentation?
4. Did the presentation flow smoothly, in a logical order? Was it easy to follow the narrative? If not, please explain.
69Presentation Skills Workbook | Mind Tools
Presentation Feedback Questionnaire(see Section 5.3)

5. Did I use my visuals effectively? Were they clear and easy to understand? How could I have made these visuals more effective? Please explain.
6. What did you like about this presentation? What didn’t you like?
7. How could I improve my performance for next time? If the performance was good, how could I make it great?
70Presentation Skills Workbook | Mind Tools