Embed Size (px)
Citation preview
Portrait DrawingsUnit Goal: Complete a realistic self-
portrait drawing
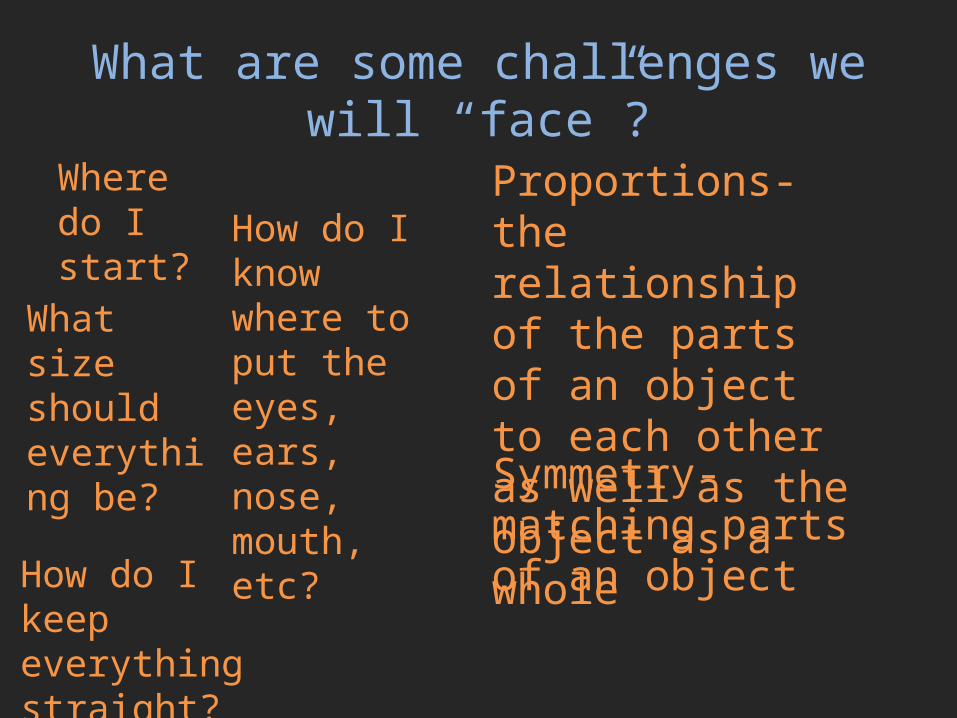
What are some challenges we will “face”?
How do I know where to put the eyes, ears, nose, mouth, etc?
What size should everything be?
Where do I start?
How do I keep everything straight?
Proportions- the relationship of the parts of an object to each other as well as the object as a whole
Symmetry- matching parts of an object
Proportions of the Face
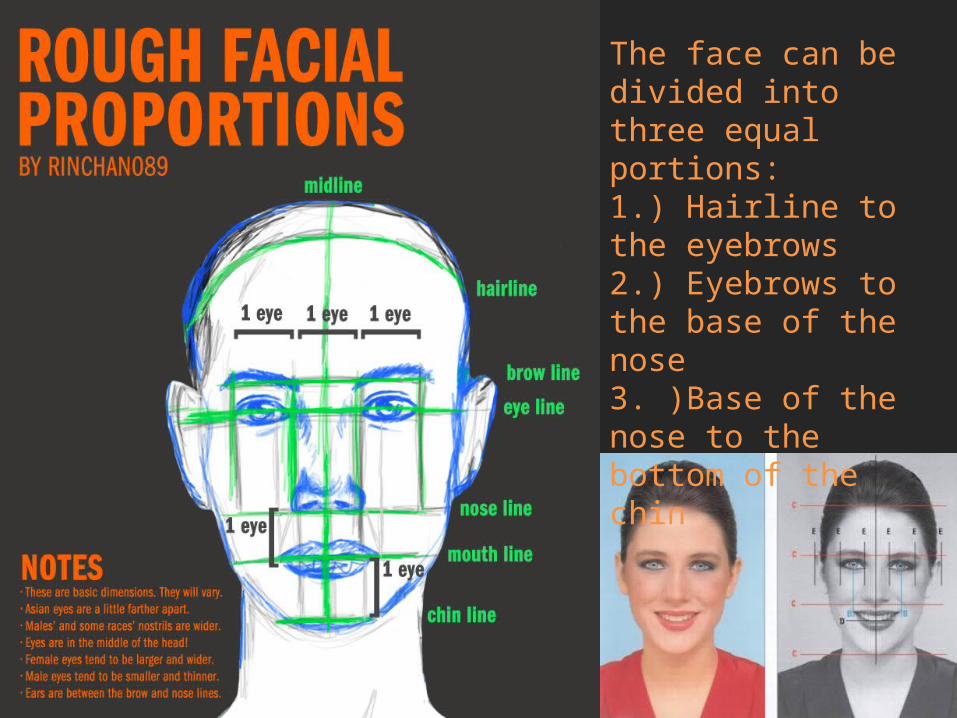
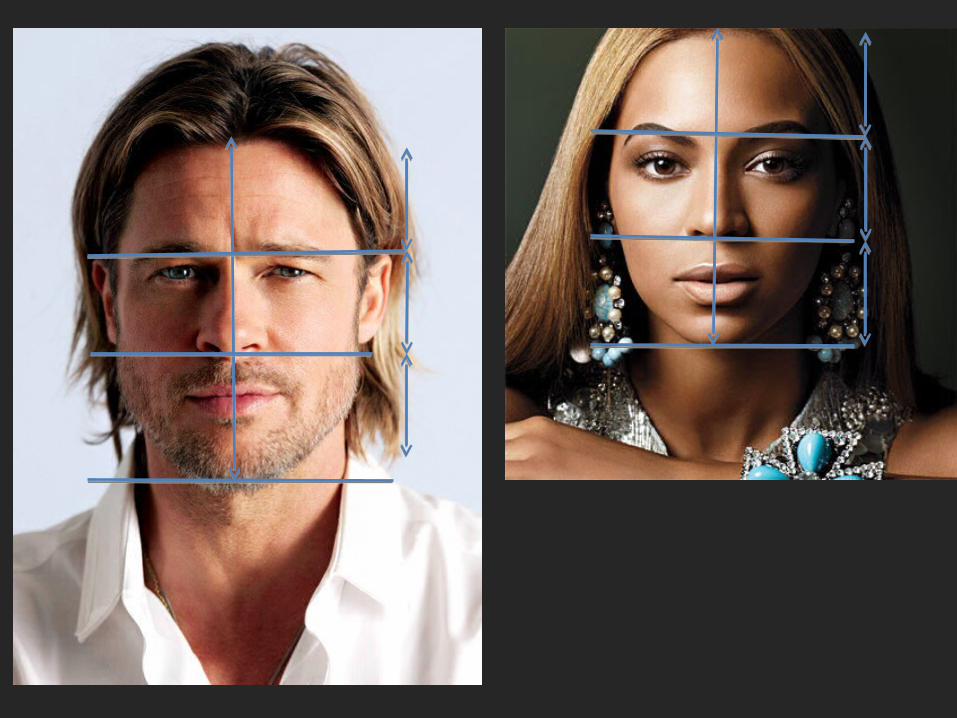
The face can be divided into three equal portions: 1.) Hairline to the eyebrows2.) Eyebrows to the base of the nose3. )Base of the nose to the bottom of the chin
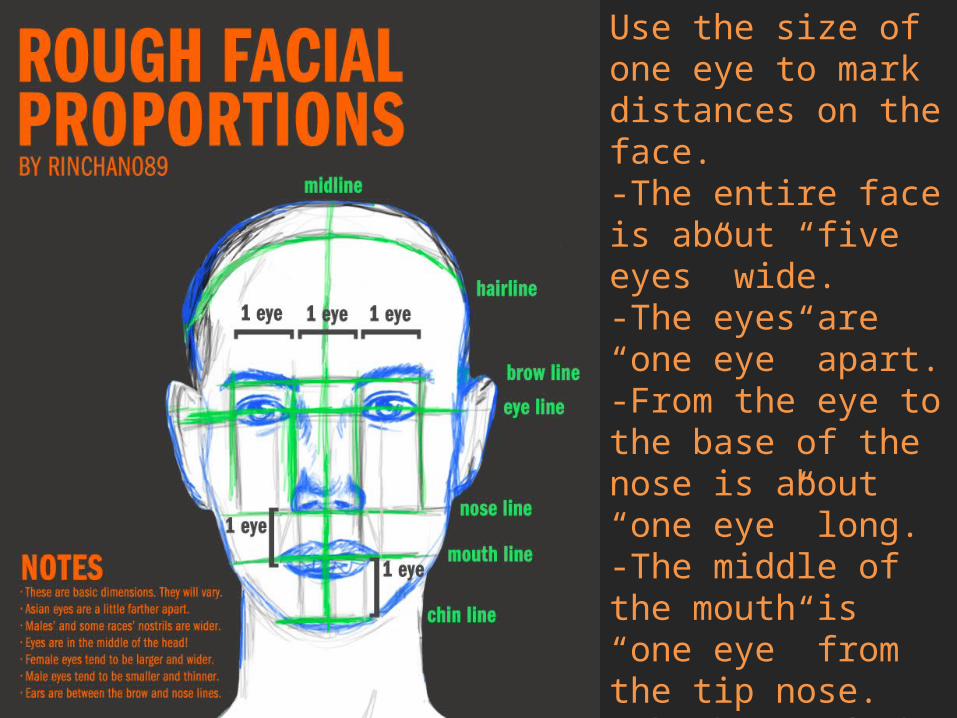
Use the size of one eye to mark distances on the face.-The entire face is about “five eyes” wide.-The eyes are “one eye” apart.-From the eye to the base of the nose is about “one eye” long.-The middle of the mouth is “one eye” from the tip nose.-The base of the chin is “one eye” under the mouth.
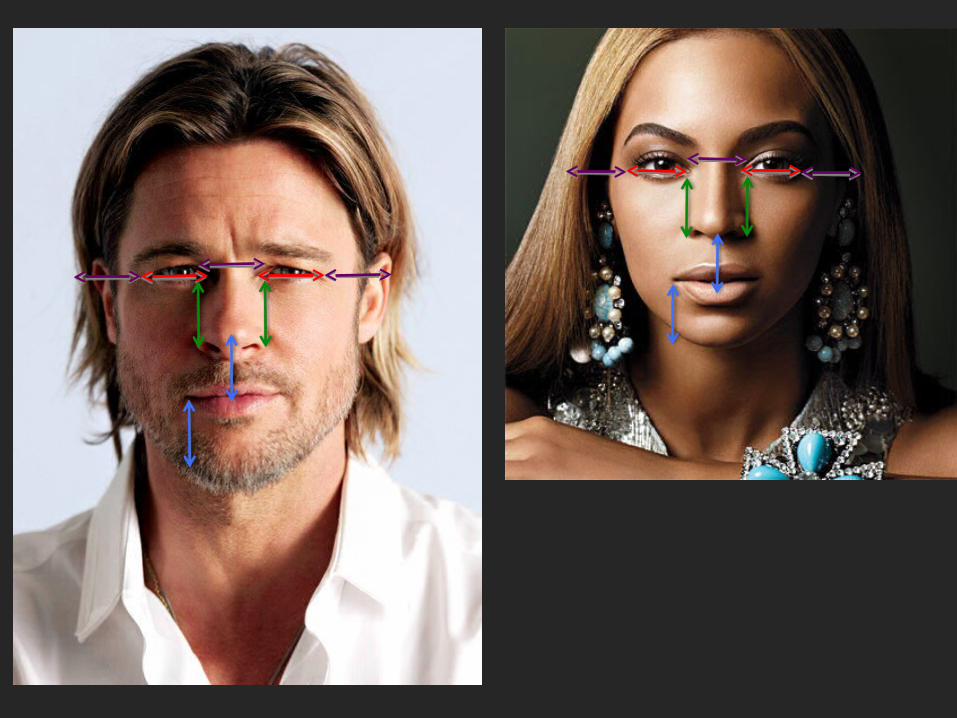
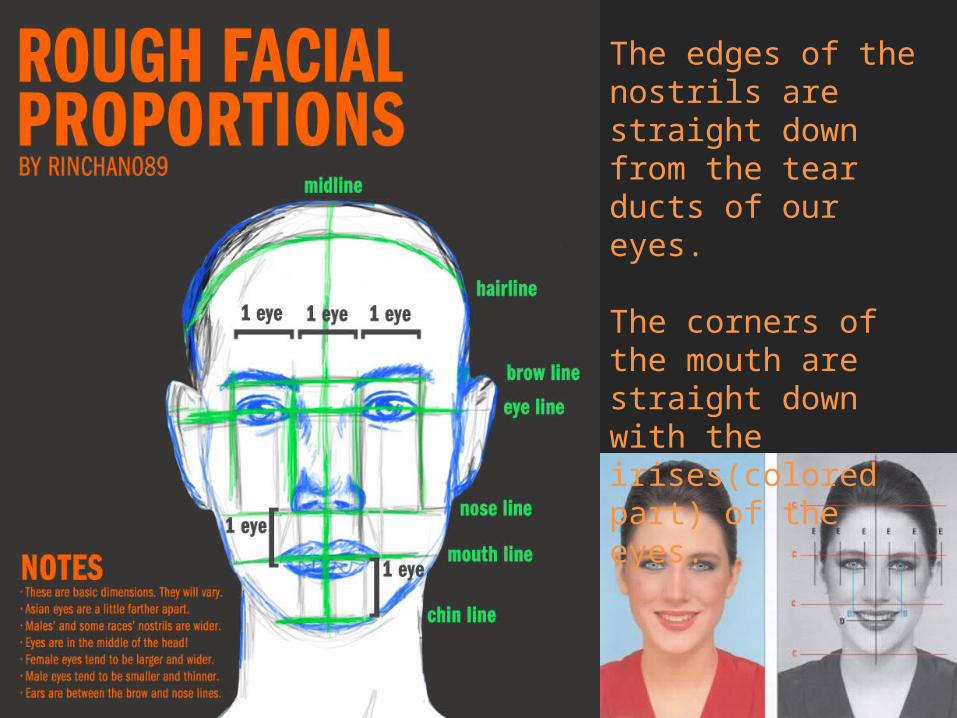
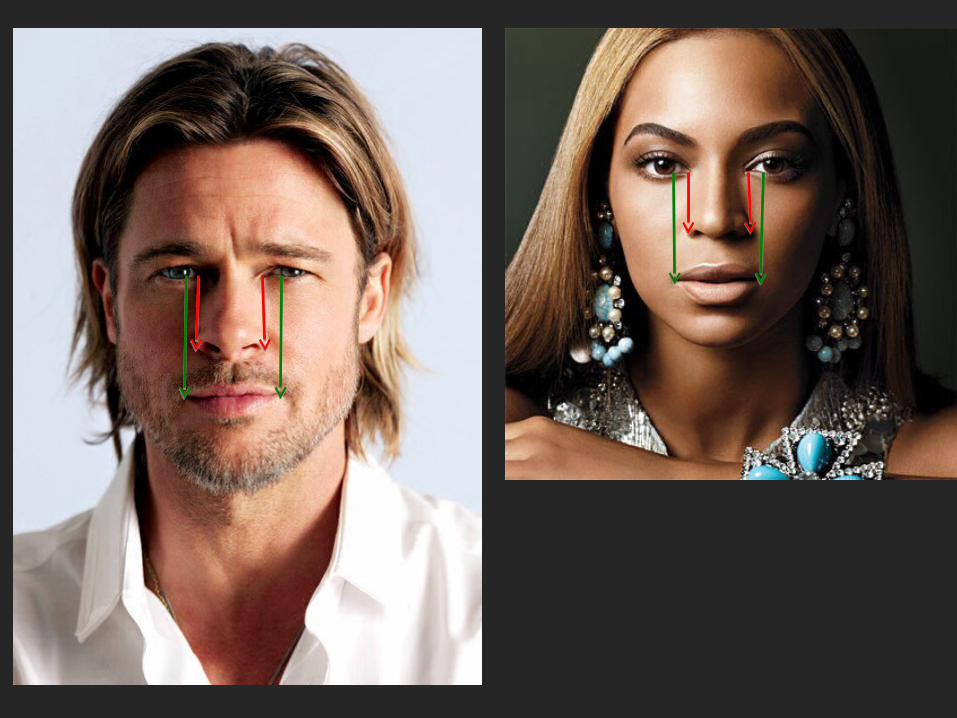
The edges of the nostrils are straight down from the tear ducts of our eyes.
The corners of the mouth are straight down with the irises(colored part) of the eyes.
Features of the Face
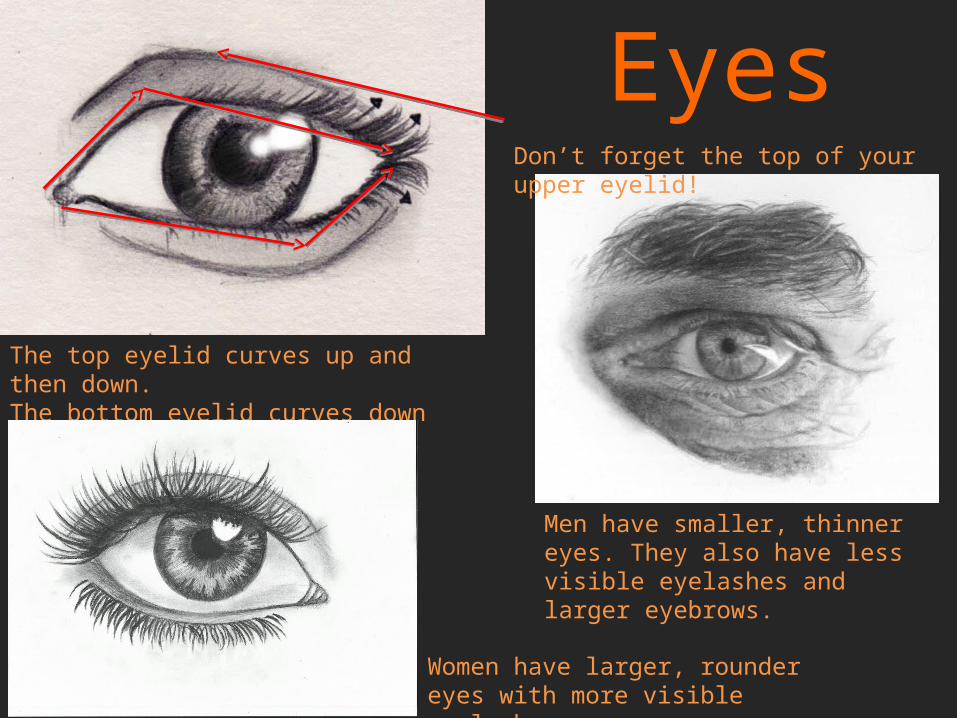
The top eyelid curves up and then down.The bottom eyelid curves down and then up.
Men have smaller, thinner eyes. They also have less visible eyelashes and larger eyebrows.
Women have larger, rounder eyes with more visible eyelashes.
Don’t forget the top of your upper eyelid!
Eyes
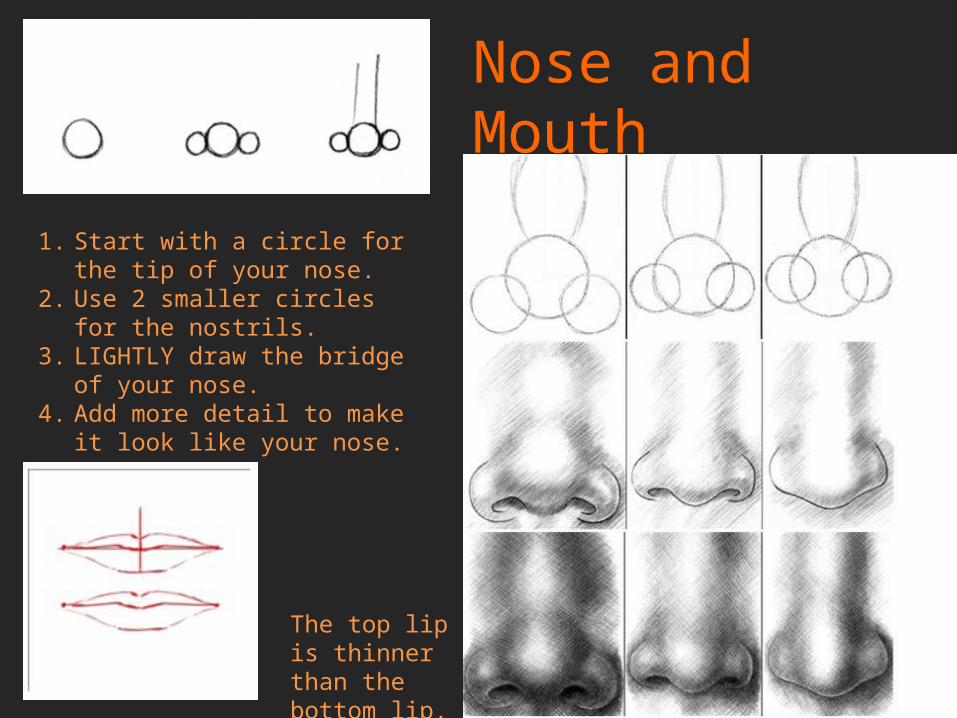
1. Start with a circle for the tip of your nose.
2. Use 2 smaller circles for the nostrils.
3. LIGHTLY draw the bridge of your nose.
4. Add more detail to make it look like your nose.
The top lip is thinner than the bottom lip.
Nose and Mouth

How to Draw the Human Face
You need: 1.) a ruler, 2.) a sheet of computer paper, and 3.) a photo of the person you would like to draw
It is important to sketch very lightly today. You will want to be able to erase.
Remember, this is a PRACTICE drawing. Do not be afraid to make mistakes and corrections.
You will get a test grade for the drawing.

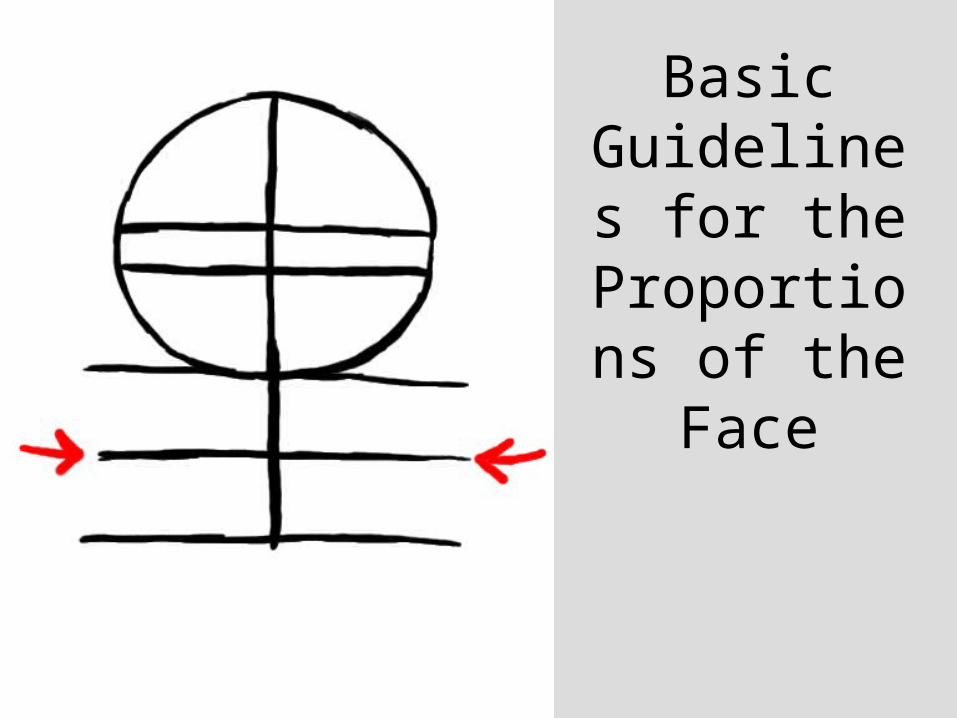
Basic Guidelines
for the Proportions of the Face
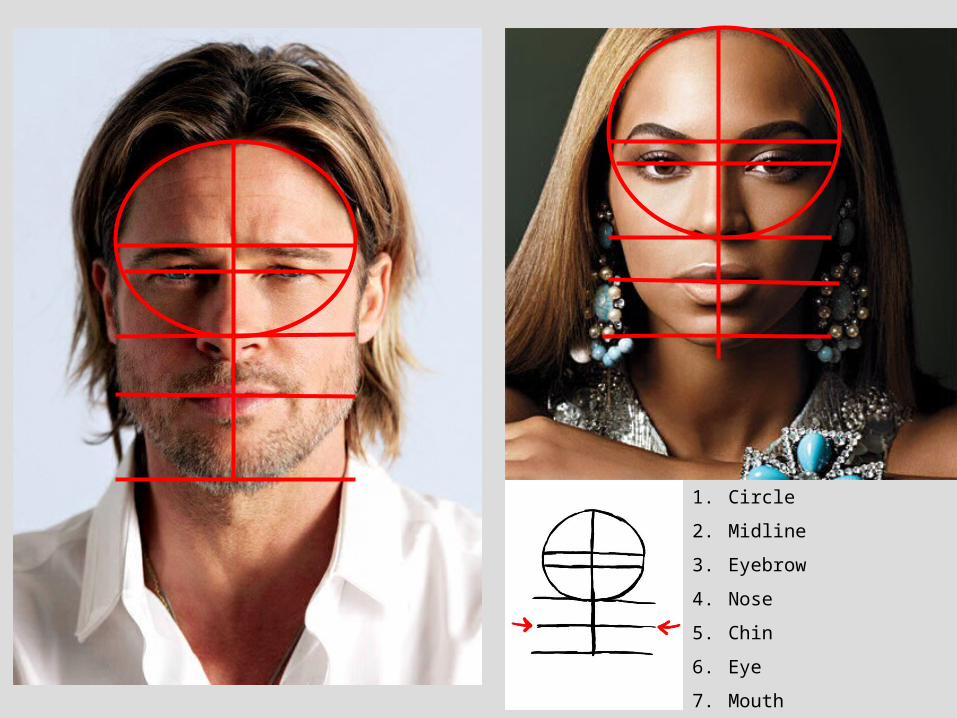
1. Circle
2. Midline
3. Eyebrow
4. Nose
5. Chin
6. Eye
7. Mouth
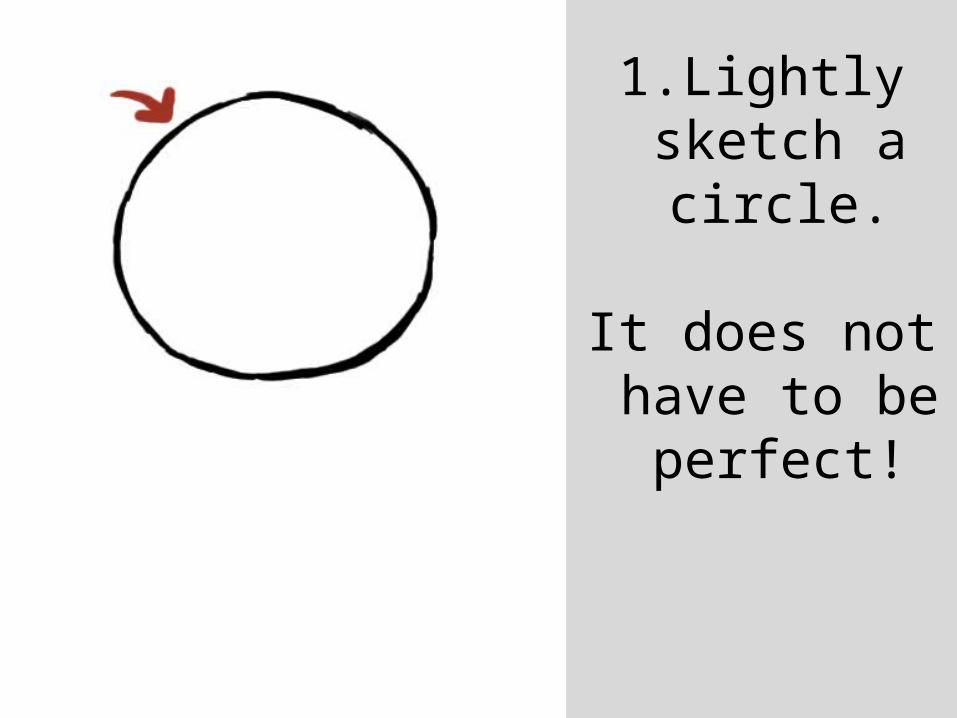
1.Lightly sketch a circle.
It does not have to be perfect!
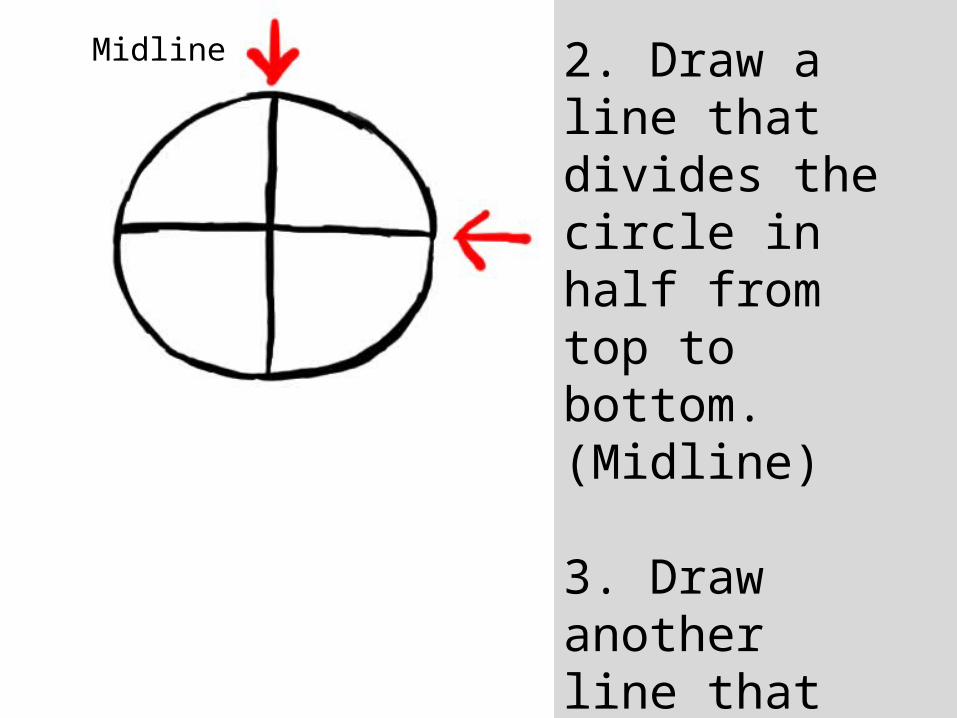
2. Draw a line that divides the circle in half from top to bottom. (Midline)
3. Draw another line that divides the circle in half from right to left.(Eyebrow line)
Midline
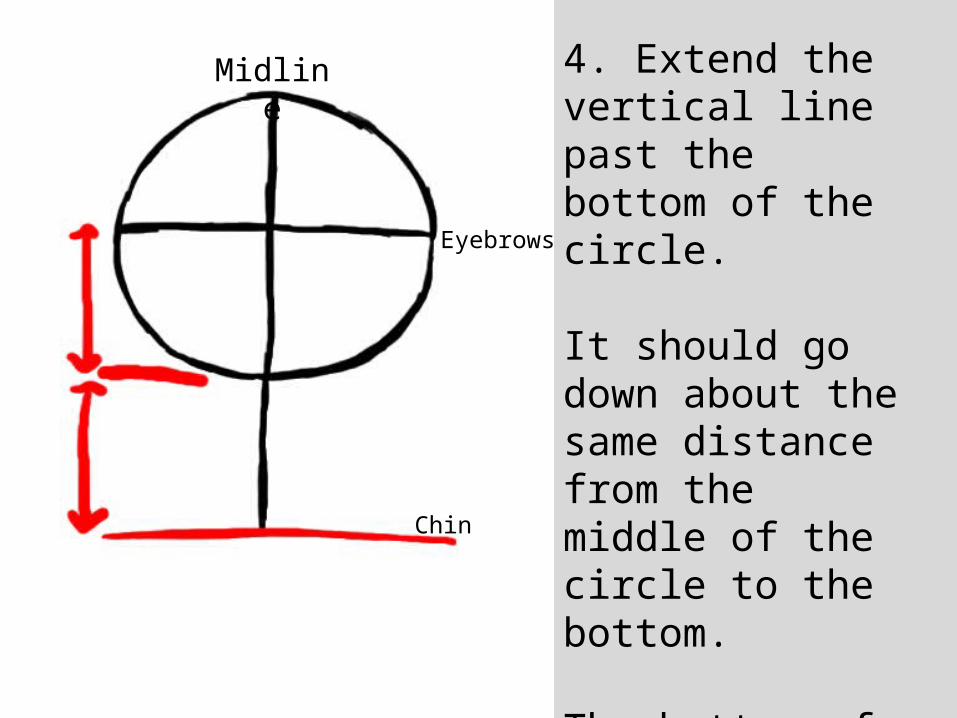
4. Extend the vertical line past the bottom of the circle.
It should go down about the same distance from the middle of the circle to the bottom.
The bottom of the line is where the chin will be.
Midline
Eyebrows
Chin

Chin
Nose
Eyebrows
5. Draw a line just below the eyebrow line.
This is where the eyes will be. (Eyeline)
Midline
Chin
Nose
Eyebrows
Eyes
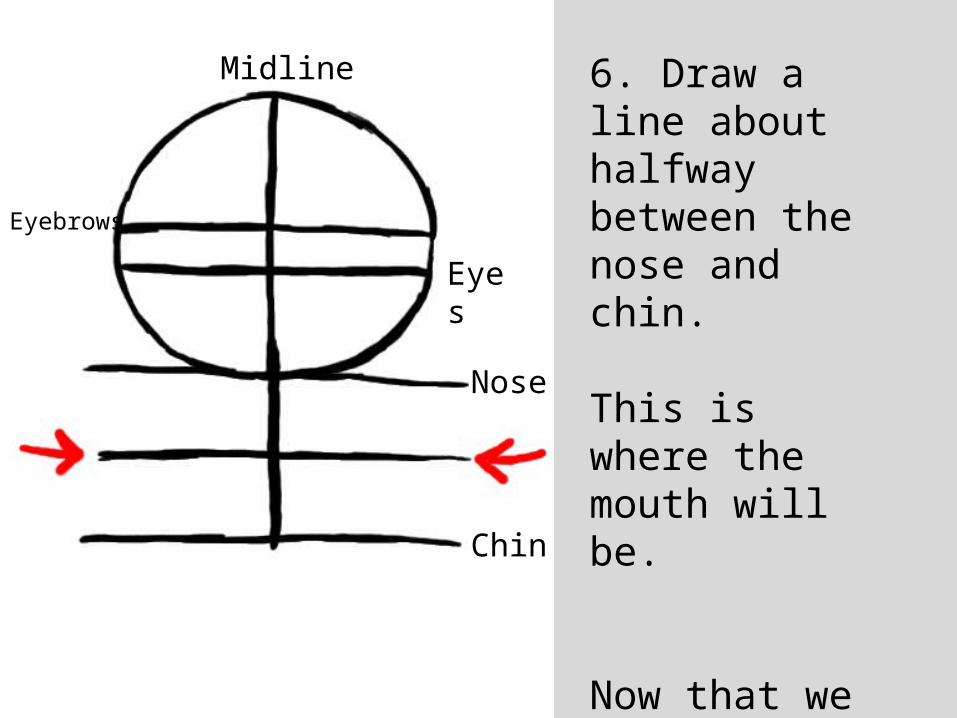
6. Draw a line about halfway between the nose and chin.
This is where the mouth will be.
Now that we have everything laid out, it’s time to start adding the features!
Midline
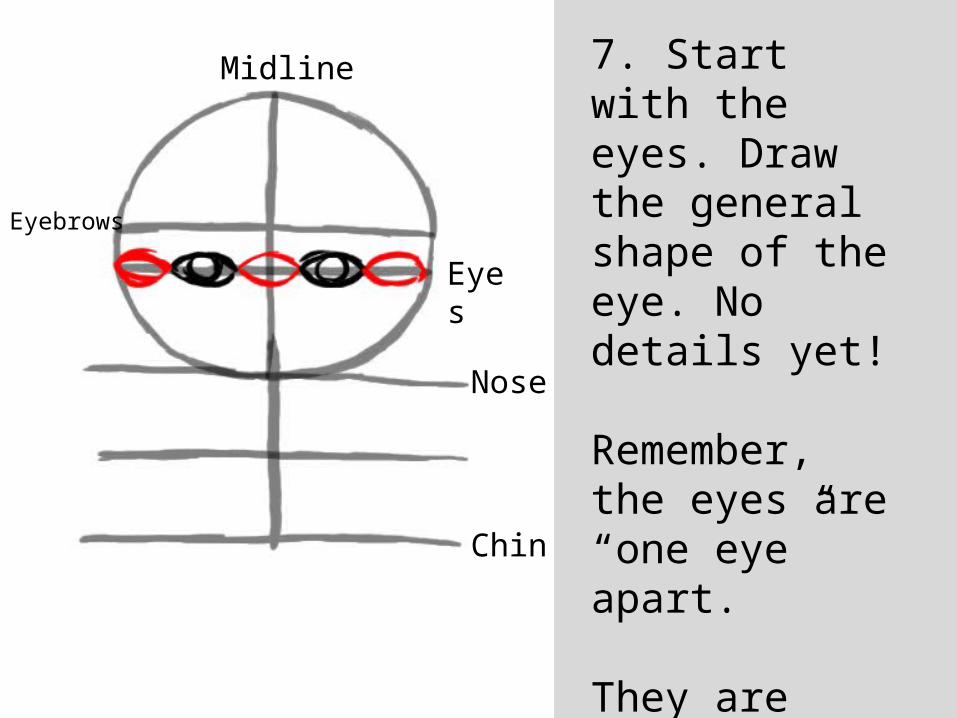
7. Start with the eyes. Draw the general shape of the eye. No details yet!
Remember, the eyes are “one eye” apart.
They are also “one eye” from the side of the circle.
Chin
Nose
Eyebrows
Eyes
Midline
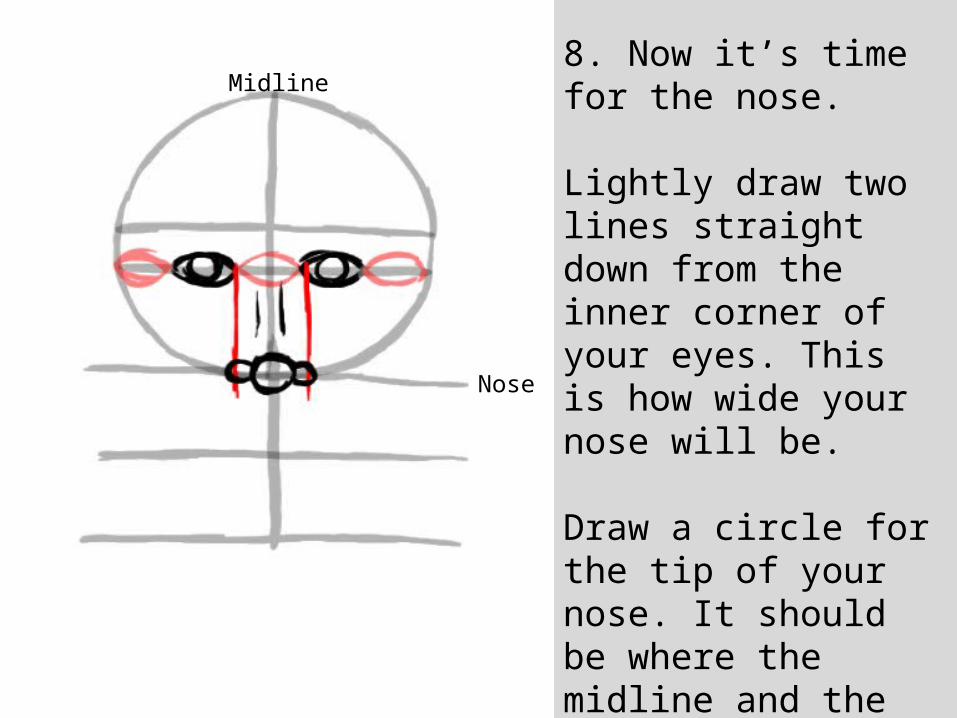
8. Now it’s time for the nose.
Lightly draw two lines straight down from the inner corner of your eyes. This is how wide your nose will be.
Draw a circle for the tip of your nose. It should be where the midline and the nose line cross.
Draw two smaller circles for the nostrils.
Midline
Nose
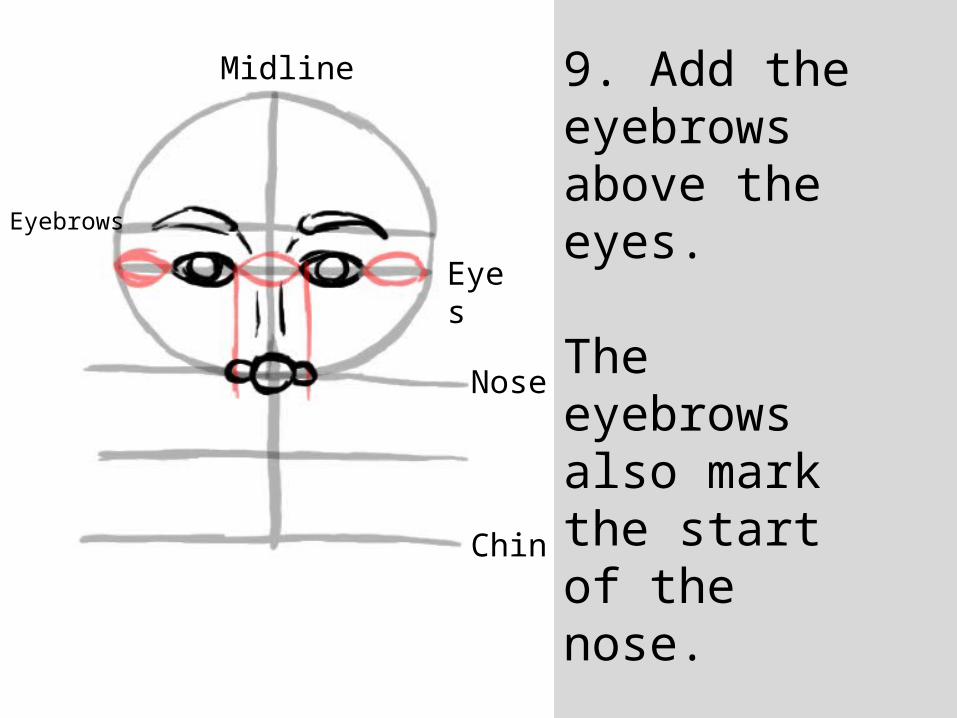
9. Add the eyebrows above the eyes.
The eyebrows also mark the start of the nose.
Chin
Nose
Eyebrows
Eyes
Midline
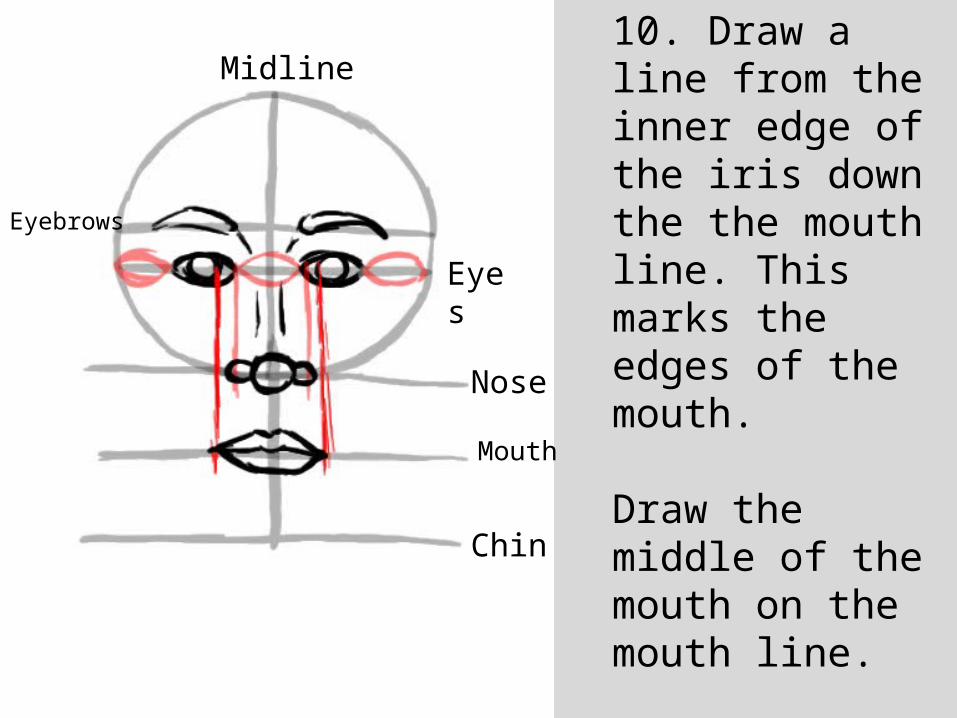
10. Draw a line from the inner edge of the iris down the the mouth line. This marks the edges of the mouth.
Draw the middle of the mouth on the mouth line.
Remember, the upper lip is thinner than the lower lip.
Mouth
Chin
Nose
Eyebrows
Eyes
Midline
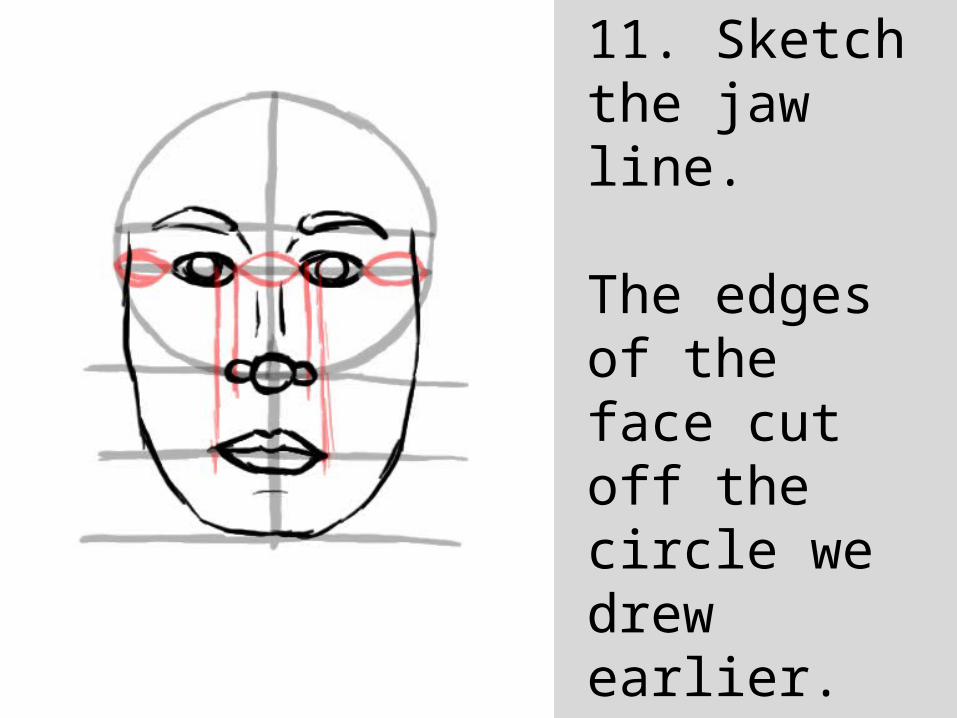
11. Sketch the jaw line.
The edges of the face cut off the circle we drew earlier.
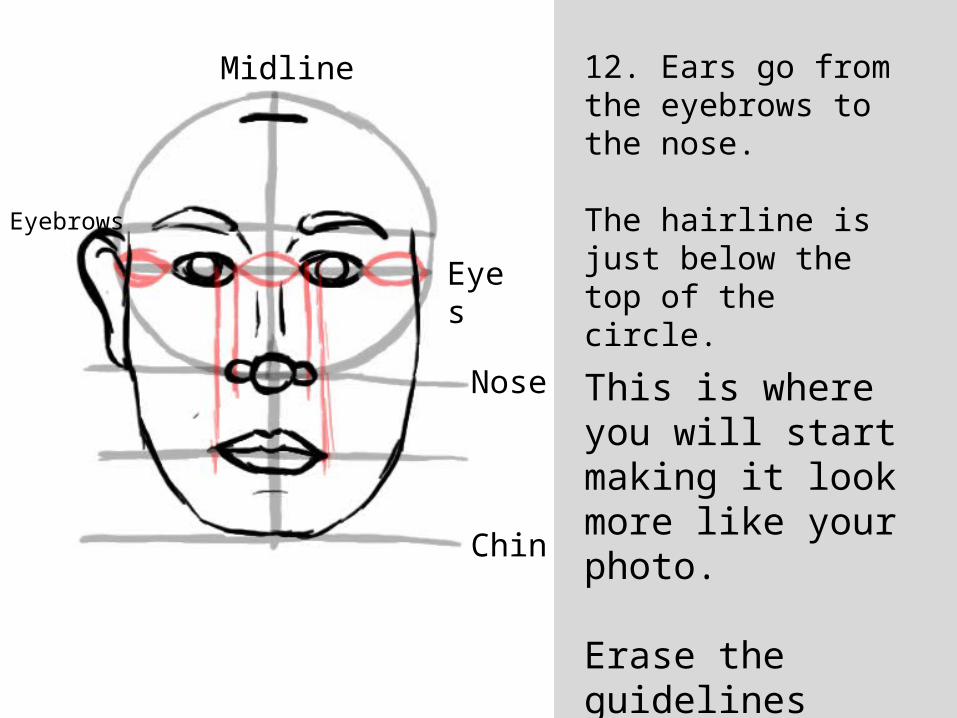
12. Ears go from the eyebrows to the nose.
The hairline is just below the top of the circle.
This is where you will start making it look more like your photo.
Erase the guidelines when you do not need them anymore.
Chin
Nose
Eyebrows
Eyes
Midline

1. Circle
2. Midline
3. Eyebrow
4. Nose
5. Chin
6. Eye
7. Mouth
Basic Guidelines
for the Proportions of the Face

Chin
Nose
Eyebrows
Eyes
Midline Basic Guidelines for the Proportions of the Face