Embed Size (px)
Citation preview

ADMINISTRATOR GUIDE 1.0 | December 2019 | 3725-49792-001
Poly CCX Business Media Phones with Microsoft
Getting HelpFor more information about installing, configuring, andadministering Poly/Polycom products or services, go toPolycom Support.
Plantronics, Inc. (Poly — formerly Plantronics and Polycom)345 Encinal StreetSanta Cruz, California95060
© 2019 Plantronics, Inc. All rights reserved. Poly, the propellerdesign, and the Poly logo are trademarks of Plantronics, Inc.All other trademarks are the property of their respectiveowners.

Contents
Before You Begin................................................................................................7Audience, Purpose, and Required Skills.............................................................................7Related Poly and Partner Resources..................................................................................7Phone Profiles.....................................................................................................................7
Getting Started................................................................................................... 8Poly CCX Phones Overview............................................................................................... 8CCX Phone Hardware Overview.........................................................................................8
LED Indicators on CCX Series Phones....................................................................8Poly CCX Phones Base Profiles......................................................................................... 9Switching the Base Profiles ................................................................................................9
Set Skype for Business as Base Profile from Microsoft Teams..............................10Set Microsoft Teams as Base Profile from Skype for Business..............................10
Network Configuration.....................................................................................11Configuring Bluetooth........................................................................................................11
Bluetooth Parameters.............................................................................................11Supported Bluetooth Profiles..................................................................................12
Extended Link Layer Discovery Protocol (LLDP).............................................................. 12Configuring LLDP Fast Start Count........................................................................13
Web Proxy Auto Discovery (WPAD)..................................................................................13View WPAD Diagnostic Information....................................................................... 14WPAD Configuration Parameters...........................................................................14
Data Center Resiliency..................................................................................................... 15TURN / ICE Parameters....................................................................................................16
Deploying CCX Phones with Microsoft Teams..............................................19
Microsoft Teams Device Settings ......................................................... 20Network Configuration Options.............................................................................. 20
Manually Set DHCP Settings.......................................................................20Configure VLAN from the Phone................................................................. 20Set 802.1x Authentication for the Phone..................................................... 21Set the PC Port for the Phone..................................................................... 21Set LAN Port Settings..................................................................................22
Change the Default Administrator Password......................................................... 22
1

Microsoft Teams Device and Software Support................................... 23Enable or Disable the System Web Interface.........................................................23Reset Custom Configurations................................................................................ 23Reset the Device to Factory Defaults in Microsoft Teams......................................24Updating Microsoft Teams......................................................................................24
Deploying CCX Phones with Skype for Business.........................................25
Deploying Poly Phones with Skype for Business................................26Configure the Network............................................................................................26
Supported DHCP Sub-Options....................................................................27Set Up Poly UC Software....................................................................................... 28Provisioning Skype for Business Phones...............................................................28
Centralized Provisioning..............................................................................29Manual Provisioning Methods..................................................................... 31
Configuring In-Band Provisioning Settings.............................................................32
Sign In Methods.......................................................................................33Configuring a Skype for Business Sign In Method and Credentials.......................33
Example Sign In Configurations.................................................................. 34PIN Authentication..................................................................................................35
PIN Authentication Parameters................................................................... 35Web Sign In for Skype for Business.......................................................................36
Web Sign In for Skype for Business Parameters.........................................36Sign In Remotely using Web Sign-In for Skype for Business......................37
Modern Authentication Supported Topologies........................................................37Sign In with Better Together over Ethernet (BToE).................................................37Web Sign In for CAP with Skype for Business Online............................................38Disabling the Sign-In and Sign-Out Soft Keys........................................................38
Microsoft Exchange Integration.............................................................39Skype for Business.................................................................................................39Integrating with Microsoft Exchange...................................................................... 39
Provision the Microsoft Exchange Calendar................................................40Enable Microsoft Exchange Calendar Using the Web Configuration
Utility.......................................................................................................40Verify the Microsoft Exchange Integration................................................... 40
Configuring the Microsoft Exchange Server...........................................................41Visual Voicemail...........................................................................................41
Contents
2
Calendar Month View.................................................................................. 41Synchronizing Call Logs.............................................................................. 41Address Book Service (ABS) Adaptive Search........................................... 42Microsoft Exchange Parameters................................................................. 42
Audio Features........................................................................................ 47Poly NoiseBlock..................................................................................................... 47
Poly NoiseBlock Parameters....................................................................... 47Supported Audio Codecs....................................................................................... 47
Supported Audio Codec Specifications....................................................... 48Audio Codec Parameters............................................................................ 49SILK Audio Codec Parameters....................................................................52
Music on Hold.........................................................................................................54Upload a Music File..................................................................................... 55Configuring Music on Hold.......................................................................... 55Music on Hold Error Messages................................................................... 56
Phone Display Features..........................................................................57Skype for Business User Interface on Poly Phones...............................................57Reverse Name Lookup...........................................................................................57
Reverse Name Lookup Parameter.............................................................. 58Time Zone Location Description.............................................................................58
Time Zone Location Parameters................................................................. 59Capture Your Phone’s Screen................................................................................ 63
Capture Your Device's Current Screen Parameters.................................... 64Time and Date Wizard............................................................................................64
Time and Date Wizard Parameters............................................................. 64Setting up the Phone Theme..................................................................................65
Theme Parameter........................................................................................65Phone Display Name..............................................................................................65
Display Name Parameters...........................................................................66Number or Custom Label....................................................................................... 67
Configure the Number or Label from the System........................................ 67Number and Label Parameters................................................................... 67
Direct Inward Dialing Number................................................................................ 68Direct Inward Dialing Number Parameters.................................................. 68
Port Usage............................................................................................... 69Configuring Better Together over Ethernet (BToE) Firewall Ports for Poly
Phones.............................................................................................................. 69Inbound and Outbound Ports for Poly Phones with Skype for Business................70
Contents
3

Inbound Ports for Poly Phones with Skype for Business.............................70Outbound Ports on Poly Phones with Skype for Business.......................... 70
Real-Time Transport Protocol (RTP) Port Parameters for Skype for Business......72Client Media Port Ranges for QoE......................................................................... 72
Configuring Security Options................................................................ 73802.1X Authentication............................................................................................ 73
802.1X Authentication Parameters..............................................................73IEEE 802.1p/Q....................................................................................................... 75
IEEE 802.1p/Q Parameters......................................................................... 75Accessing the Web Configuration Utility.................................................................76
Enable Access to the Web Configuration Utility From the Phone Menu..... 76Configuring the Web Configuration Utility....................................................76
Securing Audio Using Master Key Identifier (MKI)................................................. 77Administrator and User Passwords........................................................................ 78
Change the Default Administrator Password on the Phone........................ 78Change the Default Passwords in the Web Configuration Utility.................79Administrator and User Password Parameters........................................... 79
Device Lock for Skype for Business.......................................................................80Profile Photo on Device Lock Screen.......................................................... 80Adding Authorized Emergency Contacts on a Locked Device.................... 80Device Lock for Skype for Business Parameters........................................ 81
Configuring Privacy Settings.................................................................................. 82Privacy Configuration Parameter.................................................................82
Lock Phone Ports and Interface............................................................................. 82Phone Port Lock and Interface Parameters................................................ 82
Smart Login on Poly Phones..................................................................................83SCEP Security Protocol......................................................................................... 83
SCEP Parameters....................................................................................... 83
Certificates...............................................................................................86Install a Certificate Using Configuration Files.........................................................86Manually Install a Certificate with the Web Configuration Utility............................ 88Online Certificate Status Protocol.......................................................................... 89
Online Certificate Status Protocol Parameter..............................................89
Directories and Contacts........................................................................90Unified Contact Store............................................................................................. 90Configuring Contacts..............................................................................................90Call Lists.................................................................................................................91
Call List Parameters.................................................................................... 91
Contents
4

Local Contact Directory Parameters...................................................................... 92Outlook Contact Photo Integration......................................................................... 94
Outlook Contact Photo Parameters.............................................................94
Call Controls............................................................................................ 95Call Forwarding with Skype for Business............................................................... 95Enhanced Feature Line Key (EFLK)...................................................................... 96
EFLK Limitations......................................................................................... 96Configuring EFLK........................................................................................ 97
Busy Options to Manage Incoming Calls............................................................... 97Centralized Conference Control Protocol (CCCP)................................................. 97
Centralized Conference Control Protocol (CCCP) Parameters...................97Dial Plans............................................................................................................... 98
Dial Plan Normalization............................................................................... 98Multiple Emergency Number Dial Plan........................................................98Dial Plan, Dial Plan Normalization, and Digit Map Parameters................... 98Supported Dial Plans.................................................................................100
PSTN Gateway on Failover..................................................................................101PSTN Gateway Failover Parameters........................................................ 101
Presence Status................................................................................................... 102Presence Status Parameters.....................................................................102
Local Call Recording............................................................................................ 102Local Call Recording Parameter................................................................103
Local Digit Map.....................................................................................................103Local Digit Maps Parameters.................................................................... 103
International Dialing Prefix................................................................................... 108International Dialing Prefix Parameters..................................................... 108
Enhanced 911 (E.911)..........................................................................................109Enhanced 911 (E.911) Parameters............................................................109
Configuring Boss-Admin.......................................................................................109Maximum Number of Boss Lines...............................................................110Viewing Delegates on Boss's Phone......................................................... 110Safe Transfer for Boss-Admin....................................................................110Boss-Admin Parameters............................................................................ 111
Using CCX Phones as Shared Devices............................................... 112Skype for Business User Profiles......................................................................... 112
Create a User Profile Configuration File.................................................... 112Hot Desking.......................................................................................................... 114
Hot Desking Parameters............................................................................115Common Area Phone (CAP)................................................................................ 115
Contents
5

Disable CAP Admin Mode......................................................................... 117CAP Web Sign In.......................................................................................117Sign In to a CAP-Enabled..........................................................................117Common Area Phone Parameters.............................................................117
Skype for Business Device and Software Support............................ 119Microsoft Quality of Experience Monitoring Server Protocol (MS-QoE)............... 119
Set QoE Parameters on the Skype for Business Server........................... 119Enable In-Call QoE within your Skype Environment................................. 120Query QoE Status from the Web Configuration Utility...............................120QoE Parameters........................................................................................121Supported Skype for Business QoE Elements.......................................... 122
Manually Pairing with BToE..................................................................................125BToE Widget..............................................................................................125Enable or Disable BToE PC Pairing from the Phone.................................126Enable or Disable BToE PC Pairing from the Web Configuration Utility....126TLS Feature Support for BToE.................................................................. 126
Rebooting the Poly Phone at a Scheduled Time..................................................126Scheduled Reboot Parameters................................................................. 127
Updating Poly UC Software..................................................................................127Update UC Software Manually.................................................................. 127Automatic UC Software Updates...............................................................128Configuring Automatic Software Updates..................................................128
Data Center Resiliency.........................................................................................130
Troubleshooting............................................................................................. 132
General Troubleshooting Tasks...........................................................133Factory Reset Your Phone (Hard Reboot)............................................................133
Troubleshooting Microsoft Teams.......................................................134System Logs.........................................................................................................134
Set the Logging Level for a Phone............................................................ 134Set Log Levels from the Web Configuration Utility.................................... 134
Capture Your Phone’s Screen.............................................................................. 135
Troubleshooting Skype for Business..................................................136System Logs.........................................................................................................136
Upload Logs to the Skype for Business Server......................................... 136Logging Levels.......................................................................................... 137
Contents
6

Before You BeginTopics:
• Audience, Purpose, and Required Skills
▪ Related Poly and Partner Resources
▪ Phone Profiles
This guide provides general guidance on deploying Poly CCX 500 business media phones in MicrosoftTeams and Microsoft Skype for Business environments. This guide also provides instructions onconfiguring supported features.
Audience, Purpose, and Required SkillsThis guide is written for a technical audience.
You must be familiar with the following concepts before beginning:
• Current telecommunications practices, protocols, and principles• Telecommunication basics, video teleconferencing, and voice or data equipment
Related Poly and Partner ResourcesSee the following sites for information related to this product.
▪ The Polycom Support Site is the entry point to online product, service, and solution supportinformation including Licensing & Product Registration, Self-Service, Account Management,Product-Related Legal Notices, and Documents & Software downloads.
▪ The Polycom Document Library provides support documentation for active products, services, andsolutions. The documentation displays in responsive HTML5 format so that you can easily accessand view installation, configuration, or administration content from any online device.
▪ The Polycom Community provides access to the latest developer and support information. Createan account to access Poly support personnel and participate in developer and support forums. Youcan find the latest information on hardware, software, and partner solutions topics, share ideas, andsolve problems with your colleagues.
▪ The Polycom Partner Network are industry leaders who natively integrate the Poly standards-basedRealPresence Platform with their customers’ current UC infrastructures, making it easy for you tocommunicate face-to-face with the applications and devices you use every day.
▪ The Polycom Collaboration Services help your business succeed and get the most out of yourinvestment through the benefits of collaboration.
Phone ProfilesYou can run Microsoft Teams or Skype for Business on your CCX business media phone.
7

Getting StartedTopics:
▪ Poly CCX Phones Overview
▪ CCX Phone Hardware Overview
▪ Poly CCX Phones Base Profiles
▪ Switching the Base Profiles
Poly CCX business media phones provide a native interface for Microsoft Teams and integration withSkype for Business.
Poly CCX Phones OverviewPoly CCX phones provide a unified communications experience from your desktop phone.
CCX business media phones contain the following features and capabilities:▪ Native Microsoft Teams integration▪ HD Voice▪ Integrated Bluetooth capabilities▪ Color touch displays▪ Integrated contact list, calendar, and meetings
CCX Phone Hardware OverviewThe following topics describe the hardware features for Poly CCX Business Media Phones.
LED Indicators on CCX Series PhonesCCX series phone LEDs indicate phone and accessory states.
CCX Series Phones LED Descriptions
LED Color State and Description
Speakerphone Off – Phone is in sleep mode.
White – Speakerphone is off, but the phone is active.
Green – Speakerphone is on.
8

LED Color State and Description
Headset Off - Phone is in sleep mode.
White – No headset is active.
Green – An electronic hookswitch (EHS) headset isconnected and activated.
Blue – A USB or Bluetooth headset is connected andactivated.
Mute Off – No call is active.
Red – The phone microphone is muted.
Message Waiting Indicator (MWI) Off – No new messages are available.
Blinking Red – New or unread voicemails are available,incoming call and missed call.
Poly CCX Phones Base ProfilesPoly CCX 500 business media phones allow you to deploy either Microsoft Teams or Microsoft Skype forBusiness. You can switch the base profile using the phone or the phone's web system interface.
Microsoft Teams Profile
If you deploy your phones using the Microsoft Teams profile, configure Microsoft Teams using theMicrosoft Teams Admin Center. For more information, search for Microsoft Teams Admin Center in theMicrosoft Teams Admin Center on the Microsoft documentation website https://docs.microsoft.com/en-us/.
After users signs in to the phone, they can make Microsoft Teams calls, view their calendar, and attendmeetings. To assist users with Microsoft Teams provisioned on Poly CCX business media phones, seethe Poly CCX Business Media Phones for Microsoft Teams User Guide.
Skype for Business Profile
If you deploy your phones using the Skype for Business profile, configure Skype for Business usingSkype for Business Server or the Skype for Business Admin Center depending on your Skypedeployment. For more information, see the Microsoft documentation website https://docs.microsoft.com/en-us/.
After users sign in to the phone, they can make Skype for Business calls, view their calendar, and attendmeetings. To assist users with Skype for Business provisioned on Poly CCX business media phones, seethe Poly CCX Business Media Phones for Skype for Business User Guide.
Switching the Base ProfilesYou can switch between the Skype for Business profile and the Microsoft Teams profile from the phoneinterface.
Getting Started
9

Set Skype for Business as Base Profile from Microsoft TeamsYou can configure the phone to load the Skype for Business profile from the Teams interface.
Procedure1. On the phone screen, press the menu icon at the top left.2. Go to Settings > Device Settings.3. Select Admin Only, and enter the administrator password (the default is 456).4. Select Profile > Skype.5. Select Back and save the configuration.
The phone reboots and Skype for Business profile loads.
Set Microsoft Teams as Base Profile from Skype for BusinessYou can configure the phone to run Microsoft Teams application. Once configured with Teams profile, youcan access and modify device settings from the phone menu.
Procedure1. On the phone screen, press the menu icon at the top left.2. Go to Settings > Advanced3. Enter the administrator password (the default is 456).4. Select Aministration Settings > Network Configuration > Base Profile.5. Select Microsoft Teams.6. Select Back and save the configuration.
The phone reboots and the Microsoft Teams profile loads.
Getting Started
10

Network ConfigurationTopics:
• Configuring Bluetooth
• Extended Link Layer Discovery Protocol (LLDP)
• Web Proxy Auto Discovery (WPAD)
• Data Center Resiliency
• TURN / ICE Parameters
Poly UC Software enables you to make custom network configurations.
Configuring BluetoothYou can enable Bluetooth to allow users to connect and pair compatible Bluetooth devices such as amobile phone, tablet, laptop, or headset with Poly CCX Business Media Phone.
Bluetooth is disabled by default. You must configure the following parameters to enable Bluetooth andallow devices to find and pair with your CCX business media phone:
• feature.bluetooth.enabled• bluetooth.radioOn
After you enable Bluetooth, you can pair and cache a maximum of six Bluetooth devices with the CCXphone and connect a maximum of two devices at a time, or pair the Poly CCX phone with one of yourdevices.
When you pair your Bluetooth headset to the CCX phone, you can use your headset to manage call audiofor CCX phone calls. When you pair the CCX phone to your PC, tablet, or mobile phone, you can use theCCX phone to answer a call, end a call, or reject a call.
Note that using a Bluetooth headset can affect voice quality on the phone due to inherent limitations withBluetooth technology. You may not experience the highest voice quality when using a Bluetooth headsetwhile the 2.4 GHz band is enabled or while you are in an environment with many other Bluetooth devices.
Bluetooth ParametersUse the parameters in the following list to configure Bluetooth.
bluetooth.device.nameNULL (default)
UTF-8 string
Enter the name of the device that broadcasts over Bluetooth to other devices.
bluetooth.discoverableTimeoutSet the time in seconds after which other devices can discover this device over Bluetooth.
11

0 (default) - Other devices can always discover this device over Bluetooth.
0 - 3600 seconds
bluetooth.pairedDeviceMemorySizeSet the maximum number of devices that can be paired and cached as paired on the phone.
10 (default)
0 - 10
bluetooth.radioOn0 - The Bluetooth radio transmitter/receiver is off.
1 (default) - The Bluetooth radio is on. You must turn on the Bluetooth radio to allow devices toconnect over Bluetooth.
feature.bluetooth.enabledFor high security environments.
1 (default) – Enable Bluetooth and the Bluetooth phone screen icon.
0 - Disable Bluetooth and the Bluetooth phone screen icon.
Supported Bluetooth ProfilesTo pair devices via Bluetooth, you must ensure that paired devices support required Bluetooth profiles.Poly CCX phones support the following Bluetooth application profiles:
• Headset Profile (HSP) (both Gateway and Device)• Hands-Free Profile (HFP) (both Gateway and Device)• Advanced Audio Distribution Profile (A2DP) (Both Source and Sink)
Extended Link Layer Discovery Protocol (LLDP)The Link Layer Discovery Protocol (LLDP) is used by network devices to advertise their identity,capabilities, and neighbors on an IEEE 802 local area network, principally wired Ethernet.
LLDP is enabled by default.
Media Endpoint Discover (MED) capabilities include:• Network policy discover• Endpoint location identification discovery• Extender power discovery required for endpoint
Network Configuration
12

Configuring LLDP Fast Start CountFast start count enables a device to initially advertise itself over the network at a fast rate for a limitedtime when an LLDP-MED endpoint has been newly detected or connected to the network.
device.net.lldpFastStartCountConfigure the fast-start LLDP packets that the phone sends when booting up or when thenetwork comes up.
5 (default)
3 - 10
If fast-start packet count is configured > 10, the value resets to 10. If the fast-start packet countis < 3, the value resets to 3. If you configure an invalid value-for example, a negative value,string, or character-the value resets to default 5.
Web Proxy Auto Discovery (WPAD)The Web Proxy Auto-Discovery Protocol (WPAD) feature enables Poly phones to locate the URL of aProxy Auto-Configuration (PAC) file you configure.
WPAD is enabled by default. You can configure WPAD using configuration parameters on yourprovisioning server, DHCP Option 252, or DNS-A protocol mechanism to discover the PAC file location.When using a provisioning server or DHCP, the phone looks for the file name you specify. If using DNS-A,the phone looks only for the wpad.dat file.
The priority for PAC file searching is as follows, from first to last:• Provisioning server. Example: feature.wpad.curl="http://server.domain.com/
proxy.pac• DHCP Option 252. For instructions, see Creating an Option 252 entry in DHCP on Microsoft
TechNet: https://technet.microsoft.com/en-us/library/cc995090.aspx• DNS-A. For instructions, see Creating a WPAD entry in DNS on Microsoft TechNet: https://
technet.microsoft.com/en-us/library/cc995062.aspx
Note: If the proxies you configure in the PAC file or configuration file are either invalid orunreachable with a working fallback proxy, the time to register with Skype for Business isdelayed and the responsiveness of features that support WPAD degrade.
The phones also support Digest and NTLM Authentication mechanisms to authenticate with a proxyserver. When you sign in to Skype for Business, the phone uses the Skype credentials to sign into theWeb proxy. To manually configure proxy-specific credentials common to all users, use BasicAuthentication which is supported only when you configure the following parameters on a provisioningserver:
• feature.wpad.proxy.username• feature.wpad.proxy.password
Network Configuration
13

Supported HTTP/HTTPS Web Proxy Services
When the Web proxy server is successfully configured and operational, the phones route the followingHTTP/HTTPS Web proxy services to the Web proxy server:
Skype for Business Services
• Registration Services• Address Book Service (ABS)• Location Information Server (LIS)• Device Update (To ensure reliable software updates, device update is direct in case a proxy is not
available.)• Server Log Upload• Exchange Web Services
Other• HTTP/HTTPS Provisioning• Core File Upload
View WPAD Diagnostic InformationYou can confirm that the Web proxy server is successfully configured and operational, and accessimportant WPAD diagnostic information to track HTTP and HTTPS traffic flowing via the proxy youconfigure for WPAD.
You can view the following diagnostic information on a pre-phone basis by logging into a phone's WebConfiguration Utility.
• View if the WPAD PAC file fetch is successful• View the configured method used to fetch the PAC file and source URLs• View the DNS domain if configured• View PAC file expiry details• View the Exchange and Upload proxy• Download the PAC file
Procedure1. Enter your phone’s IP address into a web browser.2. Select Admin as the login type, enter the administrator password (the default is 456), and click
Submit.3. Go to Diagnostics > Skype for Business Status > WPAD.
WPAD Configuration ParametersThe following parameters configure the Web Proxy Auto Discovery (WPAD) feature.
feature.wpad.enabledSkype for Business Base Profile (default) - 1
Generic Base Profile (default) - 0
Network Configuration
14

You can configure values for this parameter from your provisioning server or from the phone toenable to disable WPAD.
Change causes system to restart or reboot.
feature.wpad.curlEnter the Proxy Auto-Configuration (PAC) file location.
Change causes system to restart or reboot.
feature.wpad.proxyConfigure the web proxy server address. If you configure this parameter with a proxy address,the phones do not discover DHCP or DNS-A or fetch the PAC file even if you configure a PACfile location using feature.wpad.curl .
0-255
You can specify multiple proxies using this parameter by separated each with a semicolon thesame way you specify them in the PAC file. For example:
PROXY 0.10.1.1:8080;
PROXY 10.12.2.1:8080
Change causes system to restart or reboot.
feature.wpad.proxy.usernameEnter the user name to authenticate with the proxy server.
0-255
Change causes system to restart or reboot.
feature.wpad.proxy.passwordEnter the password to authenticate with the proxy server.
The credentials you can use depend on how authentication is enabled on the proxy server. Youcan use administrator or user credentials. If Skype for Business Active Directory is integratedwith the proxy server, you do not need to configure user name or password credentials.
0-255
Change causes system to restart or reboot.
Data Center ResiliencyData center resiliency ensures that minimum basic call functions remain available in the event of a servershutdown or Wide Area Network (WAN) outage.
The phones you register with Skype for Business on-premises are enabled with this feature by defaultand no additional configuration is required.
In the event of an unplanned server shutdown or outage, phone behavior changes to the following:
Network Configuration
15

• The phone displays a scrolling banner message 'Limited functionality due to outage'.• Your presence status displays as 'Unknown'.• The presence status of your contacts displays as 'Unknown'.• You cannot change your presence status.• You cannot add or delete Skype for Business contacts.• Phones in the locked state display a message on the Sign In menu 'Limited functionality due to
outage'.• You can access current Call Forwarding settings in read-only mode.
TURN / ICE ParametersThis section lists parameters that configure the following Microsoft network features:
• Traversal Using Relays Around NAT (TURN)• Interactive Connectivity Establishment (ICE)
tcpIpApp.ice.ConnCheckInetvalPairsTime interval in milliseconds to serialize first attempt of connectivity check of identified ICEcandidate pairs per call.
25 - 100
tcpIpApp.ice.ConnCheckInetvalRetriesTime interval in milliseconds to serialize the retry attempts of connectivity check for identifiedpairs per call.
25 - 100
tcpIpApp.ice.MaxRetriesThe maximum number of retry attempts performed on each ICE connectivity check pairidentified in case of a request timeout or failure.
5 (default)
2 - 25
tcpIpApp.ice.modeMSOCS (default)
Disabled
Standard
tcpIpApp.ice.NetworkModeTCPUDP (default) – Gathers all the possible UDP and TCP ICE candidates.
TCPOnly – Gathers all the TCP candidates along with UDP host candidates.
Network Configuration
16

UDPOnly - Gathers all the UDP candidates.
tcpIpApp.ice.passwordEnter the password to authenticate to the TURN server.
NULL (default)
tcpIpApp.ice.ReflexiveChecksRequired1 (default) - TCP and UDP reflexive candidates will be collected in candidate gathering process.
0 - TCP and UDP reflexive candidates will not be collected in candidate gathering process.
tcpIpApp.ice.stun.serverEnter the IP address of the STUN server.
NULL (default)
tcpIpApp.ice.stun.udpPortThe UDP port number of the STUN server.
3478 (default)
1 - 65535
tcpIpApp.ice.tcp.enabled1 (default) - Enable TCP.
0 - Disable TCP.
tcpIpApp.ice.turn.serverEnter the IP address of the TURN server.
NULL (default)
tcpIpApp.ice.turn.tcpPort443 (default)
1 - 65535
tcpIpApp.ice.turn.udpPortThe UDP port number of the TURN server.
443 (default)
65535
tcpIpApp.ice.username
Network Configuration
17

Enter the user name to authenticate to the TURN server.
NULL (default)
Network Configuration
18

Deploying CCX Phones withMicrosoft TeamsTopics:
▪ Microsoft Teams Device Settings
▪ Microsoft Teams Device and Software Support
This section provides information about deploying your CCX phones with Microsoft Teams.
19

Microsoft Teams Device SettingsTopics:
▪ Network Configuration Options
▪ Change the Default Administrator Password
You can access and modify device settings from the Microsoft Teams Portal or from the phone menu.
Note: When you set the base profile to MSTeams, Microsoft controls the Microsoft Teams softwareexperience and performance on the Poly CCX 500 business media phones. Send all feedbackand queries to Microsoft.
Network Configuration OptionsYou can set some network configuration options from the Admin Settings menu on an individual phone.
Manually Set DHCP SettingsThe network DHCP settings will be automatically configured based on the DHCP server settings.Optionally, you can manually configure DHCP settings for a single phone.
Procedure1. On the phone screen, press the menu icon at the top left.2. Go to Settings > Device Settings.3. Select Admin Only, and enter the administrator password (the default is 456).4. Select Network Configuration > DHCP Settings.5. Enter the following details:
▪ Host Name▪ Domain Name▪ IP Address▪ Subnet Mask▪ Default Gateway▪ Primary DNS▪ Secondary DNS
Configure VLAN from the PhoneYou can manually configure the VLAN settings from the phone interface.
Procedure1. On the phone screen, press the menu icon at the top left.
20

2. Go to Settings > Device Settings.3. Select Admin Only, and enter the administrator password (the default is 456).4. Select Network Configuration > VLAN.5. Enter the VLAN Id.6. Tap the switch to enable LLDP.7. Tap the switch to enable CDP Compatibility.8. Select the required DHCP VLAN Discovery.9. Select DHCP VLAN Option.
Set 802.1x Authentication for the PhoneYou can manually configure the 802.1x authentication from the phone interface.
Procedure1. On the phone screen, press the menu icon at the top left.2. Go to Settings > Device Settings.3. Select Admin Only, and enter the administrator password (the default is 456).4. Select Network Configuration > 802.1x.5. Tap the switch for 802.1x Authentication to enable manual configuration.6. Enter the following details:
▪ EAP Method▪ Identity▪ Password▪ Anonymous ID▪ EAP-FAST In-Band Provisioning
EAP-FAST In-Band Provisioning is configurable only if you select EAP Method as EAP-FAST.
Set the PC Port for the PhoneYou can manually set the PC port for the phone.
Procedure1. On the phone screen, press the menu icon at the top left.2. Go to Settings > Device Settings.3. Select Admin Only, and enter the administrator password (the default is 456).4. Select Network Configuration > PC Port.5. Select one of the following options:
▪ Disabled▪ Auto▪ 10HD▪ 10FD▪ 100HD▪ 100FD▪ 1000FD
Microsoft Teams Device Settings
21

Set LAN Port SettingsYou can manually set Local Area Network (LAN) port settings on the phone.
Procedure1. On the phone screen, press the menu icon at the top left.2. Go to Settings > Device Settings.3. Select Admin Only, and enter the administrator password (the default is 456).4. Select Network Configuration > LAN Port Settings.5. Select one of the following options:
▪ Auto▪ 10HD▪ 10FD▪ 100HD▪ 100FD▪ 1000FD
Change the Default Administrator PasswordPoly strongly recommends that you change the default password on the phones.
Procedure1. On the phone screen, press the menu icon at the top left.2. Go to Settings > Device Settings.3. Select Admin Only, and enter the administrator password (the default is 456).4. Select Admin Password.5. Enter the default password, enter a new password, and confirm the new password.
Microsoft Teams Device Settings
22

Microsoft Teams Device and SoftwareSupportTopics:
▪ Enable or Disable the System Web Interface
▪ Reset Custom Configurations
▪ Reset the Device to Factory Defaults in Microsoft Teams
▪ Updating Microsoft Teams
This section provides information on maintaining your devices and updating your phone’s software.
Enable or Disable the System Web InterfaceYou can enable or disable access to the phone’s system web interface.
Procedure1. On the phone screen, press the menu icon at the top left.2. Go to Settings > Device Settings.3. Select Admin Only, and enter the administrator password (the default is 456).4. Select Debug.5. Toggle Web User Interface to enable or disable access to the system web interface.
Reset Custom ConfigurationsYou can erase the phone configuration done through the system web interface or from the DeviceSettings on the phone to reset the customized Debug values to defaults.
Procedure1. On the phone screen, press the menu icon at the top left.2. Go to Settings > Device Settings.3. Select Admin Only, and enter the administrator password (the default is 456).4. Select Debug > Reset Custom Config.5. When prompted Do you want to reset custom configuration?, select Continue.
23

Reset the Device to Factory Defaults in MicrosoftTeamsYou can reset the device to factory default settings if your device experiences problems that you cannotresolve by troubleshooting the device logs.
Resetting the phone to defaults clears the flash parameters, user and cached data, and resets theadministrator password to 456.
Procedure1. On the phone screen, press the menu icon at the top left.2. Go to Settings > Device Settings.3. Select Admin Only, and enter the administrator password (the default is 456).4. Select Debug > Reset to Factory Defaults.5. When prompted Do you want to reset to factory defaults?, select Continue.
Updating Microsoft TeamsManage Microsoft Teams updates for your CCX series phones through the Microsoft Teams admin portal.
Important: If you are leveraging mobile device management, make sure your compliancepolicies do not block CCX phones from being provisioned. CCX devices runthe Microsoft Teams IP Phone application. This Android-based application willpresent itself as “Android (device administrator)” and will need to be excludedfrom any compliance policies that prevent usage.
For more information on updating Microsoft Teams on your CCX phones, see the Microsoft Teamswebsite.
Manage your devices in Microsoft Teams
Microsoft Teams Device and Software Support
24

Deploying CCX Phones with Skypefor BusinessTopics:
• Deploying Poly Phones with Skype for Business
• Sign In Methods
• Microsoft Exchange Integration
• Audio Features
• Phone Display Features
• Port Usage
• Configuring Security Options
• Certificates
• Directories and Contacts
• Call Controls
▪ Using CCX Phones as Shared Devices
▪ Skype for Business Device and Software Support
This section provides information about deploying your CCX phones with Skype for Business.
25

Deploying Poly Phones with Skype forBusinessTopics:
• Configure the Network
• Set Up Poly UC Software
• Provisioning Skype for Business Phones
• Configuring In-Band Provisioning Settings
Poly offers several methods to register your Poly phones with Skype for Business.
If you are using Poly phones shipped with Skype for Business-qualified UC Software and want to keepdefault settings with no change, you need only configure the network. If you want to customize defaultsettings, complete the following tasks:
• Configure the Network• Set up Poly UC Software• Provisioning the Phones
Configure the NetworkConfigure the following network settings to register Poly devices with Skype for Business.
Procedure1. Set up or verify Domain Name System (DNS) service (SRV) records to allow the devices to
discover Skype for Business server automatically.For information on creating and verifying DNS SRV records, see the latest documentation on Microsoft TechNet.
2. Optional: If you are setting Microsoft Call Admission Control (CAC) refer to Microsoft Plan for calladmission control in Skype for Business Server 2015 for required bandwidth guidelines.
3. Obtain a root certificate authority (CA) security certificate using one of the following methods:
Certificate Method Description
Lightweight Directory AccessProtocol (LDAP) DomainName System (DNS)
Phones you register with Skype for Business are enabled with this feature bydefault and no additional configuration is required.
26

Certificate Method Description
Dynamic Host ConfigurationProtocol (DHCP) Option 43
When provisioning phones from within an enterprise, you can use DHCP Option43 to download a private CA root security certificate used by Skype for Business.The security certificate is required to support secure HTTPS and TLSconnections. In conjunction with DHCP Option 43, ensure that your devices canaccess Skype for Business Server Certificate Provisioning Web Service overHTTP (TCP 80) and HTTPS (TCP 443).
Note: If you configure DHCP Option 43 in on-premises Skype for Businessdeployments, the phone displays only the PIN Authentication menu tousers.
For more details and troubleshooting information on DHCP Option 43, see Microsoft TechNet.
DHCP Option 66 Use this method if you are using a provisioning server or setting DHCP optionsusing the following:
• DHCP Option 160. If you are using devices with a Skype or Lync BaseProfile, use Option 161 with the address (URL or IP address) of theprovisioning server. You can set the provisioning server address or URL onthe device menu.
4. Set up each user with a Skype for Business account and credentials.
Supported DHCP Sub-OptionsThe following table lists the individual sub-options and combination sub-options supported on the phonesfor DHCP Option 43.
DHCP Option 43 Sub-Options
Option Result
Option 1 – Subnet mask The phone parses the value from Option 43.
Option 2 – Time offset The phone parses the value.
Option 3 – Router The phone parses the value.
Option 4 – Time server The phone parses the value.
Option 6 – Domain Name Server The phone parses the value.
Option 7 – Domain Log server The phone parses the value.
Option 15 – Domain Name The phone parses the value.
Option 42 – Network Time Protocol server The phone parses the value.
Option 66 – TFTP Server Name The phone parses the value.
Sub-options configured in Option 43
Deploying Poly Phones with Skype for Business
27

Option Result
Options 1, 2, 3, 4, 5, 6, 7, 15, 42, and 66 The phone parses the value.
Set Up Poly UC SoftwareAfter you power your devices and set up the network, set up the Poly UC Software.
Note: To avoid placing the phone in a continuous reboot cycle, don’t provision phones with UC Softwarefrom both a Microsoft server and your own provisioning server.
Procedure1. Set up a provisioning server on your computer and create a root directory to hold all of the
required UC Software, configuration files, and subdirectories. Name the directory to identify it ascontaining the UC Software release.
2. Decide if you are provisioning your phones from Skype for Business Server or using your ownprovisioning server.Deploying UC Software in CAB file format provisions the phones and enables default featurefunctionality, including the automatic software update feature. However, if you want to change orcustomize default functionality of the phone features, you need to set up and edit UC Softwareconfiguration files on your own provisioning server and send the custom settings to the phones.
3. Download, save, and extract UC Software to the root directory you created.• If you are deploying UC Software from Skype for Business Server, download the CAB file
version of UC Software.• If you are deploying phones from your own provisioning server, download the split or
combined version of UC Software in XML format.4. After the UC Software directory is extracted, open the folder in your root directory.5. Configure a Call Park Orbit Policy.
You must configure a call park orbit policy to enable the call park feature. See Configuring CallPark on Microsoft TechNet.
Provisioning Skype for Business PhonesThe method labeled device.set is an advanced method for users familiar with configuration files anduses centralized provisioning to set the Base Profile for multiple phones.
The Base Profile is a provisioning option available on Skype for Business-enabled devices that simplifiesthe process of registering your devices with Skype for Business. The Base Profile displays in the phone'smenu system and varies by phone model. The Base Profile automates registration with a default set ofconfiguration parameters and settings; you cannot modify or customize the Base Profile or featuresettings. Because you can provision only a single phone at a time from the local phone menu, usecentralized provisioning for deployments of greater than 20 devices requiring only default Skype forBusiness settings.
If you want to configure phone options using a phone's Web Configuration Utility after registering thephone with the Skype for Business Server, you must enable access to the Web Configuration Utility.
Deploying Poly Phones with Skype for Business
28

Centralized ProvisioningUse a central provisioning server when provisioning multiple phones to:
• Configure multiple devices automatically• Facilitate automated software updates• Receive automatic log files• Add, remove, or manage features and settings to multiple phones simultaneously• Create phone groups and modify features and settings for each phone group
Note: Using an existing server to deploy your provisioning server can affect performance of yourSkype for Business deployment. Misconfiguration or nonstandard deployment of theMicrosoft Internet Information Services (IIS) web server may affect your ability to obtainaccurate Microsoft support.
Centralized Provisioning Methods
Use one of the following methods to centrally deploy multiple devices:• Use Skype for Business Online or Microsoft Exchange Online to set up phones and configure
features.• Download UC Software in CAB file format and place the software on Skype for Business Server.
Default feature settings are applied to all your phones.◦ This method requires you to set up your own provisioning server. Setting up your own
provisioning server enables you to customize feature settings using the template configurationfiles included in the UC Software download. With this method, users can sign in with theircredentials from the phone's interface.
• Use device.* parameters to configure multiple devices and only if you are familiar withcentralized provisioning and configuration files.
Set Up Phones with Skype for Business Online and Exchange OnlineSkype for Business Online and Microsoft Exchange Online provide applications and services includingemail and social networking, Exchange Server, SharePoint, Yammer, MS Office web applications, andMicrosoft Office software.
Poly offers Skype for Business Online and Exchange Online for:• Poly CCX 500 business media phones
If you need to configure media ports for Skype for Business Online deployments, see Skype for BusinessOnline for specific port numbers.
When using Skype for Business Online and Microsoft Exchange Online, note the following:• You must use TLS-DSK to authenticate the phones.• The phones support use of ZTP staging for software upgrades.
Procedure1. Install and open the Skype for Business Online, Windows PowerShell Module.2. Type the command: Import-Module SkypeOnlineConnector.
Deploying Poly Phones with Skype for Business
29

3. Connect to the Skype for Business tenancy using the command: $session=New-CsOnlineSession -Credential $cred.
4. When the Powershell credential request dialog displays, enter your Skype for Business user nameand password.
5. Import the session with the command: Import-PSSession $session -Verbose -AllowClobber.
6. Set policies with the command: CsIPPhonePolicies.
Deploy UC Software from Skype for Business ServerIf you downloaded UC Software files in CAB format, complete the following procedure to deploy UCSoftware from Skype for Business Server.
Procedure1. Download and save UC Software in CAB file format to your computer.
2. Go to Skype for Business Server and copy the CAB file to a C: drive directory.3. Use the Skype for Business Server Management Shell to go to a particular directory.4. In the Skype for Business Server Management Shell, run the following import command:
Import-CsDeviceUpdate -Identity service:1-WebServices-1 -FileName UCUpdates.cab
5. In the Skype for Business Control Panel, go to Clients > Device Update to view UC Softwareversions available on Skype for Business Server.
6. Go to Clients > Action > Approve to approve the UC Software.
Deploy UC Software from a Provisioning ServerComplete the following steps to deploy UC Software from a provisioning server.
Procedure1. Locate 000000000000.cfg in the folder after you unzip the software package.2. Place these configuration files in your root provisioning directory, create a copy of each file, and
rename them keeping the suffix .cfg.
Using edited copies of the template files ensures that you have unedited template files containingthe default values.
3. Open the master configuration file 000000000000.cfg.
In the CONFIG_FILES field, enter the name of your Skype for Business configuration file andsave.
Ensure that multiple configuration file names are comma separated.
Configuration files you enter in the CONFIG_FILES field are read left to right. If you haveconfigured the same setting in two configuration files, the setting listed first (left) is applied. Ensurethat you do not have the same parameter in more than one configuration file.
If you do not want to use the Microsoft Autodiscover service, use the following parameters todisable the feature and manually set the Skype for Business server address and SIP signaling portusing:
• Disable Autodiscover: reg.1.serverAutoDiscovery=0
Deploying Poly Phones with Skype for Business
30

• Server: reg.1.server.1.address=<server_address>• Port: reg.1.server.1.port=<port_number>
4. Set the following parameters in the device config file (device.cfg) to bypass EULA during bulkprovisioning and software upgrade:
• device.eulaAccepted.set="1"• device.eulaAccepted="1"
5. Power on your phones.Your phones display the Skype for Business Sign In screen.
Set the Base Profile with device.* ParametersThis section shows you how to provision multiple devices using parameters in the device.cfg templateconfiguration file included in your UC Software download.
Poly recommends using device.* parameters to configure multiple devices and only if you are familiar withcentralized provisioning and configuration files.
Procedure1. Locate the device.cfg template configuration file and place the device.cfg file on your
provisioning server.2. Locate and change the values of the following parameters:
• device.baseProfile= <Base Profile value>• device.set=1• device.baseProfile.set=1
3. Rename and save the file.4. Power on the phones.5. Once boot-up is complete, remove device.set from the template configuration file and save the
file again after removing device.set.
Manual Provisioning MethodsYou can use per-phone, manual provisioning methods to register Poly devices with Skype for Business.
All manual provisioning methods set the Base Profile of a phone to Skype. The Base Profile is a featureon each phone that, when set to Skype, automatically provisions the phone with the default parametersrequired to work with Skype for Business.
When you use configuration files to provision the phones with Skype for Business, the phone Base Profileis set to Generic. You do not need to set the Base Profile to Skype when provisioning with configurationfiles.
Set the Base Profile from the Settings MenuYou can set the Base Profile to Skype from the phone Settings menu.
Procedure1. Go to Settings > Advanced > Administration Settings > Network Configuration, and set Base
Profile to Skype.2. Select Back > Save Configuration.
Deploying Poly Phones with Skype for Business
31

The phone automatically restarts and displays the Sign In screen. Users can now sign in.
Set the Base Profile Using the Web Configuration UtilityYou can use the Web Configuration Utility to manually set a phone's Base Profile to Skype.
The Web Configuration Utility is disabled by default when the phone registers with Skype for BusinessServer. You must manually enable the Web Configuration Utility to configure phone settings. You cannotconfigure sign-in credentials using the Web Configuration Utility.
Procedure1. Provide power to your phones and allow the phones to complete the power-up process.2. Get the IP address of each phone in your deployment by going to Settings > Status > Platform >
Phone.The IP address displays in the IP: field.
3. Enter the phone's IP address in the address bar of a web browser.The Web Configuration Utility login screen displays.
4. Choose Admin to log in as an administrator, and then enter the administrator password (default456) and click Submit.
5. On the Home page, navigate to the Simple Setup menu.6. From the Base Profile drop-down list, choose Skype, and click Save at the bottom of the page.7. In the confirmation dialog, choose Yes.
The phone automatically restarts, and users can now sign in.
Configuring In-Band Provisioning SettingsYou must provision phones using either in-band provisioning or your provisioning server and not both.
Where settings conflict, Skype for Business in-band provisioning device settings take precedence overthe same settings configured on your provisioning server. If you are using your own provisioning server,avoid phone update loops by configuring lync.provisionDeviceParams.enabled=0 to disable thefollowing in-band provisioning device settings sent from the Skype for Business Server or Skype forBusiness Online:
• EnableDeviceUpdate• IPPhoneAdminPasswd• LocalProvisioningServerAddress• LocalProvisioningServerUser• LocalProvisioningServerPassword• LocalProvisioningServerType• ucDiffServVoice
lync.provisionDeviceParams.enabled1 (default) - Enable (accept) in-band provisioning device settings sent from Skype for Business.
0 - Disable (block) in-band provisioning device settings sent from Skype for Business.
Deploying Poly Phones with Skype for Business
32

Sign In MethodsTopics:
• Configuring a Skype for Business Sign In Method and Credentials
• PIN Authentication
• Web Sign In for Skype for Business
• Modern Authentication Supported Topologies
• Sign In with Better Together over Ethernet (BToE)
• Web Sign In for CAP with Skype for Business Online
• Disabling the Sign-In and Sign-Out Soft Keys
You can configure users to sign in or out of the phone using one of the following methods:• User ID - Enable users to sign in with their user credentials on the Sign In screen. You cannot
configure login credentials using the Web Configuration Utility.• PIN Authentication - Use this to sign in on the phone or from the Web Configuration Utility. This
option is available in on-premises Skype for Business deployments when you configure DHCPOption 43 and is not available for online deployments.
• Web Sign In for Skype for Business - This method enables secure sign-in from a browser on yourcomputer or mobile device. The phone generates a unique pairing code used to sign in on a secureOffice 365 website.
• Single Sign-On Solutions (SSO) - Allows you to use the same login credentials across multiplecloud-based applications such as Microsoft Exchange and Skype for Business.
When you change the active directory password, the phone de-registers from the Skype for Businessserver with a registration expiry value.
The maximum length of the user name or sign in address (Name + Domain) is limited to 45 characters.
While signing in to the phone, the phone displays sign-in progress messages such as DiscoveringSkype for Business Server or Authentication in progress.
Configuring a Skype for Business Sign In Method andCredentialsThe following parameters configure the type of sign in on the phones and user credentials.
reg.1.auth.loginCredentialTypeConfigure a login type and user credentials. You cannot log in to the phone with Microsoftcredentials if the parameter reg.1.auth.loginCredentialType is set to the default value.
LoginCredentialNone (default)
usernameAndPassword - Set credentials to sign-in address, user name, domain, and passwordin the required format.
33

extensionAndPIN - Set credentials to extension and PIN.
reg.1.auth.useLoginCredentialsYou can use this method in the configuration file to automatically sign in users after the phonepowers up.
1 (default) - SSI Login credentials, BToE Sign in, and Web Sign types are available forauthentication with the server.
0 - SSI Login credentials, BToE Sign in, and Web Sign types are not available for authenticationwith the server.
reg.1.auth.usePinCredentialsYou can use this method in the configuration file to automatically sign in users after the phonepowers up.
To use this sign-in method, you must enable DHCP Option 43 or dhcp.option43.override.stsUri.
1 - PIN authentication sign in method is available for authentication on the server.
0 - PIN authentication sign in method is not available for authentication on the server.
auth.unblock.periodIf the authentication request attempts fail due to a server error, further authentication attemptsare blocked for a defined number of minutes before reattempting.
30 minutes (default)
0 - 30
Example Sign In ConfigurationsYou can set PIN authentication or SSI login credentials in the configuration file to log in usersautomatically after the phone powers up.
The following example sets PIN authentication user credentials in the configuration file:• reg.1.auth.usePinCredentials="1"• reg.1.auth.loginCredentialType="extensionAndPIN"• device.set="1"• device.logincred.extension.set="1"• device.logincred.extension="xxxx"• device.logincred.pin.set="1"• device.logincred.pin="xxxx"
The following example sets SSI login credentials in the configuration file:• reg.1.auth.loginCredentialType="usernameAndPassword"• reg.1.address="[email protected]"• device.set="1"
Sign In Methods
34

• device.logincred.user.set="1"• device.logincred.user="xxxx"• device.logincred.password.set="1"• device.logincred.password="xxxxx"• device.logincred.domain.set="1"• device.logincred.domain="domain"
PIN AuthenticationYou can enable users to sign in to Skype for Business using PIN authentication.
To use PIN authentication, you must enable the Web Configuration Utility, which is disabled by default.For information on enabling the Web Configuration Utility, see Accessing the Web Configuration Utility.After you enable the Web Configuration Utility, you can enable PIN authentication using reg.1.auth.usePinCredentials .
If you configure DHCP Option 43 in on-premises Skype for Business deployments, the phone displaysonly the PIN Authentication menu to users. The PIN Auth menu does not display and is not available forSkype for Business Online.
PIN Authentication ParametersThe following parameters configure PIN Authentication.
device.logincred.extensionNULL (default) - The phones will not trigger registration.
0 to 32 - Enter a user phone extension number or string to a maximum of 32 characters. Thephone reads this extension when you configure PIN-Auth as the phone registration method.
device.logincred.pinNULL (default) - If the default value is set, the phones will not trigger registration.
0 to 32 -Enter a user phone PIN to a maximum of 32 characters. The phone reads this PINwhen you configure PIN-Auth as the phone registration method.
reg.1.auth.useLoginCredentialsYou can use this method in the configuration file to automatically sign in users after the phonepowers up.
1 (default) - SSI Login credentials, BToE Sign in, and Web Sign types are available forauthentication with the server.
0 - SSI Login credentials, BToE Sign in, and Web Sign types are not available for authenticationwith the server.
Sign In Methods
35

Web Sign In for Skype for BusinessWeb Sign In is enabled by default on phones registered with the Skype for Business server and isavailable for Skype for Business Online and On-Premise deployments.
Web Sign In enables users to securely login to Skype for Business on their phone from a computer or amobile web browser. It provides users with a way to authenticate their Skype for Business credentialswithout entering their credentials on the phone. The phone displays on-screen instructions to help usersproceed through the process. With the Web Sign In method, a user can sign in concurrently to amaximum of eight phones. If a user signs in on multiple phones and signs out from one phone, the userremains signed in on the remaining phones.
Users authenticate their accounts using a pairing code that is generated on the phone. The pairing codethat the Web Sign In method generates expires within a few minutes after the Skype for Business serversends the code to the phone. Users must sign in before the pairing code expires.
Web Sign In supports Multi-Factor Authentication (MFA) on phones. If you’re using MFA, you must useWeb Sign In as the user sign-in method with phones. For more information on configuring MFA for Office365, refer to Microsoft's Configure Azure Multi-Factor Authentication Settings.
Web Sign In for Skype for Business server is supported only when the Hybrid Modern Authentication(HMA) environment is enabled. To use the capability of HMA with Skype for Business On-Premise, ActiveDirectory should be federated with Azure Active Directory (AAD). For more information to configure HMAin your environment, refer to Hybrid Modern Authentication for Skype for Business.
Web Sign In for Skype for Business ParametersThe following parameters configure Web Sign In for Skype for Business Online and On-Premisesdeployments.
feature.webSignIn.enabled1 (default) - In Skype for Business Base Profile, the web sign in option is displayed on the phonefor the user.
0 - In Skype for Business Base Profile, the web sign in option is not displayed on the phone forthe user.
reg.1.auth.loginCredentialTypeSpecify the credential type the user must provide to log in. You cannot log in to the phone withMicrosoft credentials if reg.1.auth.loginCredentialType is set to the default value.
LoginCredentialNone (default)
onlineDeviceAuth - Enables users to sign in to the phone using Web Sign In.
usernameAndPassword - Provide description of this value.
Sign In Methods
36
Sign In Remotely using Web Sign-In for Skype for BusinessYou can sign in to Skype for Business remotely using the phone's Web Configuration Utility.
Procedure1. Enter your phone's IP address into a web browser on your computer.2. Select Admin as the login type, enter the admin password (the default is 456), and click Submit.3. Select Settings > Skype for Business Sign In.4. Select Web Sign-In from Authentication Type.5. Select Sign In.
A URL and a sign-in code display.6. Enter the URL into the web browser on your computer.7. Enter the sign-in code and select Continue.
The Skype for Business Authentication website displays.8. Enter your Skype for Business login information.
A confirmation message displays when the phone successfully signs in to Skype for Business.
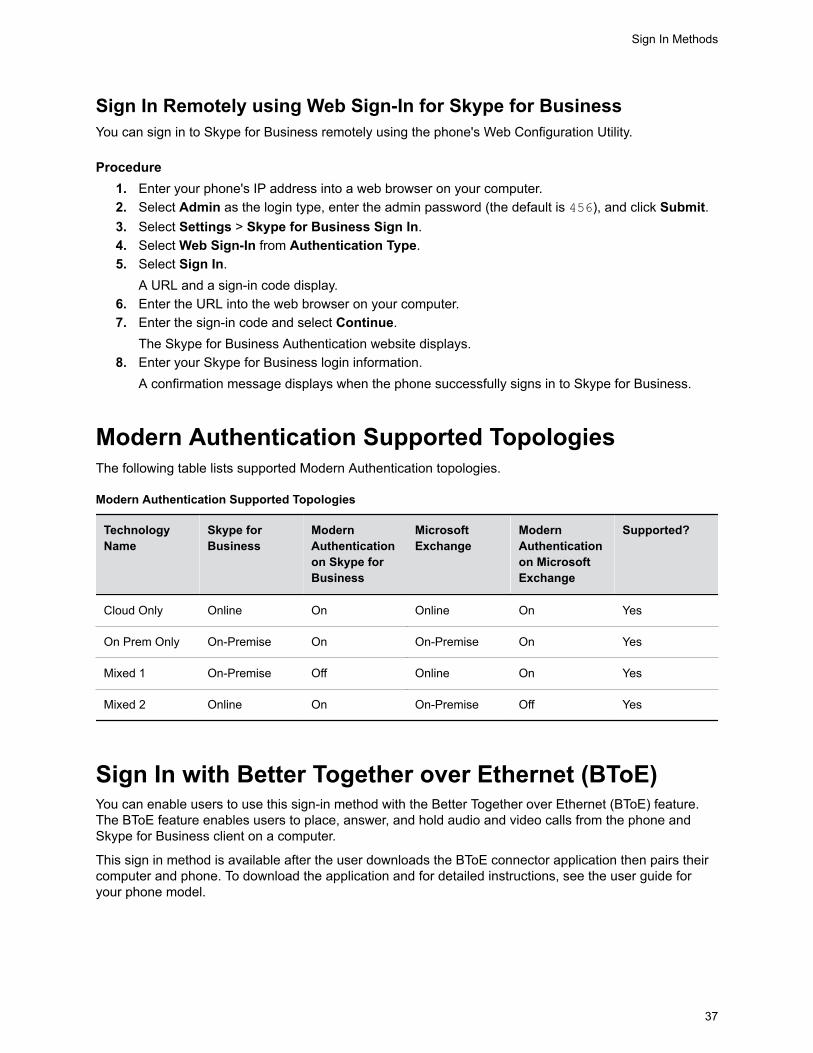
Modern Authentication Supported TopologiesThe following table lists supported Modern Authentication topologies.
Modern Authentication Supported Topologies
TechnologyName
Skype forBusiness
ModernAuthenticationon Skype forBusiness
MicrosoftExchange
ModernAuthenticationon MicrosoftExchange
Supported?
Cloud Only Online On Online On Yes
On Prem Only On-Premise On On-Premise On Yes
Mixed 1 On-Premise Off Online On Yes
Mixed 2 Online On On-Premise Off Yes
Sign In with Better Together over Ethernet (BToE)You can enable users to use this sign-in method with the Better Together over Ethernet (BToE) feature.The BToE feature enables users to place, answer, and hold audio and video calls from the phone andSkype for Business client on a computer.
This sign in method is available after the user downloads the BToE connector application then pairs theircomputer and phone. To download the application and for detailed instructions, see the user guide foryour phone model.
Sign In Methods
37
Web Sign In for CAP with Skype for Business OnlineWhen Common Area Phone (CAP) mode is enabled along with Online Web Sign In and the phone is setto CAP Admin mode, you can sign in to the phone registered with Skype for Business Online andsecurely login to Skype for Business from the phone or from a computer or mobile web browser.
This sign in method is not applicable when the phone is signed in as a guest user.
Disabling the Sign-In and Sign-Out Soft KeysIf your phones are used as shared devices in your organization, you can remove the sign-out soft key toprevent users from signing others out.
Or, you can remove both the sign-in and sign-out soft keys.
Use the following parameters to remove the sign-out soft key, or the sign-in and sign-out keys.
feature.lync.hideSignInSignOut0 (default) - The Sign In and Sign Out soft keys display on the Home screen and phone menus.
1 - The Sign In and Sign Out soft keys are removed from the Home screen and phone menus,and users are not able to sign in or out. Administrators can sign in and out with the WebConfiguration Utility.
feature.lync.hideSignOut0 (default) - The Sign Out soft key displays on the Home screen and phone menus.
1 - The Sign Out soft key is removed from the Home screen and phone menus, and users arenot able to sign out. Administrators can sign out of the phone from the Advanced menu or WebConfiguration Utility.
feature.lyncbtoe.autosignin.signoff.enabled0 (default) - When the connection between the phone and and BToE application is terminated,the credentials cached on the phone remains as is and the phone continues to stay signed in.
1 - When the connection between the phone and BToE application is terminated, the credentialscached on the phone are removed and the phone triggers auto sign-off.
Note: The auto sign-off triggers only when the phone was previously signed in using via PCsign-in method.
softkey.feature.simplifiedSignIn0 (default) - The Sign In and Sign Out soft keys are removed from the Home screen and displayin the Features menu.
1 - The Sign In and Sign Out soft keys displays on the Home screen and phone menus.
Sign In Methods
38

Microsoft Exchange IntegrationTopics:
• Skype for Business
• Integrating with Microsoft Exchange
• Configuring the Microsoft Exchange Server
If you have a Skype for Business, Office 365, Lync Server 2010 or 2013 deployment, you can integratewith Microsoft Exchange Server.
You can set up visual voicemail, call log synchronization, Outlook contact search, and Skype for BusinessAddress Book Service (ABS) adaptive search. Each of these features is enabled by default on Polyphones registered with Skype for Business.
After the phone is connected with the Exchange Server, you can:• Verify the status of Exchange Server services on each phone.• View the status of each service in the Web Configuration Utility.
Skype for BusinessSkype for Business and Lync Server provides a unified communications (UC) solution that enablescustomers, colleagues, and business partners to communicate instantly by voice, video, or messagingthrough a single interface, regardless of their location or network.
Note that the concurrent failover/fallback feature is not compatible in a Microsoft environment.
The features available when you are registered with Skype for Business Server vary with the Poly phonemodel and Poly UC Software version you are using. Poly UC Software supports the following devices withSkype for Business and Lync Server:
• Poly CCX business media phones
If you are using UC Software with Skype for Business and want to change default settings or customizeyour deployment, you must set up a provisioning server.
Poly UC Software enables you to register only a single phone line with Skype for Business Server. Whenyou register a line on a Poly phone using Skype for Business Server you cannot register lines withanother server.
Integrating with Microsoft ExchangeYou can integrate with Microsoft Exchange using one of the following methods:
• Exchange Server auto-discover• Provision the phone with the Microsoft Exchange address• Web Configuration Utility
39

Note: If you enter the Skype for Business credentials to the configuration file, phone users must entercredentials to the phone Sign In screen.
Provision the Microsoft Exchange CalendarYou can provision your phones with the Microsoft Exchange calendar.
Procedure» Add the following parameters to one of your configuration files:
• feature.exchangeCalendar.enabled=1• exchange.server.url=https://<example URL>
Enable Microsoft Exchange Calendar Using the Web ConfigurationUtilityYou can use the Web Configuration Utility to manually enable your phones with the Microsoft Exchangecalendar.
Enable the access to the Web Configuration Utility on the phone registered with Skype for Business.
This is useful for troubleshooting if auto-discovery is not working or is mis-configured. Enabling MicrosoftExchange Calendar through the Web Configuration Utility can only be performed on one phone at a time.
Procedure1. Log in to the Web Configuration Utility as Admin (default password 456).2. Go to Settings > Applications > Exchange Applications.3. In the Exchange Calendar field, select Enable.4. Enter the exchange web services URL using a Microsoft Exchange Server URL, for example
https://<mail.com>/ews/exchange.asmx.
In this example, the URL part <mail.com> is specific to an organization.5. At the bottom of the browser page, click Save.6. When the confirmation dialog displays, click Yes.
Your Exchange Calendar is successfully configured and the Calendar icon displays on your phonescreen.
Verify the Microsoft Exchange IntegrationYou can verify if all of the Exchange services are working.
Procedure» Do one of the following:
• On the phone, go to Settings > Status > Diagnostics > Warnings.• From the Web Configuration Utility, go to Diagnostics > Skype for Business Status >
Exchange Client.
Microsoft Exchange Integration
40

Configuring the Microsoft Exchange ServerYou can configure the following settings to take advantage of Microsoft Exchange services on yourphones.
Note: For help with Lync Server 2010, refer to Microsoft Configure Exchange Services for theAutodiscover Service.
For help with Lync Server 2013, refer to Microsoft Configuring Unified Messaging on MicrosoftExchange Server to work with Lync Server 2013.
Visual VoicemailOn the exchange server, enable unified messaging and enable messages to play on the phone for eachuser.
If you disable feature.exchangeVoiceMail.enabled, the Message Center and Skype for BusinessVoice mail menus display the message: Skype for Business Server only plays voicemail and you cannotdownload voicemails or play locally on the phone.
Calendar Month ViewOn the exchange server, you can enable the month view option for users to retrieve the calendar eventsfor all the days in the month.
The Month View option is disabled by default.
Calendar Month View ParametersThe following parameters configure the month view.
calendar.monthView.enabled0 (default) - Disables the Month View soft key.
1 - Enables the Month View soft key.
Synchronizing Call LogsOn the Exchange server, you can enable the option to save calls logs to each user's conversation historyin Outlook.
Call Log Synchronization ParameterUse the following parameter to configure call logs.
feature.exchangeCallLog.enabled1 (default) - The Exchange call log feature is enabled and the user call log history of Missed,Received, and outgoing calls can be retrieved on the phone.
Microsoft Exchange Integration
41

You must also enable the parameter feature.exchangeCalendar.enabled to use theExchange call log feature. If you disable feature.exchangeCalendar.enabled , alsodisable feature.exchangeCallLog.enabled to ensure call log functionality.
0 (default) - The Exchange call log feature is disabled and the user call logs history cannot beretrieved from the Exchange server.
Address Book Service (ABS) Adaptive SearchYou can enable the ABS service on the Exchange server.
There are three possible configurations.
• Outlook and ABS are both enabled by default. When both are enabled, the phone displays theSkype for Business Directory.
• If you disable Outlook and enable only ABS, the phone displays the Skype for Business Directory.• If you enable Outlook and disable ABS, the Outlook Contact Search displays in Directories.
Phones registered with Skype for Business server display a one-touch Join button that allows you to joina Skype for Business conference in a federated environment, even if you haven’t configured TransportNeutral Encapsulation Format (TNEF).
Microsoft Exchange ParametersThe following parameters configure Microsoft Exchange integration.
exchange.meeting.alert.followOfficeHours1 (default) - Enable audible calendar alerts during business hours.
0 - Disable audible calendar alerts.
exchange.meeting.alert.tonePatternpositiveConfirm (default) - Set the tone pattern of the reminder alerts using any tone specified byse.pat.*.
exchange.meeting.alert.toneVolume10 (default) - Set the volume level of reminder alert tones.
0 - 17
exchange.meeting.allowScrollingToPast0 (default) - Do not allow scrolling up in the Day calendar view to see recently past meetings.
1 - Allow scrolling up in the Day calendar view to see recently past meetings.
exchange.meeting.parseOptionSelect a meeting invite field to fetch a VMR or meeting number from.
Location (default)
Microsoft Exchange Integration
42

All
LocationAndSubject
Description
Change causes a reboot.
exchange.meeting.phonePatternNULL (default)
string
The pattern used to identify phone numbers in meeting descriptions, where "x" is a digit and "|"separates alternative patterns (for example, xxx-xxx-xxxx|604.xxx.xxxx).
exchange.meeting.realConnectProcessing.outboundRegistrationChoose a line number to use to make calls on Polycom RealConnect technology.
2 (default)
1 - 34
Change causes system to restart or reboot.
exchange.meeting.realConnectProcessing.prefix.domainDefine the One-Touch Dial meeting invite prefix domain. Example: "mypolycom.com"
exchange.meeting.realConnectProcessing.prefix.valueDefine the One-Touch Dial meeting invite prefix value.
exchange.meeting.realConnectProcessing.skype.enabled0 (default) – Disable the Skype for Business meeting on Polycom RealConnect technology.
1 - Enable the Skype for Business meeting on Polycom RealConnect technology.
Change causes system to restart or reboot.
exchange.meeting.reminderEnabled1 (default) - Meeting reminders are enabled.
0 - Meeting reminders are disabled.
exchange.meeting.reminderInterval300 seconds (default)
60 - 900 seconds
Set the interval at which phones display reminder messages.
Microsoft Exchange Integration
43
exchange.meeting.reminderSound.enabled1 (default) - The phone makes an alert sound when users receive reminder notifications ofcalendar events. Note that when enabled, alert sounds take effect only ifexchange.meeting.reminderEnabled is also enabled.
0 - The phone does not make an alert sound when users receives reminder notifications ofcalendar events.
exchange.meeting.reminderTypeCustomize the calendar reminder and tone.
2 (default) - The reminder is always audible and visual.
1 - The first reminder is audible and visual reminders are silent.
0 - All reminders are silent.
exchange.meeting.reminderWake.enabled1 (default) - The phone wakes from low power mode after receiving a calendar notification.
0 - The phone stays in low power mode after receiving a calendar notification.
exchange.pollIntervalThe interval, in seconds, to poll the Exchange server for new meetings.
30000 (default)
4000 minimum
60000 maximum
exchange.server.urlNULL (default)
string
The Microsoft Exchange server address.
feature.EWSAutodiscover.enabledIf you configure exchange.server.url and set this parameter to 1, preference is given to thevalue of exchange.server.url.
Lync Base Profile default is 1.
Generic Base Profile default is 0.
1 - Exchange autodiscovery is enabled and the phone automatically discovers the Exchangeserver using the email address or SIP URI information.
0 - Exchange autodiscovery is disabled on the phone and you must manually configure theExchange server address.
Microsoft Exchange Integration
44
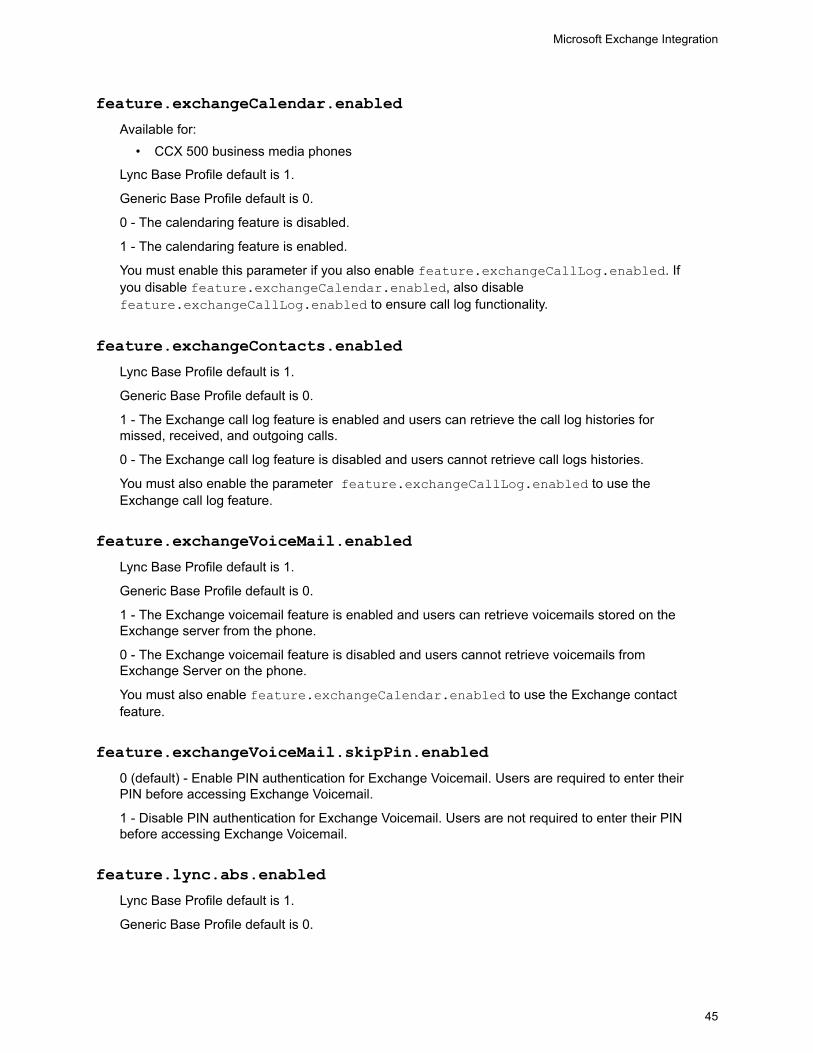
feature.exchangeCalendar.enabledAvailable for:
• CCX 500 business media phones
Lync Base Profile default is 1.
Generic Base Profile default is 0.
0 - The calendaring feature is disabled.
1 - The calendaring feature is enabled.
You must enable this parameter if you also enable feature.exchangeCallLog.enabled. Ifyou disable feature.exchangeCalendar.enabled, also disablefeature.exchangeCallLog.enabled to ensure call log functionality.
feature.exchangeContacts.enabledLync Base Profile default is 1.
Generic Base Profile default is 0.
1 - The Exchange call log feature is enabled and users can retrieve the call log histories formissed, received, and outgoing calls.
0 - The Exchange call log feature is disabled and users cannot retrieve call logs histories.
You must also enable the parameter feature.exchangeCallLog.enabled to use theExchange call log feature.
feature.exchangeVoiceMail.enabledLync Base Profile default is 1.
Generic Base Profile default is 0.
1 - The Exchange voicemail feature is enabled and users can retrieve voicemails stored on theExchange server from the phone.
0 - The Exchange voicemail feature is disabled and users cannot retrieve voicemails fromExchange Server on the phone.
You must also enable feature.exchangeCalendar.enabled to use the Exchange contactfeature.
feature.exchangeVoiceMail.skipPin.enabled0 (default) - Enable PIN authentication for Exchange Voicemail. Users are required to enter theirPIN before accessing Exchange Voicemail.
1 - Disable PIN authentication for Exchange Voicemail. Users are not required to enter their PINbefore accessing Exchange Voicemail.
feature.lync.abs.enabledLync Base Profile default is 1.
Generic Base Profile default is 0.
Microsoft Exchange Integration
45

1 - Enable comprehensive contact search in the Skype for Business address book service.
0 - Disable comprehensive contact search in the Skype for Business address book service.
feature.lync.abs.maxResultDefine the maximum number of contacts to display in a Skype for Business address bookservice contact search.
12 (default)
5 - 50
feature.wad.enabledDo not disable this parameter if you are using Skype Online or Web Sign-In.
1 (default) – The phone attempts to use Web auto-discovery and if no FQDN is available, fallsback to DNS.
0 - The phone uses DNS to locate the server FQDN and does not use Web auto-discovery. doesnot recommend disabling this parameter when using Skype for Business Online and Web SignIn.
feature.contacts.readonly0 (default) - Skype for Business Contacts are editable.
1 - Skype for Business are read-only.
up.oneTouchDirectoryLync Base Profile default is 1.
Generic Base Profile default is 0.
1 - The Skype for Business Search icon displays on the Home screen.
0 - The Skype for Business Search icon does not display on the Home screen.
up.oneTouchVoiceMail1Lync Base Profile default is 1.
Generic Base Profile default is 0.
0 - The phone displays a summary page with message counts. The user must press theConnect soft key to dial the voicemail server.
1 - The phone dials voicemail services directly (if available on the call server) without displayingthe voicemail summary.
Microsoft Exchange Integration
46

Audio FeaturesTopics:
• Poly NoiseBlock
• Supported Audio Codecs
• Music on Hold
After you set up your phones on the network, users can send and receive calls using the defaultconfiguration. You can configure modifications that optimize the audio quality of your network.
Poly phones support audio sound quality features and options you can configure to optimize theconditions of your organization's phone network system.
Poly NoiseBlockPoly NoiseBlock technology automatically mutes the microphone during audio-only and audio/video callswhen a user stops speaking.
This feature silences noises that interrupt conversations such as paper shuffling, food wrappers, andkeyboard typing. When a user speaks, the microphone is automatically unmuted.
Poly NoiseBlock ParametersUse the following parameters to configure NoiseBlock.
voice.ns.hf.block1 (default) - Enables NoiseBlock.
0 - Disables NoiseBlock.
Supported Audio CodecsThe following table lists audio codecs supported by Poly CCX phones.
Audio Codecs and Priority
Phone Audio Codec Priority
Poly CCX G.711 µ -law 6
G.711a-law 7
G.722 4
G.722.1 (24kbps, 32kbps) 5
47

Phone Audio Codec Priority
G.722.1C (48kbps) 2
G.729AB 8
Opus* 0
iLBC (13.33kbps, 15.2kbps) 0, 0
Supported Audio Codec SpecificationsThe following table summarizes the specifications for audio codecs supported on Poly phones.
Audio Codec Specifications
Algorithm Reference Raw Bit RateMaximum IPBit Rate
SampleRate
DefaultPayloadSize
EffectiveAudioBandwidth
G.711 µ -law RFC 1890 64 Kbps 80 Kbps 8 Ksps 20 ms 3.5 KHz
G.711 a-law RFC 1890 64 Kbps 80 Kbps 8 Ksps 20 ms 3.5 KHz
G.719 RFC 5404 32 Kbps
48 Kbps
64 Kbps
48 Kbps
64 Kbps
80 Kbps
48 Ksps 20 ms 20 KHz
G.711 RFC 1890 64 Kbps 80 Kbps 16 Ksps 20 ms 7 KHz
G.7221 RFC 3551 64 Kbps 80 Kbps 16 Ksps 20 ms 7 KHz
G.722.1 RFC 3047 24 Kbps
32 Kbps
40 Kbps
48 Kbps
16 Ksps 20 ms 7 KHz
G.722.1C G7221C 24 Kbps
32 Kbps
48 Kbps
40 Kbps
48 Kbps
64 Kbps
32 Ksps 20 ms 14 KHz
G.729AB RFC 1890 8 Kbps 24 Kbps 8 Ksps 20 ms 3.5 KHz
Opus RFC 6716 8 - 24 Kbps 24 - 40 Kbps 8 Ksps
16 Ksps
20 ms 3.5 KHz
7 KHz
Audio Features
48

Algorithm Reference Raw Bit RateMaximum IPBit Rate
SampleRate
DefaultPayloadSize
EffectiveAudioBandwidth
Lin16 RFC 1890 128 Kbps
256 Kbps
512 Kbps
705.6 Kbps
768 Kbps
132 Kbps
260 Kbps
516 Kbps
709.6 Kbps
772 Kbps
8 Ksps
16 Ksps
32 Ksps
44.1 Ksps
48 Ksps
10 ms 3.5 KHz
7 KHz
14 KHz
20 KHz
22 KHz
Siren 7 SIREN7 16 Kbps
24 Kbps
32 Kbps
32 Kbps
40 Kbps
48 Kbps
16 Ksps 20 ms 7 KHz
Siren14 SIREN14 24 Kbps
32 Kbps
48 Kbps
40 Kbps
48 Kbps
64 Kbps
32 Ksps 20 ms 14 KHz
Siren22 SIREN22 32 Kbps
48 Kbps
64 Kbps
48 Kbps
64 Kbps
80 Kbps
48 Ksps 20 ms 22 KHz
iLBC RFC 3951 13.33 Kbps
15.2 Kbps
31.2 Kbps
24 Kbps
8 Ksps 30 ms
20 ms
3.5 KHz
SILK SILK Skype SILK 6 - 20 Kbps
7 - 25 Kbps
8 - 30 Kbps
12 - 40 Kbps
36 Kbps
41 Kbps
46 Kbps
56 Kbps
8 Ksps
12 Ksps
16 Ksps
24 Ksps
3.5 KHz
5.2 KHz
7 KHz
11 KHz
1 Per RFC 3551. Even though the actual sampling rate for G.722 audio is 16,000 Hz (16ksps), the RTP clock rateadvertised for the G.722 payload format is 8,000 Hz because that value was erroneously assigned in RFC 1890and must remain unchanged for backward compatibility.
Note: The network bandwidth necessary to send the encoded voice is typically 5-10% higher than theencoded bit rate due to packetization overhead. For example, a G.722.1C call at 48kbps for boththe receive and transmit signals consumes about 100kbps of network bandwidth (two-way audio).
Audio Codec ParametersYou can configure a set of codec properties to improve consistency and reduce workload on the phones.
Use the following parameters to specify audio codec priority on your phones.
Audio Features
49

• Permitted values to set audio codec priority are 1 - 27• A value of 1 is the highest priority, 27 the lowest.• If 0 or Null, the codec is disabled.• A change to the default value does not cause a phone to restart or reboot
If a phone does not support a codec, the phone treats the value as 0, does not offer or accept calls usingthat codec, and continues to the codec next in priority.
voice.codecPref.G711_A7 (default)
voice.codecPref.G711_Mu6 (default)
voice.codecPref.G719.32kbps0 (default)
voice.codecPref.G719.48kbps0 (default)
voice.codecPref.G719.64kbps0 (default)
voice.codecPref.G7224 (default)
voice.codecPref.G7221.24kbps0 (default)
voice.codecPref.G7221_C.24kbps5 (default)
voice.codecPref.G7221.32kbps0 (default)
voice.codecPref.G7221_C.48kbps2 (default)
voice.codecPref.G729_AB
Audio Features
50

8 (default)
voice.codecPref.iLBC.13_33kbps0 (default)
voice.codecPref.iLBC.15_2kbps0 (default)
voice.codecPref.Lin16.8ksps0 (default)
voice.codecPref.Lin16.16ksps0 (default)
voice.codecPref.Lin16.32ksps0 (default)
voice.codecPref.Lin16.44_1ksps0 (default)
voice.codecPref.Lin16.48ksps0 (default)
voice.codecPref.Siren7.16kbps0 (default)
voice.codecPref.Siren7.24kbps0 (default)
voice.codecPref.Siren7.32kbps0 (default)
voice.codecPref.Siren14.24kbps0 (default)
voice.codecPref.Siren14.32kbps0 (default)
Audio Features
51

voice.codecPref.Siren14.48kbps0 (default)
voice.codecPref.Siren22.32kbps0 (default)
voice.codecPref.Siren22.48kbps0 (default)
voice.codecPref.Siren22.64kbps1 (default)
voice.codecPref.SILK.8ksps0 (default)
voice.codecPref.SILK.12ksps0 (default)
voice.codecPref.SILK.16ksps0 (default)
voice.codecPref.SILK.24ksps0 (default)
SILK Audio Codec ParametersPoly CCX 500 business media phones support the SILK audio codec.
Use the following parameters to configure the SILK audio codec.
voice.codecPref.SILK.8kspsSet the SILK audio codec preference for the supported codec sample rates.
0 (default)
voice.codecPref.SILK.12kspsSet the SILK audio codec preference for the supported codec sample rates.
voice.codecPref.SILK.16kspsSet the SILK audio codec preference for the supported codec sample rates.
Audio Features
52
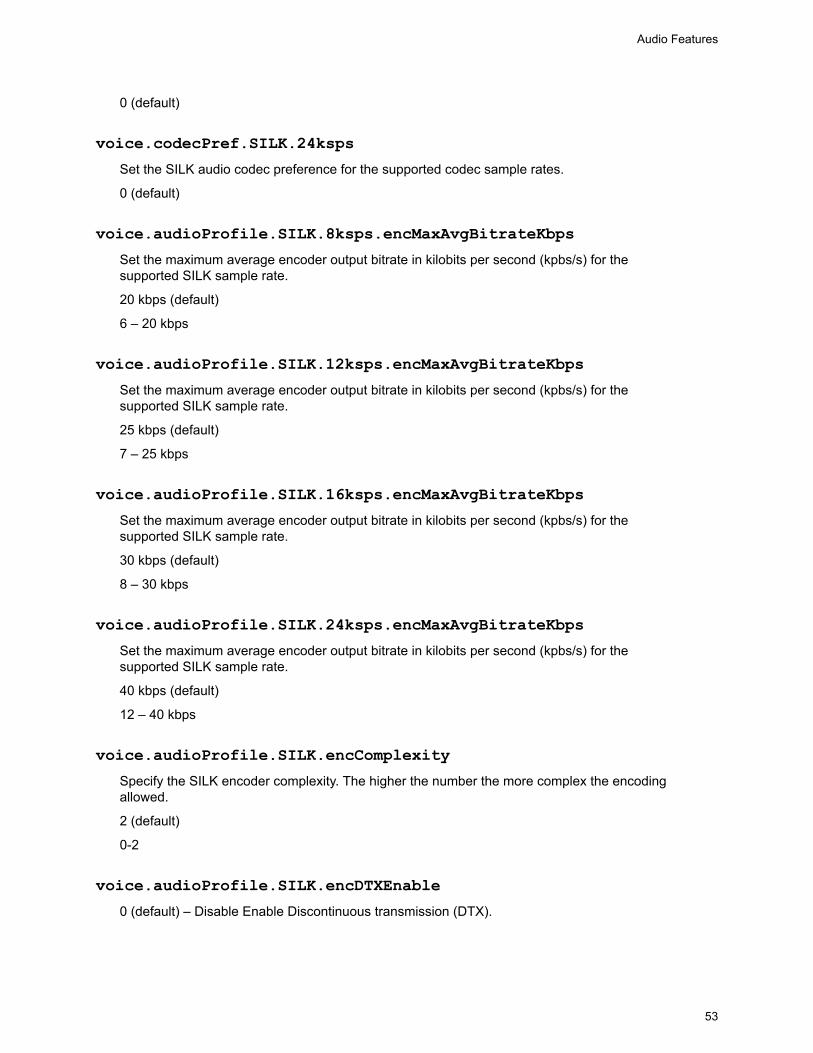
0 (default)
voice.codecPref.SILK.24kspsSet the SILK audio codec preference for the supported codec sample rates.
0 (default)
voice.audioProfile.SILK.8ksps.encMaxAvgBitrateKbpsSet the maximum average encoder output bitrate in kilobits per second (kpbs/s) for thesupported SILK sample rate.
20 kbps (default)
6 – 20 kbps
voice.audioProfile.SILK.12ksps.encMaxAvgBitrateKbpsSet the maximum average encoder output bitrate in kilobits per second (kpbs/s) for thesupported SILK sample rate.
25 kbps (default)
7 – 25 kbps
voice.audioProfile.SILK.16ksps.encMaxAvgBitrateKbpsSet the maximum average encoder output bitrate in kilobits per second (kpbs/s) for thesupported SILK sample rate.
30 kbps (default)
8 – 30 kbps
voice.audioProfile.SILK.24ksps.encMaxAvgBitrateKbpsSet the maximum average encoder output bitrate in kilobits per second (kpbs/s) for thesupported SILK sample rate.
40 kbps (default)
12 – 40 kbps
voice.audioProfile.SILK.encComplexitySpecify the SILK encoder complexity. The higher the number the more complex the encodingallowed.
2 (default)
0-2
voice.audioProfile.SILK.encDTXEnable0 (default) – Disable Enable Discontinuous transmission (DTX).
Audio Features
53

1 – Enable DTX in the SILK encoder. Note that DTX reduces the encoder bitrate to 0bps duringsilence.
voice.audioProfile.SILK.encExpectedPktLossPercentSet the SILK encoder expected network packet loss percentage.
A non-zero setting allows less inter-frame dependency to be encoded into the bitstream,resulting in increasingly larger bitrates but with an average bitrate less than that configured withvoice.audioProfile.SILK.*.
0 (default)
0-100
voice.audioProfile.SILK.encInbandFECEnable0 (default) - Disable inband Forward Error Correction (FEC) in the SILK encoder.
A non-zero value here causes perceptually important speech information to be sent twice: oncein the normal bitstream and again at a lower bitrate in later packets, resulting in an increasedbitrate.
voice.audioProfile.SILK.MaxPTimeSpecify the maximum SILK packet duration in milliseconds (ms).
20 ms
voice.audioProfile.SILK.MinPTimeSpecify the minimum SILK packet duration in milliseconds (ms).
20 ms
voice.audioProfile.SILK.pTimeThe recommended received SILK packet duration in milliseconds (ms).
20 ms
Music on HoldMusic on Hold (MoH) enables you to play music when you place a call on hold.
You can specify on the provisioning server which music file the phone plays or upload a file using thephone's Web Configuration Utility. When MoH is enabled, you can turn the music on or off while the call ison hold. If you place multiple calls on hold, only the first call placed on hold hears the music.
The default MoH file size is 540 KB and the maximum file size is 600 KB. You can increase the max filesize to 1014KB using the parameter res.quotas.tone. The phone supports the following .wav audiofile formats:
• mono G.711 (8 bits/sample, 8-khz sample rate)
Audio Features
54

• mono L16/16000 (16 bits/sample, 16-kHz sample rate)• mono L16/48000 (16 bits/sample, 48-kHz sample rate)
Upload a Music FileYou can upload a music file to the phone using the phone's Web Configuration Utility.
Procedure1. Enter your phone’s IP address into a web browser.2. Select Admin as the login type, enter the administrator password (the default is 456), and click
Submit.3. Go to Preferences > Additional Preferences > Music On Hold.4. Select MOH Status Enable and Save.5. Select Add and select a file from your computer or enter a URL.6. Click Save.
Configuring Music on HoldThe following parameters configure Music on Hold.
feature.moh.enabledMusic on hold enables phone users to stream music when they place a caller on hold.
0 (default) - Music on hold is disabled.
1 - Music on hold is enabled and you must specify a music file in feature.moh.filename.
feature.moh.filenameSpecify the file the music file you want the phone to play when users place an active call onhold.
NULL (default)
String, maximum of 256 characters
feature.moh.payloadSpecify the payload for RTP packets when music on hold is playing. For bestphoneperformance, set to 80. In PSTN calls using a media gateway that does not support apayload value of 80, set to 20.
80 (default)
20, 40, 60, 80
res.quotas.toneSet the maximum sample tone file size.
1024 KB
600 - 1024 KB
Audio Features
55

Music on Hold Error MessagesIf a music file fails to play, the phone displays one of the following messages to indicate the problem.
MoH Error Messages
Message Cause
Download failed Phone failed to download the MoH file because thecurrent file was in use.
MoH file size is 0
A network failure occurred during download.
File size exceeded the maximum File size exceeded the maximum. You can configurethe maximum file size using res.quotas.tone.
Unsupported file format The file you are uploading is not a supported fileformat.
Network is down A network failure occurred during download.
Audio Features
56

Phone Display FeaturesTopics:
• Skype for Business User Interface on Poly Phones
• Reverse Name Lookup
• Time Zone Location Description
• Capture Your Phone’s Screen
• Time and Date Wizard
• Setting up the Phone Theme
• Phone Display Name
• Number or Custom Label
• Direct Inward Dialing Number
This section explains features you can configure for the phone's screen display and lists parameters youcan use to configure these features.
Skype for Business User Interface on Poly PhonesThe user interface for Poly phones match the theme used in the Skype for Business client.
This feature is enabled by default on supported phones with the Skype Base Profile or shipped withSkype for Business enabled.
Reverse Name LookupYou can configure the phone to display incoming caller names, outgoing recipient names, and the sourcelocation where the phone obtains names.
The phone displays all Skype for Business participant names for the following functions:• CCCP conference calls• Response group calls• Team calls• Voicemail• Placed, Received, and Missed call lists
If the phone cannot match the number of the incoming or outgoing name to a name in your organization,the phone displays the name given in the SIP signaling.
If a user saves a contact to the phone's local contact directory, the call list displays that name regardlessof the priority you configure.
57

Reverse Name Lookup ParameterThe following parameter configure Reverse Name Lookup.
up.rnl.priorityOutlook,SIP,ABS,Local (default)
This parameter overrides up.useDirectoryNames in the Skype Base Profile.
Enter a comma-separated string, no spaces, for components you want to enable with ReverseName Lookup. If you misconfigure the string, the parameter value falls back to the defaultpriority order. The string isn’t case-sensitive and can include any of the following values, listedhere in the default priority order the phone looks for a matching name:
For example, if you configure "ABS,SIP,Outlook,Local”, the phone tries to match the incomingnumber with contact names in the order of components you list.
If you don’t configure the value SIP as one of the values, and the phone doesn’t obtain thecontact name using any one of the others values you configure, the phone uses the name givenin the SIP signaling.
If you configure this parameter as disabled to avoid look up from Outlook, ABS, and localsources, then the phone uses the contact name given in the SIP signaling.
Time Zone Location DescriptionThe following two parameters configure a time zone location description for their associated GMT offset:
• device.sntp.gmtOffsetcityID If you are not provisioning phones manually from the phonemenu or Web Configuration Utility and you are setting the device.sntp.gmtOffset parameter,then you must configure device.sntp.gmtOffsetcityID to ensure that the correct time zonelocation description displays on the phone menu and Web Configuration Utility. The time zonelocation description is set automatically if you set the device.sntp.gmtOffset parametermanually using the phone menu or Web Configuration Utility.
• tcpIpApp.sntp.gmtOffsetcityID If you are not provisioning phones manually from the WebConfiguration Utility and you are setting the tcpIpApp.sntp.gmtOffset parameter, then youmust configure tcpIpApp.sntp.gmtOffsetcityID to ensure that the correct time zonelocation description displays on the Web Configuration Utility. The time zone location description isset automatically if you set the tcpIpApp.sntp.gmtOffset parameter manually using the WebConfiguration Utility.
Phone Display Features
58

Time Zone Location ParametersThe following parameters configure time zone location.
Time Zone Location Parameter Values
Permitted Value Time Zone Description
0
1
2
3
4
5
6
7
8
9
10
(GMT -12:00) Eniwetok,Kwajalein
(GMT -11:00) Midway Island
(GMT -10:00) Hawaii
(GMT -9:00) Alaska
(GMT -8:00) Pacific Time (US & Canada)
(GMT -8:00) Baja California
(GMT -7:00) Mountain Time (US & Canada)
(GMT -7:00) Chihuahua,La Paz
(GMT -7:00) Mazatlan
(GMT -7:00) Arizona
(GMT -6:00) Central Time (US & Canada)
11
12
13
14
15
16
17
18
19
20
(GMT -6:00) Mexico City
(GMT -6:00) Saskatchewan
(GMT -6:00) Guadalajara
(GMT -6:00) Monterrey
(GMT -6:00) Central America
(GMT -5:00) Eastern Time (US & Canada)
(GMT -5:00) Indiana (East)
(GMT -5:00) Bogota,Lima
(GMT -5:00) Quito
(GMT -4:30) Caracas
Phone Display Features
59

Permitted Value Time Zone Description
21
22
23
24
25
26
27
28
29
30
(GMT -4:00) Atlantic Time (Canada)
(GMT -4:00) San Juan
(GMT -4:00) Manaus,La Paz
(GMT -4:00) Asuncion,Cuiaba
(GMT -4:00) Georgetown
(GMT -3:30) Newfoundland
(GMT -3:00) Brasilia
(GMT -3:00) Buenos Aires
(GMT -3:00) Greenland
(GMT -3:00) Cayenne,Fortaleza
31
32
33
34
35
36
37
38
39
40
(GMT -3:00) Montevideo
(GMT -3:00) Salvador
(GMT -3:00) Santiago
(GMT -2:00) Mid-Atlantic
(GMT -1:00) Azores
(GMT -1:00) Cape Verde Islands
(GMT 0:00) Western Europe Time
(GMT 0:00) London,Lisbon
(GMT 0:00) Casablanca
(GMT 0:00) Dublin
41
42
43
44
45
46
47
48
49
50
(GMT 0:00) Edinburgh
(GMT 0:00) Monrovia
(GMT 0:00) Reykjavik
(GMT +1:00) Belgrade
(GMT +1:00) Bratislava
(GMT +1:00) Budapest
(GMT +1:00) Ljubljana
(GMT +1:00) Prague
(GMT +1:00) Sarajevo,Skopje
(GMT +1:00) Warsaw,Zagreb
Phone Display Features
60

Permitted Value Time Zone Description
51
52
53
54
55
56
57
58
59
60
GMT +1:00) Brussels
(GMT +1:00) Copenhagen
(GMT +1:00) Madrid,Paris
(GMT +1:00) Amsterdam,Berlin
(GMT +1:00) Bern,Rome
(GMT +1:00) Stockholm,Vienna
(GMT +1:00) West Central Africa
(GMT +1:00) Windhoek
(GMT +2:00) Bucharest,Cairo
(GMT +2:00) Amman,Beirut
61
62
63
64
65
66
67
68
69
70
(GMT +2:00) Helsinki,Kyiv
(GMT +2:00) Riga,Sofia
(GMT +2:00) Tallinn,Vilnius
(GMT +2:00) Athens,Istanbul
(GMT +2:00) Damascus
(GMT +2:00) E.Europe
(GMT +2:00) Harare,Pretoria
(GMT +2:00) Jerusalem
(GMT +2:00) Kaliningrad (RTZ 1)
(GMT +2:00) Tripoli
71
72
73
74
75
78
76
77
79
80
(GMT +3:00) Moscow
(GMT +3:00) St.Petersburg
(GMT +3:00) Volgograd (RTZ 2)
(GMT +3:00) Kuwait,Riyadh
(GMT +3:00) Nairobi
(GMT +3:00) Baghdad
(GMT +3:00) Minsk
(GMT +3:30) Tehran
(GMT +4:00) Abu Dhabi,Muscat
(GMT +4:00) Baku,Tbilisi
Phone Display Features
61
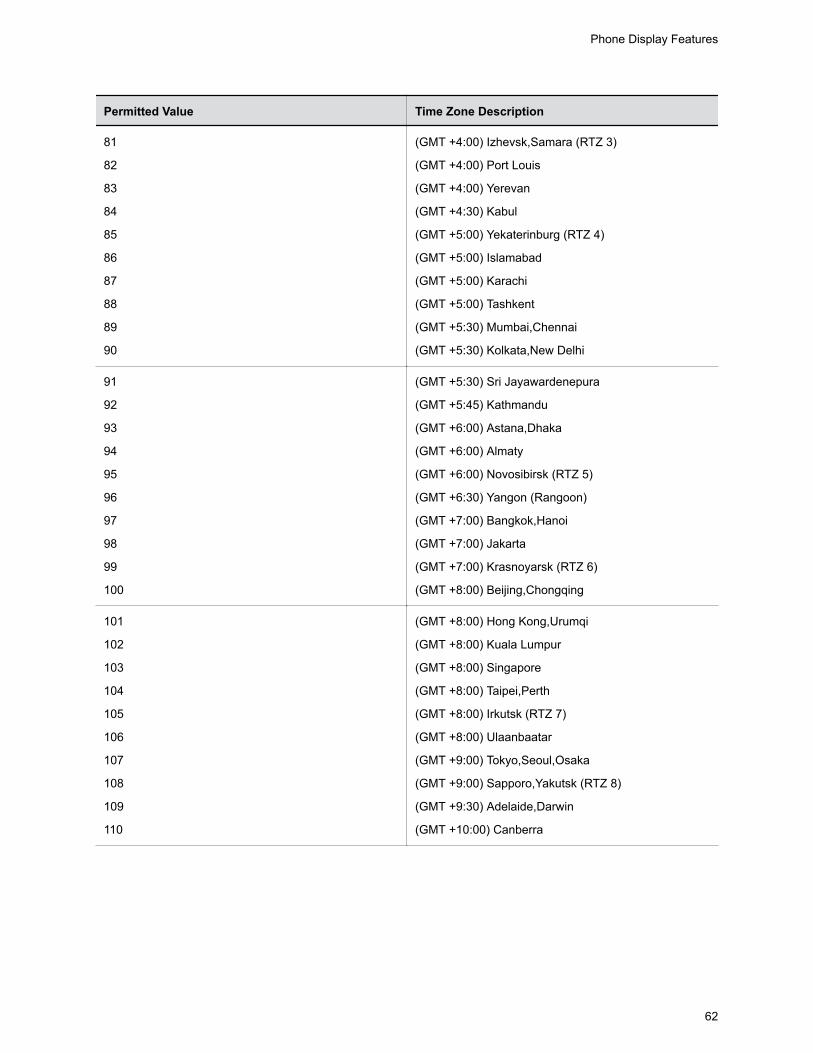
Permitted Value Time Zone Description
81
82
83
84
85
86
87
88
89
90
(GMT +4:00) Izhevsk,Samara (RTZ 3)
(GMT +4:00) Port Louis
(GMT +4:00) Yerevan
(GMT +4:30) Kabul
(GMT +5:00) Yekaterinburg (RTZ 4)
(GMT +5:00) Islamabad
(GMT +5:00) Karachi
(GMT +5:00) Tashkent
(GMT +5:30) Mumbai,Chennai
(GMT +5:30) Kolkata,New Delhi
91
92
93
94
95
96
97
98
99
100
(GMT +5:30) Sri Jayawardenepura
(GMT +5:45) Kathmandu
(GMT +6:00) Astana,Dhaka
(GMT +6:00) Almaty
(GMT +6:00) Novosibirsk (RTZ 5)
(GMT +6:30) Yangon (Rangoon)
(GMT +7:00) Bangkok,Hanoi
(GMT +7:00) Jakarta
(GMT +7:00) Krasnoyarsk (RTZ 6)
(GMT +8:00) Beijing,Chongqing
101
102
103
104
105
106
107
108
109
110
(GMT +8:00) Hong Kong,Urumqi
(GMT +8:00) Kuala Lumpur
(GMT +8:00) Singapore
(GMT +8:00) Taipei,Perth
(GMT +8:00) Irkutsk (RTZ 7)
(GMT +8:00) Ulaanbaatar
(GMT +9:00) Tokyo,Seoul,Osaka
(GMT +9:00) Sapporo,Yakutsk (RTZ 8)
(GMT +9:30) Adelaide,Darwin
(GMT +10:00) Canberra
Phone Display Features
62

Permitted Value Time Zone Description
111
112
113
114
115
116
117
118
119
120
(GMT +10:00) Magadan (RTZ 9)
(GMT +10:00) Melbourne
(GMT +10:00) Sydney,Brisbane
(GMT +10:00) Hobart
(GMT +10:00) Vladivostok
(GMT +10:00) Guam,Port Moresby
(GMT +11:00) Solomon Islands
(GMT +11:00) New Caledonia
(GMT +11:00) Chokurdakh (RTZ 10)
(GMT +12:00) Fiji Islands
121
122
123
124
125
126
(GMT +12:00) Auckland,Anadyr
(GMT +12:00) Petropavlovsk-Kamchatsky (RTZ 11)
(GMT +12:00) Wellington
(GMT +12:00) Marshall Islands
(GMT +13:00) Nuku'alofa
(GMT +13:00) Samoa
Capture Your Phone’s ScreenYou can capture your phone’s current screen.
Before you can take a screen capture, make sure the phone’s web server is enabled.
Procedure1. Add the parameter up.screenCapture.enabled to your configuration.2. Set the value to 1 and save.3. On the device, go to Settings > Basic > Preferences > Screen Capture.
Note you must repeat step 3 each time the device restarts or reboots.4. Locate and record the phone’s IP address at Status > Platform > Phone > IP Address.5. Set the phone to the screen you want to capture.6. In a web browser address field, enter https://<phoneIPaddress>/captureScreen where
<phoneIPaddress> is the IP address you obtained in step 5.
The web browser displays an image showing the phone’s current screen. You can save the imageas a BMP or JPEG file.
Related LinksConfiguring the Web Configuration Utility on page 76
Phone Display Features
63

Capture Your Device's Current Screen ParametersUse the following parameters to get a screen capture of the current screen on your device.
up.screenCapture.enabled0 (Default) - The Screen Capture menu is hidden on the phone.
1 - The Screen Capture menu displays on the phone.
When the phone reboots, screen captures are disabled from the Screen Capture menu on thephone.
Change causes system to restart or reboot.
up.screenCapture.value0 (Default) - The Screen Capture feature is disabled.
1 - The Screen Capture feature is enabled.
Time and Date WizardUsers signing into Skype for Business on the phone for the first time are prompted to set the time zone,time format, and date format before they start using the system.
This feature is enabled by default.
Time and Date Wizard ParametersUse the following parameters to enable or disable the Time and Date Wizard.
Time and Date Wizard Parameters
Parameter Permitted Values Restart orReboot
device.set 0 (default) - Do not use anydevice.xxx fields to set anyparameters.
1 - Use the device.xxx fieldsthat have device.xxx.set=1 .Set this to 1 only for the initialinstallation and set back to 0 afterthe initial installation.
Phone Display Features
64

Parameter Permitted Values Restart orReboot
device.lync.timeZone.set 0 (default) - Do not use thedevice.xxx value.
1 (default) - Use the device.xxxvalue.
For example, ifdevice.lync.timeZone.set =1, then use the value set fordevice.lync.timeZone .
device.lync.timeZone 1 (default) - Skype for BusinessTime Zone Control is enabled.
0 - Skype for Business Time ZoneControl is disabled.
Setting up the Phone ThemeYou can set the phone theme, labels, and colors that display on the user interface.
When the phone's Base Profile is set to Skype, the Skype for Business theme displays by default.
Theme ParameterThe following parameter configures the phone's theme.
up.uiThemeDefault (default) - The phone displays the default Poly theme.
SkypeForBusiness - The phone displays the Skype for Business theme.
Phone Display NameYou can configure the name that displays on the system, the connected monitor, and any deviceswirelessly connected to the system. The name you configure for the system, using any of the followingparameters, displays in the subsequent priority order:
• system.name• reg.1.displayname• reg.1.label• reg.1.address• Default system name
Phone Display Features
65

If you set the system name using the system.name parameter, the value you set displays for thesystem unless you configure a name to display for a specific feature.
Display Name ParametersSet the phone name using one or more of following parameters.
bluetooth.device.nameEnter the name of the system that broadcasts over Bluetooth to other devices.
NULL (default)
UTF-8 encoded string
reg.1.addressThe user part (for example, 1002) or the user and the host part (for example, [email protected])of the registration SIP URI or the H.323 ID/extension.
Null (default)
string address
reg.1.displaynameThe display name used in SIP signaling and/or the H.323 alias used as the default caller ID.
Null (default)
UTF-8 encoded string
reg.1.labelThe text label that displays next to the line key for registration x.
The maximum number of characters for this parameter value is 256; however, the maximumnumber of characters that a phone can display on its user interface varies by phone model andby the width of the characters you use. Parameter values that exceed the phone's maximumdisplay length are truncated by ellipses (…). The rules for parameter up.cfgLabelElidedetermine how the label is truncated.
Null (default)
UTF-8 encoded string
system.nameThe system name that displays at the top left corner of the monitor, and at the top of the Globalmenu of the phone.
Enter a string, maximum 96 characters.
Phone Display Features
66

Number or Custom LabelYou can choose to display a number, an extension, or a custom label on the Home Screen below the timeand date.
Configure the Number or Label from the SystemYou can configure the display of the number or label on the Home screen from the system menu.
Procedure» Navigate to Settings > Advanced > Administration Settings > Home Screen Label.
Number and Label ParametersYou can configure display of the phone number or label on the Home screen using centralizedprovisioning parameters.
homeScreen.placeACall.enable1 (default) - Specify Dial a Number label to display on the home screen.
0 - Does not display the label on the home screen.
homeScreen.customLabelSpecify the label to display on the phone's Home screen whenhomeScreen.labelType="Custom". The label can be 0 to 255 characters.
Null (default)
homeScreen.labelLocationSpecify where the label displays on the screen.
StatusBar (default) - The phone displays the custom label in the status bar at the top of thescreen.
BelowDate - The phone displays the custom label on the Home screen only, just below the timeand date.
homeScreen.labelTypeSpecify the type of label to display on the phone's Home screen.
PhoneNumber (default)
• When the phone is set to use Lync Base Profile, the phone number is derived from theSkype for Business server.
Custom - Enter an alphanumeric string between 0 and 255 characters.
PrimaryPhoneNumber – The status bar displays only the first phone number rather than all ofthe phone numbers.
Phone Display Features
67

None - Don't display a label.
reg.1.useteluriAsLineLabel1 - If reg.x.label="Null" the tel URI/phone number/address displays as the label of the linekey.
0 - If reg.x.label="Null" the value for reg.x.displayName, if available, displays as thelabel. If reg.x.displayName is unavailable, the user part of reg.x.address is used.
up.formatPhoneNumbers1 (default) - Enables automatic number formatting.
0 - Disables automatic number formatting and numbers display separated by "-".
Direct Inward Dialing NumberThe Direct Inward Dialing (DID) number assigned to the user on the Skype for Business server displayson the Lock, Home, and Incoming Call screens.
You can configure the format of the DID number to display on phones using parameter. You can alsoconfigure the phone to display DID numbers on phone screens of your choice with parameter.
Direct Inward Dialing Number ParametersUse the following parameters to configure DID number.
up.DIDFormatNumberAndExtension (default) – Display the DID number and extension.
NumberOnly – Display the DID number on the phone screen.
up.showDIDAllScreens (default) – Display the DID number on all the screens.
None – Disable DID number on phone.
LockedScreen – Display the DID number on the lockscreen.
StatusScreen – Display the DID number on the Statusscreen/Idle screen.
LockedAndStatusScreen – Display the DID number onthe lock and Status/Idle screen.
Phone Display Features
68
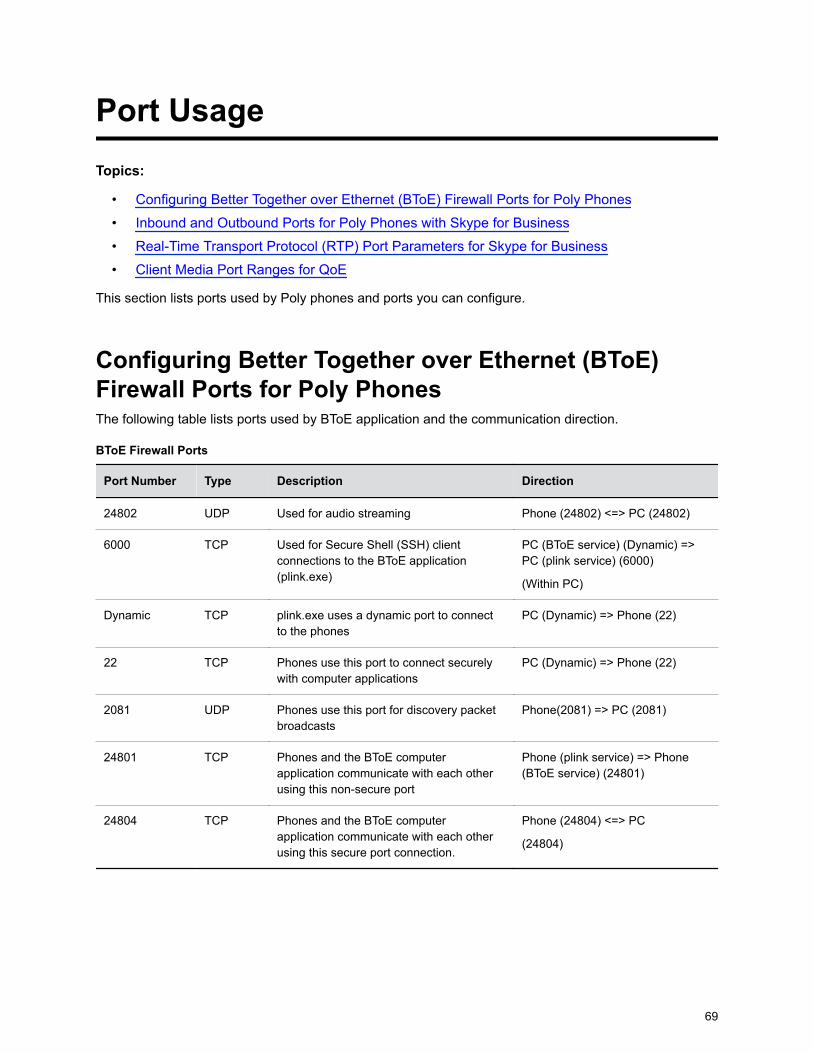
Port UsageTopics:
• Configuring Better Together over Ethernet (BToE) Firewall Ports for Poly Phones
• Inbound and Outbound Ports for Poly Phones with Skype for Business
• Real-Time Transport Protocol (RTP) Port Parameters for Skype for Business
• Client Media Port Ranges for QoE
This section lists ports used by Poly phones and ports you can configure.
Configuring Better Together over Ethernet (BToE)Firewall Ports for Poly PhonesThe following table lists ports used by BToE application and the communication direction.
BToE Firewall Ports
Port Number Type Description Direction
24802 UDP Used for audio streaming Phone (24802) <=> PC (24802)
6000 TCP Used for Secure Shell (SSH) clientconnections to the BToE application(plink.exe)
PC (BToE service) (Dynamic) =>PC (plink service) (6000)
(Within PC)
Dynamic TCP plink.exe uses a dynamic port to connectto the phones
PC (Dynamic) => Phone (22)
22 TCP Phones use this port to connect securelywith computer applications
PC (Dynamic) => Phone (22)
2081 UDP Phones use this port for discovery packetbroadcasts
Phone(2081) => PC (2081)
24801 TCP Phones and the BToE computerapplication communicate with each otherusing this non-secure port
Phone (plink service) => Phone(BToE service) (24801)
24804 TCP Phones and the BToE computerapplication communicate with each otherusing this secure port connection.
Phone (24804) <=> PC
(24804)
69

Inbound and Outbound Ports for Poly Phones withSkype for BusinessThis section provides port usage information when configuring network equipment to support Poly phoneswith Skype for Business.
For more information on port usage, visit the following articles on Microsoft TechNet:• Port and protocol requirements for servers• Skype for Business Online and Microsoft Teams
Inbound Ports for Poly Phones with Skype for BusinessThe following table lists the inbound IP ports currently used by Poly UC Software running on the Polyphones with Skype for Business.
Inbound IP Ports
Inbound Port Type Protocol Function Default ConfigurablePort Number
22 Static TCP SSHAdministration
Off No
80 Static TCP HTTP Pull Webinterface, HTTPPush
Off Yes
443 Static TCP HTTP Pull Webinterface, HTTPPush
On Yes
1023 Static TCP TelnetDiagnostics
Off No
1024 - 65535 Dynamic TCP/UDP RTP mediapackets
On Yes
1024 - 65535 Dynamic TCP/UDP RTCP mediapacketsstatistics
On Yes
5060 Static TCP/UDP SIP signaling On No
5061 Static TLS On No
Outbound Ports on Poly Phones with Skype for BusinessThe following table lists the outbound IP ports currently used by Poly UC Software running on the Polyphones with Skype for Business.
Port Usage
70
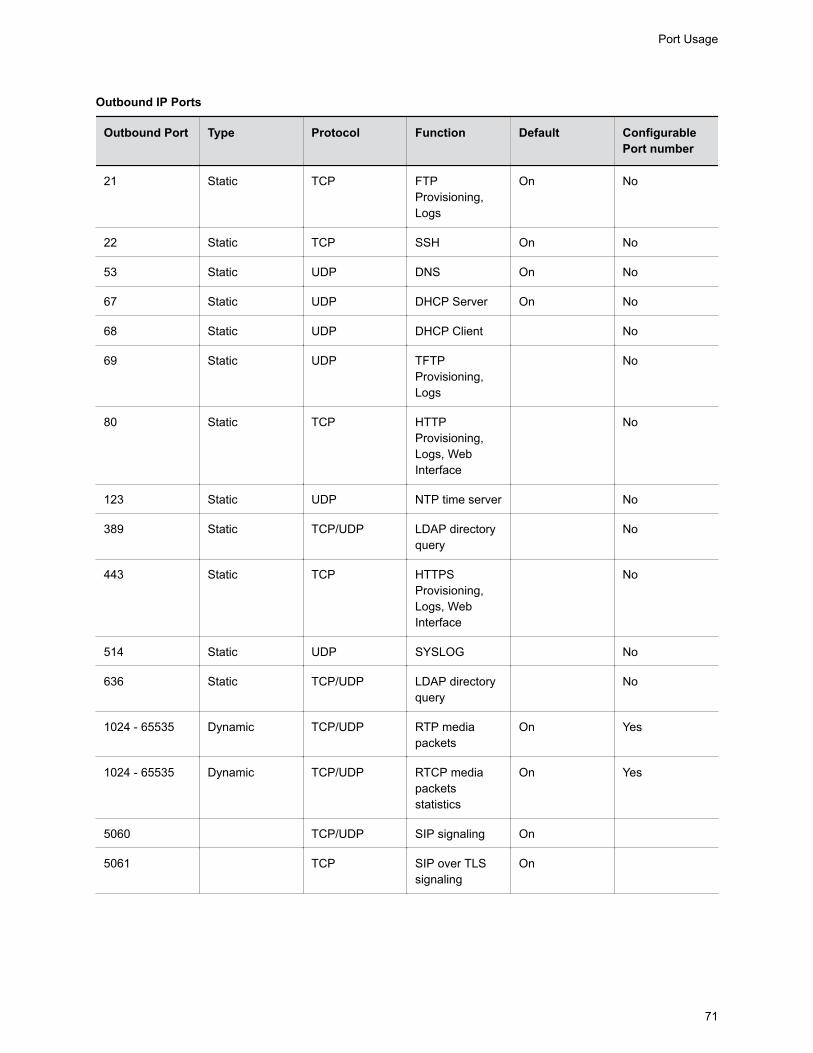
Outbound IP Ports
Outbound Port Type Protocol Function Default ConfigurablePort number
21 Static TCP FTPProvisioning,Logs
On No
22 Static TCP SSH On No
53 Static UDP DNS On No
67 Static UDP DHCP Server On No
68 Static UDP DHCP Client No
69 Static UDP TFTPProvisioning,Logs
No
80 Static TCP HTTPProvisioning,Logs, WebInterface
No
123 Static UDP NTP time server No
389 Static TCP/UDP LDAP directoryquery
No
443 Static TCP HTTPSProvisioning,Logs, WebInterface
No
514 Static UDP SYSLOG No
636 Static TCP/UDP LDAP directoryquery
No
1024 - 65535 Dynamic TCP/UDP RTP mediapackets
On Yes
1024 - 65535 Dynamic TCP/UDP RTCP mediapacketsstatistics
On Yes
5060 TCP/UDP SIP signaling On
5061 TCP SIP over TLSsignaling
On
Port Usage
71

Outbound Port Type Protocol Function Default ConfigurablePort number
5222 Static TCP PolycomResourceManager:XMPP
On No
Real-Time Transport Protocol (RTP) Port Parametersfor Skype for BusinessUse the following parameters to configure RTP packets and ports for the phones registered with Skypefor Business.
tcpIpApp.port.rtp.lync.audioPortRangeStartDetermines the start port for the audio port range.
5350 (default)
1024 - 65436
tcpIpApp.port.rtp.lync.audioPortRangeEndDetermines the end port for the audio port range.
5389 (default)
Min - 1024
Max - 65485
Client Media Port Ranges for QoETo help deploy QoE, you can enable client media ports and configure unique port ranges on the Skype forBusiness Server.
Procedure» Enable client media ports as shown in Configuring Port Ranges for your Microsoft Lync Clients in
Lync Server 2013.
Port Usage
72

Configuring Security OptionsTopics:
• 802.1X Authentication
• IEEE 802.1p/Q
• Accessing the Web Configuration Utility
• Securing Audio Using Master Key Identifier (MKI)
• Administrator and User Passwords
• Device Lock for Skype for Business
• Configuring Privacy Settings
• Lock Phone Ports and Interface
• Smart Login on Poly Phones
• SCEP Security Protocol
Poly UC Software enables you to optimize security settings, such as changing the passwords for thephone, enabling users to lock their phones, and blocking administrator functions from phone users.
802.1X AuthenticationPoly phones support IEEE 802 standards.
1X authentication and the following EAP authentication methods:• EAP-TLS (requires Device and CA certificates)• EAP-PEAPv0/MSCHAPv2 (requires CA certificates)• EAP-PEAPv0/GTC (requires CA certificates)• EAP-TTLS/MSCHAPv2 (requires CA certificates)• EAP-TTLS/GTC (requires CA certificates)• EAP-FAST (optional Protected Access Credential (PAC) file, if not using in-band provisioning)• EAP-MD5
802.1X Authentication ParametersTo set up an EAP method that requires a device or CA certificate, you need to configure TLS PlatformProfile 1 or TLS Platform Profile 2 to use with 802.1X.
You can use the parameters in the following list to configure 802.1X Authentication.
For more information on EAP authentication protocol, see RFC 3748: Extensible Authentication Protocol.
device.net.dot1x.enabledEnable or disable 802.1X authentication.
73

0
1
Change causes system to restart or reboot.
device.net.dot1x.identity1Set the identity (user name) for 802.1X authentication.
String
Change causes system to restart or reboot.
device.net.dot1x.methodSpecify the 802.1X EAP method.
EAP-None - No authentication
EAP-TLS,
EAP-PEAPv0-MSCHAPv2,
EAP-PEAPv0-GTC,
EAP-TTLS-MSCHAPv2,
EAP-TTLS-GTC,
EAP-FAST,
EAP-MD5
device.net.dot1x.password1Set the password for 802.1X authentication. This parameter is required for all methods exceptEAP-TLS.
String
Change causes system to restart or reboot.
device.net.dot1x.eapFastInBandProvEnable EAP In-Band Provisioning for EAP-FAST.
0 (default) - Disabled
1 - Unauthenticated, active only when the EAP method is EAP-FAST.
device.pacfile.dataSpecify a PAC file for EAP-FAST (optional).
Null (default)
0-2048 - String length.
device.pacfile.password
Configuring Security Options
74

The optional password for the EAP-FAST PAC file.
Null (default).
0-255 - String length.
IEEE 802.1p/QThe phone tags all Ethernet packets it transmits with an 802.1Q VLAN header when the following occurs:
• A valid VLAN ID is specified in the phone's network configuration.• The phone is instructed to tag packets through Cisco Discovery Protocol (CDP) running on a
connected Ethernet switch.• A VLAN ID is obtained from DHCP or LLDP
IEEE 802.1p/Q ParametersUse the following list to set values for IEEE 802.1p/Q parameters.
You can configure the user_priority specifically for RTP and call control packets, such as SIP signalingpackets, with default settings configurable for all other packets.
The phone tags all Ethernet packets it transmits with an 802.1Q VLAN header when the following occurs:• A valid VLAN ID specified in the phone's network configuration.• The phone is instructed to tag packets through Cisco Discovery Protocol (CDP) running on a
connected Ethernet switch.• A VLAN ID is obtained from DHCP or CDP.
qos.ethernet.other.user_prioritySet user priority for packets without a per-protocol setting.
2 (Default)
0 - 7
qos.ethernet.rtp.video.user_prioritySet user-priority used for Video RTP packets.
5 (Default)
0 - 7
qos.ethernet.rtp.user_priorityChoose the priority of voice Real-Time Protocol (RTP) packets.
5 (Default)
0 - 7
qos.ethernet.callControl.user_priority
Configuring Security Options
75

Set the user-priority used for call control packets.
5 (Default)
0 - 7
Accessing the Web Configuration UtilityWhen the Base Profile of a phone is set to Skype, access to the Web Configuration Utility is disabled bydefault.
Administrators must enable access to a phone's Web Configuration Utility from the phone menu systemor using configuration parameters.
If a phone Base Profile is set to Skype, or you use the centralized provisioning method to enter usercredentials to the configuration files, the phone displays a screen prompting an administrator to changethe default Admin password (456). Poly strongly recommends that administrators change the defaultpassword. This password is not the Skype for Business Sign In password. The password you enter hereis the same password administrators use to access the advanced settings on the phone menu and to login to a phone's Web Configuration Utility as an administrator.
Enable Access to the Web Configuration Utility From the Phone MenuWhen the phone's Base Profile is set to Skype, you can enable access to a phone's Web ConfigurationUtility form the phone's menu system.
Procedure1. On the phone, go to Settings > Advanced.2. Enter the administrator password (the default is 456).3. Select Administration Settings > Web Server Configuration.
Web Server and Web Config Mode display.4. Set Web Server to Enabled.5. Set Web Config Mode to HTTP Only, HTTPS Only, or HTTP/HTTPS and tap the back button..6. Select Save Config to save the web server configuration on the phone.
Configuring the Web Configuration UtilityThe security update for Skype for Business includes a device parameter and a correspondingdevice.set parameter
Poly recommends using device.* parameters only if you are familiar with the centralized provisioningmethod and with Poly UC Software.
Use the following parameters to enable and configure the Web Configuration Utility.
device.sec.coreDumpEncryption.enabled0 (default)
1
Configuring Security Options
76

device.sec.coreDumpEncryption.enabled.set0 (default)
1
httpd.cfg.enabledBase Profile = Generic
1 (default) - The Web Configuration Utility is enabled.
0 - The Web Configuration Utility is disabled.
Base Profile = Skype, SkypeUSB
0 (default) - The Web Configuration Utility is disabled.
1 - The Web Configuration Utility is enabled.
httpd.cfg.secureTunnelRequired1 (default) - Access to the Web Configuration Utility is allowed only over a secure tunnel(HTTPS) and non-secure (HTTP) is not allowed.
0 - Access to the Web Configuration Utility is allowed over both a secure tunnel (HTTPS) andnon-secure (HTTP).
httpd.enabledBase Profile = Generic
1 (default) - The web server is enabled.
0 - The web server is disabled.
Base Profile = Skype, SkypeUSB
0 (default) - The web server is disabled.
1 - The web server is enabled.
Related LinksCapture Your Phone’s Screen on page 63
Securing Audio Using Master Key Identifier (MKI)For secure audio communications, phones offer support for the crypto header with or without an MKI inthe SDP offer.
The following optional parameter allows you to include the crypto header in the SDP that uniquelyidentifies the SRTP stream within an SRTP session. The far end can choose to include a crypto with orwithout MKI.
sec.srtp.mki.enabled
Configuring Security Options
77

1 (default) - The phone offers two cryptos in the SDP offer: one without an MKI, and one with afour-byte MKI parameter in the SDP message of the SIP INVITE / 200 OK.
0 - The phone offers only one non-MKI crypto in the SDL offer.
Administrator and User PasswordsYou can change the default administrator and user passwords.
When you set the Base Profile to Skype, the phones displays a message prompting you to change thedefault administrator password (456). Poly strongly recommends that you change the default password.This password is separate from the Skype for Business user Sign In password. The default administratorpassword enables administrators to access advanced settings menu on the phone menu and to log in toa phone's Web Configuration Utility as an administrator.
You can change the default password using any of the following methods:
• The pop-up prompt when the phone first registers• Phone menu• System web interface (Web Configuration Utility)• Use the parameter reg.1.auth.password
You must have a user or administrator password before you can access certain menu options on thephone and in the system web interface. You can use the following default passwords to access menuoptions on the phone and to access the system web interface:
• Administrator password: 456• User password: 123
You can use an administrator password where a user password is required to see all the user options.While you can use the user password where the administrator password is required, the phone displays alimited set of menu options. Note that the system web interface displays different features and optionsdepending on which password you use.
Change the Default Administrator Password on the PhoneIf you do not change the default administrative password, the phone displays a warning and a remindermessage each time the phone reboots.
If you are registering phones with Microsoft Skype for Business Server, a message displays on the phonescreen prompting you to change the default password.
Procedure1. On the phone, go to Settings > Advanced, and enter the default password.2. Select Administration Settings > Change Admin Password.3. Enter the default password, enter a new password, and confirm the new password.
Configuring Security Options
78

Change the Default Passwords in the Web Configuration UtilityYou can change the administrator and user passwords on a per-phone basis using the system webinterface.
If the default administrative password is in use, a warning displays in the Web Configuration Utility.
Procedure1. Enter your phone’s IP address into a web browser.2. Select Admin as the login type, enter the administrator password (the default is 456), and click
Submit.3. Select Settings > Change Password.4. For the Admin, enter the Old Password, New Password, and re-enter to confirm the new
password.5. Select Save.6. For the User, enter the New Password and re-enter to confirm the new password.7. Select Save.
Administrator and User Password ParametersUse the following parameters to set the administrator and user password and configure passwordsettings.
sec.pwd.length.adminThe minimum character length for administrator passwords changed using the phone. Use 0 toallow null passwords.
1 (default)
0 -32
Change causes system to restart or reboot.
sec.pwd.length.userThe minimum character length for user passwords changed using the phone. Use 0 to allow nullpasswords.
2 (default)
0 -32
Change causes system to restart or reboot.
up.echoPasswordDigits1 (default) The phone briefly displays password characters before being masked by an asterisk.
0 - The phone displays only asterisks for the password characters.
device.auth.localAdminPasswordSpecify a local administrator password.
Configuring Security Options
79

0 - 32 characters
You must use this parameter with device.auth.localAdminPassword.set="1"
device.auth.localAdminPassword.set0 (default) - Disables overwriting the local admin password when provisioning using aconfiguration file.
1 - Enables overwriting the local admin password when provisioning using a configuration file.
Device Lock for Skype for BusinessYou can configure phones to be protected with a lock code that enables users to access personal settingsfrom different phones.
You must enable Device Lock on the Skype for Business server. After you enable Device Lock, you canenable or disable Device Lock and configure options for your phones using Poly parameters. You cannotenable or disable Device Lock using the Web Configuration Utility.
Device Lock is enabled by default for Skype for Business. If you enable Phone Lock and Device Lock forSkype for Business at the same time on a phone with the Base Profile set to Skype, the Device Lockfeature takes precedence over Phone Lock.
Administrators can configure phone behavior after six unsuccessful user unlock attempts. If users forgettheir lock code, they can reset it from the phone when signed in to their Skype for Business account. Ifusers sign in to their Skype for Business account using the Web Sign-In method, they cannot reset theirlock code from the phone.
Users must sign into the phone before using Device Lock. If a phone restarts or reboots after a user setsthe lock code, the phone is locked after the restart or reboot. Users can lock the phone from the phonescreen or Skype for Business client when the phone and computer are connected using BToE. If DeviceLock is used in conjunction with BToE, the phone and computer always remain synchronized if either thephone or computer restarts or reboots. If the BToE connection is broken between phone and computer,the phone is locked.
You can also:• Define authorized outbound emergency numbers from a locked device• Set up a minimum lock code length on the Skype for Business server
Profile Photo on Device Lock ScreenWhen a user is signed in to their Skype for Business account, that user's Microsoft Exchange or publicwebsite profile photo displays on the Lock screen.
The profile photo appears when the Device Lock feature and the Microsoft Exchange Service areenabled. Profile photos set using Active Directory are not supported and do not display on the phone.
Adding Authorized Emergency Contacts on a Locked DeviceYou can configure emergency contact numbers that users can call on a locked device in one of two ways:
• Create a policy for emergency numbers on the Skype for Business Server. Note that this methodmust be supported by a voice routing trunk configuration.
Configuring Security Options
80

• Create an authorized list for a line by configuring the value of the parameterphoneLock.authorized.x.value to a Tel URI or SIP URI, for example,phoneLock.authorized.1.value="[email protected]".
When the Base Profile of the phone is set to Skype for Business, you can configure the phone to set theorder of display for the authorized emergency numbers when the device is locked.
Device Lock for Skype for Business ParametersThe following parameters configure the Skype for Business Device Lock feature.
feature.deviceLock.enableEnables or disables the Device Lock feature on the phone.
1 (default) - Device Lock is enabled.
0 - Device Lock is disabled.
phoneLock.authorized.x.valueSpecify a registered line for 'x' and an authorized call list when the device is locked using a TelURI or SIP URI, for example, phoneLock.authorized.1.value="[email protected]" .
up.btoeDeviceLock.timeOutConfigure a time delay after which the phone locks when the user locks the computer pairedwith the phone.
10 seconds (default)
0 - 40 seconds
up.configureDeviceLockAuthListEmergencyNumberAtTop (default) - The E911 emergency number will be displayed followed byauthorized numbers when the phone is locked.
EmergencyNumberAtBottom - The authorized numbers will be displayed followed by the E911number when the phone is locked.
EmergencyNumberDisabled - Only the authorized numbers will be displayed when the phone islocked.
up.deviceLock.createLockTimeoutSpecify the timeout in minutes after which the Create Lock Code screen disappears and theuser is signed out.
0 (default) - No timeout for the Create Lock Code prompt.
0 - 3 minutes - If the user does not provide input to the Create Lock Code within the time youspecify, the Create Lock Code screen disappears and the user is signed out of the phone.
Configuring Security Options
81

up.deviceLock.signOutOnIncorrectAttemptsSpecify whether to sign out the user from the phone after six unsuccessful attempts to unlockthe phone.
0 (default) - After six unsuccessful unlock attempts, the phone displays a message indicating acountdown of 60 seconds after which the user can attempt to unlock the phone.
1 - After six unsuccessful unlock attempts, the user is signed out of the phone, must sign inagain, and is prompted to create a new lock code.
Configuring Privacy SettingsPoly UC software enables you to block user-specific information such as SIP URI and telephone numberleakage by using the following parameter.
Privacy Configuration Parameter
voIpProt.SIP.requestValidation.x.requestSets the name of the method for which validation is applied.
Null (default)
INVITE, ACK, BYE, REGISTER, CANCEL, OPTIONS, INFO, MESSAGE, SUBSCRIBE,NOTIFY, REFER, PRACK, UPDATE
ALL - Phone does not honor the above request methods received from unknown sources.
Note: Intensive request validation may have a negative performance impact due to theadditional signaling required in some cases.
Change causes system to restart or reboot.
Lock Phone Ports and InterfaceYou can make the Poly phone more secure by disabling Bluetooth, USB host, and USB device ports.
Phone Port Lock and Interface ParametersThe following parameters lock the phone ports and disable phone interface features.
feature.usb.host.enabledUse the host port for USB headset, memory sticks, mouse, keyboards.
1 (default) - The USB host port is enabled.
0 - The USB host port is disabled.
feature.bluetooth.enabled
Configuring Security Options
82

1 (default) - The Bluetooth feature is enabled. When enabled, the Bluetooth menu shows in thephone user interface.
0 - The Bluetooth feature is disabled.
Smart Login on Poly PhonesSmart Login determines if a network environment is capable of PIN Authentication.
If the STS-URI is not configured via DHCP Option43 or manually through configuration files, then PINAuthentication will not be enabled for the phone or in the Web Configuration Utility for a Skype forBusiness sign in.
SCEP Security ProtocolThe Simple Certificate Enrollment Protocol (SCEP) enables you to automatically and securely provisionmultiple phones with a digital device certificate.
SCEP ParametersUse the following parameters to configure SCEP.
SCEP.CAFingerprintConfigure the CA certificate fingerprint to confirm the authenticity of the CA response duringenrollment.
null (default)
0 - 255 characters
SCEP.certPoll.retryCountSpecify the number of times to poll the SCEP server when the SCEP server returns a CertificateEnrollment Response Message with pkiStatus set to pending.
12 (default)
1 - 24
SCEP.certPoll.retryIntervalSpecify the number of seconds to wait between poll attempts when the SCEP server returns aCertificate Enrollment Response Message with pkiStatus set to pending.
300 (default)
300 - 3600
SCEP.certRenewalRetryIntervalSpecify the time interval to retry certificate renewal.
Configuring Security Options
83

86400 minutes (default)
28800 - 259200 minutes
SCEP.certRenewalThresholdSpecify the percentage of the certificate validity interval to initiate a renewal.
80 (default)
50 - 100
SCEP.challengePasswordSpecify the challenge password to send with the Certificate Signing Request (CSR) whenrequesting a certificate.
null (default)
0 - 255 characters
SCEP.csr.commonNameSpecify the common name to use for CSR generation.
null (default)
0 - 64
SCEP.csr.countrySpecify the country name to use for CSR generation.
null (default)
0 - 2
SCEP.csr.emailSpecify the email address to use for CSR generation.
null (default)
0 - 64
SCEP.csr.organizationSpecify the organization name to use for CSR generation.
null (default)
0 - 64
SCEP.csr.stateSpecify the state name to use for CSR generation.
null (default)
Configuring Security Options
84

0 - 128 characters
SCEP.enable0 (default) - Disable the SCEP feature.
1 - Enable the SCEP feature.
SCEP.enrollment.retryCountSpecify the number of times to retry the enrolment process in case of enrolment failure.
12 (default)
1 - 24
SCEP.enrollment.retryIntervalSpecify the time interval to retry the enrolment process.
300 seconds (default)
300 - 3600 seconds
SCEP.http.passwordSpecify the password that authenticates with the SCEP server.
null (default)
string, max 255 characters
SCEP.http.usernameSpecify the user name that authenticates with the SCEP server.
null (default)
string, max 255 characters
SCEP.urlSpecify the URL address of the SCEP server accepting requests to obtain a certificate.
null (default)
0 - 255 characters
Configuring Security Options
85

CertificatesTopics:
• Install a Certificate Using Configuration Files
• Manually Install a Certificate with the Web Configuration Utility
• Online Certificate Status Protocol
If you need to set up a remote worker, you must manually install a certificate to the phone. You also havethe option to create your own XML configuration file and upload it to a phone using the Web ConfigurationUtility.
You can manually install certificates on a per-phone basis only. You must use Base64 format.
When phones are signed in and the software is downgraded, the phones will be in the signed-in stateuntil the User Certificates are valid.
If you are setting up your network and you want more information on certificate options see Configure theNetwork.
Install a Certificate Using Configuration FilesYou can manually install a certificate using configuration parameters in the template files available withUC Software.
1. Enter the following two parameters to a configuration file in your Skype for Business directory.
2. Enter the certificate and application profile as values for the two parameters:• sec.TLS.customCaCert.1=<enter the certificate>• sec.TLS.profileSelection.SIP=<ApplicationProfile1>
86

You can also enter the certificate by doing one of the following:• Add the two parameters in an XML file you create with an XML editor.• Add the two parameters to an existing configuration file you are using.
Procedure» Enter the root CA certificate, in Base64 format, in sec.TLS.customCaCert.1 and set the
application profile in sec.TLS.profileSelection.SIP .
Certificates
87

You have successfully installed a security certificate.
Manually Install a Certificate with the WebConfiguration UtilityYou can use the Web Configuration Utility to install a certificate manually.
Procedure1. Enter your phone’s IP address into a web browser.2. Select Admin as the login type, enter the administrator password (the default is 456), and click
Submit.3. Go to Utilities > Import & Export Configuration.4. Under Import Configuration, click Choose File.5. In the dialog, choose the XML configuration file you created and click Import.
The XML configuration file is successfully loaded to the phone.6. To verify that the file is loaded, go to Menu > Settings > Status > Platform > Configuration.
Certificates
88

Online Certificate Status ProtocolThe Online Certificate Status Protocol (OCSP) is used to authenticate the revocation status of an X.509digital certificate. When a user sends a request to a server, the OCSP will retrieve the information whetherthe certificate is valid or revoked.
Online Certificate Status Protocol ParameterOCSP is a more advanced protocol than the existing CRL. OCSP further offers a grace period for anexpired certificate to access servers for a limited time before certificate renewal. OCSP is disabled bydefault.
device.sec.TLS.OCSP.enabled0 (default) OCSP is disabled.
1 – OCSP is enabled
Change causes system to restart or reboot.
Ensure that device.set=”1”, and device.sec.TLS.OCSP.enabled.set="1" to enableOCSP.
Certificates
89
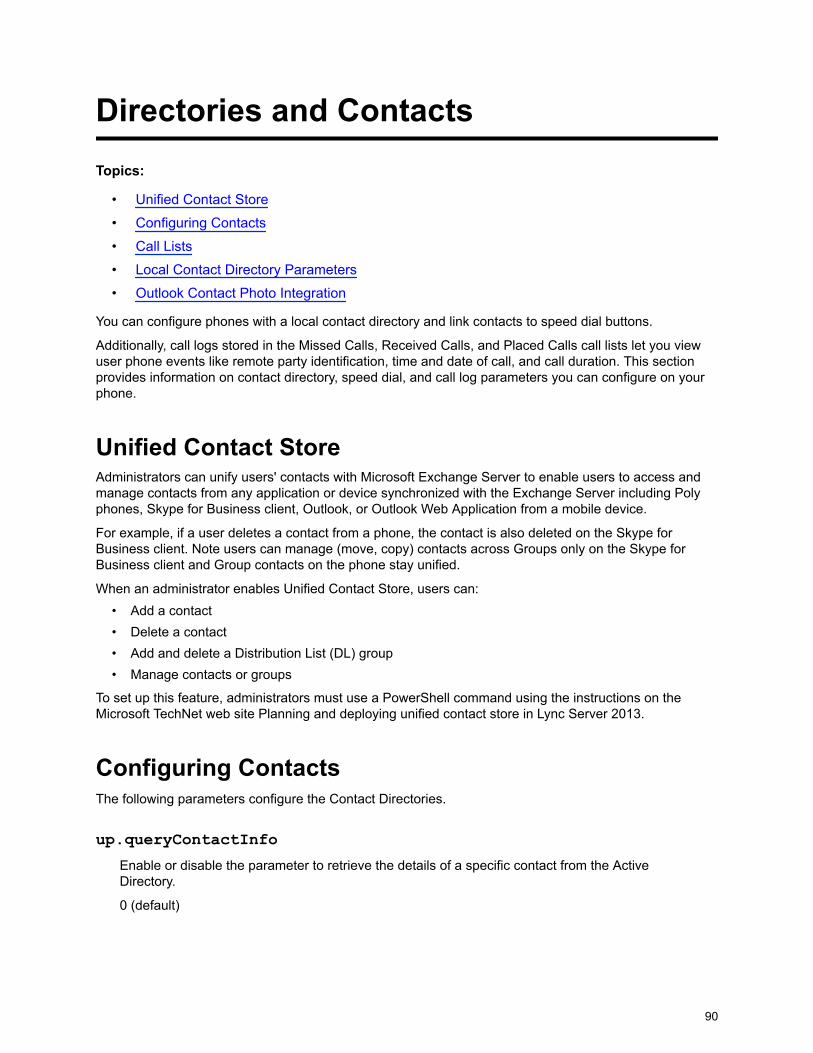
Directories and ContactsTopics:
• Unified Contact Store
• Configuring Contacts
• Call Lists
• Local Contact Directory Parameters
• Outlook Contact Photo Integration
You can configure phones with a local contact directory and link contacts to speed dial buttons.
Additionally, call logs stored in the Missed Calls, Received Calls, and Placed Calls call lists let you viewuser phone events like remote party identification, time and date of call, and call duration. This sectionprovides information on contact directory, speed dial, and call log parameters you can configure on yourphone.
Unified Contact StoreAdministrators can unify users' contacts with Microsoft Exchange Server to enable users to access andmanage contacts from any application or device synchronized with the Exchange Server including Polyphones, Skype for Business client, Outlook, or Outlook Web Application from a mobile device.
For example, if a user deletes a contact from a phone, the contact is also deleted on the Skype forBusiness client. Note users can manage (move, copy) contacts across Groups only on the Skype forBusiness client and Group contacts on the phone stay unified.
When an administrator enables Unified Contact Store, users can:• Add a contact• Delete a contact• Add and delete a Distribution List (DL) group• Manage contacts or groups
To set up this feature, administrators must use a PowerShell command using the instructions on theMicrosoft TechNet web site Planning and deploying unified contact store in Lync Server 2013.
Configuring ContactsThe following parameters configure the Contact Directories.
up.queryContactInfoEnable or disable the parameter to retrieve the details of a specific contact from the ActiveDirectory.
0 (default)
90

1
Call ListsThe phone records and maintains user phone events to a call list, which contains call information such asremote party identification, time and date of the call, and call duration.
The list is stored on the provisioning server as an XML file named <MACaddress>-calls.xml. If you wantto route the call lists to another server, use the CALL_LISTS_DIRECTORY field in the masterconfiguration file. All call lists are enabled by default.
The phone maintains all the calls in three separate user accessible call lists: Missed Calls, ReceivedCalls, and Placed Calls. Users can clear lists manually on their phones, or delete individual records or allrecords in a group (for example, all missed calls).
Call List ParametersUse the following parameters to configure call lists.
callLists.collapseDuplicatesLync Base Profile – 0 (default)
Generic Base Profile – 1 (default)
1 – Consecutive incomplete calls to/from the same party and in the same direction are collapsedinto one record in the calls list. The collapsed entry displays the number of consecutive calls.
0 – Each call is listed individually in the calls list.
callLists.logConsultationCallsLync Base Profile – 1 (default)
Generic Base Profile – 1 (default)
0 – Consultation calls not joined into a conference call are not listed as separate calls in thecalls list.
1 – Each consultation calls is listed individually in the calls list.
feature.callList.enabled1 (default) - Allows you to enable the missed, placed, and received call lists on all phone menusincluding the Home screen and dial pad.
0 - Disables all call lists.
Hiding call lists from the Home screen and dial pad requires UCS 5.4.2 RevAA or higher.
feature.callListMissed.enabled0 (Default) - The missed call list is disabled.
1 - The missed call list is enabled.
Directories and Contacts
91

To enable the missed, placed, or received call lists, feature.callList.enabled must beenabled.
feature.callListPlaced.enabled0 (Default) - The placed call list is disabled.
1 - The placed call list is enabled.
To enable the missed, placed, or received call lists, feature.callList.enabled must beenabled.
feature.callListReceived.enabled0 (Default) - The received call list is disabled.
1 - The received call list is enabled.
To enable the missed, placed, or received call lists, feature.callList.enabled must beenabled.
feature.exchangeCallLog.enabledIf Base Profile is:
Generic - 0 (default)
Skype for Business - 1 (default)
1 - The Exchange call log feature is enabled, user call logs are synchronized with the server,and the user call history of Missed, Received, and outgoing calls can be retrieved on the phone.
You must also enable the parameter feature.callList.enabled to use the Exchange calllist feature.
0 - The Exchange call list feature is disabled, the user call list history cannot be retrieved fromthe Exchange server, and the phone generates call lists locally.
Local Contact Directory ParametersThe following parameters configure the local contact directory.
contactPhotoIntegration.hideMyPhotoDon't show the signed-in user's photo on the line key but still show other users' photos.
0 (Default) - Disable the Hide My Photo feature
1 - Enable the Hide My Photo feature
dir.local.contacts.maxNumSet the maximum number of contacts that can be stored in the Local Contact Directory. Themaximum number varies by phone model, refer to section 'Maximum Capacity of the LocalContact Directory'.
Directories and Contacts
92
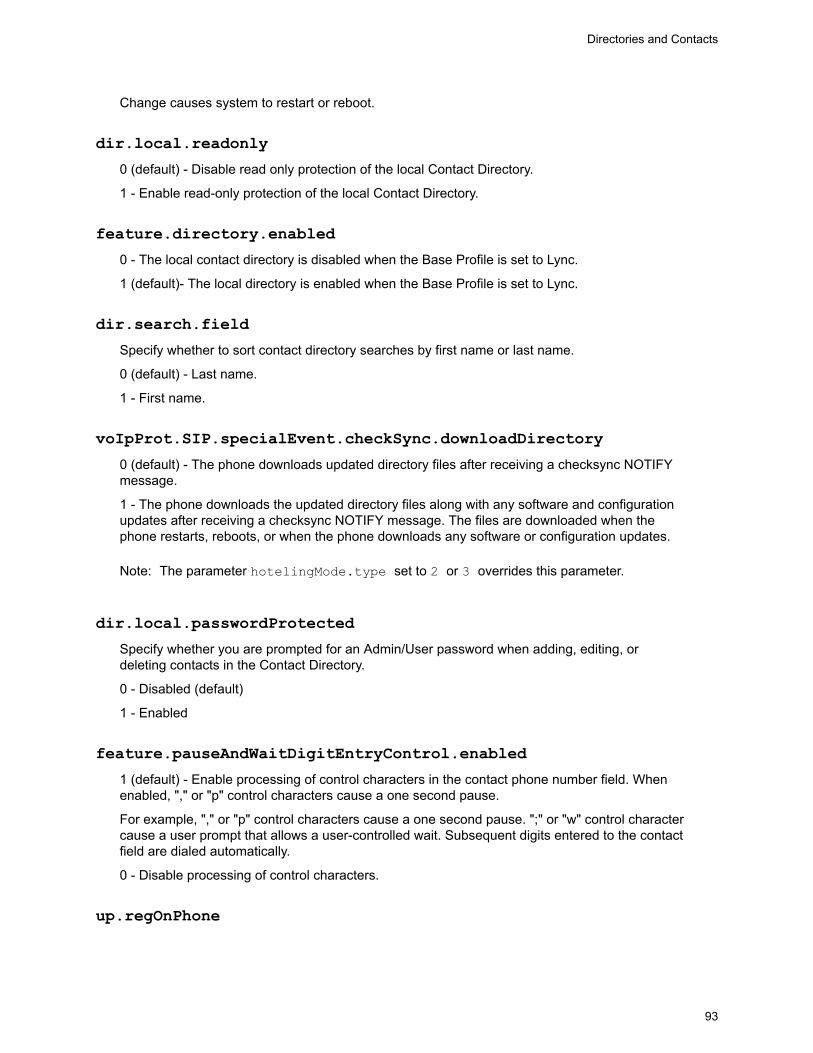
Change causes system to restart or reboot.
dir.local.readonly0 (default) - Disable read only protection of the local Contact Directory.
1 - Enable read-only protection of the local Contact Directory.
feature.directory.enabled0 - The local contact directory is disabled when the Base Profile is set to Lync.
1 (default)- The local directory is enabled when the Base Profile is set to Lync.
dir.search.fieldSpecify whether to sort contact directory searches by first name or last name.
0 (default) - Last name.
1 - First name.
voIpProt.SIP.specialEvent.checkSync.downloadDirectory0 (default) - The phone downloads updated directory files after receiving a checksync NOTIFYmessage.
1 - The phone downloads the updated directory files along with any software and configurationupdates after receiving a checksync NOTIFY message. The files are downloaded when thephone restarts, reboots, or when the phone downloads any software or configuration updates.
Note: The parameter hotelingMode.type set to 2 or 3 overrides this parameter.
dir.local.passwordProtectedSpecify whether you are prompted for an Admin/User password when adding, editing, ordeleting contacts in the Contact Directory.
0 - Disabled (default)
1 - Enabled
feature.pauseAndWaitDigitEntryControl.enabled1 (default) - Enable processing of control characters in the contact phone number field. Whenenabled, "," or "p" control characters cause a one second pause.
For example, "," or "p" control characters cause a one second pause. ";" or "w" control charactercause a user prompt that allows a user-controlled wait. Subsequent digits entered to the contactfield are dialed automatically.
0 - Disable processing of control characters.
up.regOnPhone
Directories and Contacts
93

0 (default) – Contacts you assign to a line key display on the phone in the position assigned.
1 – Contacts you assign to a line key are pushed to the attached expansion module.
Change causes system to restart or reboot.
Outlook Contact Photo IntegrationYou can configure the phone to display profile photos for the registered line and all Skype for Businesscontacts, if a photo is set for the Skype for Business or Microsoft Exchange account.
When enabled, a profile photo shows for contacts on all contact-related screens, including the Call,Recent Calls, and Directory search screens, as space permits. Set the parameterfeature.contactPhotoIntegration.enabled = 1 to enable outlook photos to display on thephone.
Contact Photo Integration Limitations
The following are limitations on the phone with the Outlook Photo Integration feature:• The phone cannot access contact photos for non-federated accounts, from image URLs, or
imported from Active Directory.
Outlook Contact Photo ParametersUse the following parameters to configure Skype for Business or Microsoft Exchange profile photos todisplay on the phone for contacts on supported contact screens.
feature.contactPhotoIntegration.enabledSet to retrieve and display Outlook profile photos for contacts on the phone.
1 (default) - Retrieves profile photos from Outlook and displays the photos for contacts.
0 - Does not show Outlook contact photos.
contactPhotoIntegration.videoMuteSet to display the profile photo for the signed-in user's video mute icon.
1 (default) - Shows the signed-in user's profile photo when on video mute.
0 - Shows the generic video mute icon.
Directories and Contacts
94

Call ControlsTopics:
• Call Forwarding with Skype for Business
• Enhanced Feature Line Key (EFLK)
• Busy Options to Manage Incoming Calls
• Centralized Conference Control Protocol (CCCP)
• Dial Plans
• PSTN Gateway on Failover
• Presence Status
• Local Call Recording
• Local Digit Map
• International Dialing Prefix
• Enhanced 911 (E.911)
• Configuring Boss-Admin
This chapter shows you how to configure call control features.
Call Forwarding with Skype for BusinessThe Skype for Business server automatically sends call forwarding functionality in-band to the phones.
When Call Forwarding is enabled on the Skype for Business server, you can override Microsoft settingsfrom a provisioning server using the Poly parameters in the following list or from the Web ConfigurationUtility.
If call forwarding is disabled on the Microsoft server then call forwarding is also disabled on the phone. Todisable call forwarding sent in-band from the Microsoft server, disable the settings for call forwarding andsimultaneous ring on the Microsoft server.
feature.forward.enable1 (default) - Enables call forwarding from the phone menu.
0 - Disables call forwarding from the main menu
homeScreen.forward.enable1 (default) - Displays the Forward icon on the Home screen.
0 - Removes the Forward icon from the Home screen.
softkey.feature.forward1 (default) - Displays the Forward soft key.
95
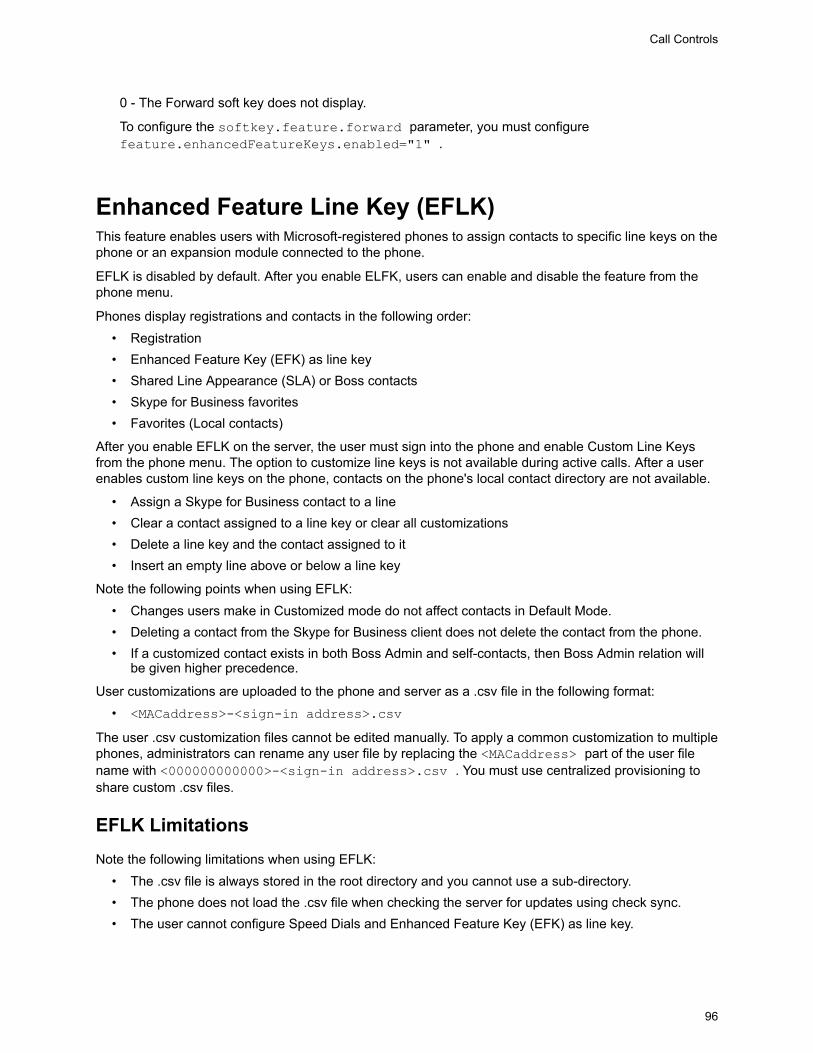
0 - The Forward soft key does not display.
To configure the softkey.feature.forward parameter, you must configurefeature.enhancedFeatureKeys.enabled="1" .
Enhanced Feature Line Key (EFLK)This feature enables users with Microsoft-registered phones to assign contacts to specific line keys on thephone or an expansion module connected to the phone.
EFLK is disabled by default. After you enable ELFK, users can enable and disable the feature from thephone menu.
Phones display registrations and contacts in the following order:• Registration• Enhanced Feature Key (EFK) as line key• Shared Line Appearance (SLA) or Boss contacts• Skype for Business favorites• Favorites (Local contacts)
After you enable EFLK on the server, the user must sign into the phone and enable Custom Line Keysfrom the phone menu. The option to customize line keys is not available during active calls. After a userenables custom line keys on the phone, contacts on the phone's local contact directory are not available.
• Assign a Skype for Business contact to a line• Clear a contact assigned to a line key or clear all customizations• Delete a line key and the contact assigned to it• Insert an empty line above or below a line key
Note the following points when using EFLK:• Changes users make in Customized mode do not affect contacts in Default Mode.• Deleting a contact from the Skype for Business client does not delete the contact from the phone.• If a customized contact exists in both Boss Admin and self-contacts, then Boss Admin relation will
be given higher precedence.
User customizations are uploaded to the phone and server as a .csv file in the following format:• <MACaddress>-<sign-in address>.csv
The user .csv customization files cannot be edited manually. To apply a common customization to multiplephones, administrators can rename any user file by replacing the <MACaddress> part of the user filename with <000000000000>-<sign-in address>.csv . You must use centralized provisioning toshare custom .csv files.
EFLK LimitationsNote the following limitations when using EFLK:
• The .csv file is always stored in the root directory and you cannot use a sub-directory.• The phone does not load the .csv file when checking the server for updates using check sync.• The user cannot configure Speed Dials and Enhanced Feature Key (EFK) as line key.
Call Controls
96

Configuring EFLKUse the following parameters to configure the Enhanced Feature Line Key feature for devices registeredwith Skype for Business.
feature.flexibleLineKey.enable0 (default) - The EFLK feature is disabled.
1 - The EFLK feature is enabled and Line Key Customization is added to the phone atSettings > Basic > Line Key Customization.
Busy Options to Manage Incoming CallsBusy Options enables users to manage incoming calls when a call or conference is already in progress.
After you enable and configure the Busy Options on the Skype for Business server, Busy Options settingstake effect on all Skype for Business call devices and clients. You can enable one of the followingpredefined settings on the devices:
• BusyonBusy: Rejects an incoming call and sends a notification to the caller stating that the user isbusy on another call.
• VoicemailonBusy: Forwards an incoming call to voicemail, when the user is either busy or doesnot answer the call.
Centralized Conference Control Protocol (CCCP)CCCP is enabled by default when the phone Base Profile is set to Skype.
CCCP enables users to initiate conference calls with Skype for Business contacts from their phone,manage conference participants, enable announcements, and lock a conference. Users can manage amaximum of 24 Skype for Business conference calls at a time on their phone. However, users can haveonly one active conference call in progress on their phone.
Centralized Conference Control Protocol (CCCP) ParametersThe following parameters configure CCCP.
Call Controls
97
Dial PlansThis section on dial plans includes information on dial plan normalization, multiple emergency number dialplans, parameters you can configure on your provisioning server, and examples of supported andunsupported dial plans.
Dial Plan NormalizationDial Plan Normalization enables you to configure dial plans on the Skype for Business server or on yourprovisioning server.
For more information on regular expressions used on Skype for Business server, see .NET FrameworkRegular Expressions on Microsoft Developer Network.
Multiple Emergency Number Dial PlanWhen registering phones with Skype for Business, you can configure multiple emergency numbers on theSkype for Business server.
When you correctly configure the multiple emergency numbers on the Skype for Business server, userscan make calls to the emergency numbers from the Skype for Business client or from a phone, evenwhen the phone is locked.
Phones receive emergency numbers through in-band provisioning and can conflict with the emergencydial string and mask. When a phone receives both multiple emergency numbers and emergency dialstring and mask, the client and phone use multiple emergency numbers.
For instructions on creating a multiple emergency number dial plan, see Configure Multiple EmergencyNumbers in Skype for Business 2015 on Microsoft TechNet.
Dial Plan, Dial Plan Normalization, and Digit Map ParametersPoly does not support all regular expression dial plans.
The following parameters configure supported dial plans with Skype for Business Server.
dialplan.1.digitmapx.T
In the above expression, enter the phone number for "x". Enter the timeout in seconds for "T".
Specify the digit map used for the dial plan using a string compatible with the digit map featureof MGCP described in 2.1.5 of RFC 3435. This parameter enables the phone to automaticallyinitiate calls to numbers that match a digit map pattern.
The string is limited to 2560 bytes and 100 segments of 64 bytes, and the following charactersare allowed in the digit map.
• A comma (,), which turns dial tone back on.• A plus sign (+) is allowed as a valid digit.• The extension letter 'R' indicates replaced string.• The extension letter 'Pn' indicates precedence, where 'n' range is 1-9.
1—Low precedence
Call Controls
98

9—High precedence
dialplan.1.digitmap.timeOutSpecify a timeout in seconds for each segment of digit map. After you press a key, the phonewaits the number of seconds you specify to match the digits to a dial plan and dial the call.
4 seconds (default)
String of positive integers separated by | for example 3 | 3 | 3 | 3 | 3 | 3
Note: If there are more digit maps than timeout values, the default value is used. If there aremore timeout values than digit maps, the extra timeout values are ignored.
dialplan.1.lyncDigitmap.timeOutThis parameter applies to lines registered with Skype for Business or Lync Server.
Specify a timeout in seconds for each segment of a digit map. After you press a key, the phonewaits the number of seconds you specify to match the digits to a dial plan and dial the call.
4 seconds (default)
0 to 99 seconds
Note: If there are more digit maps than timeout values, the default value is used. If there aremore timeout values than digit maps, the extra timeout values are ignored.
Note also that if you configure a value outside of the permitted range, the default value is used.
dialplan.userDial.timeOutSpecify the time in seconds that the phone waits before dialing a number you enter while thephone is on hook. This parameter applies only when its value is lower than up.IdleTimeOut .
4 seconds (default)
0 to 99 seconds
reg.1.applyServerDigitMapLocallySkype Base Profile: 1(default)
1 - Enable dial plan normalization. Dial plan normalization rules are downloaded from theMicrosoft Server and processed on the phone.
0 - Disable dial plan normalization. Dial plan rules are processed by the Microsoft Server.
up.IdleTimeOutSet the number of seconds that the phone is idle for before automatically leaving a menu andshowing the idle display.
During a call, the phone returns to the Call screen after the idle timeout.
40 seconds (default)
0 to 65535 seconds
Call Controls
99

Change causes system to restart or reboot.
Supported Dial PlansPoly phones support Skype for Business External Access Prefix functionality.
Examples of supported dial plans include the following:• Support for multiple combination of braces (): ^91(727|813)([2-9]\d{6})$@+9$1$2@0• Support for 'ext': ^64(\d{2})$@+86411845933$1;ext=64$1@0
Supported Dial Plans
Number Element Meaning Example Description ofExample
1 ^ Match at beginning ofstring
^123 Match the digits 123 atthe beginning of thestring
2 () Captures the matchedsubexpression
(456) Capture what isbetween theparentheses into anumbered variable,starting at 1 which canbe accessed as $n, forexample, $1
3 * Specifies zero or morematches
\d( * )
4 + Specifies one or morematches
\d( + )
5 ? Specifies zero or onematches
\d( + )
6 {n} Specifies exactly nmatches
\d {4} Match 4 digits
7 Vertical Bar (Pipe) Matches any one of theterms separated by the(vertical bar) characterwhen all characters aresurrounded by bracketsor square brackets
(1|2|3) or
[1|2|3]
Match either 1, 2, or 3.
8 \d Matches any decimaldigit
^\d Match any decimal digit(at the beginning of astring)
9 $ The match must occurat the end of the string
^(123)$ Match exactly digits123 (and not 1234)
Call Controls
100

PSTN Gateway on FailoverWhen a phone becomes unregistered due to an outage and can’t reach the Skype for Business server fora specified time interval, the phone fails over to an alternate PSTN gateway server.
You can view the PSTN failover details in the Web Configuration Utility.
When you enable this feature, calls switch to the configured PSTN gateway in the event of an outage.However, if the phone fails over, only basic call-related functions and soft keys are available.
Make sure the value of call.enableOnNotRegistered andreg.x.srtp.simplifiedBestEffort parameter is set to 1.
Note: The failover feature does not work if you enable the hybrid line registration feature.
Ensure the Direct Inward Dialing number registered on the Skype for Business server and the numberused for the PSTN gateway are same.
PSTN Gateway Failover ParametersThe following parameters configure phones to fail over to an alternate PSTN gateway in the event of anoutage or if the phones can’t reach the Skype for Business server.
feature.sfbPstnFailover.enabledEnable or disable for phones to fail over to a PSTN gateway during an outage.
0 (default)
1
Change causes system to restart or reboot.
reg.x.server.y.addressIf this parameter is set, it takes precedence even if the DHCP server is available.
Null (default) - SIP server does not accepts registrations.
IP address or hostname - SIP server that accepts registrations.
This parameter is only applicable during a failover to PSTN gateway in Skype for Businessdeployments.
reg.x.server.y.pstnServerAuth.userIdSpecify the user identification for the PSTN gateway.
Null (default)
String (maximum of 255 characters)
reg.x.server.y.pstnServerAuth.passwordSpecify the PSTN user’s password.
Call Controls
101

Null (default)
String (maximum of 255 characters)
Presence StatusYou can enable users to monitor the status of other remote users and phones.
By adding remote users to a buddy list, users can monitor changes in the status of remote users in realtime or they can monitor remote users as speed-dial contacts. Users can also manually specify theirstatus in order to override or mask automatic status updates to others and can receive notifications whenthe status of a remote line changes.
Poly phones support a maximum of 200 contacts on the Skype for Business server.
Presence Status ParametersUse the following parameters to enable Presence and display the MyStatus and Buddies soft keys onthe phone.
feature.presence.enabled0 (default) - Disable the presence feature—including buddy managements and user status.
1 - Enable the presence feature with the buddy and status options.
pres.idleSoftkeys1 (default) - The MyStat and Buddies presence idle soft keys display.
0 - The MyStat and Buddies presence idle soft keys do not display.
pres.regThe valid line/registration number to use for presence. If the value is not a valid registration, thisparameter is ignored.
1 (default)
1 - 34
Local Call RecordingLocal call recording enables you to record audio calls to a USB device connected to the phone.
You can play back recorded audio on the phone or using an audio application on the computer. To usethis feature, ensure that the USB port is enabled.
Audio calls are recorded in .wav format and include a date/time stamp. The phone displays the recordingtime remaining on the attached USB device, and users can browse all recorded files using the phone'smenu.
Call Controls
102

Note: Federal, state, and/or local laws may legally require that you notify some or all of the call partieswhen a call recording is in progress.
Local Call Recording ParameterUse the following parameter to configure local call recording.
feature.callRecording.enabled0 (default) - Disable audio call recording.
1 - Enable audio call recording.
Change causes system to restart or reboot.
Local Digit MapThe local digit map feature allows the phone to automatically call a dialed number you configure.
Dial plans apply on-hook when no Skype for Business line is registered or when line switching is enabledand at least one line has a non-empty dial plan.
Digit maps are defined by a single string or a list of strings. If a dialed number matches any string of adigit map, the call is automatically placed. If a dialed number matches no string—an impossible match—you can specify the phone's behavior. If a number ends with #, you can specify the phone's behavior,called trailing # behavior. You can also specify the digit map timeout, the period of time after you dial anumber that the call is placed. The configuration syntax of the digit map is based on recommendations insection 2.1.5 of RFC 3435.
Local Digit Maps ParametersUse the following parameters to configure the local digit map.
dialplan.applyToCallListDialChoose whether the dial plan applies to numbers dialed from the received call list or missed calllist, including sub-menus.
1 (default)
0
Change causes system to restart or reboot.
dialplan.applyToDirectoryDialLync Base Profile – 1 (default)
Generic Base Profile – 0 (default)
0— The dial plan is not applied to numbers dialed from the directory or speed dial, includingauto-call contact numbers.
Call Controls
103

1—The dial plan is applied to numbers dialed from the directory or speed dial, including auto-call contact numbers.
Change causes system to restart or reboot.
dialplan.applyToForwardLync Base Profile – 1 (default)
Generic Base Profile – 0 (default)
0—The dial plan does not apply to forwarded calls.
1—The dial plan applies to forwarded calls.
Change causes system to restart or reboot.
dialplan.applyToTelUriDialChoose whether the dial plan applies to URI dialing.
1 (default)
0
Change causes system to restart or reboot.
dialplan.applyToUserDialChoose whether the dial plan applies to calls placed when the user presses Dial.
1 (default)
0
Change causes system to restart or reboot.
dialplan.applyToUserSendChoose whether the dial plan applies to calls placed when the user presses Send.
1 (default)
0
Change causes system to restart or reboot.
dialplan.conflictMatchHandlingSelects the dialplan based on more than one match with the least timeout.
0 (default for Generic Profile)
1 (default for Skype Profile)
dialplan.digitmap.timeOut
Call Controls
104

Specify a timeout in seconds for each segment of the digit map using a string of positiveintegers separated by a vertical bar ( | ). After a user presses a key, the phone waits this manyseconds before matching the digits to a dial plan and dialing the call.
(Default) 3 | 3 | 3 | 3 | 3| 3If there are more digit maps than timeout values, the default value 3 is used. If there are moretimeout values than digit maps, the extra timeout values are ignored.
Change causes system to restart or reboot.
dialplan.digitmapSpecify the digit map used for the dial plan using a string compatible with the digit map featureof MGCP described in 2.1.5 of RFC 3435. This parameter enables the phone to automaticallyinitiate calls to numbers that match a digit map pattern.
Lync Base Profile (default) – NULL
[2-9]11|0T|+011xxx.T|0[2-9]xxxxxxxxx|+1[2-9]xxxxxxxx|[2-9]xxxxxxxxx|[2-9]xxxT (default)
The string is limited to 2560 bytes and 100 segments of 64 bytes, and the following charactersare allowed in the digit map.
• A comma (,), which turns dial tone back on.• A plus sign (+) is allowed as a valid digit.• The extension letter 'R' indicates replaced string.• The extension letter 'Pn' indicates precedence, where 'n' range is 1-9.
1—Low precedence
9—High precedence
Change causes system to restart or reboot.
dialplan.filterNonDigitUriUsersDetermine whether to filter out (+) from the dial plan.
0 (default)
1
Change causes system to restart or reboot.
dialplan.impossibleMatchHandling0 —The digits entered up to and including the point an impossible match occurred are sent tothe server immediately.
1—The phone gives a reorder tone.
2 —Users can accumulate digits and dispatch the call manually by pressing Send.
3 (default) (Skype for Business) — No digits are sent to the call server until the timeout isconfigured by dialplan.impossibleMatchHandling.timeout parameter.
Call Controls
105

If a call orbit number begins with a pound (#) or asterisk (*), you need to set the value to 2 toretrieve the call using off-hook dialing.
Change causes system to restart or reboot.
dialplan.removeEndOfDialSets if the trailing # is stripped from the digits sent out.
1 (default)
0
Change causes system to restart or reboot.
dialplan.routing.emergency.outboundIdentityChoose how your phone is identified when you place an emergency call.
NULL (default)
10-25 digit number
SIP
TEL URI
If using a URI, the full URI is included verbatim in the P-A-I header. For example:• dialplan.routing.emergency.outboundIdentity = 5551238000
• dialplan.routing.emergency.outboundIdentity = sip:[email protected]
• dialplan.routing.emergency.outboundIdentity = tel:+16045558000
dialplan.routing.emergency.preferredSourceSet the precedence of the source of emergency outbound identities.
ELIN (default)— the outbound identity used in the SIP P-Asserted-Identity header is taken fromthe network using an LLDP-MED Emergency Location Identifier Number (ELIN).
Config— the parameter dialplan.routing.emergency.outboundIdentity has prioritywhen enabled, and the LLDP-MED ELIN value is used ifdialplan.routing.emergency.outboundIdentity is NULL.
dialplan.routing.emergency.x.descriptionSet the label or description for the emergency contact address.
x=1: Emergency, Others: NULL (default)
string
x is the index of the emergency entry description where x must use sequential numberingstarting at 1.
Change causes system to restart or reboot.
dialplan.routing.emergency.x.server.y
Call Controls
106

Set the emergency server to use for emergency routing( dialplan.routing.server.x.address where x is the index).
x=1: 1, Others: Null (default)
positive integer
x is the index of the emergency entry and y is the index of the server associated with emergencyentry x. For each emergency entry (x), one or more server entries (x,y) can be configured. x andy must both use sequential numbering starting at 1.
Change causes system to restart or reboot.
dialplan.routing.emergency.x.valueSet the emergency URL values that should be watched for. When the user dials one of theURLs, the call is directed to the emergency server defined bydialplan.routing.server.x.address .
x=15: 911, others: Null (default)
SIP URL (single entry)
x is the index of the emergency entry description where x must use sequential numberingstarting at 15.
dialplan.routing.server.x.addressSet the IP address or hostname of a SIP server to use for routing calls. Multiple servers can belisted starting with x=1 to 3 for fault tolerance.
Null (default)
IP address
hostname
Blind transfer for 911 or other emergency calls may not work if registration and emergencyservers are different entities.
Change causes system to restart or reboot.
dialplan.routing.server.x.portSet the port of a SIP server to use for routing calls.
5060 (default)
1 to 65535
Change causes system to restart or reboot.
dialplan.routing.server.x.transportSet the DNS lookup of the first server to use and dialed if there is a conflict with other servers.
DNSnaptr (default)
TCPpreferred
Call Controls
107

UDPOnly
TLS
TCPOnly
For example, if dialplan.routing.server.1.transport= "UDPOnly" anddialplan.routing.server.2.transport = "TLS", then UDPOnly is used.
Change causes system to restart or reboot.
dialplan.userDial.timeOutSpecify the time in seconds that the phone waits before dialing a number entered while thephone is on hook.
Lync Base Profile (default) – 4
0-99 seconds
You can apply dialplan.userDial.timeOut only when its value is lower thanup.IdleTimeOut .
International Dialing PrefixEnter a plus (+) symbol before you dial an international phone numbers to identify to the switch that thephone number you are dialing is international.
International Dialing Prefix ParametersThe following parameters configure the international dialing prefixes.
call.internationalDialing.enabledThis parameter applies to all numeric dial pads on the phone, including for example, the contactdirectory.
Changes you make to this parameter cause a restart or reboot.
1 (default) - Disable the key tap timer that converts a double tap of the asterisk "*" symbol to the"+" symbol to indicate an international call. By default, this parameter is enabled so that a quickdouble tap of "*" converts immediately to "+". To enter a double asterisk "**", tap "*" once andwait for the key tap timer to expire to enter a second "*".
0 - When you disable this parameter, you cannot dial "+" and you must enter the internationalexit code of the country you are calling from to make international calls.
Change causes system to restart or reboot.
call.internationalPrefix.keyThe phone supports international call prefix (+) with both "0" and "*".
0 (default) - Set the international prefix with "*".
1 - Set the international prefix with "0".
Call Controls
108

Enhanced 911 (E.911)This E.911 feature allows you to configure one of three sources the phone obtains location informationfrom:
• LLDP-MED• DHCP via option 99• LIS compliant with RFC 5985
Configuring the source of location information allows the phone to share its location details in the invitesent when a 911 call is made to ensure the 911 operator dispatches emergency services to the correctaddress.
Enhanced 911 (E.911) ParametersUse the following parameters to configure E.911.
lync.E911.notificationUri.expansion.enabled0 (default) - Disables expansion of distribution lists.
1 - Enables users to expand distribution lists received as part of the notification URI.
lync.E911.notificationUri.maxUrlsSet the limit for the number of URLs in the notification URI.
30 (default)
1 - 100
Configuring Boss-AdminThe Boss-Admin feature enables a Boss to assign and share a line with an Admin, a delegate who canmanage calls efficiently on behalf of the Boss. Boss-Admin is supported with Skype for Business, Lync2013, and Lync 2010.
The Boss can add and remove Admins, monitor call status, view which Admins answered a call, and pickup calls put on hold. Admins can place, answer, hold, and transfer calls, monitor call status, set ringtoneson the Boss line, and send a call to voicemail or intercom. Phones in a Boss-Admin group can receive upto five incoming calls at the same time. Both the Boss and Admin can sort shared Boss-Admin lines onthe phone.
Bosses can assign up to 25 Admin lines to their phone; Admins cannot assign themselves as a delegateto a line on a Boss' phone. The maximum number of Bosses an Admin phone can be assigned varies byphone model and depends on the number of line keys available on the phone.
A Boss can add or remove Admins from the Skype for Business client application on a computer or fromthe phone. On CCX phones, Enhanced Boss-Admin is enabled by default and allows Bosses to add andedit Admins from the phone using the contact list and to set up the call forwarding and simultaneous callringing. You can view Enhanced Boss-Admin status in the system web interface for your device.
Call Controls
109

Boss-Admin user instructions are available in the User Guide for your phone model on Polycom VoiceSupport.
Maximum Number of Boss LinesThe following table lists the maximum number of Boss lines that can be assigned to an Admin phone.
Maximum Number of Boss Lines Assigned to an Admin Phone
Phone Model Maximum Bosses Assigned
Poly CCX 500 business media phones 23 of 24 lines
Viewing Delegates on Boss's PhoneWhen a Boss delegates an Admin, you can view the delegate's key icon on the Boss's phone. Thefollowing figure illustrates Admins on a Boss's phone.
Safe Transfer for Boss-AdminA safe transfer transfers a call to another party and allows you to continue monitoring the call with theoption to resume before the call goes to voicemail.
If the call is answered by the other party, you are disconnected from the call.
Call Controls
110
Configuring Safe TransferThe following parameters configure safe transfer for the Boss-Admin feature.
feature.lyncSafeTransfer.enabled1 (default) - Enable safe transfer and display of the Safe Transfer soft key.
0 - Disable safe transfer and display of the Safe Transfer soft key.
Boss-Admin ParametersUse the following parameters to configure Boss-Admin.
up.enhancedbossadmin1 (default)- Enable Enhanced Boss-Admin.
0 - Disable Enhanced Boss-Admin.
Change causes system to restart or reboot.
Call Controls
111

Using CCX Phones as Shared DevicesTopics:
• Skype for Business User Profiles
• Hot Desking
• Common Area Phone (CAP)
Poly phones registered with Skype for Business offer several ways to share phones and phone linesamong users.
Skype for Business User ProfilesYou can enable users to access their personal settings from any phone in the organization registered toSkype for Business.
For example, users can access their contact directory and speed dials – as well as other phone settings –even if they temporarily change work areas. This feature is particularly useful for remote and mobileworkers who do not use a dedicated work space and conduct business in multiple locations. The userprofile feature is also useful if an office has a common conference phone from which multiple users needto access their personal settings.
You must decide whether to require users to always log in to a phone or not. If you do not require users tolog in, users have the option to use the phone as is – without access to their personal settings – or theycan log in to display their personal settings. You can also specify if, after the device restarts or reboots, auser is automatically logged out.
You can choose to define default credentials. If you specify a default user ID and password, the phoneautomatically logs itself in each time an actual user logs out or the device restarts or reboots. When thedevice logs itself in using the default login credentials, a default profile displays, and users retain theoption to log in and view their personal settings.
You can configure the phones so that anyone can call authorized and emergency numbers when notlogged in to a phone using the parameter dialplan.routing.emergency.outboundIdentity.
Poly recommends that you create a single default user password for all users. You can reset a user'spassword by removing the password parameter from the override file. This causes the phone to use thedefault password in the <user>.cfg file.
To set up the user profile feature, you must:• Create a phone configuration file or update an existing file to enable the feature's settings, and
configure attributes for the feature.• Create a user configuration file in the format <user>.cfg to specify each user's password and
registration and other user-specific settings that you want to define.
Create a User Profile Configuration FileYou can create a configuration file with user-specific profile details and provision multiple phones with thatfile.
112

Procedure1. Create a configuration file for the phone and place it on the provisioning server.2. Add the prov.login* parameters you want to use to your configuration.3. Copy the prov.login* parameters you want to use for each user and enter user-specific values.
Create a User Configuration FileCreate a user-specific configuration file that stores user names, passwords, and registrations.
After a user logs in with their user ID and password (The default password is 123.), users can:• Log in to a phone to access their personal phone settings.• Log out of a phone after they finish using it.• Place a call to an authorized number from a phone that is in the logged out state.• Change their user password.
If a user changes any settings while logged in, the settings save and display the next time the user logsin. When a user logs out, the user's personal phone settings no longer display.
Procedure1. On the provisioning server, create a user configuration file for each user to log in to the phone.
The name of the file is the user's ID to log in to the phone. For example, if the user's login ID isuser100, the name of the user's configuration file is user100.cfg .
2. In each <user>.cfg file, you can add and set values for the user's login password (optional).3. Add and set values for any user-specific parameters, such as:
• Registration details (for example, the number of lines the profile displays and line labels).• Feature settings (for example, browser settings).
Note: If you add optional user-specific parameters to <user>.cfg, add only thoseparameters that will not cause the phone to restart or reboot when the parameter isupdated.
Stored User SettingsIf a user updates their password or other user-specific settings using the Main Menu on the phone, theupdates are stored in <user>-phone.cfg, not <MACaddress>-phone.cfg.
If a user updates their contact directory while logged in to a phone, the updates are stored in <user>-directory.xml. Directory updates display each time the user logs in to a phone. An up-to-date call listshistory is defined in <user>-calls.xml. This list is retained each time the user logs in to their phone.Configuration parameter precedence (from first to last) for a phone that has the user profile featureenabled is:
• <user>-phone.cfg• Web Configuration Utility• Configuration files listed in the master configuration file (including <user>.cfg)
• Default values
Using CCX Phones as Shared Devices
113

Hot DeskingYou can configure your phone to allow a hot desking or guest user to sign in on top of a host user signedin to a phone or a common area phone (CAP).
You must enable this feature on both the Skype for Business server and on your provisioning server usingthe feature.HotDesking.enable parameter. When you enable this feature, a Guest soft keydisplays on the phone. By default, this feature is enabled on the provisioning server. However, the usercan choose to enable or disable the feature from the phone.
Note: When the phone is CAP enabled, users do not have permission to enable or disable Hot Desking.
Hot Desking Sign-In Methods
If the user disables Hot Desking from the phone, the user setting overrides the Skype for Business serversetting and the feature is disabled. The guest user can sign in to the host phone by pressing the Guestsoft key. After pressing the Guest soft key, the guest user can sign in with one of the following methodseven if the phone is CAP-enabled or locked:
• User ID• Pin Authentication• Via PC• Online Web Sign In
When the guest user signs in to the phone, the host/CAP user is logged out automatically and the guestuser icon displays on the phone. After the guest user has signed in to the phone, the following details ofthe previously signed-in host/CAP user are not accessible:
• Call Logs• Voicemail• Calendar• Local Contact Directory
Host Desking Feature Limitations
The menu options that are not accessible to the guest user are as follows:• Headset Settings• Background• Screen Saver• Presence• Location Info• Diagnostic logs• Picture frame• Power Saving• Reset to Factory• Clear browser data• Network Configuration
Using CCX Phones as Shared Devices
114

Automatic Sign-Out Scenarios
When the guest user signs out of the phone, all the basic settings of the guest user are removed and thephone is set with original settings of the host user.
The following scenarios enable the phone to sign out the guest user automatically and sign in back withthe previously signed in user:
• TimeoutThis feature supports hot desking timeout, the period of time after which the phone shall sign in tothe host user when being idle in hot desking mode. This timeout is applicable only when the guestuser has signed in successfully.
◦ When the phone is idle for hot desking timeout configured on the server.
When the guest user is signed in and does not perform any activity and the timeout intervalconfigured on the server reached the value, the guest user is signed out.
◦ User taps the guest soft key and does not sign in using any sign in methods.
The timeout interval for hot desking is set to 2 minutes by default. However, the host userdoes not need to wait for 2 minutes. The host user can sign in by pressing the Host soft keyon the phone screen.
• BToE ModeWhen a guest user is signed in to the phone and the phone is in BToE mode, the followingscenarios lead to sign in the host user after logging out the guest user automatically:
◦ Guest user unpairs the BToE pairing from the device.◦ Guest user unpairs the BToE pairing using BToE client.◦ Guest user signs out from the paired Skype for Business client.
When the phone is in idle state and any one of these scenarios occur, the phone signs out the guest user.
Hot Desking ParametersThe following parameters configure Hot Desking.
feature.HotDesking.enabled1 (default) - Enable Hot Desking.
0 - Disable Hot Desking.
Common Area Phone (CAP)You can configure your phone with Common Area Phone (CAP) to restrict user's access to configurationsettings on phones deployed in common areas, typically lobbies, employee lounges, and conferencerooms.
You enable CAP Mode on a per-phone basis and CAP Mode is independent of any other configurationyou make on the Skype server or apply to the Skype user account.
Note: Poly recommends that you do not enable Boss-Admin or Shared Line Appearance while CAP isenabled.
Using CCX Phones as Shared Devices
115

After you enable this feature using feature.CAP.enable=1, CAP Mode and CAP Admin Mode areavailable on the phone. By default, CAP Mode is enabled and CAP Admin Mode is disabled.
While a phone is running in CAP Mode, users can access only basic settings and features. You can makemore features available by enabling parameters for the corresponding feature, listed below.
Features Available in CAP Mode
Soft Key / Menu CAP Mode Default Parameters to Enable
Status/DND Disabled feature.doNotDisturb.enablesoftkey.feature.mystatus
Call Forward Disabled feature.forward.enable
Device Lock Disabled feature.deviceLock.enable
Exchange Call Logs Disabled Local logs:feature.callList.enabledExchange call logs:feature.callList.enabledfeature.exchangeCallLog.enabledfeature.EWSAutodiscover.enabled
Local Contact Directory Disabled feature.directory.enabled
Exchange Calendar Disabled feature.EWSAutodiscover.enabledfeature.exchangeCalendar.enabledhomeScreen.calendar.enable
Exchange Contacts Disabled feature.EWSAutodiscover.enabledfeature.exchangeContacts.enabled
Exchange Voicemail/Messages
Disabled feature.voicemail.enabledfeature.EWSAutodiscover.enabledfeature.exchangeVoiceMail.enabledfeature.exchangeSipVMPlay.enabled
Redial Disabled homeScreen.redial.enable
You can use the phone's administrator password to enable CAP Admin Mode. CAP Admin Mode providesaccess to all phone settings available from the phone interface. In addition, in CAP Admin Mode, thephone displays Sign In / Sign Out soft keys that allow you to sign users in or out of the phone.Alternatively, you can sign into a phone in CAP Mode without enabling CAP Admin Mode from theCommon Area Phone provisioning portal at https://aka.ms/skypecap .
Any CAP-enabled phone that is not signed in with a Skype account and is left idle for three minutesdisplays a notice that the phone is not in use.
The following settings are available in CAP Admin Mode.
• Basic Settings• Sign In/Sign Out
Using CCX Phones as Shared Devices
116
• My Status (under Features > Presence > My Status)
Disable CAP Admin ModeYou can disable the Common Area Phone (CAP) Admin Mode from the phone.
Procedure1. On the phone, navigate to Settings > Advanced, and enter the default password.2. Select Administration Settings > Common Area Phone Settings > CAP Admin Mode.3. Choose Disable.
CAP Web Sign InAfter you enable the CAP feature and the phone is in CAP Mode, you can generate a code on the phonethat you use to log into the Common Area Phone Provisioning Portal, a Microsoft web service thatenables you to sign in multiple phones using any tenant account without the need to authenticate as auser on each phone.
You can log into the Common Area Provisioning Portal at https://aka.ms/skypecap using any accounthaving administrator rights to the Microsoft tenant. Note that your Skype deployment must use ModernAuthentication to access CAP web sign-in. For more information, see Skype for Business topologiessupported with Modern Authentication on Microsoft Technet.
CAP Web Sign In is not supported with On-premises Skype for Business deployments.
Note: Sign in using accounts that are designated only for the Common Area locations. The CAP portalis designed only for Common Area Phone accounts. Provisioning a CAP phone from theProvisioning Portal changes that phone's Active Directory user account password to a randomstring generated by Microsoft. For this reason, do not use the Provisioning Portal to sign in to aphone on behalf of an end user.
Sign In to a CAP-EnabledYou can sign out of a CAP-enabled phone using a code sent to the phone by the Common AreaProvisioning Portal.
Procedure1. While signed out of the phone, select Web Sign-in (CAP).
The phone displays a code.2. In the provisioning portal, enter the code in the field beside the user name and press Provision.
The user's password is reset to a random string and the phone is signed in.
Common Area Phone ParametersThe following parameters configure the Common Area Phone (CAP) feature.
Use of CAP requires UC Software 5.7.0 or later.
feature.CAP.enable
Using CCX Phones as Shared Devices
117

0 (default) - Disable Common Area Phone.
1 - Enable Common Area Phone.
Using CCX Phones as Shared Devices
118

Skype for Business Device and SoftwareSupportTopics:
• Microsoft Quality of Experience Monitoring Server Protocol (MS-QoE)
• Manually Pairing with BToE
▪ Rebooting the Poly Phone at a Scheduled Time
• Updating Poly UC Software
• Data Center Resiliency
This section provides information on maintaining your devices and updating UC Software.
Microsoft Quality of Experience Monitoring ServerProtocol (MS-QoE)Microsoft Quality of Experience Monitoring Server Protocol (MS-QoE) enables you to monitor the user'saudio quality and troubleshoot audio problems.
QoE reports contain only audio metrics and do not contain video or content sharing metrics. This featurealso enables you to query the QoE status of a phone from the Web Configuration Utility.
All parameters for enabling or disabling QoE are included in the in-band provisioning parameters sentfrom the Skype for Business server.
Note: Poly supports only those elements listed in section Supported Skype for Business QoE Elements.
For a list of all parameters that report QoE data, see Microsoft [MS-QoE] PDF at [MS-QoE]: Quality ofExperience Monitoring Server Protocol.
To help deploy QoE, you can enable client media ports and configure unique port ranges on the Skype forBusiness Server. For details, see Configuring Port Ranges for your Microsoft Lync Clients in Lync Server2013.
Set QoE Parameters on the Skype for Business ServerSet the following QoE parameters on the Skype for Business Server.
Procedure» Use the following parameters to set Quality of Experience settings on the Skype for Business
server.
EnableQoESet to 'True' to enable QoE on the server and automatically assign the URI to which QoE reportsare published.
119

If set to 'False' no QoE reports are published.
Note that the URI maps to the in-band element 'qosUri'. To get the current value ofEnableQoE, run the command Get-CsQoEConfiguration in Skype for Business ServerPowershell.
EnableInCallQoSSet to 'True' to enable in-call QoE on the server.
If set to 'False', only end-call QoE reports are sent. EnableInCallQoS maps to the in-bandelement 'enableInCallQoS'.
InCallQoSIntervalSecondsSet the time interval in seconds to publish in-call QoE reports only if there is a transition in callquality. If no change in call quality is detected, no report is sent at the interval time you set.InCallQoSIntervalSeconds maps to the in-band element inCallQoSIntervalSeconds.
voice.qualityMonitoring.rtcpxr.enableSet to 1 (default) to allow the phone to collect RTCP XR metrics.
The following figure illustrates the QoE parameter values you need to set.
Figure 1: QoE Parameters on Server Media Configuration
Enable In-Call QoE within your Skype EnvironmentWhen you enable in-call QoE, you do not need to wait until the end of the call to view call quality data.
In-call QoE is off by default and you can enable it on Windows PowerShell using the following command:
Set-CsMediaConfiguration -Identity Global -EnableInCallQoS:$TRUE -InCallQoSIntervalSeconds x (where x is a digit from 1 to 65535)
Query QoE Status from the Web Configuration UtilityUsers and administrators can query the in-band QoE status, interval, and URI from a phone's WebConfiguration Utility.
Procedure1. Enter the IP address of the phone into a web browser and log in as Administrator or User.2. Go to Diagnostics > Skype for Business Status > Quality of Experience.
Skype for Business Device and Software Support
120

QoE ParametersUse the following parameters to configure MS-QoE from a provisioning server.
voice.qoe.event.lossrate.threshold.badDefines the threshold for the network loss rate. Total packets lost for an interval/total packetsexpected for the interval *256 as stated in RFC 2611, section 4.7.1.
38 (default) - Approximately a 15% packet loss.
0 to 100
voice.qoe.event.lossrate.threshold.poorDefines the threshold for the network loss rate. Total packets lost for an interval/total packetsexpected for the interval *256 as stated in RFC 2611, section 4.7.1.
25 ms (default) - Approximately a 10% packet loss.
0 to 100
voice.qoe.event.networkmos.threshold.badDefines the threshold for Network MOS as follows:
The average of MOS-LQO wideband, as specified by [ITUP.800.1] section 2.1.2, based on theaudio codec used and the observed packet loss and inter-arrival packet jitter.
19 (default) - Indicates a MOS score of 1.9.
10 - 50 - Indicates a MOS score between 1 - 5.
networkMOS > 2.9 signifies good quality
networkMOS > 2.9 < 1.9 signifies poor quality
networkMOS < 1.9 signifies bad quality
voice.qoe.event.networkmos.threshold.poorDefines the threshold for Network MOS as follows:
The average of MOS-LQO wideband, as specified by [ITUP.800.1] section 2.1.2, based on theaudio codec used and the observed packet loss and inter-arrival packet jitter.
29 (default) - Indicates a MOS score of 2.9.
10 - 50 - Indicates a MOS score between 1 - 5.
networkMOS > 2.9 signifies good quality
networkMOS > 2.9 < 1.9 signifies poor quality
networkMOS < 1.9 signifies bad quality
Skype for Business Device and Software Support
121
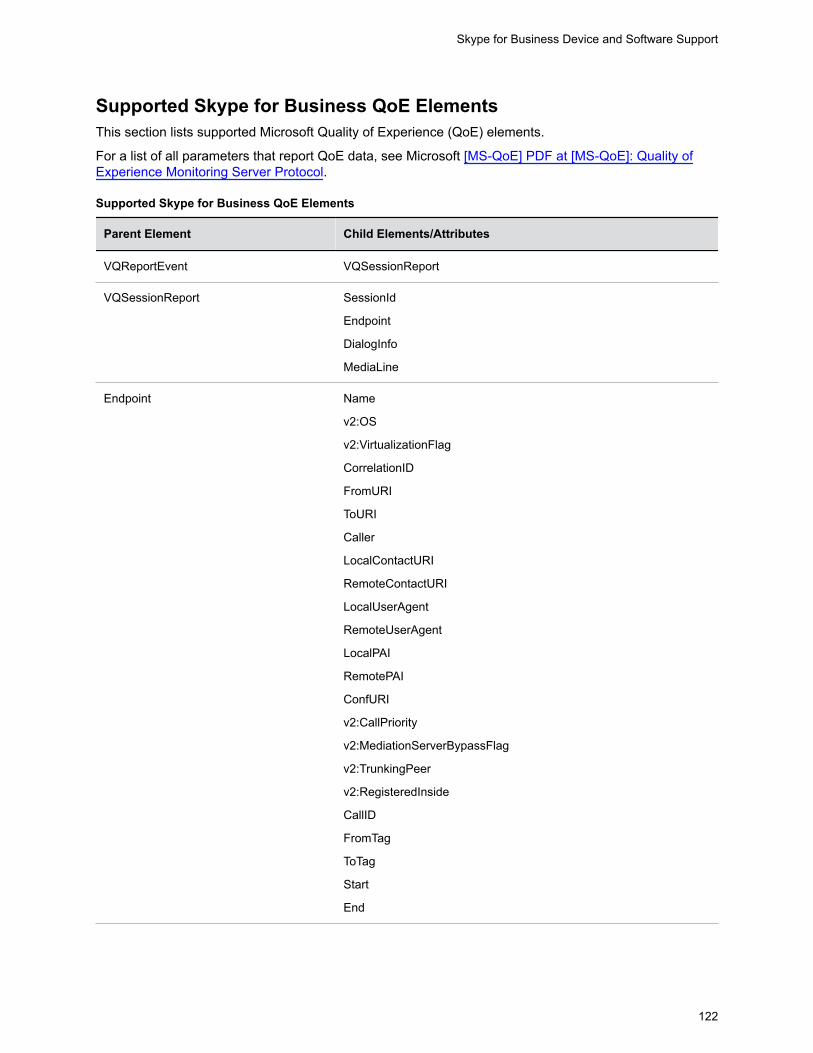
Supported Skype for Business QoE ElementsThis section lists supported Microsoft Quality of Experience (QoE) elements.
For a list of all parameters that report QoE data, see Microsoft [MS-QoE] PDF at [MS-QoE]: Quality ofExperience Monitoring Server Protocol.
Supported Skype for Business QoE Elements
Parent Element Child Elements/Attributes
VQReportEvent VQSessionReport
VQSessionReport SessionId
Endpoint
DialogInfo
MediaLine
Endpoint Name
v2:OS
v2:VirtualizationFlag
CorrelationID
FromURI
ToURI
Caller
LocalContactURI
RemoteContactURI
LocalUserAgent
RemoteUserAgent
LocalPAI
RemotePAI
ConfURI
v2:CallPriority
v2:MediationServerBypassFlag
v2:TrunkingPeer
v2:RegisteredInside
CallID
FromTag
ToTag
Start
End
Skype for Business Device and Software Support
122

Parent Element Child Elements/Attributes
MediaLine Description
InboundStream
OutboundStream
Description Connectivity
Security
Transport
LocalAddr
RemoteAddr
v3:ReflexiveLocalIPAddress
v3:MidCallReport
LocalAddr, RemoteAddr, RelayAddr IPAddr
Port
SubnetMask
v2:MACAddr
Connectivity Ice
IceWarningFlags (Five flags supported)
RelayAddress
InboundStream, OutboundStream Network
Payload
QualityEstimates
Network Jitter
PacketLoss
BurstGapLoss
Delay
Utilization
Jitter InterArrival
InterArrivalMax
Packetloss LossRate
LossRateMax
Skype for Business Device and Software Support
123

Parent Element Child Elements/Attributes
BurstGapLoss BurstDensity
BurstDuration
GapDensity
GapDuration
Delay RoundTrip
RoundTripMax
Utilization Packets
Payload Audio
Payload.Audio PayloadType
PayloadDescription
SampleRate
v4:JitterBufferSizeAvg
v4:JitterBufferSizeMax
v4:JitterBufferSizeMin
v4:NetworkJitterAvg
v4:NetworkJitterMax
v4:NetworkJitterMin
Signal SignalLevel
NoiseLevel
InitialSignalLevelRMS
RecvSignalLevelCh1
RecvNoiseLevelCh1
RenderSignalLevel
RenderNoiseLevel
RenderLoopbackSignalLevel
VsEntryCauses
EchoEventCauses
EchoPercentMicIn
EchoPercentSend
SendSignalLevelCh1
SendNoiseLevelCh1
Skype for Business Device and Software Support
124
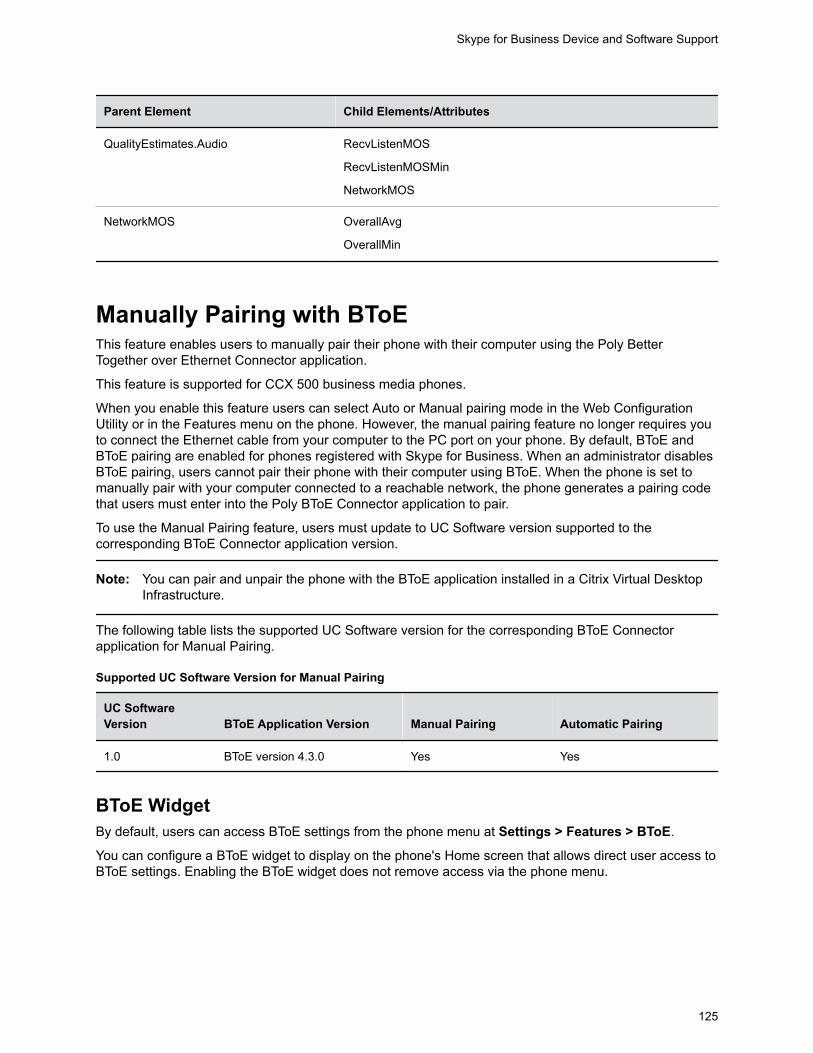
Parent Element Child Elements/Attributes
QualityEstimates.Audio RecvListenMOS
RecvListenMOSMin
NetworkMOS
NetworkMOS OverallAvg
OverallMin
Manually Pairing with BToEThis feature enables users to manually pair their phone with their computer using the Poly BetterTogether over Ethernet Connector application.
This feature is supported for CCX 500 business media phones.
When you enable this feature users can select Auto or Manual pairing mode in the Web ConfigurationUtility or in the Features menu on the phone. However, the manual pairing feature no longer requires youto connect the Ethernet cable from your computer to the PC port on your phone. By default, BToE andBToE pairing are enabled for phones registered with Skype for Business. When an administrator disablesBToE pairing, users cannot pair their phone with their computer using BToE. When the phone is set tomanually pair with your computer connected to a reachable network, the phone generates a pairing codethat users must enter into the Poly BToE Connector application to pair.
To use the Manual Pairing feature, users must update to UC Software version supported to thecorresponding BToE Connector application version.
Note: You can pair and unpair the phone with the BToE application installed in a Citrix Virtual DesktopInfrastructure.
The following table lists the supported UC Software version for the corresponding BToE Connectorapplication for Manual Pairing.
Supported UC Software Version for Manual Pairing
UC SoftwareVersion BToE Application Version Manual Pairing Automatic Pairing
1.0 BToE version 4.3.0 Yes Yes
BToE WidgetBy default, users can access BToE settings from the phone menu at Settings > Features > BToE.
You can configure a BToE widget to display on the phone's Home screen that allows direct user access toBToE settings. Enabling the BToE widget does not remove access via the phone menu.
Skype for Business Device and Software Support
125

BToE Widget ParametersThe following parameters configure the BToE Widget.
homeScreen.BToE.enable1 (default) - Displays the BToE widget on the phone's home screen.
0 - Does not display the BToE widget on the phone's home screen.
Enable or Disable BToE PC Pairing from the PhoneYou can enable or disable the BToE PC Pairing feature for Better Together over Ethernet from the phone.
Procedure1. On the phone, go to Settings > Advanced, and enter the administrator password.2. Select Administration Settings > BToE PC Pairing.3. Select Enable or Disable.
Enable or Disable BToE PC Pairing from the Web Configuration UtilityYou can enable or disable the BToE PC Pairing feature from the Web Configuration Utility.
Procedure1. Enter your phone’s IP address into a web browser.2. Select Admin as the login type, enter the administrator password (the default is 456), and click
Submit.3. Go to Settings > Skype for Business Settings > BToE PC Pairing.4. Check or uncheck Enable BToE PC Pairing.5. Click Save.
TLS Feature Support for BToEPoly BToE application supports Transport Layer Security (TLS) to authenticate:
• Poly UC Software can use TLS to authenticate phones using the BToE application.• TLS takes precedence over SSH.• If TLS connection fails between the phone and Poly BToE Connector application, then the
connection falls back to SSH.
Rebooting the Poly Phone at a Scheduled TimeYou can configure Poly phones to reboot at a scheduled time, period, or days. With this feature, you canschedule a Poly phone to reboot daily.
Skype for Business Device and Software Support
126

Scheduled Reboot ParametersUse the following parameters to configure scheduled reboot times for Poly phones.
prov.scheduledReboot.enabled0 (default)— Disables scheduled reboot.
1—Enables scheduled reboot.
prov.scheduledReboot.periodDaysSpecify the time in days between scheduled reboots.
1 day (default)
1–365 days
prov.scheduledReboot.timeSpecify a time to reboot the Poly phone. Use the 24 hour time format (HH:mm).
03:00 (default)
prov.scheduledReboot.timeRandomEndIf this parameter is set to a specific time, the scheduled reboot occurs at a random time betweenthe time set for prov.scheduledReboot.time andprov.scheduledReboot.timeRandomEnd. The time is in 24-hour format.
0–5 hours
hh:mm
Updating Poly UC SoftwareYou can update UC Software on a per-phone basis from the phone’s local interface or through the systemweb interface.
Update UC Software ManuallyYou can use an USB flash drive to update the software and configure the phone.
When you configure the phone using a USB drive, the configuration on the USB overrides all previousconfigurations. When the USB drive is removed, the system returns to the previous configuration.
Procedure1. Download and unzip UC Software to a directory on your provisioning server.2. On the phone, go to Settings > Advanced, enter the password (default 456).3. Go to Network Configuration > Provisioning Server > DHCP Menu > Boot Server.
Skype for Business Device and Software Support
127

4. In the Boot Server menu, choose Static if you are testing or provisioning a few phones, or chooseOption 66 if you are provisioning in a large environment and want phones to use a boot serverdefined in DHCP.
If you choose Option 66, skip step 5 and go to step 6.5. Go back to Provisioning Server and do the following:
• Choose a server type in the Server Type field.• Enter the server address. For example,
http://server.domain.com/41X or ftp://ftp.domain.com/41X
• Enter your server user name and server password, if required.6. Press Back until you are prompted to save your settings.7. Choose Save Configuration to save your settings.
The phone reboots.
For details on how to update the phone software using the Web Configuration Utility, see Feature Profile67993: Using the Software Upgrade Option in the Web Configuration Utility.
Automatic UC Software UpdatesBy default, the phones poll the Skype for Business Server for software updates and automaticallydownload updated software if it's available. This automatic software update feature is available on alldevices registered with Skype for Business Server using UC Software 5.0.0 and later.
An information dialog displays on the phone when a software update becomes available. The dialogprovides three options:
• Reboot - Select to restart the phone and automatically update the phone's software.• Cancel - Select to cancel the automatic software update. When you select Cancel, a DevUpdt
softkey displays on the phone's home screen. Press DevUpdt at any time to update your phone'ssoftware.
• Details - Select to view information about current and available software.
When a software update is available and the phone is inactive for a long period of time, the phoneautomatically reboots and updates the phone's software.
Configuring Automatic Software UpdatesThe following parameters configure automatic software updates and polling of the provisioning server.
device.prov.lyncDeviceUpdateEnabled0 - The automatic device update is disabled and the phone does not receive software updatesfrom the server.
1 - The automatic device update is enabled and the phone receives software updates from theserver.
Change causes system to restart or reboot.
Skype for Business Device and Software Support
128
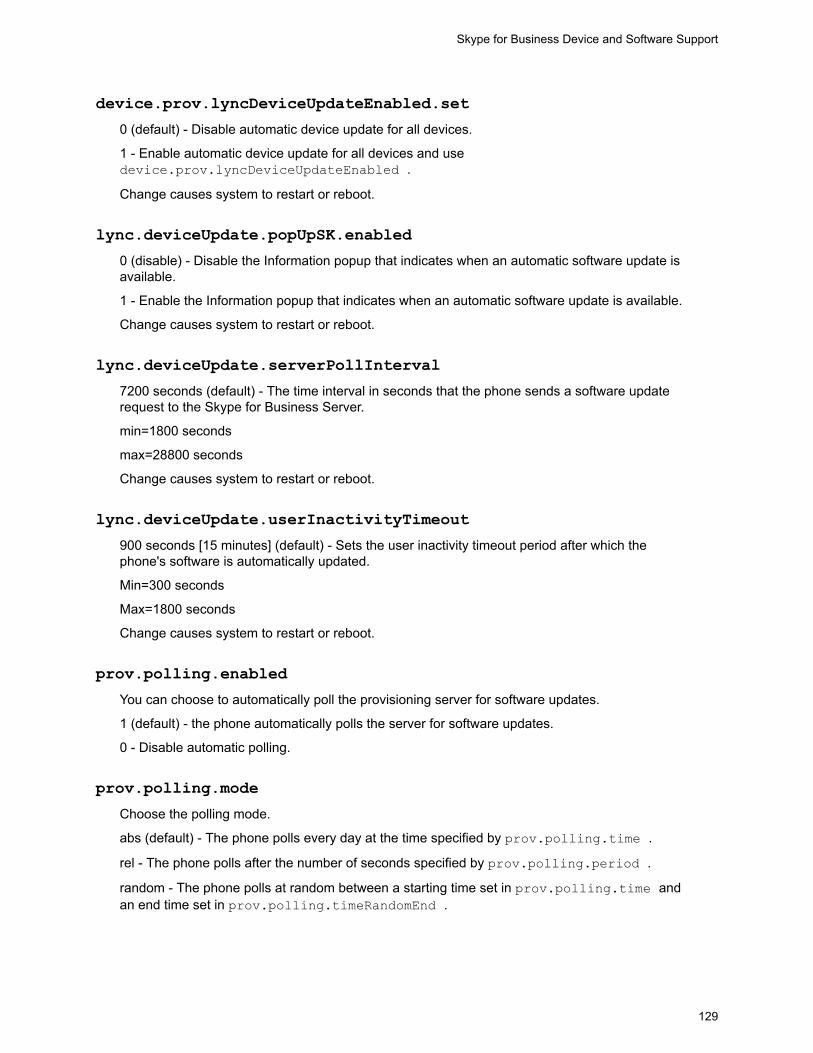
device.prov.lyncDeviceUpdateEnabled.set0 (default) - Disable automatic device update for all devices.
1 - Enable automatic device update for all devices and usedevice.prov.lyncDeviceUpdateEnabled .
Change causes system to restart or reboot.
lync.deviceUpdate.popUpSK.enabled0 (disable) - Disable the Information popup that indicates when an automatic software update isavailable.
1 - Enable the Information popup that indicates when an automatic software update is available.
Change causes system to restart or reboot.
lync.deviceUpdate.serverPollInterval7200 seconds (default) - The time interval in seconds that the phone sends a software updaterequest to the Skype for Business Server.
min=1800 seconds
max=28800 seconds
Change causes system to restart or reboot.
lync.deviceUpdate.userInactivityTimeout900 seconds [15 minutes] (default) - Sets the user inactivity timeout period after which thephone's software is automatically updated.
Min=300 seconds
Max=1800 seconds
Change causes system to restart or reboot.
prov.polling.enabledYou can choose to automatically poll the provisioning server for software updates.
1 (default) - the phone automatically polls the server for software updates.
0 - Disable automatic polling.
prov.polling.modeChoose the polling mode.
abs (default) - The phone polls every day at the time specified by prov.polling.time .
rel - The phone polls after the number of seconds specified by prov.polling.period .
random - The phone polls at random between a starting time set in prov.polling.time andan end time set in prov.polling.timeRandomEnd .
Skype for Business Device and Software Support
129

Note that if you set the polling period in prov.polling.period to a time greater than 86400seconds (one day) polling occurs on a random day within that polling period (meaning valuessuch as 86401 are over 2 days) and only between the start and end times. The day within thatperiod is determined by the phone MAC addresses and does not change with a reboot. The timewithin the start and end is calculated again with every reboot.
prov.polling.periodThe polling period in seconds.
86400 (default)
integer > 3600
The polling period is rounded up to the nearest number of days in absolute and random modeyou set in .
In relative mode, the polling period starts once the phone boots.
If random mode is set to a time greater than 86400 (one day) polling occurs on a random daybased on the phone MAC address.
prov.polling.timeSpecify the polling start time in absolute or random polling mode you choose withprov.polling.mode .
03:00 (default)
hh:mm
prov.polling.timeRandomEndThe polling stop time when the polling mode is set to random.
NULL (default)
hh:mm
Data Center ResiliencyData center resiliency ensures that minimum basic call functions remain available in the event of a servershutdown or Wide Area Network (WAN) outage.
The phones you register with Skype for Business on-premises are enabled with this feature by defaultand no additional configuration is required.
In the event of an unplanned server shutdown or outage, phone behavior changes to the following:• The phone displays a scrolling banner message 'Limited functionality due to outage'.• Your presence status displays as 'Unknown'.• The presence status of your contacts displays as 'Unknown'.• You cannot change your presence status.• You cannot add or delete Skype for Business contacts.
Skype for Business Device and Software Support
130

• Phones in the locked state display a message on the Sign In menu 'Limited functionality due tooutage'.
• You can access current Call Forwarding settings in read-only mode.
Skype for Business Device and Software Support
131

TroubleshootingTopics:
▪ General Troubleshooting Tasks
▪ Troubleshooting Microsoft Teams
▪ Troubleshooting Skype for Business
This section provides information on troubleshooting CCX business media phones.
132

General Troubleshooting TasksTopics:
▪ Factory Reset Your Phone (Hard Reboot)
If you experience issues with your CCX phone, review the following troubleshooting information to try toresolve your issue.
Factory Reset Your Phone (Hard Reboot)Symptom:
The phone gets into a state where you must factory reset the phone, but you can’t access the phone’slocal interface to reset the phone to default settings. You also can’t access the factory reset optionthrough the system web interface.
Workaround
You can factory reset your phone using the phone’s hardware (hard reboot). Resetting the phone todefaults clears the flash parameters, removes user and cached data, and resets the administratorpassword to 456.
Procedure1. Disconnect the power, then power on the Poly phone.2. As soon as the Poly logo shows on the screen, press and hold the four corners of the LCD display.
Note: It may take several tries to get the timing right or to find the correct spots to press on theLCD display.
3. Release the LCD display when the Mute indicator on the lower-right corner of the phone beginsflashing red, amber, and green.
133

Troubleshooting Microsoft TeamsTopics:
• System Logs
▪ Capture Your Phone’s Screen
Refer to the following topics to help you diagnose and fix issues with your CCX business media phoneswhen using Microsoft Teams.
For more information on troubleshooting Microsoft Teams or to get additional support, see Welcome toMicrosoft Teams at Microsoft Docs.
System LogsSystem log files assist when troubleshooting issues.
System log files contain information about system activities and the system configuration profile. Aftersetting up system logging, you can retrieve system log files.
The detailed technical data in the system log files can help Poly Global Services resolve problems andprovide technical support for your system. In such a situation, your support representative may ask you todownload log archives and send them to Poly Global Services.
You must contact Poly Customer Support to obtain the template file techsupport.cfg containingparameters that configure log levels.
Set the Logging Level for a PhoneYou can enable logging and set the logging level for general logs from the Admin Settings menu on anindividual CCX phone.
Procedure1. Go to Settings > Device Settings.2. Select Admin Settings, and enter the administrator password (the default is 456).3. Select Debug.4. Tap the switch for Logging to enable the feature.5. Tap Log Level, and select a severity level.
Set Log Levels from the Web Configuration UtilityYou can set log levels from the Web Configuration Utility.
Procedure1. Enter the IP address of the phone into a web browser and log in as Administrator or User.2. Go to Settings > Logging.3. In Server Log Level, select a log level.
134

Capture Your Phone’s ScreenYou can take a snapshot of a phone's screen to record any troubleshooting issues.
Procedure1. Go to Settings > Device Settings.2. Select Admin Only, and enter the administrator password (the default is 456).3. Select Debug, and tap the switch to enable Screen Capture.4. In a web browser, enter https://<phoneIPaddress>/captureScreen into the address field,
where <phoneIPaddress> equals your phone's IP address.5. If prompted, enter the login credentials.
The web browser displays an image showing the phone's current screen. You can save the imageas a BMP or JPEG file.
Troubleshooting Microsoft Teams
135

Troubleshooting Skype for BusinessTopics:
• System Logs
Refer to the following topics to help you diagnose and fix issues with your CCX business media phoneswhen using Skype for Business.
For more information on troubleshooting Skype for Business or to get additional support, see Skype forBusiness at Microsoft Docs.
System LogsSystem log files assist when troubleshooting issues.
System log files contain information about system activities and the system configuration profile. Aftersetting up system logging, you can retrieve system log files.
The detailed technical data in the system log files can help Poly Global Services resolve problems andprovide technical support for your system. In such a situation, your support representative may ask you todownload log archives and send them to Poly Global Services.
You must contact Poly Customer Support to obtain the template file techsupport.cfg containingparameters that configure log levels.
Upload Logs to the Skype for Business ServerTo help troubleshoot phone issues for phones registered with Skype for Business, you can allow users toupload logs to the Skype for Business server from the phone or Web Configuration Utility. Users can alsoset log levels for the phone.
This feature is available on the phones registered with Skype for Business Server On-premises or Onlineand with Microsoft Lync 2013 or 2010 Server.
Logs are uploaded to the Skype for Business Server at the following location, which you can specify inthe Skype for Business topology builder or at initial installation:
<LYNC_SERVER_LOG_PATH>\1-WebServices-1\DeviceUpdateLogs\Client\CELog
Phones support Core File Uploads to help log phone crashes. The logs are uploaded to the Skype forBusiness server in tar.gz format. The Skype for Business server must support tar.gz format todecrypt the log file uploaded to server.
Upload Logs ParametersUse the following parameters to configure log uploading to the Skype for Business server.
feature.logUpload.enabled1 (default) - Enable users to upload logs to the Skype for Business server from the phone.
136

0 - Do not allow users to upload log files to the Skype for Business server.
Send Logs from the PhoneTo help troubleshoot issues, you can send logs from the phone to the Skype for Business server.
Procedure» Go to Settings > Basic > Diagnostic Logs > Upload Logs.
The files are uploaded to the server as plain text.
Send Diagnostic Logs from the Web Configuration UtilityTo help troubleshoot issues, you can send diagnostic logs to the Skype for Business server from the WebConfiguration Utility.
This option is available when logged in as Administrator or User.
Procedure1. Enter the IP address of the phone into a web browser and log in as Administrator or User.2. Go to Diagnostics > Upload Logs.
The files are uploaded to the server as plain text.3. View uploaded URLs at Skype for Business Status > Skype for Business Parameters and one
of the following locations:• Update Server Internal URL for on-premises deployments.• Update Server External URL online deployments.
Logging LevelsThe event logging system supports the classes of events listed in the table Logging Levels.
Two types of logging are supported:• Level, change, and render• Schedule
Note: Logging parameter changes can impair system operation. Do not change any loggingparameters without prior consultation with Technical Support.
Logging Levels
Logging Level Description
0 Debug only
1 High detail class event
2 Moderate detail event class
3 Low detail event class
Troubleshooting Skype for Business
137

Logging Level Description
4 Minor error
5 Major error ‒ will eventually incapacitate the system
6 Fatal error
Each event in the log contains the following fields separated by the pipe (|) character:• Time or time/date stamp, in one of the following formats:
◦ 0 - milliseconds ‒ 011511.006 = 1 hour, 15 minutes, 11.006 seconds since booting◦ 1 - absolute time with minute resolution 0210281716 - 2002 October 28, 17:16◦ 2 - absolute time with seconds resolution 1028171642 - October 28, 17:16:42
• 1-5 character component identifier (such as "so")• Event class• Cumulative log events missed due to excessive CPU load• The event description
Set the Logging Level for a PhoneYou can enable logging and set the logging level for general logs from the Admin Settings menu on anindividual CCX phone.
Procedure1. Go to Settings > Device Settings.2. Select Admin Settings, and enter the administrator password (the default is 456).3. Select Debug.4. Tap the switch for Logging to enable the feature.5. Tap Log Level, and select a severity level.
Set Log Levels from the Web Configuration UtilityYou can set log levels from the Web Configuration Utility.
Procedure1. Enter the IP address of the phone into a web browser and log in as Administrator or User.2. Go to Settings > Logging.3. In Server Log Level, select a log level.
Troubleshooting Skype for Business
138