Embed Size (px)
Citation preview

Red Hat JBoss Enterprise ApplicationPlatform 6.4
How To Configure Server Security
How to Configure Server Security
Last Updated: 2017-12-12

Red Hat JBoss Enterprise Application Platform 6.4 How To ConfigureServer Security
How to Configure Server Security
Legal Notice
Copyright © 2017 Red Hat, Inc.
The text of and illustrations in this document are licensed by Red Hat under a Creative CommonsAttribution–Share Alike 3.0 Unported license ("CC-BY-SA"). An explanation of CC-BY-SA isavailable athttp://creativecommons.org/licenses/by-sa/3.0/. In accordance with CC-BY-SA, if you distribute this document or an adaptation of it, you mustprovide the URL for the original version.
Red Hat, as the licensor of this document, waives the right to enforce, and agrees not to assert,Section 4d of CC-BY-SA to the fullest extent permitted by applicable law.
Red Hat, Red Hat Enterprise Linux, the Shadowman logo, JBoss, OpenShift, Fedora, the Infinitylogo, and RHCE are trademarks of Red Hat, Inc., registered in the United States and othercountries.
Linux ® is the registered trademark of Linus Torvalds in the United States and other countries.
Java ® is a registered trademark of Oracle and/or its affiliates.
XFS ® is a trademark of Silicon Graphics International Corp. or its subsidiaries in the United Statesand/or other countries.
MySQL ® is a registered trademark of MySQL AB in the United States, the European Union andother countries.
Node.js ® is an official trademark of Joyent. Red Hat Software Collections is not formally related toor endorsed by the official Joyent Node.js open source or commercial project.
The OpenStack ® Word Mark and OpenStack logo are either registered trademarks/service marksor trademarks/service marks of the OpenStack Foundation, in the United States and other countriesand are used with the OpenStack Foundation's permission. We are not affiliated with, endorsed orsponsored by the OpenStack Foundation, or the OpenStack community.
All other trademarks are the property of their respective owners.
Abstract
The purpose of this document is to provide a practical guide to securing Red Hat JBoss EnterpriseApplication Platform 6. More specifically, this guide details how to secure all of the managementinterfaces on JBoss EAP 6. Before reading this guide, users should read through the SecurityArchitecture document for Red Hat JBoss Enterprise Application Platform 6 and have a solidunderstanding of how JBoss EAP 6 handles security. This document also makes use of the JBossEAP 6 CLI interface for performing configuration changes. For more information on using the CLI forboth standalone JBoss EAP 6 instances as well as JBoss EAP 6 domains, please consult the TheManagement CLI section of the Administration and Configuration guide. When completing thisdocument, readers should have a solid, working understanding of how to secure JBoss EAP 6.
. . . . . . . . . . . . . . . . . . . . . . . . . . . . . . . . . . . . . . . . . . . . . . . . . . . . . . . . . . . . . . . . . . . . . . . . . . . . . . . . . . . . . . . . . . . . . . . . . . . . . . . . . . . . . . . . . . . . . . . . . . . . . . . . . . . . . . . . . . . . . . . . . . . . . . . . . . . . . . . . . . . . . . . . . . . . . . . . . . . . . . . . . . . . . . . . . . . . . . . . . . . . . . . . . . . . . . . . . . . . . . . . . . . . . . . . . . . . . . . . . . . . . . . . . . . . . . . . . . . . . . . . . . . . . . . . . . . . . . . .
. . . . . . . . . . . . . . . . . . . . . . . . . . . . . . . . . . . . . . . . . . . . . . . . . . . . . . . . . . . . . . . . . . . . . . . . . . . . . . . . . . . . . . . . . . . . . . . . . . . . . . . . . . . . . . . . . . . . . . . . . . . . . . . . . . . . . . . . . . . . . . . . . . . . . . . . . . . . . . . . . . . . . . . . . . . . . . . . . . . . . . . . . . . . . . . . . . . . . . . . . . . . . . . . . . . . . . . . . . . . . . . . . . . . . . . . . . . . . . . . . . . . . . . . . . . . . . . . . . . . . . . . . . . . . . . . . . . . . . . .
. . . . . . . . . . . . . . . . . . . . . . . . . . . . . . . . . . . . . . . . . . . . . . . . . . . . . . . . . . . . . . . . . . . . . . . . . . . . . . . . . . . . . . . . . . . . . . . . . . . . . . . . . . . . . . . . . . . . . . . . . . . . . . . . . . . . . . . . . . . . . . . . . . . . . . . . . . . . . . . . . . . . . . . . . . . . . . . . . . . . . . . . . . . . . . . . . . . . . . . . . . . . . . . . . . . . . . . . . . . . . . . . . . . . . . . . . . . . . . . . . . . . . . . . . . . . . . . . . . . . . . . . . . . . . . . . . . . . . . . .
Table of Contents
CHAPTER 1. OVERVIEW OF SECURITY
CHAPTER 2. SECURING THE SERVER AND ITS INTERFACES2.1. BUILDING BLOCKS
2.1.1. Interfaces and Socket Bindings2.1.2. Security Realms2.1.3. Using Security Realms and Socket Bindings for Securing the Management Interfaces
2.2. HOW TO SECURE THE MANAGEMENT INTERFACES2.2.1. Configuring the Networking and Ports Used by Red Hat JBoss Enterprise Application Platform 62.2.2. Configure the Management Console for HTTPS
2.2.2.1. 1. Create a Keystore to Secure the Management Console2.2.2.2. 2. Ensure the Management Console Binds to HTTPS2.2.2.3. 3. Optional: Custom socket-binding Group2.2.2.4. 4. Create a New Security Realm2.2.2.5. 5. Configure Management Interface to Use the New Security Realm2.2.2.6. 6. Configure the Management Console to Use the Keystore2.2.2.7. 7. Restart the Red Hat JBoss Enterprise Application Platform 6 Instance
2.2.3. Setting up Distinct HTTP and HTTPS Management Interfaces2.2.4. Disabling the HTTP Interfaces2.2.5. Setting up 2-Way SSL/TLS for the Management Interfaces2.2.6. Setting up an SSL/TLS Connector2.2.7. SSL Connector Reference
2.2.7.1. name2.2.7.2. verify-client2.2.7.3. verify-depth2.2.7.4. certificate-key-file2.2.7.5. certificate-file2.2.7.6. password2.2.7.7. protocol2.2.7.8. cipher-suite2.2.7.9. key-alias2.2.7.10. truststore-type2.2.7.11. keystore-type2.2.7.12. ca-certificate-file2.2.7.13. ca-certificate-password2.2.7.14. ca-revocation-url2.2.7.15. session-cache-size2.2.7.16. session-timeout
2.2.8. Disabling Remote Access to JMX2.2.9. Using JAAS for Securing the Management Interfaces2.2.10. Silent Authentication
2.3. SECURITY AUDITING2.3.1. Configure Security Auditing for the Management Interfaces2.3.2. Configure Security Auditing for Security Domains
CHAPTER 3. SECURING USERS OF THE SERVER AND ITS MANAGEMENT INTERFACES3.1. USER AUTHENTICATION
3.1.1. Default User Configuration3.1.2. Adding Authentication via LDAP
3.2. SECURE PASSWORDS3.2.1. Password Vault
3.2.1.1. 1. Setup a Java Keystore to Store Key for Password Encryption
4
555567778899
101111111214161717171818181919192020202021212121212223242424
26262626262627
Table of Contents
1
3.2.1.2. 2. Initialize the Password Vault3.2.1.3. 3. Configure Red Hat JBoss Enterprise Application Platform 6 to use the Password Vault3.2.1.4. 4. Store a Sensitive String in the Password Vault3.2.1.5. 5. Use an Encrypted Sensitive String in Configuration3.2.1.6. Use an Encrypted Sensitive String in an Application3.2.1.7. Check if a Sensitive String is in the Password Vault3.2.1.8. Remove a Sensitive String from the Password Vault3.2.1.9. Configure Red Hat JBoss Enterprise Application Platform 6 to Use a Custom Implementation of thePassword Vault3.2.1.10. Obtain Keystore Password From External Source
3.3. ROLE-BASED ACCESS CONTROL3.3.1. Enabling Role-Based Access Control3.3.2. Changing the Permission Combination Policy3.3.3. Managing Roles
3.3.3.1. Configure User Role Assignment using the Management CLI3.3.4. Roles and User Groups3.3.5. Configure Group Role Assignment using the Management CLI3.3.6. Using RBAC with LDAP3.3.7. Scoped Roles
3.3.7.1. Configuring Scoped Roles from the Management CLI3.3.7.2. Configuring Scoped Roles from the Management Console
3.3.8. Configuring Constraints3.3.8.1. Configuring Sensitivity Constraints3.3.8.2. Configure Application Resource Constraints3.3.8.3. Configure the Vault Expression Constraint3.3.8.4. Application Resource Constraints Reference3.3.8.5. Sensitivity Constraints Reference
28313235363739
42424343444545484952525254555557585960
Red Hat JBoss Enterprise Application Platform 6.4 How To Configure Server Security
2
Table of Contents
3
CHAPTER 1. OVERVIEW OF SECURITYThe basics of JBoss EAP 6 security as well as general security concepts are covered in the Red HatJBoss Enterprise Application Platform 6 Security Architecture guide. Prior to reading this guide, it isimportant to understand the basic information covered in the Security Architecture guide aroundauthentication, authorization, security realms, encryption, and SSL/TLS.
Red Hat JBoss Enterprise Application Platform 6.4 How To Configure Server Security
4
CHAPTER 2. SECURING THE SERVER AND ITS INTERFACES
2.1. BUILDING BLOCKS
2.1.1. Interfaces and Socket Bindings
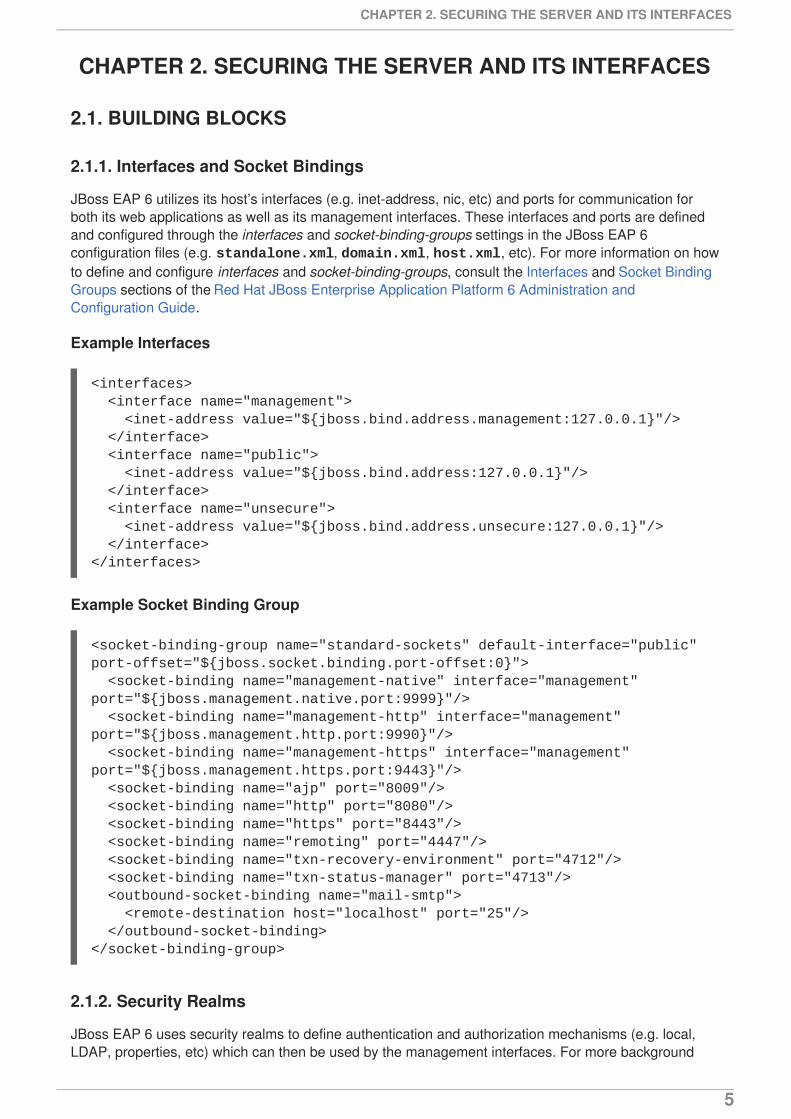
JBoss EAP 6 utilizes its host’s interfaces (e.g. inet-address, nic, etc) and ports for communication forboth its web applications as well as its management interfaces. These interfaces and ports are definedand configured through the interfaces and socket-binding-groups settings in the JBoss EAP 6configuration files (e.g. standalone.xml, domain.xml, host.xml, etc). For more information on howto define and configure interfaces and socket-binding-groups, consult the Interfaces and Socket BindingGroups sections of the Red Hat JBoss Enterprise Application Platform 6 Administration andConfiguration Guide.
Example Interfaces
Example Socket Binding Group
2.1.2. Security Realms
JBoss EAP 6 uses security realms to define authentication and authorization mechanisms (e.g. local,LDAP, properties, etc) which can then be used by the management interfaces. For more background
<interfaces> <interface name="management"> <inet-address value="${jboss.bind.address.management:127.0.0.1}"/> </interface> <interface name="public"> <inet-address value="${jboss.bind.address:127.0.0.1}"/> </interface> <interface name="unsecure"> <inet-address value="${jboss.bind.address.unsecure:127.0.0.1}"/> </interface></interfaces>
<socket-binding-group name="standard-sockets" default-interface="public" port-offset="${jboss.socket.binding.port-offset:0}"> <socket-binding name="management-native" interface="management" port="${jboss.management.native.port:9999}"/> <socket-binding name="management-http" interface="management" port="${jboss.management.http.port:9990}"/> <socket-binding name="management-https" interface="management" port="${jboss.management.https.port:9443}"/> <socket-binding name="ajp" port="8009"/> <socket-binding name="http" port="8080"/> <socket-binding name="https" port="8443"/> <socket-binding name="remoting" port="4447"/> <socket-binding name="txn-recovery-environment" port="4712"/> <socket-binding name="txn-status-manager" port="4713"/> <outbound-socket-binding name="mail-smtp"> <remote-destination host="localhost" port="25"/> </outbound-socket-binding></socket-binding-group>
CHAPTER 2. SECURING THE SERVER AND ITS INTERFACES
5
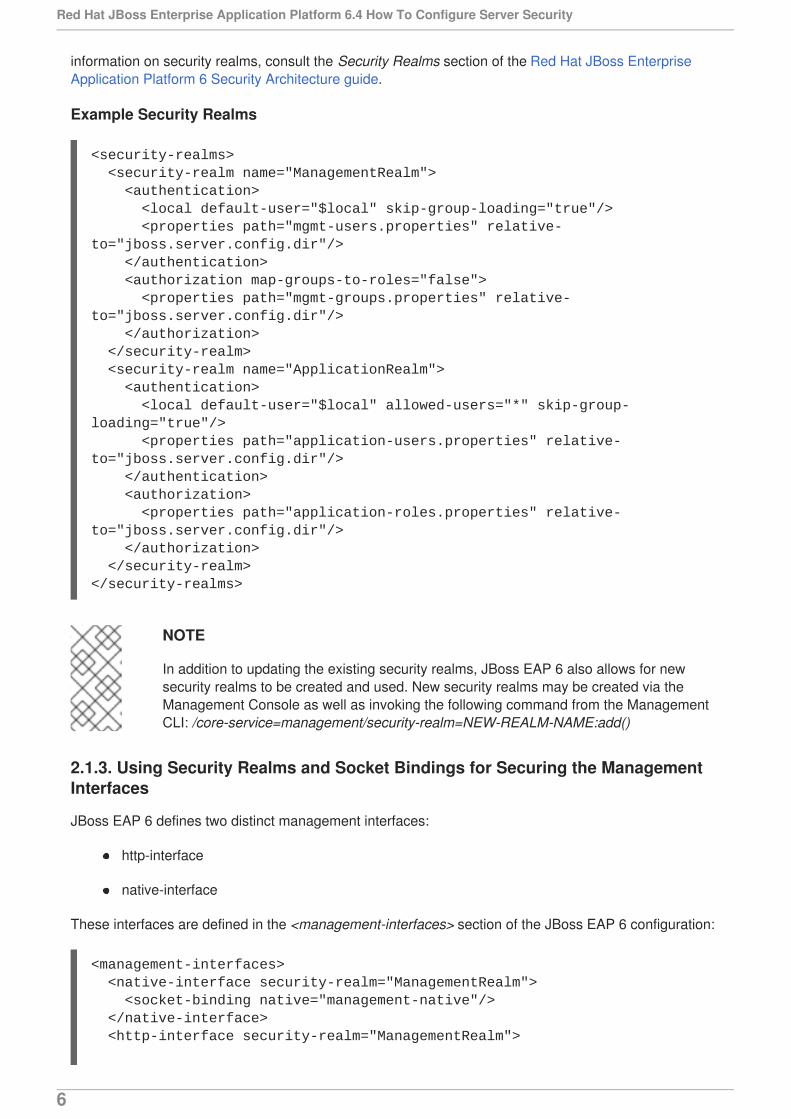
information on security realms, consult the Security Realms section of the Red Hat JBoss EnterpriseApplication Platform 6 Security Architecture guide.
Example Security Realms
NOTE
In addition to updating the existing security realms, JBoss EAP 6 also allows for newsecurity realms to be created and used. New security realms may be created via theManagement Console as well as invoking the following command from the ManagementCLI: /core-service=management/security-realm=NEW-REALM-NAME:add()
2.1.3. Using Security Realms and Socket Bindings for Securing the ManagementInterfaces
JBoss EAP 6 defines two distinct management interfaces:
http-interface
native-interface
These interfaces are defined in the <management-interfaces> section of the JBoss EAP 6 configuration:
<security-realms> <security-realm name="ManagementRealm"> <authentication> <local default-user="$local" skip-group-loading="true"/> <properties path="mgmt-users.properties" relative-to="jboss.server.config.dir"/> </authentication> <authorization map-groups-to-roles="false"> <properties path="mgmt-groups.properties" relative-to="jboss.server.config.dir"/> </authorization> </security-realm> <security-realm name="ApplicationRealm"> <authentication> <local default-user="$local" allowed-users="*" skip-group-loading="true"/> <properties path="application-users.properties" relative-to="jboss.server.config.dir"/> </authentication> <authorization> <properties path="application-roles.properties" relative-to="jboss.server.config.dir"/> </authorization> </security-realm></security-realms>
<management-interfaces> <native-interface security-realm="ManagementRealm"> <socket-binding native="management-native"/> </native-interface> <http-interface security-realm="ManagementRealm">
Red Hat JBoss Enterprise Application Platform 6.4 How To Configure Server Security
6
Notice that each interface specifies a security-realm and socket-binding. Updating the configuration forthe specified security realm and socket binding allows for the management interfaces to be secured indifferent ways. In addition to being able to secure each of these interfaces via security realms and socketbindings, both of these interfaces also may be completely disabled, and users of these interfaces may beconfigured to have various roles and access rights. There are also a few topics in this guide, such assecurity auditing, secure passwords and JMX that overlap with other subsystems within JBoss EAP 6,but still relate to securing JBoss EAP 6.
2.2. HOW TO SECURE THE MANAGEMENT INTERFACES
The following sections show how to perform various operations related to securing the JBoss EAP 6management interfaces and related subsystems.
NOTE
The below CLI commands were done assuming a standalone instance of JBoss EAP 6.For more details on using the CLI with JBoss EAP 6 domains, please consult TheManagement CLI section of the Red Hat JBoss Enterprise Application Platform 6Administration and Guide.
2.2.1. Configuring the Networking and Ports Used by Red Hat JBoss EnterpriseApplication Platform 6
Depending on the configuration of the host, JBoss EAP 6 may be configured to use various networkinterfaces and ports. This allows JBoss EAP 6 to work with different host, networking, and firewallrequirements. For more information on the Networking and Ports used by JBoss EAP 6 as well as how toconfigure those settings, please see the Network and Port Configuration section of the Red Hat JBossEnterprise Application Platform 6 Administration and Configuration guide.
2.2.2. Configure the Management Console for HTTPS
Configuring the JBoss EAP 6 management console for communication only via HTTPS providesincreased security. All network traffic between the client (web browser) and management console isencrypted, which reduces the risk of security attacks such as a man-in-the-middle attack.
In this procedure unencrypted communication with the JBoss EAP 6 standalone instance or domain isdisabled. This procedure applies to both standalone and domain mode configurations. For domainmode, prefix the Management CLI commands with the name of the host, for example: /host=master.
To configure the Management Console for HTTPS, the following steps are required:
1. Create a Keystore to Secure the Management Console
2. Ensure the Management Console Binds to HTTPS
3. Optional: Custom socket-binding Group
4. Create a New Security Realm
5. Configure Management Interface to Use the New Security Realm
<socket-binding http="management-http"/> </http-interface></management-interfaces>
CHAPTER 2. SECURING THE SERVER AND ITS INTERFACES
7
6. Configure the Management Console to Use the Keystore
7. Restart the Red Hat JBoss Enterprise Application Platform 6 Instance
2.2.2.1. 1. Create a Keystore to Secure the Management Console
NOTE
This keystore must be in JKS format as the management console is not compatible withkeystores in JCEKS format.
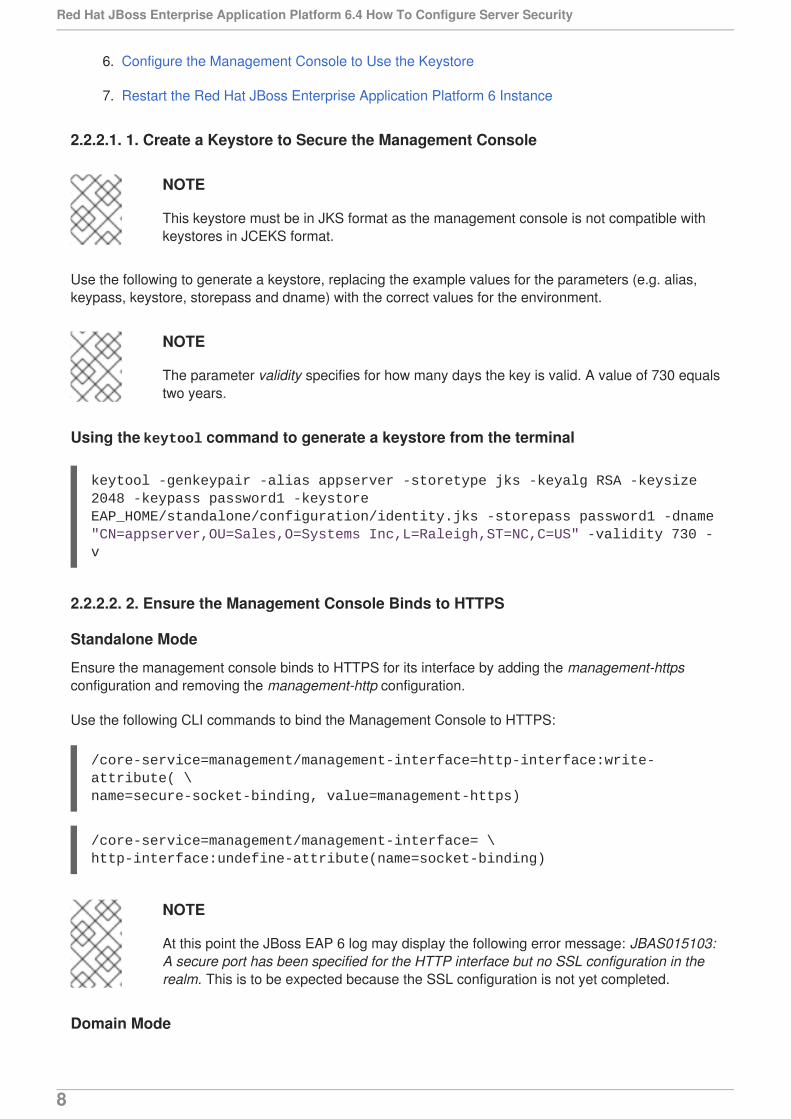
Use the following to generate a keystore, replacing the example values for the parameters (e.g. alias,keypass, keystore, storepass and dname) with the correct values for the environment.
NOTE
The parameter validity specifies for how many days the key is valid. A value of 730 equalstwo years.
Using the keytool command to generate a keystore from the terminal
2.2.2.2. 2. Ensure the Management Console Binds to HTTPS
Standalone Mode
Ensure the management console binds to HTTPS for its interface by adding the management-httpsconfiguration and removing the management-http configuration.
Use the following CLI commands to bind the Management Console to HTTPS:
NOTE
At this point the JBoss EAP 6 log may display the following error message: JBAS015103:A secure port has been specified for the HTTP interface but no SSL configuration in therealm. This is to be expected because the SSL configuration is not yet completed.
Domain Mode
keytool -genkeypair -alias appserver -storetype jks -keyalg RSA -keysize 2048 -keypass password1 -keystore EAP_HOME/standalone/configuration/identity.jks -storepass password1 -dname "CN=appserver,OU=Sales,O=Systems Inc,L=Raleigh,ST=NC,C=US" -validity 730 -v
/core-service=management/management-interface=http-interface:write-attribute( \name=secure-socket-binding, value=management-https)
/core-service=management/management-interface= \http-interface:undefine-attribute(name=socket-binding)
Red Hat JBoss Enterprise Application Platform 6.4 How To Configure Server Security
8
Change the socket element within the management-interface section by adding secure-port andremoving port configuration.
Use the following commands to bind the Management Console to HTTPS:
NOTE
At this point the JBoss EAP 6 log may display the following error message: JBAS015103:A secure port has been specified for the HTTP interface but no SSL configuration in therealm. This is to be expected because the SSL configuration is not yet completed.
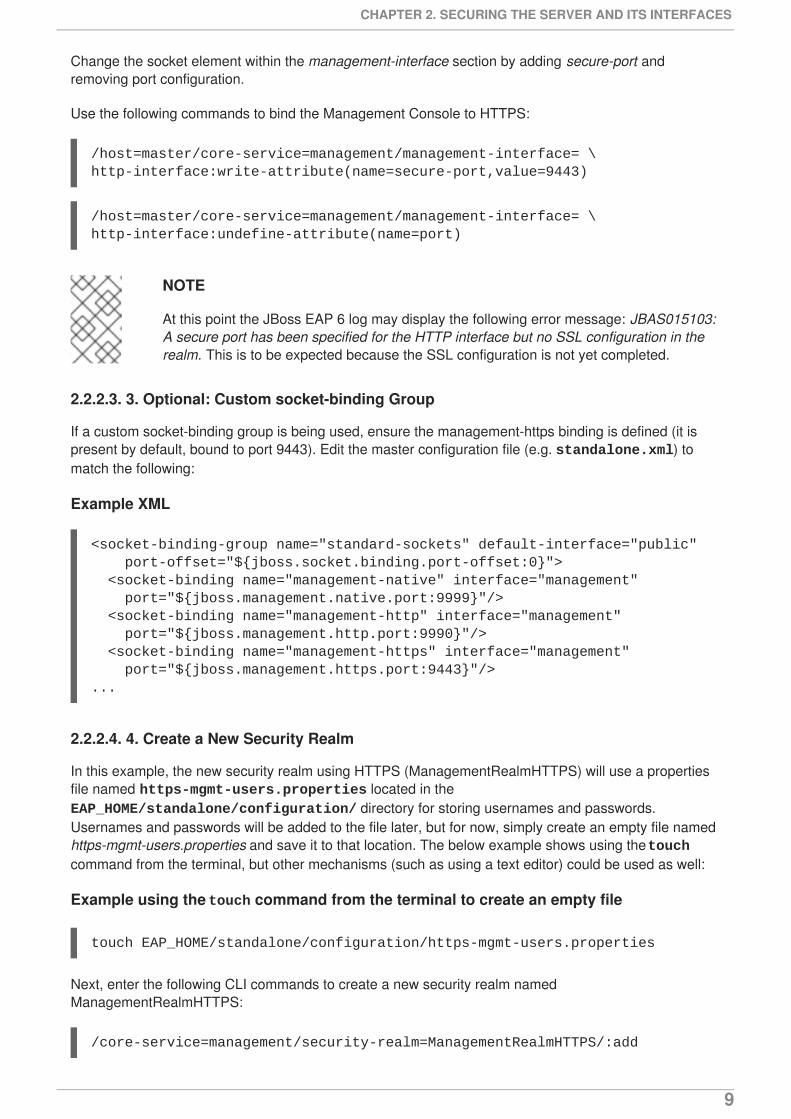
2.2.2.3. 3. Optional: Custom socket-binding Group
If a custom socket-binding group is being used, ensure the management-https binding is defined (it ispresent by default, bound to port 9443). Edit the master configuration file (e.g. standalone.xml) tomatch the following:
Example XML
2.2.2.4. 4. Create a New Security Realm
In this example, the new security realm using HTTPS (ManagementRealmHTTPS) will use a propertiesfile named https-mgmt-users.properties located in the EAP_HOME/standalone/configuration/ directory for storing usernames and passwords.Usernames and passwords will be added to the file later, but for now, simply create an empty file namedhttps-mgmt-users.properties and save it to that location. The below example shows using the touchcommand from the terminal, but other mechanisms (such as using a text editor) could be used as well:
Example using the touch command from the terminal to create an empty file
Next, enter the following CLI commands to create a new security realm namedManagementRealmHTTPS:
/host=master/core-service=management/management-interface= \http-interface:write-attribute(name=secure-port,value=9443)
/host=master/core-service=management/management-interface= \http-interface:undefine-attribute(name=port)
<socket-binding-group name="standard-sockets" default-interface="public" port-offset="${jboss.socket.binding.port-offset:0}"> <socket-binding name="management-native" interface="management" port="${jboss.management.native.port:9999}"/> <socket-binding name="management-http" interface="management" port="${jboss.management.http.port:9990}"/> <socket-binding name="management-https" interface="management" port="${jboss.management.https.port:9443}"/>...
touch EAP_HOME/standalone/configuration/https-mgmt-users.properties
/core-service=management/security-realm=ManagementRealmHTTPS/:add
CHAPTER 2. SECURING THE SERVER AND ITS INTERFACES
9
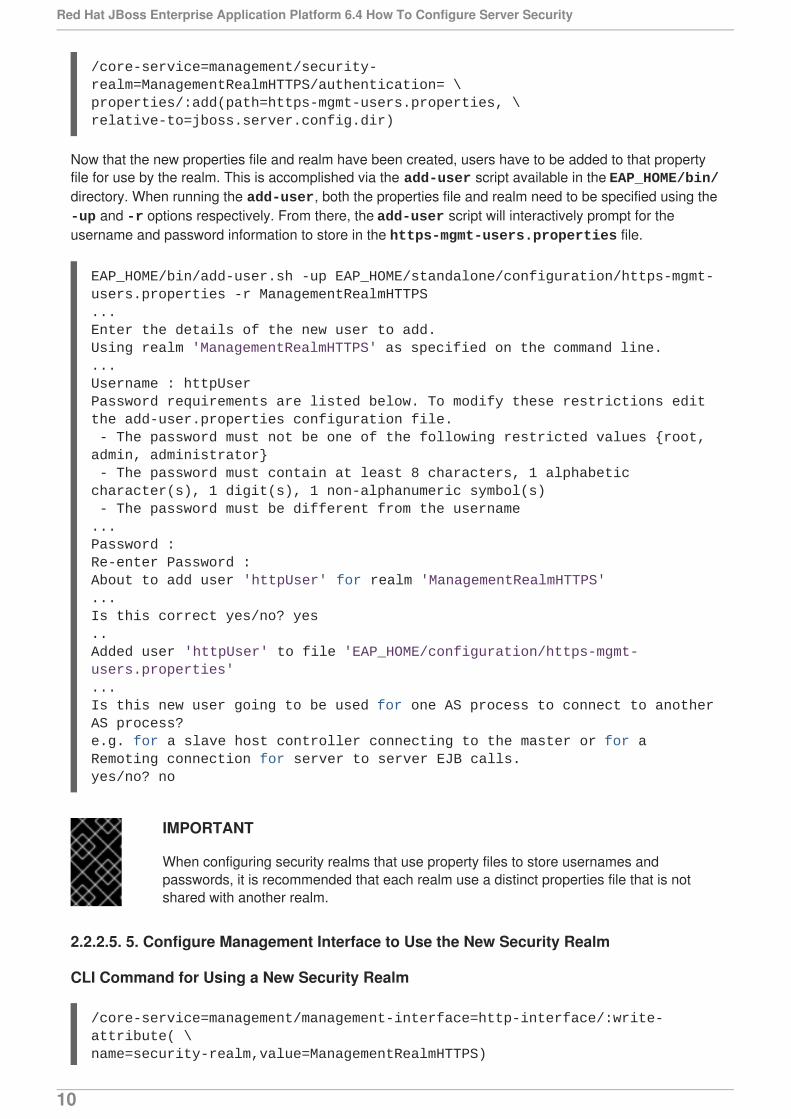
Now that the new properties file and realm have been created, users have to be added to that propertyfile for use by the realm. This is accomplished via the add-user script available in the EAP_HOME/bin/directory. When running the add-user, both the properties file and realm need to be specified using the -up and -r options respectively. From there, the add-user script will interactively prompt for theusername and password information to store in the https-mgmt-users.properties file.
IMPORTANT
When configuring security realms that use property files to store usernames andpasswords, it is recommended that each realm use a distinct properties file that is notshared with another realm.
2.2.2.5. 5. Configure Management Interface to Use the New Security Realm
CLI Command for Using a New Security Realm
/core-service=management/security-realm=ManagementRealmHTTPS/authentication= \properties/:add(path=https-mgmt-users.properties, \relative-to=jboss.server.config.dir)
EAP_HOME/bin/add-user.sh -up EAP_HOME/standalone/configuration/https-mgmt-users.properties -r ManagementRealmHTTPS...Enter the details of the new user to add.Using realm 'ManagementRealmHTTPS' as specified on the command line....Username : httpUserPassword requirements are listed below. To modify these restrictions edit the add-user.properties configuration file. - The password must not be one of the following restricted values {root, admin, administrator} - The password must contain at least 8 characters, 1 alphabetic character(s), 1 digit(s), 1 non-alphanumeric symbol(s) - The password must be different from the username...Password :Re-enter Password :About to add user 'httpUser' for realm 'ManagementRealmHTTPS'...Is this correct yes/no? yes..Added user 'httpUser' to file 'EAP_HOME/configuration/https-mgmt-users.properties'...Is this new user going to be used for one AS process to connect to another AS process?e.g. for a slave host controller connecting to the master or for a Remoting connection for server to server EJB calls.yes/no? no
/core-service=management/management-interface=http-interface/:write-attribute( \name=security-realm,value=ManagementRealmHTTPS)
Red Hat JBoss Enterprise Application Platform 6.4 How To Configure Server Security
10

2.2.2.6. 6. Configure the Management Console to Use the Keystore
Use the below CLI command to configure the management console to use the keystore. For theparameters file, password and alias their values must be copied from the first step.
CLI Command for Adding a Keystore to a Security Realm
NOTE
To update the keystore password, use the following CLI command:
/core-service=management/security-realm=ManagementRealmHTTPS/server-identity=ssl:write-attribute(name=keystore-password,value=newpassword)
2.2.2.7. 7. Restart the Red Hat JBoss Enterprise Application Platform 6 Instance
On restarting the server the log should contain the following, just before the text which states the numberof services that are started. The management console is now listening on port 9443, which confirms thatthe procedure was successful.
2.2.3. Setting up Distinct HTTP and HTTPS Management Interfaces
The Management Interface can listen on distinct interfaces for HTTP and HTTPS connections. Onescenario for this is to listen for encrypted traffic on an external network, and use unencrypted traffic on aninternal network.
The secure-interface attribute specifies the network interface on which the host’s socket for HTTPSmanagement communication should be opened, if a different interface should be used from that specifiedby the interface attribute. If it is not specified then the interface specified by the interface attribute is used.
IMPORTANT
The secure-interface attribute has no effect if the secure-port attribute is not set.
Note that when the server listens for HTTP and HTTPS traffic on the same interface, HTTPS requestsreceived by the HTTP listener are automatically redirected to the HTTPS port. When distinct interfaces
/core-service=management/security-realm=ManagementRealmHTTPS/server-identity= \ssl:add(keystore-path=identity.jks, \keystore-relative-to=jboss.server.config.dir, \keystore-password=password1, alias=appserver)
reload
14:53:14,720 INFO [org.jboss.as] (Controller Boot Thread) JBAS015962: Http management interface listening on https://127.0.0.1:9443/management14:53:14,721 INFO [org.jboss.as] (Controller Boot Thread) JBAS015952: Admin console listening on https://127.0.0.1:9443
CHAPTER 2. SECURING THE SERVER AND ITS INTERFACES
11
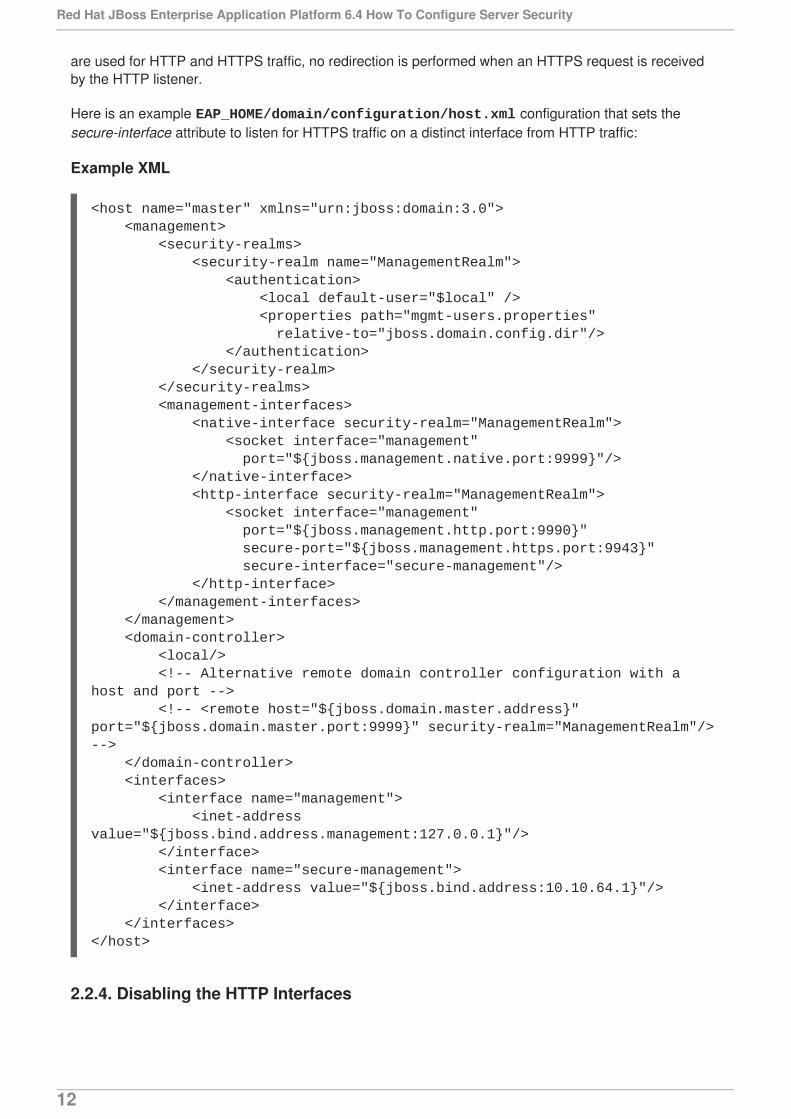
are used for HTTP and HTTPS traffic, no redirection is performed when an HTTPS request is receivedby the HTTP listener.
Here is an example EAP_HOME/domain/configuration/host.xml configuration that sets thesecure-interface attribute to listen for HTTPS traffic on a distinct interface from HTTP traffic:
Example XML
2.2.4. Disabling the HTTP Interfaces
<host name="master" xmlns="urn:jboss:domain:3.0"> <management> <security-realms> <security-realm name="ManagementRealm"> <authentication> <local default-user="$local" /> <properties path="mgmt-users.properties" relative-to="jboss.domain.config.dir"/> </authentication> </security-realm> </security-realms> <management-interfaces> <native-interface security-realm="ManagementRealm"> <socket interface="management" port="${jboss.management.native.port:9999}"/> </native-interface> <http-interface security-realm="ManagementRealm"> <socket interface="management" port="${jboss.management.http.port:9990}" secure-port="${jboss.management.https.port:9943}" secure-interface="secure-management"/> </http-interface> </management-interfaces> </management> <domain-controller> <local/> <!-- Alternative remote domain controller configuration with a host and port --> <!-- <remote host="${jboss.domain.master.address}" port="${jboss.domain.master.port:9999}" security-realm="ManagementRealm"/> --> </domain-controller> <interfaces> <interface name="management"> <inet-address value="${jboss.bind.address.management:127.0.0.1}"/> </interface> <interface name="secure-management"> <inet-address value="${jboss.bind.address:10.10.64.1}"/> </interface> </interfaces></host>
Red Hat JBoss Enterprise Application Platform 6.4 How To Configure Server Security
12
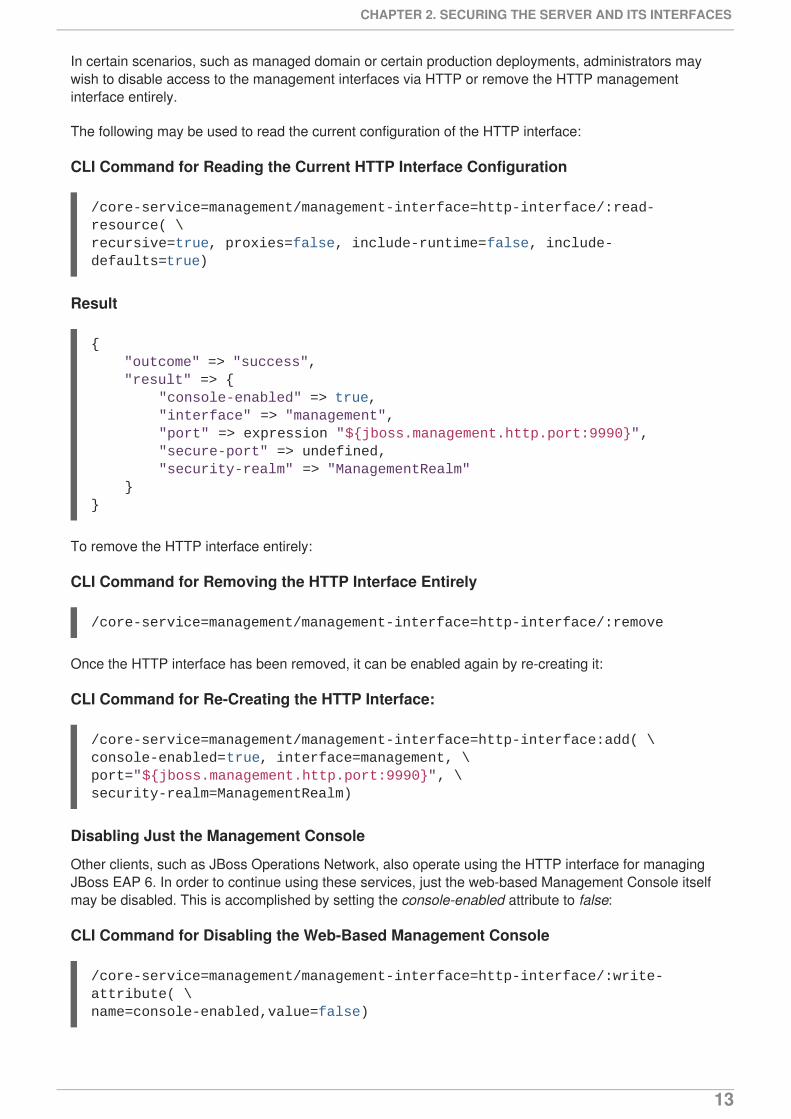
In certain scenarios, such as managed domain or certain production deployments, administrators maywish to disable access to the management interfaces via HTTP or remove the HTTP managementinterface entirely.
The following may be used to read the current configuration of the HTTP interface:
CLI Command for Reading the Current HTTP Interface Configuration
Result
To remove the HTTP interface entirely:
CLI Command for Removing the HTTP Interface Entirely
Once the HTTP interface has been removed, it can be enabled again by re-creating it:
CLI Command for Re-Creating the HTTP Interface:
Disabling Just the Management Console
Other clients, such as JBoss Operations Network, also operate using the HTTP interface for managingJBoss EAP 6. In order to continue using these services, just the web-based Management Console itselfmay be disabled. This is accomplished by setting the console-enabled attribute to false:
CLI Command for Disabling the Web-Based Management Console
/core-service=management/management-interface=http-interface/:read-resource( \recursive=true, proxies=false, include-runtime=false, include-defaults=true)
{ "outcome" => "success", "result" => { "console-enabled" => true, "interface" => "management", "port" => expression "${jboss.management.http.port:9990}", "secure-port" => undefined, "security-realm" => "ManagementRealm" }}
/core-service=management/management-interface=http-interface/:remove
/core-service=management/management-interface=http-interface:add( \console-enabled=true, interface=management, \port="${jboss.management.http.port:9990}", \security-realm=ManagementRealm)
/core-service=management/management-interface=http-interface/:write-attribute( \name=console-enabled,value=false)
CHAPTER 2. SECURING THE SERVER AND ITS INTERFACES
13
2.2.5. Setting up 2-Way SSL/TLS for the Management Interfaces
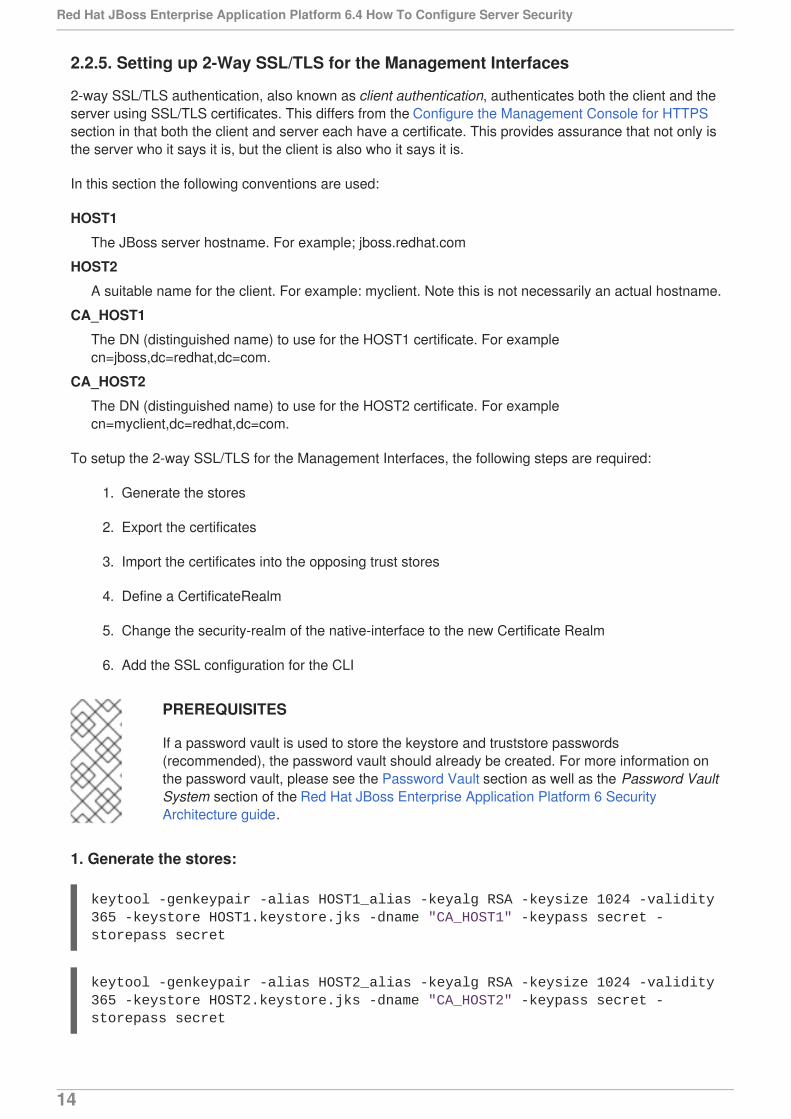
2-way SSL/TLS authentication, also known as client authentication, authenticates both the client and theserver using SSL/TLS certificates. This differs from the Configure the Management Console for HTTPSsection in that both the client and server each have a certificate. This provides assurance that not only isthe server who it says it is, but the client is also who it says it is.
In this section the following conventions are used:
HOST1
The JBoss server hostname. For example; jboss.redhat.com
HOST2
A suitable name for the client. For example: myclient. Note this is not necessarily an actual hostname.
CA_HOST1
The DN (distinguished name) to use for the HOST1 certificate. For examplecn=jboss,dc=redhat,dc=com.
CA_HOST2
The DN (distinguished name) to use for the HOST2 certificate. For examplecn=myclient,dc=redhat,dc=com.
To setup the 2-way SSL/TLS for the Management Interfaces, the following steps are required:
1. Generate the stores
2. Export the certificates
3. Import the certificates into the opposing trust stores
4. Define a CertificateRealm
5. Change the security-realm of the native-interface to the new Certificate Realm
6. Add the SSL configuration for the CLI
PREREQUISITES
If a password vault is used to store the keystore and truststore passwords(recommended), the password vault should already be created. For more information onthe password vault, please see the Password Vault section as well as the Password VaultSystem section of the Red Hat JBoss Enterprise Application Platform 6 SecurityArchitecture guide.
1. Generate the stores:
keytool -genkeypair -alias HOST1_alias -keyalg RSA -keysize 1024 -validity 365 -keystore HOST1.keystore.jks -dname "CA_HOST1" -keypass secret -storepass secret
keytool -genkeypair -alias HOST2_alias -keyalg RSA -keysize 1024 -validity 365 -keystore HOST2.keystore.jks -dname "CA_HOST2" -keypass secret -storepass secret
Red Hat JBoss Enterprise Application Platform 6.4 How To Configure Server Security
14
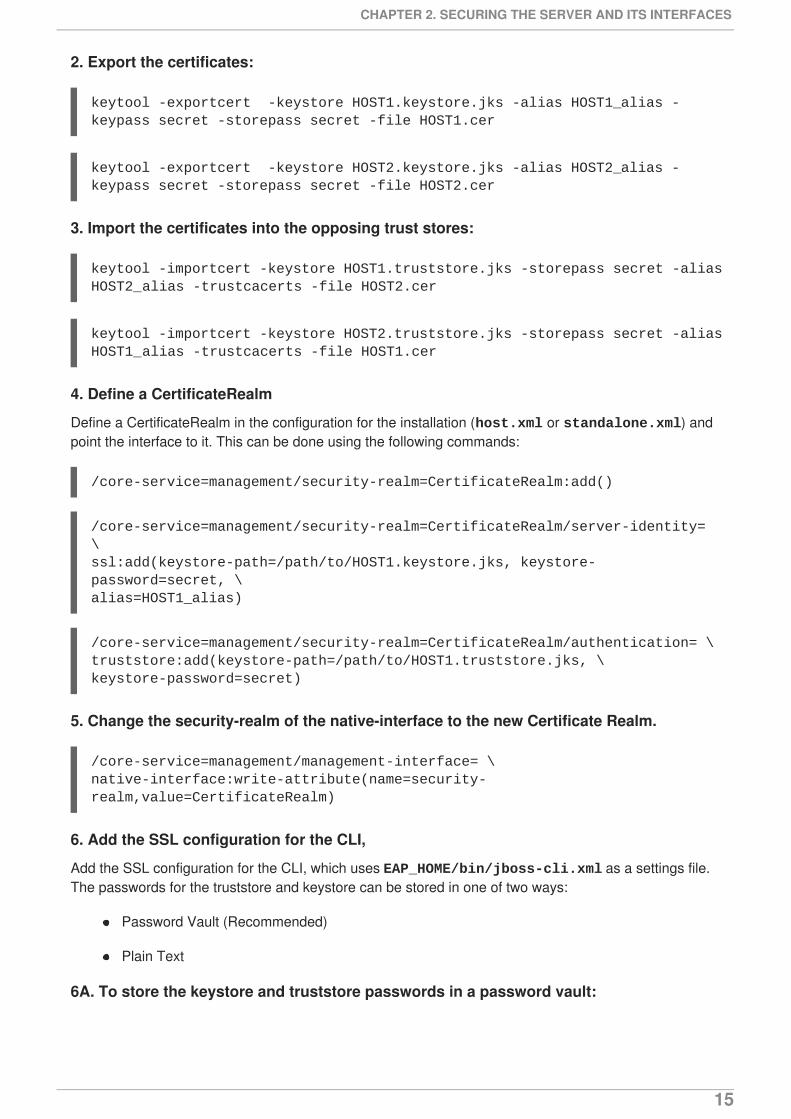
2. Export the certificates:
3. Import the certificates into the opposing trust stores:
4. Define a CertificateRealm
Define a CertificateRealm in the configuration for the installation (host.xml or standalone.xml) andpoint the interface to it. This can be done using the following commands:
5. Change the security-realm of the native-interface to the new Certificate Realm.
6. Add the SSL configuration for the CLI,
Add the SSL configuration for the CLI, which uses EAP_HOME/bin/jboss-cli.xml as a settings file.The passwords for the truststore and keystore can be stored in one of two ways:
Password Vault (Recommended)
Plain Text
6A. To store the keystore and truststore passwords in a password vault:
keytool -exportcert -keystore HOST1.keystore.jks -alias HOST1_alias -keypass secret -storepass secret -file HOST1.cer
keytool -exportcert -keystore HOST2.keystore.jks -alias HOST2_alias -keypass secret -storepass secret -file HOST2.cer
keytool -importcert -keystore HOST1.truststore.jks -storepass secret -alias HOST2_alias -trustcacerts -file HOST2.cer
keytool -importcert -keystore HOST2.truststore.jks -storepass secret -alias HOST1_alias -trustcacerts -file HOST1.cer
/core-service=management/security-realm=CertificateRealm:add()
/core-service=management/security-realm=CertificateRealm/server-identity= \ssl:add(keystore-path=/path/to/HOST1.keystore.jks, keystore-password=secret, \alias=HOST1_alias)
/core-service=management/security-realm=CertificateRealm/authentication= \truststore:add(keystore-path=/path/to/HOST1.truststore.jks, \keystore-password=secret)
/core-service=management/management-interface= \native-interface:write-attribute(name=security-realm,value=CertificateRealm)
CHAPTER 2. SECURING THE SERVER AND ITS INTERFACES
15
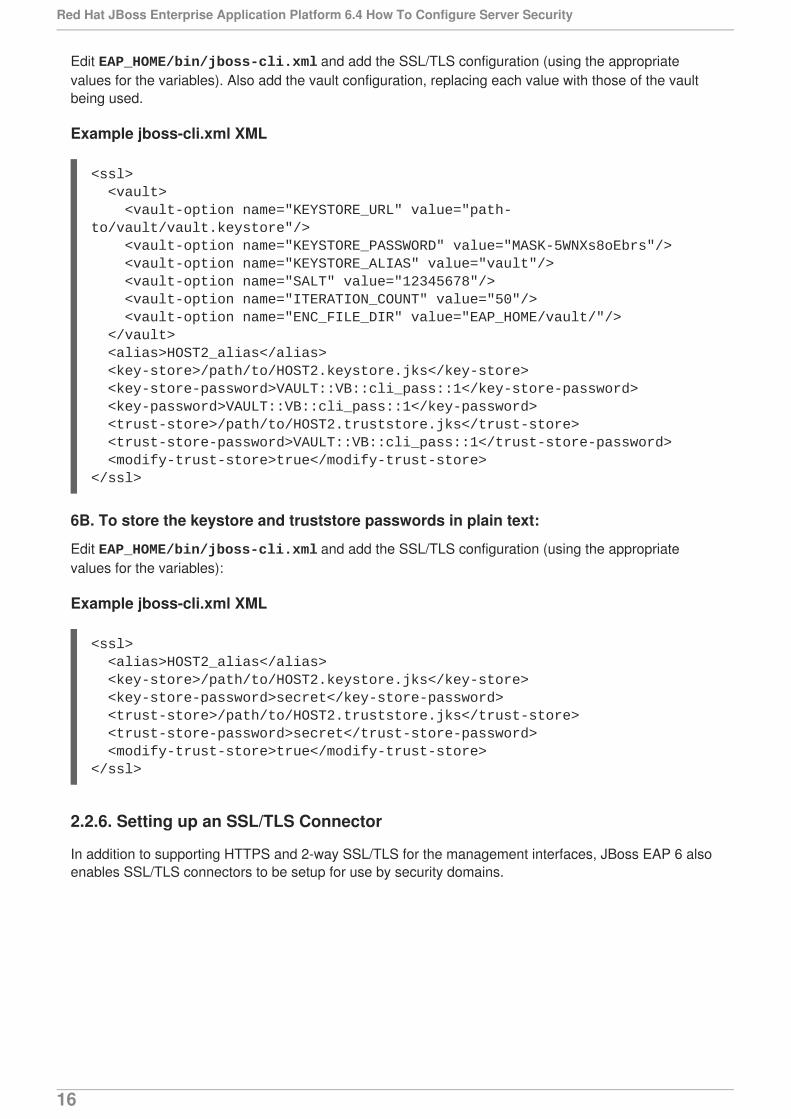
Edit EAP_HOME/bin/jboss-cli.xml and add the SSL/TLS configuration (using the appropriatevalues for the variables). Also add the vault configuration, replacing each value with those of the vaultbeing used.
Example jboss-cli.xml XML
6B. To store the keystore and truststore passwords in plain text:
Edit EAP_HOME/bin/jboss-cli.xml and add the SSL/TLS configuration (using the appropriatevalues for the variables):
Example jboss-cli.xml XML
2.2.6. Setting up an SSL/TLS Connector
In addition to supporting HTTPS and 2-way SSL/TLS for the management interfaces, JBoss EAP 6 alsoenables SSL/TLS connectors to be setup for use by security domains.
<ssl> <vault> <vault-option name="KEYSTORE_URL" value="path-to/vault/vault.keystore"/> <vault-option name="KEYSTORE_PASSWORD" value="MASK-5WNXs8oEbrs"/> <vault-option name="KEYSTORE_ALIAS" value="vault"/> <vault-option name="SALT" value="12345678"/> <vault-option name="ITERATION_COUNT" value="50"/> <vault-option name="ENC_FILE_DIR" value="EAP_HOME/vault/"/> </vault> <alias>HOST2_alias</alias> <key-store>/path/to/HOST2.keystore.jks</key-store> <key-store-password>VAULT::VB::cli_pass::1</key-store-password> <key-password>VAULT::VB::cli_pass::1</key-password> <trust-store>/path/to/HOST2.truststore.jks</trust-store> <trust-store-password>VAULT::VB::cli_pass::1</trust-store-password> <modify-trust-store>true</modify-trust-store></ssl>
<ssl> <alias>HOST2_alias</alias> <key-store>/path/to/HOST2.keystore.jks</key-store> <key-store-password>secret</key-store-password> <trust-store>/path/to/HOST2.truststore.jks</trust-store> <trust-store-password>secret</trust-store-password> <modify-trust-store>true</modify-trust-store></ssl>
Red Hat JBoss Enterprise Application Platform 6.4 How To Configure Server Security
16
IMPORTANT
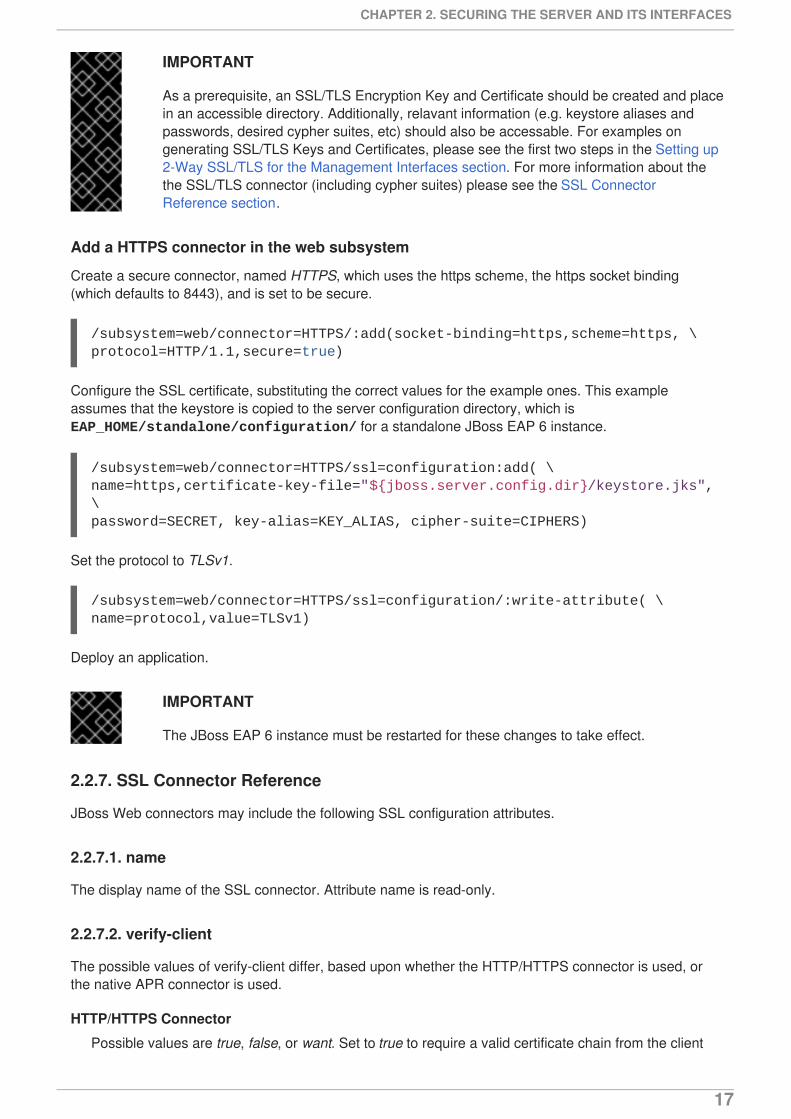
As a prerequisite, an SSL/TLS Encryption Key and Certificate should be created and placein an accessible directory. Additionally, relavant information (e.g. keystore aliases andpasswords, desired cypher suites, etc) should also be accessable. For examples ongenerating SSL/TLS Keys and Certificates, please see the first two steps in the Setting up2-Way SSL/TLS for the Management Interfaces section. For more information about thethe SSL/TLS connector (including cypher suites) please see the SSL ConnectorReference section.
Add a HTTPS connector in the web subsystem
Create a secure connector, named HTTPS, which uses the https scheme, the https socket binding(which defaults to 8443), and is set to be secure.
Configure the SSL certificate, substituting the correct values for the example ones. This exampleassumes that the keystore is copied to the server configuration directory, which is EAP_HOME/standalone/configuration/ for a standalone JBoss EAP 6 instance.
Set the protocol to TLSv1.
Deploy an application.
IMPORTANT
The JBoss EAP 6 instance must be restarted for these changes to take effect.
2.2.7. SSL Connector Reference
JBoss Web connectors may include the following SSL configuration attributes.
2.2.7.1. name
The display name of the SSL connector. Attribute name is read-only.
2.2.7.2. verify-client
The possible values of verify-client differ, based upon whether the HTTP/HTTPS connector is used, orthe native APR connector is used.
HTTP/HTTPS Connector
Possible values are true, false, or want. Set to true to require a valid certificate chain from the client
/subsystem=web/connector=HTTPS/:add(socket-binding=https,scheme=https, \protocol=HTTP/1.1,secure=true)
/subsystem=web/connector=HTTPS/ssl=configuration:add( \name=https,certificate-key-file="${jboss.server.config.dir}/keystore.jks", \password=SECRET, key-alias=KEY_ALIAS, cipher-suite=CIPHERS)
/subsystem=web/connector=HTTPS/ssl=configuration/:write-attribute( \name=protocol,value=TLSv1)
CHAPTER 2. SECURING THE SERVER AND ITS INTERFACES
17
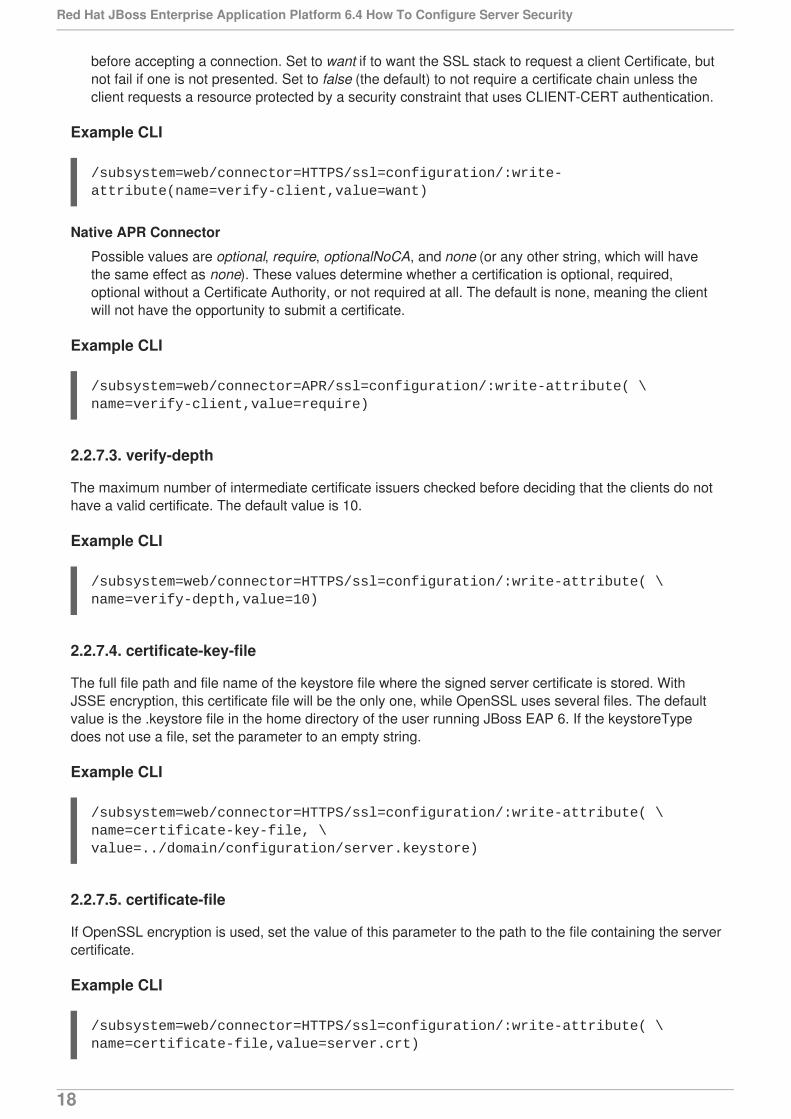
before accepting a connection. Set to want if to want the SSL stack to request a client Certificate, butnot fail if one is not presented. Set to false (the default) to not require a certificate chain unless theclient requests a resource protected by a security constraint that uses CLIENT-CERT authentication.
Example CLI
Native APR Connector
Possible values are optional, require, optionalNoCA, and none (or any other string, which will havethe same effect as none). These values determine whether a certification is optional, required,optional without a Certificate Authority, or not required at all. The default is none, meaning the clientwill not have the opportunity to submit a certificate.
Example CLI
2.2.7.3. verify-depth
The maximum number of intermediate certificate issuers checked before deciding that the clients do nothave a valid certificate. The default value is 10.
Example CLI
2.2.7.4. certificate-key-file
The full file path and file name of the keystore file where the signed server certificate is stored. WithJSSE encryption, this certificate file will be the only one, while OpenSSL uses several files. The defaultvalue is the .keystore file in the home directory of the user running JBoss EAP 6. If the keystoreTypedoes not use a file, set the parameter to an empty string.
Example CLI
2.2.7.5. certificate-file
If OpenSSL encryption is used, set the value of this parameter to the path to the file containing the servercertificate.
Example CLI
/subsystem=web/connector=HTTPS/ssl=configuration/:write-attribute(name=verify-client,value=want)
/subsystem=web/connector=APR/ssl=configuration/:write-attribute( \name=verify-client,value=require)
/subsystem=web/connector=HTTPS/ssl=configuration/:write-attribute( \name=verify-depth,value=10)
/subsystem=web/connector=HTTPS/ssl=configuration/:write-attribute( \name=certificate-key-file, \value=../domain/configuration/server.keystore)
/subsystem=web/connector=HTTPS/ssl=configuration/:write-attribute( \name=certificate-file,value=server.crt)
Red Hat JBoss Enterprise Application Platform 6.4 How To Configure Server Security
18
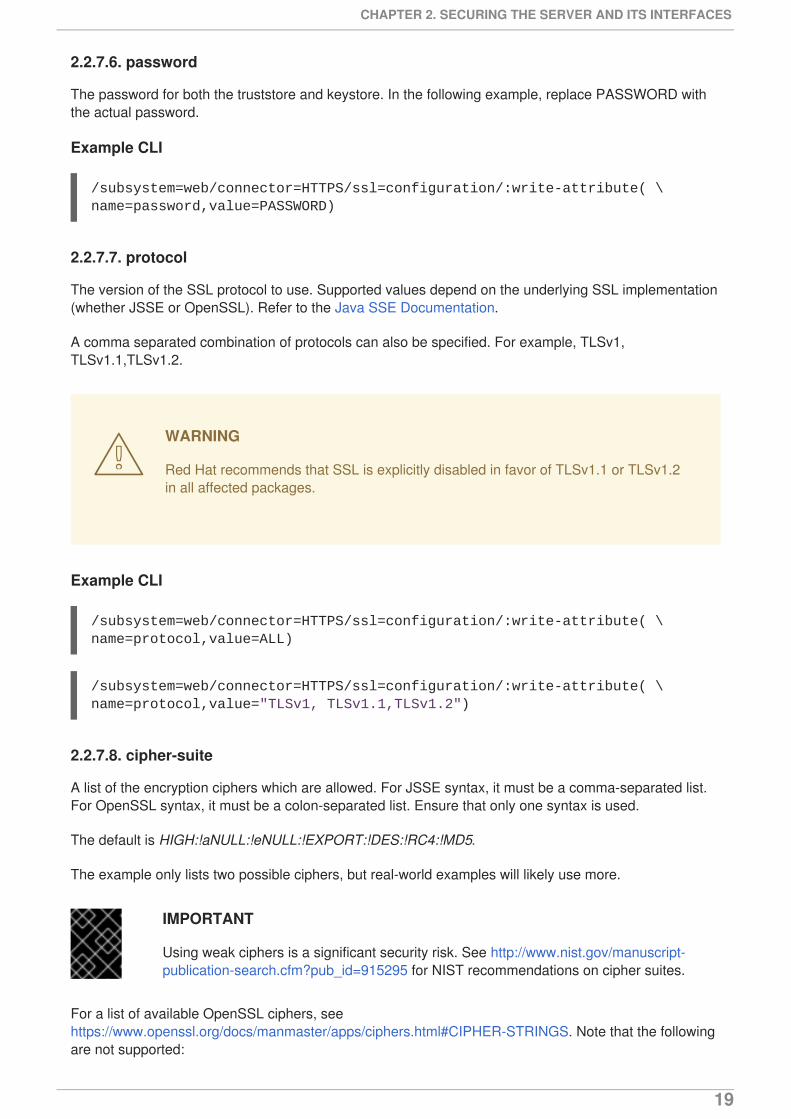
2.2.7.6. password
The password for both the truststore and keystore. In the following example, replace PASSWORD withthe actual password.
Example CLI
2.2.7.7. protocol
The version of the SSL protocol to use. Supported values depend on the underlying SSL implementation(whether JSSE or OpenSSL). Refer to the Java SSE Documentation.
A comma separated combination of protocols can also be specified. For example, TLSv1,TLSv1.1,TLSv1.2.
WARNING
Red Hat recommends that SSL is explicitly disabled in favor of TLSv1.1 or TLSv1.2in all affected packages.
Example CLI
2.2.7.8. cipher-suite
A list of the encryption ciphers which are allowed. For JSSE syntax, it must be a comma-separated list.For OpenSSL syntax, it must be a colon-separated list. Ensure that only one syntax is used.
The default is HIGH:!aNULL:!eNULL:!EXPORT:!DES:!RC4:!MD5.
The example only lists two possible ciphers, but real-world examples will likely use more.
IMPORTANT
Using weak ciphers is a significant security risk. See http://www.nist.gov/manuscript-publication-search.cfm?pub_id=915295 for NIST recommendations on cipher suites.
For a list of available OpenSSL ciphers, seehttps://www.openssl.org/docs/manmaster/apps/ciphers.html#CIPHER-STRINGS. Note that the followingare not supported:
/subsystem=web/connector=HTTPS/ssl=configuration/:write-attribute( \name=password,value=PASSWORD)
/subsystem=web/connector=HTTPS/ssl=configuration/:write-attribute( \name=protocol,value=ALL)
/subsystem=web/connector=HTTPS/ssl=configuration/:write-attribute( \name=protocol,value="TLSv1, TLSv1.1,TLSv1.2")
CHAPTER 2. SECURING THE SERVER AND ITS INTERFACES
19
@SECLEVEL
SUITEB128
SUITEB128ONLY
SUITEB192
For a list of the standard JSSE ciphers, seehttp://docs.oracle.com/javase/7/docs/technotes/guides/security/StandardNames.html#Cipher.
Example CLI
2.2.7.9. key-alias
The alias used to for the server certificate in the keystore. In the following example, replace KEY_ALIASwith the certificate’s alias.
Example CLI
2.2.7.10. truststore-type
The type of the truststore. Various types of truststores are available, including PKCS12 and Java’sstandard JKS.
Example CLI
2.2.7.11. keystore-type
The type of the keystore, Various types of keystores are available, including PKCS12 and Java’sstandard JKS.
Example CLI
2.2.7.12. ca-certificate-file
The file containing the CA certificates. This is the truststoreFile, in the case of JSSE, and uses the samepassword as the keystore. The ca-certificate-file file is used to validate client certificates.
Example CLI
/subsystem=web/connector=HTTPS/ssl=configuration/:write-attribute( \name=cipher-suite, \value="TLS_RSA_WITH_AES_128_CBC_SHA,TLS_RSA_WITH_AES_256_CBC_SHA")
/subsystem=web/connector=HTTPS/ssl=configuration/:write-attribute( \name=key-alias,value=KEY_ALIAS)
/subsystem=web/connector=HTTPS/ssl=configuration/:write-attribute( \name=truststore-type,value=jks)
/subsystem=web/connector=HTTPS/ssl=configuration/:write-attribute( \name=keystore-type,value=jks)
Red Hat JBoss Enterprise Application Platform 6.4 How To Configure Server Security
20
2.2.7.13. ca-certificate-password
The Certificate password for the ca-certificate-file. In the following example, replace theMASKED_PASSWORD with the masked password.
Example CLI
2.2.7.14. ca-revocation-url
A file or URL which contains the revocation list. It refers to the crlFile for JSSE or theSSLCARevocationFile for SSL.
Example CLI
2.2.7.15. session-cache-size
The size of the SSLSession cache. This attribute applies only to JSSE connectors. The default is 0,which specifies an unlimited cache size.
Example CLI
2.2.7.16. session-timeout
The number of seconds before a cached SSLSession expires. This attribute applies only to JSSEconnectors. The default is 86400 seconds, which is 24 hours.
Example CLI
2.2.8. Disabling Remote Access to JMX
Remote access to the JMX subsystem allows for JDK and application management operations to betriggered remotely. To disable remote access to JMX in JBoss EAP 6, one of the following two thingsmust be done:
1. Remove the remoting connector in the JMX subsystem
2. Remove the entire JMX subsystem
/subsystem=web/connector=HTTPS/ssl=configuration/:write-attribute( \name=ca-certificate-file,value=ca.crt)
/subsystem=web/connector=HTTPS/ssl=configuration/:write-attribute( \name=ca-certificate-password, value=MASKED_PASSWORD)
/subsystem=web/connector=HTTPS/ssl=configuration/:write-attribute( \name=ca-revocation-url,value=ca.crl)
/subsystem=web/connector=HTTPS/ssl=configuration/:write-attribute( \name=session-cache-size,value=100)
/subsystem=web/connector=HTTPS/ssl=configuration/:write-attribute( \name=session-timeout,value=43200)
CHAPTER 2. SECURING THE SERVER AND ITS INTERFACES
21
Removing the remoting connector
Removing the entire JMX subsytem
For more information on JMX, please see the JMX section of the Red Hat JBoss Enterprise ApplicationPlatform 6 Security Architecture guide
2.2.9. Using JAAS for Securing the Management Interfaces
JAAS is a declarative security API used by JBoss EAP 6 to manage security. For more details andbackground regarding JAAS and declarative security, see the Declarative Security and JAAS section ofthe Red Hat JBoss Enterprise Application Platform 6 Security Architecture guide.
NOTE
When JBoss EAP 6 instances are configured to run in ADMIN_ONLY mode, using JAASto secure the management interfaces is not supported. For more information onADMIN_ONLY mode, please see section Reference of Switches and Arguments to passat Server Runtime of the Administration and Configuration Guide.
To use JAAS to authenticate to the management interfaces, the following steps must be performed:
1. Create a security domain
2. Create a security realm with JAAS authentication
3. Update the Management Interfaces to use new security realm
4. Optional - Assign group membership
1. Creating a security domain
In this example, a security domain is created with the UserRoles login module, but other login modulesmay be used as well:
2. Create a security realm with JAAS authentication
To create a security realm with JAAS Authentication:
/subsystem=jmx/remoting-connector=jmx/:remove
/subsystem=jmx/:remove
/subsystem=security/security-domain=UsersLMDomain:add( \cache-type=default)
/subsystem=security/security-domain=UsersLMDomain/authentication=classic:add
/subsystem=security/security-domain=UsersLMDomain/authentication= \classic/login-module=UsersRoles:add(code=UsersRoles, flag=required, \module-options=[("usersProperties"=>"users.properties"), \("rolesProperties"=>"roles.properties")])
Red Hat JBoss Enterprise Application Platform 6.4 How To Configure Server Security
22
3. Update the Management Interfaces to use new security realm
To update the http-interface to use the new realm:
To update the native-interface to use the new realm:
4. Optional - Assign group membership
The attribute assign-groups determines whether loaded user membership information from the securitydomain is used for group assignment in the security realm. When set to true this group assignment isused for Role-Based Access Control (RBAC).
To configure the assign-groups attribute:
2.2.10. Silent Authentication
The default installation of JBoss EAP 6 contains a method of silent authentication for a localManagement CLI user. This allows the local user the ability to access the Management CLI withoutusername or password authentication. This functionality is enabled as a convenience, and to assist localusers running Management CLI scripts without requiring authentication. It is considered a useful featuregiven that access to the local configuration typically also gives the user the ability to add their own userdetails or otherwise disable security checks.
The convenience of silent authentication for local users can be disabled where greater security control isrequired. This can be achieved by removing the local element within the security-realm section of theconfiguration file. This applies to both the standalone instances as well as domains.
IMPORTANT
The removal of the local element should only be done if the impact on the JBoss EAP 6instance and its configuration is fully understood.
To remove silent authentication from a realm:
/core-service=management/security-realm=SecurityDomainAuthnRealm:add
/core-service=management/security-realm= \SecurityDomainAuthnRealm/authentication=jaas:add(name=UsersLMDomain)
/core-service=management/management-interface=http-interface/:write-attribute( \name=security-realm,value=SecurityDomainAuthnRealm)
/core-service=management/management-interface=native-interface/:write-attribute( \name=security-realm,value=SecurityDomainAuthnRealm)
/core-service=management/security-realm=SecurityDomainAuthnRealm/authentication= \jaas:write-attribute(name=assign-groups,value=true)
/core-service=management/security-realm=REALM_NAME/authentication=local:remove
CHAPTER 2. SECURING THE SERVER AND ITS INTERFACES
23
2.3. SECURITY AUDITING
Security auditing refers to triggering events, such as writing to a log, in response to an event thathappens within the security subsystem or the management interfaces. Auditing mechanisms areconfigured as part of a security domain or management interface.
Auditing uses provider modules. Both included provider modules as well as custom implementationsmay be used.
2.3.1. Configure Security Auditing for the Management Interfaces
For more information on configuring auditing for the management interfaces, refer to the ManagementInterface Audit Logging section of the Red Hat JBoss Enterprise Application Platform 6 Administrationand Configuration Guide.
2.3.2. Configure Security Auditing for Security Domains
To configure security auditing settings for a security domain, the following steps must be performed fromthe management console:
1. Open the security domain’s detailed view.
2. Navigate to the Auditing subsystem configuration.
3. Add a provider module.
4. Verify the module is working
5. Optional: Add, edit, or remove module options.
1. Open the security domain’s detailed view.
Click Configuration at the top of the screen.
In a managed domain, select a profile to modify from the Profile selection box at the top left.
Expand the Security menu and select Security Domains.
Click View for the security domain to edit.
2. Navigate to the Auditing subsystem configuration.
Select the Audit tab at the top of the screen.
The configuration area is divided into two areas: Provider Modules and Details. The provider module isthe basic unit of configuration. A security domain can include several provider modules each of whichcan include attributes and options.
3. Add a provider module.
Click Add and fill in the Code section with the classname of the provider module.
4. Verify the module is working
The goal of an audit module is to provide a way to monitor the events in the security subsystem. Thismonitoring can be done by means of writing to a log file, email notifications or any other measurableauditing mechanism.
Red Hat JBoss Enterprise Application Platform 6.4 How To Configure Server Security
24
For example, JBoss EAP 6 includes the org.jboss.security.audit.providers.LogAuditProvider module bydefault. If enabled following the steps above , this audit module writes security notifications to a audit.log file in the log subfolder within the EAP_HOME directory.
To verify if the steps above have worked in the context of theorg.jboss.security.audit.providers.LogAuditProvider, perform an action that is likely to trigger a notificationand then check the audit log file.
5.Optional: Add, edit, or remove module options.
To add options to your module, click its entry in the Modules list, and select the Module Options tab in theDetails section of the page. Click Add, and provide the key and value for the option.
To edit an option that already exists, click Remove to remove it, and click Add to add it again with thecorrect options.
CHAPTER 2. SECURING THE SERVER AND ITS INTERFACES
25
CHAPTER 3. SECURING USERS OF THE SERVER AND ITSMANAGEMENT INTERFACES
In addition to understanding how to secure the various interfaces of JBoss EAP 6, its also important tounderstand how to secure the users that access those interfaces.
3.1. USER AUTHENTICATION
3.1.1. Default User Configuration
All management interfaces in JBoss EAP 6 are secured by default and users can access them in twodifferent ways: local interfaces and remote interfaces. The basics of both of these authenticationmechanisms are covered in the Default Security and Red Hat JBoss Enterprise Application Platform Outof the Box sections of the Red Hat JBoss Enterprise Application Platform 6 Security Architecture guide.By default, access to these interfaces is configured in the Management Realm security realm. Initially,the local interface is enabled and requires access to the host machine running the JBoss EAP 6instance. Remote access is also enabled and is configured to use a file-based identity store. By default ituses mgmt-users.properties file to store usernames and passwords, and mgmt-groups.properties to store user group information.
User information is added to these files by using the included adduser script located in the EAP_HOME/bin/ directory.
To add a user via the adduser script:
1. Run the add-user.sh or add-user.bat command.
2. Choose whether to add a Management User or Application User.
3. Choose the realm the user will be added to. By default, the only available realms areManagementRealm and ApplicationRealm. If a custom realm has been added, its name can bemanually entered instead.
4. Type the desired username, password, and optional roles when prompted. The changes arewritten to each of the properties files for the security realm.
3.1.2. Adding Authentication via LDAP
JBoss EAP 6 also supports using LDAP authentication for securing the management interfaces. Thebasics of LDAP and how it works with JBoss EAP are covered in the LDAP, Using LDAP with theManagement Interfaces, and Using LDAP with the ManagementRealm sections of the the Red Hat JBossEnterprise Application Platform 6 Security Architecture guide. For more specifics on how to secure themanagement interfaces using LDAP authentication, see the Securing the Management Interfaces withLDAP section of the How to Configure Identity Management guide.
3.2. SECURE PASSWORDS
3.2.1. Password Vault
Configuration of JBoss EAP 6 and associated applications requires potentially sensitive information, suchas usernames and passwords. Instead of storing the password as plain text in configuration files, thePassword Vault feature can be used to mask the password information and store it in an encrypted
Red Hat JBoss Enterprise Application Platform 6.4 How To Configure Server Security
26

keystore. Once the password is stored, references can be included in Management CLI commands orapplications deployed to JBoss EAP 6.
The Password Vault uses the Java Keystore as its storage mechanism. Password Vault consists of twoparts: storage and key storage. Java Keystore is used to store the key, which is used to encrypt ordecrypt sensitive strings in Vault storage.
To setup and use a Password Vault requires the following steps:
1. Setup a Java Keystore to Store Key for Password Encryption
2. Initialize the Password Vault
3. Configure Red Hat JBoss Enterprise Application Platform 6 to use the Password Vault
4. Store a Sensitive String in the Password Vault
5. Use an Encrypted Sensitive String in Configuration
3.2.1.1. 1. Setup a Java Keystore to Store Key for Password Encryption
NOTE
The keytool utility, provided by the Java Runtime Environment (JRE), is utilized for thissteps. Locate the path for the file, which on Red Hat Enterprise Linux is /usr/bin/keytool.
WARNING
JCEKS keystore implementations differ between Java vendors so the keystore mustbe generated using the keytool utility from the same vendor as the JDK used. Usinga keystore generated by the keytool from one vendor’s JDK in a JBoss EAP 6instance running on a JDK from a different vendor results in the following exception:java.io.IOException: com.sun.crypto.provider.SealedObjectForKeyProtector
To setup the keystore, perform the following steps:
1. Create a directory to store the keystore and other encrypted information.
2. Determine the parameters to use with keytool utility.
3. Run the keytool command
1. Create a directory to store the keystore and other encrypted information
Create a directory to store the keystore and other important information. The rest of this procedureassumes that the directory is EAP_HOME/vault/. Since this directory will contain sensitive information itshould be accessible to only limited users. At a minimum the user account under which JBoss EAP 6 isrunning requires read-write access.
2. Determine the parameters to use with keytool utility.
CHAPTER 3. SECURING USERS OF THE SERVER AND ITS MANAGEMENT INTERFACES
27
Decide on values for the following parameters:
alias
The alias is a unique identifier for the vault or other data stored in the keystore. Aliases are case-insensitive.
storetype
The storetype specifies the keystore type. The value jceks is recommended.
keyalg
The algorithm to use for encryption. Use the documentation for the JRE and operating system to seewhich other choices are available.
keysize
The size of an encryption key impacts how difficult it is to decrypt through brute force. For informationon appropriate values, see the documentation distributed with the keytool utility.
storepass
The value of storepass is the password that is used to authenticate to the keystore so that the keycan be read. The password must be at least 6 characters long and must be provided when thekeystore is accessed. If this parameter is omitted, the keytool utility will prompt for it to be enteredafter the command has been executed
keypass
The value of keypass is the password used to access the specific key and must match the value ofthe storepass parameter.
validity
The value of validity is the period (in days) for which the key will be valid.
keystore
The value of keystore is the filepath and filename in which the keystore’s values are to be stored. Thekeystore file is created when data is first added to it. Ensure the correct file path separator is used: /(forward slash) for Red Hat Enterprise Linux and similar operating systems, \ (backslash) for MicrosoftWindows Server.
The keytool utility has many other options. See the documentation for the JRE or the operating systemfor more details.
3. Run the keytool command
This results in a keystore that has been created in the file EAP_HOME/vault/vault.keystore. Itstores a single key, with the alias vault, which will be used to store encrypted strings, such as passwords,for JBoss EAP 6.
3.2.1.2. 2. Initialize the Password Vault
The Password Vault can be initialized either interactively, where you are prompted for each parameter’svalue, or non-interactively, where all parameters' values are provided on the commmand line. Eachmethod gives the same result, so either may be used.
The following parameters will be needed:
$ keytool -genseckey -alias vault -storetype jceks -keyalg AES -keysize 128 -storepass vault22 -keypass vault22 -validity 730 -keystore EAP_HOME/vault/vault.keystore
Red Hat JBoss Enterprise Application Platform 6.4 How To Configure Server Security
28
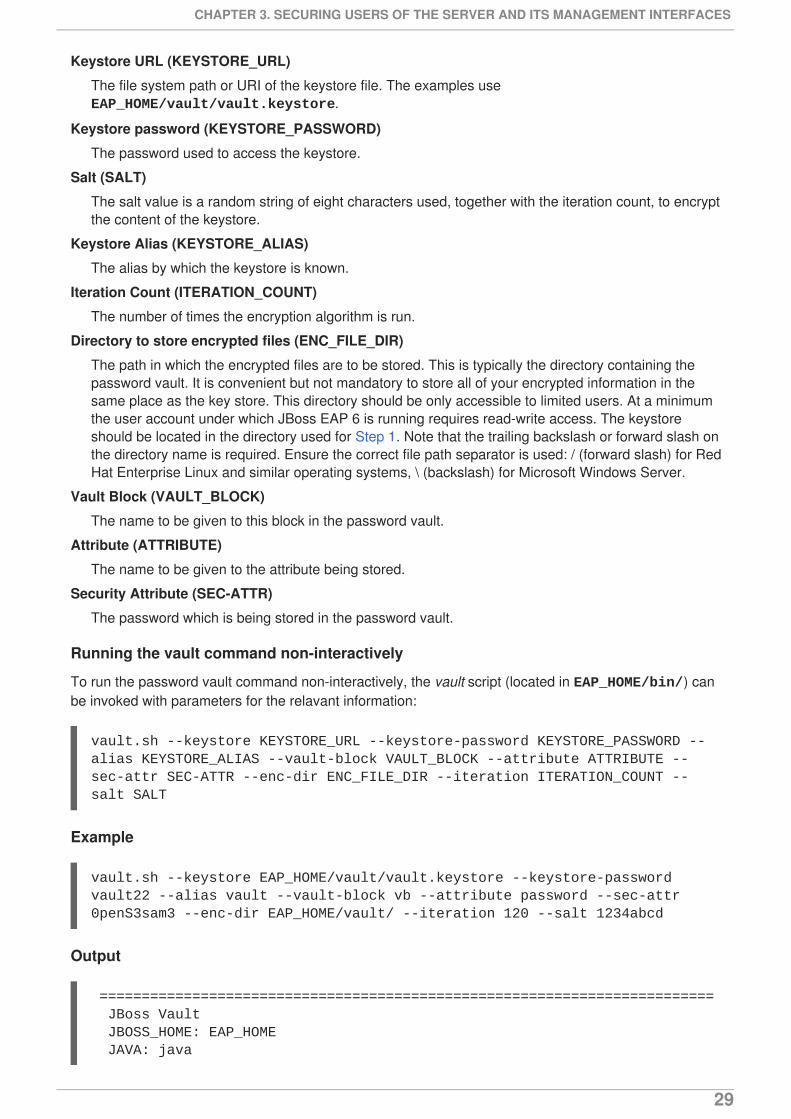
Keystore URL (KEYSTORE_URL)
The file system path or URI of the keystore file. The examples use EAP_HOME/vault/vault.keystore.
Keystore password (KEYSTORE_PASSWORD)
The password used to access the keystore.
Salt (SALT)
The salt value is a random string of eight characters used, together with the iteration count, to encryptthe content of the keystore.
Keystore Alias (KEYSTORE_ALIAS)
The alias by which the keystore is known.
Iteration Count (ITERATION_COUNT)
The number of times the encryption algorithm is run.
Directory to store encrypted files (ENC_FILE_DIR)
The path in which the encrypted files are to be stored. This is typically the directory containing thepassword vault. It is convenient but not mandatory to store all of your encrypted information in thesame place as the key store. This directory should be only accessible to limited users. At a minimumthe user account under which JBoss EAP 6 is running requires read-write access. The keystoreshould be located in the directory used for Step 1. Note that the trailing backslash or forward slash onthe directory name is required. Ensure the correct file path separator is used: / (forward slash) for RedHat Enterprise Linux and similar operating systems, \ (backslash) for Microsoft Windows Server.
Vault Block (VAULT_BLOCK)
The name to be given to this block in the password vault.
Attribute (ATTRIBUTE)
The name to be given to the attribute being stored.
Security Attribute (SEC-ATTR)
The password which is being stored in the password vault.
Running the vault command non-interactively
To run the password vault command non-interactively, the vault script (located in EAP_HOME/bin/) canbe invoked with parameters for the relavant information:
Example
Output
vault.sh --keystore KEYSTORE_URL --keystore-password KEYSTORE_PASSWORD --alias KEYSTORE_ALIAS --vault-block VAULT_BLOCK --attribute ATTRIBUTE --sec-attr SEC-ATTR --enc-dir ENC_FILE_DIR --iteration ITERATION_COUNT --salt SALT
vault.sh --keystore EAP_HOME/vault/vault.keystore --keystore-password vault22 --alias vault --vault-block vb --attribute password --sec-attr 0penS3sam3 --enc-dir EAP_HOME/vault/ --iteration 120 --salt 1234abcd
========================================================================= JBoss Vault JBOSS_HOME: EAP_HOME JAVA: java
CHAPTER 3. SECURING USERS OF THE SERVER AND ITS MANAGEMENT INTERFACES
29
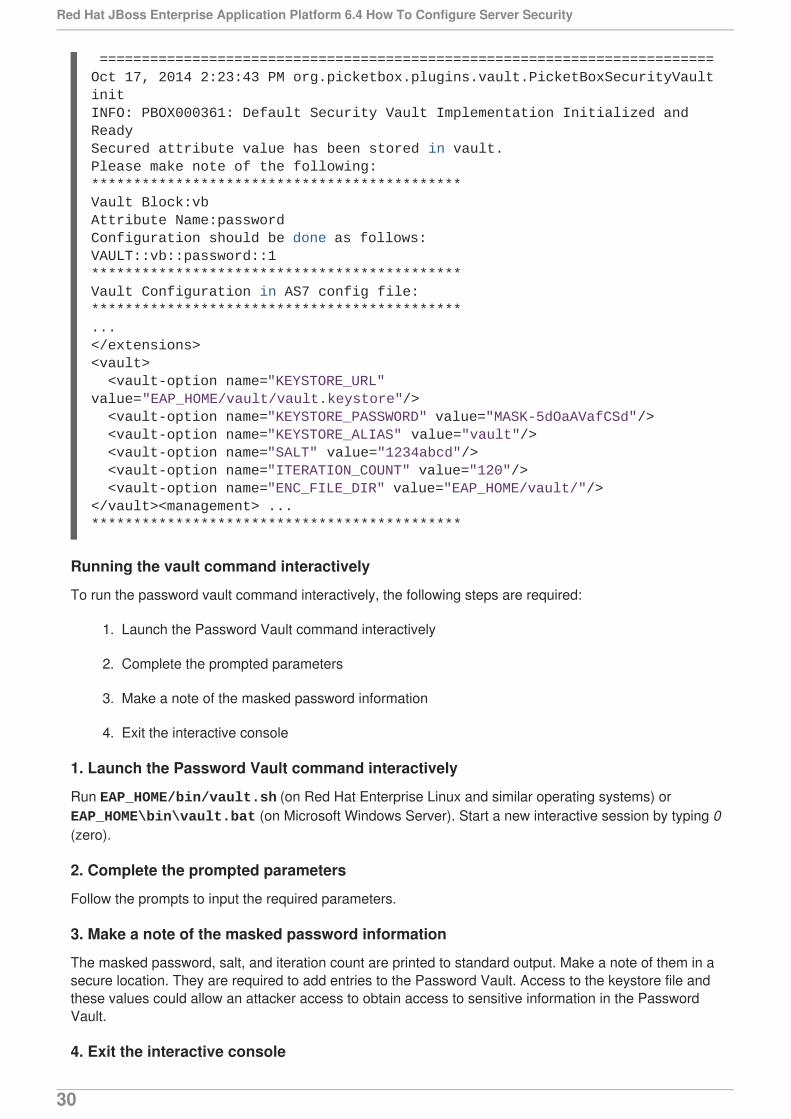
Running the vault command interactively
To run the password vault command interactively, the following steps are required:
1. Launch the Password Vault command interactively
2. Complete the prompted parameters
3. Make a note of the masked password information
4. Exit the interactive console
1. Launch the Password Vault command interactively
Run EAP_HOME/bin/vault.sh (on Red Hat Enterprise Linux and similar operating systems) or EAP_HOME\bin\vault.bat (on Microsoft Windows Server). Start a new interactive session by typing 0(zero).
2. Complete the prompted parameters
Follow the prompts to input the required parameters.
3. Make a note of the masked password information
The masked password, salt, and iteration count are printed to standard output. Make a note of them in asecure location. They are required to add entries to the Password Vault. Access to the keystore file andthese values could allow an attacker access to obtain access to sensitive information in the PasswordVault.
4. Exit the interactive console
=========================================================================Oct 17, 2014 2:23:43 PM org.picketbox.plugins.vault.PicketBoxSecurityVault initINFO: PBOX000361: Default Security Vault Implementation Initialized and ReadySecured attribute value has been stored in vault.Please make note of the following:********************************************Vault Block:vbAttribute Name:passwordConfiguration should be done as follows:VAULT::vb::password::1********************************************Vault Configuration in AS7 config file:********************************************...</extensions><vault> <vault-option name="KEYSTORE_URL" value="EAP_HOME/vault/vault.keystore"/> <vault-option name="KEYSTORE_PASSWORD" value="MASK-5dOaAVafCSd"/> <vault-option name="KEYSTORE_ALIAS" value="vault"/> <vault-option name="SALT" value="1234abcd"/> <vault-option name="ITERATION_COUNT" value="120"/> <vault-option name="ENC_FILE_DIR" value="EAP_HOME/vault/"/></vault><management> ...********************************************
Red Hat JBoss Enterprise Application Platform 6.4 How To Configure Server Security
30
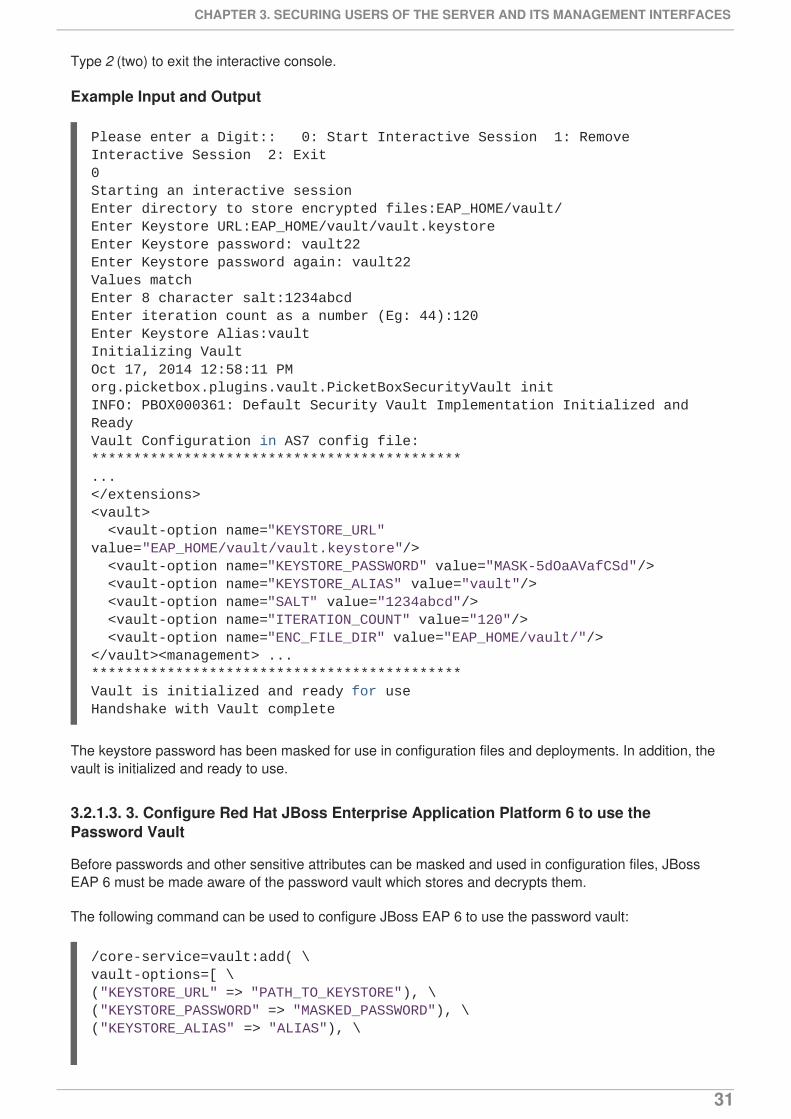
Type 2 (two) to exit the interactive console.
Example Input and Output
The keystore password has been masked for use in configuration files and deployments. In addition, thevault is initialized and ready to use.
3.2.1.3. 3. Configure Red Hat JBoss Enterprise Application Platform 6 to use thePassword Vault
Before passwords and other sensitive attributes can be masked and used in configuration files, JBossEAP 6 must be made aware of the password vault which stores and decrypts them.
The following command can be used to configure JBoss EAP 6 to use the password vault:
Please enter a Digit:: 0: Start Interactive Session 1: Remove Interactive Session 2: Exit0Starting an interactive sessionEnter directory to store encrypted files:EAP_HOME/vault/Enter Keystore URL:EAP_HOME/vault/vault.keystoreEnter Keystore password: vault22Enter Keystore password again: vault22Values matchEnter 8 character salt:1234abcdEnter iteration count as a number (Eg: 44):120Enter Keystore Alias:vaultInitializing VaultOct 17, 2014 12:58:11 PM org.picketbox.plugins.vault.PicketBoxSecurityVault initINFO: PBOX000361: Default Security Vault Implementation Initialized and ReadyVault Configuration in AS7 config file:********************************************...</extensions><vault> <vault-option name="KEYSTORE_URL" value="EAP_HOME/vault/vault.keystore"/> <vault-option name="KEYSTORE_PASSWORD" value="MASK-5dOaAVafCSd"/> <vault-option name="KEYSTORE_ALIAS" value="vault"/> <vault-option name="SALT" value="1234abcd"/> <vault-option name="ITERATION_COUNT" value="120"/> <vault-option name="ENC_FILE_DIR" value="EAP_HOME/vault/"/></vault><management> ...********************************************Vault is initialized and ready for useHandshake with Vault complete
/core-service=vault:add( \vault-options=[ \("KEYSTORE_URL" => "PATH_TO_KEYSTORE"), \("KEYSTORE_PASSWORD" => "MASKED_PASSWORD"), \("KEYSTORE_ALIAS" => "ALIAS"), \
CHAPTER 3. SECURING USERS OF THE SERVER AND ITS MANAGEMENT INTERFACES
31
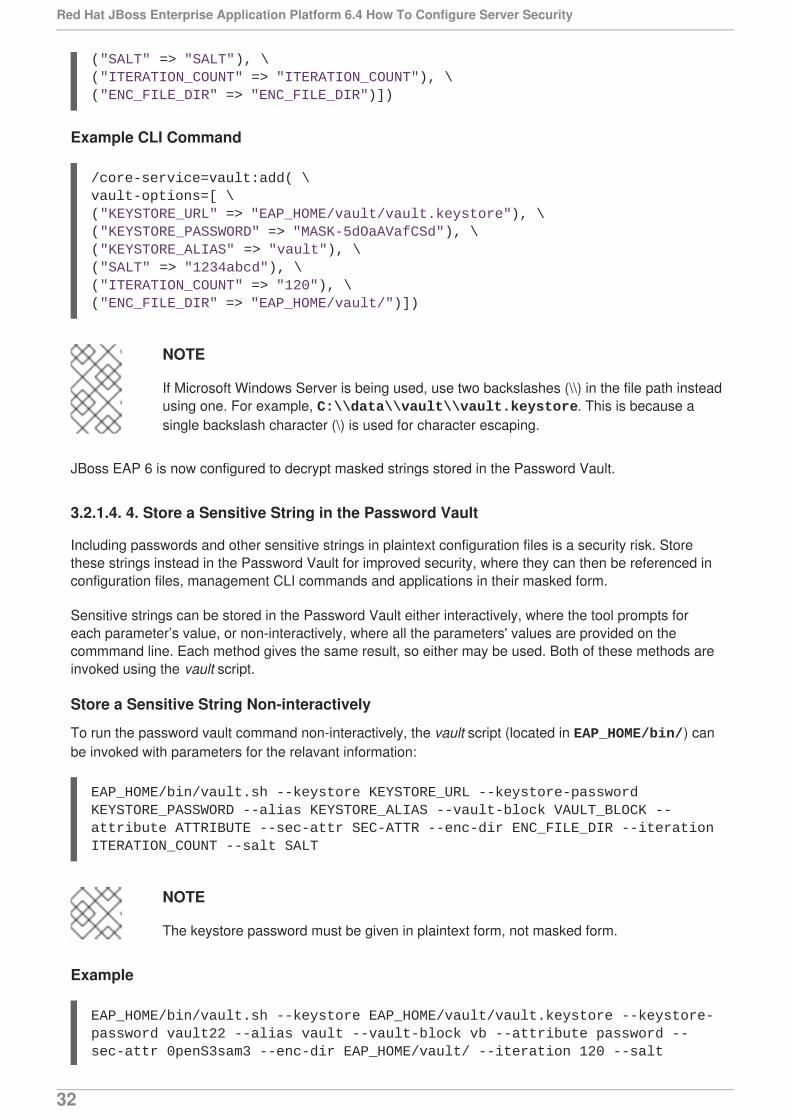
Example CLI Command
NOTE
If Microsoft Windows Server is being used, use two backslashes (\\) in the file path insteadusing one. For example, C:\\data\\vault\\vault.keystore. This is because asingle backslash character (\) is used for character escaping.
JBoss EAP 6 is now configured to decrypt masked strings stored in the Password Vault.
3.2.1.4. 4. Store a Sensitive String in the Password Vault
Including passwords and other sensitive strings in plaintext configuration files is a security risk. Storethese strings instead in the Password Vault for improved security, where they can then be referenced inconfiguration files, management CLI commands and applications in their masked form.
Sensitive strings can be stored in the Password Vault either interactively, where the tool prompts foreach parameter’s value, or non-interactively, where all the parameters' values are provided on thecommmand line. Each method gives the same result, so either may be used. Both of these methods areinvoked using the vault script.
Store a Sensitive String Non-interactively
To run the password vault command non-interactively, the vault script (located in EAP_HOME/bin/) canbe invoked with parameters for the relavant information:
NOTE
The keystore password must be given in plaintext form, not masked form.
Example
("SALT" => "SALT"), \("ITERATION_COUNT" => "ITERATION_COUNT"), \("ENC_FILE_DIR" => "ENC_FILE_DIR")])
/core-service=vault:add( \vault-options=[ \("KEYSTORE_URL" => "EAP_HOME/vault/vault.keystore"), \("KEYSTORE_PASSWORD" => "MASK-5dOaAVafCSd"), \("KEYSTORE_ALIAS" => "vault"), \("SALT" => "1234abcd"), \("ITERATION_COUNT" => "120"), \("ENC_FILE_DIR" => "EAP_HOME/vault/")])
EAP_HOME/bin/vault.sh --keystore KEYSTORE_URL --keystore-password KEYSTORE_PASSWORD --alias KEYSTORE_ALIAS --vault-block VAULT_BLOCK --attribute ATTRIBUTE --sec-attr SEC-ATTR --enc-dir ENC_FILE_DIR --iteration ITERATION_COUNT --salt SALT
EAP_HOME/bin/vault.sh --keystore EAP_HOME/vault/vault.keystore --keystore-password vault22 --alias vault --vault-block vb --attribute password --sec-attr 0penS3sam3 --enc-dir EAP_HOME/vault/ --iteration 120 --salt
Red Hat JBoss Enterprise Application Platform 6.4 How To Configure Server Security
32
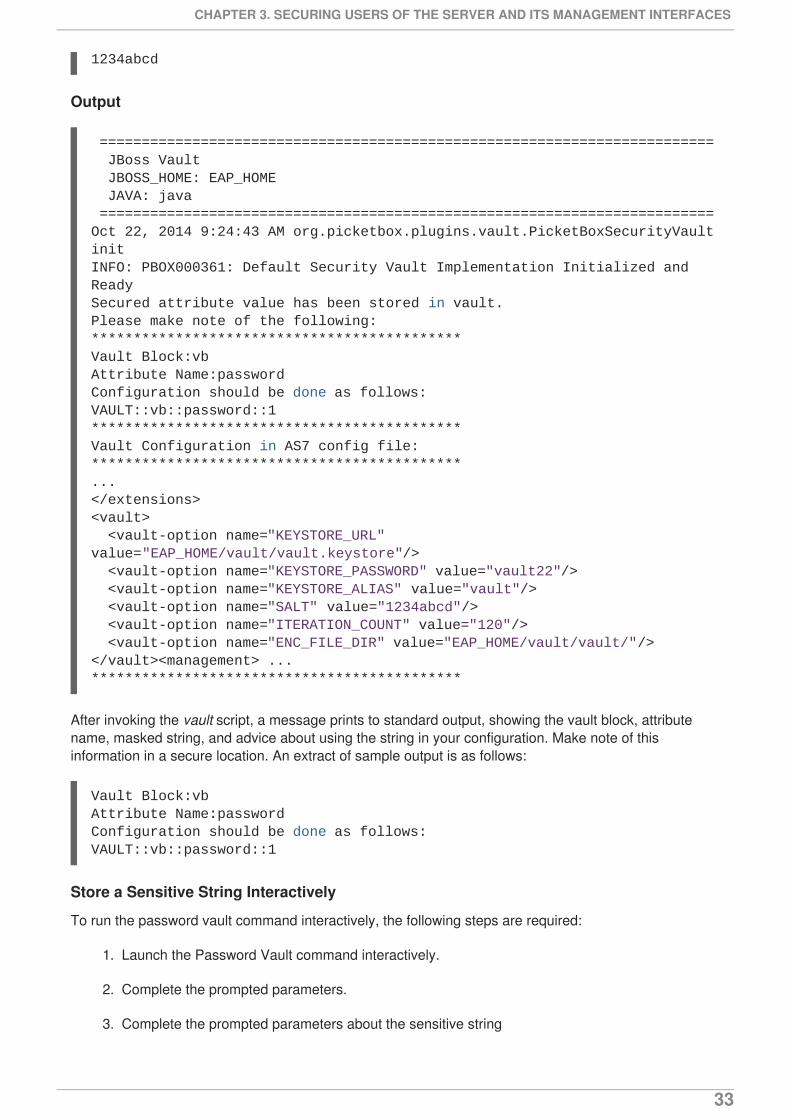
Output
After invoking the vault script, a message prints to standard output, showing the vault block, attributename, masked string, and advice about using the string in your configuration. Make note of thisinformation in a secure location. An extract of sample output is as follows:
Store a Sensitive String Interactively
To run the password vault command interactively, the following steps are required:
1. Launch the Password Vault command interactively.
2. Complete the prompted parameters.
3. Complete the prompted parameters about the sensitive string
1234abcd
========================================================================= JBoss Vault JBOSS_HOME: EAP_HOME JAVA: java =========================================================================Oct 22, 2014 9:24:43 AM org.picketbox.plugins.vault.PicketBoxSecurityVault initINFO: PBOX000361: Default Security Vault Implementation Initialized and ReadySecured attribute value has been stored in vault.Please make note of the following:********************************************Vault Block:vbAttribute Name:passwordConfiguration should be done as follows:VAULT::vb::password::1********************************************Vault Configuration in AS7 config file:********************************************...</extensions><vault> <vault-option name="KEYSTORE_URL" value="EAP_HOME/vault/vault.keystore"/> <vault-option name="KEYSTORE_PASSWORD" value="vault22"/> <vault-option name="KEYSTORE_ALIAS" value="vault"/> <vault-option name="SALT" value="1234abcd"/> <vault-option name="ITERATION_COUNT" value="120"/> <vault-option name="ENC_FILE_DIR" value="EAP_HOME/vault/vault/"/></vault><management> ...********************************************
Vault Block:vbAttribute Name:passwordConfiguration should be done as follows:VAULT::vb::password::1
CHAPTER 3. SECURING USERS OF THE SERVER AND ITS MANAGEMENT INTERFACES
33
4. Make note of the information about the masked string
5. Exit the interactive console.
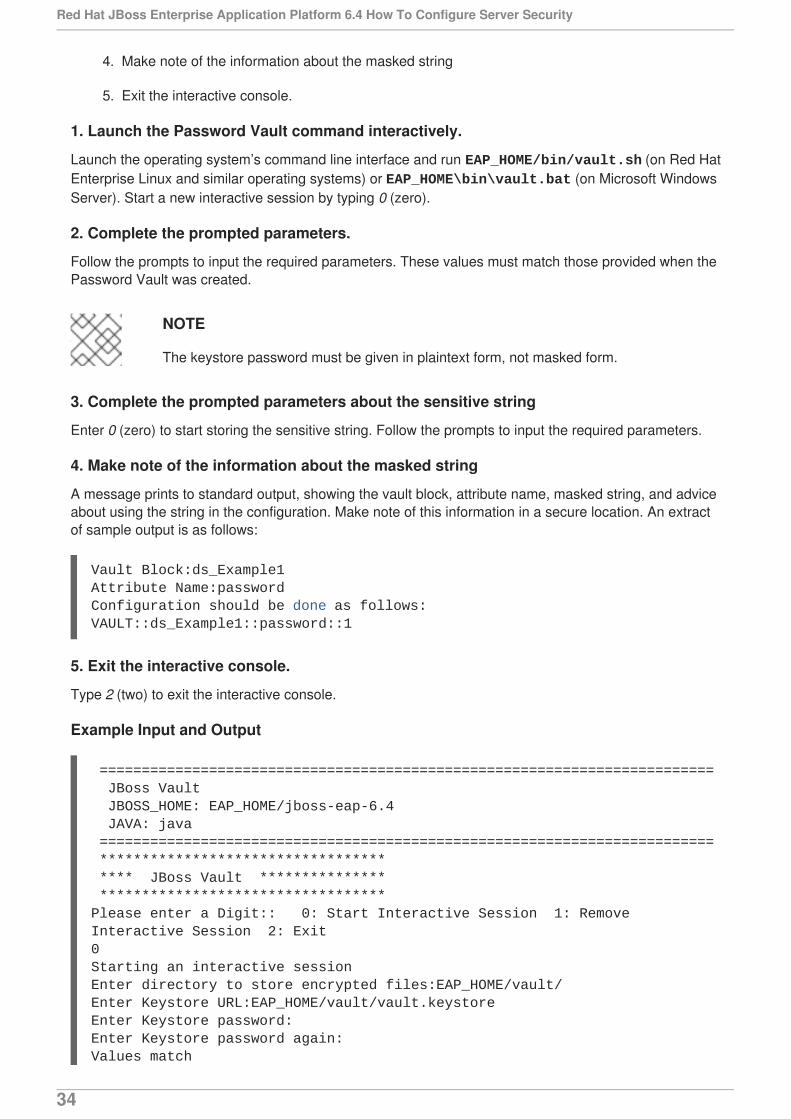
1. Launch the Password Vault command interactively.
Launch the operating system’s command line interface and run EAP_HOME/bin/vault.sh (on Red HatEnterprise Linux and similar operating systems) or EAP_HOME\bin\vault.bat (on Microsoft WindowsServer). Start a new interactive session by typing 0 (zero).
2. Complete the prompted parameters.
Follow the prompts to input the required parameters. These values must match those provided when thePassword Vault was created.
NOTE
The keystore password must be given in plaintext form, not masked form.
3. Complete the prompted parameters about the sensitive string
Enter 0 (zero) to start storing the sensitive string. Follow the prompts to input the required parameters.
4. Make note of the information about the masked string
A message prints to standard output, showing the vault block, attribute name, masked string, and adviceabout using the string in the configuration. Make note of this information in a secure location. An extractof sample output is as follows:
5. Exit the interactive console.
Type 2 (two) to exit the interactive console.
Example Input and Output
Vault Block:ds_Example1Attribute Name:passwordConfiguration should be done as follows:VAULT::ds_Example1::password::1
========================================================================= JBoss Vault JBOSS_HOME: EAP_HOME/jboss-eap-6.4 JAVA: java ========================================================================= ********************************** **** JBoss Vault *************** **********************************Please enter a Digit:: 0: Start Interactive Session 1: Remove Interactive Session 2: Exit0Starting an interactive sessionEnter directory to store encrypted files:EAP_HOME/vault/Enter Keystore URL:EAP_HOME/vault/vault.keystoreEnter Keystore password:Enter Keystore password again:Values match
Red Hat JBoss Enterprise Application Platform 6.4 How To Configure Server Security
34
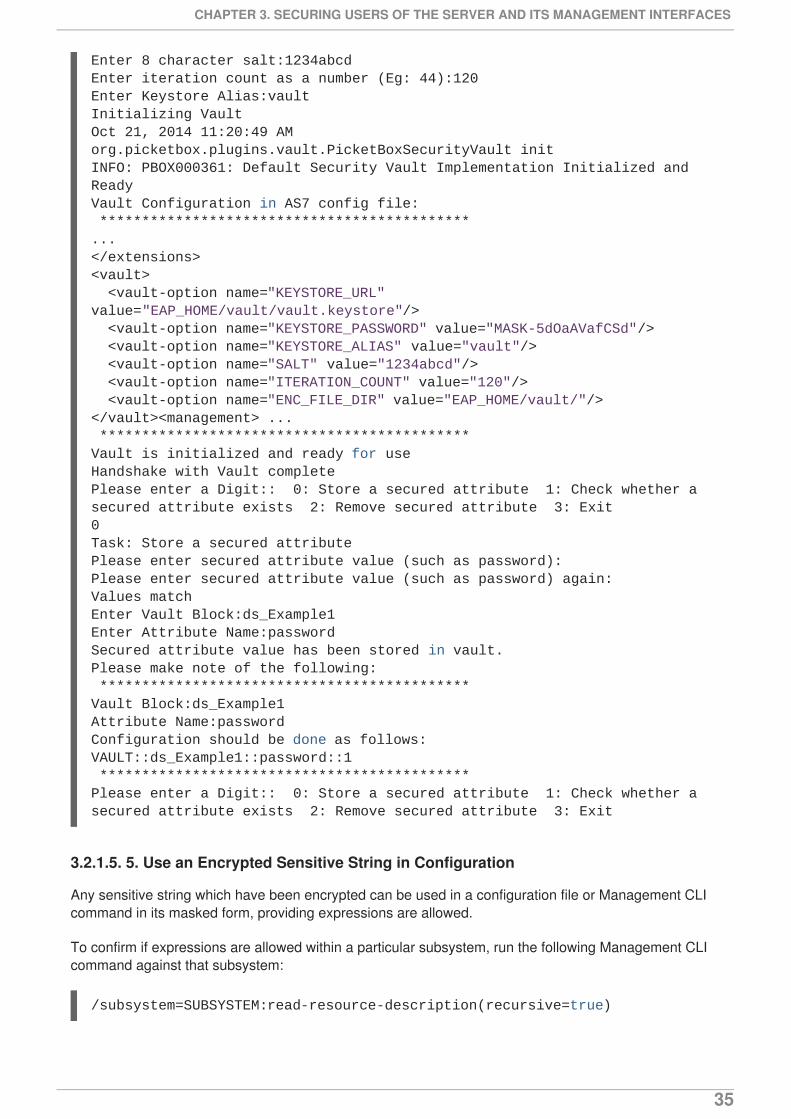
3.2.1.5. 5. Use an Encrypted Sensitive String in Configuration
Any sensitive string which have been encrypted can be used in a configuration file or Management CLIcommand in its masked form, providing expressions are allowed.
To confirm if expressions are allowed within a particular subsystem, run the following Management CLIcommand against that subsystem:
Enter 8 character salt:1234abcdEnter iteration count as a number (Eg: 44):120Enter Keystore Alias:vaultInitializing VaultOct 21, 2014 11:20:49 AM org.picketbox.plugins.vault.PicketBoxSecurityVault initINFO: PBOX000361: Default Security Vault Implementation Initialized and ReadyVault Configuration in AS7 config file: ********************************************...</extensions><vault> <vault-option name="KEYSTORE_URL" value="EAP_HOME/vault/vault.keystore"/> <vault-option name="KEYSTORE_PASSWORD" value="MASK-5dOaAVafCSd"/> <vault-option name="KEYSTORE_ALIAS" value="vault"/> <vault-option name="SALT" value="1234abcd"/> <vault-option name="ITERATION_COUNT" value="120"/> <vault-option name="ENC_FILE_DIR" value="EAP_HOME/vault/"/></vault><management> ... ********************************************Vault is initialized and ready for useHandshake with Vault completePlease enter a Digit:: 0: Store a secured attribute 1: Check whether a secured attribute exists 2: Remove secured attribute 3: Exit0Task: Store a secured attributePlease enter secured attribute value (such as password):Please enter secured attribute value (such as password) again:Values matchEnter Vault Block:ds_Example1Enter Attribute Name:passwordSecured attribute value has been stored in vault.Please make note of the following: ********************************************Vault Block:ds_Example1Attribute Name:passwordConfiguration should be done as follows:VAULT::ds_Example1::password::1 ********************************************Please enter a Digit:: 0: Store a secured attribute 1: Check whether a secured attribute exists 2: Remove secured attribute 3: Exit
/subsystem=SUBSYSTEM:read-resource-description(recursive=true)
CHAPTER 3. SECURING USERS OF THE SERVER AND ITS MANAGEMENT INTERFACES
35

From the output of running this command, look for the value of the expressions-allowed parameter. If thisis true, then expressions can be used within the configuration of this subsystem.
Use the following syntax to replace any plaintext string with the masked form.
Example - Datasource Definition Using a Password in Masked Form
3.2.1.6. Use an Encrypted Sensitive String in an Application
Encrypted strings stored in the Password Vault can be used in an application’s source code. The belowexample is an extract of a servlet’s source code, illustrating the use of a masked password in adatasource definition, instead of the plaintext password. The plaintext version is commented out so thatyou can see the difference.
Servlet Using a Vaulted Password
${VAULT::VAULT_BLOCK::ATTRIBUTE_NAME::MASKED_STRING}
... <subsystem xmlns="urn:jboss:domain:datasources:1.0"> <datasources> <datasource jndi-name="java:jboss/datasources/ExampleDS" enabled="true" use-java-context="true" pool-name="H2DS"> <connection-url>jdbc:h2:mem:test;DB_CLOSE_DELAY=-1</connection-url> <driver>h2</driver> <pool></pool> <security> <user-name>sa</user-name> <password>${VAULT::ds_ExampleDS::password::1}</password> </security> </datasource> <drivers> <driver name="h2" module="com.h2database.h2"> <xa-datasource-class>org.h2.jdbcx.JdbcDataSource</xa-datasource-class> </driver> </drivers> </datasources> </subsystem>...
@DataSourceDefinition( name = "java:jboss/datasources/LoginDS", user = "sa", password = "VAULT::DS::thePass::1", className = "org.h2.jdbcx.JdbcDataSource", url = "jdbc:h2:tcp://localhost/mem:test") /*old (plaintext) definition@DataSourceDefinition( name = "java:jboss/datasources/LoginDS", user = "sa", password = "sa", className = "org.h2.jdbcx.JdbcDataSource",
Red Hat JBoss Enterprise Application Platform 6.4 How To Configure Server Security
36
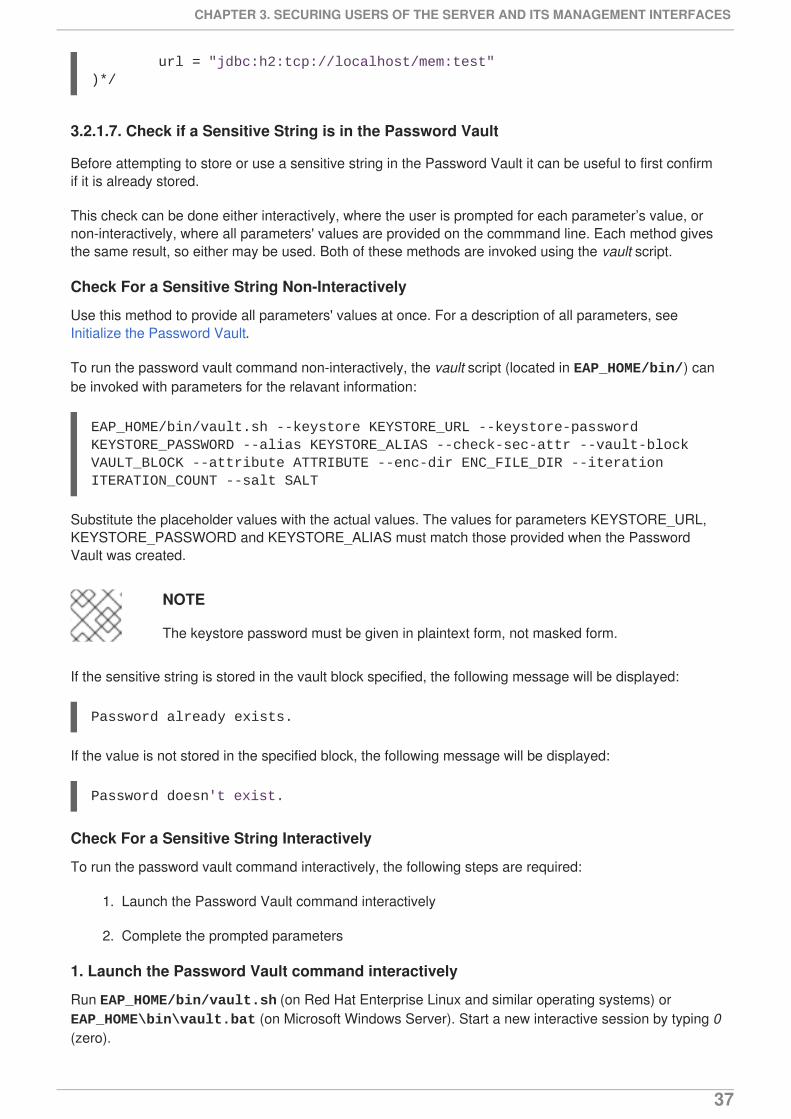
3.2.1.7. Check if a Sensitive String is in the Password Vault
Before attempting to store or use a sensitive string in the Password Vault it can be useful to first confirmif it is already stored.
This check can be done either interactively, where the user is prompted for each parameter’s value, ornon-interactively, where all parameters' values are provided on the commmand line. Each method givesthe same result, so either may be used. Both of these methods are invoked using the vault script.
Check For a Sensitive String Non-Interactively
Use this method to provide all parameters' values at once. For a description of all parameters, seeInitialize the Password Vault.
To run the password vault command non-interactively, the vault script (located in EAP_HOME/bin/) canbe invoked with parameters for the relavant information:
Substitute the placeholder values with the actual values. The values for parameters KEYSTORE_URL,KEYSTORE_PASSWORD and KEYSTORE_ALIAS must match those provided when the PasswordVault was created.
NOTE
The keystore password must be given in plaintext form, not masked form.
If the sensitive string is stored in the vault block specified, the following message will be displayed:
If the value is not stored in the specified block, the following message will be displayed:
Check For a Sensitive String Interactively
To run the password vault command interactively, the following steps are required:
1. Launch the Password Vault command interactively
2. Complete the prompted parameters
1. Launch the Password Vault command interactively
Run EAP_HOME/bin/vault.sh (on Red Hat Enterprise Linux and similar operating systems) or EAP_HOME\bin\vault.bat (on Microsoft Windows Server). Start a new interactive session by typing 0(zero).
url = "jdbc:h2:tcp://localhost/mem:test")*/
EAP_HOME/bin/vault.sh --keystore KEYSTORE_URL --keystore-password KEYSTORE_PASSWORD --alias KEYSTORE_ALIAS --check-sec-attr --vault-block VAULT_BLOCK --attribute ATTRIBUTE --enc-dir ENC_FILE_DIR --iteration ITERATION_COUNT --salt SALT
Password already exists.
Password doesn't exist.
CHAPTER 3. SECURING USERS OF THE SERVER AND ITS MANAGEMENT INTERFACES
37

2. Complete the Prompted Parameters
Follow the prompts to input the required authentication parameters. These values must match thoseprovided when the Password Vault was created.
NOTE
When prompted for authentication, the keystore password must be given in plaintext form,not masked form.
Enter 1 (one) to select “Check whether a secured attribute exists”.
Enter the name of the vault block in which the sensitive string is stored.
Enter the name of the sensitive string to be checked.
If the sensitive string is stored in the vault block specified, a confirmation message like the following willbe output:
If the sensitive string is not stored in the specified block, a message like the following will be output:
Example- Check For a Sensitive String Interactively
A value exists for (VAULT_BLOCK, ATTRIBUTE)
No value has been store for (VAULT_BLOCK, ATTRIBUTE)
========================================================================= JBoss Vault JBOSS_HOME: EAP_HOME JAVA: java ========================================================================= ********************************** **** JBoss Vault *************** **********************************Please enter a Digit:: 0: Start Interactive Session 1: Remove Interactive Session 2: Exit0Starting an interactive sessionEnter directory to store encrypted files:EAP_HOME/vaultEnter Keystore URL:EAP_HOME/vault/vault.keystoreEnter Keystore password:Enter Keystore password again:Values matchEnter 8 character salt:1234abcdEnter iteration count as a number (Eg: 44):120Enter Keystore Alias:vaultInitializing VaultOct 22, 2014 12:53:56 PM org.picketbox.plugins.vault.PicketBoxSecurityVault initINFO: PBOX000361: Default Security Vault Implementation Initialized and ReadyVault Configuration in AS7 config file: ********************************************...
Red Hat JBoss Enterprise Application Platform 6.4 How To Configure Server Security
38
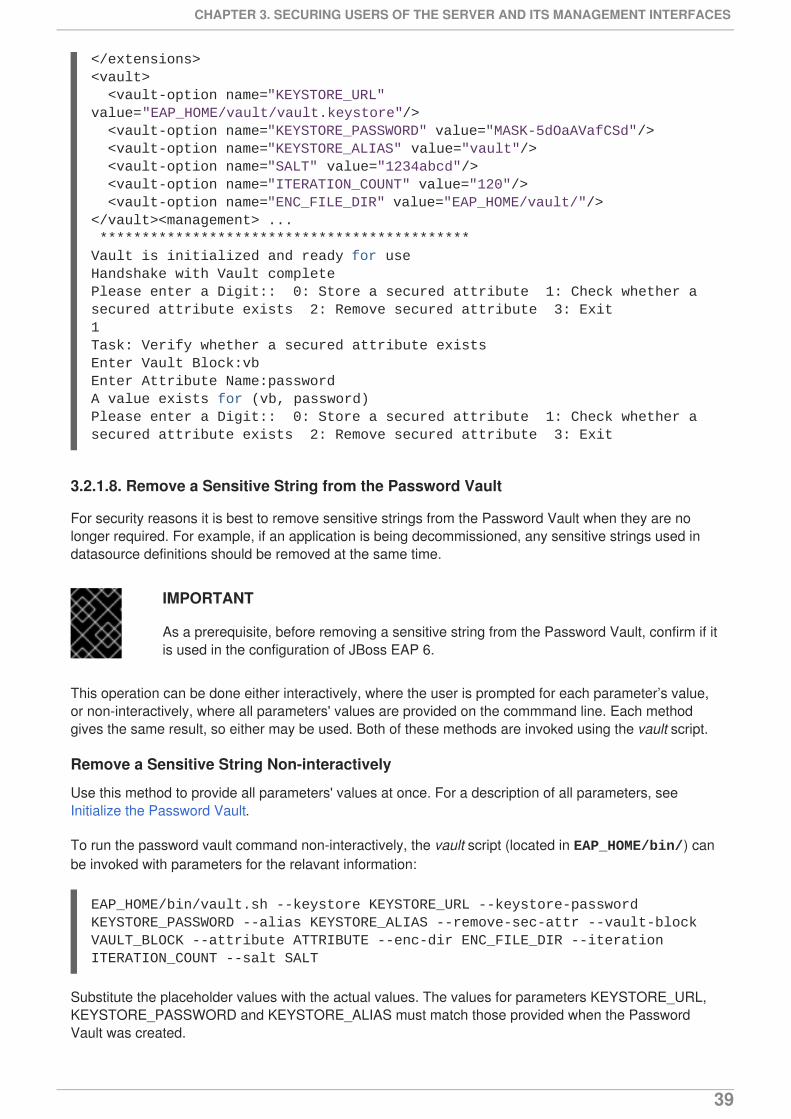
3.2.1.8. Remove a Sensitive String from the Password Vault
For security reasons it is best to remove sensitive strings from the Password Vault when they are nolonger required. For example, if an application is being decommissioned, any sensitive strings used indatasource definitions should be removed at the same time.
IMPORTANT
As a prerequisite, before removing a sensitive string from the Password Vault, confirm if itis used in the configuration of JBoss EAP 6.
This operation can be done either interactively, where the user is prompted for each parameter’s value,or non-interactively, where all parameters' values are provided on the commmand line. Each methodgives the same result, so either may be used. Both of these methods are invoked using the vault script.
Remove a Sensitive String Non-interactively
Use this method to provide all parameters' values at once. For a description of all parameters, seeInitialize the Password Vault.
To run the password vault command non-interactively, the vault script (located in EAP_HOME/bin/) canbe invoked with parameters for the relavant information:
Substitute the placeholder values with the actual values. The values for parameters KEYSTORE_URL,KEYSTORE_PASSWORD and KEYSTORE_ALIAS must match those provided when the PasswordVault was created.
</extensions><vault> <vault-option name="KEYSTORE_URL" value="EAP_HOME/vault/vault.keystore"/> <vault-option name="KEYSTORE_PASSWORD" value="MASK-5dOaAVafCSd"/> <vault-option name="KEYSTORE_ALIAS" value="vault"/> <vault-option name="SALT" value="1234abcd"/> <vault-option name="ITERATION_COUNT" value="120"/> <vault-option name="ENC_FILE_DIR" value="EAP_HOME/vault/"/></vault><management> ... ********************************************Vault is initialized and ready for useHandshake with Vault completePlease enter a Digit:: 0: Store a secured attribute 1: Check whether a secured attribute exists 2: Remove secured attribute 3: Exit1Task: Verify whether a secured attribute existsEnter Vault Block:vbEnter Attribute Name:passwordA value exists for (vb, password)Please enter a Digit:: 0: Store a secured attribute 1: Check whether a secured attribute exists 2: Remove secured attribute 3: Exit
EAP_HOME/bin/vault.sh --keystore KEYSTORE_URL --keystore-password KEYSTORE_PASSWORD --alias KEYSTORE_ALIAS --remove-sec-attr --vault-block VAULT_BLOCK --attribute ATTRIBUTE --enc-dir ENC_FILE_DIR --iteration ITERATION_COUNT --salt SALT
CHAPTER 3. SECURING USERS OF THE SERVER AND ITS MANAGEMENT INTERFACES
39
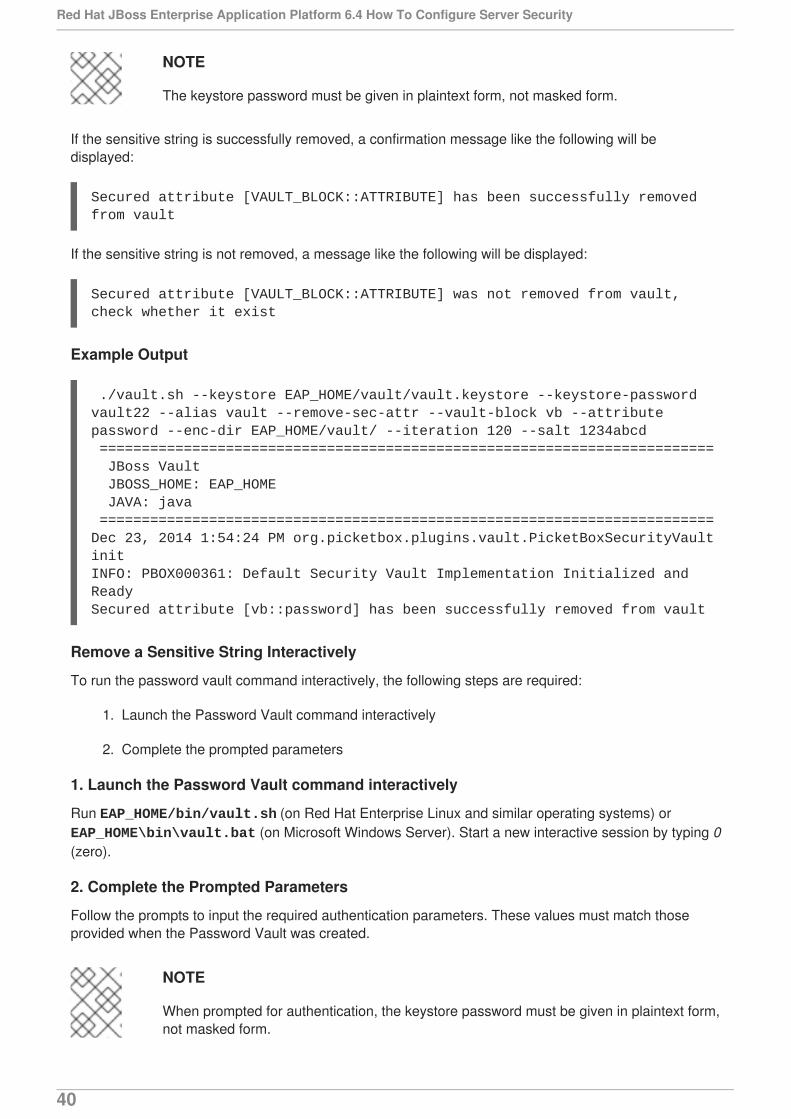
NOTE
The keystore password must be given in plaintext form, not masked form.
If the sensitive string is successfully removed, a confirmation message like the following will bedisplayed:
If the sensitive string is not removed, a message like the following will be displayed:
Example Output
Remove a Sensitive String Interactively
To run the password vault command interactively, the following steps are required:
1. Launch the Password Vault command interactively
2. Complete the prompted parameters
1. Launch the Password Vault command interactively
Run EAP_HOME/bin/vault.sh (on Red Hat Enterprise Linux and similar operating systems) or EAP_HOME\bin\vault.bat (on Microsoft Windows Server). Start a new interactive session by typing 0(zero).
2. Complete the Prompted Parameters
Follow the prompts to input the required authentication parameters. These values must match thoseprovided when the Password Vault was created.
NOTE
When prompted for authentication, the keystore password must be given in plaintext form,not masked form.
Secured attribute [VAULT_BLOCK::ATTRIBUTE] has been successfully removed from vault
Secured attribute [VAULT_BLOCK::ATTRIBUTE] was not removed from vault, check whether it exist
./vault.sh --keystore EAP_HOME/vault/vault.keystore --keystore-password vault22 --alias vault --remove-sec-attr --vault-block vb --attribute password --enc-dir EAP_HOME/vault/ --iteration 120 --salt 1234abcd ========================================================================= JBoss Vault JBOSS_HOME: EAP_HOME JAVA: java =========================================================================Dec 23, 2014 1:54:24 PM org.picketbox.plugins.vault.PicketBoxSecurityVault initINFO: PBOX000361: Default Security Vault Implementation Initialized and ReadySecured attribute [vb::password] has been successfully removed from vault
Red Hat JBoss Enterprise Application Platform 6.4 How To Configure Server Security
40
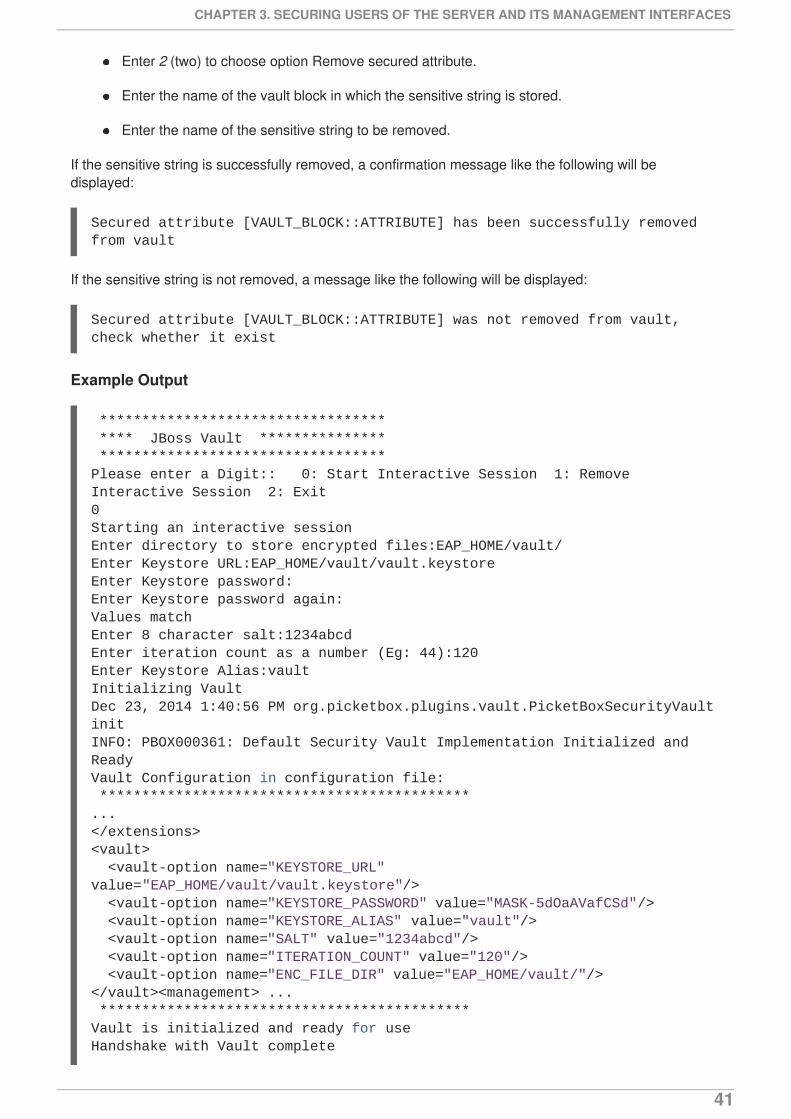
Enter 2 (two) to choose option Remove secured attribute.
Enter the name of the vault block in which the sensitive string is stored.
Enter the name of the sensitive string to be removed.
If the sensitive string is successfully removed, a confirmation message like the following will bedisplayed:
If the sensitive string is not removed, a message like the following will be displayed:
Example Output
Secured attribute [VAULT_BLOCK::ATTRIBUTE] has been successfully removed from vault
Secured attribute [VAULT_BLOCK::ATTRIBUTE] was not removed from vault, check whether it exist
********************************** **** JBoss Vault *************** **********************************Please enter a Digit:: 0: Start Interactive Session 1: Remove Interactive Session 2: Exit0Starting an interactive sessionEnter directory to store encrypted files:EAP_HOME/vault/Enter Keystore URL:EAP_HOME/vault/vault.keystoreEnter Keystore password:Enter Keystore password again:Values matchEnter 8 character salt:1234abcdEnter iteration count as a number (Eg: 44):120Enter Keystore Alias:vaultInitializing VaultDec 23, 2014 1:40:56 PM org.picketbox.plugins.vault.PicketBoxSecurityVault initINFO: PBOX000361: Default Security Vault Implementation Initialized and ReadyVault Configuration in configuration file: ********************************************...</extensions><vault> <vault-option name="KEYSTORE_URL" value="EAP_HOME/vault/vault.keystore"/> <vault-option name="KEYSTORE_PASSWORD" value="MASK-5dOaAVafCSd"/> <vault-option name="KEYSTORE_ALIAS" value="vault"/> <vault-option name="SALT" value="1234abcd"/> <vault-option name="ITERATION_COUNT" value="120"/> <vault-option name="ENC_FILE_DIR" value="EAP_HOME/vault/"/></vault><management> ... ********************************************Vault is initialized and ready for useHandshake with Vault complete
CHAPTER 3. SECURING USERS OF THE SERVER AND ITS MANAGEMENT INTERFACES
41
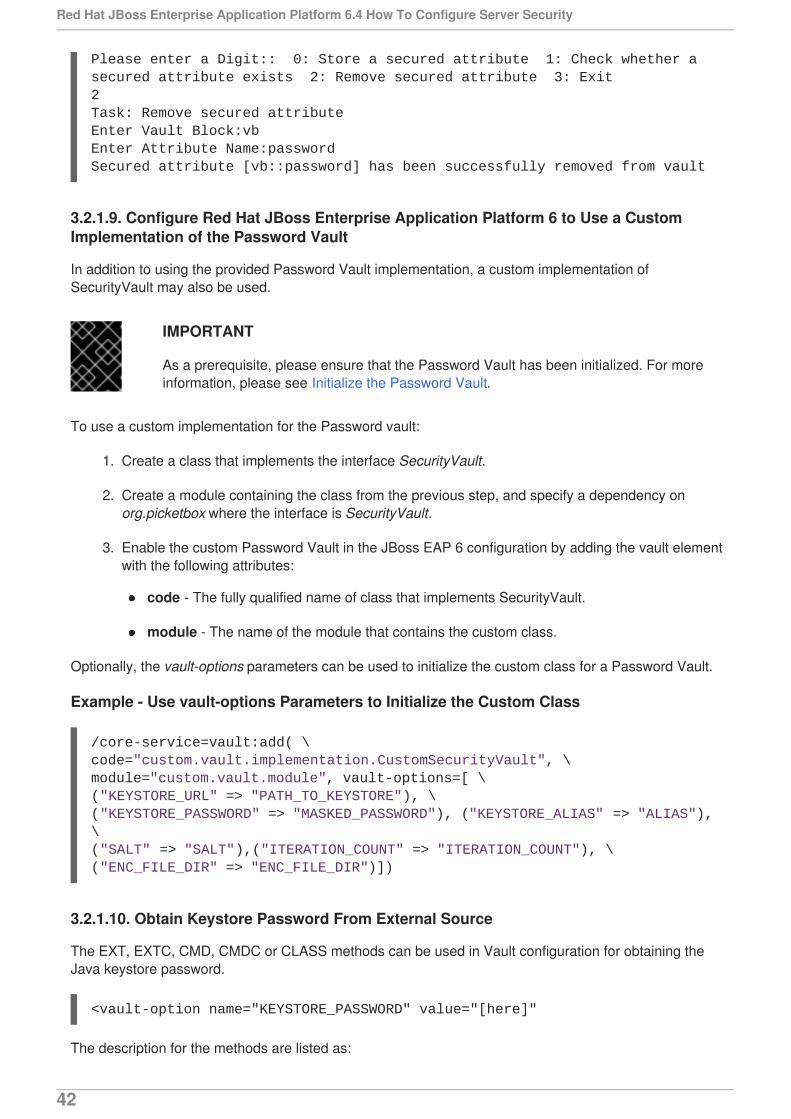
3.2.1.9. Configure Red Hat JBoss Enterprise Application Platform 6 to Use a CustomImplementation of the Password Vault
In addition to using the provided Password Vault implementation, a custom implementation ofSecurityVault may also be used.
IMPORTANT
As a prerequisite, please ensure that the Password Vault has been initialized. For moreinformation, please see Initialize the Password Vault.
To use a custom implementation for the Password vault:
1. Create a class that implements the interface SecurityVault.
2. Create a module containing the class from the previous step, and specify a dependency onorg.picketbox where the interface is SecurityVault.
3. Enable the custom Password Vault in the JBoss EAP 6 configuration by adding the vault elementwith the following attributes:
code - The fully qualified name of class that implements SecurityVault.
module - The name of the module that contains the custom class.
Optionally, the vault-options parameters can be used to initialize the custom class for a Password Vault.
Example - Use vault-options Parameters to Initialize the Custom Class
3.2.1.10. Obtain Keystore Password From External Source
The EXT, EXTC, CMD, CMDC or CLASS methods can be used in Vault configuration for obtaining theJava keystore password.
The description for the methods are listed as:
Please enter a Digit:: 0: Store a secured attribute 1: Check whether a secured attribute exists 2: Remove secured attribute 3: Exit2Task: Remove secured attributeEnter Vault Block:vbEnter Attribute Name:passwordSecured attribute [vb::password] has been successfully removed from vault
/core-service=vault:add( \code="custom.vault.implementation.CustomSecurityVault", \module="custom.vault.module", vault-options=[ \("KEYSTORE_URL" => "PATH_TO_KEYSTORE"), \("KEYSTORE_PASSWORD" => "MASKED_PASSWORD"), ("KEYSTORE_ALIAS" => "ALIAS"), \("SALT" => "SALT"),("ITERATION_COUNT" => "ITERATION_COUNT"), \("ENC_FILE_DIR" => "ENC_FILE_DIR")])
<vault-option name="KEYSTORE_PASSWORD" value="[here]"
Red Hat JBoss Enterprise Application Platform 6.4 How To Configure Server Security
42
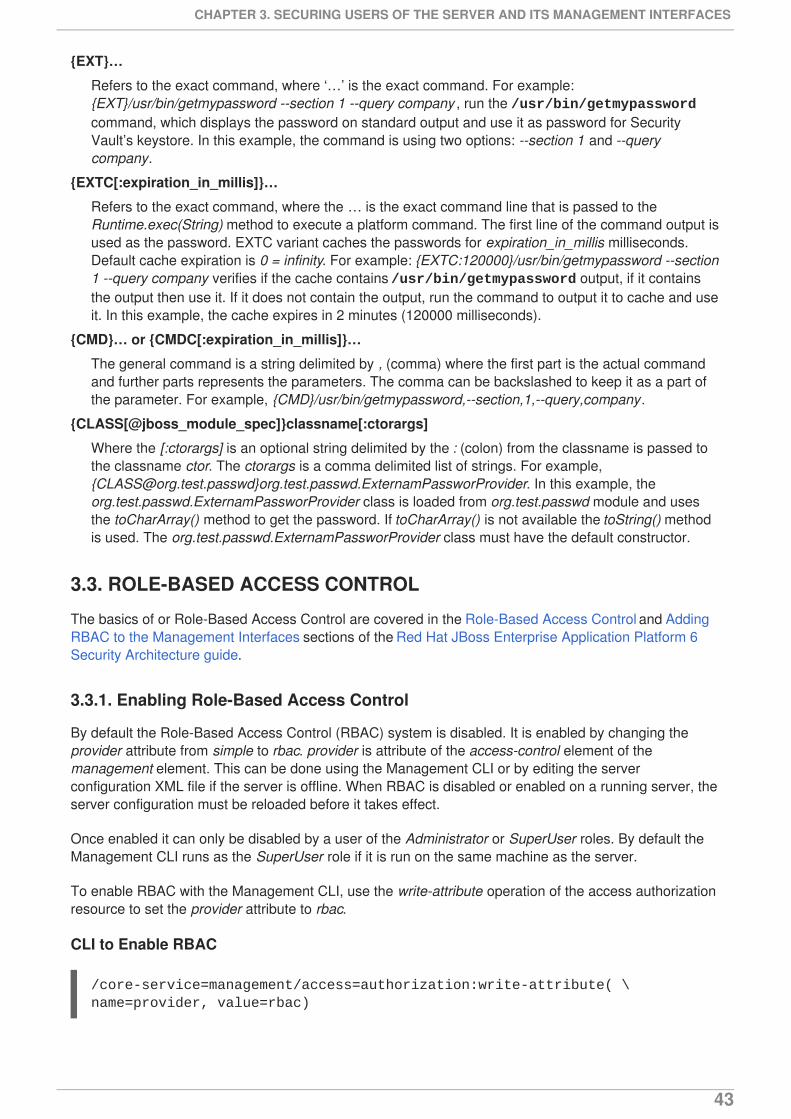
{EXT}… Refers to the exact command, where ‘…’ is the exact command. For example:{EXT}/usr/bin/getmypassword --section 1 --query company , run the /usr/bin/getmypasswordcommand, which displays the password on standard output and use it as password for SecurityVault’s keystore. In this example, the command is using two options: --section 1 and --querycompany.
{EXTC[:expiration_in_millis]}… Refers to the exact command, where the … is the exact command line that is passed to theRuntime.exec(String) method to execute a platform command. The first line of the command output isused as the password. EXTC variant caches the passwords for expiration_in_millis milliseconds.Default cache expiration is 0 = infinity. For example: {EXTC:120000}/usr/bin/getmypassword --section1 --query company verifies if the cache contains /usr/bin/getmypassword output, if it containsthe output then use it. If it does not contain the output, run the command to output it to cache and useit. In this example, the cache expires in 2 minutes (120000 milliseconds).
{CMD}… or {CMDC[:expiration_in_millis]}… The general command is a string delimited by , (comma) where the first part is the actual commandand further parts represents the parameters. The comma can be backslashed to keep it as a part ofthe parameter. For example, {CMD}/usr/bin/getmypassword,--section,1,--query,company .
{CLASS[@jboss_module_spec]}classname[:ctorargs]
Where the [:ctorargs] is an optional string delimited by the : (colon) from the classname is passed tothe classname ctor. The ctorargs is a comma delimited list of strings. For example,{[email protected]}org.test.passwd.ExternamPassworProvider. In this example, theorg.test.passwd.ExternamPassworProvider class is loaded from org.test.passwd module and usesthe toCharArray() method to get the password. If toCharArray() is not available the toString() methodis used. The org.test.passwd.ExternamPassworProvider class must have the default constructor.
3.3. ROLE-BASED ACCESS CONTROL
The basics of or Role-Based Access Control are covered in the Role-Based Access Control and AddingRBAC to the Management Interfaces sections of the Red Hat JBoss Enterprise Application Platform 6Security Architecture guide.
3.3.1. Enabling Role-Based Access Control
By default the Role-Based Access Control (RBAC) system is disabled. It is enabled by changing theprovider attribute from simple to rbac. provider is attribute of the access-control element of themanagement element. This can be done using the Management CLI or by editing the serverconfiguration XML file if the server is offline. When RBAC is disabled or enabled on a running server, theserver configuration must be reloaded before it takes effect.
Once enabled it can only be disabled by a user of the Administrator or SuperUser roles. By default theManagement CLI runs as the SuperUser role if it is run on the same machine as the server.
To enable RBAC with the Management CLI, use the write-attribute operation of the access authorizationresource to set the provider attribute to rbac.
CLI to Enable RBAC
/core-service=management/access=authorization:write-attribute( \name=provider, value=rbac)
CHAPTER 3. SECURING USERS OF THE SERVER AND ITS MANAGEMENT INTERFACES
43
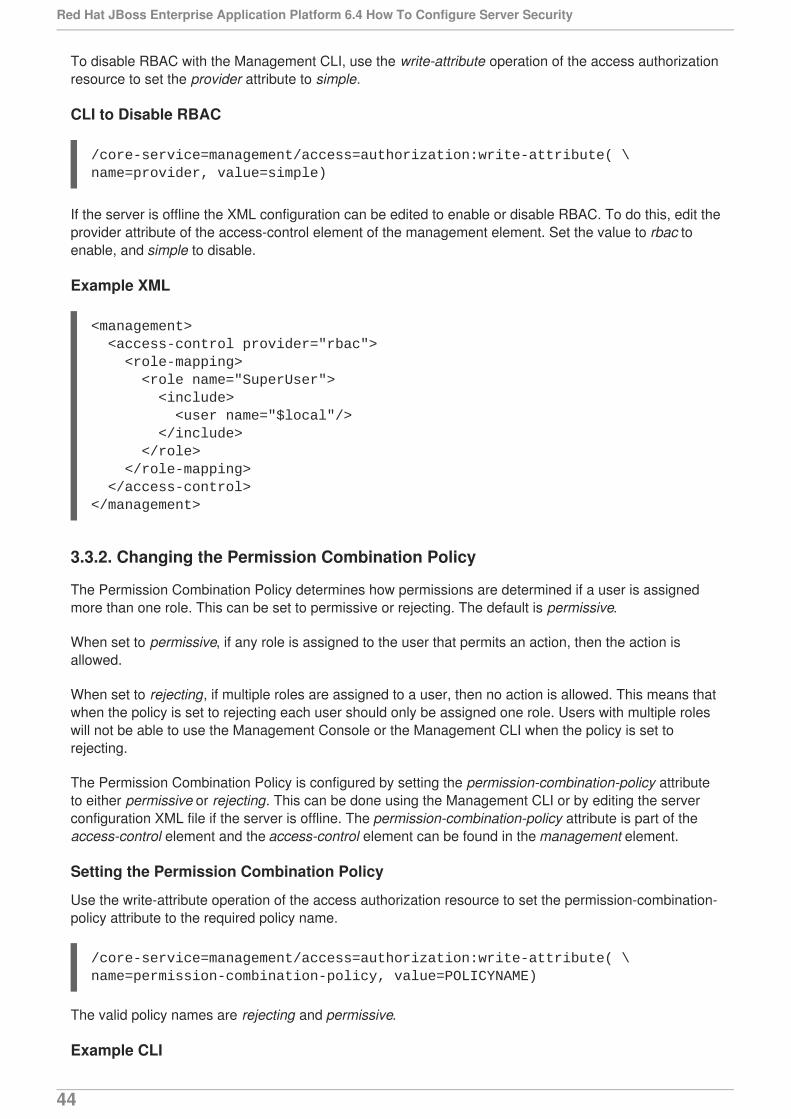
To disable RBAC with the Management CLI, use the write-attribute operation of the access authorizationresource to set the provider attribute to simple.
CLI to Disable RBAC
If the server is offline the XML configuration can be edited to enable or disable RBAC. To do this, edit theprovider attribute of the access-control element of the management element. Set the value to rbac toenable, and simple to disable.
Example XML
3.3.2. Changing the Permission Combination Policy
The Permission Combination Policy determines how permissions are determined if a user is assignedmore than one role. This can be set to permissive or rejecting. The default is permissive.
When set to permissive, if any role is assigned to the user that permits an action, then the action isallowed.
When set to rejecting, if multiple roles are assigned to a user, then no action is allowed. This means thatwhen the policy is set to rejecting each user should only be assigned one role. Users with multiple roleswill not be able to use the Management Console or the Management CLI when the policy is set torejecting.
The Permission Combination Policy is configured by setting the permission-combination-policy attributeto either permissive or rejecting. This can be done using the Management CLI or by editing the serverconfiguration XML file if the server is offline. The permission-combination-policy attribute is part of theaccess-control element and the access-control element can be found in the management element.
Setting the Permission Combination Policy
Use the write-attribute operation of the access authorization resource to set the permission-combination-policy attribute to the required policy name.
The valid policy names are rejecting and permissive.
Example CLI
/core-service=management/access=authorization:write-attribute( \name=provider, value=simple)
<management> <access-control provider="rbac"> <role-mapping> <role name="SuperUser"> <include> <user name="$local"/> </include> </role> </role-mapping> </access-control></management>
/core-service=management/access=authorization:write-attribute( \name=permission-combination-policy, value=POLICYNAME)
Red Hat JBoss Enterprise Application Platform 6.4 How To Configure Server Security
44
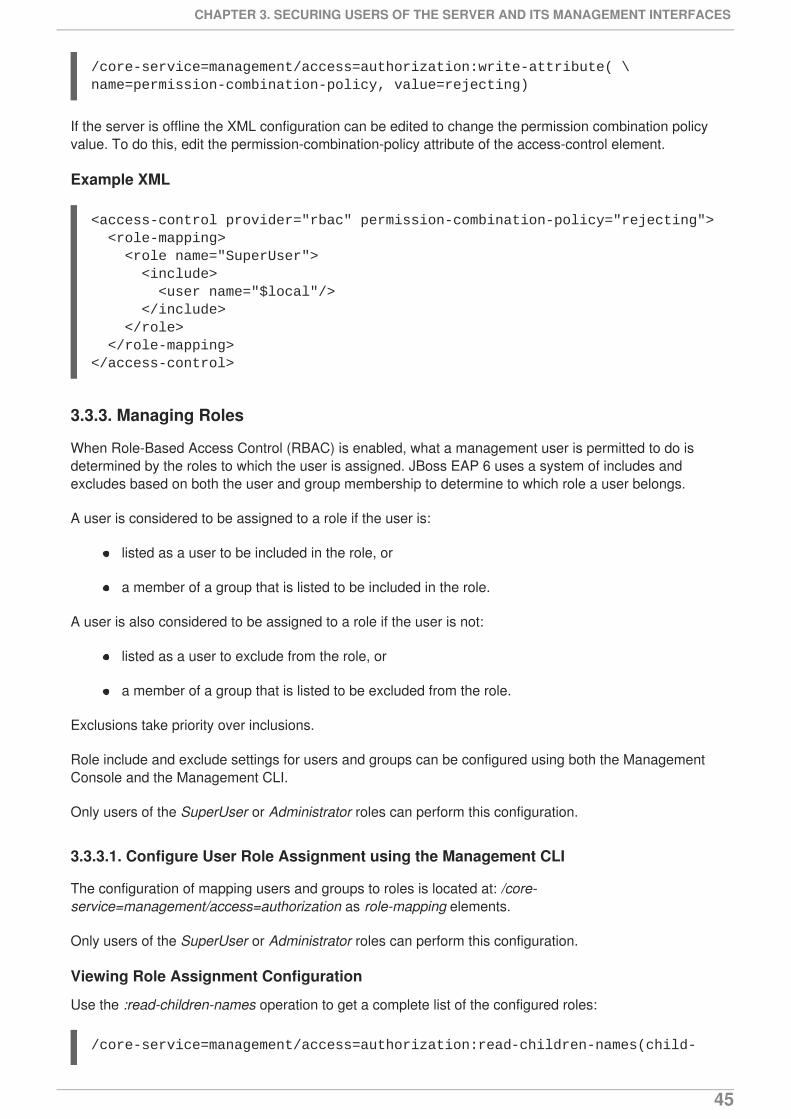
If the server is offline the XML configuration can be edited to change the permission combination policyvalue. To do this, edit the permission-combination-policy attribute of the access-control element.
Example XML
3.3.3. Managing Roles
When Role-Based Access Control (RBAC) is enabled, what a management user is permitted to do isdetermined by the roles to which the user is assigned. JBoss EAP 6 uses a system of includes andexcludes based on both the user and group membership to determine to which role a user belongs.
A user is considered to be assigned to a role if the user is:
listed as a user to be included in the role, or
a member of a group that is listed to be included in the role.
A user is also considered to be assigned to a role if the user is not:
listed as a user to exclude from the role, or
a member of a group that is listed to be excluded from the role.
Exclusions take priority over inclusions.
Role include and exclude settings for users and groups can be configured using both the ManagementConsole and the Management CLI.
Only users of the SuperUser or Administrator roles can perform this configuration.
3.3.3.1. Configure User Role Assignment using the Management CLI
The configuration of mapping users and groups to roles is located at: /core-service=management/access=authorization as role-mapping elements.
Only users of the SuperUser or Administrator roles can perform this configuration.
Viewing Role Assignment Configuration
Use the :read-children-names operation to get a complete list of the configured roles:
/core-service=management/access=authorization:write-attribute( \name=permission-combination-policy, value=rejecting)
<access-control provider="rbac" permission-combination-policy="rejecting"> <role-mapping> <role name="SuperUser"> <include> <user name="$local"/> </include> </role> </role-mapping></access-control>
/core-service=management/access=authorization:read-children-names(child-
CHAPTER 3. SECURING USERS OF THE SERVER AND ITS MANAGEMENT INTERFACES
45
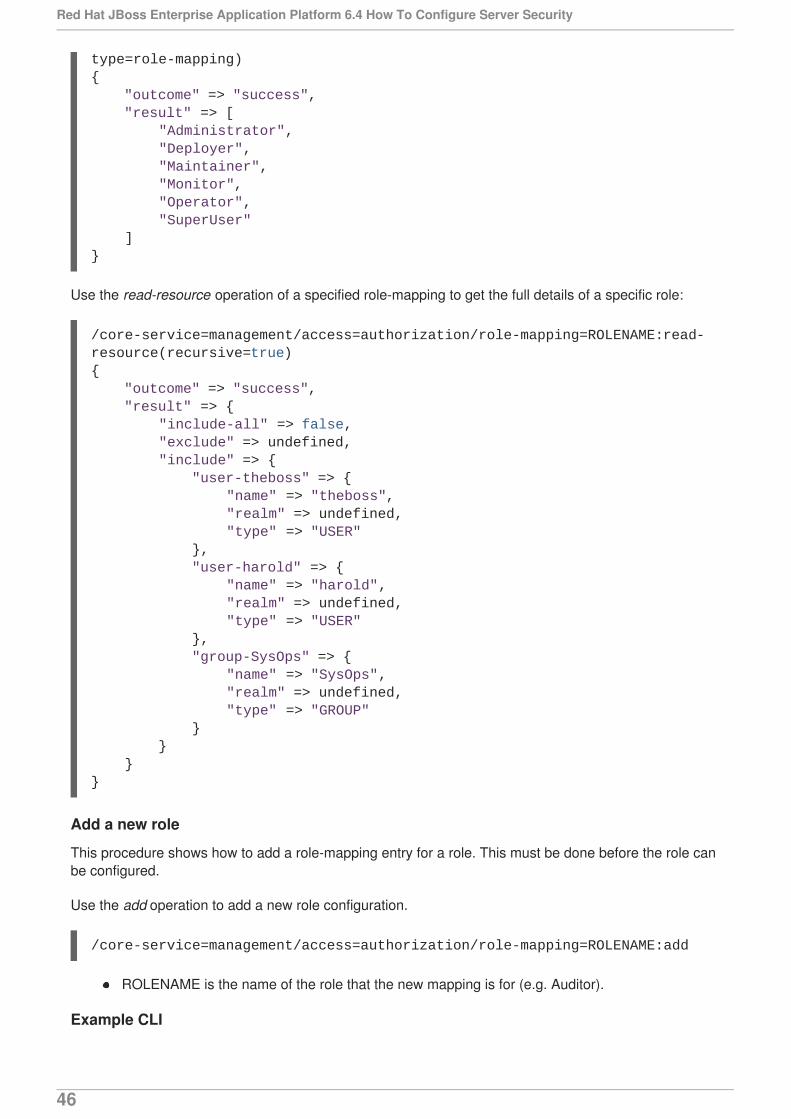
Use the read-resource operation of a specified role-mapping to get the full details of a specific role:
Add a new role
This procedure shows how to add a role-mapping entry for a role. This must be done before the role canbe configured.
Use the add operation to add a new role configuration.
ROLENAME is the name of the role that the new mapping is for (e.g. Auditor).
Example CLI
type=role-mapping){ "outcome" => "success", "result" => [ "Administrator", "Deployer", "Maintainer", "Monitor", "Operator", "SuperUser" ]}
/core-service=management/access=authorization/role-mapping=ROLENAME:read-resource(recursive=true){ "outcome" => "success", "result" => { "include-all" => false, "exclude" => undefined, "include" => { "user-theboss" => { "name" => "theboss", "realm" => undefined, "type" => "USER" }, "user-harold" => { "name" => "harold", "realm" => undefined, "type" => "USER" }, "group-SysOps" => { "name" => "SysOps", "realm" => undefined, "type" => "GROUP" } } }}
/core-service=management/access=authorization/role-mapping=ROLENAME:add
Red Hat JBoss Enterprise Application Platform 6.4 How To Configure Server Security
46
Add a user as included in a role
This procedure shows how to add a user to the included list of a role.
If no configuration for a role has been done, then a role-mapping entry for it must be done first.
Use the add operation to add a user entry to the includes list of the role.
ROLENAME is the name of the role being configured. (e.g. Auditor)
ALIAS is a unique name for this mapping. Red Hat recommends that the use of a namingconvention for aliases such as user-USERNAME. (e.g. user-max)
USERNAME is the name of the user being added to the include list. (e.g. max)
Example CLI
Add a user as excluded in a role
This procedure shows how to add a user to the excluded list of a role.
If no configuration for a role has been done, then a role-mapping entry for it must be done first.
Use the add operation to add a user entry to the excludes list of the role.
ROLENAME is the name of the role being configured. (e.g. Auditor)
USERNAME is the name of the user being added to the exclude list. (e.g. max)
ALIAS is a unique name for this mapping. Red Hat recommends that the use of a namingconvention for aliases such as user-USERNAME. (e.g. user-max)
Example CLI
Remove user role include configuration
This procedure shows how to remove a user include entry from a role mapping.
/core-service=management/access=authorization/role-mapping=Auditor:add
/core-service=management/access=authorization/role-mapping=ROLENAME/include= \ALIAS:add(name=USERNAME, type=USER)
/core-service=management/access=authorization/role-mapping=Auditor/include= \user-max:add(name=max, type=USER)
/core-service=management/access=authorization/role-mapping=ROLENAME/exclude= \ALIAS:add(name=USERNAME, type=USER)
/core-service=management/access=authorization/role-mapping=Auditor/exclude= \user-max:add(name=max, type=USER)
CHAPTER 3. SECURING USERS OF THE SERVER AND ITS MANAGEMENT INTERFACES
47
Use the remove operation to remove the entry.
ROLENAME is the name of the role being configured (e.g. Auditor)
ALIAS is a unique name for this mapping. Red Hat recommends that the use of a namingconvention for aliases such as user-USERNAME. (e.g. user-max)
Example CLI
NOTE
Removing the user from the list of includes does not remove the user from the system, nordoes it guarantee that the role won’t be assigned to the user. The role might still beassigned based on group membership.
Remove user role exclude configuration
This procedure shows how to remove an user exclude entry from a role mapping.
Use the remove operation to remove the entry.
ROLENAME is the name of the role being configured. (e.g. Auditor)
ALIAS is a unique name for this mapping. Red Hat recommends that the use of a namingconvention for aliases such as user-USERNAME. (e.g. user-max)
NOTE
Removing the user from the list of excludes does not remove the user from the system,nor does it guarantee the role will be assigned to the user. Roles might still be excludedbased on group membership.
3.3.4. Roles and User Groups
Users authenticated using either the mgmt-users.properties file or an LDAP server, can bemembers of user groups. A user group is an arbitrary label that can be assigned to one or more users.
/core-service=management/access=authorization/role-mapping=ROLENAME/include= \ALIAS:remove
/core-service=management/access=authorization/role-mapping=Auditor/include= \user-max:remove
/core-service=management/access=authorization/role-mapping=ROLENAME/exclude= \ALIAS:remove
/core-service=management/access=authorization/role-mapping=Auditor/exclude= \user-max:remove
Red Hat JBoss Enterprise Application Platform 6.4 How To Configure Server Security
48
The RBAC system can be configured to automatically assign roles to users depending on what usergroups they are members of. It can also exclude users from roles based on group membership.
When using the mgmt-users.properties file, group information is stored in the mgmt-groups.properties file. When using LDAP the group information is stored in the LDAP sever andmaintained by those responsible for the LDAP server.
3.3.5. Configure Group Role Assignment using the Management CLI
Groups to be included or excluded from a role can be configured in the Management Console and theManagement CLI. This topic only shows using the Management CLI.
The configuration of mapping users and groups to roles is located in the management API at: /core-service=management/access=authorization as role-mapping elements.
Only users in the SuperUser or Administrator roles can perform this configuration.
Viewing Group Role Assignment Configuration
Use the read-children-names operation to get a complete list of the configured roles:
Use the read-resource operation of a specified role-mapping to get the full details of a specific role:
/core-service=management/access=authorization:read-children-names(child-type=role-mapping){ "outcome" => "success", "result" => [ "Administrator", "Deployer", "Maintainer", "Monitor", "Operator", "SuperUser" ]}
/core-service=management/access=authorization/role-mapping= \ROLENAME:read-resource(recursive=true){ "outcome" => "success", "result" => { "include-all" => false, "exclude" => undefined, "include" => { "user-theboss" => { "name" => "theboss", "realm" => undefined, "type" => "USER" }, "user-harold" => { "name" => "harold", "realm" => undefined, "type" => "USER" }, "group-SysOps" => {
CHAPTER 3. SECURING USERS OF THE SERVER AND ITS MANAGEMENT INTERFACES
49
Add a new role
This procedure shows how to add a role-mapping entry for a role. This must be done before the role canbe configured.
Use the add operation to add a new role configuration.
Add a Group as included in a role
This procedure shows how to add a Group to the included list of a role.
If no configuration for a role has been done, then a role-mapping entry for it must be done first.
Use the add operation to add a Group entry to the includes list of the role.
ROLENAME is the name of the role being configured. (e.g. Auditor)
GROUPNAME is the name of the group being added to the include list. (e.g. investigators)
ALIAS is a unique name for this mapping. Red Hat recommends that you use a namingconvention for your aliases such as group-GROUPNAME. (e.g. group-investigators)
Example CLI
Add a group as excluded in a role
This procedure shows how to add a group to the excluded list of a role.
If no configuration for a role has been done, then a role-mapping entry for it must be created first.
Use the add operation to add a group entry to the excludes list of the role.
ROLENAME is the name of the role being configured (e.g. Auditor)
GROUPNAME is the name of the group being added to the include list (e.g. supervisors)
"name" => "SysOps", "realm" => undefined, "type" => "GROUP" } } }}
/core-service=management/access=authorization/role-mapping=ROLENAME:add
/core-service=management/access=authorization/role-mapping= \ROLENAME/include=ALIAS:add(name=GROUPNAME, type=GROUP)
/core-service=management/access=authorization/role-mapping=Auditor/include= \group-investigators:add(name=investigators, type=GROUP)
/core-service=management/access=authorization/role-mapping=ROLENAME/exclude= \ALIAS:add(name=GROUPNAME, type=GROUP)
Red Hat JBoss Enterprise Application Platform 6.4 How To Configure Server Security
50
ALIAS is a unique name for this mapping. Red Hat recommends that you use a namingconvention for your aliases such as group-GROUPNAME. (e.g. group-supervisors)
Example CLI
Remove group role include configuration
This procedure shows how to remove a group include entry from a role mapping.
Use the remove operation to remove the entry.
ROLENAME is the name of the role being configured (e.g. Auditor)
ALIAS is a unique name for this mapping. Red Hat recommends that you use a namingconvention for your aliases such as group-GROUPNAME. (e.g. group-investigators)
Example CLI
NOTE
Removing the group from the list of includes does not remove the group from the system,nor does it guarantee that the role won’t be assigned to users in this group. The role mightstill be assigned to users in the group individually.
Remove a user group exclude entry
This procedure shows how to remove a group exclude entry from a role mapping.
Use the remove operation to remove the entry.
ROLENAME is the name of the role being configured. (e.g. Auditor)
ALIAS is a unique name for this mapping. Red Hat recommends that you use a namingconvention for your aliases such as group-GROUPNAME. (e.g. group-supervisors)
/core-service=management/access=authorization/role-mapping=Auditor/exclude= \group-supervisors:add(name=supervisors, type=GROUP)
/core-service=management/access=authorization/role-mapping=ROLENAME/include= \ALIAS:remove
/core-service=management/access=authorization/role-mapping=Auditor/include= \group-investigators:remove
/core-service=management/access=authorization/role-mapping=ROLENAME/exclude= \ALIAS:remove
/core-service=management/access=authorization/role-mapping=Auditor/exclude= \group-supervisors:remove
CHAPTER 3. SECURING USERS OF THE SERVER AND ITS MANAGEMENT INTERFACES
51

NOTE
Removing the group from the list of excludes does not remove the group from the system.It also does not guarantee the role will be assigned to members of the group. Roles mightstill be excluded based on group membership.
3.3.6. Using RBAC with LDAP
The basics of using RBAC with LDAP as well as how to configure JBoss EAP 6 to use RBAC with LDAPare covered in the LDAP and RBAC section in the How to Configure Identity Management guide.
3.3.7. Scoped Roles
Scoped Roles are user-defined roles that grant the permissions of one of the standard roles but only forone or more specified server groups or hosts in an JBoss EAP 6 domain. Scoped roles allow formanagement users to be granted permissions that are limited to only those server groups or hosts thatare required.
IMPORTANT
Scoped roles can be created by users assigned the Administrator or SuperUser roles.
They are defined by five characteristics:
A unique name.
Which of the standard roles it is based on.
If it applies to Server Groups or Hosts
The list of server groups or hosts that it is restricted to.
If all users are automatically included. This defaults to false.
Once created a scoped role can be assigned to users and groups the same way that the standard rolesare.
Creating a scoped role does not allow for defining new permissions. Scoped roles can only be used toapply the permissions of an existing role in a limited scope. For example, a scoped role could be createdbased on the Deployer role which is restricted to a single server group.
There are only two scopes that roles can be limited to:
Host-scoped roles
A role that is host-scoped restricts the permissions of that role to one or more hosts. This meansaccess is provided to the relevant /host=*/ resource trees but resources that are specific to otherhosts are hidden.
Server-Group-scoped roles
A role that is server-group-scoped restricts the permissions of that role to one or more server groups.Additionally the role permissions will also apply to the profile, socket binding group, server config andserver resources that are associated with the specified server-groups. Any sub-resources within anyof those that are not logically related to the server-group will not be visible to the user.
3.3.7.1. Configuring Scoped Roles from the Management CLI
Red Hat JBoss Enterprise Application Platform 6.4 How To Configure Server Security
52
IMPORTANT
Only users in the SuperUser or Administrator roles can perform this configuration.
Add a New Scoped Role
To add a new Scoped Role, the following operations must be done:
Replace NEW-SCOPED-ROLE, BASE-ROLE, and SERVER-GROUP-NAME with the proper information.
Viewing and Editing a Scoped Role Mapping
A Scoped Role’s details (including members) can be view by issuing the following command:
Replace NEW-SCOPED-ROLE with the proper information.
To edit a Scoped Role’s details, the write-attribute command may be used. For example:
Replace NEW-SCOPED-ROLE with the proper information.
Delete a Scoped Role
Replace NEW-SCOPED-ROLE with the proper information.
IMPORTANT
A Scoped Role cannot be deleted if users or groups are assigned to it. Remove the roleassignments first, and then delete it.
Adding and Removing Users
Adding and removing users to and from Scoped Roles follows the same process as adding and removingstandard roles.
/core-service=management/access=authorization/server-group-scoped-role= \NEW-SCOPED-ROLE:add(base-role=BASE-ROLE, server-groups=[SERVER-GROUP-NAME])
/core-service=management/access=authorization/role-mapping=NEW-SCOPED-ROLE:add
/core-service=management/access=authorization/role-mapping= \NEW-SCOPED-ROLE:read-resource(recursive=true)
/core-service=management/access=authorization/role-mapping= \NEW-SCOPED-ROLE:write-attribute(name=include-all, value=true)
/core-service=management/access=authorization/role-mapping= \NEW-SCOPED-ROLE:remove
/core-service=management/access=authorization/server-group-scoped-role= \NEW-SCOPED-ROLE:remove
CHAPTER 3. SECURING USERS OF THE SERVER AND ITS MANAGEMENT INTERFACES
53
3.3.7.2. Configuring Scoped Roles from the Management Console
IMPORTANT
Only users in the SuperUser or Administrator roles can perform this configuration.
Scoped Role configuration in the management console can be found by following these steps:
1. Login to the Management Console
2. Click on the Administration tab
3. Under the Access Control menu on the left and select Role Assignment.
4. Select ROLES tab, and then the Scoped Roles tab within it.
The Scoped Roles section of the Management Console consists of two main areas, a table containing alist of the currently configured scoped roles, and the Selection panel which displays the details of the rolecurrently selected in the table.
The following procedures show how to perform configuration tasks for Scoped Roles.
Add a New Scoped Role
1. Login to the Management Console
2. Navigate to the Scoped Roles area of the Roles tab.
3. Click Add. The Add Scoped Role dialog appears.
4. Specify the following details:
Name, the unique name for the new scoped role.
Base Role, the role which this role will base its permissions on.
Type, whether this role will be restricted to hosts or server groups.
Scope, the list of hosts or server groups that the role is restricted to. Multiple entries can beselected.
Include All, should this role automatically include all users. Defaults to no.
5. Click Save and the dialog will close and the newly created role will appear in the table.
Edit a Scoped Role
1. Login to the Management Console
2. Navigate to the Scoped Roles area of the Roles tab.
3. Click on the desired scoped role to edit in the table. The details of that role appears in theSelection panel below the table.
4. Click Edit in the Selection panel. The Selection panel enters edit mode.
Red Hat JBoss Enterprise Application Platform 6.4 How To Configure Server Security
54
5. Update the desired details to change and click the Save button. The Selection panel returns to itsprevious state. Both the Selection panel and table show the newly updated details.
View Scoped Role Members
1. Login to the Management Console
2. Navigate to the Scoped Roles area of the Roles tab.
3. Click on the desired scoped role in the table to view the Members of, then click Members. TheMembers of role dialog appears. It shows users and groups that are included or excluded fromthe role.
4. Click Done when finished reviewing this information.
Delete a Scoped Role
1. Login to the Management Console
2. Navigate to the Scoped Roles area of the Roles tab.
3. Select the scoped role to be removed in the table.
4. Click the Remove button. The Remove Scoped Role dialog appears.
5. Click Confirm.The dialog closes and the role is removed.
IMPORTANT
A Scoped Role cannot be deleted if users or groups are assigned to it. Remove the roleassignments first, and then delete it.
Adding and Removing Users
Adding and removing users to and from Scoped Roles follows the same process as adding and removingstandard roles. To update a user’s Scoped Roles:
1. Login to the Management Console
2. Click on the Administration tab
3. Under the Access Control menu on the left and select Role Assignment.
4. Click on the Users tab.
5. Select the desired user from the table.
6. Click Edit in the Selection section
7. Once the desired roles have been added/removed, click Save.
3.3.8. Configuring Constraints
3.3.8.1. Configuring Sensitivity Constraints
CHAPTER 3. SECURING USERS OF THE SERVER AND ITS MANAGEMENT INTERFACES
55
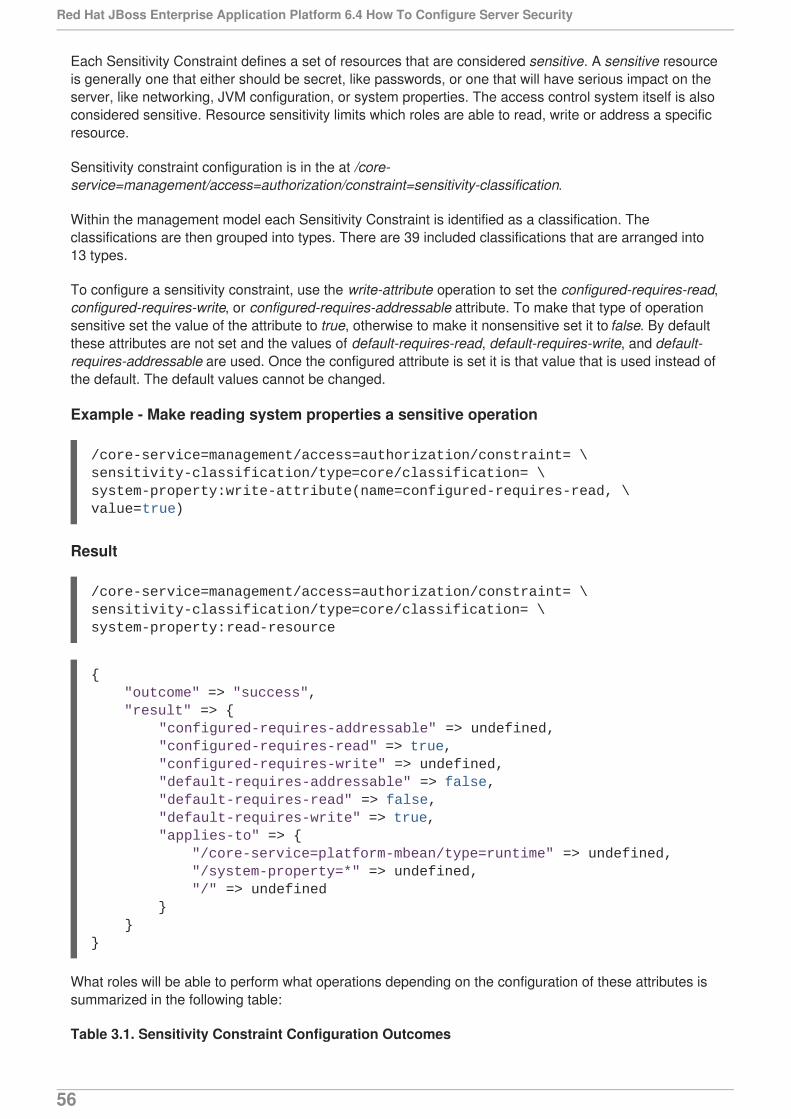
Each Sensitivity Constraint defines a set of resources that are considered sensitive. A sensitive resourceis generally one that either should be secret, like passwords, or one that will have serious impact on theserver, like networking, JVM configuration, or system properties. The access control system itself is alsoconsidered sensitive. Resource sensitivity limits which roles are able to read, write or address a specificresource.
Sensitivity constraint configuration is in the at /core-service=management/access=authorization/constraint=sensitivity-classification.
Within the management model each Sensitivity Constraint is identified as a classification. Theclassifications are then grouped into types. There are 39 included classifications that are arranged into13 types.
To configure a sensitivity constraint, use the write-attribute operation to set the configured-requires-read,configured-requires-write, or configured-requires-addressable attribute. To make that type of operationsensitive set the value of the attribute to true, otherwise to make it nonsensitive set it to false. By defaultthese attributes are not set and the values of default-requires-read, default-requires-write, and default-requires-addressable are used. Once the configured attribute is set it is that value that is used instead ofthe default. The default values cannot be changed.
Example - Make reading system properties a sensitive operation
Result
What roles will be able to perform what operations depending on the configuration of these attributes issummarized in the following table:
Table 3.1. Sensitivity Constraint Configuration Outcomes
/core-service=management/access=authorization/constraint= \sensitivity-classification/type=core/classification= \system-property:write-attribute(name=configured-requires-read, \value=true)
/core-service=management/access=authorization/constraint= \sensitivity-classification/type=core/classification= \system-property:read-resource
{ "outcome" => "success", "result" => { "configured-requires-addressable" => undefined, "configured-requires-read" => true, "configured-requires-write" => undefined, "default-requires-addressable" => false, "default-requires-read" => false, "default-requires-write" => true, "applies-to" => { "/core-service=platform-mbean/type=runtime" => undefined, "/system-property=*" => undefined, "/" => undefined } }}
Red Hat JBoss Enterprise Application Platform 6.4 How To Configure Server Security
56
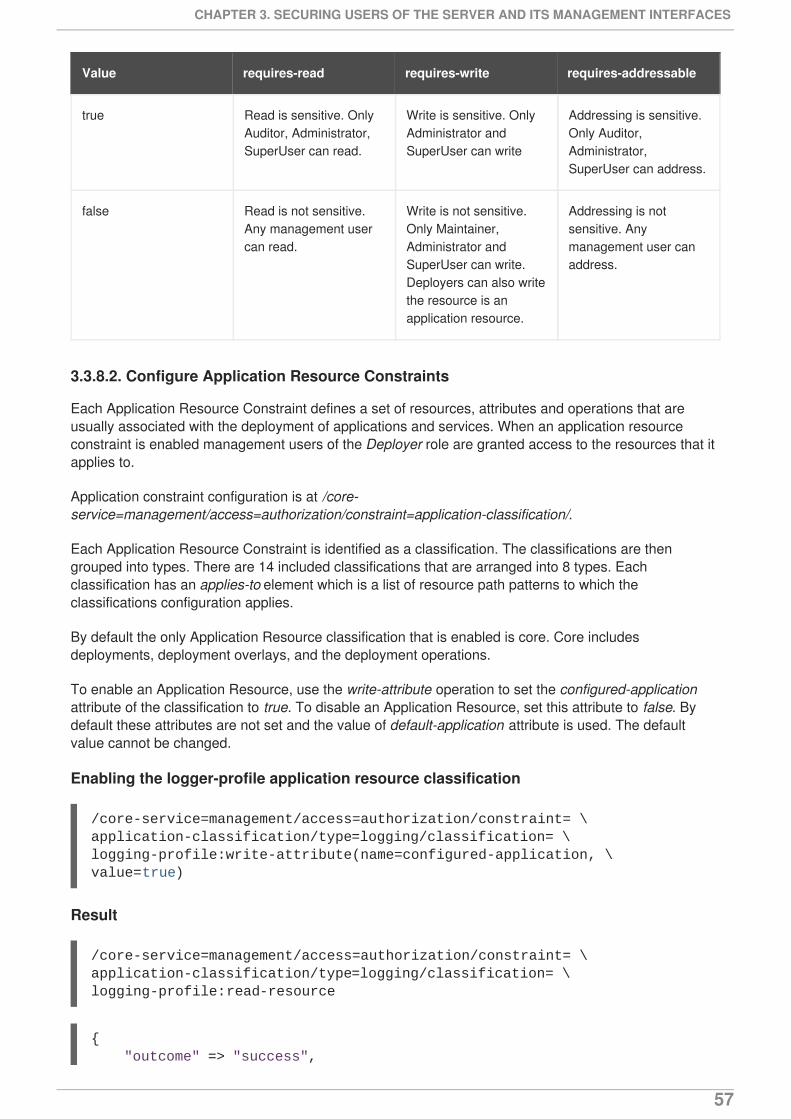
Value requires-read requires-write requires-addressable
true Read is sensitive. OnlyAuditor, Administrator,SuperUser can read.
Write is sensitive. OnlyAdministrator andSuperUser can write
Addressing is sensitive.Only Auditor,Administrator,SuperUser can address.
false Read is not sensitive.Any management usercan read.
Write is not sensitive.Only Maintainer,Administrator andSuperUser can write.Deployers can also writethe resource is anapplication resource.
Addressing is notsensitive. Anymanagement user canaddress.
3.3.8.2. Configure Application Resource Constraints
Each Application Resource Constraint defines a set of resources, attributes and operations that areusually associated with the deployment of applications and services. When an application resourceconstraint is enabled management users of the Deployer role are granted access to the resources that itapplies to.
Application constraint configuration is at /core-service=management/access=authorization/constraint=application-classification/.
Each Application Resource Constraint is identified as a classification. The classifications are thengrouped into types. There are 14 included classifications that are arranged into 8 types. Eachclassification has an applies-to element which is a list of resource path patterns to which theclassifications configuration applies.
By default the only Application Resource classification that is enabled is core. Core includesdeployments, deployment overlays, and the deployment operations.
To enable an Application Resource, use the write-attribute operation to set the configured-applicationattribute of the classification to true. To disable an Application Resource, set this attribute to false. Bydefault these attributes are not set and the value of default-application attribute is used. The defaultvalue cannot be changed.
Enabling the logger-profile application resource classification
Result
/core-service=management/access=authorization/constraint= \application-classification/type=logging/classification= \logging-profile:write-attribute(name=configured-application, \value=true)
/core-service=management/access=authorization/constraint= \application-classification/type=logging/classification= \logging-profile:read-resource
{ "outcome" => "success",
CHAPTER 3. SECURING USERS OF THE SERVER AND ITS MANAGEMENT INTERFACES
57
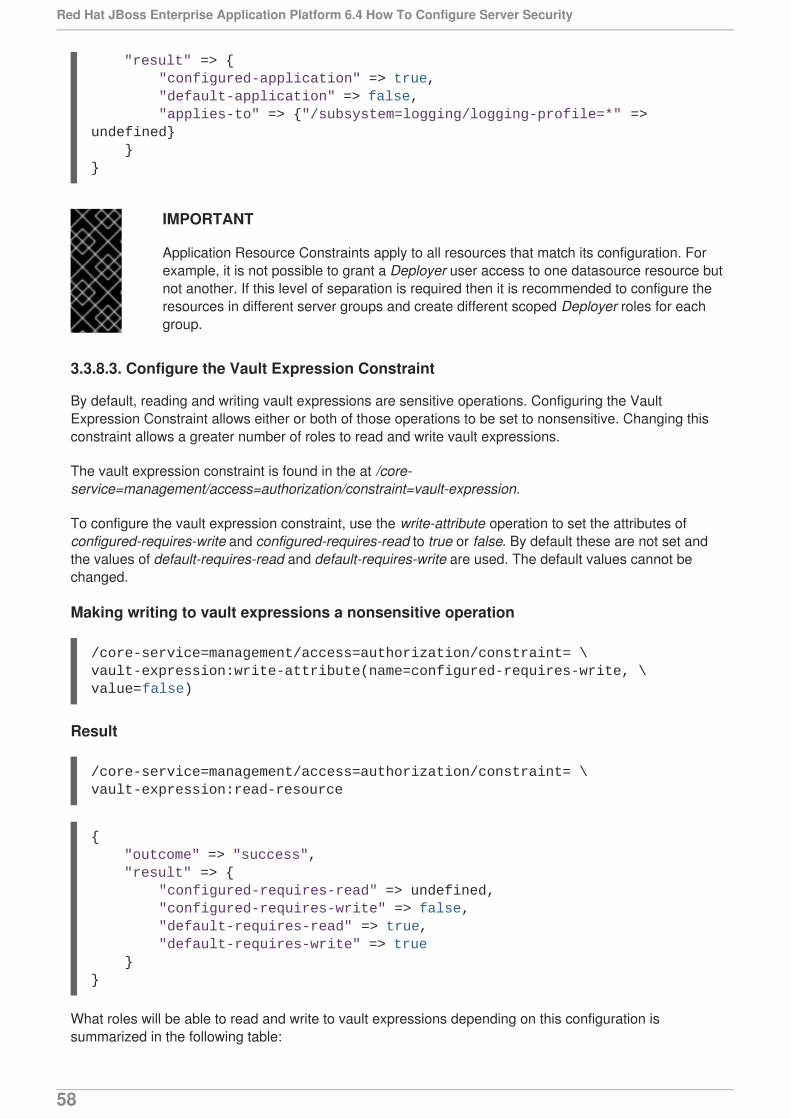
IMPORTANT
Application Resource Constraints apply to all resources that match its configuration. Forexample, it is not possible to grant a Deployer user access to one datasource resource butnot another. If this level of separation is required then it is recommended to configure theresources in different server groups and create different scoped Deployer roles for eachgroup.
3.3.8.3. Configure the Vault Expression Constraint
By default, reading and writing vault expressions are sensitive operations. Configuring the VaultExpression Constraint allows either or both of those operations to be set to nonsensitive. Changing thisconstraint allows a greater number of roles to read and write vault expressions.
The vault expression constraint is found in the at /core-service=management/access=authorization/constraint=vault-expression.
To configure the vault expression constraint, use the write-attribute operation to set the attributes ofconfigured-requires-write and configured-requires-read to true or false. By default these are not set andthe values of default-requires-read and default-requires-write are used. The default values cannot bechanged.
Making writing to vault expressions a nonsensitive operation
Result
What roles will be able to read and write to vault expressions depending on this configuration issummarized in the following table:
"result" => { "configured-application" => true, "default-application" => false, "applies-to" => {"/subsystem=logging/logging-profile=*" => undefined} }}
/core-service=management/access=authorization/constraint= \vault-expression:write-attribute(name=configured-requires-write, \value=false)
/core-service=management/access=authorization/constraint= \vault-expression:read-resource
{ "outcome" => "success", "result" => { "configured-requires-read" => undefined, "configured-requires-write" => false, "default-requires-read" => true, "default-requires-write" => true }}
Red Hat JBoss Enterprise Application Platform 6.4 How To Configure Server Security
58
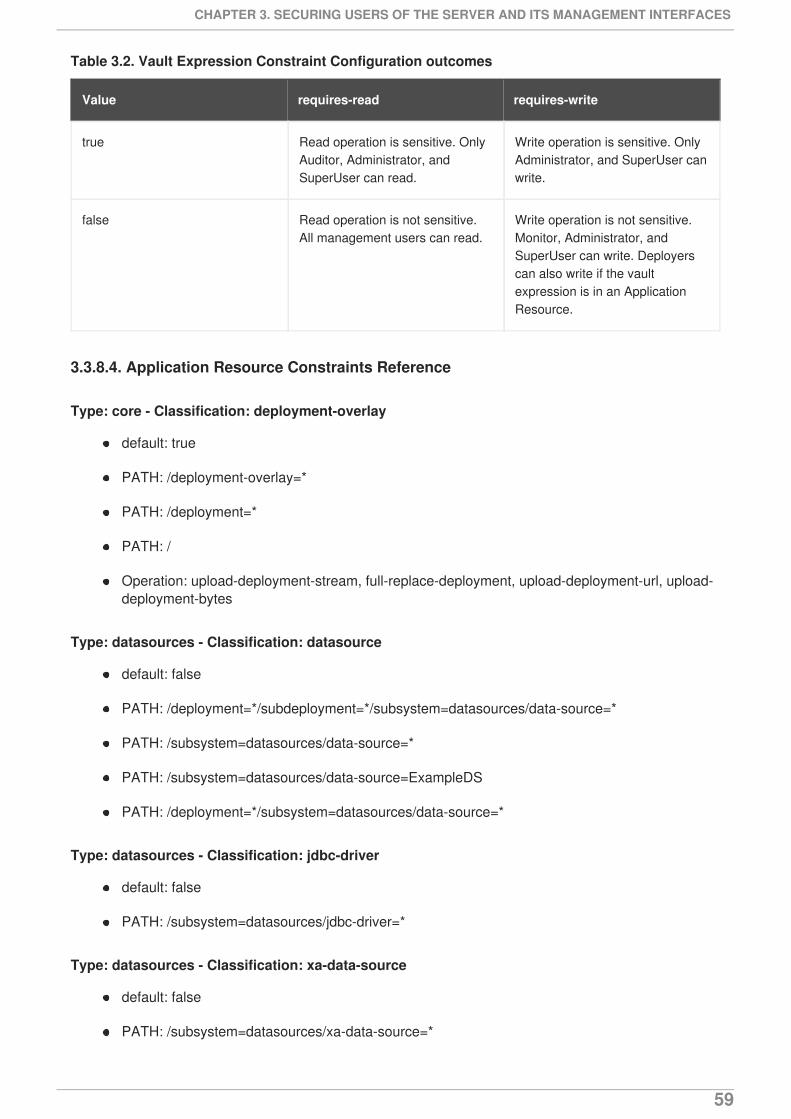
Table 3.2. Vault Expression Constraint Configuration outcomes
Value requires-read requires-write
true Read operation is sensitive. OnlyAuditor, Administrator, andSuperUser can read.
Write operation is sensitive. OnlyAdministrator, and SuperUser canwrite.
false Read operation is not sensitive.All management users can read.
Write operation is not sensitive.Monitor, Administrator, andSuperUser can write. Deployerscan also write if the vaultexpression is in an ApplicationResource.
3.3.8.4. Application Resource Constraints Reference
Type: core - Classification: deployment-overlay
default: true
PATH: /deployment-overlay=*
PATH: /deployment=*
PATH: /
Operation: upload-deployment-stream, full-replace-deployment, upload-deployment-url, upload-deployment-bytes
Type: datasources - Classification: datasource
default: false
PATH: /deployment=*/subdeployment=*/subsystem=datasources/data-source=*
PATH: /subsystem=datasources/data-source=*
PATH: /subsystem=datasources/data-source=ExampleDS
PATH: /deployment=*/subsystem=datasources/data-source=*
Type: datasources - Classification: jdbc-driver
default: false
PATH: /subsystem=datasources/jdbc-driver=*
Type: datasources - Classification: xa-data-source
default: false
PATH: /subsystem=datasources/xa-data-source=*
CHAPTER 3. SECURING USERS OF THE SERVER AND ITS MANAGEMENT INTERFACES
59
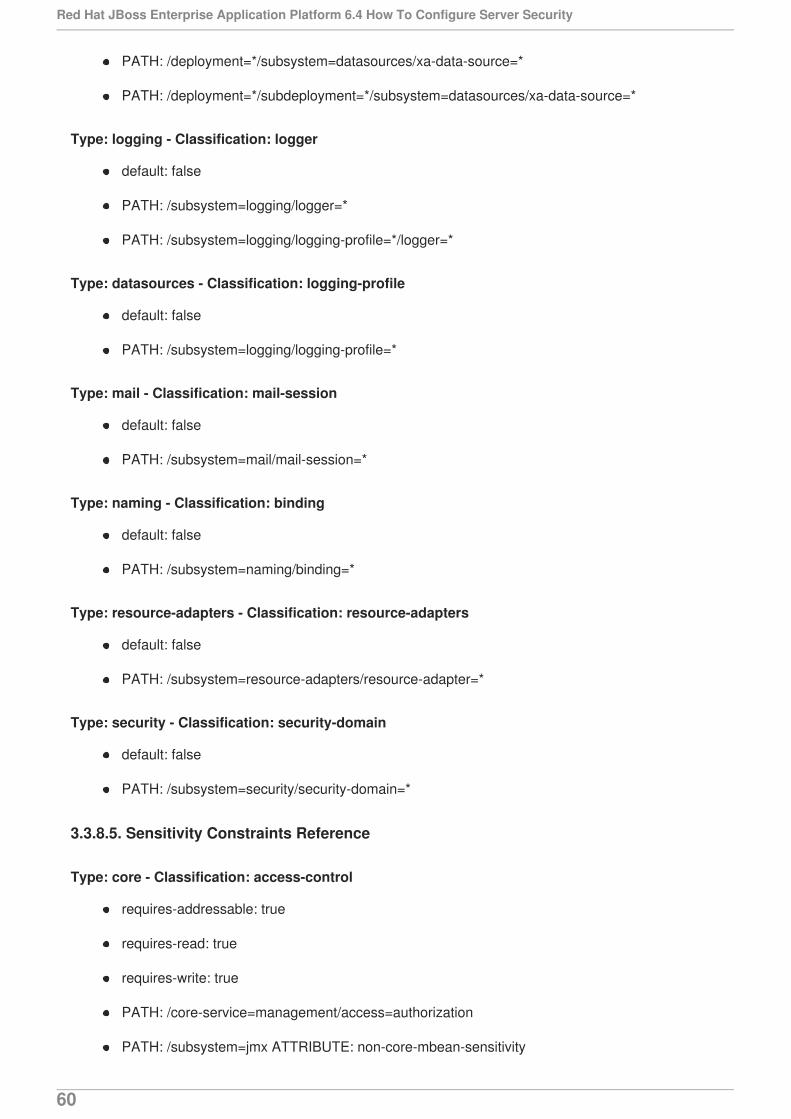
PATH: /deployment=*/subsystem=datasources/xa-data-source=*
PATH: /deployment=*/subdeployment=*/subsystem=datasources/xa-data-source=*
Type: logging - Classification: logger
default: false
PATH: /subsystem=logging/logger=*
PATH: /subsystem=logging/logging-profile=*/logger=*
Type: datasources - Classification: logging-profile
default: false
PATH: /subsystem=logging/logging-profile=*
Type: mail - Classification: mail-session
default: false
PATH: /subsystem=mail/mail-session=*
Type: naming - Classification: binding
default: false
PATH: /subsystem=naming/binding=*
Type: resource-adapters - Classification: resource-adapters
default: false
PATH: /subsystem=resource-adapters/resource-adapter=*
Type: security - Classification: security-domain
default: false
PATH: /subsystem=security/security-domain=*
3.3.8.5. Sensitivity Constraints Reference
Type: core - Classification: access-control
requires-addressable: true
requires-read: true
requires-write: true
PATH: /core-service=management/access=authorization
PATH: /subsystem=jmx ATTRIBUTE: non-core-mbean-sensitivity
Red Hat JBoss Enterprise Application Platform 6.4 How To Configure Server Security
60
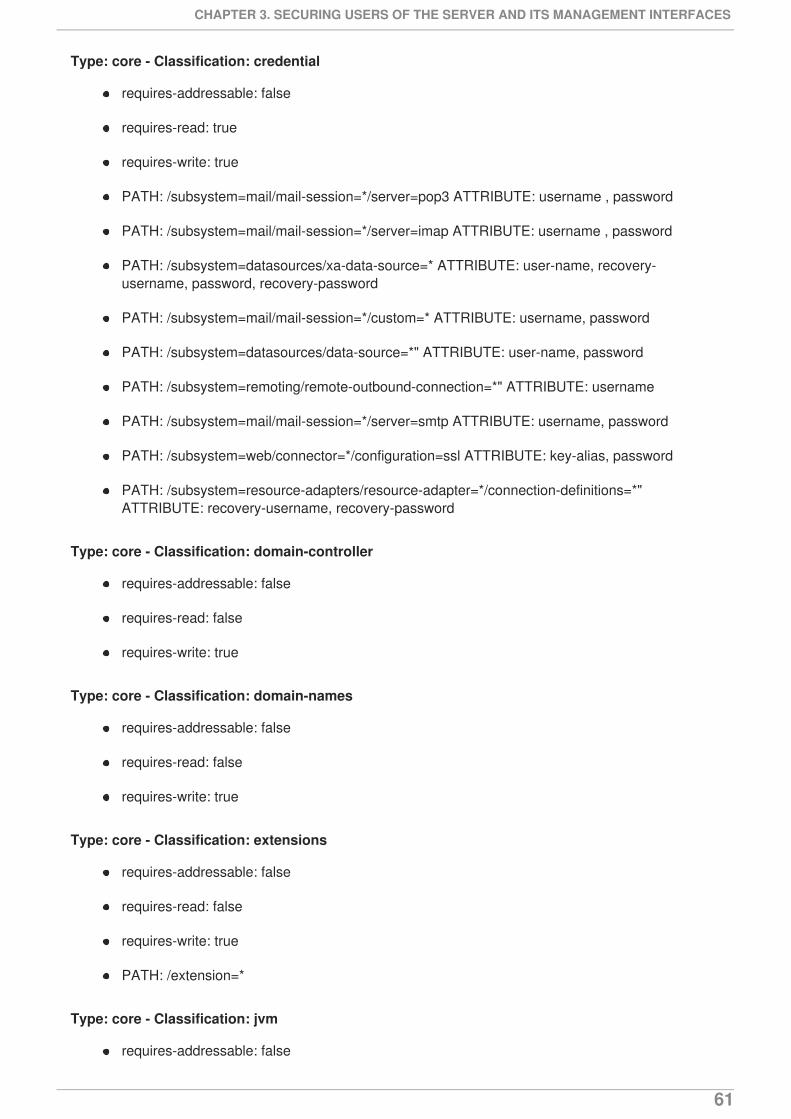
Type: core - Classification: credential
requires-addressable: false
requires-read: true
requires-write: true
PATH: /subsystem=mail/mail-session=*/server=pop3 ATTRIBUTE: username , password
PATH: /subsystem=mail/mail-session=*/server=imap ATTRIBUTE: username , password
PATH: /subsystem=datasources/xa-data-source=* ATTRIBUTE: user-name, recovery-username, password, recovery-password
PATH: /subsystem=mail/mail-session=*/custom=* ATTRIBUTE: username, password
PATH: /subsystem=datasources/data-source=*" ATTRIBUTE: user-name, password
PATH: /subsystem=remoting/remote-outbound-connection=*" ATTRIBUTE: username
PATH: /subsystem=mail/mail-session=*/server=smtp ATTRIBUTE: username, password
PATH: /subsystem=web/connector=*/configuration=ssl ATTRIBUTE: key-alias, password
PATH: /subsystem=resource-adapters/resource-adapter=*/connection-definitions=*"ATTRIBUTE: recovery-username, recovery-password
Type: core - Classification: domain-controller
requires-addressable: false
requires-read: false
requires-write: true
Type: core - Classification: domain-names
requires-addressable: false
requires-read: false
requires-write: true
Type: core - Classification: extensions
requires-addressable: false
requires-read: false
requires-write: true
PATH: /extension=*
Type: core - Classification: jvm
requires-addressable: false
CHAPTER 3. SECURING USERS OF THE SERVER AND ITS MANAGEMENT INTERFACES
61
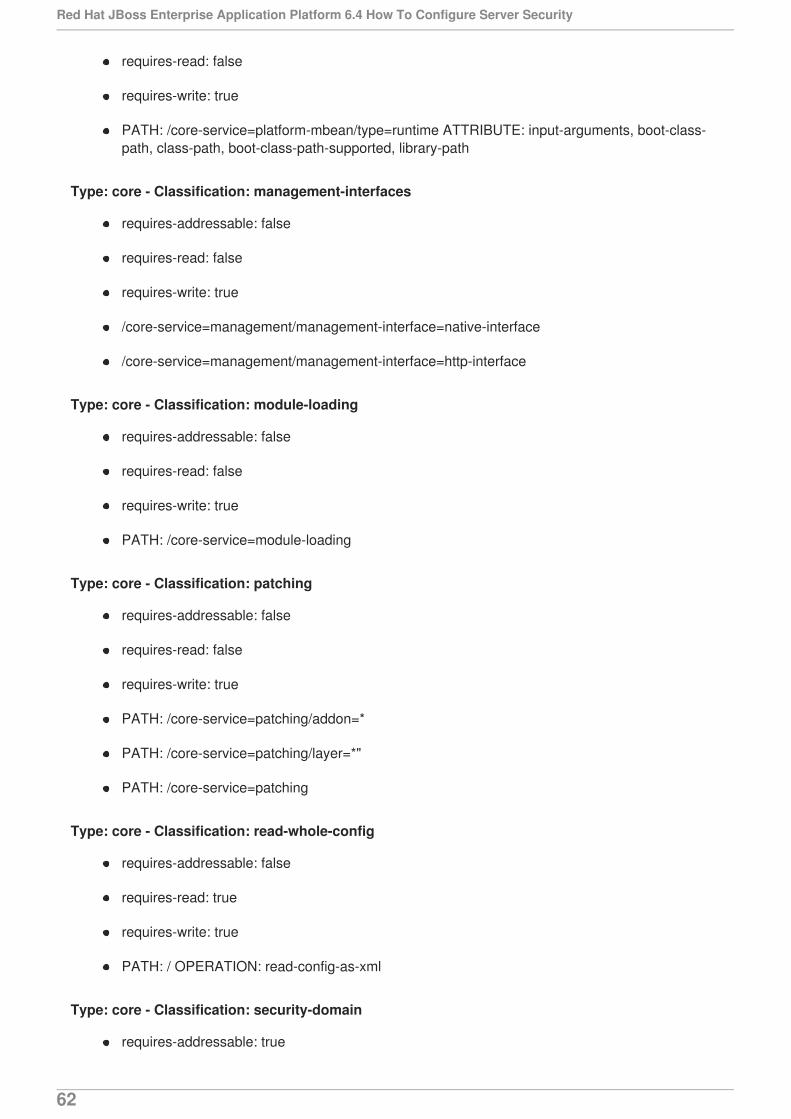
requires-read: false
requires-write: true
PATH: /core-service=platform-mbean/type=runtime ATTRIBUTE: input-arguments, boot-class-path, class-path, boot-class-path-supported, library-path
Type: core - Classification: management-interfaces
requires-addressable: false
requires-read: false
requires-write: true
/core-service=management/management-interface=native-interface
/core-service=management/management-interface=http-interface
Type: core - Classification: module-loading
requires-addressable: false
requires-read: false
requires-write: true
PATH: /core-service=module-loading
Type: core - Classification: patching
requires-addressable: false
requires-read: false
requires-write: true
PATH: /core-service=patching/addon=*
PATH: /core-service=patching/layer=*"
PATH: /core-service=patching
Type: core - Classification: read-whole-config
requires-addressable: false
requires-read: true
requires-write: true
PATH: / OPERATION: read-config-as-xml
Type: core - Classification: security-domain
requires-addressable: true
Red Hat JBoss Enterprise Application Platform 6.4 How To Configure Server Security
62
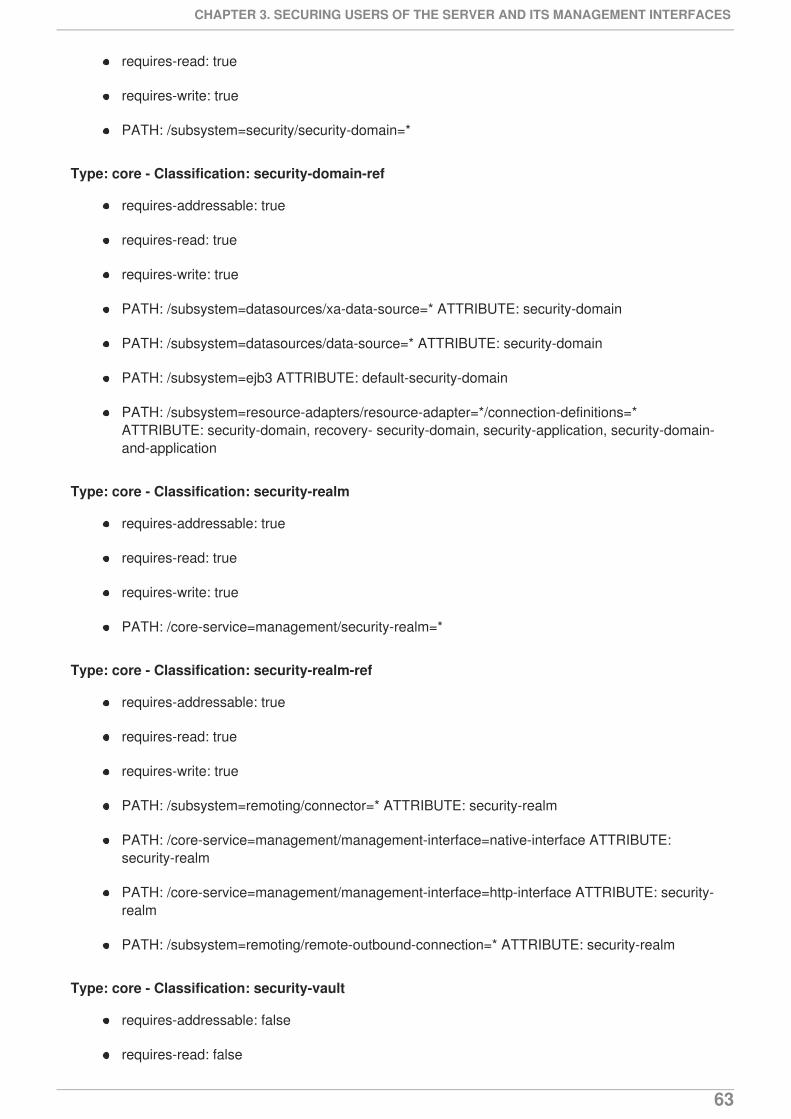
requires-read: true
requires-write: true
PATH: /subsystem=security/security-domain=*
Type: core - Classification: security-domain-ref
requires-addressable: true
requires-read: true
requires-write: true
PATH: /subsystem=datasources/xa-data-source=* ATTRIBUTE: security-domain
PATH: /subsystem=datasources/data-source=* ATTRIBUTE: security-domain
PATH: /subsystem=ejb3 ATTRIBUTE: default-security-domain
PATH: /subsystem=resource-adapters/resource-adapter=*/connection-definitions=*ATTRIBUTE: security-domain, recovery- security-domain, security-application, security-domain-and-application
Type: core - Classification: security-realm
requires-addressable: true
requires-read: true
requires-write: true
PATH: /core-service=management/security-realm=*
Type: core - Classification: security-realm-ref
requires-addressable: true
requires-read: true
requires-write: true
PATH: /subsystem=remoting/connector=* ATTRIBUTE: security-realm
PATH: /core-service=management/management-interface=native-interface ATTRIBUTE:security-realm
PATH: /core-service=management/management-interface=http-interface ATTRIBUTE: security-realm
PATH: /subsystem=remoting/remote-outbound-connection=* ATTRIBUTE: security-realm
Type: core - Classification: security-vault
requires-addressable: false
requires-read: false
CHAPTER 3. SECURING USERS OF THE SERVER AND ITS MANAGEMENT INTERFACES
63
requires-write: true
PATH: /core-service=vault
Type: core - Classification: service-container
requires-addressable: false
requires-read: false
requires-write: true
PATH: /core-service=service-container
Type: core - Classification: snapshots
requires-addressable: false
requires-read: false
requires-write: false
PATH: / ATTRIBUTE: take-snapshot, list-snapshots, delete-snapshot
Type: core - Classification: socket-binding-ref
requires-addressable: false
requires-read: false
requires-write: false
PATH: /subsystem=mail/mail-session=*/server=pop3 ATTRIBUTE: outbound-socket-binding-ref
PATH: /subsystem=mail/mail-session=*/server=imap ATTRIBUTE: outbound-socket-binding-ref
PATH: /subsystem=remoting/connector=* ATTRIBUTE: socket-binding
PATH: /subsystem=web/connector=* ATTRIBUTE: socket-binding
PATH: /subsystem=remoting/local-outbound-connection=* ATTRIBUTE: outbound-socket-binding-ref
PATH: /socket-binding-group=*/local-destination-outbound-socket-binding=* ATTRIBUTE:socket-binding-ref
PATH: /subsystem=remoting/remote-outbound-connection=* ATTRIBUTE: outbound-socket-binding-ref
PATH: /subsystem=mail/mail-session=*/server=smtp ATTRIBUTE: outbound-socket-binding-ref
PATH: /subsystem=transactions ATTRIBUTE: process-id-socket-binding, status-socket-binding,socket-binding
Type: core - Classification: socket-config
requires-addressable: false
Red Hat JBoss Enterprise Application Platform 6.4 How To Configure Server Security
64
requires-read: false
requires-write: true
PATH: /interface=* OPERATION: resolve-internet-address
PATH: /core-service=management/management-interface=native-interface ATTRIBUTE: port,interface, socket-binding
PATH: /socket-binding-group=*
PATH: /core-service=management/management-interface=http-interface ATTRIBUTE: port,secure-port, interface, secure-socket-binding, socket-binding
PATH: / OPERATION: resolve-internet-address
PATH: /subsystem=transactions ATTRIBUTE: process-id-socket-max-ports
Type: core - Classification: system-property
requires-addressable: false
requires-read: false
requires-write: true
PATH: /core-service=platform-mbean/type=runtime ATTRIBUTE: system-properties
PATH: /system-property=*
PATH: / OPERATION: resolve-expression
Type: datasources - Classification: data-source-security
requires-addressable: false
requires-read: true
requires-write: true
PATH: /subsystem=datasources/xa-data-source=* ATTRIBUTE: user-name, security-domain,password
PATH: /subsystem=datasources/data-source=* ATTRIBUTE: user-name, security-domain,password
Type: jdr - Classification: jdr
requires-addressable: false
requires-read: false
requires-write: true
PATH: /subsystem=jdr OPERATION: generate-jdr-report
Type: jmx - Classification: jmx
CHAPTER 3. SECURING USERS OF THE SERVER AND ITS MANAGEMENT INTERFACES
65
Type: jmx - Classification: jmxrequires-addressable: false
requires-read: false
requires-write: true
PATH: /subsystem=jmx
Type: mail - Classification: mail-server-security
requires-addressable: false
requires-read: false
requires-write: true
PATH: /subsystem=mail/mail-session=*/server=pop3 ATTRIBUTE: username, tls, ssl, password
PATH: /subsystem=mail/mail-session=*/server=imap ATTRIBUTE: username, tls, ssl, password
PATH: /subsystem=mail/mail-session=/custom= ATTRIBUTE: username, tls, ssl, password
PATH: /subsystem=mail/mail-session=*/server=smtp ATTRIBUTE: username, tls, ssl, password
Type: naming - Classification: jndi-view
requires-addressable: false
requires-read: true
requires-write: true
PATH: /subsystem=naming OPERATION: jndi-view
Type: naming - Classification: naming-binding
requires-addressable: false
requires-read: false
requires-write: false
PATH: /subsystem=naming/binding=*
Type: remoting - Classification: remoting-security
requires-addressable: false
requires-read: true
requires-write: true
PATH: /subsystem=remoting/connector=* ATTRIBUTE: authentication-provider, security-realm
PATH: /subsystem=remoting/remote-outbound-connection=* ATTRIBUTE: username, security-realm
Red Hat JBoss Enterprise Application Platform 6.4 How To Configure Server Security
66
PATH: /subsystem=remoting/connector=*/security=sasl
Type: resource-adapters - Classification: resource-adapter-security
requires-addressable: false
requires-read: true
requires-write: true
PATH: /subsystem=resource-adapters/resource-adapter=*/connection-definitions=*ATTRIBUTE: security-domain, recovery-username, recovery-security-domain, security-application, security-domain-and-application, recovery-password
Type: security - Classification: misc-security
requires-addressable: false
requires-read: true
requires-write: true
PATH: /subsystem=security ATTRIBUTE: deep-copy-subject-mode
Type: web - Classification: web-access-log
requires-addressable: false
requires-read: false
requires-write: false
PATH: /subsystem=web/virtual-server=*/configuration=access-log
Type: web - Classification: web-connector
requires-addressable: false
requires-read: false
requires-write: false
PATH: /subsystem=web/connector=*
Type: web - Classification: web-ssl
requires-addressable: false
requires-read: true
requires-write: true
PATH: /subsystem=web/connector=*/configuration=ssl
Type: web - Classification: web-sso
CHAPTER 3. SECURING USERS OF THE SERVER AND ITS MANAGEMENT INTERFACES
67
requires-addressable: false
requires-read: true
requires-write: true
PATH: /subsystem=web/virtual-server=*/configuration=sso
Type: web - Classification: web-valve
requires-addressable: false
requires-read: false
requires-write: false
PATH: /subsystem=web/valve=*
Red Hat JBoss Enterprise Application Platform 6.4 How To Configure Server Security
68