Embed Size (px)
Citation preview

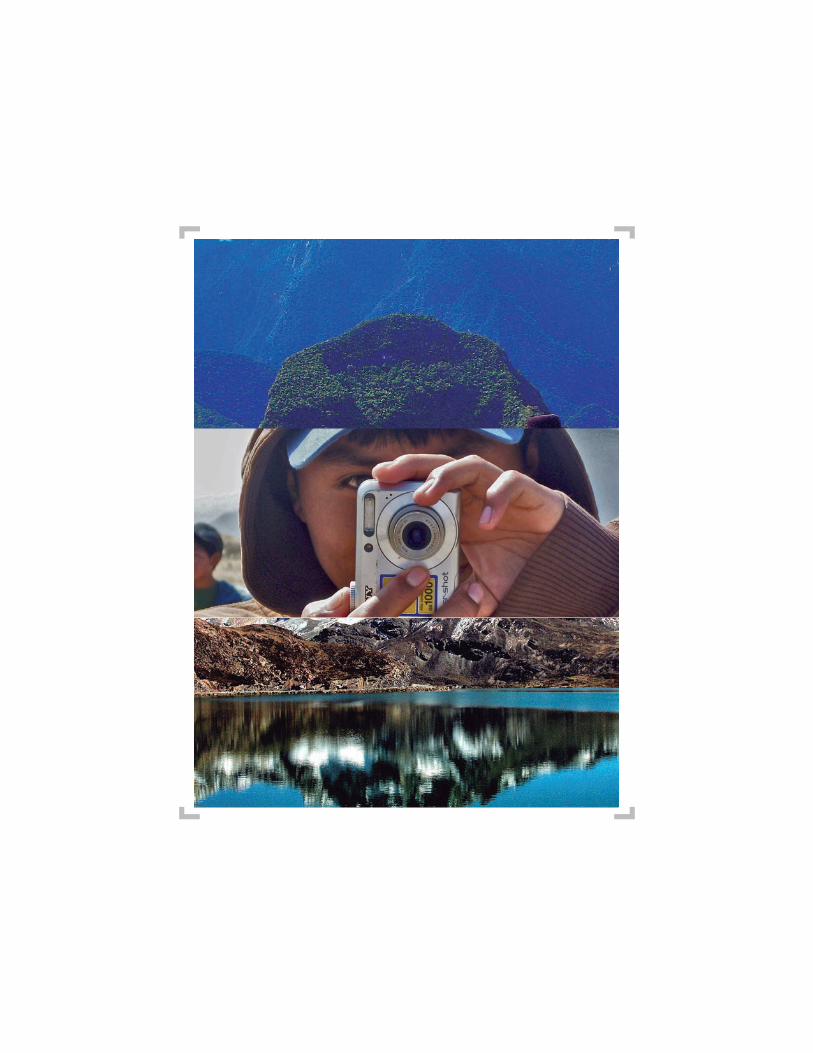
Ojos Propios: Photography
by and for the People
A Curriculum Guide


Ojos Propios: Photography by and for the People
A Curriculum Guide
Experience | S
tudy | Create | R
efine | Present | R
eflect 7
Ojos Propios: Photography by
and for the PeopleParticipatory photography as a tool for K-12 teachers to infuse Latin American
and Caribbean history and culture in the classroom
The Institute of Latin American Studies (ILAS) has commissioned the production of this Participatory Photography Guide to serve as a resource for K-12 teachers, with the objective of encouraging and facilitating the use of photography in New York City (NYC) to include Latin American and Caribbean history and culture in the classroom. The ILAS K-12 Outreach Program strives to enhance the professional capacity of teachers in a multicultural New York City environment and promote the inclusion of Latin American and Caribbean history and culture in their classrooms and students’ daily lives. The program draws on the expertise and support of faculty and students across Columbia University to offer educators resources and opportunities to learn about creative ways of incorporating Latin American and Caribbean history and culture into their curriculum.

Experience | S
tudy | Create | R
efine | Present | R
eflect 9
Experience | S
tudy | Create | R
efine | Present | R
eflect 8
Production Institute of Latin American Studies, Columbia University with the collaboration of Urban Arts Partnership
Designer Sandy Chang www.sandychangdesign.com
Institute of Latin American Studies Maritza E. Colón-Fermín, Esteban Andrade, Lucía Caumont-Stipanicic, and Maried Rivera Nieves
Copyright © 2017 by Institute of Latin American Studies, Columbia University
INST
ITU
TE O
F LATIN AMERICAN ST
UD
IES
C
OLU M B I A U N I V ERSITY
ILASEST. 1962
Introduction ...........................................................................10 – 11
Ojos Propios ..........................................................................12 – 13
Unit One: Portrait Is Place .............................................................14 Lesson 1: Reading Photography ............................................15 –19 Lesson 2: Building a Historical Portrait, Part 1 .......................20 – 23 Lesson 3: Building a Historical Portrait, Part 2 .......................24 – 26 Lesson 4: Building a Current Portrait ....................................27 – 29 Going Beyond ...............................................................................30
Unit Two: Food Is Story .................................................................31 Lesson 1: Food Story One .....................................................32 – 35 Lesson 2: Food Story Two .....................................................36 – 38 Lesson 3: Solterito Story .......................................................39 – 41 Pushing Further ............................................................................42
Unit Three: Environment Is Everything ..........................................43 Lesson 1: Seeing the World ..................................................44 – 49 Lesson 2: Landscape as Portrait ............................................50 – 54 Lesson 3: Landscape as Community .....................................55 – 56 Moving Forward ...........................................................................57
Resources ..............................................................................58 – 89
Credits ...................................................................................90 – 92
Contacts ........................................................................................93
Table of Contents
Experience | S
tudy | Create | R
efine | Present | R
eflect 11
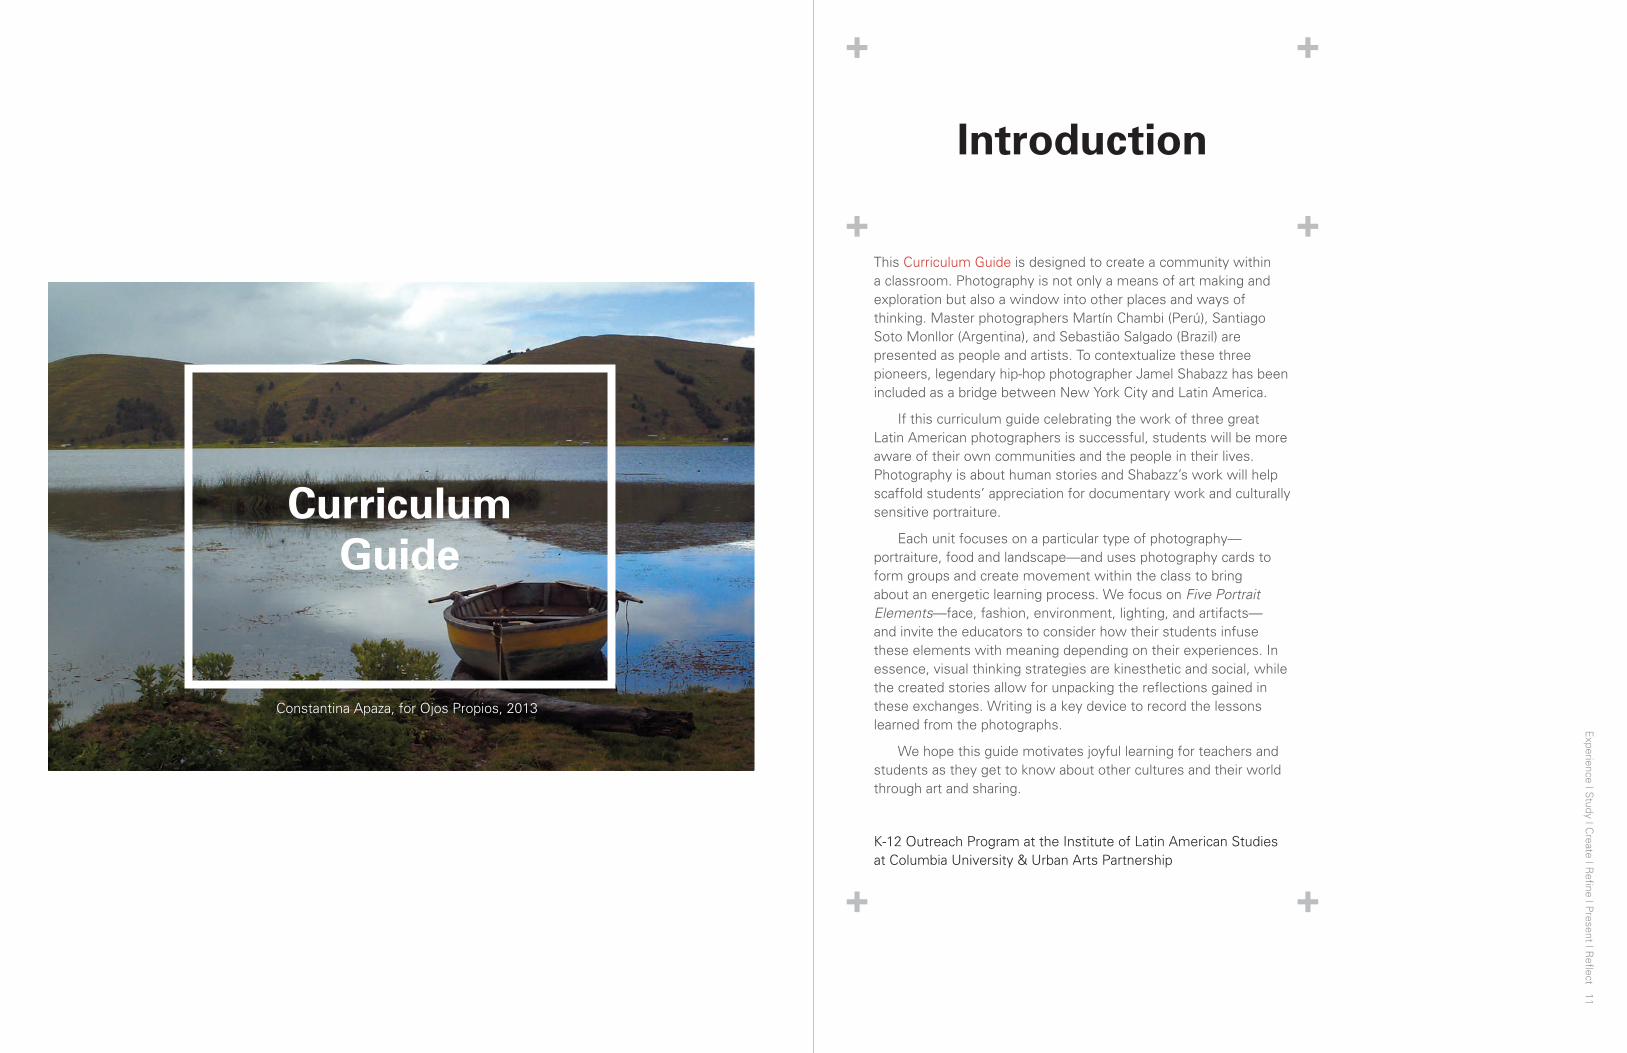
Curriculum Guide
Constantina Apaza, for Ojos Propios, 2013
Introduction
This Curriculum Guide is designed to create a community within a classroom. Photography is not only a means of art making and exploration but also a window into other places and ways of thinking. Master photographers Martín Chambi (Perú), Santiago Soto Monllor (Argentina), and Sebastião Salgado (Brazil) are presented as people and artists. To contextualize these three pioneers, legendary hip-hop photographer Jamel Shabazz has been included as a bridge between New York City and Latin America.
If this curriculum guide celebrating the work of three great Latin American photographers is successful, students will be more aware of their own communities and the people in their lives. Photography is about human stories and Shabazz’s work will help scaffold students’ appreciation for documentary work and culturally sensitive portraiture.
Each unit focuses on a particular type of photography—portraiture, food and landscape—and uses photography cards to form groups and create movement within the class to bring about an energetic learning process. We focus on Five Portrait Elements—face, fashion, environment, lighting, and artifacts—and invite the educators to consider how their students infuse these elements with meaning depending on their experiences. In essence, visual thinking strategies are kinesthetic and social, while the created stories allow for unpacking the reflections gained in these exchanges. Writing is a key device to record the lessons learned from the photographs.
We hope this guide motivates joyful learning for teachers and students as they get to know about other cultures and their world through art and sharing.
K-12 Outreach Program at the Institute of Latin American Studies at Columbia University & Urban Arts Partnership

Experience | S
tudy | Create | R
efine | Present | R
eflect 13
Experience | S
tudy | Create | R
efine | Present | R
eflect 12
Ojos Propios can be translated as through their own eyes. Peruvian artist
Andrés Longhi created this photographic project by which peoples from a
variety of origins and ages engage in photography by
and for the people.
Kevin Guevara, for Ojos Propios, 2010
In November 2015, Andrés Longhi and his team were in residence at the Institute of Latin American Studies at Columbia University, where they exhibited a selection of their work, and conducted a workshop at the Columbia Secondary School MSE-M362.
Ojos Propios can be translated as through their own eyes. Peruvian artist Andrés Longhi created this photographic project in which individuals from a variety of origins and ages take photographs and create photography by and of the people. Longhi has provided cameras and instructions on the technical and artistic components of photography to children and adults in rural communities and underprivileged neighborhoods across Perú so that they can document their experiences through their own eyes to create the Self Portrait of a Nation, as the title of the project indicates. The result is a participatory process through which people learn from each other in an egalitarian arrangement and where photography becomes both personal expression and collective action. The sheer beauty and candor of the images validates Longhi’s democratic vision of art-making.
In Andrés Longhi’s words, “the aim of Ojos Propios is to find images of the daily lives of families and the quotidian activities undertaken in their intimate environments. We look at each image showing a small family history, which, together with others with the same level of registration, generate a series of photographs that tell the stories of organized social groups and, with them, the great national stories. From this concept, and to give sustainability to Ojos Propios, we have created the Self Portrait of a Nation project as a collection of photographs that constitute a bank of images made by Peruvian people, in which they tell their own life stories in each region of the country. These images, of general and free use, constitute an important tool for the promotion of the nation, its history, customs, culture, environment, and especially to reinforce identity. We follow an innovative educational process to deliver to the people—the protagonists of their own stories– an alternative and inclusive tool of communication that dispenses with language: the image. Our method is to use photography and images to generate a collective memory and use it to find the emotions that mobilize and generate processes of life in a harmonious, cohesive and inclusive society”.
Ojos Propios
Unit O
ne | Experience | S
tudy | Create | R
efine | Present | R
eflect 15
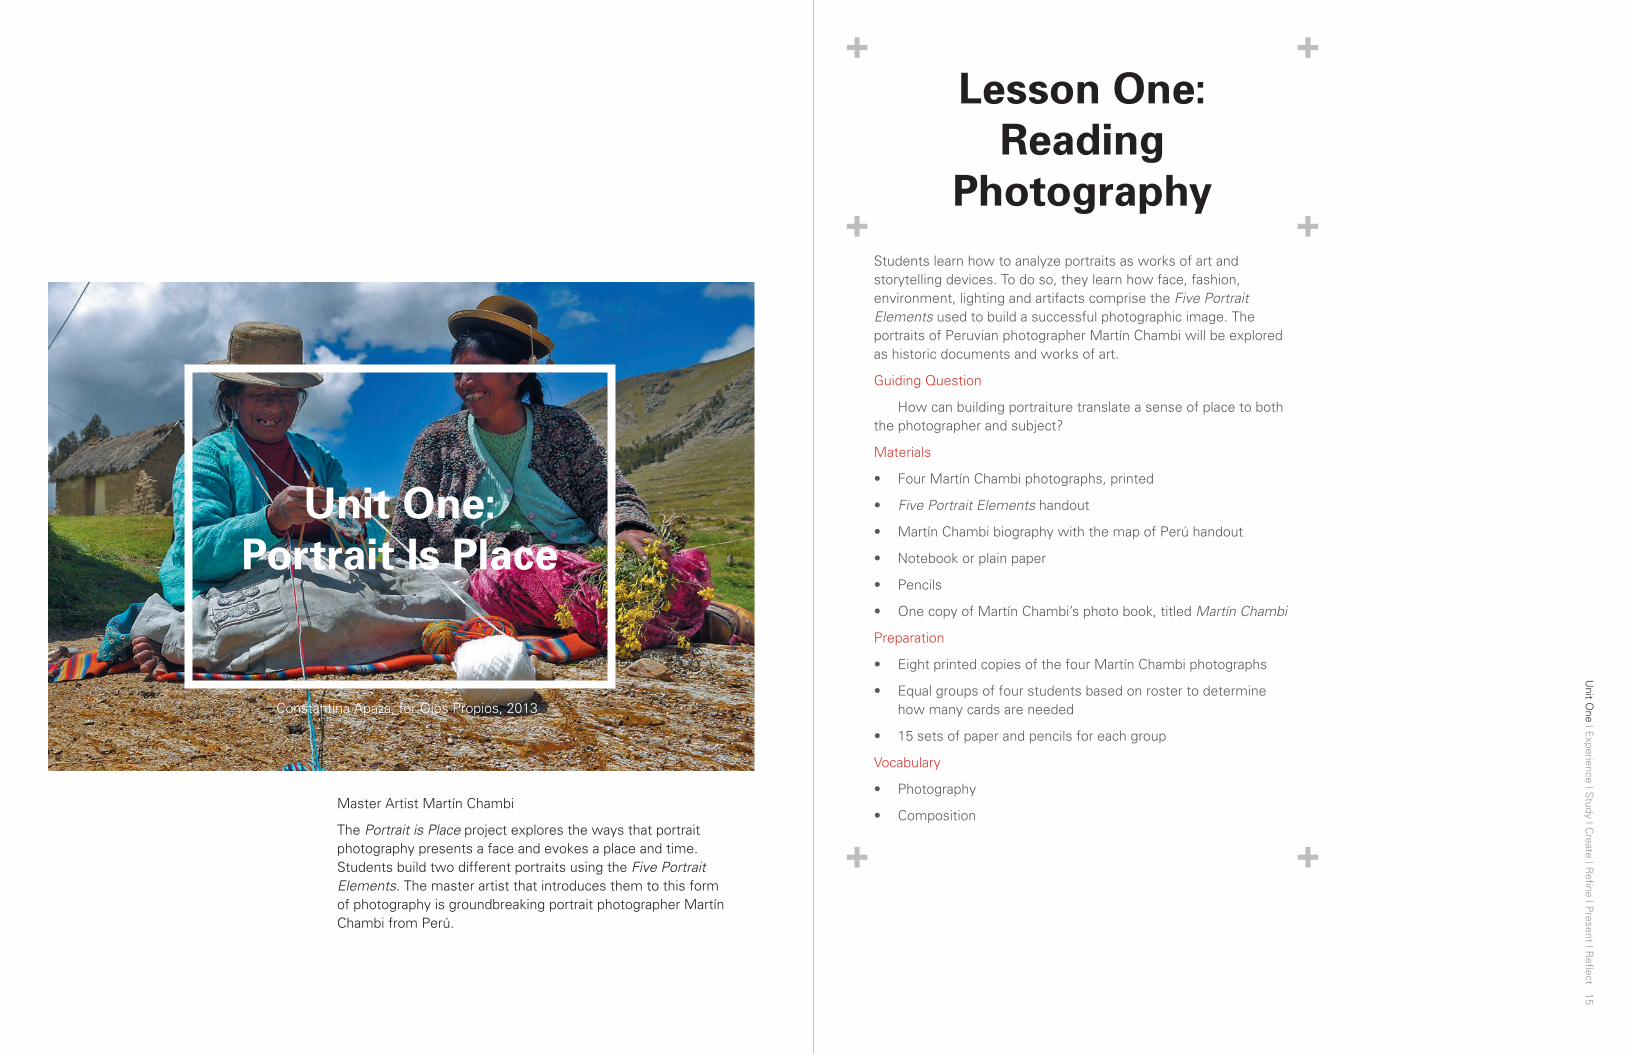
Unit One: Portrait Is Place
Master Artist Martín Chambi
The Portrait is Place project explores the ways that portrait photography presents a face and evokes a place and time. Students build two different portraits using the Five Portrait Elements. The master artist that introduces them to this form of photography is groundbreaking portrait photographer Martín Chambi from Perú.
Constantina Apaza, for Ojos Propios, 2013
Students learn how to analyze portraits as works of art and storytelling devices. To do so, they learn how face, fashion, environment, lighting and artifacts comprise the Five Portrait Elements used to build a successful photographic image. The portraits of Peruvian photographer Martín Chambi will be explored as historic documents and works of art.
Guiding Question
How can building portraiture translate a sense of place to both the photographer and subject?
Materials
• Four Martín Chambi photographs, printed
• Five Portrait Elements handout
• Martín Chambi biography with the map of Perú handout
• Notebook or plain paper
• Pencils
• One copy of Martín Chambi’s photo book, titled Martín Chambi
Preparation
• Eight printed copies of the four Martín Chambi photographs
• Equal groups of four students based on roster to determine how many cards are needed
• 15 sets of paper and pencils for each group
Vocabulary
• Photography
• Composition
Lesson One: Reading
Photography
Unit O
ne | Experience | S
tudy | Create | R
efine | Present | R
eflect 17
Unit O
ne | Experience | S
tudy | Create | R
efine | Present | R
eflect 16
Portrait Photography Outcomes + Standards Met (Participants Will Be Able to...)
• Gain awareness of photography composition
• Learn about Peruvian photographer Martín Chambi
• Develop language to analyze photography
• Develop stories based on photographs of Martín Chambi
• Develop a sense of how people and places come together in a photograph to make story
Part 1—Experience (20 minutes): Pass out the deck of shuffled photographs by Martín Chambi to students. Tell them not to turn the cards over until they are given further instructions. Let them know that on the count of three, they are to turn the cards over and find the people in the room with the same photograph as them. This will create four groups. Count down: 1-2-3.
• Once the class is in their four groups, give them five minutes to come up with a story based on the photograph card they all have.
• After five minutes, give each group one minute to share the story they created with the rest of the class.
• In the final ten minutes of this section, present each of the four Martín Chambi images and ask the class to share what they see in the images.
Part 2—Study (20 minutes): While students are still in their groups, prepare to introduce them to Martín Chambi, Perú and portrait photography.
• Show the Martín Chambi biography with the map of Perú. Ask students if they have ever heard of Martín Chambi or Perú.
• Introduce the word portrait by asking the class: Has anyone ever taken a self-portrait? As a group, define portrait, then give them the definition: Portrait photography or portraiture is photography of a person or group of people that displays the expression, personality and mood of the subject. Like other types of portraiture, the focus of the photograph is usually the person’s face, although the entire body and the background or context may be included.
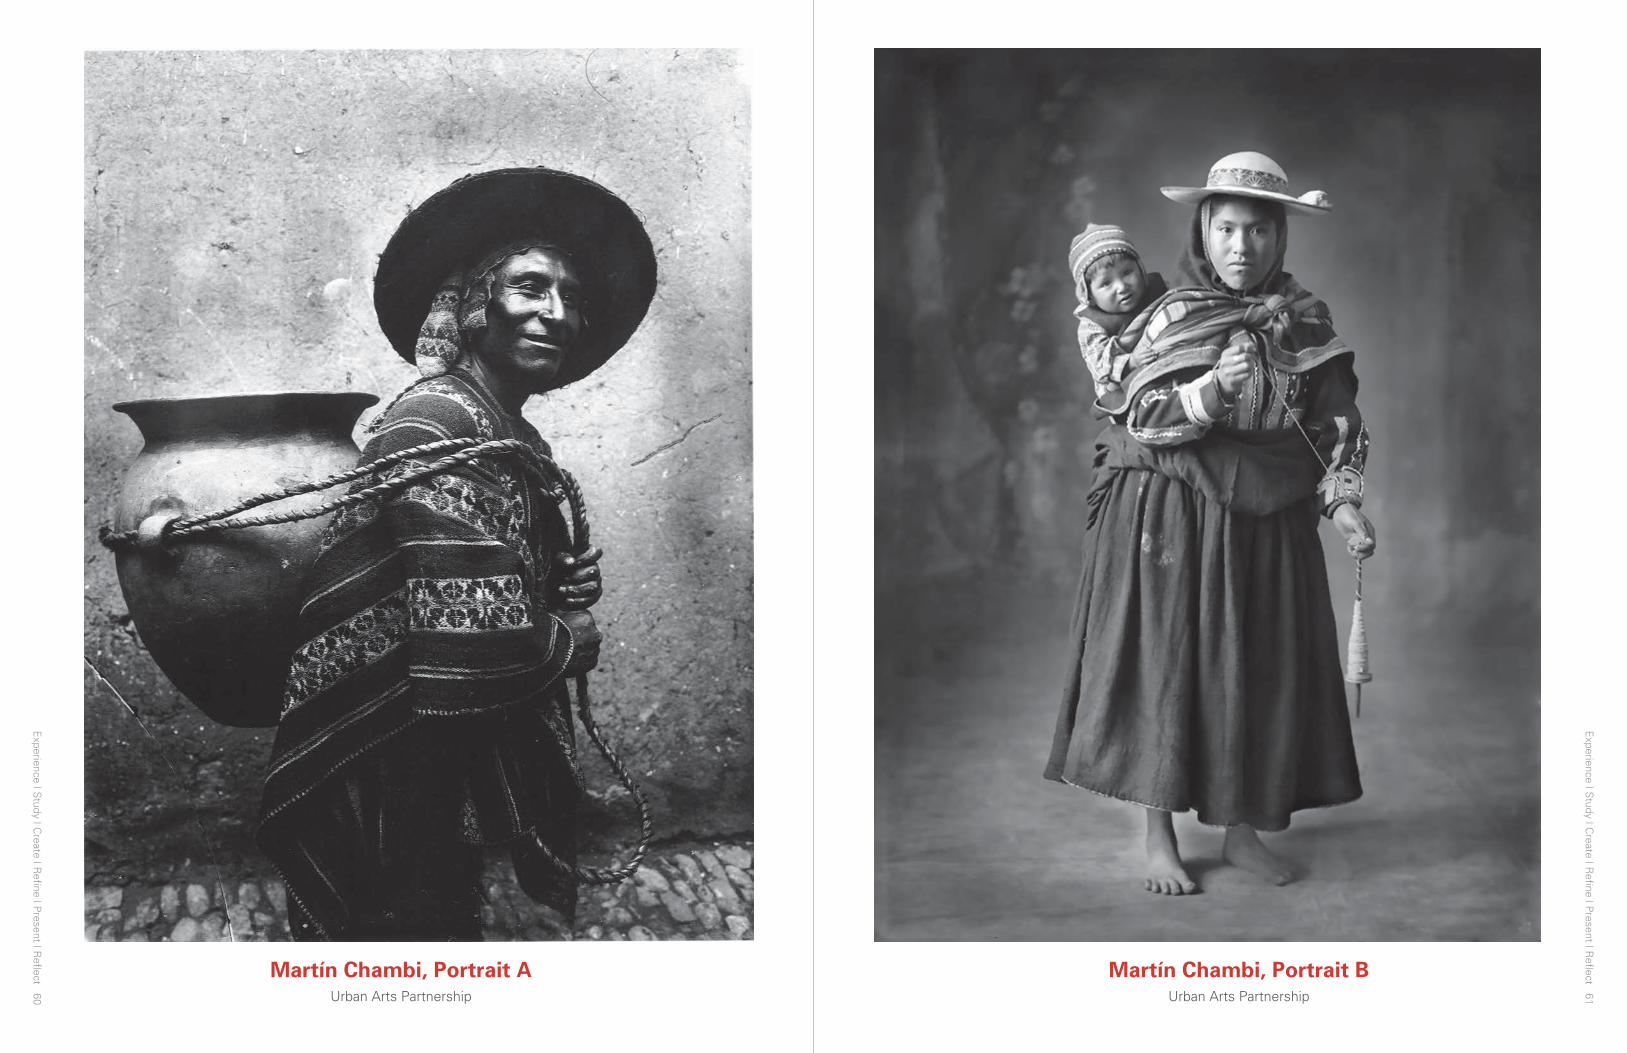
• Show students the Five Portrait Element document and decode Martín Chambi Portrait A (face, fashion, environment, lighting, and artifacts).
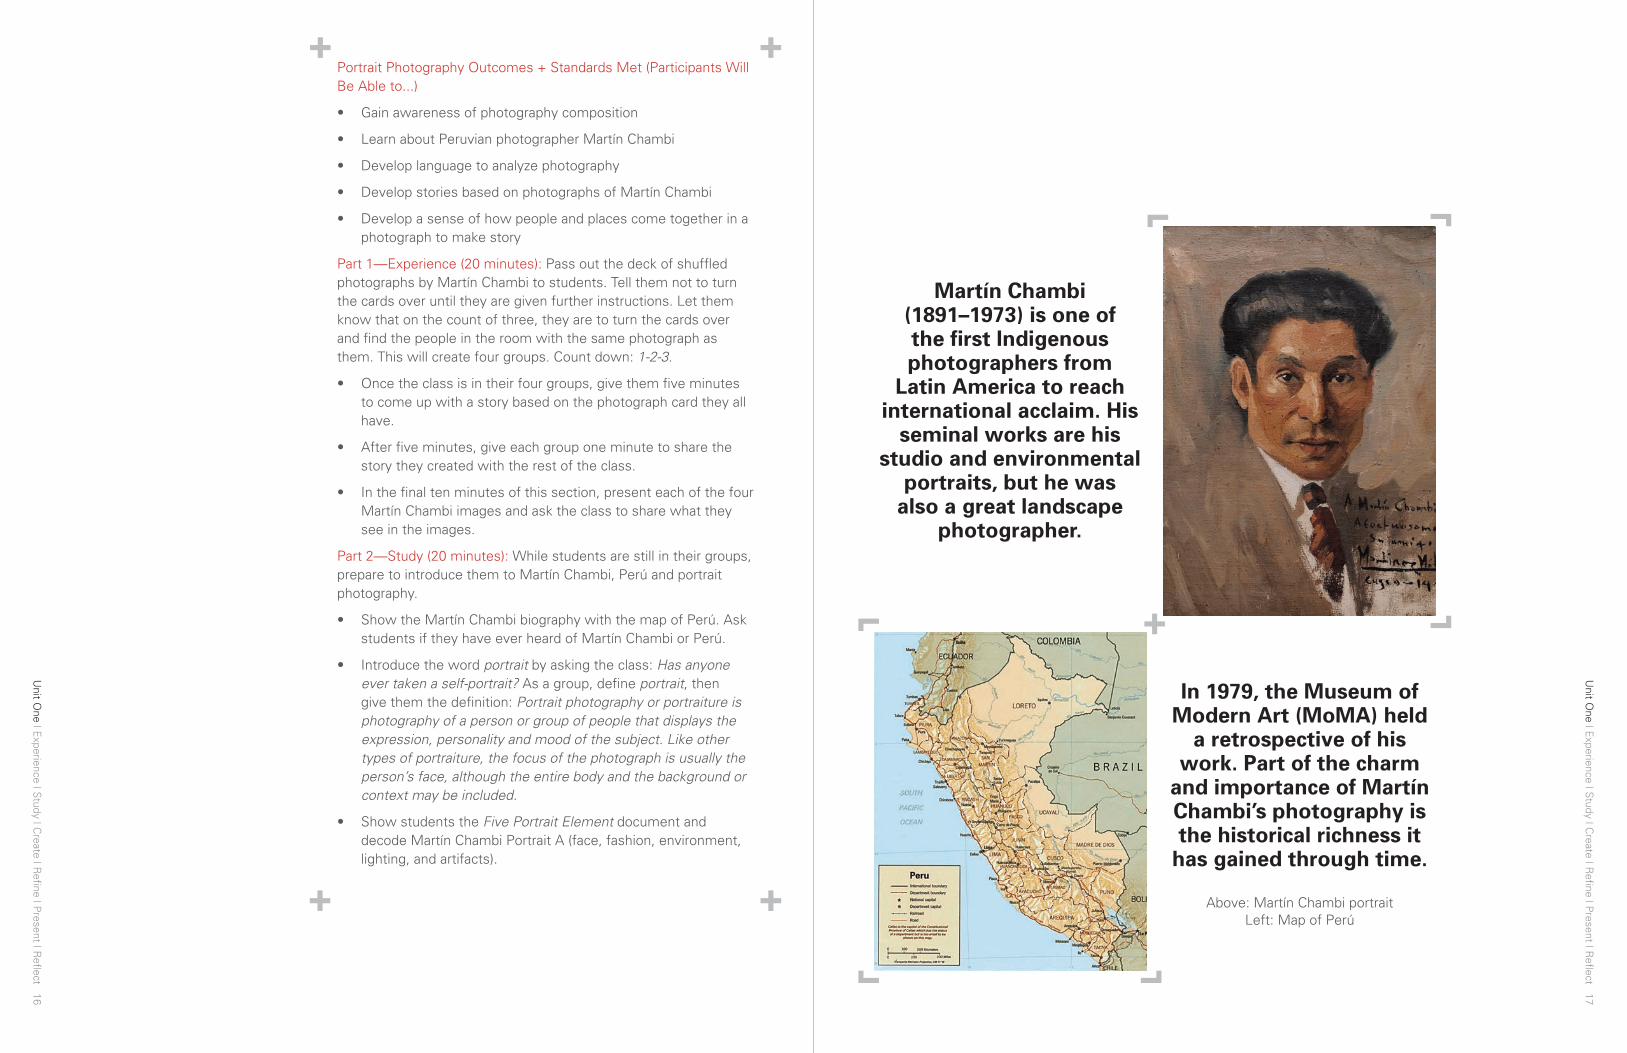
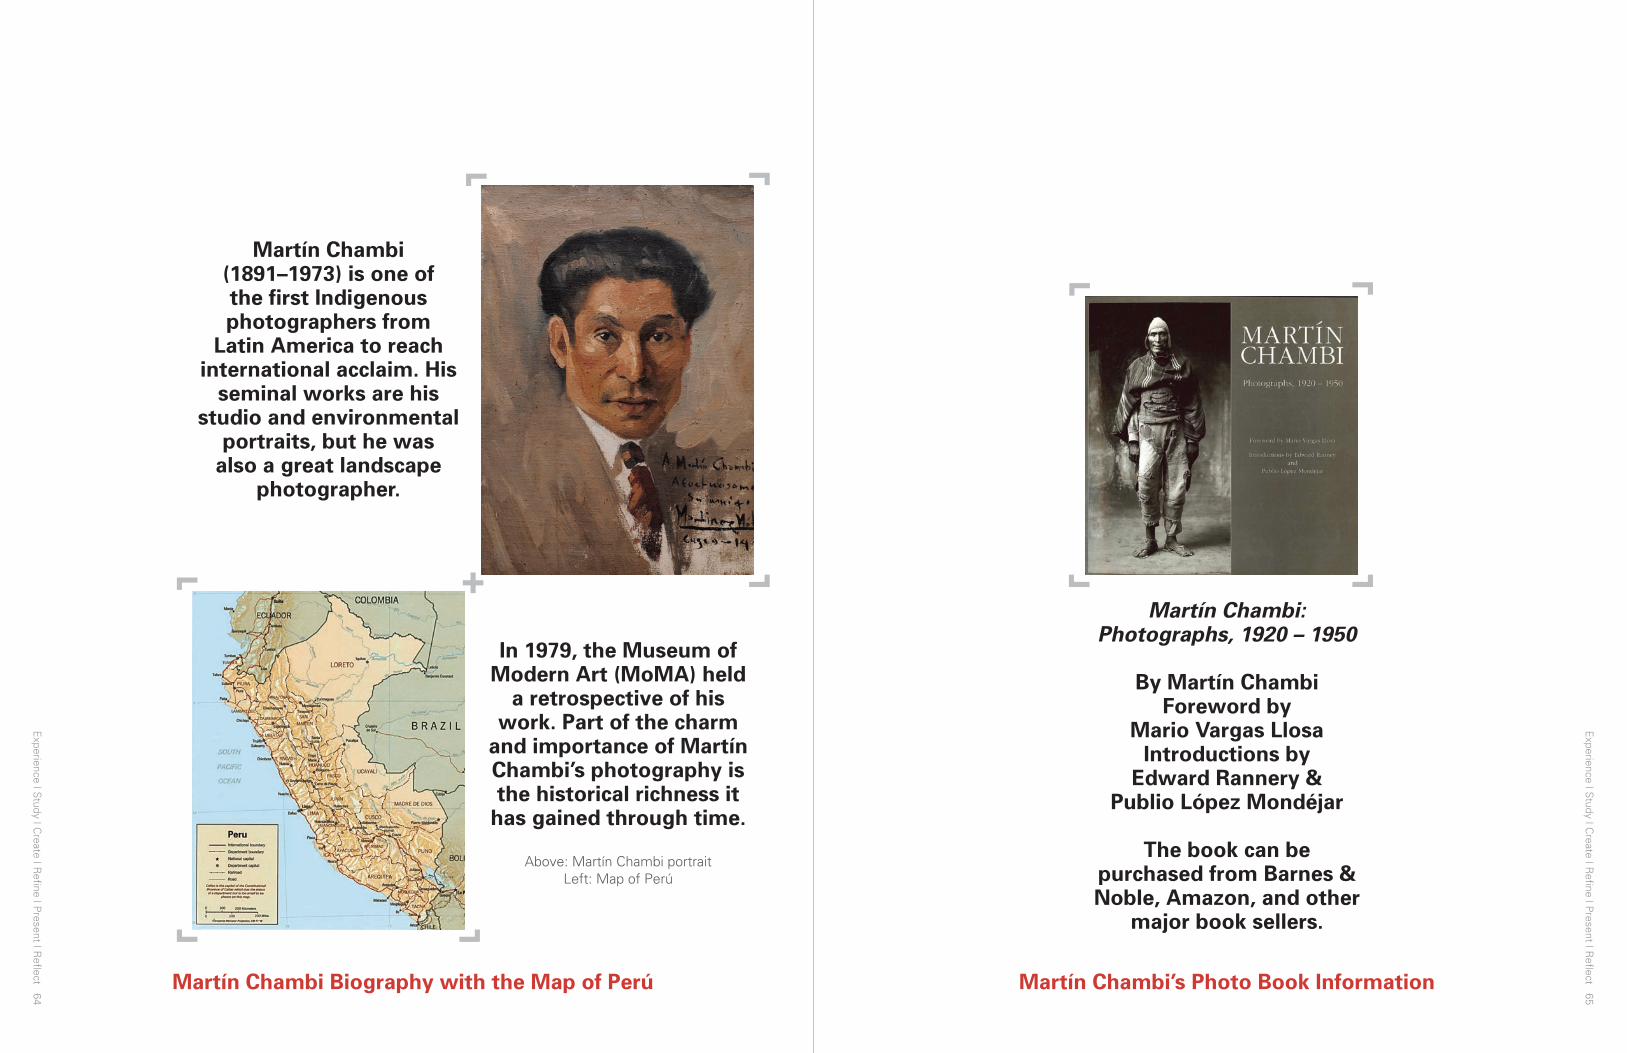
Martín Chambi (1891–1973) is one of the first Indigenous photographers from
Latin America to reach international acclaim. His
seminal works are his studio and environmental
portraits, but he was also a great landscape
photographer.
In 1979, the Museum of Modern Art (MoMA) held
a retrospective of his work. Part of the charm
and importance of Martín Chambi’s photography is the historical richness it
has gained through time.
Above: Martín Chambi portrait Left: Map of Perú
Unit O
ne | Experience | S
tudy | Create | R
efine | Present | R
eflect 19
Unit O
ne | Experience | S
tudy | Create | R
efine | Present | R
eflect 18
• Use the work of Martín Chambi (Wedding of Don Julio is a great example) to explain how portraits do not just show a face but also give a sense of time and place that tells a story. Who is Don Julio? What kind of day do you think he is having?
• Tell the students to prepare to work in pairs to create a story based on the portraits of Martín Chambi.
Part 3—Create & Refine (30 minutes): Tell students that they are now going to work in pairs and possibly one or more groups of three. When given the signal, they are to find another person in the room with a different portrait than the one they have. This will create, depending on your classroom, 10-15 groups of two. Count down: 1-2-3.
• Once students are in their groups, tell them they now have five minutes to create a story based on the two portraits. But first, give them an example of how you can create a detailed setting and a character description using one of Martín Chambi’s images. Count down: 1-2-3.
• Once students have had five minutes together on this task, pass out paper and pencil to each group.
• After ten minutes, ask students to stop. Let them know the next step is to work together to write their short story based on their portraits. Both students will work to create the story, with one person in the group as the designated writer and the other in charge of creating names for all the characters. Let the class know that each story has to have a beginning, middle, end and setting with details. This could be a good time to review the example provided earlier.
• Students have ten minutes to write their story.
• When the ten minutes are up, ask two groups to share their story with the class. Ask the class to pay close attention for beginning, middle, end and setting details. Allow for constructive feedback from the class and then give the remainder of the time for students to refine and complete their stories.
• If groups finish early, give them the Martín Chambi biography handout to read.
Part 4—Present & Reflect (20 minutes)
For the final 20 minutes of class, selected students stand up and share their stories. There should be enough time for 5-8 students to share. Another option would be for students to have a peer-to-peer review of their stories.
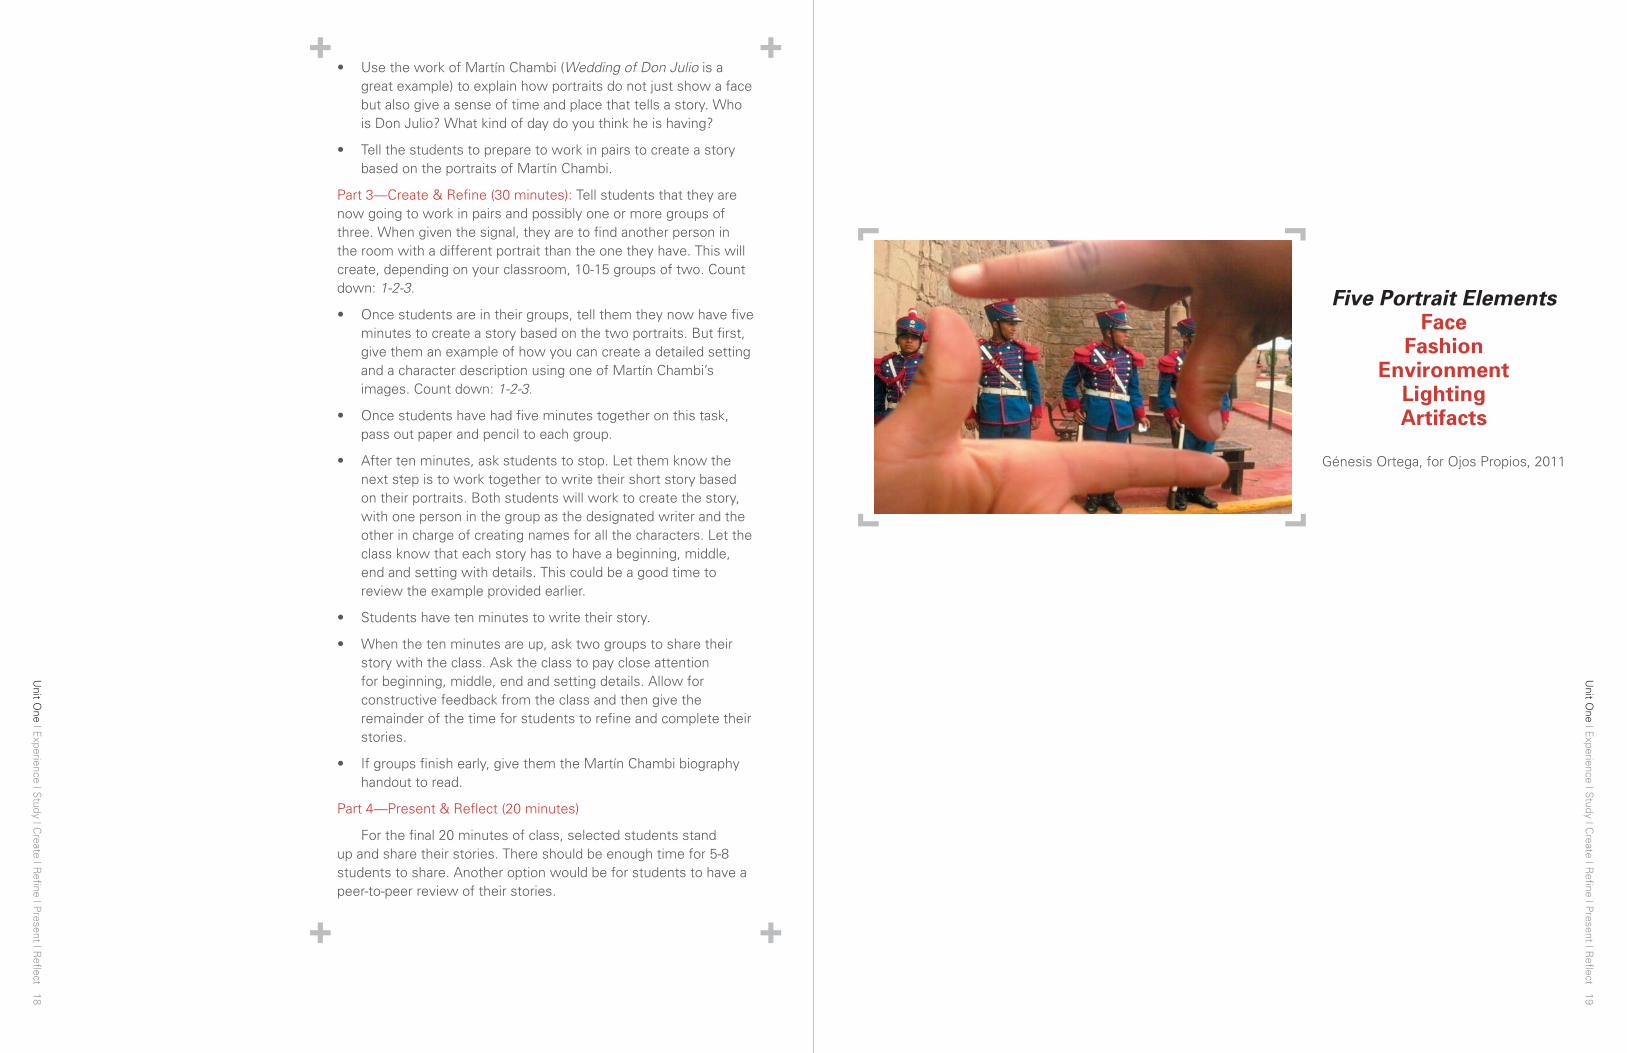
Five Portrait Elements Face
FashionEnvironment
LightingArtifacts
Génesis Ortega, for Ojos Propios, 2011
Unit O
ne | Experience | S
tudy | Create | R
efine | Present | R
eflect 21
Unit O
ne | Experience | S
tudy | Create | R
efine | Present | R
eflect 20
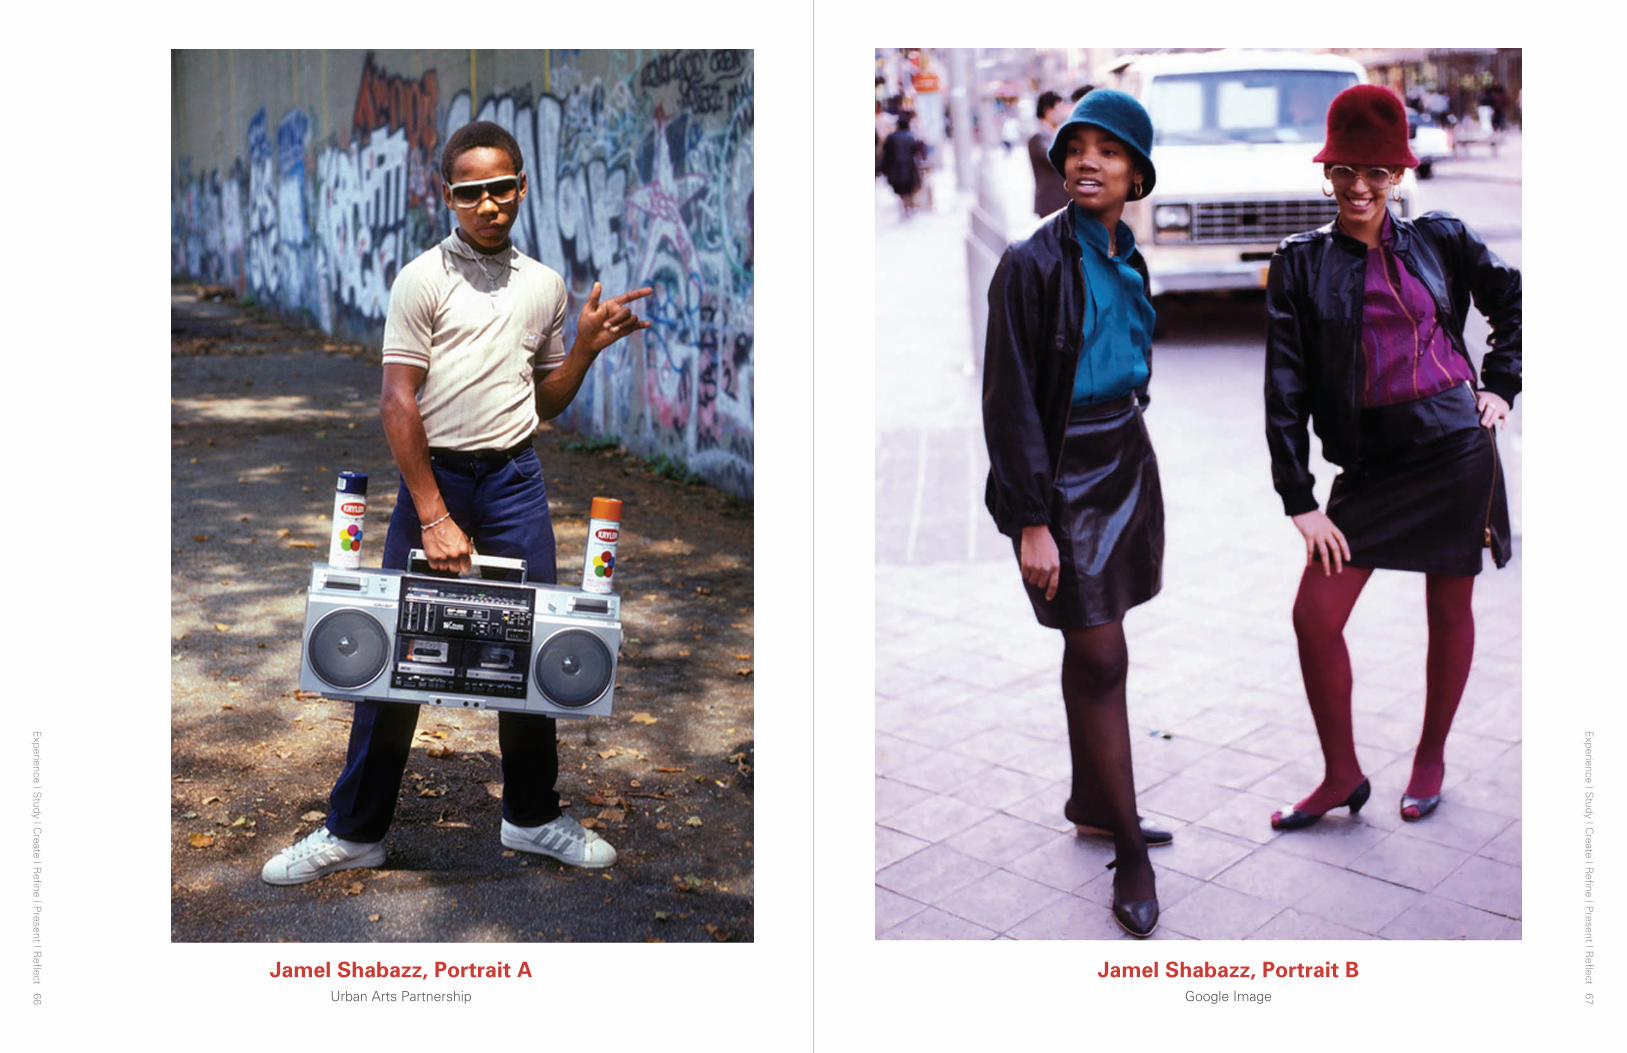
Jamel Shabazz (1960–) is an African-American
fine art, street style and documentary
photographer. Jamel’s documentation of urban
New York City in the 1970s and 1980s has garnered him worldwide acclaim.
Inspired by photographic greats such as Gordon Parks and James Van
Der Zee, Jamel captured the everyday life of a
forgotten time: New York City neighborhoods when hip-hop culture was just
beginning to develop a visceral presence.
His photography was rediscovered in the late
1990s and has been published in a series of highly successful photo books. Similar to Martín Chambi, Shabazz was a
pioneer by photographing his environment and the
people in it.
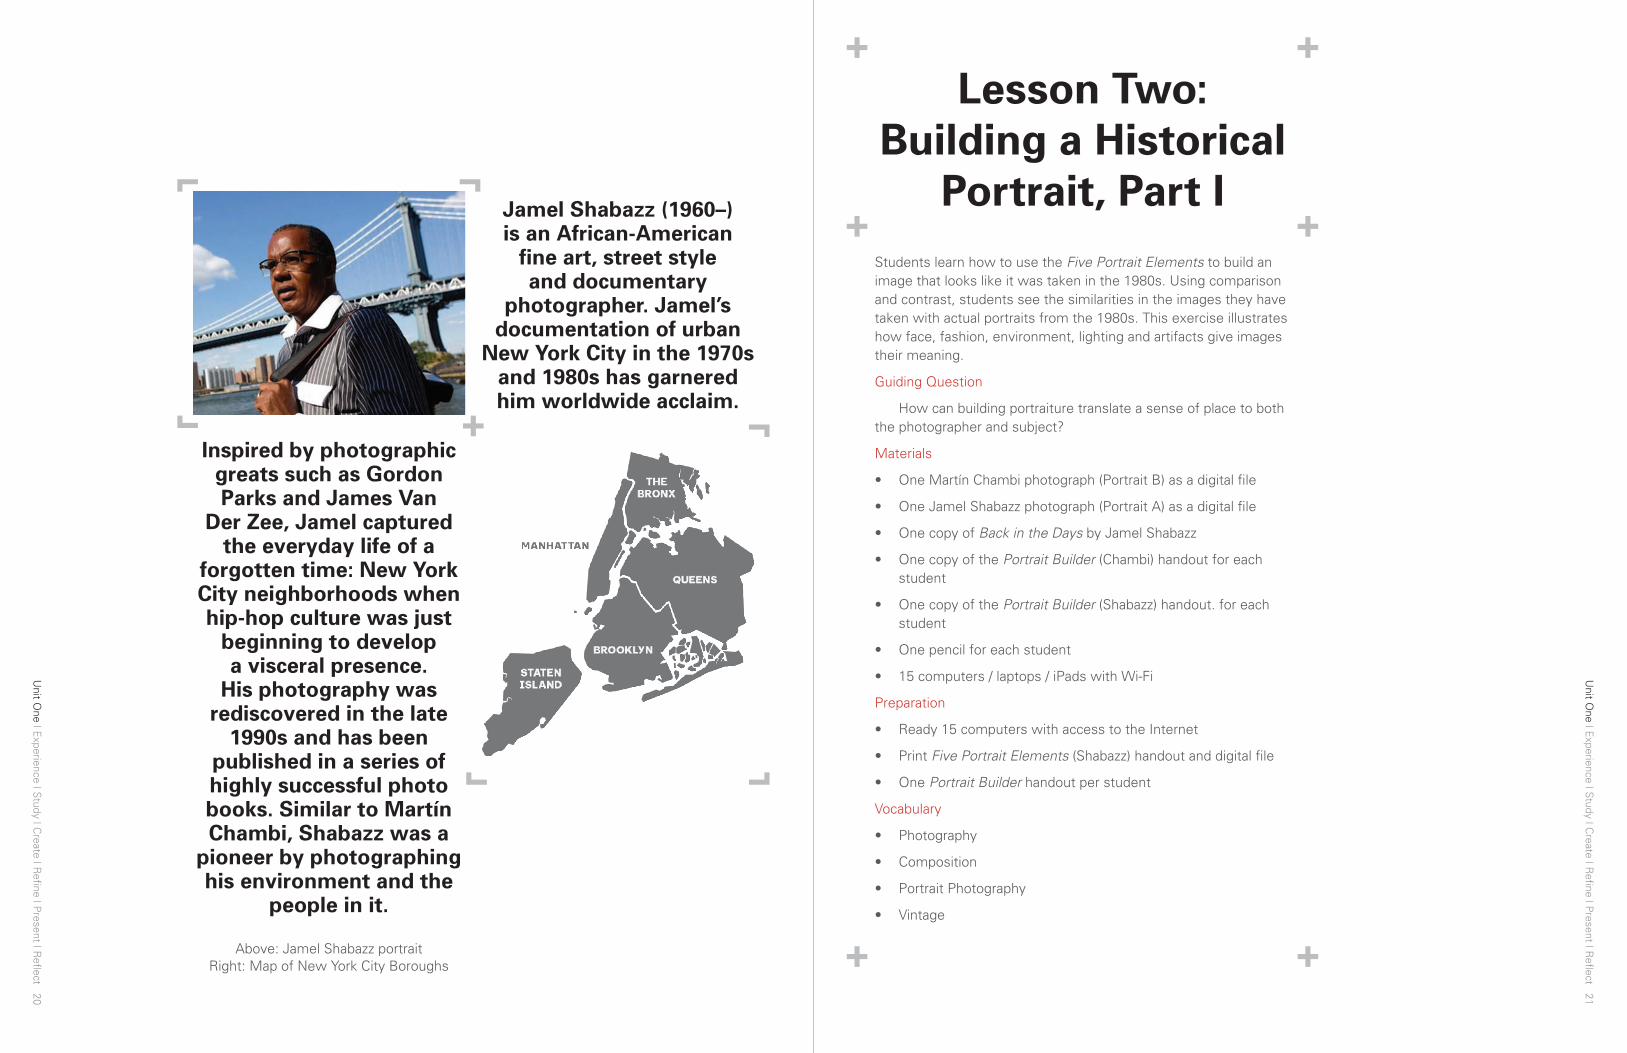
Above: Jamel Shabazz portrait Right: Map of New York City Boroughs
Students learn how to use the Five Portrait Elements to build an image that looks like it was taken in the 1980s. Using comparison and contrast, students see the similarities in the images they have taken with actual portraits from the 1980s. This exercise illustrates how face, fashion, environment, lighting and artifacts give images their meaning.
Guiding Question
How can building portraiture translate a sense of place to both the photographer and subject?
Materials
• One Martín Chambi photograph (Portrait B) as a digital file
• One Jamel Shabazz photograph (Portrait A) as a digital file
• One copy of Back in the Days by Jamel Shabazz
• One copy of the Portrait Builder (Chambi) handout for each student
• One copy of the Portrait Builder (Shabazz) handout. for each student
• One pencil for each student
• 15 computers / laptops / iPads with Wi-Fi
Preparation
• Ready 15 computers with access to the Internet
• Print Five Portrait Elements (Shabazz) handout and digital file
• One Portrait Builder handout per student
Vocabulary
• Photography
• Composition
• Portrait Photography
• Vintage
Lesson Two: Building a Historical
Portrait, Part I

Unit O
ne | Experience | S
tudy | Create | R
efine | Present | R
eflect 23
Unit O
ne | Experience | S
tudy | Create | R
efine | Present | R
eflect 22
Outcomes + Standards Met (Participants Will Be Able to...)
• Gain awareness of photography composition
• Learn about Peruvian photographer Martín Chambi
• Learn about African-American photographer Jamel Shabazz
• Develop language to analyze portrait photography
• Build portraits inspired by the photography of Jamel Shabazz and Martín Chambi
Part 1—Experience (20 minutes): The room should be set up to facilitate a conversation about photography.
• Ask the class: Do you remember the photography of Martín Chambi?
• Take some responses and be sure to reintroduce the word portrait and its definition.
• Ask the class: Who can name the Five Portrait Elements?
• Take some responses from the class and be sure to name them all. Present Portrait Builder handout (Chambi version) for review and then present Martín Chambi portrait A.
• Ask the class to consider how the Five Portrait Elements are used in this photograph.
• Ask the class to consider what the story is behind this image: Who is this man? What is his name? Where was he the morning this photograph was taken?
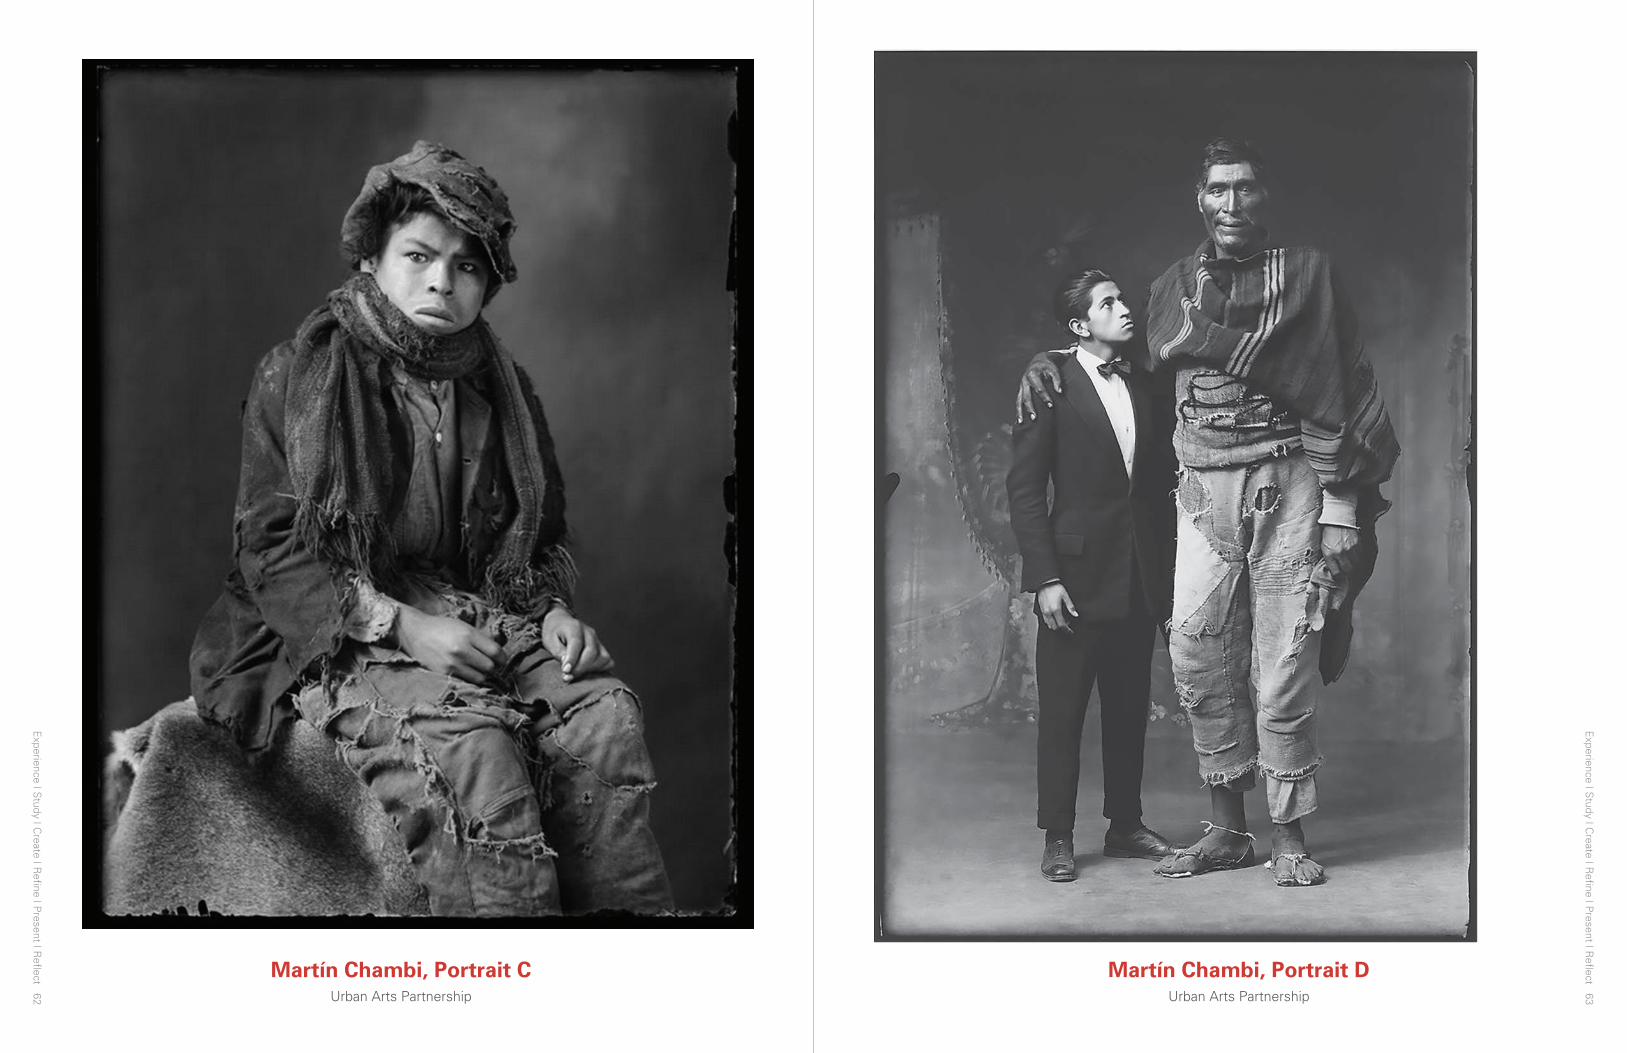
Part 2—Study (20 minutes): Once students have finished having this conversation, present Jamel Shabazz Portrait A.
• Ask the class: What do you notice about this image? How is it different from the work of Martín Chambi?
• Ask the class to consider how the Five Portrait Elements are used in this photograph.
• Ask the class to consider what the story is behind this image: Who is this boy? What is his name?
• Lead the class in a conversation about the setting of this image, introducing the biography of Jamel Shabazz and his photo book Back in the Day. Speak about how New York City has changed since the 1980s. Be sure to cover how fashion, environment and artifacts have changed.
Part 3—Create & Refine (30 minutes): Pass out the Portrait Builder handout (Shabazz version). Let the class know that part of what makes a portrait successful is how it conveys a sense of place and mood. Let the class know that they are going to take portraits of each other to look as if they were taken in the 1980s: they are going to create a vintage portrait.
• Present Jamel Shabazz Portrait B and then define the word vintage: of old, recognized, and enduring interest, importance, or quality; something that is not new but that is valued.
• Once all the students have their Portrait Builder handout (Shabazz version), tell them to brainstorm on how they can create a vintage portrait, specifically, an image that looks as if it was taken in the 1980s, like a Jamel Shabazz photograph. Give them five minutes to brainstorm on their own and then give them 15 minutes to search individually or in pairs for visual references for the 1980s using computers or iPads. Give an example of an artifact or fashion that may have existed in the 1980s.
• Remind the class that they should use face, fashion, environment, lighting and artifacts to give the image its meaning.

Unit O
ne | Experience | S
tudy | Create | R
efine | Present | R
eflect 25
Unit O
ne | Experience | S
tudy | Create | R
efine | Present | R
eflect 24
Students learn how to use the Five Portrait Elements to build an image that looks like it was taken in the 1980s. Using comparison and contrast, students see the similarities in the images they have taken with actual portraits from the 1980s. This exercise illustrates how face, fashion, environment, lighting and artifacts give images their meaning.
Guiding Question
How can building portraiture translate a sense of place to both the photographer and subject?
Materials
• Martín Chambi photograph (Portrait A)
• Jamel Shabazz photograph (Portrait C)
• Extra copies of the Portrait Builder handouts (Chambi and Shabazz versions)
• 15 digital or disposable cameras
Preparation
• Distribute handouts of Martín Chambi’s biography and Jamel Shabazz’s photos for SmartBoard or Projector
• Gather blank Portrait Builder handouts and one digital version
• Create groups of 2–4 to take Vintage Portraits
• Plan the locations so students have multiple options in the school. An additional teacher or volunteer could be helpful.
Vocabulary
• Photography
• Composition
• Portrait Photography
• Vintage
Lesson Three: Building A Historical
Portrait, Part II
This exercise illustrates how face, fashion,
environment, lighting and artifacts give images their
meaning.
Jeanyna Garcia, for Ojos Propios, 2011
Unit O
ne | Experience | S
tudy | Create | R
efine | Present | R
eflect 27
Unit O
ne | Experience | S
tudy | Create | R
efine | Present | R
eflect 26
Outcomes + Standards Met (Participants Will Be Able to...)
• Gain awareness of photography composition
• Learn about Peruvian photographer Martín Chambi
• Learn about African-American photographer Jamel Shabazz
• Develop language to analyze portrait photography
• Build portraits inspired by the photography of Jamel Shabazz and Martín Chambi
• Work collaboratively to build a portrait, i.e., have a photo shoot with creative direction
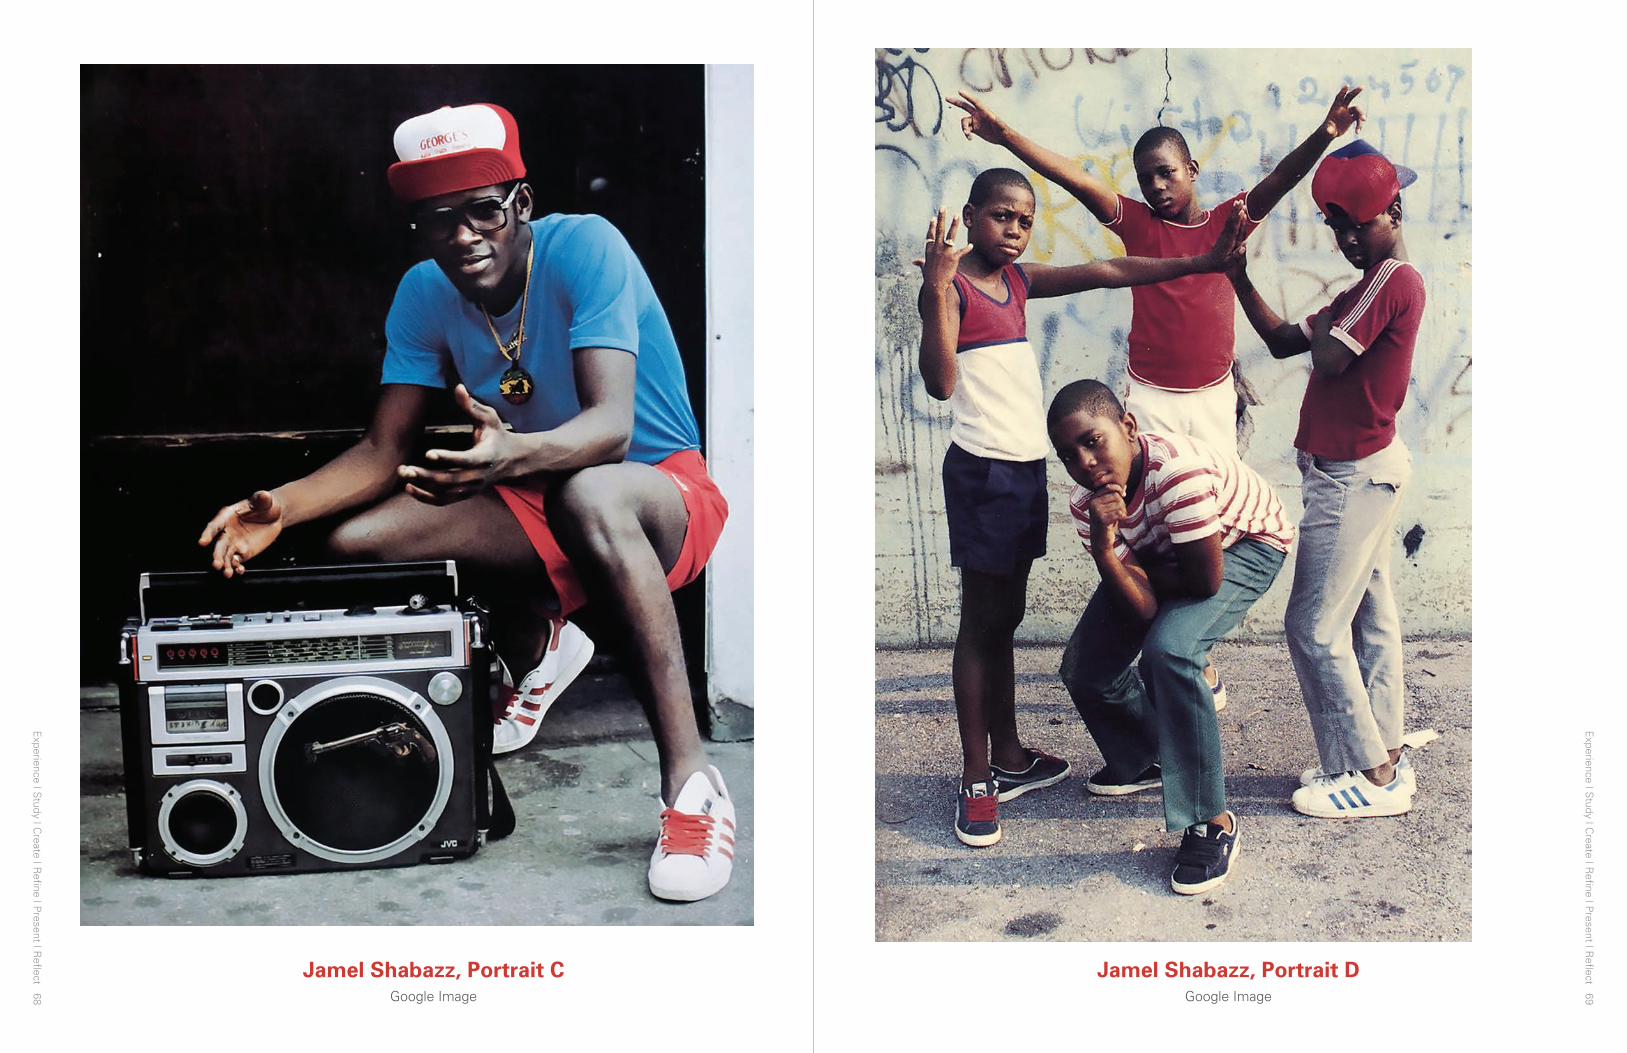
Part 1—Experience (30 minutes): Present Jamel Shabazz Portrait C and Martín Chambi Portrait C.
• Ask students to take five minutes to write down how these two images use the Five Portrait Elements.
• Once the five minutes are over, pass out their artifacts and organize students into their groups.
• Students hand in their written responses, get their cameras and get in line to go take portraits.
• Take the class to the destination(s) for their photo shoots. Let them know they will have 50–60 minutes for their portrait session.
Part 2—Study (Ongoing during the shoot)
While students are working, check on their progress and be certain they are memorizing the Five Portrait Elements: face, fashion, environment, lighting and artifacts.
Part 3—Create & Refine (30 minutes)
Take 2–4 minutes with each group to provide positive feedback and encouragement. Give each group some idea of how they can improve their vintage portrait using different compositions and ask them to make adjustments to make their photography unique.
Part 4—Present & Reflect (20 minutes)
When the group returns to the classroom, take one or two SD cards, plug them into a computer or iPad and upload images, or view on students’ camera screens. Review the images and point out how students were able to create a mood and sense of place with their portraits. As you go through the images, ask the class to give constructive feedback on the portraits. Print some of the best ones from each group for the next class.
Students learn how to use the Five Portrait Elements to build an image. This exercise illustrates how face, fashion, environment, lighting and artifacts give images their meaning.
Guiding Question
How can building portraiture translate a sense of place to both the photographer and subject?
Materials
• Martín Chambi photograph (Portrait A)
• Jamel Shabazz photograph (Portrait A)
• Extra copies of the Portrait Builder handout (Chambi and Shabazz versions)
• 15 digital or disposable cameras
Preparation
• Gather copies of Martín Chambi’s biography and Jamel Shabazz photos
• Ready 15 computers with access to the Internet
Vocabulary
• Photography
• Composition
• Portrait Photography
• Vintage
Outcomes + Standards Met (Participants Will Be Able to...)
• Gain awareness of photography composition
• Learn about Peruvian photographer Martín Chambi
• Learn about African-American photographer Jamel Shabazz
• Develop language to analyze portrait photography
• Build portraits inspired by the photography of Jamel Shabazz and Martín Chambi
Lesson Four: Building a
Current Portrait
Unit O
ne | Experience | S
tudy | Create | R
efine | Present | R
eflect 29
Unit O
ne | Experience | S
tudy | Create | R
efine | Present | R
eflect 28
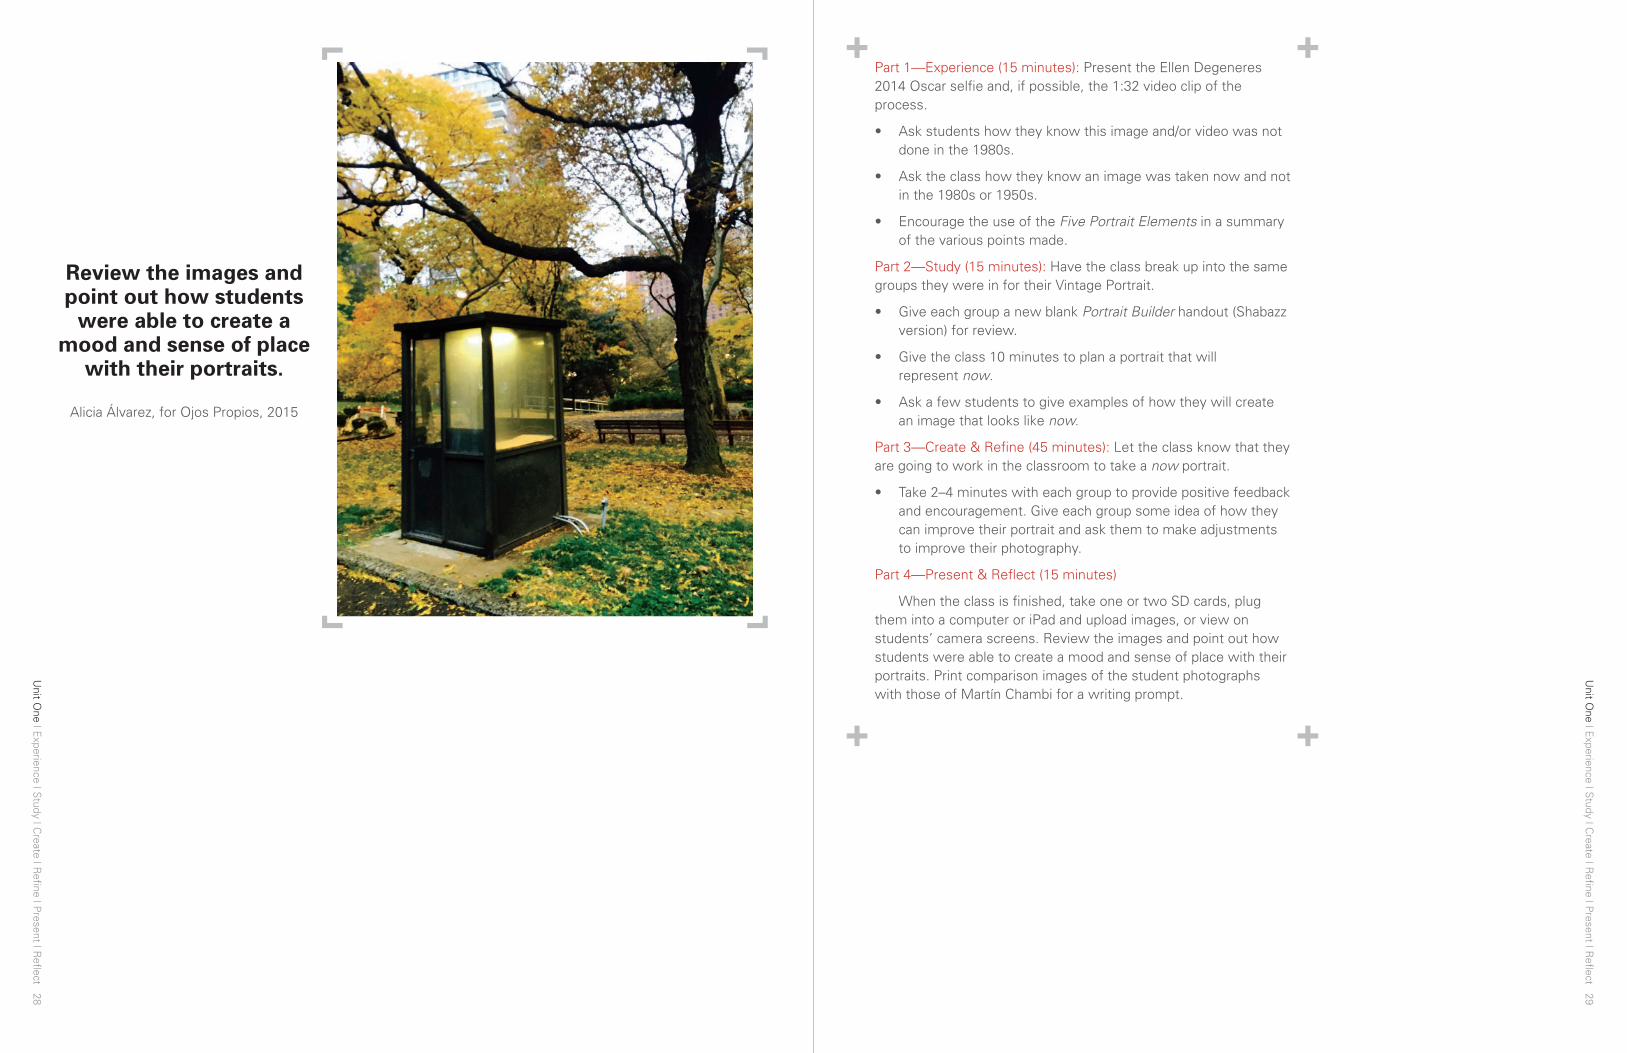
Review the images and point out how students
were able to create a mood and sense of place
with their portraits.
Alicia Álvarez, for Ojos Propios, 2015
Part 1—Experience (15 minutes): Present the Ellen Degeneres 2014 Oscar selfie and, if possible, the 1:32 video clip of the process.
• Ask students how they know this image and/or video was not done in the 1980s.
• Ask the class how they know an image was taken now and not in the 1980s or 1950s.
• Encourage the use of the Five Portrait Elements in a summary of the various points made.
Part 2—Study (15 minutes): Have the class break up into the same groups they were in for their Vintage Portrait.
• Give each group a new blank Portrait Builder handout (Shabazz version) for review.
• Give the class 10 minutes to plan a portrait that will represent now.
• Ask a few students to give examples of how they will create an image that looks like now.
Part 3—Create & Refine (45 minutes): Let the class know that they are going to work in the classroom to take a now portrait.
• Take 2–4 minutes with each group to provide positive feedback and encouragement. Give each group some idea of how they can improve their portrait and ask them to make adjustments to improve their photography.
Part 4—Present & Reflect (15 minutes)
When the class is finished, take one or two SD cards, plug them into a computer or iPad and upload images, or view on students’ camera screens. Review the images and point out how students were able to create a mood and sense of place with their portraits. Print comparison images of the student photographs with those of Martín Chambi for a writing prompt.
Unit O
ne | Experience | S
tudy | Create | R
efine | Present | R
eflect 30
• Students can compare and contrast their Now and Vintage portraits as a writing prompt.
• Students can compare and contrast their Now and Vintage portraits with the work of Martín Chambi as a writing prompt.
Unit Vocabulary
• Photography: the art or process of producing images by the action of radiant energy and especially light on a sensitive surface (as film or an optical sensor).
• Composition: the placement or arrangement of visual elements or ingredients in a work of art, as distinct from the subject of a work.
• Portrait Photography: also known as portraiture, it is the photography of a person or group of people that displays the expression, personality and mood of the subject. The focus of the photograph is usually the person’s face, although the entire body and the background or context may be included.
• Vintage: of old, recognized, and enduring interest, importance, or quality; something that is not new but that is valued.
Going Beyond
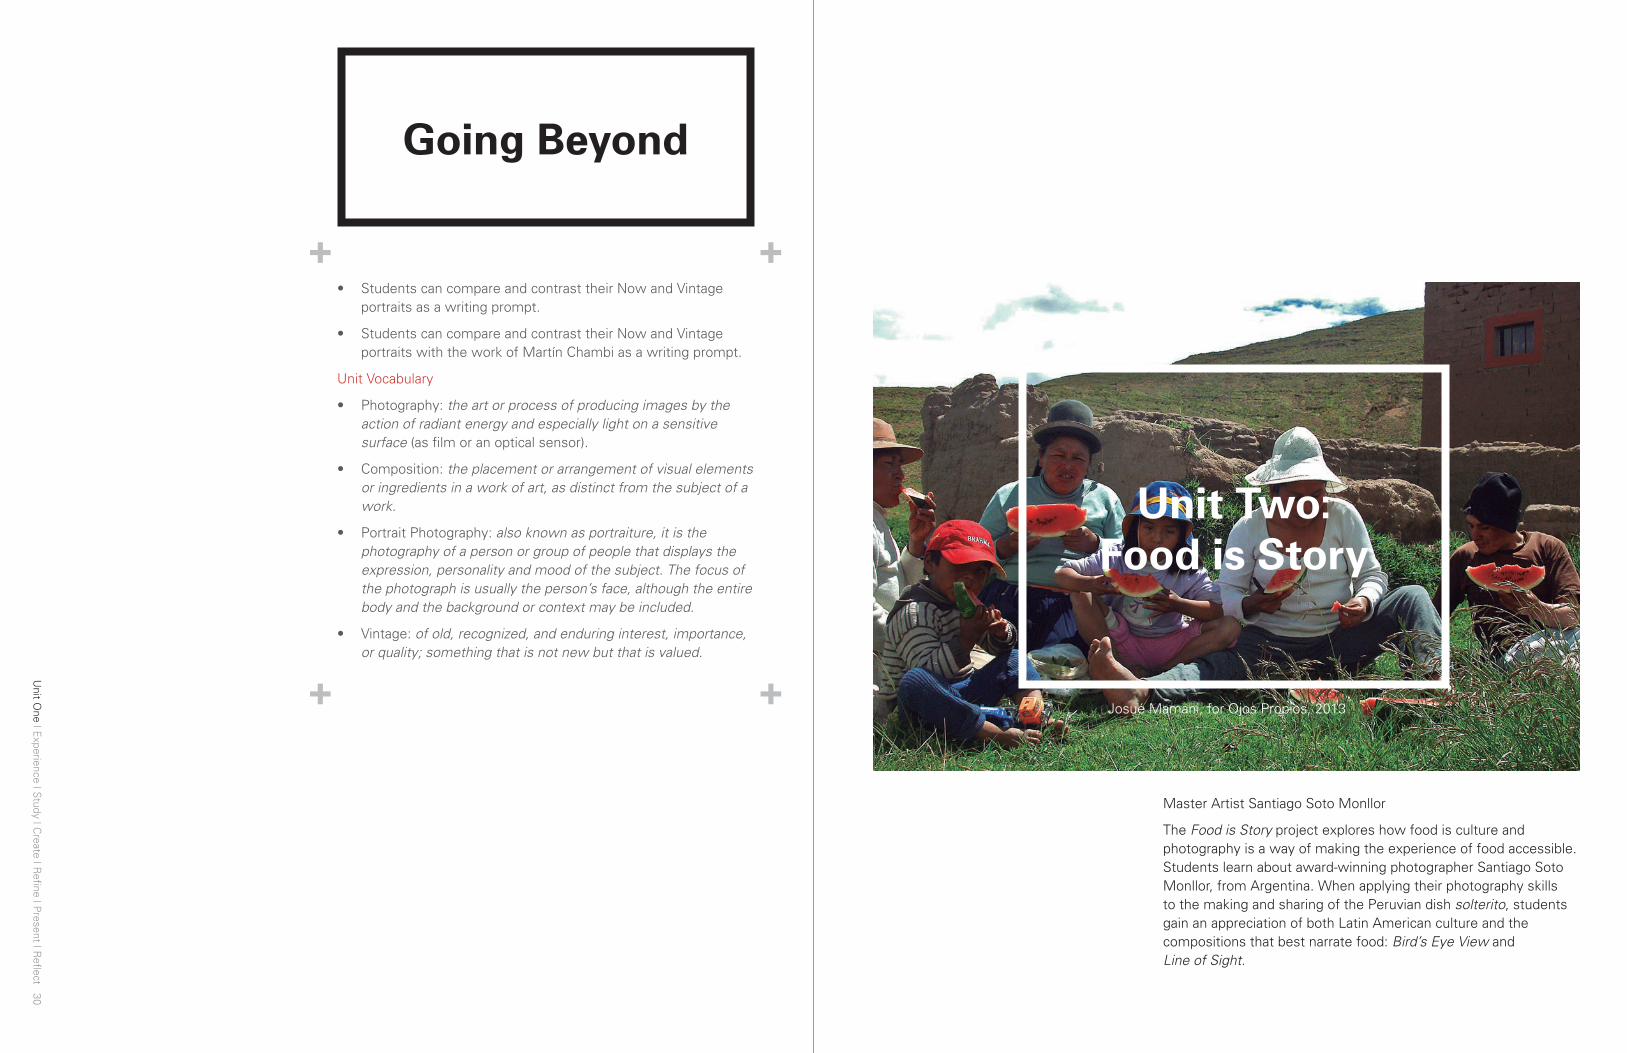
Unit Two: Food is Story
Master Artist Santiago Soto Monllor
The Food is Story project explores how food is culture and photography is a way of making the experience of food accessible. Students learn about award-winning photographer Santiago Soto Monllor, from Argentina. When applying their photography skills to the making and sharing of the Peruvian dish solterito, students gain an appreciation of both Latin American culture and the compositions that best narrate food: Bird’s Eye View and Line of Sight.
Josué Mamani, for Ojos Propios, 2013
Unit Tw
o | Experience | S
tudy | Create | R
efine | Present | R
eflect 33
Unit Tw
o | Experience | S
tudy | Create | R
efine | Present | R
eflect 32
Students explore ways in which food tells stories through location, preparation and sharing. Using established methods of analysis, students explore how food photography communicates culture—place, people, and meaning-making. Students also explore their own food legacies by interviewing a household member to get the story behind a traditional family recipe. Interviews are recorded and shared as an oral history in class and an item or ingredient from the family is brought in to photograph.
Guiding Question
How can photographing the creation and sharing of food build a sense of community and culture?
Materials
• Multiple copies of five food photographs printed as 4"x6" cards
• Santiago Soto Monllor biography with the map of Argentina handout
• Santiago Soto Monllor food photographs C, D, and E
• One Food Story handout per student
• One pencil for each student
• 10 to 15 digital or disposable cameras
• Five pineapples and five potatoes
• Printed 4"x6" sized cards of five food photographs
Lesson One: Food Story, Part I
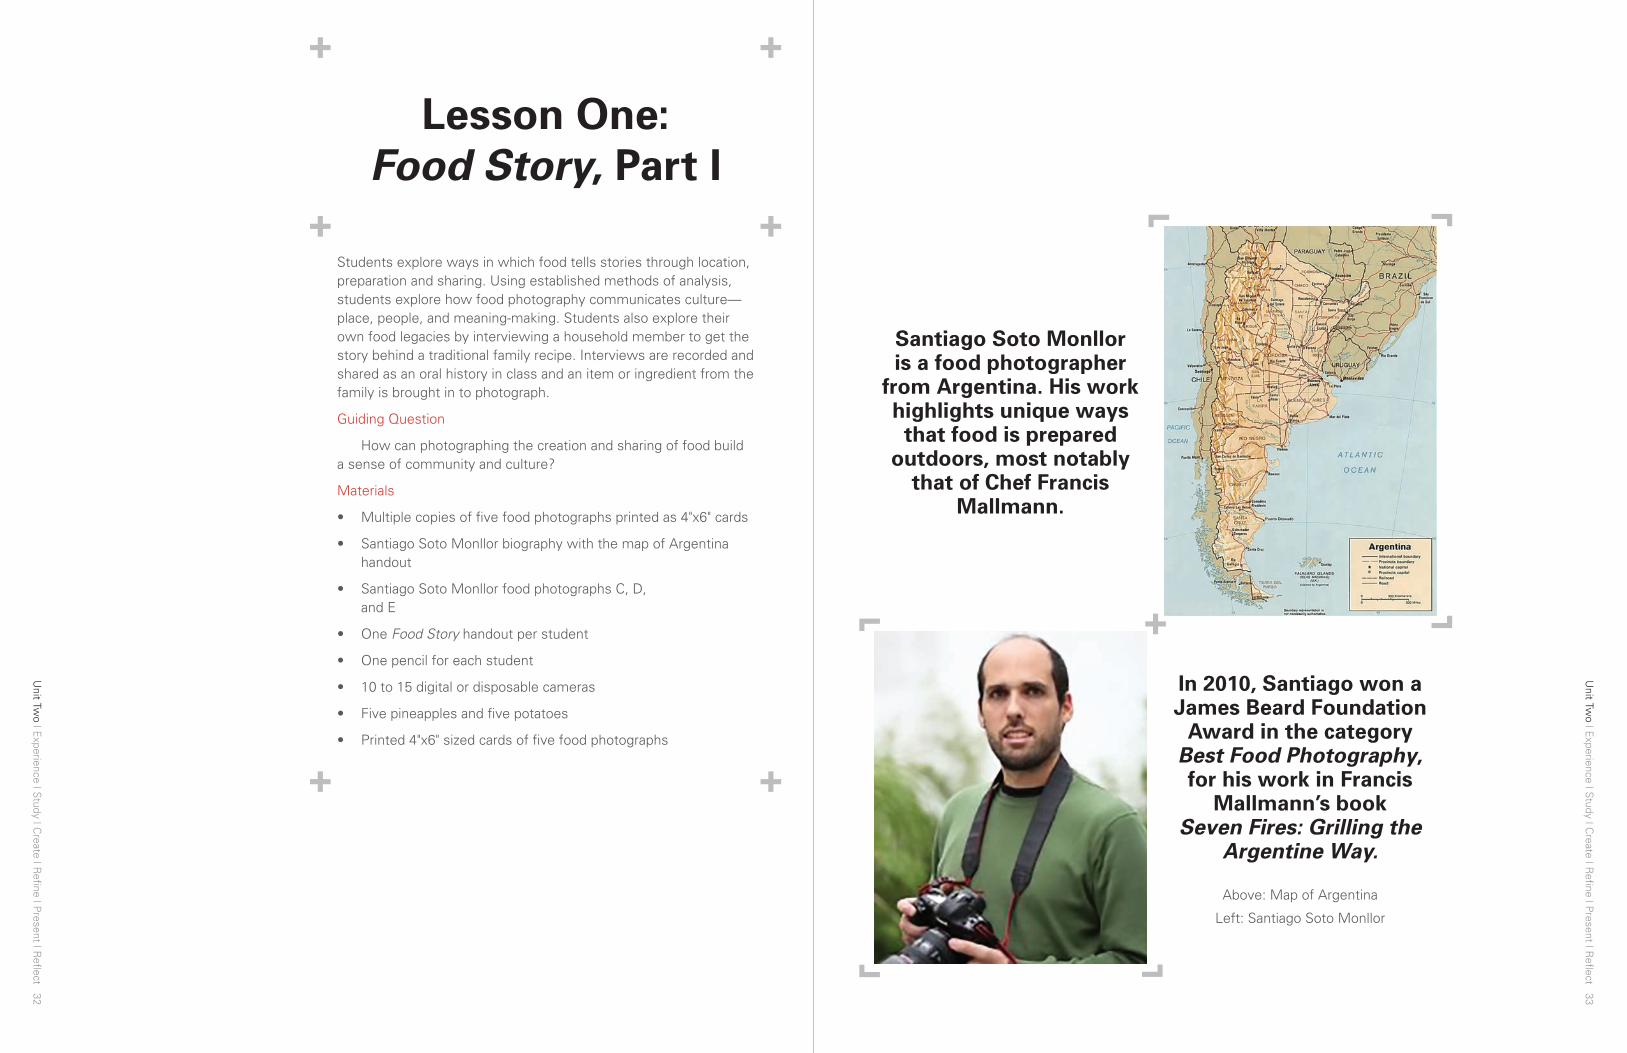
Santiago Soto Monllor is a food photographer
from Argentina. His work highlights unique ways that food is prepared
outdoors, most notably that of Chef Francis
Mallmann.
In 2010, Santiago won a James Beard Foundation
Award in the category Best Food Photography, for his work in Francis
Mallmann’s book Seven Fires: Grilling the
Argentine Way.
Above: Map of Argentina
Left: Santiago Soto Monllor

Unit Tw
o | Experience | S
tudy | Create | R
efine | Present | R
eflect 35
Unit Tw
o | Experience | S
tudy | Create | R
efine | Present | R
eflect 34
Preparation
• Divide class into equal groups of 4 to 5 students based on the class roster
• Gather Santiago Soto Monllor food photos A, C, D, and E
• Have digital or disposable cameras ready to distribute
• Have pineapples and potatoes ready to be photographed (enough for each pair of students to have a potato or pineapple)
Vocabulary
• Photography
• Bird’s Eye View
• Line of Sight
• High Angle
Culture Outcomes + Standards Met (Participants Will Be Able to...)
• Gain awareness of food photography composition
• Learn about Argentine food photographer Santiago Soto Monllor
• Develop language to analyze food photography
• Develop an appreciation for food as a vehicle of culture
Part 1—Experience (20 minutes)
• Pass out the deck of shuffled 4"x6" photographs of food (quinoa, corn, fava beans, tomato and onion).
• Tell students not to turn the cards over until they are given further instructions.
• Let them know that on the count of three, they will turn the cards over and find the people in the room with the same photograph as them. This will create four to five groups.
• Count down: 1-2-3.
• Once the class is in four to five groups, tell students they have 5 minutes to think about a family dish that includes the food on the photograph they were given.
• After 5 minutes, give each group 1 minute to share 1–2 of the dishes they came up with.
• In the final 10 minutes, ask the class to find 1–2 people with a different ingredient and think of another dish they could make that includes all two or three ingredients they collectively have. Give an example, such as: corn, tomato, and onion can make salsa.
Part 2—Study (20 minutes): While students are still in their smaller groups, introduce them to the photography of Santiago Soto Monllor using Photographs A, C, D and E.
• Show the Santiago Soto Monllor biography with the map of Argentina. Ask students if they have ever heard of Santiago Soto Monllor or Francis Mallmann.
• Introduce the concept Food Photography by asking them if they have ever taken a picture of their food before. Ask if they remember the angle they used to photograph their food.
• Ask students if they are able to identify the types of composition used to photograph the food on their cards (they will be Bird’s Eye View, Line of Sight, or High Angle).
• Identify which food photographs that were passed around earlier are line of sight or bird’s eye view and the one high angle image. Give students time to identify which composition was used for their photo.
• Using the work of Soto Monllor, show them how he likes to use a high angle to photograph food which is between bird’s eye view and line of sight.
• Using the work of Soto Monllor, show students how he likes to use a high angle—between bird’s eye view and line of sight– to photograph food.
• Ask students to consider how line of sight, bird’s eye view, and the high angle tell different stories by presenting different information.
• Pass out the Food Story handouts.
Part 3—Create & Refine (30 minutes): Present the Food Story handout to the class. Identify the sections of the Food Story handout where students interview a member of their household to find out the origins of a traditional family recipe.
• Each student completes a sketch of the ingredient they want to photograph.
• After students have completed their sketch, give them the food of their choice.
• Have students work in pairs and practice taking photos of the items they’ve sketched, but with potatoes and pineapples instead.
Part 4—Present & Reflect (10 minutes)
For the final 20 minutes of class, selected students stand up and share their traditional family dish, who they are going to interview, and what ingredient they want to bring to class to photograph.
Unit Tw
o | Experience | S
tudy | Create | R
efine | Present | R
eflect 37
Unit Tw
o | Experience | S
tudy | Create | R
efine | Present | R
eflect 36
How can photographing the creation and sharing of food build a sense of community and culture?
Nicholas Chang, for Ojos Propios, 2015
Students explore their own food legacies by interviewing a household member to get the story behind a traditional family recipe. Interviews are recorded and shared as an oral history in class and an item/ingredient from the family is brought in to photograph.
Guiding Question
How can photographing the creation and sharing of food build a sense of community and culture?
Materials
• Multiple copies of 5 food photographs printed as 4"x6" cards
• Santiago Soto Monllor biography with the map of Argentina
• Santiago Soto Monllor Food Photographs A, C, D and E
• One Food Story handout (one for each student)
• One Food Story recorder (one for each student)
• Pencils
• 10 to 15 digital or disposable cameras
• Sample photos from the previous class
Preparation
• Prepare copies of students’ photos of pineapples and potatoes
• Ready 10 to 15 digital or disposable cameras
• Collect students’ Food Story handouts (preferably as homework)
• Collect students’ food items in advance
Vocabulary
• Photography
• Bird’s Eye View
• Line of Sight
• High Angle
Lesson Two: Food Story, Part II

Unit Tw
o | Experience | S
tudy | Create | R
efine | Present | R
eflect 39
Unit Tw
o | Experience | S
tudy | Create | R
efine | Present | R
eflect 38
Culture Outcomes + Standards Met (Participants Will Be Able to...)
• Gain awareness of food photography composition
• Learn about Argentine food photographer Santiago Soto Monllor
• Develop language to analyze food photography
• Develop an appreciation for food as a vehicle of culture
Part 1—Experience (10 minutes)
• Present Soto Monllor’s Food Photograph E.
• Ask students to consider what is present in the photo and how it represents culture.
• Present the definition of culture and identify how traditional food recipes represent various aspects of a family’s culture: the arts and other manifestations of human intellectual achievement regarded collectively.
• Pass around the Food Story Recorder and let the students know they are going to take notes while classmates share excerpts from their interviews.
Part 2—Study (30 minutes)
• Students take turns presenting the ingredient they want to photograph and an excerpt from their traditional dish interview with someone in their household.
• Students listen to each other and take notes on how students’ traditional family recipes represent their cultures.
Part 3—Create & Refine (30 minutes)
• After students have shared, transition the class to work in groups to photograph their items.
• Students work in pairs photographing their food items at their desks to accompany their interviews.
Part 4—Present & Reflect (10 minutes)
Students transition back to their seats to reflect on how they can use their photography and interviews to represent their families.
Students learn how to make the Peruvian dish solterito with the South American grain quinoa. The class uses established photography skills to best highlight the creative process of preparing and sharing this dish.
Guiding Question
How can photographing the creation and sharing of food build a sense of community and culture?
Materials
• 1/3 cups quinoa grains, cooked
• Four ounces queso fresco, cubed
• 1/2 cup corn kernels, cooked
• 3/4 cup fava beans, shelled and boiled
• One small onion, diced
• One tomato, diced
• One rocoto chile, seeded, membrane removed, and chopped
• One yellow chile, seeded, membrane removed, and chopped
• One tablespoon chopped parsley
• One tablespoon chopped huacatay leaves
• 3/4 cup black olives, cut in strips
• Four tablespoons white wine vinegar
• Five tablespoons vegetable oil
• 1/2 teaspoon dried oregano
• Salt and pepper
• Four large mixing bowls
• Four large mixing spoons
• Enough small bowls and spoons for the class
• 10 to 15 digital or disposable cameras
• Recipe on four cards
Lesson Three: Solterito Story
Unit Tw
o | Experience | S
tudy | Create | R
efine | Present | R
eflect 41
Unit Tw
o | Experience | S
tudy | Create | R
efine | Present | R
eflect 40
Preparation
• Prepare copies of the recipe for solterito
• Prepare all the food items, especially those that need to be cooked ahead of time
• Prepare to have help in each of your four groups (a parent would be great)
• Play Peruvian music
Vocabulary
• Solterito
• Peru
• Quinoa
• Huacatay
Outcomes + Standards Met (Participants Will Be Able to...)
• Gain awareness of photography composition
• Gain awareness of food culture
• Learn about Argentine food photographer Santiago Soto Monllor
• Develop language to analyze food photography
• Build food photos inspired by the photography of Santiago Soto Monllor
• Learn how to make the Peruvian dish solterito
Part 1—Experience (40 minutes): Students prepare to work in groups of four. Display instructions in the front of the room and have a card with the recipe for each group.
• Place all the ingredients together in a bowl.
• Mix well and season with salt and pepper to taste.
• Serve.
Part 2—Study (Ongoing)
Check in with students about their progress.
Part 3—Create & Refine (20 minutes)
Students take a break after the dish is complete to photograph the presentation of solterito.
Part 4—Present & Reflect (15 minutes)
Students enjoy eating the solterito as a community.
Gain awareness of food culture
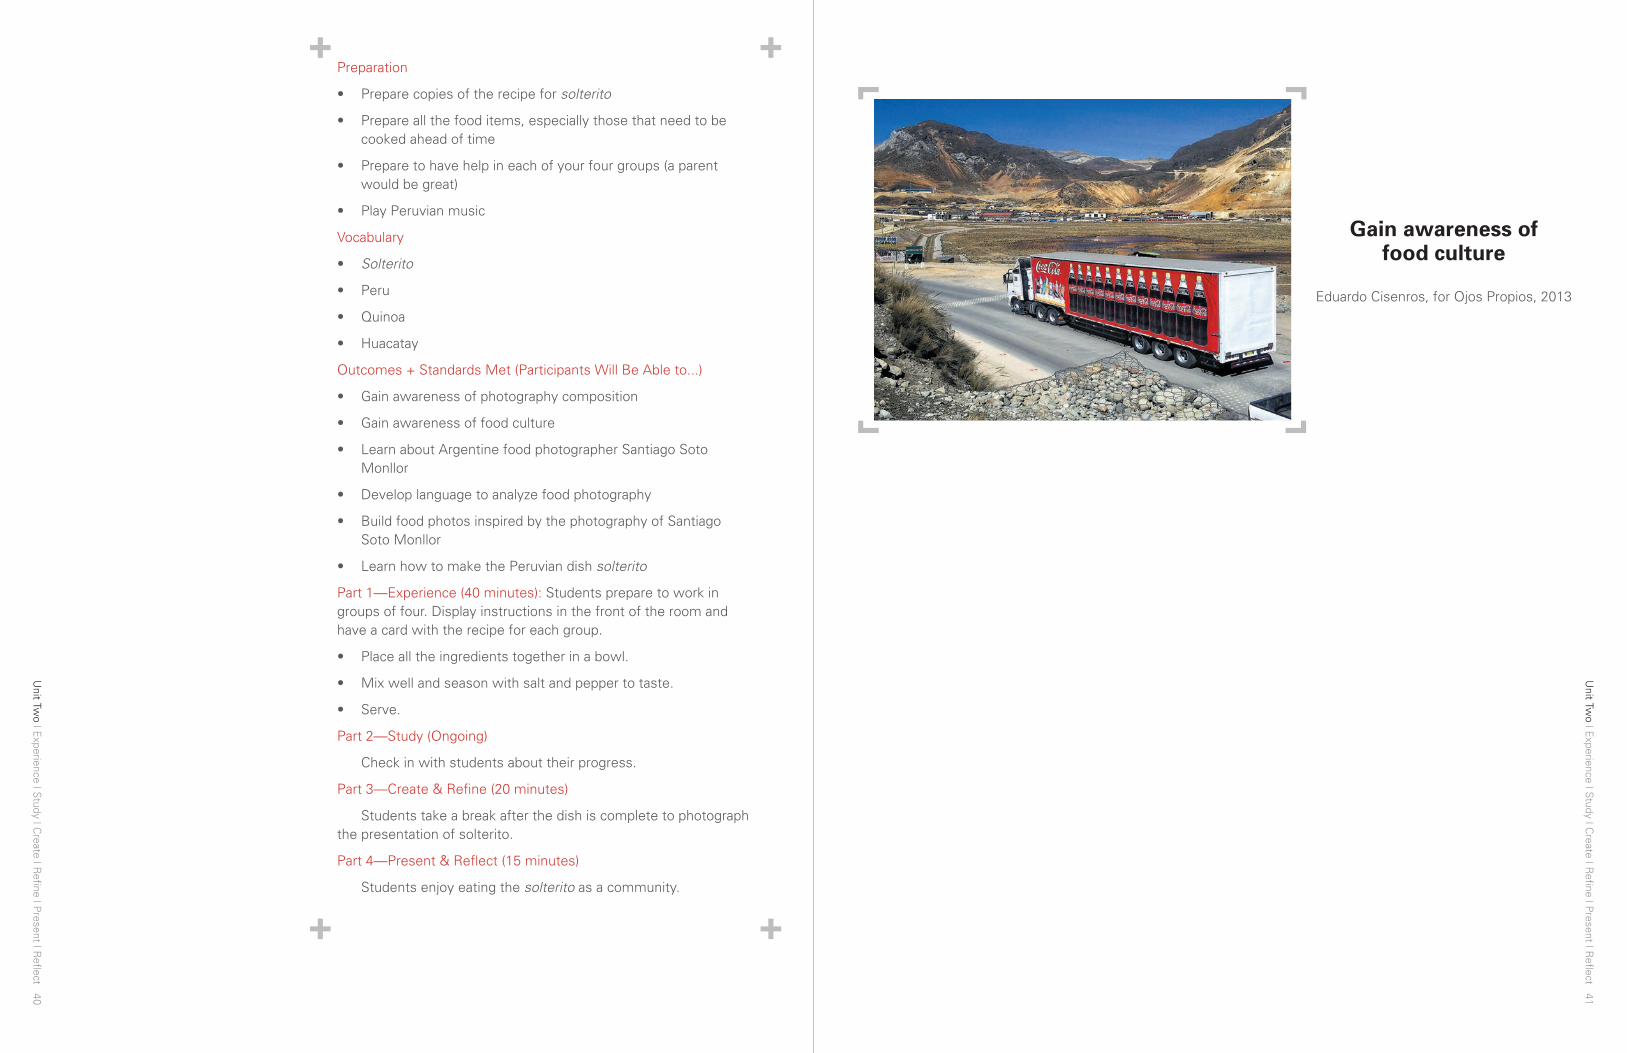
Eduardo Cisenros, for Ojos Propios, 2013

Unit Tw
o | Experience | S
tudy | Create | R
efine | Present | R
eflect 42
• Students can learn more about other Peruvian and/or South American dishes.
• A member of a student’s family who was interviewed can visit the class and share a Food Story.
• Students can listen to South American music throughout the unit.
Unit Vocabulary
• Photography: the art or process of producing images by the action of radiant energy and especially light on a sensitive surface (as film or an optical sensor).
• Bird’s Eye View: the photographic or cinematic angle that sees the subject directly overhead such as from the view of a bird.
• Line of Sight: the photographic or cinematic angle that lines up directly with a subject.
• High Angle: the photographic or cinematic angle that is high but not above a subject.
• Culture: the beliefs, customs, arts, etc., of a particular society, group, place, or time.
• Solterito: an appetizer that originated in Arequipa, a beautiful southern region in the Peruvian mountains. Solterito is believed to have originated from the Spanish word soltero, which means single man. One interpretation is that solterito is a simple dish for one person to make.
• Quinoa: a grain crop that produces edible seeds and that originated in the Andean region of Peru, Bolivia, Ecuador and Colombia.
Pushing Further
Unit Three: The Environment
is Everything
This project explores the iconic power of landscape photography as a means to define a place. By using Depth of Field and Rule of Thirds, students build landscapes of their school’s community. Students learn about award-winning photographer Sebastião Salgado, from Brazil.
Judith Milagros Quispe, for Ojos Propios, 2013
Unit Three | E
xperience | Study | C
reate | Refine | P
resent | Reflect 45
Unit Three | E
xperience | Study | C
reate | Refine | P
resent | Reflect 44
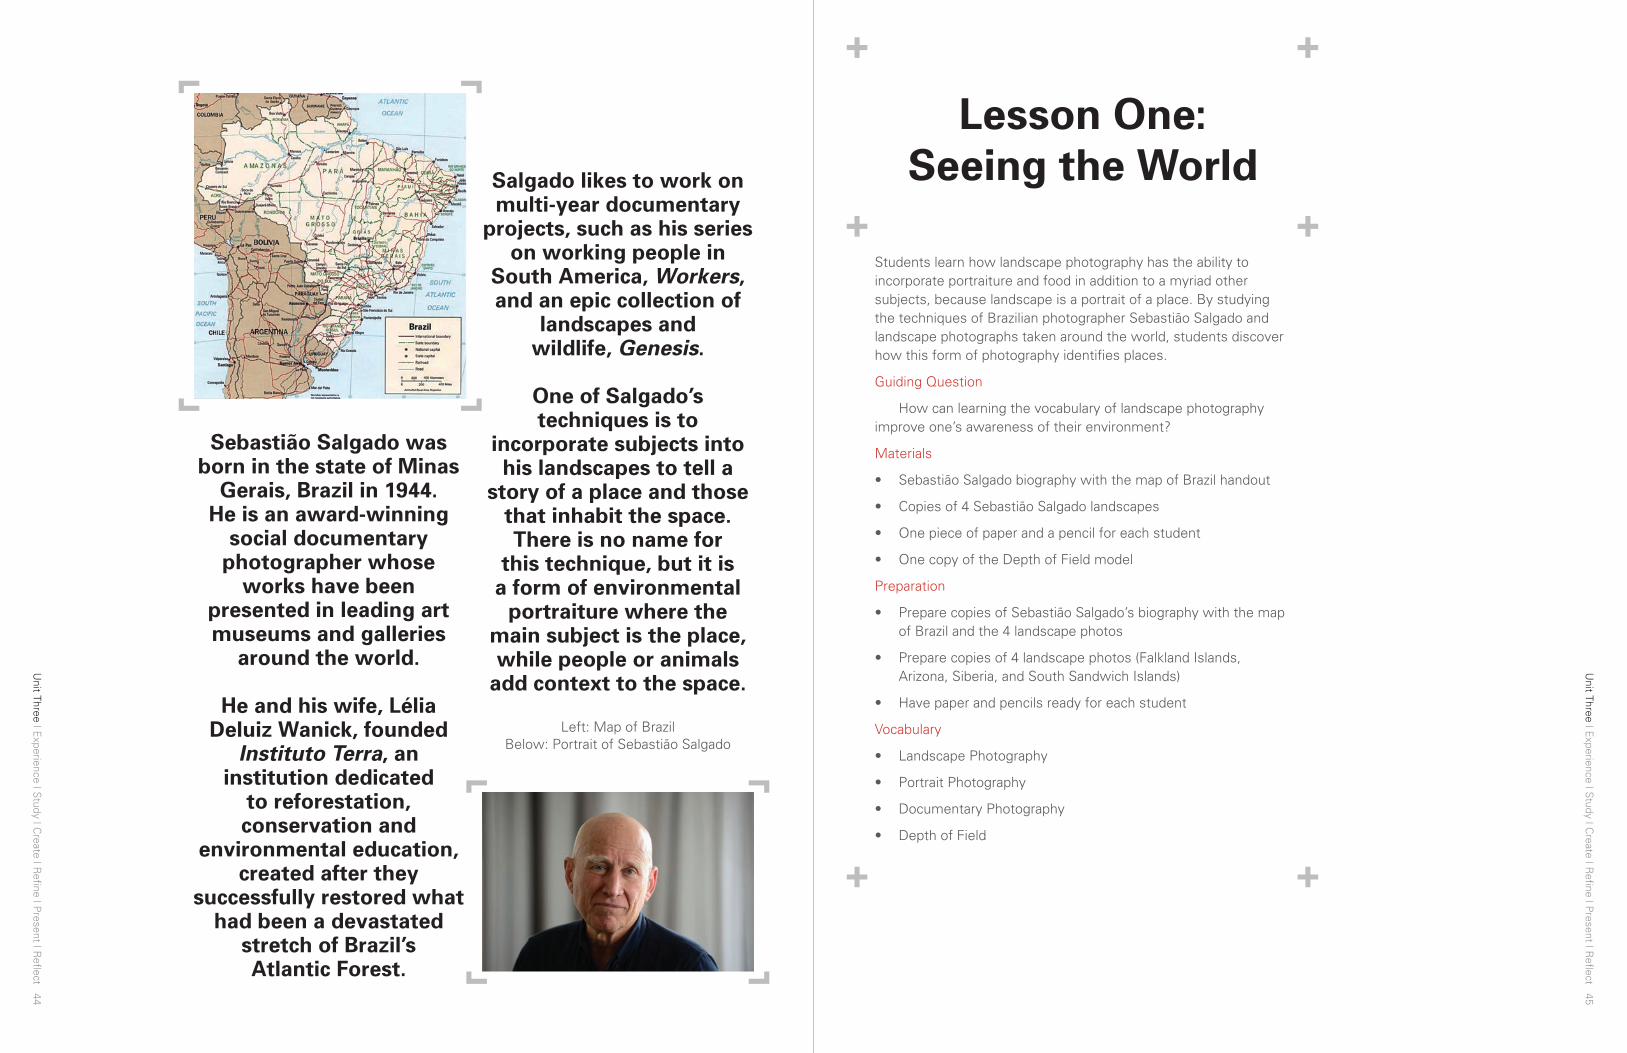
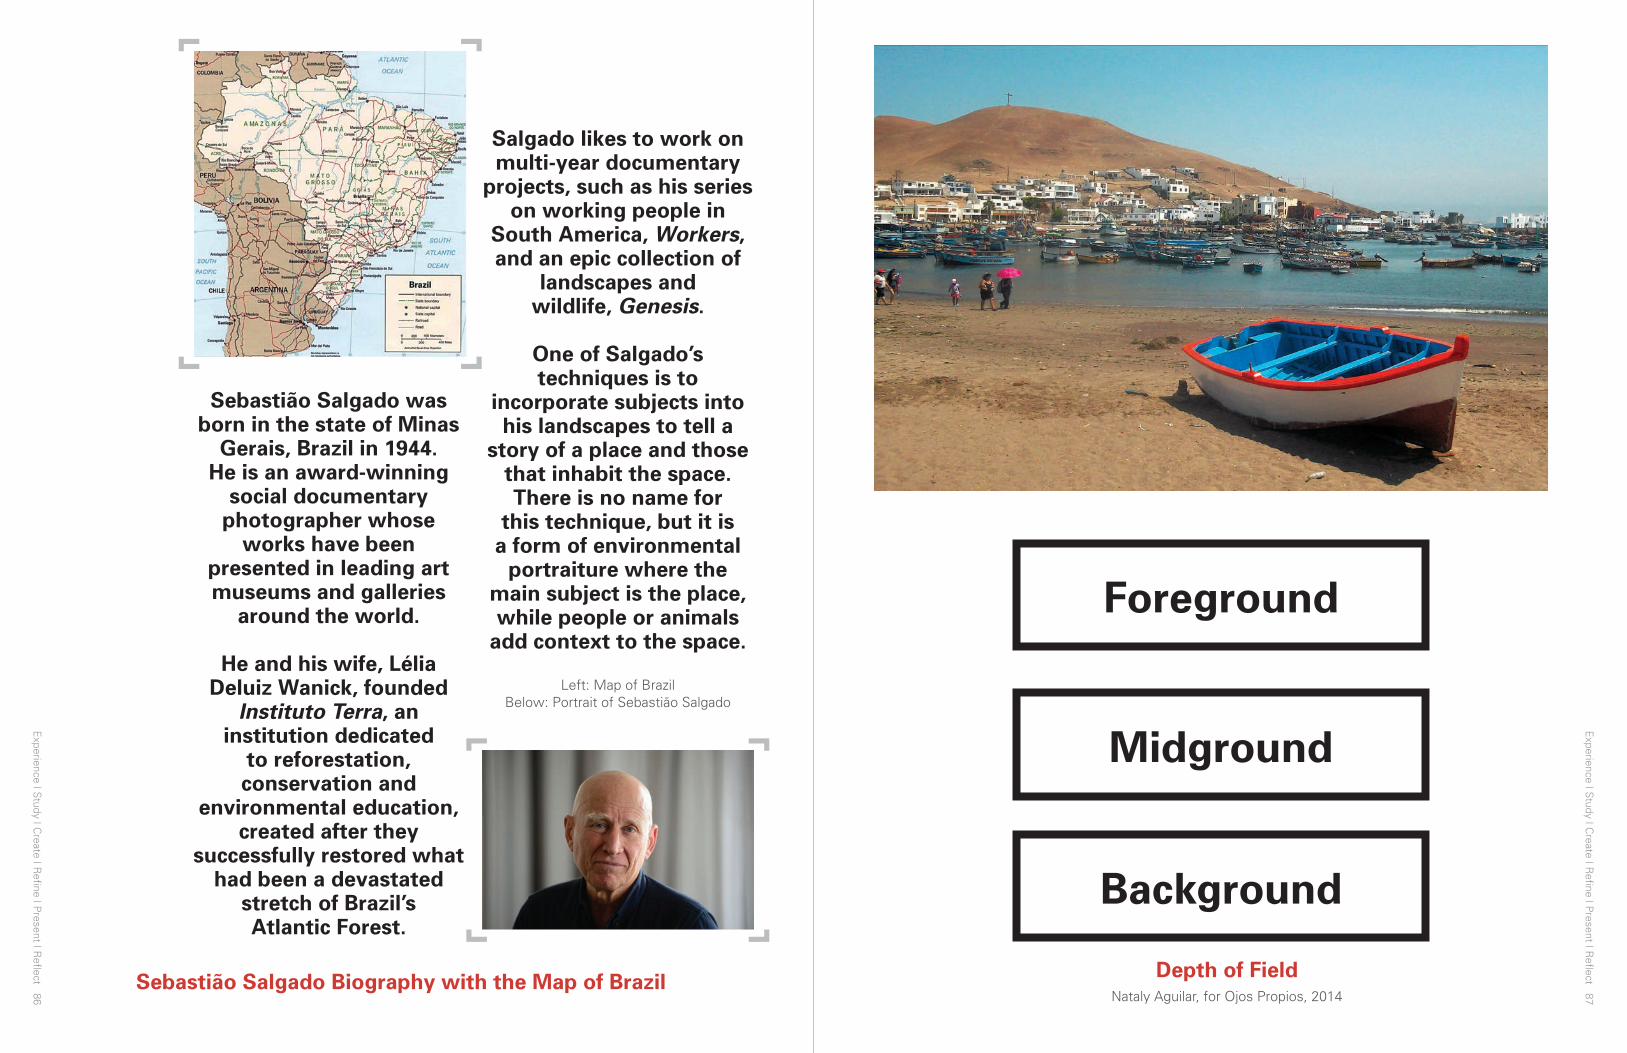
Sebastião Salgado was born in the state of Minas
Gerais, Brazil in 1944. He is an award-winning
social documentary photographer whose
works have been presented in leading art museums and galleries
around the world.
He and his wife, Lélia Deluiz Wanick, founded
Instituto Terra, an institution dedicated
to reforestation, conservation and
environmental education, created after they
successfully restored what had been a devastated
stretch of Brazil’s Atlantic Forest.
Salgado likes to work on multi-year documentary
projects, such as his series on working people in
South America, Workers, and an epic collection of
landscapes and wildlife, Genesis.
One of Salgado’s techniques is to
incorporate subjects into his landscapes to tell a
story of a place and those that inhabit the space. There is no name for
this technique, but it is a form of environmental
portraiture where the main subject is the place, while people or animals
add context to the space.
Left: Map of Brazil Below: Portrait of Sebastião Salgado
Students learn how landscape photography has the ability to incorporate portraiture and food in addition to a myriad other subjects, because landscape is a portrait of a place. By studying the techniques of Brazilian photographer Sebastião Salgado and landscape photographs taken around the world, students discover how this form of photography identifies places.
Guiding Question
How can learning the vocabulary of landscape photography improve one’s awareness of their environment?
Materials
• Sebastião Salgado biography with the map of Brazil handout
• Copies of 4 Sebastião Salgado landscapes
• One piece of paper and a pencil for each student
• One copy of the Depth of Field model
Preparation
• Prepare copies of Sebastião Salgado’s biography with the map of Brazil and the 4 landscape photos
• Prepare copies of 4 landscape photos (Falkland Islands, Arizona, Siberia, and South Sandwich Islands)
• Have paper and pencils ready for each student
Vocabulary
• Landscape Photography
• Portrait Photography
• Documentary Photography
• Depth of Field
Lesson One: Seeing the World
Unit Three | E
xperience | Study | C
reate | Refine | P
resent | Reflect 47
Unit Three | E
xperience | Study | C
reate | Refine | P
resent | Reflect 46
Outcomes + Standards Met (Participants Will Be Able to...)
• Gain awareness of landscape photography
• Gain awareness of documentary photography
• Learn about Brazilian photographer Sebastião Salgado
• Develop language to analyze landscape photography
• Develop language to analyze documentary photography
• Develop a sense of how landscape photography has the ability to define space and bring people and places together
Part 1—Experience (20 minutes)
• Pass around to students the deck of shuffled 4”x 6” photographs by Sebastião Salgado.
• Tell students not to turn the cards over until they are given further instructions.
• Let students know that on the count of three, they are to turn the cards over and find the people in the room with the same photograph as them. This will create four groups. Count down: 1-2-3.
• Once the class is in four groups, give students five minutes to come up with a story based on the photograph card they all have.
• After five minutes, give each group one minute to share the story they created with the rest of the class.
• In the final 10 minutes of this section, present each of the four Sebastião Salgado images and ask the class to share what they see in the images.
Part 2—Study (20 minutes): While students are still in their groups, prepare to introduce them to Sebastião Salgado, Brazil, and landscape photography.
• Show the Sebastião Salgado biography with the map of Brazil. Ask students if they ever heard of Sebastião Salgado or Brazil.
• Introduce the word landscape by asking students: Has anyone ever seen a postcard image of New York? Take some responses.
• Extend the conversation to other postcards they may have seen, then give them the definition.
• ∆ Landscape photography shows spaces within the world, sometimes vast and unending, but at other times microscopic.
• ∆ Landscape photographs typically capture the presence of nature but can also focus on man-made features or disturbances of landscapes.
• Show students the four landscape photographs and ask if anyone knows where these photos were taken. If there are students who know where they were taken, ask why.
• What information is presented in the photograph that tells you where it was taken?
• Guide the class into a conversation about travel, places they have been, places they want to go and connect their memories and hopes with iconic landscapes that define places, such as the New York City skyline or the Statue of Liberty.
• Tell the students to prepare to work in pairs to create a story based on the landscapes of Sebastião Salgado.
Part 3—Create & Refine (30 minutes): Tell students that they are now going to work in pairs and possibly one or more groups of three. When given the signal, they are to find another person in the room with a different landscape than the one they have. This will create, depending on your classroom, 10–15 groups of two. Count down: 1-2-3.
• Once students are in their groups, tell them they now have five minutes to create a story based on the two portraits. Count down: 1-2-3.
• On the third minute, start passing out paper and pencil to each group.
• On the final minute, ask students to stop. Let them know the next step is to work together to write their short story based on their landscapes.
• Both students in each group will create the story: one of them is the designated writer, who makes up the setting, while the other should come up with the names of all the characters and the theme of the story. Let the class know that each story has to have a beginning, middle, end, and a setting with details.
• Give students 10 minutes to write their stories.
• When the 10 minutes are up, it will be halfway through Part 3. Ask two groups to share their story with the class.
• Ask the class to pay close attention for beginning, middle, end, and setting details. Allow for constructive feedback from the class, then give the remainder of the time for students to refine and complete their stories.
• If groups finish early, give them the Sebastião Salgado biography handout to read.

Unit Three | E
xperience | Study | C
reate | Refine | P
resent | Reflect 49
Unit Three | E
xperience | Study | C
reate | Refine | P
resent | Reflect 48
Part 4—Present & Reflect (20 minutes)
• For the final 20 minutes of class, selected students stand up and share their stories.
• There should be enough time for 5–8 students to share. Another option would be for students to have a peer-to-peer review of their stories.
• Collect their stories at the end of class or have them refine them as a homework assignment. Note: these stories will be used again.
Students learn how landscape photography
has the ability to incorporate portraiture and food in addition to
a myriad other subjects, because landscape is a
portrait of a place.
Erick Aquino, for Ojos Propios, 2012

Unit Three | E
xperience | Study | C
reate | Refine | P
resent | Reflect 51
Unit Three | E
xperience | Study | C
reate | Refine | P
resent | Reflect 50
Students create two different types of landscape portraits in the community of their school: one that shows the familiar and another that highlights the unfamiliar. Through this exercise, students learn to appreciate how landscape photography is used to give the portrait of a place. A possible extension is analyzing their landscape photographs using the Five Portrait Elements.
Guiding Question
How can learning the vocabulary of landscape photography improve one’s awareness of their environment?
Materials
• Sebastião Salgado’s biography with the map of Brazil handout
• Copies of four Sebastião Salgado landscape photographs
• One piece of paper and a pencil for each student
• One copy of the Depth of Field model
• Select student work from previous lesson—landscape stories
• One Community Landscape Photography handout for each student
Preparation
• Prepare copies of Sebastião Salgado’s biography with the map of Brazil and the four landscape photos
• Prepare copies of four landscape photos (Falkland Islands, Arizona, Siberia, and South Sandwich Islands)
• Have papers and pencils ready for each student
• Prepare to present Depth of Field model
• Prepare to present Community Landscape Photography handout and distribute to each student
Lesson Two: Landscape as Portrait
Vocabulary
• Landscape Photography
• Portrait Photography
• Documentary Photography
• Depth of Field
• Community
Outcomes + Standards Met (Participants Will Be Able to...)
• Gain awareness of photography composition
• Gain awareness of landscape photography
• Gain awareness of documentary photography
• Learn about Brazilian photographer Sebastião Salgado
• Develop language to analyze photography
• Develop a sense of how landscape photography has the ability to define space and bring people and places together
Part 1—Experience (20 minutes): The room should be set up to facilitate a conversation about photography. Students should have paper and pencils.
• Ask the class: Do you remember the photography of Sebastião Salgado?
• Take some responses and be sure to reintroduce the word landscape.
• Ask the class if they can remember any of the stories they created in small groups.
• Present the class with Sebastião Salgado Landscape Photograph D. Ask the class if this is a landscape photograph based on the definition. Why or why not?
• Remind the class of Sebastião Salgado’s biography (show it if necessary), pointing out that he is a landscape and documentary photographer.
• Ask the class to consider what documentary photography means. Take some responses, then present the definition: the form of photography used to chronicle significant events of historical importance and everyday life.
• Ask the class to consider if it is possible for a photograph to be both a landscape and documentary photograph. Give students 5 minutes to write their responses, and then discuss them in the entire group.

Unit Three | E
xperience | Study | C
reate | Refine | P
resent | Reflect 53
Unit Three | E
xperience | Study | C
reate | Refine | P
resent | Reflect 52
How can learning the vocabulary of landscape
photography improve one’s awareness of their
environment?
Walter Valladolid, for Ojos Propios, 2013
Part 2—Study (20 minutes): Once the class has finished the conversation comparing and contrasting landscape and documentary photography, present one of the students’ stories from the previous activity—a strong example of storytelling with beginning, middle, end, setting and at least one character.
• Select a volunteer to read the story aloud.
• Ask one half of the class to play close attention to the beginning, middle and end of the story, and the other half to play close attention to the character(s) and setting details.
• Give a quick synopsis of how beginning, middle and end help define a story. Point out how characters and setting serve as focal points of the story.
• Ask the class if photographs have their own beginning, middles and ends. Ask why or why not.
• Present the Depth of Field model to the class. Highlight how all photographs have some form of depth of field but landscape photography, in particular, depends on depth of field because it shows spaces within the world.
• Point out how the foreground (the closest point in an image to the photographer) is like the beginning, the midground (the space between foreground and background) is like the middle, and the background (the space farthest from the photographer) is like the end.
• Present each of the four Sebastião Salgado images and identify the beginning, middle and end of the photographs.
Part 3—Create & Refine (30 minutes): Present the Community Landscape Photography directions and pass around the Community Landscape Photography handout.
• Once all students have their paper, choose a volunteer(s) to review the directions for the project. Each student is to take a landscape photograph using Depth of Field (beginning, middle and end) that showcases either what is familiar or unfamiliar about the school community.
• Check for understanding by asking the class to give examples of familiar places in the school community. Ask why they are familiar, in order to build a working understanding of the directions. Do the same for unfamiliar places.
• Give the class 20 minutes to complete their Community Landscape Photography handout that will include a sketch of the space they will photograph and a written description of why it is familiar or unfamiliar. They will also include how they will use Depth of Field to tell a story with their photograph.
Unit Three | E
xperience | Study | C
reate | Refine | P
resent | Reflect 55
Unit Three | E
xperience | Study | C
reate | Refine | P
resent | Reflect 54
Part 4—Present & Reflect (20 minutes)
• For the final 20 minutes of class, students share their work—presenting the location, familiar or unfamiliar elements, and their use of Depth of Field.
• Before collecting their work, let the class know that they will work in groups based on their location for the next class.
Students create two different types of landscape portraits in the school community: one that shows the familiar and another that highlights the unfamiliar. Through this exercise, students learn to appreciate how landscape photography is used to give the portrait of a place. A possible extension could be analyzing their landscape photographs using the Five Portrait Elements.
Guiding Question
How can learning the vocabulary of landscape photography improve one’s awareness of their environment?
Materials
• Community Landscape Photography
• Copies of Ojos Propios landscape photographs
• 15 cameras
Preparation
• Prepare guiding materials to present, such as the Community Landscape Photography handout
• Ready 15 cameras
Vocabulary
• Landscape photography
• Documentary photography
• Portrait photography
• Depth of Field
Outcomes + Standards Met (Participants Will Be Able to...)
• Gain awareness of photography composition
• Learn about Peruvian photographer Martín Chambi
• Learn about African-American photographer Jamel Shabazz
• Develop language to analyze portrait photography
• Build portraits inspired by the photography of Jamel Shabazz and Martín Chambi
Lesson Three: Landscape
as Community
Unit Three | E
xperience | Study | C
reate | Refine | P
resent | Reflect 57
Unit Three | E
xperience | Study | C
reate | Refine | P
resent | Reflect 56
Part 1—Experience (15 minutes): Review some of the Community Landscape Photography ideas from the class.
• Present the two landscape photographs from Ojos Propios. Explain to the class who this group is and how they work in various communities. Share the definition of community.
• Ask the class to consider the communities represented in the photos.
Part 2—Study (10 minutes)
Have the class line up in their assigned groups for their Community Landscape Photography project. Give each group a camera.
Part 3—Create & Refine (50 minutes)
• Let the class know that they are going to work in their groups with supervision to take their landscape photographs.
• Take 2–4 minutes with each group to provide positive feedback and encouragement. Give each group some idea of how they can improve their portrait and ask them to make adjustments to make their photography great.
Part 4—Present & Reflect (15 minutes)
• When the students are finished and have returned, present the photographs of one or two groups to the rest of the class.
• Without putting each group under too much pressure, review the images and point out how they were able to show what is familiar and unfamiliar about the community.
• Point out how Depth of Field was used to communicate a story. Identify how some photos are both landscape and documentary. Explain why.
Experience | S
tudy | Create | R
efine | Present | R
eflect 57
• The class can take a field trip to other communities and create landscape photographs based on what they feel is the story of that space.
• Students can bring in photographs they may have taken from their travels or postcards they have received to analyze.
Unit Vocabulary
• Photography: the art or process of producing images by the action of radiant energy and especially light on a sensitive surface (as film or an optical sensor).
• Landscape Photography: shows spaces within the world, sometimes vast and unending, but at other times microscopic. Landscape photographs typically capture the presence of nature but can also focus on man-made features or disturbances of landscapes.
• Portrait Photography: photography of a person or group of people that displays the expression, personality, and mood of the subject. Like other types of portraiture, the focus of the photograph is usually the person’s face, although the entire body and the background or context may be included.
• Documentary Photography: the form of photography used to chronicle significant events of historical importance and everyday life.
• Depth of Field: the amount of distance between the nearest and farthest objects that appear in acceptably sharp focus in a photograph. Depth of Field uses foreground, midground and background as the three planes that determine all that can be seen in an image.
• Community: the people of a district or country considered collectively, especially in the context of social values and responsibilities; society.
Moving Forward
Experience | S
tudy | Create | R
efine | Present | R
eflect 58
Experience | S
tudy | Create | R
efine | Present | R
eflect 59
Resources
María Belén Jiménez, for Ojos Propios, 2014
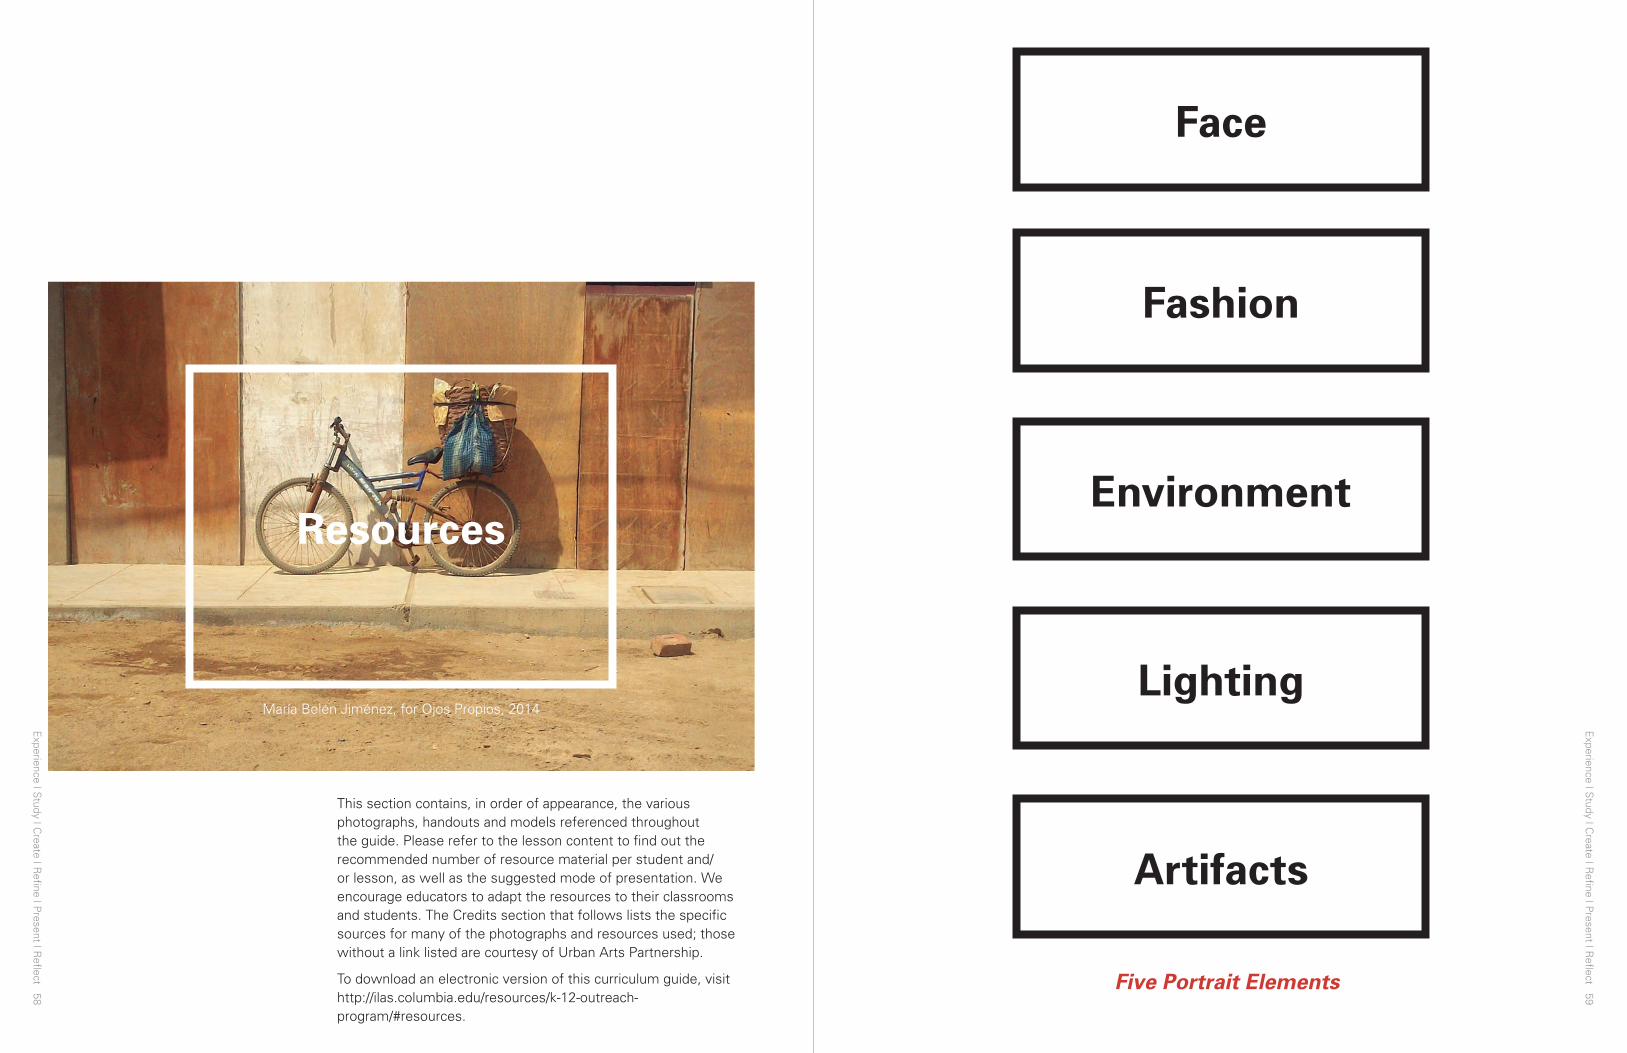
This section contains, in order of appearance, the various photographs, handouts and models referenced throughout the guide. Please refer to the lesson content to find out the recommended number of resource material per student and/or lesson, as well as the suggested mode of presentation. We encourage educators to adapt the resources to their classrooms and students. The Credits section that follows lists the specific sources for many of the photographs and resources used; those without a link listed are courtesy of Urban Arts Partnership.
To download an electronic version of this curriculum guide, visit http://ilas.columbia.edu/resources/k-12-outreach-program/#resources.
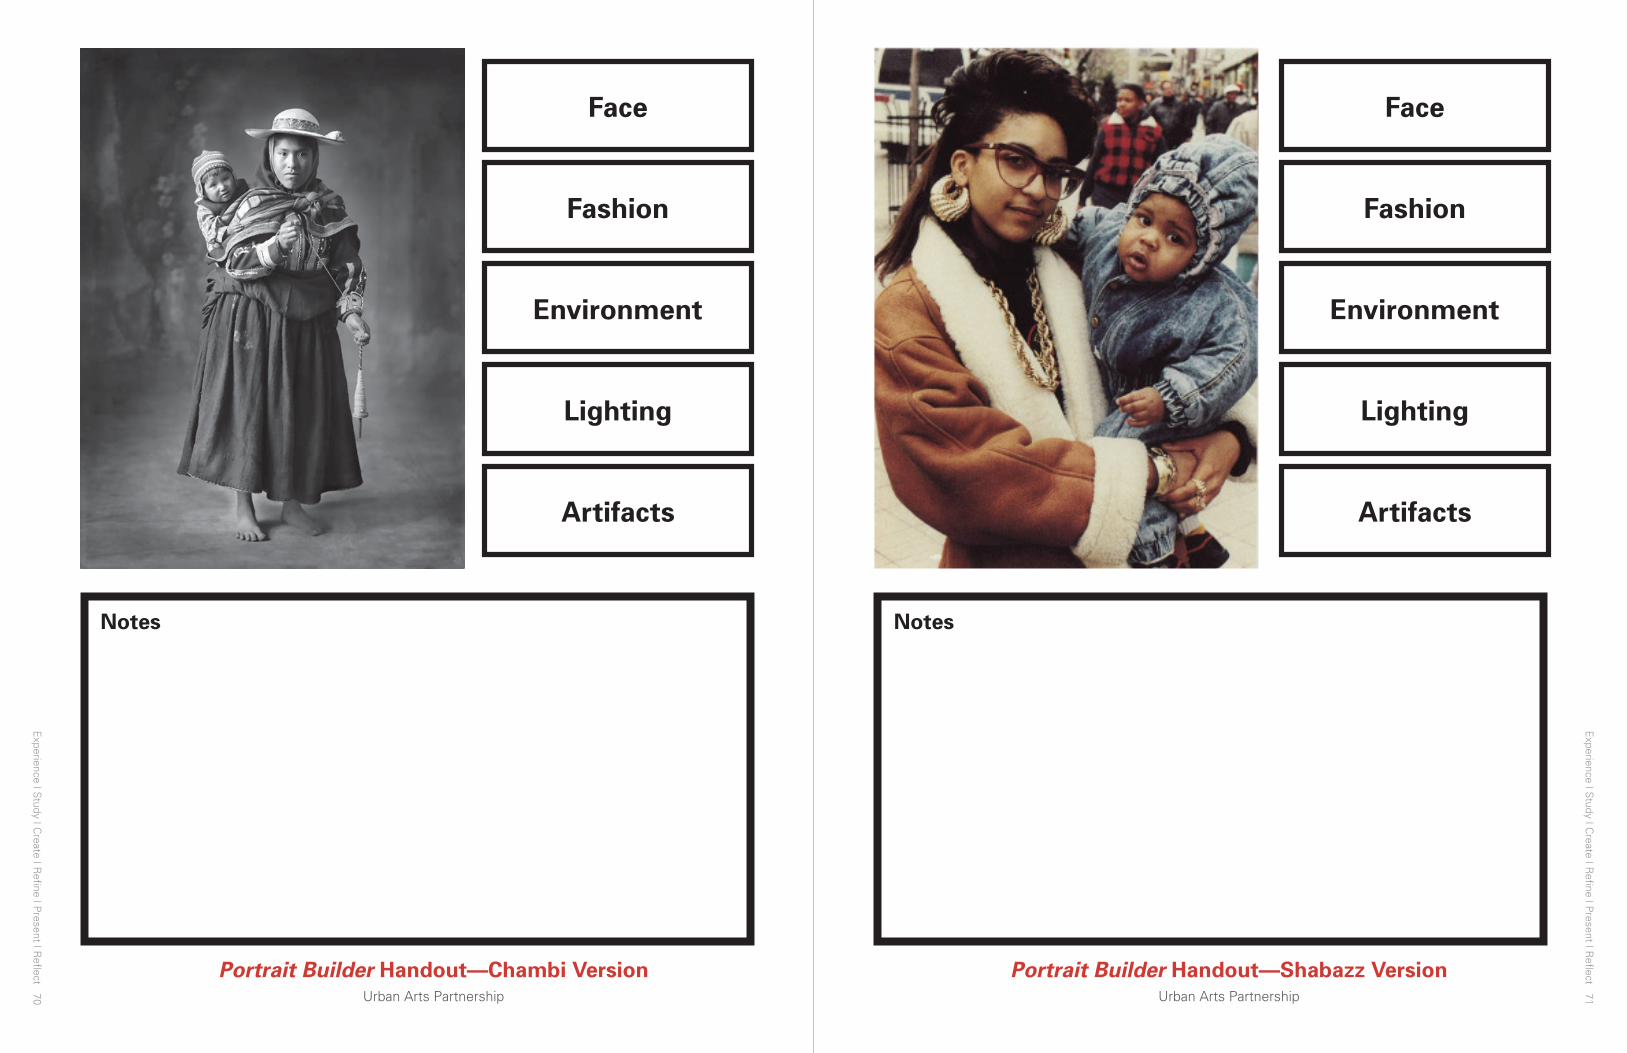
Five Portrait Elements
Face
Fashion
Environment
Lighting
Artifacts
Experience | S
tudy | Create | R
efine | Present | R
eflect 60
Experience | S
tudy | Create | R
efine | Present | R
eflect 61
Martín Chambi, Portrait AUrban Arts Partnership
Martín Chambi, Portrait BUrban Arts Partnership
Experience | S
tudy | Create | R
efine | Present | R
eflect 62
Experience | S
tudy | Create | R
efine | Present | R
eflect 63
Martín Chambi, Portrait CUrban Arts Partnership
Martín Chambi, Portrait DUrban Arts Partnership
Experience | S
tudy | Create | R
efine | Present | R
eflect 64
Experience | S
tudy | Create | R
efine | Present | R
eflect 65
Martín Chambi (1891–1973) is one of the first Indigenous photographers from
Latin America to reach international acclaim. His
seminal works are his studio and environmental
portraits, but he was also a great landscape
photographer.
In 1979, the Museum of Modern Art (MoMA) held
a retrospective of his work. Part of the charm
and importance of Martín Chambi’s photography is the historical richness it
has gained through time.
Above: Martín Chambi portrait Left: Map of Perú
Martín Chambi Biography with the Map of Perú
Martín Chambi: Photographs, 1920 – 1950
By Martín Chambi Foreword by
Mario Vargas Llosa Introductions by
Edward Rannery & Publio López Mondéjar
The book can be purchased from Barnes & Noble, Amazon, and other
major book sellers.
Martín Chambi’s Photo Book Information
Experience | S
tudy | Create | R
efine | Present | R
eflect 66
Experience | S
tudy | Create | R
efine | Present | R
eflect 67
Jamel Shabazz, Portrait AUrban Arts Partnership
Jamel Shabazz, Portrait BGoogle Image
Experience | S
tudy | Create | R
efine | Present | R
eflect 68
Experience | S
tudy | Create | R
efine | Present | R
eflect 69
Jamel Shabazz, Portrait CGoogle Image
Jamel Shabazz, Portrait DGoogle Image
Experience | S
tudy | Create | R
efine | Present | R
eflect 70
Experience | S
tudy | Create | R
efine | Present | R
eflect 71
Face
Fashion
Environment
Lighting
Artifacts
Notes
Portrait Builder Handout—Chambi VersionUrban Arts Partnership
Notes:
Notes
Portrait Builder Handout—Shabazz VersionUrban Arts Partnership
Face
Fashion
Environment
Lighting
Artifacts

Experience | S
tudy | Create | R
efine | Present | R
eflect 72
Experience | S
tudy | Create | R
efine | Present | R
eflect 73
Jamel Shabazz (1960–) is an African-American
fine art, street style and documentary
photographer. Jamel’s documentation of urban
New York City in the 1970s and 1980s has garnered him worldwide acclaim.
Inspired by photographic greats such as Gordon Parks and James Van
Der Zee, Jamel captured the everyday life of a
forgotten time: New York City neighborhoods when hip-hop culture was just
beginning to develop a visceral presence.
His photography was rediscovered in the late
1990s and has been published in a series of highly successful photo books. Similar to Martín Chambi, Shabazz was a
pioneer by photographing his environment and the
people in it.
Above: Jamel Shabazz portrait Right: Map of New York City Boroughs
Jamel Shabazz Biography with the Map of New York City Boroughs
Back in the Days
By Jamel Shabazz
The book is available to purchase from Barnes &
Noble, Amazon, and other major book sellers.
Jamel Shabazz’s Photo Book Information
Experience | S
tudy | Create | R
efine | Present | R
eflect 74
Experience | S
tudy | Create | R
efine | Present | R
eflect 75
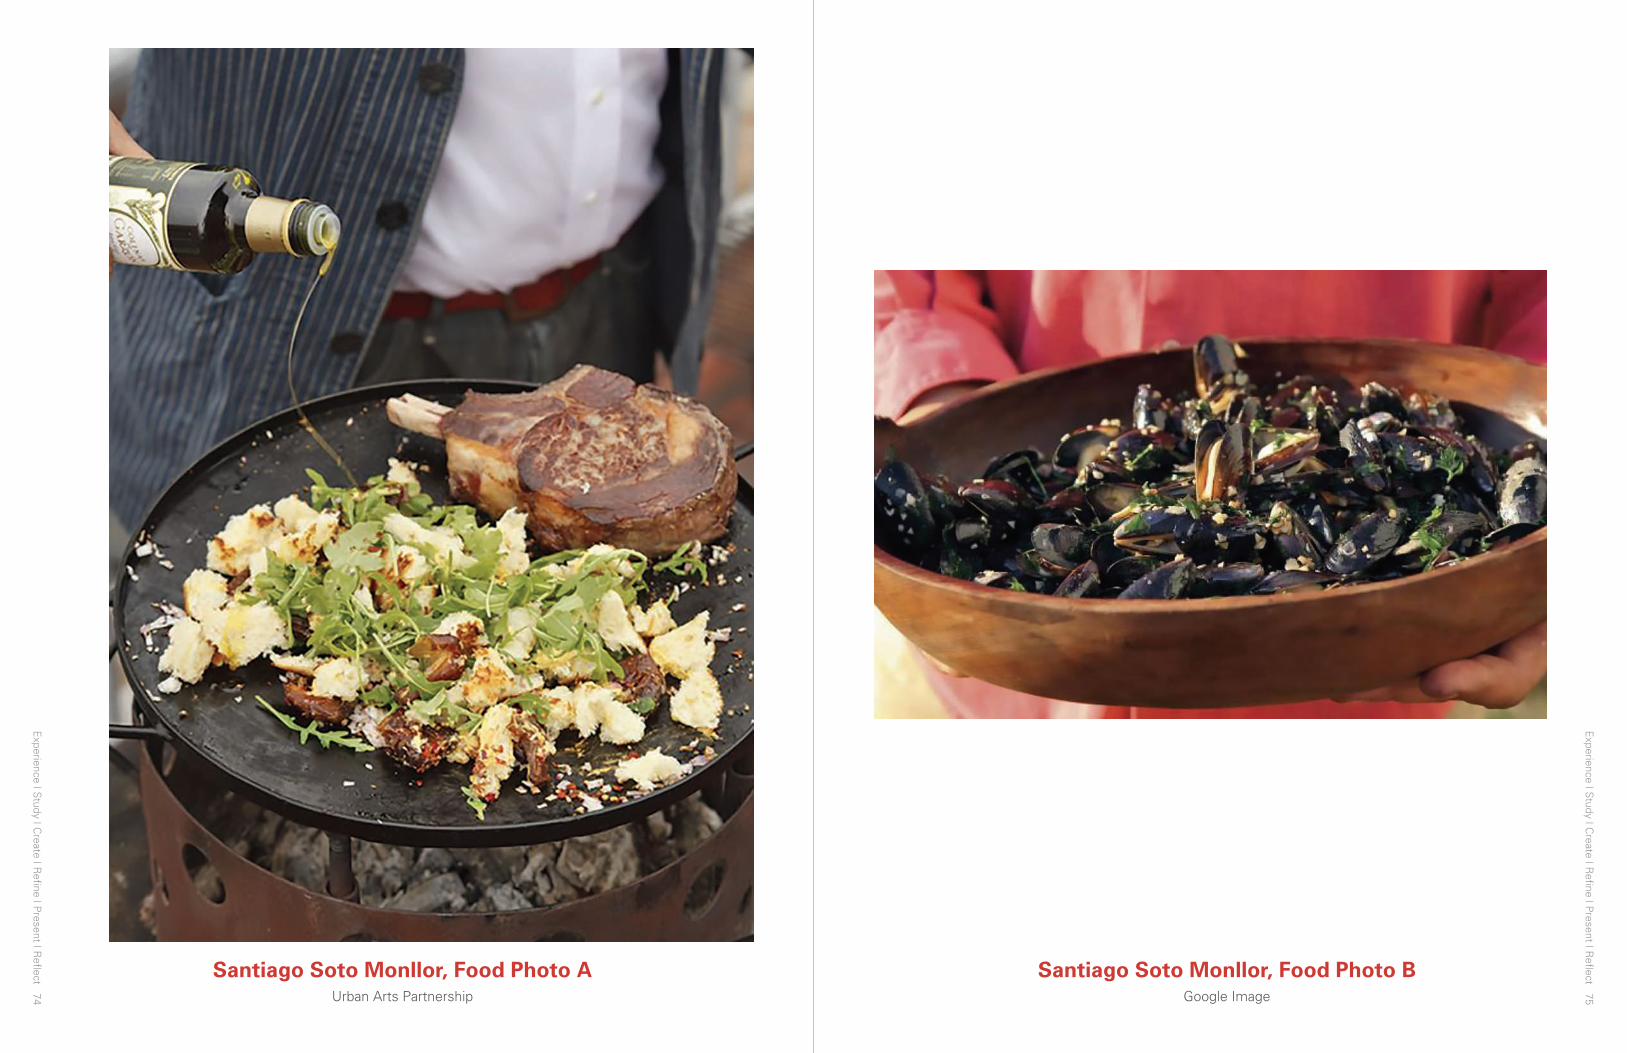
Santiago Soto Monllor, Food Photo AUrban Arts Partnership
Santiago Soto Monllor, Food Photo BGoogle Image

Experience | S
tudy | Create | R
efine | Present | R
eflect 76
Experience | S
tudy | Create | R
efine | Present | R
eflect 77
Santiago Soto Monllor, Food Photo CGoogle Image
Santiago Soto Monllor, Food Photo DGoogle Image
Experience | S
tudy | Create | R
efine | Present | R
eflect 78
Experience | S
tudy | Create | R
efine | Present | R
eflect 79
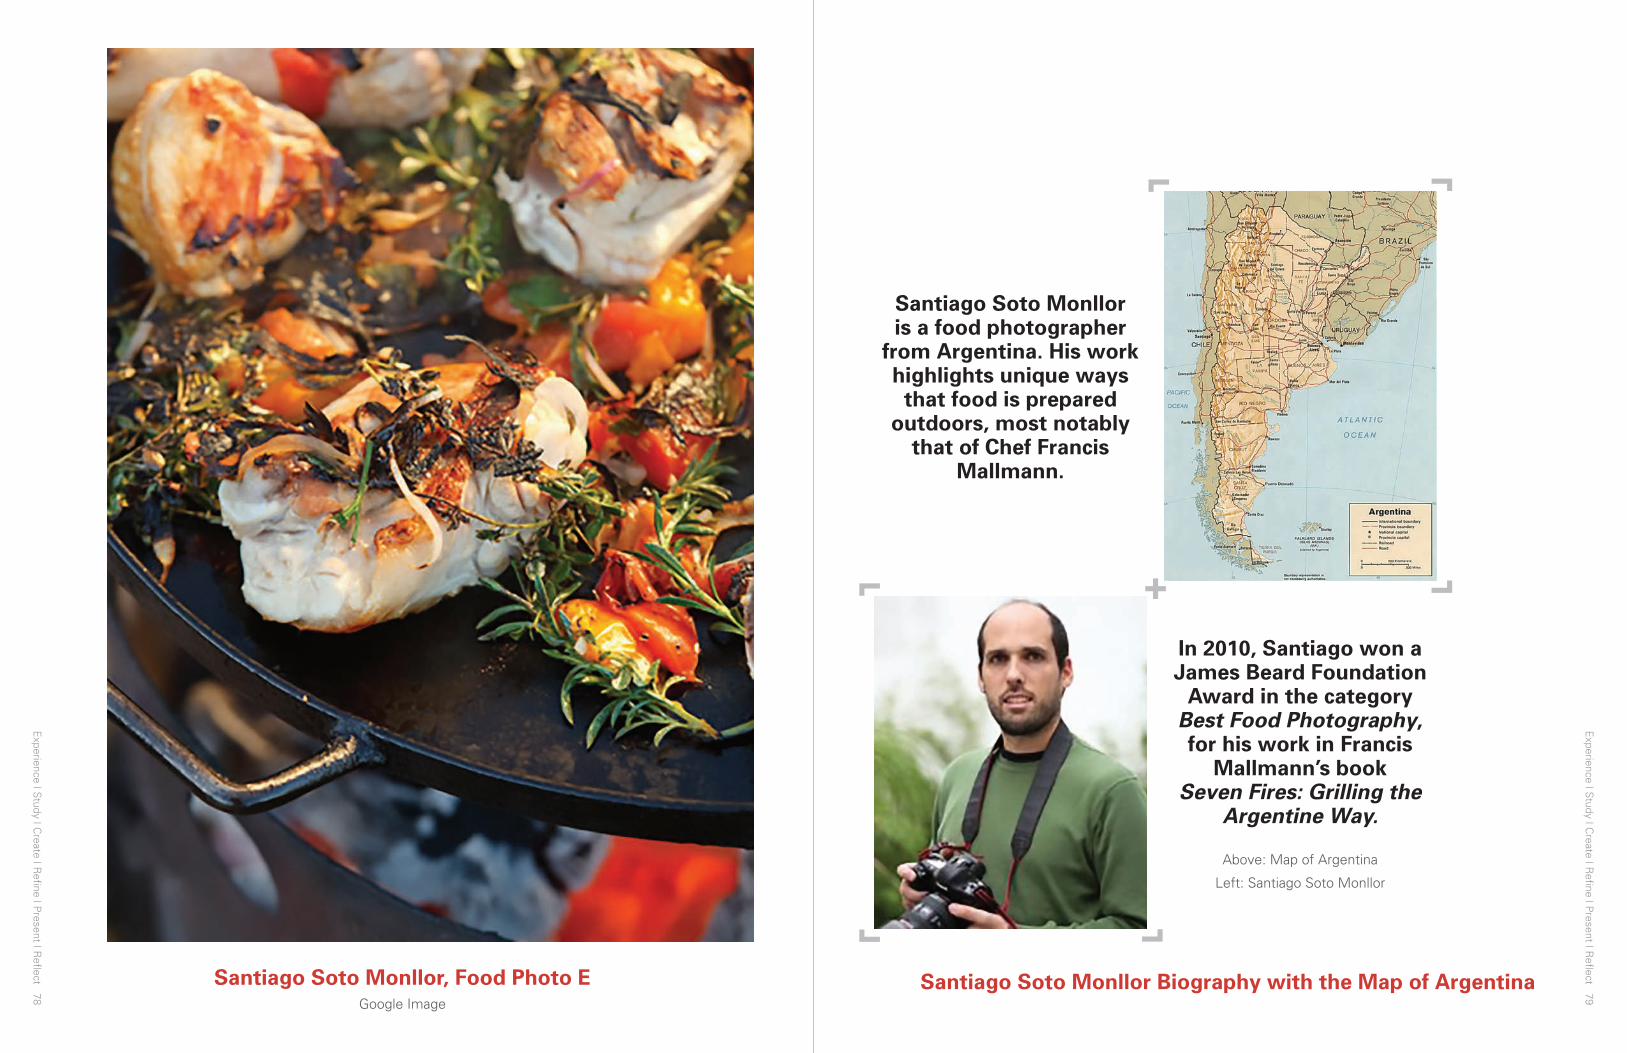
Santiago Soto Monllor, Food Photo EGoogle Image
Santiago Soto Monllor is a food photographer
from Argentina. His work highlights unique ways that food is prepared
outdoors, most notably that of Chef Francis
Mallmann.
In 2010, Santiago won a James Beard Foundation
Award in the category Best Food Photography, for his work in Francis
Mallmann’s book Seven Fires: Grilling the
Argentine Way.
Above: Map of Argentina
Left: Santiago Soto Monllor
Santiago Soto Monllor Biography with the Map of Argentina

Experience | S
tudy | Create | R
efine | Present | R
eflect 80
Experience | S
tudy | Create | R
efine | Present | R
eflect 81
Food Story
What is the story behind this family dish?
Record the ingredients of the family recipe.
What is the name of the dish?
Ingredient SketchWho are you interviewing?
Ingredients Part One
• 1/3 cups quinoa grains, cooked
• Four ounces queso fresco, cubed
• 1/2 cup corn kernels, cooked
• 3/4 cup fava beans, shelled and boiled
• One small onion, diced
• One tomato, diced
• One rocoto chile, seeded, membrane removed, and chopped
Ingredients Part Two
• One yellow chile, seeded, membrane removed, and chopped
• One tablespoon chopped parsley
• One tablespoon chopped huacatay leaves
• 3/4 cup black olives, cut in strips
• Four tablespoons white wine vinegar
• Five tablespoons vegetable oil
• 1/2 teaspoon dried oregano
• Salt and pepper
Solterito Recipe Cards

Experience | S
tudy | Create | R
efine | Present | R
eflect 82
Experience | S
tudy | Create | R
efine | Present | R
eflect 83
Sebastião Salgado, Landscape Photo A—Falkland IslandsUrban Arts Partnership
Sebastião Salgado, Landscape Photo B—ArizonaGoogle Image

Experience | S
tudy | Create | R
efine | Present | R
eflect 84
Experience | S
tudy | Create | R
efine | Present | R
eflect 85
Sebastião Salgado, Landscape Photo C—SiberiaThe New York Times
Sebastião Salgado, Landscape Photo D—South Sandwich Islands Google Image
Experience | S
tudy | Create | R
efine | Present | R
eflect 86
Experience | S
tudy | Create | R
efine | Present | R
eflect 87
Sebastião Salgado was born in the state of Minas
Gerais, Brazil in 1944. He is an award-winning
social documentary photographer whose
works have been presented in leading art museums and galleries
around the world.
He and his wife, Lélia Deluiz Wanick, founded
Instituto Terra, an institution dedicated
to reforestation, conservation and
environmental education, created after they
successfully restored what had been a devastated
stretch of Brazil’s Atlantic Forest.
Salgado likes to work on multi-year documentary
projects, such as his series on working people in
South America, Workers, and an epic collection of
landscapes and wildlife, Genesis.
One of Salgado’s techniques is to
incorporate subjects into his landscapes to tell a
story of a place and those that inhabit the space. There is no name for
this technique, but it is a form of environmental
portraiture where the main subject is the place, while people or animals
add context to the space.
Left: Map of Brazil Below: Portrait of Sebastião Salgado
Sebastião Salgado Biography with the Map of Brazil Depth of Field Nataly Aguilar, for Ojos Propios, 2014
Foreground
Midground
Background
Experience | S
tudy | Create | R
efine | Present | R
eflect 88
Experience | S
tudy | Create | R
efine | Present | R
eflect 89
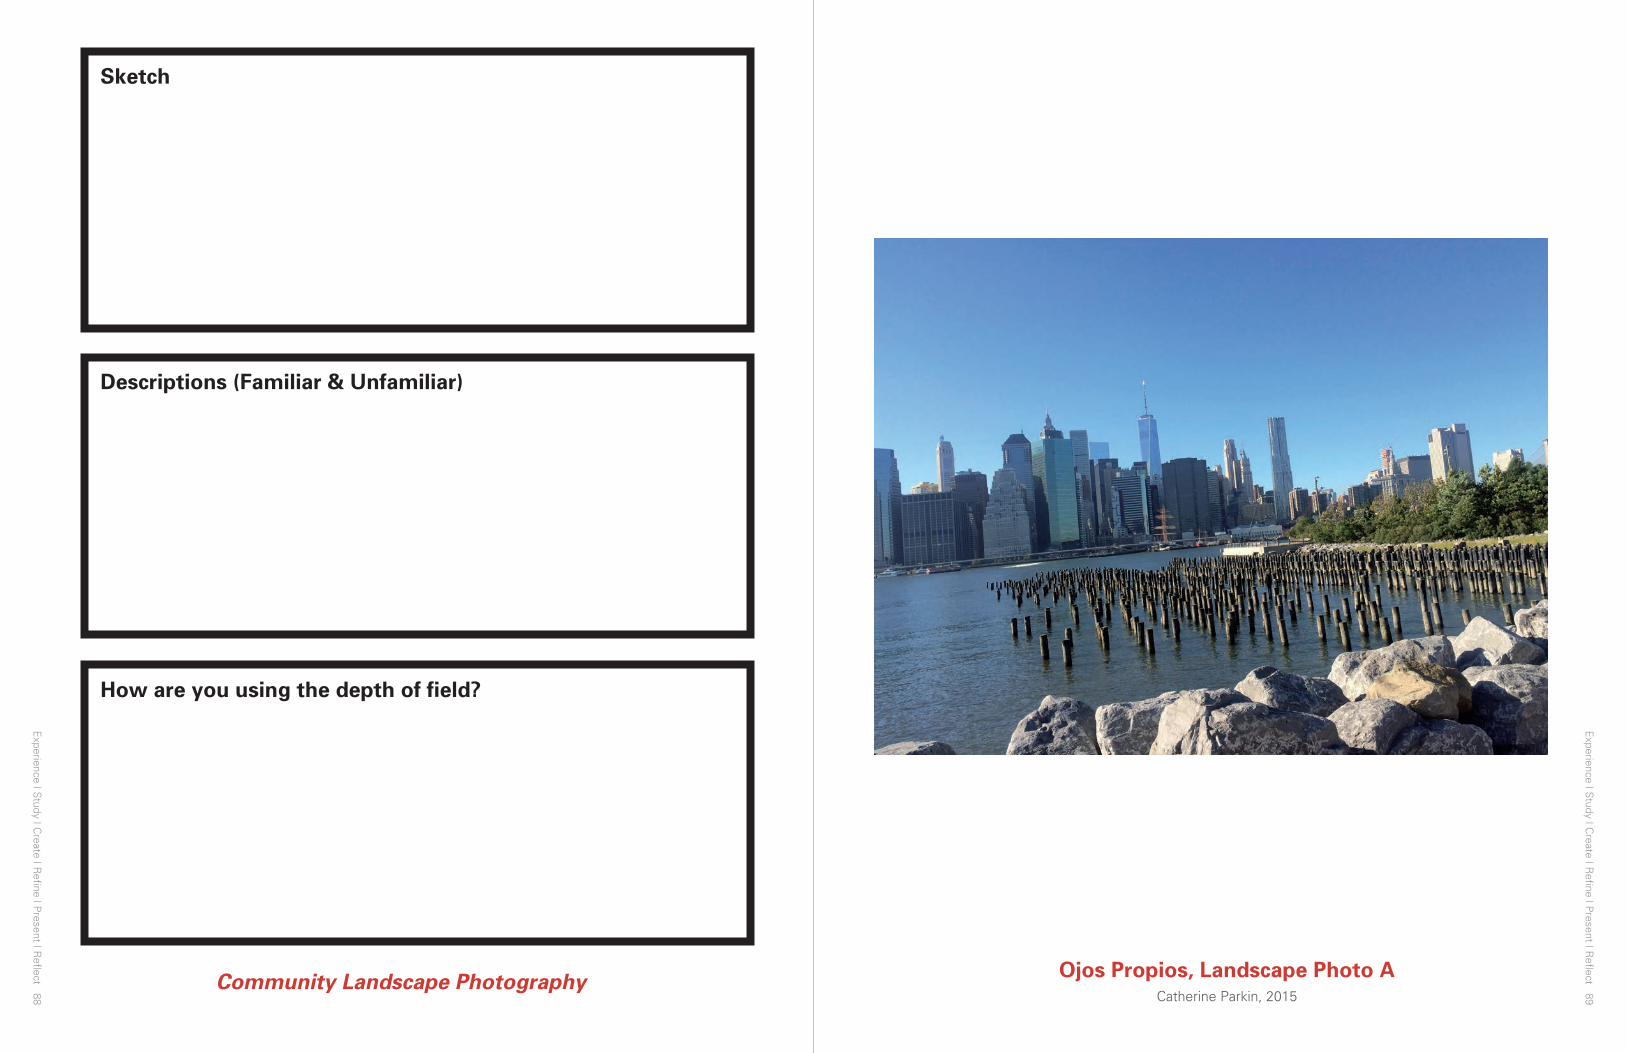
Community Landscape Photography
How are you using the depth of field?
Descriptions (Familiar & Unfamiliar)
Sketch
Ojos Propios, Landscape Photo A Catherine Parkin, 2015
Experience | S
tudy | Create | R
efine | Present | R
eflect 91
Experience | S
tudy | Create | R
efine | Present | R
eflect 90
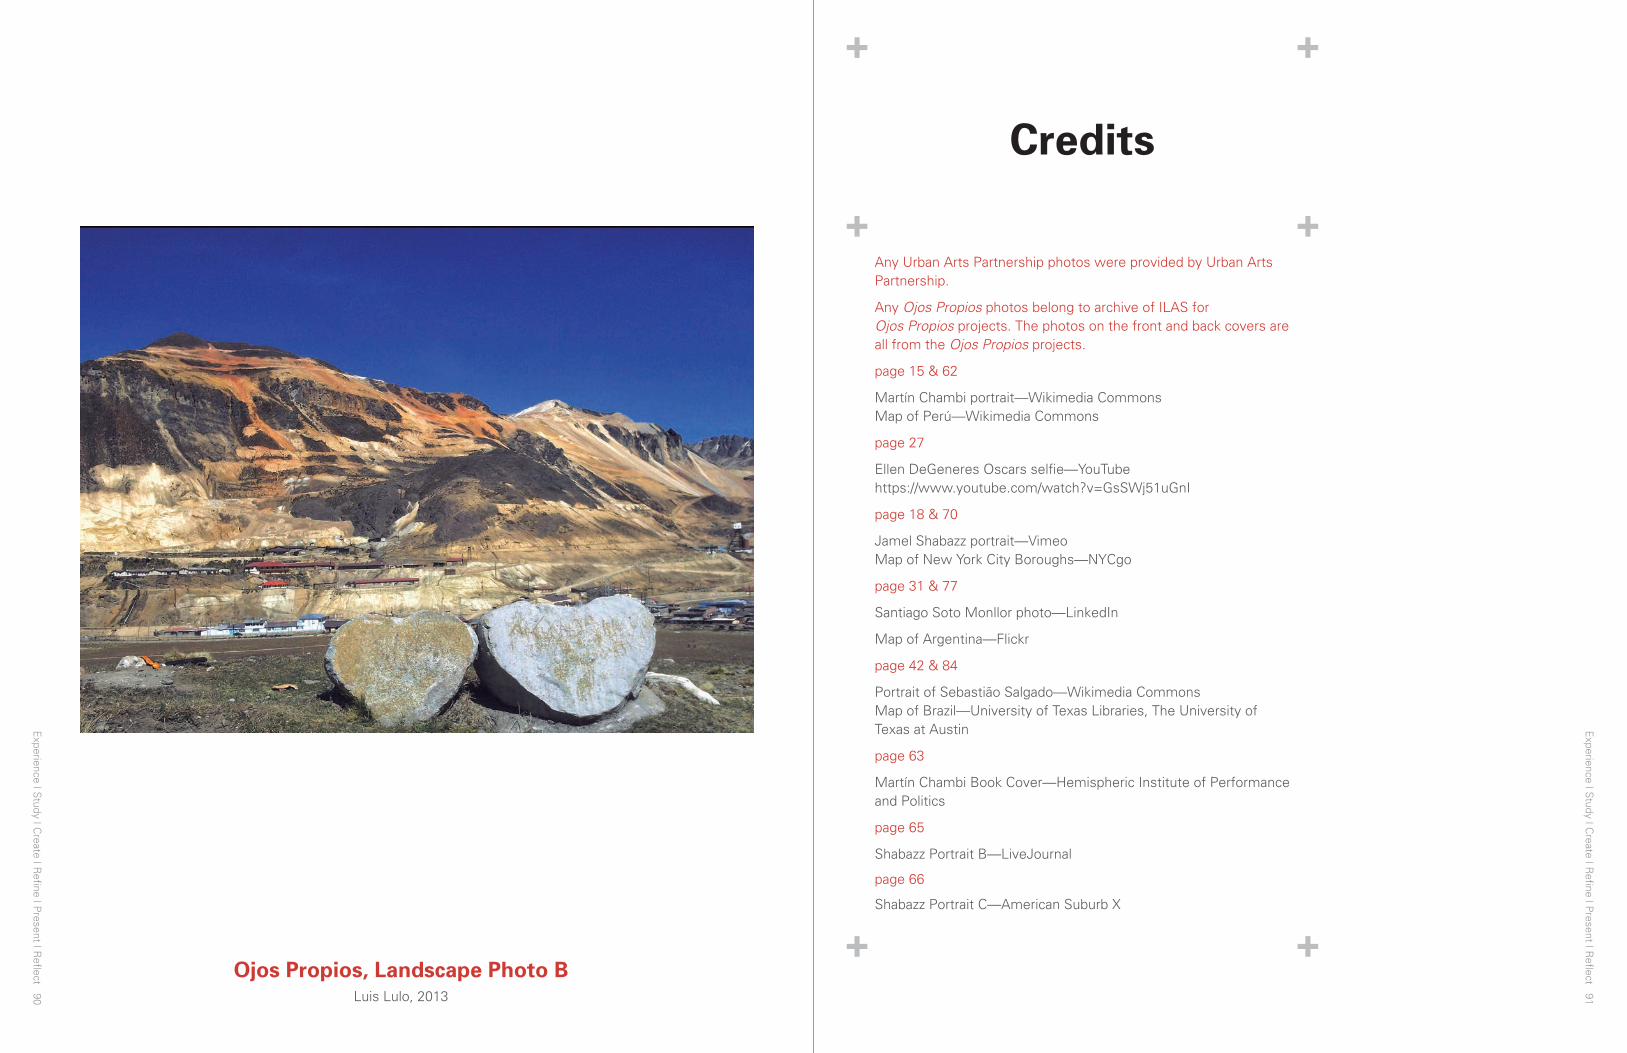
Ojos Propios, Landscape Photo B Luis Lulo, 2013
Credits
Any Urban Arts Partnership photos were provided by Urban Arts Partnership.
Any Ojos Propios photos belong to archive of ILAS for Ojos Propios projects. The photos on the front and back covers are all from the Ojos Propios projects.
page 15 & 62
Martín Chambi portrait—Wikimedia Commons Map of Perú—Wikimedia Commons
page 27
Ellen DeGeneres Oscars selfie—YouTube https://www.youtube.com/watch?v=GsSWj51uGnI
page 18 & 70
Jamel Shabazz portrait—Vimeo Map of New York City Boroughs—NYCgo
page 31 & 77
Santiago Soto Monllor photo—LinkedIn
Map of Argentina—Flickr
page 42 & 84
Portrait of Sebastião Salgado—Wikimedia Commons Map of Brazil—University of Texas Libraries, The University of Texas at Austin
page 63
Martín Chambi Book Cover—Hemispheric Institute of Performance and Politics
page 65
Shabazz Portrait B—LiveJournal
page 66
Shabazz Portrait C—American Suburb X
Experience | S
tudy | Create | R
efine | Present | R
eflect 92
page 67
Shabazz Portrait D—American Suburb X
page 71
Jamel Shabazz Book Cover—Amazon
page 73
Food Photo B—Chron
page 74
Food Photo C—The Real Argentina
page 75
Food Photo D—The Real Argentina
page 76
Food Photo E—TasteBook
page 81
Arizona—Ran Dian
page 82
Siberia—The New York Times
page 83
South Sandwich Islands—Ran Dian
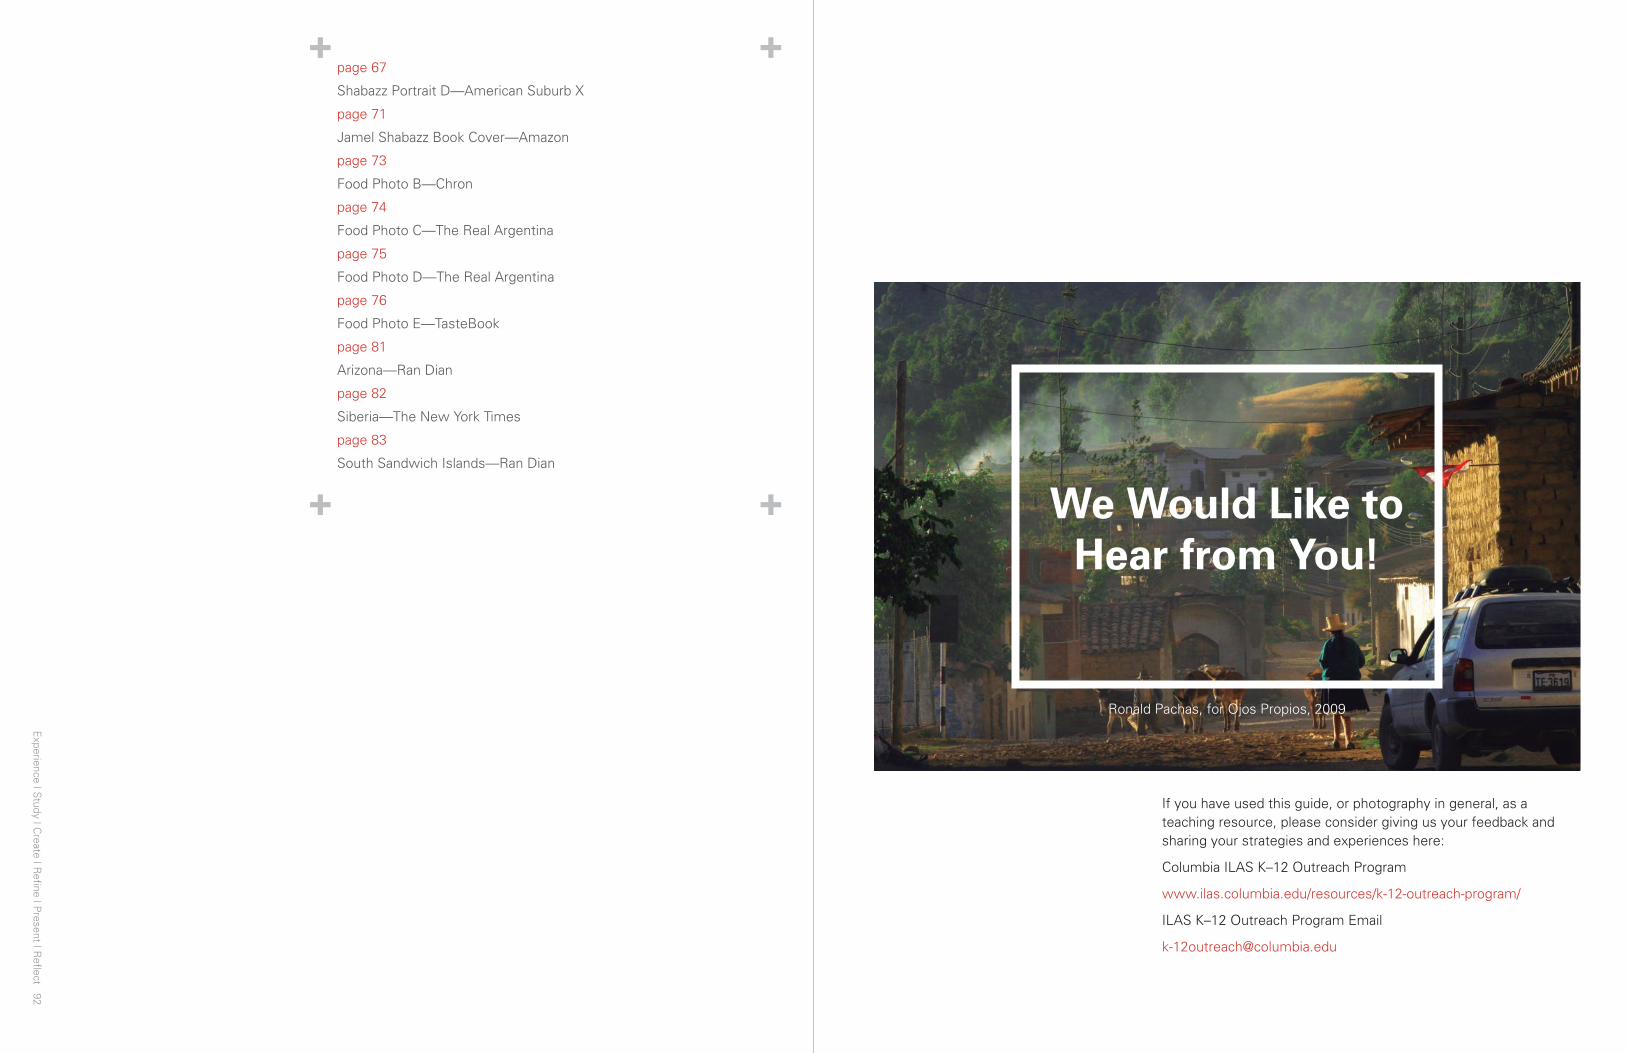
We Would Like to Hear from You!
If you have used this guide, or photography in general, as a teaching resource, please consider giving us your feedback and sharing your strategies and experiences here:
Columbia ILAS K–12 Outreach Program
www.ilas.columbia.edu/resources/k-12-outreach-program/
ILAS K–12 Outreach Program Email
Ronald Pachas, for Ojos Propios, 2009