Embed Size (px)
Citation preview
P a g e | 1
Outlook Web App – Quick Start
Section 1.1 Access Outlook Web App
Section 1.2 View Folders
Section 1.3 Disable Group by Conversation
Section 1.4 Access other Apps such as Calendars
Section 1.5 Add a Shared Mailbox
Section 1.6 Add a Shared Calendar
1.1 Access Outlook Web App Table of Contents
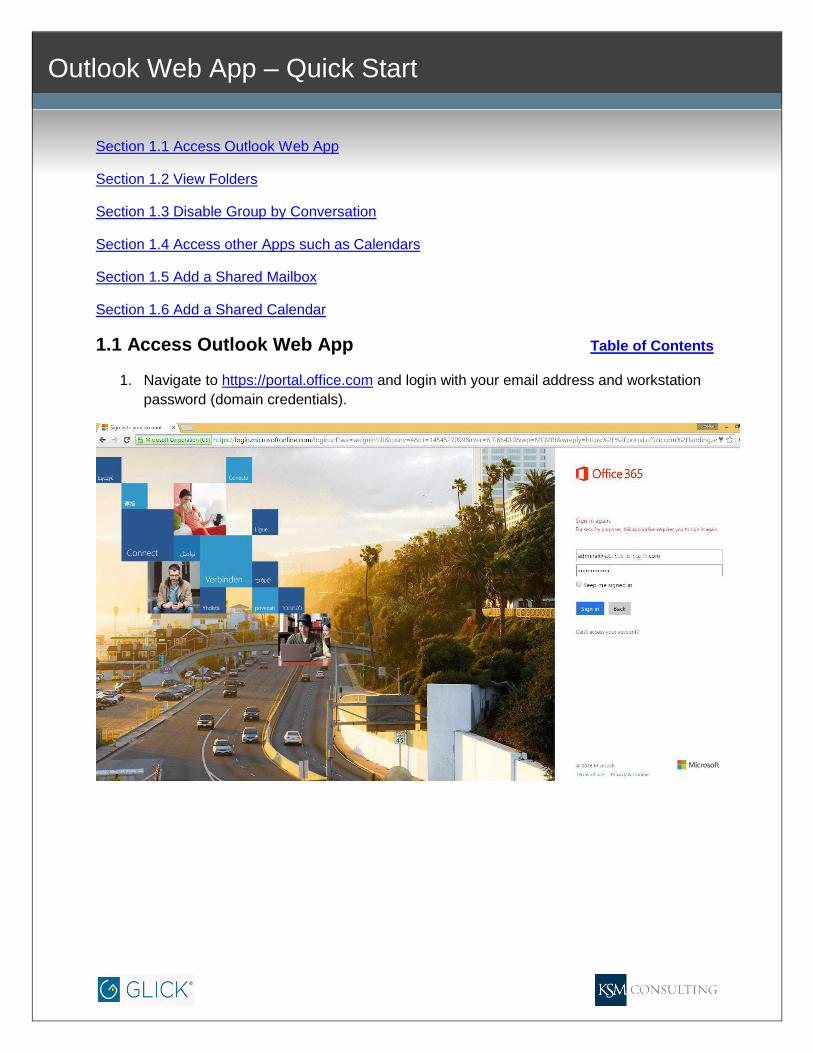
1. Navigate to https://portal.office.com and login with your email address and workstation
password (domain credentials).
P a g e | 2
Outlook Web App – Quick Start
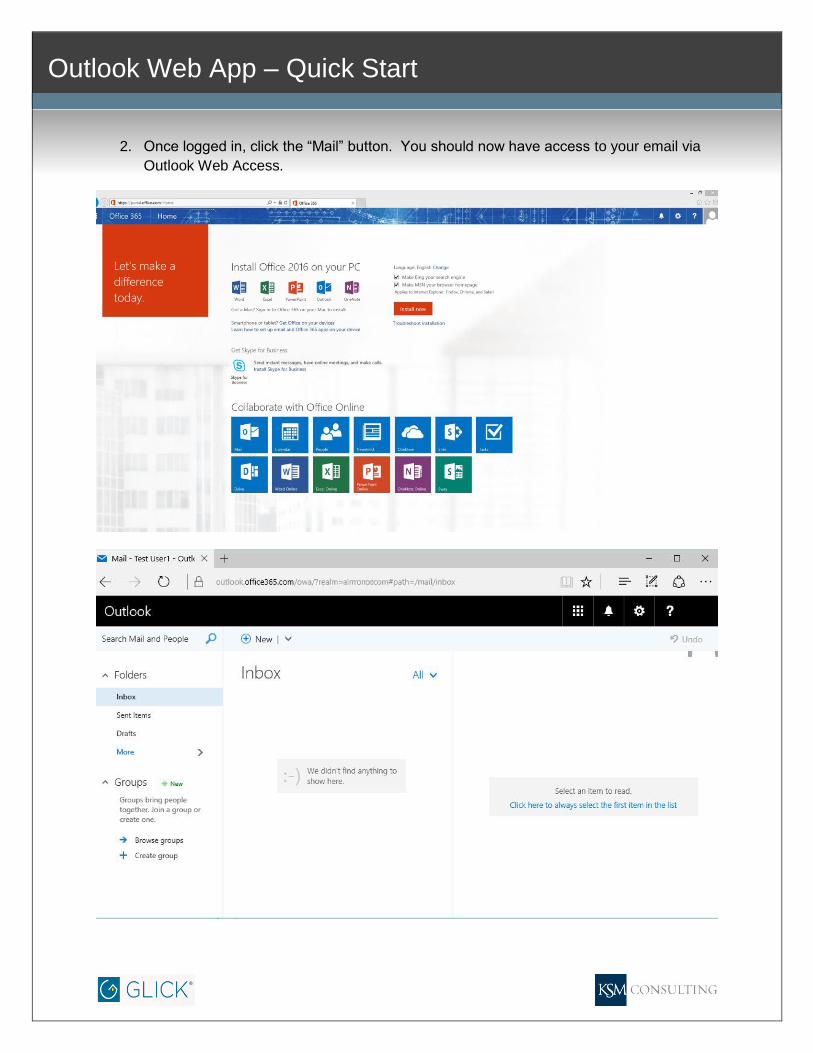
2. Once logged in, click the “Mail” button. You should now have access to your email via
Outlook Web Access.

P a g e | 3
Outlook Web App – Quick Start
1.2 View Folders Table of Contents
1. Your Inbox, Sent Items and Drafts are visible by default after logging into Outlook Web
Access. In order to view more folders, click the “More” link.
P a g e | 4
Outlook Web App – Quick Start
1.3 Disable Group by Conversations Table of Contents
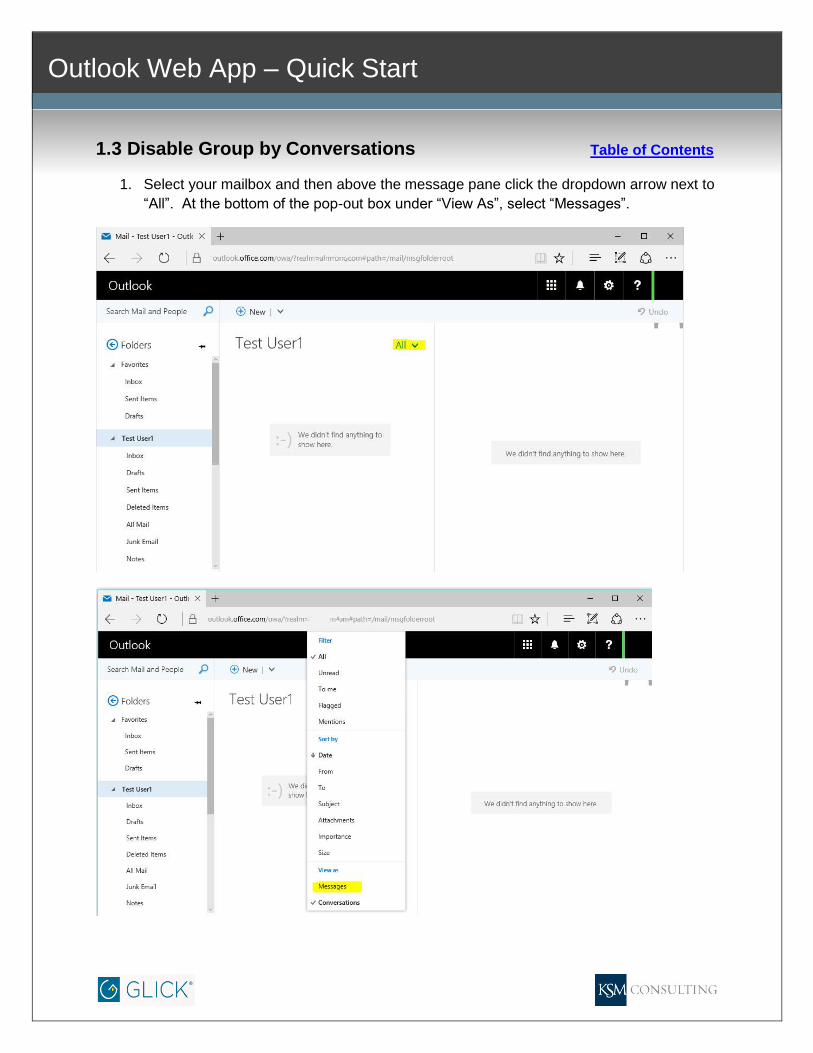
1. Select your mailbox and then above the message pane click the dropdown arrow next to
“All”. At the bottom of the pop-out box under “View As”, select “Messages”.
P a g e | 5
Outlook Web App – Quick Start
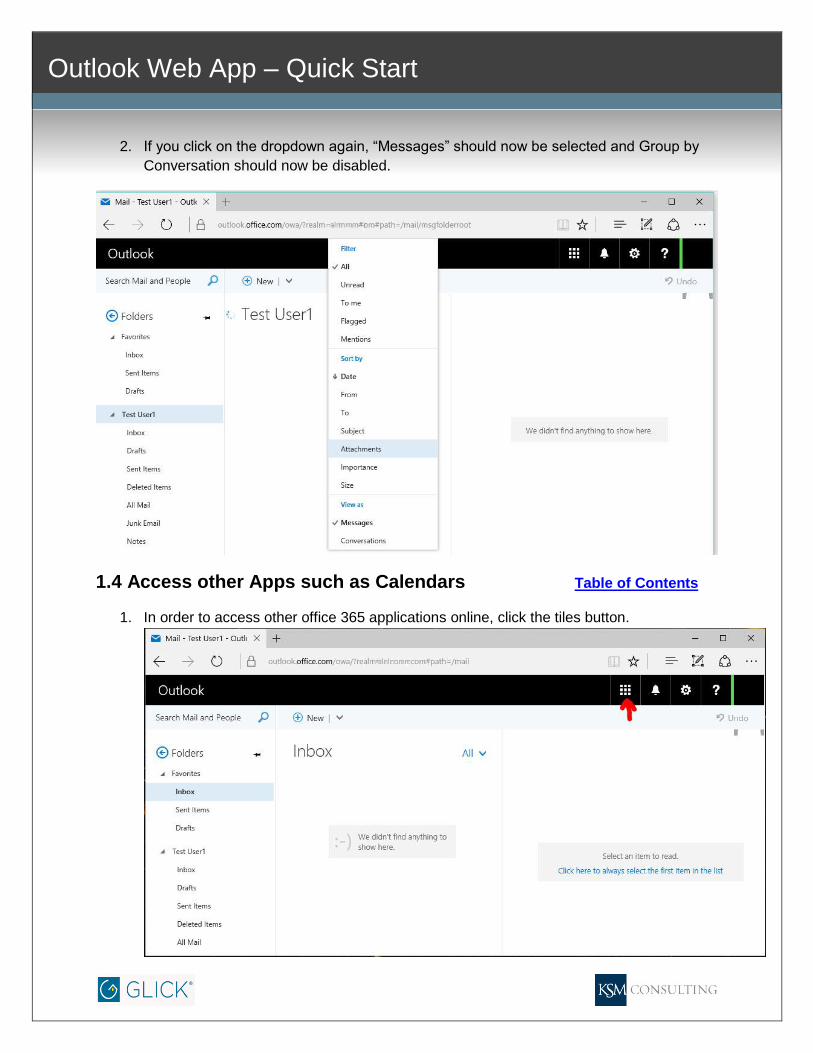
2. If you click on the dropdown again, “Messages” should now be selected and Group by
Conversation should now be disabled.
1.4 Access other Apps such as Calendars Table of Contents
1. In order to access other office 365 applications online, click the tiles button.
P a g e | 6
Outlook Web App – Quick Start
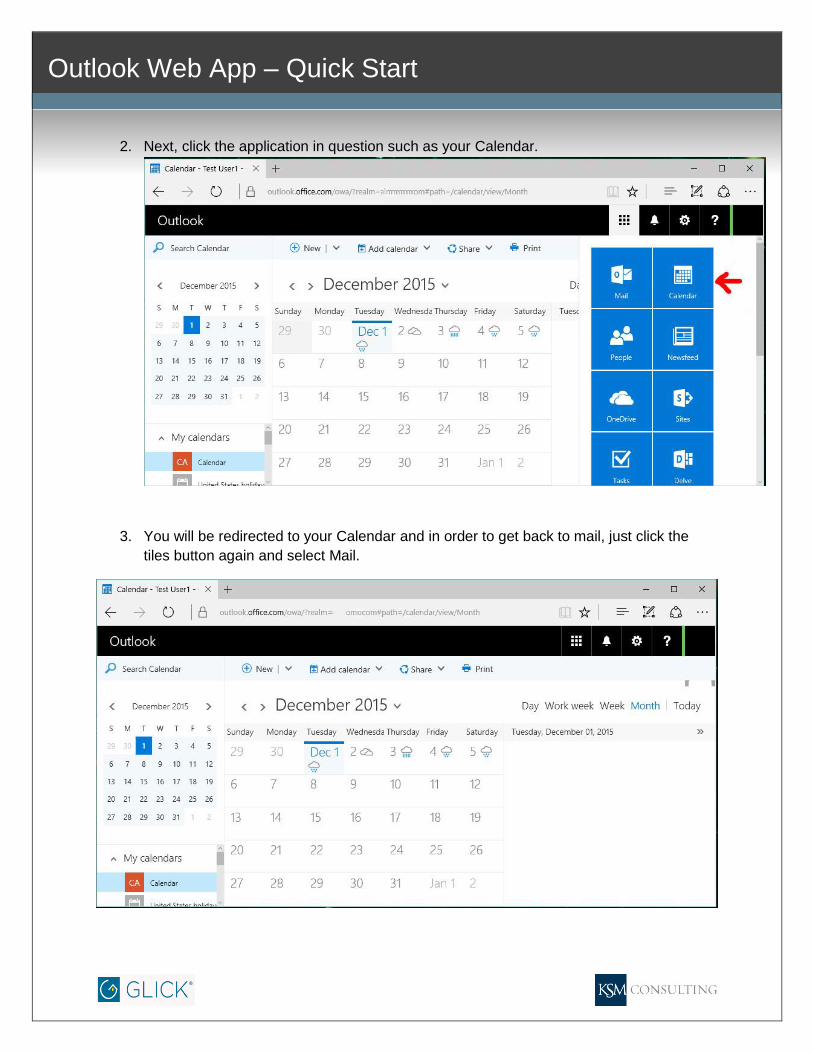
2. Next, click the application in question such as your Calendar.
3. You will be redirected to your Calendar and in order to get back to mail, just click the
tiles button again and select Mail.

P a g e | 7
Outlook Web App – Quick Start
1.5 Add a Shared Mailbox Table of Contents
1. Right-click your mailbox and select “Add shared folder…”
P a g e | 8
Outlook Web App – Quick Start
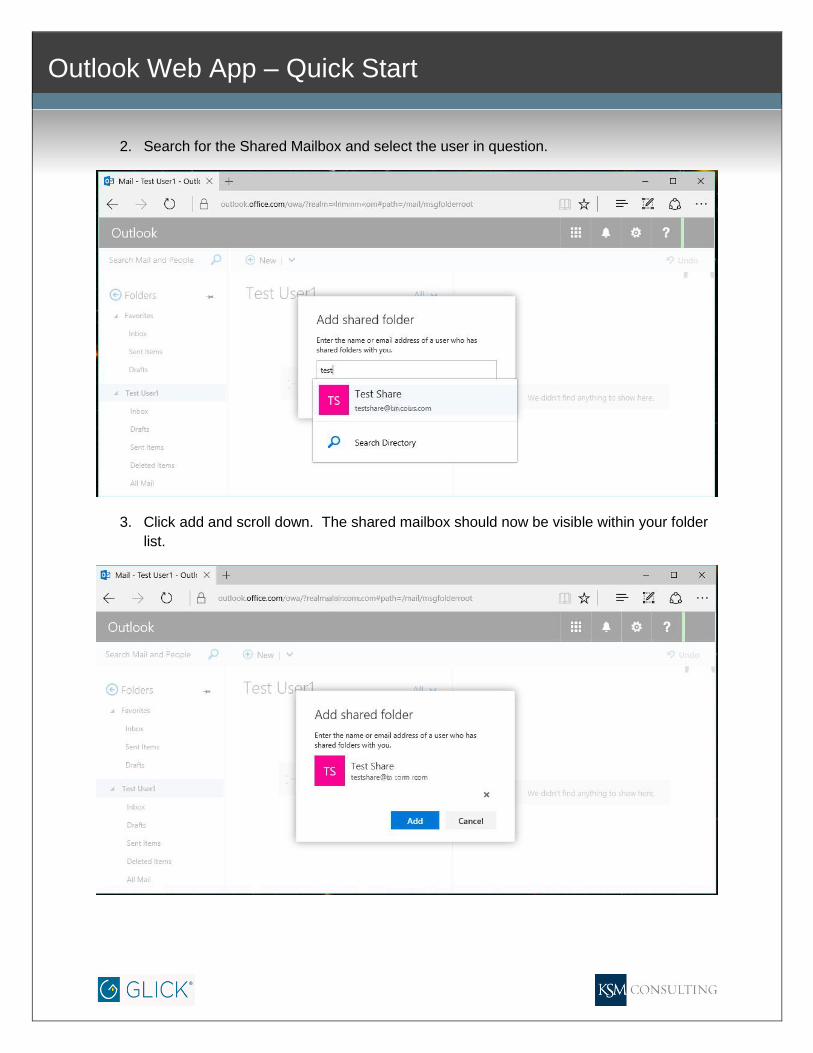
2. Search for the Shared Mailbox and select the user in question.
3. Click add and scroll down. The shared mailbox should now be visible within your folder
list.

P a g e | 9
Outlook Web App – Quick Start
1.6 Add a Shared Calendar Table of Contents
1. Click the tile button and navigate to your Calendar.
P a g e | 10
Outlook Web App – Quick Start
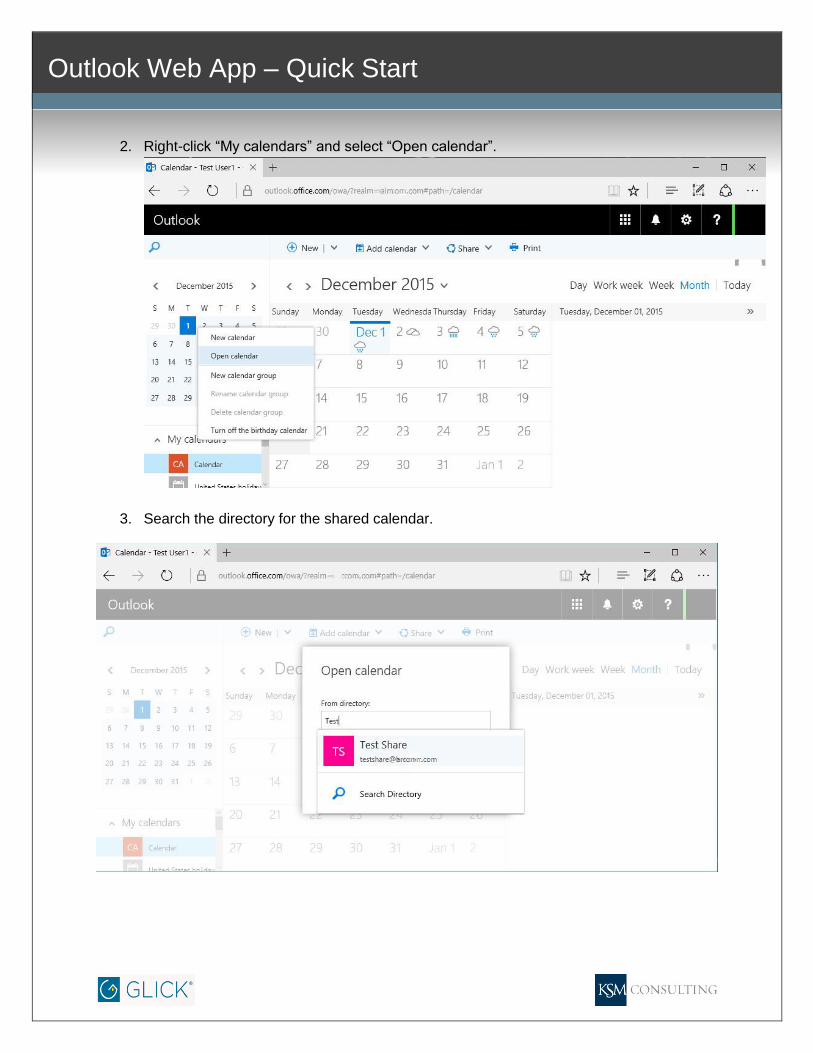
2. Right-click “My calendars” and select “Open calendar”.
3. Search the directory for the shared calendar.

P a g e | 11
Outlook Web App – Quick Start
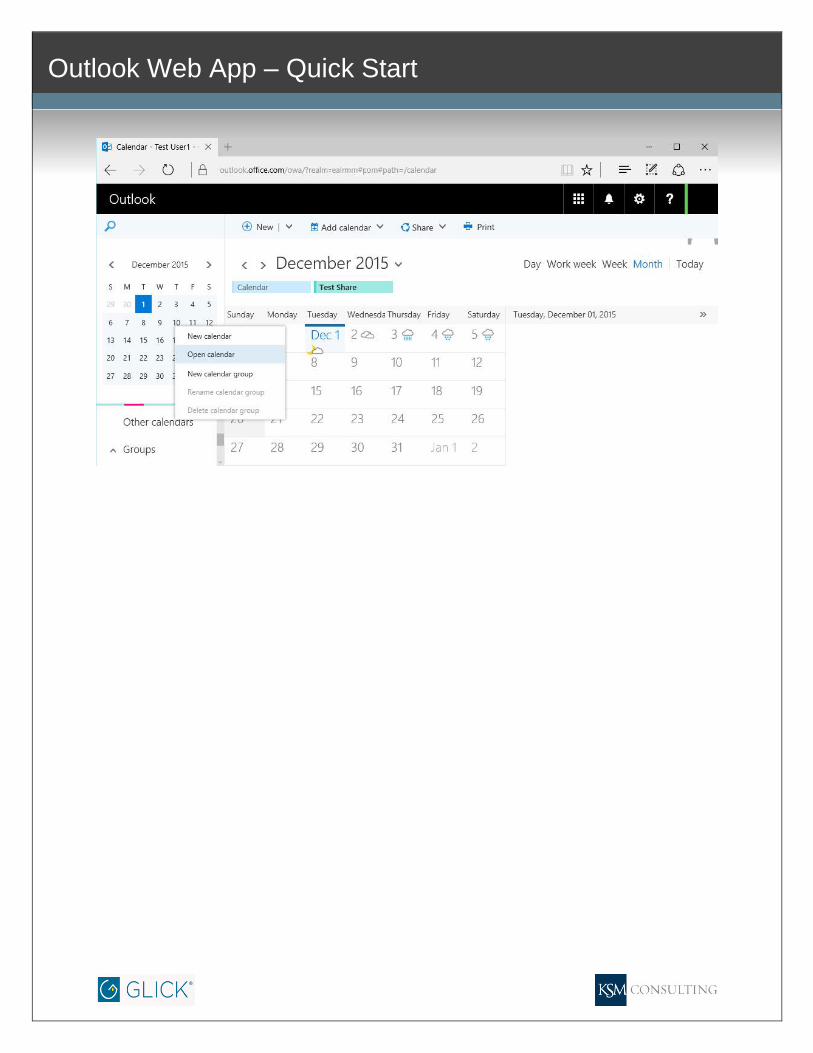
4. Select the shared calendar in question and click the “Open” button.
5. The calendar in question should now be listed under “My Calendars.
****** Note, you can also go through the same process adding the shared calendar under “Other
Calendars. *******
P a g e | 12
Outlook Web App – Quick Start