Embed Size (px)
Citation preview
a teaching guide to safe and responsible hunting
NORTH DAKOTAHUNTER EDUC ATION MANUAL
Copyright © 2010 Kalkomey Enterprises, Inc., www.kalkomey.com
Published by Kalkomey Enterprises, Inc., 14086 Proton Road, Dallas, TX 75244, 214-351-0461. Printed in the U.S.A.
Copyright © 2010 by Kalkomey Enterprises, Inc. All rights reserved. No part of this publication may be reproduced in any form or by any process without permission in writing from Kalkomey Enterprises, Inc. Effort has been made to make this publication as complete and accurate as possible. All references contained in this publication have been compiled from sources believed to be reliable, and to represent the best current opinion on the subject. Kalkomey Enterprises, Inc. is not responsible or liable for any claims, liabilities, damages, or other adverse effects or consequences to any person or property caused or alleged to be caused directly or indirectly from the application or use of the information contained in this publication. P0910
JUDO is a registered trademark of Zwickey Archery, Inc.
PowerPoint is a registered trademark of Microsoft Corporation.
Pyrodex is a registered trademark of Hodgdon Powder Co., Inc.
TMA is a registered trademark of the Treestand Manufacturer’s Association.
www.kalkomey.com
a teaching guide to safe and responsible hunting
NORTH DAKOTAHUNTER EDUC ATION MANUAL
Copyright © 2010 Kalkomey Enterprises, Inc., www.kalkomey.com
1
Preparing To TeachThe key to confident and effective teaching is preparation. If you master the material and plan in advance how to present it, the teaching experience will be rewarding for both you and your students. There is no substitute for adequate prepa-ration. The basic material that should be covered is listed in the Class Plan on pages 4-8. The material is covered in greater detail in the Lesson Plans on pages 9-62 and in even more detail in the Student Manual.
◆ Familiarize yourself with the various printed instructor aids available to help you teach. You have three levels of printed material—the Class Plan, the Lesson Plans, and the Student Manual—to use in preparing to teach and as aids while teaching.•Class Plan: Pages 4-8 of this guide provide a five-page quick reference that gives you a place to write your time
schedule for the class, a list of the important topics, and suggestions for activities.•Lesson Plans: On pages 9-62 of this guide are Lesson Plans that summarize each chapter of the Student Manual.
Each Lesson Plan gives: - Objectives. Statements of what students should have learned at the completion of the lesson. These will help you set goals and keep on course.
- Lesson Material. Key points from the Student Manual, presented in outline form, that should be covered in class. In the margins for each topic, you will see these helpful icons:
indicates the page number of the Student Manual where the material begins.
indicates that there also are illustrations in the Student Manual you may want to use.
- Chapter Quiz. List of questions to ask during your instruction to help you determine the students’ comprehension of the material. These questions also appear at the end of each chapter in the Student Manual.
• Student Manual: You should study all of the material in the Student Manual before you teach. ◆ Decide what level of printed instructor aids is appropriate for you. Your teaching experience and familiarity with the material will determine which printed aids you want to use to prepare to teach and what to have in front of you while teaching. •Experienced: If you have taught this course before and are well acquainted with the material, the lesson objectives,
and classroom activities, you may need to use only the Class Plan. This plan will help you keep on schedule and remind you of the key topics to be covered in each lesson.
•Familiar: If you are familiar with all of the material in the Student Manual but have not taught the material before, you will want to use both the Class Plan and the Lesson Plans provided in this guide. The Lesson Plans will help you focus on the key information, plan how to present it, and give you ideas for questions and activities to reinforce the learning.
•Novice: If you are new to some of the material and have not taught this course before, you will want to use the Class Plan and the Lesson Plans provided in this guide, as well as the Student Manual. You may want to organize a three-ring binder and put each chapter of the Student Manual behind the Lesson Plan for that chapter.
Teaching the Hunter Education Course
Copyright © 2010 Kalkomey Enterprises, Inc., www.kalkomey.com
2
◆ Choose and obtain the teaching aids you wish to use. Variation in the presentation of the material is essential to holding the attention of students and helping them retain the information. Even adults have an attention span of only 20-30 minutes, so breaking up the class routine with various teaching aids is critical. Consider using:•Props: Bring in examples of the equipment being covered—unloaded firearms with different actions, bow and arrow,
unloaded muzzleloader, fluorescent orange clothing, eye and ear protection, etc.•Visual Aids: Consider using all or some of the slides from the companion PowerPoint presentation that is included
with this course. You also may wish to copy illustrations from the Student Manual to transparencies to display using an overhead projector.
• Sample Documents: Obtain samples of documents, such as your state’s hunting laws, a hunting license application, a game tag, and a hunting plan.
•Guest Speakers: Ask a hunting law enforcement officer or hunting equipment industry professional to speak for 10-20 minutes. The guest appearance of a law enforcement official is an excellent way to reinforce the message that hunting safely and responsibly isn’t just a good idea—it’s the law!
Teaching the MaterialBelow is a suggested format for covering the material in each chapter. For long chapters, you may wish to break the material into two parts and follow the suggested format for each part. The “do’s” and “don’ts” listed below will help make your teaching more effective.
◆ Cover each chapter by telling students what they will learn, teaching the lesson, and then summarizing what they should have learned. An effective way to achieve this is by doing the following.• Introduction. Briefly state the lesson’s objectives.•Lecture and questions. Reinforce the key safety, responsibility, and hunting law points. Encourage discussion and
questions from students. Use props, sample documents, or overheads as needed. Ask the Review Questions aloud, and have the students answer aloud. If there is any confusion, clarify the material.
• Summary. Restate key points. ◆ Observe these teaching “do’s.”•Teach with confidence. Remember, you know the material better than anyone else in the room.•Treat the students courteously. Let the students know that there are no “dumb questions.”• Speak clearly and loudly enough to be heard in the back of the room.•Vary your voice to avoid monotony. Use volume, inflection, and pauses to emphasize key points.•Maintain eye contact with your students. This keeps their interest and helps you assess whether they comprehend the
material.•Encourage discussion; for example, ask the students to explain the benefits of safe hunting practices or the dangers of
unsafe practices.•When releasing the students for a break, clearly indicate when you plan to start again.•Be punctual when starting the class and resuming after breaks. Take a 10-15 minute break at least every 1½ to 2
hours. •Maintain order in the classroom—remember that you are in charge.•Encourage students to follow along in their Student Manual. ◆ Avoid these teaching “don’ts.”•Don’t read the material. Instead, speak to the students, putting the material in your own words.•Don’t allow one or two students to dominate the class discussion. Try to get all to participate.•Don’t allow yourself to get off schedule; otherwise, you will not be able to cover all of the material.•Avoid telling “war stories.” Instead, use concise descriptions of personal experience only to make important points.•Don’t use profanity or tell off-color jokes. You will lose respect as an instructor.•Avoid annoying or distracting mannerisms, such as jingling coins in your pocket or twirling a pointer.•Avoid using demonstrations by the instructor. Do this only when it is impossible or impractical for the students
themselves to do the demonstrating.
Copyright © 2010 Kalkomey Enterprises, Inc., www.kalkomey.com
3
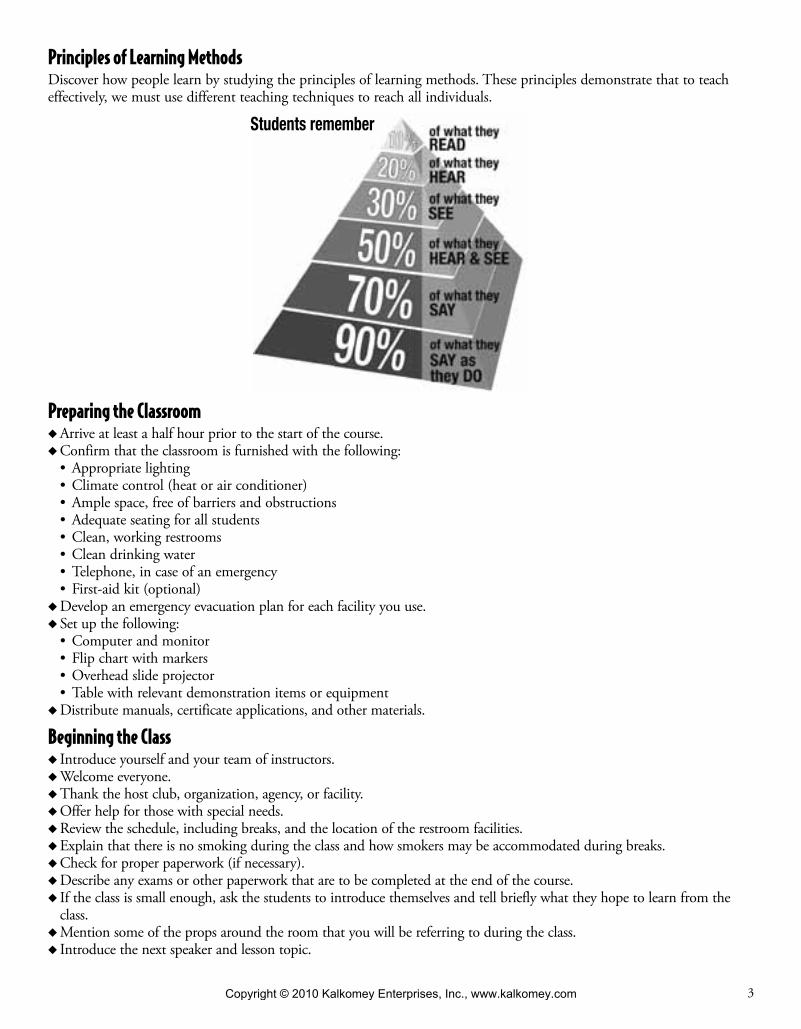
Principles of Learning MethodsDiscover how people learn by studying the principles of learning methods. These principles demonstrate that to teach effectively, we must use different teaching techniques to reach all individuals.
Preparing the Classroom ◆ Arrive at least a half hour prior to the start of the course. ◆ Confirm that the classroom is furnished with the following:•Appropriate lighting•Climate control (heat or air conditioner)•Ample space, free of barriers and obstructions•Adequate seating for all students•Clean, working restrooms•Clean drinking water•Telephone, in case of an emergency•First-aid kit (optional) ◆ Develop an emergency evacuation plan for each facility you use. ◆ Set up the following:•Computer and monitor•Flip chart with markers•Overhead slide projector•Table with relevant demonstration items or equipment ◆ Distribute manuals, certificate applications, and other materials.
Beginning the Class ◆ Introduce yourself and your team of instructors. ◆ Welcome everyone. ◆ Thank the host club, organization, agency, or facility. ◆ Offer help for those with special needs. ◆ Review the schedule, including breaks, and the location of the restroom facilities. ◆ Explain that there is no smoking during the class and how smokers may be accommodated during breaks. ◆ Check for proper paperwork (if necessary). ◆ Describe any exams or other paperwork that are to be completed at the end of the course. ◆ If the class is small enough, ask the students to introduce themselves and tell briefly what they hope to learn from the class. ◆ Mention some of the props around the room that you will be referring to during the class. ◆ Introduce the next speaker and lesson topic.
Students remember
Copyright © 2010 Kalkomey Enterprises, Inc., www.kalkomey.com
4
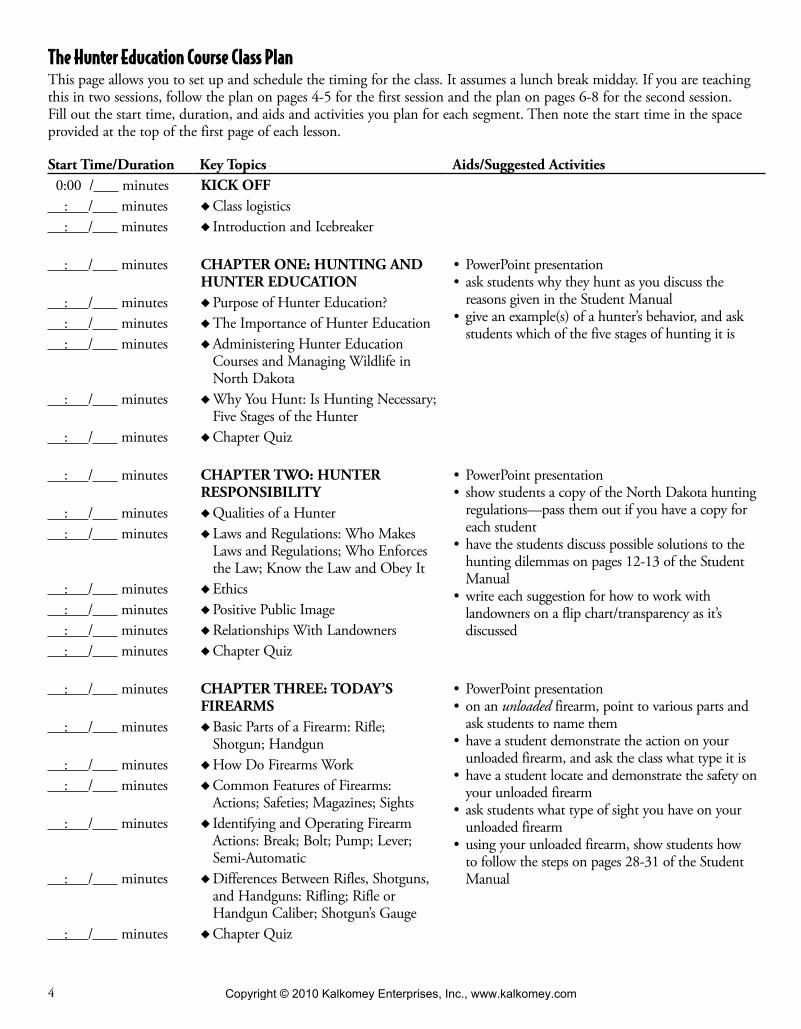
The Hunter Education Course Class PlanThis page allows you to set up and schedule the timing for the class. It assumes a lunch break midday. If you are teaching this in two sessions, follow the plan on pages 4-5 for the first session and the plan on pages 6-8 for the second session. Fill out the start time, duration, and aids and activities you plan for each segment. Then note the start time in the space provided at the top of the first page of each lesson.
Start Time/Duration Key Topics Aids/Suggested Activities 0:00 / minutes KICK OFF : / minutes ◆ Class logistics : / minutes ◆ Introduction and Icebreaker
: / minutes CHAPTER ONE: HUNTING AND HUNTER EDUCATION
• PowerPoint presentation• ask students why they hunt as you discuss the
reasons given in the Student Manual• give an example(s) of a hunter’s behavior, and ask
students which of the five stages of hunting it is
: / minutes ◆ Purpose of Hunter Education? : / minutes ◆ The Importance of Hunter Education : / minutes ◆ Administering Hunter Education
Courses and Managing Wildlife in North Dakota
: / minutes ◆ Why You Hunt: Is Hunting Necessary; Five Stages of the Hunter
: / minutes ◆ Chapter Quiz
: / minutes CHAPTER TWO: HUNTER RESPONSIBILITY
• PowerPoint presentation• show students a copy of the North Dakota hunting
regulations—pass them out if you have a copy for each student
• have the students discuss possible solutions to the hunting dilemmas on pages 12-13 of the Student Manual
•write each suggestion for how to work with landowners on a flip chart/transparency as it’s discussed
: / minutes ◆ Qualities of a Hunter : / minutes ◆ Laws and Regulations: Who Makes
Laws and Regulations; Who Enforces the Law; Know the Law and Obey It
: / minutes ◆ Ethics : / minutes ◆ Positive Public Image : / minutes ◆ Relationships With Landowners : / minutes ◆ Chapter Quiz
: / minutes CHAPTER THREE: TODAY’S FIREARMS
• PowerPoint presentation• on an unloaded firearm, point to various parts and
ask students to name them• have a student demonstrate the action on your
unloaded firearm, and ask the class what type it is• have a student locate and demonstrate the safety on
your unloaded firearm• ask students what type of sight you have on your
unloaded firearm• using your unloaded firearm, show students how
to follow the steps on pages 28-31 of the Student Manual
: / minutes ◆ Basic Parts of a Firearm: Rifle; Shotgun; Handgun
: / minutes ◆ How Do Firearms Work : / minutes ◆ Common Features of Firearms:
Actions; Safeties; Magazines; Sights : / minutes ◆ Identifying and Operating Firearm
Actions: Break; Bolt; Pump; Lever; Semi-Automatic
: / minutes ◆ Differences Between Rifles, Shotguns, and Handguns: Rifling; Rifle or Handgun Caliber; Shotgun’s Gauge
: / minutes ◆ Chapter Quiz
Copyright © 2010 Kalkomey Enterprises, Inc., www.kalkomey.com
5
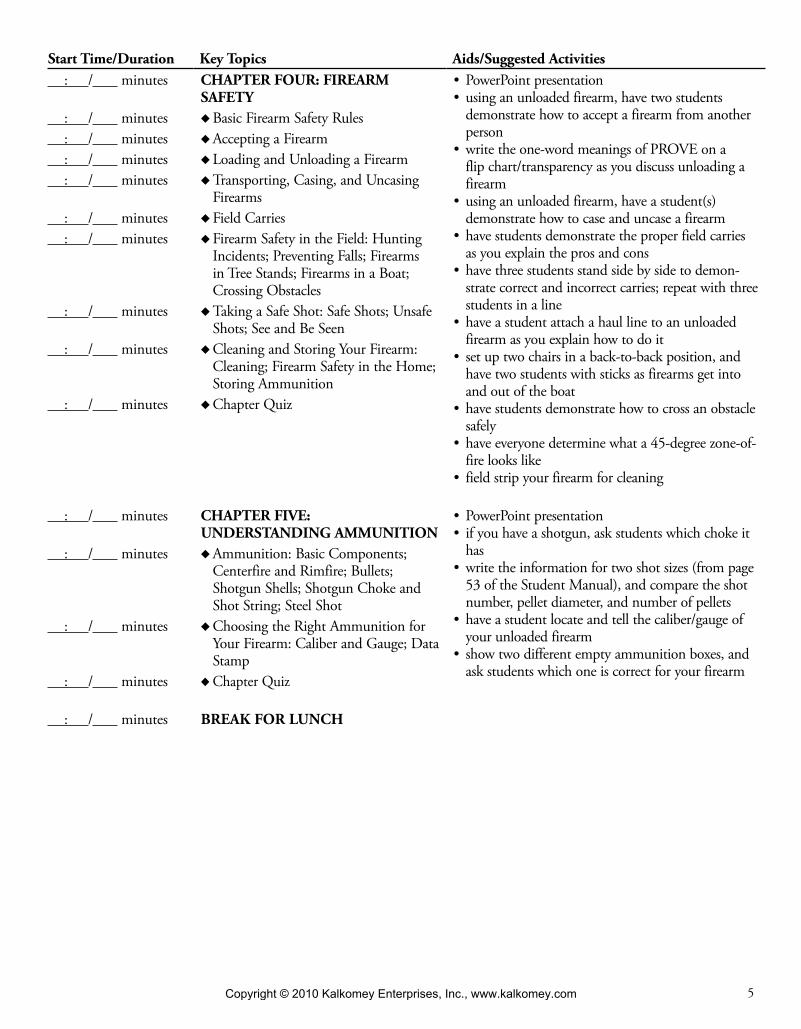
Start Time/Duration Key Topics Aids/Suggested Activities : / minutes CHAPTER FOUR: FIREARM
SAFETY• PowerPoint presentation• using an unloaded firearm, have two students
demonstrate how to accept a firearm from another person
•write the one-word meanings of PROVE on a flip chart/transparency as you discuss unloading a firearm
• using an unloaded firearm, have a student(s) demonstrate how to case and uncase a firearm
• have students demonstrate the proper field carries as you explain the pros and cons
• have three students stand side by side to demon-strate correct and incorrect carries; repeat with three students in a line
• have a student attach a haul line to an unloaded firearm as you explain how to do it
• set up two chairs in a back-to-back position, and have two students with sticks as firearms get into and out of the boat
• have students demonstrate how to cross an obstacle safely
• have everyone determine what a 45-degree zone-of-fire looks like
• field strip your firearm for cleaning
: / minutes ◆ Basic Firearm Safety Rules : / minutes ◆ Accepting a Firearm : / minutes ◆ Loading and Unloading a Firearm : / minutes ◆ Transporting, Casing, and Uncasing
Firearms : / minutes ◆ Field Carries : / minutes ◆ Firearm Safety in the Field: Hunting
Incidents; Preventing Falls; Firearms in Tree Stands; Firearms in a Boat; Crossing Obstacles
: / minutes ◆ Taking a Safe Shot: Safe Shots; Unsafe Shots; See and Be Seen
: / minutes ◆ Cleaning and Storing Your Firearm: Cleaning; Firearm Safety in the Home; Storing Ammunition
: / minutes ◆ Chapter Quiz
: / minutes CHAPTER FIVE: UNDERSTANDING AMMUNITION
• PowerPoint presentation• if you have a shotgun, ask students which choke it
has•write the information for two shot sizes (from page
53 of the Student Manual), and compare the shot number, pellet diameter, and number of pellets
• have a student locate and tell the caliber/gauge of your unloaded firearm
• show two different empty ammunition boxes, and ask students which one is correct for your firearm
: / minutes ◆ Ammunition: Basic Components; Centerfire and Rimfire; Bullets; Shotgun Shells; Shotgun Choke and Shot String; Steel Shot
: / minutes ◆ Choosing the Right Ammunition for Your Firearm: Caliber and Gauge; Data Stamp
: / minutes ◆ Chapter Quiz
: / minutes BREAK FOR LUNCH
Copyright © 2010 Kalkomey Enterprises, Inc., www.kalkomey.com
6
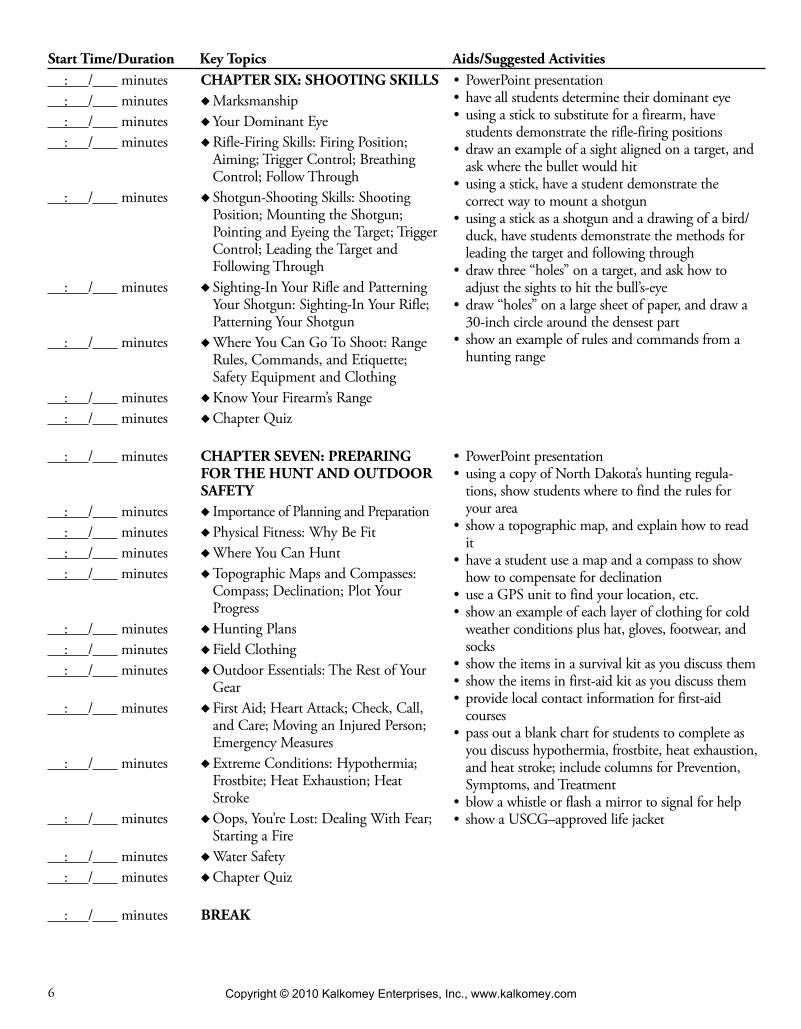
Start Time/Duration Key Topics Aids/Suggested Activities : / minutes CHAPTER SIX: SHOOTING SKILLS • PowerPoint presentation
• have all students determine their dominant eye• using a stick to substitute for a firearm, have
students demonstrate the rifle-firing positions• draw an example of a sight aligned on a target, and
ask where the bullet would hit• using a stick, have a student demonstrate the
correct way to mount a shotgun• using a stick as a shotgun and a drawing of a bird/
duck, have students demonstrate the methods for leading the target and following through
• draw three “holes” on a target, and ask how to adjust the sights to hit the bull’s-eye
• draw “holes” on a large sheet of paper, and draw a 30-inch circle around the densest part
• show an example of rules and commands from a hunting range
: / minutes ◆ Marksmanship : / minutes ◆ Your Dominant Eye : / minutes ◆ Rifle-Firing Skills: Firing Position;
Aiming; Trigger Control; Breathing Control; Follow Through
: / minutes ◆ Shotgun-Shooting Skills: Shooting Position; Mounting the Shotgun; Pointing and Eyeing the Target; Trigger Control; Leading the Target and Following Through
: / minutes ◆ Sighting-In Your Rifle and Patterning Your Shotgun: Sighting-In Your Rifle; Patterning Your Shotgun
: / minutes ◆ Where You Can Go To Shoot: Range Rules, Commands, and Etiquette; Safety Equipment and Clothing
: / minutes ◆ Know Your Firearm’s Range : / minutes ◆ Chapter Quiz
: / minutes CHAPTER SEVEN: PREPARING FOR THE HUNT AND OUTDOOR SAFETY
• PowerPoint presentation• using a copy of North Dakota’s hunting regula-
tions, show students where to find the rules for your area
• show a topographic map, and explain how to read it
• have a student use a map and a compass to show how to compensate for declination
• use a GPS unit to find your location, etc.• show an example of each layer of clothing for cold
weather conditions plus hat, gloves, footwear, and socks
• show the items in a survival kit as you discuss them• show the items in first-aid kit as you discuss them• provide local contact information for first-aid
courses• pass out a blank chart for students to complete as
you discuss hypothermia, frostbite, heat exhaustion, and heat stroke; include columns for Prevention, Symptoms, and Treatment
• blow a whistle or flash a mirror to signal for help• show a USCG–approved life jacket
: / minutes ◆ Importance of Planning and Preparation : / minutes ◆ Physical Fitness: Why Be Fit : / minutes ◆ Where You Can Hunt : / minutes ◆ Topographic Maps and Compasses:
Compass; Declination; Plot Your Progress
: / minutes ◆ Hunting Plans : / minutes ◆ Field Clothing : / minutes ◆ Outdoor Essentials: The Rest of Your
Gear : / minutes ◆ First Aid; Heart Attack; Check, Call,
and Care; Moving an Injured Person; Emergency Measures
: / minutes ◆ Extreme Conditions: Hypothermia; Frostbite; Heat Exhaustion; Heat Stroke
: / minutes ◆ Oops, You’re Lost: Dealing With Fear; Starting a Fire
: / minutes ◆ Water Safety : / minutes ◆ Chapter Quiz
: / minutes BREAK
Copyright © 2010 Kalkomey Enterprises, Inc., www.kalkomey.com
7
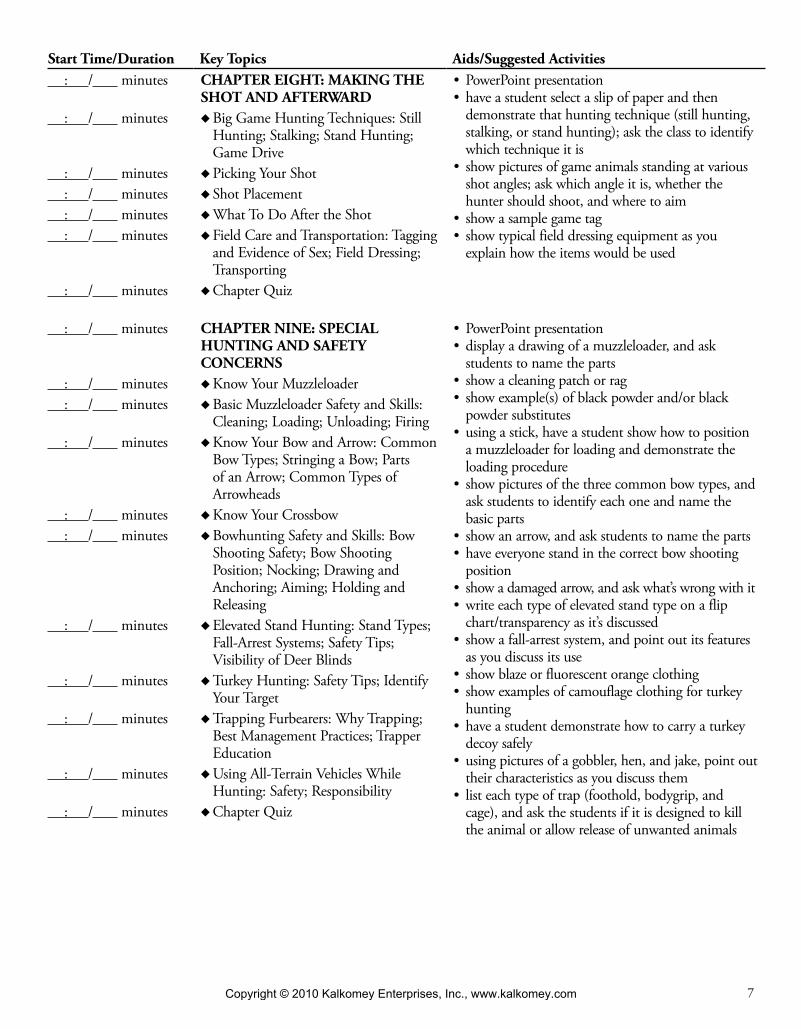
Start Time/Duration Key Topics Aids/Suggested Activities : / minutes CHAPTER EIGHT: MAKING THE
SHOT AND AFTERWARD• PowerPoint presentation• have a student select a slip of paper and then
demonstrate that hunting technique (still hunting, stalking, or stand hunting); ask the class to identify which technique it is
• show pictures of game animals standing at various shot angles; ask which angle it is, whether the hunter should shoot, and where to aim
• show a sample game tag• show typical field dressing equipment as you
explain how the items would be used
: / minutes ◆ Big Game Hunting Techniques: Still Hunting; Stalking; Stand Hunting; Game Drive
: / minutes ◆ Picking Your Shot : / minutes ◆ Shot Placement : / minutes ◆ What To Do After the Shot : / minutes ◆ Field Care and Transportation: Tagging
and Evidence of Sex; Field Dressing; Transporting
: / minutes ◆ Chapter Quiz
: / minutes CHAPTER NINE: SPECIAL HUNTING AND SAFETY CONCERNS
• PowerPoint presentation• display a drawing of a muzzleloader, and ask
students to name the parts• show a cleaning patch or rag• show example(s) of black powder and/or black
powder substitutes• using a stick, have a student show how to position
a muzzleloader for loading and demonstrate the loading procedure
• show pictures of the three common bow types, and ask students to identify each one and name the basic parts
• show an arrow, and ask students to name the parts• have everyone stand in the correct bow shooting
position• show a damaged arrow, and ask what’s wrong with it•write each type of elevated stand type on a flip
chart/transparency as it’s discussed• show a fall-arrest system, and point out its features
as you discuss its use• show blaze or fluorescent orange clothing• show examples of camouflage clothing for turkey
hunting• have a student demonstrate how to carry a turkey
decoy safely• using pictures of a gobbler, hen, and jake, point out
their characteristics as you discuss them• list each type of trap (foothold, bodygrip, and
cage), and ask the students if it is designed to kill the animal or allow release of unwanted animals
: / minutes ◆ Know Your Muzzleloader : / minutes ◆ Basic Muzzleloader Safety and Skills:
Cleaning; Loading; Unloading; Firing : / minutes ◆ Know Your Bow and Arrow: Common
Bow Types; Stringing a Bow; Parts of an Arrow; Common Types of Arrowheads
: / minutes ◆ Know Your Crossbow : / minutes ◆ Bowhunting Safety and Skills: Bow
Shooting Safety; Bow Shooting Position; Nocking; Drawing and Anchoring; Aiming; Holding and Releasing
: / minutes ◆ Elevated Stand Hunting: Stand Types; Fall-Arrest Systems; Safety Tips; Visibility of Deer Blinds
: / minutes ◆ Turkey Hunting: Safety Tips; Identify Your Target
: / minutes ◆ Trapping Furbearers: Why Trapping; Best Management Practices; Trapper Education
: / minutes ◆ Using All-Terrain Vehicles While Hunting: Safety; Responsibility
: / minutes ◆ Chapter Quiz
Copyright © 2010 Kalkomey Enterprises, Inc., www.kalkomey.com
8
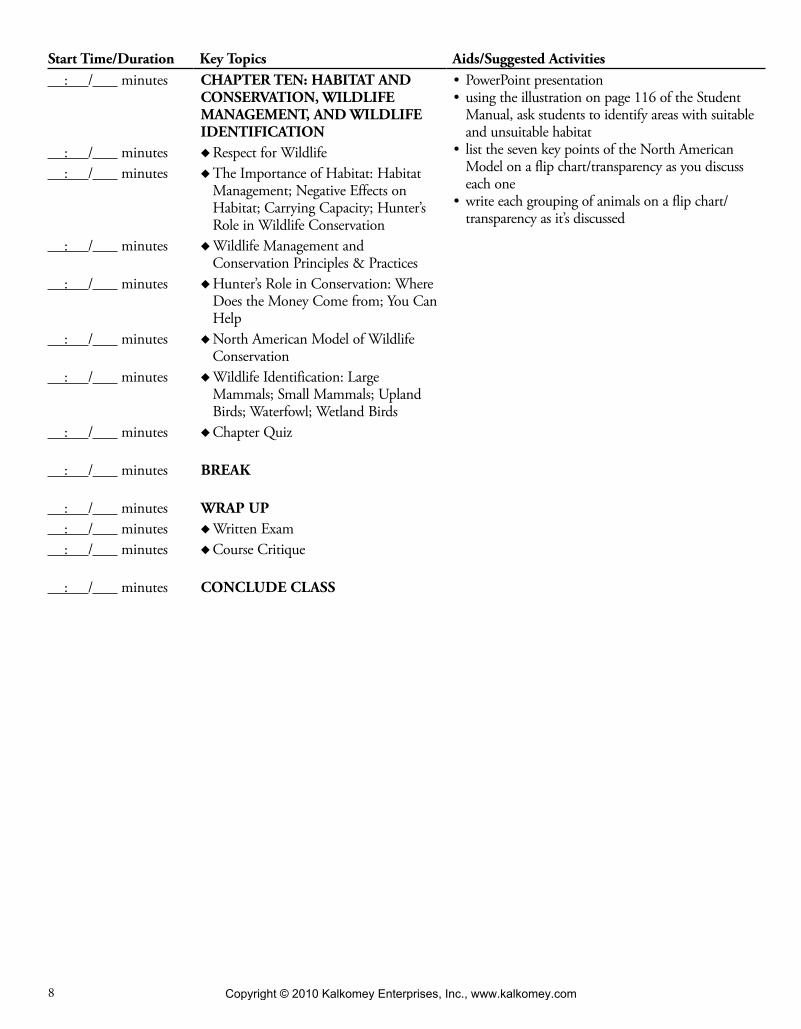
Start Time/Duration Key Topics Aids/Suggested Activities : / minutes CHAPTER TEN: HABITAT AND
CONSERVATION, WILDLIFE MANAGEMENT, AND WILDLIFE IDENTIFICATION
• PowerPoint presentation• using the illustration on page 116 of the Student
Manual, ask students to identify areas with suitable and unsuitable habitat
• list the seven key points of the North American Model on a flip chart/transparency as you discuss each one
•write each grouping of animals on a flip chart/transparency as it’s discussed
: / minutes ◆ Respect for Wildlife : / minutes ◆ The Importance of Habitat: Habitat
Management; Negative Effects on Habitat; Carrying Capacity; Hunter’s Role in Wildlife Conservation
: / minutes ◆ Wildlife Management and Conservation Principles & Practices
: / minutes ◆ Hunter’s Role in Conservation: Where Does the Money Come from; You Can Help
: / minutes ◆ North American Model of Wildlife Conservation
: / minutes ◆ Wildlife Identification: Large Mammals; Small Mammals; Upland Birds; Waterfowl; Wetland Birds
: / minutes ◆ Chapter Quiz
: / minutes BREAK
: / minutes WRAP UP : / minutes ◆ Written Exam : / minutes ◆ Course Critique
: / minutes CONCLUDE CLASS
Copyright © 2010 Kalkomey Enterprises, Inc., www.kalkomey.com
9
Objec
tives
The
stud
ent s
houl
d …
4
4
5
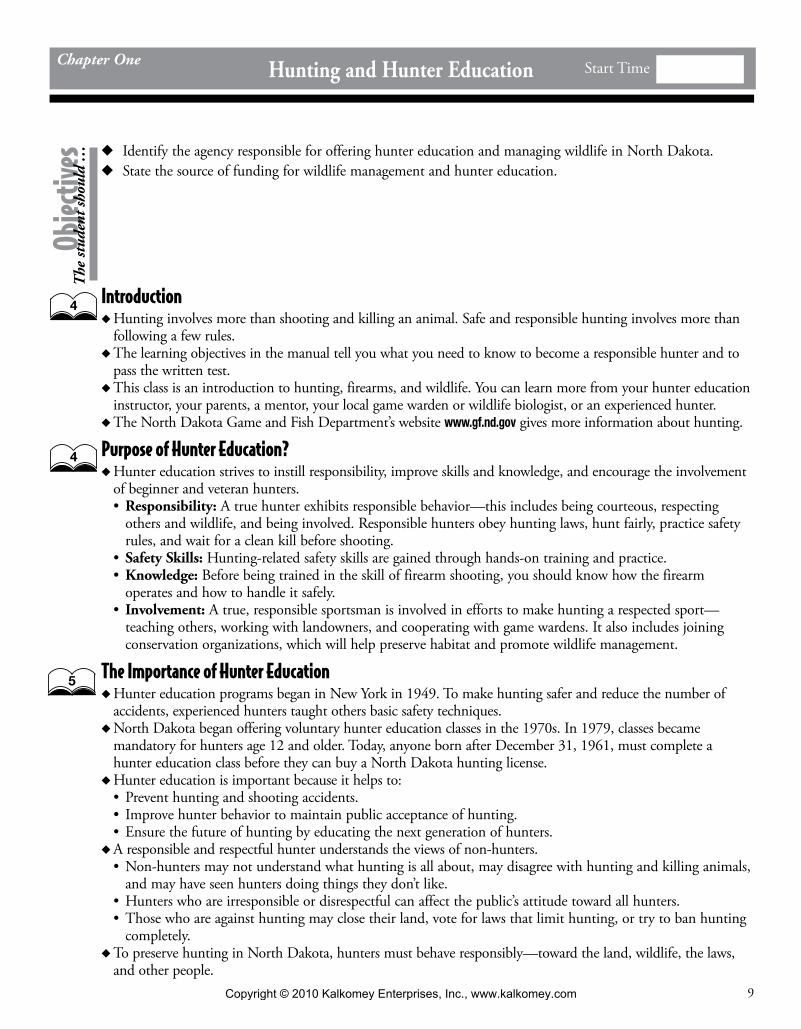
Chapter One Hunting and Hunter Education Start Time
◆ Identify the agency responsible for offering hunter education and managing wildlife in North Dakota. ◆ State the source of funding for wildlife management and hunter education.
Introduction ◆ Hunting involves more than shooting and killing an animal. Safe and responsible hunting involves more than following a few rules. ◆ The learning objectives in the manual tell you what you need to know to become a responsible hunter and to pass the written test. ◆ This class is an introduction to hunting, firearms, and wildlife. You can learn more from your hunter education instructor, your parents, a mentor, your local game warden or wildlife biologist, or an experienced hunter. ◆ The North Dakota Game and Fish Department’s website www.gf.nd.gov gives more information about hunting.
Purpose of Hunter Education? ◆ Hunter education strives to instill responsibility, improve skills and knowledge, and encourage the involvement of beginner and veteran hunters.•Responsibility: A true hunter exhibits responsible behavior—this includes being courteous, respecting
others and wildlife, and being involved. Responsible hunters obey hunting laws, hunt fairly, practice safety rules, and wait for a clean kill before shooting.
• Safety Skills: Hunting-related safety skills are gained through hands-on training and practice.•Knowledge: Before being trained in the skill of firearm shooting, you should know how the firearm
operates and how to handle it safely.• Involvement: A true, responsible sportsman is involved in efforts to make hunting a respected sport—
teaching others, working with landowners, and cooperating with game wardens. It also includes joining conservation organizations, which will help preserve habitat and promote wildlife management.
The Importance of Hunter Education ◆ Hunter education programs began in New York in 1949. To make hunting safer and reduce the number of accidents, experienced hunters taught others basic safety techniques. ◆ North Dakota began offering voluntary hunter education classes in the 1970s. In 1979, classes became mandatory for hunters age 12 and older. Today, anyone born after December 31, 1961, must complete a hunter education class before they can buy a North Dakota hunting license. ◆ Hunter education is important because it helps to:•Prevent hunting and shooting accidents.• Improve hunter behavior to maintain public acceptance of hunting.•Ensure the future of hunting by educating the next generation of hunters. ◆ A responsible and respectful hunter understands the views of non-hunters. •Non-hunters may not understand what hunting is all about, may disagree with hunting and killing animals,
and may have seen hunters doing things they don’t like. •Hunters who are irresponsible or disrespectful can affect the public’s attitude toward all hunters. •Those who are against hunting may close their land, vote for laws that limit hunting, or try to ban hunting
completely. ◆ To preserve hunting in North Dakota, hunters must behave responsibly—toward the land, wildlife, the laws, and other people.
Copyright © 2010 Kalkomey Enterprises, Inc., www.kalkomey.com
10
6
6
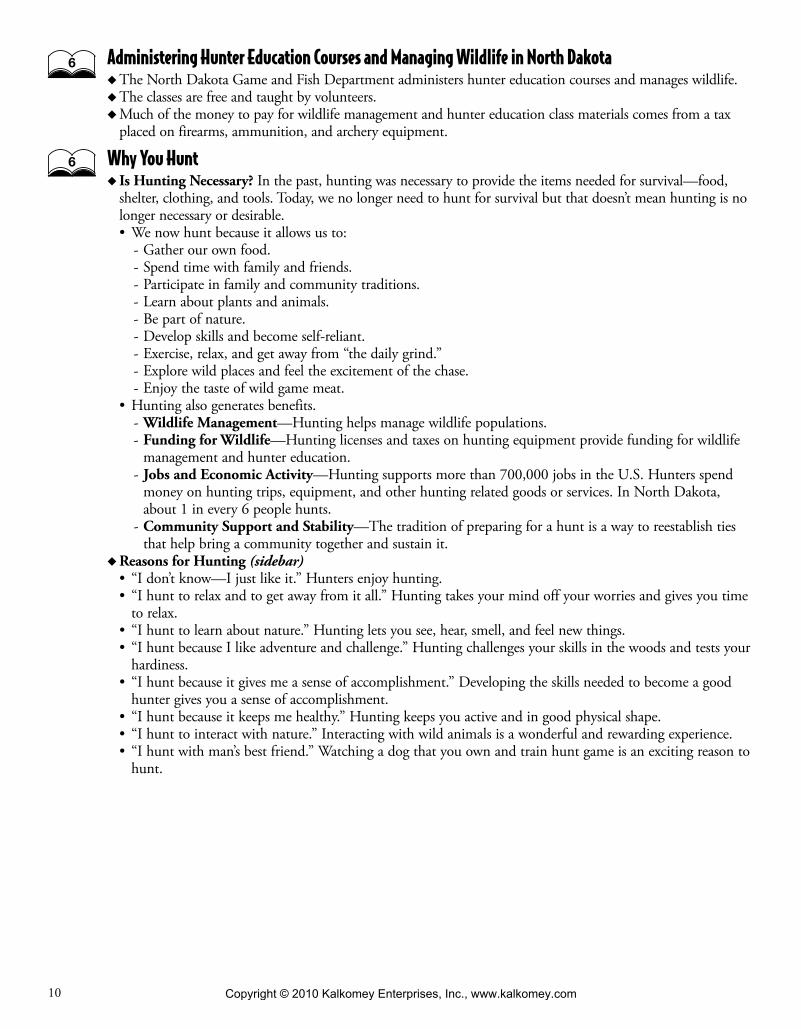
Administering Hunter Education Courses and Managing Wildlife in North Dakota ◆ The North Dakota Game and Fish Department administers hunter education courses and manages wildlife. ◆ The classes are free and taught by volunteers. ◆ Much of the money to pay for wildlife management and hunter education class materials comes from a tax placed on firearms, ammunition, and archery equipment.
Why You Hunt ◆ Is Hunting Necessary? In the past, hunting was necessary to provide the items needed for survival—food, shelter, clothing, and tools. Today, we no longer need to hunt for survival but that doesn’t mean hunting is no longer necessary or desirable. •We now hunt because it allows us to:
- Gather our own food. - Spend time with family and friends. - Participate in family and community traditions. - Learn about plants and animals. - Be part of nature. - Develop skills and become self-reliant. - Exercise, relax, and get away from “the daily grind.” - Explore wild places and feel the excitement of the chase. - Enjoy the taste of wild game meat.
•Hunting also generates benefits. - Wildlife Management—Hunting helps manage wildlife populations. - Funding for Wildlife—Hunting licenses and taxes on hunting equipment provide funding for wildlife management and hunter education.
- Jobs and Economic Activity—Hunting supports more than 700,000 jobs in the U.S. Hunters spend money on hunting trips, equipment, and other hunting related goods or services. In North Dakota, about 1 in every 6 people hunts.
- Community Support and Stability—The tradition of preparing for a hunt is a way to reestablish ties that help bring a community together and sustain it.
◆ Reasons for Hunting (sidebar)• “I don’t know—I just like it.” Hunters enjoy hunting.• “I hunt to relax and to get away from it all.” Hunting takes your mind off your worries and gives you time
to relax. • “I hunt to learn about nature.” Hunting lets you see, hear, smell, and feel new things.• “I hunt because I like adventure and challenge.” Hunting challenges your skills in the woods and tests your
hardiness.• “I hunt because it gives me a sense of accomplishment.” Developing the skills needed to become a good
hunter gives you a sense of accomplishment.• “I hunt because it keeps me healthy.” Hunting keeps you active and in good physical shape.• “I hunt to interact with nature.” Interacting with wild animals is a wonderful and rewarding experience.• “I hunt with man’s best friend.” Watching a dog that you own and train hunt game is an exciting reason to
hunt.
Copyright © 2010 Kalkomey Enterprises, Inc., www.kalkomey.com
11
◆ Five Stages of the Hunter Many hunters go through five stages of development. The stages are marked by changes in attitudes and feelings about hunting.• Stage One: The Shooting Stage Many beginning hunters want to be able to shoot an animal to test their
skills and often judge success by the amount of shooting they do. In this stage, the first concern is safety.• Stage Two: The Limiting-Out Stage Hunters at this stage determine their success by how many animals
they bring home. In this stage, it is important to remember the rules of safe gun handling and to follow hunting laws and regulations carefully.
• Stage Three: The Selective Stage The hunter is usually hunting one particular animal, often going after animals that are secretive or otherwise difficult to hunt. Success is judged by the ability to master a challenge.
• Stage Four: The Method Stage Some hunters choose a particular method to hunt, such as bow hunting, that will make hunting more difficult and challenging. Success is judged by the ability to learn and master a particular method.
• Stage Five: The Philosopher Stage As many hunters mature and gain experience, they look back and find that what they enjoy most is a combination of many things, including the enjoyment they get from being outdoors and from passing their knowledge on to new hunters. Success is judged by how they feel about the entire hunting experience.
8Ch
apte
r Qui
z 1. The purpose of hunter education is to help hunters become safe, responsible, and knowledgeable. true or falseAnswer: true
2. Hunter education is important because it:____ teaches hunters how to be safe.____ teaches hunters how to be responsible.____ takes a lot of time to complete.Answer: •teacheshuntershowtobesafe
•teaches hunters how to be responsible.3. Hunter education in North Dakota is
supported by: ____ volunteers who teach classes.____ North Dakota Game and Fish Department,
which develops class materials.____ a tax that provides funding to buy class
materials.Answer:•volunteerswhoteachclasses.
•North Dakota Game and Fish Depart-ment, which develops class materials.
•a tax that provides funding to buy class materials.
4. List three benefits that hunting provides.Answer: Any three of:
•Wildlife management•Funding for wildlife•Jobs and economic activity•Community support and stability
5. Why do you want to hunt? Give your personal reasons. Answer: May include some the following:
•I just like it.•I want to get away from it all.•I want to learn about nature.•I like the adventure and challenge.•It gives me a sense of accomplishment.•It keeps me healthy.•I want to interact with nature.•I like hunting with my dog.
6. Give three reasons why it is important to behave responsibly around non-hunters. Answer: May include three of the following:
•To avoid doing things that non-hunters don’t like, such as wearing blood-stained clothing in public
•To keep them from closing their land to hunters
•To keep them from voting for laws that limit hunting
•To keep them from trying to ban hunting
•To preserve hunting in North Dakota
Copyright © 2010 Kalkomey Enterprises, Inc., www.kalkomey.com
12
Objec
tives
The
stud
ent s
houl
d …
11
10
Chapter Two Hunter Responsibility Start Time
◆ Describe the behavior of a responsible hunter. ◆ Describe how responsible hunters show respect for other people—hunters and non-hunters. ◆ Explain why hunting laws and regulations are important. ◆ Explain what is meant by “ethics” and “fair chase.” ◆ Describe the basics of positive relationships with landowners.
Qualities of a Hunter ◆ Safe, smart hunters must be responsible. They must think about and care about wildlife, landowners, other hunters and themselves. ◆ Hunters also follow a hunter’s code that is based on respect for what is safe and fair. ◆ To ensure the future of hunting, hunters remember their four basic areas of responsibility—self, other hunters, landowners, and natural resources. Examples of positive, responsible qualities which all hunters must strive to maintain:•Handle firearms safely and responsibly—maintain control of the muzzle at all times and ALWAYS treat a
firearm as if it were loaded.•Follow all the safety rules, and make sure your companions do also.•Obey game laws because that is the legal and ethical thing to do.•Plan for a hunt by exploring the area, learning the boundaries and names of the owners, and asking for
permission to hunt far in advance of the hunt.•Respect the rights of landowners to privacy and safety.•Leave fences and gates as you find them.•Pack out litter.•Take game animals, fish, and birds in a lawful and humane way.
Laws and Regulations ◆ Who Makes Laws and Regulations? •Hunting laws are created with the leadership of hunters working with the elected officials who are respon-
sible for making new laws. These laws are intended to protect and manage wildlife populations and to protect hunters.
• (sidebar) Market hunting nearly exterminated the North American bison in the 1800s. At the turn of the century, concerned hunters, including President Theodore Roosevelt, formed the Boone and Crockett Club. This club worked with others to pass laws to protect wildlife for future generations. Thanks to their efforts once-rare species are now abundant enough for us to hunt and enjoy again.
•Passing laws takes time and effort, so laws don’t change very often. Therefore, North Dakota and other states give state wildlife agencies the authority to make regulations. These regulations are based on public input and on information provided by scientists and wildlife managers, are easier to change than laws, and work better for managing wildlife.
◆ Who Enforces the Law? The game warden and other local law enforcement personnel enforce game laws. They may ask to see your license, may ask questions about when and where you have hunted, or may ask to inspect any animal you have killed. You must cooperate.
Copyright © 2010 Kalkomey Enterprises, Inc., www.kalkomey.com
13
12
◆ Know the Law and Obey It! Not knowing hunting laws is not an excuse for violating them. Hunters must know the laws and respect them. Ignorance is not a defense. If you violate the law, the fines may in the thousands of dollars and you may lose your hunting privileges. Keep these guidelines in mind:•Read and understand North Dakota’s hunting regulations every year.•Always carry a copy of the hunting regulations in the field.•Don’t rely on others to tell you what is legal and right.•Make sure you have the correct licenses, permits, stamps, and tags before you go hunting.
Ethics ◆ In addition to obeying the law, the responsible hunter develops and follows a personal code of ethics. Ethics are the rules for right and wrong, good and bad that help us know how to act in certain situations.•Being a responsible hunter is doing things right when no one else is watching.•A person with good ethics understands right and wrong, and chooses to do the right thing in any situation.•A person with good hunting ethics will not do anything in the field he or she knows or feels is wrong, even
if it is legal. ◆ Fair chase. Fair chase means balancing the skills and equipment of the hunter with the abilities of the animal to escape. Responsible hunters do not take unfair advantage of game animals, even if it is legal. ◆ How do you know what’s right and what’s wrong? There is no “list” of ethical rules to help. You must decide for yourself based on your personal sense of what is right and wrong. If you doubt your decision at any point, don’t do it.•Violation of Hunting Law Dilemma: On page 12 of the Student Manual, the dilemma involving David
and Bob is a situation that gives you two unpleasant choices. Read the situation with the students. Then have them discuss what David should do.
•What would you do? The situation on page 13 involves two friends who are duck hunting on the river. Read the situation with the students. Then discuss the questions at the end with the class.
•Hunting: Is it a right or a privilege? (from pages 13 and 14) The United States and Canada guarantee certain rights to each citizen. Rights cannot be taken away. For example, freedom of speech and freedom of religion are rights. Privileges are extra benefits given to a person or group. Hunting is a privilege—one that can be taken away if a hunter fails to meet certain standards. Hunters who behave irresponsibly and illegally also can jeopardize all hunters’ privileges to hunt.
◆ What makes a hunter responsible? To review, a responsible hunter:•Knows and obeys laws and regulations.•Views hunting as more than killing an animal.•Develops a personal code of ethics and sticks to it.•Takes full responsibility for his or her actions.•Respects people, the land, and wildlife.•Does not drink and hunt. ◆ A Hunter’s Code: (sidebar)1. I pledge to learn and follow the rules of firearm and hunting safety.2. I pledge to obey all hunting regulations. I will conduct myself in a responsible manner.3. I pledge to respect the activities and beliefs of other hunters and non-hunters.4. I pledge to report game law violations to the North Dakota Game and Fish Department immediately.5. I pledge to ask for landowner permission to hunt.6. I pledge to hunt according to “fair chase.”7. I pledge to develop my hunting and shooting skills.8. I pledge to support wildlife conservation programs.9. I pledge to teach others the skills, techniques, rules, and ethics of a true hunter.10. I pledge to make full use of any animal I take.
Copyright © 2010 Kalkomey Enterprises, Inc., www.kalkomey.com
14
Positive Public Image Here are some ways you can project a positive image of hunting to the public and create your own self-image as a responsible hunter.
◆ Obey the game laws. ◆ Get in physical and mental shape for the hunting season. ◆ Be familiar with your firearms and safe-handling procedures. ◆ Pay attention to your personal appearance. ◆ Show respect for other users of the land. ◆ Keep vehicles on designated roads. ◆ Do not use alcohol or drugs. ◆ Pick up your litter and than of others. ◆ Report bad examples of fellow hunters. ◆ Cover game from sight when traveling home from hunting. ◆ Eat or share harvested game. ◆ Take tasteful photos of harvested game.
Relationships With Landowners ◆ Hunting in North America has been successful because the system is based upon public ownership of wildlife. But, without the cooperation and relationships with private landowners, most hunters would have few places to hunt. ◆ The majority of North Dakota is owned by private landowners, and they decide who hunts on their property. You must develop a relationship with these people so that you have the privilege of hunting on their land. Remember, hunting is a privilege and not a right. ◆ Here are some suggestions that may increase your chances of a landowner giving you access to private land.•Provide a proper introduction and make contact in person if possible. Also, NEVER assume that the
permission you get lasts longer than for the single time you ask.•Offer to park your vehicle and walk. Don’t block access to gates and road approaches, and don’t park on
roadways.•Demonstrate your knowledge of property boundaries. Check the boundaries on a map, or ask the
landowner.•Hunt in pairs or small groups. Large groups often have less success in gaining access.•Make landowner contacts during times when landowners are NOT busy. Avoid busy times such as spring
planting, fall harvesting, calving, etc.•Clearly define what species you wish to hunt.•Make contact well in advance. The earlier you can talk to the landowner, the better.•Hunt later in the seasons, and avoid family holidays. It can be tougher to get permission to hunt on opening
weekends, before the landowner’s friends and family have hunted, and over holidays like Thanksgiving and Christmas weekend.
•Dress casually, and act casually. Fancy vehicles and clothing may hurt your chances.•Take a woman or youth hunting. •Try making a contact for a species other than deer or pheasant. Making an initial contact to hunt another
species, such as cottontail rabbits or coyotes, will let the landowner learn that you are a responsible hunter and land steward.
•Leave things the way you found them or in better condition. •Report your hunt back to the landowner, and offer part of the harvest. Thank landowners in person if they
are not busy, or send them a note.•Offer your assistance during busy times. See if landowners would like a hand during cattle branding, fencing
season, harvesting, bad winters, or floods.•Respect the local conditions. Don’t travel on rural roads when they are muddy or soft. Do not build fires
without the landowner’s permission.• Show interest in the landowner’s operation. •Report things that seem out of place such as downed fences, dead livestock, off-trail driving, other hunters,
or an open gate.•Keep rural roadways clear. Blocking traffic can be annoying and dangerous. Do not stop in the middle of
roads or approaches or in front of gates.
14
14
Copyright © 2010 Kalkomey Enterprises, Inc., www.kalkomey.com
15
1. We have hunting laws to protect:____ wildlife.____ people.Answer: •wildlife
•people2. Hunting is a right, not a privilege.
true or falseAnswer: false
3. Hunters can help maintain a positive public image by: ____ wearing bloody hunting clothing to town.____ bragging in public about how many animals
they kill.____ respecting the needs and wishes of other
people.Answer: respecting the needs and wishes of other
people.4. When is it okay to be irresponsible?
____ when nobody else can see you____ when your behavior doesn’t hurt anyone____ neverAnswer: never
5. Fair chase ethics include actions and an attitude that show: ____ an interest in killing as many animals as
possible.____ a respect for wildlife.____ a desire to break the law.Answer: a respect for wildlife.
6. Just because something is legal does not automati-cally mean it is fair or responsible. true or falseAnswer: true
7. List three behaviors of a responsible hunter.Answer: Any three of:
•Knows and obeys laws and regulations.•Views hunting as more than killing an
animal.•Develops a personal code of ethics and
sticks to it.•Takes full responsibility for his or her
actions.•Respects people, the land, and wildlife.•Does not drink and hunt.
8. Whose responsibility is it to know the laws and regulations before you go hunting? ____ yours____ your parents____ the leader of your hunting groupAnswer: yours
9. A responsible hunter follows the law and takes _________________ for his or her actions.Answer: full responsibility
10. The job of the game warden is to: ____ tell you where to find deer and elk to hunt.____ make sure that all hunting laws and regula-
tions are followed.Answer: make sure that all hunting laws and regu-
lations are followed.
Chap
ter Q
uiz
Copyright © 2010 Kalkomey Enterprises, Inc., www.kalkomey.com
16
◆ Describe the basic parts of a rifle, shotgun, and handgun. ◆ Explain how a firearm fires. ◆ Identify five firearm actions commonly found in rifles and shotguns and explain how they work. ◆ Identify the location(s) of safeties on firearms and explain how they are used. ◆ Name three types of sights found on firearms. ◆ Explain the differences between a rifle and a shotgun.
Introduction ◆ A firearm is a mechanical device that uses pressure from burning powder to force a projectile out of a metal tube. ◆ To appreciate the importance of firearm safety, you first must understand how firearms work
Basic Parts of a Firearm ◆ All modern firearms have three basic groups of parts.•Action: The heart of a firearm—moving parts that load, fire, and eject the shells or cartridges. Several types
are used in modern firearms. Muzzleloaders have locks instead of actions.• Stock: The handle of a firearm. Can be one or two pieces; usually made of wood or synthetics.•Barrel: The metal tube that a projectile travels through. ◆ Parts of a Bolt-Action Rifle: See page 21 for a diagram of parts on a bolt-action rifle (butt, stock, safety, bolt handle, bolt, chamber, sight, muzzle, barrel, forestock, magazine, trigger, trigger guard). ◆ Parts of a Pump-Action Shotgun: Shotguns are long-barreled firearms used by hunters. See page 22 for a diagram of parts on a pump-action shotgun (butt, stock, safety, action bar, rib, sight, muzzle, barrel, forestock, magazine, trigger, trigger guard). ◆ Parts of a Handgun: Handguns (revolvers and pistols) are short-barreled firearms sometimes used for hunting. See page 22 for a diagram of parts on a handgun (grip, hammer, barrel, sight, muzzle, ejector rod, cylinder, trigger, trigger guard).
How Do Firearms Work ◆ Despite their differences, all firearms operate using the same basic principles. ◆ See page 23 for diagrams that show what happens when the trigger is pulled.1. Squeeze the trigger.2. The firing pin strikes the primer. The primer ignites the gunpowder.3. The burning powder creates pressure. The pressure pushes the projectile (bullet or shot) down the barrel.4. The bullet spirals down the bore (rifle or handgun only). The projectile leaves the barrel at the muzzle.
Common Features of Firearms ◆ Firearm Actions: Firearms are classified by action type. The action is made up of parts that load, unload, fire, and eject the shotshell or cartridge. Actions are either single-shot or repeating—single-shot firearms must be reloaded after each fire; repeating firearms have extra cartridges or shotshells ready in a magazine, cylinder, or extra barrel. •Bolt Action operates like a door bolt, solidly locking into the breech. This makes it accurate and
dependable. - To open the action, lift the handle up and pull it to the rear. - If a firearm is loaded, the cartridge or shotshell will be ejected as you pull the bolt to the rear. To make sure it’s unloaded, visually check both the open action and the magazine for extra ammunition.
- Store bolt separately from the firearm.
Chapter One / Page 16 Chapter Three Today’s Firearms Start TimeOb
jectiv
esT
he st
uden
t sho
uld
…
20
23
23
Copyright © 2010 Kalkomey Enterprises, Inc., www.kalkomey.com
17
26
•Lever Action has a large metal lever located behind the trigger. This handle usually also forms the trigger guard. - To open the action, push the lever down and forward, which extracts a cartridge case from the chamber and ejects it. If the magazine holds extra cartridges, another is instantly ready to be loaded.
- To unload, push the lever down and forward repeatedly until no more cartridges are ejected. To make sure it’s unloaded, visually check both the chamber and magazine for additional cartridges.
- Most models also have an exposed hammer, which can be dangerous. - Use extra caution to keep your hands away from the trigger while working the lever action.
•Pump Action is fast and smooth. It allows the shooter to re-cock without looking away from the target. Pump action is also referred to as “slide action” or “trombone action.” - To open the action, slide the forestock to the rear, which extracts and ejects the cartridge or shotshell. Sliding the forestock toward the muzzle closes the action and readies another cartridge or shell for loading. Pump-action opens after it’s fired or if a release lever is pressed and the forestock is pulled to the rear.
- To make sure it’s unloaded, visually check both the chamber and magazine for cartridges or shotshells.• Semi-Automatic (or Autoloading) Action automatically ejects the case of a cartridge or shotshell and
reloads the chamber as each shot is fired manually. - To open the action, pull back the bolt’s operating handle (on a rifle or shotgun) or slide (on a pistol). Most semi-automatics, when the bolt or slide is pulled back, lock in the open position if the magazine is empty. If the firearm doesn’t lock open, a cartridge or shotshell from the magazine has gone into the chamber, making the firearm ready to fire. Some semi-automatics do not lock open and must be held open to check the chamber.
- To unload, first remove the magazine and lock the action open. Make sure it’s unloaded—visually check the chamber for an additional cartridge or shell.
- When closing the action for loading, pull back to unlock the bolt or slide, then let go, allowing it to travel forward on its own. Do not guide it forward with your hand because it may not seat properly.
- On a semi-automatic, the trigger must be pulled each time a shot is fired. This makes the semi-automatic different from the fully-automatic firearm, which fires continuously as long as the trigger is held down. The fully-automatic may not be used for hunting or sport shooting.
•Break (or Hinge) Action operates on the same principle as a door hinge and is simple to load and unload. - To open the action, point the barrel(s) at the ground. The release is pressed and stock drops down, allowing cartridges or shotshells to eject or be removed manually if loaded.
- Hinge actions have a separate barrel for each shot rather than a magazine. Most models have one or two barrels, but some have up to four.
- Some models have an exposed hammer, which can be dangerous.•Revolving Action takes its name from a revolving cylinder containing a number of cartridge chambers.
One chamber at a time lines up with the barrel as the firearm fired. Cylinders rotate clockwise or counter-clockwise. Revolving actions usually are found on handguns; referred to as “single action” or “double action.” - Single action: Will fire only after the hammer has been cocked manually. - Double action: Pulling the trigger cocks and releases the hammer; typically also can be hammer-cocked like a single-action revolver.
◆ Safety Mechanisms: Safety is a mechanical device that blocks the action to prevent the firearm from shooting until the safety is released or pushed to “off.” Safeties should never be relied on to protect against accidental shooting. Never replace safe firearm handling by trusting a safety—safeties can fail or be bumped from safe position. Don’t release a safety until just before you shoot. Safeties are located around the receiver. Types of safeties:•Cross-Bolt Safety: Common on pump and semi-automatic firearms. Simple push-button action blocks the
trigger or hammer. Located at the trigger guard or ahead of the hammer.•Lever Safety: Common on bolt-action rifles and handguns. A pivoting lever or tab blocks the trigger or
firing pin. •Tang Safety: Common on some rifles and shotguns. A sliding bar or button blocks the firing action.
Located on the tang (metal strip behind receiver) of firearms or on the side of the receiver on some rifles.
Copyright © 2010 Kalkomey Enterprises, Inc., www.kalkomey.com
18
•Hammer or Half-Cock Safety: Common on firearms with exposed hammers. Positions the trigger at half-cock, away from the firing pin. Engaged by placing the trigger at half-cock; some firearms automatically rebound to this position after the trigger is released. While not a true safety, it is sometimes described as a mechanical safety device by firearm manufacturers.
◆ Magazines: Magazine is the place in repeating firearms that stores ammunition that has not been fired. By working the action, the cartridge is picked up from the magazine and placed in the chamber ready to be fired.•Magazines are designed with a spring and a follower that push against cartridges to move them into the
action. To see if the magazine is empty, you must either see or feel the follower; if you cannot, a cartridge may be jammed in the magazine. Tubular magazines require close attention to make sure cartridge is not jammed in the magazine.
•Magazines may be detachable or fixed. - Detachable allows you to remove extra ammunition from the firearm by removing the magazine. - Fixed (tubular magazines, hinged-floorplates, and revolving magazines) require ammunition to be removed manually from the firearm.
◆ Sights: Sights are devices used to line up a muzzle with the shooter’s eye to hit target. This is more critical on firearms that fire a single projectile (rifle or handgun) than a firearm that shoots a pattern of shot (shotgun). Shotguns usually have simple pointing beads. Rifles typically have an open, aperture (peep), or telescopic sight. Most handguns have open sight, although some specialized handguns have dot or telescopic sights.•Bead Sight: Simple round bead set into top of the barrel near the muzzle. Some shotguns have a second,
smaller bead about halfway back on the barrel. The shooter points with the shotgun and follows a moving object. Bead is used for reference as the shotgun is pointed and moved to follow flying or running targets.
•Open Sight: Combination of bead or post front sight and notched rear sight. Simple and inexpensive, they allow quick sighting. To aim, center the top of bead or post within the notch of the rear sight and line up on the target. Open sights can be fixed or adjustable.
•Aperture (Peep) Sight: Combination of bead or post front sight and a round hole set on the rifle’s receiver close to the shooter’s eye. To aim, center the target in the rear peep or aperture sight and bring the front sight into center of the hole. This sight is more accurate and adjusted more easily than an open sight.
•Telescopic Sight (Scope): Small telescope mounted on your firearm. A scope gathers light, brightening the image and magnifying target, and does away with aligning rear and front sights.
•Dot Sight: Small device mounted on a firearm that uses electronics or optical fibers to project a glowing dot or another mark on the lens in front of the shooter’s eye. Some also magnify like telescopic sights.
Identifying and Operating Firearm Actions ◆ You must be able to recognize which type of action a rifle or shotgun has, understand how it works, and operate it safely and correctly. ◆ How To Operate a Break Action•Locate the action-release lever.•Push the action-release lever to one side. While keeping a firm grip on the stock and your finger off the
trigger, move the barrel(s) downward.•Based on whether the break action has an extractor or ejector, remove spent or loaded cartridges from the
firearm. Extractors move the cartridge a short distance out of the chamber, and you physically the remove the spent or loaded cartridges. Ejectors eject spent cartridges out of the firearm and let you physically remove loaded cartridges from the firearm.
•Examine the bore from the chamber end of the barrel(s) to check for obstructions.•To load the break action:
- Look at the data stamp on the barrel to make sure you have the correct ammunition. - Open the action. - While keeping good muzzle control, insert the new ammunition into the chamber and close the action.
•On some break actions, closing the action automatically engages the safety. On most break actions, you must engage the safety manually.
27
28
Copyright © 2010 Kalkomey Enterprises, Inc., www.kalkomey.com
19
29
29
30
◆ How To Operate a Bolt Action•To operate the bolt action, lift, pull back, and push forward and down—like a door bolt.• Since the action on some models will not open if the safety is on, follow these steps to open the action.
- Point the muzzle in a safe direction. - Release the safety. - Keep your finger off the trigger, and carefully open the action.
•To load the bolt action: - Open the bolt and insert the ammunition into the magazine from the top of the action. - Close the action. A round of ammunition will be fed from the magazine into the chamber. - Operate the bolt to eject ammunition and load it from the magazine.
◆ How To Operate a Pump Action•Point the muzzle in a safe direction. Locate the action-release button.•With your finger off the trigger, push and hold the action-release button while pumping the action. After
you shoot most pump-action shotguns, you usually do not have to use the action-release button—simply pump the action to open it.
•After you fire the gun, pump the action to eject the empty case, load a live round of ammunition into the chamber from the magazine, and cock the hammer. Then the firearm is ready to shoot.
•To make sure the chamber and magazine are empty: - With your finger off the trigger, push and hold the action-release button and pump the action several times.
- Visually check to ensure the chamber is empty.•Leave the action open when not hunting. ◆ How To Operate a Lever Action •Point the muzzle in a safe direction. Keep your finger off the trigger.•Open the action by pulling or pushing the lever in a downward direction away from the stock and toward
the muzzle of the barrel. This ejects any cartridge or empty case, cocks the hammer, and slides a live cartridge from the magazine onto a carrier.
•Close the action by moving the lever back to its original position. This pushes the live cartridge into the chamber and locks the action. The firearm is ready to shoot.
• Since many lever actions require you to put the hammer down to half cock to engage the safety, here are the steps for a right-handed shooter. You should have someone who has experience with lever actions teach you how to do this safely. - Point the muzzle in a safe direction. - Maintain a firm grip on the fore end of the firearm with one hand. Grasp the wrist of the stock with your other hand behind the action, curl your thumb around the hammer spur, and ease the hammer back.
- Pull the trigger with your index finger to release the hammer while you maintain control of the hammer with your thumb.
- Keeping the trigger pulled, ease the hammer down all the way with your thumb. - Remove your index finger from the trigger and trigger guard. With your thumb, ease the hammer back until the half-cock notch engages.
•Make sure you have sufficient stature and strength to manipulate the lever safely during cycling of the action as well as during the de-cocking/cocking of the hammer. If you cannot work a lever action safely, consider another type of firearm.
•When you are ready to shoot the firearm: - While keeping your finger off the trigger, use your right thumb to pull the hammer all the way back until it locks into full-cock position.
- Squeeze the trigger to fire. Some lever actions require that you squeeze the lever while squeezing or pulling the trigger.
- Before attempting this procedure with a loaded firearm, practice it many times with an unloaded firearm until you can do it correctly and safely every time.
•To unload a lever action: - Work the lever action forward and back until all cartridges are ejected. - Keep your finger off the trigger while you work the action; if you don’t, the firearm will fire.
Copyright © 2010 Kalkomey Enterprises, Inc., www.kalkomey.com
20
◆ How To Operate a Semi-Automatic Action•The following steps provide a general guideline for loading and unloading a semi-automatic firearm. Have
someone who is experienced with your type of semi-automatic show you how to load and unload it safely and correctly.
•To unload a semi-automatic firearm: - If the firearm has a removable magazine, remove it. This ensures that there can be only one round of ammunition in the firearm.
- Operate the cocking lever or slide to eject the last cartridge from the chamber. - While holding the action open, engage the button or lever that locks the action open. - Look into the chamber to verify that the feed path is clear. - Do not put your finger in the action to see if the chamber is empty. If the action closes accidentally, you might injure or sever your finger.
•To load a semi-automatic firearm: - Point the muzzle in a safe direction. - If the firearm has a safety, engage it. - Make sure you have the correct cartridges for your firearm. - If the magazine is removable, insert the correct cartridges into the magazine. If the magazine is not removable, close the action unless it must be open to load the magazine and then insert the correct cartridges into the fixed magazine.
- Open the action as far back as it will go. Do not try to put a cartridge into the empty chamber manually. - Let the action close with full spring force, making sure that the action picks up the cartridge and moves it to the empty chamber. The firearm is now loaded.
- When you are ready to fire, release the safety.•How a semi-automatic firearm works: Semi-automatic firearms are either recoil- or gas-operated.
- In a gas-operated model, some of the gas pressure from the fired cartridge is used to push a piston backwards. This causes the action to open. A spring causes the action to close.
- In a recoil-operated firearm, the force of the empty case being pushed backward while the bullet is pushed forward causes the action to open. A spring causes the action to close.
- With both types, the action ejects the empty case, cocks the firing pin or hammer, and loads a cartridge from the magazine into the chamber so that the firearm is ready to shoot.
- To make sure the firearm does not jam and will work properly, you must keep both types clean and use ammunition that is powerful enough to operate the firearm.
Differences Between Rifles, Shotguns, and Handguns ◆ The main differences between rifles, shotguns, and handguns are their barrels and the type of ammunition used.•Rifle barrel: Long with thick walls; spiraling grooves (called “rifling”) cut into the bore.• Shotgun barrel: Long; made of fairly thin steel that is smooth on the inside to allow shot and wad to glide
out without friction. Thinner than rifle barrel since it does not have to withstand as much pressure.•Handgun barrel: Much shorter than a rifle or shotgun barrel; designed to be shot while held with one or
two hands, rather than being placed against the shooter’s shoulder. Bores of most handgun barrels also have a grooved pattern similar to rifles.
◆ Rifling in the Rifle or Handgun Bore: A bullet fired from a rifle or handgun has a spiral spin that keeps it point-first in flight, increasing accuracy and distance. This is achieved by rifling inside the barrel, from which the rifle got its name. The barrel is thick and has spiraling grooves cut or pressed into the bore. The ridges of metal between the grooves are called lands. Together, grooves and lands make up rifling. ◆ Rifle or Handgun Caliber: Caliber describes the size of a rifle or handgun bore and the size of cartridges designed for different bores.•Caliber usually is measured as the diameter of a bore from land to opposite land. No standard is established
for designating caliber. Sometimes it is given as diameter of bullet—distance between grooves. •Caliber designations sometimes have a second number, unrelated to diameter. For example, the .30-30 is a
.30-caliber cartridge, but the second number is from the days when the cartridge took 30 grains of powder. The “06” in .30-06 refers to year (1906) it became official ammunition of the U.S. military.
•Every rifle or handgun is designed for a specific cartridge—the ammunition must match the firearm data stamp. The data stamp is imprinted on the barrel and tells what ammunition must be used. Several .30-caliber firearms use the same bullet size but are designed for different cartridges.
32
33
32
31
Copyright © 2010 Kalkomey Enterprises, Inc., www.kalkomey.com
21
33 ◆ A Shotgun’s Gauge: Shotguns are classified by gauge, a measure related to the diameter of smooth shotgun bore and the size of shotshell designed for that bore. •Common shotgun gauges are 10, 12, 16, 20, and 28 gauge. The smaller the gauge number, the larger the
shotgun bore. Gauge is determined by the number of lead balls of a size equal to the exact diameter of the bore that it takes to weigh one pound. For example, it takes 12 lead balls with the same diameter as a 12-gauge shotgun bore to weigh one pound. The .410-bore shotgun is the only exception to the shotgun gauge designation. It has a bore diameter of 410/1000ths of an inch, approximately equivalent to 67½ gauge.
•Each gauge of a shotgun shoots only shells of that gauge (12-gauge shells are used only in 12-gauge guns).• Shotgun gauge is often marked on the rear of the barrel. The shell gauge is marked on the shell and the factory
box.
1. What are the three basic parts of rifles and shotguns?____ sights, trigger, barrel____ stock, barrel, action____ stock, trigger, sightsAnswer: stock, barrel, action
2. “Always point the muzzle in a safe direction.” Which end of the barrel is the muzzle? ____ front end____ back endAnswer: front end
3. Why should you never rely solely on a safety to keep a gun from firing accidentally?____ The safety is a mechanical device and may
wear out.____ Safeties are usually well made but can fail.____ A hard blow, such as a fall, can cause a gun
to fire.Answer: The safety is a mechanical device and
may wear out. Safeties are usually well made but can fail.
4. List the five basic firearm actions.Answer: i. bolt action
ii. lever actioniii. pump actioniv. semi-automatic actionv. break (or hinge) action
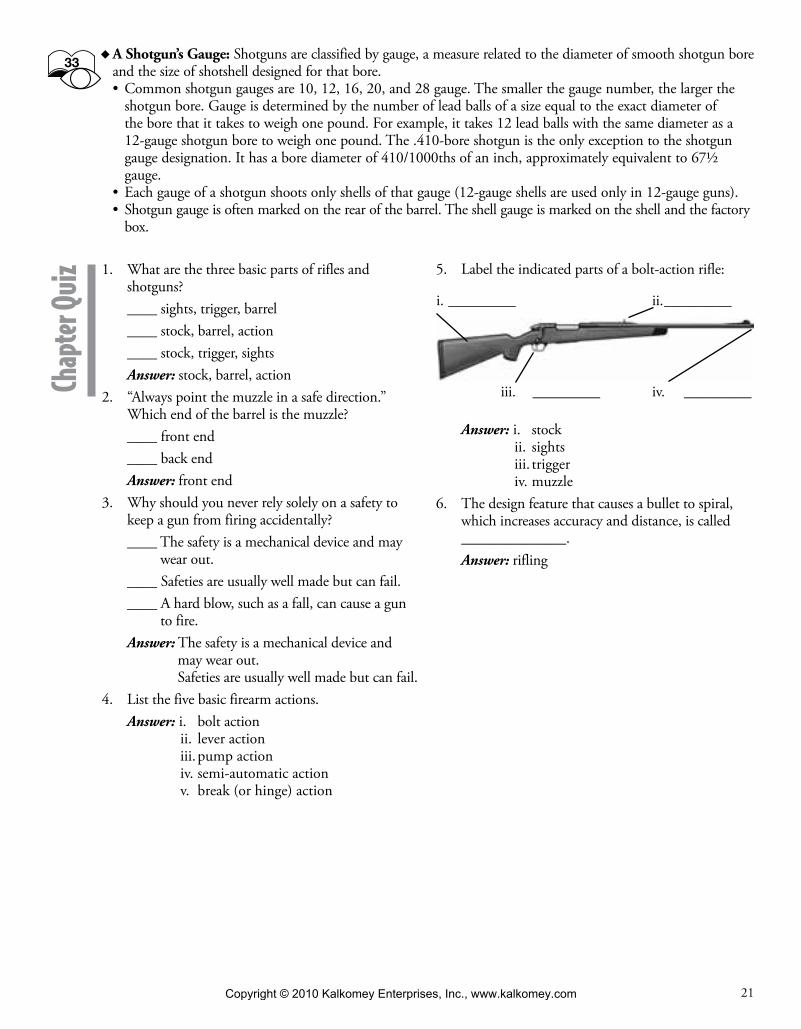
5. Label the indicated parts of a bolt-action rifle:
Answer: i. stockii. sightsiii. triggeriv. muzzle
6. The design feature that causes a bullet to spiral, which increases accuracy and distance, is called ______________. Answer: rifling
i. _________ ii. _________
iii. _________ iv. _________Chap
ter Q
uiz
Copyright © 2010 Kalkomey Enterprises, Inc., www.kalkomey.com
22
◆ State the four basic rules of firearm safety. ◆ Describe the proper procedure for accepting a
firearm from another person. ◆ Demonstrate proper loading and unloading of
firearms. ◆ Identify a safe method for transporting firearms
and vehicles and boats. ◆ Demonstrate six methods for carrying a firearm
safely in the field. ◆ Identify a safe method for getting a firearm into a
tree stand.
◆ Demonstrate the safe method for crossing an obstacle if hunting alone and if hunting with a partner.
◆ Define “safe zone-of-fire” and state its importance. ◆ Explain why it is not a good practice to shoot at a
“sky-lined” animal. ◆ State why hunters need to wear hunter orange
clothing and what the requirement is in North Dakota.
◆ Describe the procedure for safely cleaning a firearm and storing it.
Basic Firearm Safety RulesKnow the four basic rules of firearm safety, and follow them at all times. (Other principles of safe gun handling are on the inside front cover of the manual.)1. Always point the muzzle of your gun in a safe direction. Never point the gun at yourself or others.2. Always treat every gun as if it were loaded—even if you are sure it is unloaded.3. Always be sure of your target and what lies beyond. Never point your gun at something you do not plan to
shoot.4. Always keep your finger off the trigger until ready to fire. Putting your finger in the trigger guard could cause
an accidental discharge if the gun is loaded.
Accepting a FirearmTo accept a firearm from another person:
◆ Check that the action is open before touching the firearm. ◆ Visually check to see that the chamber and magazine are empty. ◆ Take the firearm with both hands. Keep the muzzle pointed in a safe direction. ◆ Say “thank you” so that the passer releases the firearm.
Loading and Unloading a Firearm ◆ Follow these guidelines when loading and unloading firearms.•Get help from someone familiar with the firearm.•Do not use live ammunition to learn how to use your firearm. Use “dummy” ammunition instead.•Keep your finger outside the trigger guard.•Practice! The more comfortable you are with the operation of your firearm, the more safely you will handle
it. ◆ Loading: Do not load a firearm until you can discharge it safely and legally. Here are the steps to load a firearm safely.1. Make sure the gun that is unloaded and that the barrel is unobstructed.2. Point the firearm in a safe direction.3. If the firearm can be loaded with the safety on, apply the safety.4. Make sure to use the correct cartridge(s) or shell(s) for the firearm—match the date stamp on the firearm
with the data stamp on the ammunition.5. Load the firearm, following the procedure for the type of gun you are using.
- Single-shot firearm: Place the ammunition in the chamber, and close the action. - Lever-action or pump-action firearm with a tubular magazine: Make sure the action is closed, load the magazine, and then cycle the action to bring a round from the magazine to the chamber.
29Chapter Four Firearm Safety Start TimeOb
jectiv
esT
he st
uden
t sho
uld
…
35
35
36
Copyright © 2010 Kalkomey Enterprises, Inc., www.kalkomey.com
23
- Firearms with a removable box magazine: Load the magazine and then insert it into the firearm. Close the action to load the chamber.
- Firearms with a nonremovable box magazine: Load the ammunition into the magazine. Close the action to load the chamber.
6. Put the safety on if you were unable to do so before loading. ◆ Unloading: Here are the steps to unload a firearm safely. Use PROVE to remember them.1. Point the firearm in a safe direction away from others and yourself.2. Remove all ammunition. For a semi-automatic firearm with a detachable magazine, remove the firearm
from the magazine first. For other types of actions, open the action to remove cartridges from the chamber first. Then remove any detachable magazine and all other cartridges from the firearm. For a firearm without a detachable magazine, eject cartridges or shells. Leave the action open.
3. Observe that the chamber is empty. 4. Verify that the feed path is empty. To make sure it is free of ammunition and obstructions, work the
firearm’s action and visually check the feed mechanism and magazine.5. Examine the bore for rust, excessive oil, or obstructions. If present, clean the firearm before it is fired or
stored.
Transporting, Casing, and Uncasing Firearms ◆ Transporting: Follow these rules when transporting a firearm.•Unload your firearm. NEVER carry a loaded firearm in a vehicle.•Place your firearm in a protective gun case. Keep it separate from ammunition.•Point the muzzle in a safe direction when putting it into or taking it out of a vehicle•Never pull the firearm toward you muzzle first.• Secure the firearm in the vehicle so that it cannot move during travel.•Put the firearm in the vehicle so that the muzzle will not point at any person or animal traveling in the
vehicle.• Store the firearm and ammunition in a locked place if you leave the vehicle. ◆ Casing a Firearm: Here are the steps.1. Unload and check the firearm.2. Make sure the firearm is empty. Leave the action open.3. Open the gun case, place the firearm inside, and close the case.4. Place the unloading firearm securely in the vehicle.
◆ Uncasing a Firearm: Here are the steps.1. Carefully remove the firearm from the vehicle. Maintain control of the muzzle.2. With the muzzle pointed in a safe direction, lay the firearm on a solid surface and open the gun case.3. Check that the firearm is unloaded and that the bore is clear of obstructions.
Field CarriesField carry is the position in which you carry your firearm while hunting. Here are six field carries.
◆ Two-Hand/Ready Carry: Use both hands to hold the firearm across the body with the muzzle pointed up; cover the trigger guard with your hand; keep your finger off the trigger. Gives you the best control and can be one of the safest carries. Do not use if someone is walking on the side where the muzzle is pointing. ◆ Sling Carry: With the muzzle pointed up, hang the firearm from one shoulder by the sling; hook your thumb under the sling while walking or standing. Not recommended for walking in rough terrain or heavy brush. Do not use if someone is behind you. ◆ Elbow Carry: Tuck the firearm under your armpit and let it hand across your elbow; keep the muzzle pointed at the ground in front of you. Gives the least muzzle control. Do not use if someone is in front of you or if you are in brushy terrain. ◆ Cradle Carry: Cradle the barrel in the bend of one arm with the muzzle pointed up. A comfortable carry that will not tire your arms. Do not use if someone is walking on the side where the muzzle is pointing. ◆ Trail Carry: Grip the stock with one hand; keep the muzzle pointing down and in front of you. Offers poor muzzle control, especially if you fall or stumble. Do not use when you are behind another person. ◆ Shoulder Carry: Hold the stock with the firearm leaning against your shoulder and the muzzle pointing up. Works well in high brush but is not secure. Do not use if someone is behind you.
37
37
38
38
39
Copyright © 2010 Kalkomey Enterprises, Inc., www.kalkomey.com
24
40
41
Firearm Safety in the Field ◆ When should you load your firearm? There’s no rule to tell you exactly when is the right time. It depends on the situation, your experience, and your skill. A reasonable and safe compromise is to chamber a round and keep the safety on “safe” until you reach an area where you expect to find game. Never walk around with a loaded firearm and the safety in the “fire” position. ◆ Hunting Incidents: From the law enforcement perspective, a hunting incident occurs when hunter directly or indirectly causes personal injury or death while using a firearm or bow. This is any unplanned, uncontrolled action that occurs while you use sporting arms. Can include near misses. Being responsible in order to prevent hunting incidents is your first priority. ◆ Main Causes of Hunting Incidents: (sidebar)•Hunter Judgment Mistakes such as mistaking another person for game or not checking the foreground or
background before firing.• Safety Rule Violations include pointing a muzzle in an unsafe direction, and ignoring proper procedures
for crossing a fence, obstacle, or difficult terrain.•Lack of Control and Practice can lead to accidental discharges and stray shots.•Four major factors of hunting-related incidents in North Dakota:
1. Careless handling of firearm2. Shooter swinging on game3. Victim out of sight of shooter4. Victim moved into line of fire
◆ Preventing Falls: To minimize the likelihood of a fall or stumble, follow these guidelines.•Never run or jump while carrying a loaded firearm.•Always unload your firearm when on poor footing or when crossing obstacles.•Do not try to cross a stream by walking on a fallen log.•Wear proper footgear. Deep-treaded, lace-up hunting boots are good.• If you fall or stumble, try to control your firearm’s muzzle so that it points away from you and your hunting
companions. After a fall, point the firearm in a safe direction, open the action, unload the firearm, and check for any barrel obstructions. Even tiny obstructions can be dangerous.
◆ Firearms in Tree Stands: Here are the steps to get your firearm safely into and out of a tree stand.1. Unload your firearm, and open the action. PROVE it is safe.2. Lay it on the ground with the muzzle slightly elevated to keep out dirt and debris.3. Make a “bridle” by tying a short rope or cord around the stock and attaching the other end to the barrel. If
your firearm has a sling, use it.4. Tie a haul line securely to the sling or bridle so that the firearm hangs with the muzzle pointed down.5. Slip the end of the haul line through your belt—leave it untied so that it can pull free if you fall.6. Put on your fall-arrest system, secure yourself to the tree, and climb to your stand.7. After you are in the stand and secure, haul up the firearm. Untie the haul line and bridle.8. Check the barrel for obstructions. Reload the gun.9. To lower the firearm, attach the haul line again and gently lower the firearm to the ground on the opposite
side of the tree from your climbing route. After you are back on the ground, check the barrel for obstruc-tions.
◆ Firearms in a Boat: The same rules apply as when transporting firearms in a vehicle—unload and case firearms before transporting. The action should be open or the gun broken down, whichever makes it the safest.•Before boarding the boat, place the unloaded firearm into the bow (front) of the boat with the muzzle
pointing forward. •When hunting with others, the first person settles into the bow position facing forward after the first gun is
placed. Place the second unloaded firearm in the stern (rear) of the boat with the muzzle pointing rearward. The second person settles in the stern position facing rearward. Repeat the procedure when unloading.
Copyright © 2010 Kalkomey Enterprises, Inc., www.kalkomey.com
25
◆ Crossing Obstacles: Do not lean a firearm against the fence or obstacle while you are crossing it. The method for crossing an obstacle depends on whether you are alone or with others.• If you are alone: (1) Unload your firearm, and leave the action open. (2) Carefully place your firearm on the
ground under the obstacle. Point the muzzle away from you. (3) Move away from the firearm, and cross the obstacle. Pull the firearm toward you by the stock end, not the muzzle end.
• If you are with others: (1) Both hunters unload their firearms and leave the actions open. (2) One hunter crosses the obstacle while the other hunter holds the firearms. (3) The hunter holding the firearms passes them to the first hunter and then crosses the obstacle.
◆ Safe Shots: Zone-of-fire is the area in which a hunter can shoot safely. Before setting off in a group, hunters should agree on each person’s zone-of-fire. This is particularly true of groups hunting birds, rabbits, or other small game. •For safety purposes, it’s best to have no more than three hunters in a group. For new hunters, two is safer
until they become familiar with maintaining a proper zone-of-fire.•Hunters should be spaced 25 to 40 yards apart and always in sight of one another. Each hunter has a zone-
of-fire which spans about 45 degrees directly in front of each hunter. (Some states require an adult to be immediately beside a youth hunter. In this case, the adult should be a supervisor only—not a hunter.)
•To visualize 45 degrees, focus on a distant, fixed object straight out in front of you. Stretch your arms straight out from your sides. Make a fist with thumbs held up. Gradually draw arms in toward the front until both thumbs are in focus without moving your eyes. This gives your outer boundaries.
• If three hunters are walking side by side hunting pheasants, hunter in center will shoot at birds flushed in the middle which fly straight away. Other hunters will shoot at birds flying toward their end of line.
• If a bird turns and flies back across the line of hunters, it’s best if all three hold their swings and do not fire. Same is true of rabbit scurrying back between hunters.
•No hunter, especially when swinging on game, should allow his or her gun to point at a person. Better to pass up a shot than risk injuring someone or damaging property.
•Every hunter should wear daylight fluorescent orange whether required by law or not. ◆ Unsafe Shots: Do not shoot:• If you see an animal you can’t identify.• If you hear a sound or catch a movement out of the corner of your eye.• If your target is “sky-lined.”• If your target is clearly out of range.• If there are objects in the foreground that could deflect your bullet and cause it to travel in unsafe direc-
tions. Do not shoot at frozen ground or water.•At a flock of birds or a group of animals. Pick out a single bird or animal when shooting. ◆ See and Be Seen: Wearing hunter/blaze orange clothing makes it much easier for other hunters to see you so that it’s less likely they will mistake you for a target. North Dakota law requires all big game hunters and anyone with them to wear a head covering and outer garment above the waistline of solid daylight fluorescent orange color, totaling at least 400 square inches (about the size of four pieces of paper). Bird hunters should wear hunter orange also. Never do anything that might make someone mistake you for game or that might cover up your hunter orange.
Cleaning and Storing Your Firearm ◆ Cleaning Your Firearm: Firearms must be cleaned after every use to keep them in top condition. •Cleaning firearms requires your full attention. Never do so while doing something else. Use a clean, clear
work area.•Follow these basic steps to clean a firearm.
- Point the muzzle in a safe direction, and make sure the gun is unloaded. - Remove all ammunition from the cleaning bench. - Field strip the firearm following the owner’s manual instructions. Then clean each part separately. - If possible, clean the barrel from the breech end using a bore guide and a cleaning rod with a brush/patch wet with solvent attached. Pass brush or patch all through barrel.
•Use a flexible “pull through” cleaning cable if cleaning a firearm with a lever or semi-automatic action.•Use cleaning solvents in a well-ventilated area and only as directed.• If cleaning from the muzzle end, use a muzzle protector so that you don’t damage the rifling near the
muzzle.
42
44
43
44
44
Copyright © 2010 Kalkomey Enterprises, Inc., www.kalkomey.com
26
◆ Firearm Safety in the Home: More than half of the fatal firearm incidents reported each year occur at home—almost all are caused by carelessness and lack of knowledge. It is a hunter’s duty to prevent firearm mishaps in the home.•Treat every firearm in the home with as much or more respect as in the field.•Firearms must be stored unloaded and in a locked location, separate from ammunition. The storage area
should be cool, clean, and dry. Avoid storing firearms in closed gun cases or scabbards since moisture can accumulate.
•Displaying guns in glass cabinets or wall racks is an invitation to thieves and curious children. Guns should be hidden from view and locked. For best protection against theft and fire damage, purchase a safe.
◆ Storing Ammunition: Store ammunition in a separate locked compartment, away from flammables. Store ammunition in a cool, dry place to prevent corrosion. Corroded ammunition can cause jamming, misfires, and other safety problems.
1. To load or unload a firearm safely, you should always:____ put the safety on.____ dry fire the firearm before loading and after
unloading.____ point the muzzle in a safe direction.Answer:•putthesafetyon.
•point the muzzle in a safe direction.2. _________ is not a safe way to transport a
firearm. a. Unloadedb. With the action openc. In a gun cased. Loaded and in a gun rack in the rear windowAnswer: d. Loaded and in a gun rack in the rear
window3. Which of the following steps apply when
accepting a firearm from another person?____ Make sure that the action is open, and
visually check the chamber and magazine before touching the firearm.
____ Grasp the firearm in both hands, keeping the muzzle pointed in a safe direction.
____ Thank the other person to let them know you have control of the firearm.
Answer: •Makesurethattheactionisopen,and visually check the chamber and magazine before touching the firearm.
•Grasp the firearm in both hands, keeping the muzzle pointed in a safe direction.
•Thank the other person to let them know you have control of the firearm.
4. If three hunters are walking side by side, the hunter in the center should keep the gun pointed ____________ or _________________.Answer: to the front or up.
5. If three hunters are walking side by side, it is acceptable for the hunter in the center to use the: ____ cradle carry.____ elbow carry.____ shoulder carry.____ trail carry.Answer: shoulder carry.
6. Firearms should always be stored unloaded, separate from ammunition, each in separate, locked storage cabinets or units. true or falseAnswer: true
7. The carry method that offers the best control of your firearm is the: ____ cradle carry.____ elbow carry.____ shoulder carry.____ trail carry.Answer: two-hand carry.
Chap
ter Q
uiz
46
Copyright © 2010 Kalkomey Enterprises, Inc., www.kalkomey.com
27
8. If you should stumble or fall while carrying a firearm: ____ make every effort to control the direction of
the muzzle so that it does not point at you or others.
____ unload the firearm and check the barrel for obstructions.
____ clean the barrel with a portable cleaning kit, if necessary.
Answer: •makeeveryefforttocontrolthedirection of the muzzle so that it does not point at you or others.
•unload the firearm and check the barrel for obstructions.
9. When crossing a fence with a firearm, the first step is always to unload your firearm and leave the action open. true or falseAnswer: true
10. When two hunters, each carrying a firearm, are crossing an obstacle such as a fence: ____ one hunter crosses over the obstacle first, and
the loaded firearms are handed to him/her.____ both hunters cross over at the same time,
each carrying their own firearms with the muzzles pointed in a safe direction.
____ one passes his or her unloaded, action-open firearm to the other, and crosses the obstacle first; then the unloaded firearms with the actions open and the muzzles pointed in a safe direction are passed to him/her so that the other hunter can cross the obstacle safely.
Answer: one passes his or her unloaded, action-open firearm to the other, and crosses the obstacle first; then the unloaded firearms with the actions open and the muzzles pointed in a safe direction are passed to him/her so that the other hunter can cross the obstacle safely.
11. Would you consider it a safe or unsafe situation to shoot at the game in this figure? ____ safe____ unsafeAnswer: unsafe
12. The main reason for wearing hunter orange clothing while hunting is to: ____ make it more difficult for game to see you.____ continue an old hunting tradition.____ make yourself more visible to other hunters.Answer: make yourself more visible to other
hunters.
Copyright © 2010 Kalkomey Enterprises, Inc., www.kalkomey.com
28
◆ Identify the basic components of rifle and shotgun ammunition. ◆ Correctly match ammunition with firearms. ◆ Explain the danger of mixing different gauges of shotshells. ◆ Choose the proper ammunition for the game you are hunting. ◆ Explain why it is important to know your firearm’s range.
Ammunition ◆ Although rifle cartridges and shotgun shells have many similarities—designs, basic parts, physical and chemical reactions to make them work—they are used for different firearms. ◆ Basic Components of Ammunition: Case, primer, gunpowder, and projectile(s); shotshells have an additional component called wad.•Case: Container, usually brass, steel, copper, paper, or plastic, that holds ammunition components together.•Primer: Explosive chemical compound that ignites gunpowder when struck by the firing pin; may be placed
either in the rim of the case (rimfire) or in the center of the base of the case (centerfire).•Gunpowder: A chemical mixture that burns very rapidly and converts to expanding gas when ignited.
Modern smokeless powder will burn slowly when impacted or ignited in the open (outside of the case). Black powder is less stable and can be explosive when impacted or ignited in the open.
•Projectile: The object(s) expelled from the barrel. - Bullet: A projectile, usually containing lead, fired through a rifle or handgun barrel - Slug: A solid projectile, usually of lead, fired through a shotgun barrel - Shot: A group of lead, steel, tungsten alloy, or bismuth pellets fired through a shotgun barrel
•Wad: Seal and/or shot container, made of paper or plastic, separating powder from a slug or shot in shotshell; prevents gas from escaping through the shot and holds the shot together as it passes through the barrel.
◆ Centerfire and Rimfire Ammunition•Centerfire: Used for rifles, shotguns, and handguns; has primer located in center of base; is usually
reloadable.•Rimfire: Has primer contained in the rim of the case; is limited to low-pressure loads; is not reloadable. ◆ Bullets come in different shapes and sizes and are commonly made of lead and copper.•Bullet Weight: In addition to selecting the correct caliber for your ammunition, you also must decide
on weight. Weight is expressed in grains. Heavier bullets usually deliver more power. Modern bullets are designed for particular sizes of game animals.
•Bullet Trajectory: Trajectory is the path a bullet takes during flight. Gravity, air resistance, speed, and weight of the bullet affect trajectory. Gravity pulls the bullet down as it travels forward. Air resistance slows the flight of the bullet. - The trajectory is slightly curved; if you sight-in your firearm to hit a target at 200 yards, you will hit the target high at 100 yards and low at 300 yards.
- Weight also affects trajectory. A .30-06 Springfield cartridge with a 180-grain bullet has a different flight pattern that the same cartridge with a 150-grain bullet. Before you go hunting, practice sighting-in your rifle with the ammunition you plan to use.
29Chapter Five Understanding Ammunition Start TimeOb
jectiv
esT
he st
uden
t sho
uld
…
49
50
50
Copyright © 2010 Kalkomey Enterprises, Inc., www.kalkomey.com
29
51
52
54
◆ Shotgun Shells: Each gauge of shotgun requires a specific shotshell. Make sure the gauge marked on the shotshell matches the gauge of your shotgun. The gauge is also printed on the ammunition box.• Shot Size: Shot comes in various sizes. The sizes are numbered—the larger the number, the smaller the
size of the shot. Choose the right shot size for the animals you are hunting. Always check North Dakota’s hunting regulations before you choose your ammunition.
•Load: You can buy shotshells that have the same gauge but different powder charges—target, field, or magnum load. Magnum loads have more powder and more shot than target or field loads.
•Length: The length of a shotshell is normally given in inches. It refers to the length of the shell after it has been fired. Shotshells must match the length specified by the manufacturer (found on the barrel).
•Non-Toxic Shot: (sidebar) Non-toxic shot (steel, tungsten alloy, or bismuth shot) is required throughout the U.S. for waterfowl hunting.
◆ Shotgun Choke and Shot String: When shotshell is fired, pellets leave the barrel and begin to spread or scatter. The farther pellets travel, the greater the spread of the group of pellets (shot) in length and diameter. This spread is called the shot string.•Choke will affect the shot pattern when the shot string hits the target.•Distance from the target determines the choke needed. Shotgun choke determines shot string only. Choke
does not alter the shotgun’s shot speed (velocity) or distance (range)—it just controls how tight or spread out the pellets will be at a specific distance. - Cylinder choke is an unconstricted barrel. Shot string spreads quickly. - Improved Cylinder has slight constriction. Shot string spreads fairly quickly. Good choice for quail, rabbits, and other upland game at relatively close ranges.
- Modified choke has moderate constriction. Shot stays together longer, making the shot string denser and more useful at longer ranges. Used when dove hunting and when using steel shot to hunt for ducks or geese. An Improved Modified choke is slightly tighter than Modified.
- Full choke has tight constriction. The shot string holds together even longer, making this choke good for squirrels, turkey, and other game shot at 40-yard and longer ranges. Turkey hunters sometimes use Extra Full or Turkey choke for even denser patterns at long range.
◆ Steel Shot: Steel shot is slightly lighter and harder than lead shot of same size—reducing its velocity and distance and keeping the pattern tighter. Pattern your shotgun with various loads of steel shot before hunting waterfowl.
Choosing the Right Ammunition for Your Firearm ◆ Only one size of ammunition properly fits any firearm. Putting any other size cartridge or shotshell into a firearm is extremely dangerous. ◆ Caliber and Gauge: Ammunition comes in different lengths, shapes, and diameters. Choose a caliber or gauge that is suited to your firearm as well as the game you wish to hunt. ◆ The Data Stamp: To find the caliber or gauge of your firearm, locate the data stamp on the barrel of the firearm. Make sure the data stamp on the ammunition matches the data stamp on the barrel. If you’re not sure, ask someone who is experienced and familiar with your firearm to help you select the correct ammunition. ◆ If you do not match the ammunition to the firearm, the cartridge could become lodged in the firearm, explode, and cause serious injury to the user or bystander. If the data stamp on the ammunition does not match the data stamp on your firearm, do not use the ammunition.
Copyright © 2010 Kalkomey Enterprises, Inc., www.kalkomey.com
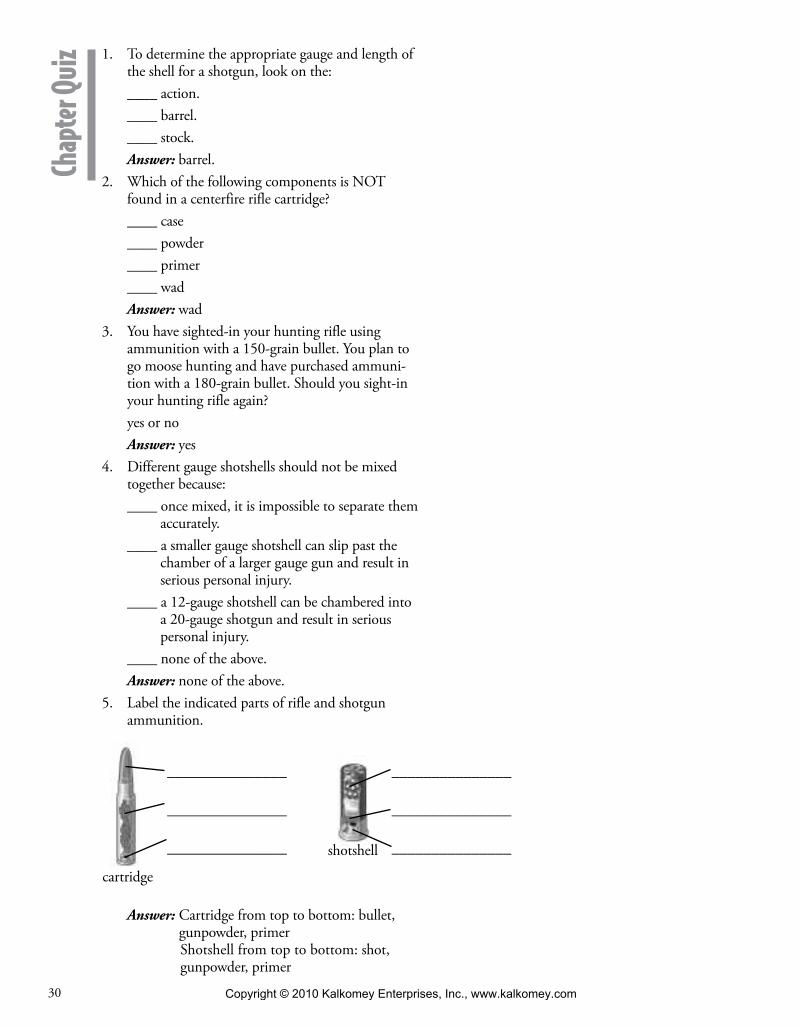
30
1. To determine the appropriate gauge and length of the shell for a shotgun, look on the:____ action.____ barrel.____ stock.Answer: barrel.
2. Which of the following components is NOT found in a centerfire rifle cartridge? ____ case____ powder____ primer____ wadAnswer: wad
3. You have sighted-in your hunting rifle using ammunition with a 150-grain bullet. You plan to go moose hunting and have purchased ammuni-tion with a 180-grain bullet. Should you sight-in your hunting rifle again?yes or noAnswer: yes
4. Different gauge shotshells should not be mixed together because:____ once mixed, it is impossible to separate them
accurately.____ a smaller gauge shotshell can slip past the
chamber of a larger gauge gun and result in serious personal injury.
____ a 12-gauge shotshell can be chambered into a 20-gauge shotgun and result in serious personal injury.
____ none of the above.Answer: none of the above.
5. Label the indicated parts of rifle and shotgun ammunition.
Answer: Cartridge from top to bottom: bullet, gunpowder, primerShotshell from top to bottom: shot, gunpowder, primer
Chap
ter Q
uiz
_______________
_______________
_______________
_______________
_______________
_______________
cartridge
shotshell
Copyright © 2010 Kalkomey Enterprises, Inc., www.kalkomey.com
31
◆ Give two reasons why good marksmanship is important.
◆ Define “dominant eye” and explain the procedure for determining it.
◆ Identify and describe the different skills for rifle marksmanship.
◆ Demonstrate four proper positions for rifle firing.
◆ Identify and describe the different skills for shotgun marksmanship.
◆ Explain the basic steps for sighting-in a rifle. ◆ Explain the safety rules, equipment, commands,
and etiquette used at a shooting range.
Marksmanship ◆ Good marksmanship means accurately and consistently hitting a target where planned. When hunting, accuracy is critical for a clean kill. •First reason is safety. When you know you can shoot accurately, you can concentrate on where to aim and
determine if a shot is safe.• Second reason is to make a clean kill. A hunter’s goal should be to place one accurate shot for a quick, clean,
humane kill. ◆ Shooting combines loading and unloading a firearm with selecting the correct ammunition and applying shooting skills. It takes time, practice, coaching, and self-study to become proficient. ◆ To learn to shoot, ask a firearm instructor to help you and join a shooting club. Shotgun owners can try shooting trap, skeet, or sporting clays. Rifle shooter can try target shooting. ◆ You can learn the fundamentals of shooting in the classroom before heading to the range.
Your Dominant Eye ◆ Your dominant eye is the stronger of your two eyes. Use your dominant eye for accurate aiming. ◆ For most people, the dominant hand and the dominant eye are the same. Some people are cross-dominant—this means they are right-handed but left-eye dominant, or vice versa. If you are cross-dominant, your instructor may want you to mount your firearm on the shoulder of your dominant eye. ◆ Finding Your Dominant Eye: (sidebar)•Face an object that is about 10 feet away.•Extend your arms straight out in front of you.•Form a triangle by overlapping your hands.•Look through the triangle with both eyes.•Focus on the object.•Without moving your hands, close one eye at a time. The eye that keeps the object in the center of the
triangle is your dominant eye.
Rifle-Firing Skills ◆ Rifle marksmanship depends on mastery of several fundamental techniques—firing position, aiming, trigger control, breathing control, and follow through. ◆ Firing Position: Firing from a bench or table is a good position to use when learning how to fire a rifle. Then you can proceed to the four other positions.•Prone: The steadiest position and good for firing accurate shots. Not suitable in tall grass or dense brush. To
position yourself: - If you are right-handed, lie on your stomach with your body slightly to the left of the line of aim. If you are left-handed, reverse this position.
- Keep your back straight and your legs in a relaxed position. - Bend both elbows and curve your shoulders slightly forward to form a solid upper-body position. The upper body and arms support the rifle’s weight.
29Chapter Six Shooting Skills Start TimeOb
jectiv
esT
he st
uden
t sho
uld
…
57
58
58
59
Copyright © 2010 Kalkomey Enterprises, Inc., www.kalkomey.com
32
• Sitting: The next steadiest position. More suitable than prone when you are in tall grass or brush. To position yourself: - Sit solidly on the ground with your legs crossed or open. - If you are right-handed, position your body about 30° to the right of the line of aim. - Place your elbow near, but not on, the bony part of the left knee. - Tuck the left elbow as far under the rifle as possible. - Place the right elbow on or near the right knee. - Reverse the procedure if you are left-handed. - Hold the rifle firmly, but do not grip too tightly. Brace your body—not your shoulder—against something stable to help steady your aim.
•Kneeling: Not as steady as prone or sitting since the firing arm is free. To position yourself: - Turn so that you are at about a 45° angle to the target. - If you are right-handed, lower your body so that your right knee is on the ground. Put your left foot forward to steady yourself.
- Place your elbow near, but not on, the bony part of the left knee. - Tuck the left elbow as far under the rifle as possible. - If you are left-handed, kneel on the left knee with the right foot forward and the right elbow on the right knee.
• Standing: The least stable position and the most difficult. To help steady your shot, rest the rifle on a stable object or use a carrying strap such as a sling. To position yourself: - If you are right-handed, turn your body about 90° to the right of the target. - Place your feet shoulder-width apart. - Support the rifle with your left arm. Hold your left arm against your body for extra support. - Hold the rifle firmly against your shoulder with the right hand. Do not grip too tightly. - Reverse the procedure if you are left-handed.
◆ Aiming: A rifle is aimed. This requires sight alignment. Sight alignment is the process of lining up rear and front sights. Sight picture is the image you see when sights are aligned correctly with the target.•Open sight: Line up the target with the blade or bead of the front sight within the notch of the rear sight.•Aperture sight: Line up the target with the front sight within the rear peephole.•Telescopic sight with crosshair reticle: Line up the target with the crosshairs of the sight.•Telescopic sight with dot reticle: Line up the target with the dot of the sight. The dot must be centered. ◆ Trigger Control: Trigger control is essential for an accurate shot.•When the sights are aligned on the target, squeeze the trigger slowly and steadily.•Do not jerk the trigger. Anything other than a smooth squeeze will send the shot off target.•Try not to tense up before the rifle fires. ◆ Breathing Control: As you breathe, your arm wavers, causing your firearm to move also. Therefore, you must control your breathing at the exact moment you fire.•When you are in firing position, take a deep breath, exhale a portion of it, and hold your breath while you
aim.•When your front sight is in focus and on target, hold your breath while you squeeze the trigger. If you hold
your breath too long, you may lose control and you will miss the target. If you run out of breath before firing, start over.
◆ Follow Through: To follow through, maintain your sight picture and/or firing position after discharging the firearm. If you move too soon, you will miss the target. For best results, count to three after squeezing the trigger before you lower the rifle.
59
60
60
61
Copyright © 2010 Kalkomey Enterprises, Inc., www.kalkomey.com
33
Shotgun-Shooting Skills ◆ Shotgun shooting differs substantially from rifle firing. These differences are in shooting position, mounting or holding the shotgun, pointing, trigger control, leading, and follow through. ◆ Shooting Position: For shotgun shooting, stand like a boxer with your feet spread apart and your body well-balanced. Your arms and trunk should be free to swing to the right and left of the target. Relax so that you can move smoothly.•When shooting, your body weight shifts to the leading leg. This is the left leg if you shoot right-handed and
the right leg if you shoot left-handed.•The leading hand holds the shotgun’s forestock and points to the target area. ◆ Mounting the Shotgun: To “mount the shotgun,” place the stock against your cheek and then put it against your shoulder. Doing this makes sure the firearm is in exactly the same position each time you shoot. If you raise the firearm to your shoulder first and then move your cheek to the stock, you will likely miss the target. ◆ Pointing and Eyeing the Target•Pointing: With a shotgun, you point at the target instead of aiming. To shoot accurately, you must move
your body, firearm, and eyes in one smooth, coordinated movement. This requires practice.•Eyeing the Target: Keep both eyes wide open and focused on the moving target, not on the barrel or bead
sight. While watching the target, mount the firearm correctly, point it at the target, and pull the trigger. ◆ Trigger Control: A shotgun trigger is pulled—similar to the action of striking a keyboard. Pull the trigger quickly but not hard. ◆ Leading the Target and Following Through•Leading means shooting ahead of the moving target. If you shoot directly at a moving target, it will have
passed by when the shot reaches the spot. With correct leading, the shot and the target get to the same spot at the same time.
•Leading is part of swinging through. With the swing-through method, you swing the muzzle of the shotgun so that it points at a flying bird. Following its path, increase the speed of your swing until the muzzle has passed through to a spot just ahead of the bird (leading). Then fire.
•Continue your swing during the shot and after. This is called follow through. Follow through helps prevent you from shooting behind your target.
Sighting-In Your Rifle and Patterning Your Shotgun ◆ To make sure your shot hits where you want it to, you need to sight-in your rifle and pattern your shotgun. ◆ Sighting-In Your Rifle: A step-by-step process of firing and adjusting your sights until the bullet hits where you aim. Once you have your rifle sighted-in, practice firing and then practice some more. ◆ How To Sight-In a Rifle• Set up a target with a safe backstop at 25 yards. Using the same ammunition you will use when hunting,
fire at least three test shots.•Check the target. If the shots are grouped but not at your point of aim, adjust the sight in the same
direction you want to move your hits. If your shots are not grouped, get someone to help you.•Move the target to the range from which you will be hunting—usually 100-200 yards. Repeat the first two
steps.•After your rifle is sighted-in, practice shooting under various light and weather conditions and at various
distances. ◆ Sight Adjustment Rule: (sidebar) The rear sight should be moved in the direction that the bullet should travel. Moving the rear sight left or right to move the bullet left or right is called “adjusting for windage.” Raising or lowering the rear sight to move the bullet up or down is called “adjusting for elevation.” ◆ Patterning Your Shotgun: To know what shot pattern you can expect from a specific shotgun, you must pattern your shotgun. To pattern your shotgun:•Make a target from a 30-inch or larger piece of paper. Then stand 40 yards away, and point and shoot at the
center of the target.•Repeat with different shotshell brands and different shot sizes.•Take each target and draw a 30-inch diameter circle so that the center of the circle has the greatest number,
or highest density, of hits.•Use this to determine which brands of shells, shot sizes, chokes, and loads perform best and at what range.
64
65
62
63
Copyright © 2010 Kalkomey Enterprises, Inc., www.kalkomey.com
34
Where You Can Go To Shoot ◆ Before you go out to practice, check local, state, and federal laws governing where you can shoot. The safest places are shooting ranges. ◆ Range Rules, Commands, and Etiquette: Range rules and commands may vary from range to range. At each range, read the rules and learn the commands. Always obey the range officer, the person who gives the commands.•Two important range commands: “Cease-fire” means stop shooting, unload your firearm, put it down on
the bench with the action open and the muzzle pointing downrange, and step back behind the cease-fire line. “The range is active” (or “hot” or “live”) means you can load and shoot your firearm.
• Shooters are expected to follow range etiquette. Here are some examples. - When shooting a muzzleloader, shot from downwind of other shooters. - Always ask for permission before handling another person’s firearm or equipment. - Avoid interrupting or distracting others while they are shooting. - Avoid rapid-fire shooting so that you don’t disturb others. - Shoot only at your own targets. - Offer advice or coaching to help new shooters. - Be aware of where your shells are ejecting and erect a barrier to keep the shooter beside you from being hit by your spent shells.
- Clean up after shooting—pick up your shells, and take down your target.• Safety Equipment and Clothing: Shooting requires safety equipment. Many ranges require shooters to
wear hearing and eye protection. Even if they don’t, it is still a good idea. - Use headphone-style hearing protectors if you are firing a rifle. - Use earplugs if you are shooting a shotgun since headphones affect how a shotgun can be mounted.
Know Your Firearm’s RangeKnowing a firearm’s “maximum projectile range” is critical—it tells at what distances a firearm’s projectile could cause injury to persons, animals, or objects. When hunting, knowing the “effective killing range” lets you immediately assess when shot will give clean kill. The effective killing range will always be less than the maximum projectile range.
67
65
Copyright © 2010 Kalkomey Enterprises, Inc., www.kalkomey.com
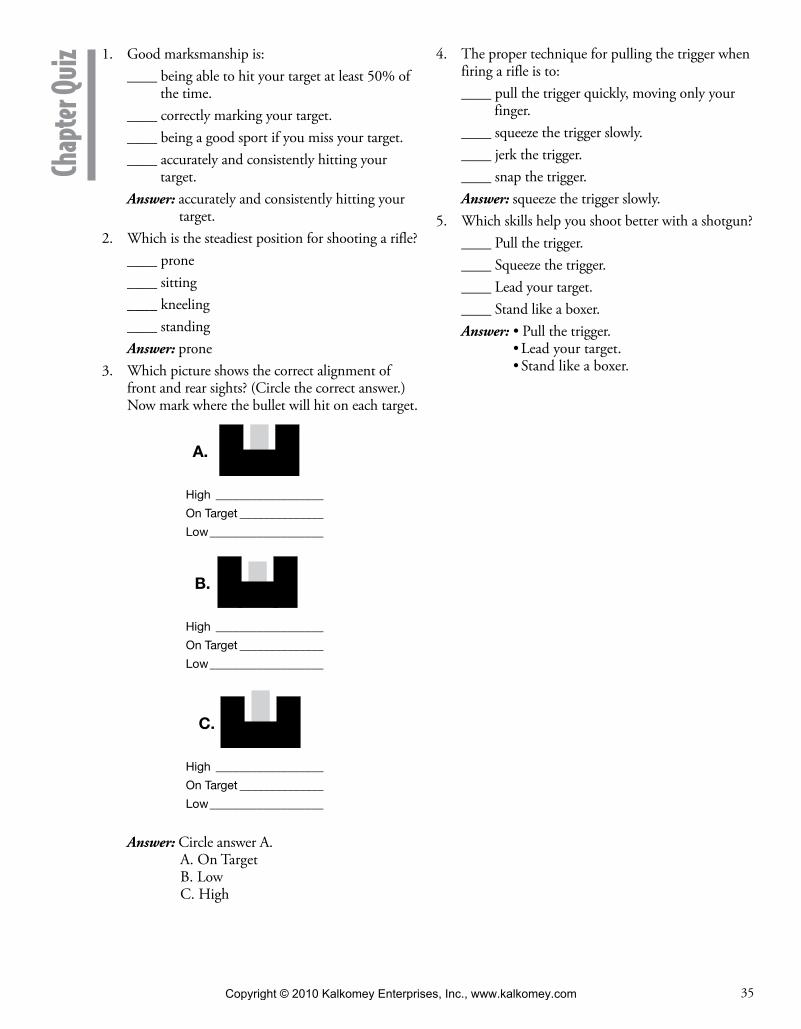
35
1. Good marksmanship is:____ being able to hit your target at least 50% of
the time.____ correctly marking your target.____ being a good sport if you miss your target.____ accurately and consistently hitting your
target.Answer: accurately and consistently hitting your
target.2. Which is the steadiest position for shooting a rifle?
____ prone____ sitting____ kneeling____ standingAnswer: prone
3. Which picture shows the correct alignment of front and rear sights? (Circle the correct answer.) Now mark where the bullet will hit on each target.
Answer: Circle answer A.A. On TargetB. LowC. High
4. The proper technique for pulling the trigger when firing a rifle is to:____ pull the trigger quickly, moving only your
finger.____ squeeze the trigger slowly.____ jerk the trigger.____ snap the trigger.Answer: squeeze the trigger slowly.
5. Which skills help you shoot better with a shotgun? ____ Pull the trigger.____ Squeeze the trigger.____ Lead your target.____ Stand like a boxer.Answer: •Pullthetrigger.
•Lead your target.•Stand like a boxer.
Chap
ter Q
uiz
A.
High __________________
On Target ______________
Low ___________________
B.
High __________________
On Target ______________
Low ___________________
C.
High __________________
On Target ______________
Low ___________________
Copyright © 2010 Kalkomey Enterprises, Inc., www.kalkomey.com
36
◆ Explain the importance of physical fitness. ◆ List some general guidelines for hunting on public
and private land. ◆ Be familiar with the use of a compass. ◆ List three pieces of information that should be
included in a hunting plan. ◆ Explain the importance of dressing in layers. ◆ List five essential items to bring along on any hunt.
◆ Explain why it is important for every hunter to take a first-aid and CPR training course.
◆ List five abilities that are impaired if the hunter consumes alcohol or drugs.
◆ List two factors that increase the possibility for hypothermia, frostbite, and heat exhaustion.
◆ Explain what S.T.O.P. means. ◆ Describe three ways to signal for help when lost. ◆ Explain why water safety is important to hunters.
Importance of Planning and Preparation ◆ Hunting is a safe sport, but it does involve a certain amount of risk. A variety of incidents can occur on a trip outdoors. Rough terrain—particularly when it’s unfamiliar—increases the chance of accidents. Climate extremes also increase the risk. In remote areas, there’s always the possibility of becoming lost. ◆ To plan properly, address these four areas.•Be Ready: To avoid or minimize problems, it’s essential to plan carefully for the hunt. Responsible hunters
anticipate potential problems and make plans to deal with them. Considerations include terrain, location, weather, dangerous game, and the potential for forest fires.
•Know Your Location: Learn about your chosen hunting area before you arrive. Purchase a topographic map, and familiarize yourself with the terrain. If it’s within a convenient drive, visit the area in off-season.
•Prepare for Safety: You also need to assess your physical condition and equipment. Refresh your memory of hunting and firearm safety rules, and review rules with your hunting partners.
•Tell Others: Prepare a hunting plan that tells where and with whom you are hunting and when you expect to return. Give specific directions on your route to your destination and any alternate destinations. Leave the plan with a family member or friend. Do not deviate from the hunting plan without notification. When you’re hunting with group, each person should discuss their route plan.
Physical Fitness ◆ Your physical condition affects both the type of hunting you plan to do and the location where you plan to hunt. Never hunt in conditions beyond your physical abilities. ◆ Why Be Fit Before You Hunt? Here are four reasons.•You can walk faster and farther. This lets you cover more area and gives you access to more remote sites.•You can avoid exhaustion and dangerous lapses of concentration. Being alert and focused helps you avoid
accidents, reduces your chances of getting lost, and allows you to pay more attention to firearm safety and shooting skills.
• If you are not out of breath, you have better breath control while aiming. This can improve your marks-manship.
•You will be more successful if you must pursue or track a wounded animal.
Where You Can Hunt ◆ Hunting is available on public or private land. Public land is owned by the federal, state, or local government. Private land is owned by an individual or a business. Be sure you know the rules and laws that apply to your location before you hunt. Get a copy of North Dakota’s current hunting regulations and study it.
26Chapter One / Page 36 Chapter Seven Preparing for the Hunt and Outdoor Safety Start TimeOb
jectiv
esT
he st
uden
t sho
uld
…
69
69
70
Copyright © 2010 Kalkomey Enterprises, Inc., www.kalkomey.com
37
72
◆ If you plan to hunt on private land:•Get permission from the landowner well in advance.•Confirm the date and time with the landowner before each outing.•Let the landowner know when you leave. Offer to share your game.• Send the owner a thank you note.•Always clean up your trash.•Always follow the landowner’s instructions about where and when you can hunt and any other restrictions.•Never shoot around houses, buildings, or livestock.•Leave gates as you find them.•Report acts of vandalism or other unusual situations. ◆ If you plan to hunt on public lands:•Know which government agency manages the property. Get a map of the area.•Check regulations to be sure hunting is allowed and there are no special restrictions.•Be aware that non-hunters may be on the property also. Treat everyone you meet with courtesy and respect.•Don’t hunt near heavily used recreation areas.•Always clean up your trash.•Never shoot around houses, buildings, or livestock.•Leave gates as you find them.•Report acts of vandalism or other unusual situations.•Take care to avoid spreading weeds.
Topographic Maps and Compasses ◆ When in a remote or unfamiliar area, a topographic map and compass are a must. Topographic maps, created from aerial photographs, reveal the contours of the land, including hills, ridges, and valleys, as well as lakes, rivers, creeks, trails, and roads.•Contour lines show the elevation of the ground.•Contour intervals reveal how much vertical distance is between each contour line—closely spaced contour
lines indicate very steep slopes.•Contour lines that are sharply tapered indicate an uphill direction.•Rounded contour lines typically indicate a downhill direction. ◆ The Compass: An orienteering compass is a critical piece of equipment for outdoor travel. A good orienteering compass has these features:•Clear base plate that allows you to see the map underneath• Straight sides for aligning two points or for drawing lines•Liquid-filled needle housing that keeps a magnetic needle relatively steady when taking readings•Two arrows: A direction arrow painted on the base plate (or you may use the edge of the compass) is used
to point a compass from your starting point to your destination; the orienting arrow, located in needle housing, is used to orient the compass to a map
◆ Using a Map and Compass: (sidebar)•Mark your starting point and where you want to go on your topographic map. Draw a straight line between
the two points.•Lay the base plate edge of the compass along the line. Make sure the direction-of-travel arrow points in the
direction you want to go.•Center the north arrow (the “N”) of the compass dial along a north/south line on the map.•Correct for declination. Check the diagram at the bottom of the map that shows whether magnetic north is
to the left or right of true north. Turn the compass dial the correct number of degrees left or right as shown. •Hold the compass level out in front of you. Rotate your body until the red tip of the compass needle lines
up with the “N” on the compass. The direction-of-travel arrow now points in the direction you want to go. ◆ Declination: Topographic maps drawn to true north (the North Pole), which is indicated by grid lines on a map. However, a compass will always point to magnetic north, which is in the Hudson Bay area. The difference between true north and magnetic north is called “declination.”•When true north and magnetic north are aligned, you’re at zero degrees declination. A compass needle
points to true north. If you are east or west of zero degrees declination, the compass will not be in line with true north.
71
71
72
Copyright © 2010 Kalkomey Enterprises, Inc., www.kalkomey.com
38
•To compensate for declination: - Center north arrow (“N”) of the compass dial along the north/south line of the map. - Check the diagram on the map that shows whether magnetic north is to the left or the right of true north. - Turn the compass dial the correct number of degrees left or right as indicated on the map. “N” now points to magnetic north.
- Hold the compass level in front of you and rotate your body until the tip of the compass needle aligns with “N” on the compass dial. The direction arrow on the base plate points in the direction you want to go.
◆ Plot Your Progress •As you hike into unfamiliar terrain, keep your bearings by taking frequent compass readings and plotting
your progress on a map. - Note key points, such as stream crossings, to help you find your way back. - Pay particular attention when you reach a high point at the top of a ridge; use elevation to locate landmarks visible from there.
•Learning to set your course and take bearings takes study and practice. The best way to become proficient with a compass is under the guidance of an experienced individual.
◆ Global Positioning System (GPS): (sidebar) Navigation system based on a network of satellites. Users with a GPS unit can determine their exact location (latitude and longitude) in any weather all over the world, 24 hours a day. •GPS satellites circle the earth twice a day and transmit information to the earth. GPS receivers use this
information to calculate the user’s location by comparing the time a signal was transmitted by satellite with the time it was received. The time difference tells the GPS receiver the distance from the satellite. By calcu-lating several satellite distances, the receiver can determine and display a user’s location on a GPS unit.
•Once the user’s position is determined, the GPS receiver can calculate the other information—bearing, trip distance, distance to a destination, sunrise and sunset times, and more.
•GPS receivers are accurate to within 15 meters (49 feet) on average. Certain atmospheric factors and other sources of error can affect accuracy.
Hunting Plans ◆ Here are some reasons why it is important to prepare a hunting plan.• If an emergency happens at home while you are out hunting, others would know where to look for you.• If you or a hunting partner did not return on time, others would know where to look for you.• If friends decide to hunt in your same area, they would be able to avoid disturbing your hunt. ◆ Your hunting plan should include the information someone would need to find you in an emergency. A sample plan is on page 75 of the Student Manual. Include at least the “3 W’s”:•Where are you going? Show your specific location on a map. Let someone know if your plans change.•Who is with you? List the names and contact information for everyone who is with you.•When are you returning? Be specific, and allow for delays. Tell your family or friends how long they should
wait before taking action to find you. Let someone know if you will be late. ◆ Review your hunting plan carefully and often. As the time for your hunt approaches, finalize your plan. Leave the plan with someone you trust. ◆ Remember, plan your hunt and hunt your plan!
Field Clothing ◆ Your clothes are not about fashion but about survival and comfort. Dress appropriately, and be prepared for a change in the weather. ◆ To deal with extremes in weather, dress in layers.•Layer next to your skin: Wear a material, like polypropylene, that wicks away moisture if you begin to sweat.•Next layer: For insulation and warmth, wear wool or synthetic materials, like fleece, that retain some
warmth even when wet.•Top layer: Wear water-repellant and/or wind-resistant material. Be careful about wearing denim jeans,
cotton sweatshirts, and cotton socks—cotton clothing does not keep you warm if it gets wet.•Be sure to bring along a warm hat.
72
73
73
74
Copyright © 2010 Kalkomey Enterprises, Inc., www.kalkomey.com
39
76
76
79
Outdoor Essentials: The Rest of Your Gear ◆ In addition to your firearm, ammunition, and clothing, you’ll need a few other items in the field. Having the correct gear can make a difference between survival and death if things go wrong on your hunt. Page 76 gives a list of essential items. ◆ Pack the items in a belt pouch or fanny pack. NEVER head into the field without your survival kit. ◆ The “Rule of 3s”: (sidebar) We can survive for:• 3 minutes without air• 3 hours in severe weather without shelter• 3 days without water• 3 weeks without food
First Aid ◆ Since injuries can occur while hunting, you should know what to do, and what not to do, in a medical emergency. •You should take a first-aid course from the American Red Cross or another organization. The course should
include instruction for rescue breathing and other possible outdoor emergency needs. You also need a good first-aid kit that includes latex gloves, sterile gauze dressings, roller bandages, tape, triangular bandages, space blanket, barrier for rescue breathing in CPR, maintenance medications, first-aid book.
•You also should learn how to perform CPR properly in case of a heart attack or an injury that the causes the heartbeat or breathing to stop.
◆ How Do I Know if I’m Having a Heart Attack? If you think you are having a heart problems or a heart attack, get help immediately. You may be having a heart attack if you:•Feel a pain that is like bad heartburn.•Feel a pressure or crushing pain in your chest, sometimes with sweating, nausea, or vomiting.•Feel pain that extends from your chest into the jaw, left arm, or left shoulder.•Feel tightness in your chest.•Have shortness of breath for more than a couple of seconds. ◆ Check, Call, & Care: If first aid or CPR is needed, follow these three basic steps called the “3 C’s.”•CHECK the area to make sure it is safe for you to attend to the victim. If it is safe, check the victim to find
out what happened and to determine his or her condition.•CALL for help, if possible. Use your cell phone. Call out to others who might be within earshot.•CARE for the victim, using what you learned in first-aid/CPR class. ◆ Moving an Injured Person: To avoid permanent damage, you should let medical professionals move a victim with a back or neck injury. If a victim must be pulled to safety, move him or her lengthwise and head first—support the head and neck, and keep the spine in alignment. ◆ First-Aid Emergency Measures: The chart on page 78 gives information for broken bones, burns, cuts, hypothermia, frostbite, an object in the eyes, shock, sunburn, heat stroke, heat exhaustion, unconsciousness, insect stings, and rescue breathing/CPR.
Extreme Conditions ◆ Extreme weather conditions can create dangerous situations for hunters. Take appropriate clothing and equipment for the worst possible conditions. ◆ Alcohol and Drugs: (sidebar) Consuming alcohol before or during a hunt increases the risk of incidents because it impairs coordination, hearing, vision, communication, and judgment. Drugs can have a similar effect. If you take prescription medicine, ask your doctor if it is safe to hunt while taking it. ◆ Hypothermia: Occurs when the body loses heat faster than it can produce it, causing your core body temper-ature to fall. Hypothermia is often induced by cold, wet conditions, such as rain, snow, sleet, or immersion in water. Moisture from perspiration, humidity, and dew or rain on bushes and trees also can soak clothing, putting you at risk in cold weather. Wet or damp clothes will draw heat out of the body more rapidly than cold air. Wind lowers the body temperature as it evaporates moisture. Resting against cold surfaces also will draw heat from the body.
Copyright © 2010 Kalkomey Enterprises, Inc., www.kalkomey.com
40
•Prevention of Hypothermia - Hypothermia can be prevented by dressing properly, by avoiding potentially dangerous weather condi-tions, and by drying out as quickly as possible when wet.
- High-calorie foods, such as chocolate, peanuts, or raisins, provide quick energy that helps body produce heat.
- Stay hydrated—drink plenty of water. • Symptoms of Hypothermia
- Uncontrolled shivering, usually the first obvious symptom, which ceases as hypothermia progresses - Slow, slurred speech - Memory loss - Irrational behavior, such as removing clothing - Lack of body movement - Sleepiness - Unconsciousness, which could lead to death
•Treatment of Hypothermia - Find shelter for the victim. - Remove wet clothing—replace with dry clothing and other protective covering. If there is no dry clothing, use a fire to dry one layer at a time.
- Give warm liquids to rehydrate and rewarm, but never give the victim alcohol. Quick-energy foods also produce inner body heat.
- For mild cases, use fire, blankets, or another person’s body heat to warm the victim. - In more advanced stages, have one or more persons place themselves in body contact with the victim. Place canteens of hot water insulated with socks or towels on the groin, armpits, and the sides of the victim’s neck.
- A victim who is at or near unconsciousness must be handled gently. Do not immerse the victim in a warm bath or expose to a large fire—this can lead to traumatic shock or death. Immediately contact emergency medical personnel to evacuate the victim to a hospital for treatment.
◆ Frostbite: Occurs when tissue freezes. The best prevention is to avoid severe weather. If caught in extremely cold weather, pay attention to the head and the extremities such as fingers, toes, ears, and nose. Wear a face cover if the temperature is below 0° Fahrenheit. • Symptoms of Frostbite
- Skin turns off-white. - Prickly or tingling feeling occurs as ice crystals form. - Pain may be present initially, then disappears as the frostbite progresses. - In severe cases, the victim experiences a loss of feeling in the affected area.
•Treatment of Frostbite - Warm the affected area with body heat or water heated to 110˚F, but avoid rubbing the area—this can damage tissue.
- Don’t use an external heat source—it could cause burns. - Wrap with warm, dry clothing. - Move to a warm shelter. - Drink hot liquids. - Get medical attention.
◆ Heat Exhaustion: The opposite of hypothermia—core body temperature increases, usually as a result of hot and humid conditions, plus a lack of water.•Prevention of Heat Exhaustion
- Drink plenty of water. - Take frequent breaks if hiking to or from hunting spot, especially when carrying a large load. - Dress in layers, and shed layers as physical activity increases.
80
80
Copyright © 2010 Kalkomey Enterprises, Inc., www.kalkomey.com
41
• Symptoms of Heat Exhaustion - Pale and clammy skin - Weakness - Nausea - Headache - Muscle cramps
•Treatment of Heat Exhaustion - Move to a cooler place, and drink water. - Fan to lower the body temperature, but don’t over-chill.
◆ Heat Stroke: Should be treated as a medical emergency—it can be fatal.• Symptoms of Heat Stroke
- Dry, hot, and flushed skin—dark or purple in color - Dilated pupils - Rapid, weak pulse - Shallow breathing - High temperature—may be in excess of 106° Fahrenheit
•Treatment of Heat Stroke - Wrap in a sheet and soak with cool—not cold—water. - Fan, but don’t over-chill. - Get to hospital immediately.
Oops, You’re Lost! ◆ The best way to survive a potentially dangerous situation is to avoid it. Any time a person is hunting, there is a chance that he or she may become lost. If you don’t feel comfortable hunting in an area or if you feel unpre-pared, don’t do it. Rule of thumb: The greater the chance of becoming lost, the more detailed your preparation needs to be. ◆ If you are lost or injured while hunting, remember S.T.O.P.—Sit down, Think, Observe, and Plan. ◆ Seven Survival Rules: (sidebar) •Tell someone where you are going and when you plan to return.•Try to hunt with someone else whenever possible.•Take enough food for several days in case of an emergency.•Take a compass and map, and know how to use them.•Wear proper clothing and equipment.•Plan your hunt so that you will return before dark.•Carry a survival kit with shelter and fire-starting materials. ◆ Dealing With Fear: Fear is a normal reaction to being lost; everyone feels afraid when they are lost. By admitting you are lost, you will know to follow these steps, making it less likely you will make mistakes that could worsen your situation.•Wait for help. Wandering through the woods will likely take you farther off course. If you told others where
you were going, they can find you easier if you stay where you are.•Before it gets dark, make preparations for an overnight camp. Start a campfire, build a shelter, and take
inventory of your supplies to plan how to make the best use of each item.•Remember that the international distress signal for help is three of anything.
- Always carry a whistle for emergencies. Three loud blasts will alert others that you need help. The proper response is two return whistle blasts.
- If you do not have a whistle, you may fire three shots from your firearm. Make sure you fire in a safe direction.
- At night, build three fires in a triangle. In daylight, use a small mirror to reflect the sun’s rays and/or spell out “SOS” in the snow or sand.
•Remember that you left a hunting plan with someone. If you don’t return or call on time, they will start looking for you. That is why it is very important to follow your hunting plan closely.
81
Copyright © 2010 Kalkomey Enterprises, Inc., www.kalkomey.com
42
◆ Starting a Fire: Start a fire to stay warm, dry your clothes, cook food, and signal for help. •Practice starting a fire before you go hunting. •Carry at least three different fire starters.•Don’t wait until it’s dark and you are cold to start your fire. Gather your wood and start your fire as soon as
you decide you are spending the night in the woods.• Start your fire in a safe area and safe manner. Do not start a forest fire. ◆ Spending an unplanned night in the woods might not be pleasant. If you are properly prepared, it need not be life-threatening.
Water Safety ◆ Always wear a U.S. Coast Guard–approved life jacket while you’re in a boat. Life jackets will keep you afloat and keep you warm. ◆ If you get caught in a storm and your boat swamps or capsizes, stay with the boat. Signal passing boats with a bright cloth, or raise an oar if one is available. ◆ Place an oar under your back and shoulders and another under your legs to help you float. If decoys are in reach, stuff them inside your jacket. ◆ Use chest waders and hip boots to help you stay afloat.•Chest waders: Trap air in the waders by bending your knees and raising your feet. Lie on your back.•Hip boots: Trap air in the boots by bending your knees. Lie on your stomach. ◆ Equip your boat with a means for re-entry—ladder, sling, etc.—if you fall into the water. ◆ During winter months, remember that at least four inches of new, clear ice is necessary to support a single hunter.
83
83
Copyright © 2010 Kalkomey Enterprises, Inc., www.kalkomey.com
43
1. List four things you can do to prepare for your hunt.Answer:•Beready:Anticipatepotentialproblems;
make plans to deal with them.•Know your location: Purchase a topo-
graphic map to familiarize yourself with the terrain; visit the area in the off-season.
•Prepare for safety: Assess your physical condition and equipment; review hunting and firearm safety rules.
•Tell others: Prepare a hunting plan; leave it with a family member or friend.
2. Mental condition, heart condition, and poor physical condition can affect a hunter’s ability to be safe and responsible. true or falseAnswer: true
3. What information should you include on your hunting trip sheet or hunting plan?Answer:•whereyouaregoing
•who is with you•when you are returning
4. With whom should you leave your trip plan?Answer: someone you trust
5. If dressing for cold weather conditions, you should:____ wear several layers of clothing instead of one
heavy article of clothing.____ wear cotton since it can provide warmth
even when wet.____ wear wool.Answer: •wearseverallayersofclothinginsteadof
one heavy article of clothing.•wear wool.
6. Hypothermia can be prevented by:____ staying dry.____ exposing yourself to the wind to dry out if
wet.____ dressing properly.Answer: staying dry.
7. The use of alcohol and drugs impairs which of the body’s abilities listed below?____ hearing____ judgment____ vision____ coordinationAnswer: •hearing
•judgment•vision•coordination
8. What does S.T.O.P. stand for?Answer: Sit down, Think, Observe, Plan
9. The international emergency signal for distress is:____ three fires evenly spaced.____ three blasts of a whistle.____ three shots.Answer: •threefiresevenlyspaced.
•three blasts of a whistle.•three shots.
Chap
ter Q
uiz
Copyright © 2010 Kalkomey Enterprises, Inc., www.kalkomey.com
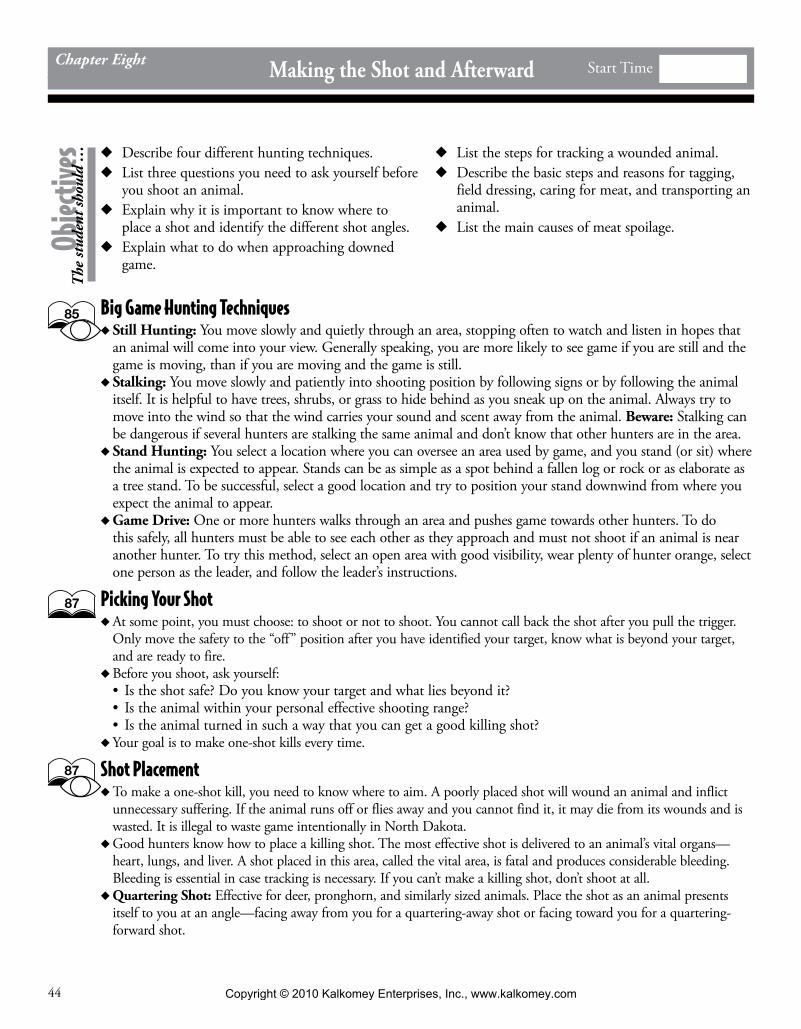
44
◆ Describe four different hunting techniques. ◆ List three questions you need to ask yourself before
you shoot an animal. ◆ Explain why it is important to know where to
place a shot and identify the different shot angles. ◆ Explain what to do when approaching downed
game.
◆ List the steps for tracking a wounded animal. ◆ Describe the basic steps and reasons for tagging,
field dressing, caring for meat, and transporting an animal.
◆ List the main causes of meat spoilage.
Big Game Hunting Techniques ◆ Still Hunting: You move slowly and quietly through an area, stopping often to watch and listen in hopes that an animal will come into your view. Generally speaking, you are more likely to see game if you are still and the game is moving, than if you are moving and the game is still. ◆ Stalking: You move slowly and patiently into shooting position by following signs or by following the animal itself. It is helpful to have trees, shrubs, or grass to hide behind as you sneak up on the animal. Always try to move into the wind so that the wind carries your sound and scent away from the animal. Beware: Stalking can be dangerous if several hunters are stalking the same animal and don’t know that other hunters are in the area. ◆ Stand Hunting: You select a location where you can oversee an area used by game, and you stand (or sit) where the animal is expected to appear. Stands can be as simple as a spot behind a fallen log or rock or as elaborate as a tree stand. To be successful, select a good location and try to position your stand downwind from where you expect the animal to appear. ◆ Game Drive: One or more hunters walks through an area and pushes game towards other hunters. To do this safely, all hunters must be able to see each other as they approach and must not shoot if an animal is near another hunter. To try this method, select an open area with good visibility, wear plenty of hunter orange, select one person as the leader, and follow the leader’s instructions.
Picking Your Shot ◆ At some point, you must choose: to shoot or not to shoot. You cannot call back the shot after you pull the trigger. Only move the safety to the “off” position after you have identified your target, know what is beyond your target, and are ready to fire. ◆ Before you shoot, ask yourself:• Is the shot safe? Do you know your target and what lies beyond it?• Is the animal within your personal effective shooting range?• Is the animal turned in such a way that you can get a good killing shot? ◆ Your goal is to make one-shot kills every time.
Shot Placement ◆ To make a one-shot kill, you need to know where to aim. A poorly placed shot will wound an animal and inflict unnecessary suffering. If the animal runs off or flies away and you cannot find it, it may die from its wounds and is wasted. It is illegal to waste game intentionally in North Dakota. ◆ Good hunters know how to place a killing shot. The most effective shot is delivered to an animal’s vital organs—heart, lungs, and liver. A shot placed in this area, called the vital area, is fatal and produces considerable bleeding. Bleeding is essential in case tracking is necessary. If you can’t make a killing shot, don’t shoot at all. ◆ Quartering Shot: Effective for deer, pronghorn, and similarly sized animals. Place the shot as an animal presents itself to you at an angle—facing away from you for a quartering-away shot or facing toward you for a quartering-forward shot.
26Chapter One / Page 44 Chapter Eight Making the Shot and Afterward Start TimeOb
jectiv
esT
he st
uden
t sho
uld
…
87
85
87
Copyright © 2010 Kalkomey Enterprises, Inc., www.kalkomey.com
45
◆ Broadside Shot: Preferable for all of North Dakota’s big game animals. With this shot, the bullet doesn’t have to pass through the stomach and intestines. On larger animals, the bullet should pass through both lungs for an effective and rapid kill.•To place a broadside shot, wait for the animal to turn broadside. Put your sights on the back of the front leg
and bring them up the back of the leg, ¼ of the way up the body.•A shot placed in this area hits the heart/lung area and misses the shoulder and leg bones.
What To Do After the Shot ◆ Even with a perfect shot, the animal might not fall instantly and die right away. A deer hit in the vital area can run for hundreds of yards before collapsing. You must do your best to recover every animal you shoot. ◆ If a wounded animal does not die on the spot:•Mentally mark the location of the animal when you shot and where you saw it last. Look for a distinctive
feature to help. Be sure to look back often when tracking.•Wait for at least 30 minutes before following a wounded animal. A wounded animal will likely lie down and
either die or be too weak to get up. It might take 4-6 hours for an animal hit outside the vital area to die.•While waiting, go over the shot in your mind. What was the animal doing before you shot? Did it change
position after you shot? Unusual running behavior after a shot may indicate an animal has been hit.•Go slowly and look carefully for signs of a hit.
- Check for blood, hair, or bone chips near the spot where the animal was standing. - Always assume that you made your shot until you recover the animal or are absolutely certain you missed it cleanly.
•To track a wounded animal: - Mark the places where you were and where the animal was standing when you shot. - Take a compass bearing on the direction you saw the animal go. - Look for signs—blood, tracks, meat, hair, or bone—on grass, rocks, leaves, and trees. Also look for broken twigs, disturbed vegetation, and broken ground.
- At each sign along the animal’s path, mark the site with highly visible flagging material. Remember to remove these flags after you find the animal.
- Walk to the side of the trail if possible so that you don’t disturb sign. - If others are helping you, keep trackers and flankers 50 yards apart. Trackers concentrate on the trail, and flankers look ahead for downed or fleeing game.
- Never give up on a trail until you’ve made every effort to find the next sign. If you lose the trail, search in widening circles from the last sign, especially downhill and near water.
•Approach a downed animal carefully. Approach it from behind and poke it with a stick to make sure it is dead. Watch to see if it’s breathing. If it does not move, check the eyes. If it does not blink, the animal is dead. If it is still alive, kill it quickly with a shot to the base of the ear.
◆ Appreciate the Gift. You may be proud of your accomplishment and also feel sadness for the death of the animal. Take a moment to give thanks for what hunting means to you and for the wonderful gift you have received.
88
Copyright © 2010 Kalkomey Enterprises, Inc., www.kalkomey.com
46
Field Care and Transportation ◆ You’ve made the kill. Now you must tag the game, field dress it, and transport it to your home or camp. ◆ Tagging and Evidence of Sex: After the kill, claim the animal as yours by properly notching your tag and attaching it to the animal’s carcass. See the North Dakota Big Game Hunting Regulations for the proper procedures for tagging and for keeping proper evidence of sex and species attached to the carcass. ◆ Field Dressing: After you tag the animal, you need to field dress and cool the meat immediately. This involves removing the entrails and internal organs. Opening the body cavity allows the meat to cool and helps prevent spoilage. Meat must be kept cool, dry, and clean; heat, dirt, and moisture can cause meat to spoil or taste bad. The best way to learn how to field dress is from an experienced hunter. See pages 90-91 for field-dressing instructions.•Be careful when field dressing so that you don’t get cut with a knife or sharp bone end.•Field Dressing Precautions: Heat is problem since bacteria grow rapidly in a carcass. Animals need to be
cooled quickly and kept cool. The meat cools more quickly if the animal is skinned right away, hung up off the ground out of direct sunlight, and covered with a game bag or cloth. - Don’t cram birds or small animals together in a hot game pouch or throw them in a pile. - Don’t leave them in a car trunk when it’s warm outside. - Don’t leave large animals lying in the snow. Snow tends to insulate, not cool, the carcass.
•Disease: Not common in free-ranging wildlife populations. Wildlife diseases usually do not affect people, but there are exceptions. Health concerns that you should learn about include rabies, tularemia, and chronic wasting disease (CWD). To prevent unnecessary contact with infected animals: - Wear rubber or latex gloves when handling the animal. - Do not cut the internal organs, spinal cord, or bones when opening the body cavity or removing the entrails.
- Stay informed about wildlife diseases in your area, and know how to tell if an animal is infected. - Contact your local Game and Fish Department office to report any animal that appears to be sick.
•Field Dressing Equipment: Most birds and game animals can be field dressed with a normal, sharp hunting knife with a 2½- to 4-inch blade. Bring a sharpening steel to sharpen your knife. For larger animals, you might need a game saw or axe to split bones. To keep the heart and liver to eat, carry them in plastic bags. For large animals that are skinned and quartered in the field, you need cheesecloth game bags to hang meat and protect it from flies. Bring paper towels to wipe out the body cavity and clean yourself—but do not litter.
◆ Transporting: When transporting game in a vehicle, make sure the carcass stays clean and receives enough air circu-lation. One or two hunters can drag most animals to a vehicle: just pull it along, stopping to rest as needed. Never carry a deer on your shoulders—you might look like a deer to another hunter. Large animals or animals harvested in remote areas can be cut up into halves or quarters and packed out by backpack or gamecart. In North Dakota, the tagged head must be taken out with the meat.
91
Copyright © 2010 Kalkomey Enterprises, Inc., www.kalkomey.com
47
1. A good hunter practices shooting their firearm to:____ take shots that impress friends and family.____ take shots which perform a clean kill.____ use up all of their ammunition.Answer: take shots which perform a clean kill.
2. The preferred shot for larger game animals, such as deer, elk, and bear, is the:____ rear-end____ head-on____ quartering-awayAnswer: quartering-away
3. If you shoot a deer and it runs out of sight, you should:____ assume you missed and keep hunting.____ wait at least half an hour before tracking,
depending on the blood trail.____ immediately follow the blood trail as quickly
as possible so that the meat doesn’t spoil.Answer: wait at least half an hour before tracking,
depending on the blood trail.4. When approaching a downed deer or other large
animal, you should:____ approach from the front and make noise to
startle the animal.____ pause above and behind the animal’s
head and watch the chest cavity for any movement.
____ approach from the front if the animal’s eyes are closed.
____ any of the above are safe methods for approaching downed animals.
Answer: pause above and behind the animal’s head and watch the chest cavity for any movement.
5. The most important thing you can do to make sure your games tastes good on the dinner table is:____ use a lot of ketchup.____ properly field dress the animal and care for
the meat while you’re still in the field.____ keep the carcass wrapped in plastic until you
can field dress it.Answer: properly field dress the animal and care
for the meat while you’re still in the field.
6. The first thing you should do after you determine the animal is dead is:____ cut across the throat area to let it “bleed
out.”____ tag it according to the hunting regulations.____ throw it over your shoulders and pack it out
to your vehicle.Answer: tag it according to the hunting
regulations.7. You should field dress an animal as quickly as
possible after recovering the carcass because:____ removing the entrails makes the carcass
lighter to transport.____ removing the entrails allows the meat to
cool, which helps keep it from spoiling.Answer: removing the entrails allows the meat to
cool, which helps keep it from spoiling.8. ________ would not contribute to meat spoiling.
____ Cold____ Dirt____ Moisture____ HeatAnswer: Cold
Chap
ter Q
uiz
Copyright © 2010 Kalkomey Enterprises, Inc., www.kalkomey.com
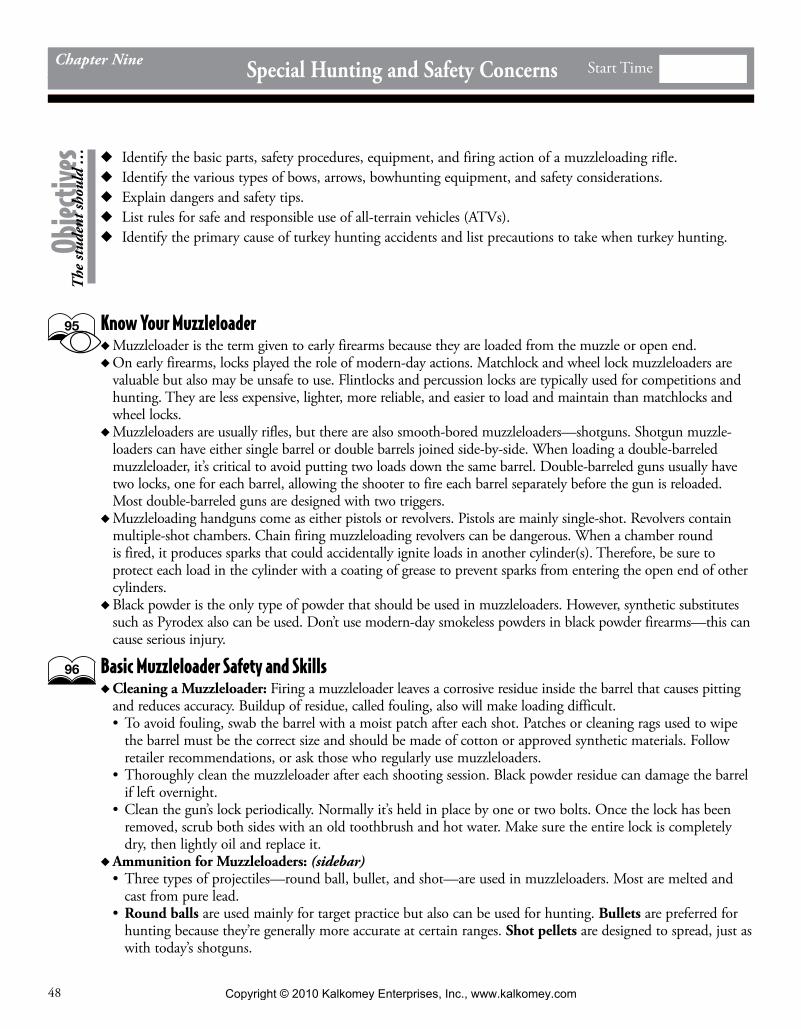
48
◆ Identify the basic parts, safety procedures, equipment, and firing action of a muzzleloading rifle. ◆ Identify the various types of bows, arrows, bowhunting equipment, and safety considerations. ◆ Explain dangers and safety tips. ◆ List rules for safe and responsible use of all-terrain vehicles (ATVs). ◆ Identify the primary cause of turkey hunting accidents and list precautions to take when turkey hunting.
Know Your Muzzleloader ◆ Muzzleloader is the term given to early firearms because they are loaded from the muzzle or open end. ◆ On early firearms, locks played the role of modern-day actions. Matchlock and wheel lock muzzleloaders are valuable but also may be unsafe to use. Flintlocks and percussion locks are typically used for competitions and hunting. They are less expensive, lighter, more reliable, and easier to load and maintain than matchlocks and wheel locks. ◆ Muzzleloaders are usually rifles, but there are also smooth-bored muzzleloaders—shotguns. Shotgun muzzle-loaders can have either single barrel or double barrels joined side-by-side. When loading a double-barreled muzzleloader, it’s critical to avoid putting two loads down the same barrel. Double-barreled guns usually have two locks, one for each barrel, allowing the shooter to fire each barrel separately before the gun is reloaded. Most double-barreled guns are designed with two triggers. ◆ Muzzleloading handguns come as either pistols or revolvers. Pistols are mainly single-shot. Revolvers contain multiple-shot chambers. Chain firing muzzleloading revolvers can be dangerous. When a chamber round is fired, it produces sparks that could accidentally ignite loads in another cylinder(s). Therefore, be sure to protect each load in the cylinder with a coating of grease to prevent sparks from entering the open end of other cylinders. ◆ Black powder is the only type of powder that should be used in muzzleloaders. However, synthetic substitutes such as Pyrodex also can be used. Don’t use modern-day smokeless powders in black powder firearms—this can cause serious injury.
Basic Muzzleloader Safety and Skills ◆ Cleaning a Muzzleloader: Firing a muzzleloader leaves a corrosive residue inside the barrel that causes pitting and reduces accuracy. Buildup of residue, called fouling, also will make loading difficult.•To avoid fouling, swab the barrel with a moist patch after each shot. Patches or cleaning rags used to wipe
the barrel must be the correct size and should be made of cotton or approved synthetic materials. Follow retailer recommendations, or ask those who regularly use muzzleloaders.
•Thoroughly clean the muzzleloader after each shooting session. Black powder residue can damage the barrel if left overnight.
•Clean the gun’s lock periodically. Normally it’s held in place by one or two bolts. Once the lock has been removed, scrub both sides with an old toothbrush and hot water. Make sure the entire lock is completely dry, then lightly oil and replace it.
◆ Ammunition for Muzzleloaders: (sidebar)•Three types of projectiles—round ball, bullet, and shot—are used in muzzleloaders. Most are melted and
cast from pure lead.•Round balls are used mainly for target practice but also can be used for hunting. Bullets are preferred for
hunting because they’re generally more accurate at certain ranges. Shot pellets are designed to spread, just as with today’s shotguns.
26Chapter One / Page 48 Chapter Nine Special Hunting and Safety Concerns Start TimeOb
jectiv
esT
he st
uden
t sho
uld
…
95
96
Copyright © 2010 Kalkomey Enterprises, Inc., www.kalkomey.com
49
•Black powder is made of potassium nitrate (saltpeter), sulfur, and charcoal. When ignited, it causes a dense cloud of white smoke. It comes in four sizes or granulations. - Fg: Coarse grain typically used in cannons, rifles larger than .75 caliber, and 10-gauge shotguns or larger - FFg: Medium grain typically used in larger rifles between .50 and .75 caliber, 20-gauge to 12-gauge shotguns, and pistols larger than .50 caliber
- FFFg: Fine grain typically used in smaller rifles and pistols under .50 caliber and smaller shotguns - FFFFg: Extra-fine grain typically used as a priming powder in flintlocks
•Pyrodex and Clear Shot are black powder substitutes that can be used in amounts equal to black powder, but loading may vary. Substitutes are not recommended for flintlocks because they may not ignite from sparks as easily.
◆ Basic Muzzleloader Safety: (sidebar)•Keep the muzzle pointed in a safe direction. Do not lean over, stand in front of, or blow down the muzzle.•Use only black powder or a safe substitute in a muzzleloading firearm.•Wait until ready to fire before you prime or cap a muzzleloader.•Always wear shooting glasses and ear protection when shooting. A long-sleeve shirt is also advisable.•Never smoke while shooting or loading or when near a powder horn or flask.•Load the muzzleloader directly from a calibrated powder measure—do not load from a horn, flask, or other
container. Loose sparks or glowing embers in the barrel can cause powder to explode.•Load only one charge at a time.•Unload the muzzleloader before bringing it into your home, camp, or vehicle.• Stay with the charged muzzleloader at all times. ◆ Loading a Muzzleloader: Loading or charging a muzzleloading firearm presents some special concerns because it requires the muzzle to be pointed upward. •For rifles, position the butt on the ground between your feet. You should face the underside of the barrel.
The muzzle should be pointed upward and away from the body. Never work directly over the muzzle.•Determine if the gun is already loaded by checking the barrel with a marked ramrod, which has an
“unloaded” or empty marking. If you’re unsure, consult an experienced muzzleloader user or gunsmith.•Measure out the proper amount and type of powder using a calibrated powder measure. Replace the
powder horn’s cap, and swing the horn to the other side of your body. Pour powder into the barrel from the measure. Tap the barrel to make sure all the powder falls to the breech end.
•Center a lubricated precut patch over the muzzle. You can lubricate the patch with a manufactured lubricant or saliva. Lay the ball on the patch with sprue or flat side up, if the ball comes with this feature. Then seat the ball and start it down the barrel using a short starter.
•Use a longer ramrod to push the ball the rest of the way, making sure it’s seated well on the powder charge. Push the ramrod in short strokes, gripping it just a few inches above the muzzle. If you use longer strokes, you might accidentally snap the rod and injure your hands or arm. The ramrod should be marked to show when the ball is properly seated over the specific load such as 70 grains of FFFg powder.
◆ Unloading a Muzzleloader: Unload the muzzleloader by discharging into a suitable backstop. When the muzzleloader is unloaded, place a ramrod or loading rod in the barrel before leaning the firearm against a good rest—this prevents debris from falling down the barrel and blocking the touchhole. ◆ Firing a Muzzleloader•Percussion Lock Muzzleloader: When ready to fire the muzzleloader safely, place the percussion cap on the
nipple. Be sure that your surroundings and backstop are safe. Then aim and fire. •Flintlock Muzzleloader: When priming a flintlock, pull the hammer to half-cock position and open the
priming pan cover. Check the flint, making sure the setting is tight and properly adjusted. Insert vent pick or fine wire into the barrel’s touchhole to make sure the opening is clear. With the priming horn, fill the pan about three-fourths full of FFFFg powder. Close frizzen and pull hammer to full-cock when ready to fire the shot safely.
•After firing, place hammer in the half-cock position and swab the barrel to remove sparks that might be inside.
97
98
97
98
Copyright © 2010 Kalkomey Enterprises, Inc., www.kalkomey.com
50
◆ Hang Fire Situations: (sidebar) Sometimes a muzzleloader will not fire immediately when the trigger is pulled (“hang fire”). This requires great caution because the gun might fire some time after the cap or flint created the initial sparks. •Keep the gun pointed in a safe direction, preferably downrange. •Don’t take it anywhere that it could injure someone or damage property if it fires. • If the gun doesn’t fire properly, get help from an experienced shooter to unload with a ball discharger.
Know Your Bow and Arrow ◆ Modern bows can shoot arrows more than 200 yards, at speeds more than 135 miles per hour. Any bow can be dangerous at any range and should be handled responsibly. However, the bow is a short-range hunting tool. Shots are usually limited to 40 yards or less; and at this range, the arrow penetrates and can even pass through an animal. Most shots are taken at 20 yards or less. ◆ Common Bow Types•Longbow (Stick Bow): The “traditional” bow, which has straight limbs that form an arc when strung. Used
by those interested in traditional shooting with little additional equipment.•Recurve Bow: Much like the longbow, but limbs curve back away from the belly of the bow, which can
provide more power in a shorter bow than a longbow. A popular choice because it’s smooth and quiet.•Compound Bow: The most popular bow for both hunting and target shooting. Its many styles work
basically the same way; wheels and cables are attached to limbs to make it easier to hold at full draw (pulled completely back) and enable it to propel an arrow faster than the longbow or recurve bow.
◆ Stringing a Bow: The safe and easy way to string a recurve or long bow is to use a bowstringer. The push-pull or step-through method can be hazardous to you or to the bow. •A bowstringer is a strong cord with a loop or pocket at each end that fits over the limb tip of the recurve
and some longbows. By standing on the loose middle of the cord after it’s attached to tips, limbs can be flexed as the handle is pulled. This allows the bowstring to be slipped safely into place.
•To replace compound bow strings, you must use a bow press or have double tears at the end of each cable. Double tears allow you to change strings by stepping on string being replaced first and on new string second. A bow press is used to place and hold tension on limbs, allowing strings to be changed. Inexperienced bowhunters should have a person replace the string on a compound bow.
◆ Parts of an Arrow• Shaft: Long spine of the arrow. Modern arrow shafts are made of wood, fiberglass, aluminum, or carbon.
Regardless of shaft material, the arrow must have correct stiffness to match the bow. As an arrow is released, the shaft bends and then straightens in flight. Incorrect stiffness causes the arrow to fly erratically and inaccurately.
• Fletching: Plastic vanes or feathers on arrow. Fletching creates wind drag and also can cause an arrow to spin similarly to rifle bullet, providing stability and accuracy in flight. Fletching is made up of three or more vanes or feathers. One feather is a different color and is called the “cock” feather; others are the “hen” feathers.
•Arrowhead: The point of an arrow. Many kinds are available, each with a different purpose and advantage. •Nock: A slotted plastic tip, located on the rear end of an arrow, that snaps onto the string and holds an
arrow in position. There is a certain point on bowstring, called a “nocking point,” where arrows are nocked. ◆ Bowhunting Accessories: (sidebar)•To protect the three fingers that draw the bowstring, archers wear three-fingered gloves or finger tabs, or use
mechanical releases.•Mechanical release snaps onto the string and is pulled back with the shooting hand. The archer pulls the
trigger to release the string.•An armguard protects the inner part of the bow arm during release as the string snaps back. The armguard
prevents the bowstring from hitting loose clothing and also protects the arm if an arrow breaks during release.
99
99
100
100
100
Copyright © 2010 Kalkomey Enterprises, Inc., www.kalkomey.com
51
◆ Common Types of Arrowheads•Bullet Point: Steel point used for target shooting and small game hunting.•Blunt Point: Used for small game hunting and some types of target shooting; made of steel, hard rubber, or
plastic.•Field Point: Steel point used for target shooting and small game hunting.• JUDO Point: Designed with spring arms attached to catch in grass and leaves, preventing arrow loss; used
for “stump” shooting and small game hunting.•Fish Point: Long, barbed or spring-loaded arrowhead that spears fish and secures them until they’re landed
with an attached line.•Broadhead Points: Used primarily for big game hunting and the only arrowhead that may be used for big
game hunting. Its number of steel blades may vary. It must be solidly built and always razor-sharp. Many states regulate the minimum diameter and number of cutting edges of broadheads used to hunt big game.
•Mechanical (Expandable) Blade Broadhead: Blades are retracted close to the ferrule before the shot. Upon impact, blades expand to expose cutting edges.
Know Your CrossbowA crossbow is a bow with a rifle-like stock that shoots bolts or short arrows. Safe use of the crossbow requires following safety rules for both firearms and bows.
◆ Many states have laws that limit the use of crossbows. ◆ Never travel with a loaded, cocked crossbow. ◆ Like conventional bows, the crossbow is limited to short-range shooting.
Bowhunting Safety and Skills ◆ Many states require a bowhunter education course to hunt legally with archery equipment. In North Dakota, anyone over age 12 must have a hunter education certificate to purchase a bowhunting license. Currently, a separate bowhunting course and certificate are not required. ◆ Bow Shooting Safety: Arrows are as deadly as bullets, so basic safety rules that govern firearm shooting also apply to archery. Although shooting accidents are rare, they do happen. Archers must obey safety rules.•Release arrow only when the path to the target and beyond is clear.•Make sure there’s something to stop the arrow if you miss—never shoot over the horizon.•Avoid shooting an arrow in the general direction of another person. Arrows are easily deflected. A small
twig, unseen by you, can cause an arrow to veer dangerously off course.•Don’t shoot straight up. A falling arrow carries enough force to penetrate the human skull.•Carry arrows in the nocked position only when slowly approaching game—never nock an arrow or draw a
bow if someone is in front of you.•Use a haul line to raise the bow and quiver into a tree stand to avoid serious injury.•A bow should never be “dry fired.” Releasing string without an arrow nocked transfers energy back to limbs
instead of the arrow. Bow can fly apart, injuring anyone nearby. ◆ Bow Shooting Position: Stand at a right angle to the target with your feet approximately shoulder-width apart. Your stance should feel comfortable and balanced. You may slide your front foot back a little for a more open stance. ◆ Archery Equipment Safety: (sidebar) Before practicing or hunting, an archer must examine each arrow to make certain there are no cracks or breaks in the shaft and that the nock is in good condition. A cracked or broken nock can be replaced, but shaft with cracks or breaks should be discarded. The shaft may shatter on release and be driven into shooter’s wrist or arm. Types of damage to look for are: cracks and splinters in wood arrows; creases, dents, or cracks in aluminum arrows; and crushed sidewalls on fiberglass or graphite arrows. ◆ Broadhead Safety: (sidebar) Many archers’ injuries come from broadheads. Broadheads must be kept razor-sharp for hunting, which creates safety problems if handled carelessly. To prevent injury: •Use a special wrench to screw on broadheads. This device covers blades while the broadhead is being
tightened on the arrow. If a wrench isn’t used, the slightest slip can cause a serious cut. When sharpening broadheads, always stroke the blade away from your hands and body.
•Always keep broadheads covered with a quiver while traveling to and from the field.•While dressing bow-killed game, remember that the broadhead may remain in the animal. Use great caution
until all parts of the broadhead are found.
102
101
101
102
102
Copyright © 2010 Kalkomey Enterprises, Inc., www.kalkomey.com
52
◆ Nocking an Arrow: Position a nocked arrow about a quarter inch above the arrow rest on the bow handle. On most bows, a small brass band called a “nock point” is crimped onto the bowstring to mark the correct position. •To nock arrow:
- Grasp the arrow between the thumb and index finger of your right hand (if you shoot right-handed). - With the left hand, hold the bow parallel to the ground about waist high, the string toward your body. - Lay the arrow shaft on the bow’s arrow rest. - Align the slot in the nock with string, making sure that the cock feather points up (while bow parallel to ground).
- Pull the arrow back until the string snaps into the slot. ◆ Drawing and Anchoring the Bow:•To draw the bow:
- Grip the bow handle firmly in the left hand, but don’t squeeze. - With the bow arm straight, raise the bow to a point that your arm is parallel to the ground, while simulta-neously drawing the string back to your “anchor point” with the shooting hand.
•Practice will help determine your best anchor point—one that’s comfortable and provides the most accurate shooting. Your fingers should touch the same anchor point each time you draw the bow.
◆ Aiming the Bow: The two main methods for aiming bows are bowsights and instinctive aiming.•Bowsights work best when the distance to the target is known. For instance, when hunting from a tree
stand or blind, you can measure distance to the area where game is expected to appear and then line up appropriate sight pin on target. In hunting situations where it’s hard to know the exact distance to the target, bowsights may not work well. The key to using bowsights is to practice judging distances.
• Instinctive aiming is more versatile than the bowsight method. Simply look at the intended target with both eyes open and release. Adjust aim for different distances by instinct developed with practice. Instinctive aiming takes longer to perfect than bowsight method but eliminates much of the guesswork.
◆ Holding and Releasing the Bow: •Allow your fingers to slip quickly away from the string. This gives the arrow a straight, stable flight.•Keep your bow arm pointed directly at the target after release. If the bow is jerked on release, the arrow will
fly off target.•Follow through by leaving the drawing hand at anchor point well after the string is released.
Elevated Stand Hunting ◆ Elevated stands place the hunter above ground level. Can be a tree stand placed in or against trees, or free-standing structure. Popular with both firearm and bow hunters. •Advantages:
- Provide a wider field of vision—game is spotted sooner than at ground level - Allow time to plan for best shot through earlier detection of game - Position a hunter above the animal’s normal field of vision - Make a hunter’s scent harder to detect and movement less noticeable - Make a hunter more visible to other sportsmen so less likely to be hit by a stray bullet - Provide a good backstop due to shooting at a downward angle
•Disadvantages: - Increase risk of injury resulting from falling - Can be difficult to carry, especially large, portable stands - Provide no protection from cold or wind - Give little room for movement - Cannot move toward game while hunting
104
105
103
Copyright © 2010 Kalkomey Enterprises, Inc., www.kalkomey.com
53
◆ Elevated Stand Types: Commercial stands that are manufactured, certified, and tested to Treestand Manufacturer’s Association (TMA) standards are best. Avoid homemade stands. Four basic types:•Hang-On Stands: Simple platforms that must be hauled into place and secured with belts or chains. Requires
separate climbing aids such as segmented ladders or climbing sticks.•Climbing Stands: Consist of two sections. Hunter “walks” the stand up the tree by moving top section with
the hands and bottom section with the feet. •Ladder Stands: Provide a platform 10 to 20 feet above ground and have a built-in ladder. Due to the
stand’s size, it takes 3-5 people to erect it or take it down safely. The stands lean against a tree and are chained or strapped into place.
•Tripods, Quadpods, or Tower Stands (Free-Standing): An alternative to the tree stand. Similar to a ladder tree stand, but are free-standing and can be placed anywhere that has a firm base.
◆ Fall-Arrest Systems: Use a fall-arrest system (FAS) that is manufactured to TMA standards. Due to the risks of injuries or death, hunters who choose not to wear and use their FAS properly should stay on the ground to hunt.•Always use a properly fitting FAS including a full-body harness while climbing a tree, installing an elevated
platform or tree stand, and hunting from a tree stand. Make sure your FAS includes these components: - Full-body harness—the vest harness is a very effective style of full-body harness - Lineman’s-style belt and/or climbing belt—used when climbing up and down the tree - Tree strap—goes around the tree - Tether—attaches the harness to the tree strap - Suspension relief strap—provides a loop to stand in if you fall
•With an adult present, practice adjusting and using your FAS at ground level before hunting from an elevated stand. Also practice using the suspension relief strap.
•Discard any FAS that shows signs of wear and tear or has been worn during a fall. Also adhere to the expiration date sewn into the FAS by the manufacturer.
◆ Protection from Falling: (sidebar) To protect yourself if you fall, always wear your FAS full-body harness. •At ground level, attach one end of the FAS belt to one side of the harness, wrap the belt around the tree,
and attach the other end of the belt to the other side of the harness. Keep your FAS attached to the tree throughout your hunt—from the time you leave the ground until you get back down. - Use the FAS lineman’s-style belt with your FAS full-body harness when you are installing or uninstalling the stand or the climbing aids for a hang-on tree stand.
- Also use the belt with your full-body harness when you are climbing into or out of a hang-on stand. •When you are in any tree stand, including a ladder stand, use the FAS tree strap and tether to attach your
FAS full-body harness to the tree. Attach the tree strap to the tree so that the strap is at, or above, head level when you are standing. Then adjust both the tree strap and tether so that you have no slack in the tether while seated.
• If you should fall while in your stand: - Do not panic. Your FAS will hold you. - Signal for help, using a signaling device such as a whistle, radio, or cell phone. - Climb back onto the platform as quickly as possible. - Take actions to avoid suspension trauma if you must wait for rescue. Use the FAS suspension relief strap. If you do not have a suspension relief strap, moving your legs continuously by pushing off from the tree may keep your blood flowing.
◆ Safety Tips: Merely climbing into or out of an elevated stand puts you at risk. Long hours in the stand and poor safety techniques can lead to accidental falls. To protect yourself:•Purchase a commercial stand that is manufactured, certified, and tested to TMA standards.•Read the manufacturer’s instructions and watch the video that come with the stand. Review each season.•Attach your FAS to the tree while at ground level, and keep it attached throughout your hunt—from the
time you leave the ground until you get back down.•Use a tree stand only during daylight hours.•Practice first with your tree stand and FAS at ground level, using all safety devices. Continue to practice,
gradually going higher.•When climbing into or out of a tree stand, always use three points of contact with your hands and feet.
105
106
Copyright © 2010 Kalkomey Enterprises, Inc., www.kalkomey.com
54
107
108
•Keep a firm hold on the climbing system as you enter or leave a platform. Don’t let go until you know you are secure. - Stay tethered to the tree while moving onto or off the platform. - Step on the center of the platform when entering the stand.
•Do not climb with anything in your hands or on your back. Use a haul line to raise and lower equipment. - Firearm: Unload it and open the action. - Bow: Put the arrows in a covered quiver.
•Get enough sleep to ensure you are well rested before using a tree stand.•Carry a signaling device—whistle, radio, or cell phone—to let others know if you have a problem.•Take your time and plan every move while installing and using an elevated stand.•Check your stand carefully prior to each use. Do not leave a stand attached to a tree for more than two
weeks.•Never exceed the weight limit of your stand or FAS. Weight includes you plus your equipment.•ALWAYS tell someone where you are hunting and when you will return. ◆ Visibility of Deer Blinds Can Be a Safety Issue: Many ground blinds and elevated stands often blend into the surroundings. Therefore, they may go unnoticed by other hunters who might shoot in that direction unknow-ingly. To make them visible to other hunters, you can mark blinds easily with an extra blaze orange cap or vest, a piece of blaze orange material, or manufactured signs.
Turkey Hunting ◆ Turkey Hunting Safety Tips•Remember that you alone are responsible for your actions. Once you pull the trigger, there is no calling
back the shot. Turkey hunting is exciting, and people often make mistakes when excited.•Hunting is not a competitive activity. A successful turkey hunt is one in which you have called a turkey
into shotgun range. If your thinking is focused primarily on the turkey’s size or “beard” length, you may be endangering others.
•Always be absolutely sure of your target. Shoot only when you see the entire bird. Never shoot at any sound, including turkey calls, or movements. Never shoot at a “part or piece” of a turkey.
• In the spring hunting season, never shoot until you see the beard. No beard—no shot!• If you use camouflage, cover your entire body—including your face and hands. Never wear or use
anything that is red, white, blue, or black—the colors of turkeys.•Do not think you are alone in the woods. Some hunters use a gobble call to attract male turkeys. Until
you positively know otherwise, assume that every sound you hear is made by another person.•Always plan and discuss your hunt with your hunting companions. Make sure you can see in all direc-
tions for at least 50 yards to protect yourself from someone who might stalk your calling sounds. If possible, sit with your back against a tree that is at least as wide as your shoulders and as tall as your head.
•Do not move if you see another hunter. Stay completely still, and speak to the hunter in a normal voice or call out in a loud voice to someone farther away. Never wave, use a turkey call, or stand up. Do not move until the other hunter knows you are there.
•Wear blaze orange when entering or leaving the turkey woods. Blaze orange will make you highly visible to other hunters who may be in the woods with you. Once you are set up to call, you can conceal your blaze orange clothing and replace it with camouflage clothing.
•Never carry a decoy or turkey unless it is totally concealed or wrapped in blaze orange material. If you carry something that looks like a turkey, you greatly increase your chances of being mistaken for game.
•Use a flashlight in the dark. This will ensure that other hunters do not mistake you for game and also will prevent falls or other accidents.
Copyright © 2010 Kalkomey Enterprises, Inc., www.kalkomey.com
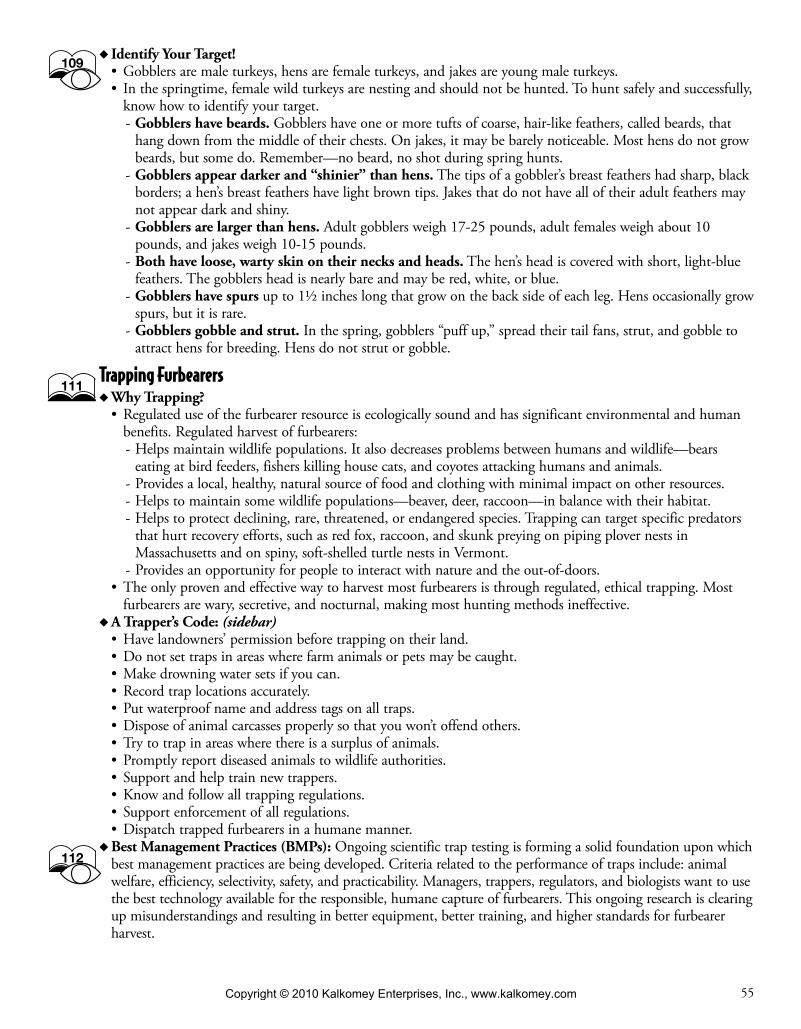
55
◆ Identify Your Target! •Gobblers are male turkeys, hens are female turkeys, and jakes are young male turkeys.• In the springtime, female wild turkeys are nesting and should not be hunted. To hunt safely and successfully,
know how to identify your target. - Gobblers have beards. Gobblers have one or more tufts of coarse, hair-like feathers, called beards, that hang down from the middle of their chests. On jakes, it may be barely noticeable. Most hens do not grow beards, but some do. Remember—no beard, no shot during spring hunts.
- Gobblers appear darker and “shinier” than hens. The tips of a gobbler’s breast feathers had sharp, black borders; a hen’s breast feathers have light brown tips. Jakes that do not have all of their adult feathers may not appear dark and shiny.
- Gobblers are larger than hens. Adult gobblers weigh 17-25 pounds, adult females weigh about 10 pounds, and jakes weigh 10-15 pounds.
- Both have loose, warty skin on their necks and heads. The hen’s head is covered with short, light-blue feathers. The gobblers head is nearly bare and may be red, white, or blue.
- Gobblers have spurs up to 1½ inches long that grow on the back side of each leg. Hens occasionally grow spurs, but it is rare.
- Gobblers gobble and strut. In the spring, gobblers “puff up,” spread their tail fans, strut, and gobble to attract hens for breeding. Hens do not strut or gobble.
Trapping Furbearers ◆ Why Trapping?•Regulated use of the furbearer resource is ecologically sound and has significant environmental and human
benefits. Regulated harvest of furbearers: - Helps maintain wildlife populations. It also decreases problems between humans and wildlife—bears eating at bird feeders, fishers killing house cats, and coyotes attacking humans and animals.
- Provides a local, healthy, natural source of food and clothing with minimal impact on other resources. - Helps to maintain some wildlife populations—beaver, deer, raccoon—in balance with their habitat. - Helps to protect declining, rare, threatened, or endangered species. Trapping can target specific predators that hurt recovery efforts, such as red fox, raccoon, and skunk preying on piping plover nests in Massachusetts and on spiny, soft-shelled turtle nests in Vermont.
- Provides an opportunity for people to interact with nature and the out-of-doors.•The only proven and effective way to harvest most furbearers is through regulated, ethical trapping. Most
furbearers are wary, secretive, and nocturnal, making most hunting methods ineffective. ◆ A Trapper’s Code: (sidebar)•Have landowners’ permission before trapping on their land.•Do not set traps in areas where farm animals or pets may be caught.•Make drowning water sets if you can.•Record trap locations accurately.•Put waterproof name and address tags on all traps.•Dispose of animal carcasses properly so that you won’t offend others.•Try to trap in areas where there is a surplus of animals.•Promptly report diseased animals to wildlife authorities.• Support and help train new trappers.•Know and follow all trapping regulations.• Support enforcement of all regulations.•Dispatch trapped furbearers in a humane manner. ◆ Best Management Practices (BMPs): Ongoing scientific trap testing is forming a solid foundation upon which best management practices are being developed. Criteria related to the performance of traps include: animal welfare, efficiency, selectivity, safety, and practicability. Managers, trappers, regulators, and biologists want to use the best technology available for the responsible, humane capture of furbearers. This ongoing research is clearing up misunderstandings and resulting in better equipment, better training, and higher standards for furbearer harvest.
109
112
111
Copyright © 2010 Kalkomey Enterprises, Inc., www.kalkomey.com
56
113
◆ Trapper Education: In most states, you must take a trapper education course. The goal is to develop ethical, responsible, and knowledgeable trappers who support wildlife conservation efforts.•Ethical, responsible trappers:
- Use selective traps. - Minimize the time an animal is held in a restraining trap. - Care about the welfare of animals. - Use equipment and methods that have proven to be the best available. - Follow the law. - Respect themselves, landowners, the public, other trappers, and the resource. - Support land conservation efforts.
•To learn more about trapper education, contact the North Dakota Game and Fish Department at 701-328-6300 or visit www.gf.nd.gov.
Using All-Terrain Vehicles While Hunting ◆ More hunters are using all-terrain vehicles (ATVs). With an ATV, you can travel quickly to remote areas that might otherwise not be accessible, or you can quickly and easily pack out a kill. These vehicles also can be dangerous—take the time before your hunt to learn how to use the ATV safely and responsibly. Check with the land management agency to find out what restrictions apply to ATV use and where. ◆ ATV Safety•Always wear a helmet approved by the Department of Transportation. Also wear protective glasses or
goggles, gloves, and appropriate footwear.•Know how to operate an ATV properly. Read and follow all manufacturer’s guidelines. Take an ATV
operator’s course.•Never overload your ATV. Limit your ATV to one person. Limit additional gear, and balance your load.•Watch your speed. Too many accidents occur because of high speed or recklessness. Maintain a slow to
moderate speed, and exercise caution while turning.•Use the buddy system. Travel in groups. Look over your shoulder frequently to make sure no one is left
behind.•Think safety and be prepared. Be sure that riding conditions are safe. Always carry a first-aid kit and basic
repair tools. ◆ ATV Responsibility: People who misuse ATVs disturb wildlife and damage roads, trails, and the environment. Noise or presence of an ATV also may annoy other people. Using an ATV in irresponsible ways can result in loss of access to land, destruction of habitat, disturbance of wildlife, and possibly ruining someone else’s hunt. Follow these rules to operate an ATV responsibly:•Use good judgment.•Know and follow all regulations and laws regarding ATVs.•Carry firearms unloaded, cased, and on a gun rack.•Travel only on trails designated for motorized use.•Avoid damage to the land. Stay out of streams, wet meadows, and steep terrain.•Never chase or harass wildlife.•Respect other hunters. Do not ride your ATV during prime hunting hours or in areas where others are
hunting.•Yield the right-of-way if you encounter other hunters on foot or with pack animals. Pull to the side, turn off
your engine, and let them pass.•Keep you speed down to minimize dust and noise.
Copyright © 2010 Kalkomey Enterprises, Inc., www.kalkomey.com

57
1. A muzzleloader ramrod tool is used for two things. One is to push down the projectile, and the other is to show if it is ___________________.Answer: properly seated.
2. Broadheads on an arrow are very sharp and should always be carried in a ___________ and be put on with a broadhead wrench.Answer: quiver
3. Tree stand accidents can be avoided by:____ wearing a Fall Arrest System (FAS)/full-body
harness.____ selecting a suitable tree for your stand.____ keeping at least three points of contact.____ using a haul line to raise and lower your gear.Answer: •wearingaFallArrestSystem(FAS)/
full-body harness.•selecting a suitable tree for your stand.•keeping at least three points of contact.•using a haul line to raise and lower
your gear.4. A responsible ATV operator should:
____ travel only where permitted.____ avoid mud, water, and steep banks.____ chase animals.____ be courteous to others.____ ignore rules and regulations.Answer: •travelonlywherepermitted.
•avoid mud, water, and steep banks.•be courteous to others.
5. You should always look for a turkey’s “beard” when hunting in the spring to know if the turkey is:____ a gobbler.____ very old.____ a female.____ a young male.Answer: a gobbler.
6. List four rules found in the Trapper’s Code.Answer: Any four of:
•Have landowners’ permission before trapping on their land.
•Do not set traps in areas where farm animals or pets may be caught.
•Make drowning water sets if you can.•Record trap locations accurately.•Put waterproof name and address tags
on all traps.•Dispose of animal carcasses properly so
that you won’t offend others.•Try to trap in areas where there is a
surplus of animals.•Promptly report diseased animals to
wildlife authorities.•Support and help train new trappers.•Know and follow all trapping regula-
tions.•Support enforcement of all regulations.•Dispatch trapped furbearers in a
humane manner.
Chap
ter Q
uiz
Copyright © 2010 Kalkomey Enterprises, Inc., www.kalkomey.com
58
◆ Understand habitat and carrying capacity. ◆ Define wildlife management, and explain the role of hunting in managing wildlife. ◆ Define conservation, and list ways in which hunters pay for and contribute to conservation. ◆ Identify North Dakota’s primary game species.
Respect for Wildlife ◆ At some point, you will have to grapple with difficult questions that society and non-hunters may ask you: If a hunter’s basic goal is to kill, why is it important for a hunter to have respect for that animal? Can you kill something you respect? Should you? Should hunters also be conservationists? Why? ◆ Most hunters have immense respect for the wildlife they hunt—and don’t hunt. They also respect the land that supports wildlife. Hunting can teach you to understand the cycles of nature and make it easier to accept that death is a natural and important part of life. ◆ Being a responsible hunter means respecting wildlife and giving something back in exchange for the continued privilege to hunt. Through their support for wildlife management and conservation programs, hunters are directly responsible for many of the healthy wildlife populations we enjoy today.
The Importance of Habitat ◆ An animal’s habitat is its home. A habitat is everything that an animal needs, including food, water, cover, and space. The quality and size of a habitat determines the number of animals that can live there. ◆ Habitat Management•The most essential aspect of wildlife management is habitat management. Habitat loss presents the greatest
threat to wildlife.•Habitat management safeguards the essential elements to meet basic life needs.
- Food and water are necessary to all wildlife. Competition for these elements among species makes cover, space, and arrangement top priorities.
- Cover protects animals from predators and the weather while they feed, breed, roost, nest, and travel. Cover ranges from thick weeds and brush to a few rocks piled together.
- Space is necessary for adequate food among wildlife, territorial space for mating and nesting, and freedom from stress-related diseases.
•Edge effect is where two or more contrasting habitats meet. For example, an alfalfa field (agricultural habitat) next to a woodland habitat creates an edge effect. Areas like this, especially near water, are good locations to find wildlife. The habitat’s arrangement will affect the amount of edge space present. The more edge space that is present, the greater the carrying capacity.
◆ Negative Effects on Habitat•Habitat Fragmentation: Some wildlife species require larger habitats to be successful. Activities, such as oil
development and wind turbines, break up large tracts of habitat due to road construction. This can impact a series directly through habitat destruction and indirectly by increased human and vehicular disturbances.
•Wetland Drainage: Humans may drain wetlands to increase acreage for activities such as farming and construction of homes and businesses. Natural wetlands act as an area for storing melting snow and rain. When wetlands are removed, flooding results. Loss of small wetlands also takes away habitat for waterfowl, fish, and amphibians.
26Chapter One / Page 58 Chapter Ten Habitat Conservation, Wildlife Management, and Wildlife Identification
Start TimeOb
jectiv
esT
he st
uden
t sho
uld
…
115
115
Copyright © 2010 Kalkomey Enterprises, Inc., www.kalkomey.com
59
•Urbanization and Loss of Prairie: - High agriculture commodity prices generally mean important grassland habitat for wildlife is converted to farmland. This includes the loss of Conservation Reserve Program (CRP) acres.
- Development of housing in rural areas also destroys habitats. Maintaining these areas with fertilizers, pesticides, and large quantities of water negatively affects wildlife and water resources.
◆ Carrying Capacity•Resources in any habitat can support only a certain quantity of wildlife. As seasons change, food, water,
or cover may be in short supply. Carrying capacity is the number of animals the habitat can support all year long. The carrying capacity of a certain tract of land can vary from year to year, changed by nature or humans.
•Factors that limit potential production of wildlife include disease and parasites, starvation, predators, pollution, accidents, old age, hunting, and loss of habitat.
• If the conditions are balanced, game animals will produce a surplus, which can be harvested on an annual, sustainable basis.
◆ The Hunter’s Role in Wildlife Conservation• Since wildlife is a renewable resource with a surplus, hunters help keep wildlife populations at a healthy
balance for the habitat. Regulated hunting has never led to threatened or endangered wildlife populations.•Hunting is an effective wildlife management tool. Hunters play an important role by providing information
from the field that wildlife managers need.•Funding from hunting licenses has helped many game and non-game species recover from dwindling
populations.
Wildlife Management and Conservation Principles ◆ A wildlife manager’s job is to maintain a number of animals in a habitat at or below the habitat’s carrying capacity so that no damage is done to the animals or to the habitat.•The wildlife manager’s task is similar to the rancher’s. Just as ranchers limit the number of animals in
a cattle herd to the level that the habitat can tolerate, wildlife managers keep the number of animals in balance with their habitat. In addition to looking at the total number of each species in the habitat, wildlife managers also monitor the breeding stock—the correct mix of adult and young animals needed to sustain a population.
•To manage habitats, wildlife managers consider historical trends, current habitat conditions, breeding population levels, long-term projections, and breeding success. With that knowledge, wildlife managers have a variety of practices to keep habitats in balance.
◆ Wildlife Management Practices•Monitoring Wildlife Populations: Wildlife managers continuously monitor the birth rate and death rate of
various species and the conditions of their habitat. This provides data needed to set hunting regulations and determine if other wildlife management practices are needed to conserve species.
•Habitat Improvement: Succession is the natural change in vegetation and wildlife populations in an area. As succession occurs, the change in habitat affects the type and number of wildlife that the habitat can support. Wildlife managers may cut down or burn forested areas to promote new growth and slow down the process of succession. This enables them to increase production of certain species.
•Hunting Regulations: Hunting regulations protect the habitat and preserve animal populations. Regulations include setting daily and seasonal time limits, bag limits, and the legal methods for taking wildlife.
•Hunting: Hunting is an effective wildlife management tool. Hunting practices help managers keep animal populations in balance with their habitat.
•Predator Control: In rare instances, predators must be reduced to enable some wildlife populations to establish stable populations, particularly threatened or endangered species.
•Controlling or Preventing Disease and Its Spread: Disease can have a devastating effect on wildlife. Avian cholera, for example, poses a serious threat, especially to ducks and geese on crowded wintering grounds. Once avian cholera occurs, managers must work to prevent its spread by gathering and burning waterfowl carcasses daily.
•Management Funds/Programs: In addition to Pittman-Robertson funds, many states have initiated programs that help finance conservation efforts.
118
117
118
Copyright © 2010 Kalkomey Enterprises, Inc., www.kalkomey.com
60
Hunter’s Role in Conservation ◆ Before humans occupied the North American continent, the laws of nature controlled wild animals. We changed that by taking the land to use for our own purposes. When we urbanize an area by building houses, shopping centers, or offices, we change its carrying capacity. Farming, ranching, mining, logging, and building roads also change the carrying capacity. Changing the carrying capacity affects the number and types of wildlife that can live on that land. Hunting also affects wildlife populations. ◆ Not all human activity is necessarily bad for wildlife. Some populations are managed successfully so that they can live side by side with humans—as long as humans are willing to follow the principles of conservation.•Conservation is the responsible care and management of wildlife. It means that we think about the possible
effects of our actions on wildlife and that we act in a way that animal populations are able to grow and sustain themselves.
•Most hunters are conservationists. They know they are the top “predator” and the only predator who can intentionally help their prey through conservation efforts. Hunters contribute time and money to projects that benefit wildlife and wildlife habitat, join wildlife conservation organizations, and obey hunting laws and regulations.
◆ Where Does the Money for Conservation Come from?•You contribute money to wildlife conservation every time you buy a hunting license, duck stamp, rifle, or
box of ammunition. - The money from your hunting license helps the North Dakota Game and Fish Department pay for conservation projects, law enforcement, and hunter education and other programs.
- When you buy a federal duck stamp, the money goes directly to federal conservation programs to help waterfowl. Hunters provide about $185 million per year through license fees.
- Hunters played an important role in getting the Pittman-Robertson Act passed. Hunters provide almost $86 million a year for conservation through the federal excise tax. It is the single biggest source of money collected nationally for wildlife.
- Hunters also pay for conservation through membership fees for organizations such as Pheasants Forever, Rocky Mountain Elk Foundation, National Wild Turkey Federation, Mule Deer Foundation, Ducks Unlimited, and other conservation groups. The main purpose of these organizations is to conserve wildlife and its habitat.
•Conservation-minded hunters have done more to help wildlife populations than any other segment of society. Contrary to popular belief, regulated hunting does not cause wildlife to become endangered or extinct. In fact, many species exist today only because of the efforts and commitment of responsible, respectful hunters.
◆ Pittman-Robertson Act: (sidebar) Federal Aid in Wildlife Restoration funding was established in 1937 by the Pittman-Robertson Act.•The Act funds selection, restoration, and improvement of wildlife habitat, as well as wildlife management
research. It was amended in 1970 to include funding for hunter education and for public target ranges.•Funds for the Act come from federal excise tax on sporting arms, ammunition, archery equipment, and
handguns.•Each state’s proportion of the federal funds is based on the area of the state and number of licensed hunters. ◆ You Can Help! Because wildlife can’t speak for itself, hunters and others must speak on its behalf. Here are some things you can do.• Stay Informed. Learn about how land-use decisions impact wildlife.•Become Involved. Attend meetings, get to know the people responsible for making decisions, and become a
positive voice for conservation.•Follow Up. When decision-makers make decisions that benefit wildlife, let them know they made great
choices. When they make bad decisions, let them know that you hope they’ll consider wildlife the next time.• In some areas, biologists ask hunters to report the kinds and numbers of animals they see while hunting,
or to provide samples from their animals, such as teeth or wings. In North Dakota, hunters are encouraged to report their harvest during certain seasons. Sometimes they are asked some questions when they buy a license, or they may receive a written survey in the mail. This information is vital to biologists and managers, and your help in providing information is important. The future of hunting depends on the continued participation of hunters in efforts like these.
119
Copyright © 2010 Kalkomey Enterprises, Inc., www.kalkomey.com
61
The North American Model of Wildlife Conservation ◆ In the first two decades of the 20th century, sportsmen from the United States and Canada developed a model for continental conservation of wildlife. It is called the North American Model of Wildlife Conservation. Among its achievements are the restoration of wildlife continentally and the creation of a new profession: wildlife biologist. ◆ The model also has spawned many organizations with a caring eye towards wildlife. Hunters, anglers, and wildlife viewers today spend billions of dollars annually to feed their thirsts for being outdoors while the general ban against keeping wildlife privately has safeguarded the public and livestock health by preventing easy passage for pathogens and parasites between humans, livestock, and wildlife. ◆ Here are the seven key points of the Model.•Wildlife as Public Trust Resources: Wildlife in North America is public property. The government holds
wildlife in trust for the benefit of all people.•Elimination of Markets for Wildlife: Wildlife cannot be slaughtered for commercial use. This policy elimi-
nates trafficking in dead game animals.•Allocation of Wildlife by Law: Every citizen in good standing—regardless of wealth, social standing, or
land ownership—is allowed to participate in the harvest of wildlife within guidelines set by lawmakers.•Wildlife Can Only Be Killed for a Legitimate Purpose: Animals can be killed only for legitimate
purposes—for food and fur, in self-defense, and for protection of property.•Wildlife Is Considered an International Resource: As such, hunting shall be managed cooperatively across
state and province boundaries.• Science Is the Proper Tool for Discharge of Wildlife Policy: Wildlife management, use, and conservation
shall be based on sound scientific knowledge and principles.•Democracy of Hunting: Hunting, fishing, and trapping shall be democratic. This gives all persons—rich
and poor alike—the opportunity to participate.
Wildlife Identification ◆ Developing wildlife identification skills is a basic requirement for hunters. Mistakes can lead to the illegal harvest of game or non-game animals. To identify game properly, you must learn to recognize key character-istics of the animal you’re hunting. ◆ Identifying animals accurately is a skill that improves with experience. Sometimes the difference between animals in the same species is subtle, such as the size of ears or a distinctive coloring. Recognizing tracks and scat also can help identify animals. ◆ Good sources for learning about wildlife are wildlife identification manuals, photo libraries, and searches on websites. Hunting shows are good places to view wildlife but many shows use practices that hunters consider unethical. ◆ Wild animals are generally divided into four groups: large mammals, small mammals, upland birds, and waterfowl and wetland birds. Each group may include species that are “threatened” or “endangered.”•Large Mammals: Typically include horned animals, antlered animals, bears, and large members of wild cat
or wild dog families. Characteristics: (sidebar) - Warm-blooded animals with hair. Young are nourished with milk from the mother. - Carnivorous (meat eating), herbivorous (plant eating), or omnivorous (meat and plant eating). - Mammals vary in social behavior—some live in groups, and others are solitary except when mating or raising offspring.
- Horns are hollow and not shed; antlers are solid bone and shed annually. - The hooves of horned and antlered animals have two parts (cloven-hoofed). - Horned and antlered animals chew cud (ruminants).
• Small Mammals: Examples are rabbits and squirrels. Some are sought after primarily for their pelts, such as fox and mink.
•Upland Birds: Examples are turkey, grouse, quail, and pheasants. “Upland” refers to where they are often found. - They have short, rounded wings good for short flights and strong legs for running. - Males usually are more colorful than females.
122
125
Copyright © 2010 Kalkomey Enterprises, Inc., www.kalkomey.com
62
•Waterfowl and Wetland Birds: Waterfowl are warm-blooded animals that live on or near water, and include diving ducks and puddle ducks. Wetland birds live close to water in marshy and coastal areas and include cranes and pelicans.
◆ Within each group, there may be species that are “threatened” or “endangered.”• Some are protected from hunting because their numbers are small and they produce no surplus to harvest. •Animals labeled “threatened” or “endangered” are protected by federal law.
1. Name the four essential elements of wildlife habitat.Answer: food, water, cover, and space
2. Which of the following is the biggest threat to wildlife populations today?____ Hunting____ Disease____ Habitat lossAnswer: Habitat loss
3. Hunting is an important tool of wildlife manage-ment. true or falseAnswer: true
4. A wildlife manager:____ tries to save the life of every animal.____ tries to promote healthy populations of
animals.____ protests against hunting and trapping.Answer: tries to promote healthy populations of
animals.5. Which of the following are tools biologists use to
manage wildlife?____ Habitat improvement____ Hunter surveys____ Animal inventoriesAnswer: •Habitatimprovement
•Hunter surveys•Animal inventories
6. Name the federal act that charges a special tax on guns and other hunting equipment to raise money for conservation and wildlife management.Answer: Pittman-Robertson Act
7. Who pays for wildlife management in North Dakota?____ Bird watchers____ Hunters____ Wildlife watchersAnswer: Hunters
8. The North American Model of Wildlife Conservation contains how many key points?____ 5____ 10____ 7Answer: 7
Chap
ter Q
uiz
Copyright © 2010 Kalkomey Enterprises, Inc., www.kalkomey.com