Embed Size (px)
Citation preview

@Road Confidential
User Guide @Road iDT 3000
with Canned Comments
November 2007
@Road iDT 3000 User Guide
@Road Confidential Page i
@Road, Inc. World Headquarters 47071 Bayside Parkway Fremont, CA 94538 Tel: 1-877-7AtRoad www.road.com
@Road (India) AtRoad Software India Private, Ltd. 901 (A1) & 902 (A2), Tidel Park No. 4 Canal Bank Road Taramani, Chennai 600 113 Tel: 91 (44) 2254-1941
@Road, Ltd. (EMEA) North Felaw Maltings 48 Felaw Street Ipswich IP2 8HE, UK Tel: 44 (0) 1473-696-300 www.road.com
@Road (APAC) Level 8, 15 Talavera Road North Ryde NSW 2113 Australia Tel: (61) 2 8875-0588 www.road.com
UG-iDTCC-18Oct07US
October 2007
www.road.com
Copyright © 2007 by @Road, a Division of Trimble. All rights reserved. No part of this document may be reproduced or transmitted in any form by any means—electronically, mechanically, by photocopying, via recording or otherwise—without the prior written consent of @Road, Inc. Contact the @Road Corporate Communications Department for reprint information.
The information in this document constitutes confidential and proprietary information of @Road, Inc. This document is intended for the use of @Road customers and their employees only. The disclosure of all or any part of this document to or the use of all or any part of this document by any other party is strictly prohibited without the prior written consent of @Road, Inc.
This document is for informational purposes only and is intended to provide assistance for users of @Road’s solutions. Nothing herein is intended to supersede, amend or modify the provisions of any written agreement between @Road and any of its customers.
@Road, the @Road logo, AppSmart, FleetASAP, Garnet, GeoManager, iLM, Integrated Differential, Internet Data Terminal, Internet Location Manager, Internet Trailer Manager, iTM, iWM, LocationSmart, Pathway, Pocket Edition, Portico, RoadFORCE, StatASAP, Taskforce, TempASAP, Vectorlink and Vidus are registered trademarks, trademarks or service marks of @Road, Inc. or its subsidiaries. All other trademarks and service marks used herein are the property of their respective owners.
@Road solutions, including without limitation its products, software and services, are protected under one or more patents or patents pending in jurisdictions around the world. @Road patents include without limitation the following: U.S. – 5,477,228; 5,694,594; 5,959,577; 5,990,827; 6,459,988; 6,529,159; 6,552,682; 6,594,576; 6,664,922; 6,578,005; 5,963,911; 6,862,524; 6,795,017; 6,882,313; 6,867,733; 6,832,140; 6,922,566; 6,965,665; 6,980,131; 6,980,812; 7,006,820; 7,035,620, 7,043,255 and 7,082,605; Australia – patents 682,585 and 722,806; Canada – patent 2,183,586; China – patents 95,192,287.4 and 97,180,004.9; France, Ireland, Italy, Netherlands, Spain and United Kingdom – European Patent No. EP0938714; France, Ireland, Italy, Spain and United Kingdom – European Patent No. EP0752136; France, Finland, Netherlands and United Kingdom – European Patent No. EP1168863; Germany – patents 69,411,744.7; 60,105,094.008; 69,512,040 and 69,703,938; India – patent 19,044; and United Kingdom – patents 705,442 and 2,373,655B.
Further information relating to @Road copyrights, trademarks, patents and patents pending may be found at the @Road Web site, www.road.com.
@Road solutions are intended to monitor and make available information concerning business activities, including without limitation activities related to field and mobile workers. It is the customer’s sole responsibility to ensure that use of any @Road solution complies with any applicable laws and regulations. It is the customer’s responsibility to develop and communicate policies concerning the use of any @Road solution prior to implementation of such solution. Customers are urged to consult with their own legal counsel in connection with the particular use(s) to which the customer puts any @Road solution and the potential implications of such use(s).
@Road iDT 3000 User Guide
Table of Contents Preface..................................................................................................................................................1
System Specifications......................................................................................................................1
1 Introduction ...................................................................................................................................2
2 Using the iDT..................................................................................................................................3 Accessing Application Soft Keys .....................................................................................................3
3 Driver Logs .....................................................................................................................................5 Sending Duty Status .......................................................................................................................5 Viewing Log Reports.......................................................................................................................9 Summary Report...........................................................................................................................10 Detailed Log Report......................................................................................................................11 Log Report Graph.........................................................................................................................12 Driver Alerts .................................................................................................................................12
4 Messaging....................................................................................................................................14 Messaging Soft Keys.....................................................................................................................14 Messaging Inbox Soft Keys ...........................................................................................................15 Accessing Inbox Messages............................................................................................................16 Viewing and Selecting New Messages ..........................................................................................18 Sending Messages ........................................................................................................................18
5 Using Forms .................................................................................................................................20 Viewing and Selecting Forms........................................................................................................20 Completing and Sending Forms....................................................................................................20
6 Setting Manual Functions .............................................................................................................22
Glossary ..............................................................................................................................................23
@Road Confidential Page ii
@Road iDT 3000 User Guide
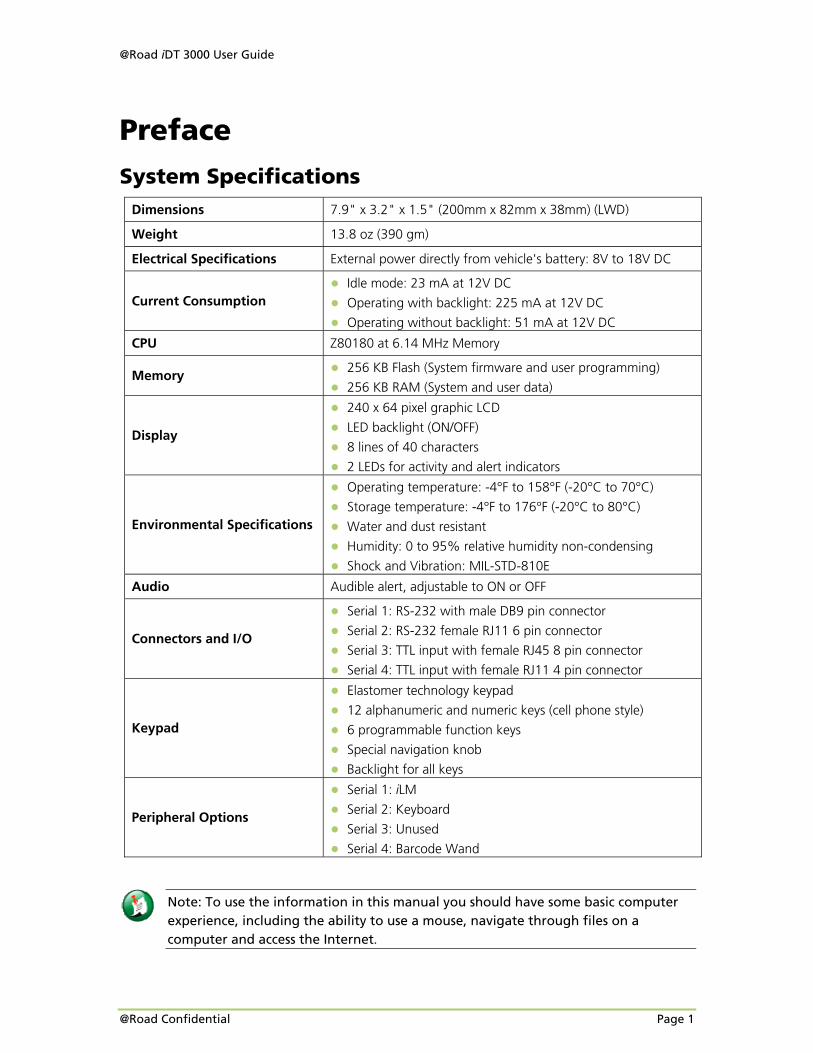
Preface System Specifications
Dimensions 7.9" x 3.2" x 1.5" (200mm x 82mm x 38mm) (LWD)
Weight 13.8 oz (390 gm)
Electrical Specifications External power directly from vehicle's battery: 8V to 18V DC
Current Consumption ● Idle mode: 23 mA at 12V DC
● Operating with backlight: 225 mA at 12V DC
● Operating without backlight: 51 mA at 12V DC
CPU Z80180 at 6.14 MHz Memory
Memory ● 256 KB Flash (System firmware and user programming)
● 256 KB RAM (System and user data)
Display
● 240 x 64 pixel graphic LCD
● LED backlight (ON/OFF)
● 8 lines of 40 characters
● 2 LEDs for activity and alert indicators
Environmental Specifications
● Operating temperature: -4°F to 158°F (-20°C to 70°C)
● Storage temperature: -4°F to 176°F (-20°C to 80°C)
● Water and dust resistant
● Humidity: 0 to 95% relative humidity non-condensing
● Shock and Vibration: MIL-STD-810E
Audio Audible alert, adjustable to ON or OFF
Connectors and I/O
● Serial 1: RS-232 with male DB9 pin connector
● Serial 2: RS-232 female RJ11 6 pin connector
● Serial 3: TTL input with female RJ45 8 pin connector
● Serial 4: TTL input with female RJ11 4 pin connector
Keypad
● Elastomer technology keypad
● 12 alphanumeric and numeric keys (cell phone style)
● 6 programmable function keys
● Special navigation knob
● Backlight for all keys
Peripheral Options
● Serial 1: iLM
● Serial 2: Keyboard
● Serial 3: Unused
● Serial 4: Barcode Wand
Note: To use the information in this manual you should have some basic computer experience, including the ability to use a mouse, navigate through files on a computer and access the Internet.
@Road Confidential Page 1
@Road iDT 3000 User Guide
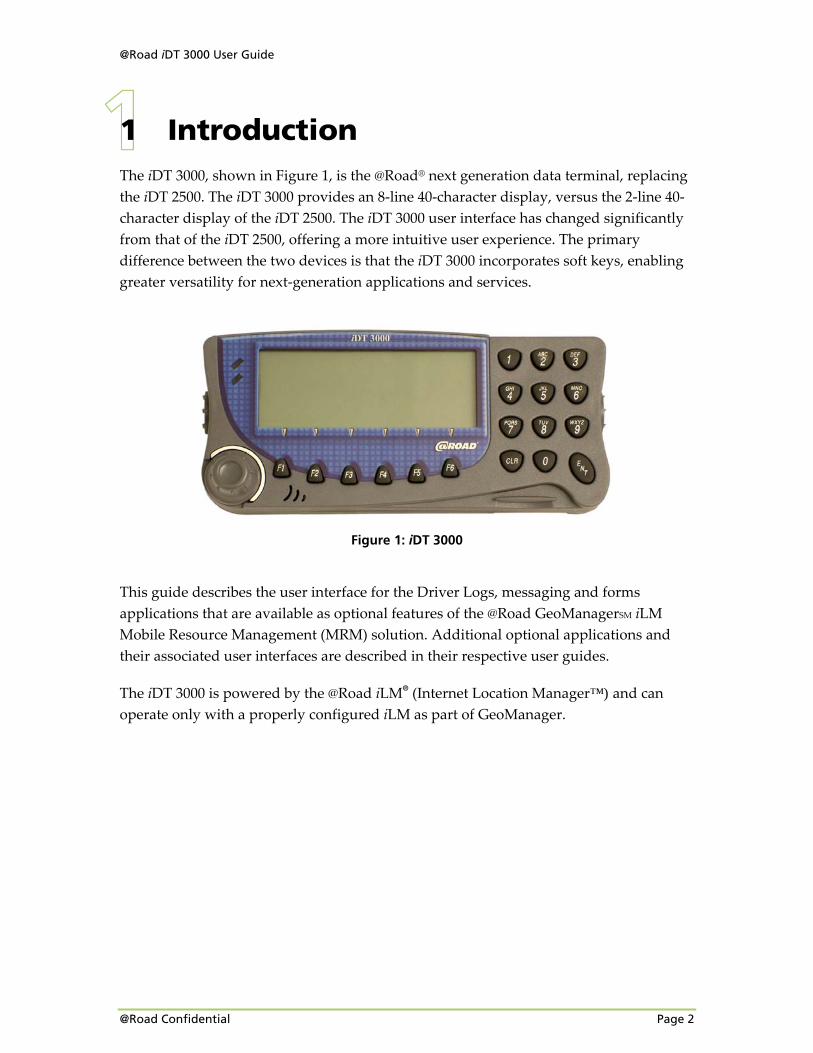
1 Introduction The iDT 3000, shown in Figure 1, is the @Road® next generation data terminal, replacing the iDT 2500. The iDT 3000 provides an 8‐line 40‐character display, versus the 2‐line 40‐character display of the iDT 2500. The iDT 3000 user interface has changed significantly from that of the iDT 2500, offering a more intuitive user experience. The primary difference between the two devices is that the iDT 3000 incorporates soft keys, enabling greater versatility for next‐generation applications and services.
Figure 1: iDT 3000
This guide describes the user interface for the Driver Logs, messaging and forms applications that are available as optional features of the @Road GeoManagerSM iLM Mobile Resource Management (MRM) solution. Additional optional applications and their associated user interfaces are described in their respective user guides.
The iDT 3000 is powered by the @Road iLM® (Internet Location Manager™) and can operate only with a properly configured iLM as part of GeoManager.
@Road Confidential Page 2
@Road iDT 3000 User Guide
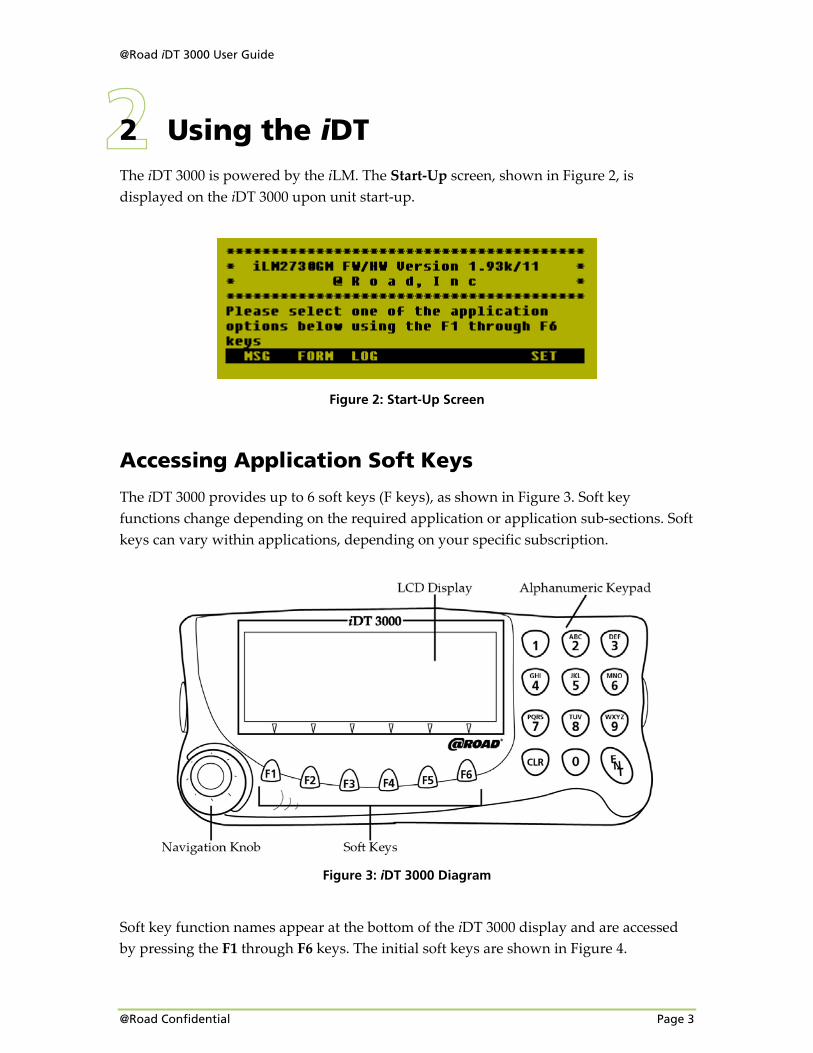
2 Using the iDT The iDT 3000 is powered by the iLM. The Start‐Up screen, shown in Figure 2, is displayed on the iDT 3000 upon unit start‐up.
Figure 2: Start-Up Screen
Accessing Application Soft Keys
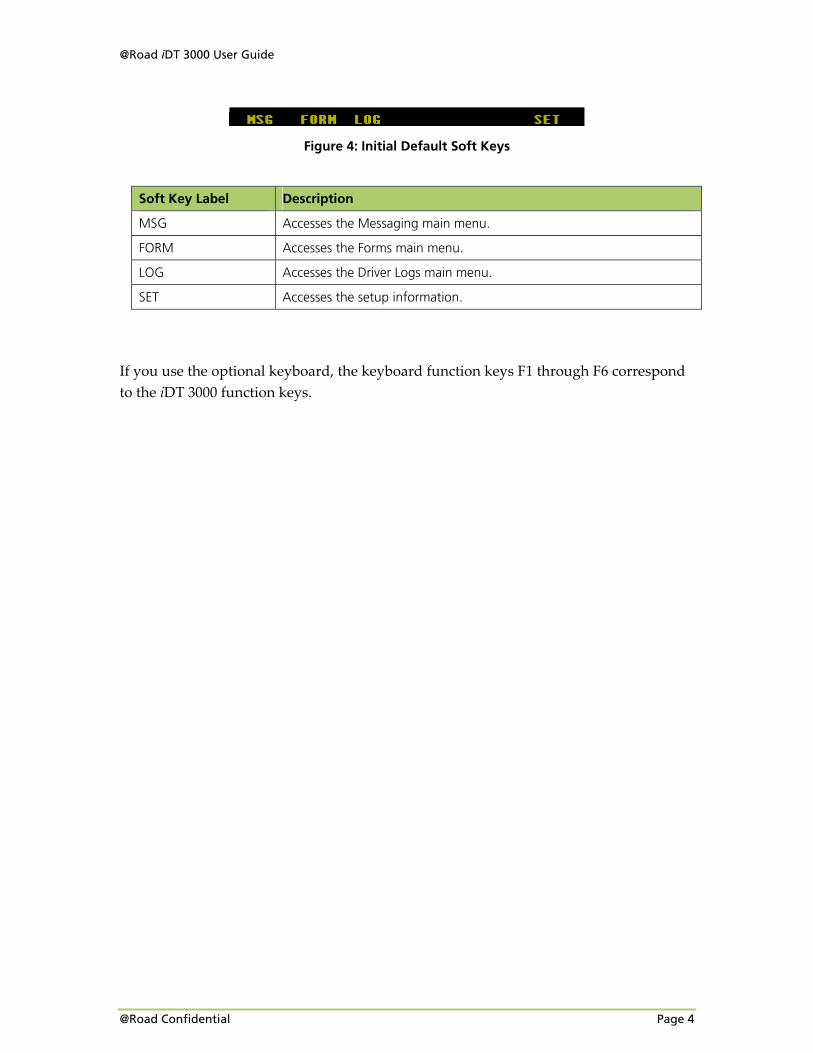
The iDT 3000 provides up to 6 soft keys (F keys), as shown in Figure 3. Soft key functions change depending on the required application or application sub‐sections. Soft keys can vary within applications, depending on your specific subscription.
Figure 3: iDT 3000 Diagram
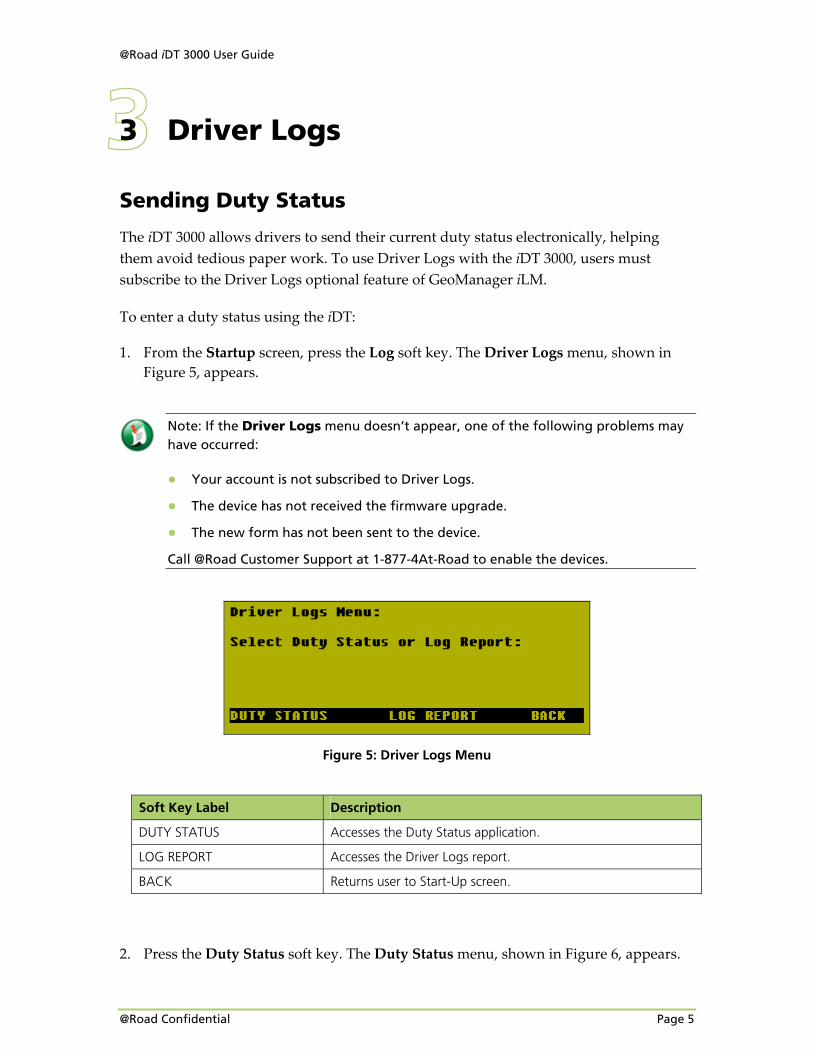
Soft key function names appear at the bottom of the iDT 3000 display and are accessed by pressing the F1 through F6 keys. The initial soft keys are shown in Figure 4.
@Road Confidential Page 3
@Road iDT 3000 User Guide
Figure 4: Initial Default Soft Keys
Soft Key Label Description
MSG Accesses the Messaging main menu.
FORM Accesses the Forms main menu.
LOG Accesses the Driver Logs main menu.
SET Accesses the setup information.
If you use the optional keyboard, the keyboard function keys F1 through F6 correspond to the iDT 3000 function keys.
@Road Confidential Page 4
@Road iDT 3000 User Guide
3 Driver Logs
Sending Duty Status
The iDT 3000 allows drivers to send their current duty status electronically, helping them avoid tedious paper work. To use Driver Logs with the iDT 3000, users must subscribe to the Driver Logs optional feature of GeoManager iLM.
To enter a duty status using the iDT:
1. From the Startup screen, press the Log soft key. The Driver Logs menu, shown in Figure 5, appears.
Note: If the Driver Logs menu doesn’t appear, one of the following problems may have occurred:
● Your account is not subscribed to Driver Logs.
● The device has not received the firmware upgrade.
● The new form has not been sent to the device.
Call @Road Customer Support at 1-877-4At-Road to enable the devices.
Figure 5: Driver Logs Menu
Soft Key Label Description
DUTY STATUS Accesses the Duty Status application.
LOG REPORT Accesses the Driver Logs report.
BACK Returns user to Start-Up screen.
2. Press the Duty Status soft key. The Duty Status menu, shown in Figure 6, appears.
@Road Confidential Page 5

@Road iDT 3000 User Guide
Figure 6: Duty Status Menu
Soft Key Label Description
OFFDUTY (F1) Selects an off duty status and opens the Duty Status form.
SLEEP (F2) Selects a sleeper berth status and opens the Duty Status form.
DRIVE (F3) Selects an off duty status and opens the Duty Status form.
ONDUTY (F4) Selects an on duty but not driving status and opens the Duty Status form.
OILFLD (F5) Selects an on duty but waiting at an oil field status. Opens the Duty Status form with a default comment of Oilfield Wait Time.
Note: This duty status is only available for drivers who are specifically assigned oilfield HOS regulations. If Oilfld is available, the Cancel function is not available. Use Back instead.
CANCEL (F5) Cancels the duty status and returns to the Driver Logs menu.
BACK (F6) Returns to the Driver Logs menu.
3. Press the appropriate duty status soft key. The Duty Status Form menu, Figure 7, appears.
Figure 7: Duty Status Form
4. Enter the Driver ID.
5. Press the Next soft key. This will take you to the next form field.
@Road Confidential Page 6
@Road iDT 3000 User Guide
6. The Date & Time default to the current date and time. Press the Next soft key.
7. Enter the Odometer.
8. Press the Next soft key.
9. Enter any Comments. You can also select to send canned messages in the comments field.
To select Canned Messages:
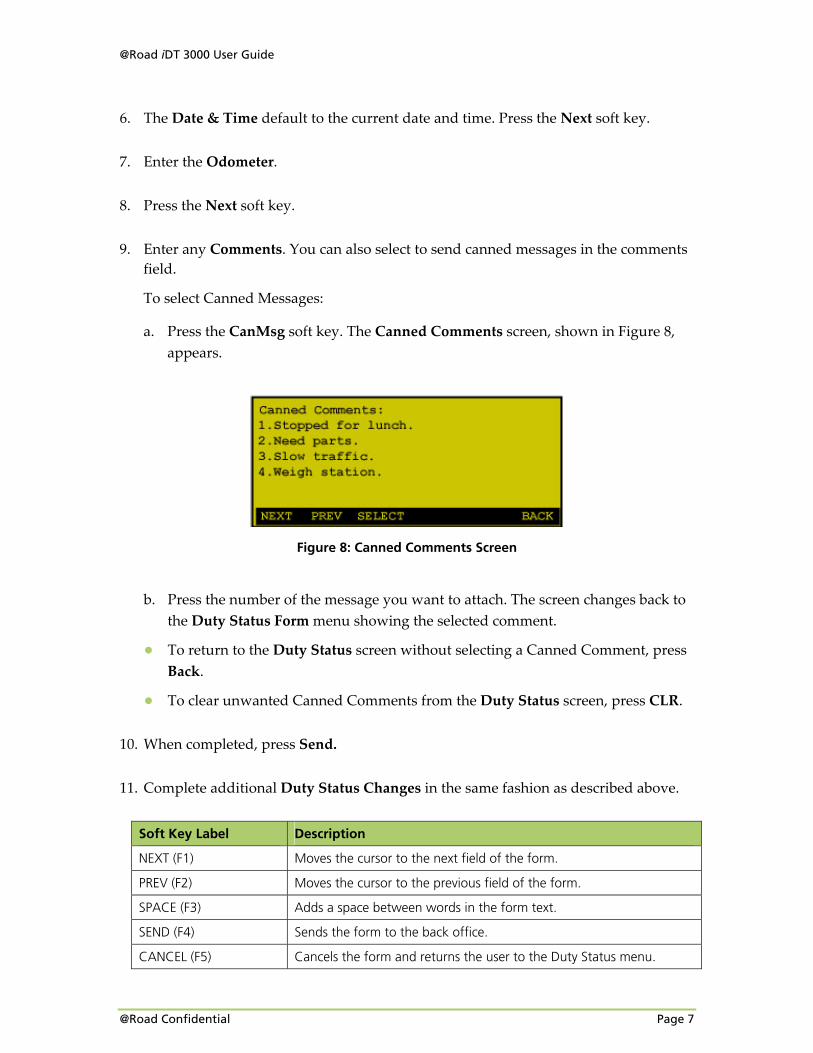
a. Press the CanMsg soft key. The Canned Comments screen, shown in Figure 8, appears.
Figure 8: Canned Comments Screen
b. Press the number of the message you want to attach. The screen changes back to the Duty Status Form menu showing the selected comment.
● To return to the Duty Status screen without selecting a Canned Comment, press Back.
● To clear unwanted Canned Comments from the Duty Status screen, press CLR.
10. When completed, press Send.
11. Complete additional Duty Status Changes in the same fashion as described above.
Soft Key Label Description
NEXT (F1) Moves the cursor to the next field of the form.
PREV (F2) Moves the cursor to the previous field of the form.
SPACE (F3) Adds a space between words in the form text.
SEND (F4) Sends the form to the back office.
CANCEL (F5) Cancels the form and returns the user to the Duty Status menu.
@Road Confidential Page 7
@Road iDT 3000 User Guide
@Road Confidential Page 8
Soft Key Label Description
BACK (F6) Press the Back soft key to return to the Duty Status menu.
Note:
● If the vehicle does not have GPS at the time of a duty status change, the latitude longitude coordinates are zero (0d0m0s 0d0m0s).
● If the dispatcher enters a duty status change through the browser, the latitude longitude coordinates are zero (0d0m0s 0d0m0s).
● If the odometer range is outside previously entered mileage, then an Odometer warning appears.
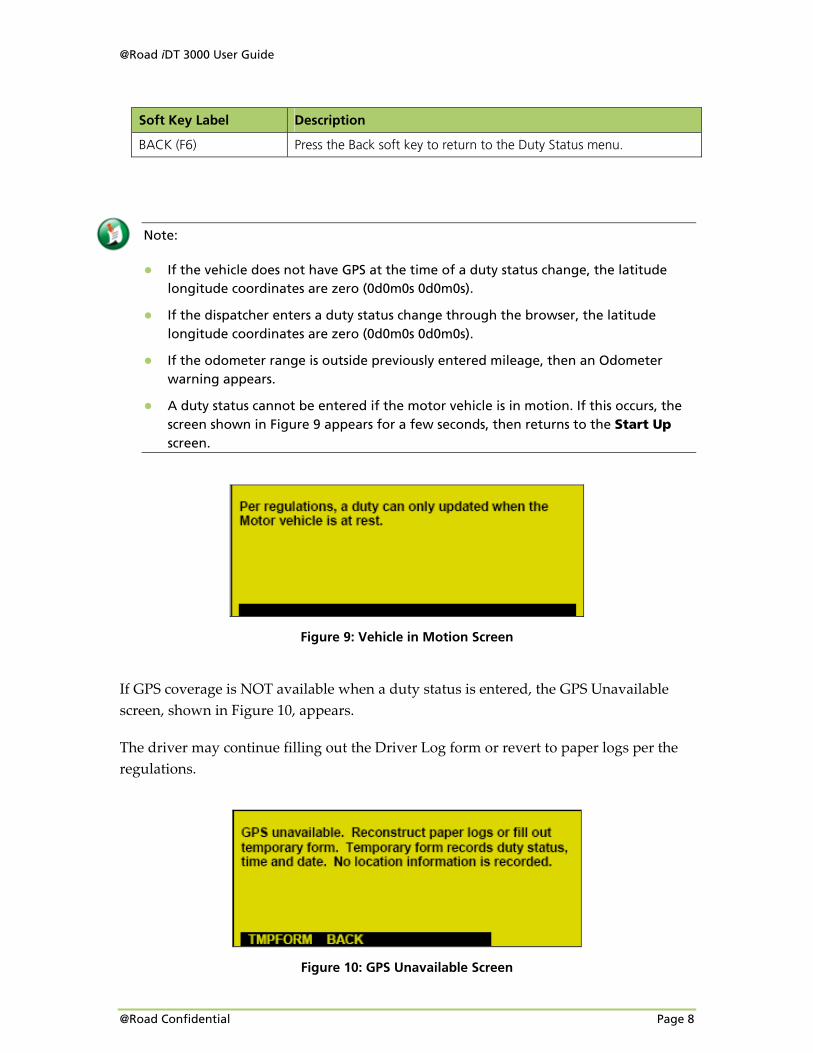
● A duty status cannot be entered if the motor vehicle is in motion. If this occurs, the screen shown in Figure 9 appears for a few seconds, then returns to the Start Up screen.
Figure 9: Vehicle in Motion Screen
If GPS coverage is NOT available when a duty status is entered, the GPS Unavailable screen, shown in Figure 10, appears.
The driver may continue filling out the Driver Log form or revert to paper logs per the regulations.
Figure 10: GPS Unavailable Screen
@Road iDT 3000 User Guide
Soft Key Label Description
TMPFORM (F1) Accesses the Driver Logs form which a driver can fill out and save until GPS becomes available.
BACK (F3) Returns to the Driver Logs menu.
If no action is taken within two minutes of the message being displayed, the new duty status will be submitted.
Auto Logs still requires that drivers enter both the initial On Duty status and the Off Duty status at the end of the day.
Note: Auto Logs is an optional feature. Please check with your administrator to determine whether your account has been enabled with Auto Logs.
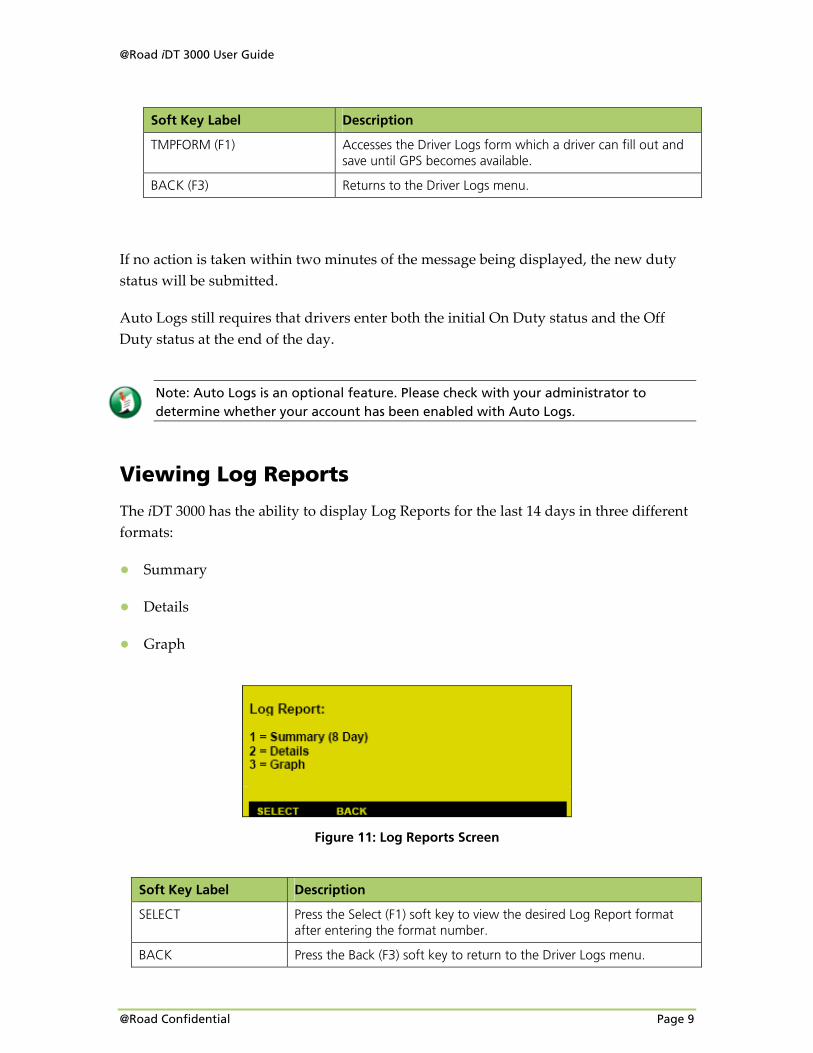
Viewing Log Reports
The iDT 3000 has the ability to display Log Reports for the last 14 days in three different formats:
● Summary
● Details
● Graph
Figure 11: Log Reports Screen
Soft Key Label Description
SELECT Press the Select (F1) soft key to view the desired Log Report format after entering the format number.
BACK Press the Back (F3) soft key to return to the Driver Logs menu.
@Road Confidential Page 9
@Road iDT 3000 User Guide
To select a Log Report format:
1. From the Driver Logs menu, shown in Figure 5, press the Log Report soft key. The Log Reports screen, shown in Figure 11, appears.
2. Enter the Log Report format number you want. This can be 1, 2, or 3.
3. Press Select. The iDT screen displays the desired Log Report format.
To return to the main iDT screen, press the Back soft key.
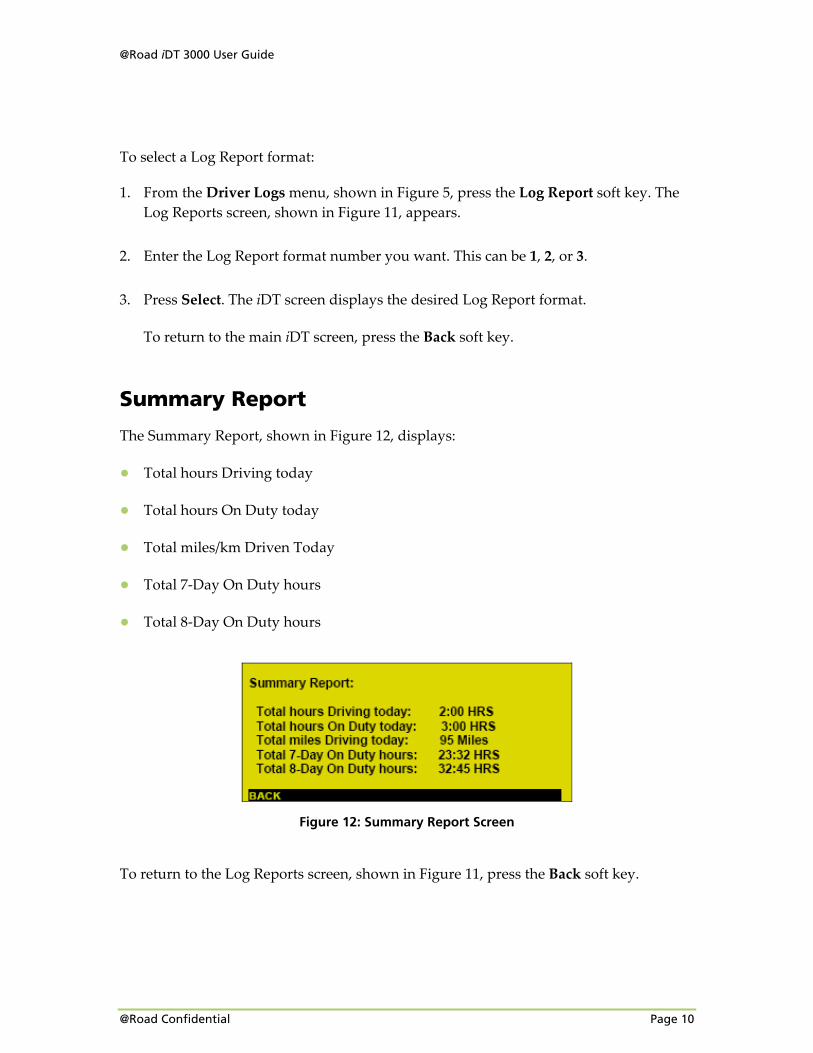
Summary Report
The Summary Report, shown in Figure 12, displays:
● Total hours Driving today
● Total hours On Duty today
● Total miles/km Driven Today
● Total 7‐Day On Duty hours
● Total 8‐Day On Duty hours
Figure 12: Summary Report Screen
To return to the Log Reports screen, shown in Figure 11, press the Back soft key.
@Road Confidential Page 10
@Road iDT 3000 User Guide
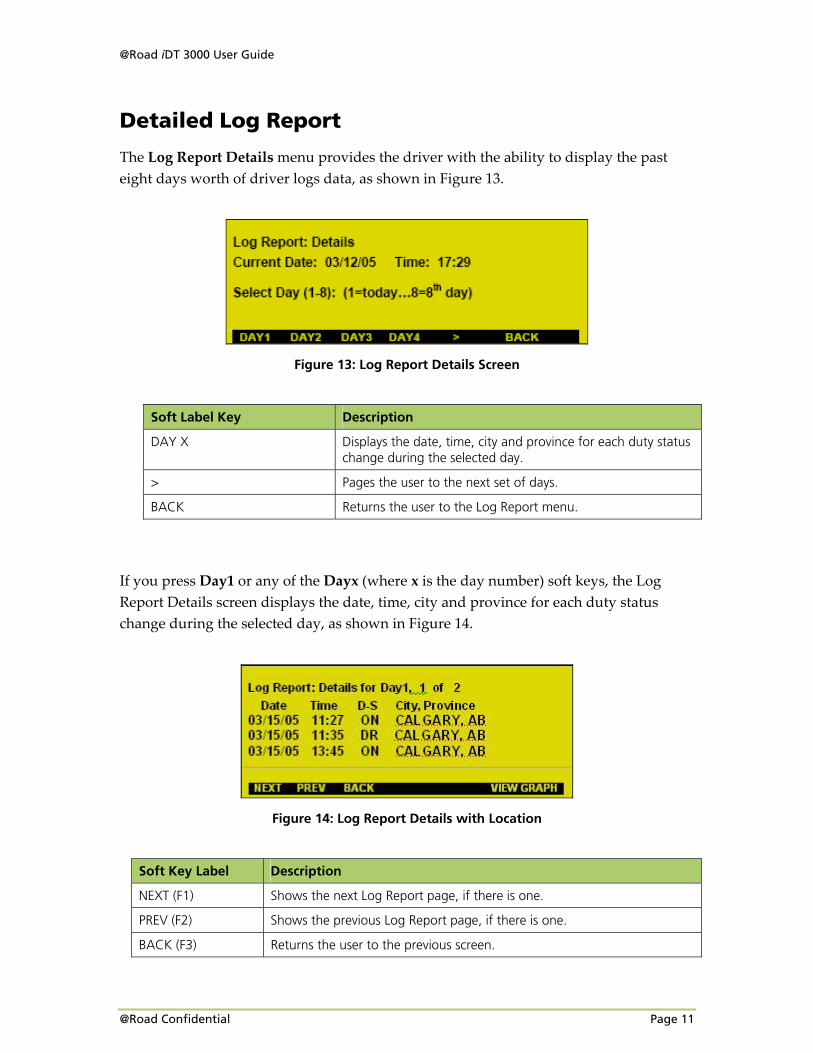
Detailed Log Report
The Log Report Details menu provides the driver with the ability to display the past eight days worth of driver logs data, as shown in Figure 13.
Figure 13: Log Report Details Screen
Soft Label Key Description
DAY X Displays the date, time, city and province for each duty status change during the selected day.
> Pages the user to the next set of days.
BACK Returns the user to the Log Report menu.
If you press Day1 or any of the Dayx (where x is the day number) soft keys, the Log Report Details screen displays the date, time, city and province for each duty status change during the selected day, as shown in Figure 14.
Figure 14: Log Report Details with Location
Soft Key Label Description
NEXT (F1) Shows the next Log Report page, if there is one.
PREV (F2) Shows the previous Log Report page, if there is one.
BACK (F3) Returns the user to the previous screen.
@Road Confidential Page 11
@Road iDT 3000 User Guide
VIEW GRAPH (F6) Shows a visual representation of the requested day.
Some days may have more than one page of duty status information, as indicated by the last part of the title line. For example, in Figure 14 there are two pages of information as indicated by the 1 of 2.
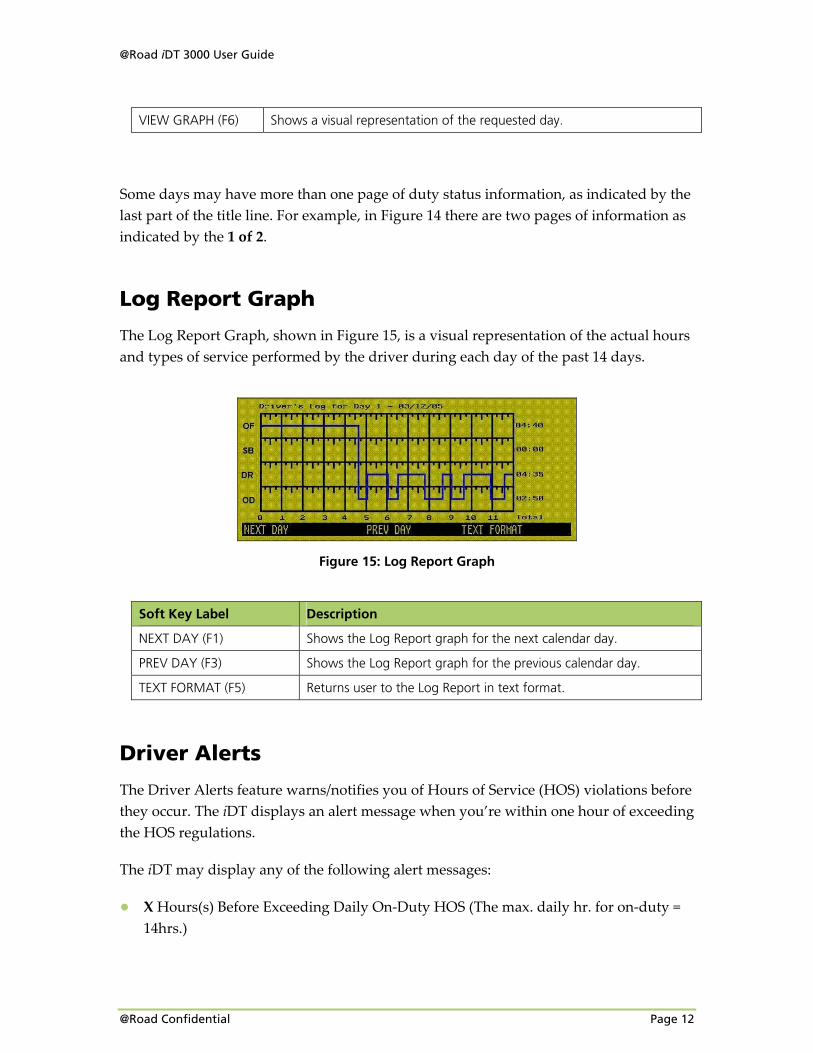
Log Report Graph
The Log Report Graph, shown in Figure 15, is a visual representation of the actual hours and types of service performed by the driver during each day of the past 14 days.
Figure 15: Log Report Graph
Soft Key Label Description
NEXT DAY (F1) Shows the Log Report graph for the next calendar day.
PREV DAY (F3) Shows the Log Report graph for the previous calendar day.
TEXT FORMAT (F5) Returns user to the Log Report in text format.
Driver Alerts
The Driver Alerts feature warns/notifies you of Hours of Service (HOS) violations before they occur. The iDT displays an alert message when you’re within one hour of exceeding the HOS regulations.
The iDT may display any of the following alert messages:
● X Hours(s) Before Exceeding Daily On‐Duty HOS (The max. daily hr. for on‐duty = 14hrs.)
@Road Confidential Page 12
@Road iDT 3000 User Guide
● X Hours(s) Before Exceeding Daily Driving Duty HOS (The max. daily hr. for driving duty = 11hrs.)
● X Hours(s) Before Exceeding Weekly On‐Duty HOS (The max. weekly hr. for on‐duty = Hours of Service Rules Selected)
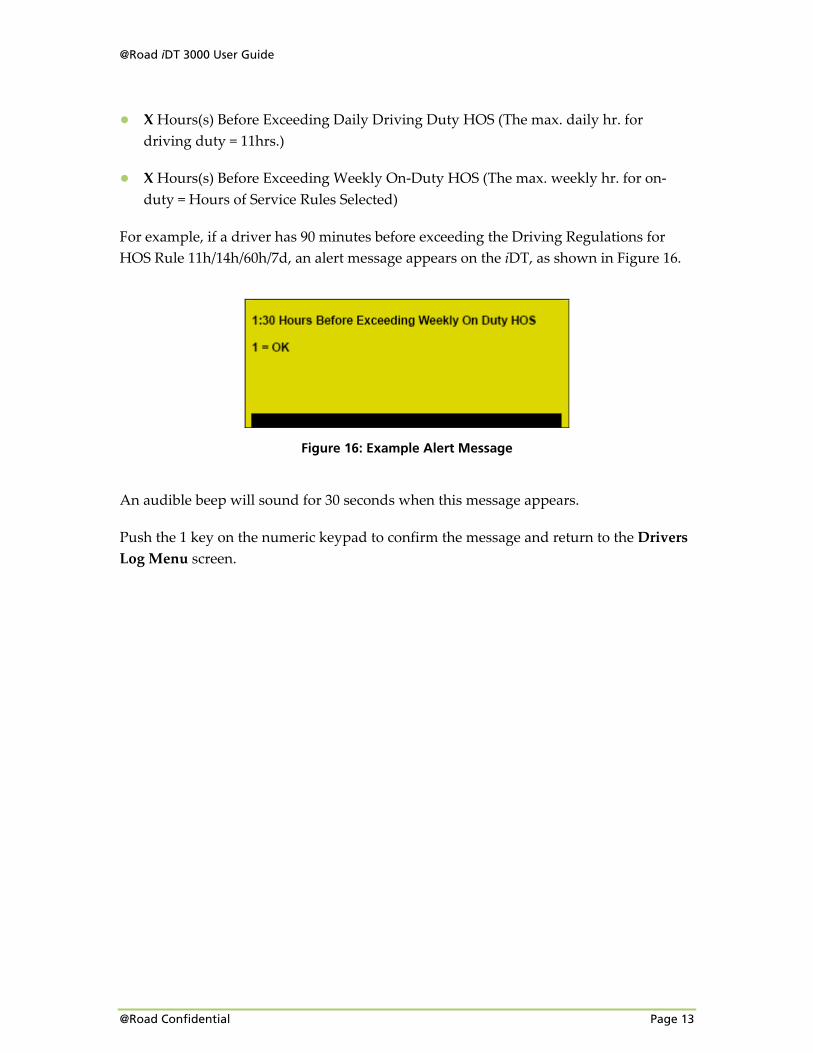
For example, if a driver has 90 minutes before exceeding the Driving Regulations for HOS Rule 11h/14h/60h/7d, an alert message appears on the iDT, as shown in Figure 16.
Figure 16: Example Alert Message
An audible beep will sound for 30 seconds when this message appears.
Push the 1 key on the numeric keypad to confirm the message and return to the Drivers Log Menu screen.
@Road Confidential Page 13
@Road iDT 3000 User Guide
4 Messaging The messaging application, an optional feature of GeoManager iLM, enables two‐way communications between field users and a dispatcher or fleet administrator. Field users may select any of the 30 pre‐defined messages that are created by the administrator. In addition, field users may customize each message by appending up to 20 characters. Dispatchers or fleet administrators may use the messaging application to send messages containing up to 480 characters to field users.
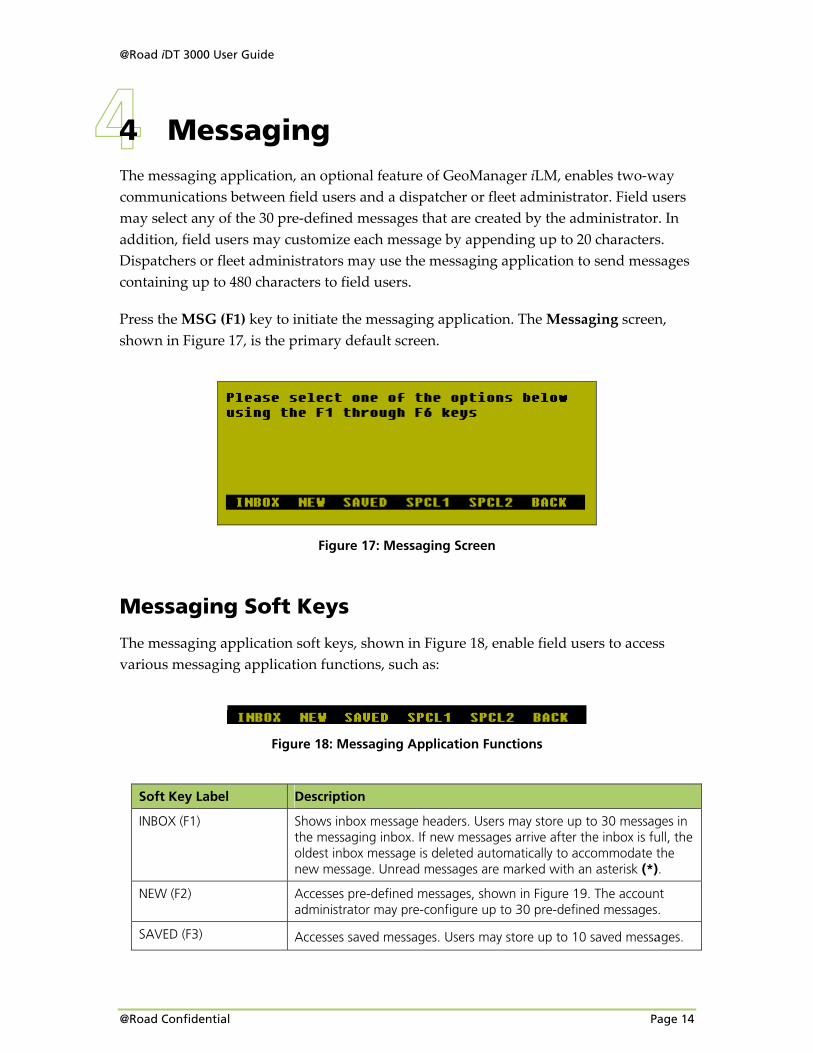
Press the MSG (F1) key to initiate the messaging application. The Messaging screen, shown in Figure 17, is the primary default screen.
Figure 17: Messaging Screen
Messaging Soft Keys
The messaging application soft keys, shown in Figure 18, enable field users to access various messaging application functions, such as:
Figure 18: Messaging Application Functions
Soft Key Label Description
INBOX (F1) Shows inbox message headers. Users may store up to 30 messages in the messaging inbox. If new messages arrive after the inbox is full, the oldest inbox message is deleted automatically to accommodate the new message. Unread messages are marked with an asterisk (*).
NEW (F2) Accesses pre-defined messages, shown in Figure 19. The account administrator may pre-configure up to 30 pre-defined messages.
SAVED (F3) Accesses saved messages. Users may store up to 10 saved messages.
@Road Confidential Page 14

@Road iDT 3000 User Guide
@Road Confidential Page 15
Soft Key Label Description
SPCL1 (F4) Sends a pre-defined SPCL1 message. The account administrator configures SPCL1 messages.
SPCL2 (F5) Sends a pre-defined SPCL2 message. The account administrator configures SPCL2 messages.
BACK (F5) Returns the user to the previous application screen.
Navigation Knob The navigation knob duplicates the Next, Previous and Send functionality during message selection:
● Turn the knob left to highlight the previous message.
● Turn the knob right to highlight the next message.
● Press the knob to send the message.
Figure 19: Available Messages
Messaging Inbox Soft Keys
The messaging Inbox soft keys, shown in Figure 20, enable users to navigate, view, and save Inbox messages. The active message is highlighted (the first inbox message is highlighted by default).
Figure 20: Messaging Inbox Soft Keys
Soft Key Label Description
NEXT (F1) Highlights the next Inbox message. Hold down the Next (F1) key to auto scroll the highlight down through the Inbox messages.
PREV (F2) Highlights the previous message. Hold down on the Prev (F2) key to auto scroll the highlight up through the Inbox messages.
@Road iDT 3000 User Guide
@Road Confidential Page 16
Soft Key Label Description
VIEW (F3) Opens the highlighted message for viewing. The message selected displays up to 480 characters, employing word-wrap for ease of reading.
SV/UNS (F2) Moves currently unread messages to the saved message folder. You may store up to 10 messages in the saved message folder.
If you save a message after the saved folder is full, the oldest saved message is automatically deleted to make room for the new message. An s marked next to the message indicates that it is saved, as shown in Error! Reference source not found.. Press the SV/UNS (F2) key again to unsave a message.
BACK (F5) Returns the user to the previous application menu.
Navigation Knob The navigation knob duplicates the Next, Previous and Send functionality during message selection:
● Turn the knob left to highlight the previous message.
● Turn the knob right to highlight the next message.
● Press the knob to send the message.
Accessing Inbox Messages
You may view a highlighted Inbox message on the display by pressing the View (F3) key.
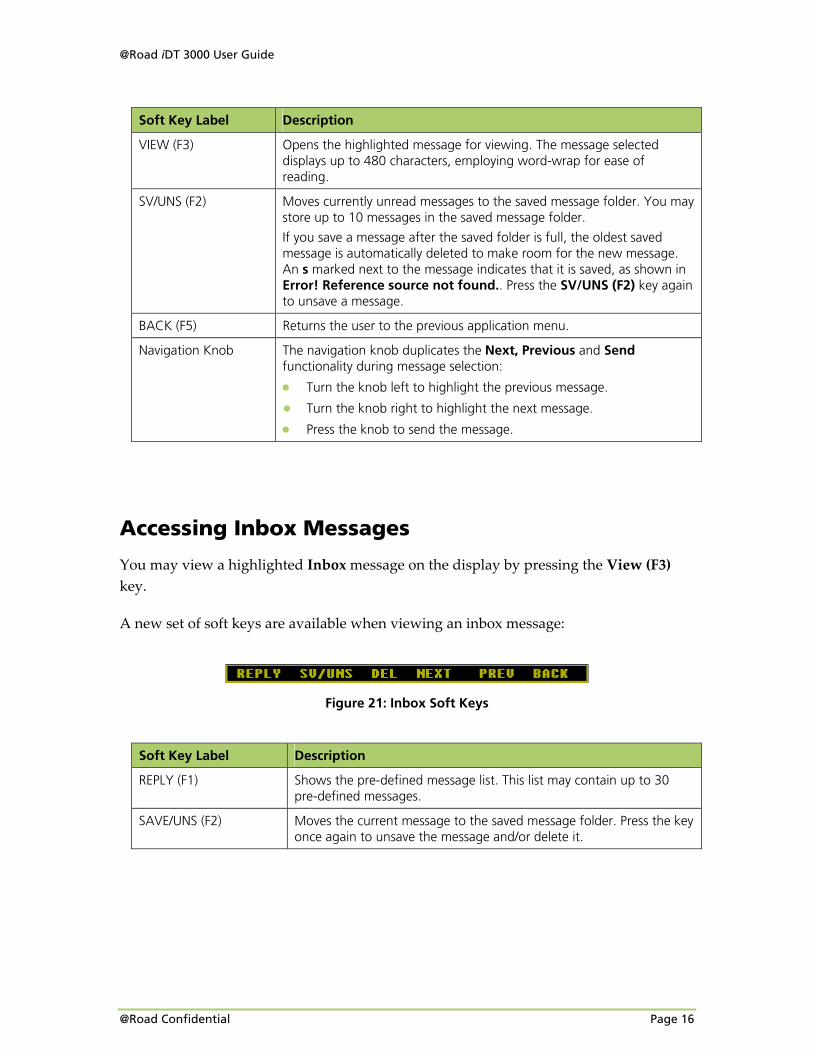
A new set of soft keys are available when viewing an inbox message:
Figure 21: Inbox Soft Keys
Soft Key Label Description
REPLY (F1) Shows the pre-defined message list. This list may contain up to 30 pre-defined messages.
SAVE/UNS (F2) Moves the current message to the saved message folder. Press the key once again to unsave the message and/or delete it.
@Road iDT 3000 User Guide
@Road Confidential Page 17
Soft Key Label Description
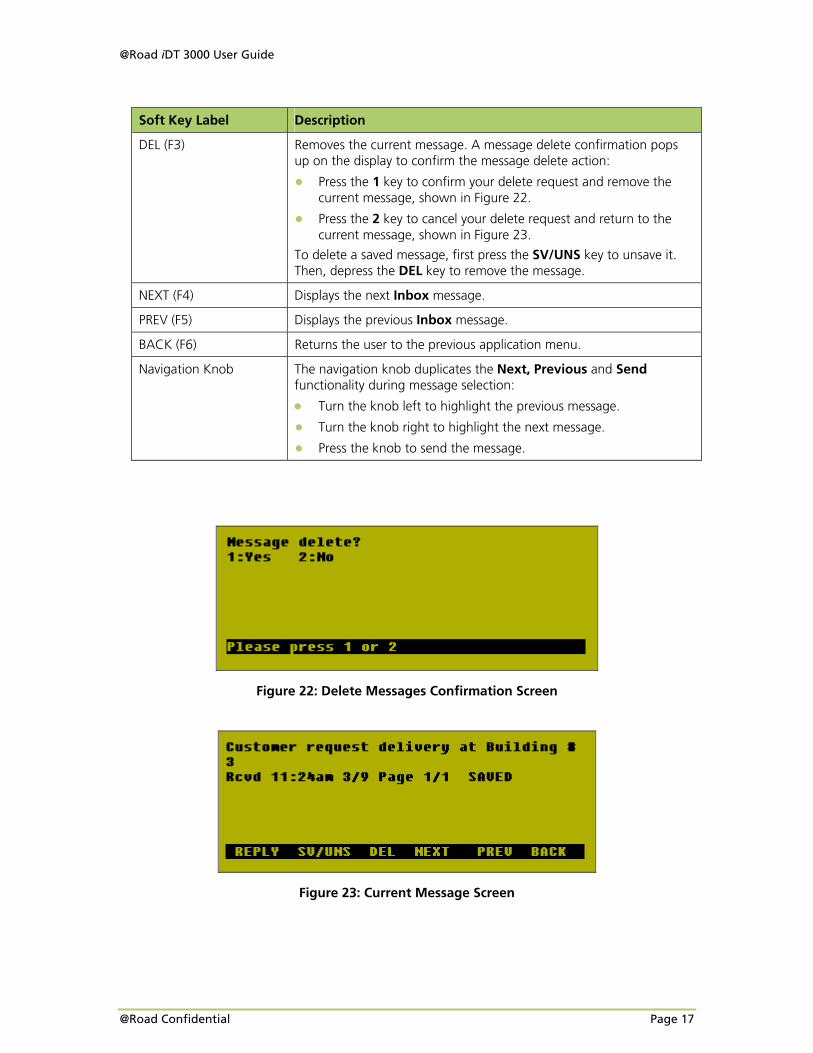
DEL (F3) Removes the current message. A message delete confirmation pops up on the display to confirm the message delete action:
● Press the 1 key to confirm your delete request and remove the current message, shown in Figure 22.
● Press the 2 key to cancel your delete request and return to the current message, shown in Figure 23.
To delete a saved message, first press the SV/UNS key to unsave it. Then, depress the DEL key to remove the message.
NEXT (F4) Displays the next Inbox message.
PREV (F5) Displays the previous Inbox message.
BACK (F6) Returns the user to the previous application menu.
Navigation Knob The navigation knob duplicates the Next, Previous and Send functionality during message selection:
● Turn the knob left to highlight the previous message.
● Turn the knob right to highlight the next message.
● Press the knob to send the message.
Figure 22: Delete Messages Confirmation Screen
Figure 23: Current Message Screen
@Road iDT 3000 User Guide
Viewing and Selecting New Messages
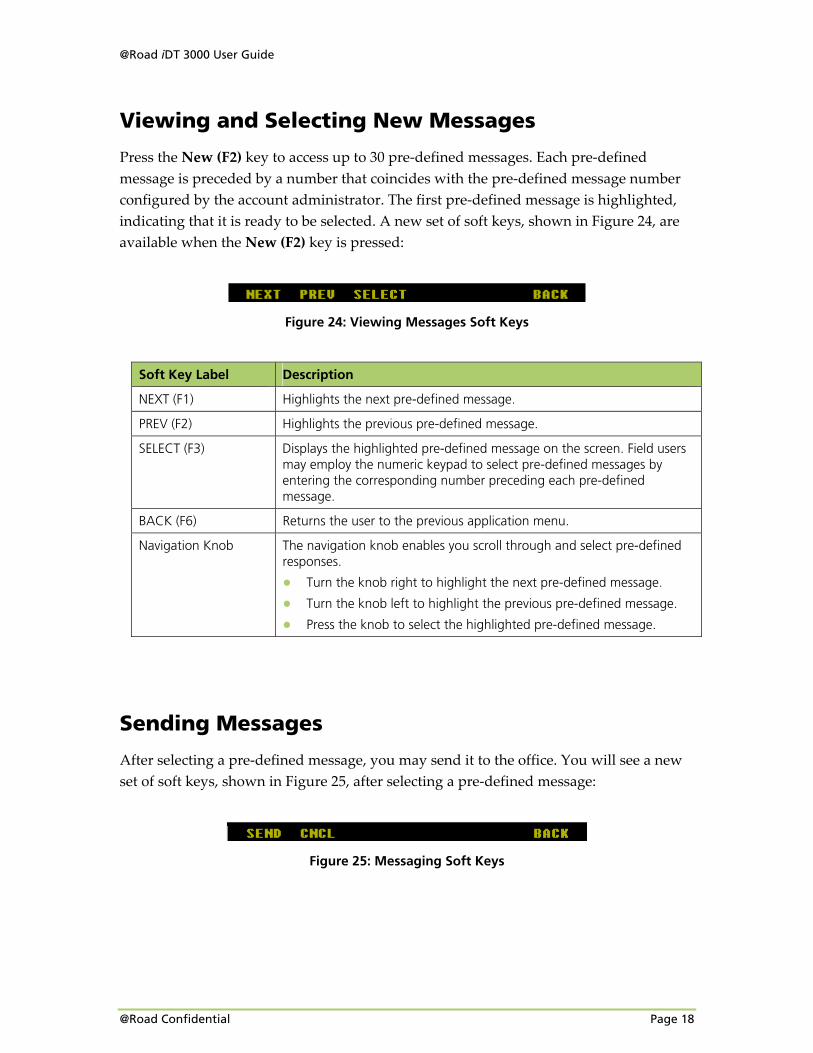
Press the New (F2) key to access up to 30 pre‐defined messages. Each pre‐defined message is preceded by a number that coincides with the pre‐defined message number configured by the account administrator. The first pre‐defined message is highlighted, indicating that it is ready to be selected. A new set of soft keys, shown in Figure 24, are available when the New (F2) key is pressed:
Figure 24: Viewing Messages Soft Keys
Soft Key Label Description
NEXT (F1) Highlights the next pre-defined message.
PREV (F2) Highlights the previous pre-defined message.
SELECT (F3) Displays the highlighted pre-defined message on the screen. Field users may employ the numeric keypad to select pre-defined messages by entering the corresponding number preceding each pre-defined message.
BACK (F6) Returns the user to the previous application menu.
Navigation Knob The navigation knob enables you scroll through and select pre-defined responses.
● Turn the knob right to highlight the next pre-defined message.
● Turn the knob left to highlight the previous pre-defined message.
● Press the knob to select the highlighted pre-defined message.
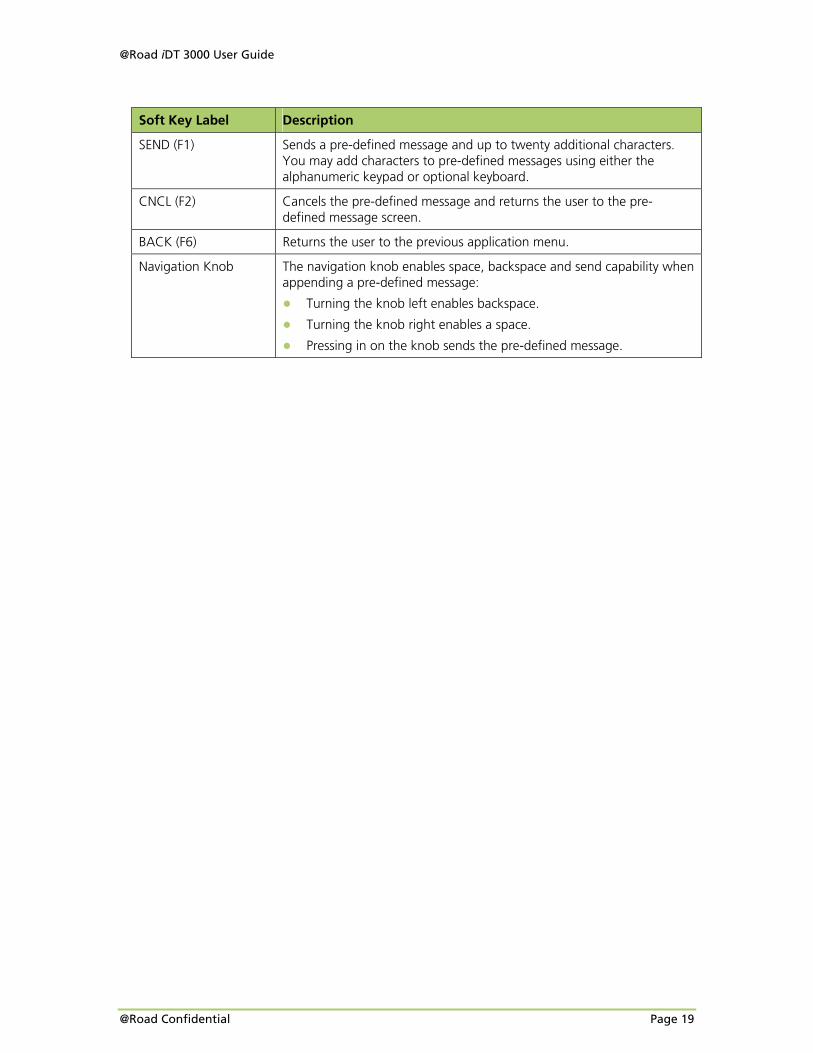
Sending Messages
After selecting a pre‐defined message, you may send it to the office. You will see a new set of soft keys, shown in Figure 25, after selecting a pre‐defined message:
Figure 25: Messaging Soft Keys
@Road Confidential Page 18
@Road iDT 3000 User Guide
Soft Key Label Description
SEND (F1) Sends a pre-defined message and up to twenty additional characters. You may add characters to pre-defined messages using either the alphanumeric keypad or optional keyboard.
CNCL (F2) Cancels the pre-defined message and returns the user to the pre-defined message screen.
BACK (F6) Returns the user to the previous application menu.
Navigation Knob The navigation knob enables space, backspace and send capability when appending a pre-defined message:
● Turning the knob left enables backspace.
● Turning the knob right enables a space.
● Pressing in on the knob sends the pre-defined message.
@Road Confidential Page 19
@Road iDT 3000 User Guide
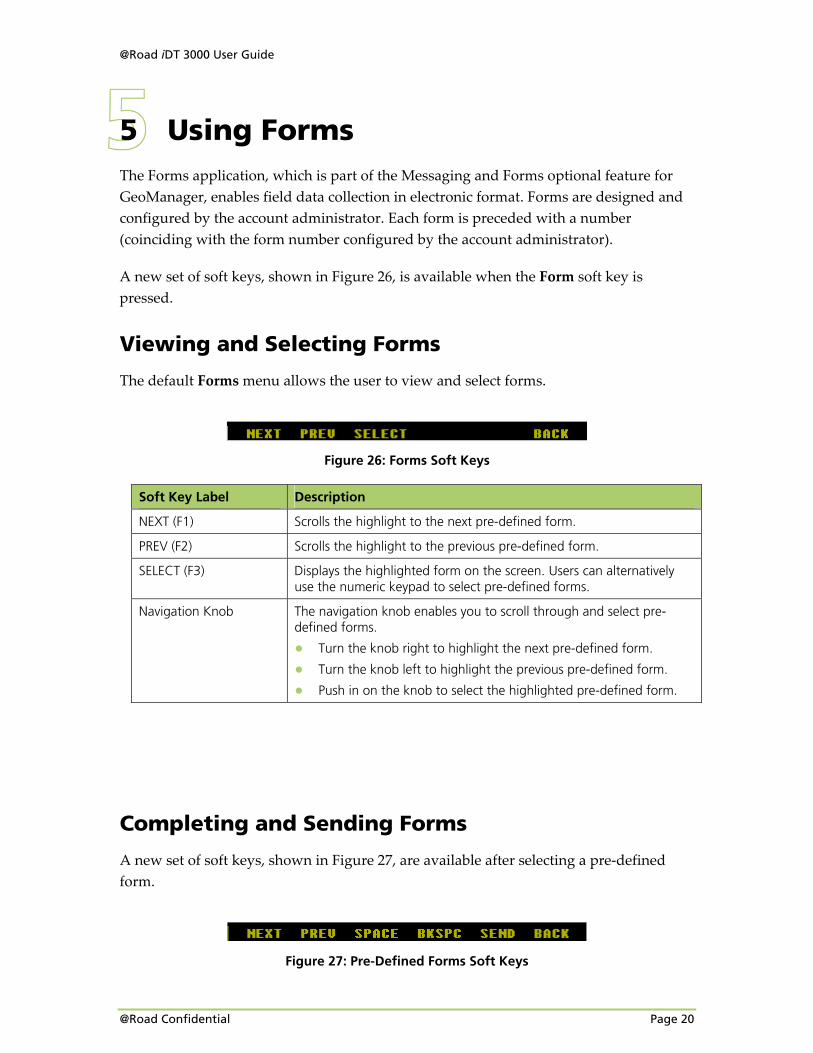
5 Using Forms The Forms application, which is part of the Messaging and Forms optional feature for GeoManager, enables field data collection in electronic format. Forms are designed and configured by the account administrator. Each form is preceded with a number (coinciding with the form number configured by the account administrator).
A new set of soft keys, shown in Figure 26, is available when the Form soft key is pressed.
Viewing and Selecting Forms
The default Forms menu allows the user to view and select forms.
Figure 26: Forms Soft Keys
Soft Key Label Description
NEXT (F1) Scrolls the highlight to the next pre-defined form.
PREV (F2) Scrolls the highlight to the previous pre-defined form.
SELECT (F3) Displays the highlighted form on the screen. Users can alternatively use the numeric keypad to select pre-defined forms.
Navigation Knob The navigation knob enables you to scroll through and select pre-defined forms.
● Turn the knob right to highlight the next pre-defined form.
● Turn the knob left to highlight the previous pre-defined form.
● Push in on the knob to select the highlighted pre-defined form.
Completing and Sending Forms
A new set of soft keys, shown in Figure 27, are available after selecting a pre‐defined form.
Figure 27: Pre-Defined Forms Soft Keys
@Road Confidential Page 20
@Road iDT 3000 User Guide
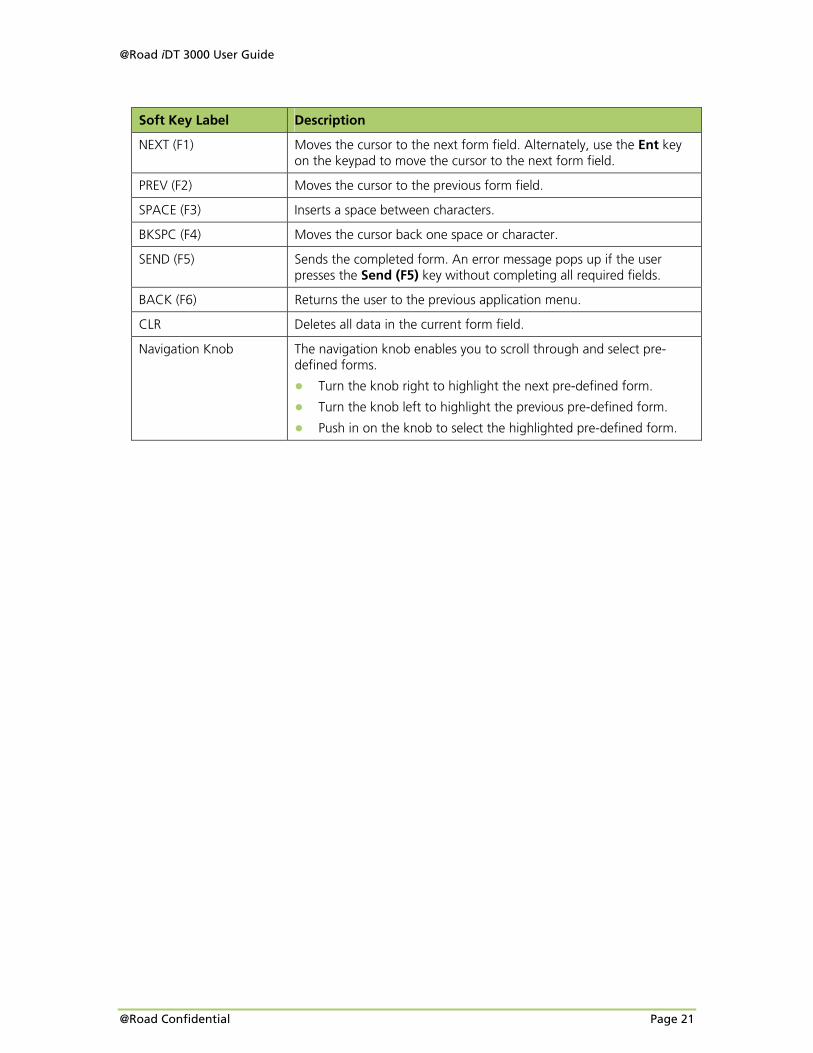
Soft Key Label Description
NEXT (F1) Moves the cursor to the next form field. Alternately, use the Ent key on the keypad to move the cursor to the next form field.
PREV (F2) Moves the cursor to the previous form field.
SPACE (F3) Inserts a space between characters.
BKSPC (F4) Moves the cursor back one space or character.
SEND (F5) Sends the completed form. An error message pops up if the user presses the Send (F5) key without completing all required fields.
BACK (F6) Returns the user to the previous application menu.
CLR Deletes all data in the current form field.
Navigation Knob The navigation knob enables you to scroll through and select pre-defined forms.
● Turn the knob right to highlight the next pre-defined form.
● Turn the knob left to highlight the previous pre-defined form.
● Push in on the knob to select the highlighted pre-defined form.
@Road Confidential Page 21
@Road iDT 3000 User Guide
6 Setting Manual Functions From the Startup Screen, press Set (F6) to change various settings of the iDT 3000. Use the alphanumeric keypad to choose the desired function.
● Press 1 to turn off the back display light.
● Press 2 to turn on the back display light.
● Press 3 to Click On/Off the click function. This changes the default beep to a click.
● Press 4 to turn ON/OFF the optional bar code function.
● Press 5 on the Keypad to view the messages in the MSG Queue. These are messages currently held in the iLM’s memory that will be sent as soon as cellular coverage is available.
● Press 6 to turn On/Off the key lock. This locks or unlocks the optional keyboard.
@Road Confidential Page 22
@Road iDT 3000 User Guide
@Road Confidential Page 23
Glossary iDT Internet Data Terminal is a
iLM® Internet Location Manager is a patented @Road in‐vehicle mobile resource management device using GPS and wireless network communications technologies. The @Road iLM captures location‐based information in the field and securely transmits it over high‐speed wireless networks to @Road subscribers. This data shows up in the form of on‐demand, exception or scheduled web‐based reports that reflect information such as mobile worker location, vehicle speed, starts and stops on customizable maps.
packet A piece of data sent over a packet‐switching network, such as the Internet. A packet includes not just data but also address information about its origination and destination.
PIN Personal Identification Number is an additional security feature for wireless phones, much like a password. Programming a PIN into the Subscriber Information Module (SIM) on a wireless phone requires the user to enter that access code each time the phone is turned on.