Embed Size (px)
Citation preview
MK6 Gen2 GTI Exhaust Installation Instructions
February 2012 1
Tools Required Wrenches/sockets: 13, 15, 16, 17, 22 mm Flat-blade screwdriver Penetrating lubricant
Summary This document includes instructions for the following tasks: MK6 Gen2 GTI Turboback Exhaust Installation MK6 Gen2 GTI Catback Exhaust Installation MK5/MK6 Gen2 GTI Downpipe Installation Connecting Gen2 Components with Previous-Generation
Components
MK6 Gen2 GTI Turboback Exhaust Installation
Factory Exhaust Removal 1. Jack up the car and secure it properly. 2. Remove the O2 sensors and let them hang. 3. Spray penetrating lubricant on all rusty fasteners to facilitate removal. 4. Remove the factory axle shield for easier access to downpipe nuts. 5. Remove the four 16-mm nuts holding the downpipe to the turbo. 6. Before pulling off the studs, remove the 13-mm nuts holding the cross
braces under the exhaust. 7. Loosen the downpipe bolts but leave them in to hold the front of the
exhaust while you remove the rear. 8. Move to the back of the car and pull the factory hangers out of each
mount. 9. Let the back of the exhaust hang down while you remove the
downpipe bolts. 10. Remove the downpipe off the studs and lower gently. 11. Slip out from under the car and remove the factory rubber mount.
This component will be reused later.
MK6 Gen2 GTI Exhaust System Installation Instructions
Eurojet 2
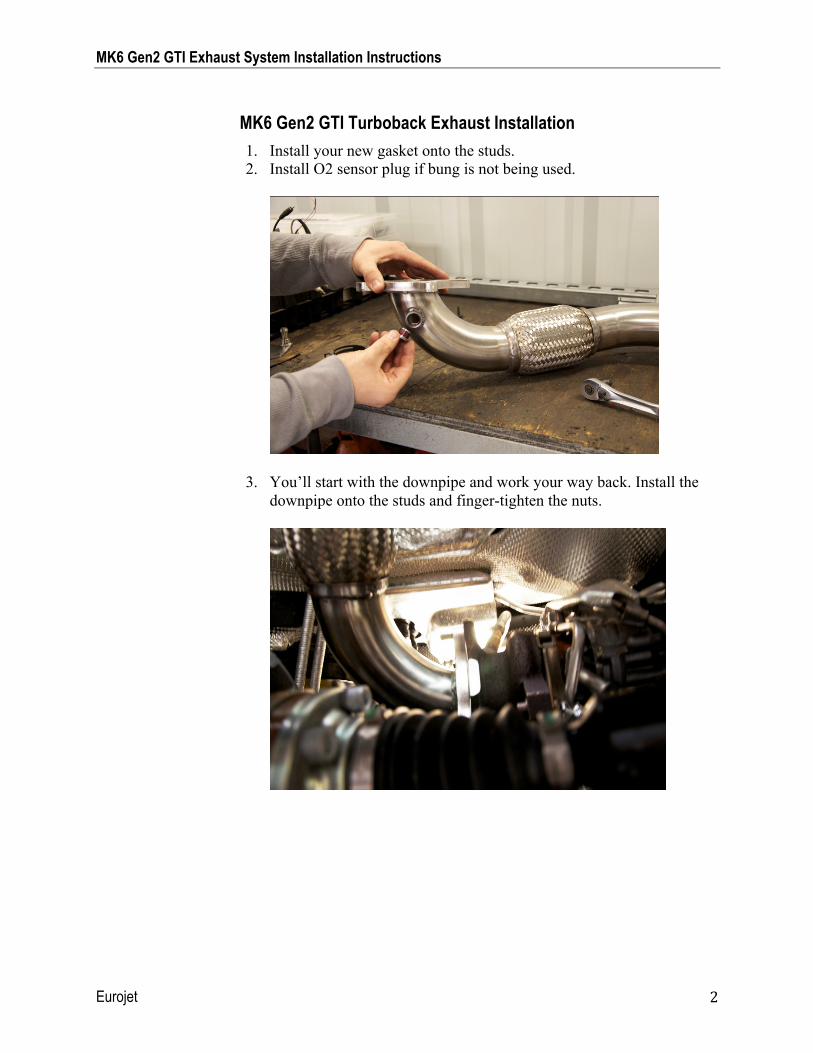
MK6 Gen2 GTI Turboback Exhaust Installation 1. Install your new gasket onto the studs. 2. Install O2 sensor plug if bung is not being used.
3. You’ll start with the downpipe and work your way back. Install the downpipe onto the studs and finger-tighten the nuts.
MK6 Gen2 GTI Exhaust System Installation Instructions
Eurojet 3
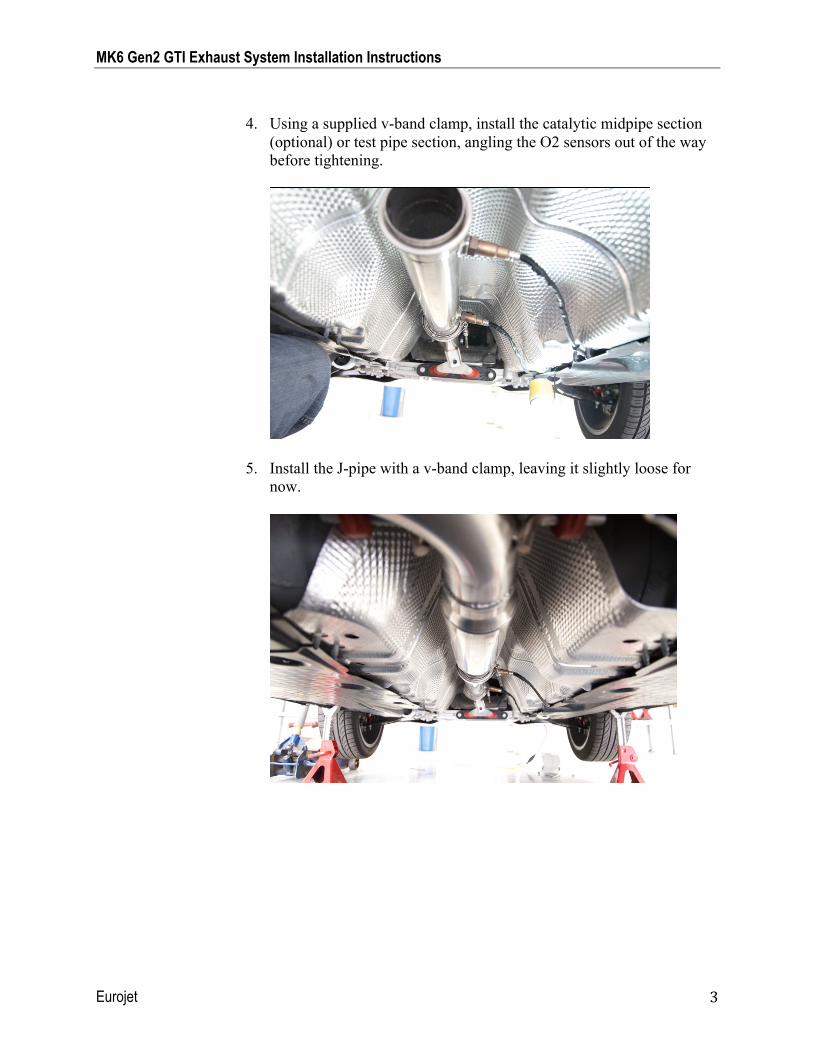
4. Using a supplied v-band clamp, install the catalytic midpipe section
(optional) or test pipe section, angling the O2 sensors out of the way before tightening.
5. Install the J-pipe with a v-band clamp, leaving it slightly loose for now.

MK6 Gen2 GTI Exhaust System Installation Instructions
Eurojet 4
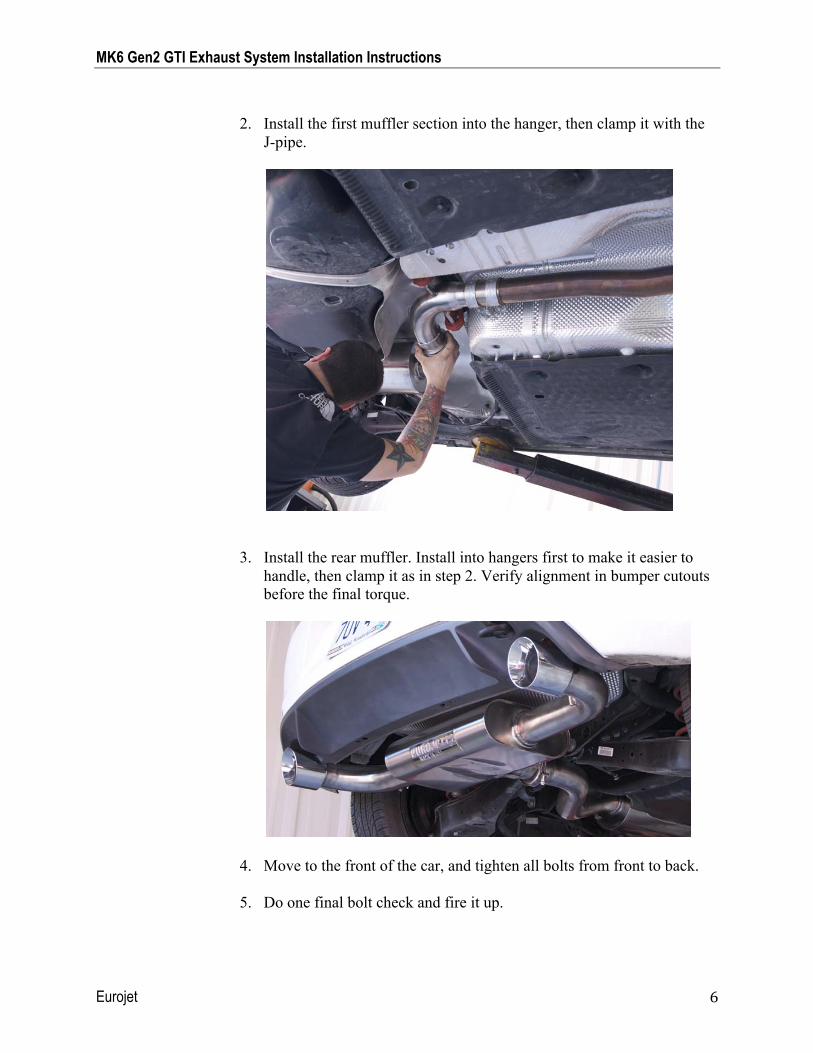
6. Install the first muffler section into the hanger, then clamp it with the
J-pipe.
7. Install the rear muffler. Install into hangers first to make it easier to handle, then clamp it as in step 7. Verify alignment in bumper cutouts before the final torque.
8. Move to the front of the car, and tighten all bolts from front to back. 9. Install the O2 sensors and cross-braces. 10. Do one final bolt check, fire it up, and check for exhaust leaks. 11. Lower the car and drive!
MK6 Gen2 GTI Exhaust System Installation Instructions
Eurojet 5
MK6 Gen2 GTI Catback Exhaust Installation
Factory Exhaust Removal 1. Jack up the car and secure it properly. 2. Spray penetrating lubricant on all rusty fasteners to facilitate removal. 3. Move to the back of the car and pull the factory hangers out of each
mount. 4. Let the back of the exhaust hang down while you remove the front
clamp bolts. 5. Remove the factory system out of the clamp and lower gently. 6. Slip out from under the car and start installing your Eurojet exhaust.
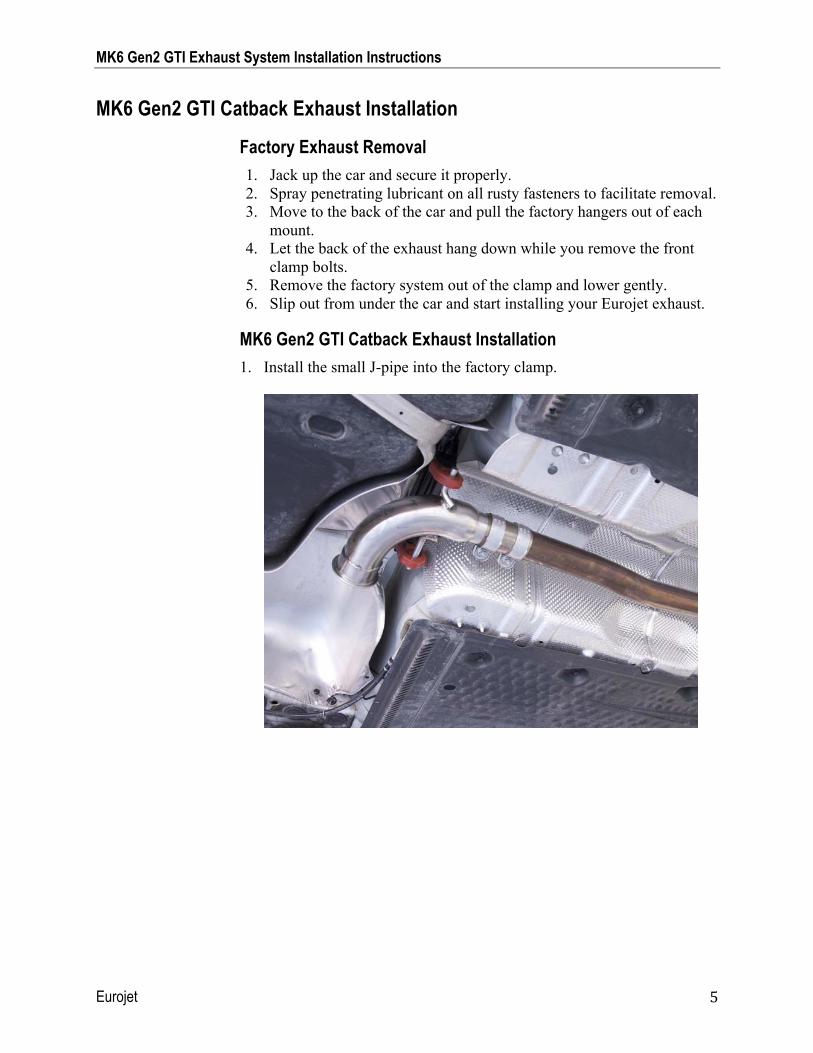
MK6 Gen2 GTI Catback Exhaust Installation 1. Install the small J-pipe into the factory clamp.
MK6 Gen2 GTI Exhaust System Installation Instructions
Eurojet 6
2. Install the first muffler section into the hanger, then clamp it with the
J-pipe.
3. Install the rear muffler. Install into hangers first to make it easier to handle, then clamp it as in step 2. Verify alignment in bumper cutouts before the final torque.
4. Move to the front of the car, and tighten all bolts from front to back.
5. Do one final bolt check and fire it up.
MK6 Gen2 GTI Exhaust System Installation Instructions
Eurojet 7
MK5/MK6 Gen2 GTI Downpipe Installation
Factory Downpipe Removal 1. Jack up the car and secure it properly.2. Remove the O2 sensors and let them hang. 3. Spray penetrating lubricant on all rusty fasteners to facilitate removal.4. Remove the factory axle shield for easier access to downpipe nuts.5. Remove the four 16-mm nuts holding the downpipe to the turbo.6. Before pulling off the studs, remove the 13-mm nuts holding the cross
braces under the exhaust. 7. Loosen the downpipe bolts but leave them in to hold the front of the
exhaust while you work on the removing the rear from the factory coupler.
8. Remove the front hanger bolts, then pull the downpipe off the studs and lower gently.
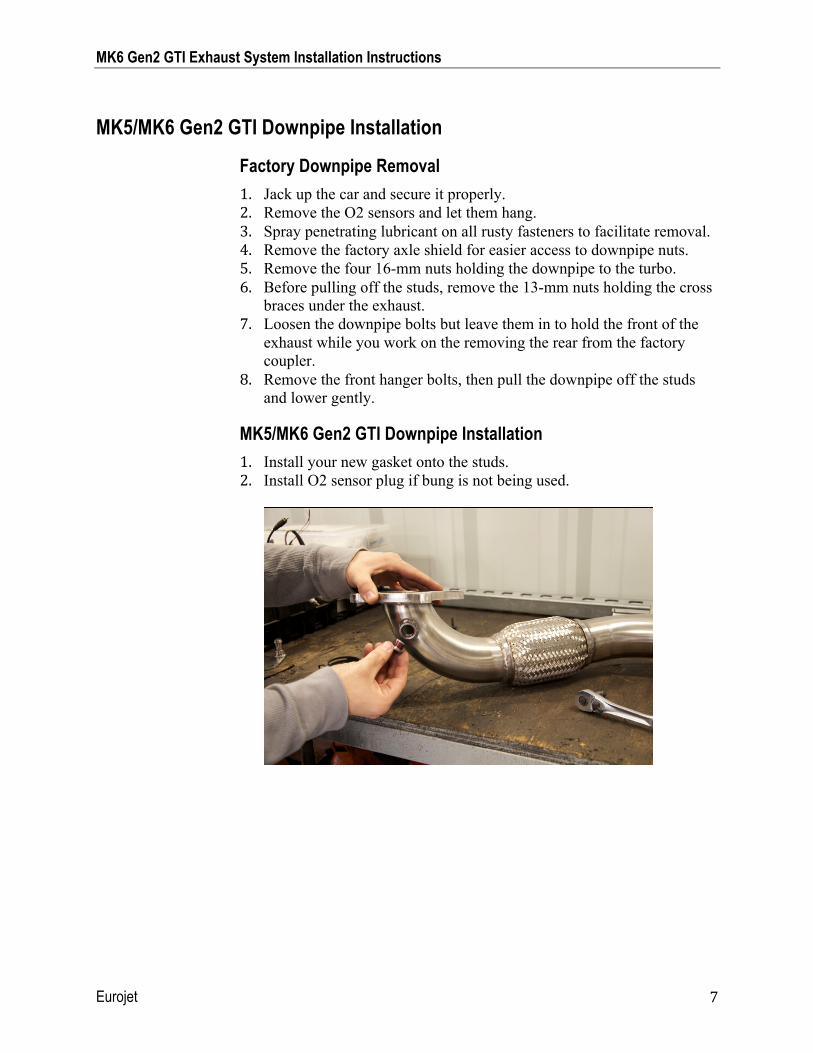
MK5/MK6 Gen2 GTI Downpipe Installation 1. Install your new gasket onto the studs. 2. Install O2 sensor plug if bung is not being used.
MK6 Gen2 GTI Exhaust System Installation Instructions
Eurojet 8
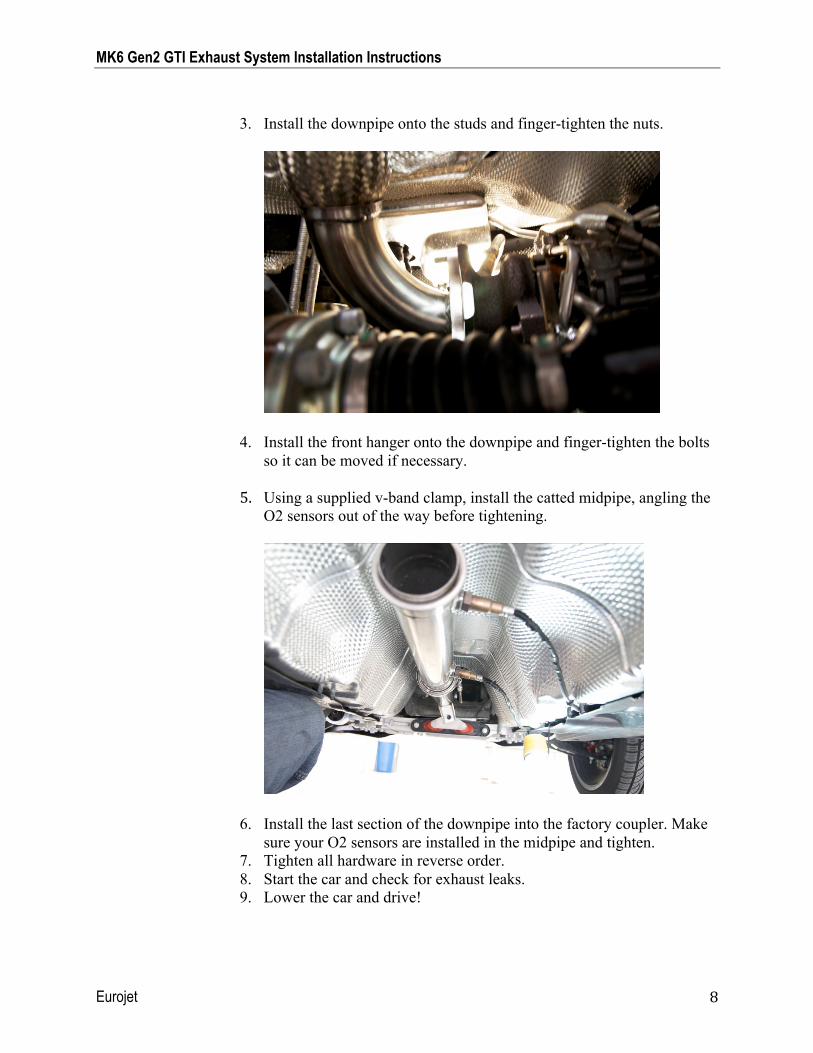
3. Install the downpipe onto the studs and finger-tighten the nuts.
4. Install the front hanger onto the downpipe and finger-tighten the bolts so it can be moved if necessary.
5. Using a supplied v-band clamp, install the catted midpipe, angling the O2 sensors out of the way before tightening.
6. Install the last section of the downpipe into the factory coupler. Make sure your O2 sensors are installed in the midpipe and tighten.
7. Tighten all hardware in reverse order. 8. Start the car and check for exhaust leaks. 9. Lower the car and drive!

MK6 Gen2 GTI Exhaust System Installation Instructions
Eurojet 9
Connecting Gen2 Components with Previous-Generation Components Eurojet’s Gen2 exhaust systems offer new features that not only enhance durability, but also improve exhaust flow to maximize horsepower and minimize turbo lag. For compatibility with previous-generation systems, the male flange on the Gen2 component must be trimmed to properly mate with the previous-generation component. You can purchase your Gen2 system with these modifications, or make them yourself by following these simple steps:
1. Trim the male flange of the Gen2 component so that it is flush with
the v-band.
2. If necessary, grind to create a smooth surface.
MK6 Gen2 GTI Exhaust System Installation Instructions
Eurojet 10
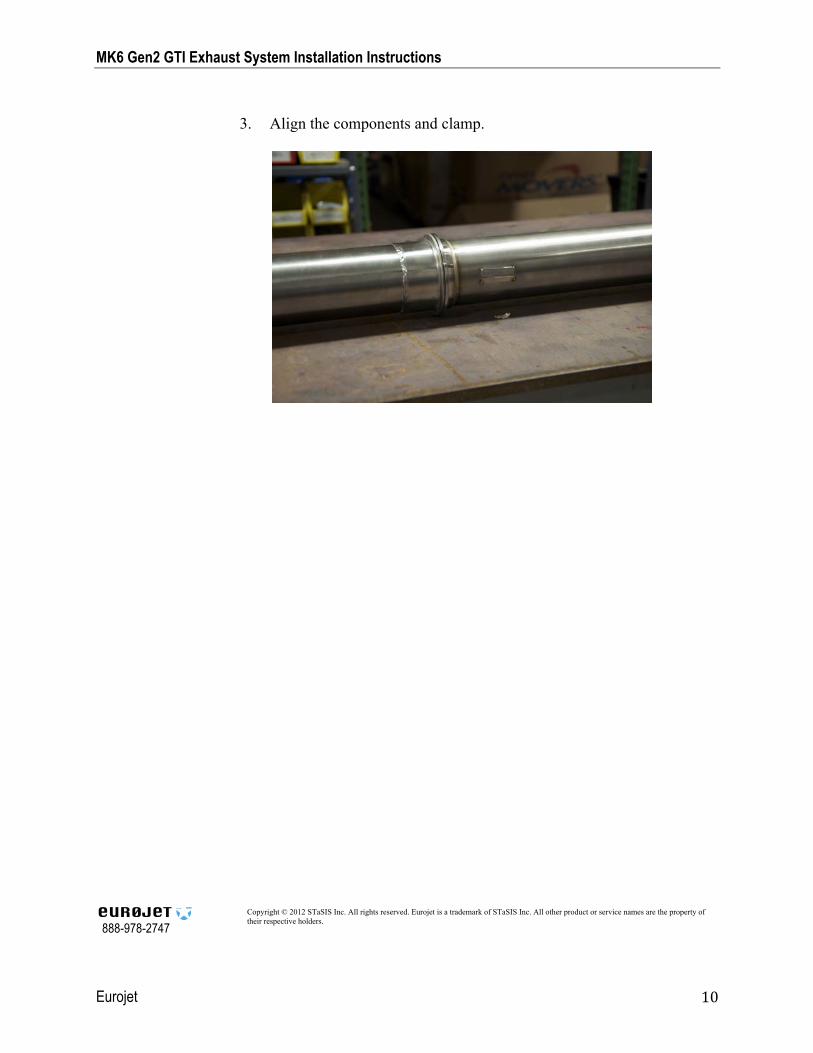
3. Align the components and clamp.
888-978-2747
Copyright © 2012 STaSIS Inc. All rights reserved. Eurojet is a trademark of STaSIS Inc. All other product or service names are the property of their respective holders.