Embed Size (px)
Citation preview

Microsoft Office
Word 2013 ExpertMicrosoft Office
Word 2013 ExpertCourseware # 3251
Lesson 4: Working with Forms
Microsoft Office
Word 2013 Expert
Lesson Objectives
• understand what a mass mailing is• understand what the main document and
recipient list are• perform a simple mass-mailing task• merge using envelopes or labels• insert fields into a blank form• use a customized form with fill-in fields• mark a document as final• lock a form to fill-in fields only

Microsoft Office
Word 2013 Expert
Creating Mailing Documents
• Mailings feature means each person on mailing list receives personalized letter without having to type the same letter several times, referred to as mail merge
• Main Document– Standard letter, label, envelope or list format you can
merge with Data Source – Contains identical text for each personalized document
with special merge fields to indicate where each type of variable from Data Source to be placed
• Data Source– List of variable information to insert into fields in Main
Document where one variable ends and another variable begins
Microsoft Office
Word 2013 Expert
Creating Mailing Documents
• Understanding the Main Document– Can insert merge fields individually, or use preset merge fields– Can insert individual merge fields to include merge field in
non-standard style or repeat merge fields in different areas of main document
– Merge fields appear with and around merge code• When merge field selected, appears as to show special code
that performs pre-defined task• To delete merge field, select code, including chevrons on either side of
code
– Can also activate Step-by-Step Wizard to guide through process by selecting options from task pane• Process similar to using Mailings tab, but provides more explanation at
each step• Activate from Start Mail Merge command
Microsoft Office
Word 2013 Expert
Creating Mailing Documents
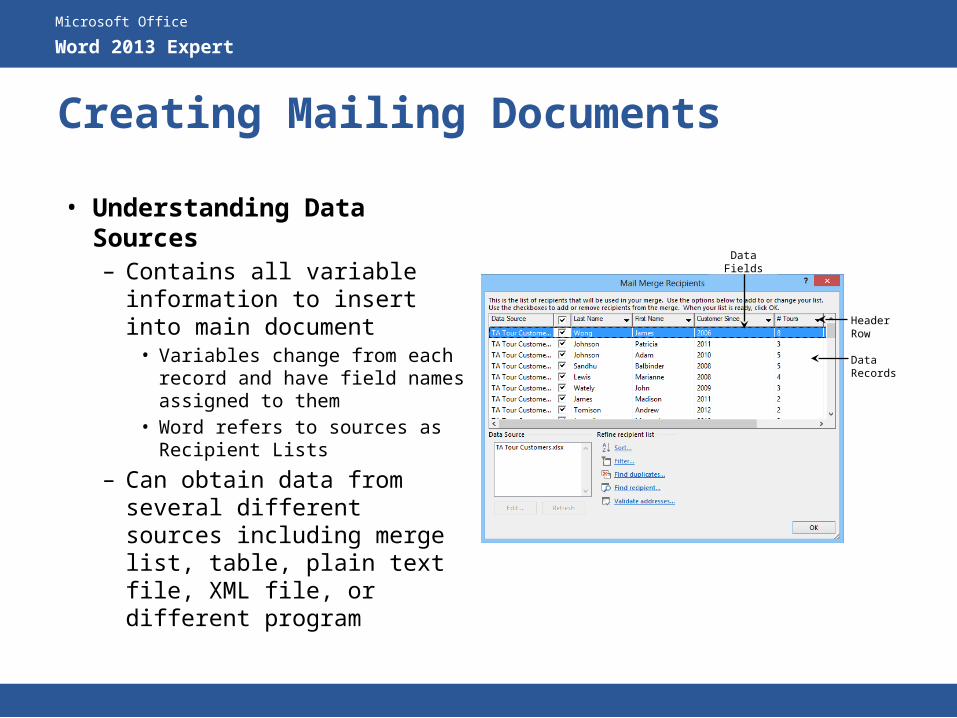
• Understanding Data Sources– Contains all variable
information to insert into main document• Variables change from each
record and have field names assigned to them
• Word refers to sources as Recipient Lists
– Can obtain data from several different sources including merge list, table, plain text file, XML file, or different program
Data Fields
Header Row Data Records
Microsoft Office
Word 2013 Expert
Creating Mailing Documents
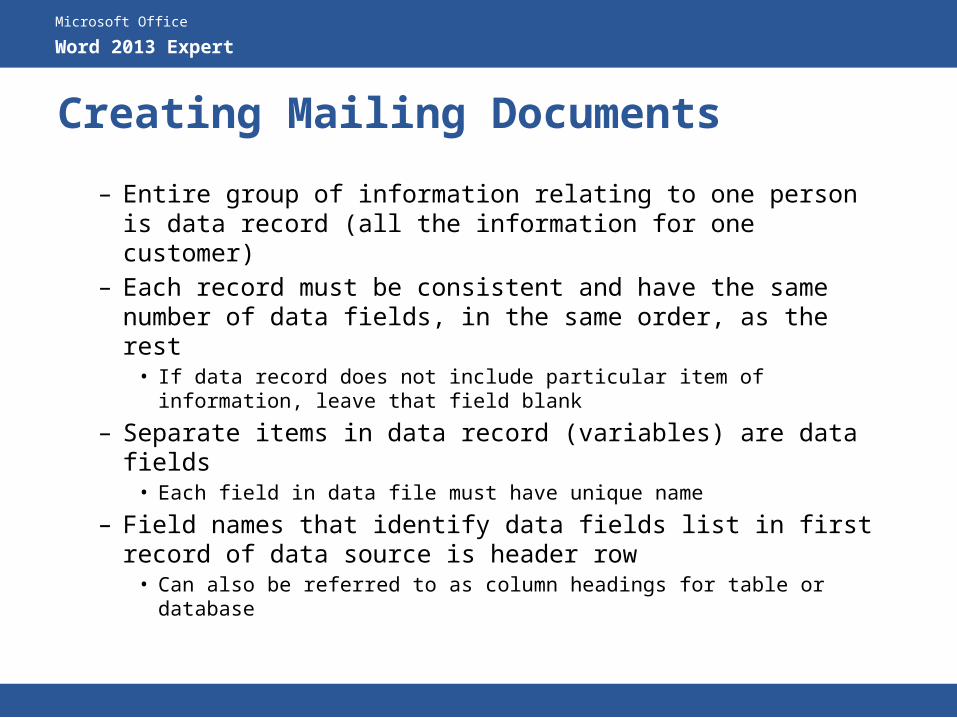
– Entire group of information relating to one person is data record (all the information for one customer)
– Each record must be consistent and have the same number of data fields, in the same order, as the rest• If data record does not include particular item of information,
leave that field blank
– Separate items in data record (variables) are data fields • Each field in data file must have unique name
– Field names that identify data fields list in first record of data source is header row• Can also be referred to as column headings for table or
database
Microsoft Office
Word 2013 Expert
Creating Mailing Documents
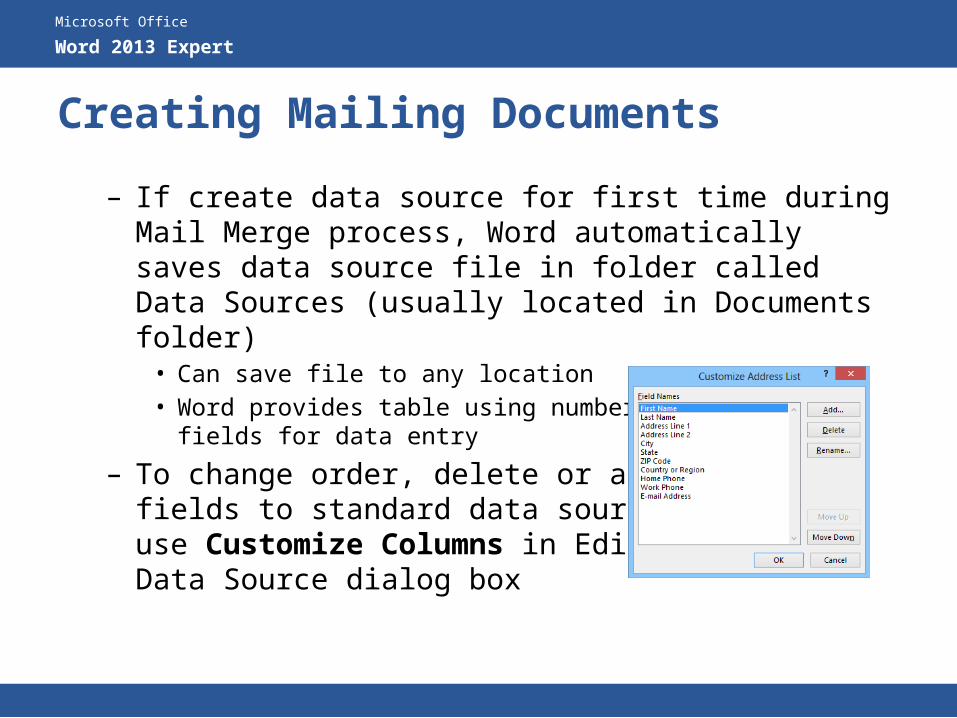
– If create data source for first time during Mail Merge process, Word automatically saves data source file in folder called Data Sources (usually located in Documents folder)• Can save file to any location• Word provides table using number of standard fields for
data entry
– To change order, delete or add newfields to standard data source form, use Customize Columns in Edit Data Source dialog box
Microsoft Office
Word 2013 Expert
Creating Mailing Documents
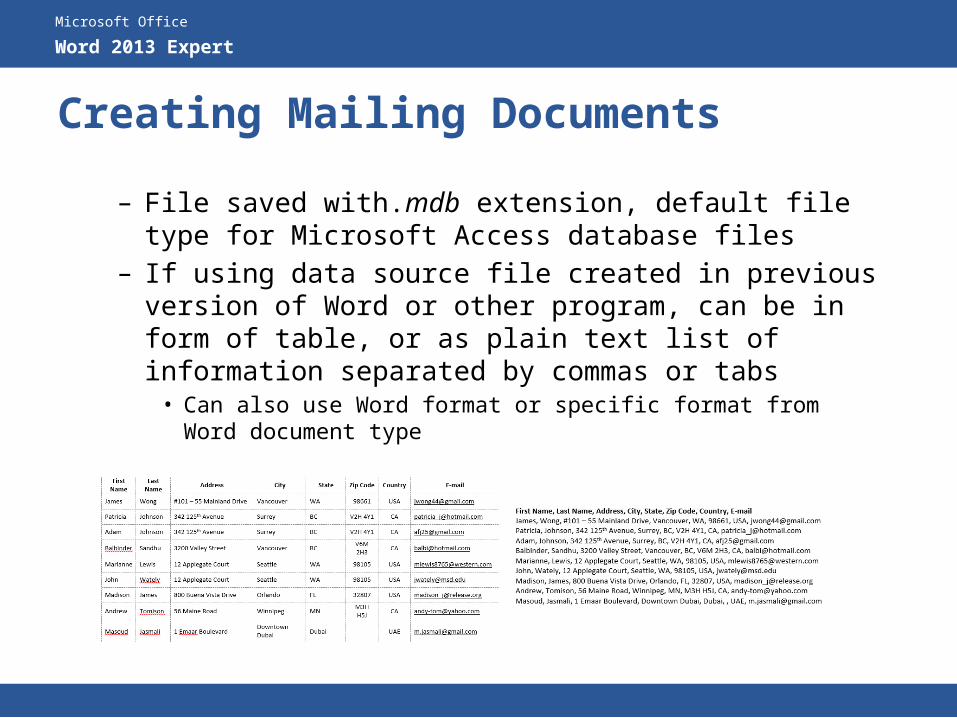
– File saved with.mdb extension, default file type for Microsoft Access database files
– If using data source file created in previous version of Word or other program, can be in form of table, or as plain text list of information separated by commas or tabs• Can also use Word format or specific format from Word
document type
Microsoft Office
Word 2013 Expert
Creating Mailing Documents
– To view information in data source at any time, on Mailings tab in Start Mail Merge group, click Edit Recipient List
– Consider very carefully how you enter information in data source
– By default, new data source created during mail merge process is created as address list • Word provides option of creating different fields or customizing default
fields during data source creation• Can also create data source in another format and select it during
merge process
– To change order of fields in data source, drag column heading to new location
– Can also use existing data from Word document, Excel worksheet, Access database, Outlook contacts, text files, or from XML format
Microsoft Office
Word 2013 Expert
Creating Mailing Documents
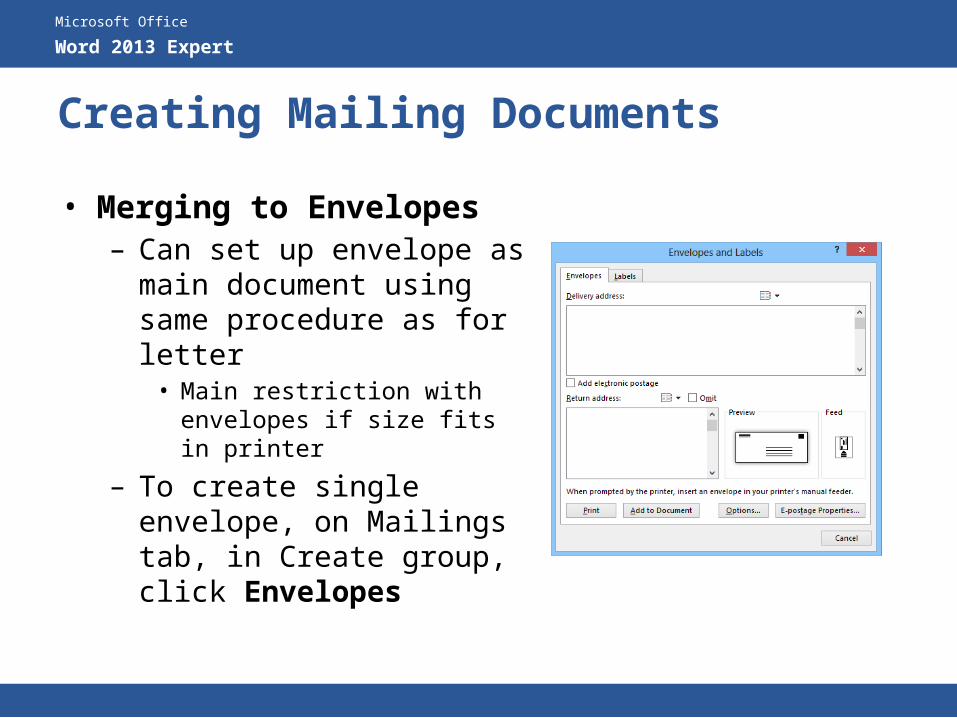
• Merging to Envelopes– Can set up envelope as
main document using same procedure as for letter• Main restriction with
envelopes if size fits in printer
– To create single envelope, on Mailings tab, in Create group, click Envelopes

Microsoft Office
Word 2013 Expert
Creating Mailing Documents
• Word sets envelope size to be 9”x5”size, and shows how envelope should be fed or inserted into printer– Use Options to change size of
envelope
Microsoft Office
Word 2013 Expert
Creating Mailing Documents
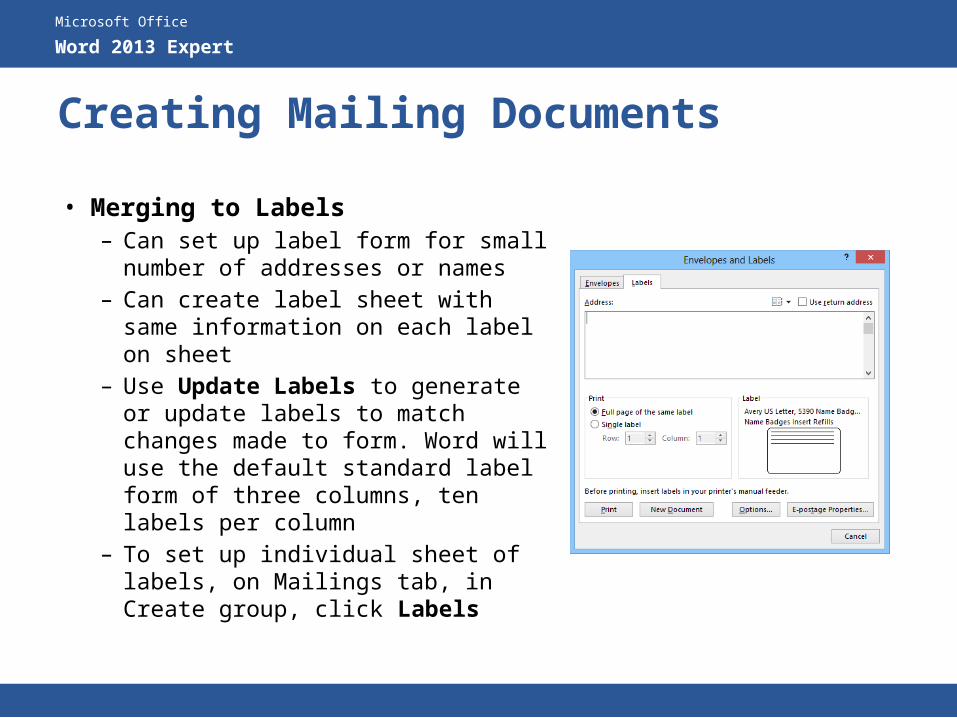
• Merging to Labels– Can set up label form for small
number of addresses or names– Can create label sheet with same
information on each label on sheet– Use Update Labels to generate
or update labels to match changes made to form. Word will use the default standard label form of three columns, ten labels per column
– To set up individual sheet of labels, on Mailings tab, in Create group, click Labels
Microsoft Office
Word 2013 Expert
Creating Mailing Documents
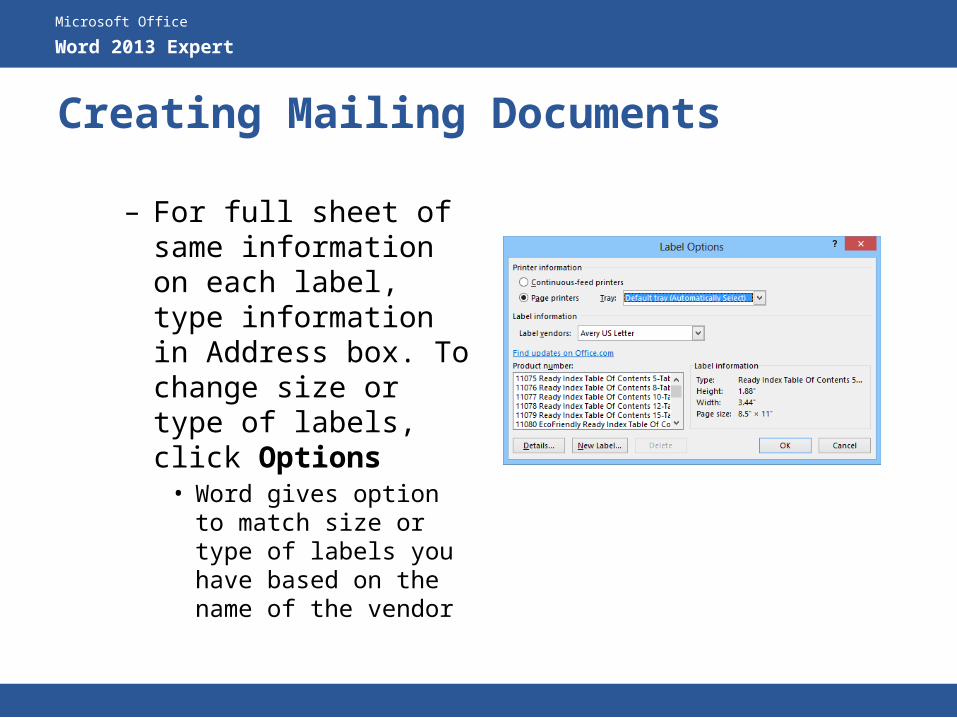
– For full sheet of same information on each label, type information in Address box. To change size or type of labels, click Options• Word gives option to
match size or type of labels you have based on the name of the vendor
Microsoft Office
Word 2013 Expert
Creating Mailing Documents
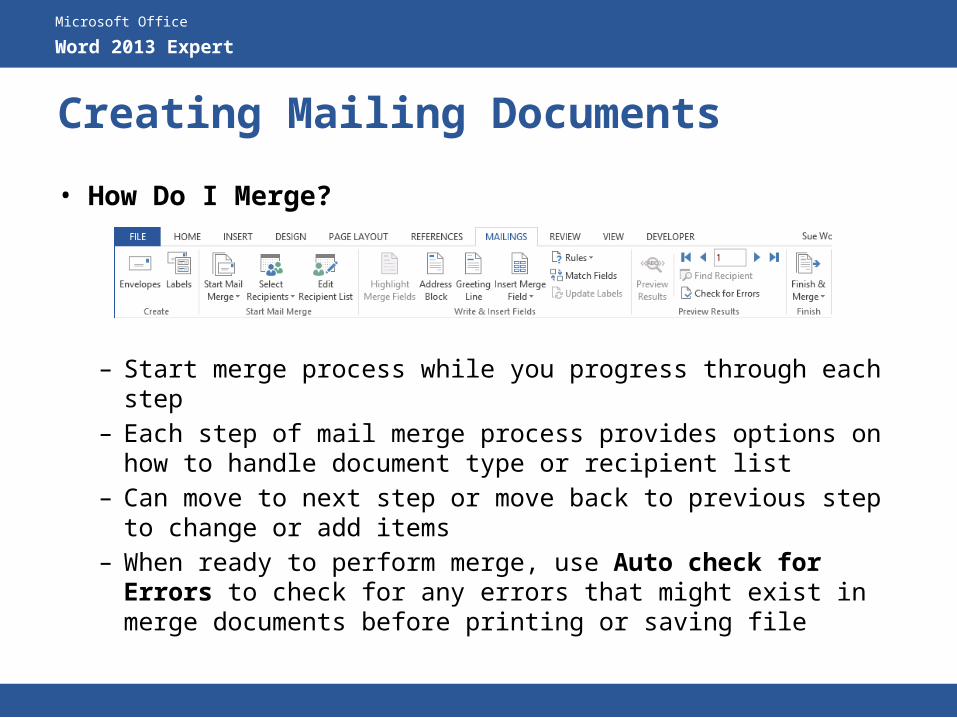
• How Do I Merge?
– Start merge process while you progress through each step
– Each step of mail merge process provides options on how to handle document type or recipient list
– Can move to next step or move back to previous step to change or add items
– When ready to perform merge, use Auto check for Errors to check for any errors that might exist in merge documents before printing or saving file
Microsoft Office
Word 2013 Expert
Creating Mailing Documents
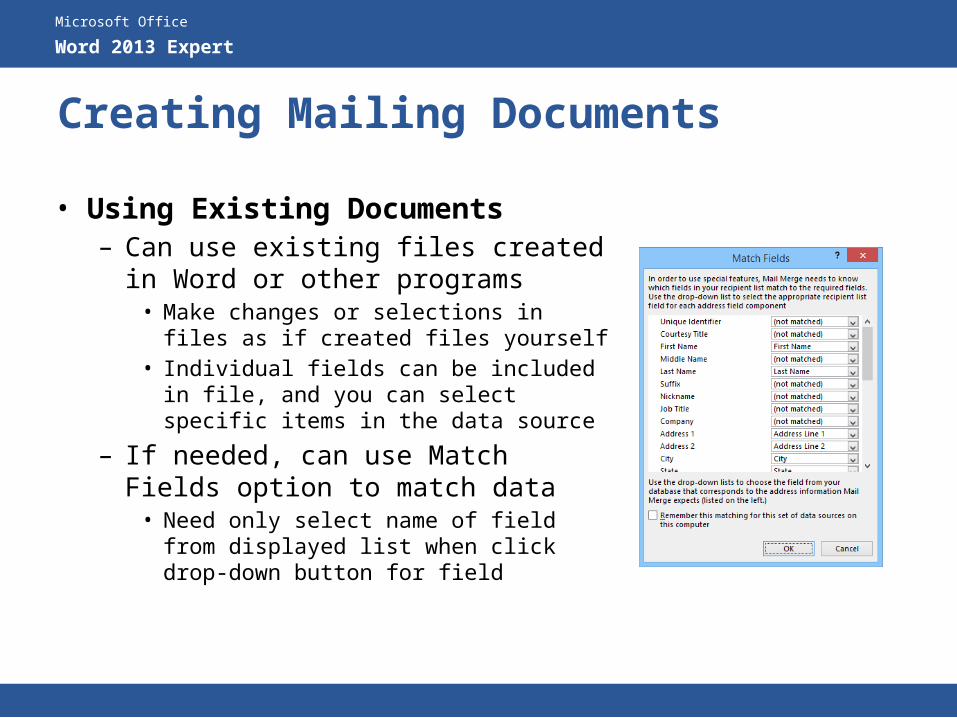
• Using Existing Documents– Can use existing files created in
Word or other programs• Make changes or selections in files
as if created files yourself• Individual fields can be included in
file, and you can select specific items in the data source
– If needed, can use Match Fields option to match data• Need only select name of field from
displayed list when click drop-down button for field
Microsoft Office
Word 2013 Expert
Setting Rules for Merges
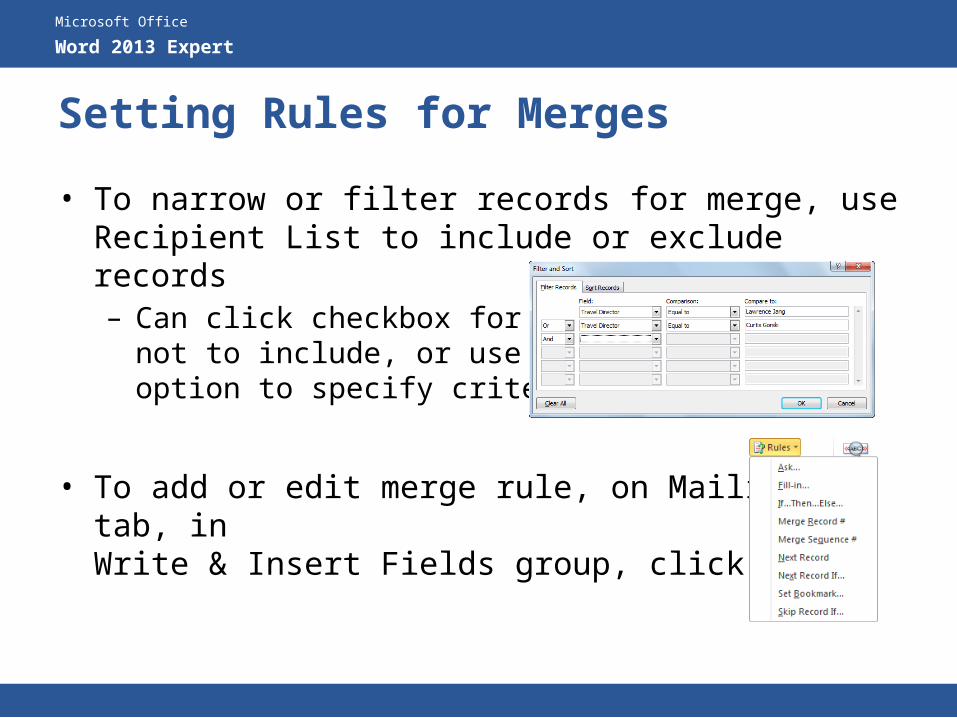
• To narrow or filter records for merge, use Recipient List to include or exclude records– Can click checkbox for record
not to include, or use Filter option to specify criteria
• To add or edit merge rule, on Mailings tab, in Write & Insert Fields group, click Rules
Microsoft Office
Word 2013 Expert
Setting Rules for Merges
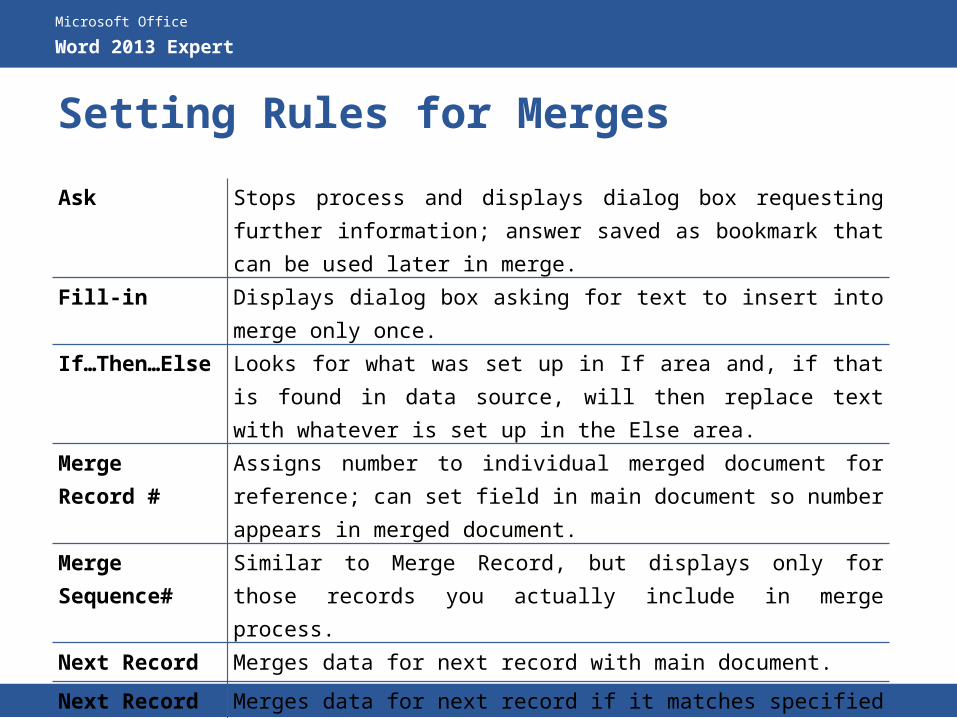
Ask Stops process and displays dialog box requesting further information; answer saved as bookmark that can be used later in merge.
Fill-in Displays dialog box asking for text to insert into merge only once.
If…Then…Else
Looks for what was set up in If area and, if that is found in data source, will then replace text with whatever is set up in the Else area.
Merge Record #
Assigns number to individual merged document for reference; can set field in main document so number appears in merged document.
Merge Sequence#
Similar to Merge Record, but displays only for those records you actually include in merge process.
Next Record Merges data for next record with main document.
Next Record If
Merges data for next record if it matches specified criteria.
Set Bookmark
Sets bookmark for text used frequently in main document; can change bookmark to use main document for another purpose.
Skip Record If
Skips this record if it matches specified criteria and continues merge with next record.
Microsoft Office
Word 2013 Expert
Creating Online Forms
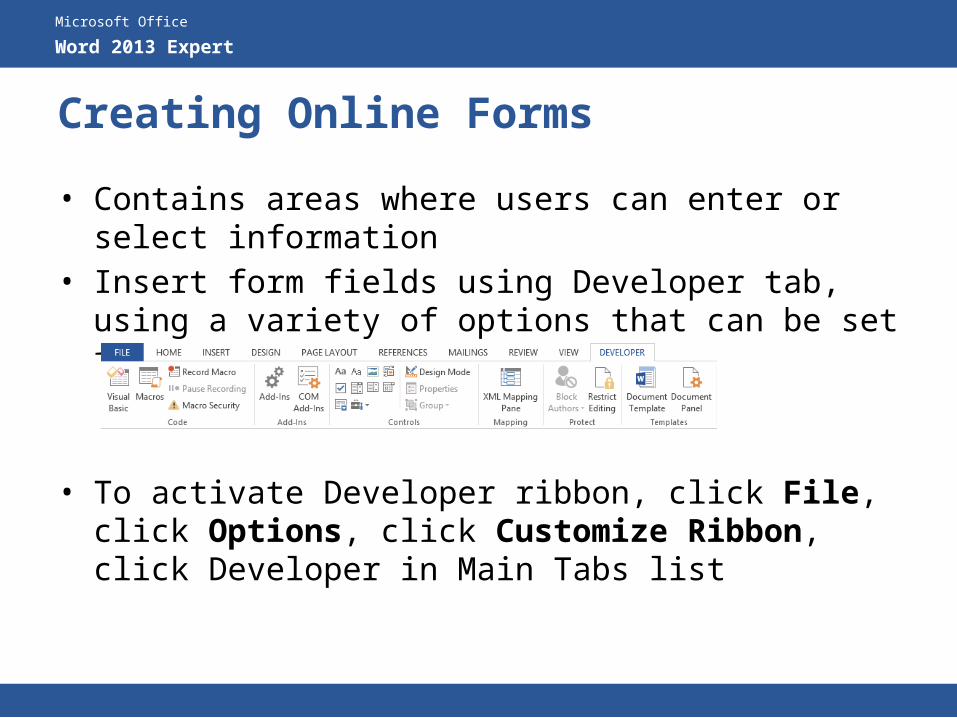
• Contains areas where users can enter or select information
• Insert form fields using Developer tab, using a variety of options that can be set for each form field
• To activate Developer ribbon, click File, click Options, click Customize Ribbon, click Developer in Main Tabs list
Microsoft Office
Word 2013 Expert
Creating Online Forms
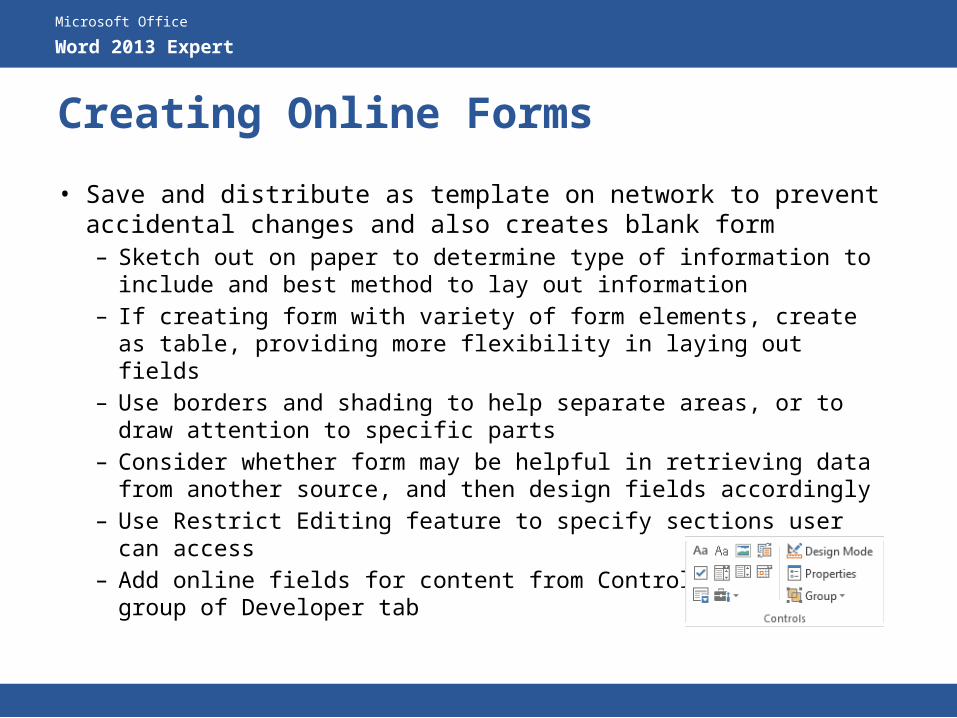
• Save and distribute as template on network to prevent accidental changes and also creates blank form– Sketch out on paper to determine type of information to
include and best method to lay out information– If creating form with variety of form elements, create as
table, providing more flexibility in laying out fields– Use borders and shading to help separate areas, or to draw
attention to specific parts– Consider whether form may be helpful in retrieving data
from another source, and then design fields accordingly– Use Restrict Editing feature to specify sections user can
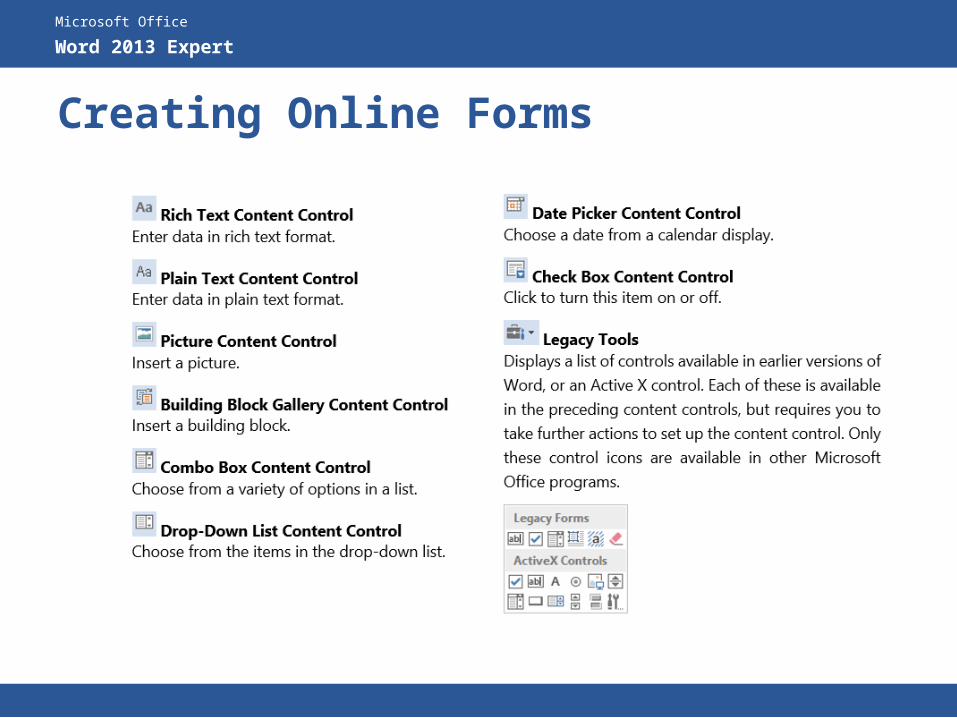
access– Add online fields for content from Controls
group of Developer tab
Microsoft Office
Word 2013 Expert
Creating Online Forms
Microsoft Office
Word 2013 Expert
Creating Online Forms
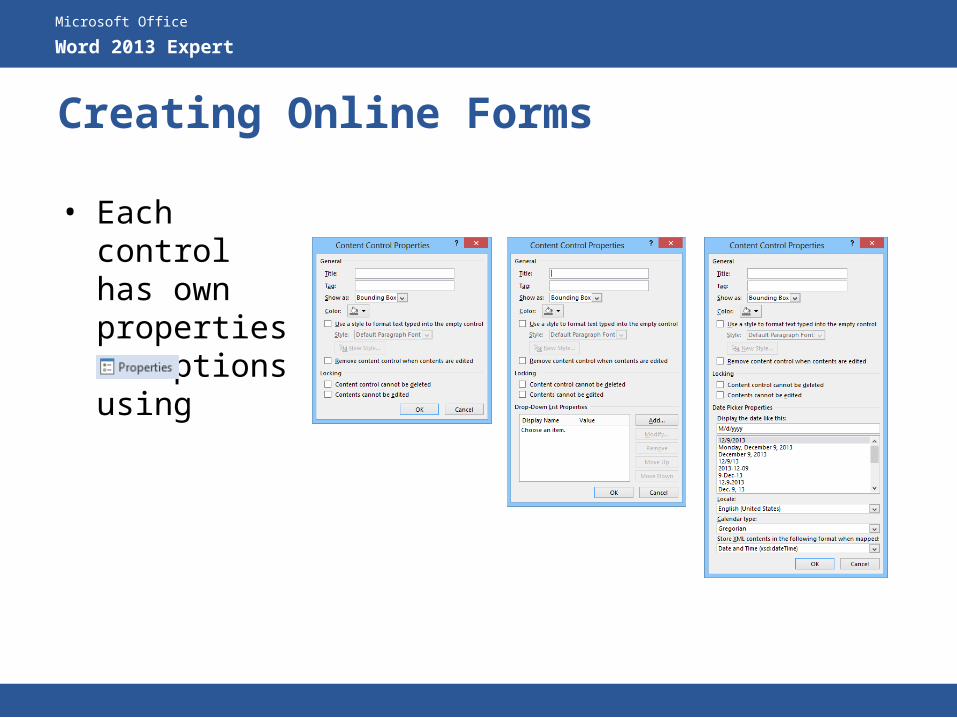
• Each control has own properties or options using
Microsoft Office
Word 2013 Expert
Creating Online Forms
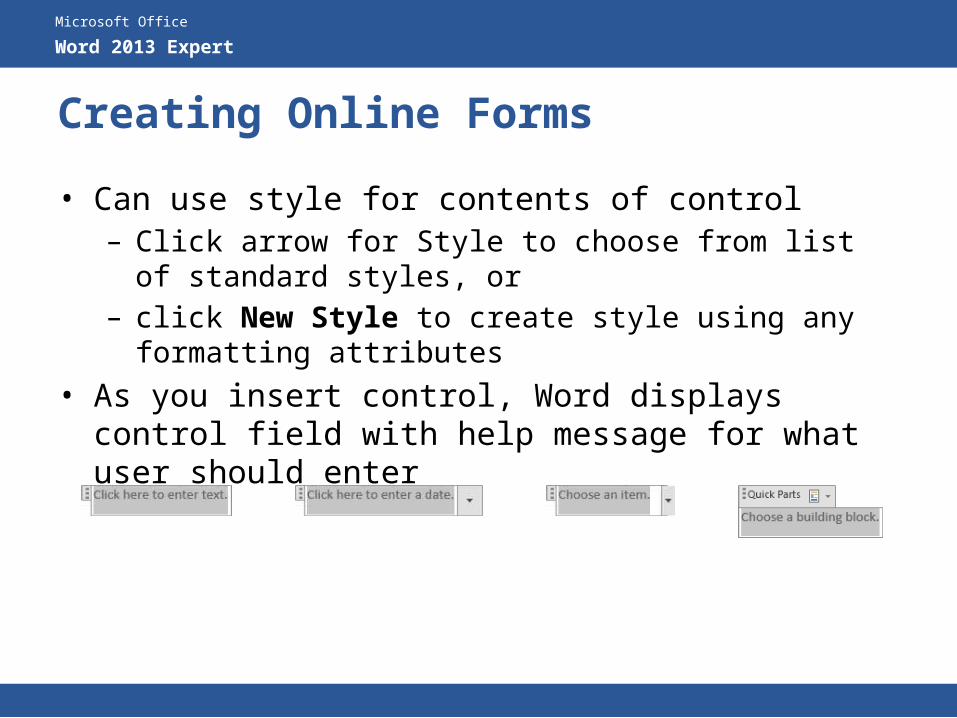
• Can use style for contents of control– Click arrow for Style to choose from list of standard
styles, or – click New Style to create style using any
formatting attributes• As you insert control, Word displays control field
with help message for what user should enter
Microsoft Office
Word 2013 Expert
Creating Online Forms
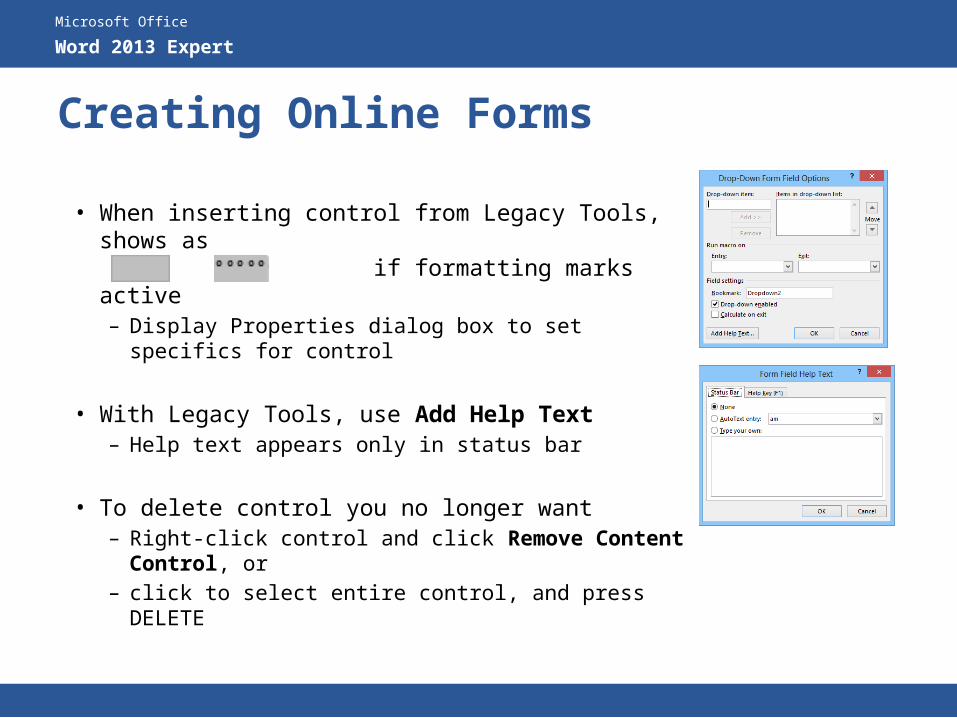
• When inserting control from Legacy Tools, shows as or if formatting marks active– Display Properties dialog box to set specifics
for control
• With Legacy Tools, use Add Help Text– Help text appears only in status bar
• To delete control you no longer want– Right-click control and click Remove
Content Control, or– click to select entire control, and press
DELETE
Microsoft Office
Word 2013 Expert
Creating Online Forms
• Locking the Form– To restrict form, click Developer tab, in Protect
Group, click Restrict Editing• In Editing restrictions area, click Allow only this type of
editing in the document and change option to Filling in forms
• Set password to protect document
– Can also use Restrict Editing from Review tab to protect form
– When need to make changes to form, unlock using password
Microsoft Office
Word 2013 Expert
Lesson Summary
• understand what a mass mailing is• understand what the main document and
recipient list are• perform a simple mass-mailing task• merge using envelopes or labels• insert fields into a blank form• use a customized form with fill-in fields• mark a document as final• lock a form to fill-in fields only
Microsoft Office
Word 2013 Expert
Review Questions
1. What is a mail merge?2. Describe the purpose of a Main Document and
the Data Source.3. Explain the following terms and how you would
use each in a data source:a. Data Record c. Header Rowb. Data Fields
4. What is the benefit of using <<Address Block>> instead of inserting individual fields such as <<First Name>>, <<Last Name>>, <<Address>>, <<City>>?
Microsoft Office
Word 2013 Expert
Review Questions
5. If you wanted a guide to take you through the merge process one step at a time, which option would you use?
6. How can you set up labels to have the same address appear in each of the labels on an individual label form?
7. When merging to labels, if you make a change to the first label, what do you need to do for all the labels to include the changes when the records are merged?
8. If you want Word to prompt you to enter data to insert into the merge document only once, which Rule would you use?
Microsoft Office
Word 2013 Expert
Review Questions
9. What’s the difference between Next Record and Next Record If?
10. How does an online form differ from a typical form?
11. Why should an online form be saved and distributed as a template on the network?
12. How can you lock the form?


![[MS-OFFDI]: Microsoft Office File Format Documentation ...MS... · Microsoft PowerPoint 2010 Microsoft PowerPoint 2013 Microsoft Word 97 Microsoft Word 2000 Microsoft Word 2002 Microsoft](https://img.dokumen.tips/doc/110x75/5ea61160271e716b297d501f/ms-offdi-microsoft-office-file-format-documentation-ms-microsoft-powerpoint.jpg)

![[MS-OFFDI]: Microsoft Office File Format Documentation … · 2017-09-19 · Microsoft Word 97 Microsoft Word 2000 Microsoft Word 2002 Microsoft Office Word 2003 Microsoft Office](https://img.dokumen.tips/doc/110x75/5edde022ad6a402d66691993/ms-offdi-microsoft-office-file-format-documentation-2017-09-19-microsoft-word.jpg)


![EXPERT SELECTIONS - Churchill Downs · 2017-05-26 · EXPERT SELECTIONS Joe Kristufek ... #2 Silver Wraith – Turf to dirt; ... Microsoft Word - joe052717[1].docx](https://img.dokumen.tips/doc/110x75/5b39938b7f8b9a40428ead18/expert-selections-churchill-downs-2017-05-26-expert-selections-joe-kristufek.jpg)