Embed Size (px)
Citation preview
MGB V8 Roadster restoration project – Report 144
V8 Register – MG Car Club 170611-V8-restoration-Mike-Macartney-Report-144 1
9th June 2017. BRAKE PIPES & FRONT SUSPENSION - continued
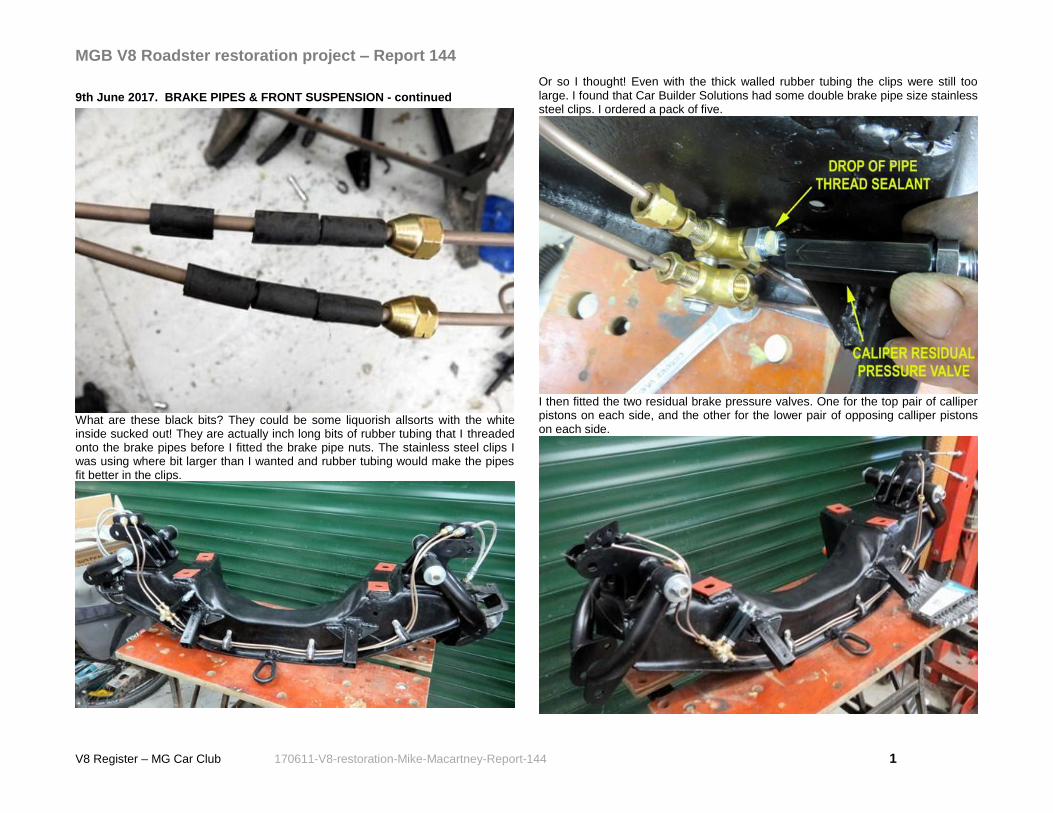
What are these black bits? They could be some liquorish allsorts with the white inside sucked out! They are actually inch long bits of rubber tubing that I threaded onto the brake pipes before I fitted the brake pipe nuts. The stainless steel clips I was using where bit larger than I wanted and rubber tubing would make the pipes fit better in the clips.
Or so I thought! Even with the thick walled rubber tubing the clips were still too large. I found that Car Builder Solutions had some double brake pipe size stainless steel clips. I ordered a pack of five.
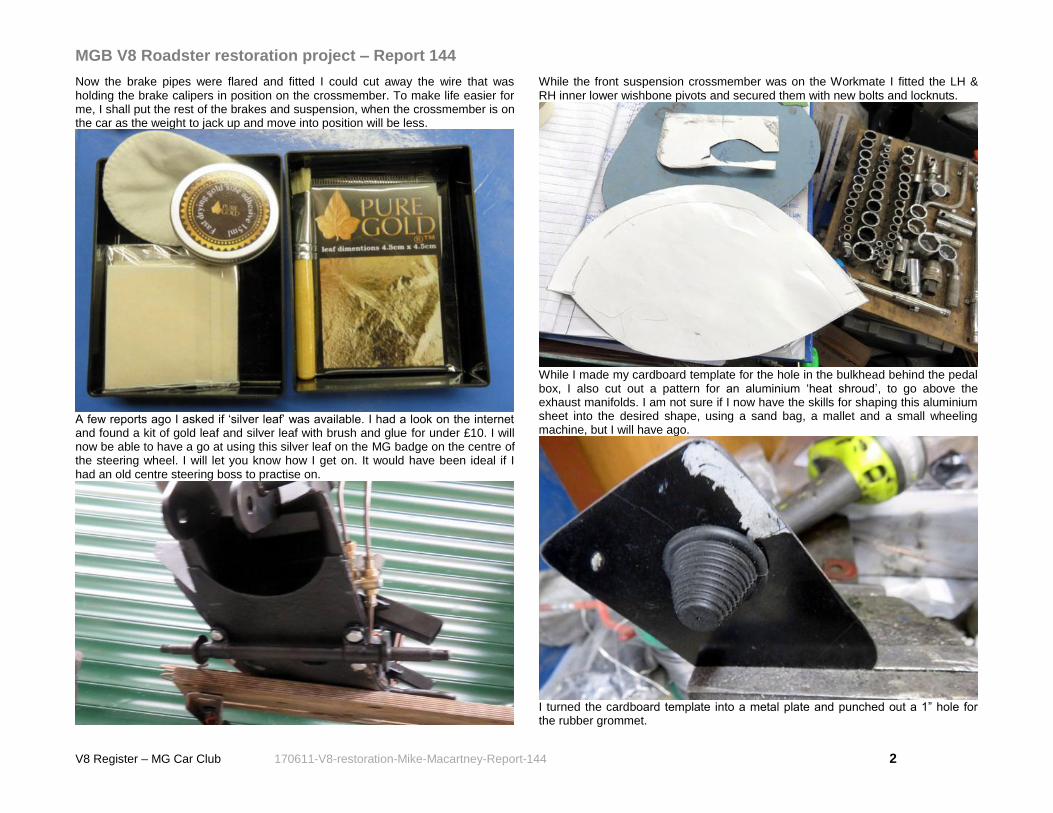
I then fitted the two residual brake pressure valves. One for the top pair of calliper pistons on each side, and the other for the lower pair of opposing calliper pistons on each side.
MGB V8 Roadster restoration project – Report 144
V8 Register – MG Car Club 170611-V8-restoration-Mike-Macartney-Report-144 2
Now the brake pipes were flared and fitted I could cut away the wire that was holding the brake calipers in position on the crossmember. To make life easier for me, I shall put the rest of the brakes and suspension, when the crossmember is on the car as the weight to jack up and move into position will be less.
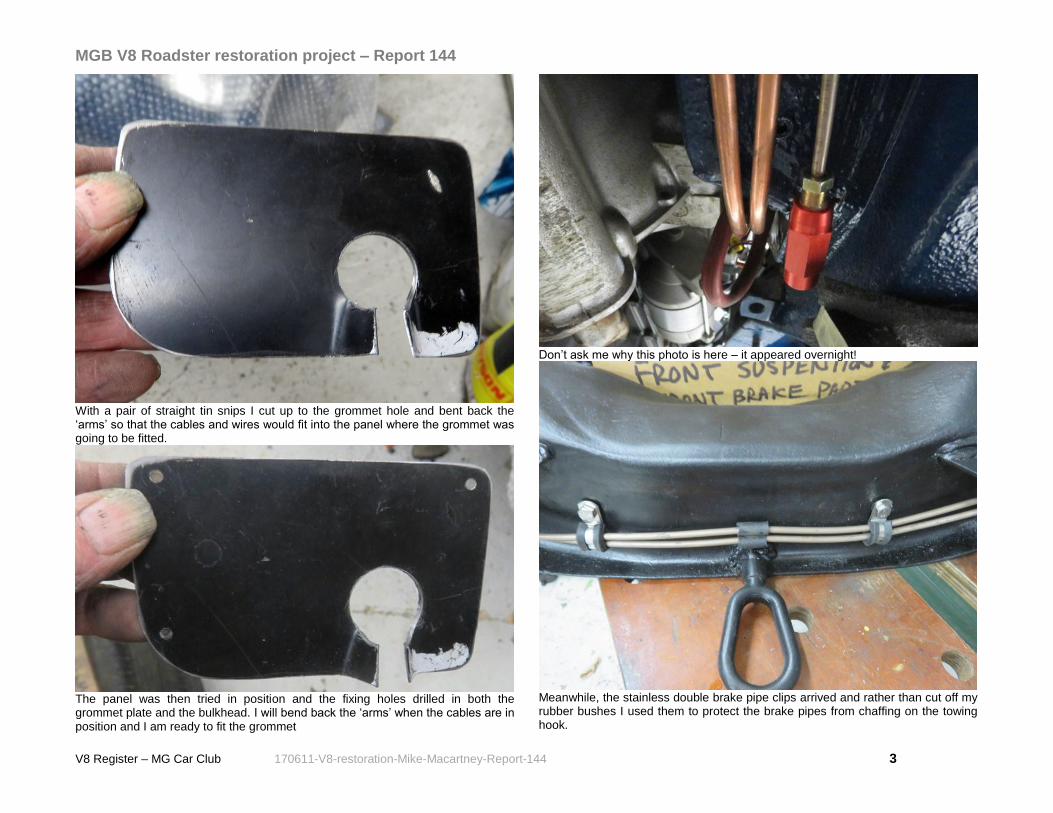
A few reports ago I asked if ‘silver leaf’ was available. I had a look on the internet and found a kit of gold leaf and silver leaf with brush and glue for under £10. I will now be able to have a go at using this silver leaf on the MG badge on the centre of the steering wheel. I will let you know how I get on. It would have been ideal if I had an old centre steering boss to practise on.
While the front suspension crossmember was on the Workmate I fitted the LH & RH inner lower wishbone pivots and secured them with new bolts and locknuts.
While I made my cardboard template for the hole in the bulkhead behind the pedal box, I also cut out a pattern for an aluminium ‘heat shroud’, to go above the exhaust manifolds. I am not sure if I now have the skills for shaping this aluminium sheet into the desired shape, using a sand bag, a mallet and a small wheeling machine, but I will have ago.
I turned the cardboard template into a metal plate and punched out a 1” hole for the rubber grommet.
MGB V8 Roadster restoration project – Report 144
V8 Register – MG Car Club 170611-V8-restoration-Mike-Macartney-Report-144 3
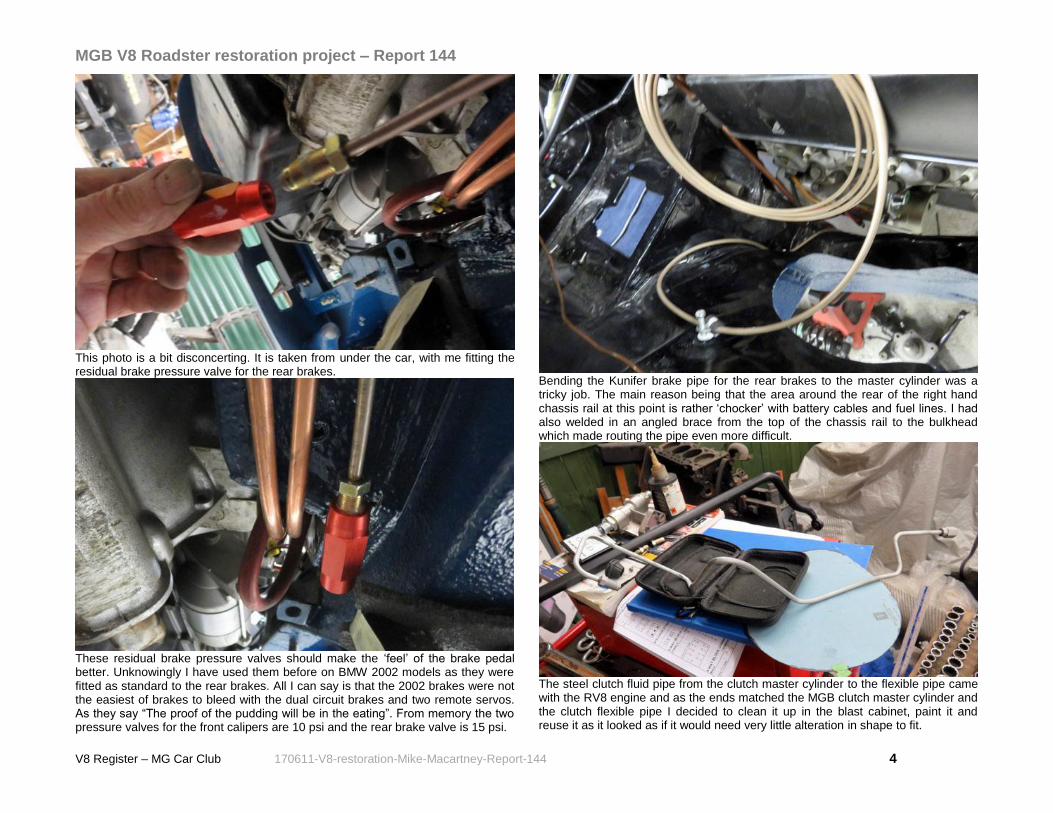
With a pair of straight tin snips I cut up to the grommet hole and bent back the ‘arms’ so that the cables and wires would fit into the panel where the grommet was going to be fitted.
The panel was then tried in position and the fixing holes drilled in both the grommet plate and the bulkhead. I will bend back the ‘arms’ when the cables are in position and I am ready to fit the grommet
Don’t ask me why this photo is here – it appeared overnight!
Meanwhile, the stainless double brake pipe clips arrived and rather than cut off my rubber bushes I used them to protect the brake pipes from chaffing on the towing hook.
MGB V8 Roadster restoration project – Report 144
V8 Register – MG Car Club 170611-V8-restoration-Mike-Macartney-Report-144 4
This photo is a bit disconcerting. It is taken from under the car, with me fitting the residual brake pressure valve for the rear brakes.
These residual brake pressure valves should make the ‘feel’ of the brake pedal better. Unknowingly I have used them before on BMW 2002 models as they were fitted as standard to the rear brakes. All I can say is that the 2002 brakes were not the easiest of brakes to bleed with the dual circuit brakes and two remote servos. As they say “The proof of the pudding will be in the eating”. From memory the two pressure valves for the front calipers are 10 psi and the rear brake valve is 15 psi.
Bending the Kunifer brake pipe for the rear brakes to the master cylinder was a tricky job. The main reason being that the area around the rear of the right hand chassis rail at this point is rather ‘chocker’ with battery cables and fuel lines. I had also welded in an angled brace from the top of the chassis rail to the bulkhead which made routing the pipe even more difficult.
The steel clutch fluid pipe from the clutch master cylinder to the flexible pipe came with the RV8 engine and as the ends matched the MGB clutch master cylinder and the clutch flexible pipe I decided to clean it up in the blast cabinet, paint it and reuse it as it looked as if it would need very little alteration in shape to fit.
MGB V8 Roadster restoration project – Report 144
V8 Register – MG Car Club 170611-V8-restoration-Mike-Macartney-Report-144 5
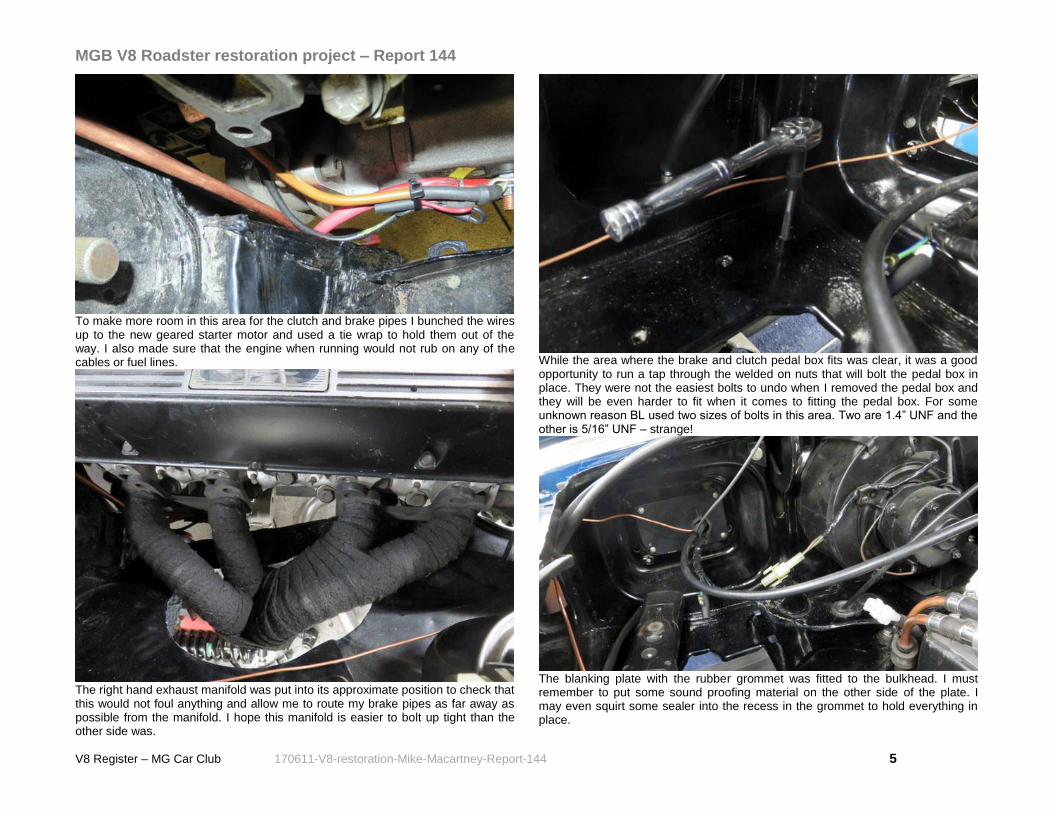
To make more room in this area for the clutch and brake pipes I bunched the wires up to the new geared starter motor and used a tie wrap to hold them out of the way. I also made sure that the engine when running would not rub on any of the cables or fuel lines.
The right hand exhaust manifold was put into its approximate position to check that this would not foul anything and allow me to route my brake pipes as far away as possible from the manifold. I hope this manifold is easier to bolt up tight than the other side was.
While the area where the brake and clutch pedal box fits was clear, it was a good opportunity to run a tap through the welded on nuts that will bolt the pedal box in place. They were not the easiest bolts to undo when I removed the pedal box and they will be even harder to fit when it comes to fitting the pedal box. For some unknown reason BL used two sizes of bolts in this area. Two are 1.4” UNF and the other is 5/16” UNF – strange!
The blanking plate with the rubber grommet was fitted to the bulkhead. I must remember to put some sound proofing material on the other side of the plate. I may even squirt some sealer into the recess in the grommet to hold everything in place.
MGB V8 Roadster restoration project – Report 144
V8 Register – MG Car Club 170611-V8-restoration-Mike-Macartney-Report-144 6
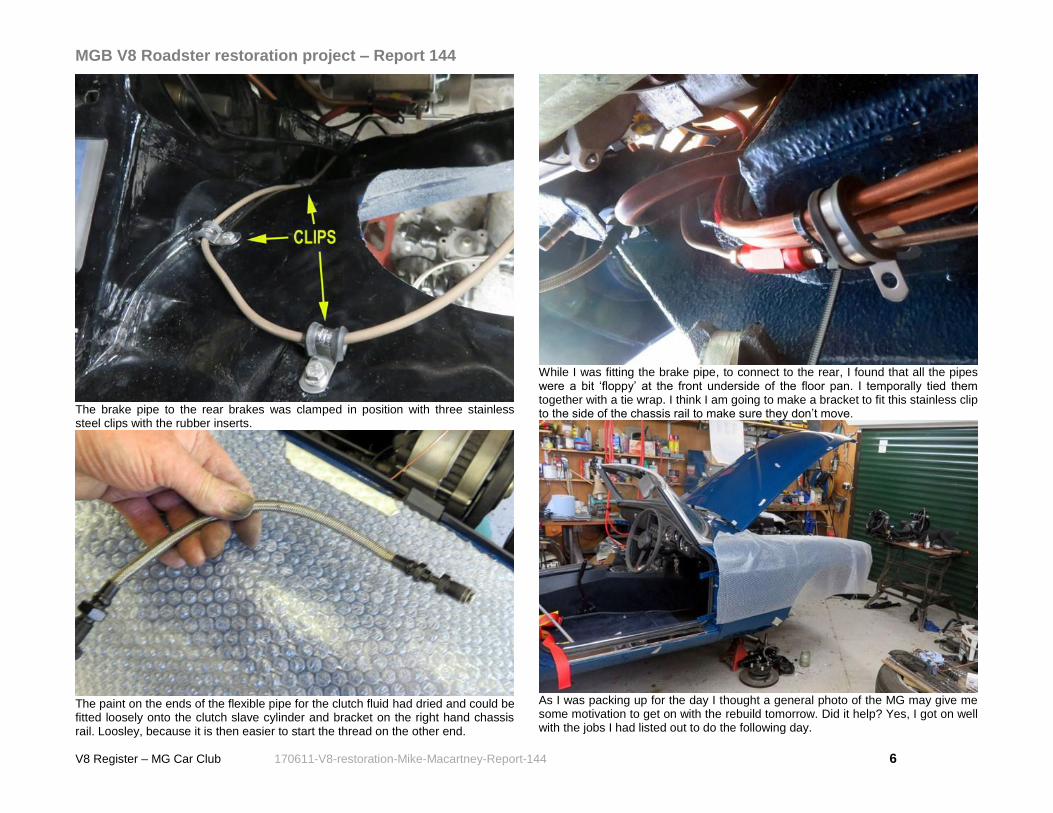
The brake pipe to the rear brakes was clamped in position with three stainless steel clips with the rubber inserts.
The paint on the ends of the flexible pipe for the clutch fluid had dried and could be fitted loosely onto the clutch slave cylinder and bracket on the right hand chassis rail. Loosley, because it is then easier to start the thread on the other end.
While I was fitting the brake pipe, to connect to the rear, I found that all the pipes were a bit ‘floppy’ at the front underside of the floor pan. I temporally tied them together with a tie wrap. I think I am going to make a bracket to fit this stainless clip to the side of the chassis rail to make sure they don’t move.
As I was packing up for the day I thought a general photo of the MG may give me some motivation to get on with the rebuild tomorrow. Did it help? Yes, I got on well with the jobs I had listed out to do the following day.
MGB V8 Roadster restoration project – Report 144
V8 Register – MG Car Club 170611-V8-restoration-Mike-Macartney-Report-144 7
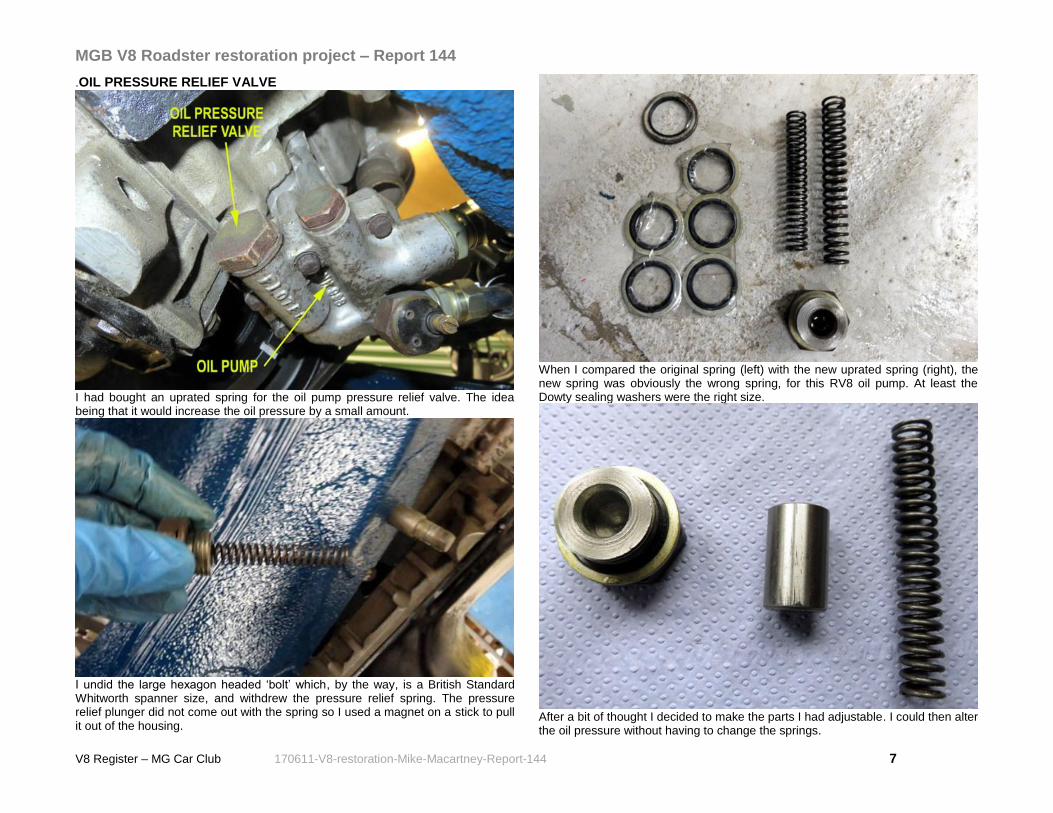
.OIL PRESSURE RELIEF VALVE
I had bought an uprated spring for the oil pump pressure relief valve. The idea being that it would increase the oil pressure by a small amount.
I undid the large hexagon headed ‘bolt’ which, by the way, is a British Standard Whitworth spanner size, and withdrew the pressure relief spring. The pressure relief plunger did not come out with the spring so I used a magnet on a stick to pull it out of the housing.
When I compared the original spring (left) with the new uprated spring (right), the new spring was obviously the wrong spring, for this RV8 oil pump. At least the Dowty sealing washers were the right size.
After a bit of thought I decided to make the parts I had adjustable. I could then alter the oil pressure without having to change the springs.
MGB V8 Roadster restoration project – Report 144
V8 Register – MG Car Club 170611-V8-restoration-Mike-Macartney-Report-144 8
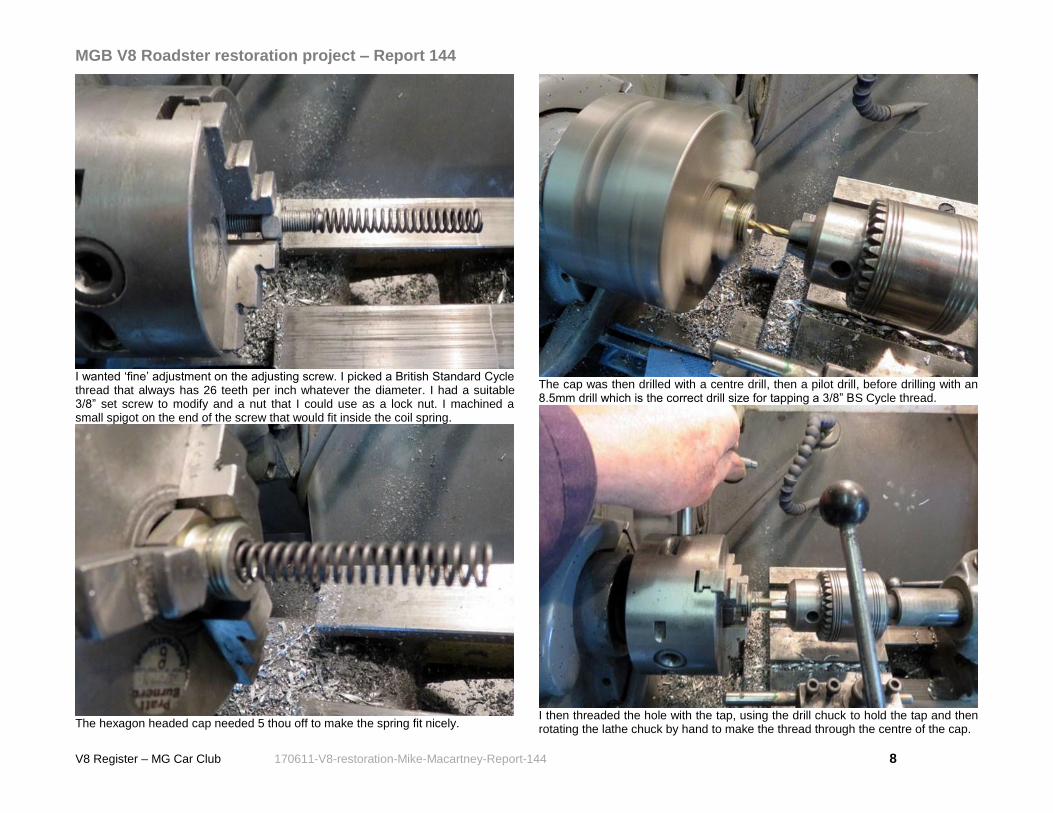
I wanted ‘fine’ adjustment on the adjusting screw. I picked a British Standard Cycle thread that always has 26 teeth per inch whatever the diameter. I had a suitable 3/8” set screw to modify and a nut that I could use as a lock nut. I machined a small spigot on the end of the screw that would fit inside the coil spring.
The hexagon headed cap needed 5 thou off to make the spring fit nicely.
The cap was then drilled with a centre drill, then a pilot drill, before drilling with an 8.5mm drill which is the correct drill size for tapping a 3/8” BS Cycle thread.
I then threaded the hole with the tap, using the drill chuck to hold the tap and then rotating the lathe chuck by hand to make the thread through the centre of the cap.
MGB V8 Roadster restoration project – Report 144
V8 Register – MG Car Club 170611-V8-restoration-Mike-Macartney-Report-144 9
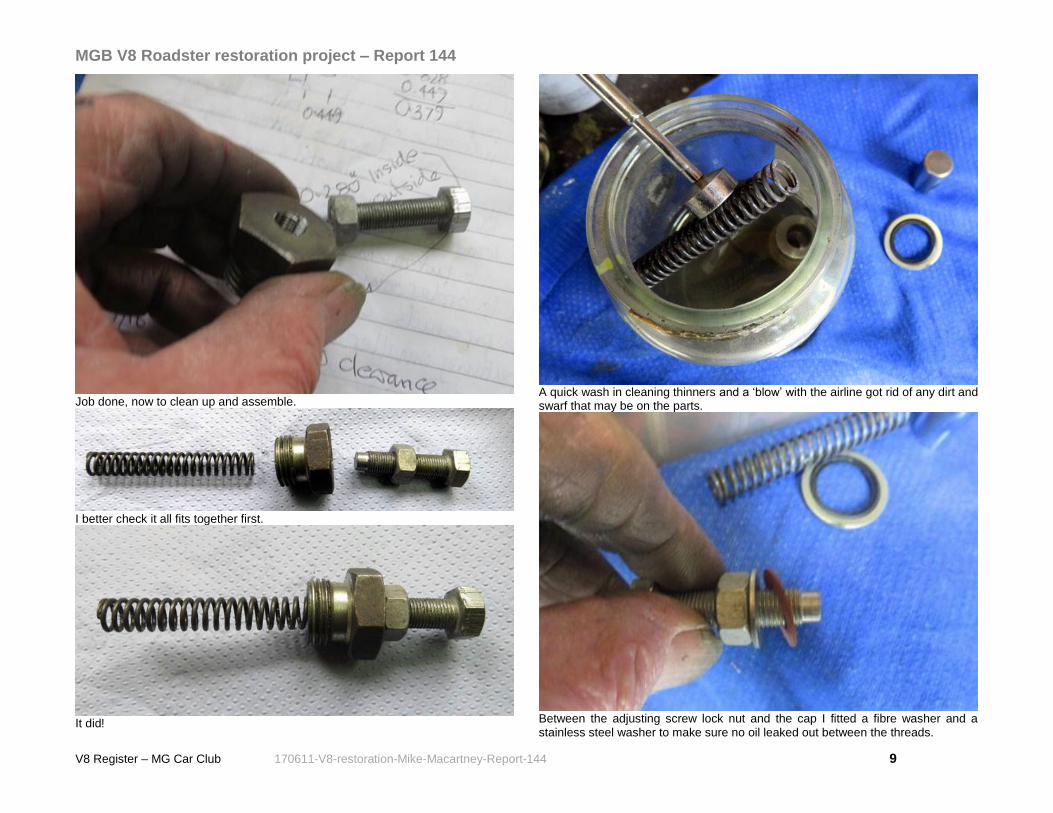
Job done, now to clean up and assemble.
I better check it all fits together first.
It did!
A quick wash in cleaning thinners and a ‘blow’ with the airline got rid of any dirt and swarf that may be on the parts.
Between the adjusting screw lock nut and the cap I fitted a fibre washer and a stainless steel washer to make sure no oil leaked out between the threads.
MGB V8 Roadster restoration project – Report 144
V8 Register – MG Car Club 170611-V8-restoration-Mike-Macartney-Report-144 10
I set the spring at the standard length for the time being. When I want to increase the oil pressure I would loosen the lock nut. Screw in the bolt head at the left hand end until the desired oil pressure was reached and then tighten up the lock nut.
The modified adjustable oil pressure relief valve fitted back inside the oil pump housing.
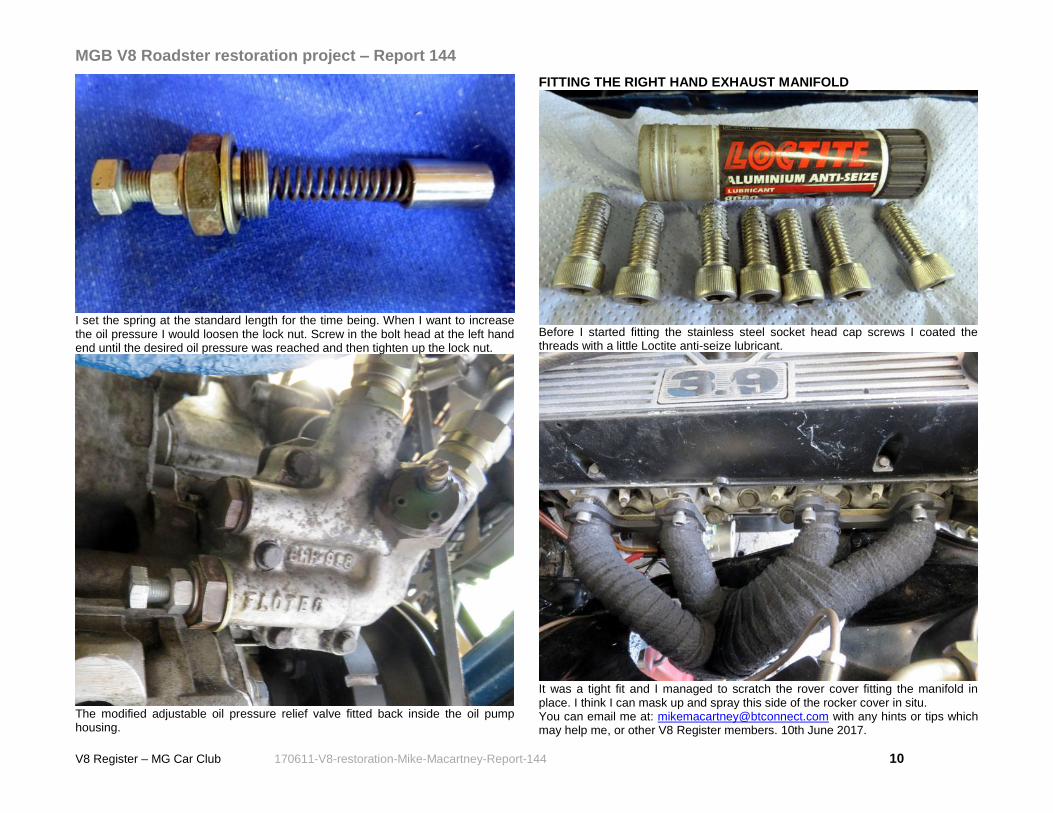
FITTING THE RIGHT HAND EXHAUST MANIFOLD
Before I started fitting the stainless steel socket head cap screws I coated the threads with a little Loctite anti-seize lubricant.
It was a tight fit and I managed to scratch the rover cover fitting the manifold in place. I think I can mask up and spray this side of the rocker cover in situ. You can email me at: [email protected] with any hints or tips which may help me, or other V8 Register members. 10th June 2017.