Embed Size (px)
Citation preview

Measuring and Designing our Garden or
Ages 4 and up (one 30-45 minute session)
Objectives: To explore the space that will be the garden from an imaginary “bird’s eye” view,
To begin to realize the diversity of plant life in the world,
To understand what we usually plant in our zone and why,
To learn that there is a place for creativity in the garden.
To understand and learn about spatial relationships
To learn how to use a tape measure, and what units of measure are.
Materials: Large piece of drawing paper for each of the children
Colored pencils or crayons and double sided tape,
A map of the US or a globe,
Chalk board or something large for the teacher to work on in front of the class,
Lots of seed catalogs that can be cut up for the sake of education.
Scissors for everyone
Measuring tape
Large wooden pot labels
Set up: Set out the seed catalogs. Take a walk into the garden with the children to measure its parameters.
Place double sided tape in long strips on drawing paper to simulate rows in the garden.
Part One: Allow the children to measure several things with the tape measure (a fence, themselves, or
buildings). Have them pull it out completely to see how far it will go. Ask the children if they know
how long an inch is.
Show them the garden plot or the proposed space for the garden. Put a few wooden pot labels on
the corners to mark the area. Show them how to measure the garden and count along with them to
find out its measurements.
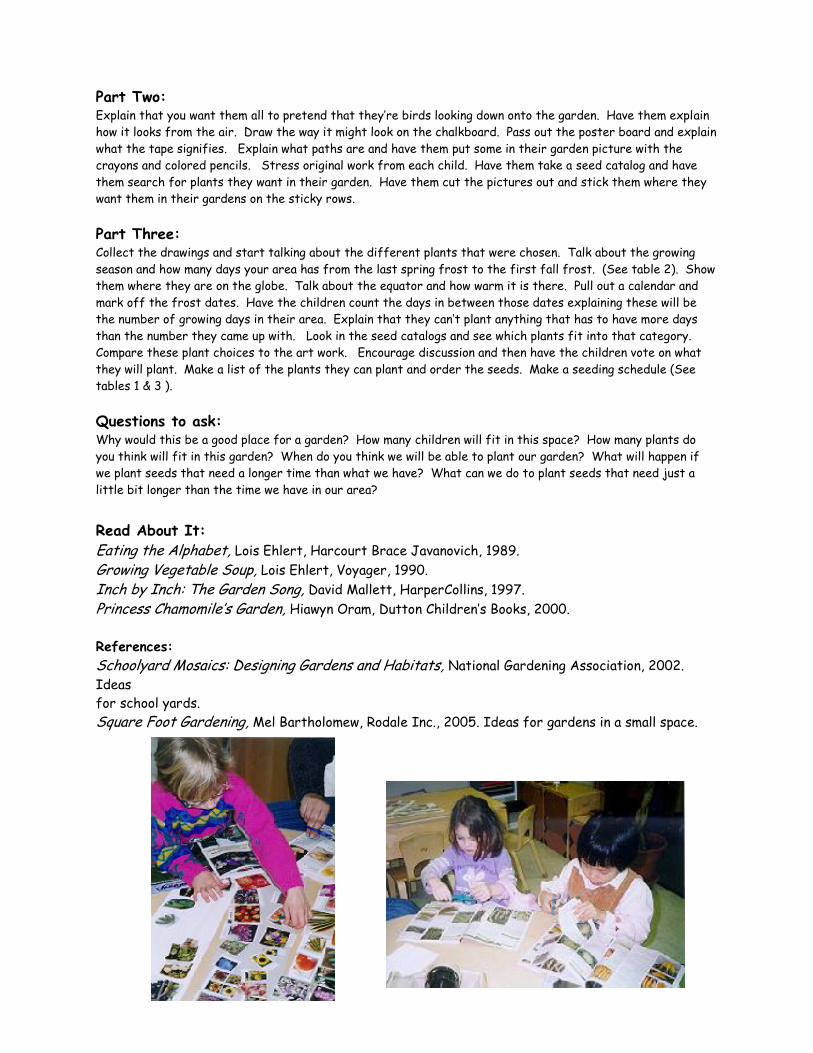
Part Two: Explain that you want them all to pretend that they’re birds looking down onto the garden. Have them explain
how it looks from the air. Draw the way it might look on the chalkboard. Pass out the poster board and explain
what the tape signifies. Explain what paths are and have them put some in their garden picture with the
crayons and colored pencils. Stress original work from each child. Have them take a seed catalog and have
them search for plants they want in their garden. Have them cut the pictures out and stick them where they
want them in their gardens on the sticky rows.
Part Three: Collect the drawings and start talking about the different plants that were chosen. Talk about the growing
season and how many days your area has from the last spring frost to the first fall frost. (See table 2). Show
them where they are on the globe. Talk about the equator and how warm it is there. Pull out a calendar and
mark off the frost dates. Have the children count the days in between those dates explaining these will be
the number of growing days in their area. Explain that they can’t plant anything that has to have more days
than the number they came up with. Look in the seed catalogs and see which plants fit into that category.
Compare these plant choices to the art work. Encourage discussion and then have the children vote on what
they will plant. Make a list of the plants they can plant and order the seeds. Make a seeding schedule (See
tables 1 & 3 ).
Questions to ask: Why would this be a good place for a garden? How many children will fit in this space? How many plants do
you think will fit in this garden? When do you think we will be able to plant our garden? What will happen if
we plant seeds that need a longer time than what we have? What can we do to plant seeds that need just a
little bit longer than the time we have in our area? Read About It: Eating the Alphabet, Lois Ehlert, Harcourt Brace Javanovich, 1989.
Growing Vegetable Soup, Lois Ehlert, Voyager, 1990.
Inch by Inch: The Garden Song, David Mallett, HarperCollins, 1997.
Princess Chamomile’s Garden, Hiawyn Oram, Dutton Children’s Books, 2000.
References:
Schoolyard Mosaics: Designing Gardens and Habitats, National Gardening Association, 2002.
Ideas
for school yards.
Square Foot Gardening, Mel Bartholomew, Rodale Inc., 2005. Ideas for gardens in a small space.
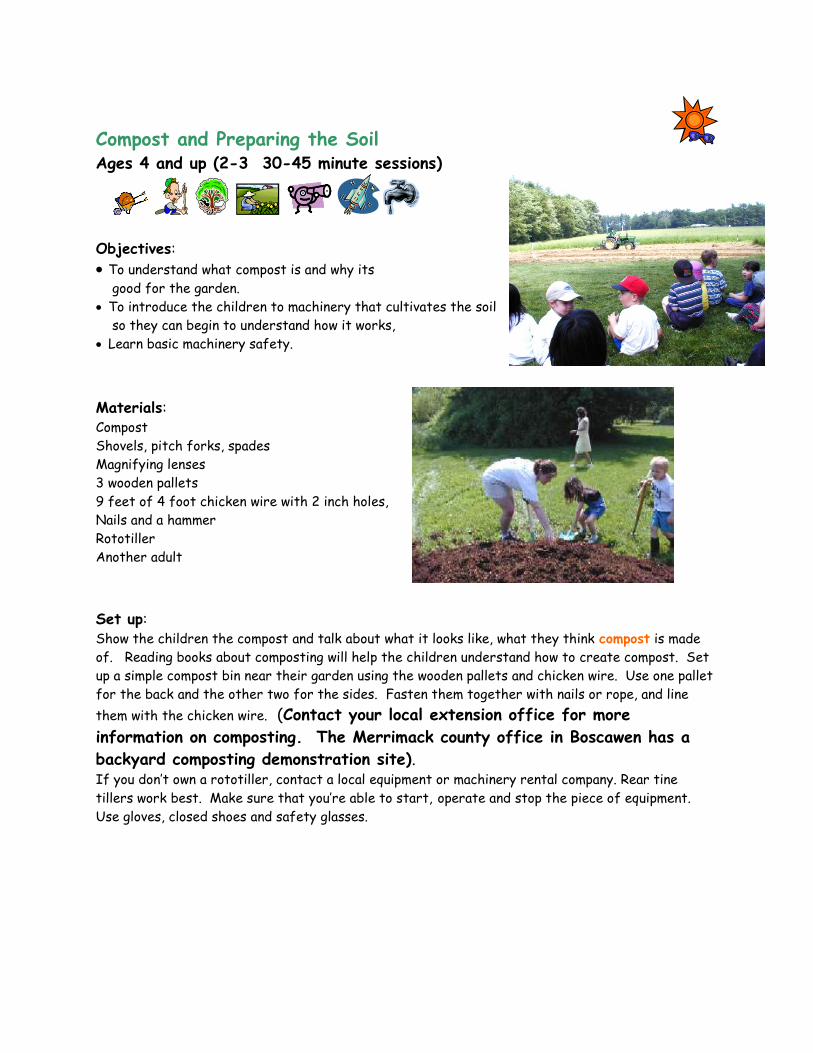
Compost and Preparing the Soil Ages 4 and up (2-3 30-45 minute sessions)
Objectives:
To understand what compost is and why its good for the garden.
To introduce the children to machinery that cultivates the soil
so they can begin to understand how it works,
Learn basic machinery safety.
Materials: Compost
Shovels, pitch forks, spades
Magnifying lenses
3 wooden pallets
9 feet of 4 foot chicken wire with 2 inch holes,
Nails and a hammer
Rototiller
Another adult
Set up: Show the children the compost and talk about what it looks like, what they think compost is made
of. Reading books about composting will help the children understand how to create compost. Set
up a simple compost bin near their garden using the wooden pallets and chicken wire. Use one pallet
for the back and the other two for the sides. Fasten them together with nails or rope, and line
them with the chicken wire. (Contact your local extension office for more
information on composting. The Merrimack county office in Boscawen has a
backyard composting demonstration site). If you don’t own a rototiller, contact a local equipment or machinery rental company. Rear tine
tillers work best. Make sure that you’re able to start, operate and stop the piece of equipment.
Use gloves, closed shoes and safety glasses.

Part One: Encourage the children to dig into the compost. Talk about what they see in the compost (worms
and many different kinds of bugs). Have them count of the number of worms they find. Many of
the children understand the concept of the worm castings being good for the plants and garden.
Begin to move the compost pile to the garden with
shovels, pitch forks and other tools. Try setting up a
bucket brigade with the children. It might spice up the
chore at hand. Several days may be needed to move the
compost and spread it out on the garden area.
Part Two:
Talk about why we prepare soil for planting. Talk about
what would happen if the soil wasn’t turned over in the
spring. Cut a square foot of soil out of the untilled
garden and show the kids how compacted it is. Talk
about water getting through it. Talk about where the roots will be as the plants grow. Explain what
a rototiller does.
Part Three: Have a helper bring the children to a safe distance to
observe the machinery at work. Till about half the plot.
Stop the equipment. Allow the children to come out and
explore the newly tilled soil. Talk about how it’s
changed. Have the children feel the difference between
the tilled soil and untilled soil.
Part Four: Add a worm composting bin in the classroom,
kitchen or outside. As an experiment add things that
won’t compost, like a plastic cup. Have the children see the difference. Ask them to make
predictions.
Questions to ask: How does compost help our plants? Why do the worms like the compost so much? Why is compost
good for the environment? What is humus? Why is it good to compost our yard and food wastes?
What do the tines on the tiller look like? Which soil do you think the plants will like the best?
Glossary: Compost: Compost is made of many things like grass, leaves, stable waste and food wastes. These
ingredients decompose over time and turn into humus.
Humus: the rich dark nutrient rich soil layer of your garden.
Castings: droppings/ manure.

Activities: Set up a worm composting lab in the classroom. Supplies available from the National
Gardening Association.
Make Dirt Pudding –(see Reference Section - Recipes)
Read About It: Compost! Growing Gardens from Your Garbage, Linda Glaser, Sagebrush, 2001.
Dirt: Jump Into Science, National Geographic Children’s, 2002.
A Handful of Dirt, Raymond Bial, Walker & Co., 2000.
Mud, Mary Lyn Ray, Voyager, 2001
One Small Square Backyard, Donald M. Silver, W. H. Freeman & Co., 1993.
Slop!, Margaret Read MacDonald, Fulcrum Kids, 1997.
References Let it Rot! Gardener’s Guide to Composting, Stu Campbell, Storey Pub., 1998.
Worms Eat My Garbage, Mary Appelhof, Flower Press, 1997..
Worms Eat Our Garbage: Classroom Activities, Mary Appelhof, Mary Frances Fenton,
Barbara Loss Harris, Flower Press, 1993.

Planting the Garden
Ages 3 and up (many 30-45 minute sessions
until the entire garden is planted).
Objectives: To learn how to plant (depth and size of holes for plants
or seeds)
To understand how to space plants for healthy growth
To becoming aware of proper use of tools in the garden
To become aware of the garden paths.
Materials: Plants and seeds
Gardening tools (trowels for everyone and a hoe)
Pot labels
Washable and permanent markers
Another adult.
Set up: Create the garden paths. (We used landscape fabric for paths).
Ready the rows to be planted before the children come out to help.
When planting with young children, try to get the help of another
adult. One adult can supervise the taking of plants and seeds. The
other adult can help the children do the planting.
For each plant, create two labels with a matching symbol that children can easily recognize. Place
one label in the container of the plant to be planted and the matching label in its garden location.
Talk to the children about the symbols and matching before they join you in the garden. Allow the
children to match the pot symbol to the location symbol in the garden. Take them on a garden path
walk, and ask them to be aware of their bodies in the garden.
Part One: The children should choose their plants and find the location
where they should be planted. Explain how large they should
make the hole. Talk about different spacing for different
plants. Do they know why the tomatoes are spaced so far
apart? If plants are spaced too closely they won’t have what
they need to grow, will become weak and may get diseased. If
plants are spaced too far apart, more weeds will grow. (See
table 1 for proper plant spacing).

Part Two: After the plants are transplanted into the garden, start sowing seeds. Explain how deep different
seeds should be planted, following the packet directions. Sow a few extra seeds that will be thinned
out later. Make labels with permanent markers to show where seeds have been sown.
Part Three: Thoroughly water all the transplants and
seeds. Clean up all the tools and put them
away. Wash hands and reminisce.
Questions to ask: Why did you choose this plant? What type of
plant are you planting? How big does the hole
need to be for that plant? Do you remember why we can’t plant seeds too deep? What do seeds
need to germinate? Why do we pat the seeds down once we plant them? Why do we water
everything after we plant it? How long will it take for the seeds to come up through the ground?
Why don’t the roots grow up and leaves grow down? What will happen if we put a plant in the
ground upside down? (Try it!) Why are worms good for the soil? What is the name of the tool you
are using? Why should we clean up our tools after we are through planting?
Read About It: Eddie’s Garden & How to Make Things Grow, Sarah Garland, Frances Lincoln, 2004.
How the Groundhog’s Garden Grew, Lynne Cherry, Blue Sky Press, 2003.

Weeding and Mulching Ages 3 and up (3-4 sessions of 30-45 minutes)
Objectives: To learn about the benefits of mulching the garden
To distinguishing weeds from desired plants,
To become aware of plant characteristics,
To understanding what makes a weed, a weed.
Mulch reduces the amount of weeding and hoeing that will
have to be done in the garden. When mulch decomposes, it
can add organic matter to the soil. It can warm the soil
for an earlier start, or keep it cool in hot weather. Mulch helps conserve moisture and prevents the
possibility of erosion. There are several different choices for mulch, choose whatever works best
for your garden. This may require research on your part for what is available in your area. We
chose salt marsh hay, because it was available in our area and doesn’t contain weed seeds.
See table 6 for the pros and cons of different mulches.
Materials: Hay bales, or other mulch,
Wheel barrow or 5 gallon buckets for carrying the mulches.
Part One: After the bales of salt-marsh hay were delivered, we allowed the children to jump off them and
play. The children adjusted to the smell of the hay (it smells salty or musty). Talk about the
benefits of mulching and what weeds are. Go on a weed hunting expedition.
Part Two: Demonstrate how to spread the mulch around the plants then supervise the fun.
Questions to ask: Do you know what weeds are?
How can we eliminate the weeds in the garden besides
mulching? Could we step on them all? Pull them up?
Why does covering weeds with mulch stop them
from growing?
What is another reason that it’s good to mulch a
garden?
Activity: Make paint brushes with hay as a material. Be aware that some children may have allergies.

A Dirty Job
Ages 4 and up (two 60 minute sessions)
Objectives: To show the water holding capacities of different garden soils and learn the affects those
capacities can have on plant growth.
To gain some understanding of soils and how it maintains plant life.
Can be used with section 5.2 to learn about toads.
Materials: Source of Heavy Clay soil (clay can be bought in
a craft store and used if clay soil isn’t available).,
Three, gallon size, zip lock bags filled with
different soils: One with sandy loam, one with sand,
and one with clay
Dry grass clippings
5 gallon bucket
3 Clear plastic cups or soda bottles
Sticks and stuff for decorating
Water
Paper towels
Several plastic dish pans; one for every two children.
Set up: Dig up clay from the ground and place it in a 5 gallon bucket. Add water to smooth it out and mix it
up. Remove any debris and life forms like rocks, sticks and worms.
Find two other kinds of soil, preferably sandy loam and sand. Put some of each in the zip lock bags.
Put holes in the bottom of the plastic containers.
Part One: Encourage the children to explore the differences in the soils. Talk about water holding capacities
of different soils. Put the three different kinds of soil in the clear paper cups and put them side by
side on paper towels. Talk to the children about how fast or slow water goes through soil. Talk
about how water mixes or dissolves nutrients in soil. Explain how that nutrient rich water is taken
up by plants. Use the stop watch to time a few cups of water draining through the different soils
in the plastic cups. If you couldn’t get a stop watch, or for more excitement, have the children
count and record what number they got to before the water came out the bottom each cup. Talk
about which kind of soil might be best or bad for plants and why.

Part Two: Introduce the idea of using the clay soil to create adobe and introduce what adobe means and what
it is used for. Make toad houses or other garden art out of the adobe by passing out dish pans to
groups of two, dividing the clay up among the children and encourage them to get their hands dirty.
Amend the clay with the grass clippings to provide added strength. A ratio of 2:1 clay to clippings
works well. Divide the amended clay up evenly among the children. Have fun creating and
constructing. Place the creations in the sunshine to dry. When they are completely dry, have your
little gardeners choose a special place for their masterpieces to reside for the summer.
Questions to ask: What is dirt made of? How do plants get the nutrients from soil? Why does water move so fast
through sand? What does transpiration mean? Where do the nutrients in the soil come from?
Activity: At snack time drink with straws, a good way to demonstrate how water is taken up and roots
function.
Read About It: Frogs and Toads, Bobbie Kalman and Tammy Everts, Crabtree Pub., Co., 1994.
Frog and Toad Together, Arnold Lobel, HarperTrophy, 1979.
From Tadpole to Frog, Wendy Pfeffer and Holly Keller, Harper Collins, 1994.

Pinching and Deadheading
Ages 3 and up (one 30-45 minute session)
Objectives: To understand what “going to seed” means,
To show a plants response to pinching and deadheading,
To learn proper maintenance of the garden,
To encourage observation.
Materials: Scissors,
A bucket for carrying flowers,
A bucket for the spent flower heads,
Jars or vases filled with water
Part One: Take a walk into the garden and show the children the nodes
on a flowering plant. Explain that they are going to cut
their plants just above a node. Talk about what might happen
when they do this and what the benefits may be. Next find
plants in the garden with spent flowers. Explain their next
task will be deadheading Both of these techniques encourage
more branching and growth. Explain that if they don’t
deadhead the plants will go to seed and stop flowering. Show
the children how to carry out the activity and then allow
them to cut and deadhead.
Part Two: Bring the cut flowers indoors and add them to the vases with water for everyone to enjoy.
Questions to ask: Why do plants flower? What will happen if the spent flowers are left on the plant? What will
happen when we cut the flowers? If we let the spent flowers go to seed, can we plant those seeds
to grow more flowers? If the plants branch more will they produce more flowers? How can we
keep the cut flowers fresh indoors? How long do they think the flowers will last indoors? Why?

Glossary: Node: the point where leaves grow on the stem of a plant.
Internode: The space on the stem between each node.
Deadheading: act of removing a flower which has begun to wilt or die.
Activities: Make a weaving frame in the garden. (See Reference Section –You Make It, for diagram).
Warp up the frame with baler twine or string. Have children use any long weeds and
prunings to weave.
Over and under,
In and out,
That’s what weaving,
Is all about.
Tuck the spent flowers into the weaving. This can be added to each day. When the frame
is full, the weaving can be cut from the frame, dried and brought inside for decoration.
Use flowers for a still life painting in the classroom.
Use tweezers and magnifying glasses to dissect old flowers that have gone to seed; this
works well with older sunflowers.
How do flowers take up water with no roots? Put a white carnation in a glass of water with
food coloring and watch the color change.

Harvesting
Ages 2 and up (many 30-45 minute sessions)
Materials: Scissors
Baskets
Paint chips
Large wooden plant labels,
Hole punch
Set up: Go to a hardware store and get paint chips in a variety of “ripe” colors.
Punch holes in the paint chips and attach them to the wooden plant
labels. Place them in the garden with the plant that is ripe when it is
that corresponding color. For example: Tomatoes are ripe when they
are red.
Part One: Start by explaining the colored labels. Instruct the children to pick only those fruits that match
the colors on the paint chips. Show them that each kind of plant has a different color. Show them
what you mean by picking one ripe fruit from each vegetable choice. Don’t get upset if they pick
unripe produce.
As all of you work in the garden re-enforce the
difference between ripe and unripe fruit by
pointing out examples. Enjoy all your hard work
by making a salad and cooking some of the
vegetables. Send the produce home with the
children so they can share their experiences with
their parents. If possible, share some of the
harvest with less fortunate folks.
Objectives: To understand the difference
between ripe and unripe produce
To learn the joy of sharing

Questions to ask: What would happen if the seeds in the ripe fruit were dried and planted?
What would happen if we picked our tomatoes before they’re ripe?
Why does fruit ripen? Read a book about fried green tomatoes.
Activities:
Read the story Stone Soup and make Stone Soup with each child contributing
something from the garden. You may want to take the children to a local Farmer’s Market to see all the ripe vegetables
and fruits for sale.
If you have planted pumpkins, carve or decorate them for the Harvest Festival.
Have a fall Harvest Celebration and invite families to see the results of all your efforts.
Read About It: Stone Soup
Bone Button Borscht, Aubrey Davis, Kids Can Press, 1995. (Eastern European version)
Button Soup, Doris Orgel, Banta, 1994
Pea Soup Fog, Connie Macdonald Smit, Down East Books, 2004 (Includes a recipe for pea soup)
Stone Soup, Ann McGovern, Scholastic, 1968.
Stone Soup, Heather Forest, August House LittleFolk, 1998. (Includes a recipe.)
Stone Soup, Jon J. Muth, Scholastic Press, 2003. (An Asian tale)
Stone Soup, Marcia Brown, Aladdin, 1997.
Tumbleweed Stew, Susan Stevens Crummel, Green Light Readers, 2000. (Includes a snack recipe)
Pumpkins
From Seed to Pumpkin, Wendy Pfeffer, HarperCollins Pub., 2004. (Includes a recipe for
roasted pumpkin seeds.)
Pumpkin Blanket, Deborah T. Zagwyn, Tricycle Press, 1997.
Pumpkin Book, Gail Gibbons, Holiday House, 2000.
Pumpkin Circle, George Levenson, Tricycle Press, 1999.
Pumpkins, Jacqueline Farmer, Charlesbridge, 2004.
Pumpkins: A Story for a Field, Mary Lyn Ray, Voyager, 1996
Pumpkin Fiesta, Caryn Yacowitz, HarperCollins Pub., 1998 (Includes a recipe)
Pumpkin, Pumpkin, Jeanne Titherington, Greenwillow Books, 1986.
Pumpkin Soup, Helen Cooper, Farrar Strauss Giroux, 1998. (Includes a recipe)
Too Many Pumpkins, Linda White, Holiday House, 1997.
Markets
Farmers’ Market, Paul Brett Johnson, Orchard Books, 1997.
Market!, Ted Lewin, HarperTrophy, 1996
Market Day, Eve Bunting, Joanna Colter Books, 1996.
Market Day, Lois Ehlert, Harcourt, Inc., 2000.

Market Days: From Market to Market Around the World, Marti Shohet, BridgeWater
Books, 1995.
To Market, To Market, Anne Miranda, Harcourt, Inc. 1997.
Resources: Kids' Pumpkin Projects, Deanna F. Cook, Williamson Pub. Co.,1998.
The Perfect Pumpkin, Gail Damerow, Storey Communications, 1997.
Making flour from groats.
Where there’s a will there’s a way!
Pride in a job well done!