Embed Size (px)
DESCRIPTION
American Red Cross First Aid Instructor's Manual CPR AED
Citation preview
First Aid/CPR/AED Instructor’s Manual
First A
id/C
PR
/AE
D | Instructor’s M
anual

American Red Cross First Aid/CPR/AED
Instructor’s Manual
This instructor’s manual is part of the American Red Cross First Aid/CPR/AED program. Visit redcross.org to learn more about this program.
The emergency care procedures outlined in this book reflect the standard of knowledge and accepted emergency practices in the United States at the time this book was published. It is the reader’s responsibility to stay informed of changes in emergency care procedures.
PLEASE READ THE FOLLOWING TERMS AND CONDITIONS BEFORE AGREEING TO ACCESS AND DOWNLOAD THE AMERICAN RED CROSS MATERIALS. BY DOWNLOADING THE MATERIALS, YOU HEREBY AGREE TO BE BOUND BY THE TERMS AND CONDITIONS.
The downloadable electronic materials, including all content, graphics, images and logos, are copyrighted by and the exclusive property of The American National Red Cross (“Red Cross”). Unless otherwise indicated in writing by the Red Cross, the Red Cross grants you (“recipient”) the limited right to download, print, photocopy and use the electronic materials, subject to the following restrictions:
■■ The recipient is prohibited from reproducing the materials for any reason.
■■ The recipient is prohibited from creating electronic versions of the materials.
■■ The recipient is prohibited from revising, altering, adapting or modifying the materials.
■■ The recipient is prohibited from creating any derivative works incorporating, in part or in whole, the content of the materials.
■■ The recipient is prohibited from downloading the materials and putting them on their own website without Red Cross permission.
Any rights not expressly granted herein are reserved by the Red Cross. The Red Cross does not permit its materials to be reproduced or published without advance written permission from the Red Cross. To request permission to reproduce or publish Red Cross materials, please submit your written request to The American National Red Cross.
Copyright © 2014 by The American National Red Cross. All rights reserved.
The Red Cross emblem, American Red Cross® and the American Red Cross logo are trademarks of The American National Red Cross and protected by various national statutes.
Published by StayWell Health & Safety Solutions
Printed in the United States of America
ISBN: 978-1-58480-625-7
This manual is dedicated to the thousands of employees and volunteers of the American Red Cross
who contribute their time and talent to supporting and teaching life-saving skills worldwide and to the
thousands of course participants and other readers who have decided to be prepared to take action
when an emergency strikes.
This manual reflects the 2010 Consensus on Science for CPR and Emergency Cardiovascular Care (ECC) and the Guidelines 2010 for First Aid. These treatment recommendations and related training guidelines have been reviewed by the American Red Cross Scientific Advisory Council, a panel of nationally recognized experts in fields that include emergency medicine, occupational health, sports medicine, school and public health, emergency medical services (EMS), aquatics, emergency preparedness and disaster mobilization.
The American Red Cross First Aid/CPR/AED Instructor’s Manual was developed through the dedication of both employees and volunteers. Their commitment to excellence made this manual possible.
ACknowlEDgmEnTs
Acknowledgments iii
the american red cross team for this edition included:
Guidance and support were provided by the following individuals:
Jean ErdtmannSenior DirectorProgram Development and Sales Support
Jennifer DeibertManagerProgram Development
Ted T. Crites, CHES Manager, Technical Development First Aid, CPR, AED Programs
John HendricksonProject ManagerSales Support
Gina GunnProject ManagerSales Support
Erich EricsonSenior AssociateProgram Development
Don LauritzenSenior AssociateOperations
Cheryl MurraySenior AssociateProgram Development
Lindsay O’Donnell, CHESSenior AssociateProgram Development
Mark SchrafSenior AssociateBusiness Planning
John ThompsonSenior AssociateProgram Administration
Adreania TolliverSenior AssociateProgram Development
Laurie Willshire, MPH, RNSenior AssociateProgram Administration
Wendy Moltrup, CHESAssociateProgram Development
Charles SnyderAssociateProgram Development
Jack McMasterPresidentPreparedness and Health and Safety Services
Scott ConnerSenior Vice PresidentPreparedness and Health and Safety Services
Don VardellNational ChairPreparedness and Health and Safety Services
iv First Aid/CPR/AED | Instructor’s Manual
the following members of the american red cross scientific advisory council also provided guidance and review:
David Markenson, MD, FAAP, EMT-PChair, American Red Cross Scientific Advisory CouncilChief, Pediatric Emergency MedicineMaria Fareri Children’s HospitalWestchester Medical CenterValhalla, NY
Jonathan L. Epstein, MEMS, NREMT-PVice Chair, American Red Cross Scientific Advisory CouncilNortheast EMS, Inc.Wakefield, MA
Richard N. Bradley, MD, FACEPCPR Subcouncil Chair, American Red Cross Scientific Advisory Council Associate Professor of Emergency MedicineUniversity of Texas Medical School at HoustonHouston, TX
Jeffrey Pellegrino, PhD, EMS-I, EMTFirst Aid Subcouncil Chair, American Red Cross Scientific Advisory CouncilAssistant Director Faculty Professional Development CenterKent State UniversityKent, OH
David C. Berry, PhD, ATC, EMT-BMember, American Red Cross Scientific Advisory CouncilAssociate Professor of Kinesiology and Athletic Training Education Program DirectorSaginaw Valley State UniversityUniversity Center, MI
Nancy MonahanPresident
Sunil BhedaSenior Vice PresidentProduct Development
Paula BattVice PresidentSales and Client Services
David CaneManaging Editor
Danielle DiPalmaEditorial Director
Laura ScottSenior Content Manager
Michelle ClarkSenior Graphic Designer
Maureen PanczaEditorial Project Manager
the stayWell team for this edition included:
the sounding Board for this edition included:
George BradbySenior Safety EngineerNorthrup Grumman ShipbuildingHampton Roads Chapter, American Red CrossCarrollton, VA
Nathan DeeterHR Training Specialist The Arc of Anchorage Anchorage, AK
Laura JacksonCPR and First Aid Program ManagerGreater Kansas City Chapter, American Red CrossKansas City, MO
Karen PoundsAssistant Director, Health and Safety ServicesGreater Houston Area Chapter, American Red CrossPearland, TX
Janet ReedTraining SpecialistAmerican Red Cross of Central MassachusettsWestboro, MA
William M. SnellingIT/Chair Instructional Support CommitteeSoutheastern Pennsylvania Chapter, American Red CrossPhiladelphia, PA
Danielle GahlInstructional Programs ManagerAmerican Red Cross Serving King and Kitsap CountiesSeattle, WA
Timothy ArchuletaHealth and Safety OfficerAmerican Red Cross of Greater Los AngelesLos Angeles, CA
Lynne OsborneManager of Workplace ProgramsSoutheastern Michigan Chapter, American Red CrossDetroit, MI
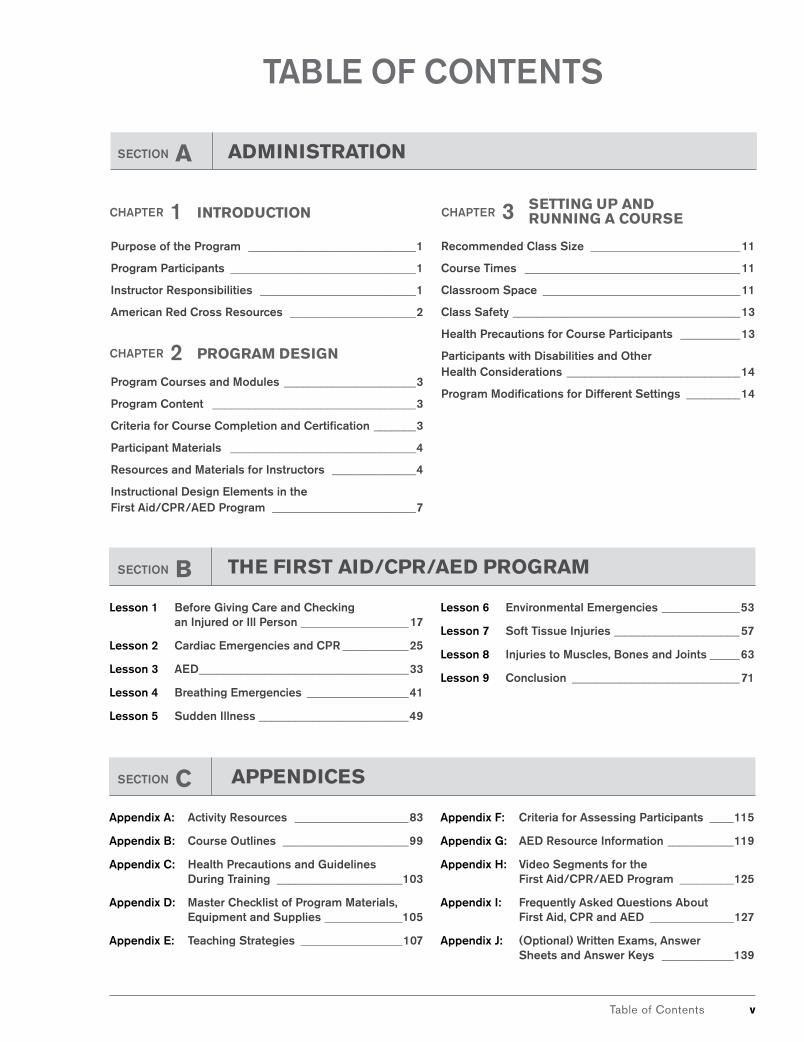
Table of Contents v
Purpose of the Program ____________________________1
Program Participants _______________________________1
Instructor Responsibilities __________________________1
American Red Cross Resources _____________________2
Program Courses and modules ______________________3
Program Content __________________________________3
Criteria for Course Completion and Certification _______3
Participant materials _______________________________4
Resources and materials for Instructors ______________4
Instructional Design Elements in the First Aid/CPR/AED Program ________________________7
Recommended Class size _________________________ 11
Course Times ____________________________________11
Classroom space _________________________________11
Class safety ______________________________________13
Health Precautions for Course Participants __________13
Participants with Disabilities and other Health Considerations _____________________________14
Program modifications for Different settings _________14
lesson 1 Before giving Care and Checking an Injured or Ill Person __________________ 17
lesson 2 Cardiac Emergencies and CPR ___________25
lesson 3 AED ___________________________________33
lesson 4 Breathing Emergencies _________________41
lesson 5 sudden Illness _________________________49
lesson 6 Environmental Emergencies _____________53
lesson 7 soft Tissue Injuries _____________________57
lesson 8 Injuries to muscles, Bones and Joints _____63
lesson 9 Conclusion ____________________________71
sECTIon A
CHAPTER 1
sECTIon B
sECTIon C
adMInIstratIon
IntroductIon
the FIrst aId/cPr/aed ProGraM
Appendix A: Activity Resources ___________________83
Appendix B: Course outlines _____________________99
Appendix C: Health Precautions and guidelines During Training _____________________103
Appendix D: master Checklist of Program materials, Equipment and supplies _____________105
Appendix E: Teaching strategies _________________107
Appendix F: Criteria for Assessing Participants ____115
Appendix g: AED Resource Information ___________119
Appendix H: Video segments for the First Aid/CPR/AED Program _________125
Appendix I: Frequently Asked Questions About First Aid, CPR and AED ______________127
Appendix J: (optional) written Exams, Answer sheets and Answer keys ____________139
aPPendIces
TABlE oF ConTEnTs
CHAPTER 2 ProGraM desIGn
CHAPTER 3 settInG uP and runnInG a course

1chapter 1 | Introduction
Purpose of the Program
Program Participants
Instructor Responsibilities
IntroductIon
chapter 1
AdministrAtion SectIon A
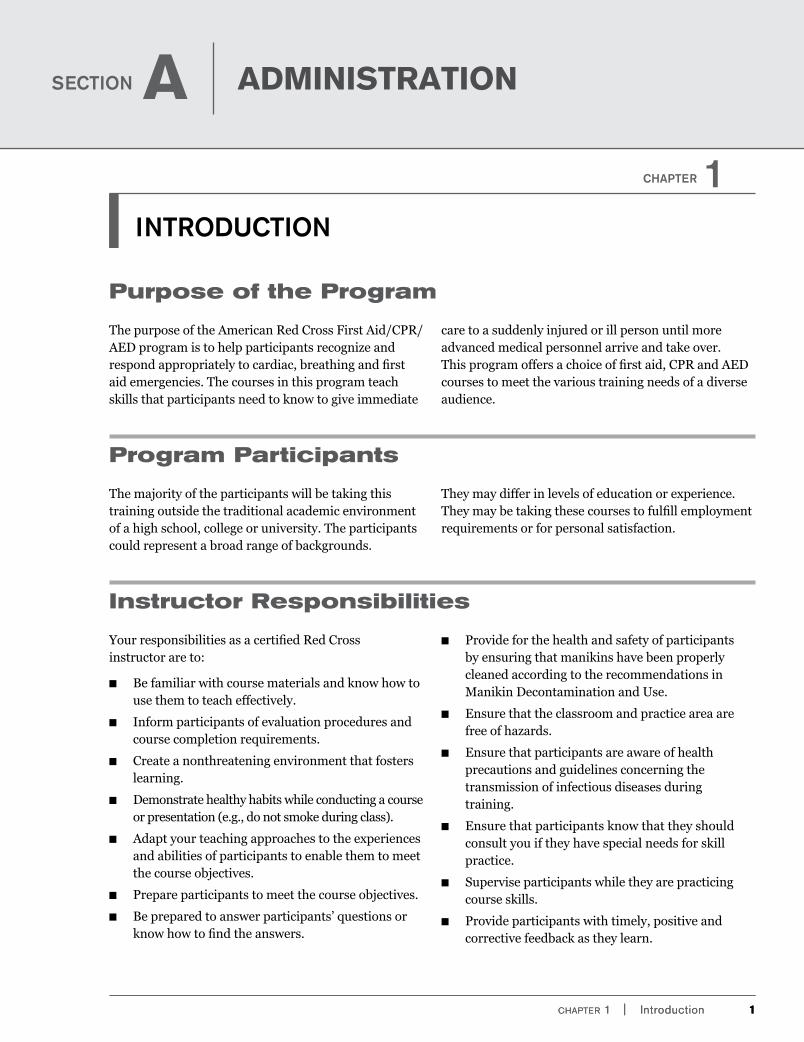
The purpose of the American Red Cross First Aid/CPR/AED program is to help participants recognize and respond appropriately to cardiac, breathing and first aid emergencies. The courses in this program teach skills that participants need to know to give immediate
care to a suddenly injured or ill person until more advanced medical personnel arrive and take over. This program offers a choice of first aid, CPR and AED courses to meet the various training needs of a diverse audience.
The majority of the participants will be taking this training outside the traditional academic environment of a high school, college or university. The participants could represent a broad range of backgrounds.
They may differ in levels of education or experience. They may be taking these courses to fulfill employment requirements or for personal satisfaction.
Your responsibilities as a certified Red Cross instructor are to:
■■ Be familiar with course materials and know how to use them to teach effectively.
■■ Inform participants of evaluation procedures and course completion requirements.
■■ Create a nonthreatening environment that fosters learning.
■■ Demonstrate healthy habits while conducting a course or presentation (e.g., do not smoke during class).
■■ Adapt your teaching approaches to the experiences and abilities of participants to enable them to meet the course objectives.
■■ Prepare participants to meet the course objectives.
■■ Be prepared to answer participants’ questions or know how to find the answers.
■■ Provide for the health and safety of participants by ensuring that manikins have been properly cleaned according to the recommendations in Manikin Decontamination and Use.
■■ Ensure that the classroom and practice area are free of hazards.
■■ Ensure that participants are aware of health precautions and guidelines concerning the transmission of infectious diseases during training.
■■ Ensure that participants know that they should consult you if they have special needs for skill practice.
■■ Supervise participants while they are practicing course skills.
■■ Provide participants with timely, positive and corrective feedback as they learn.
1chapter 1 | Introduction
■■ Evaluate participants as they perform skills, with a focus on the critical performance steps as described in the skill evaluation tools and as shown on the video.
■■ Identify participants who are having difficulty, and develop effective strategies to help them meet course objectives.
■■ Conduct courses in a manner consistent with course design.
■■ Issue course completion certificates.
■■ Submit completed course records and reports to the Red Cross within 10 working days from the course completion.
■■ Be familiar with and inform participants of other Red Cross courses and programs.
■■ Identify potential instructor candidates and refer them to the appropriate Red Cross representatives.
■■ Abide by the obligations in the Instructor Agreement and Code of Conduct and, if applicable, the Authorized Provider Agreement.
■■ Represent the Red Cross in a positive manner.
■■ Promote volunteer opportunities available through the Red Cross.
Keep updated on the latest instructor information by visiting Instructor’s Corner (instructorscorner.org). This site features program materials, frequently asked questions, instructor and program updates and course-related forms. The American Red Cross
Learning Center provides online access to manage instructor and course records, and print certificates. If you need further information or support for your program, contact the Training Support Center at 1-800-RED CROSS or [email protected].
American Red Cross Resources
2 First aid/cpr/aeD | Instructor’s Manual
Chapter 2 | program Design 3
This chapter describes the organization, content and structure of the American Red Cross First Aid/CPR/AED program, related materials and resources.
Program Courses and Modules
chapter 2prOGraM DeSIGN
The First Aid/CPR/AED program includes the following courses and modules, any of which can be combined (e.g., Standard First Aid with CPR/AED—Adult):
■■ First Aid
■■ CPR—Adult
■■ CPR—Child
■■ CPR—Infant
■■ AED—Adult
■■ AED—Child
Optional First Aid Modules and Lessons
■■ Asthma Inhaler (lesson plan available on Instructor’s Corner)
■■ Anaphylaxis and Epinephrine Auto-Injector (lesson plan available on Instructor’s Corner)
■■ Using a Tourniquet (lesson plan available on Instructor’s Corner)
Program Content
The technical content within the First Aid/CPR/AED program reflects the most current consensus on scientific recommendations. The program content includes the knowledge and skills necessary for participants to safely identify and give appropriate care, regardless of the type of emergency. The program stresses the basic steps to follow in any emergency, beginning with the most important step—the decision
to act—and helps participants confront their fears of getting involved and giving care.
The program explains the emergency medical services (EMS) system, emphasizes the need for rapid medical assistance in an emergency and provides instruction on appropriate care for a variety of injuries and sudden illnesses that lay responders may encounter in their workplaces, schools, communities and homes.
Criteria for Course Completion and Certification
Red Cross certification means that on a particular date an instructor verified that a participant demonstrated competency in all required skills taught in the course. Competency is defined as being able to demonstrate correct decision-making, sequence care steps properly, and proficiently complete all required skills without any coaching or assistance. To complete the course successfully, the participant must:
■■ Attend all class sessions.
■■ Participate in all course activities.
■■ Demonstrate competency in all required skills.
■■ Successfully participate in an end-of-course scenario(s).
Procedures for assessing participant progress are included in Appendix F: Criteria for Assessing Participants.
4 First aid/Cpr/aeD | Instructor’s Manual
Participant Materials
There are two participant products associated with the First Aid/CPR/AED program: the participant’s manual and ready reference cards. All First Aid/CPR/AED course participants have access to free digital versions of both products that can be viewed online and printed out. The ready reference cards and participant’s manual are available online in e-book format. Print versions of both products are available for purchase. Participants are not required to have any course materials during class.
Activity sheets for all course activities are located in the instructor’s manual and are available on Instructor’s Corner. For skill sessions, participants may use ready reference cards or refer to the course presentation and/or skill poster(s) in the classroom as a visual aid.
While participants are not required to have any course materials, it is strongly recommended to use at least one of the visual aids identified for skill sessions and course activities. The appropriate visual aids that can be used for this purpose are clearly identified within the lessons.
American Red Cross First Aid/CPR/AED Participant’s Manual
The participant’s manual is designed as a resource that can be used during class and as a refresher tool after the course is complete. The participant’s manual discusses in greater detail all topics covered during the course and additional content recognized by the Occupational Safety and Health Administration (OSHA) as well as supplemental information on prevention and preparedness.
American Red Cross First Aid/CPR/AED Ready Reference Cards
There are two versions of the First Aid/CPR/AED ready reference cards: adult and pediatric. The ready reference cards can be used during skill sessions or for quick reference after the course. Instructors are strongly encouraged to have extra copies of the ready reference cards for use during skill practice sessions.
First Aid/CPR/AED Refreshers First aid/CPR/AED knowledge and skills begin to decline within as little as 3 months after training. That is why refreshers—a series of short, online learning exercises and quizzes—are included in the First Aid/CPR/AED program.
Refreshers help with skill retention by giving participants opportunities to test and reaffirm first aid/CPR/AED knowledge and practice skills learned in class. The goal of the refresher program is to keep the skills and knowledge learned in class fresh in participants’ minds.
The first refresher takes place about 3 months after class. Participants will receive additional refreshers throughout the certification period at about 3-month intervals. Although participation in the refresher program is voluntary, all participants are strongly encouraged to complete the refreshers on schedule.
Resources and Materials for Instructors
American Red Cross First Aid/CPR/AED Instructor’s Manual
The instructor’s manual contains all the information needed for planning, preparing and conducting courses. Although the lesson plans are essential (and required) during class, other information included in the instructor’s manual is more useful for planning and preparation. To account for this range of uses, the instructor’s manual is available in two formats: a full print version, which is available for purchase, or a free electronic version, which can be printed out on-demand from Instructor’s Corner. For those who wish to use the free electronic version, it is advised that
they print out only Section B (the lesson plans) but not Sections A and C, which can be viewed online at any time. The lesson plans have been streamlined and formatted for the print on-demand option and are as printer-friendly as possible.
This instructor’s manual consists of the following sections:
■■ Section A: Administration. This section explains the purpose of the course and provides instructors with necessary administrative information as well as overviews of program materials, course content and delivery options.
Chapter 2 | program Design 5
■■ Section B: The First Aid/CPR/AED Program. This section contains the lesson plans for the program. Review the relevant lessons before conducting a course so that you are comfortable with the unique structure, instructional approach and content of each lesson. Because of the streamlined approach used to accommodate those who wish to use the free electronic version, the lesson plans contain only the information necessary to conduct the course. Additional information on conducting specific course activities is available on Instructor’s Corner. Instructors should be familiar with the content of the following lesson components:
■{ Lesson Objectives
■{ Guidance for the Instructor
■{ Materials, Equipment and Supplies
■{ Activities
■{ Skill Sessions (not included in all lessons)
■{ Visual Aid
■{ Lesson Wrap-Up
■■ Section C: Appendices. The appendices at the end of this instructor’s manual contain the detailed information essential for effectively conducting a course, including how to carry out skill sessions and activities, health and safety precautions, and a list of the video segments used during the course. The following appendices are located in Section C:
■{ Appendix A: Activity Resources
■{ Appendix B: Course Outlines
■{ Appendix C: Health Precautions and Guidelines During Training
■{ Appendix D: Master Checklist of Program Materials, Equipment and Supplies
■{ Appendix E: Teaching Strategies
■{ Appendix F: Criteria for Assessing Participants
■{ Appendix G: AED Resource Information
■{ Appendix H: Video Segments for the First Aid/CPR/AED Program
■{ Appendix I: Frequently Asked Questions About First Aid, CPR and AED
■{ Appendix J: (Optional) Written Exams, Answer Sheets and Answer Keys
Instructor’s Corner
As an instructor, you should register on Instructor’s Corner and visit the site regularly for program
information and updates. Once you have completed the brief registration process, you will have free access to many important resources for instructors.
The following First Aid/CPR/AED instructor resources are available on Instructor’s Corner:
■■ Administrative Terms and Procedures
■■ Common Participant Skill Errors
■■ Expanded Activity Directions
■■ Guidelines for Conducting American Red Cross First Aid/CPR/AED Review and Challenge Courses
■■ Manikin Decontamination and Use
■■ Participant Course Evaluation Form
■■ Participant Progress Log
■■ Sample Course Record and Course Record Addendum
■■ Optional Module: Asthma Inhaler
■■ Optional Lesson: Anaphylaxis and Epinephrine Auto-Injector
■■ Optional Module: Using a Tourniquet
Additional materials on Instructor’s Corner include:
■■ Additional course outlines.
■■ Americans with Disabilities Act (ADA) Accommodations Resource Guide for Conducting and Administering Health and Safety Courses and course modifications.
■■ Course Record and Course Record Addendum.
■■ First Aid/CPR/AED course presentation.
■■ Administrative forms and policies, including the Instructor Agreement and Code of Conduct and the Manual of Administrative Policies and Procedures (MAPP).
■■ Information about other Red Cross training and education programs.
■■ Frequently asked questions and expert answers to your technical questions.
■■ An Instructor’s Corner forum that enables you to communicate with instructors and instructor trainers around the country.
■■ The Instructor News Center featuring upcoming webcasts, conference dates, program announcements and Red Cross news.
6 First aid/Cpr/aeD | Instructor’s Manual
■■ Link to the American Red Cross Learning Center website.
■■ Links to redcrossstore.org and shopstaywell.com for training supplies and Red Cross retail products.
American Red Cross First Aid/CPR/AED Course Presentation
Another resource for instructors is the First Aid/CPR/AED course presentation. Similar to a PowerPoint presentation, the course presentation is an in-class visual aid that is projected onto a screen or viewing area. Instructors “click” through the presentation slides as they progress through the lessons.
The course presentation is designed to include all the visual information needed to conduct a First Aid/CPR/AED course. The course presentation includes skill sheets, video segments, activity directions, information included on activity worksheets or activity sheets, and lecture points. When using the course presentation, it is not necessary to use any print products (other than the lesson plan).
Before conducting the course, become familiar with the presentation software and test the system used for its display. Although printed reference materials are not necessary when using the course presentation, it is recommended that you have back-up copies of the ready reference cards and activity resources in case technical difficulties occur.
Course Presentation System Requirements:
■■ Adobe Reader 9
■■ Flash Player 8 or 9 for Windows and Mac
■■ Flash Player 9 for Linux and Solaris
Equipment Requirements:
■■ Laptop/desktop computer
■■ Power source
■■ Projector (including any connection cables)
■■ Projection screen/area
■■ Computer speakers (or other source for sound)
The presentation is available to download from Instructor’s Corner. The presentation is saved as a PDF. To view the presentation, save the files to your computer and double click on the appropriate PDF icon to open it. Additional directions for using the course presentation are available on Instructor’s Corner.
American Red Cross First Aid/CPR/AED DVD
The American Red Cross First Aid/CPR/AED DVD is designed specifically for use during the
First Aid/CPR/AED courses. Instructors are required to use the segments on this DVD or included in the course presentation as they contain model demonstrations that combine real-life scenarios with studio-based skill segments to help ensure that lesson objectives are met. The course may not be conducted if the DVD or course presentation is not available. For your convenience, Appendix H: Video Segments for the First Aid/CPR/AED Program contains a list of the video segments and running times.
Skills Posters
Skills posters for CPR, choking, splinting and checking an injured or ill adult, child and infant have been developed to use in class. When using posters, place them in a location that all participants can see. For larger classes or larger classroom spaces, multiple posters should be used. Posters are available for purchase from ShopStayWell.
Training Equipment and Red Cross Retail Products
Equipment used during the course, such as CPR breathing barriers and first aid kits, and a wide range of Red Cross retail products are available through the local Red Cross chapter or the Red Cross store (redcrossstore.org).
Additional Red Cross Courses
A wide range of additional training opportunities in health and safety and preparedness are offered through the Red Cross. Additional Red Cross programs include:
■■ Lifeguarding
■■ Swimming and Water Safety
■■ Babysitter’s Training
■■ Family Caregiving
■■ Nurse Assistant Training
■■ CPR/AED for Professional Rescuers and Health Care Providers
■■ Wilderness and Remote First Aid
■■ Emergency Medical Response
Refer participants to the local chapter for more information about scheduled courses in their community.
Chapter 2 | program Design 7
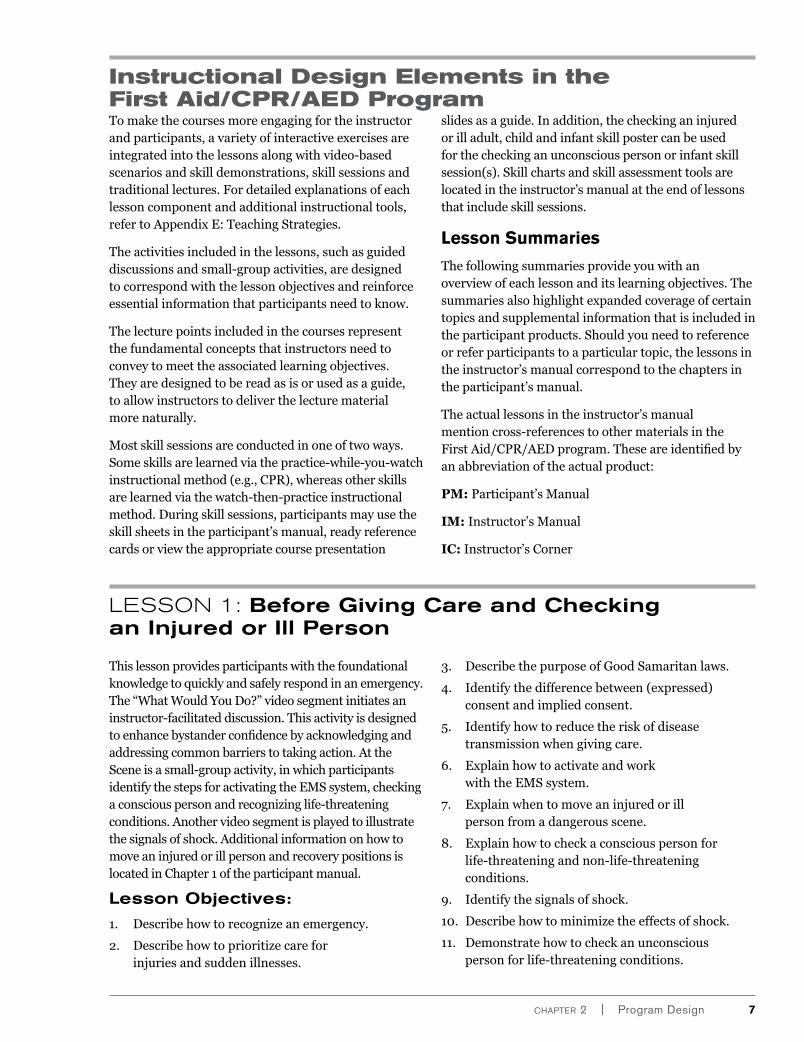
Instructional Design Elements in the First Aid/CPR/AED Program
Lesson 1: Before Giving Care and Checking an Injured or Ill Person
To make the courses more engaging for the instructor and participants, a variety of interactive exercises are integrated into the lessons along with video-based scenarios and skill demonstrations, skill sessions and traditional lectures. For detailed explanations of each lesson component and additional instructional tools, refer to Appendix E: Teaching Strategies.
The activities included in the lessons, such as guided discussions and small-group activities, are designed to correspond with the lesson objectives and reinforce essential information that participants need to know.
The lecture points included in the courses represent the fundamental concepts that instructors need to convey to meet the associated learning objectives. They are designed to be read as is or used as a guide, to allow instructors to deliver the lecture material more naturally.
Most skill sessions are conducted in one of two ways. Some skills are learned via the practice-while-you-watch instructional method (e.g., CPR), whereas other skills are learned via the watch-then-practice instructional method. During skill sessions, participants may use the skill sheets in the participant’s manual, ready reference cards or view the appropriate course presentation
slides as a guide. In addition, the checking an injured or ill adult, child and infant skill poster can be used for the checking an unconscious person or infant skill session(s). Skill charts and skill assessment tools are located in the instructor’s manual at the end of lessons that include skill sessions.
Lesson Summaries
The following summaries provide you with an overview of each lesson and its learning objectives. The summaries also highlight expanded coverage of certain topics and supplemental information that is included in the participant products. Should you need to reference or refer participants to a particular topic, the lessons in the instructor’s manual correspond to the chapters in the participant’s manual.
The actual lessons in the instructor’s manual mention cross-references to other materials in the First Aid/CPR/AED program. These are identified by an abbreviation of the actual product:
PM: Participant’s Manual
IM: Instructor’s Manual
IC: Instructor’s Corner
This lesson provides participants with the foundational knowledge to quickly and safely respond in an emergency. The “What Would You Do?” video segment initiates an instructor-facilitated discussion. This activity is designed to enhance bystander confidence by acknowledging and addressing common barriers to taking action. At the Scene is a small-group activity, in which participants identify the steps for activating the EMS system, checking a conscious person and recognizing life-threatening conditions. Another video segment is played to illustrate the signals of shock. Additional information on how to move an injured or ill person and recovery positions is located in Chapter 1 of the participant manual.
Lesson Objectives:
1. Describe how to recognize an emergency.
2. Describe how to prioritize care for injuries and sudden illnesses.
3. Describe the purpose of Good Samaritan laws.
4. Identify the difference between (expressed) consent and implied consent.
5. Identify how to reduce the risk of disease transmission when giving care.
6. Explain how to activate and work with the EMS system.
7. Explain when to move an injured or ill person from a dangerous scene.
8. Explain how to check a conscious person for life-threatening and non-life-threatening conditions.
9. Identify the signals of shock.
10. Describe how to minimize the effects of shock.
11. Demonstrate how to check an unconscious person for life-threatening conditions.
8 First aid/Cpr/aeD | Instructor’s Manual
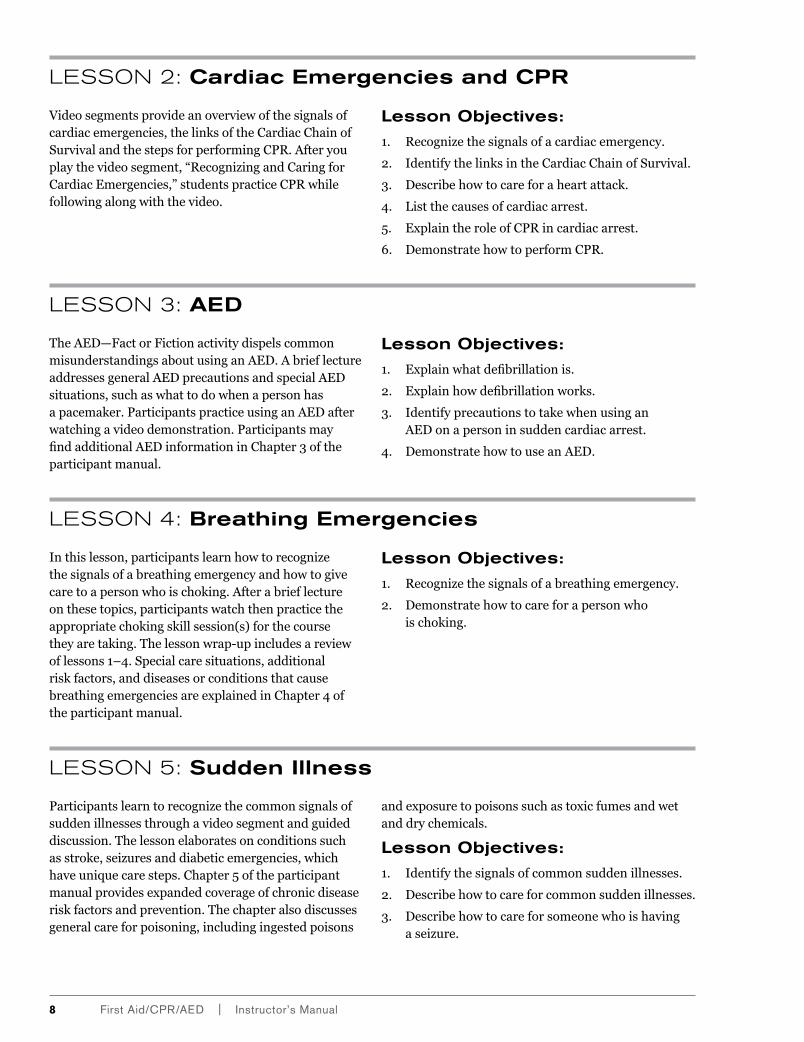
Lesson 2: Cardiac Emergencies and CPR
Lesson 3: AED
Lesson 4: Breathing Emergencies
Lesson 5: Sudden Illness
Video segments provide an overview of the signals of cardiac emergencies, the links of the Cardiac Chain of Survival and the steps for performing CPR. After you play the video segment, “Recognizing and Caring for Cardiac Emergencies,” students practice CPR while following along with the video.
Lesson Objectives:
1. Recognize the signals of a cardiac emergency.
2. Identify the links in the Cardiac Chain of Survival.
3. Describe how to care for a heart attack.
4. List the causes of cardiac arrest.
5. Explain the role of CPR in cardiac arrest.
6. Demonstrate how to perform CPR.
The AED—Fact or Fiction activity dispels common misunderstandings about using an AED. A brief lecture addresses general AED precautions and special AED situations, such as what to do when a person has a pacemaker. Participants practice using an AED after watching a video demonstration. Participants may find additional AED information in Chapter 3 of the participant manual.
Lesson Objectives:
1. Explain what defibrillation is.
2. Explain how defibrillation works.
3. Identify precautions to take when using an AED on a person in sudden cardiac arrest.
4. Demonstrate how to use an AED.
In this lesson, participants learn how to recognize the signals of a breathing emergency and how to give care to a person who is choking. After a brief lecture on these topics, participants watch then practice the appropriate choking skill session(s) for the course they are taking. The lesson wrap-up includes a review of lessons 1–4. Special care situations, additional risk factors, and diseases or conditions that cause breathing emergencies are explained in Chapter 4 of the participant manual.
Lesson Objectives:
1. Recognize the signals of a breathing emergency.
2. Demonstrate how to care for a person who is choking.
Participants learn to recognize the common signals of sudden illnesses through a video segment and guided discussion. The lesson elaborates on conditions such as stroke, seizures and diabetic emergencies, which have unique care steps. Chapter 5 of the participant manual provides expanded coverage of chronic disease risk factors and prevention. The chapter also discusses general care for poisoning, including ingested poisons
and exposure to poisons such as toxic fumes and wet and dry chemicals.
Lesson Objectives:
1. Identify the signals of common sudden illnesses.
2. Describe how to care for common sudden illnesses.
3. Describe how to care for someone who is having a seizure.
Chapter 2 | program Design 9
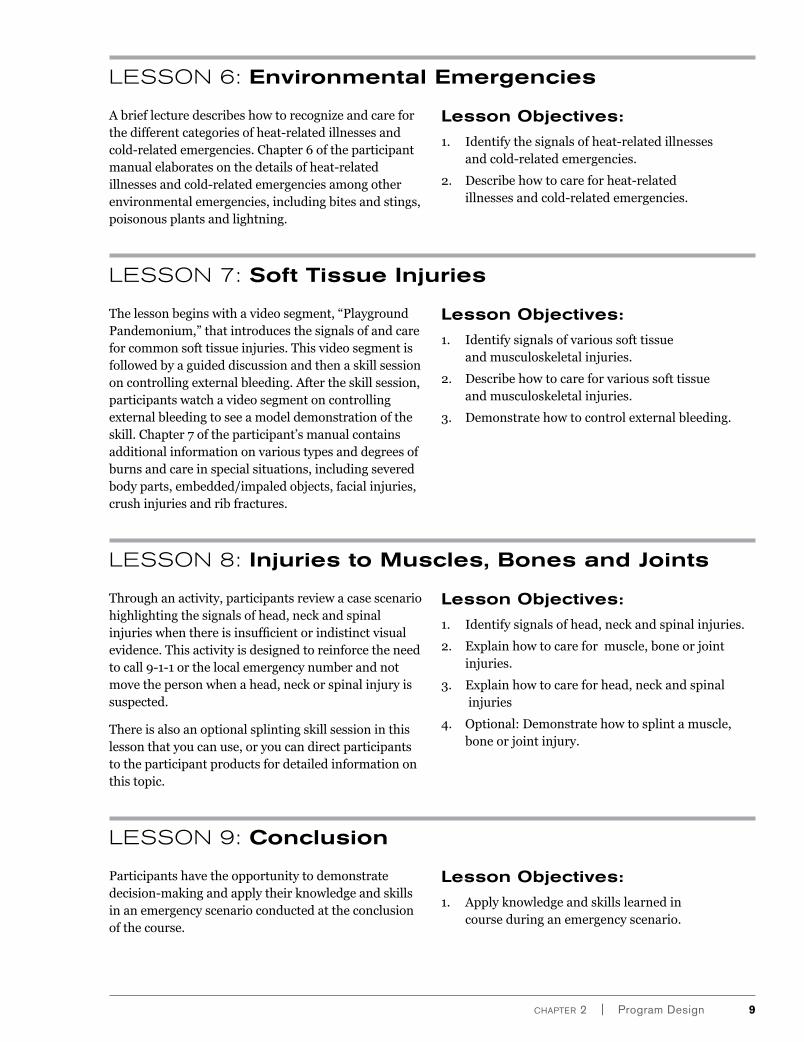
Lesson 6: Environmental Emergencies
Lesson 7: Soft Tissue Injuries
Lesson 8: Injuries to Muscles, Bones and Joints
Lesson 9: Conclusion
A brief lecture describes how to recognize and care for the different categories of heat-related illnesses and cold-related emergencies. Chapter 6 of the participant manual elaborates on the details of heat-related illnesses and cold-related emergencies among other environmental emergencies, including bites and stings, poisonous plants and lightning.
Lesson Objectives:
1. Identify the signals of heat-related illnesses and cold-related emergencies.
2. Describe how to care for heat-related illnesses and cold-related emergencies.
The lesson begins with a video segment, “Playground Pandemonium,” that introduces the signals of and care for common soft tissue injuries. This video segment is followed by a guided discussion and then a skill session on controlling external bleeding. After the skill session, participants watch a video segment on controlling external bleeding to see a model demonstration of the skill. Chapter 7 of the participant’s manual contains additional information on various types and degrees of burns and care in special situations, including severed body parts, embedded/impaled objects, facial injuries, crush injuries and rib fractures.
Lesson Objectives:
1. Identify signals of various soft tissue and musculoskeletal injuries.
2. Describe how to care for various soft tissue and musculoskeletal injuries.
3. Demonstrate how to control external bleeding.
Through an activity, participants review a case scenario highlighting the signals of head, neck and spinal injuries when there is insufficient or indistinct visual evidence. This activity is designed to reinforce the need to call 9-1-1 or the local emergency number and not move the person when a head, neck or spinal injury is suspected.
There is also an optional splinting skill session in this lesson that you can use, or you can direct participants to the participant products for detailed information on this topic.
Lesson Objectives:
1. Identify signals of head, neck and spinal injuries.
2. Explain how to care for muscle, bone or joint injuries.
3. Explain how to care for head, neck and spinal injuries
4. Optional: Demonstrate how to splint a muscle, bone or joint injury.
Participants have the opportunity to demonstrate decision-making and apply their knowledge and skills in an emergency scenario conducted at the conclusion of the course.
Lesson Objectives:
1. Apply knowledge and skills learned in course during an emergency scenario.
10 First aid/Cpr/aeD | Instructor’s Manual
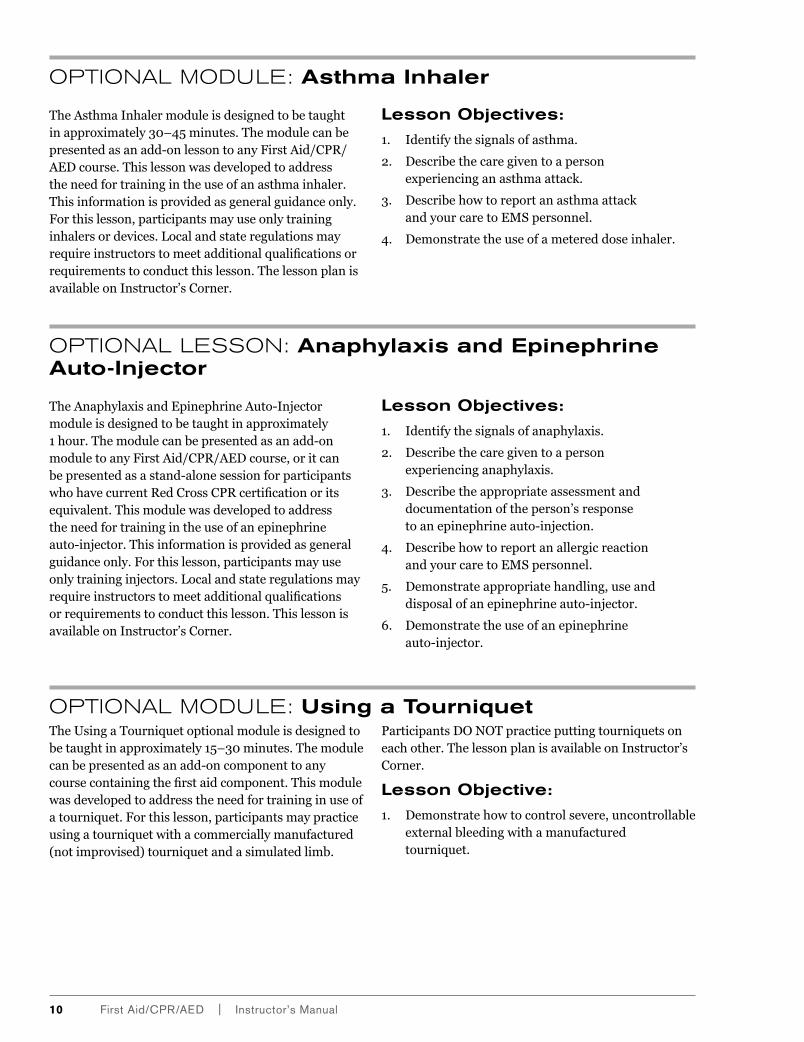
optionaL Lesson: Anaphylaxis and Epinephrine
optionaL ModuLe: Using a Tourniquet
optionaL ModuLe: Asthma Inhaler
Auto-Injector
The Anaphylaxis and Epinephrine Auto-Injector module is designed to be taught in approximately 1 hour. The module can be presented as an add-on module to any First Aid/CPR/AED course, or it can be presented as a stand-alone session for participants who have current Red Cross CPR certification or its equivalent. This module was developed to address the need for training in the use of an epinephrine auto-injector. This information is provided as general guidance only. For this lesson, participants may use only training injectors. Local and state regulations may require instructors to meet additional qualifications or requirements to conduct this lesson. This lesson is available on Instructor’s Corner.
Lesson Objectives:
1. Identify the signals of anaphylaxis.
2. Describe the care given to a person experiencing anaphylaxis.
3. Describe the appropriate assessment and documentation of the person’s response to an epinephrine auto-injection.
4. Describe how to report an allergic reaction and your care to EMS personnel.
5. Demonstrate appropriate handling, use and disposal of an epinephrine auto-injector.
6. Demonstrate the use of an epinephrine auto-injector.
The Using a Tourniquet optional module is designed to be taught in approximately 15–30 minutes. The module can be presented as an add-on component to any course containing the first aid component. This module was developed to address the need for training in use of a tourniquet. For this lesson, participants may practice using a tourniquet with a commercially manufactured (not improvised) tourniquet and a simulated limb.
Participants DO NOT practice putting tourniquets on each other. The lesson plan is available on Instructor’s Corner.
Lesson Objective:
1. Demonstrate how to control severe, uncontrollable external bleeding with a manufactured tourniquet.
The Asthma Inhaler module is designed to be taught in approximately 30–45 minutes. The module can be presented as an add-on lesson to any First Aid/CPR/AED course. This lesson was developed to address the need for training in the use of an asthma inhaler. This information is provided as general guidance only. For this lesson, participants may use only training inhalers or devices. Local and state regulations may require instructors to meet additional qualifications or requirements to conduct this lesson. The lesson plan is available on Instructor’s Corner.
Lesson Objectives:
1. Identify the signals of asthma.
2. Describe the care given to a person experiencing an asthma attack.
3. Describe how to report an asthma attack and your care to EMS personnel.
4. Demonstrate the use of a metered dose inhaler.
Chapter 3 | Setting Up and running a Course 11
This chapter explains how to organize and conduct the courses in the American Red Cross First Aid/CPR/AED program.
Recommended Class Size
chapter 3SettING Up aND rUNNING a cOUrSe
The course outline and lesson plans for the CPR and first aid components have been developed for a class of six to 10 participants to one instructor. The AED components have been developed for a class of six participants to one instructor. If your class is larger, you will need to allow more time or have co-instructors or instructor aides help you. The amount of available equipment and assistance may limit class size or may extend class time.
In some settings, you may need to adapt your approach as you would for a mass CPR training event. For example, in many schools there are often classes of 20 to 30 students or multiple classes learning together. In this case, teachers could assign other activities and have smaller groups practicing skills. Another option would be to work with the local Red Cross chapter to have additional instructors trained or have trained instructors visit the school for a special event.
Course Times
The times listed are approximate and apply to Adult or Child courses only. Additional time is necessary when combining Adult, Child and/or Infant skills. You must carefully consider the issue of time when planning each class session. The lesson plans in this instructor’s manual should be followed as closely as possible, but facility constraints, specific instructor-to-participant ratios and equipment-to-participant ratios, as well as participant needs such as breaks, may increase course length.
Other factors that may influence lesson planning include:
■■ Classroom availability and layout.
■■ Equipment availability.
■■ Number of participants.
■■ Skill level of participants.
■■ Instructor experience.
■■ Number of instructors.
■■ Optional skills or lessons.
Classroom Space
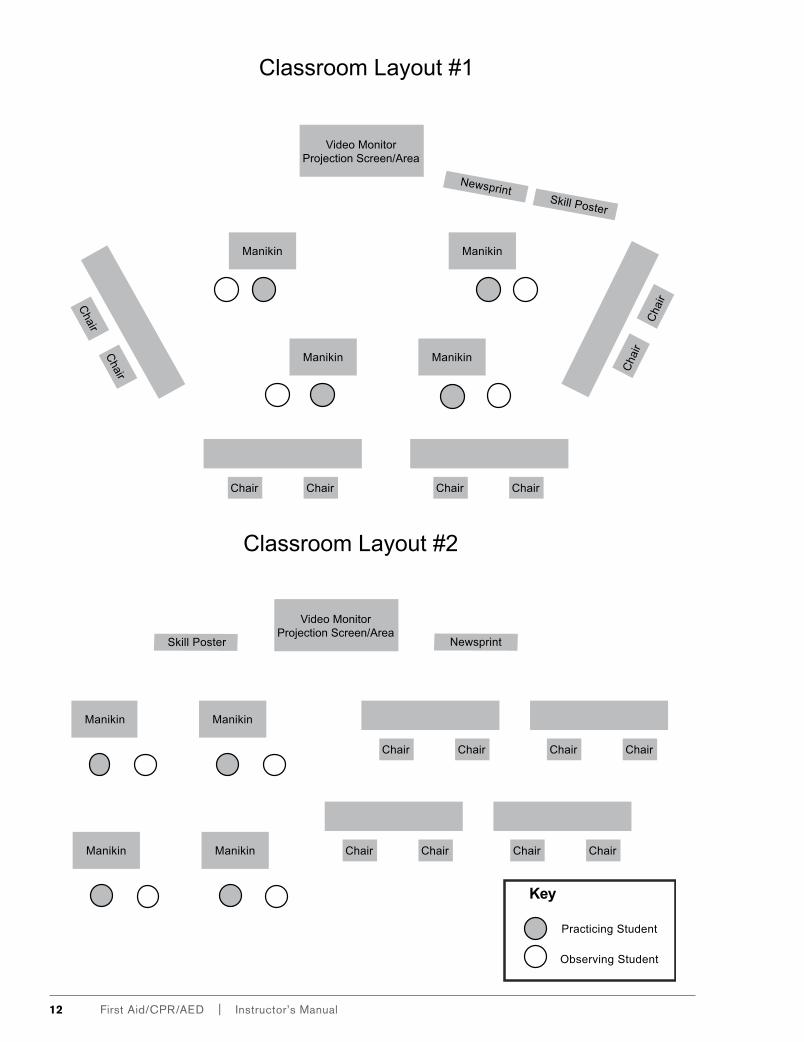
The lessons described in this instructor’s manual require classroom space suitable for lectures, class discussions, activities, video presentations and skill sessions. The classroom should provide a safe, comfortable and appropriate learning environment. The room should be well lit, well ventilated and comfortable in temperature. If the practice area is not
carpeted, provide some knee protection, such as folded blankets or mats, for use by participants or allow them to bring their own padding materials.
The following diagrams provide examples of appropriate classroom setups to facilitate classroom discussions and video presentations.
12 First aid/Cpr/aeD | Instructor’s Manual
Newsprint
Video MonitorProjection Screen/Area
Manikin
ManikinManikin
Manikin
ChairChairChairChair
Chair
Chair C
hair
Cha
ir
Classroom Layout #1
Skill Poster
Newsprint
Manikin
Manikin
Manikin
Manikin
ChairChairChairChair
ChairChairChairChair
Classroom Layout #2
Skill Poster
Video MonitorProjection Screen/Area
Key
Practicing Student
Observing Student

Chapter 3 | Setting Up and running a Course 13
Class Safety
As a First Aid/CPR/AED instructor, it is important for you to make the teaching environment as safe as possible. Participants who feel that they are at risk for injury or illness may become distracted. These same feelings may also affect your ability to conduct the courses. There are several steps you can take to help increase class safety:
■■ Instructor Preparation. Consider possible hazards and manage safety concerns before a course starts. Often, you can foresee hazards and take steps to eliminate or control them long before participants arrive.
■■ Assisting Instructors and Co-Instructors. Assisting instructors and co-instructors can help decrease risks by giving more supervision and reducing the instructor-to-participant ratio. They also increase participation and learning by providing more one-on-one attention to participants. When using co-instructors or assisting instructors, clearly define their roles and responsibilities. Doing so will help eliminate confusion and lapses in supervision. Remember that you are ultimately responsible for your participants’ safety. To determine your staffing needs, consider the different ages and the individual abilities of participants in the course. If your course has a large number of participants, you will need additional help.
■■ Instructor Aides. Individuals who express an interest in becoming an instructor but do not meet the instructor requirements, for example, the minimum age, can participate in the course experience as an instructor aide. Clearly define their roles and responsibilities. Instructor aides must always be under the direct supervision of an instructor and should never be left alone to supervise course participants. Instructor aides may not evaluate or certify participants’ skill performance. Instructor aides must possess a basic-level certificate(s) in the applicable program or course for which they wish to assist. A First Aid/CPR/AED instructor can train an instructor aide candidate. Contact the local Red Cross chapter to get further information about instructor aide training. In general, duties and responsibilities of instructor aides include:
■{ Handling registration and record keeping.
■{ Setting up classrooms and handing out supplies.
■{ Assisting with equipment (e.g., setup, cleaning and distribution of materials).
■{ Helping participants with skill sessions or small-group activities.
Health Precautions for Course Participants
As a Red Cross instructor, one of your responsibilities is to protect participants from health risks. The materials and procedures for teaching these courses are designed to:
■■ Limit the risk of disease transmission.
■■ Limit the risk of one participant injuring another when practicing with a partner.
■■ Limit the risk that the activity involved in the skill session could cause injury or sudden illness.
When possible, prospective participants should be provided information about health requirements and safety before enrolling in the course. Ask participants to talk with you before any skill session if they doubt that they can participate in the activity.
People with certain health conditions may be hesitant to take part in the skill sessions. These conditions could include a history of heart attacks or other heart conditions or respiratory problems. Suggest that these participants check with their health care provider before participating in skill sessions involving physical activity. Inform participants who take the course but are not able to demonstrate the skills taught in the skill sessions that they cannot receive a Red Cross course completion certificate. Encourage them, however, to participate to whatever extent possible, as they can still learn valuable, life-saving information. The Red Cross advocates that, whenever possible, the instructor adjust participants’ activity levels as necessary to facilitate learning and help participants meet course and skill objectives.
14 First aid/Cpr/aeD | Instructor’s Manual
You should explain that participants in Red Cross classroom-based courses also have the option to audit
a course, which eliminates the requirements for course completion.
Participants with Disabilities and Other Health Considerations
Program Modifications for Different Settings
People with disabilities and other conditions may be able to perform first aid, CPR and AED skills. Some skills may need modification, but the result is the same. Instructors should focus on the critical components of a skill that are needed to successfully meet the objective.
Detailed guidance on these topics is included in the Americans with Disabilities Act (ADA) Accommodation Resource Guide for Conducting and Administering Health and Safety Services Courses, which is available on Instructor’s Corner.
The First Aid/CPR/AED program can be customized to meet participants’ specific needs. It can be offered, for example, as a certification program to meet a regulatory requirement or as an employee benefit program. Schools may integrate training into the curriculum.
Some program modification options are built into the program. For example, Lesson 8, Injuries to Muscles, Bones and Joints, contains an optional session for splinting skill practices for customers who want to have this additional information included in the course. Adding the Asthma Inhaler or the Anaphylaxis and Epinephrine Auto-Injector optional lessons is another way to modify the program for different settings.
Training in the Workplace
training to Meet a Workplace certification requirementCourses are designed to meet the training requirements of various occupational, office or industrial settings. When offering the program to meet certification requirements, adapting the training does not mean that you can add to, delete or change the content.
To modify the program for a workplace with certification needs, a Red Cross representative should meet with the workplace safety representative to discuss the needs before scheduling a course. A Red Cross representative should convey this information to you so that you can adequately prepare to deliver the course material. As an instructor, you should ask these questions:
■■ Why is the workplace customer offering this training?
■■ What is the background of program participants?
This includes:
■{ Previous first aid or CPR/AED training.
■{ Job responsibilities.
■{ Educational background.
■{ English as a second language.
■■ What site-specific information is known? This includes:
■{ The type and frequency of past incidents of injury or sudden illness in the workplace.
■{ Established emergency procedures. (Is there a written emergency action plan?)
■{ The type and location of first aid supplies at the site.
■{ State or local regulations requiring written assessments.
training as an employee BenefitIn some cases, first aid training is offered as an employee benefit rather than for certification or to meet other regulations. Under such circumstances, if the employer does not require or want certification, it is possible to customize the program by presenting only those lessons or topics that meet the employer’s specific needs. These can be taught as stand-alone lessons, for example, during a lunch hour.
Before training begins, the Red Cross representative must ensure that the employer understands that although the information to be conveyed is relevant and important, this type of training is not comprehensive and will not result in Red Cross certification for employees.

Chapter 3 | Setting Up and running a Course 15
CEUs for Professionals
Many course takers are professionals who need continuing education units (CEUs) to maintain a license and/or certification. Examples include nurses, social workers, recreation professionals, teachers and day care providers.
The American Red Cross is approved as an authorized provider by the International Association for
Continuing Education and Training (IACET). IACET’s Criteria and Guidelines for Quality Continuing Education and Training Programs are the standards by which hundreds of organizations measure their educational offerings. For additional information, contact the Training Support Center.

The FirsT Aid/CPr/Aed ProgrAm Section B
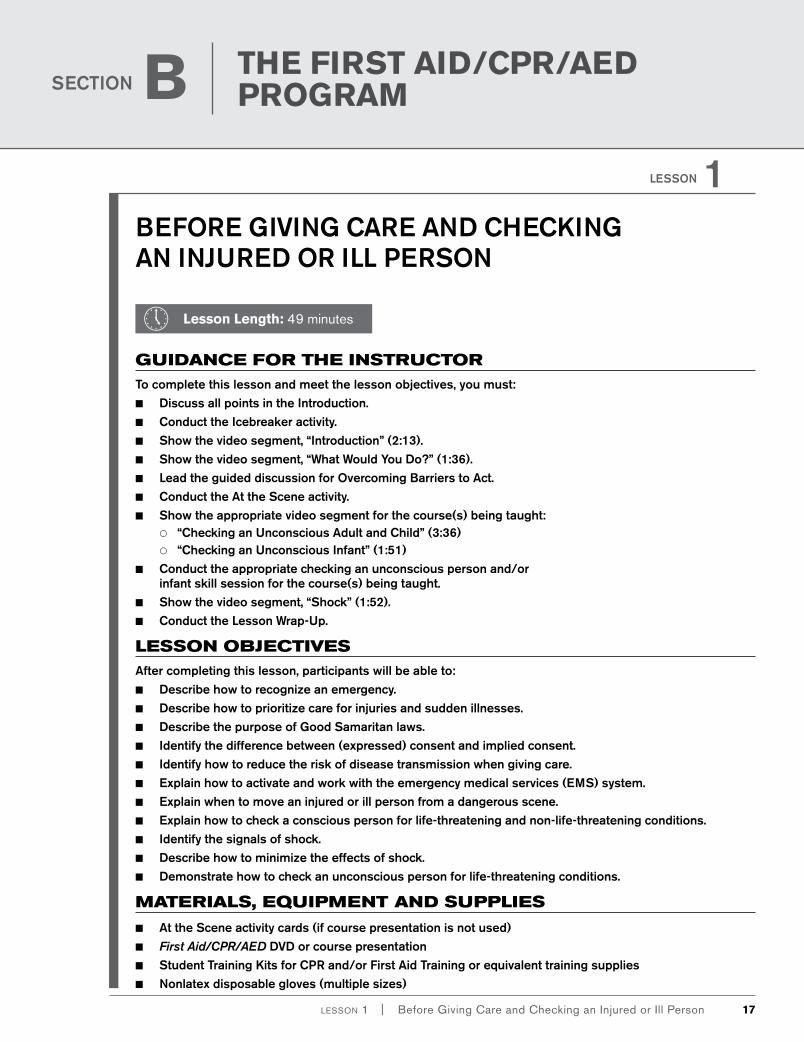
¡¡ Lesson Length: 49 minutes
GUIDANCE FOR THE INSTRUCTORto complete this lesson and meet the lesson objectives, you must:
■■ Discuss all points in the introduction. ■■ conduct the icebreaker activity.■■ Show the video segment, “introduction” (2:13).■■ Show the video segment, “What Would You Do?” (1:36).■■ Lead the guided discussion for overcoming Barriers to Act. ■■ conduct the At the Scene activity.■■ Show the appropriate video segment for the course(s) being taught:
■{ “checking an Unconscious Adult and child” (3:36)■{ “checking an Unconscious infant” (1:51)
■■ conduct the appropriate checking an unconscious person and/or infant skill session for the course(s) being taught.
■■ Show the video segment, “Shock” (1:52).■■ conduct the Lesson Wrap-Up.
LESSON OBJECTIVESAfter completing this lesson, participants will be able to:
■■ Describe how to recognize an emergency.■■ Describe how to prioritize care for injuries and sudden illnesses. ■■ Describe the purpose of Good Samaritan laws. ■■ identify the difference between (expressed) consent and implied consent. ■■ identify how to reduce the risk of disease transmission when giving care. ■■ explain how to activate and work with the emergency medical services (eMS) system.■■ explain when to move an injured or ill person from a dangerous scene. ■■ explain how to check a conscious person for life-threatening and non-life-threatening conditions. ■■ identify the signals of shock.■■ Describe how to minimize the effects of shock.■■ Demonstrate how to check an unconscious person for life-threatening conditions.
MATERIALS, EQUIPMENT AND SUPPLIES
■■ At the Scene activity cards (if course presentation is not used)■■ First Aid/CPR/AED DVD or course presentation ■■ Student training Kits for cPR and/or First Aid training or equivalent training supplies ■■ nonlatex disposable gloves (multiple sizes)
BeFoRe GiVinG cARe AnD cHecKinG An inJUReD oR iLL PeRSon
LeSSon 1
17lesson 1 | Before Giving Care and Checking an Injured or Ill Person
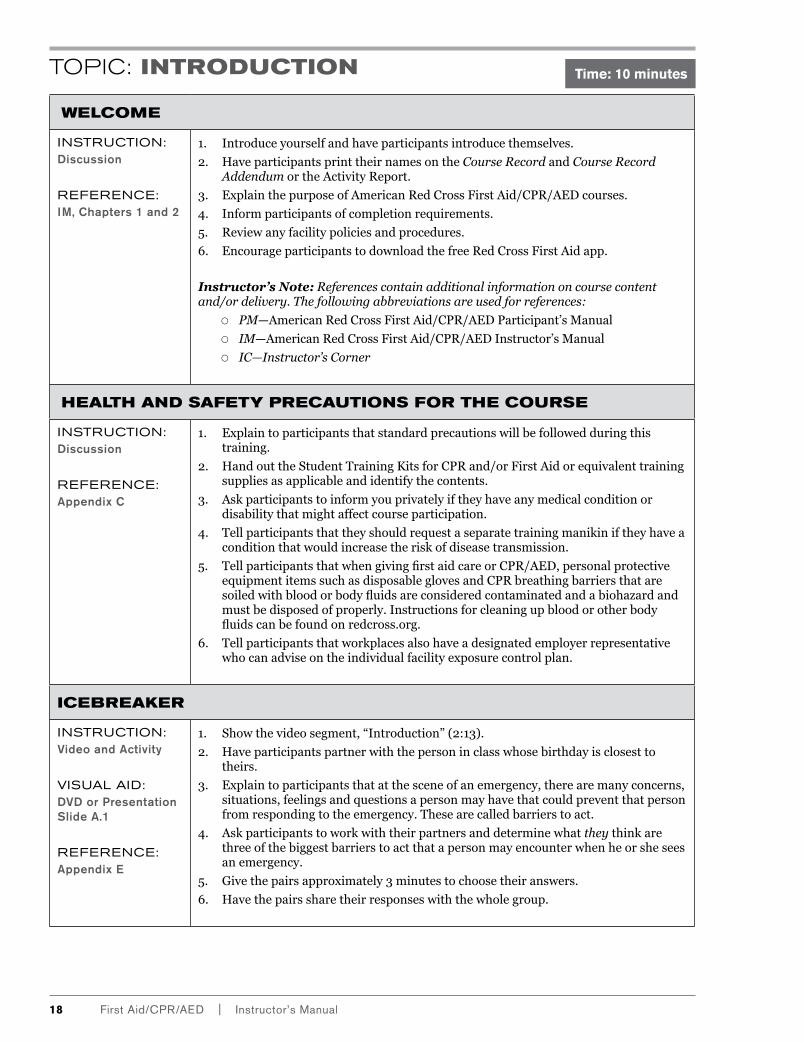
TOPIC: INTRODUCTION
WELCOME
INSTRUCTION:Discussion
REFERENCE:iM, chapters 1 and 2
1. Introduceyourselfandhaveparticipantsintroducethemselves.
2. HaveparticipantsprinttheirnamesontheCourse RecordandCourse Record AddendumortheActivityReport.
3. ExplainthepurposeofAmericanRedCrossFirstAid/CPR/AEDcourses.
4. Informparticipantsofcompletionrequirements.
5. Reviewanyfacilitypoliciesandprocedures.
6. EncourageparticipantstodownloadthefreeRedCrossFirstAidapp.
Instructor’s Note:References contain additional information on course content and/or delivery. The following abbreviations are used for references:
■{ PM—AmericanRedCrossFirstAid/CPR/AEDParticipant’sManual
■{ IM—AmericanRedCrossFirstAid/CPR/AEDInstructor’sManual
■{ IC—Instructor’s Corner
HEALTH AND SAFETy PRECAUTIONS FOR THE COURSE
INSTRUCTION:Discussion
REFERENCE:Appendix c
1. Explaintoparticipantsthatstandardprecautionswillbefollowedduringthistraining.
2. HandouttheStudentTrainingKitsforCPRand/orFirstAidorequivalenttrainingsuppliesasapplicableandidentifythecontents.
3. Askparticipantstoinformyouprivatelyiftheyhaveanymedicalconditionordisabilitythatmightaffectcourseparticipation.
4. Tellparticipantsthattheyshouldrequestaseparatetrainingmanikiniftheyhaveaconditionthatwouldincreasetheriskofdiseasetransmission.
5. TellparticipantsthatwhengivingfirstaidcareorCPR/AED,personalprotectiveequipmentitemssuchasdisposableglovesandCPRbreathingbarriersthataresoiledwithbloodorbodyfluidsareconsideredcontaminatedandabiohazardandmustbedisposedofproperly.Instructionsforcleaningupbloodorotherbodyfluidscanbefoundonredcross.org.
6. Tellparticipantsthatworkplacesalsohaveadesignatedemployerrepresentativewhocanadviseontheindividualfacilityexposurecontrolplan.
ICEBREAkER
INSTRUCTION:Video and Activity
VISUAL AID:DVD or Presentation Slide A.1
REFERENCE:Appendix e
1. Showthevideosegment,“Introduction”(2:13).
2. Haveparticipantspartnerwiththepersoninclasswhosebirthdayisclosesttotheirs.
3. Explaintoparticipantsthatatthesceneofanemergency,therearemanyconcerns,situations,feelingsandquestionsapersonmayhavethatcouldpreventthatpersonfromrespondingtotheemergency.Thesearecalledbarrierstoact.
4. Askparticipantstoworkwiththeirpartnersanddeterminewhatthey thinkarethreeofthebiggestbarrierstoactthatapersonmayencounterwhenheorsheseesanemergency.
5. Givethepairsapproximately3minutestochoosetheiranswers.
6. Havethepairssharetheirresponseswiththewholegroup.
Time: 10 minutes
18 First Aid/CPR/AeD | Instructor’s Manual
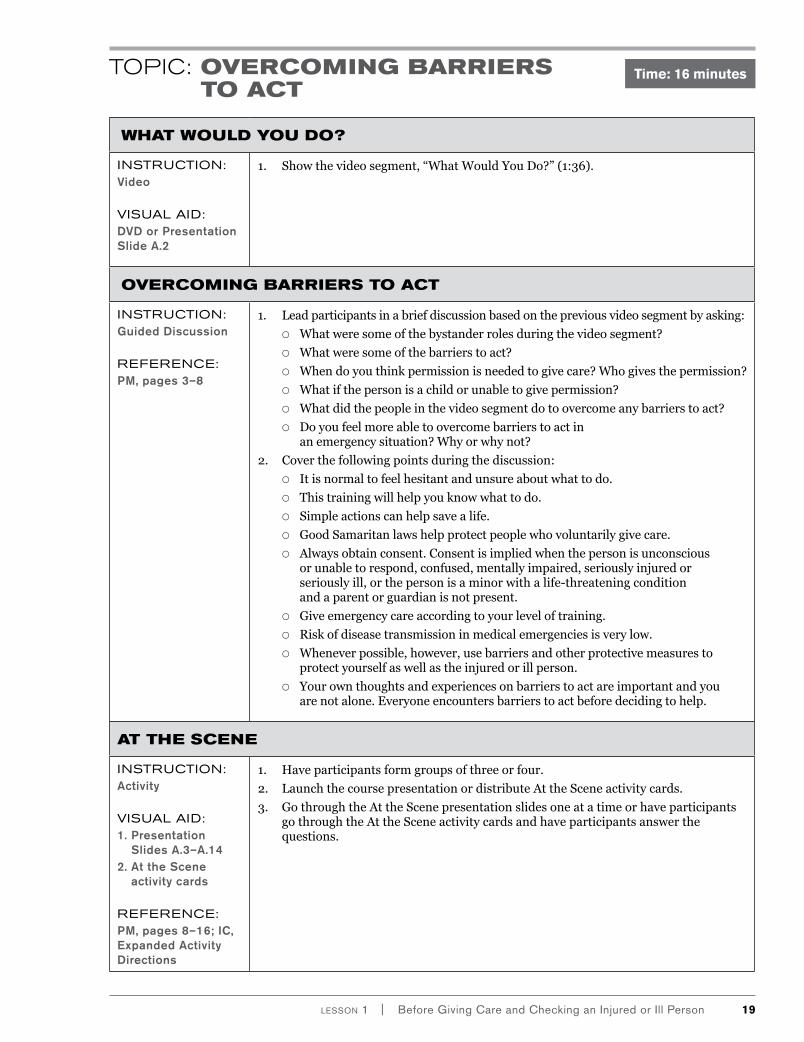
TOPIC: OVERCOMING BARRIERS TO ACT
WHAT WOULD yOU DO?
INSTRUCTION:Video
VISUAL AID:DVD or Presentation Slide A.2
1. Showthevideosegment,“WhatWouldYouDo?”(1:36).
OVERCOMING BARRIERS TO ACT
INSTRUCTION:Guided Discussion
REFERENCE:PM, pages 3–8
1. Leadparticipantsinabriefdiscussionbasedonthepreviousvideosegmentbyasking:
■{ Whatweresomeofthebystanderrolesduringthevideosegment?
■{ Whatweresomeofthebarrierstoact?
■{ Whendoyouthinkpermissionisneededtogivecare?Whogivesthepermission?
■{ Whatifthepersonisachildorunabletogivepermission?
■{ Whatdidthepeopleinthevideosegmentdotoovercomeanybarrierstoact?
■{ Doyoufeelmoreabletoovercomebarrierstoactinanemergencysituation?Whyorwhynot?
2. Coverthefollowingpointsduringthediscussion:
■{ Itisnormaltofeelhesitantandunsureaboutwhattodo.
■{ Thistrainingwillhelpyouknowwhattodo.
■{ Simpleactionscanhelpsavealife.
■{ GoodSamaritanlawshelpprotectpeoplewhovoluntarilygivecare.
■{ Alwaysobtainconsent.Consentisimpliedwhenthepersonisunconsciousorunabletorespond,confused,mentallyimpaired,seriouslyinjuredorseriouslyill,orthepersonisaminorwithalife-threateningconditionandaparentorguardianisnotpresent.
■{ Giveemergencycareaccordingtoyourleveloftraining.
■{ Riskofdiseasetransmissioninmedicalemergenciesisverylow.
■{ Wheneverpossible,however,usebarriersandotherprotectivemeasurestoprotectyourselfaswellastheinjuredorillperson.
■{ Yourownthoughtsandexperiencesonbarrierstoactareimportantandyouarenotalone.Everyoneencountersbarrierstoactbeforedecidingtohelp.
AT THE SCENE
INSTRUCTION:Activity
VISUAL AID:1. Presentation
Slides A.3–A.142. At the Scene
activity cards
REFERENCE:PM, pages 8–16; ic, expanded Activity Directions
1. Haveparticipantsformgroupsofthreeorfour.
2. LaunchthecoursepresentationordistributeAttheSceneactivitycards.
3. GothroughtheAttheScenepresentationslidesoneatatimeorhaveparticipantsgothroughtheAttheSceneactivitycardsandhaveparticipantsanswerthequestions.
Time: 16 minutes
19lesson 1 | Before Giving Care and Checking an Injured or Ill Person
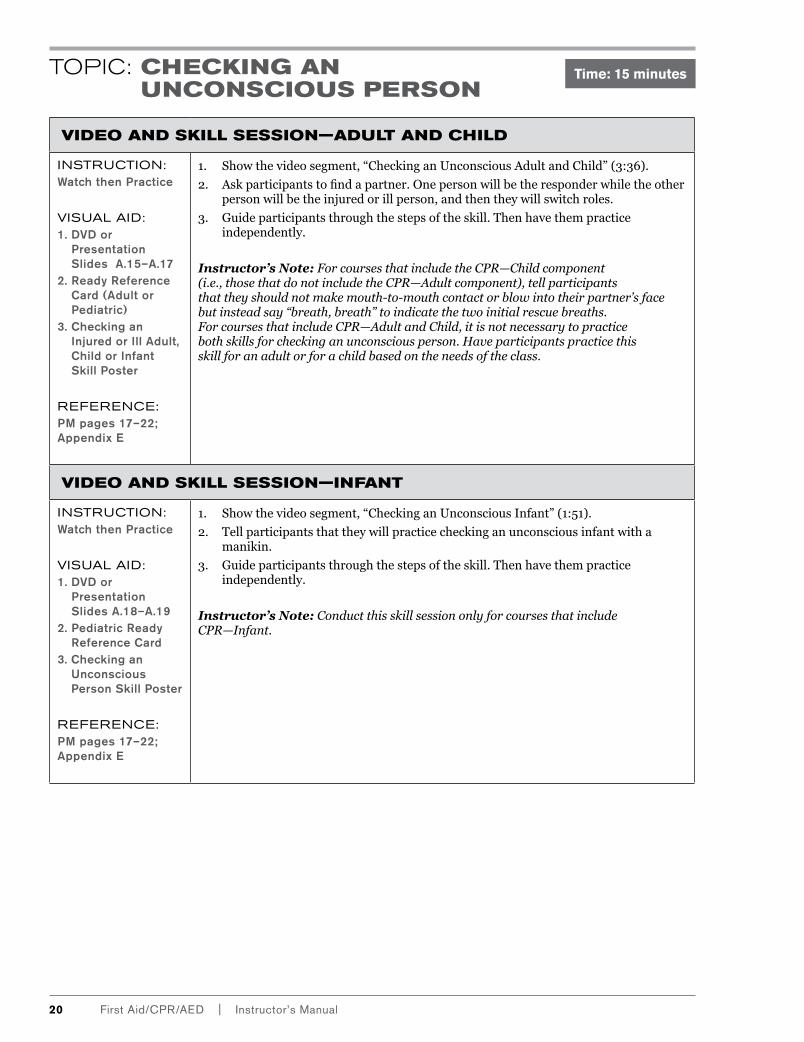
TOPIC: CHECkING AN UNCONSCIOUS PERSON
VIDEO AND SkILL SESSION—ADULT AND CHILD
INSTRUCTION:Watch then Practice
VISUAL AID:1. DVD or
Presentation Slides A.15–A.17
2. Ready Reference card (Adult or Pediatric)
3. checking an injured or ill Adult, child or infant Skill Poster
REFERENCE:PM pages 17–22; Appendix e
1. Showthevideosegment,“CheckinganUnconsciousAdultandChild”(3:36).
2. Askparticipantstofindapartner.Onepersonwillbetheresponderwhiletheotherpersonwillbetheinjuredorillperson,andthentheywillswitchroles.
3. Guideparticipantsthroughthestepsoftheskill.Thenhavethempracticeindependently.
Instructor’s Note: For courses that include the CPR—Child component (i.e., those that do not include the CPR—Adult component), tell participants that they should not make mouth-to-mouth contact or blow into their partner’s face but instead say “breath, breath” to indicate the two initial rescue breaths. For courses that include CPR—Adult and Child, it is not necessary to practice both skills for checking an unconscious person. Have participants practice this skill for an adult or for a child based on the needs of the class.
VIDEO AND SkILL SESSION—INFANT
INSTRUCTION:Watch then Practice
VISUAL AID:1. DVD or
Presentation Slides A.18–A.19
2. Pediatric Ready Reference card
3. checking an Unconscious Person Skill Poster
REFERENCE:PM pages 17–22; Appendix e
1. Showthevideosegment,“CheckinganUnconsciousInfant”(1:51).
2. Tellparticipantsthattheywillpracticecheckinganunconsciousinfantwithamanikin.
3. Guideparticipantsthroughthestepsoftheskill.Thenhavethempracticeindependently.
Instructor’s Note: Conduct this skill session only for courses that include CPR—Infant.
Time: 15 minutes
20 First Aid/CPR/AeD | Instructor’s Manual
21lesson 1 | Before Giving Care and Checking an Injured or Ill Person
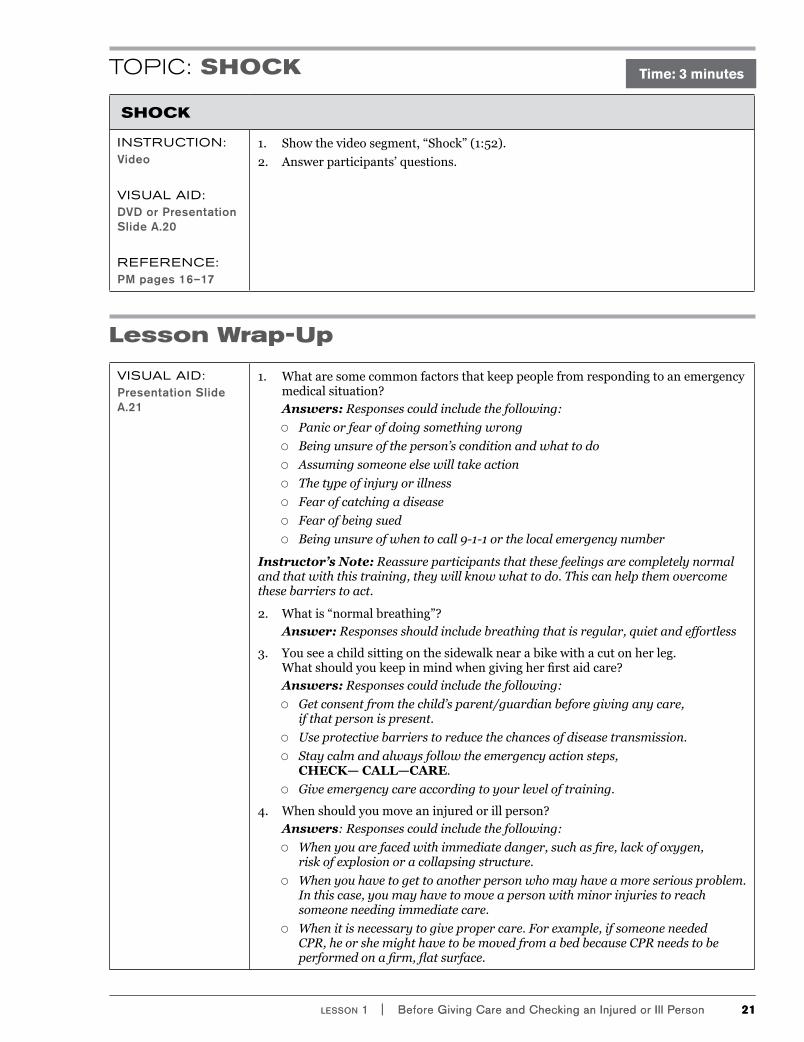
TOPIC: SHOCk
SHOCk
INSTRUCTION:Video
VISUAL AID:DVD or Presentation Slide A.20
REFERENCE:PM pages 16–17
1. Showthevideosegment,“Shock”(1:52).
2. Answerparticipants’questions.
Time: 3 minutes
Lesson Wrap-Up
VISUAL AID:Presentation Slide A.21
1. Whataresomecommonfactorsthatkeeppeoplefromrespondingtoanemergencymedicalsituation?Answers: Responses could include the following:
■{ Panic or fear of doing something wrong
■{ Being unsure of the person’s condition and what to do
■{ Assuming someone else will take action
■{ The type of injury or illness
■{ Fear of catching a disease
■{ Fear of being sued
■{ Being unsure of when to call 9-1-1 or the local emergency number
Instructor’s Note: Reassure participants that these feelings are completely normal and that with this training, they will know what to do. This can help them overcome these barriers to act.
2. Whatis“normalbreathing”?Answer: Responses should include breathing that is regular, quiet and effortless
3. Youseeachildsittingonthesidewalknearabikewithacutonherleg.Whatshouldyoukeepinmindwhengivingherfirstaidcare?Answers: Responses could include the following:
■{ Get consent from the child’s parent/guardian before giving any care, if that person is present.
■{ Use protective barriers to reduce the chances of disease transmission.
■{ Stay calm and always follow the emergency action steps, CHECK— CALL—CARE.
■{ Give emergency care according to your level of training.
4. Whenshouldyoumoveaninjuredorillperson?Answers: Responses could include the following:
■{ When you are faced with immediate danger, such as fire, lack of oxygen, risk of explosion or a collapsing structure.
■{ When you have to get to another person who may have a more serious problem. In this case, you may have to move a person with minor injuries to reach someone needing immediate care.
■{ When it is necessary to give proper care. For example, if someone needed CPR, he or she might have to be moved from a bed because CPR needs to be performed on a firm, flat surface.
21lesson 1 | Before Giving Care and Checking an Injured or Ill Person
Skill Chart and Skill Assessment Tool
SkILL CHART
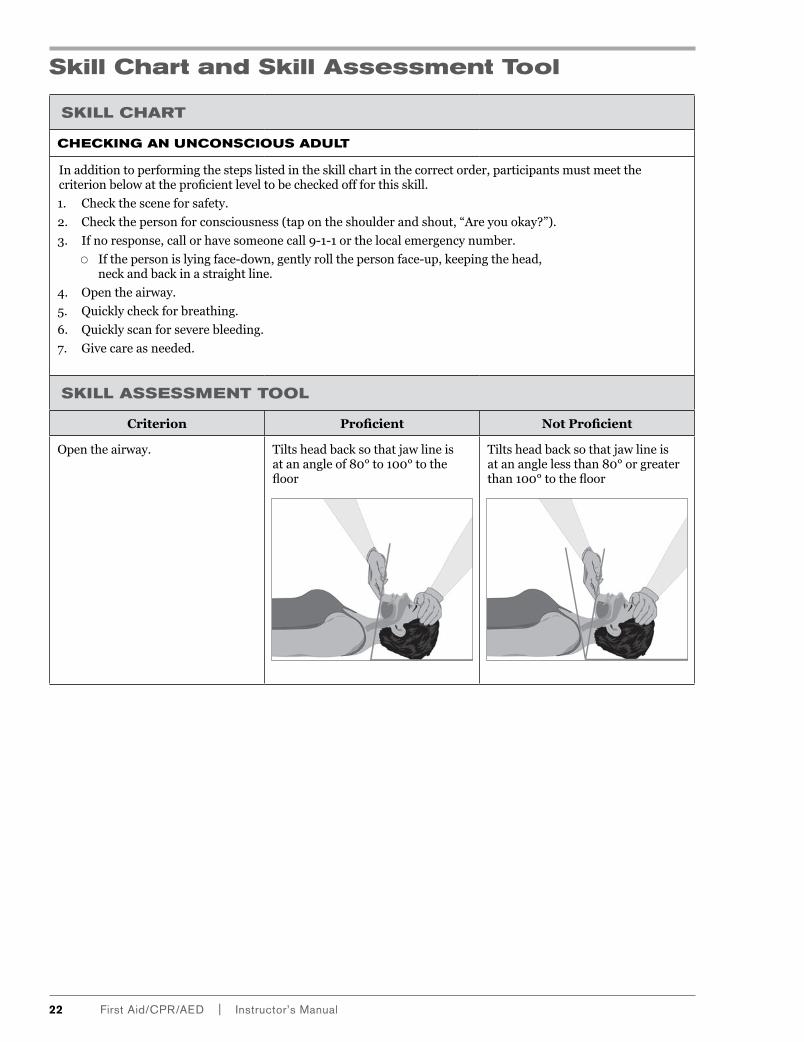
CHECkING AN UNCONSCIOUS ADULT
Inadditiontoperformingthestepslistedintheskillchartinthecorrectorder,participantsmustmeetthecriterionbelowattheproficientleveltobecheckedoffforthisskill.
1. Checkthesceneforsafety.
2. Checkthepersonforconsciousness(tapontheshoulderandshout,“Areyouokay?”).
3. Ifnoresponse,callorhavesomeonecall9-1-1orthelocalemergencynumber.
■{ Ifthepersonislyingface-down,gentlyrollthepersonface-up,keepingthehead,neckandbackinastraightline.
4. Opentheairway.
5. Quicklycheckforbreathing.
6. Quicklyscanforseverebleeding.
7. Givecareasneeded.
SkILL ASSESSMENT TOOL
Criterion Proficient Not Proficient
Opentheairway. Tiltsheadbacksothatjawlineisatanangleof80°to100°tothefloor
Tiltsheadbacksothatjawlineisatananglelessthan80°orgreaterthan100°tothefloor
22 First Aid/CPR/AeD | Instructor’s Manual
23lesson 1 | Before Giving Care and Checking an Injured or Ill Person
Skill Chart and Skill Assessment Tool
SkILL CHART
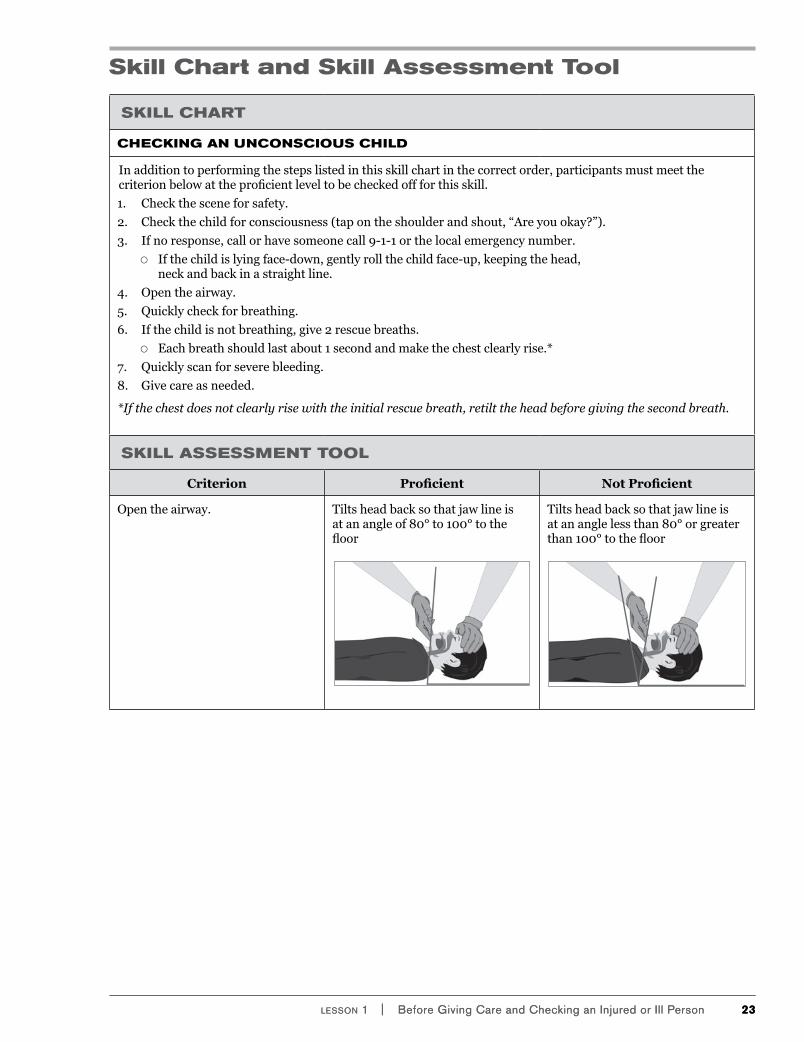
CHECkING AN UNCONSCIOUS CHILD
Inadditiontoperformingthestepslistedinthisskillchartinthecorrectorder,participantsmustmeetthecriterionbelowattheproficientleveltobecheckedoffforthisskill.
1. Checkthesceneforsafety.
2. Checkthechildforconsciousness(tapontheshoulderandshout,“Areyouokay?”).
3. Ifnoresponse,callorhavesomeonecall9-1-1orthelocalemergencynumber.
■{ Ifthechildislyingface-down,gentlyrollthechildface-up,keepingthehead,neckandbackinastraightline.
4. Opentheairway.
5. Quicklycheckforbreathing.
6. Ifthechildisnotbreathing,give2rescuebreaths.
■{ Eachbreathshouldlastabout1secondandmakethechestclearlyrise.*
7. Quicklyscanforseverebleeding.
8. Givecareasneeded.
*If the chest does not clearly rise with the initial rescue breath, retilt the head before giving the second breath.
SkILL ASSESSMENT TOOL
Criterion Proficient Not Proficient
Opentheairway. Tiltsheadbacksothatjawlineisatanangleof80°to100°tothefloor
Tiltsheadbacksothatjawlineisatananglelessthan80°orgreaterthan100°tothefloor
23lesson 1 | Before Giving Care and Checking an Injured or Ill Person
Skill Chart and Skill Assessment Tool
SKILL CHART
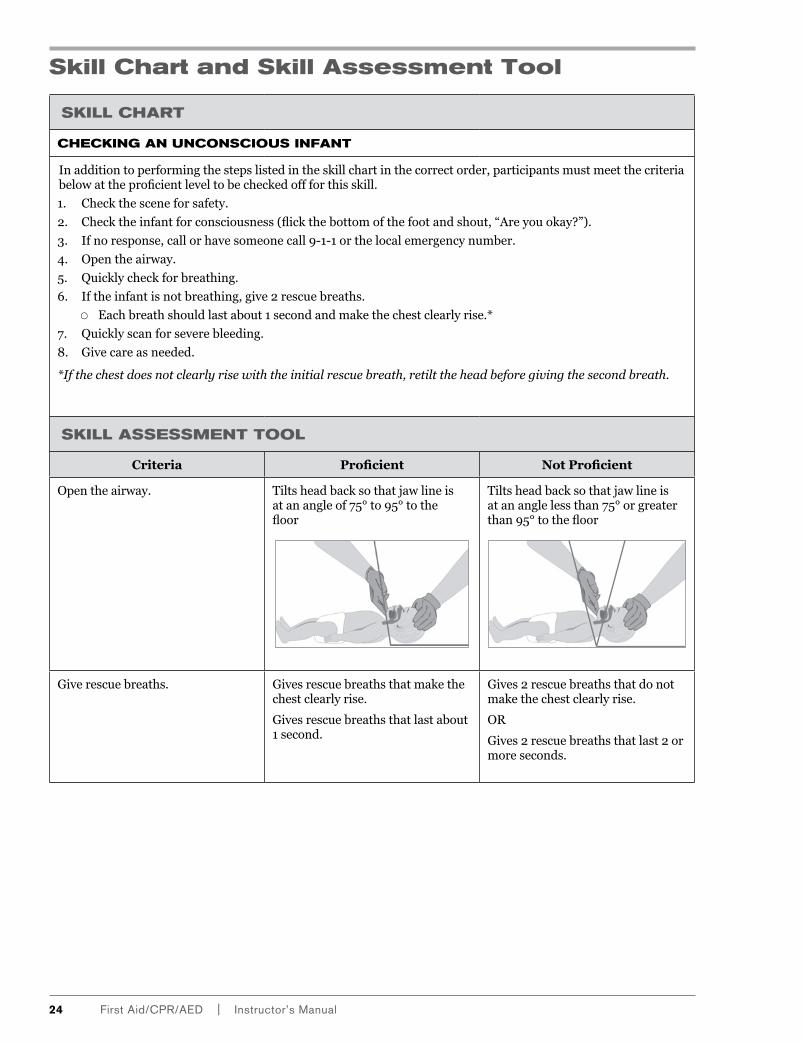
CHeCKIng An UnConSCIoUS InfAnT
In addition to performing the steps listed in the skill chart in the correct order, participants must meet the criteria below at the proficient level to be checked off for this skill.
1. Check the scene for safety.
2. Check the infant for consciousness (flick the bottom of the foot and shout, “Are you okay?”).
3. If no response, call or have someone call 9-1-1 or the local emergency number.
4. Open the airway.
5. Quickly check for breathing.
6. If the infant is not breathing, give 2 rescue breaths.
{{ Each breath should last about 1 second and make the chest clearly rise.*
7. Quickly scan for severe bleeding.
8. Give care as needed.
*If the chest does not clearly rise with the initial rescue breath, retilt the head before giving the second breath.
SKILL ASSeSSmenT TooL
Criteria Proficient Not Proficient
Open the airway. Tilts head back so that jaw line is at an angle of 75° to 95° to the floor
Tilts head back so that jaw line is at an angle less than 75° or greater than 95° to the floor
Give rescue breaths. Gives rescue breaths that make the chest clearly rise.
Gives rescue breaths that last about 1 second.
Gives 2 rescue breaths that do not make the chest clearly rise.
OR
Gives 2 rescue breaths that last 2 or more seconds.
24 First Aid/CPR/AED | Instructor’s Manual

25lesson 2 | Cardiac emergencies and CPR
lesson 2
¡¡ Lesson Length: 35 minutes
GUIDANCE FOR THE INSTRUCTORTo complete this lesson and meet the lesson objectives, you must:
■■ Conduct the lecture for signals of a Heart Attack.■■ show the video segment, “Recognizing and Caring for Cardiac emergencies” (4:28). ■■ show the appropriate CPR video segment for the course(s) being taught:
■{ “CPR—Adult and Child” (7:46)■{ “CPR—Infant” (6:51)
■■ Conduct the appropriate CPR skill session(s) for the course(s) being taught.■■ explain what to do if the chest does not rise with rescue breaths.■■ Conduct the lesson Wrap-Up.
LESSON OBJECTIVES After completing this lesson, participants will be able to:
■■ Recognize the signals of a cardiac emergency.■■ Identify the links in the Cardiac Chain of survival.■■ Describe how to care for a heart attack.■■ list the causes of cardiac arrest.■■ explain the role of CPR in cardiac arrest. ■■ Demonstrate how to perform CPR.
MATERIALS, EQUIPMENT AND SUPPLIES
■■ CPR breathing barriers (one for each participant)■■ Manikins (one for every two participants)■■ nonlatex disposable gloves (multiple sizes)
CARDIAC eMeRgenCIes AnD CPR
TOPIC: CARDIAC EMERGENCIES
SIGNALS OF A HEART ATTACk
INSTRUCTION:lecture
VISUAL AID:Presentation slides B.1–B.2
REFERENCE:PM, pages 30–33
1. Recognizingsignalsofaheartattackisimportantforall—eachyearnearly800,000peoplehavetheirfirstheartattackandanadditional470,000haveanotherheartattack.
2. Themostcommonsignalofaheartattackispersistentchestpain,discomfortorpressurethatlastslongerthan3–5minutes,thatgoesawayandcomesbackorthatpersistsevenduringrest.Othersignalsinclude:
■{ Painrangingfromdiscomforttoanunbearablecrushingsensationinthechest.
■{ Pressure,squeezing,tightness,achingorheavinessinthechest.
■{ Milddiscomfort,pressureorpainoftenfeltinthecenterofthechest.
■{ Chestdiscomfortorpainthatspreadstotheshoulder,arm,neck,jaw,stomachorback.
■{ Dizziness,light-headednessorlossofconsciousness.
Time: 8 minutes
26 First Aid/CPR/AeD | Instructor’s Manual26 First Aid/CPR/AeD | Instructor’s Manual
SIGNALS OF A HEART ATTACk Continued
■{ Troublebreathing,includingnoisybreathing,shortnessofbreathandbreathingthatisfasterthannormal.
■{ Nausea.
■{ Paleorashen(gray)skin.
■{ Sweating—facemaybemoistorpersonmaybesweatingprofusely.
3. Apersonmaydenythatheorsheisexperiencingsignalsofaheartattack.
4. Womenaresomewhatmorelikelytoexperiencesuchsignalsas:
■{ Shortnessofbreath.
■{ Nauseaorvomiting.
■{ Stomach,backorjawpain.
■{ Unexplainedfatigueormalaise.
■{ Sudden,sharpbutshort-livedpainoutsidethebreastbone.
5. Thequickeryourecognizeacardiacemergencyandtakeaction,thebetterthechanceofsurvival.
RECOGNIzING AND CARING FOR CARDIAC EMERGENCIES
INSTRUCTION:Video
VISUAL AID:DVD or Presentation slide B.3
REFERENCE:PM pages 33–34
1. Showthevideosegment,“RecognizingandCaringforCardiacEmergencies”(4:28).
2. Answerparticipants’questions.
TOPIC: CPR
VIDEO AND SkILL SESSION
INSTRUCTION:Practice While You Watch
VISUAL AID:1. DVD or
Presentation slides B.4–B.8
2. Ready Reference Card (Adult or Pediatric)
REFERENCE:PM, pages 34–39; Appendix e
1. Tellparticipantsthattheyareabouttopracticealongwithavideosegmentshowingthecareforapersonwhoisunconsciousandnotbreathing.
2. Haveparticipantspositionthemselvessothattheycanclearlyviewthemonitor.
3. ShowtheappropriateCPRvideosegmentforthecourse(s)beingtaught.
Instructor’s Note: If you are teaching a course that includes CPR—Adult and Child, you need to complete only one skill session. Adult or child manikins may be used. Select the manikins based on the needs of the course. If you are teaching CPR—Infant, only infant manikins may be used.
Time: 22 minutes
27lesson 2 | Cardiac emergencies and CPR
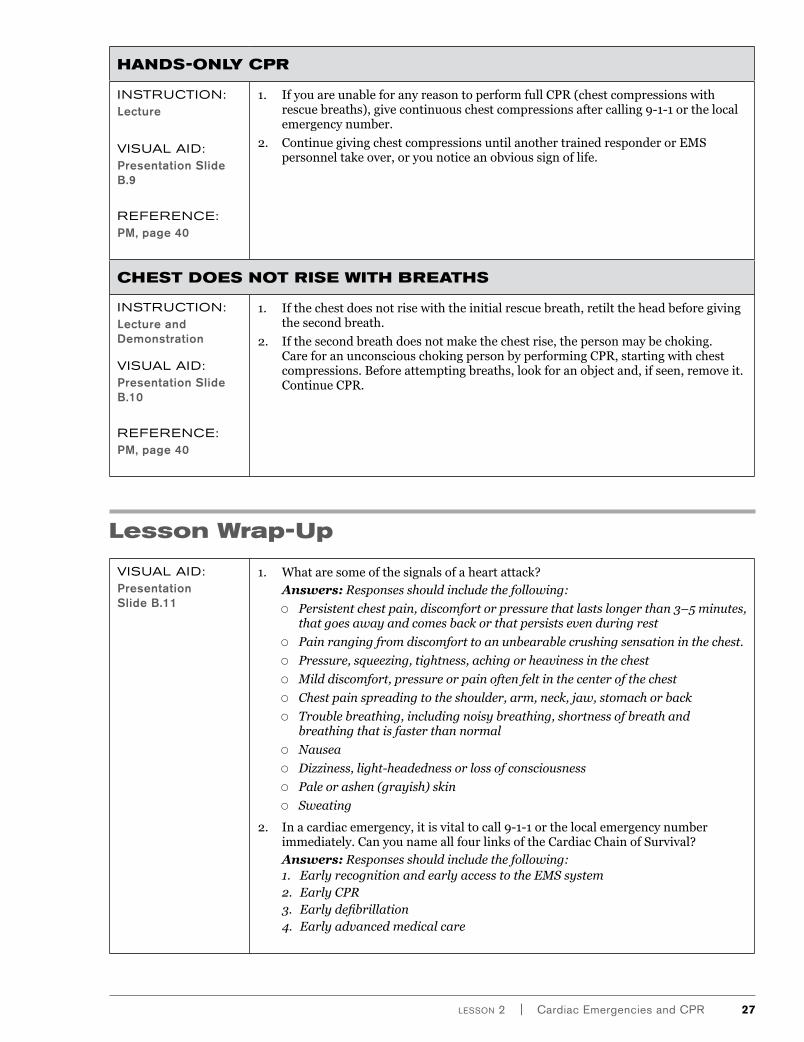
Lesson Wrap-Up
VISUAL AID:Presentation slide B.11
1. Whataresomeofthesignalsofaheartattack?Answers: Responses should include the following:
■{ Persistent chest pain, discomfort or pressure that lasts longer than 3–5 minutes, that goes away and comes back or that persists even during rest
■{ Pain ranging from discomfort to an unbearable crushing sensation in the chest.
■{ Pressure, squeezing, tightness, aching or heaviness in the chest
■{ Mild discomfort, pressure or pain often felt in the center of the chest
■{ Chest pain spreading to the shoulder, arm, neck, jaw, stomach or back
■{ Trouble breathing, including noisy breathing, shortness of breath and breathing that is faster than normal
■{ Nausea
■{ Dizziness, light-headedness or loss of consciousness
■{ Pale or ashen (grayish) skin
■{ Sweating
2. Inacardiacemergency,itisvitaltocall9-1-1orthelocalemergencynumberimmediately.CanyounameallfourlinksoftheCardiacChainofSurvival?Answers: Responses should include the following:1. Early recognition and early access to the EMS system2. Early CPR3. Early defibrillation4. Early advanced medical care
HANDS-ONLy CPR
INSTRUCTION:lecture
VISUAL AID:Presentation slide B.9
REFERENCE: PM, page 40
1. IfyouareunableforanyreasontoperformfullCPR(chestcompressionswithrescuebreaths),givecontinuouschestcompressionsaftercalling9-1-1orthelocalemergencynumber.
2. ContinuegivingchestcompressionsuntilanothertrainedresponderorEMSpersonneltakeover,oryounoticeanobvioussignoflife.
CHEST DOES NOT RISE WITH BREATHS
INSTRUCTION:lecture and Demonstration
VISUAL AID:Presentation slide B.10
REFERENCE: PM, page 40
1. Ifthechestdoesnotrisewiththeinitialrescuebreath,retilttheheadbeforegivingthesecondbreath.
2. Ifthesecondbreathdoesnotmakethechestrise,thepersonmaybechoking.CareforanunconsciouschokingpersonbyperformingCPR,startingwithchestcompressions.Beforeattemptingbreaths,lookforanobjectand,ifseen,removeit.ContinueCPR.
28 First Aid/CPR/AeD | Instructor’s Manual
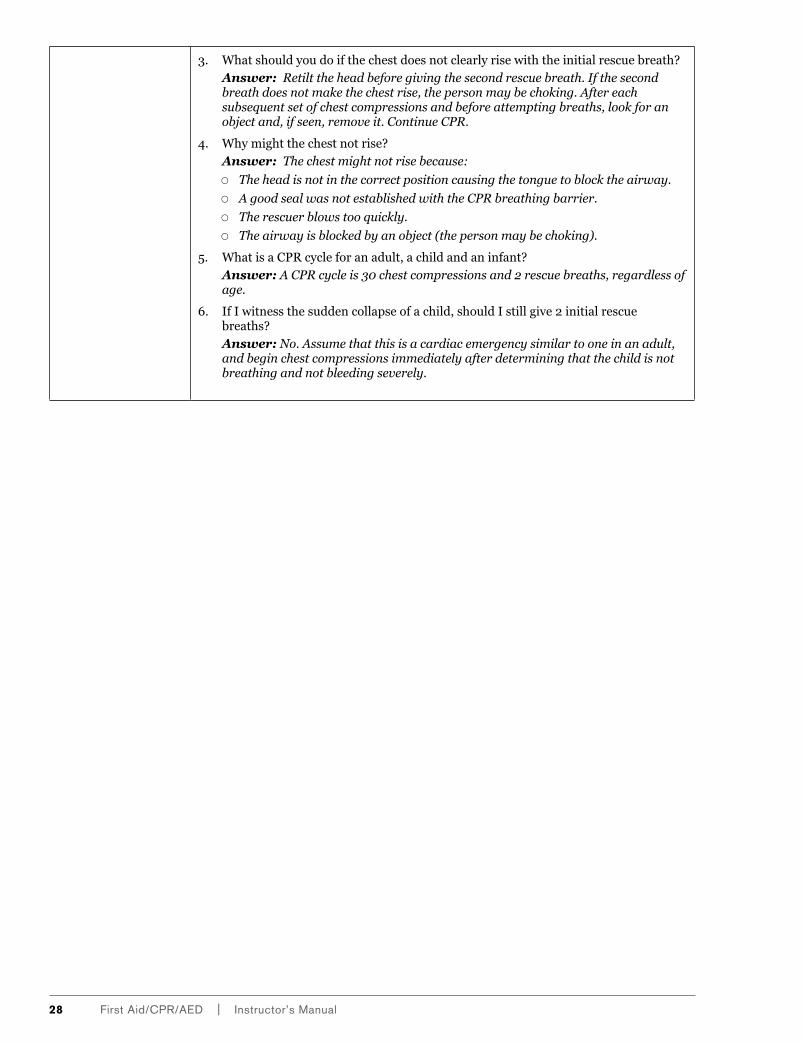
3. Whatshouldyoudoifthechestdoesnotclearlyrisewiththeinitialrescuebreath?Answer: Retilt the head before giving the second rescue breath. If the second breath does not make the chest rise, the person may be choking. After each subsequent set of chest compressions and before attempting breaths, look for an object and, if seen, remove it. Continue CPR.
4. Whymightthechestnotrise?Answer: The chest might not rise because:
■{ The head is not in the correct position causing the tongue to block the airway.
■{ A good seal was not established with the CPR breathing barrier.
■{ The rescuer blows too quickly.
■{ The airway is blocked by an object (the person may be choking).
5. WhatisaCPRcycleforanadult,achildandaninfant?Answer: A CPR cycle is 30 chest compressions and 2 rescue breaths, regardless of age.
6. IfIwitnessthesuddencollapseofachild,shouldIstillgive2initialrescuebreaths?Answer: No. Assume that this is a cardiac emergency similar to one in an adult, and begin chest compressions immediately after determining that the child is not breathing and not bleeding severely.
29lesson 2 | Cardiac emergencies and CPR
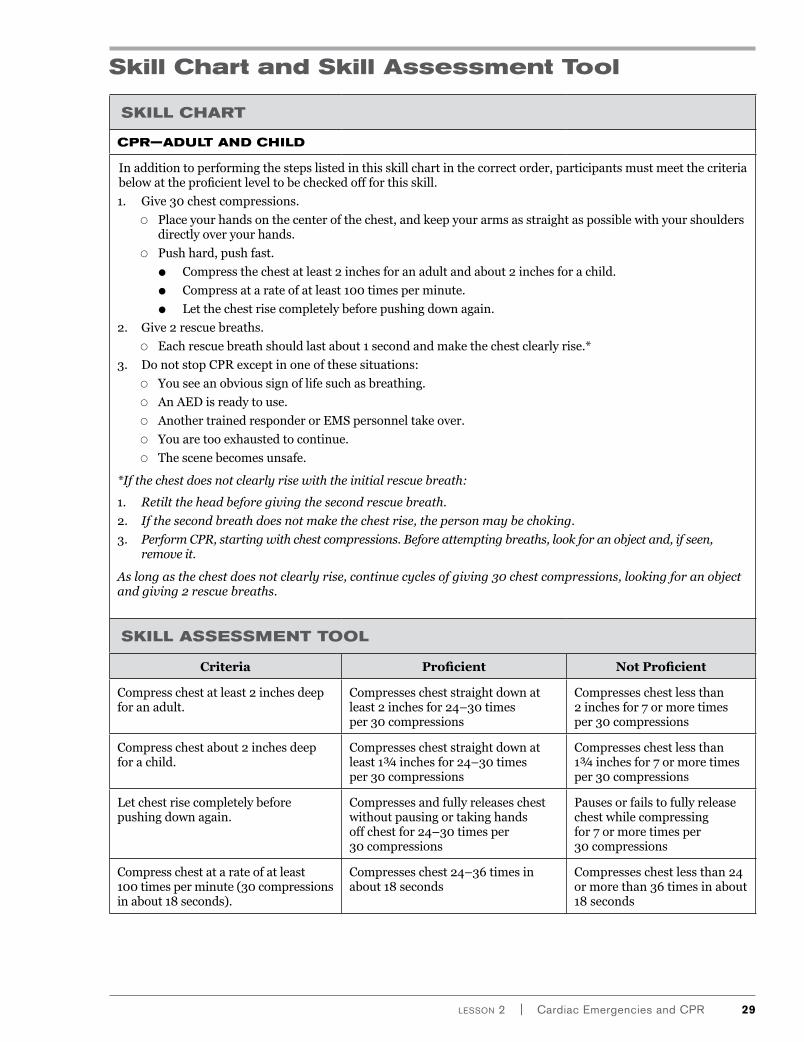
Skill Chart and Skill Assessment Tool
SkILL CHART
CPR—ADULT AND CHILD
Inadditiontoperformingthestepslistedinthisskillchartinthecorrectorder,participantsmustmeetthecriteriabelowattheproficientleveltobecheckedoffforthisskill.
1. Give30chestcompressions.
■{ Placeyourhandsonthecenterofthechest,andkeepyourarmsasstraightaspossiblewithyourshouldersdirectlyoveryourhands.
■{ Pushhard,pushfast.
■● Compressthechestatleast2inchesforanadultandabout2inchesforachild.
■● Compressatarateofatleast100timesperminute.
■● Letthechestrisecompletelybeforepushingdownagain.
2. Give2rescuebreaths.
■{ Eachrescuebreathshouldlastabout1secondandmakethechestclearlyrise.*
3. DonotstopCPRexceptinoneofthesesituations:
■{ Youseeanobvioussignoflifesuchasbreathing.
■{ AnAEDisreadytouse.
■{ AnothertrainedresponderorEMSpersonneltakeover.
■{ Youaretooexhaustedtocontinue.
■{ Thescenebecomesunsafe.
*If the chest does not clearly rise with the initial rescue breath:
1. Retilt the head before giving the second rescue breath.
2. If the second breath does not make the chest rise, the person may be choking.
3. Perform CPR, starting with chest compressions. Before attempting breaths, look for an object and, if seen, remove it.
As long as the chest does not clearly rise, continue cycles of giving 30 chest compressions, looking for an object and giving 2 rescue breaths.
SkILL ASSESSMENT TOOL
Criteria Proficient Not Proficient
Compresschestatleast2inchesdeepforanadult.
Compressescheststraightdownatleast2inchesfor24–30timesper30compressions
Compresseschestlessthan2inchesfor7ormoretimesper30compressions
Compresschestabout2inchesdeepforachild.
Compressescheststraightdownatleast1¾inchesfor24–30timesper30compressions
Compresseschestlessthan1¾inchesfor7ormoretimesper30compressions
Letchestrisecompletelybeforepushingdownagain.
Compressesandfullyreleaseschestwithoutpausingortakinghandsoffchestfor24–30timesper30compressions
Pausesorfailstofullyreleasechestwhilecompressingfor7ormoretimesper30compressions
Compresschestatarateofatleast100timesperminute(30compressionsinabout18seconds).
Compresseschest24–36timesinabout18seconds
Compresseschestlessthan24ormorethan36timesinabout18seconds
30 First Aid/CPR/AeD | Instructor’s Manual
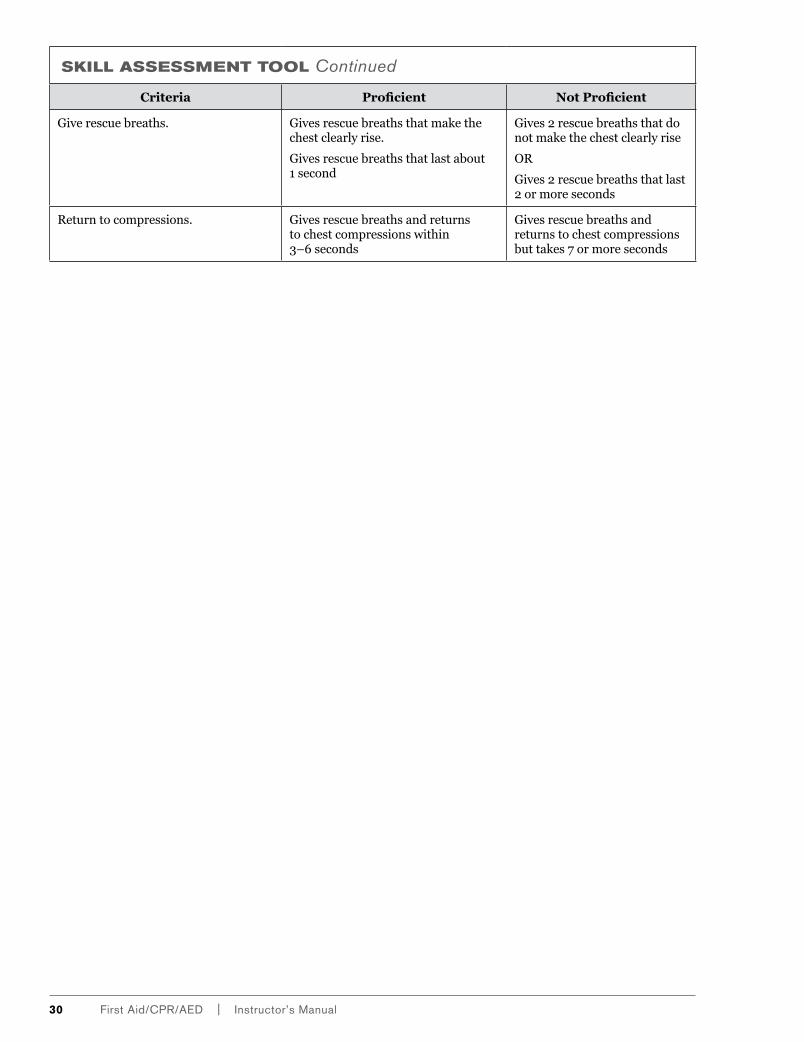
SkILL ASSESSMENT TOOL Continued
Criteria Proficient Not Proficient
Giverescuebreaths. Givesrescuebreathsthatmakethechestclearlyrise.
Givesrescuebreathsthatlastabout1second
Gives2rescuebreathsthatdonotmakethechestclearlyrise
OR
Gives2rescuebreathsthatlast2ormoreseconds
Returntocompressions. Givesrescuebreathsandreturnstochestcompressionswithin3–6seconds
Givesrescuebreathsandreturnstochestcompressionsbuttakes7ormoreseconds
31lesson 2 | Cardiac emergencies and CPR
Skill Chart and Skill Assessment Tool
SkILL CHART
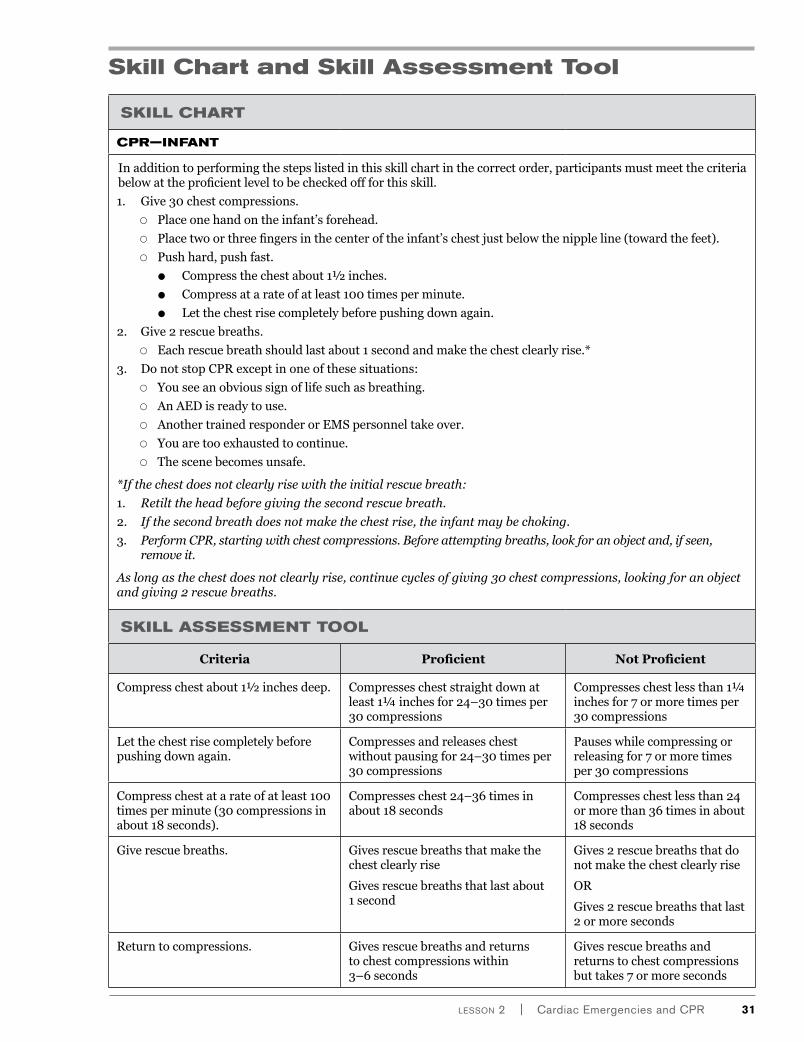
CPR—INFANT
Inadditiontoperformingthestepslistedinthisskillchartinthecorrectorder,participantsmustmeetthecriteriabelowattheproficientleveltobecheckedoffforthisskill.
1. Give30chestcompressions.
■{ Placeonehandontheinfant’sforehead.
■{ Placetwoorthreefingersinthecenteroftheinfant’schestjustbelowthenippleline(towardthefeet).
■{ Pushhard,pushfast.
■● Compressthechestabout1½inches.
■● Compressatarateofatleast100timesperminute.
■● Letthechestrisecompletelybeforepushingdownagain.
2. Give2rescuebreaths.
■{ Eachrescuebreathshouldlastabout1secondandmakethechestclearlyrise.*
3. DonotstopCPRexceptinoneofthesesituations:
■{ Youseeanobvioussignoflifesuchasbreathing.
■{ AnAEDisreadytouse.
■{ AnothertrainedresponderorEMSpersonneltakeover.
■{ Youaretooexhaustedtocontinue.
■{ Thescenebecomesunsafe.
*If the chest does not clearly rise with the initial rescue breath:
1. Retilt the head before giving the second rescue breath.
2. If the second breath does not make the chest rise, the infant may be choking.
3. Perform CPR, starting with chest compressions. Before attempting breaths, look for an object and, if seen, remove it.
As long as the chest does not clearly rise, continue cycles of giving 30 chest compressions, looking for an object and giving 2 rescue breaths.
SkILL ASSESSMENT TOOL
Criteria Proficient Not Proficient
Compresschestabout1½inchesdeep. Compressescheststraightdownatleast1¼inchesfor24–30timesper30compressions
Compresseschestlessthan1¼inchesfor7ormoretimesper30compressions
Letthechestrisecompletelybeforepushingdownagain.
Compressesandreleaseschestwithoutpausingfor24–30timesper30compressions
Pauseswhilecompressingorreleasingfor7ormoretimesper30compressions
Compresschestatarateofatleast100timesperminute(30compressionsinabout18seconds).
Compresseschest24–36timesinabout18seconds
Compresseschestlessthan24ormorethan36timesinabout18seconds
Giverescuebreaths. Givesrescuebreathsthatmakethechestclearlyrise
Givesrescuebreathsthatlastabout1second
Gives2rescuebreathsthatdonotmakethechestclearlyrise
OR
Gives2rescuebreathsthatlast2ormoreseconds
Returntocompressions. Givesrescuebreathsandreturnstochestcompressionswithin3–6seconds
Givesrescuebreathsandreturnstochestcompressionsbuttakes7ormoreseconds

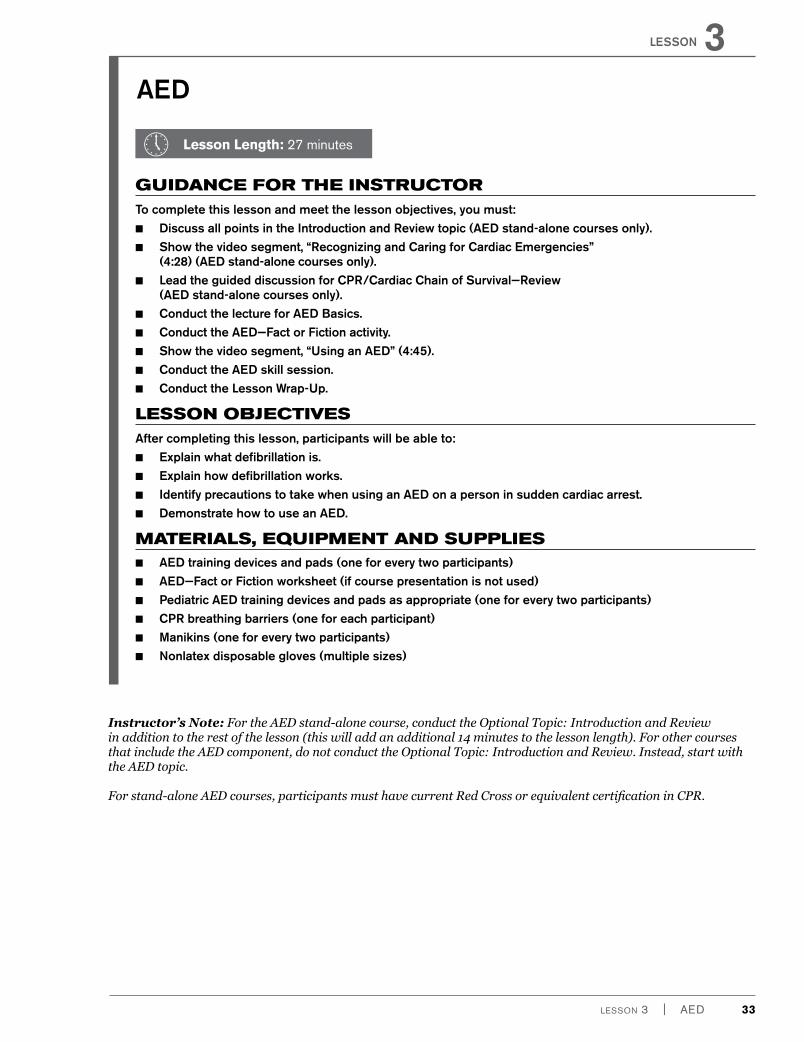
¡¡ Lesson Length: 27 minutes
GUIDANCE FOR THE INSTRUCTORTo complete this lesson and meet the lesson objectives, you must:
■■ Discuss all points in the Introduction and Review topic (AED stand-alone courses only).■■ Show the video segment, “Recognizing and Caring for Cardiac Emergencies”
(4:28) (AED stand-alone courses only).■■ Lead the guided discussion for CPR/Cardiac Chain of Survival—Review
(AED stand-alone courses only).■■ Conduct the lecture for AED Basics.■■ Conduct the AED—Fact or Fiction activity.■■ Show the video segment, “Using an AED” (4:45).■■ Conduct the AED skill session.■■ Conduct the Lesson Wrap-Up.
LESSON OBJECTIVES After completing this lesson, participants will be able to:
■■ Explain what defibrillation is.■■ Explain how defibrillation works.■■ Identify precautions to take when using an AED on a person in sudden cardiac arrest. ■■ Demonstrate how to use an AED.
MATERIALS, EQUIPMENT AND SUPPLIES ■■ AED training devices and pads (one for every two participants)■■ AED—Fact or Fiction worksheet (if course presentation is not used)■■ Pediatric AED training devices and pads as appropriate (one for every two participants) ■■ CPR breathing barriers (one for each participant)■■ Manikins (one for every two participants)■■ Nonlatex disposable gloves (multiple sizes)
AED
LESSoN 3
Lesson 3 | AeD 33
Instructor’s Note: For the AED stand-alone course, conduct the Optional Topic: Introduction and Review in addition to the rest of the lesson (this will add an additional 14 minutes to the lesson length). For other courses that include the AED component, do not conduct the Optional Topic: Introduction and Review. Instead, start with the AED topic.
For stand-alone AED courses, participants must have current Red Cross or equivalent certification in CPR.

34 First Aid/CPR/AeD | Instructor’s Manual
OptiOnal tOpiC: INTRODUCTION AND REVIEW
Time: 14 minutes
WELCOME
INSTRUCTION:Discussion
REFERENCE:IM, Chapters 1 and 2
1. Introduceyourself.
2. Haveparticipantsintroducethemselves.
3. HaveparticipantsprinttheirnamesontheCourse RecordandCourse RecordAddendumortheActivityReport.
4. ExplainthepurposeofAmericanRedCrossFirstAid/CPR/AEDcourses.
5. Informparticipantsofcompletionrequirements.
6. Reviewanyfacilitypoliciesandprocedures.
HEALTH AND SAFETy PRECAUTIONS FOR THE COURSE
INSTRUCTION:Discussion
REFERENCE:Appendix C
1. Explaintoparticipantsthatstandardprecautionswillbefollowedduringthistraining.
2. Askparticipantstoinformyouprivatelyiftheyhaveanymedicalconditionordisabilitythatmightaffectcourseparticipation.
3. Tellparticipantsthattheyshouldrequestaseparatetrainingmanikiniftheyhaveaconditionthatwouldincreasetheriskofdiseasetransmission.
CARDIAC EMERGENCIES
INSTRUCTION:Video
VISUAL AID:DVD or Presentation Slide B.12
REFERENCE:PM, pages 33–34
1. Showthevideosegment,“RecognizingandCaringforCardiacEmergencies”(4:28)
2. Answerparticipants’questions.
CPR/CARDIAC CHAIN OF SURVIVAL—REVIEW
INSTRUCTION:Guided Discussion
REFERENCE:PM, pages 30–39
1. LeadparticipantsinadiscussiontoreviewbasicCPRinformationbyasking:
■{ Whataresomeofthesignalsofaheartattack?
■{ WhatarethefourlinksoftheCardiacChainofSurvival?
■{ WhatisaCPRcycleforanadult,achildandaninfant?
2. Coverthefollowingpointsduringthediscussion:
■{ Signalsofaheartattackinclude:
■● Persistentchestpain,discomfortorpressurethatlastslongerthan3–5minutes,thatgoesawayandcomesbackorthatpersistsevenduringrest.
■● Pressure,squeezing,tightness,achingorheavinessinthechest.
■● Milddiscomfort,pressureorpainoftenfeltinthecenterofthechest.
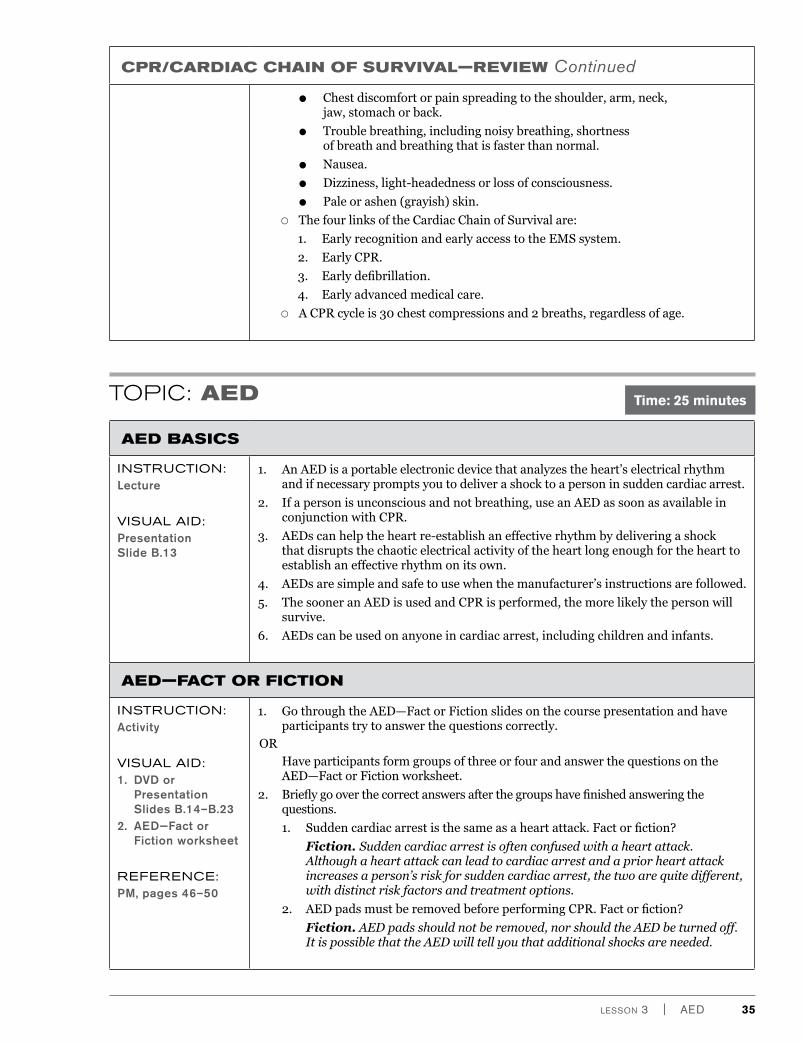
Lesson 3 | AeD 35
CPR/CARDIAC CHAIN OF SURVIVAL—REVIEW Continued
■● Chestdiscomfortorpainspreadingtotheshoulder,arm,neck,jaw,stomachorback.
■● Troublebreathing,includingnoisybreathing,shortnessofbreathandbreathingthatisfasterthannormal.
■● Nausea.
■● Dizziness,light-headednessorlossofconsciousness.
■● Paleorashen(grayish)skin.
■{ ThefourlinksoftheCardiacChainofSurvivalare:
1. EarlyrecognitionandearlyaccesstotheEMSsystem.
2. EarlyCPR.
3. Earlydefibrillation.
4. Earlyadvancedmedicalcare.
■{ ACPRcycleis30chestcompressionsand2breaths,regardlessofage.
tOpiC: AED Time: 25 minutes
AED BASICS
INSTRUCTION:Lecture
VISUAL AID:Presentation Slide B.13
1. AnAEDisaportableelectronicdevicethatanalyzestheheart’selectricalrhythmandifnecessarypromptsyoutodeliverashocktoapersoninsuddencardiacarrest.
2. Ifapersonisunconsciousandnotbreathing,useanAEDassoonasavailableinconjunctionwithCPR.
3. AEDscanhelptheheartre-establishaneffectiverhythmbydeliveringashockthatdisruptsthechaoticelectricalactivityoftheheartlongenoughforthehearttoestablishaneffectiverhythmonitsown.
4. AEDsaresimpleandsafetousewhenthemanufacturer’sinstructionsarefollowed.
5. ThesooneranAEDisusedandCPRisperformed,themorelikelythepersonwillsurvive.
6. AEDscanbeusedonanyoneincardiacarrest,includingchildrenandinfants.
AED—FACT OR FICTION
INSTRUCTION:Activity
VISUAL AID:1. DVD or
Presentation Slides B.14–B.23
2. AED—Fact or Fiction worksheet
REFERENCE:PM, pages 46–50
1. GothroughtheAED—FactorFictionslidesonthecoursepresentationandhaveparticipantstrytoanswerthequestionscorrectly.
ORHaveparticipantsformgroupsofthreeorfourandanswerthequestionsontheAED—FactorFictionworksheet.
2. Brieflygooverthecorrectanswersafterthegroupshavefinishedansweringthequestions.
1. Suddencardiacarrestisthesameasaheartattack.Factorfiction?
Fiction.Sudden cardiac arrest is often confused with a heart attack. Although a heart attack can lead to cardiac arrest and a prior heart attack increases a person’s risk for sudden cardiac arrest, the two are quite different, with distinct risk factors and treatment options.
2. AEDpadsmustberemovedbeforeperformingCPR.Factorfiction?
Fiction. AED pads should not be removed, nor should the AED be turned off. It is possible that the AED will tell you that additional shocks are needed.
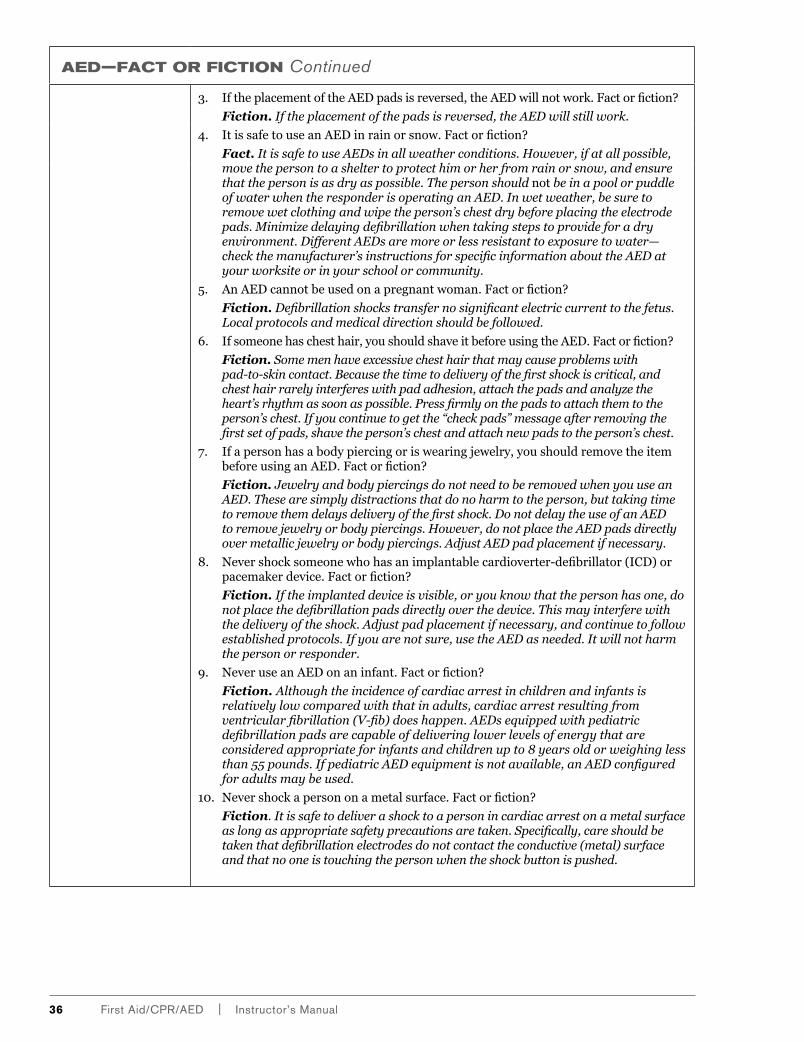
36 First Aid/CPR/AED | Instructor’s Manual
AED—FAct or Fiction Continued
3. IftheplacementoftheAEDpadsisreversed,theAEDwillnotwork.Factorfiction?
Fiction. If the placement of the pads is reversed, the AED will still work.
4. ItissafetouseanAEDinrainorsnow.Factorfiction?
Fact. It is safe to use AEDs in all weather conditions. However, if at all possible, move the person to a shelter to protect him or her from rain or snow, and ensure that the person is as dry as possible. The person should not be in a pool or puddle of water when the responder is operating an AED. In wet weather, be sure to remove wet clothing and wipe the person’s chest dry before placing the electrode pads. Minimize delaying defibrillation when taking steps to provide for a dry environment. Different AEDs are more or less resistant to exposure to water—check the manufacturer’s instructions for specific information about the AED at your worksite or in your school or community.
5. AnAEDcannotbeusedonapregnantwoman.Factorfiction?
Fiction. Defibrillation shocks transfer no significant electric current to the fetus. Local protocols and medical direction should be followed.
6. Ifsomeonehaschesthair,youshouldshaveitbeforeusingtheAED.Factorfiction?
Fiction. Some men have excessive chest hair that may cause problems with pad-to-skin contact. Because the time to delivery of the first shock is critical, and chest hair rarely interferes with pad adhesion, attach the pads and analyze the heart’s rhythm as soon as possible. Press firmly on the pads to attach them to the person’s chest. If you continue to get the “check pads” message after removing the first set of pads, shave the person’s chest and attach new pads to the person’s chest.
7. Ifapersonhasabodypiercingoriswearingjewelry,youshouldremovetheitembeforeusinganAED.Factorfiction?
Fiction. Jewelry and body piercings do not need to be removed when you use an AED. These are simply distractions that do no harm to the person, but taking time to remove them delays delivery of the first shock. Do not delay the use of an AED to remove jewelry or body piercings. However, do not place the AED pads directly over metallic jewelry or body piercings. Adjust AED pad placement if necessary.
8. Nevershocksomeonewhohasanimplantablecardioverter-defibrillator(ICD)orpacemakerdevice.Factorfiction?
Fiction. If the implanted device is visible, or you know that the person has one, do not place the defibrillation pads directly over the device. This may interfere with the delivery of the shock. Adjust pad placement if necessary, and continue to follow established protocols. If you are not sure, use the AED as needed. It will not harm the person or responder.
9. NeveruseanAEDonaninfant.Factorfiction?
Fiction. Although the incidence of cardiac arrest in children and infants is relatively low compared with that in adults, cardiac arrest resulting from ventricular fibrillation (V-fib) does happen. AEDs equipped with pediatric defibrillation pads are capable of delivering lower levels of energy that are considered appropriate for infants and children up to 8 years old or weighing less than 55 pounds. If pediatric AED equipment is not available, an AED configured for adults may be used.
10. Nevershockapersononametalsurface.Factorfiction?
Fiction. It is safe to deliver a shock to a person in cardiac arrest on a metal surface as long as appropriate safety precautions are taken. Specifically, care should be taken that defibrillation electrodes do not contact the conductive (metal) surface and that no one is touching the person when the shock button is pushed.
Lesson 3 | AeD 37
VIDEO AND SkILL SESSION
INSTRUCTION:Watch then Practice
VISUAL AID:1. DVD or
Presentation Slides B.24–B.25
2. Ready Reference Card (Adult or Pediatric)
REFERENCE:PM, pages 46–48; Appendix E
1. Showthevideosegment,“UsinganAED”(4:45).
2. Askparticipantstofindapartner.
3. Guideparticipantsthroughthestepsoftheskillfollowinga1-shockscenarioandusingthevoicepromptsfromonetrainingdevice.Thenhavethempracticeindependently.
Instructor’s Note: If you are teaching AED—Adult and Child, you need to complete only one skill session. Adult or child manikins may be used. Select the manikins based on the needs of the course.
Lesson Wrap-Up
VISUAL AID:Presentation Slide B.26
1. WhyisitimportantnottotouchthepersonwhiletheAEDisanalyzing?Answer: Touching or moving the person may adversely affect the analysis.
2. Whyisitimportantnottotouchthepersonwhilethedeviceisdefibrillating?Answer: You or others could be shocked.
3. WhyisimportanttoknowCPRevenifanAEDisavailable?Answer: CPR helps circulate blood that contains oxygen to the vital organs until an AED is ready to use or EMS personnel take over.
Instructor’s Note: If you are conducting a stand-alone AED course, proceed to Lesson 9 to conclude the course.
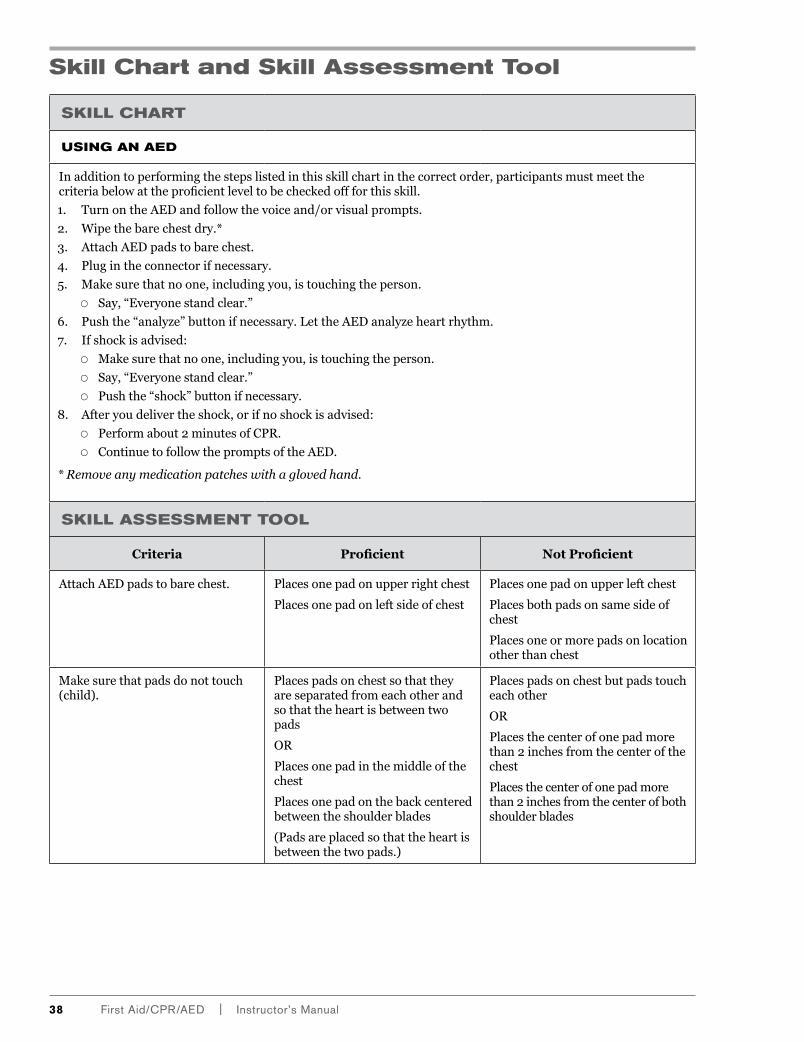
38 First Aid/CPR/AeD | Instructor’s Manual
Skill Chart and Skill Assessment Tool
SkILL CHART
USING AN AED
Inadditiontoperformingthestepslistedinthisskillchartinthecorrectorder,participantsmustmeetthecriteriabelowattheproficientleveltobecheckedoffforthisskill.
1. TurnontheAEDandfollowthevoiceand/orvisualprompts.
2. Wipethebarechestdry.*
3. AttachAEDpadstobarechest.
4. Plugintheconnectorifnecessary.
5. Makesurethatnoone,includingyou,istouchingtheperson.
■{ Say,“Everyonestandclear.”
6. Pushthe“analyze”buttonifnecessary.LettheAEDanalyzeheartrhythm.
7. Ifshockisadvised:
■{ Makesurethatnoone,includingyou,istouchingtheperson.
■{ Say,“Everyonestandclear.”
■{ Pushthe“shock”buttonifnecessary.
8. Afteryoudelivertheshock,orifnoshockisadvised:
■{ Performabout2minutesofCPR.
■{ ContinuetofollowthepromptsoftheAED.
* Remove any medication patches with a gloved hand.
SkILL ASSESSMENT TOOL
Criteria Proficient Not Proficient
AttachAEDpadstobarechest. Placesonepadonupperrightchest
Placesonepadonleftsideofchest
Placesonepadonupperleftchest
Placesbothpadsonsamesideofchest
Placesoneormorepadsonlocationotherthanchest
Makesurethatpadsdonottouch(child).
Placespadsonchestsothattheyareseparatedfromeachotherandsothattheheartisbetweentwopads
OR
Placesonepadinthemiddleofthechest
Placesonepadonthebackcenteredbetweentheshoulderblades
(Padsareplacedsothattheheartisbetweenthetwopads.)
Placespadsonchestbutpadstoucheachother
OR
Placesthecenterofonepadmorethan2inchesfromthecenterofthechest
Placesthecenterofonepadmorethan2inchesfromthecenterofbothshoulderblades
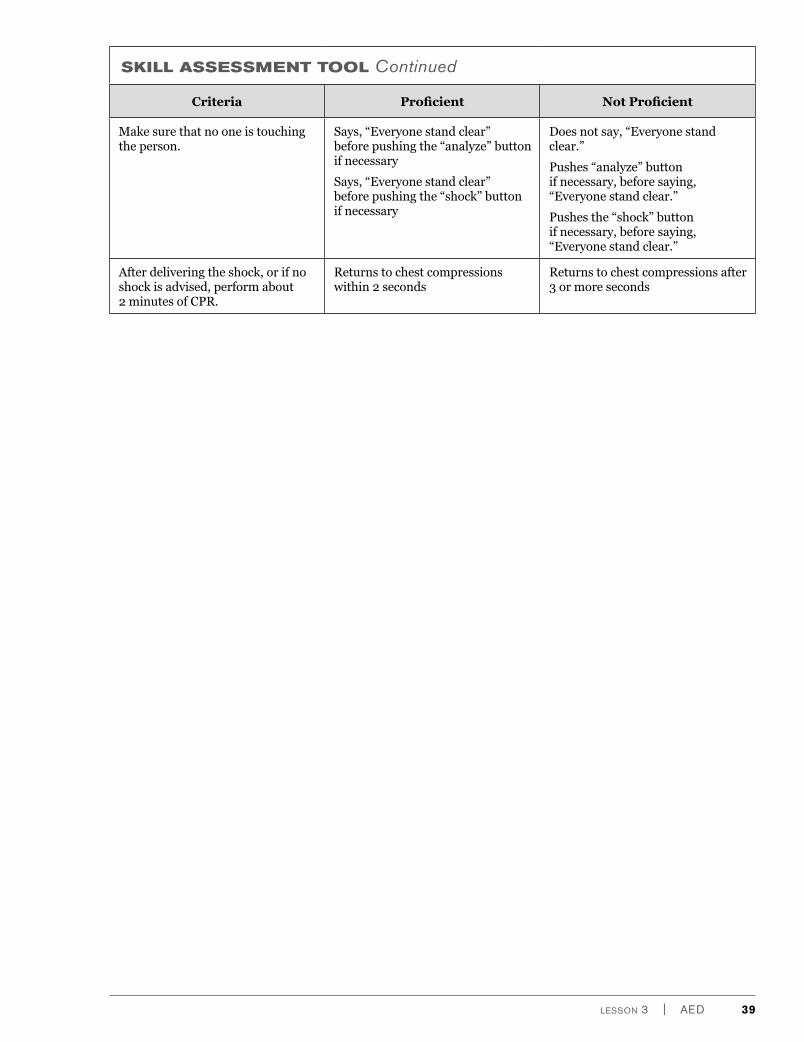
Lesson 3 | AeD 39
SkILL ASSESSMENT TOOL Continued
Criteria Proficient Not Proficient
Makesurethatnooneistouchingtheperson.
Says,“Everyonestandclear”beforepushingthe“analyze”buttonifnecessary
Says,“Everyonestandclear”beforepushingthe“shock”buttonifnecessary
Doesnotsay,“Everyonestandclear.”
Pushes“analyze”buttonifnecessary,beforesaying,“Everyonestandclear.”
Pushesthe“shock”buttonifnecessary,beforesaying,“Everyonestandclear.”
Afterdeliveringtheshock,orifnoshockisadvised,performabout2minutesofCPR.
Returnstochestcompressionswithin2seconds
Returnstochestcompressionsafter3ormoreseconds


lesson 4 | Breathing emergencies 41
¡¡ Lesson Length: 34 minutes
GUIDANCE FOR THE INSTRUCTORTo complete this lesson and meet the lesson objectives, you must:
■■ Conduct the lecture for Signals of a Breathing Emergency.■■ Lead the guided discussion for Recognizing Breathing Emergencies.■■ Show the appropriate choking video segment(s) for the course being taught:
■{ “Conscious Choking—Adult and Child” (2:25)■{ “Conscious Choking—Infant” (1:56)
■■ Conduct the appropriate choking skill session(s) for the course being taught.■■ Explain care for a conscious choking person who becomes unconscious.
■{ Note: If using the DVD, do not show the unconscious choking video segment(s).■■ Conduct the Lesson Wrap-Up.
LESSON OBJECTIVES After completing this lesson, participants will be able to:
■■ Recognize the signals of a breathing emergency.■■ Demonstrate how to care for a person who is choking.
MATERIALS, EQUIPMENT AND SUPPLIES
■■ CPR breathing barriers (one for each participant)■■ Manikins (one for every two participants)
BREATHING EMERGENCIES
LESSoN 4
TOPIC: BREATHING EMERGENCIES Time: 9 minutes
SIGNALS OF A BREATHING EMERGENCy
INSTRUCTION:Lecture
VISUAL AID:Presentation Slide B.27
1. Abreathingemergencyoccurswhenapersonishavingtroublebreathingorcannotbreatheatall.
2. Therearemanycausesofbreathingemergencies,includinginjury,illnessanddisease.
3. Careforbreathingemergenciesisbasicallythesameforadults,childrenandinfants.
4. Careforinfantsisslightlydifferentbecauseoftheirsmallersize.
5. Breathingemergenciescanturnintocardiacemergencies,ifuntreated.
RECOGNIzING BREATHING EMERGENCIES
INSTRUCTION:Guided Discussion
REFERENCE:PM, pages 57–61
1. Leadparticipantsinadiscussionbyasking:
■{ Whataresomesignalsofabreathingemergency?
■{ Howmightyourecognizeabreathingemergency?
■{ Whataresomecommoncausesofbreathingemergenciesinadults?Children?Infants?
Instructor’s Note: You need to cover child and/or infant choking information only for courses that include those components.
42 First Aid/CPR/AeD | Instructor’s Manual
RECOGNIzING BREATHING EMERGENCIES Continued
2. Coverthefollowingpointsduringthediscussion:
■{ Commonsignalsofabreathingemergencyinclude:
■● Troublebreathingornobreathing,sloworrapidbreathing,unusuallydeeporshallowbreathing,andgasping,wheezing,gurglingormakinghigh-pitchednoises.
■● Unusuallymoistorcoolskin.
■● Flushed,pale,ashenorbluishskincolor.
■● Dizzinessorlight-headedness.
■● Paininthechestortinglinginthehands,feetorlips.
■● Apprehensiveorfearfulfeelings.
■{ Youcanrecognizeabreathingemergencybyobservingandlisteningtotheperson’sbreathingandactions,andbyaskingthepersonhowheorshefeels.
■{ Breathingemergenciescanbecausedby:
■● Choking.
■● Illness.
■● Chronicconditions(long-lasting,orfrequentlyrecurring),suchasasthma.
■● Electrocution.
■● Irregularheartbeat.
■● Heartattack.
■● Injurytotheheadorbrainstem,chest,lungsorabdomen.
■● Allergicreactions.
■● Drugoverdose(especiallyalcohol,narcoticpainkillers,barbiturates,anestheticsandotherdepressants).
■● Poisoning.
■● Emotionaldistress.
■● Nonfataldrowning.
■{ Causesofchokinginanadultinclude:
■● Tryingtoswallowlargepiecesofpoorlychewedfood.
■● Drinkingalcoholbeforeorduringmeals.(Alcoholdullsthenervesthataidswallowing.)
■● Wearingdentures.(Denturesmakeitdifficulttosensewhetherfoodisfullychewedbeforeitisswallowed.)
■● Eatingwhiletalkingexcitedlyorlaughing,oreatingtoofast.
■● Walking,playingorrunningwithfoodorobjectsinthemouth.
■{ Foodisresponsibleformostofthechokingincidentsinchildrenandincludes:
■● Round,firmfoodsuchashotdogsandcarrotsticks.
■● Hard,gooeyorstickycandy.
■● Grapes.
■● Popcorn.
■● Chewinggum.
■● Vitamins.■{ Othernonfooditemsthatcancausechokinginclude:
■● Babypowder.
■● Objectsfromthetrashincludingeggshellsandpop-topsfrombeveragecans.
■● Safetypins.
■● Coins.
■● Marbles.
■● Penandmarkercaps.
■● Smallbutton-typebatteries.
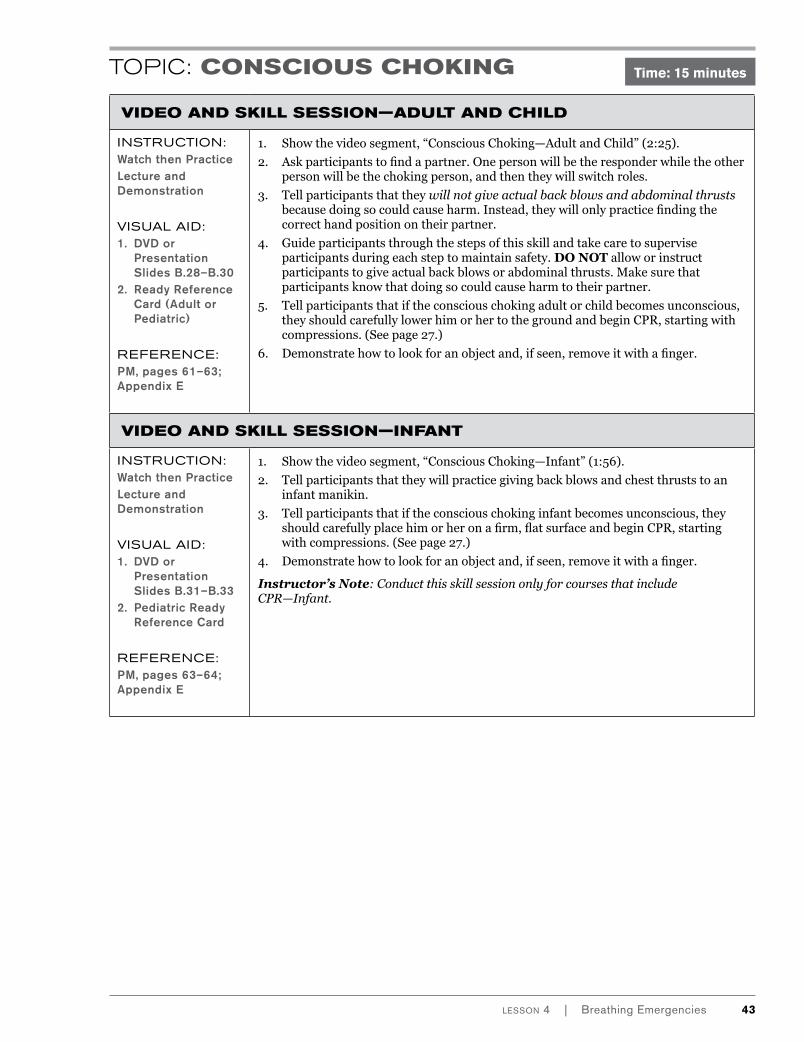
lesson 4 | Breathing emergencies 43
TOPIC: CONSCIOUS CHOKING
VIDEO AND SKILL SESSION—ADULT AND CHILD
INSTRUCTION:Watch then PracticeLecture and Demonstration
VISUAL AID:1. DVD or
Presentation Slides B.28–B.30
2. Ready Reference Card (Adult or Pediatric)
REFERENCE:PM, pages 61–63; Appendix E
1. Showthevideosegment,“ConsciousChoking—AdultandChild”(2:25).
2. Askparticipantstofindapartner.Onepersonwillbetheresponderwhiletheotherpersonwillbethechokingperson,andthentheywillswitchroles.
3. Tellparticipantsthattheywill not give actual back blows and abdominal thrustsbecausedoingsocouldcauseharm.Instead,theywillonlypracticefindingthecorrecthandpositionontheirpartner.
4. Guideparticipantsthroughthestepsofthisskillandtakecaretosuperviseparticipantsduringeachsteptomaintainsafety. DO NOTalloworinstructparticipantstogiveactualbackblowsorabdominalthrusts.Makesurethatparticipantsknowthatdoingsocouldcauseharmtotheirpartner.
5. Tellparticipantsthatiftheconsciouschokingadultorchildbecomesunconscious,theyshouldcarefullylowerhimorhertothegroundandbeginCPR,startingwithcompressions.(Seepage27.)
6. Demonstratehowtolookforanobjectand,ifseen,removeitwithafinger.
VIDEO AND SKILL SESSION—INFANT
INSTRUCTION:Watch then PracticeLecture and Demonstration
VISUAL AID:1. DVD or
Presentation Slides B.31–B.33
2. Pediatric Ready Reference Card
REFERENCE:PM, pages 63–64; Appendix E
1. Showthevideosegment,“ConsciousChoking—Infant”(1:56).
2. Tellparticipantsthattheywillpracticegivingbackblowsandchestthruststoaninfantmanikin.
3. Tellparticipantsthatiftheconsciouschokinginfantbecomesunconscious,theyshouldcarefullyplacehimorheronafirm,flatsurfaceandbeginCPR,startingwithcompressions.(Seepage27.)
4. Demonstratehowtolookforanobjectand,ifseen,removeitwithafinger.
Instructor’s Note: Conduct this skill session only for courses that include CPR—Infant.
Time: 15 minutes
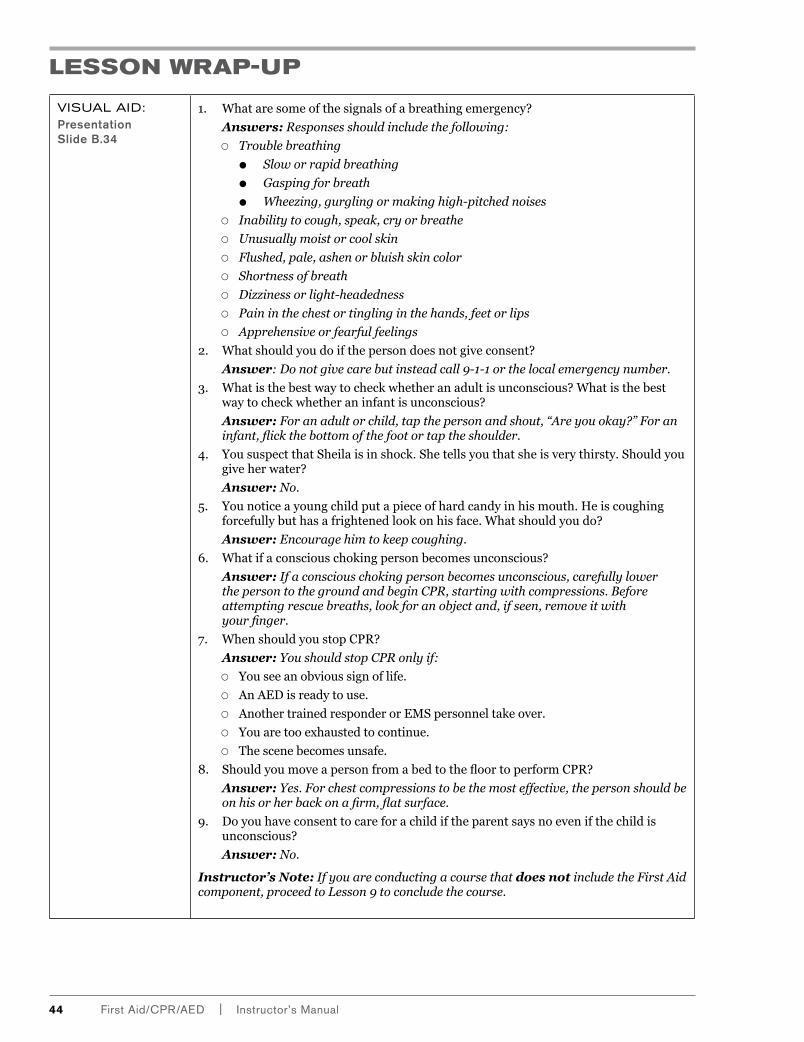
44 First Aid/CPR/AeD | Instructor’s Manual
LESSON WRAP-UP
VISUAL AID:Presentation Slide B.34
1. Whataresomeofthesignalsofabreathingemergency?
Answers: Responses should include the following:
■{ Trouble breathing
■● Slow or rapid breathing
■● Gasping for breath
■● Wheezing, gurgling or making high-pitched noises
■{ Inability to cough, speak, cry or breathe
■{ Unusually moist or cool skin
■{ Flushed, pale, ashen or bluish skin color
■{ Shortness of breath
■{ Dizziness or light-headedness
■{ Pain in the chest or tingling in the hands, feet or lips
■{ Apprehensive or fearful feelings
2. Whatshouldyoudoifthepersondoesnotgiveconsent?
Answer: Do not give care but instead call 9-1-1 or the local emergency number.
3. Whatisthebestwaytocheckwhetheranadultisunconscious?Whatisthebestwaytocheckwhetheraninfantisunconscious?
Answer: For an adult or child, tap the person and shout, “Are you okay?” For an infant, flick the bottom of the foot or tap the shoulder.
4. YoususpectthatSheilaisinshock.Shetellsyouthatsheisverythirsty.Shouldyougiveherwater?
Answer: No.
5. Younoticeayoungchildputapieceofhardcandyinhismouth.Heiscoughingforcefullybuthasafrightenedlookonhisface.Whatshouldyoudo?
Answer: Encourage him to keep coughing.
6. Whatifaconsciouschokingpersonbecomesunconscious?
Answer: If a conscious choking person becomes unconscious, carefully lower the person to the ground and begin CPR, starting with compressions. Before attempting rescue breaths, look for an object and, if seen, remove it with your finger.
7. WhenshouldyoustopCPR?
Answer: You should stop CPR only if:
■{ Youseeanobvioussignoflife.
■{ AnAEDisreadytouse.
■{ AnothertrainedresponderorEMSpersonneltakeover.
■{ Youaretooexhaustedtocontinue.
■{ Thescenebecomesunsafe.
8. ShouldyoumoveapersonfromabedtothefloortoperformCPR?
Answer: Yes. For chest compressions to be the most effective, the person should be on his or her back on a firm, flat surface.
9. Doyouhaveconsenttocareforachildiftheparentsaysnoevenifthechildisunconscious?
Answer: No.
Instructor’s Note: If you are conducting a course that does not include the First Aid component, proceed to Lesson 9 to conclude the course.
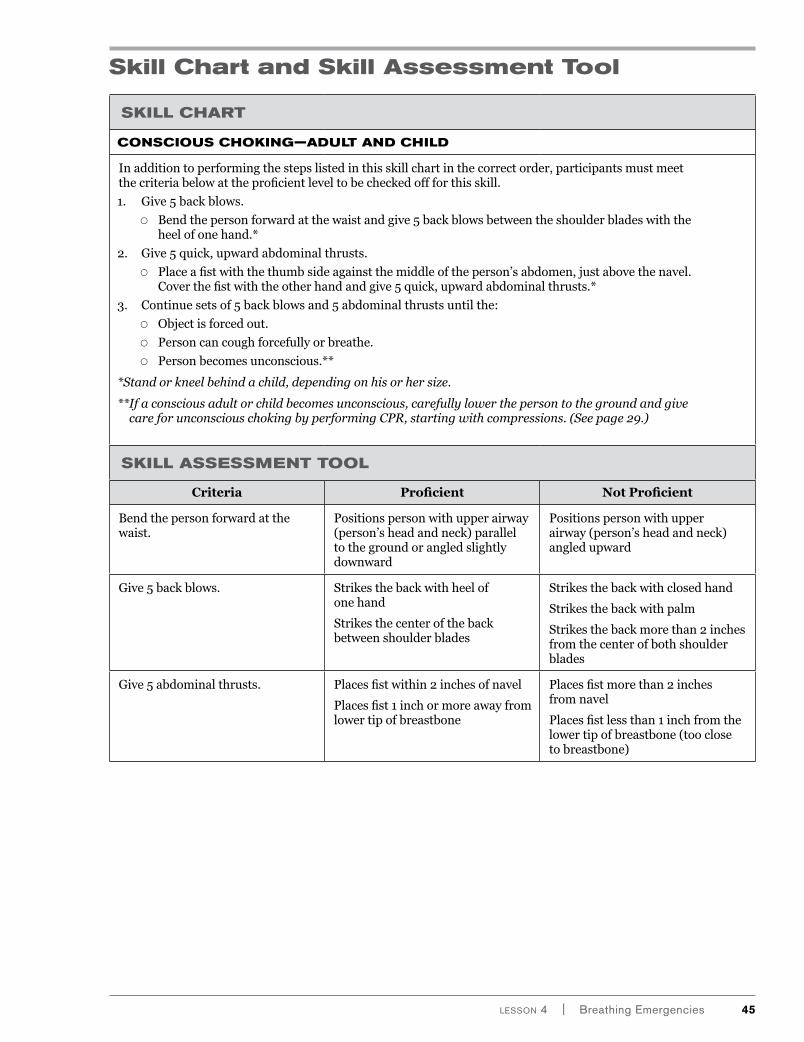
lesson 4 | Breathing emergencies 45
Skill Chart and Skill Assessment Tool
SKILL CHART
CONSCIOUS CHOKING—ADULT AND CHILD
Inadditiontoperformingthestepslistedinthisskillchartinthecorrectorder,participantsmustmeetthecriteriabelowattheproficientleveltobecheckedoffforthisskill.
1. Give5backblows.
■{ Bendthepersonforwardatthewaistandgive5backblowsbetweentheshoulderbladeswiththeheelofonehand.*
2. Give5quick,upwardabdominalthrusts.
■{ Placeafistwiththethumbsideagainstthemiddleoftheperson’sabdomen,justabovethenavel.Coverthefistwiththeotherhandandgive5quick,upwardabdominalthrusts.*
3. Continuesetsof5backblowsand5abdominalthrustsuntilthe:
■{ Objectisforcedout.
■{ Personcancoughforcefullyorbreathe.
■{ Personbecomesunconscious.**
*Stand or kneel behind a child, depending on his or her size.
** If a conscious adult or child becomes unconscious, carefully lower the person to the ground and give care for unconscious choking by performing CPR, starting with compressions. (See page 29.)
SKILL ASSESSMENT TOOL
Criteria Proficient Not Proficient
Bendthepersonforwardatthewaist.
Positionspersonwithupperairway(person’sheadandneck)paralleltothegroundorangledslightlydownward
Positionspersonwithupperairway(person’sheadandneck)angledupward
Give5backblows. Strikesthebackwithheelofonehand
Strikesthecenterofthebackbetweenshoulderblades
Strikesthebackwithclosedhand
Strikesthebackwithpalm
Strikesthebackmorethan2inchesfromthecenterofbothshoulderblades
Give5abdominalthrusts. Placesfistwithin2inchesofnavel
Placesfist1inchormoreawayfromlowertipofbreastbone
Placesfistmorethan2inchesfromnavel
Placesfistlessthan1inchfromthelowertipofbreastbone(tooclosetobreastbone)
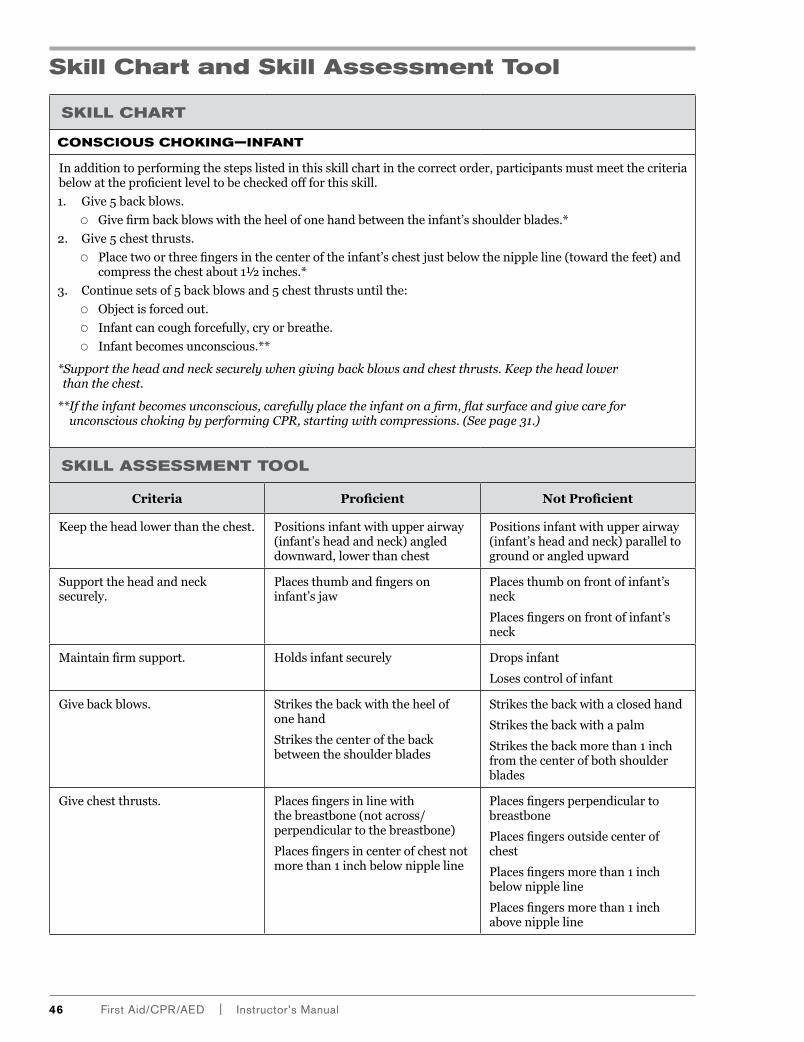
46 First Aid/CPR/AeD | Instructor’s Manual
Skill Chart and Skill Assessment Tool
SKILL CHART
CONSCIOUS CHOKING—INFANT
Inadditiontoperformingthestepslistedinthisskillchartinthecorrectorder,participantsmustmeetthecriteriabelowattheproficientleveltobecheckedoffforthisskill.
1. Give5backblows.
■{ Givefirmbackblowswiththeheelofonehandbetweentheinfant’sshoulderblades.*
2. Give5chestthrusts.
■{ Placetwoorthreefingersinthecenteroftheinfant’schestjustbelowthenippleline(towardthefeet)andcompressthechestabout1½inches.*
3. Continuesetsof5backblowsand5chestthrustsuntilthe:
■{ Objectisforcedout.
■{ Infantcancoughforcefully,cryorbreathe.
■{ Infantbecomesunconscious.**
* Support the head and neck securely when giving back blows and chest thrusts. Keep the head lower than the chest.
** If the infant becomes unconscious, carefully place the infant on a firm, flat surface and give care for unconscious choking by performing CPR, starting with compressions. (See page 31.)
SKILL ASSESSMENT TOOL
Criteria Proficient Not Proficient
Keeptheheadlowerthanthechest. Positionsinfantwithupperairway(infant’sheadandneck)angleddownward,lowerthanchest
Positionsinfantwithupperairway(infant’sheadandneck)paralleltogroundorangledupward
Supporttheheadandnecksecurely.
Placesthumbandfingersoninfant’sjaw
Placesthumbonfrontofinfant’sneck
Placesfingersonfrontofinfant’sneck
Maintainfirmsupport. Holdsinfantsecurely Dropsinfant
Losescontrolofinfant
Givebackblows. Strikesthebackwiththeheelofonehand
Strikesthecenterofthebackbetweentheshoulderblades
Strikesthebackwithaclosedhand
Strikesthebackwithapalm
Strikesthebackmorethan1inchfromthecenterofbothshoulderblades
Givechestthrusts. Placesfingersinlinewiththebreastbone(notacross/perpendiculartothebreastbone)
Placesfingersincenterofchestnotmorethan1inchbelownippleline
Placesfingersperpendiculartobreastbone
Placesfingersoutsidecenterofchest
Placesfingersmorethan1inchbelownippleline
Placesfingersmorethan1inchabovenippleline

Lesson 4 | Breathing emergencies 47
Page intentionally left blank

48 First Aid/CPR/AeD | Instructor’s Manual
Page intentionally left blank
¡¡ Lesson Length: 30 minutes
GUIDANCE FOR THE INSTRUCTORTo complete this lesson and meet the lesson objectives, you must:
■■ Show the video segment, “Recognizing Sudden Illness” (8:27).■■ Lead the guided discussion for Caring for a Diabetic Emergency.■■ Conduct the Lesson Wrap-Up.
LESSON OBJECTIVESAfter completing this lesson, participants will be able to:
■■ Identify the signals of common sudden illnesses.■■ Describe how to care for common sudden illnesses.■■ Describe how to care for someone who is having a seizure.
MATERIALS, EQUIPMENT AND SUPPLIES
■■ No additional materials are needed for this lesson.
SUDDEN ILLNESS
LESSoN 5
49lesson 5 | sudden Illness
TOPIC: SUDDEN ILLNESS
RECOGNIzING SUDDEN ILLNESS
INSTRUCTION:Video
VISUAL AID:DVD or Presentation Slide C.1
REFERENCE:PM, pages 69–71
1. Showthevideosegment,“RecognizingSuddenIllness”(8:27).
2. Answerparticipants’questions.
Time: 12 minutes
50 First Aid/CPR/AeD | Instructor’s Manual
TOPIC: DIABETIC EMERGENCIES
CARING FOR A DIABETIC EMERGENCy
INSTRUCTION:Guided Discussion
REFERENCE:PM, pages 74–76
1. Leadparticipantsinadiscussionbyasking:
■{ Thinkingbacktothevideosegment(“WhatWouldYouDo?”),whatweresomeofthesignalsthatthepersonwashavingadiabeticemergency?
■{ Imagineyouweretheresponderinthatscene.Whatcarecouldyougivetothepersonhavingthediabeticemergency?
2. Coverthefollowingpointsduringthediscussion:
■{ Peoplewhohavediabetesmaybecomesuddenlyillbecausethereistoomuchortoolittlesugarintheirblood.
■{ Apersonexperiencingadiabeticemergencymaybeextremelytiredorweak,seemirritableorbeconfrontational.
■{ Othersignalsincludesweating,paleorclammyskin,troublewalkingorlosingbalance,andbeingconfusedordisoriented.
■{ Ifthediabeticpersonisconsciousandabletoswallowandadvisesyouthatheorsheneedssugar,givesugarintheformofseveralglucosetabletsorglucosepaste,a12-ounceservingoffruitjuice,milk,anondietsoftdrinkortablesugardissolvedinaglassofwater.Call9-1-1orthelocalemergencynumberifthepersonisorbecomesunconscious,thepersoncannotswallow,thepersondoesnotfeelbetterwithinabout5minutesaftertakingsugaroryoucannotimmediatelyfindasourceofsugar.
Lesson Wrap-Up
SUDDEN ILLNESS TRIVIA
VISUAL AID:Presentation Slides C.2–C.11
1. Whatsuddenillnessiscausedbyablockageofbloodflowtothebrain?
Answer: Stroke.
2. WhatdoesFASTstandfor?
Answer: Face, arm, speech and time.
3. Ifyoususpectthatsomeonemightbehavingastroke,howmightyouobserveweaknessornumbnessinonearm?
Answer: Ask the person to raise both arms and notice whether one arm drifts downward.
4. Forayoungchildoraninfant,isafebrileseizurelastinglessthan5minuteslifethreatening?
Answer: No. Most febrile seizures are not life threatening.
5. Shouldyoucall9-1-1orthelocalemergencynumberifapersonhadaseizurethattookplaceinthewaterbutlastedlessthan5minutes?
Answer: Yes.
Time: 8 minutes
SUDDEN ILLNESS TRIVIA Continued
6. Whatmightcauseyoutosuspectapersonishavinganallergicreaction?
Answer: Signals of an allergic reaction include the following:
■{ Hives
■{ Itching
■{ Rash
■{ Weakness
■{ Nausea
■{ Stomach cramps
■{ Vomiting
■{ Dizziness
■{ Trouble breathing (including coughing and wheezing)
7. Whenshouldyoucall9-1-1orthelocalemergencynumberforsomeoneyoususpectishavinganallergicreaction?
Answer: Call 9-1-1 or the local emergency number if the person:
■{ Has trouble breathing.
■{ Complains of the throat tightening.
■{ Explains that he or she is subject to severe allergic reactions.
■{ Is unconscious.
8. Aco-workerappearstofaintafterstandinginthebackofacrowdedconferenceroomfor20minutes.Hequicklyregainsconsciousnessandsayshefeelsfine.Shouldyoucall9-1-1orthelocalemergencynumber?
Answer: No. Fainting is not usually harmful. The person will usually recover quickly with no lasting effects, so it may not be necessary to call 9-1-1 or the local emergency number. However, in many cases, what appears to be a simple case of fainting may actually be a signal of a more serious condition. Call 9-1-1 or the local emergency number if you have any reason to suspect a more serious condition.
9. Whenyouarecheckingapersonwhoappearstobesuddenlyill,whatcluesmightindicatethecauseofthesuddenillness?
Answer: When you are checking a person, look for a medical ID tag, bracelet, necklace or anklet that indicates that the person has a chronic condition or allergy. Other clues could include smells, presence of medicine or environmental condition such as high heat.
10. Yoususpectthatayoungchildhasswallowedalargeamountofprescribedmedicine.Thechildiscomplainingofastomachache.Shouldyougivethechildsomethingtodrink?
Answer: No. Do not give the child anything to eat or drink unless medical professionals tell you to do so.
51lesson 5 | sudden Illness


Lesson 6 | environmental emergencies 53
¡¡ Lesson Length: 22 minutes
GUIDANCE FOR THE INSTRUCTORTo complete this lesson and meet the lesson objectives, you must:
■■ Conduct the lecture for Heat-Related Illnesses.■■ Conduct the lecture for Caring for Heat-Related Illnesses.■■ Conduct the lecture for Cold-Related Emergencies.■■ Conduct the lecture for Caring for Cold-Related Emergencies.■■ Conduct the Lesson Wrap-Up.
LESSON OBJECTIVES After completing this lesson, participants will be able to:
■■ Identify the signals of heat-related illnesses and cold-related emergencies.■■ Describe how to care for heat-related illnesses and cold-related emergencies.
MATERIALS, EQUIPMENT AND SUPPLIES
■■ No additional materials are needed for this lesson.
ENVIRONMENTAL EMERGENCIES
LEssoN 6
TOPIC: RECOGNIZING AND CARING FOR HEAT-RELATED ILLNESSES
HEAT-RELATED ILLNESSES
INSTRUCTION:Lecture
VISUAL AID:Presentation slides C.12–C.13
1. Heat-relatedillnessesarecausedbyoverexposuretoheatanddehydration.
2. Aheat-relatedillnesscanresultinheatstroke,alife-threateningcondition.
3. Heat crampsarepainfulmusclespasms,usuallyinthelegsorabdomen.Heatcrampsaretheleastsevereandoftenthefirstsignalthatthebodyishavingtroublewiththeheat.
4. Heatexhaustionismoreseverethanheatcramps.Signalsofheatexhaustioninclude:
■{ Cool,moistpale,ashen(gray)orflushedskin.
■{ Headache.
■{ Nausea.
■{ Dizziness.
■{ Weakness.
■{ Exhaustion.
5. Heatstrokeistheleastcommonandmostsevereheat-relatedillness.Heatstrokeoftendevelopswhenthebody’ssystemsbecomeoverwhelmedbyheatandbegintostopfunctioning.
Time: 10 minutes
54 First Aid/CPR/AeD | Instructor’s Manual
HEAT-RELATED ILLNESSES Continued
6. Signalsofheatstrokeinclude:
■{ Extremelyhighbodytemperature.
■{ Redskinthatcanbeeitherdryormoist.
■{ Changesinconsciousness.
■{ Vomiting.
■{ Rapid,weakpulse.
■{ Rapid,shallowbreathing.
■{ Confusion.
■{ Seizures.
7. Youngchildrenandolderadultsaremoresusceptiblethanotherpeopletotemperatureextremesandareatgreaterriskforheat-relatedillnesses.
CARING FOR HEAT-RELATED ILLNESSES
INSTRUCTION:Lecture
VISUAL AID:Presentation slideC.14
REFERENCE:PM, pages 82–83
1. Forheatcramps:
■{ Movethepersontoacoolplace.
■{ Givethepersonanelectrolyte/carbohydrate-containingfluid,suchasacommercialsportsdrink,fruitjuiceormilk.Watermayalsobegiven.
■{ Lightlystretchthecrampingmuscleandgentlymassagethesurroundingarea.
■{ Thepersonshouldnottakesalttablets,whichcanmaketheconditionworse.
2. Forheatexhaustion:
■{ Movethepersontoacoolerenvironment.
■{ Loosenorremoveasmuchclothingaspossible.
■{ Applycool,wetclothsandtakecaretoremoistenthemperiodically.
■{ Spraythepersonwithwater.
■{ Fantheperson.
■{ Ifthepersonisconsciousandabletoswallow,givesmallamountsofacoolfluidsuchasanelectrolyte-containingcommercialsportsdrinkorfruitjuice.Milkorwatermayalsobegiven.Giveabout4ouncesevery15minutes.
■{ Letthepersonrestinacomfortablepositionandwatchcarefullyforchangesincondition.
■{ Iftheperson’sconditiondoesnotimproveorifthepersonrefusesfluids,hasachangeinconsciousnessorvomits,call9-1-1orthelocalemergencynumber.
3. Forheatstroke:
■{ Callorhavesomeoneelsecall9-1-1orthelocalemergencynumberimmediatelybecauseheatstrokeislifethreatening.
■{ Rapidlycoolthebodybyimmersingthepersonuptotheneckincoldwaterifpossible(preferredmethod).
OR
■{ Douseorspraythepersonwithcoldwater.
■{ Spongethepersonovertheentirebodywithicewater-dousedtowels,frequentlyrotatingthecold,wettowels.
■{ Coverthepersonwithbagsofice.
■{ Ifyouarenotabletomeasureandmonitortheperson’stemperature,applyrapidcoolingmethodsfor20minutesoruntilthepersonimproves.
■{ Careforotherconditionsasfound.
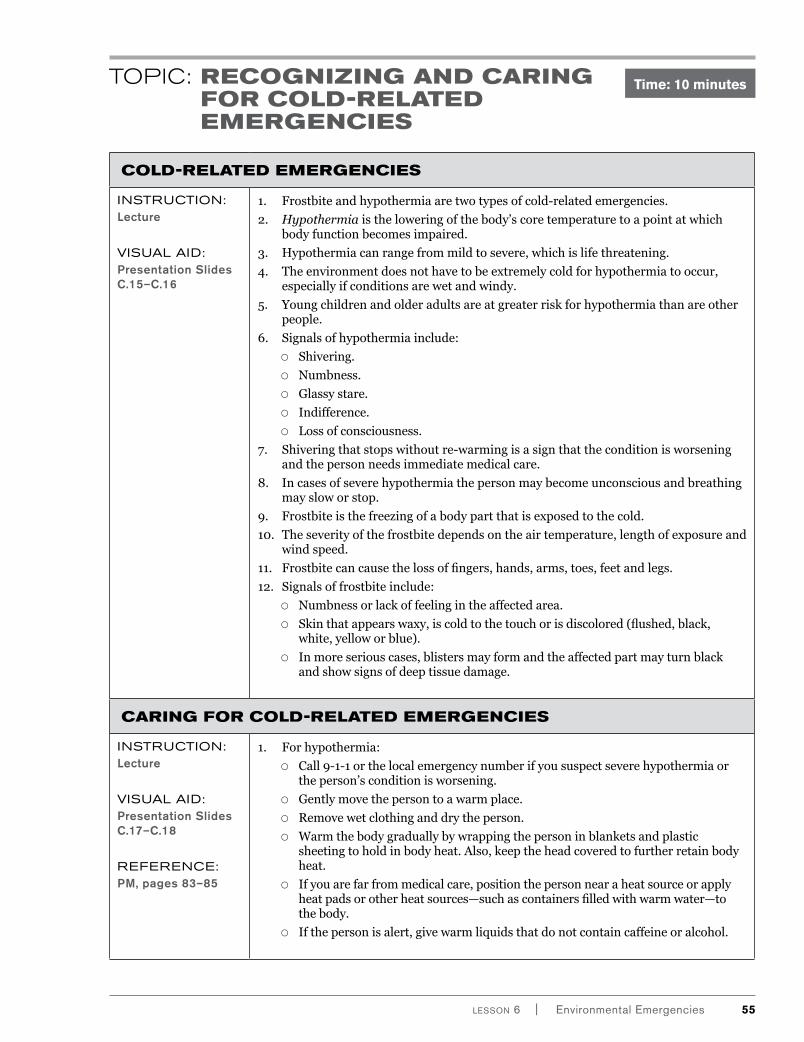
Lesson 6 | environmental emergencies 55
TOPIC: RECOGNIZING AND CARING FOR COLD-RELATED EMERGENCIES
COLD-RELATED EMERGENCIES
INSTRUCTION:Lecture
VISUAL AID:Presentation slides C.15–C.16
1. Frostbiteandhypothermiaaretwotypesofcold-relatedemergencies.
2. Hypothermiaistheloweringofthebody’scoretemperaturetoapointatwhichbodyfunctionbecomesimpaired.
3. Hypothermiacanrangefrommildtosevere,whichislifethreatening.
4. Theenvironmentdoesnothavetobeextremelycoldforhypothermiatooccur,especiallyifconditionsarewetandwindy.
5. Youngchildrenandolderadultsareatgreaterriskforhypothermiathanareotherpeople.
6. Signalsofhypothermiainclude:
■{ Shivering.
■{ Numbness.
■{ Glassystare.
■{ Indifference.
■{ Lossofconsciousness.
7. Shiveringthatstopswithoutre-warmingisasignthattheconditionisworseningandthepersonneedsimmediatemedicalcare.
8. Incasesofseverehypothermiathepersonmaybecomeunconsciousandbreathingmaysloworstop.
9. Frostbiteisthefreezingofabodypartthatisexposedtothecold.
10. Theseverityofthefrostbitedependsontheairtemperature,lengthofexposureandwindspeed.
11. Frostbitecancausethelossoffingers,hands,arms,toes,feetandlegs.
12. Signalsoffrostbiteinclude:
■{ Numbnessorlackoffeelingintheaffectedarea.
■{ Skinthatappearswaxy,iscoldtothetouchorisdiscolored(flushed,black,white,yelloworblue).
■{ Inmoreseriouscases,blistersmayformandtheaffectedpartmayturnblackandshowsignsofdeeptissuedamage.
CARING FOR COLD-RELATED EMERGENCIES
INSTRUCTION:Lecture
VISUAL AID:Presentation slides C.17–C.18
REFERENCE:PM, pages 83–85
1. Forhypothermia:
■{ Call9-1-1orthelocalemergencynumberifyoususpectseverehypothermiaortheperson’sconditionisworsening.
■{ Gentlymovethepersontoawarmplace.
■{ Removewetclothinganddrytheperson.
■{ Warmthebodygraduallybywrappingthepersoninblanketsandplasticsheetingtoholdinbodyheat.Also,keeptheheadcoveredtofurtherretainbodyheat.
■{ Ifyouarefarfrommedicalcare,positionthepersonnearaheatsourceorapplyheatpadsorotherheatsources—suchascontainersfilledwithwarmwater—tothebody.
■{ Ifthepersonisalert,givewarmliquidsthatdonotcontaincaffeineoralcohol.
Time: 10 minutes
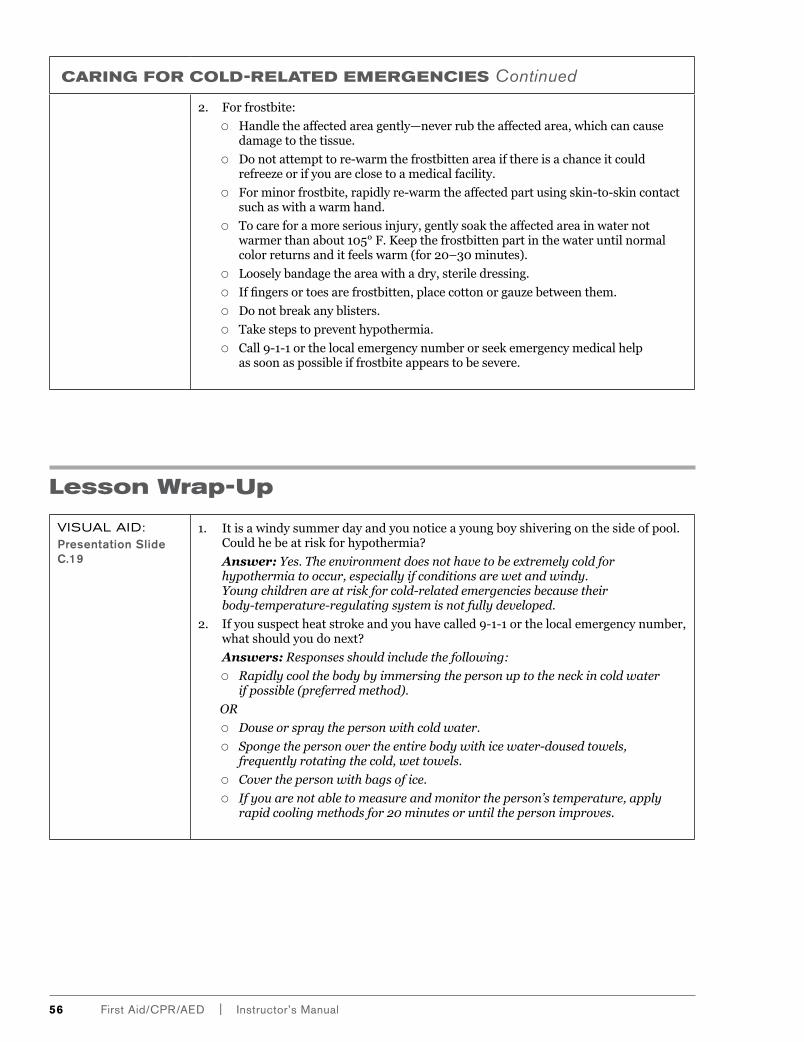
56 First Aid/CPR/AeD | Instructor’s Manual
CARING FOR COLD-RELATED EMERGENCIES Continued
2. Forfrostbite:
■{ Handletheaffectedareagently—neverrubtheaffectedarea,whichcancausedamagetothetissue.
■{ Donotattempttore-warmthefrostbittenareaifthereisachanceitcouldrefreezeorifyouareclosetoamedicalfacility.
■{ Forminorfrostbite,rapidlyre-warmtheaffectedpartusingskin-to-skincontactsuchaswithawarmhand.
■{ Tocareforamoreseriousinjury,gentlysoaktheaffectedareainwaternotwarmerthanabout105°F.Keepthefrostbittenpartinthewateruntilnormalcolorreturnsanditfeelswarm(for20–30minutes).
■{ Looselybandagetheareawithadry,steriledressing.
■{ Iffingersortoesarefrostbitten,placecottonorgauzebetweenthem.
■{ Donotbreakanyblisters.
■{ Takestepstopreventhypothermia.
■{ Call9-1-1orthelocalemergencynumberorseekemergencymedicalhelpassoonaspossibleiffrostbiteappearstobesevere.
Lesson Wrap-Up
VISUAL AID:Presentation slide C.19
1. Itisawindysummerdayandyounoticeayoungboyshiveringonthesideofpool.Couldhebeatriskforhypothermia?
Answer: Yes. The environment does not have to be extremely cold for hypothermia to occur, especially if conditions are wet and windy. Young children are at risk for cold-related emergencies because their body-temperature-regulating system is not fully developed.
2. Ifyoususpectheatstrokeandyouhavecalled9-1-1orthelocalemergencynumber,whatshouldyoudonext?
Answers: Responses should include the following:
■{ Rapidly cool the body by immersing the person up to the neck in cold water if possible (preferred method).
OR
■{ Douse or spray the person with cold water.
■{ Sponge the person over the entire body with ice water-doused towels, frequently rotating the cold, wet towels.
■{ Cover the person with bags of ice.
■{ If you are not able to measure and monitor the person’s temperature, apply rapid cooling methods for 20 minutes or until the person improves.
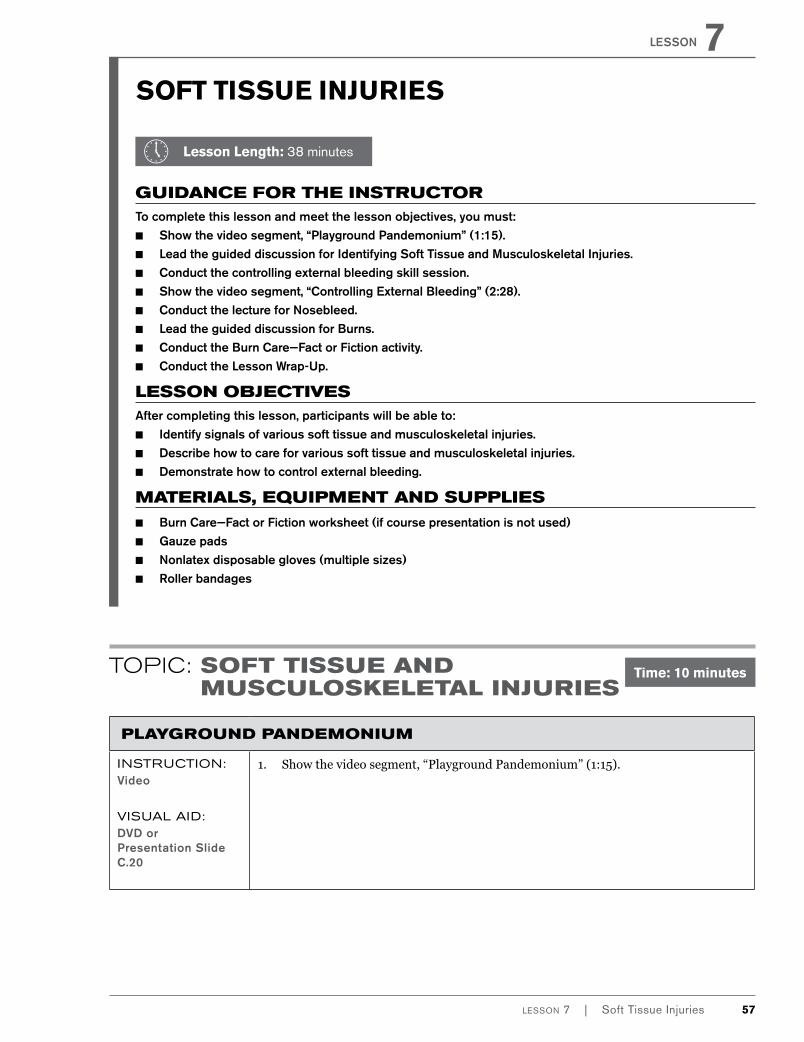
SOFT TISSUE INJURIES
lesson 7
¡¡ Lesson Length: 38 minutes
GUIDANCE FOR THE INSTRUCTORTo complete this lesson and meet the lesson objectives, you must:
■■ show the video segment, “Playground Pandemonium” (1:15).■■ lead the guided discussion for Identifying soft Tissue and Musculoskeletal Injuries.■■ Conduct the controlling external bleeding skill session.■■ show the video segment, “Controlling external Bleeding” (2:28).■■ Conduct the lecture for nosebleed.■■ lead the guided discussion for Burns.■■ Conduct the Burn Care—Fact or Fiction activity.■■ Conduct the lesson Wrap-Up.
LESSON OBJECTIVESAfter completing this lesson, participants will be able to:
■■ Identify signals of various soft tissue and musculoskeletal injuries.■■ Describe how to care for various soft tissue and musculoskeletal injuries.■■ Demonstrate how to control external bleeding.
MATERIALS, EQUIPMENT AND SUPPLIES
■■ Burn Care—Fact or Fiction worksheet (if course presentation is not used)■■ Gauze pads■■ nonlatex disposable gloves (multiple sizes)■■ Roller bandages
TOPIC: SOFT TISSUE AND MUSCULOSKELETAL INJURIES
PLAyGROUND PANDEMONIUM
INSTRUCTION:Video
VISUAL AID:DVD or Presentation slide C.20
1. Showthevideosegment,“PlaygroundPandemonium”(1:15).
Time: 10 minutes
lesson 7 | soft Tissue Injuries 57
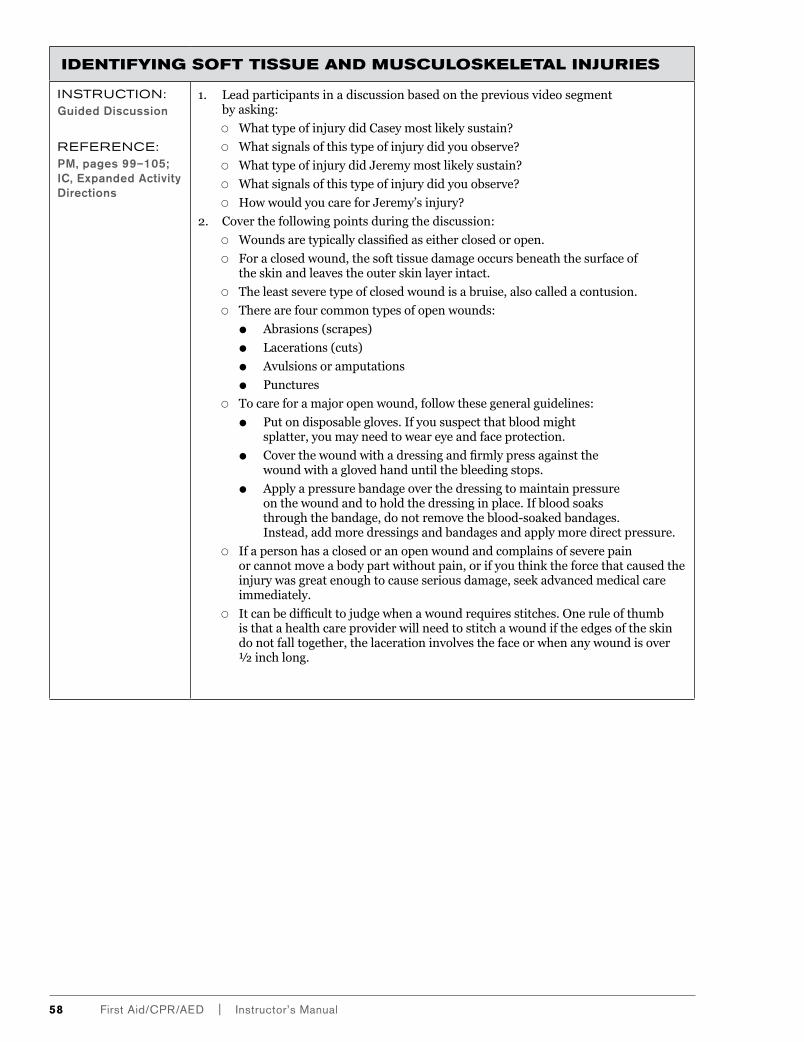
IDENTIFyING SOFT TISSUE AND MUSCULOSKELETAL INJURIES
INSTRUCTION:Guided Discussion
REFERENCE:PM, pages 99–105; IC, expanded Activity Directions
1. Leadparticipantsinadiscussionbasedonthepreviousvideosegmentbyasking:
■{ WhattypeofinjurydidCaseymostlikelysustain?
■{ Whatsignalsofthistypeofinjurydidyouobserve?
■{ WhattypeofinjurydidJeremymostlikelysustain?
■{ Whatsignalsofthistypeofinjurydidyouobserve?
■{ HowwouldyoucareforJeremy’sinjury?
2. Coverthefollowingpointsduringthediscussion:
■{ Woundsaretypicallyclassifiedaseitherclosedoropen.
■{ Foraclosedwound,thesofttissuedamageoccursbeneaththesurfaceoftheskinandleavestheouterskinlayerintact.
■{ Theleastseveretypeofclosedwoundisabruise,alsocalledacontusion.
■{ Therearefourcommontypesofopenwounds:
■● Abrasions(scrapes)
■● Lacerations(cuts)
■● Avulsionsoramputations
■● Punctures
■{ Tocareforamajoropenwound,followthesegeneralguidelines:
■● Putondisposablegloves.Ifyoususpectthatbloodmightsplatter,youmayneedtoweareyeandfaceprotection.
■● Coverthewoundwithadressingandfirmlypressagainstthewoundwithaglovedhanduntilthebleedingstops.
■● Applyapressurebandageoverthedressingtomaintainpressureonthewoundandtoholdthedressinginplace.Ifbloodsoaksthroughthebandage,donotremovetheblood-soakedbandages.Instead,addmoredressingsandbandagesandapplymoredirectpressure.
■{ Ifapersonhasaclosedoranopenwoundandcomplainsofseverepainorcannotmoveabodypartwithoutpain,orifyouthinktheforcethatcausedtheinjurywasgreatenoughtocauseseriousdamage,seekadvancedmedicalcareimmediately.
■{ Itcanbedifficulttojudgewhenawoundrequiresstitches.Oneruleofthumbisthatahealthcareproviderwillneedtostitchawoundiftheedgesoftheskindonotfalltogether,thelacerationinvolvesthefaceorwhenanywoundisover½inchlong.
58 First Aid/CPR/AeD | Instructor’s Manual

TOPIC: CARING FOR SOFT TISSUE INJURIES
VIDEO AND SKILL SESSION—CONTROLLING ExTERNAL BLEEDING
INSTRUCTION:Practice then Watch
VISUAL AID:1. DVD or
Presentation slides C.21–C.22
2. Ready Reference Card (Adult or Pediatric)
REFERENCE:PM, pages 102–106; Appendix e
1. Askparticipantstofindapartner.Onepersonwillbetheresponderwhiletheotherpersonwillbetheinjuredperson,andthentheywillswitchroles.
2. Haveparticipantspracticecontrollingbleedingforawoundontheforearm.
3. Afterparticipantspractice,showthevideosegment,“ControllingExternalBleeding”(2:28)toreinforcethecorrectprocedure.
NOSEBLEED
INSTRUCTION:lecture
VISUAL AID:Presentation slide C.23
REFERENCE:PM, page 110
1. Nosebleedsarequitecommon,especiallyforchildren.
2. Tocareforanosebleed,havethepersonsitwiththeheadslightlyforwardwhilepinchingthenostrilstogetherfor10minutes.Ifpinchingthenostrilsdoesnotcontrolthebleeding:
■{ Applyanicepacktothebridgeofthenose.
■{ Putpressureontheupperlipjustbeneaththenose.
3. Youshouldseekmedicalcareifthebleedingpersistsorrecursorifthepersonsaysthatitresultsfromhighbloodpressure.
BURNS
INSTRUCTION:Guided Discussion
1. Leadparticipantsinadiscussiononburnsbyasking:
■{ Whatisaburn?
■{ Whatarethedifferenttypesofburns?
■{ Whenisaburnconsideredcritical?
2. Coverthefollowingpointsduringthediscussion:
■{ Burnsareaspecialtypeofsofttissueinjury.
■{ Burnsareclassifiedbydepth.Thedeepertheburn,themoreseriousitis.Theseclassificationsaresuperficial,partialthicknessandfullthickness.
■{ Burnsarealsoclassifiedbytheirsources:thermal(fromheat),chemical,electricalandradiation(typicallyfromthesun).
■{ Criticalburnsarepotentiallylifethreatening,disablingordisfiguring.
■{ Itisoftendifficulttotellwhetheraburniscritical—evensuperficialburnscanbeconsideredcriticaliftheycoveralargeareaorcertainbodyparts.
Time: 27 minutes
lesson 7 | soft Tissue Injuries 59
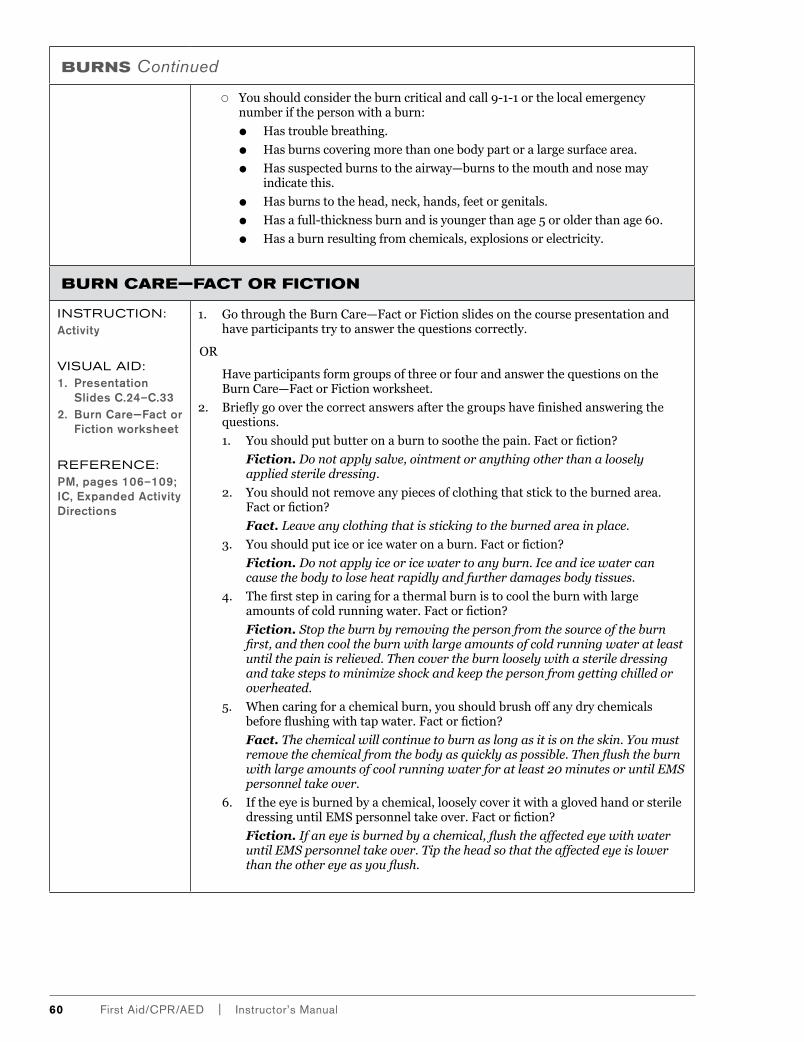
BURNS Continued
■{ Youshouldconsidertheburncriticalandcall9-1-1orthelocalemergencynumberifthepersonwithaburn:
■● Hastroublebreathing.
■● Hasburnscoveringmorethanonebodypartoralargesurfacearea.
■● Hassuspectedburnstotheairway—burnstothemouthandnosemayindicatethis.
■● Hasburnstothehead,neck,hands,feetorgenitals.
■● Hasafull-thicknessburnandisyoungerthanage5orolderthanage60.
■● Hasaburnresultingfromchemicals,explosionsorelectricity.
BURN CARE—FACT OR FICTION
INSTRUCTION:Activity
VISUAL AID:1. Presentation
slides C.24–C.332. Burn Care—Fact or
Fiction worksheet
REFERENCE:PM, pages 106–109; IC, expanded Activity Directions
1. GothroughtheBurnCare—FactorFictionslidesonthecoursepresentationandhaveparticipantstrytoanswerthequestionscorrectly.
OR
HaveparticipantsformgroupsofthreeorfourandanswerthequestionsontheBurnCare—FactorFictionworksheet.
2. Brieflygooverthecorrectanswersafterthegroupshavefinishedansweringthequestions.
1. Youshouldputbutteronaburntosoothethepain.Factorfiction?
Fiction.Do not apply salve, ointment or anything other than a loosely applied sterile dressing.
2. Youshouldnotremoveanypiecesofclothingthatsticktotheburnedarea.Factorfiction?
Fact. Leave any clothing that is sticking to the burned area in place.
3. Youshouldputiceoricewateronaburn.Factorfiction?
Fiction. Do not apply ice or ice water to any burn. Ice and ice water can cause the body to lose heat rapidly and further damages body tissues.
4. Thefirststepincaringforathermalburnistocooltheburnwithlargeamountsofcoldrunningwater.Factorfiction?
Fiction. Stop the burn by removing the person from the source of the burn first, and then cool the burn with large amounts of cold running water at least until the pain is relieved. Then cover the burn loosely with a sterile dressing and take steps to minimize shock and keep the person from getting chilled or overheated.
5. Whencaringforachemicalburn,youshouldbrushoffanydrychemicalsbeforeflushingwithtapwater.Factorfiction?
Fact. The chemical will continue to burn as long as it is on the skin. You must remove the chemical from the body as quickly as possible. Then flush the burn with large amounts of cool running water for at least 20 minutes or until EMS personnel take over.
6. Iftheeyeisburnedbyachemical,looselycoveritwithaglovedhandorsteriledressinguntilEMSpersonneltakeover.Factorfiction?
Fiction. If an eye is burned by a chemical, flush the affected eye with water until EMS personnel take over. Tip the head so that the affected eye is lower than the other eye as you flush.
60 First Aid/CPR/AeD | Instructor’s Manual
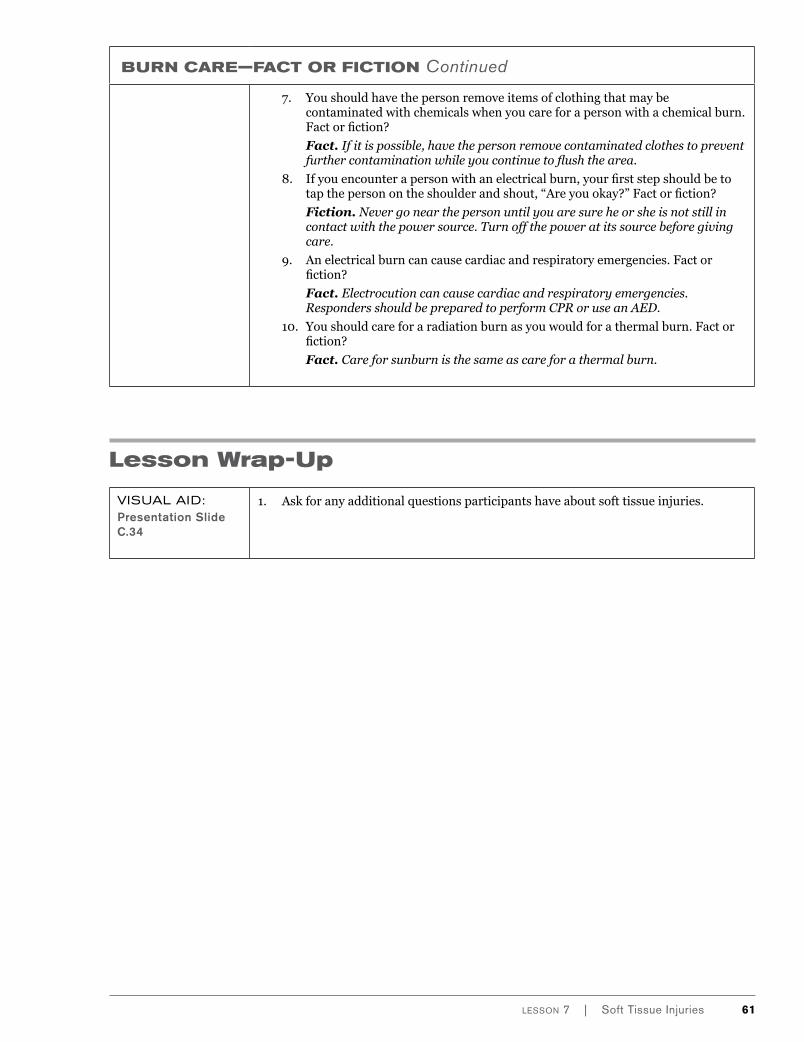
BURN CARE—FACT OR FICTION Continued
7. Youshouldhavethepersonremoveitemsofclothingthatmaybecontaminatedwithchemicalswhenyoucareforapersonwithachemicalburn.Factorfiction?
Fact. If it is possible, have the person remove contaminated clothes to prevent further contamination while you continue to flush the area.
8. Ifyouencounterapersonwithanelectricalburn,yourfirststepshouldbetotapthepersonontheshoulderandshout,“Areyouokay?”Factorfiction?
Fiction. Never go near the person until you are sure he or she is not still in contact with the power source. Turn off the power at its source before giving care.
9. Anelectricalburncancausecardiacandrespiratoryemergencies.Factorfiction?
Fact. Electrocution can cause cardiac and respiratory emergencies. Responders should be prepared to perform CPR or use an AED.
10. Youshouldcareforaradiationburnasyouwouldforathermalburn.Factorfiction?
Fact. Care for sunburn is the same as care for a thermal burn.
Lesson Wrap-Up
VISUAL AID:Presentation slide C.34
1. Askforanyadditionalquestionsparticipantshaveaboutsofttissueinjuries.
lesson 7 | soft Tissue Injuries 61
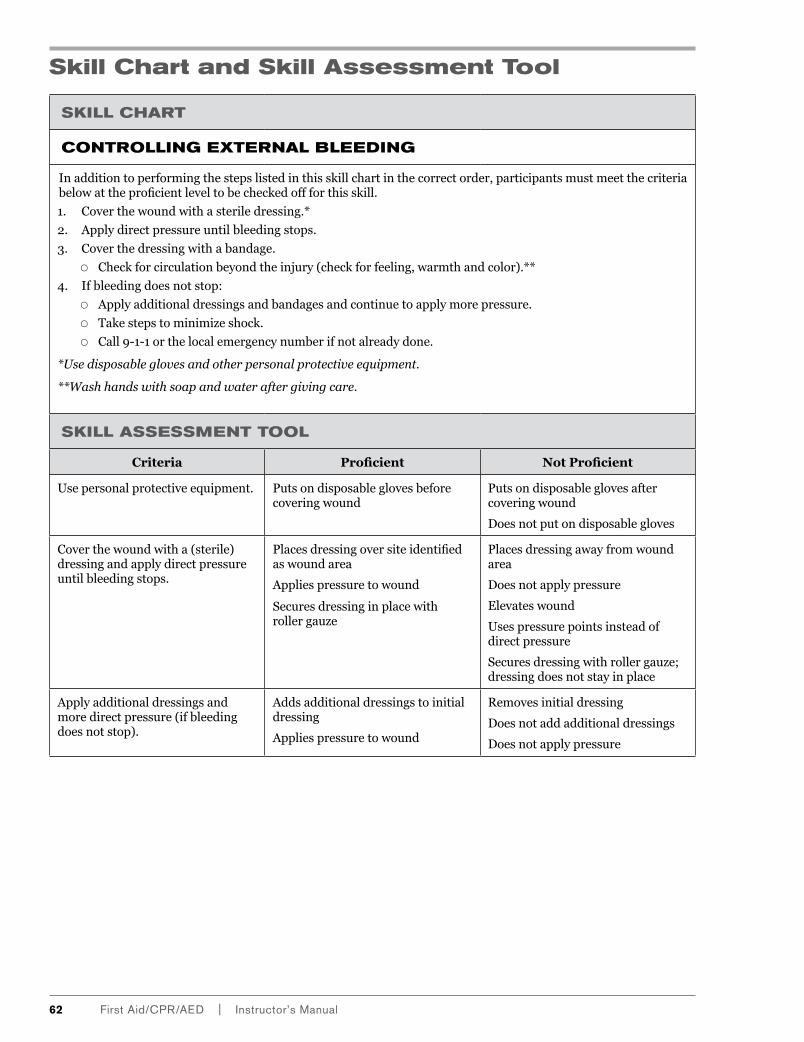
Skill Chart and Skill Assessment Tool
SKILL CHART
CONTROLLING ExTERNAL BLEEDING
Inadditiontoperformingthestepslistedinthisskillchartinthecorrectorder,participantsmustmeetthecriteriabelowattheproficientleveltobecheckedoffforthisskill.
1. Coverthewoundwithasteriledressing.*
2. Applydirectpressureuntilbleedingstops.
3. Coverthedressingwithabandage.
■{ Checkforcirculationbeyondtheinjury(checkforfeeling,warmthandcolor).**
4. Ifbleedingdoesnotstop:
■{ Applyadditionaldressingsandbandagesandcontinuetoapplymorepressure.
■{ Takestepstominimizeshock.
■{ Call9-1-1orthelocalemergencynumberifnotalreadydone.
*Use disposable gloves and other personal protective equipment.
**Wash hands with soap and water after giving care.
SKILL ASSESSMENT TOOL
Criteria Proficient Not Proficient
Usepersonalprotectiveequipment. Putsondisposableglovesbeforecoveringwound
Putsondisposableglovesaftercoveringwound
Doesnotputondisposablegloves
Coverthewoundwitha(sterile)dressingandapplydirectpressureuntilbleedingstops.
Placesdressingoversiteidentifiedaswoundarea
Appliespressuretowound
Securesdressinginplacewithrollergauze
Placesdressingawayfromwoundarea
Doesnotapplypressure
Elevateswound
Usespressurepointsinsteadofdirectpressure
Securesdressingwithrollergauze;dressingdoesnotstayinplace
Applyadditionaldressingsandmoredirectpressure(ifbleedingdoesnotstop).
Addsadditionaldressingstoinitialdressing
Appliespressuretowound
Removesinitialdressing
Doesnotaddadditionaldressings
Doesnotapplypressure
62 First Aid/CPR/AeD | Instructor’s Manual
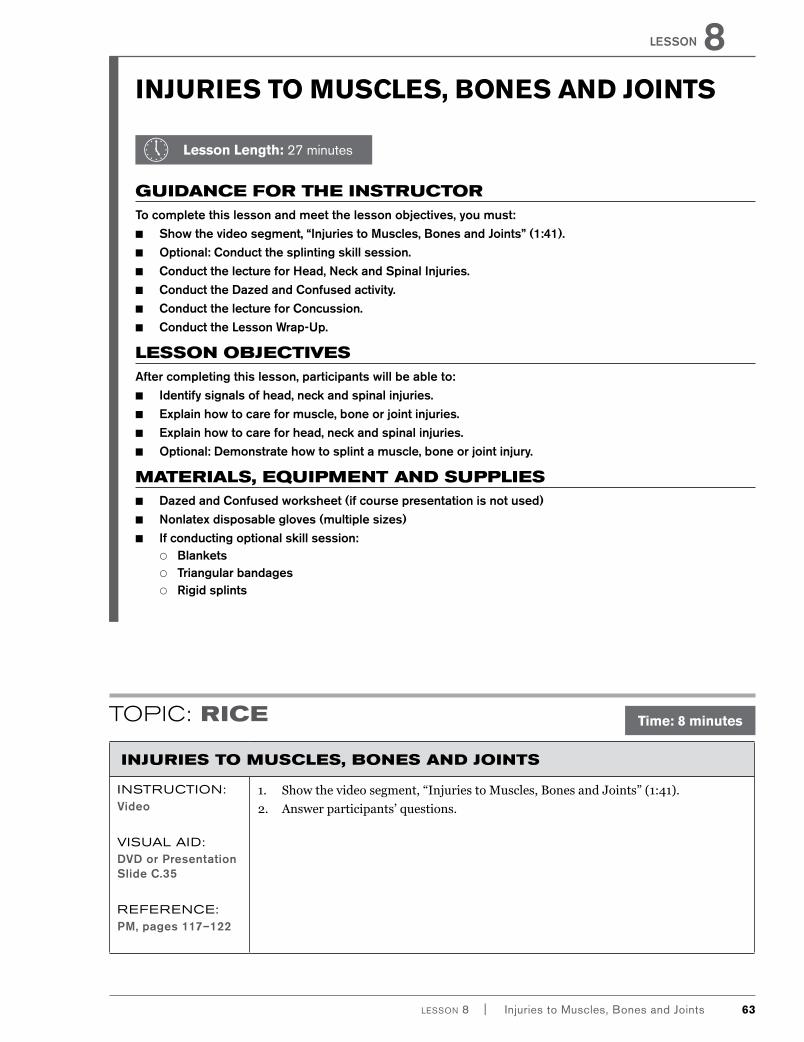
¡¡ Lesson Length: 27 minutes
GUIDANCE FOR THE INSTRUCTORTo complete this lesson and meet the lesson objectives, you must:
■■ Show the video segment, “Injuries to Muscles, Bones and Joints” (1:41).■■ Optional: Conduct the splinting skill session. ■■ Conduct the lecture for Head, Neck and Spinal Injuries. ■■ Conduct the Dazed and Confused activity. ■■ Conduct the lecture for Concussion.■■ Conduct the Lesson Wrap-Up.
LESSON OBJECTIVES After completing this lesson, participants will be able to:
■■ Identify signals of head, neck and spinal injuries.■■ Explain how to care for muscle, bone or joint injuries. ■■ Explain how to care for head, neck and spinal injuries.■■ Optional: Demonstrate how to splint a muscle, bone or joint injury.
MATERIALS, EQUIPMENT AND SUPPLIES ■■ Dazed and Confused worksheet (if course presentation is not used)■■ Nonlatex disposable gloves (multiple sizes)■■ If conducting optional skill session:
■{ Blankets■{ Triangular bandages■{ Rigid splints
INJURIES TO MUSCLES, BONES AND JOINTS
LESSON 8
TOPIC: RICE
INJURIES TO MUSCLES, BONES AND JOINTS
INSTRUCTION:Video
VISUAL AID:DVD or Presentation Slide C.35
REFERENCE:PM, pages 117–122
1. Showthevideosegment,“InjuriestoMuscles,BonesandJoints”(1:41).
2. Answerparticipants’questions.
Time: 8 minutes
lesson 8 | Injuries to Muscles, Bones and Joints 63
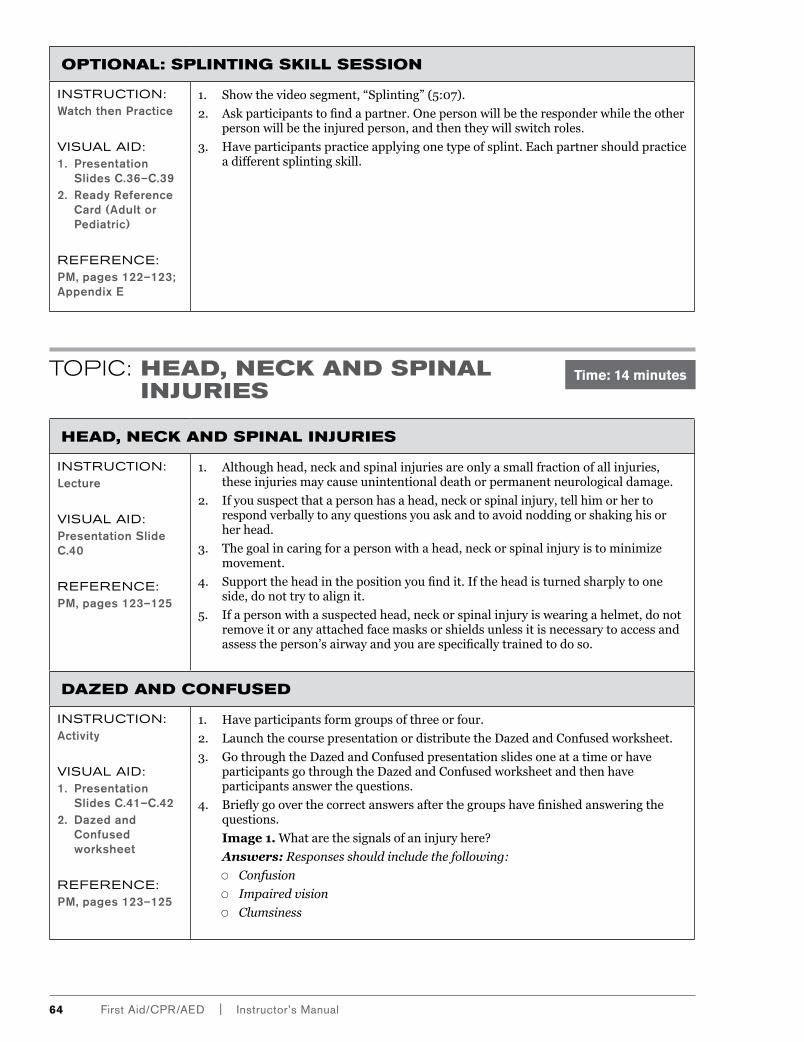
64 First Aid/CPR/AeD | Instructor’s Manual
OPTIONAL: SPLINTING SkILL SESSION
INSTRUCTION:Watch then Practice
VISUAL AID:1. Presentation
Slides C.36–C.392. Ready Reference
Card (Adult or Pediatric)
REFERENCE:PM, pages 122–123; Appendix E
1. Showthevideosegment,“Splinting”(5:07).
2. Askparticipantstofindapartner.Onepersonwillbetheresponderwhiletheotherpersonwillbetheinjuredperson,andthentheywillswitchroles.
3. Haveparticipantspracticeapplyingonetypeofsplint.Eachpartnershouldpracticeadifferentsplintingskill.
TOPIC: HEAD, NECk AND SPINAL INJURIES
HEAD, NECk AND SPINAL INJURIES
INSTRUCTION:Lecture
VISUAL AID:Presentation Slide C.40
REFERENCE:PM, pages 123–125
1. Althoughhead,neckandspinalinjuriesareonlyasmallfractionofallinjuries,theseinjuriesmaycauseunintentionaldeathorpermanentneurologicaldamage.
2. Ifyoususpectthatapersonhasahead,neckorspinalinjury,tellhimorhertorespondverballytoanyquestionsyouaskandtoavoidnoddingorshakinghisorherhead.
3. Thegoalincaringforapersonwithahead,neckorspinalinjuryistominimizemovement.
4. Supporttheheadinthepositionyoufindit.Iftheheadisturnedsharplytooneside,donottrytoalignit.
5. Ifapersonwithasuspectedhead,neckorspinalinjuryiswearingahelmet,donotremoveitoranyattachedfacemasksorshieldsunlessitisnecessarytoaccessandassesstheperson’sairwayandyouarespecificallytrainedtodoso.
DAzED AND CONFUSED
INSTRUCTION:Activity
VISUAL AID:1. Presentation
Slides C.41–C.422. Dazed and
Confused worksheet
REFERENCE:PM, pages 123–125
1. Haveparticipantsformgroupsofthreeorfour.
2. LaunchthecoursepresentationordistributetheDazedandConfusedworksheet.
3. GothroughtheDazedandConfusedpresentationslidesoneatatimeorhaveparticipantsgothroughtheDazedandConfusedworksheetandthenhaveparticipantsanswerthequestions.
4. Brieflygooverthecorrectanswersafterthegroupshavefinishedansweringthequestions.
Image 1.Whatarethesignalsofaninjuryhere?
Answers: Responses should include the following:
■{ Confusion
■{ Impaired vision
■{ Clumsiness
Time: 14 minutes
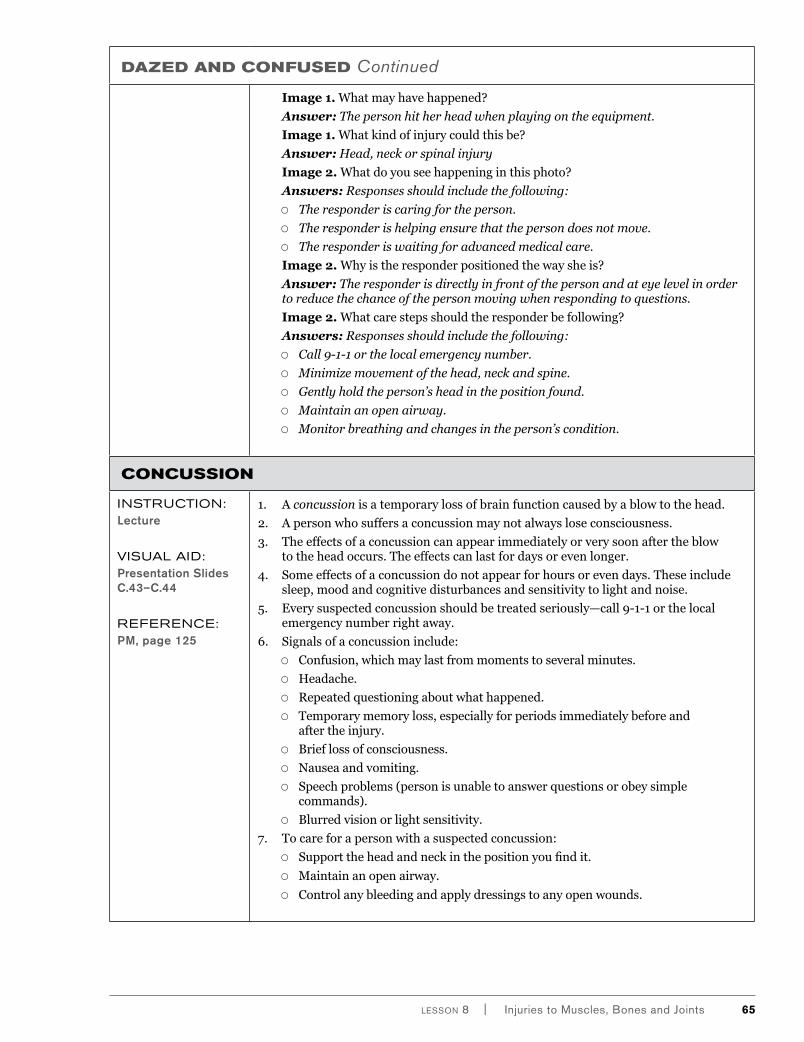
lesson 8 | Injuries to Muscles, Bones and Joints 65
DAzED AND CONFUSED Continued
Image 1.Whatmayhavehappened?
Answer: The person hit her head when playing on the equipment.
Image 1.Whatkindofinjurycouldthisbe?
Answer: Head, neck or spinal injury
Image 2. Whatdoyouseehappeninginthisphoto?
Answers: Responses should include the following:
■{ The responder is caring for the person.
■{ The responder is helping ensure that the person does not move.
■{ The responder is waiting for advanced medical care.
Image 2. Whyistheresponderpositionedthewaysheis?
Answer: The responder is directly in front of the person and at eye level in order to reduce the chance of the person moving when responding to questions.
Image 2. Whatcarestepsshouldtheresponderbefollowing?
Answers: Responses should include the following:
■{ Call 9-1-1 or the local emergency number.
■{ Minimize movement of the head, neck and spine.
■{ Gently hold the person’s head in the position found.
■{ Maintain an open airway.
■{ Monitor breathing and changes in the person’s condition.
CONCUSSION
INSTRUCTION:Lecture
VISUAL AID:Presentation Slides C.43–C.44
REFERENCE:PM, page 125
1. Aconcussionisatemporarylossofbrainfunctioncausedbyablowtothehead.
2. Apersonwhosuffersaconcussionmaynotalwaysloseconsciousness.
3. Theeffectsofaconcussioncanappearimmediatelyorverysoonaftertheblowtotheheadoccurs.Theeffectscanlastfordaysorevenlonger.
4. Someeffectsofaconcussiondonotappearforhoursorevendays.Theseincludesleep,moodandcognitivedisturbancesandsensitivitytolightandnoise.
5. Everysuspectedconcussionshouldbetreatedseriously—call9-1-1orthelocalemergencynumberrightaway.
6. Signalsofaconcussioninclude:
■{ Confusion,whichmaylastfrommomentstoseveralminutes.
■{ Headache.
■{ Repeatedquestioningaboutwhathappened.
■{ Temporarymemoryloss,especiallyforperiodsimmediatelybeforeandaftertheinjury.
■{ Brieflossofconsciousness.
■{ Nauseaandvomiting.
■{ Speechproblems(personisunabletoanswerquestionsorobeysimplecommands).
■{ Blurredvisionorlightsensitivity.
7. Tocareforapersonwithasuspectedconcussion:
■{ Supporttheheadandneckinthepositionyoufindit.
■{ Maintainanopenairway.
■{ Controlanybleedingandapplydressingstoanyopenwounds.

66 First Aid/CPR/AeD | Instructor’s Manual
CONCUSSION Continued
■{ Donotapplydirectpressureifthereareanysignalsofanobviousskullfracture.
■{ Ifthereisclearfluidleakingfromtheearsorawoundinthescalp,coverthearealooselywithasterilegauzedressing.
■{ Monitorthepersonforanychangesincondition.
■{ Trytocalmandreassuretheperson.Encouragethepersontoengageinconversationwithyou;itmaypreventlossofconsciousness.
Lesson Wrap-Up
VISUAL AID:Presentation Slide C.45
1. Howdoyoucontrolbleedingwhenitisassociatedwithanopenfracture?
Answer: Apply dressings and light pressure around the area of the open wound to control bleeding. Do not move the injured area or press directly on the open wound.
2. Ifyoususpectthatapersonhasahead,neckorspinalinjuryandthepersonstartstovomit,whatshouldyoudo?
Answer: If the person starts to vomit, roll him or her on to one side, without twisting the head, neck or spine, to keep the airway clear. To minimize movement of the person’s head, neck and spine, two responders should place the person in this position if possible.
3. Asher,age8,trippedandbumpedhishead.Atfirstyouthoughtitwasjustaminorbumpbuthewillnotstopcrying.Nowyouareworriedtheinjurymightbemoresevere.Whatsignalswouldindicatetheinjuryissevere?
Answers: Responses could include the following:
■{ Confusion, which may last from moments to several minutes
■{ Headache
■{ Repeated questioning about what happened
■{ Temporary memory loss, especially for periods immediately before and after the injury
■{ Brief loss of consciousness
■{ Nausea and vomiting
■{ Speech problems (person is unable to answer questions or obey simple commands)
■{ Blurred vision or light sensitivity
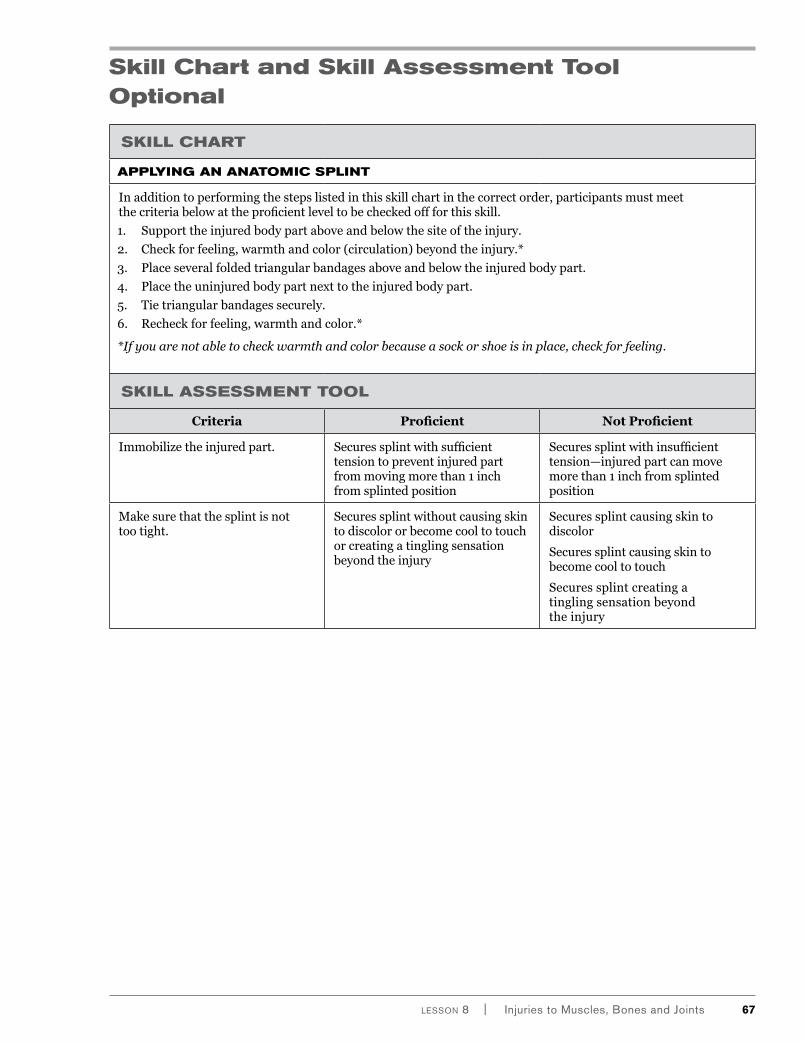
lesson 8 | Injuries to Muscles, Bones and Joints 67
Skill Chart and Skill Assessment Tool Optional
SkILL CHART
APPLyING AN ANATOMIC SPLINT
Inadditiontoperformingthestepslistedinthisskillchartinthecorrectorder,participantsmustmeetthecriteriabelowattheproficientleveltobecheckedoffforthisskill.
1. Supporttheinjuredbodypartaboveandbelowthesiteoftheinjury.
2. Checkforfeeling,warmthandcolor(circulation)beyondtheinjury.*
3. Placeseveralfoldedtriangularbandagesaboveandbelowtheinjuredbodypart.
4. Placetheuninjuredbodypartnexttotheinjuredbodypart.
5. Tietriangularbandagessecurely.
6. Recheckforfeeling,warmthandcolor.*
*If you are not able to check warmth and color because a sock or shoe is in place, check for feeling.
SkILL ASSESSMENT TOOL
Criteria Proficient Not Proficient
Immobilizetheinjuredpart. Securessplintwithsufficienttensiontopreventinjuredpartfrommovingmorethan1inchfromsplintedposition
Securessplintwithinsufficienttension—injuredpartcanmovemorethan1inchfromsplintedposition
Makesurethatthesplintisnottootight.
Securessplintwithoutcausingskintodiscolororbecomecooltotouchorcreatingatinglingsensationbeyondtheinjury
Securessplintcausingskintodiscolor
Securessplintcausingskintobecomecooltotouch
Securessplintcreatingatinglingsensationbeyondtheinjury

68 First Aid/CPR/AeD | Instructor’s Manual
Skill Chart and Skill Assessment Tool Optional
SkILL CHART
APPLyING A SOFT SPLINT
Inadditiontoperformingthestepslistedinthisskillchartinthecorrectorder,participantsmustmeetthecriteriabelowattheproficientleveltobecheckedoffforthisskill.
1. Supporttheinjuredbodypartaboveandbelowthesiteoftheinjury.
2. Checkforfeeling,warmthandcolor(circulation)beyondtheinjury.*
3. Placeseveralfoldedtriangularbandagesaboveandbelowtheinjuredbodypart.
4. Gentlywrapasoftobject(e.g.,afoldedblanketorpillow)aroundtheinjuredbodypart.
5. Tietriangularbandagessecurelywithknots.
6. Recheckforfeeling,warmthandcolor.*
*If you are not able to check warmth and color because a sock or shoe is in place, check for feeling.
SkILL ASSESSMENT TOOL
Criteria Proficient Not Proficient
Immobilizetheinjuredpart. Securessplintwithsufficienttensiontopreventinjuredpartfrommovingmorethan1inchfromsplintedposition
Securessplintwithinsufficienttension—injuredpartcanmovemorethan1inchfromsplintedposition
Makesurethatthesplintisnottootight.
Securessplintwithoutcausingskintodiscolororbecomecooltotouchorcreatingatinglingsensationbeyondtheinjury
Securessplintcausingskintodiscolor
Securessplintcausingskintobecomecooltotouch
Securessplintcreatingatinglingsensationbeyondtheinjury
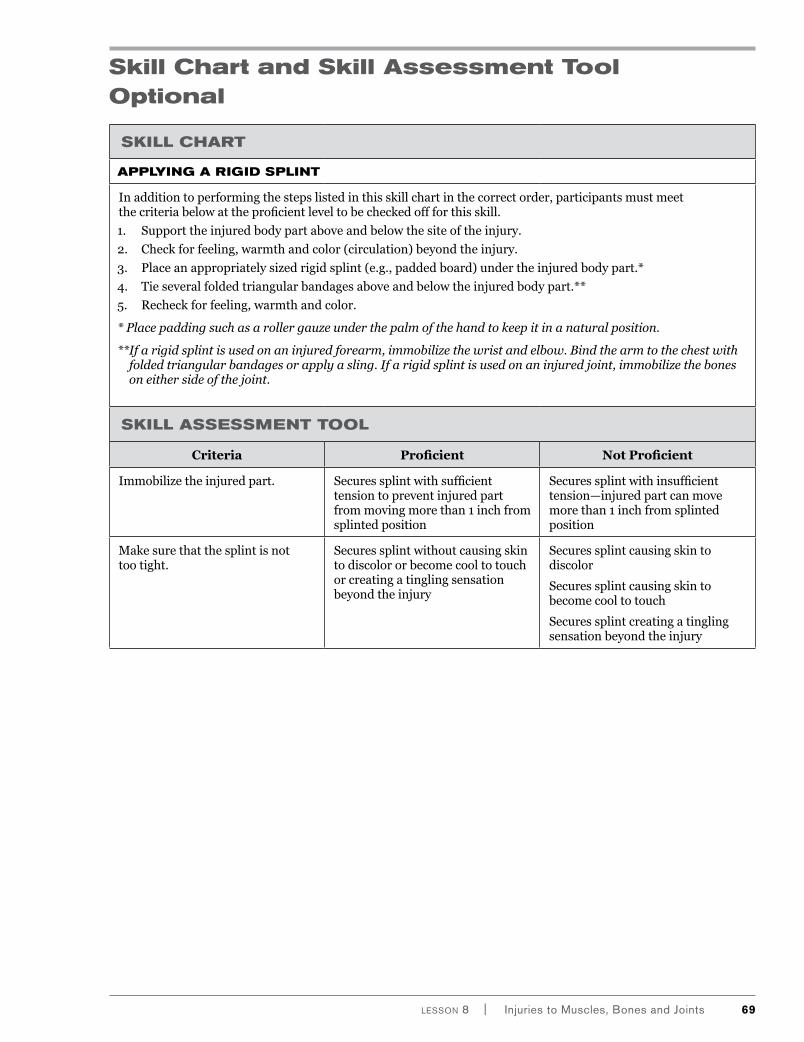
lesson 8 | Injuries to Muscles, Bones and Joints 69
Skill Chart and Skill Assessment Tool Optional
SkILL CHART
APPLyING A RIGID SPLINT
Inadditiontoperformingthestepslistedinthisskillchartinthecorrectorder,participantsmustmeetthecriteriabelowattheproficientleveltobecheckedoffforthisskill.
1. Supporttheinjuredbodypartaboveandbelowthesiteoftheinjury.
2. Checkforfeeling,warmthandcolor(circulation)beyondtheinjury.
3. Placeanappropriatelysizedrigidsplint(e.g.,paddedboard)undertheinjuredbodypart.*
4. Tieseveralfoldedtriangularbandagesaboveandbelowtheinjuredbodypart.**
5. Recheckforfeeling,warmthandcolor.
* Place padding such as a roller gauze under the palm of the hand to keep it in a natural position.
** If a rigid splint is used on an injured forearm, immobilize the wrist and elbow. Bind the arm to the chest with folded triangular bandages or apply a sling. If a rigid splint is used on an injured joint, immobilize the bones on either side of the joint.
SkILL ASSESSMENT TOOL
Criteria Proficient Not Proficient
Immobilizetheinjuredpart. Securessplintwithsufficienttensiontopreventinjuredpartfrommovingmorethan1inchfromsplintedposition
Securessplintwithinsufficienttension—injuredpartcanmovemorethan1inchfromsplintedposition
Makesurethatthesplintisnottootight.
Securessplintwithoutcausingskintodiscolororbecomecooltotouchorcreatingatinglingsensationbeyondtheinjury
Securessplintcausingskintodiscolor
Securessplintcausingskintobecomecooltotouch
Securessplintcreatingatinglingsensationbeyondtheinjury
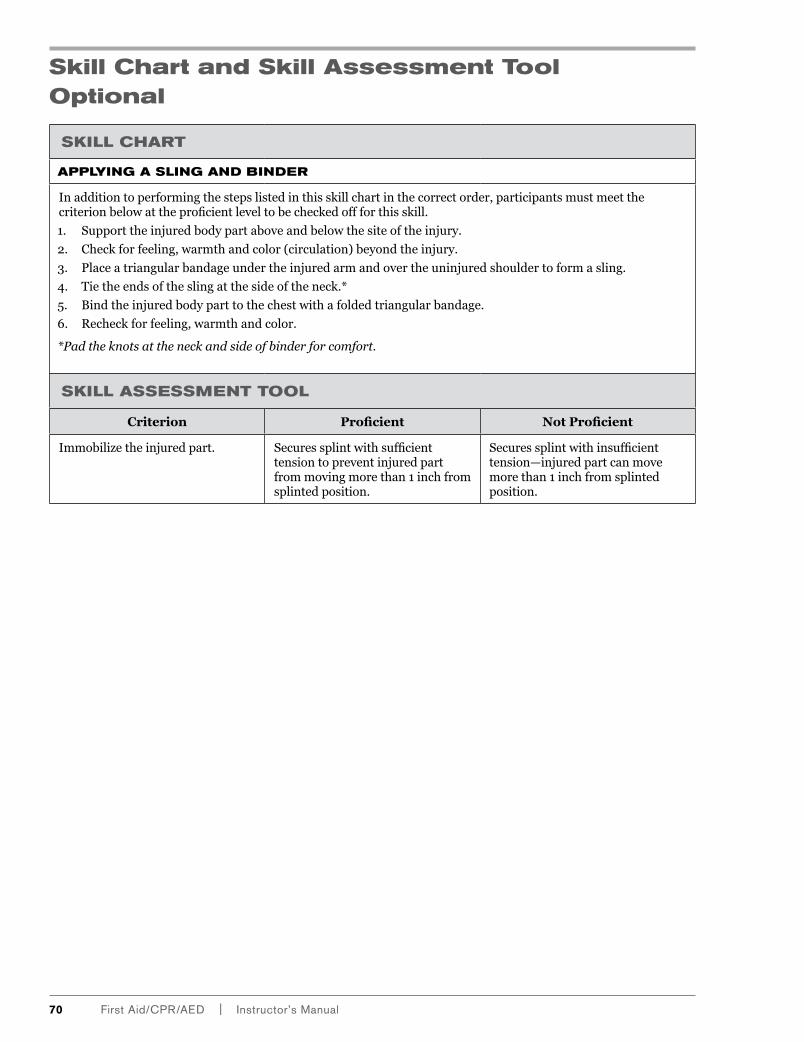
70 First Aid/CPR/AeD | Instructor’s Manual
Skill Chart and Skill Assessment Tool Optional
SkILL CHART
APPLyING A SLING AND BINDER
Inadditiontoperformingthestepslistedinthisskillchartinthecorrectorder,participantsmustmeetthecriterionbelowattheproficientleveltobecheckedoffforthisskill.
1. Supporttheinjuredbodypartaboveandbelowthesiteoftheinjury.
2. Checkforfeeling,warmthandcolor(circulation)beyondtheinjury.
3. Placeatriangularbandageundertheinjuredarmandovertheuninjuredshouldertoformasling.
4. Tietheendsoftheslingatthesideoftheneck.*
5. Bindtheinjuredbodyparttothechestwithafoldedtriangularbandage.
6. Recheckforfeeling,warmthandcolor.
*Pad the knots at the neck and side of binder for comfort.
SkILL ASSESSMENT TOOL
Criterion Proficient Not Proficient
Immobilizetheinjuredpart. Securessplintwithsufficienttensiontopreventinjuredpartfrommovingmorethan1inchfromsplintedposition.
Securessplintwithinsufficienttension—injuredpartcanmovemorethan1inchfromsplintedposition.
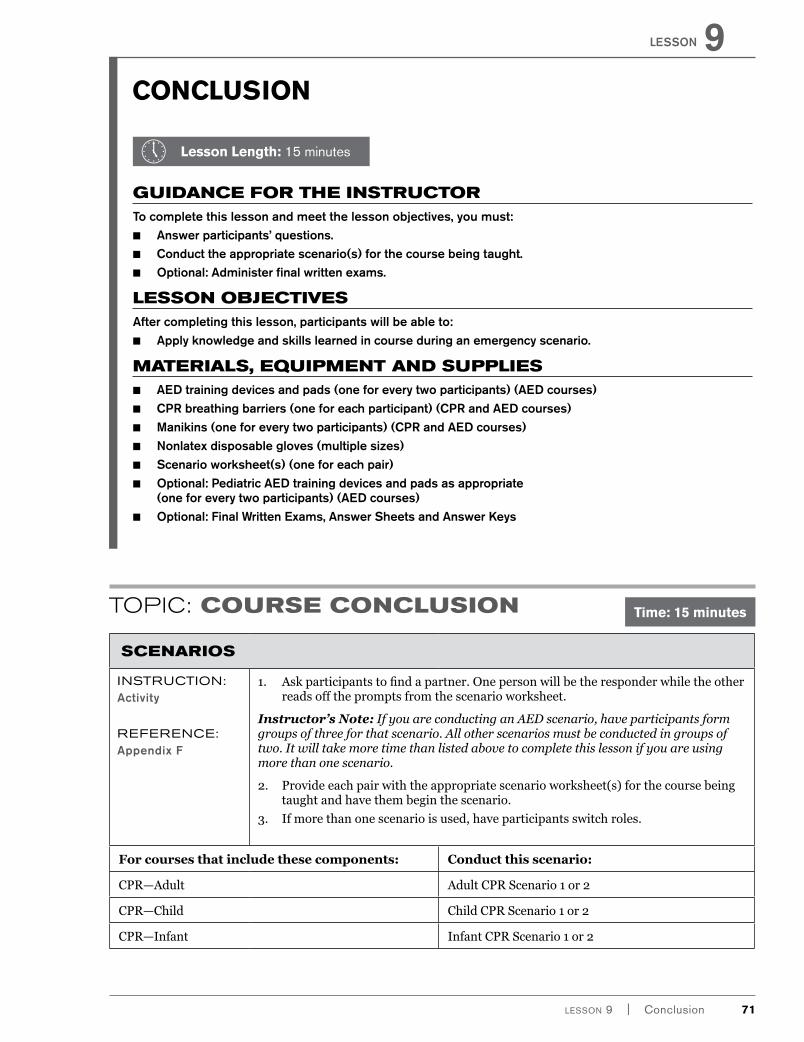
lesson 9 | Conclusion 71
CONCLUSION
¡¡ Lesson Length: 15 minutes
GUIDANCE FOR THE INSTRUCTORTo complete this lesson and meet the lesson objectives, you must:
■■ Answer participants’ questions.■■ Conduct the appropriate scenario(s) for the course being taught.■■ Optional: Administer final written exams.
lESSON ObjECTIvESAfter completing this lesson, participants will be able to:
■■ Apply knowledge and skills learned in course during an emergency scenario.
MATERIAlS, EQUIPMENT AND SUPPlIES ■■ AED training devices and pads (one for every two participants) (AED courses)■■ CPR breathing barriers (one for each participant) (CPR and AED courses)■■ Manikins (one for every two participants) (CPR and AED courses)■■ Nonlatex disposable gloves (multiple sizes)■■ Scenario worksheet(s) (one for each pair)■■ Optional: Pediatric AED training devices and pads as appropriate
(one for every two participants) (AED courses)■■ Optional: Final Written Exams, Answer Sheets and Answer Keys
TOPIC: COURSE CONClUSION
SCENARIOS
INSTRUCTION:Activity
REFERENCE:Appendix F
1. Askparticipantstofindapartner.Onepersonwillbetheresponderwhiletheotherreadsoffthepromptsfromthescenarioworksheet.
Instructor’s Note: If you are conducting an AED scenario, have participants form groups of three for that scenario. All other scenarios must be conducted in groups of two. It will take more time than listed above to complete this lesson if you are using more than one scenario.
2. Provideeachpairwiththeappropriatescenarioworksheet(s)forthecoursebeingtaughtandhavethembeginthescenario.
3. Ifmorethanonescenarioisused,haveparticipantsswitchroles.
For courses that include these components: Conduct this scenario:
CPR—Adult AdultCPRScenario1or2
CPR—Child ChildCPRScenario1or2
CPR—Infant InfantCPRScenario1or2
Time: 15 minutes
lESSON 9
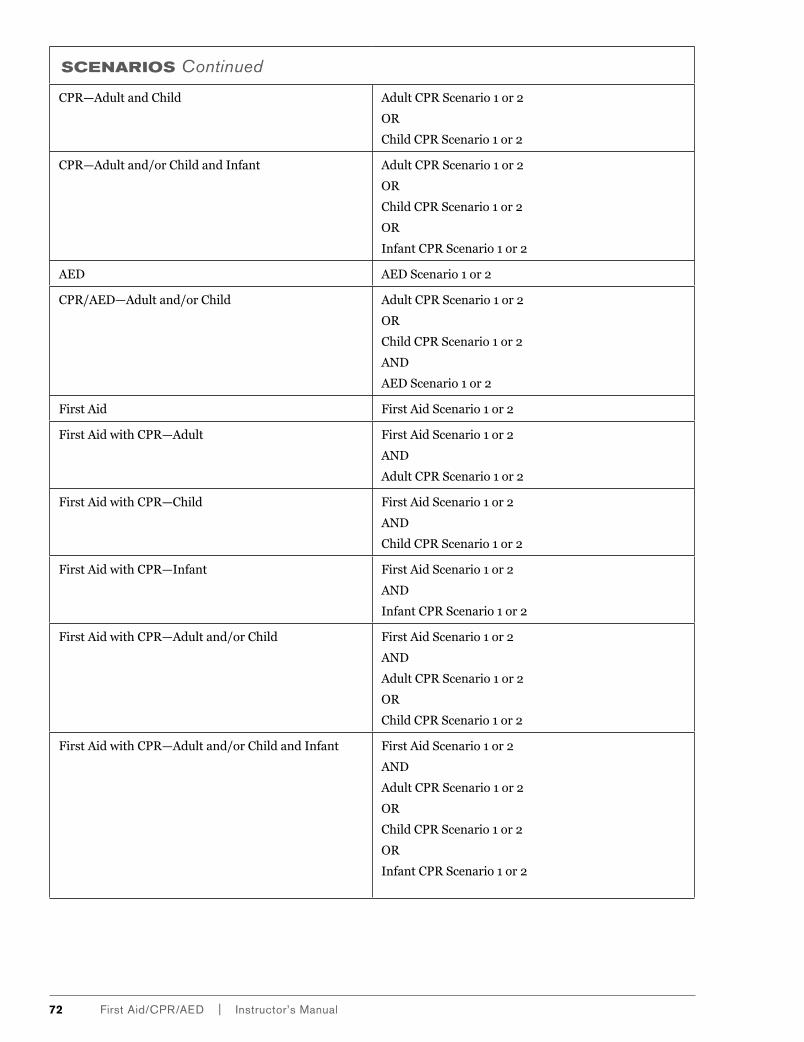
72 First Aid/CPR/AeD | Instructor’s Manual
SCENARIOS Continued
CPR—AdultandChild AdultCPRScenario1or2
OR
ChildCPRScenario1or2
CPR—Adultand/orChildandInfant AdultCPRScenario1or2
OR
ChildCPRScenario1or2
OR
InfantCPRScenario1or2
AED AEDScenario1or2
CPR/AED—Adultand/orChild AdultCPRScenario1or2
OR
ChildCPRScenario1or2
AND
AEDScenario1or2
FirstAid FirstAidScenario1or2
FirstAidwithCPR—Adult FirstAidScenario1or2
AND
AdultCPRScenario1or2
FirstAidwithCPR—Child FirstAidScenario1or2
AND
ChildCPRScenario1or2
FirstAidwithCPR—Infant FirstAidScenario1or2
AND
InfantCPRScenario1or2
FirstAidwithCPR—Adultand/orChild FirstAidScenario1or2
AND
AdultCPRScenario1or2
OR
ChildCPRScenario1or2
FirstAidwithCPR—Adultand/orChildandInfant FirstAidScenario1or2
AND
AdultCPRScenario1or2
OR
ChildCPRScenario1or2
OR
InfantCPRScenario1or2
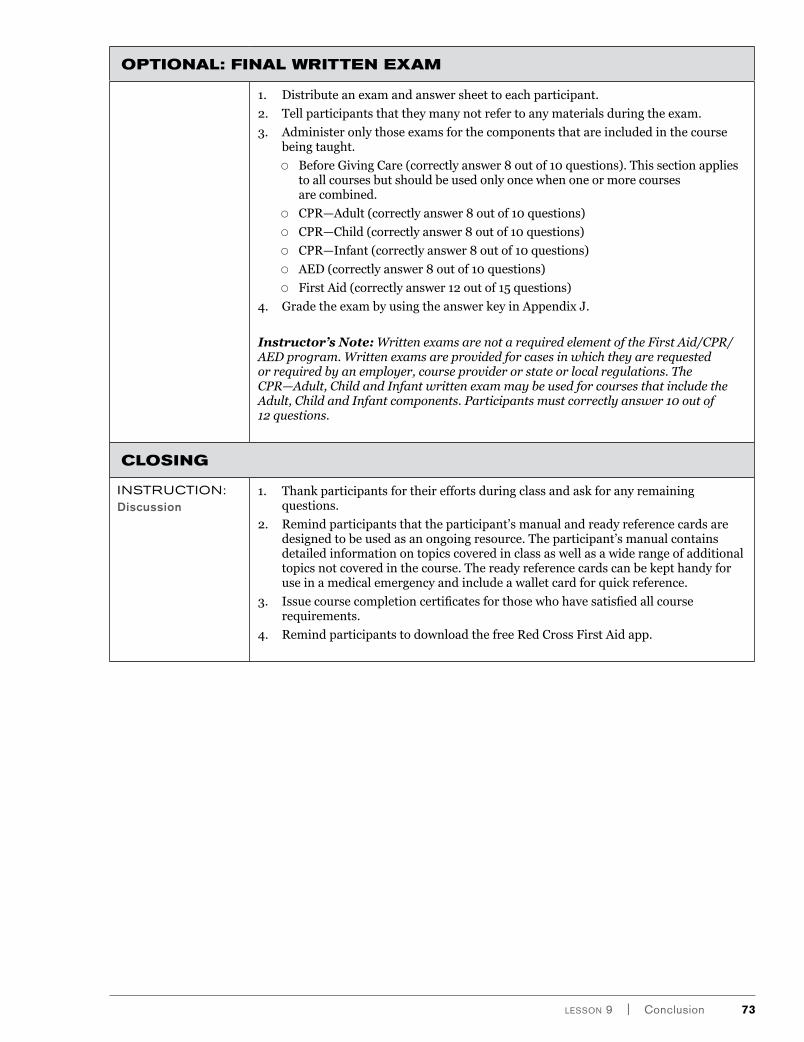
lesson 9 | Conclusion 73
OPTIONAl: FINAl WRITTEN ExAM
1. Distributeanexamandanswersheettoeachparticipant.
2. Tellparticipantsthattheymanynotrefertoanymaterialsduringtheexam.
3. Administeronlythoseexamsforthecomponentsthatareincludedinthecoursebeingtaught.
■{ BeforeGivingCare(correctlyanswer8outof10questions).Thissectionappliestoallcoursesbutshouldbeusedonlyoncewhenoneormorecoursesarecombined.
■{ CPR—Adult(correctlyanswer8outof10questions)
■{ CPR—Child(correctlyanswer8outof10questions)
■{ CPR—Infant(correctlyanswer8outof10questions)
■{ AED(correctlyanswer8outof10questions)
■{ FirstAid(correctlyanswer12outof15questions)
4. GradetheexambyusingtheanswerkeyinAppendixJ.
Instructor’s Note: Written exams are not a required element of the First Aid/CPR/AED program. Written exams are provided for cases in which they are requested or required by an employer, course provider or state or local regulations. The CPR—Adult, Child and Infant written exam may be used for courses that include the Adult, Child and Infant components. Participants must correctly answer 10 out of 12 questions.
ClOSING
INSTRUCTION:Discussion
1. Thankparticipantsfortheireffortsduringclassandaskforanyremainingquestions.
2. Remindparticipantsthattheparticipant’smanualandreadyreferencecardsaredesignedtobeusedasanongoingresource.Theparticipant’smanualcontainsdetailedinformationontopicscoveredinclassaswellasawiderangeofadditionaltopicsnotcoveredinthecourse.Thereadyreferencecardscanbekepthandyforuseinamedicalemergencyandincludeawalletcardforquickreference.
3. Issuecoursecompletioncertificatesforthosewhohavesatisfiedallcourserequirements.
4. RemindparticipantstodownloadthefreeRedCrossFirstAidapp.
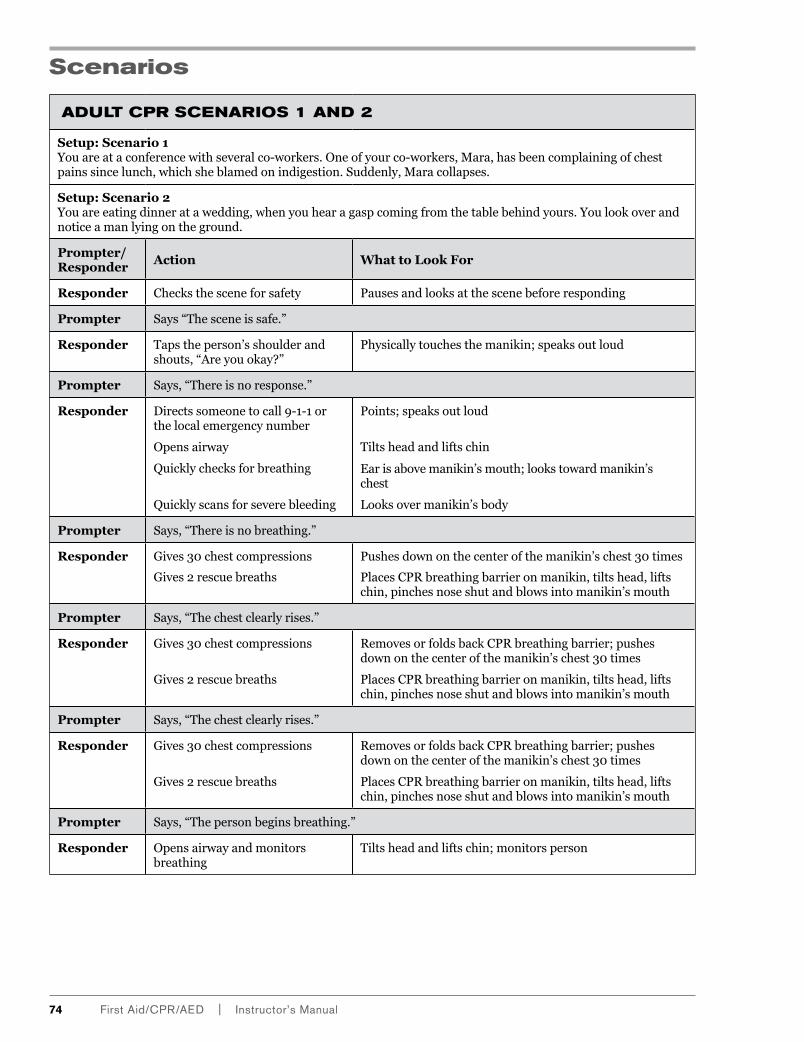
74 First Aid/CPR/AeD | Instructor’s Manual
Scenarios
ADUlT CPR SCENARIOS 1 AND 2
Setup: Scenario 1Youareataconferencewithseveralco-workers.Oneofyourco-workers,Mara,hasbeencomplainingofchestpainssincelunch,whichsheblamedonindigestion.Suddenly,Maracollapses.
Setup: Scenario 2Youareeatingdinneratawedding,whenyouhearagaspcomingfromthetablebehindyours.Youlookoverandnoticeamanlyingontheground.
Prompter/ Responder
Action What to Look For
Responder Checksthesceneforsafety Pausesandlooksatthescenebeforeresponding
Prompter Says“Thesceneissafe.”
Responder Tapstheperson’sshoulderandshouts,“Areyouokay?”
Physicallytouchesthemanikin;speaksoutloud
Prompter Says,“Thereisnoresponse.”
Responder Directssomeonetocall9-1-1orthelocalemergencynumber
Opensairway
Quicklychecksforbreathing
Quicklyscansforseverebleeding
Points;speaksoutloud
Tiltsheadandliftschin
Earisabovemanikin’smouth;lookstowardmanikin’schest
Looksovermanikin’sbody
Prompter Says,“Thereisnobreathing.”
Responder Gives30chestcompressions
Gives2rescuebreaths
Pushesdownonthecenterofthemanikin’schest30times
PlacesCPRbreathingbarrieronmanikin,tiltshead,liftschin,pinchesnoseshutandblowsintomanikin’smouth
Prompter Says,“Thechestclearlyrises.”
Responder Gives30chestcompressions
Gives2rescuebreaths
RemovesorfoldsbackCPRbreathingbarrier;pushesdownonthecenterofthemanikin’schest30times
PlacesCPRbreathingbarrieronmanikin,tiltshead,liftschin,pinchesnoseshutandblowsintomanikin’smouth
Prompter Says,“Thechestclearlyrises.”
Responder Gives30chestcompressions
Gives2rescuebreaths
RemovesorfoldsbackCPRbreathingbarrier;pushesdownonthecenterofthemanikin’schest30times
PlacesCPRbreathingbarrieronmanikin,tiltshead,liftschin,pinchesnoseshutandblowsintomanikin’smouth
Prompter Says,“Thepersonbeginsbreathing.”
Responder Opensairwayandmonitorsbreathing
Tiltsheadandliftschin;monitorsperson
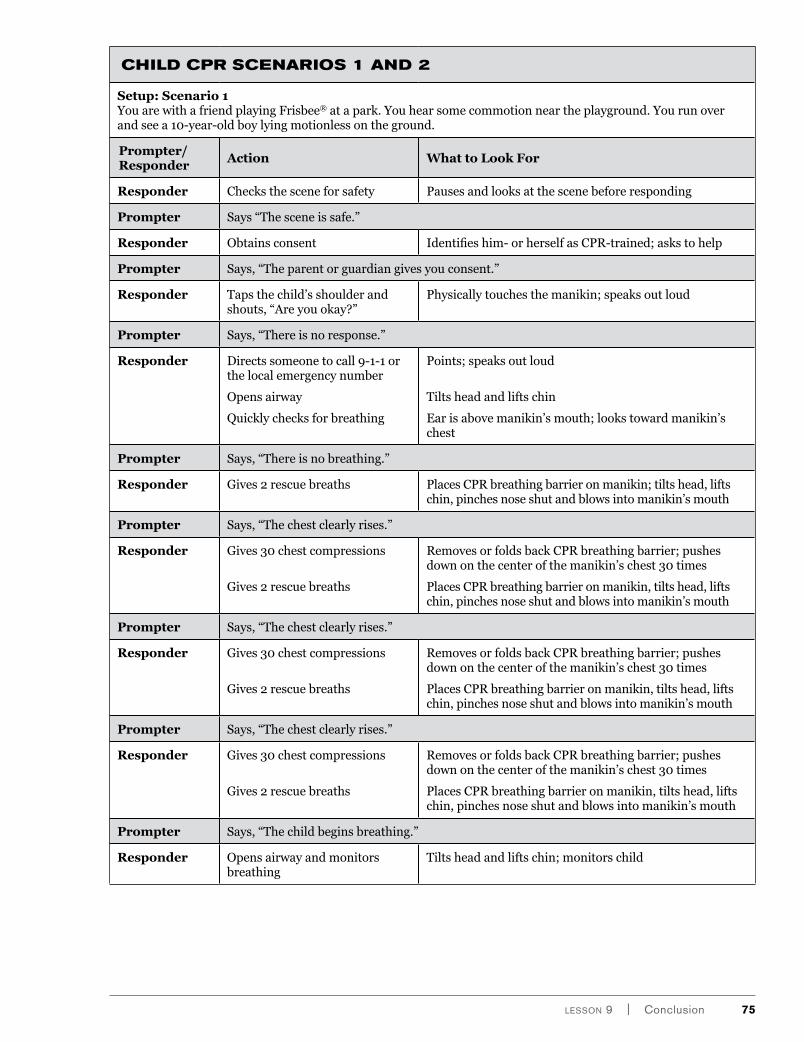
lesson 9 | Conclusion 75
CHIlD CPR SCENARIOS 1 AND 2
Setup: Scenario 1YouarewithafriendplayingFrisbee®atapark.Youhearsomecommotionneartheplayground.Yourunoverandseea10-year-oldboylyingmotionlessontheground.
Prompter/ Responder
Action What to Look For
Responder Checksthesceneforsafety Pausesandlooksatthescenebeforeresponding
Prompter Says“Thesceneissafe.”
Responder Obtainsconsent Identifieshim-orherselfasCPR-trained;askstohelp
Prompter Says,“Theparentorguardiangivesyouconsent.”
Responder Tapsthechild’sshoulderandshouts,“Areyouokay?”
Physicallytouchesthemanikin;speaksoutloud
Prompter Says,“Thereisnoresponse.”
Responder Directssomeonetocall9-1-1orthelocalemergencynumber
Opensairway
Quicklychecksforbreathing
Points;speaksoutloud
Tiltsheadandliftschin
Earisabovemanikin’smouth;lookstowardmanikin’schest
Prompter Says,“Thereisnobreathing.”
Responder Gives2rescuebreaths PlacesCPRbreathingbarrieronmanikin;tiltshead,liftschin,pinchesnoseshutandblowsintomanikin’smouth
Prompter Says,“Thechestclearlyrises.”
Responder Gives30chestcompressions
Gives2rescuebreaths
RemovesorfoldsbackCPRbreathingbarrier;pushesdownonthecenterofthemanikin’schest30times
PlacesCPRbreathingbarrieronmanikin,tiltshead,liftschin,pinchesnoseshutandblowsintomanikin’smouth
Prompter Says,“Thechestclearlyrises.”
Responder Gives30chestcompressions
Gives2rescuebreaths
RemovesorfoldsbackCPRbreathingbarrier;pushesdownonthecenterofthemanikin’schest30times
PlacesCPRbreathingbarrieronmanikin,tiltshead,liftschin,pinchesnoseshutandblowsintomanikin’smouth
Prompter Says,“Thechestclearlyrises.”
Responder Gives30chestcompressions
Gives2rescuebreaths
RemovesorfoldsbackCPRbreathingbarrier;pushesdownonthecenterofthemanikin’schest30times
PlacesCPRbreathingbarrieronmanikin,tiltshead,liftschin,pinchesnoseshutandblowsintomanikin’smouth
Prompter Says,“Thechildbeginsbreathing.”
Responder Opensairwayandmonitorsbreathing
Tiltsheadandliftschin;monitorschild

76 First Aid/CPR/AeD | Instructor’s Manual
Setup: Scenario 2Whilewalkingyourdog,younoticeagroupofchildrenplayingbaseball.Youseeoneofthechildrengetstruckwiththebaseballandthencollapsetotheground.Youtieyourdogupandapproachthescene.
Prompter/ Responder
Action What to Look For
Responder Checksthesceneforsafety Pausesandlooksatthescenebeforeresponding
Prompter Says“Thesceneissafe.”
Responder Obtainsconsent Identifieshim-orherselfasCPR-trained;askstohelp
Prompter Says,“Theparentorguardiangivesyouconsent.”
Responder Tapsthechild’sshoulderandshouts,“Areyouokay?”
Physicallytouchesthemanikin;speaksoutloud
Prompter Says,“Thereisnoresponse.”
Responder Directssomeonetocall9-1-1orthelocalemergencynumber
Opensairway
Quicklychecksforbreathing
Quicklyscansforseverebleeding
Points;speaksoutloud
Tiltsheadandliftschin
Earisabovemanikin’smouth;lookstowardmanikin’schest
Looksovermanikin’sbody
Prompter Says,“Thereisnobreathing.”
Responder Gives30chestcompressions
Gives2rescuebreaths
Pushesdownonthecenterofthemanikin’schest30times
PlacesCPRbreathingbarrieronmanikin,tiltshead,liftschin,pinchesnoseshutandblowsintomanikin’smouth
Prompter Says,“Thechestclearlyrises.”
Responder Gives30chestcompressions
Gives2rescuebreaths
RemovesorfoldsbackCPRbreathingbarrier;pushesdownonthecenterofthemanikin’schest30times
PlacesCPRbreathingbarrieronmanikin,tiltshead,liftschin,pinchesnoseshutandblowsintomanikin’smouth
Prompter Says,“Thechestclearlyrises.”
Responder Gives30chestcompressions
Gives2rescuebreaths
RemovesorfoldsbackCPRbreathingbarrier;pushesdownonthecenterofthemanikin’schest30times
PlacesCPRbreathingbarrieronmanikin,tiltshead,liftschin,pinchesnoseshutandblowsintomanikin’smouth
Prompter Says,“Thechildbeginsbreathing.”
Responder Opensairwayandmonitorsbreathing Tiltsheadandliftschin;monitorsperson
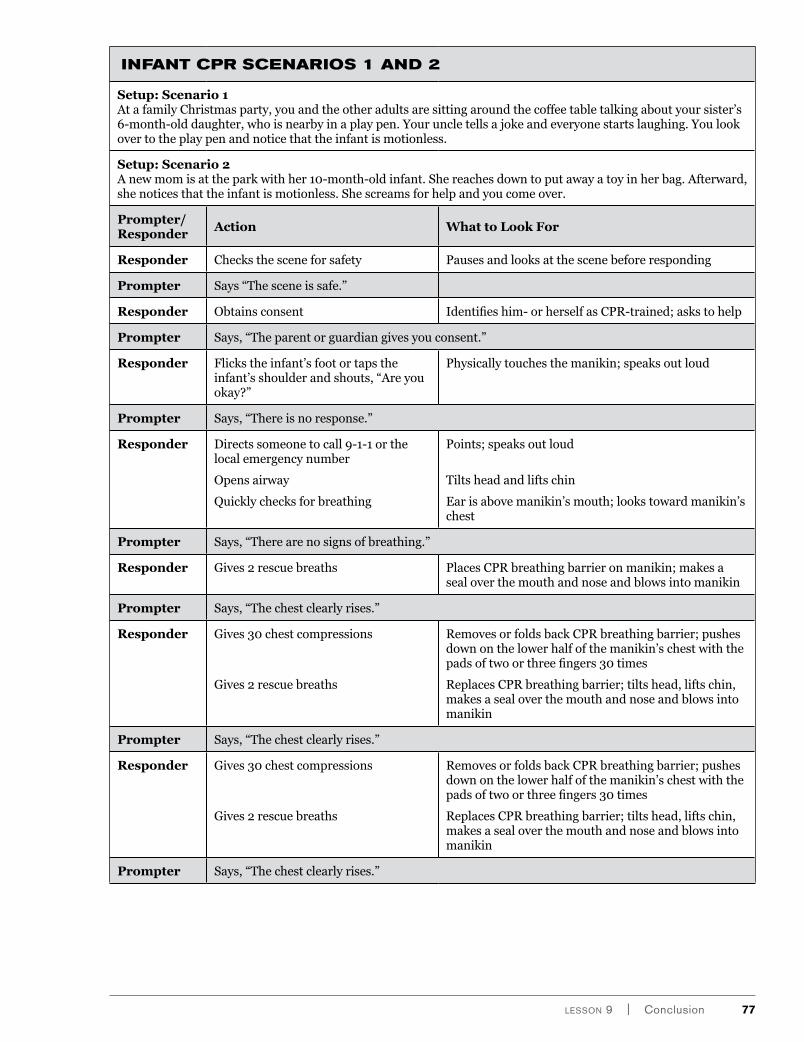
lesson 9 | Conclusion 77
INFANT CPR SCENARIOS 1 AND 2
Setup: Scenario 1AtafamilyChristmasparty,youandtheotheradultsaresittingaroundthecoffeetabletalkingaboutyoursister’s6-month-olddaughter,whoisnearbyinaplaypen.Youruncletellsajokeandeveryonestartslaughing.Youlookovertotheplaypenandnoticethattheinfantismotionless.
Setup: Scenario 2Anewmomisattheparkwithher10-month-oldinfant.Shereachesdowntoputawayatoyinherbag.Afterward,shenoticesthattheinfantismotionless.Shescreamsforhelpandyoucomeover.
Prompter/ Responder
Action What to Look For
Responder Checksthesceneforsafety Pausesandlooksatthescenebeforeresponding
Prompter Says“Thesceneissafe.”
Responder Obtainsconsent Identifieshim-orherselfasCPR-trained;askstohelp
Prompter Says,“Theparentorguardiangivesyouconsent.”
Responder Flickstheinfant’sfootortapstheinfant’sshoulderandshouts,“Areyouokay?”
Physicallytouchesthemanikin;speaksoutloud
Prompter Says,“Thereisnoresponse.”
Responder Directssomeonetocall9-1-1orthelocalemergencynumber
Opensairway
Quicklychecksforbreathing
Points;speaksoutloud
Tiltsheadandliftschin
Earisabovemanikin’smouth;lookstowardmanikin’schest
Prompter Says,“Therearenosignsofbreathing.”
Responder Gives2rescuebreaths PlacesCPRbreathingbarrieronmanikin;makesasealoverthemouthandnoseandblowsintomanikin
Prompter Says,“Thechestclearlyrises.”
Responder Gives30chestcompressions
Gives2rescuebreaths
RemovesorfoldsbackCPRbreathingbarrier;pushesdownonthelowerhalfofthemanikin’schestwiththepadsoftwoorthreefingers30times
ReplacesCPRbreathingbarrier;tiltshead,liftschin,makesasealoverthemouthandnoseandblowsintomanikin
Prompter Says,“Thechestclearlyrises.”
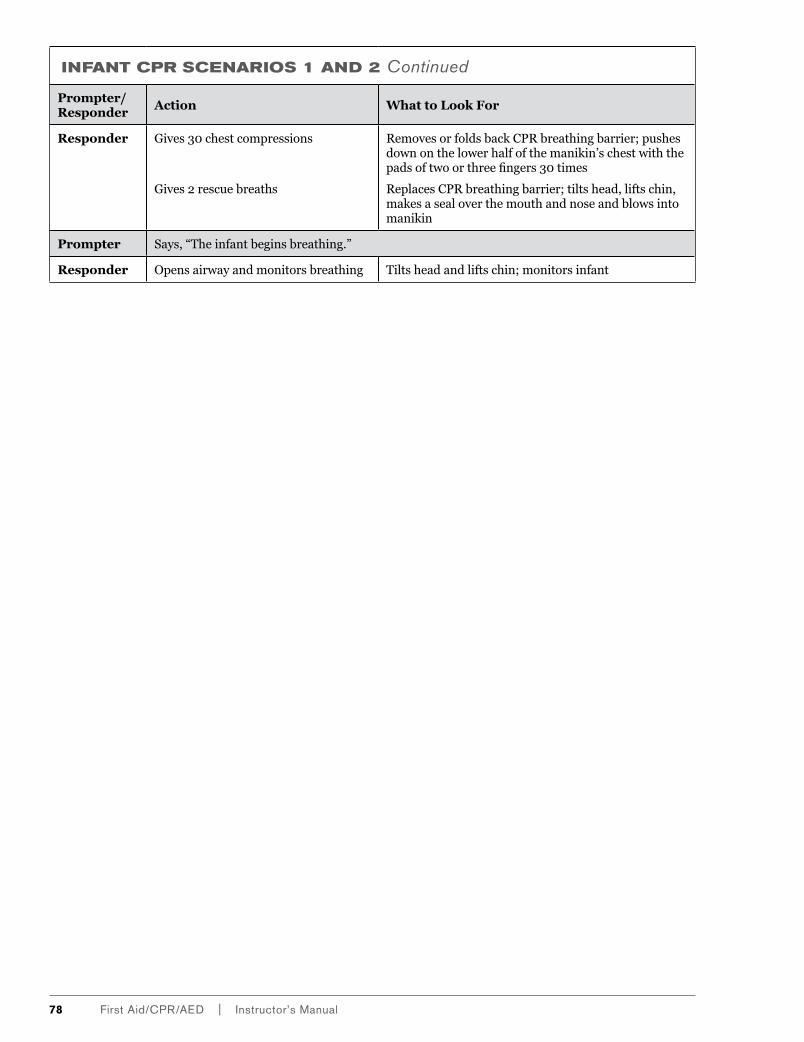
78 First Aid/CPR/AeD | Instructor’s Manual
INFANT CPR SCENARIOS 1 AND 2 Continued
Prompter/ Responder
Action What to Look For
Responder Gives30chestcompressions
Gives2rescuebreaths
RemovesorfoldsbackCPRbreathingbarrier;pushesdownonthelowerhalfofthemanikin’schestwiththepadsoftwoorthreefingers30times
ReplacesCPRbreathingbarrier;tiltshead,liftschin,makesasealoverthemouthandnoseandblowsintomanikin
Prompter Says,“Theinfantbeginsbreathing.”
Responder Opensairwayandmonitorsbreathing Tiltsheadandliftschin;monitorsinfant

lesson 9 | Conclusion 79
AED SCENARIOS 1 AND 2
Setup: Scenario 1Youandaco-workerareeatinglunchinthecafeteriawhenyounoticeaman(orachild)suddenlycollapse.YoufollowtheemergencyactionstepsCHECK—CALL—CARE.Youinstructyourco-workertocall9-1-1orthelocalemergencynumberandtogettheAEDfromthebreakroomwhileyoubeginCPR.Whenyourco-workerreturnswiththeAEDyouareactivelyperformingCPR.YouarebothtrainedinCPR/AED.
Setup: Scenario 2Youareworkingataclothingstoreinabusyshoppingmall.Younoticethatseveralpeoplearestandingaroundanadultwhohascollapsed.Youandaco-workerapproachtoinvestigate.YoufollowtheemergencyactionstepsCHECK—CALL—CARE.Youinstructyourco-workertocall9-1-1orthelocalemergencynumberandtogettheAEDfromthefoodcourtwhileyoubeginCPR.Whenyourco-workerreturnswiththeAEDyouareactivelyperformingCPR.YouarebothtrainedinCPR/AED.
Prompter/ Responder
Action What to Look For
Responder 1 Checksthesceneforsafety Pausesandlooksatthescenebeforeresponding
Prompter Says“Thesceneissafe.”
Responder 1 Tapstheperson’sshoulderandshouts,“Areyouokay?”
Physicallytouchesthemanikin;speaksoutloud
Prompter Says,“Thereisnoresponse.”
Responder 1 Directsresponder2tocall9-1-1orthelocalemergencynumberandgettheAED.
Opensairway
Quicklychecksforbreathing
Quicklyscansforseverebleeding
Points;speaksoutloud
Tiltsheadandliftschin
Earisabovemanikin’smouth;lookstowardmanikin’schest
Looksovermanikin’sbody
Prompter Says,“Thereisnobreathing.”
Responder 1 Gives30chestcompressions
Gives2rescuebreaths
Pushesdownonthecenterofthemanikin’schest30times
PlacesCPRbreathingbarrieronmanikin;tiltshead,liftschin,pinchesnoseshutandblowsintomanikin’smouth
Prompter Says,“Thechestclearlyrises.”
Responder 1 Gives30chestcompressions Pushesdownonthecenterofthemanikin’schest30times
Prompter Says“Yourco-workerarriveswiththeAED.”
Responder 2 TurnsonAED
Wipeschestdry
Plugsinconnector
Makessurenooneistouchingtheperson
TurnsonAED
Simulateswipingthechestdry
Plugsconnectorintodevice
Says,“Everyonestandclear.”
Responder 1 Continuescompressions Pushesdownonthecenterofthemanikin’schestuntilresponder2says,“Everyonestandclear.”
Prompter Says,“Everyoneisclear.”
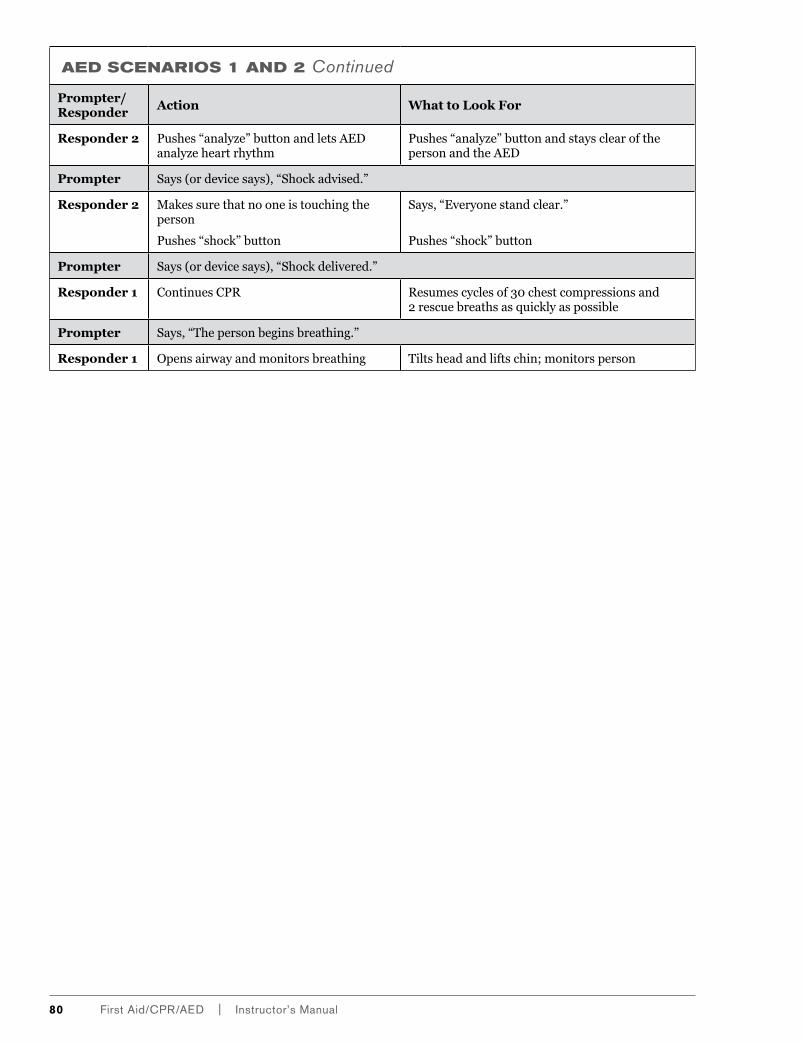
80 First Aid/CPR/AeD | Instructor’s Manual
AED SCENARIOS 1 AND 2 Continued
Prompter/ Responder
Action What to Look For
Responder 2 Pushes“analyze”buttonandletsAEDanalyzeheartrhythm
Pushes“analyze”buttonandstaysclearofthepersonandtheAED
Prompter Says(ordevicesays),“Shockadvised.”
Responder 2 Makessurethatnooneistouchingtheperson
Pushes“shock”button
Says,“Everyonestandclear.”
Pushes“shock”button
Prompter Says(ordevicesays),“Shockdelivered.”
Responder 1 ContinuesCPR Resumescyclesof30chestcompressionsand2rescuebreathsasquicklyaspossible
Prompter Says,“Thepersonbeginsbreathing.”
Responder 1 Opensairwayandmonitorsbreathing Tiltsheadandliftschin;monitorsperson
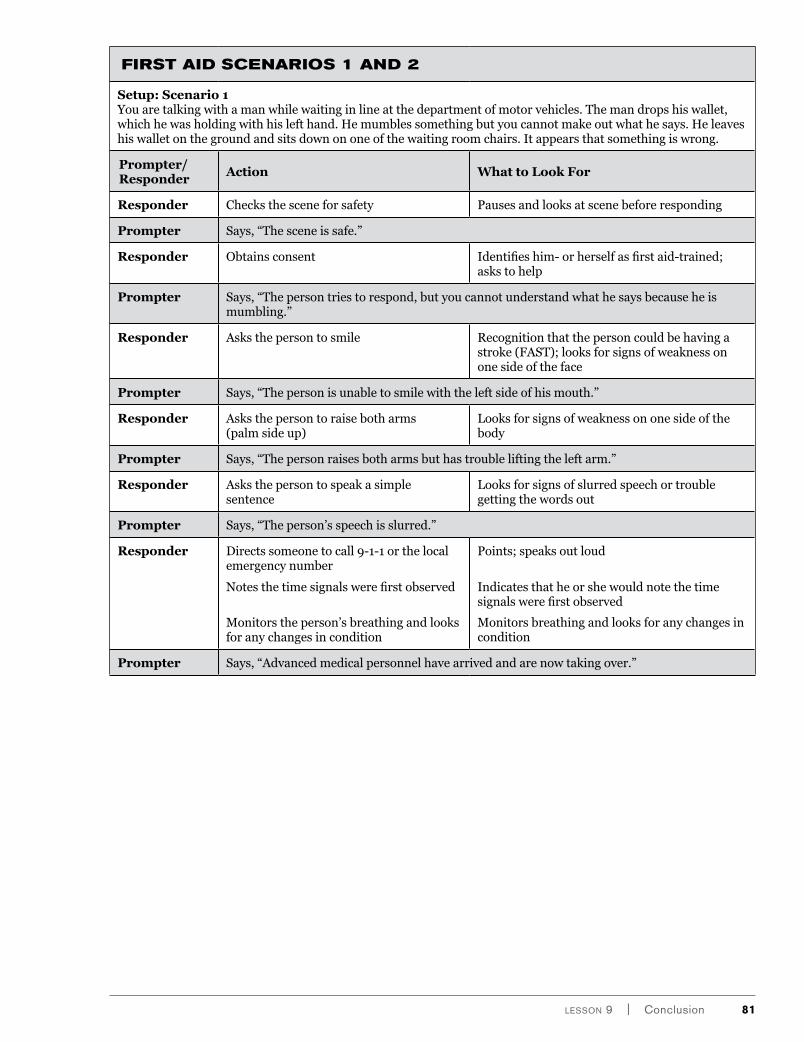
lesson 9 | Conclusion 81
FIRST AID SCENARIOS 1 AND 2
Setup: Scenario 1 Youaretalkingwithamanwhilewaitinginlineatthedepartmentofmotorvehicles.Themandropshiswallet,whichhewasholdingwithhislefthand.Hemumblessomethingbutyoucannotmakeoutwhathesays.Heleaveshiswalletonthegroundandsitsdownononeofthewaitingroomchairs.Itappearsthatsomethingiswrong.
Prompter/ Responder
Action What to Look For
Responder Checksthesceneforsafety Pausesandlooksatscenebeforeresponding
Prompter Says,“Thesceneissafe.”
Responder Obtainsconsent Identifieshim-orherselfasfirstaid-trained;askstohelp
Prompter Says,“Thepersontriestorespond,butyoucannotunderstandwhathesaysbecauseheismumbling.”
Responder Asksthepersontosmile Recognitionthatthepersoncouldbehavingastroke(FAST);looksforsignsofweaknessononesideoftheface
Prompter Says,“Thepersonisunabletosmilewiththeleftsideofhismouth.”
Responder Asksthepersontoraisebotharms(palmsideup)
Looksforsignsofweaknessononesideofthebody
Prompter Says,“Thepersonraisesbotharmsbuthastroubleliftingtheleftarm.”
Responder Asksthepersontospeakasimplesentence
Looksforsignsofslurredspeechortroublegettingthewordsout
Prompter Says,“Theperson’sspeechisslurred.”
Responder Directssomeonetocall9-1-1orthelocalemergencynumber
Notesthetimesignalswerefirstobserved
Monitorstheperson’sbreathingandlooksforanychangesincondition
Points;speaksoutloud
Indicatesthatheorshewouldnotethetimesignalswerefirstobserved
Monitorsbreathingandlooksforanychangesincondition
Prompter Says,“Advancedmedicalpersonnelhavearrivedandarenowtakingover.”

82 First Aid/CPR/AeD | Instructor’s Manual
Setup: Scenario 2Youaresittingonacitybuswhenyounoticeapersonslumpedoverinherseat,sweatingandstaringblanklyahead.Thepersonsittingnexttohersays,“Somebodyhelp,somethingiswrong.”
Prompter/ Responder
Action What to Look For
Responder Checksthesceneforsafety Pausesandlooksatscenebeforeresponding
Prompter Says,“Thesceneissafe.”
Responder Obtainsconsent Identifieshim-orherselfasfirstaid-trained;askstohelp
Prompter Says,“Thepersongivesyouconsent.”
Responder Askstheperson,“Whatisyourname?” Askssimplequestionstolearnaboutwhathappened
Prompter Says,“Thepersongivesyouhername.”
Responder Askstheperson,“Whathappened?” Askssimplequestionstolearnaboutwhathappened
Prompter Says,“Shedoesnotknow.”
Responder Askstheperson,“Doyoufeelpainordiscomfort?Ifso,where?”
Askssimplequestionstolearnaboutwhathappened
Prompter Says,“Thepersonhasabadheadache.”
Responder Askstheperson,“Doyouhaveanymedicalconditions?”
Askssimplequestionstolearnaboutwhathappened
Prompter Says,“Thepersonhasdiabetes.”
Responder Askstheperson,“Areyoutakinganymedications?”
Askssimplequestionstolearnaboutwhathappened
Prompter Says,“Thepersontakesprescriptionmedicationfordiabetes.”
Responder Askstheperson,“Whendidyoulasteatordrinkanything?”
Askssimplequestionstolearnaboutwhathappened
Prompter Says,“Thepersonhasnothadanythingtoeattodayanddrankonlywaterallday.”
Responder Givesthepersonsomeformofsugar
Hasthepersonrestinacomfortableposition
Looks/asksforsomeformofsugar
Helpsthepersonrestinacomfortableposition;continuestomonitortheperson’sreactiontothesugar
Prompter Says,“Noadditionalcareisneededatthismoment.”
■■ At the Scene Activity Cards
■■ AED—Fact or Fiction Worksheet
■■ Burn Care—Fact or Fiction Worksheet
■■ Dazed and Confused Worksheet
■■ Scenario Worksheets
■{ Adult CPR Scenarios 1 and 2
■{ Child CPR Scenarios 1 and 2
■{ Infant CPR Scenarios 1 and 2
■{ AED Scenarios 1 and 2
■{ First Aid Scenarios 1 and 2
Activity ResouRces
Appendix A
Appendicessection c
appendix A | activity Resources 83
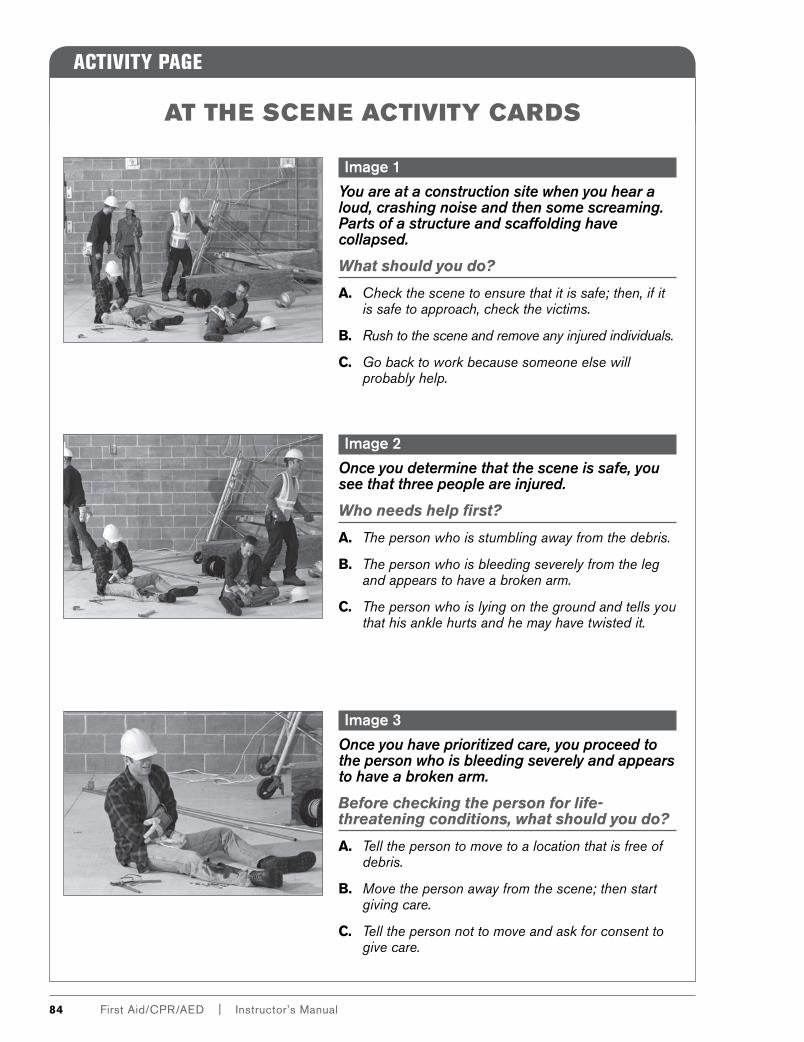
Activity PAge
At the Scene Activity cArdS
image 3
Once you have prioritized care, you proceed to the person who is bleeding severely and appears to have a broken arm.
Before checking the person for life-threatening conditions, what should you do?
A. Tell the person to move to a location that is free of debris.
B. Move the person away from the scene; then start giving care.
c. Tell the person not to move and ask for consent to give care.
image 2
Once you determine that the scene is safe, you see that three people are injured.
Who needs help first?
A. The person who is stumbling away from the debris.
B. The person who is bleeding severely from the leg and appears to have a broken arm.
c. The person who is lying on the ground and tells you that his ankle hurts and he may have twisted it.
image 1
You are at a construction site when you hear a loud, crashing noise and then some screaming. Parts of a structure and scaffolding have collapsed.
What should you do?
A. Check the scene to ensure that it is safe; then, if it is safe to approach, check the victims.
B. Rush to the scene and remove any injured individuals.
c. Go back to work because someone else will probably help.
84 First aid/CpR/aed | instructor’s Manual
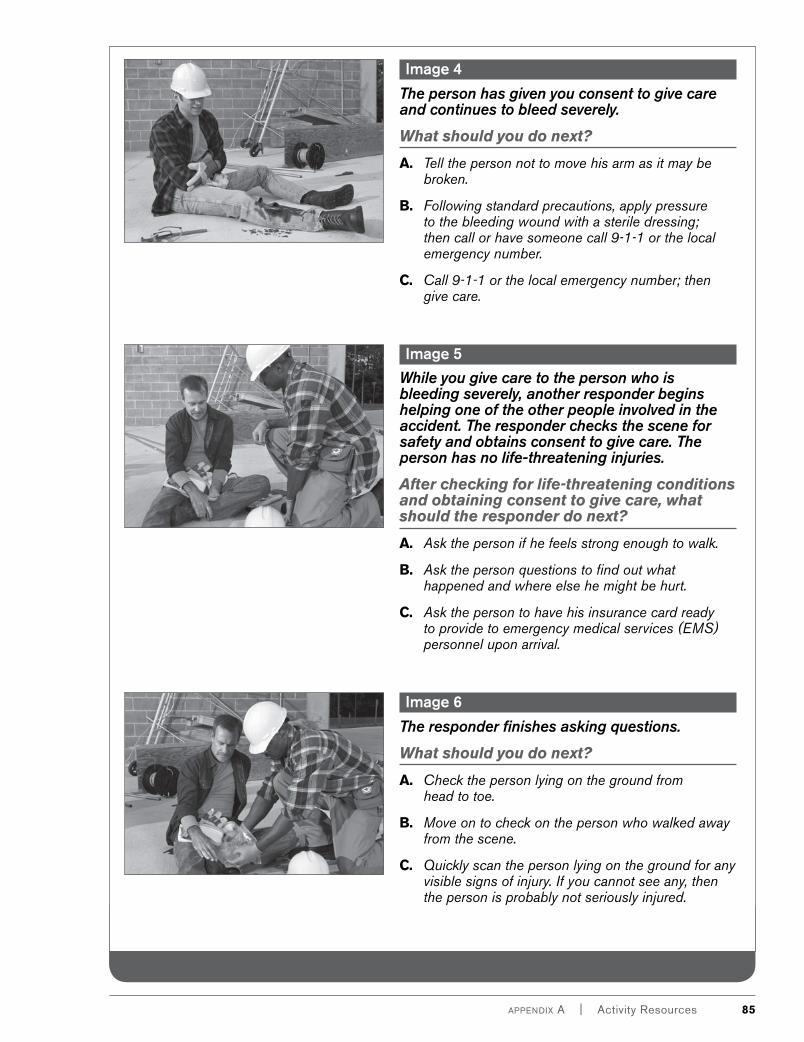
appendix A | activity Resources 85
image 6
The responder finishes asking questions.
What should you do next?
A. Check the person lying on the ground from head to toe.
B. Move on to check on the person who walked away from the scene.
c. Quickly scan the person lying on the ground for any visible signs of injury. If you cannot see any, then the person is probably not seriously injured.
image 5While you give care to the person who is bleeding severely, another responder begins helping one of the other people involved in the accident. The responder checks the scene for safety and obtains consent to give care. The person has no life-threatening injuries.
After checking for life-threatening conditions and obtaining consent to give care, what should the responder do next?
A. Ask the person if he feels strong enough to walk.
B. Ask the person questions to find out what happened and where else he might be hurt.
c. Ask the person to have his insurance card ready to provide to emergency medical services (EMS) personnel upon arrival.
image 4
The person has given you consent to give care and continues to bleed severely.
What should you do next?
A. Tell the person not to move his arm as it may be broken.
B. Following standard precautions, apply pressure to the bleeding wound with a sterile dressing; then call or have someone call 9-1-1 or the local emergency number.
c. Call 9-1-1 or the local emergency number; then give care.
86 First aid/CpR/aed | instructor’s Manual
Activity PAge
Aed—FAct or Fiction WorkSheet
1. Sudden cardiac arrest is the same as a heart attack. Fact or fiction?
2. AED pads must be removed before performing CPR. Fact or fiction?
3. If the placement of the AED pads is reversed, the AED will not work. Fact or fiction?
4. It is safe to use an AED in rain or snow. Fact or fiction?
5. An AED cannot be used on a pregnant woman. Fact or fiction?
6. If someone has chest hair, you should shave it before using the AED. Fact or fiction?
7. If a person has a body piercing or is wearing jewelry, you should remove the item before using an AED. Fact or fiction?
8. Never shock someone who has an implantable cardioverter-defibrillator (ICD) or pacemaker device. Fact or fiction?
9. Never use an AED on an infant. Fact or fiction?
10. Never shock a person on a metal surface. Fact or fiction?
appendix A | activity Resources 87
Activity PAge
Burn cAre—FAct or Fiction WorkSheet
1. You should put butter on a burn to soothe the pain. Fact or fiction?
2. You should not remove any pieces of clothing that stick to the burned area. Fact or fiction?
3. You should put ice or ice water on a burn. Fact or fiction?
4. The first step in caring for a thermal burn is to cool the burn with large amounts of cold running water. Fact or fiction?
5. When caring for a chemical burn, you should brush off any dry chemicals before flushing with tap water. Fact or fiction?
6. If the eye is burned by a chemical, loosely cover it with a gloved hand or sterile dressing until EMS personnel take over. Fact or fiction?
7. You should have the person remove items of clothing that may be contaminated with chemicals when you care for a person with a chemical burn. Fact or fiction?
8. If you encounter a person with an electrical burn, your first step should be to tap the person on the shoulder and shout, “Are you okay?” Fact or fiction?
9. An electrical burn can cause cardiac and respiratory emergencies. Fact or fiction?
10. You should care for a radiation burn as you would for a thermal burn. Fact or fiction?
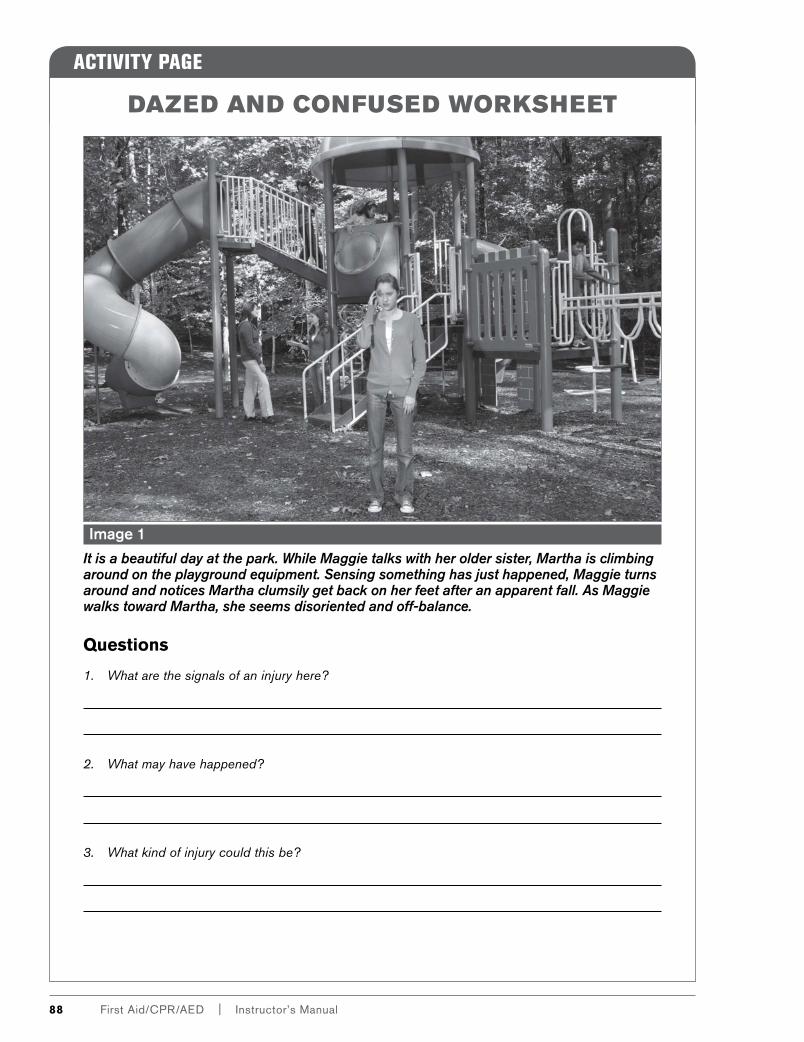
Activity PAge
dAzed And conFuSed WorkSheet
88 First aid/CpR/aed | instructor’s Manual
image 1It is a beautiful day at the park. While Maggie talks with her older sister, Martha is climbing around on the playground equipment. Sensing something has just happened, Maggie turns around and notices Martha clumsily get back on her feet after an apparent fall. As Maggie walks toward Martha, she seems disoriented and off-balance.
Questions
1. What are the signals of an injury here?
2. What may have happened?
3. What kind of injury could this be?
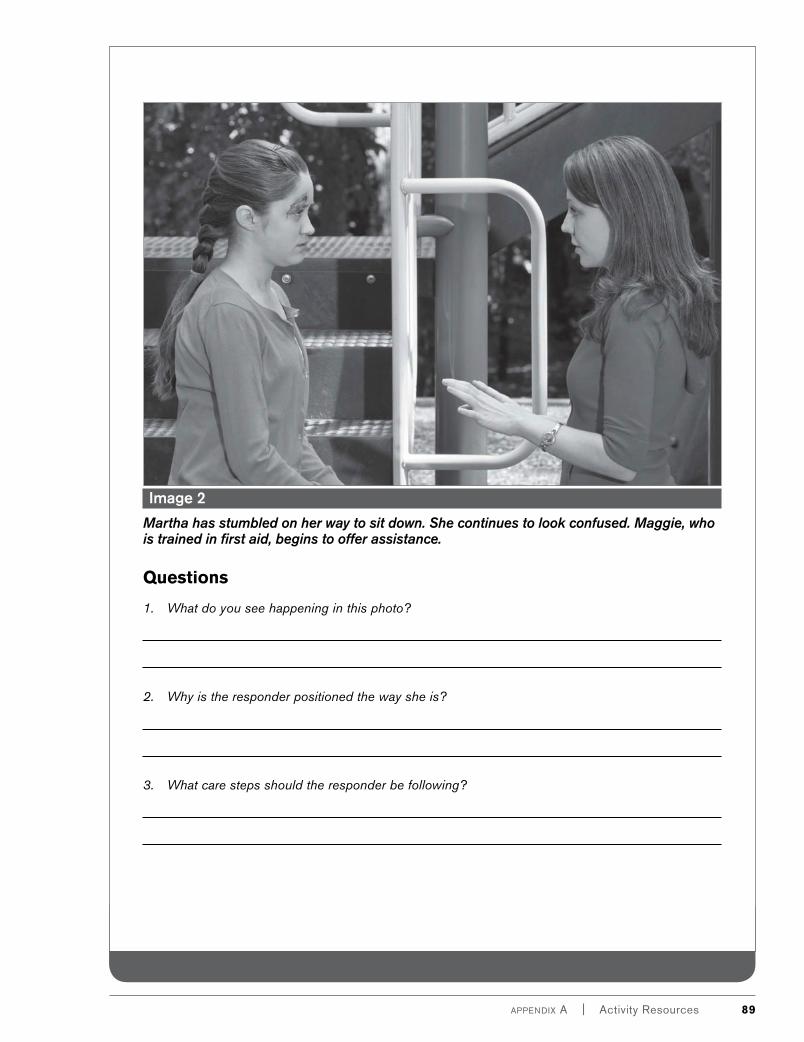
appendix A | activity Resources 89
image 2
Martha has stumbled on her way to sit down. She continues to look confused. Maggie, who is trained in first aid, begins to offer assistance.
Questions
1. What do you see happening in this photo?
2. Why is the responder positioned the way she is?
3. What care steps should the responder be following?
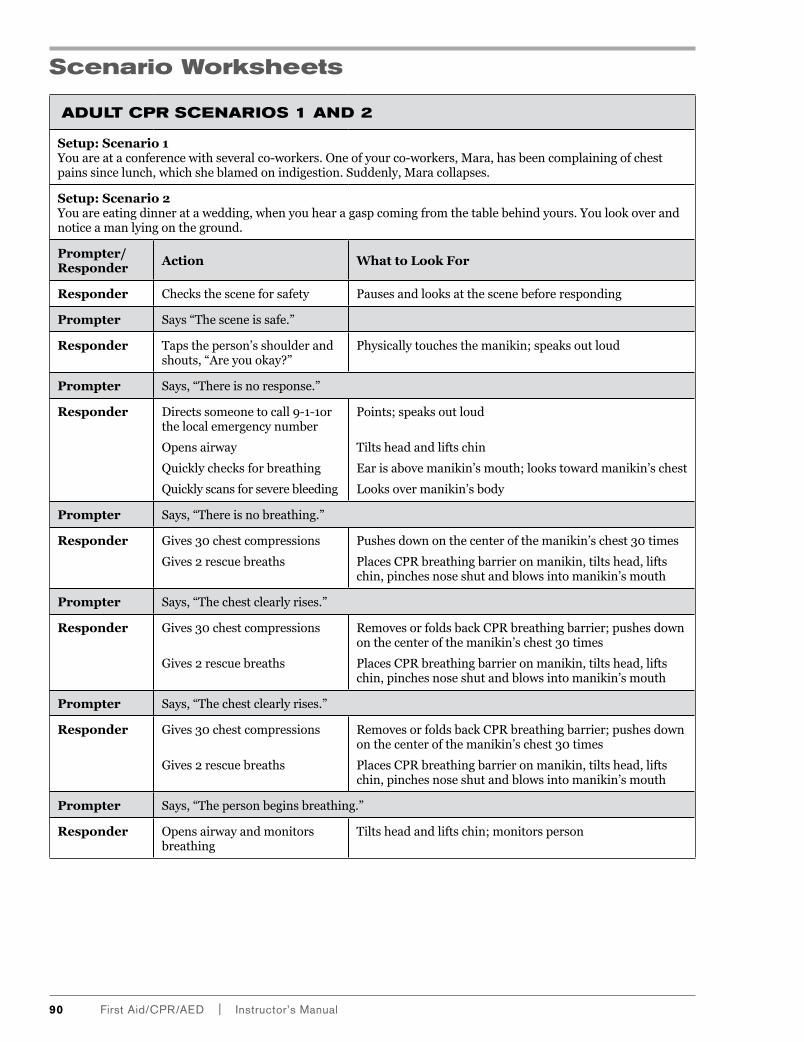
Scenario Worksheets
Adult CPR SCenARioS 1 And 2
Setup: Scenario 1You are at a conference with several co-workers. One of your co-workers, Mara, has been complaining of chest pains since lunch, which she blamed on indigestion. Suddenly, Mara collapses.
Setup: Scenario 2You are eating dinner at a wedding, when you hear a gasp coming from the table behind yours. You look over and notice a man lying on the ground.
Prompter/ Responder
Action What to Look For
Responder Checks the scene for safety Pauses and looks at the scene before responding
Prompter Says “The scene is safe.”
Responder Taps the person’s shoulder and shouts, “Are you okay?”
Physically touches the manikin; speaks out loud
Prompter Says, “There is no response.”
Responder Directs someone to call 9-1-1or the local emergency number
Opens airway
Quickly checks for breathing
Quickly scans for severe bleeding
Points; speaks out loud
Tilts head and lifts chin
Ear is above manikin’s mouth; looks toward manikin’s chest
Looks over manikin’s body
Prompter Says, “There is no breathing.”
Responder Gives 30 chest compressions
Gives 2 rescue breaths
Pushes down on the center of the manikin’s chest 30 times
Places CPR breathing barrier on manikin, tilts head, lifts chin, pinches nose shut and blows into manikin’s mouth
Prompter Says, “The chest clearly rises.”
Responder Gives 30 chest compressions
Gives 2 rescue breaths
Removes or folds back CPR breathing barrier; pushes down on the center of the manikin’s chest 30 times
Places CPR breathing barrier on manikin, tilts head, lifts chin, pinches nose shut and blows into manikin’s mouth
Prompter Says, “The person begins breathing.”
Responder Opens airway and monitors breathing
Tilts head and lifts chin; monitors person
90 First aid/CpR/aed | instructor’s Manual
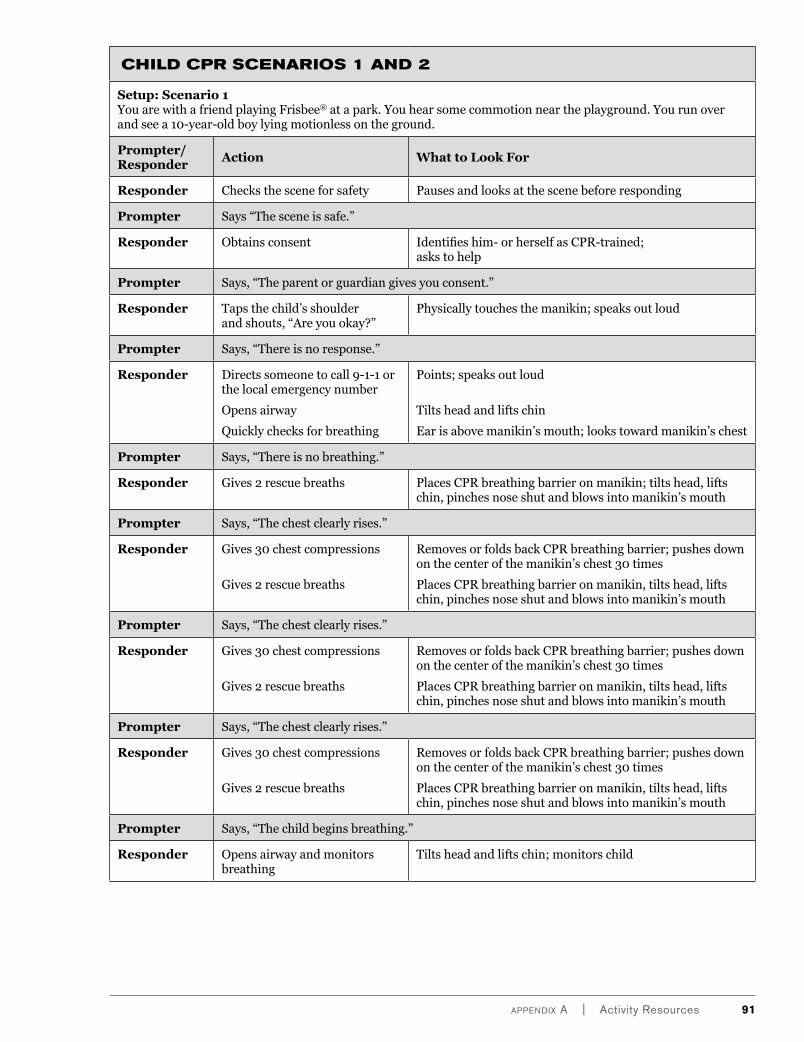
Child CPR SCenARioS 1 And 2
Setup: Scenario 1You are with a friend playing Frisbee® at a park. You hear some commotion near the playground. You run over and see a 10-year-old boy lying motionless on the ground.
Prompter/ Responder
Action What to Look For
Responder Checks the scene for safety Pauses and looks at the scene before responding
Prompter Says “The scene is safe.”
Responder Obtains consent Identifies him- or herself as CPR-trained; asks to help
Prompter Says, “The parent or guardian gives you consent.”
Responder Taps the child’s shoulder and shouts, “Are you okay?”
Physically touches the manikin; speaks out loud
Prompter Says, “There is no response.”
Responder Directs someone to call 9-1-1 or the local emergency number
Opens airway
Quickly checks for breathing
Points; speaks out loud
Tilts head and lifts chin
Ear is above manikin’s mouth; looks toward manikin’s chest
Prompter Says, “There is no breathing.”
Responder Gives 2 rescue breaths Places CPR breathing barrier on manikin; tilts head, lifts chin, pinches nose shut and blows into manikin’s mouth
Prompter Says, “The chest clearly rises.”
Responder Gives 30 chest compressions
Gives 2 rescue breaths
Removes or folds back CPR breathing barrier; pushes down on the center of the manikin’s chest 30 times
Places CPR breathing barrier on manikin, tilts head, lifts chin, pinches nose shut and blows into manikin’s mouth
Prompter Says, “The child begins breathing.”
Responder Opens airway and monitors breathing
Tilts head and lifts chin; monitors child
appendix A | activity Resources 91
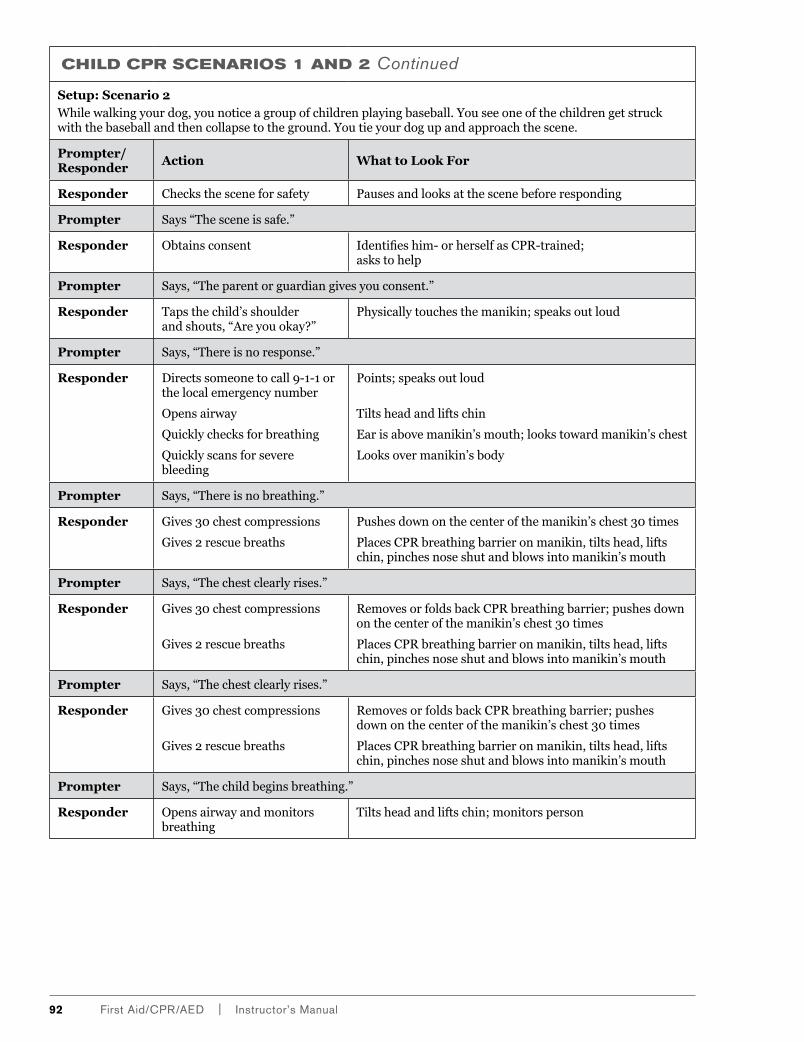
Child CPR SCenARioS 1 And 2 Continued
Setup: Scenario 2While walking your dog, you notice a group of children playing baseball. You see one of the children get struck with the baseball and then collapse to the ground. You tie your dog up and approach the scene.
Prompter/ Responder
Action What to Look For
Responder Checks the scene for safety Pauses and looks at the scene before responding
Prompter Says “The scene is safe.”
Responder Obtains consent Identifies him- or herself as CPR-trained; asks to help
Prompter Says, “The parent or guardian gives you consent.”
Responder Taps the child’s shoulder and shouts, “Are you okay?”
Physically touches the manikin; speaks out loud
Prompter Says, “There is no response.”
Responder Directs someone to call 9-1-1 or the local emergency number
Opens airway
Quickly checks for breathing
Quickly scans for severe bleeding
Points; speaks out loud
Tilts head and lifts chin
Ear is above manikin’s mouth; looks toward manikin’s chest
Looks over manikin’s body
Prompter Says, “There is no breathing.”
Responder Gives 30 chest compressions
Gives 2 rescue breaths
Pushes down on the center of the manikin’s chest 30 times
Places CPR breathing barrier on manikin, tilts head, lifts chin, pinches nose shut and blows into manikin’s mouth
Prompter Says, “The chest clearly rises.”
Responder Gives 30 chest compressions
Gives 2 rescue breaths
Removes or folds back CPR breathing barrier; pushes down on the center of the manikin’s chest 30 times
Places CPR breathing barrier on manikin, tilts head, lifts chin, pinches nose shut and blows into manikin’s mouth
Prompter Says, “The chest clearly rises.”
Responder Gives 30 chest compressions
Gives 2 rescue breaths
Removes or folds back CPR breathing barrier; pushes down on the center of the manikin’s chest 30 times
Places CPR breathing barrier on manikin, tilts head, lifts chin, pinches nose shut and blows into manikin’s mouth
Prompter Says, “The child begins breathing.”
Responder Opens airway and monitors breathing
Tilts head and lifts chin; monitors person
92 First aid/CpR/aed | instructor’s Manual
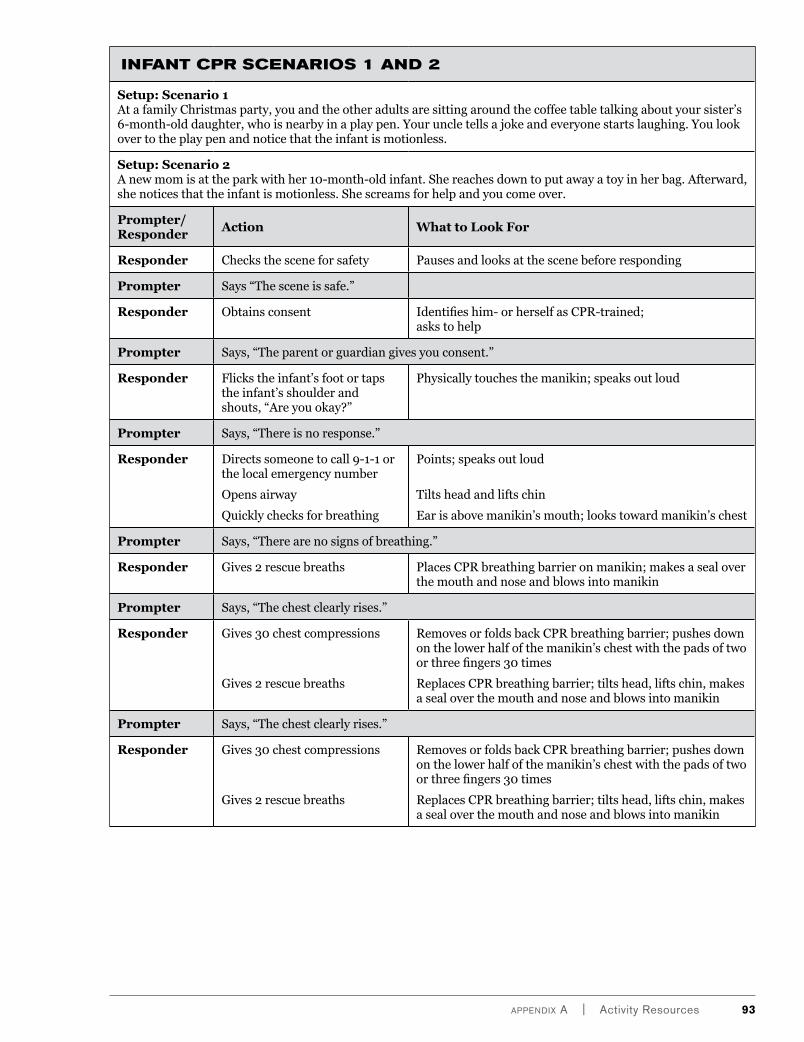
infAnt CPR SCenARioS 1 And 2
Setup: Scenario 1At a family Christmas party, you and the other adults are sitting around the coffee table talking about your sister’s 6-month-old daughter, who is nearby in a play pen. Your uncle tells a joke and everyone starts laughing. You look over to the play pen and notice that the infant is motionless.
Setup: Scenario 2A new mom is at the park with her 10-month-old infant. She reaches down to put away a toy in her bag. Afterward, she notices that the infant is motionless. She screams for help and you come over.
Prompter/ Responder
Action What to Look For
Responder Checks the scene for safety Pauses and looks at the scene before responding
Prompter Says “The scene is safe.”
Responder Obtains consent Identifies him- or herself as CPR-trained; asks to help
Prompter Says, “The parent or guardian gives you consent.”
Responder Flicks the infant’s foot or taps the infant’s shoulder and shouts, “Are you okay?”
Physically touches the manikin; speaks out loud
Prompter Says, “There is no response.”
Responder Directs someone to call 9-1-1 or the local emergency number
Opens airway
Quickly checks for breathing
Points; speaks out loud
Tilts head and lifts chin
Ear is above manikin’s mouth; looks toward manikin’s chest
Prompter Says, “There are no signs of breathing.”
Responder Gives 2 rescue breaths Places CPR breathing barrier on manikin; makes a seal over the mouth and nose and blows into manikin
Prompter Says, “The chest clearly rises.”
Responder Gives 30 chest compressions
Gives 2 rescue breaths
Removes or folds back CPR breathing barrier; pushes down on the lower half of the manikin’s chest with the pads of two or three fingers 30 times
Replaces CPR breathing barrier; tilts head, lifts chin, makes a seal over the mouth and nose and blows into manikin
appendix A | activity Resources 93
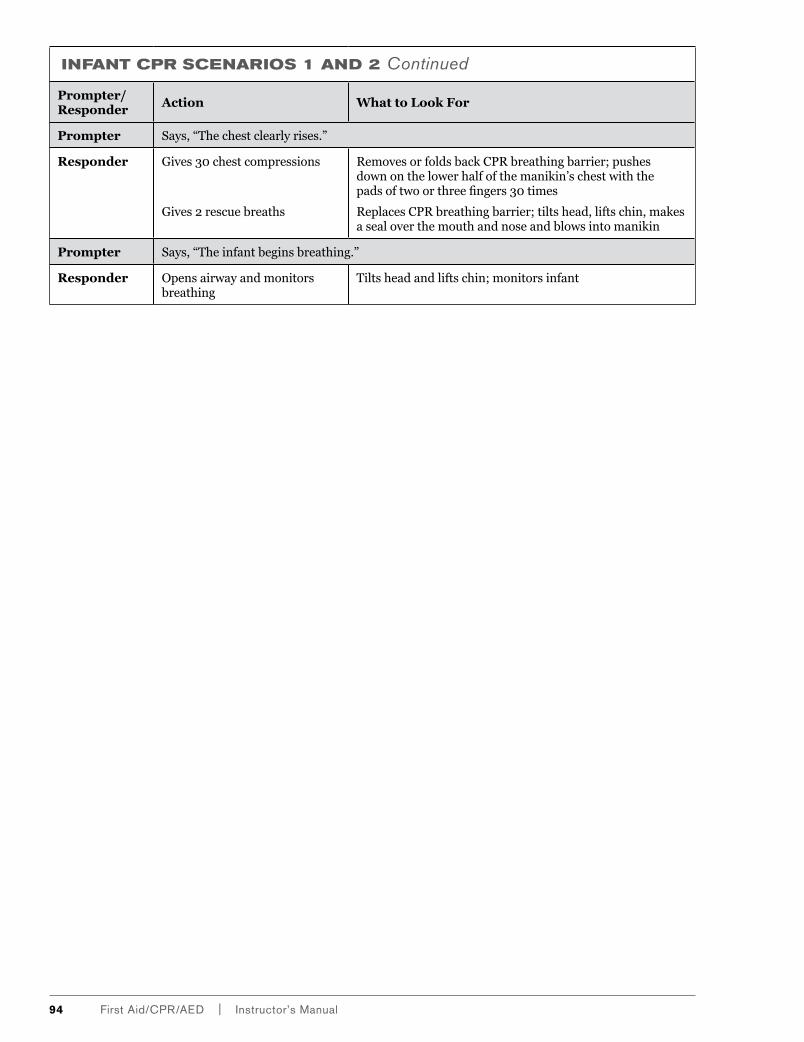
infAnt CPR SCenARioS 1 And 2 Continued
Prompter/ Responder
Action What to Look For
Prompter Says, “The chest clearly rises.”
Responder Gives 30 chest compressions
Gives 2 rescue breaths
Removes or folds back CPR breathing barrier; pushes down on the lower half of the manikin’s chest with the pads of two or three fingers 30 times
Replaces CPR breathing barrier; tilts head, lifts chin, makes a seal over the mouth and nose and blows into manikin
Prompter Says, “The infant begins breathing.”
Responder Opens airway and monitors breathing
Tilts head and lifts chin; monitors infant
94 First aid/CpR/aed | instructor’s Manual
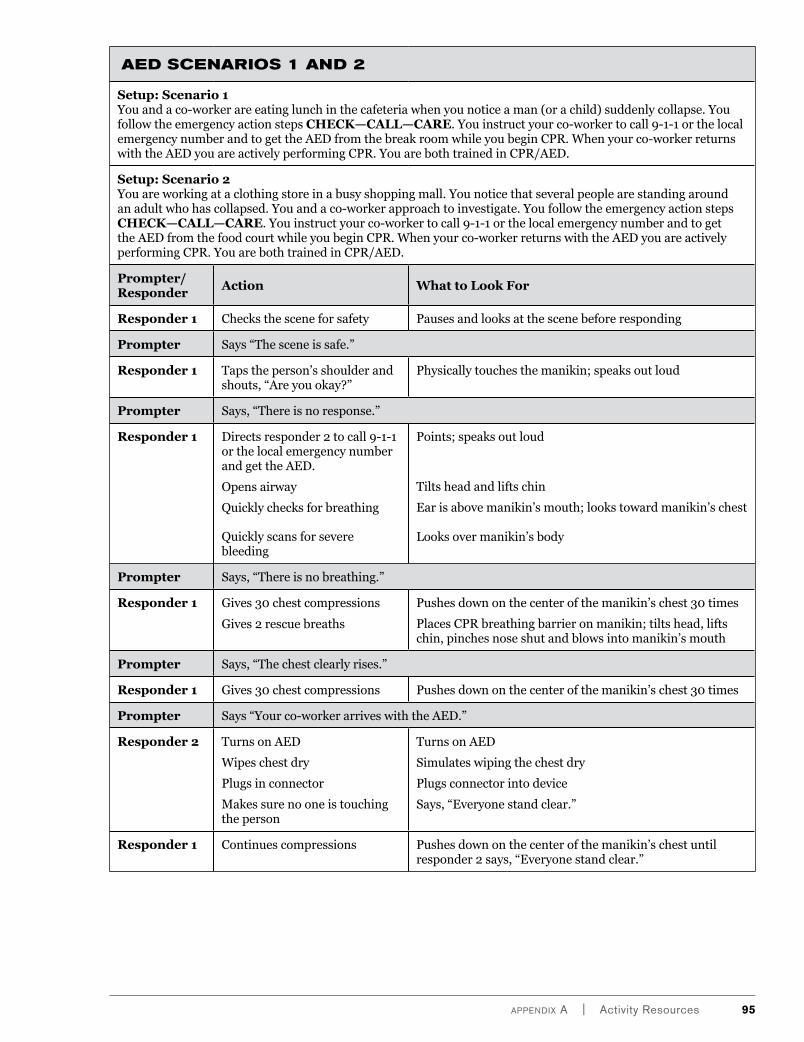
appendix A | activity Resources 95
Aed SCenARioS 1 And 2
Setup: Scenario 1You and a co-worker are eating lunch in the cafeteria when you notice a man (or a child) suddenly collapse. You follow the emergency action steps CHECK—CALL—CARE. You instruct your co-worker to call 9-1-1 or the local emergency number and to get the AED from the break room while you begin CPR. When your co-worker returns with the AED you are actively performing CPR. You are both trained in CPR/AED.
Setup: Scenario 2You are working at a clothing store in a busy shopping mall. You notice that several people are standing around an adult who has collapsed. You and a co-worker approach to investigate. You follow the emergency action steps CHECK—CALL—CARE. You instruct your co-worker to call 9-1-1 or the local emergency number and to get the AED from the food court while you begin CPR. When your co-worker returns with the AED you are actively performing CPR. You are both trained in CPR/AED.
Prompter/ Responder
Action What to Look For
Responder 1 Checks the scene for safety Pauses and looks at the scene before responding
Prompter Says “The scene is safe.”
Responder 1 Taps the person’s shoulder and shouts, “Are you okay?”
Physically touches the manikin; speaks out loud
Prompter Says, “There is no response.”
Responder 1 Directs responder 2 to call 9-1-1 or the local emergency number and get the AED.
Opens airway
Quickly checks for breathing
Quickly scans for severe bleeding
Points; speaks out loud
Tilts head and lifts chin
Ear is above manikin’s mouth; looks toward manikin’s chest
Looks over manikin’s body
Prompter Says, “There is no breathing.”
Responder 1 Gives 30 chest compressions
Gives 2 rescue breaths
Pushes down on the center of the manikin’s chest 30 times
Places CPR breathing barrier on manikin; tilts head, lifts chin, pinches nose shut and blows into manikin’s mouth
Prompter Says, “The chest clearly rises.”
Responder 1 Gives 30 chest compressions Pushes down on the center of the manikin’s chest 30 times
Prompter Says “Your co-worker arrives with the AED.”
Responder 2 Turns on AED
Wipes chest dry
Plugs in connector
Makes sure no one is touching the person
Turns on AED
Simulates wiping the chest dry
Plugs connector into device
Says, “Everyone stand clear.”
Responder 1 Continues compressions Pushes down on the center of the manikin’s chest until responder 2 says, “Everyone stand clear.”
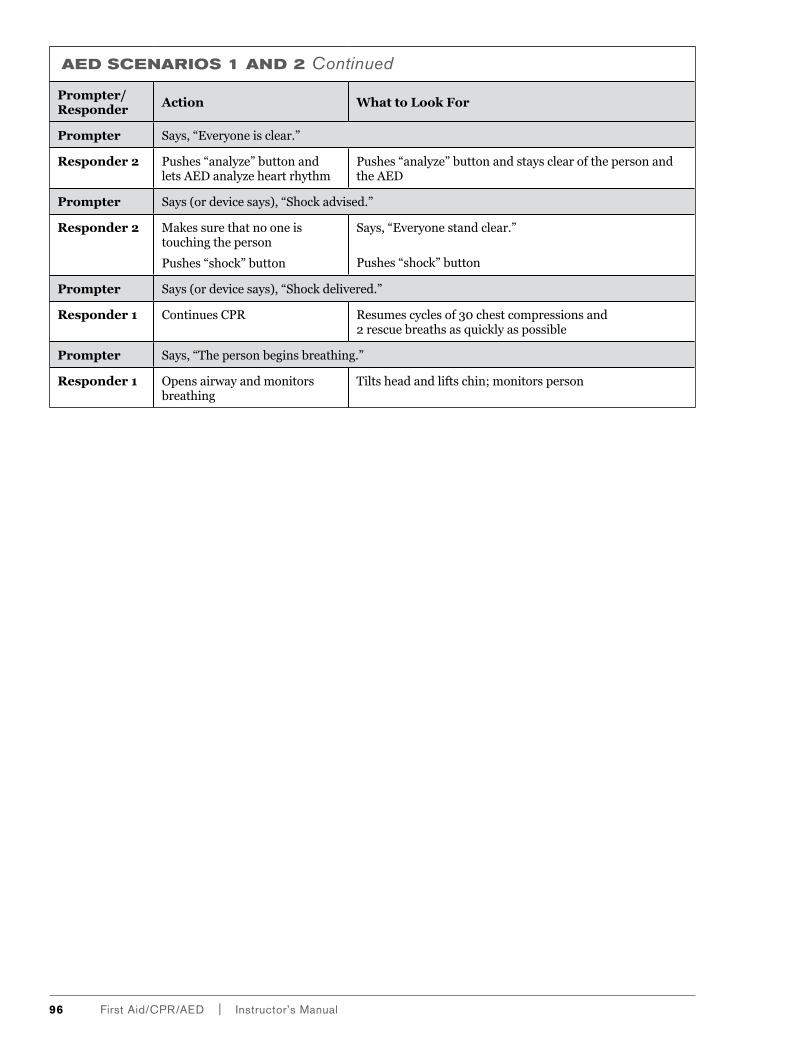
Aed SCenARioS 1 And 2 Continued
Prompter/ Responder
Action What to Look For
Prompter Says, “Everyone is clear.”
Responder 2 Pushes “analyze” button and lets AED analyze heart rhythm
Pushes “analyze” button and stays clear of the person and the AED
Prompter Says (or device says), “Shock advised.”
Responder 2 Makes sure that no one is touching the person
Pushes “shock” button
Says, “Everyone stand clear.”
Pushes “shock” button
Prompter Says (or device says), “Shock delivered.”
Responder 1 Continues CPR Resumes cycles of 30 chest compressions and 2 rescue breaths as quickly as possible
Prompter Says, “The person begins breathing.”
Responder 1 Opens airway and monitors breathing
Tilts head and lifts chin; monitors person
96 First aid/CpR/aed | instructor’s Manual
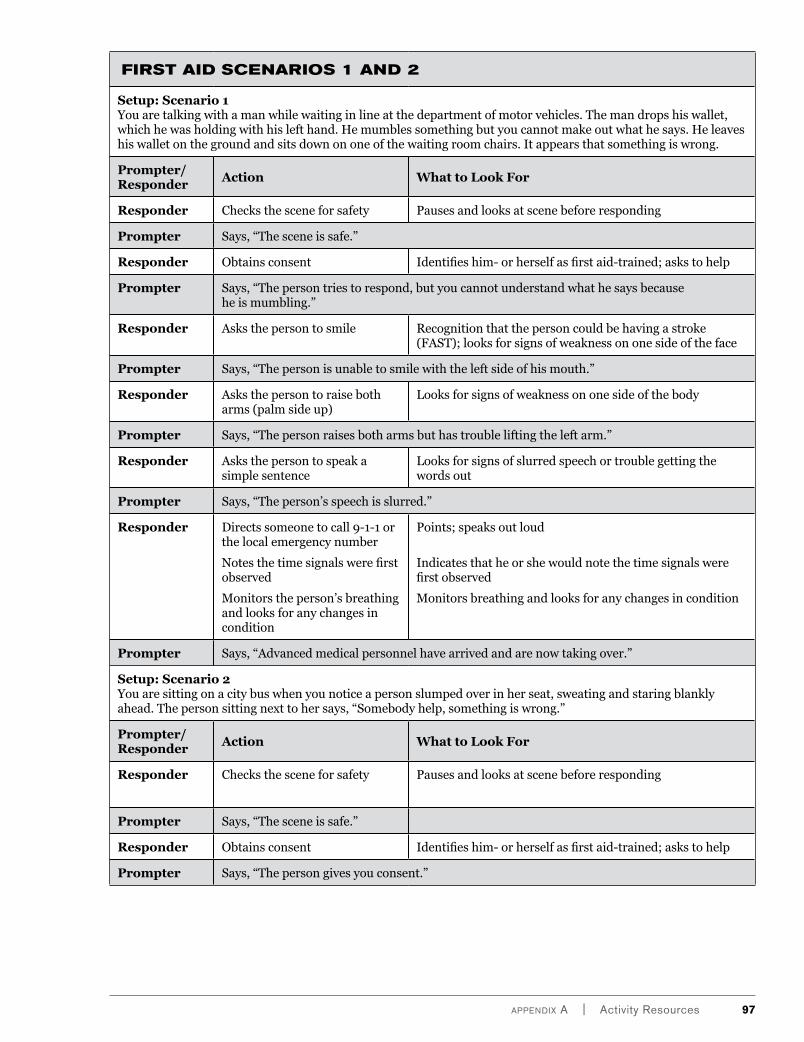
fiRSt Aid SCenARioS 1 And 2
Setup: Scenario 1 You are talking with a man while waiting in line at the department of motor vehicles. The man drops his wallet, which he was holding with his left hand. He mumbles something but you cannot make out what he says. He leaves his wallet on the ground and sits down on one of the waiting room chairs. It appears that something is wrong.
Prompter/ Responder
Action What to Look For
Responder Checks the scene for safety Pauses and looks at scene before responding
Prompter Says, “The scene is safe.”
Responder Obtains consent Identifies him- or herself as first aid-trained; asks to help
Prompter Says, “The person tries to respond, but you cannot understand what he says because he is mumbling.”
Responder Asks the person to smile Recognition that the person could be having a stroke (FAST); looks for signs of weakness on one side of the face
Prompter Says, “The person is unable to smile with the left side of his mouth.”
Responder Asks the person to raise both arms (palm side up)
Looks for signs of weakness on one side of the body
Prompter Says, “The person raises both arms but has trouble lifting the left arm.”
Responder Asks the person to speak a simple sentence
Looks for signs of slurred speech or trouble getting the words out
Prompter Says, “The person’s speech is slurred.”
Responder Directs someone to call 9-1-1 or the local emergency number
Notes the time signals were first observed
Monitors the person’s breathing and looks for any changes in condition
Points; speaks out loud
Indicates that he or she would note the time signals were first observed
Monitors breathing and looks for any changes in condition
Prompter Says, “Advanced medical personnel have arrived and are now taking over.”
Setup: Scenario 2You are sitting on a city bus when you notice a person slumped over in her seat, sweating and staring blankly ahead. The person sitting next to her says, “Somebody help, something is wrong.”
Prompter/ Responder
Action What to Look For
Responder Checks the scene for safety Pauses and looks at scene before responding
Prompter Says, “The scene is safe.”
Responder Obtains consent Identifies him- or herself as first aid-trained; asks to help
Prompter Says, “The person gives you consent.”
appendix A | activity Resources 97
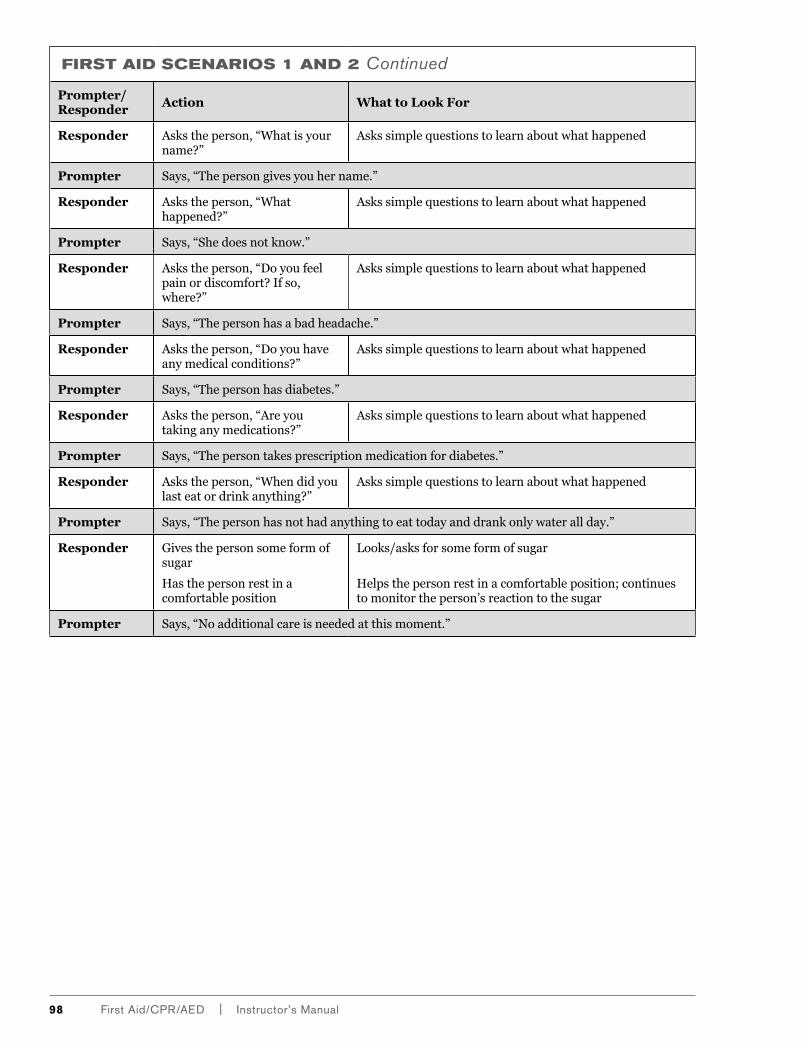
98 First aid/CpR/aed | instructor’s Manual
fiRSt Aid SCenARioS 1 And 2 Continued
Prompter/ Responder
Action What to Look For
Responder Asks the person, “What is your name?”
Asks simple questions to learn about what happened
Prompter Says, “The person gives you her name.”
Responder Asks the person, “What happened?”
Asks simple questions to learn about what happened
Prompter Says, “She does not know.”
Responder Asks the person, “Do you feel pain or discomfort? If so, where?”
Asks simple questions to learn about what happened
Prompter Says, “The person has a bad headache.”
Responder Asks the person, “Do you have any medical conditions?”
Asks simple questions to learn about what happened
Prompter Says, “The person has diabetes.”
Responder Asks the person, “Are you taking any medications?”
Asks simple questions to learn about what happened
Prompter Says, “The person takes prescription medication for diabetes.”
Responder Asks the person, “When did you last eat or drink anything?”
Asks simple questions to learn about what happened
Prompter Says, “The person has not had anything to eat today and drank only water all day.”
Responder Gives the person some form of sugar
Has the person rest in a comfortable position
Looks/asks for some form of sugar
Helps the person rest in a comfortable position; continues to monitor the person’s reaction to the sugar
Prompter Says, “No additional care is needed at this moment.”
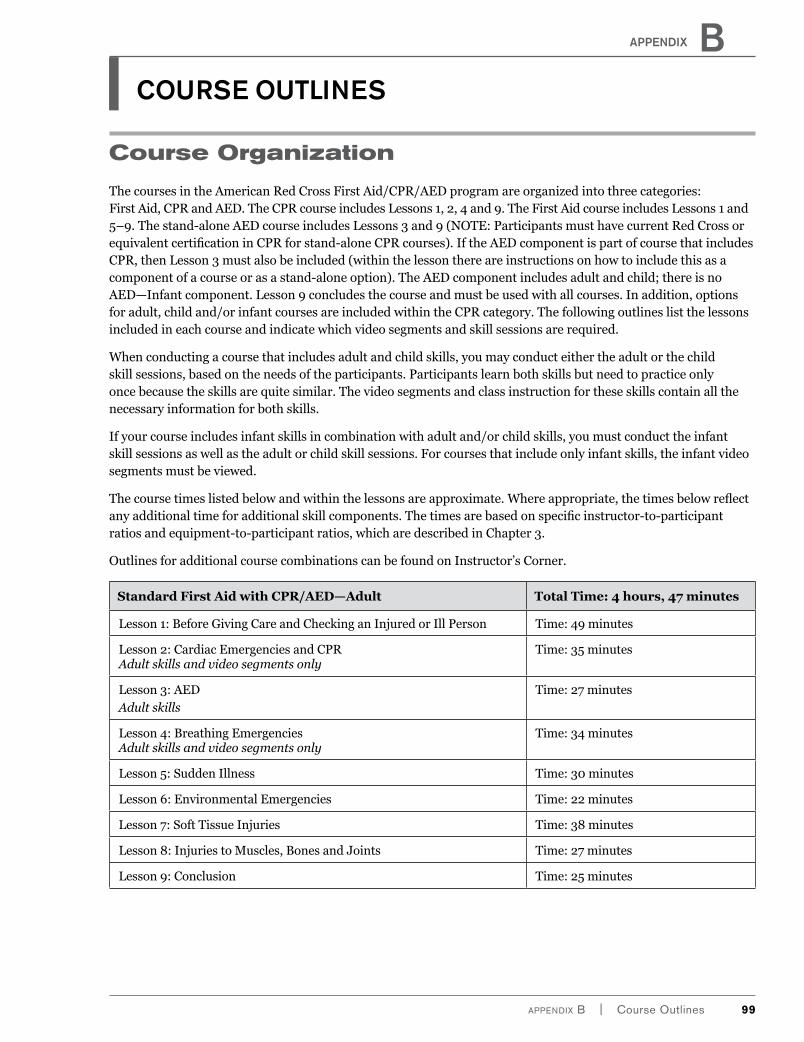
appendix BCourse outlines
Course Organization
The courses in the American Red Cross First Aid/CPR/AED program are organized into three categories: First Aid, CPR and AED. The CPR course includes Lessons 1, 2, 4 and 9. The First Aid course includes Lessons 1 and 5–9. The stand-alone AED course includes Lessons 3 and 9 (NOTE: Participants must have current Red Cross or equivalent certification in CPR for stand-alone CPR courses). If the AED component is part of course that includes CPR, then Lesson 3 must also be included (within the lesson there are instructions on how to include this as a component of a course or as a stand-alone option). The AED component includes adult and child; there is no AED—Infant component. Lesson 9 concludes the course and must be used with all courses. In addition, options for adult, child and/or infant courses are included within the CPR category. The following outlines list the lessons included in each course and indicate which video segments and skill sessions are required.
When conducting a course that includes adult and child skills, you may conduct either the adult or the child skill sessions, based on the needs of the participants. Participants learn both skills but need to practice only once because the skills are quite similar. The video segments and class instruction for these skills contain all the necessary information for both skills.
If your course includes infant skills in combination with adult and/or child skills, you must conduct the infant skill sessions as well as the adult or child skill sessions. For courses that include only infant skills, the infant video segments must be viewed.
The course times listed below and within the lessons are approximate. Where appropriate, the times below reflect any additional time for additional skill components. The times are based on specific instructor-to-participant ratios and equipment-to-participant ratios, which are described in Chapter 3.
Outlines for additional course combinations can be found on Instructor’s Corner.
Standard First Aid with CPR/AED—Adult Total Time: 4 hours, 47 minutes
Lesson 1: Before Giving Care and Checking an Injured or Ill Person Time: 49 minutes
Lesson 2: Cardiac Emergencies and CPRAdult skills and video segments only
Time: 35 minutes
Lesson 3: AED Adult skills
Time: 27 minutes
Lesson 4: Breathing EmergenciesAdult skills and video segments only
Time: 34 minutes
Lesson 5: Sudden Illness Time: 30 minutes
Lesson 6: Environmental Emergencies Time: 22 minutes
Lesson 7: Soft Tissue Injuries Time: 38 minutes
Lesson 8: Injuries to Muscles, Bones and Joints Time: 27 minutes
Lesson 9: Conclusion Time: 25 minutes
appendix B | Course Outlines 99
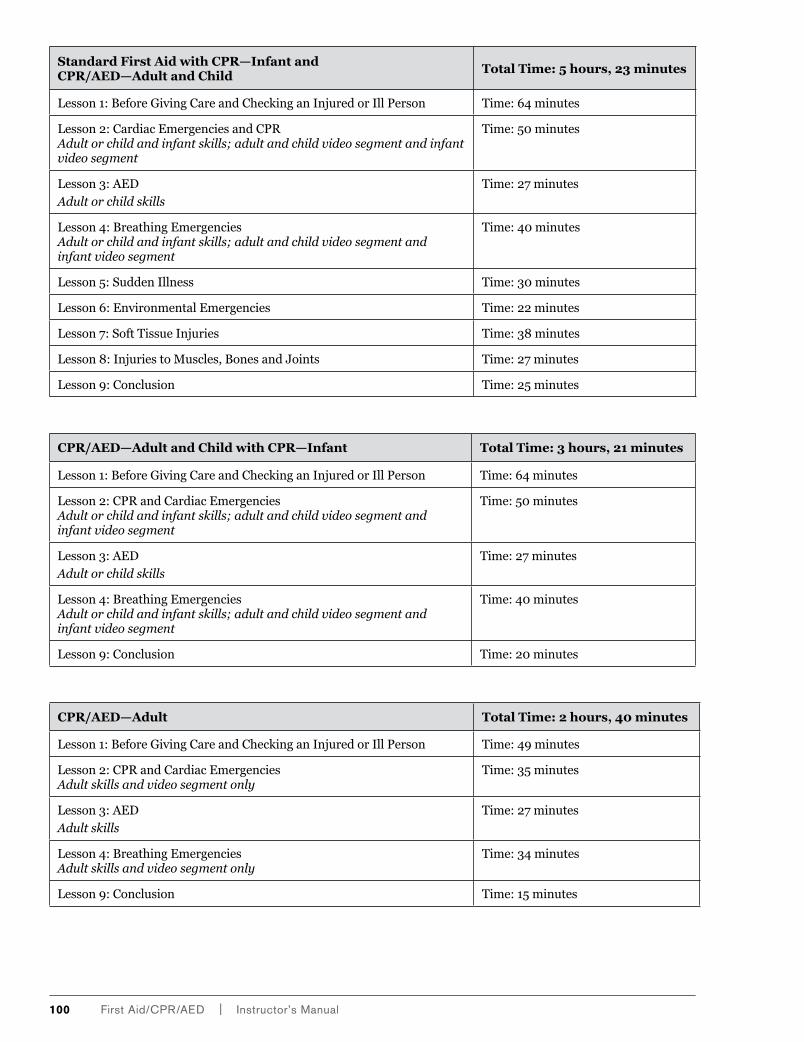
100 First aid/CpR/aed | instructor’s Manual
Standard First Aid with CPR—Infant and CPR/AED—Adult and Child
Total Time: 5 hours, 23 minutes
Lesson 1: Before Giving Care and Checking an Injured or Ill Person Time: 64 minutes
Lesson 2: Cardiac Emergencies and CPRAdult or child and infant skills; adult and child video segment and infant video segment
Time: 50 minutes
Lesson 3: AED Adult or child skills
Time: 27 minutes
Lesson 4: Breathing EmergenciesAdult or child and infant skills; adult and child video segment and infant video segment
Time: 40 minutes
Lesson 5: Sudden Illness Time: 30 minutes
Lesson 6: Environmental Emergencies Time: 22 minutes
Lesson 7: Soft Tissue Injuries Time: 38 minutes
Lesson 8: Injuries to Muscles, Bones and Joints Time: 27 minutes
Lesson 9: Conclusion Time: 25 minutes
CPR/AED—Adult and Child with CPR—Infant Total Time: 3 hours, 21 minutes
Lesson 1: Before Giving Care and Checking an Injured or Ill Person Time: 64 minutes
Lesson 2: CPR and Cardiac Emergencies Adult or child and infant skills; adult and child video segment and infant video segment
Time: 50 minutes
Lesson 3: AED Adult or child skills
Time: 27 minutes
Lesson 4: Breathing EmergenciesAdult or child and infant skills; adult and child video segment and infant video segment
Time: 40 minutes
Lesson 9: Conclusion Time: 20 minutes
CPR/AED—Adult Total Time: 2 hours, 40 minutes
Lesson 1: Before Giving Care and Checking an Injured or Ill Person Time: 49 minutes
Lesson 2: CPR and Cardiac EmergenciesAdult skills and video segment only
Time: 35 minutes
Lesson 3: AED Adult skills
Time: 27 minutes
Lesson 4: Breathing EmergenciesAdult skills and video segment only
Time: 34 minutes
Lesson 9: Conclusion Time: 15 minutes
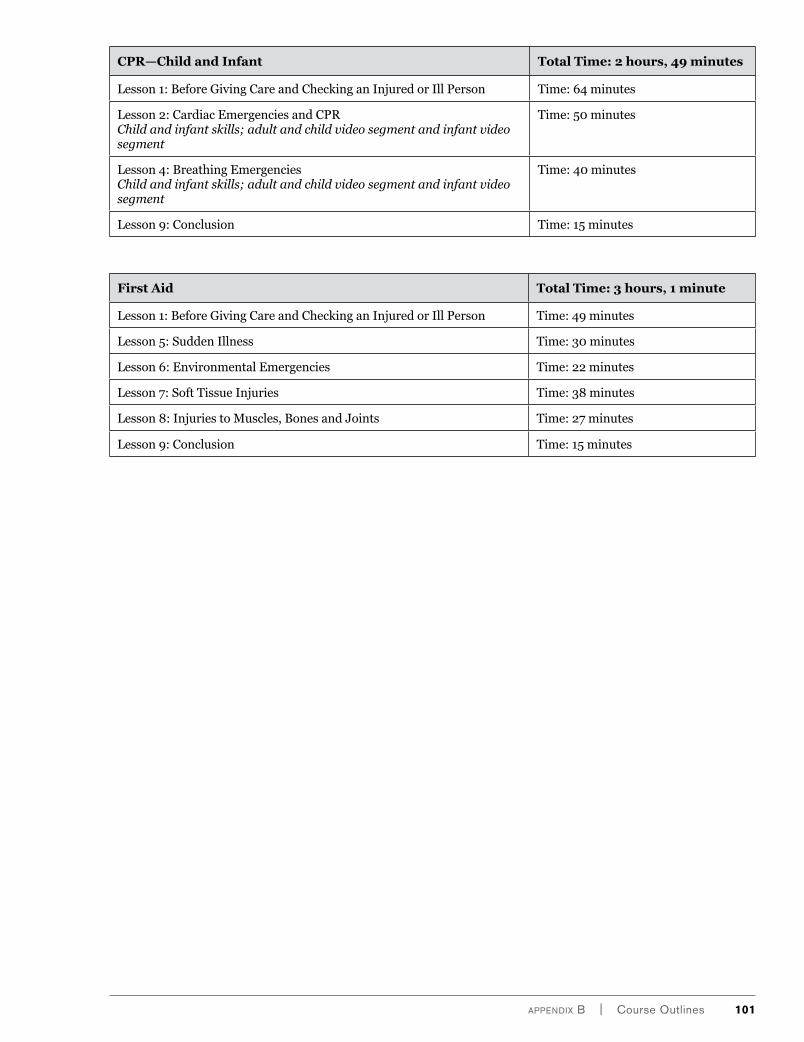
appendix B | Course Outlines 101
CPR—Child and Infant Total Time: 2 hours, 49 minutes
Lesson 1: Before Giving Care and Checking an Injured or Ill Person Time: 64 minutes
Lesson 2: Cardiac Emergencies and CPRChild and infant skills; adult and child video segment and infant video segment
Time: 50 minutes
Lesson 4: Breathing EmergenciesChild and infant skills; adult and child video segment and infant video segment
Time: 40 minutes
Lesson 9: Conclusion Time: 15 minutes
First Aid Total Time: 3 hours, 1 minute
Lesson 1: Before Giving Care and Checking an Injured or Ill Person Time: 49 minutes
Lesson 5: Sudden Illness Time: 30 minutes
Lesson 6: Environmental Emergencies Time: 22 minutes
Lesson 7: Soft Tissue Injuries Time: 38 minutes
Lesson 8: Injuries to Muscles, Bones and Joints Time: 27 minutes
Lesson 9: Conclusion Time: 15 minutes

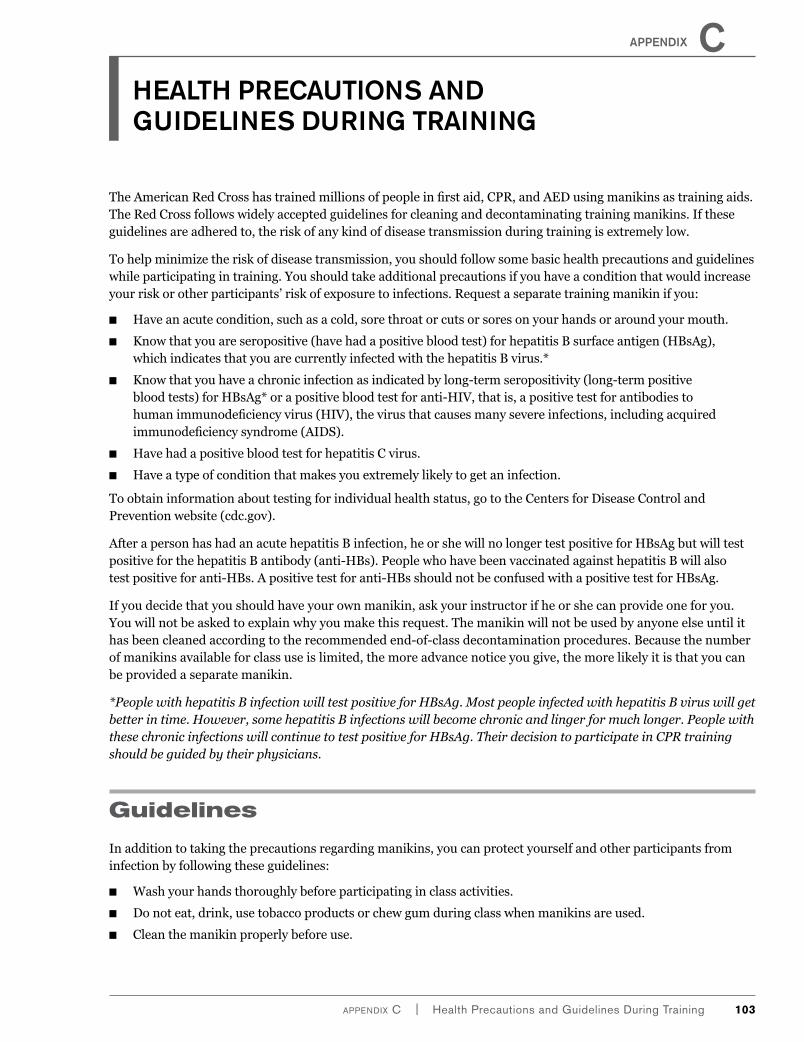
appendix c | Health precautions and Guidelines during Training 103
The American Red Cross has trained millions of people in first aid, CPR, and AED using manikins as training aids. The Red Cross follows widely accepted guidelines for cleaning and decontaminating training manikins. If these guidelines are adhered to, the risk of any kind of disease transmission during training is extremely low.
To help minimize the risk of disease transmission, you should follow some basic health precautions and guidelines while participating in training. You should take additional precautions if you have a condition that would increase your risk or other participants’ risk of exposure to infections. Request a separate training manikin if you:
■■ Have an acute condition, such as a cold, sore throat or cuts or sores on your hands or around your mouth.
■■ Know that you are seropositive (have had a positive blood test) for hepatitis B surface antigen (HBsAg), which indicates that you are currently infected with the hepatitis B virus.*
■■ Know that you have a chronic infection as indicated by long-term seropositivity (long-term positive blood tests) for HBsAg* or a positive blood test for anti-HIV, that is, a positive test for antibodies to human immunodeficiency virus (HIV), the virus that causes many severe infections, including acquired immunodeficiency syndrome (AIDS).
■■ Have had a positive blood test for hepatitis C virus.
■■ Have a type of condition that makes you extremely likely to get an infection.
To obtain information about testing for individual health status, go to the Centers for Disease Control and Prevention website (cdc.gov).
After a person has had an acute hepatitis B infection, he or she will no longer test positive for HBsAg but will test positive for the hepatitis B antibody (anti-HBs). People who have been vaccinated against hepatitis B will also test positive for anti-HBs. A positive test for anti-HBs should not be confused with a positive test for HBsAg.
If you decide that you should have your own manikin, ask your instructor if he or she can provide one for you. You will not be asked to explain why you make this request. The manikin will not be used by anyone else until it has been cleaned according to the recommended end-of-class decontamination procedures. Because the number of manikins available for class use is limited, the more advance notice you give, the more likely it is that you can be provided a separate manikin.
*People with hepatitis B infection will test positive for HBsAg. Most people infected with hepatitis B virus will get better in time. However, some hepatitis B infections will become chronic and linger for much longer. People with these chronic infections will continue to test positive for HBsAg. Their decision to participate in CPR training should be guided by their physicians.
Guidelines
In addition to taking the precautions regarding manikins, you can protect yourself and other participants from infection by following these guidelines:
■■ Wash your hands thoroughly before participating in class activities.
■■ Do not eat, drink, use tobacco products or chew gum during class when manikins are used.
■■ Clean the manikin properly before use.
HealtH Precautions and Guidelines durinG traininG
aPPendix C
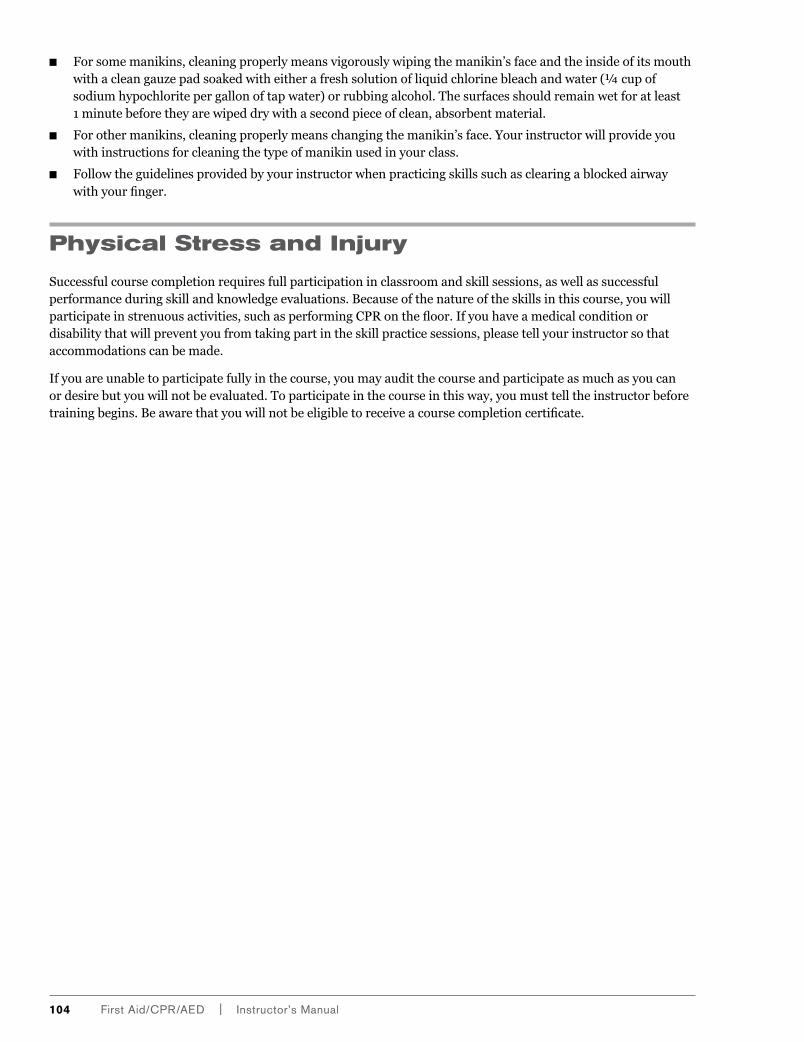
104 First aid/cpR/aed | instructor’s Manual
■■ For some manikins, cleaning properly means vigorously wiping the manikin’s face and the inside of its mouth with a clean gauze pad soaked with either a fresh solution of liquid chlorine bleach and water (¼ cup of sodium hypochlorite per gallon of tap water) or rubbing alcohol. The surfaces should remain wet for at least 1 minute before they are wiped dry with a second piece of clean, absorbent material.
■■ For other manikins, cleaning properly means changing the manikin’s face. Your instructor will provide you with instructions for cleaning the type of manikin used in your class.
■■ Follow the guidelines provided by your instructor when practicing skills such as clearing a blocked airway with your finger.
Physical Stress and Injury
Successful course completion requires full participation in classroom and skill sessions, as well as successful performance during skill and knowledge evaluations. Because of the nature of the skills in this course, you will participate in strenuous activities, such as performing CPR on the floor. If you have a medical condition or disability that will prevent you from taking part in the skill practice sessions, please tell your instructor so that accommodations can be made.
If you are unable to participate fully in the course, you may audit the course and participate as much as you can or desire but you will not be evaluated. To participate in the course in this way, you must tell the instructor before training begins. Be aware that you will not be eligible to receive a course completion certificate.
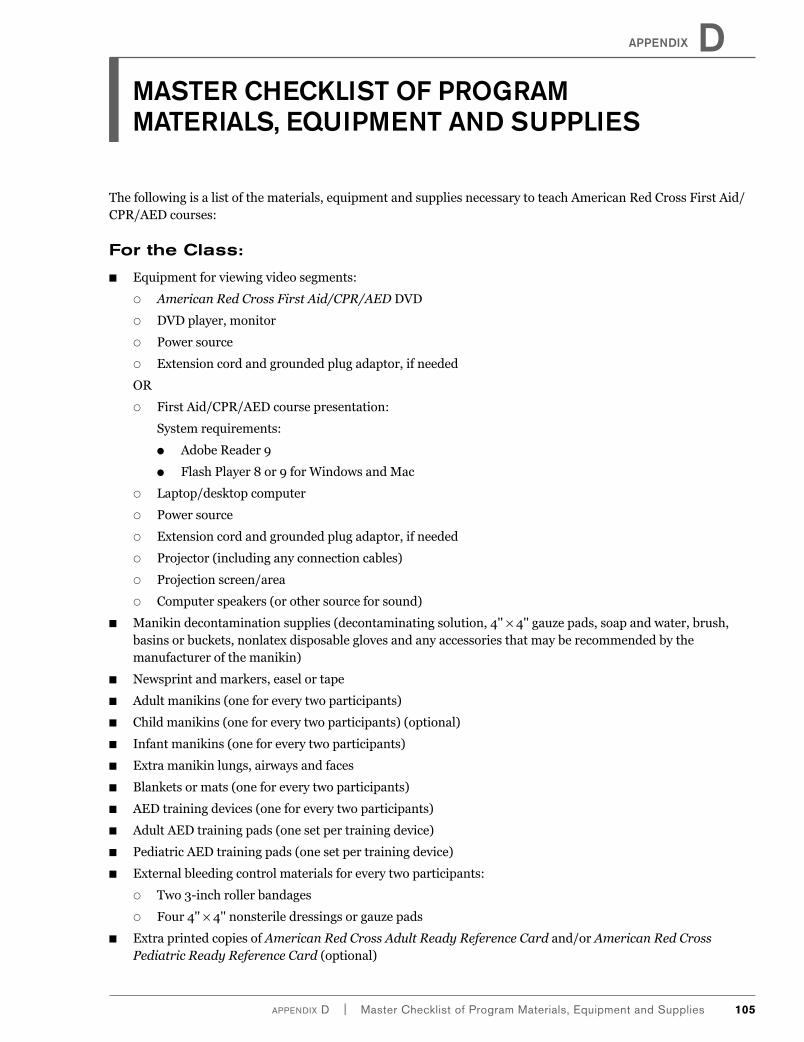
appendix D | Master Checklist of program Materials, equipment and Supplies 105
appendix D
The following is a list of the materials, equipment and supplies necessary to teach American Red Cross First Aid/CPR/AED courses:
For the Class:
■■ Equipment for viewing video segments:
■{ American Red Cross First Aid/CPR/AED DVD
■{ DVD player, monitor
■{ Power source
■{ Extension cord and grounded plug adaptor, if needed
OR
■{ First Aid/CPR/AED course presentation:
System requirements:
■● Adobe Reader 9
■● Flash Player 8 or 9 for Windows and Mac
■{ Laptop/desktop computer
■{ Power source
■{ Extension cord and grounded plug adaptor, if needed
■{ Projector (including any connection cables)
■{ Projection screen/area
■{ Computer speakers (or other source for sound)
■■ Manikin decontamination supplies (decontaminating solution, 4'' × 4'' gauze pads, soap and water, brush, basins or buckets, nonlatex disposable gloves and any accessories that may be recommended by the manufacturer of the manikin)
■■ Newsprint and markers, easel or tape
■■ Adult manikins (one for every two participants)
■■ Child manikins (one for every two participants) (optional)
■■ Infant manikins (one for every two participants)
■■ Extra manikin lungs, airways and faces
■■ Blankets or mats (one for every two participants)
■■ AED training devices (one for every two participants)
■■ Adult AED training pads (one set per training device)
■■ Pediatric AED training pads (one set per training device)
■■ External bleeding control materials for every two participants:
■{ Two 3-inch roller bandages
■{ Four 4'' × 4'' nonsterile dressings or gauze pads
■■ Extra printed copies of American Red Cross Adult Ready Reference Card and/or American Red Cross Pediatric Ready Reference Card (optional)
Master CheCklist of prograM Materials, equipMent and supplies
106 First aid/CpR/aed | instructor’s Manual
■■ Checking an Injured or Ill Adult, Child or Infant Skill Poster (Stock No. 656734) (optional)
■■ CPR Skill Poster (Stock No. 656737) (optional)
■■ Conscious Choking Skill Poster (Stock No. 656758) (optional)
■■ Applying a Splint Skill Poster (Stock No. 656729) (optional)
■■ Splinting materials for optional splinting skill session (for each pair of participants):
■{ Four triangular bandages
■{ One 3-inch roller bandage
■{ Blanket or pillow
■{ Rigid splints (magazines, cardboard, long and short boards or commercial splints)
Note: American Red Cross Student Training Kits for CPR and/or First Aid may be used to substitute for some items on this list.
For Participants:
■■ Name tags
■■ Pencils and/or pens
■■ CPR breathing barriers
■■ Nonlatex disposable gloves (multiple sizes)
■■ American Red Cross First Aid/CPR/AED Participant’s Manual (e-book, printed out or hard copy) (optional)
■■ American Red Cross Adult Ready Reference Card and/or American Red Cross Pediatric Ready Reference Card (printed out or hard copy) (optional)
■■ Final written exams (Appendix J) (optional)
■■ Answer sheet for written exams (Appendix J) (optional)
Note: American Red Cross Student Training Kits for CPR and/or First Aid may be used to substitute for some items on this list.
For the Instructor
■■ American Red Cross identification
■■ Name tag
■■ American Red Cross First Aid/CPR/AED Instructor’s Manual or printed copy of lesson plans
■■ Participant course evaluation forms (Instructor’s Corner)
■■ Course Record and Course Record Addendum (Instructor’s Corner)
■■ Participant progress log (Instructor’s Corner)
■■ Extra pens or pencils
■■ American Red Cross First Aid/CPR/AED Participant’s Manual (e-book, printed out or hard copy) (optional)
■■ American Red Cross Adult Ready Reference Card and/or American Red Cross Pediatric Ready Reference Card (printed out or hard copy) (optional)
■■ Answer keys for both written exams (Appendix J) (optional)
appendix E | Teaching Strategies 107
appendix E
Teaching the Lessons
Before you teach a lesson, you should read the lesson plan, review the appropriate pages in the participant manual or ready reference cards, and gather necessary materials, equipment and supplies.
Each lesson plan contains the following:
■■ Lesson name
■■ Lesson objectives (specific course knowledge and skill objectives appropriate to the lesson)
■■ Guidance for the instructor (steps to be taken to complete the lesson)
■■ Materials, equipment and supplies (materials specific to course being taught)
■■ Topic names
■■ Activities (class exercises that enhance participants’ understanding of the course material)
■■ Skill sessions (practice of skills by participants; not all lessons contain skill sessions)
■■ Visual aids (the visual instructional aids that can be used)
■■ Lesson wrap-up (lesson review)
There are multiple teaching strategies used throughout the course to keep participants engaged including activities and skill sessions. Rather than simply lecturing to participants, maximize learning by facilitating class discussion and interaction. Question and answer sessions are built into the course to help such interaction. The questions enable participants to think about the issues and draw on experience or prior knowledge.
Working with Your Audience
Understanding your audience will help you engage participants in course activities. If you can relate to your audience, you will be better able to facilitate the activities successfully, help participants associate classroom information with personal experiences, provide a positive learning environment and maintain participants’ self-esteem. You may have adults and youths from a variety of age groups in your course. Being aware of these differences before the course begins can help you anticipate any issues before they arise, such as different levels of understanding and skill.
Facilitating Discussion
Many activities and discussions in this course make use of facilitation principles, with the course instructor serving as the facilitator.
Facilitation is based on the concept of pushing, pulling and balancing the flow of information. Push skills have to do with information flowing mostly from instructor to participants. Pull skills are used when the instructor engages participants through the use of interactive exercises and by asking and answering questions or using other approaches that actively involve participants in their own learning, such as with the use of open-ended questions. Balance skills involve managing the push and pull of information to keep the learning process moving and to maximize learning.
When you facilitate classroom discussion and participant responses, keep in mind the following points:
■■ Maximize class interaction.
■■ Use pull skills to engage participants in classroom discussions and to keep discussions on topic or to provide necessary information.
■■ Pull skills are also useful to solicit responses from different participants to prevent one participant from dominating the discussion.
Teaching STraTegieS
108 First aid/CpR/aed | instructor’s Manual
■■ Promote an open exchange of information and ideas by asking open-ended questions (i.e., questions that begin with “who,” “what,” “when,” “where,” “why” or “how”), waiting for responses, listening, managing silence and referring participants’ questions back to the group for discussion and resolution.
■■ Ensure effective discussion sessions by giving and receiving feedback, maintaining an open perspective, setting the climate, staying on topic and managing time effectively.
Facilitation techniques allow you to evaluate participants’ knowledge and understanding throughout the course. In addition, facilitation:
■■ Gives you the opportunity to evaluate the group’s needs and focus the activities on those needs.
■■ Allows you to build on participants’ previous knowledge and skills.
■■ Allows participants to associate previous knowledge and skills with new information.
■■ Allows participants to learn from one another.
■■ Keeps participants engaged and interested throughout the course.
Activities
The educational activities in this course:
■■ Are learner-focused and involve ongoing evaluation of participants, beginning when they enter the classroom.
■■ Teach participants to use their critical-thinking skills to solve problems.
■■ Allow participants to associate information with their personal experience.
Guided Discussion
The instructor’s role in the guided discussions is critical. The ability to introduce questions that prompt discussion is an important aspect of facilitating good discussions. The purposes of asking questions for guided discussions are to:
■■ Increase comprehension (i.e., when the group does not understand something, the discussion may offer an alternative explanation that clarifies the information for participants).
■■ Monitor and evaluate the group’s level of understanding.
■■ Focus the group’s attention on the relevant topic.
■■ Ensure that the group covers all of the supplied content for each activity.
Lectures
Instructor presentation, or lecture, is sometimes the most effective way to deliver information. However, because lecturing is a passive way for participants to learn, it should be kept as brief as possible. Too much lecturing causes participants to become disengaged, resulting in less effective learning. Lecture points are specific content that instructors must communicate to participants and are written so that they can be read aloud as written or rephrased as needed. When you use lecture points, it is important that you fully understand the content in order to rephrase or provide context as needed. If you are using the course presentation, the main points for the lecture are included on the accompanying slide. If you are not using the course presentation, it is often helpful to write bullet points on newsprint before the class to facilitate the learning process. This practice also helps you meet the various learning needs of participants.
When delivering a lecture, it is important that the lecture be dynamic and engaging. Keeping the lecture moving, avoiding long stories of personal experiences and maintaining a learner-centered focus will vastly improve educational outcomes. One way to accomplish this is to prepare for interactive lectures. An interactive lecture will have opportunities for two-way communication between participants and the instructor as well as among the participants themselves. To prepare an interactive lecture, keep the following suggestions in mind:
appendix E | Teaching Strategies 109
■■ Ensure that you understand the purpose of the lecture and plan accordingly.
■■ Feel free to rephrase the lecture points to fit your natural speaking style.
■■ Prepare lecture notes so that you can avoid reading from the instructor’s manual while lecturing.
■■ Use analogies to help create a bridge between lecture material and participants’ experiences.
■■ Strive for interaction with participants during lectures.
■■ Encourage participants to add to the lecture.
Group Activities
This course also uses group exercises to meet learning needs and promote interaction. When conducting group exercises, you should choose both the size and makeup of the groups. Form groups using the fewest number of participants necessary to conduct the exercise. Keeping the group size small will help avoid potential group-dynamics issues and establish a comfortable environment for the exchange of ideas.
Form new groups for each activity. Changing group members among activities promotes class cohesion, avoids situations in which one or more participant feels left out and keeps friendships from taking precedence over learning. Using an arbitrary selection criterion each time you form groups will help you vary group makeup and give participants the chance to interact with many different classmates. For example, try using selection criteria such as find the person in class whose birthday is closest to yours and form a pair, find the person who lives the farthest from you and form a pair, or find the other people in class whose birthday is in the same season as yours (winter, spring, summer or fall) and form a group.
Small-group exercisesSmall-group exercises use two to four participants working together to solve a problem or complete an activity. These exercises allow participants to use one another’s knowledge to solve problems and learn from others’ experiences.
Large-group exercisesLarge-group exercises use large numbers of participants or the whole class to solve a problem or complete an activity. When the entire class works together, it provides an opportunity to exchange ideas, discuss problems and think about the many ways to solve a problem.
Lesson Wrap-Ups
These question-and-answer sessions are found at the end of each lesson. As you lead the wrap-ups, ask for volunteers to provide answers. Waiting up to 10 seconds for an answer can help encourage hesitant participants to answer. Call on participants by name if you are having a hard time finding volunteers. However, do not insist that all participants provide answers. Participants can still gain from this format even if they appear reluctant to answer.
Ideal responses are provided for each question. Answers labeled “Responses could include” are examples of one or more possible correct answers. For these questions, an example of a correct answer is provided in case participants are unable to come up with the correct answer(s) on their own. Answers labeled “Responses should include” are the correct answer(s) that must be covered. In this case, instructors must provide any or all of the answers if participants are unable to come up with the correct answer(s) on their own.
Conducting Skill Sessions
Skill sessions are a critical component of most American Red Cross courses that result in certification. Skill sessions should be well organized and well managed. During the skill sessions, participants are learning and perfecting skills. These sessions should include direction and instruction, ample practice time, instructor reinforcement, corrective feedback and encouragement to ensure participants’ success. Plan the skill sessions to reinforce learning objectives.
110 First aid/CpR/aed | instructor’s Manual
Skill session structure may include practice while you watch, when participants practice the skill along with on-screen instruction; watch then practice, when participants receive on-screen instruction and then apply that knowledge by practicing the skill; and practice then watch, when participants explore and create knowledge by attempting a skill and then view on-screen instruction to confirm skill competence.
When conducting a course that includes adult and child skills, you may conduct either the adult or the child skill sessions, based on the needs of the participants. The video segments and class instruction for these skills contain all the necessary information for both skills. However, if your course includes infant skills in combination with adult and/or child skills, you must conduct the infant skill sessions. For courses that include only infant skills, the infant video segments must be viewed.
During the skill sessions, you are responsible for:
■■ Maintaining a safe learning environment.
■■ Ensuring that participants can see the video monitor when appropriate.
■■ Helping participants form pairs and making sure that they have the necessary equipment for skill practice (e.g., CPR breathing barriers, nonlatex disposable gloves).
■■ Demonstrating a skill or skill components and/or guiding participants through a skill.
■■ Keeping the sessions running smoothly.
■■ Providing sufficient time for all participants to practice each skill.
■■ Identifying errors promptly and providing appropriate feedback to help participants improve their skills.
■■ Encouraging participants to improve their skills.
■■ Checking each participant for skill competency.
Orienting Participants to Skill Sessions
Orienting participants to the skill sessions will help them get started quickly and practice more efficiently. Participants should practice in groups of two or three. Some skill sessions require participants to practice on a partner, whereas others require practice on a manikin. Practice on a real person (partner) is important because participants can experience giving care to someone and understanding how care is experienced.
Coaching vs. Prompting Participants
The desired outcome of each skill session is for participants to demonstrate a skill correctly from beginning to end without receiving any assistance from you or a partner or referring to the participant materials. Because participants learn at different rates, bring different levels of knowledge and learn in different ways, you will find yourself generally coaching or guiding participants as they first learn skill elements. Coaching occurs in the initial phases of skill practice and allows you to give participants information that they need to establish a sequence, timing, duration and technique of a particular skill. When coaching, also known as guided practice, provide information such as the sequence of steps in a skill. Statements such as “check the scene for safety” or “check the person for consciousness” are examples of coaching.
Once guided practice ends and independent demonstration of a skill begins, you should change tactics and shift to prompting. Prompting allows instructors to assess that a participant is able to make the right decision at the right time and give the appropriate care. The putting it all together portion of the video segments are designed for prompt-only practice.
Because participants are expected to demonstrate skills without any assistance, when you prompt someone, provide only the information necessary for the participant to make a decision and give care. In other words, you should give information only about the conditions found. For example say, “The child is unconscious” instead of “Call 9-1-1” or “Breaths do not go in” instead of “Give a rescue breath.”
appendix E | Teaching Strategies 111
Partner Practice
Practicing on a partner has been included in this training to provide participants with experience in giving care to a real person. One participant acts as the injured or ill person while the other gives care. Participants change roles so that each participant has a chance to practice the skill. During partner practice, be sure that participants do not engage in horseplay, which can lead to injury. To ensure a satisfactory comfort level, it is better to allow participants to choose their partners. Some participants may be reluctant to practice with participants of the opposite sex. Instructors should accommodate participants’ preferences. It is important that partner pairs be rotated (exchange roles), or one partner will gain most of the skills while the other partner misses a critical learning experience.
Instructor-Led Practice
Instructor-led practice can be used to focus on a skill or part of a skill. It is particularly useful for introducing new skills that build on previously learned skills or for safety reasons. With this method, the instructor guides participants through each step of a skill while checking on participants to ensure that all in the group complete the steps properly as the instructor calls them out.
When you lead the practice, position yourself so that you can see everyone. It may help to have participants’ heads pointing in the same direction and their partners in the same relative position next to them. Being able to see everyone allows you to monitor skill performance as well as ensure participant safety.
Reciprocal Practice
Reciprocal practice occurs when course participants guide, provide feedback and check one another’s skill performance. The goal is for a participant to demonstrate a skill correctly without any assistance from a partner. During reciprocal practice, move among participants and observe to ensure that they are appropriately practicing the skills and are receiving feedback from their partners. Provide feedback as appropriate and assistance as needed. Remember, if you can observe a participant correctly demonstrate a skill from start to finish without assistance and at the level of proficiency indicated on the skill assessment tool, you may check off that person’s skill on the participant progress log. Let the participant know that no further demonstration of that skill is required.
How Participants Learn Skills
Closely supervise participants during skill sessions. The time for learning and refining skills in this course is relatively short. Therefore, skill sessions, particularly the first one, are demanding of the instructors. By carefully planning the first session and commending participants for practicing correctly, you can create a positive learning environment.
The skills taught will likely be new to most participants and may require frequent one-on-one attention. Keeping in mind the following list of skill characteristics will allow for more effective skill sessions.
■■ Course skills are complex. Participants often have some difficulties when they first begin.
■■ Skills are learned by hands-on practice. Immediate success in demonstrating the skill is unlikely. Refinements in technique take time and practice. Allow participants multiple opportunities to practice skills.
■■ Skills require a defined sequence of movements. Participants should consistently follow this sequence when learning skills.
■■ Learning times for each skill differ, because some skills are easier than others.
■■ Participants have different learning rates. Take individual differences into account when teaching any course.
■■ Skills, especially the individual components of opening the airway and checking for breathing, are quickly forgotten. Frequent practice improves skill retention.
112 First aid/CpR/aed | instructor’s Manual
Helping Participants Practice Correctly
Practicing a skill aids learning only when the skill is performed correctly. One of your most difficult challenges as an instructor is to ensure that participants practice correctly. Continually monitor all participants, watching for errors participants make while practicing. Try to correct problems as soon as possible so that participants will practice the skill correctly. While you are working closely with one participant, check others with an occasional glance. Correct any problems you notice to keep participants from continuing to practice incorrectly. Encourage participants to ask questions if they are unsure how to perform any part of a skill.
A positive learning environment is important. Participants perform best when you keep them informed of their progress. When participants are practicing correctly, provide positive feedback that identifies what they are doing correctly. If participants are practicing incorrectly, provide specific corrective feedback. Before saying what they are doing wrong, tell them what they are doing correctly. Then, tactfully help them improve their performance.
Other strategies for corrective feedback include the following:
■■ If the error is simple, explain directly and positively how to correct the skill performance. Be specific when providing feedback. For example, if the participant is having trouble finding the proper hand placement for CPR, you might say, “The steps leading up to beginning CPR are good; now try finding the center of the chest for compressions. That will be the spot you want to aim for.”
■■ Show the participant what he or she should be doing. For the previous example, you might have to demonstrate hand placement for the person doing the skill.
■■ Explaining why participants should perform a skill in a certain way may help them remember how to perform the skill correctly. For example, if a participant continually forgets to check a scene for safety before assessing a patient, you might remind the participant that the responder can quickly become injured or ill because of an unsafe scene.
■■ If a participant has an ongoing problem with a technique, carefully observe what he or she is doing. Give specific instructions for performing the technique the correct way and lead the participant through the skill. It may help to have the participant state the steps back to you for reinforcement.
■■ Emphasize the critical performance steps to focus on those skills that make a difference in the successful completion of a skill.
■■ During skill sessions, resist telling participants anecdotes, which can distract or confuse participants.
■■ Remind participants what they are doing right and what they need to improve. Use phrases such as, “Your arms are lined up well, but try to keep them as straight as possible while giving compressions to help ensure that they are effective.” Help participants focus on the critical components of each skill.
Participants with Disabilities and Other Health Considerations
People with disabilities and other health conditions can perform the skills in the First Aid/CPR/AED program. In some cases, the skills needed to care for injured or ill individuals may need modification, but the result is the same. Instructors should focus on the critical components of a skill that are needed to successfully meet the objective. Instructors must always teach to the standards set forth but must be aware that participants may modify how a skill is accomplished and still meet the objective, which allows them to receive certification in the course. See the Americans with Disabilities Act (ADA) Accommodation Resource Guide for Conducting And Administering Health And Safety Services Courses on Instructor’s Corner at for more information.
As a Red Cross instructor, you may conduct a course that includes a person with a disability or other condition. Participants with a physical disability include those who are deaf or hard of hearing, legally blind, lack full use of limbs, have breathing difficulties or have other physical problems. When a participant with a disability or other condition can successfully meet course objectives, he or she should receive a course completion certificate. If a participant cannot meet the course objectives because of a disability or other condition, this should be communicated to the participant as early as possible.
appendix E | Teaching Strategies 113
Helping Participants with Physical Disabilities
To help a participant who has a physical disability, you may modify the delivery of course materials as follows:
■■ Increase the amount of time you spend with each participant
■■ Allow frequent rest periods
■■ Help participants modify the techniques necessary for successful skill completion
People with Reading Difficulties and Disabilities
If you believe that a class includes participants who have reading difficulties or disabilities, you should discuss this with those participants individually and privately without attracting the attention of the rest of the class. You should make modifications that will allow these individuals to participate fully in class, such as reading any necessary material to the class.
Identifying People with Reading Difficulties or Disabilities
Course participants will do some reading during this course. You must be prepared to detect any such difficulties and provide those participants with every opportunity to succeed, including modifications. Some participants may have difficulty reading because English is his or her second language. Through observation, you may be able to detect that an individual has reading difficulties.
Problems with reading skills may be present when:
■■ A participant does not follow along with written material or turn pages as the instructor reads.
■■ A participant says that he or she:
■{ Forgot his or her glasses.
■{ Has not done well in educational settings.
■{ Does not do well in testing situations.
Helping Participants with Reading Difficulties or Disabilities
Final written exams are not a required component of the course. If a final exam has been requested or required by an employer, course provider, or state or local regulations, you may administer an oral exam instead. Refer to the Fundamentals of Instructor Training Participant’s Manual for guidance on giving oral exams.

appendix F | Criteria for assessing participants 115
Criteria for Course Completion
Many agencies, organizations and individuals look to the American Red Cross for formal training that results in certification. Red Cross certification means that on a particular date an instructor verified that a course participant could demonstrate competency in all required skills taught in the course. Competency is defined as being able to perform each skill to meet the objective without guidance and apply those skills in a simulated emergency.
Achieving course certification does not imply any future demonstration of the knowledge or skill at the level achieved on the particular date of course completion.
To successfully complete the course, the participant must:
■■ Attend all class sessions.
■■ Participate in all course activities.
■■ Demonstrate competency in all required skills.
■■ Successfully participate in an end-of-course scenario(s).
Evaluating Skills
In the First Aid/CPR/AED program, skills are evaluated during skill sessions within the lessons. As an instructor, your goal is to help participants achieve the performance criteria for each skill. The primary tools to assist you in evaluating participants’ skills are the skill charts and skill assessment tools.
Before conducting a course, become familiar with the skill charts and skill assessment tools (found at the end of the lesson in which the skill is practiced). The skill charts contain the required steps of a skill in numerical order. The skill assessment tools provide assessment criteria for proficient and not proficient performance of the critical components of a skill that are necessary to meet the objective. Skill assessment tools include specific depths, ranges, rates, intervals, times and other quantifiable elements by which to assess skill performance. The skill assessment tools are designed to help you decide whether a participant has met the objective.
During skill sessions, you should check off a skill as completed on the participant progress log once participants demonstrate proficiency in it. It is your responsibility as the instructor to observe participants’ skill performance to determine whether they are performing the skill correctly with respect to sequence, timing and duration, and whether their techniques meet the established skill proficiency criteria.
In order to complete the course requirements and receive a completion certificate, the participant must be able to complete all required skills proficiently without any coaching or assistance.
For additional guidance on evaluating skill performance, you may also review How to Run Skill Practice Sessions in Appendix H and Teaching to the Standard, Testing to the Objective in Lesson 6 of the American Red Cross Fundamentals of Instructor Training: Participant’s Manual.
Scenarios
Participants have the opportunity to demonstrate decision-making and apply their knowledge and skills in an emergency scenario conducted at the conclusion of the course.
appendix FCriteria for assessing partiCipants
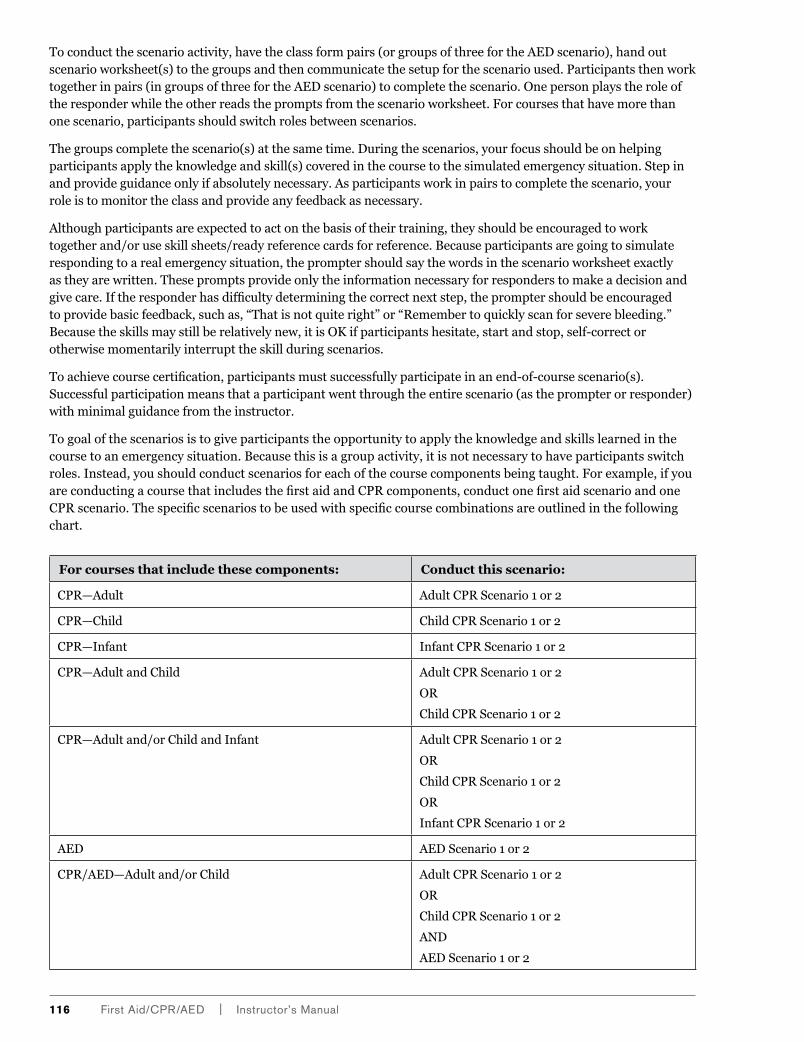
116 First aid/CpR/aed | instructor’s Manual
To conduct the scenario activity, have the class form pairs (or groups of three for the AED scenario), hand out scenario worksheet(s) to the groups and then communicate the setup for the scenario used. Participants then work together in pairs (in groups of three for the AED scenario) to complete the scenario. One person plays the role of the responder while the other reads the prompts from the scenario worksheet. For courses that have more than one scenario, participants should switch roles between scenarios.
The groups complete the scenario(s) at the same time. During the scenarios, your focus should be on helping participants apply the knowledge and skill(s) covered in the course to the simulated emergency situation. Step in and provide guidance only if absolutely necessary. As participants work in pairs to complete the scenario, your role is to monitor the class and provide any feedback as necessary.
Although participants are expected to act on the basis of their training, they should be encouraged to work together and/or use skill sheets/ready reference cards for reference. Because participants are going to simulate responding to a real emergency situation, the prompter should say the words in the scenario worksheet exactly as they are written. These prompts provide only the information necessary for respon ders to make a decision and give care. If the responder has difficulty determining the correct next step, the prompter should be encouraged to provide basic feedback, such as, “That is not quite right” or “Remember to quickly scan for severe bleeding.” Because the skills may still be relatively new, it is OK if participants hesitate, start and stop, self-correct or otherwise momentarily interrupt the skill during scenarios.
To achieve course certification, participants must successfully participate in an end-of-course scenario(s). Successful participation means that a participant went through the entire scenario (as the prompter or responder) with minimal guidance from the instructor.
To goal of the scenarios is to give participants the opportunity to apply the knowledge and skills learned in the course to an emergency situation. Because this is a group activity, it is not necessary to have participants switch roles. Instead, you should conduct scenarios for each of the course components being taught. For example, if you are conducting a course that includes the first aid and CPR components, conduct one first aid scenario and one CPR scenario. The specific scenarios to be used with specific course combinations are outlined in the following chart.
For courses that include these components: Conduct this scenario:
CPR—Adult Adult CPR Scenario 1 or 2
CPR—Child Child CPR Scenario 1 or 2
CPR—Infant Infant CPR Scenario 1 or 2
CPR—Adult and Child Adult CPR Scenario 1 or 2
OR
Child CPR Scenario 1 or 2
CPR—Adult and/or Child and Infant Adult CPR Scenario 1 or 2
OR
Child CPR Scenario 1 or 2
OR
Infant CPR Scenario 1 or 2
AED AED Scenario 1 or 2
CPR/AED—Adult and/or Child Adult CPR Scenario 1 or 2
OR
Child CPR Scenario 1 or 2
AND
AED Scenario 1 or 2
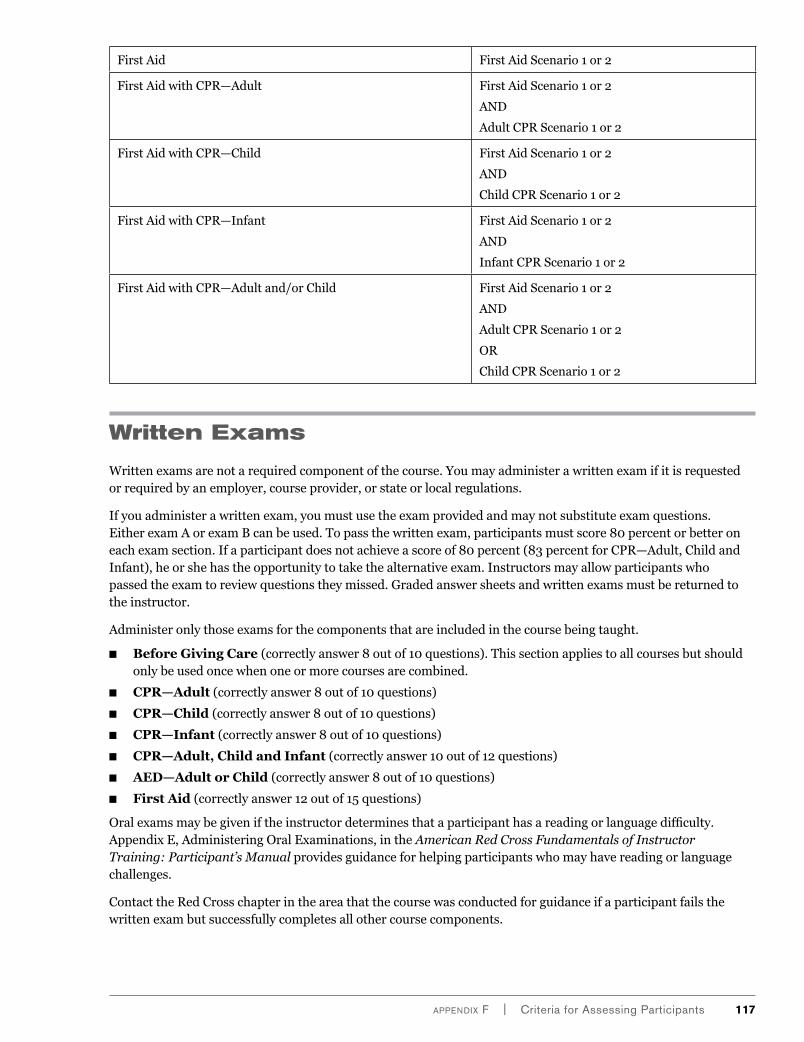
appendix F | Criteria for assessing participants 117
First Aid First Aid Scenario 1 or 2
First Aid with CPR—Adult First Aid Scenario 1 or 2
AND
Adult CPR Scenario 1 or 2
First Aid with CPR—Child First Aid Scenario 1 or 2
AND
Child CPR Scenario 1 or 2
First Aid with CPR—Infant First Aid Scenario 1 or 2
AND
Infant CPR Scenario 1 or 2
First Aid with CPR—Adult and/or Child First Aid Scenario 1 or 2
AND
Adult CPR Scenario 1 or 2
OR
Child CPR Scenario 1 or 2
Written Exams
Written exams are not a required component of the course. You may administer a written exam if it is requested or required by an employer, course provider, or state or local regulations.
If you administer a written exam, you must use the exam provided and may not substitute exam questions. Either exam A or exam B can be used. To pass the written exam, participants must score 80 percent or better on each exam section. If a participant does not achieve a score of 80 percent (83 percent for CPR—Adult, Child and Infant), he or she has the opportunity to take the alternative exam. Instructors may allow participants who passed the exam to review questions they missed. Graded answer sheets and written exams must be returned to the instructor.
Administer only those exams for the components that are included in the course being taught.
■■ Before Giving Care (correctly answer 8 out of 10 questions). This section applies to all courses but should only be used once when one or more courses are combined.
■■ CPR—Adult (correctly answer 8 out of 10 questions)
■■ CPR—Child (correctly answer 8 out of 10 questions)
■■ CPR—Infant (correctly answer 8 out of 10 questions)
■■ CPR—Adult, Child and Infant (correctly answer 10 out of 12 questions)
■■ AED—Adult or Child (correctly answer 8 out of 10 questions)
■■ First Aid (correctly answer 12 out of 15 questions)
Oral exams may be given if the instructor determines that a participant has a reading or language difficulty. Appendix E, Administering Oral Examinations, in the American Red Cross Fundamentals of Instructor Training: Participant’s Manual provides guidance for helping participants who may have reading or language challenges.
Contact the Red Cross chapter in the area that the course was conducted for guidance if a participant fails the written exam but successfully completes all other course components.
118 First aid/CpR/aed | instructor’s Manual
Criteria for Grading Participants
Course participants are assigned one of the following grades:
■■ Successful is entered for a participant who has attended all class sessions, participated in all course activities, passed all the required course skills and passed the required scenario assessments.
■■ Unsuccessful is entered for a participant who has not met course objectives and/or does not successfully attend all class sessions, participate in all course activities, complete all the required skills and/or complete the scenario assessments and who prefers not to be retested or does not pass a retest.
■■ Not Evaluated is entered as the final grade for a participant who is not attending the course with intent to receive a completion certificate. The participant, with approval from the instructor, is allowed to choose his or her own level of participation in the course. This grade should not be substituted for Unsuccessful for a participant who attempts certification but is unable to pass the completion requirements. A participant who chooses to audit must make his or her intent known to the instructor at the beginning of the class.
Make any notations that you think are necessary to record in the comments section on the Course Record, for instance, when you make accommodations, such as administering the final exam verbally.
Awarding Certificates
Discuss with the local Red Cross chapter the procedures for obtaining Red Cross course completion certificates for participants in your courses. Be sure to follow approved procedures.
appendix G
The following information is provided as a resource for instructors and instructor trainers who conduct the lesson containing automated external defibrillation (AED) information. It is not intended for this information to be added to all the current American Red Cross AED training courses. Significant guidance, review and input was provided by the American Red Cross Scientific Advisory Council chair and subject-matter expert David Markenson, MD, FAAP, EMT-P.
Introduction
Each year, more than 300,000 people die of sudden cardiac arrest in the United States. Sudden cardiac arrest in adults is most commonly caused by an abnormal heart rhythm called ventricular fibrillation (V-fib). This cardiac arrhythmia is characterized by completely disorganized electrical activity, which causes the heart to quiver and cease functioning as a pump. While less common, ventricular tachycardia (V-tach) can also cause sudden cardiac arrest. V-tach occurs when there is very rapid contraction of the ventricles; so rapid that the heart is no longer able to pump blood.
Sudden cardiac arrest can happen to anyone at any time—and not just to adults. Defibrillation is an electrical shock that can correct V-fib and V-tach by interrupting the chaotic electrical activity and helping the heart to re-establish an effective electrical rhythm. An AED is a portable electronic device that analyzes the heart’s rhythm and, if necessary, tells the responder to deliver a shock to a person of sudden cardiac arrest.
Care for persons of sudden cardiac arrest has been greatly improved through the advent of more widespread and rapid access to AEDs. These devices allow for quick detection and defibrillation of a shockable rhythm by trained, nonprofessional responders and even the lay public. This technological breakthrough has led to increased detection and treatment of V-fib and V-tach in persons of all ages.
Causes of Cardiac Arrest in Adults
Causes of cardiac arrest in adults include:
■■ Cardiovascular disease.
■■ Abnormal electrical activity of the heart (arrhythmias).
■■ Drowning.
■■ Airway obstruction.
■■ Brain damage.
■■ Electrocution.
■■ Trauma.
Defibrillation Recommendations for Pediatric Victims
While it is not known exactly how many pediatric incidents occur, studies suggest that there may be more occurrences of V-fib than previously believed. Recent studies have also shown that the chance for survival is much higher for V-fib than other rhythms. Traditional therapy for children has not included early rhythm detection and possible defibrillation and these studies have shown that this may represent missed opportunities
aed ResouRce infoRmation
appendix G | aed Resource information 119
120 First aid/CpR/aed | instructor’s Manual
to save a child’s life. Unfortunately, there is a shortened window of opportunity for detection of V-fib in children when compared to adults and, as such, a small window of opportunity for subsequent rapid defibrillation. This window of opportunity may be lost for a lack of early recognition of V-fib because of the initial emphasis placed on airway and breathing problems at the exclusion of all else by traditional emergency care procedures. Early detection of V-fib in children and infants is critical to ensure the best chance of survival for a child in cardiac arrest with a shockable rhythm. Even though studies began suggesting that this window of opportunity to treat V-fib in children existed, there was a lack of equipment for rapid detection and early defibrillation.
The development of special pediatric AED pads and equipment addresses concerns regarding the possibility of injury to young children and infants caused by the higher energy levels of conventional AEDs used for adults. AEDs that are configured for persons under age 8 or weighing less than 55 pounds have been proven reliable and accurate in determining shockable rhythms and delivering effective shocks. Further, this advance in defibrillation technology was reviewed and approved by the Food and Drug Administration (FDA).
On July 1, 2003, the Pediatric Advanced Life Support (PALS) Task Force of the International Liaison Committee on Resuscitation (ILCOR) released updated guidance and an advisory statement that supported the use of pediatric AED pads on persons between the ages of 1 and 8 (and less than 55 pounds) who have no pulse and are not moving or breathing. Subsequent to this ILCOR advisory statement, the American Academy of Pediatrics (AAP) released new guidance.
In the November 2007 issue of its official journal, Pediatrics, the AAP published a policy statement supporting the use of pediatric AED equipment on children and infants in cardiac arrest. This statement advises that an AED can be used on a child or an infant (under age 8 or weighing less than 55 pounds).
AEDs equipped with pediatric defibrillation pads are capable of delivering lower levels of energy that are considered appropriate for children and infants up to 8 years old or weighing less than 55 pounds. Pediatric AED pads and/or equipment should be used, if available. However, if pediatric-specific equipment is not available, an AED designed for adults can be used on children and infants. In any event, local protocols, medical direction and the manufacturer’s instructions should always be followed. The Red Cross supports the consensus of the scientific community.
While the incidence is relatively low compared to adults, cardiac arrest resulting from V-fib does happen to young children and infants and is no less dramatic. The emotional trauma and devastation of the loss of a child to a family and community cannot be measured.
Causes of Cardiac Arrest in Children and Infants
Most cases of cardiac arrest in children and infants are not sudden. Causes of cardiac arrest in young children and infants include:
■■ Airway problems.
■■ Breathing problems.
■■ Traumatic injuries or an accident (e.g., automobile accident, drowning, electrocution or poisoning).
■■ A hard blow to the chest (i.e., commotio cordis).
■■ Congenital heart disease.
■■ Sudden infant death syndrome (SIDS).
The Role of CPR
Quality CPR, especially if it is started promptly, can help by keeping blood containing oxygen flowing to the brain and other vital organs and may increase the chances of a successful defibrillation shock. However, in cases of sudden cardiac arrest, CPR by itself is insufficient to correct the heart’s underlying electrical problem.
appendix G | aed Resource information 121
AEDs are needed to correct the problem. Once CPR has been started, it should not be interrupted unnecessarily. After a shock is delivered or if no shock is advised, CPR is performed without interruption until the AED begins rhythm analysis or there is an obvious sign of life, such as when normal breathing returns or the person regains consciousness.
As demonstrated in the Cardiac Chain of Survival, the sooner 9-1-1 or the local emergency number is called and CPR is initiated, and the quicker an AED can be applied and advanced medical care can be provided, the better the chance of survival.
Defibrillation
■■ AEDs provide an electric shock to the heart called defibrillation.
■■ Delivering an electric shock with an AED disrupts abnormal electrical activity long enough to allow the heart to develop an effective rhythm on its own.
■■ The sooner a shockable rhythm is identified and the defibrillation shock is administered, the greater the likelihood the person will survive.
■■ Defibrillation treats the specific abnormal rhythm, most commonly V-fib.
Defibrillation Equipment Operation and Pad Placement
■■ The manufacturer’s operating instructions and local protocols should always be followed.
■■ Pads are reversible. Reversal of pads may affect data display and analysis of rhythm but not the delivery of the defibrillation. However, always try to ensure correct pad placement.
■■ If the pads are not securely attached to the person’s chest or if the cables are not fastened properly, the responder will receive a “Connect electrodes” or other error message from the AED. This message may appear in print on the small screen on the front of the machine or in a voice prompt. If you receive such a message, check to see that the pads and cables are attached properly. In all cases, the manufacturer’s instructions must be followed because AEDs differ in the type of cables and adhesive electrode pads used.
■■ At this point, the AED is ready to analyze the heart rhythm. Some devices require the responder to press a button marked “analyze” to have the machine examine the heart rhythm. Other models automatically analyze the heart rhythm. The responder must ensure that no one is touching or moving the person during this time. If the AED identifies a rhythm that should be defibrillated, it will prompt either with an on-screen message or by voice, or both. This message often states, “Shock advised,” followed by “Press to shock” or “Press the shock button now,” which indicates that the responder must press a button to defibrillate the person.
■■ A voice prompt from the AED will also advise everyone to “Stand clear” before administering a shock. This is an important measure that all present must follow. Any time an AED is analyzing the rhythm, charging to a specific energy level or delivering a shock, the responder and others must not be in contact with the person. This will ensure that the rhythm analysis will be accurate and that no one other than the person will receive any of the electrical energy when it is discharged. It is the responsibility of the person who operates the AED to warn responders and bystanders to move away from contact with the person before analyzing and before pressing the “shock” button. This can be done by shouting, “Stand clear!” Another common warning is “I’m clear, you’re clear, everybody clear!” while actually checking around the person before pressing the “shock” button.
■■ In some instances, the heart will not require defibrillation. In these cases, the AED device will inform you that no shock is needed. The AED should be left attached to the person and turned on. Unless there is an obvious sign of life (movement, normal breathing or pulse), immediately resume CPR.
122 First aid/CpR/aed | instructor’s Manual
Note: Some AEDs are fully automatic and do not require the operator to press a button to deliver a shock. When using this type of AED, extra care should be taken to ensure that no one is touching the person before the AED delivers a shock. Follow the manufacturer’s instructions and local protocols to use the unit correctly.
■■ The number of shocks the AED delivers and the energy level for each shock are often preset by the manufacturer according to the standard of care established by the state or local emergency medical services (EMS) authority. The medical director of the individual or local AED program can establish local operating protocols based on the area EMS or regulatory guidelines. The 2010 Consensus on Science recommends a standard AED protocol of 1 shock immediately followed by about 2 minutes of CPR.
Defibrillation Equipment Operation and Pad Placement for Pediatric Victims
Currently, several of the devices available use technology that attenuates, or lowers, the energy level of the defibrillation shock. This may provide either one single-energy level shock or multiple shocks of single energy or escalating energy, but all will be at a lower energy level than would be delivered without the attenuation circuitry.
The energy-lowering circuitry may be encased in a conspicuous plastic housing located between the pad’s connector on one end and the pads themselves on the other end. Some AEDs have a “keyed” adapter that is inserted into the AED for switching to pediatric operation.
■■ This visible feature and other visible markings unique to the pediatric pads lead to easier recognition of the pads as appropriate for pediatric persons (younger than age 8 or weighing less than 55 pounds) and are less likely to be confused with other defibrillation equipment.
■■ Pad placement is the same regardless of the make or model.
■■ If a trained responder is unsure and the child appears to be older than 8 years of age or to weigh more than 55 pounds, care should not be delayed to determine the exact age and weight. The adult AED pads and AED equipment should be applied and used.
■■ In some areas of the country, local protocols may allow the use of AEDs with nonpediatric AED pads for children and infants of all ages. This protocol will be based on the local medical directors’ estimate of the potential risk of use of these devices being far less than the benefit of defibrillating a child in V-fib. A responder should only use nonpediatric AEDs on children and infants under 8 years of age or less than 55 pounds if approved and allowed by local medical protocol and pediatric pads or adapters are not available.
■■ For a child or an infant in cardiac arrest, follow the same general steps and precautions that you would when using an AED on an adult. If the pads risk touching each other because of the smaller chest size, use the front/back (anterior/posterior) method of pad placement.
Special Resuscitation Situations
Some situations require responders to pay special attention when using an AED. It is important that responders be familiar with these situations and able to respond appropriately.
■■ Hypothermia. People with hypothermia have been resuscitated even after prolonged exposure. If there is no normal breathing, begin CPR until an AED becomes available. Dry the person’s chest and attach the AED. If a shock is indicated, deliver a shock and follow the instructions of the AED. If there is still no normal breathing, continue CPR. Follow the local protocol as to whether additional shocks should be delivered. CPR should be continued and the person should be protected from further heat loss. Remove wet garments, if possible, and insulate or shield the person from wind, heat or cold. The person should not be defibrillated in water. CPR or defibrillation should not be withheld to re-warm the person. Responders should handle people with hypothermia gently, as shaking them could result in V-fib.
■■ AEDs, Pacemakers and Implantable Cardiac Devices. Some people whose hearts are weak and not able to generate an electrical impulse may have had a pacemaker implanted. The pacemaker serves the function of the sinoatrial (SA) node, the natural pacemaker. These small implantable devices may sometimes
appendix G | aed Resource information 123
be located in the area below the right collarbone. There may be a small lump that can be felt under the skin. Sometimes the pacemaker is placed somewhere else. Other individuals may have an implantable cardioverter-defibrillator (ICD), a miniature version of an AED, which acts to automatically recognize and restore abnormal heart rhythms. If visible, or you know that the person has an implanted cardiac device or pacemaker, do not place the defibrillation pads directly over the implanted device. This may interfere with the delivery of the shock. Adjust pad placement if necessary, and continue to follow the established protocol. If you are not sure, use the AED if needed. It will not harm the person or responder. Responders should be aware that it is possible to receive a mild shock if an ICD delivers a shock to the person while CPR is performed. This risk of injury to rescuers is minimal and the amount of electrical energy involved is low. Much of the electrical energy is absorbed by the person’s own body tissues. Some protocols may include temporarily deactivating the shock capability of an ICD with a donut magnet or other precautions. Responders should be aware of and follow any special precautions associated with ICDs but should not delay performing CPR and using an AED.
■■ Transdermal Medication Patches and AEDs. Some patients may use a transdermal medication patch. The most common of these patches is the nitroglycerin patch, used by those with a history of cardiac problems. These patches are usually placed on the chest. If you encounter a person with a patch on his or her chest, remove it with a gloved hand. Nitroglycerin and other medication patches pose a possible absorption risk for responders, not an explosion hazard. Nitroglycerin patches look very similar to nicotine patches that people use to stop smoking. Although these patches do not interfere with defibrillation, time may be wasted attempting to identify the type of patch. Therefore, any medication patches on the person’s chest should be removed. Never place AED electrode pads directly on top of medication patches.
■■ Trauma and AEDs. If a person is in cardiac arrest resulting from traumatic injuries, the AED may still be used. Defibrillation should be administered according to local protocols.
■■ AEDs Around Water. AEDs can be used in a variety of environments including rain and snow. Always use common sense when using an AED and follow the manufacturer’s recommendations. The person should not be in a pool or puddle of water when the responder is operating an AED. If it is raining, steps should be taken to ensure that the person is as dry as possible and sheltered from the rain. Ensure that the person’s chest (and back of a smaller child, if using anterior/posterior pad placement) is wiped dry. However, minimize delaying defibrillation when taking steps to provide for a dry environment. The electric current of an AED is very directional between the electrode pads, and AEDs are very safe when all precautions and manufacturer’s operating instructions are followed. When using an AED near water, such as at a pool facility, attempt to put the person on a dry surface, such as a backboard. The person’s chest should be wiped dry. If possible, the person should be placed on a backboard and moved away from the water. Proceed to use the defibrillator as in any situation.
■■ Chest Hair. Some men have excessive chest hair that may cause difficulty with pad-to-skin contact. Since time to first shock is critical, and chest hair rarely interferes with pad adhesion, attach the pads and analyze the heart’s rhythm as soon as possible. Press firmly on the pads to attach them to the person’s chest. If you get a “check pads” or similar message from the AED, remove the pads and replace with new ones. The pad adhesive may pull out some of the chest hair, which may solve the problem. If you continue to get the “check pads” message, remove the pads, shave the person’s chest and attach new pads to the person’s chest. Spare defibrillation pads and a safety razor should be included in the AED kit. Be careful not to cut the person while shaving, as cuts and scrapes can interfere with rhythm analysis.
■■ Jewelry and Body Piercings. Jewelry and body piercings do not need to be removed when using an AED. These are simply distractions that do no harm to the person, but taking time to remove them delays delivery of the first shock. Do not delay the use of an AED to remove jewelry or body piercings. Do not place the defibrillation pad directly over metallic jewelry or body piercings. Adjust pad placement if necessary and continue to follow established protocols.
■■ Other AED Protocols. Other AED protocols are not incorrect, nor harmful. For example, delivering three shocks and then performing CPR. However, improved methods, based on new scientific evidence, make it easier to coordinate performing CPR and using the AED. Follow the instructions of the AED you are using, whether it is to give one shock and then perform CPR or to give three shocks followed by CPR.
124 First aid/CpR/aed | instructor’s Manual
Note: Metal surfaces are not included as a special circumstance because they pose no shock hazard to either a person or a responder. Additional information provided by AED manufacturers confirms that it is safe to defibrillate a person on a metal surface as long as the appropriate safety precautions are taken. Specifically, care should be taken that the defibrillation electrodes do not contact the conductive surface and that no one is touching the person when the “shock” button is pressed.
Maintenance of AEDs
For defibrillators to function optimally, they must be maintained like any other machine. The AEDs that are available today require minimal maintenance. These devices have various self-testing features. However, it is important that operators are familiar with any visual or audible warning prompts the AED may have to warn of malfunction or a low battery. It is important that you read the operator’s manual thoroughly and check with the manufacturer to obtain all necessary information regarding maintenance.
In most instances, if the machine detects any malfunction, you should contact the manufacturer. The device may need to be returned to the manufacturer for service. While AEDs require minimal maintenance, it is important to remember the following:
■■ Follow the manufacturer’s specific recommendations and your facility’s schedule for periodic equipment checks, including checking the batteries and defibrillation pads.
■■ Make sure that batteries have enough energy for one complete rescue. (A fully charged back-up battery should be readily available.)
■■ Make sure that the correct defibrillator pads are in the package and are properly sealed.
■■ Check any expiration dates on defibrillation pads and batteries and replace as necessary. Properly dispose of any pads that have passed their expiration date regardless of whether they have been used or not.
■■ After use, make sure that all accessories are replaced and that the machine is in proper working order.
■■ If at any time the machine fails to work properly or warning indicators are recognized, discontinue use, place it out of service and contact the manufacturer immediately.
AEDs and Oxygen
When using AEDs in conjunction with administration of emergency oxygen, follow these guidelines:
■■ Avoid the use of free-flowing oxygen and the use of an AED in a confined space.
■■ Prior to shocking a person with an AED, ensure that no one is touching or is in contact with the person or the resuscitation equipment.
■■ Keep breathing devices with free-flowing oxygen away from the person during defibrillation.
■■ Follow local protocols.
Definitions■■ Free-flowing oxygen is defined as any oxygen that is released into the environment either intentionally or
unintentionally, which could reach potentially dangerous levels.
■■ Confined space is a space that:
■{ Is confined because the configurations hinder the activities of employees who must enter, work in and exit the space.
■{ Has limited or restricted means of entry or exit (e.g., tanks, vessels, silos, storage bins, hoppers, vaults and pits).
■{ Is not designed for continuous employee occupancy.
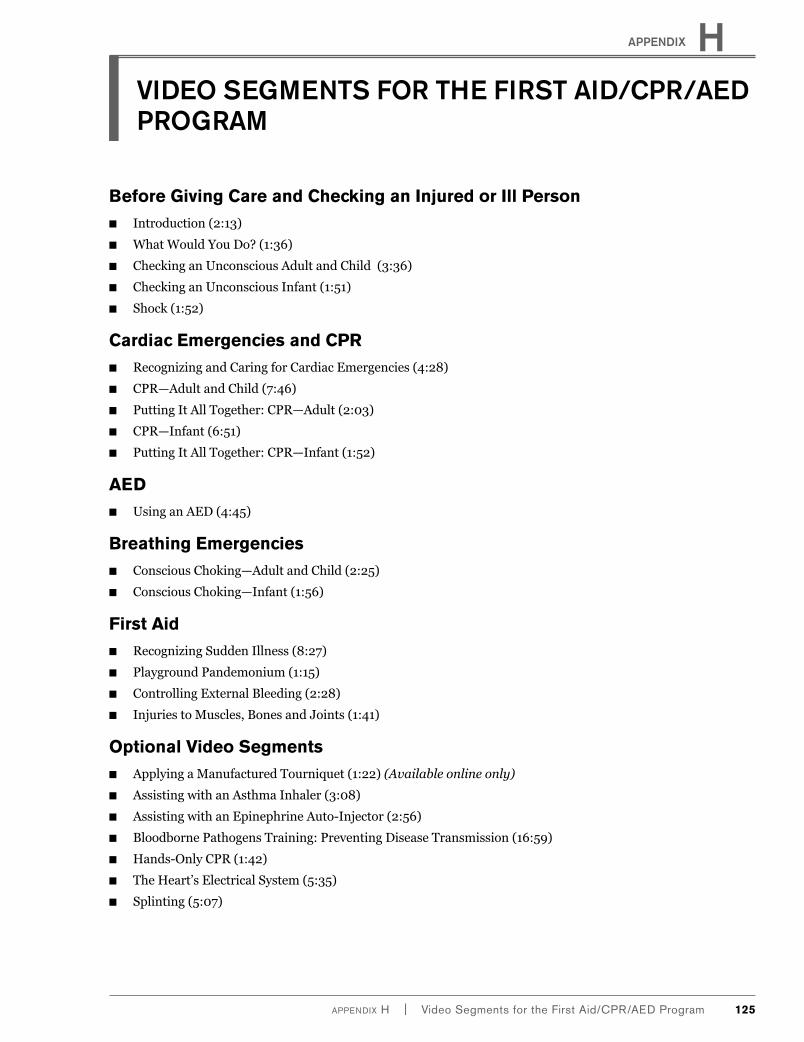
appendix H | Video Segments for the First aid/CpR/aed program 125
appendix H
Before Giving Care and Checking an Injured or Ill Person■■ Introduction (2:13)
■■ What Would You Do? (1:36)
■■ Checking an Unconscious Adult and Child (3:36)
■■ Checking an Unconscious Infant (1:51)
■■ Shock (1:52)
Cardiac Emergencies and CPR■■ Recognizing and Caring for Cardiac Emergencies (4:28)
■■ CPR—Adult and Child (7:46)
■■ Putting It All Together: CPR—Adult (2:03)
■■ CPR—Infant (6:51)
■■ Putting It All Together: CPR—Infant (1:52)
AED■■ Using an AED (4:45)
Breathing Emergencies■■ Conscious Choking—Adult and Child (2:25)
■■ Conscious Choking—Infant (1:56)
First Aid■■ Recognizing Sudden Illness (8:27)
■■ Playground Pandemonium (1:15)
■■ Controlling External Bleeding (2:28)
■■ Injuries to Muscles, Bones and Joints (1:41)
Optional Video Segments■■ Applying a Manufactured Tourniquet (1:22) (Available online only)
■■ Assisting with an Asthma Inhaler (3:08)
■■ Assisting with an Epinephrine Auto-Injector (2:56)
■■ Bloodborne Pathogens Training: Preventing Disease Transmission (16:59)
■■ Hands-Only CPR (1:42)
■■ The Heart’s Electrical System (5:35)
■■ Splinting (5:07)
video segments for the first aid/cpr/aed program

Instructor Training Segments■■ Introduction (1:53)
■■ Preparing to Conduct a Skill Session (4:14)
■■ How to Conduct a Skill Session (2:02)
■■ How to Use Video Support (5:09)
■■ Observing and Evaluating Skill Performance (5:07)
■■ The Critical Eye (4:47)
■■ Conducting Scenarios (4:04)
126 First aid/CpR/aed | instructor’s Manual

appendix i | Frequently Asked Questions About First Aid, CPR and AED 127
appendix IFrequently asked questions about First aid, Cpr and aed
Lesson 1: Before Giving Care and Checking an Injured or Ill Person
Coping with the Emotional Aspects of Giving Care
Q: HowcanIcopewiththeemotionalaspectsofgivingcaretosomeoneinanemergency?
A: Beinginvolvedintherescueofanotherpersoncancauseawiderangeoffeelings.Thesefeelingsarenormal.Italsoisimportanttoknowthattalkingaboutyourfeelingsishelpfulincopingwiththestressofrespondingtosomeoneinanemergencysituation.Youmaywishtotalkwithfamilymembers,consultwithyourhumanresourcesdepartmentaboutyourcompany’semployeeassistanceprogramorconsultwithyourpersonalhealthcareproviderorclergyforcounselingorreferraltoaprofessional.
Checking the Scene
Q: Whatisaconfinedspace?
A: TheOccupationalSafetyandHealthAdministration(OSHA)considersaconfinedspaceasaspacethat:
■■ Isconfinedbecausetheconfigurationshindertheactivitiesofemployeeswhomustenter,workinandexitthespace.
■■ Haslimitedorrestrictedmeansofentryorexit(e.g.,tanks,vessels,silos,storagebins,hoppers,vaultsandpits).
■■ Isnotdesignedforcontinuousemployeeoccupancy.
Q: IfIamcheckingthesceneforsafety,whatdangeroussituationsmaypreventmefromreachingtheperson?
A: Somescenesmaybeunsafeforobviousreasonssuchasfire,smoke-filledspacesortraffic.Youshouldalsoavoidgoingintoareasthatrequirespecialtrainingandequipment(e.g.,respirators,self-containedbreathingapparatus).Thisincludesapoisonousgasenvironment,possibleexplosiveenvironment(e.g.,naturalgasorpropane),collapsedorpartiallycollapsedstructuresandconfinedareaswithnoventilationorfreshair.
Checking a Conscious PersonQ: Whyisitimportanttoasktheconsciouspersonquestionsthatadvancedmedicalpersonnel
willaskanyway?
A: Aperson’sconditionmayworsen,andheorshemaybeunconsciousbythetimeadvancedmedicalpersonnelarrive.Theperson’sanswerstoyourquestionsmayprovidevaluableinformationthatwouldotherwisebeunavailable.
Q: Whatifapersonisjustbarelyconsciousandgroggyorconfused?
A: Apersonwhoisbarelyconsciousandgroggyorconfusedmayhavealife-threateninginjuryorillness.Call9-1-1orthelocalemergencynumber.Staywiththepersonandmonitorhisorherconditionuntiladvancedmedicalcarearrives.
Checking an Unconscious Adult, Child or Infant
Q: Howlongshouldyoucheckforbreathing?
A: Youshouldcheckforbreathingfornomorethan10seconds.
128 First Aid/CPR/AED | Instructor’s Manual
Q: Whatisnormalbreathing?
A: Normalbreathingisregular,quietandeffortless.Infantshaveperiodicbreathing,sochangesinpatternsofbreathingarenormal.Isolatedorinfrequentgaspingintheabsenceofotherbreathinginanunconsciouspersonmaybeagonal gasps,whichcanoccurafterthehearthasstoppedbeating.Agonalgaspsarenotbreathing.Sincereducingtimewithoutchestcompressionsissoimportant,rescuersshoulddecideinfavorofdoingchestcompressionsifthereisanydoubtthatavictimisbreathing.
Q: Whatifthepersonisface-down?
A: Ifthepersonisface-down,checkforresponsiveness,call9-1-1orthelocalemergencynumber,andthenrollthepersonontohisorherbackandquicklycheckforbreathing.
Q: WhatifIamalone?
A: Ifyouarealone:
■■ CallFirst(call9-1-1orthelocalemergencynumberbeforegivingcare)for:
■{ Anyadultorchildabout12yearsofageorolderwhoisunconscious.
■{ Achildoraninfantwhomyousawsuddenlycollapse.
■{ Anunconsciouschildorinfantwhoyouknowhasheartproblems.
■■ CareFirst(give2minutesofcare,thencall9-1-1orthelocalemergencynumber)for:
■{ Anunconsciouschild(youngerthanaboutage12)whomyoudidnotseecollapse.
■{ Anydrowningvictim.
Q: DoIskipthecheckforbleedingforachildandaninfantifthebreathsdonotgoinontheinitialbreaths?
A: Quicklyscanforseverebleedingasyouaremovingintopositiontogivechestcompressions.
Q: Fordrowningorothernoncardiaccondition(e.g.,hypoxia)inadults,doestheassessmentchange?
A: Yes.Youwouldgive2rescuebreathsaftercheckingforbreathing.
Q: Whatiftherescuebreathsgoinafterremovingtheforeignobject?
A: ContinueCPR.
Q: Forawitnessed,suddencollapseofachild,doestheassessmentchange?
A: Yes.Afteropeningtheairwayandcheckingforbreathing,immediatelybeginCPR,startingwithchestcompressions.
Contaminated Materials
Q: Whatisconsideredtobecontaminatedbyblood?
A: Materialscontaminatedbybloodinclude:
■■ Itemsthatwhencompressedreleasebloodinaliquidorsemi-liquidstate.
■■ Itemscakedwithbloodthatwill,ormay,releasethebloodwhenhandled.
Q: HowdoIdisposeofcontaminatedmaterialsifmyworkplacedoesnothaveabiohazardcontainer?
A: Ifthereisnobiohazardcontaineravailable,adouble-linedplasticbagmaybeused.Aworkplacehealthandsafetyofficerorthelocalhealthdepartmentshouldbecontactedregardingproceduresandregulationsfordisposal.
Q: Whathappenstothebiohazardcontaineraftercontaminatedmaterialshavebeendisposedof?
A: Aworkplaceshouldhaveaplaninplacetoproperlydisposeofcontaminatedmaterial.Someworkplacesworkwiththeirlocalmedicalfacility,publichealthunitoranothercontractingagencyfordisposalofthecontainers.Foradditionalinformation,contactyourworkplacehealthandsafetyofficerorOSHA.
appendix i | Frequently Asked Questions About First Aid, CPR and AED 129
Preventing Disease Transmission
Q: DoIhavetoworryaboutallbodyfluids,evensalivaandtears?
A: Yes.Eventhoughthereisadecreasedriskoftransmissionofinfectiousmaterialsinsalivaandtears,precautionsshouldbetakenwheneverthereiscontactwithaperson’sbodyfluids.
Q: Canthehumanimmunodeficiencyvirus(HIV),thevirusthatcausesacquiredimmunodeficiencysyndrome(AIDS),bespreadbytouchingaperson?
A: No.HIVcannotbespreadbytouchingaperson’sunbrokenskin.HIVisknowntobetransmittedonlythroughexposuretoinfectedblood,semen,vaginalsecretionsandbreastmilk.
Q: HowishepatitisBvirus(HBV)transmitted?
A: HBVismostoftentransmittedthroughunprotecteddirectorindirectcontactwithinfectedbloodorbodyfluids.HBVisnottransmittedbycasualcontact,suchasshakinghands,orbyindirectcontactwithobjectssuchasdrinkingfountainsortelephones.High-riskactivitiesandsituationsinclude:
■■ Sexwithaninfectedpartner.
■■ Injectiondrugusethatinvolvessharingneedles,syringesordrug-preparationequipment.
■■ BirthtoanHBV-infectedmother.
■■ Contactwithbloodoropensoresofaninfectedperson.
■■ Needlesticksorsharpinstrumentexposures.
■■ Sharingitemssuchasrazorsortoothbrusheswithaninfectedperson.
(Source: Centers for Disease Control and Prevention, www.cdc.gov/hepatitis/)
Q: HowishepatitisCvirus(HCV)transmitted?
A: HCVistransmittedprimarilybydirectcontactwithhumanblood,throughsexualcontactandfrommothertochildatbirth.High-riskactivitiesandsituationsinclude:
■■ Injectiondruguse(currentlythemostcommonmeansofHCVtransmissionintheUnitedStates).
■■ Receiptofdonatedblood,bloodproductsandorgans(onceacommonmeansoftransmissionbutnowrareintheUnitedStatessincebloodscreeningbecameavailablein1992).
■■ Needlestickinjuriesinhealthcaresettings.
■■ BirthtoanHCV-infectedmother.
■■ SexwithanHCV-infectedperson(aninefficientmeansoftransmission,sospreadisinfrequent).
■■ Sharingpersonalitemscontaminatedwithinfectiousblood,suchasrazorsortoothbrushes(alsoaninefficientmeansoftransmission).
■■ Otherhealthcareproceduresthatinvolveinvasiveprocedures,suchasinjections(usuallyrecognizedinthecontextofoutbreaks).
(Source: Centers for Disease Control and Prevention, www.cdc.gov/hepatitis/)
Good Samaritan Laws and Consent
Q: Myworkplacedealswithchildren.DoIneedtogetconsentfromachildtogivecare?
A: No.Impliedconsentappliestochildrenwhoobviouslyneedemergencyhelpwhenaparentorguardianisnotpresent.Whenaparentorlegalguardianregistersachildforachild-careprogram,manystatesrequirethatthecaregiverinformtheparentabouttheprogram’spolicyonfirstaid/emergencycareandasktheparenttocompleteaconsentandcontactform.
Checking an Unconscious Infant
Q: HowmuchairshouldIblowwhengivingrescuebreaths?
A: Justenoughtomakethechestclearlyrise.
130 First Aid/CPR/AED | Instructor’s Manual
Q: HowlongshouldIpausebetweentheinitial2rescuebreaths?
A: Youshouldpausejustlongenoughtotakeinairtogivethesecondbreath.
Shock
Q: ShouldIgiveapersonshowingsignalsofshocksomethingtoeatordrink?
A: No.Donotgivethepersonanythingtoeatordrink,eventhoughheorsheislikelytobethirsty.Theperson’sconditionmaybesevereenoughtorequiresurgery,inwhichcaseitisbetterthatthestomachisempty.
Lesson 2: Cardiac Emergencies and CPR
Heart Attacks
Q: I’vereadontheInternetthatifIamhavingaheartattack,IshouldtrycoughCPR.Isthatagoodidea?
A: Todate,thereisinsufficientscientificevidencesupportingself-initiatedCPR(alsoknownascoughCPR).Instead,emphasisshouldbeplacedonrecognizingthesignalsofaheartattackandcalling9-1-1orthelocalemergencynumberimmediately.
Q: IfIsuspectthatIamhavingaheartattack,shouldItakeaspirin?
Takingaspirinshould never take precedenceovercalling9-1-1orthelocalemergencynumberifyouexperiencesignalsofaheartattack.Beforeyouhaveanysignalsofaheartattack,checkwithyourhealthcareprovidertobesurethatitisappropriateforyoutotakeaspirin.Ifso,forapersonhavingaheartattack,takingaspirinaftercalling9-1-1canhaveabeneficialeffect.
Q: Whatifthepersonhavingaheartattacktakesnitroglycerin?
A: Assistaconsciouspersonintakinganyprescribednitroglycerinforaknownheartcondition.Quick-actingformsofnitroglycerinusedinanemergencyincludetablets(asublingualtabletisplacedunderthetongue)andsprays.
CPR
Q: WhatdoIdoifIgettiredwhileperformingCPR?
A: Ifonerespondergetstiredwhilewaitingforadvancedmedicalpersonneltoarrive,heorshemayaskanothertrainedrespondertotakeover.Thesecondrespondershouldbeginwithchestcompressionsandthenbreaths.Ifperforminghands-onlyCPR,thesecondrespondershouldcontinuewithcompressions.
Q: CanIperformCPRonapersonwhoisonabedorcouch?
A: No.Forchestcompressionstobemosteffective,thepersonshouldbeonafirm,flatsurface,withtheperson’sheadonthesamelevelorlowerthantheheart.Ifthepersonisonasoftsurface,suchasabedoracouch,movehimorhertothefirm,flatsurface.
Q: Shouldmyhandpositionbedifferentwhengivingcompressionstoapregnantwoman?
A: Yes.Placeyourhandsslightlyhigheronthechest(towardthewoman’shead).
Q: IfIamdoingchestcompressionsandIhearbonescracking,shouldIstop?
A: RibsmaybebrokenduringCPR.ContinuedoingCPR,butquicklycheckyourhandpositionandthedepthofcompressionstobesurethatyouaredoingthecompressionsproperly.Sometimesthesoundyouhearisnotbonescrackingbutcartilageseparating.Forapersonwhosehearthasstopped,thebenefitsofCPRoutweightherisks,evenwhenbonesbreak.
Q: WhatifIamunable,forwhateverreason,togivebothrescuebreathsandchestcompressions?
A: IfyouareunableforanyreasontoperformfullCPR(chestcompressionswithrescuebreaths),givecontinuouschestcompressionsaftercalling9-1-1orthelocalemergencynumber.ContinuegivingchestcompressionsuntilanothertrainedresponderorEMSpersonneltakeoveroryounoticeanobvioussignoflife.

appendix i | Frequently Asked Questions About First Aid, CPR and AED 131
Q: WhenCPRisrequired,doIneedtobarethechest?
A: Ifyoucangiveeffectivecompressions,youdonotneedtobarethechest.Ifclothinginterfereswithyourabilitytolocatethecorrecthandpositionorgiveeffectivecompressions,thenyoushouldremoveorloosenenoughclothingtoalloweffectivecompressions.
Q: Whatiscommotio cordis?
TheNationalAthleticTrainers’Associationstatesthatcommotio cordisisaconditioncausedbyablowtothechest(directlyovertheheart)thatoccursbetweenheartcontractions.Thebluntforcecausesalethalabnormalheartrhythm.
Q: Whatifthepersonvomits?
A: Ifatanytimethepersonvomits,quicklyrollhimorherontotheside,asyousupporttheheadandneckandrollthebodyasaunit.Aftervomitingstops,wipetheperson’smouthoutusingafingersweep.Rollthepersonontohisorherbackandcontinuegivingcare.
Q: Whatdoes“justbelowthenippleline”meanforfingerplacementwhenperformingCPRonaninfant?
A: Fingersshouldbeinthecenteroftheinfant’schestjustbelowthenippleline(withfingerstowardtheinfant’sfeet).
Q: Whymightthechestnotrise?
A: Thechestmaynotrisebecause:
■■ Theheadisnotinthecorrectposition,causingthetonguetoblocktheairway.
■■ AgoodsealwasnotestablishedwiththeCPRbreathingbarrier.
■■ Therescuerblowstooquickly.
■■ Theairwayisblockedbyanobject(thepersonmaybechoking).
Q: WhatiftherescuebreathsgoinafterIremoveaforeignobject?
A: ContinueCPR.
Q: WhenshouldIuseanAED?
A: UseanAEDassoonasonebecomesavailable.Ifalone,gettheAEDactivatedandinuseasfastaspossible.IfasecondresponderbringstheAED,minimizeinterruptionofCPRuntiltheAEDbeginsanalysis.
Lesson 3: AED
Q. Ifthelocationofthepadsonthechestisreversed,willtheAEDstillwork?
A. Yes.Iftheplacementofthepadsisreversed,theAEDwillstillworkproperly.
Q. Shouldthepadsberemovedand/ortheAEDturnedoffiftheAEDprompts,“Noshockadvised,continueCPR”(orsimilar)?
A. No.Thepadsshouldnotberemoved,norshouldtheAEDbeturnedoff.ItispossiblethattheAEDwilltellyouthatadditionalshocksareneeded.
Q. ShouldIusepediatricAEDpadsonanadult?
A. No.PediatricAEDpadsshould notbeusedonanadult,astheymaynotdeliverenoughenergyfordefibrillation.
Q. DoAEDsneedregularmaintenance?
A. Yes.AllAEDsrequireregularmaintenance.Maintenanceincludescheckingandchangingbatteriesandelectrodecablesandpads.Alwaysfollowthemanufacturer’sinstructionsformaintenanceoftheAEDatyourworksite.
132 First Aid/CPR/AED | Instructor’s Manual
Q. CanAEDsbeusedsafelyintherainandsnow?
A. AEDscanbeusedinavarietyofenvironmentsincludingrain,snowandice.WhenusinganAED,alwaysfollowthemanufacturer’srecommendations.ThepersonshouldnotbeinapoolorpuddleofwaterwhentheresponderisoperatinganAED.Ifitisraining,ensurethatthepersonisasdryaspossibleandshelteredfromtherain.Minimizedelayingdefibrillationwhenprovidingforadryenvironment.Wipetheperson’schest(andbackofasmallerchild,ifusinganterior/posteriorpadplacement).ManufacturersstatethatAEDsaresafewhenallprecautionsandoperatinginstructionsarefollowed.
Q. CanIdefibrillatesomeonewhohasapacemakerorotherimplantablecardiacdevice?
A. Yes.Ifanimplantedcardiacdeviceisvisibleoryouknowthatthepersonhassuchacardiacdevice,donotplacethedefibrillationpadsdirectlyovertheimplanteddevice.Thismayinterferewiththedeliveryoftheshock.Adjustpadplacementifnecessary,andcontinuetofollowtheestablishedprotocol.
Q. Arethereanyspecialconsiderationswhenplacingelectrodepadsonafemale?
A. Ifthefemaleiswearingabra,removeitbeforeplacingtheelectrodepads.Asforallindividuals,placeoneelectrodepadonherupperrightchestandoneonherlowerleftsideunderherbreast.
Q. CanIdefibrillateapregnantwoman?
A. Yes.Defibrillationshockstransfernosignificantelectriccurrenttothefetus.Localprotocolsandmedicaldirectionshouldbefollowed.
Q. CanAEDsbeusedonyoungchildrenandinfants?
A. CertainAEDequipmentandelectrodepadsthatarespecificallydesignedtodeliverlowerenergylevelsforpediatricpersons(childrenandinfants)havebeenapprovedbytheFoodandDrugAdministration(FDA)andarerecommendedforuseoninfantsincardiacarrestbytheAmericanAcademyofPediatrics(AAP).AEDsareappropriateforuseonanyoneincardiacarrest,regardlessofage,includingchildrenasyoungasnewborns.Whenpediatricsettingsorpadsareavailable,respondersshouldusethemwhentreatingchildrenandinfants.Ifpediatricequipmentisnotavailable,respondersmayuseAEDsconfiguredforadults.AnAEDshouldbeusedalongwithhigh-qualityCPR.
Q. WherecanIpurchaseanAEDformycompany,schoolorhome?
A. ContactthelocalAmericanRedCrosschapterorgotheRedCrossStore(redcrossstore.org)forinformationonhowtopurchaseanAED.
Q: DoIneedtobetrainedinAED?
A. ThestepsinapplyingandusinganAEDaresimple;however,trainingisimportanttoknowwhentousetheAEDandthesafetyprecautionsassociatedwiththeAED.
Lesson 4: Breathing Emergencies
Conscious Choking—Adult and Child
Q: WhatshouldIdoifaconsciouschokingadultorchildbecomesunconscious?
A: Ifthepersonbecomesunconscious,carefullylowerthepersontothefloorandbeginCPR,startingwithcompressions.Beforeattemptingbreaths,lookforanobjectand,ifseen,removeit.ContinueCPR.
Q: ShouldIcall9-1-1orthelocalemergencynumberforaconsciouschokingperson?
A: Yes.Evenifaforeignobjectdoescomeout,thereisachancethattissueintheperson’sairwaymayswellandcausefurthercomplications.Iftheobjectdoesnotcomeout,thepersonmaybecomeunconsciousandneedadditionalcare.
appendix i | Frequently Asked Questions About First Aid, CPR and AED 133
Q: WhatifIamaloneandchoking?
A: Call9-1-1orthelocalemergencynumber,evenifyoucannotspeak,anddonothangupthephone.Youcangiveyourselfabdominalthrusts.Bendoverafirmobject,suchasthebackofachairorarailing,andpressyourabdomenagainstit.Avoidasharpedgeorcornerthatmighthurtyou.
Q: WhyshouldIgiveacombinationofbackblowsandabdominalthruststoaconsciousadultorchildwhoischoking?
A: Basedonthe2010ConsensusonScienceforCPRandEmergencyCardiovascularCare,acombinationofbackblowsandabdominalthrustsismoreeffectiveinclearinganobstructedairwaythanasingletechnique.
Q: Whatifthechokingpersonispregnant,toolargetoreacharoundorinawheelchairandcannotstand?
A: Ifapersonispregnant,toolargeforyoutostandbehindandreacharoundhisorherabdomenorinawheelchair,givechestthrusts.Togivechestthrusts,makeafistwithonehand,grabyourfistwiththeotherhand,placethethumbsideofyourfistonthecenteroftheperson’sbreastboneandgivequickthrustsintothechest.
Q: WhatifthepersonchokingismuchshorterthanIam?
A: Youmayhavetoadjustandgetdownononekneetogivebackblowsandabdominalthrusts.
Q: HowhardshouldIperformabdominalthrustsonachild?
A: Youshouldthrusthardenoughtoproduceanartificialcoughthatwilldislodgetheobject.
Q: Whatiftheobjectdoesnotcomeout?
A: Continuecyclesof30chestcompressions,objectcheck/removaland2rescuebreathsuntiltheobjectisremovedandthechestclearlyriseswithrescuebreaths,youareabletogetbreathsinandseethechestclearlyrise,thepersonstartsbreathingonhisorherownoradvancedmedicalpersonneltakeover.
Conscious Choking—Infant
Q: WhatshouldIdoifaconsciouschokinginfantbecomesunconscious?
A: Iftheinfantbecomesunconscious,carefullyplacetheinfantonafirm,flatsurfaceandbeginCPR,startingwithcompressions.Beforeattemptingbreaths,lookforanobjectand,ifseen,removeit.ContinueCPR.
Q: ShouldIcall9-1-1orthelocalemergencynumberforaconsciouschokinginfant?
A: Yes.Evenifaforeignobjectdoescomeout,thereisachancethattissueintheinfant’sairwaymayswellandcausefurthercomplications.Iftheobjectdoesnotcomeout,theinfantmaybecomeunconsciousandneedadditionalcare.
Q: Whatiftheobjectdoesnotcomeout?
A: Continuecyclesof30chestcompressions,objectcheck/removaland2rescuebreathsuntiltheobjectisremovedandthechestclearlyriseswithrescuebreaths,youcangetairintotheinfantandseethechestclearlyrise,theinfantstartsbreathingonhisorherownoradvancedmedicalpersonneltakeover.
134 First Aid/CPR/AED | Instructor’s Manual
Lesson 5: Sudden Illness
Fainting
Q: WhatcaredoIgiveforsomeonewhohasfainted?
A: Positionthepersononaflatsurface.Monitortheperson’sbreathingandconsciousness.Loosenanyrestrictiveclothing.Donotgivethepersonanythingtoeatordrink.Donotsplashwateronthepersonorslaphisorherface.Call9-1-1orthelocalemergencynumber.
Diabetic Emergency
Q: HowdoIrecognizeifsomeonewhoisadiabetichastoomuchsugar(hyperglycemia)ornotenoughsugar(hypoglycemia)?
A: Thesignalsforthetwoconditionsaresimilar.Thefirstaidcaregivenisthesameforbothconditions.Iftheproblemishypoglycemia,theperson’sconditioncangetworserapidly,andadministeringsugarintheformofseveralglucosetabletsorglucosepaste,a12-ounceservingoffruitjuice,milk,nondietsoftdrinkortablesugardissolvedinaglassofwatercanimprovetheperson’scondition.Iftheproblemishyperglycemia,theperson’sconditionwillgetgraduallyworse.Givingtheseformsofsugarwillnotspeedupthedeteriorationsignificantly.Ifthepersonisconsciousandabletoswallow,thereistimetogetmedicalcareiftheperson’sconditiondoesnotimprovequickly.
Seizures
Q: ShouldItrytoholddownsomeonewhoishavingaseizure?
A: No.Donottrytoholddownapersonwhoishavingaseizure.Yourprimarycareobjectiveistoprotectthepersonfromanyfurtherinjury.Keepthepersonfromstrikinganynearbyobjectsandkeeptheairwayopenaftertheseizurehasended.
Q: WhenshouldIcall9-1-1orthelocalemergencynumberforsomeonehavingaseizure?
A: Althoughmostseizuresarenotlifethreatening,calladvancedmedicalcareiftheseizurelastsmorethan5minutes,thepersonhasrepeatedseizureswithnosignsofslowingdown,youareuncertainaboutthecauseorthisistheperson’sfirstseizure,thepersonispregnantordiabetic,thepersonisachildoraninfant,theseizuretakesplaceinthewater,thepersonfailstoregainconsciousnessaftertheseizure,thepersonisachildoraninfantwhoexperiencedafebrileseizurebroughtonbyahighfever,thepersoniselderlyandcouldhavesufferedastroke,orthepersonbecomesinjuredorshowsotherlife-threateningconditions.
Q: ShouldIputsomethingintheperson’smouthtokeephimorherfrombitingthetongue?
A: No.Donotplaceanythingintheperson’smouthorbetweenhisorherteeth.Placinganobjectintheperson’smouthisineffectivebecausemosttonguebitingoccursatthebeginningofaseizureandtryingtoplaceanobjectinthemouthmaycausemouthinjuriesoraspiration.Youmaybecomeinjuredwhileplacinganobjectinaperson’smouth,aswell.
Q: Whatisafebrileseizure?
A: Febrileseizuresareseizuresbroughtonbyarapidincreaseinbodytemperature.Theyaremostcommoninchildrenyoungerthanage5.
appendix i | Frequently Asked Questions About First Aid, CPR and AED 135
Stroke
Q: Whataretheriskfactorsforstroke?
A: Riskfactorsforstrokearesimilartothoseforheartdisease.Themostimportantriskfactorsforstrokethatcanbecontrolledarehighbloodpressure,highbloodcholesterol,poordiet,physicalinactivityandobesity,diabetesandsmoking.Someriskfactorsarebeyondyourcontrol,suchasage,gender,familyhistoryofstroke,raceorpriorstroke,transientischemicattack(TIA)andheartattack.
Q: Isthereanytreatmentforstroke?
A: Today,medicaltreatmentsareavailablethatcanreduceorevenpreventthelong-termeffectsofastroke.Itisvitaltogivethesetreatmentsassoonaspossibleafterastrokehasoccurred.Theemphasisshouldbeoncalling9-1-1orthelocalemergencynumberimmediatelyifyoususpectthatsomeoneishavingastroke.
Poisoning
Q: ShouldItrytoinducevomitingifapersonhasingestedapoison?
A: No.Youshouldcall9-1-1ortheNationalPoisonControlCenter(PCC)hotlineat800-222-1222.TheemergencymedicaldispatcherorcalltakerorthePCCoperatorwillknowtheproperactionsthatshouldbetaken,dependingonthetypeofpoisonthatwasingested.
Q: ShouldIgiveapersonwhoingestedapoisonwaterormilktodrink?
A: No.DonotgiveanythingbymouthunlessadvisedtobyamedicalprofessionalorthePCC.
Q: ShouldIgiveapersonwhoingestedapoisonactivatedcharcoal?
A: No.Youshouldcall9-1-1orthePCChotlineat800-222-1222.TheemergencymedicaldispatcherorcalltakerorthePCCoperatorwillknowtheproperactionsthatshouldbetaken,dependingonthetypeofpoisonthatwasingested.
Allergic Reaction
Q: WhatcareshouldIgivetosomeonewhohastroublebreathingbecauseofanallergicreaction?
A: Thepersonmaybeexperiencingatypeofsevereallergicreactioncalledanaphylaxis.Call9-1-1orthelocalemergencynumberimmediately,placethepersoninacomfortablepositionforbreathing,andcomfortandreassurethepersonuntiladvancedmedicalpersonneltakeover.Insomecases,youmayneedtoassistthepersoninusinghisorherepinephrineauto-injector.
Lesson 6: Environmental Emergencies
Heat-Related Illnesses
Q: Canaheat-relatedillnessoccuronacoldday?
A: Yes,ifapersonhasbeenexercisingorperformingastress-relatedactivitythatmaycausethebodytolosefluids.
Q: Shouldyougiveasportsdrinktoapersonwhoissufferingfromheatcrampsorheatexhaustion?
A: Yes.Giveapersonexperiencingheatcramps,dehydrationorheatexhaustionsmallamountsofanelectrolyte/carbohydrate-containingfluid,suchasacommercialsportsdrink,fruitjuiceormilk,aslongasheorsheisconsciousandabletoswallow.Watermayalsobegiven.Forheatexhaustion,giveabout4ouncesevery15minutes.
Cold-Related Emergencies
Q: Shouldyourubafrostbittenbodyparttowarmitup?
A: No.Neverrubabodypartthatmaybefrostbitten.Rubbingcancauseextensive,painfulsofttissuedamage.Donotattempttore-warmthefrostbittenareaifthereisachancethatitcouldrefreezeorifyouareclosetoamedicalfacility.
136 First Aid/CPR/AED | Instructor’s Manual
Q: ShouldIgivefluidstodrinkthatcontainalcoholorcaffeinetoapersonwhoisinacoldenvironment?
A: No.Alcoholandcaffeineinterferewiththebody’snormalresponsetocoldandmakeapersonmoresusceptibletohypothermia.
Lesson 7: Soft Tissue Injuries
Applying an Ice Pack
Q: CanIuseareusablegelpackonasofttissueinjuryifIdonothaveanicepack?
A: Anicepack(amixtureoficeandcoldwater)ispreferred.Single-use,chemicalcoldpacksareeffective,butreusablegelpacksarelesseffectiveinreducingswellinginasofttissueinjury.
Controlling External Bleeding
Q: Ifnosterileorcleandressingsareavailable,whatothermaterialscouldIusetocoverableedingwound?
A: Othermaterials,suchascleanwashcloths,towelsorarticlesofclothing,canbeusedtocoverableedingwound.Materialsthatarecleanandabsorbentarebest.Donotusepapertowels,tissues,cottonballsorothermaterialthatcanteareasily.
Q: WhatifIdonothaveanyfresh,runningtapwatertoirrigateaminorwound?
A: Youcanuseanysourceofcleanwatertoirrigateaminorwound,butcleantapwater(underpressure)ismoreeffectiveatremovingdirtanddebris.
Q: Ifdisposableglovesarenotavailable,shouldIstillgivecaretosomeonewhoisbleedingseverely?
A: Althoughtheriskofdiseasetransmissionislow,itexists,andthereforethisshouldbeapersonaldecision.Wearingglovesisrecommended,butyoumaychoosetogivecarewithoutthem.Youcoulduseothermaterials,suchasabulkydressing.Abarriershouldbeusedtolimityourcontactwiththeperson’sblood.Ifconsciousandable,thepersoncanassistinapplyingdirectpressuretothewoundwithhisorherhand.Avoidtouchingyourfaceandotherpartsofyourbodywhengivingcare.Alwayswashyourhandsthoroughlywithsoapandwaterimmediatelyaftergivingcare.Ifgloveswereunavailableandyougavecareinaworkplaceemergencysituation,reportthesituationtoyoursupervisorasapossibleexposuretoinfectiousdiseases.
Q: HowdoIknowifawoundneedsstitches?
A: Stitchesareoftenneededwhentheedgesoftheskindonotfalltogether,whenthewoundisover½inchlongorwhenthewoundwouldleaveanobviousscar,suchasontheface.Controlthebleedingandhavethepersonseekadvancedmedicalcare.
Q: Shouldatourniquetbeusedtocontrolbleeding?
A: Atourniquetisatightbandplacedaroundanarmoralegtoconstrictbloodvessels,tostopbloodflowtoawound.Becauseofthepotentialforadverseeffects,atourniquetshouldbeusedonly as a last resortincasesofdelayed-careordelayedemergencymedicalservices(EMS)responsesituationswhendirectpressuredoesnotstopthebleedingoryouarenotabletoapplydirectpressure.
Q: Whydowenolongerusepressurepointsorelevationtostopbleeding?
A: Moreemphasisisbeingplacedondirectpressureasitisthemosteffectivemethodofcontrollingexternalbleeding.Thescientificevidencedoesnotsupporttheuseofpressurepointsorelevationtocontrolexternalbleeding.Usingthesemethodsmaydistracttheresponderfromapplyingtheproven,effectivetechniqueofdirectpressure.
appendix i | Frequently Asked Questions About First Aid, CPR and AED 137
Burns
Q: ShouldIputwateronanelectricalburn?
A: Yes.Careforelectricalburnsisthesameascareforthermal(heat)burns(coldwater).
Q: CanIputointmentorothermedicationsonaburn?
A: No.Donotputanykindofointmentorsalveonanythingotherthanaveryminorburn.Ointmentsdonotrelievepainandcanalsosealinheat.Donotusehomeremedies,suchasbutterorpetroleumjelly(whichcancauseinfection),onaburn.Coldwaterisbesttocooltheburnandreducepain.
Q: Iftheperson’sburnedclothingisstuckonhisorherbody,shouldItrytoremoveit?
A: No.Donottrytoremoveanyclothingthatisstickingtothepersonbecauseyoucouldfurtherexposethewoundtoinfection.
Lesson 8: Injuries to Muscles, Bones and Joints
Muscle, Bone and Joint Injuries
Q: Whydoyounotcoverthefracturesitewithbandageswhensplintingafracture?
A: Excessivepressureappliedtoafracturesitecancomplicatetheinjury.Itisunnecessarytocoverafractureunlessthereisbleeding.
Q: Howdoyoucontrolbleedingwhenitisassociatedwithanopenfracture?
A: Applydressingsandlightpressurearoundtheareaoftheopenwoundtocontrolbleeding.Donotmovetheinjuredarea.
Head, Neck and Spinal InjuriesQ: IfIsuspectthatapersonhasahead,neckorspinalinjuryandthepersonstartstovomit,what
doIdo?
A: Ifthepersonbeginstovomit,rollhimorherononesidetokeeptheairwayclear.Tominimizemovementoftheperson’shead,neckandspine,tworespondersshouldplacethepersoninthisposition,ifpossible.Onerespondershouldhelpmovethepersonwhiletheotherkeepsthehead,neckandspineinline.
SplintingQ: Whyisitbettertoleavetheperson’sshoeonwhensplintinganankle?
A: Theshoecanactasasplintandminimizeswelling.Also,removingtheshoemayrequiremanipulatingtheankleandshouldbedoneonlybyhealthcareproviders.

appendix J | Written exams, answer Sheets and answer Keys 139
appendix J
■■ American Red Cross Before Giving Care Exam A
■■ American Red Cross Before Giving Care Exam B
■■ American Red Cross Before Giving Care Answer Sheet
■■ American Red Cross CPR—Adult Exam A
■■ American Red Cross CPR—Adult Exam B
■■ American Red Cross CPR—Child Exam A
■■ American Red Cross CPR—Child Exam B
■■ American Red Cross CPR—Infant Exam A
■■ American Red Cross CPR—Infant Exam B
■■ American Red Cross CPR—Adult, Child and Infant Exam A
■■ American Red Cross CPR—Adult, Child and Infant Exam B
■■ American Red Cross CPR Answer Sheet
■■ American Red Cross AED—Adult or Child Exam A
■■ American Red Cross AED—Adult or Child Exam B
■■ American Red Cross AED Answer Sheet
■■ American Red Cross First Aid Exam A
■■ American Red Cross First Aid Exam B
■■ American Red Cross First Aid Answer Sheet
■■ Answer Keys (see back of book)
Written exams, ansWer sheets and ansWer Keys
140 First aid/CpR/aed | instructor’s Manual
—Do not write on this exam—
American Red Cross Before Giving Care Exam A
IMPORTANT: Read all instructions before beginning the exam.
INSTRUCTIONS: Do not write on this exam. Mark all answers in pencil on the separate answer sheet as directed by your instructor. Read each question carefully. Then choose the best answer and fill in that circle completely on the answer sheet. If you wish to change an answer, erase your first answer entirely. Return this exam with your answer sheet to your instructor when you are finished.
EXAMPLE
ANSWER SHEET
xx. a b c d
xx. Why does the American Red Cross teach this course?
a. To help people recognize and respond appropriately in an emergency
b. To help people make appropriate decisions when they see an emergency
c. To enable people to give immediate care to a suddenly injured or ill person until more advanced medical care takes over
d. All of the above
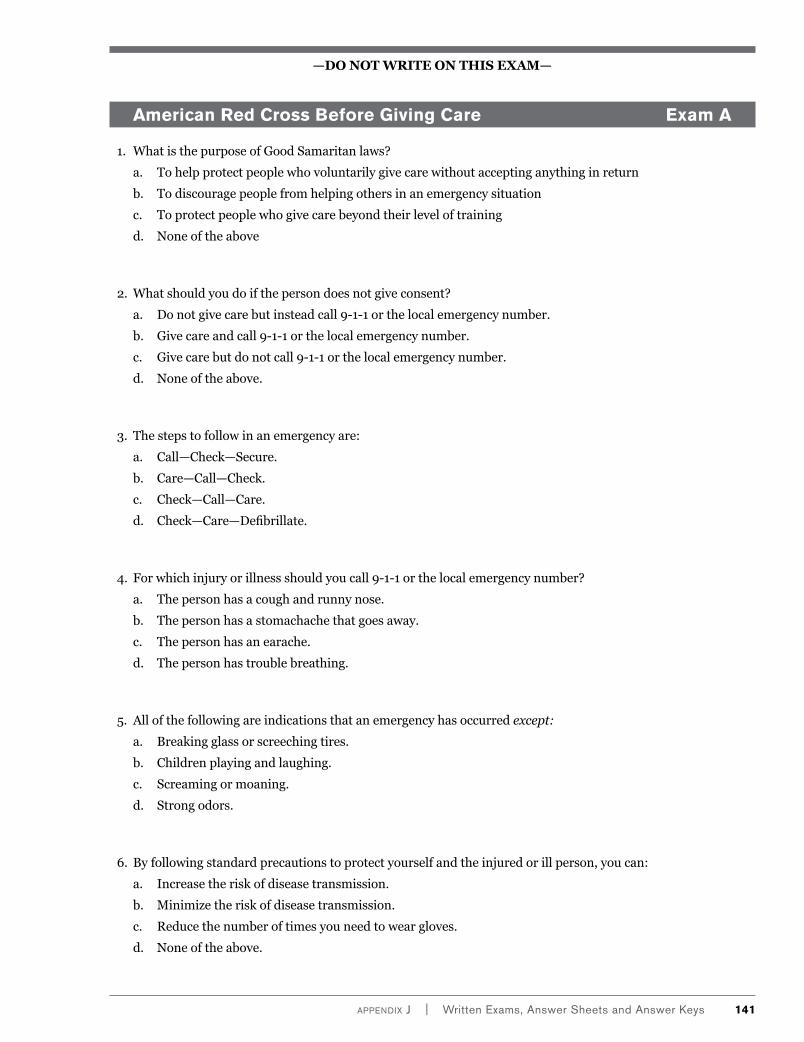
appendix J | Written exams, answer Sheets and answer Keys 141
—Do not write on this exam—
American Red Cross Before Giving Care Exam A
1. What is the purpose of Good Samaritan laws?
a. To help protect people who voluntarily give care without accepting anything in return
b. To discourage people from helping others in an emergency situation
c. To protect people who give care beyond their level of training
d. None of the above
2. What should you do if the person does not give consent?
a. Do not give care but instead call 9-1-1 or the local emergency number.
b. Give care and call 9-1-1 or the local emergency number.
c. Give care but do not call 9-1-1 or the local emergency number.
d. None of the above.
3. The steps to follow in an emergency are:
a. Call—Check—Secure.
b. Care—Call—Check.
c. Check—Call—Care.
d. Check—Care—Defibrillate.
4. For which injury or illness should you call 9-1-1 or the local emergency number?
a. The person has a cough and runny nose.
b. The person has a stomachache that goes away.
c. The person has an earache.
d. The person has trouble breathing.
5. All of the following are indications that an emergency has occurred except:
a. Breaking glass or screeching tires.
b. Children playing and laughing.
c. Screaming or moaning.
d. Strong odors.
6. By following standard precautions to protect yourself and the injured or ill person, you can:
a. Increase the risk of disease transmission.
b. Minimize the risk of disease transmission.
c. Reduce the number of times you need to wear gloves.
d. None of the above.
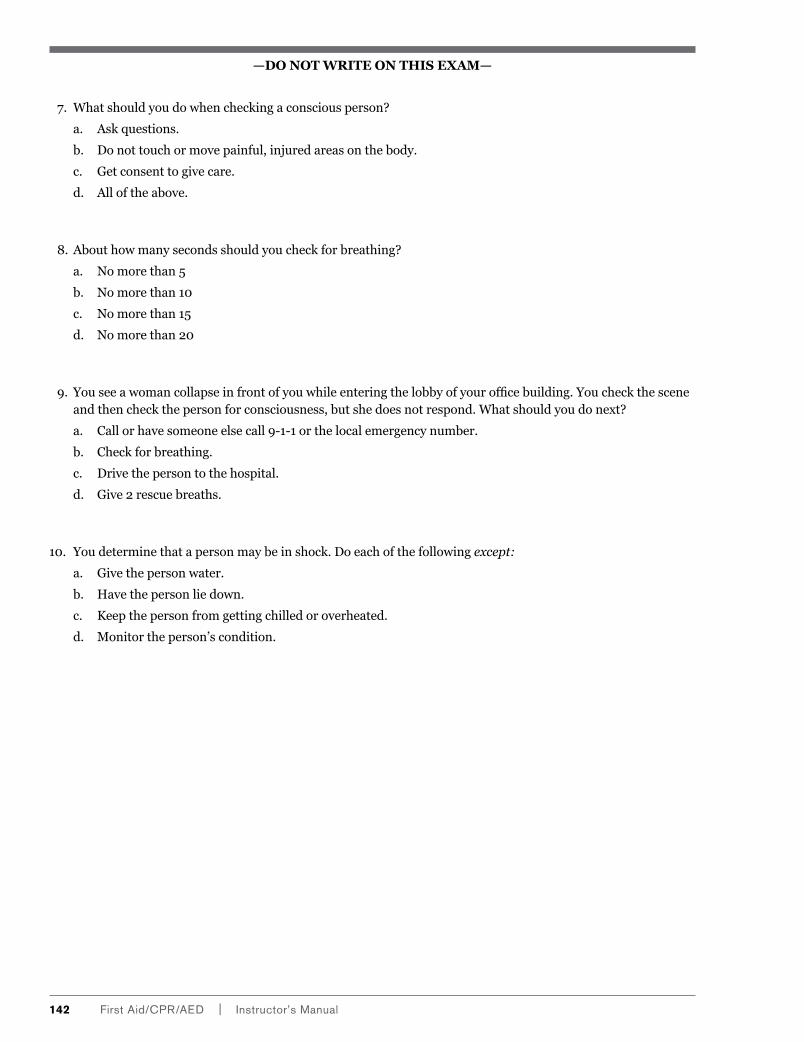
142 First aid/CpR/aed | instructor’s Manual
—Do not write on this exam—
7. What should you do when checking a conscious person?
a. Ask questions.
b. Do not touch or move painful, injured areas on the body.
c. Get consent to give care.
d. All of the above.
8. About how many seconds should you check for breathing?
a. No more than 5
b. No more than 10
c. No more than 15
d. No more than 20
9. You see a woman collapse in front of you while entering the lobby of your office building. You check the scene and then check the person for consciousness, but she does not respond. What should you do next?
a. Call or have someone else call 9-1-1 or the local emergency number.
b. Check for breathing.
c. Drive the person to the hospital.
d. Give 2 rescue breaths.
10. You determine that a person may be in shock. Do each of the following except:
a. Give the person water.
b. Have the person lie down.
c. Keep the person from getting chilled or overheated.
d. Monitor the person’s condition.
appendix J | Written exams, answer Sheets and answer Keys 143
—Do not write on this exam—
American Red Cross Before Giving Care Exam B
IMPORTANT: Read all instructions before beginning the exam.
INSTRUCTIONS: Do not write on this exam. Mark all answers in pencil on the separate answer sheet as directed by your instructor. Read each question carefully. Then choose the best answer and fill in that circle completely on the answer sheet. If you wish to change an answer, erase your first answer entirely. Return this exam with your answer sheet to your instructor when you are finished.
EXAMPLE
ANSWER SHEET
xx. a b c d
xx. Why does the American Red Cross teach this course?
a. To help people recognize and respond appropriately in an emergency
b. To help people make appropriate decisions when they see an emergency
c. To enable people to give immediate care to a suddenly injured or ill person until more advanced medical care takes over
d. All of the above
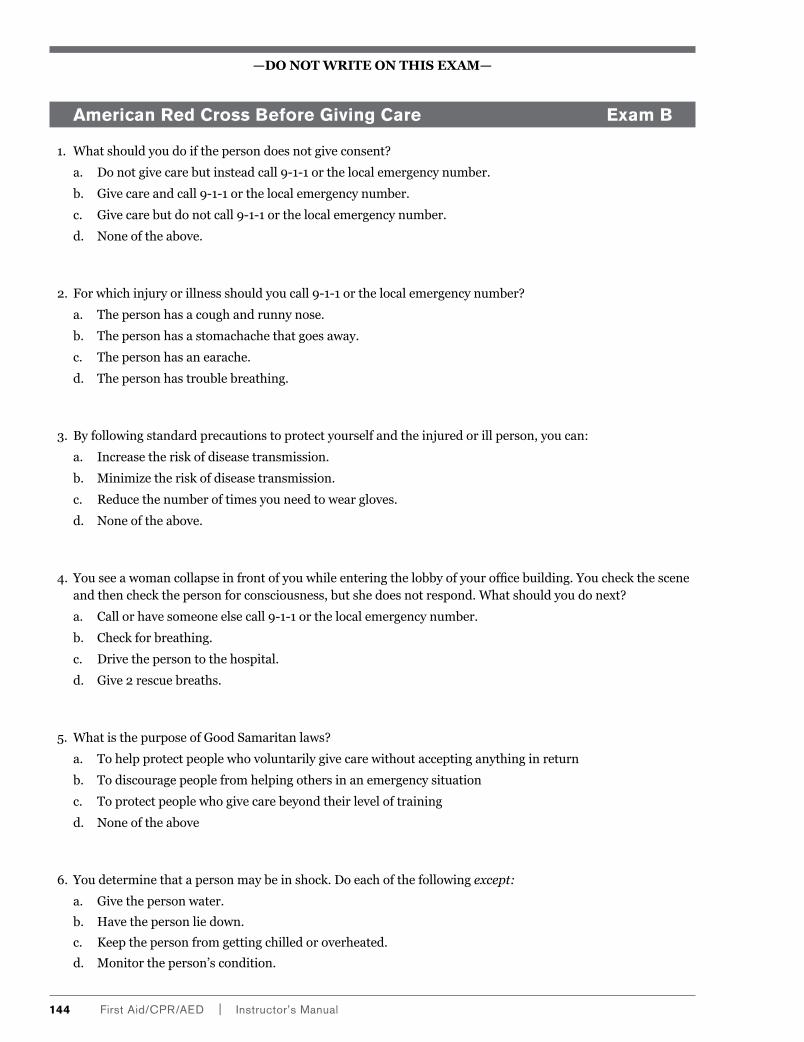
144 First aid/CpR/aed | instructor’s Manual
—Do not write on this exam—
American Red Cross Before Giving Care Exam B
1. What should you do if the person does not give consent?
a. Do not give care but instead call 9-1-1 or the local emergency number.
b. Give care and call 9-1-1 or the local emergency number.
c. Give care but do not call 9-1-1 or the local emergency number.
d. None of the above.
2. For which injury or illness should you call 9-1-1 or the local emergency number?
a. The person has a cough and runny nose.
b. The person has a stomachache that goes away.
c. The person has an earache.
d. The person has trouble breathing.
3. By following standard precautions to protect yourself and the injured or ill person, you can:
a. Increase the risk of disease transmission.
b. Minimize the risk of disease transmission.
c. Reduce the number of times you need to wear gloves.
d. None of the above.
4. You see a woman collapse in front of you while entering the lobby of your office building. You check the scene and then check the person for consciousness, but she does not respond. What should you do next?
a. Call or have someone else call 9-1-1 or the local emergency number.
b. Check for breathing.
c. Drive the person to the hospital.
d. Give 2 rescue breaths.
5. What is the purpose of Good Samaritan laws?
a. To help protect people who voluntarily give care without accepting anything in return
b. To discourage people from helping others in an emergency situation
c. To protect people who give care beyond their level of training
d. None of the above
6. You determine that a person may be in shock. Do each of the following except:
a. Give the person water.
b. Have the person lie down.
c. Keep the person from getting chilled or overheated.
d. Monitor the person’s condition.
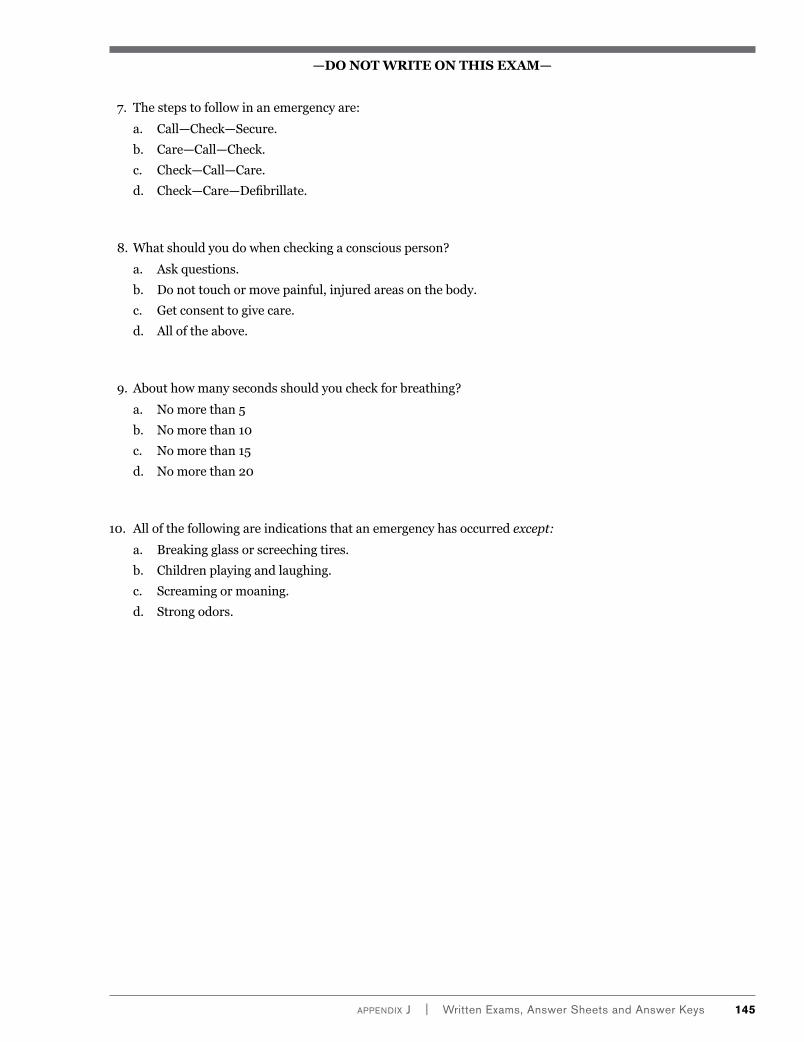
appendix J | Written exams, answer Sheets and answer Keys 145
—Do not write on this exam—
7. The steps to follow in an emergency are:
a. Call—Check—Secure.
b. Care—Call—Check.
c. Check—Call—Care.
d. Check—Care—Defibrillate.
8. What should you do when checking a conscious person?
a. Ask questions.
b. Do not touch or move painful, injured areas on the body.
c. Get consent to give care.
d. All of the above.
9. About how many seconds should you check for breathing?
a. No more than 5
b. No more than 10
c. No more than 15
d. No more than 20
10. All of the following are indications that an emergency has occurred except:
a. Breaking glass or screeching tires.
b. Children playing and laughing.
c. Screaming or moaning.
d. Strong odors.
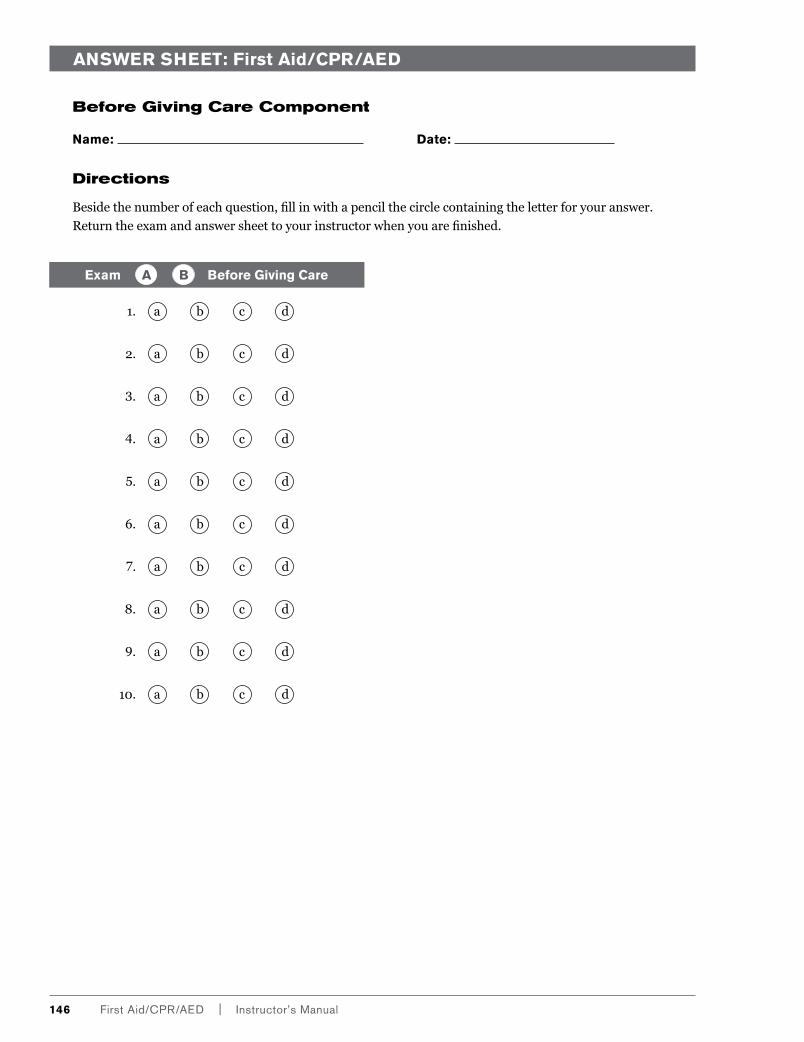
146 First aid/CpR/aed | instructor’s Manual
ANSWER SHEET: First Aid/CPR/AED
Before Giving Care Component
Name: Date:
Directions
Beside the number of each question, fill in with a pencil the circle containing the letter for your answer.
Return the exam and answer sheet to your instructor when you are finished.
Exam Before Giving Care A B
1. a b c d
2. a b c d
3. a b c d
4. a b c d
5. a b c d
6. a b c d
7. a b c d
8. a b c d
9. a b c d
10. a b c d
appendix J | Written exams, answer Sheets and answer Keys 147
—Do not write on this exam—
American Red Cross CPR—Adult Exam A
IMPORTANT: Read all instructions before beginning the exam.
INSTRUCTIONS: Do not write on this exam. Mark all answers in pencil on the separate answer sheet as directed by your instructor. Read each question carefully. Then choose the best answer and fill in that circle completely on the answer sheet. If you wish to change an answer, erase your first answer entirely. Return this exam with your answer sheet to your instructor when you are finished.
EXAMPLE
ANSWER SHEET
xx. a b c d
xx. Why does the American Red Cross teach this course?
a. To help people recognize and respond appropriately in an emergency
b. To help people make appropriate decisions when they see an emergency
c. To enable people to give immediate care to a suddenly injured or ill person until more advanced medical care takes over
d. All of the above
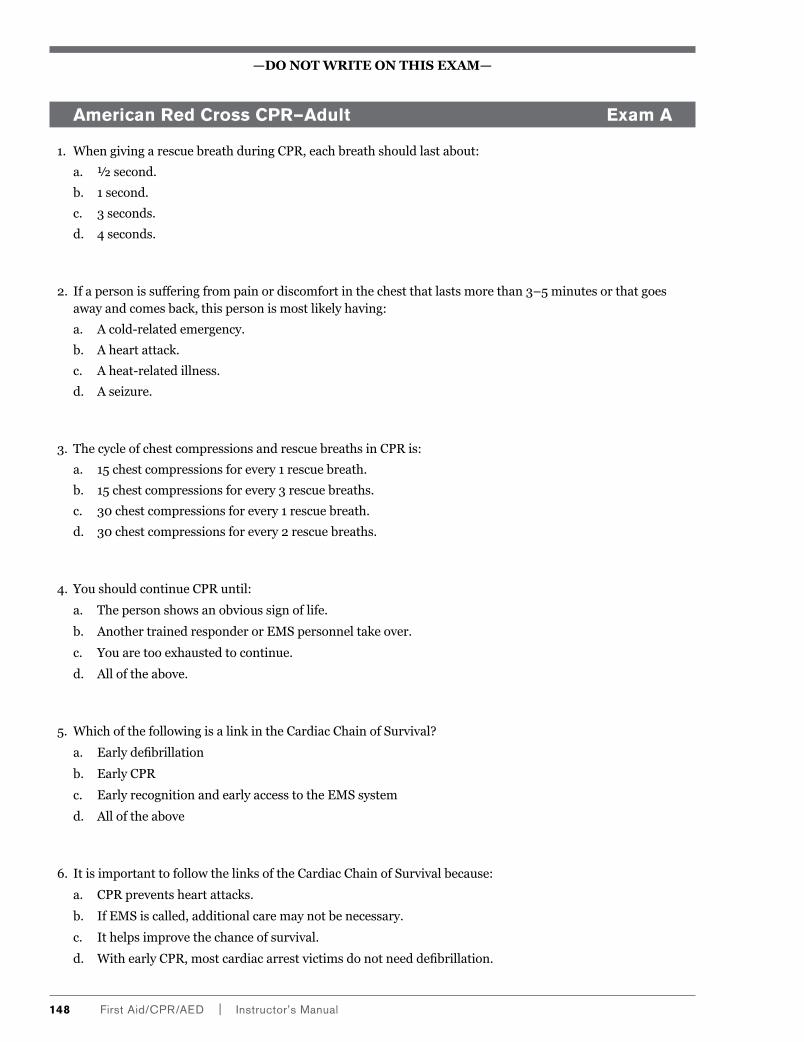
148 First aid/CpR/aed | instructor’s Manual
—Do not write on this exam—
American Red Cross CPR—Adult Exam A
1. When giving a rescue breath during CPR, each breath should last about:
a. ½ second.
b. 1 second.
c. 3 seconds.
d. 4 seconds.
2. If a person is suffering from pain or discomfort in the chest that lasts more than 3–5 minutes or that goes away and comes back, this person is most likely having:
a. A cold-related emergency.
b. A heart attack.
c. A heat-related illness.
d. A seizure.
3. The cycle of chest compressions and rescue breaths in CPR is:
a. 15 chest compressions for every 1 rescue breath.
b. 15 chest compressions for every 3 rescue breaths.
c. 30 chest compressions for every 1 rescue breath.
d. 30 chest compressions for every 2 rescue breaths.
4. You should continue CPR until:
a. The person shows an obvious sign of life.
b. Another trained responder or EMS personnel take over.
c. You are too exhausted to continue.
d. All of the above.
5. Which of the following is a link in the Cardiac Chain of Survival?
a. Early defibrillation
b. Early CPR
c. Early recognition and early access to the EMS system
d. All of the above
6. It is important to follow the links of the Cardiac Chain of Survival because:
a. CPR prevents heart attacks.
b. If EMS is called, additional care may not be necessary.
c. It helps improve the chance of survival.
d. With early CPR, most cardiac arrest victims do not need defibrillation.
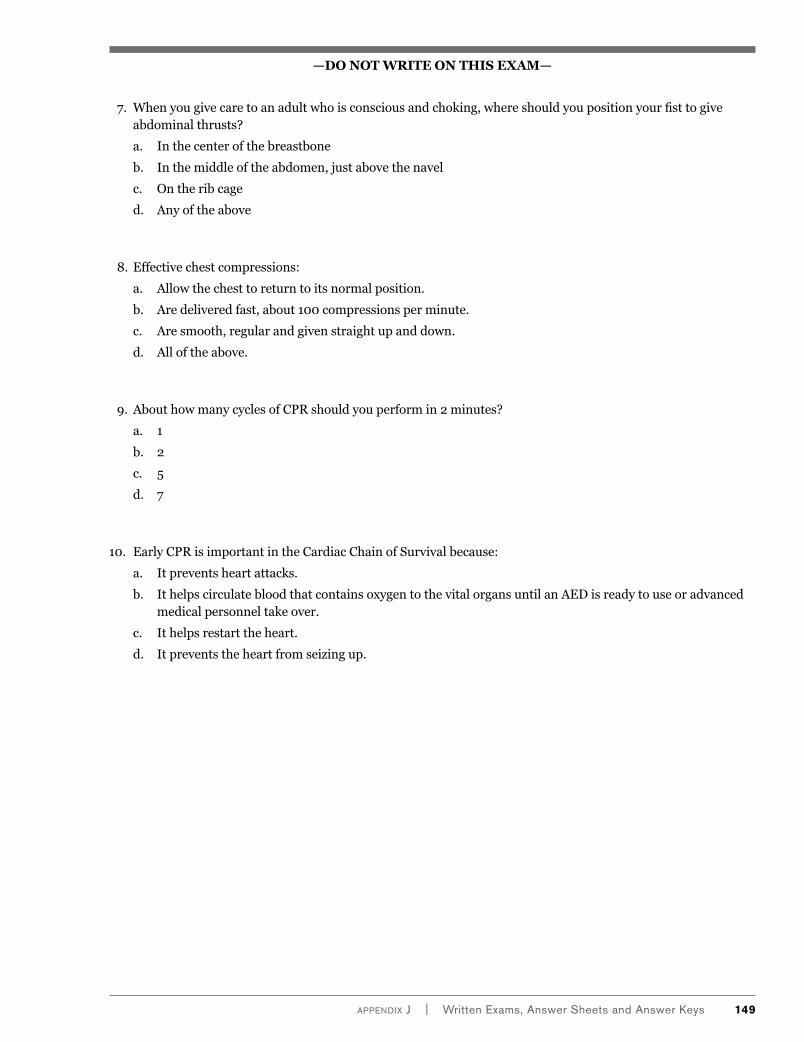
appendix J | Written exams, answer Sheets and answer Keys 149
—Do not write on this exam—
7. When you give care to an adult who is conscious and choking, where should you position your fist to give abdominal thrusts?
a. In the center of the breastbone
b. In the middle of the abdomen, just above the navel
c. On the rib cage
d. Any of the above
8. Effective chest compressions:
a. Allow the chest to return to its normal position.
b. Are delivered fast, about 100 compressions per minute.
c. Are smooth, regular and given straight up and down.
d. All of the above.
9. About how many cycles of CPR should you perform in 2 minutes?
a. 1
b. 2
c. 5
d. 7
10. Early CPR is important in the Cardiac Chain of Survival because:
a. It prevents heart attacks.
b. It helps circulate blood that contains oxygen to the vital organs until an AED is ready to use or advanced medical personnel take over.
c. It helps restart the heart.
d. It prevents the heart from seizing up.

150 First aid/CpR/aed | instructor’s Manual
—Do not write on this exam—
American Red Cross CPR—Adult Exam B
IMPORTANT: Read all instructions before beginning the exam.
INSTRUCTIONS: Do not write on this exam. Mark all answers in pencil on the separate answer sheet as directed by your instructor. Read each question carefully. Then choose the best answer and fill in that circle completely on the answer sheet. If you wish to change an answer, erase your first answer entirely. Return this exam with your answer sheet to your instructor when you are finished.
EXAMPLE
ANSWER SHEET
xx. a b c d
xx. Why does the American Red Cross teach this course?
a. To help people recognize and respond appropriately in an emergency
b. To help people make appropriate decisions when they see an emergency
c. To enable people to give immediate care to a suddenly injured or ill person until more advanced medical care takes over
d. All of the above
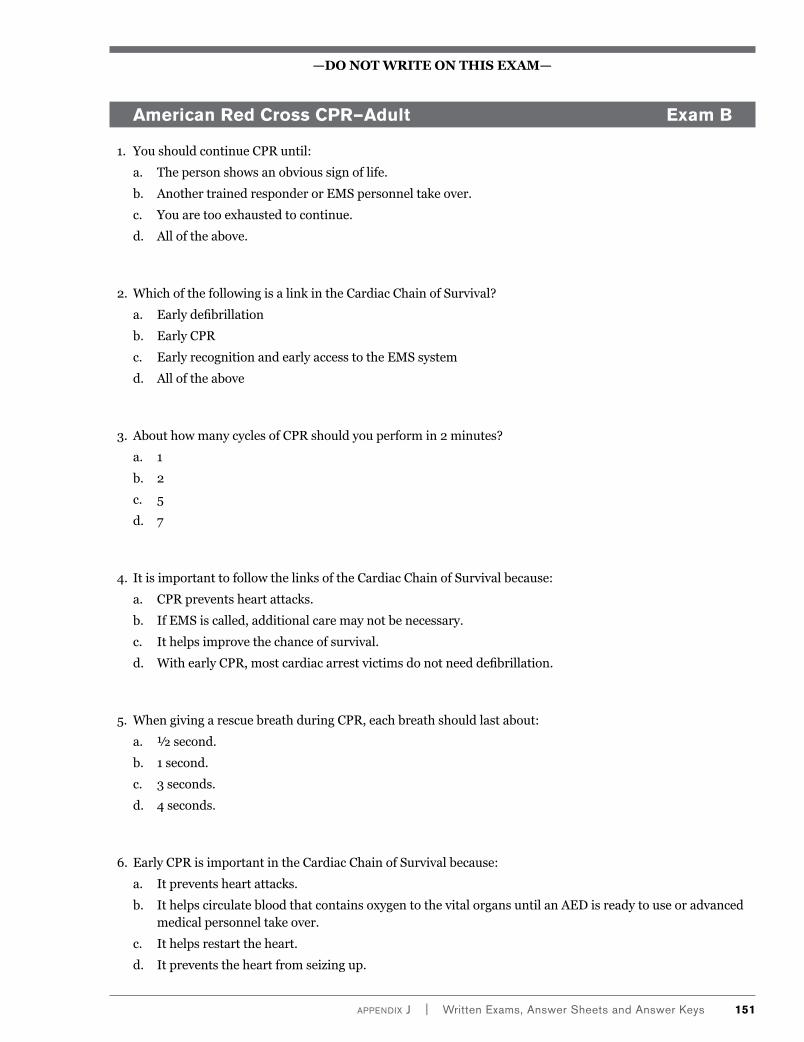
appendix J | Written exams, answer Sheets and answer Keys 151
—Do not write on this exam—
American Red Cross CPR—Adult Exam B
1. You should continue CPR until:
a. The person shows an obvious sign of life.
b. Another trained responder or EMS personnel take over.
c. You are too exhausted to continue.
d. All of the above.
2. Which of the following is a link in the Cardiac Chain of Survival?
a. Early defibrillation
b. Early CPR
c. Early recognition and early access to the EMS system
d. All of the above
3. About how many cycles of CPR should you perform in 2 minutes?
a. 1
b. 2
c. 5
d. 7
4. It is important to follow the links of the Cardiac Chain of Survival because:
a. CPR prevents heart attacks.
b. If EMS is called, additional care may not be necessary.
c. It helps improve the chance of survival.
d. With early CPR, most cardiac arrest victims do not need defibrillation.
5. When giving a rescue breath during CPR, each breath should last about:
a. ½ second.
b. 1 second.
c. 3 seconds.
d. 4 seconds.
6. Early CPR is important in the Cardiac Chain of Survival because:
a. It prevents heart attacks.
b. It helps circulate blood that contains oxygen to the vital organs until an AED is ready to use or advanced medical personnel take over.
c. It helps restart the heart.
d. It prevents the heart from seizing up.
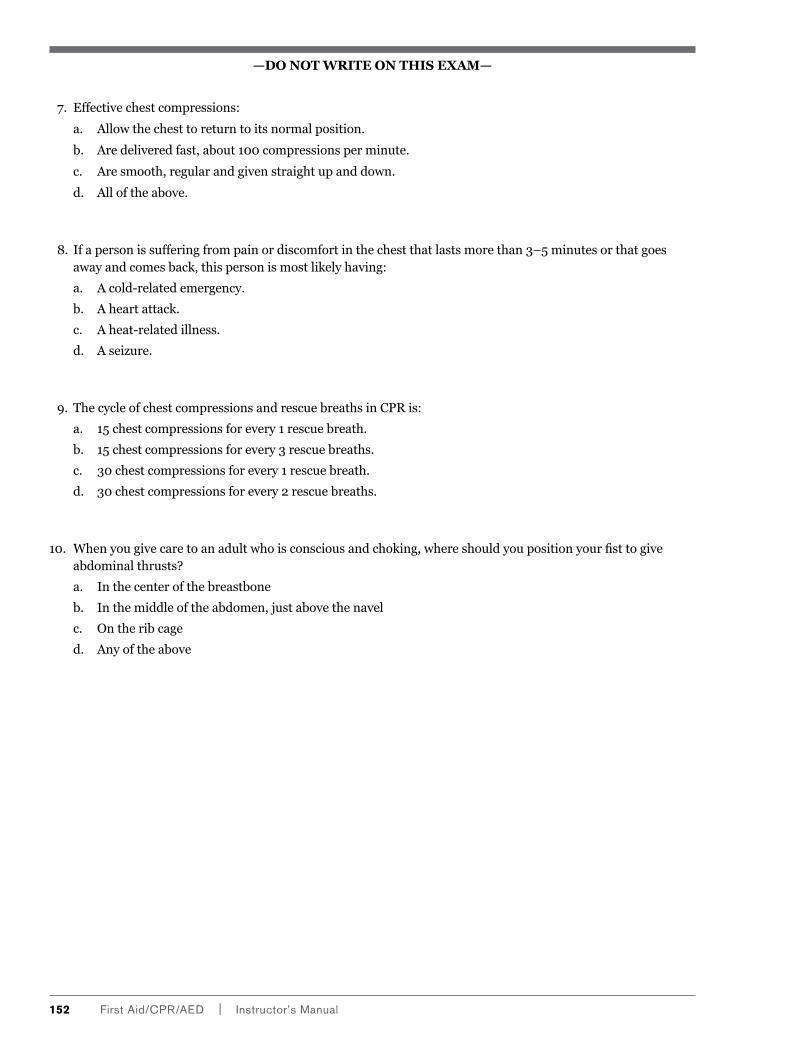
152 First aid/CpR/aed | instructor’s Manual
—Do not write on this exam—
7. Effective chest compressions:
a. Allow the chest to return to its normal position.
b. Are delivered fast, about 100 compressions per minute.
c. Are smooth, regular and given straight up and down.
d. All of the above.
8. If a person is suffering from pain or discomfort in the chest that lasts more than 3–5 minutes or that goes away and comes back, this person is most likely having:
a. A cold-related emergency.
b. A heart attack.
c. A heat-related illness.
d. A seizure.
9. The cycle of chest compressions and rescue breaths in CPR is:
a. 15 chest compressions for every 1 rescue breath.
b. 15 chest compressions for every 3 rescue breaths.
c. 30 chest compressions for every 1 rescue breath.
d. 30 chest compressions for every 2 rescue breaths.
10. When you give care to an adult who is conscious and choking, where should you position your fist to give abdominal thrusts?
a. In the center of the breastbone
b. In the middle of the abdomen, just above the navel
c. On the rib cage
d. Any of the above

appendix J | Written exams, answer Sheets and answer Keys 153
—Do not write on this exam—
American Red Cross CPR—Child Exam A
IMPORTANT: Read all instructions before beginning the exam.
INSTRUCTIONS: Do not write on this exam. Mark all answers in pencil on the separate answer sheet as directed by your instructor. Read each question carefully. Then choose the best answer and fill in that circle completely on the answer sheet. If you wish to change an answer, erase your first answer entirely. Return this exam with your answer sheet to your instructor when you are finished.
EXAMPLE
ANSWER SHEET
xx. a b c d
xx. Why does the American Red Cross teach this course?
a. To help people recognize and respond appropriately in an emergency
b. To help people make appropriate decisions when they see an emergency
c. To enable people to give immediate care to a suddenly injured or ill person until more advanced medical care takes over
d. All of the above
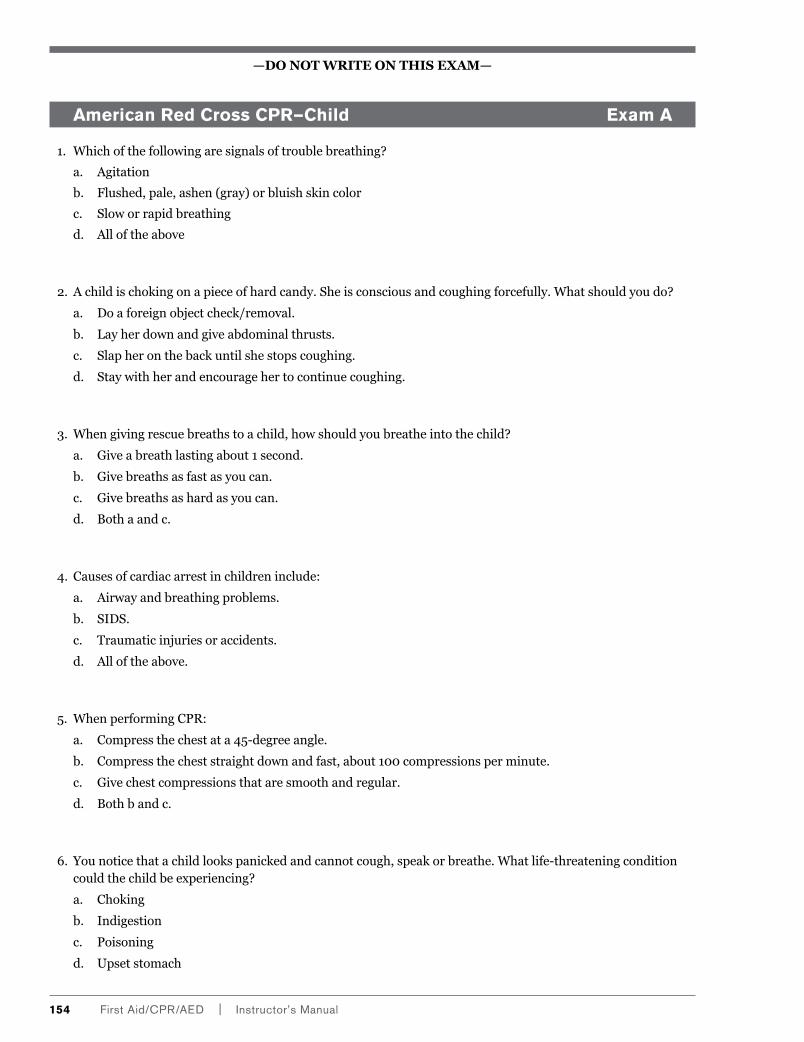
154 First aid/CpR/aed | instructor’s Manual
—Do not write on this exam—
American Red Cross CPR—Child Exam A
1. Which of the following are signals of trouble breathing?
a. Agitation
b. Flushed, pale, ashen (gray) or bluish skin color
c. Slow or rapid breathing
d. All of the above
2. A child is choking on a piece of hard candy. She is conscious and coughing forcefully. What should you do?
a. Do a foreign object check/removal.
b. Lay her down and give abdominal thrusts.
c. Slap her on the back until she stops coughing.
d. Stay with her and encourage her to continue coughing.
3. When giving rescue breaths to a child, how should you breathe into the child?
a. Give a breath lasting about 1 second.
b. Give breaths as fast as you can.
c. Give breaths as hard as you can.
d. Both a and c.
4. Causes of cardiac arrest in children include:
a. Airway and breathing problems.
b. SIDS.
c. Traumatic injuries or accidents.
d. All of the above.
5. When performing CPR:
a. Compress the chest at a 45-degree angle.
b. Compress the chest straight down and fast, about 100 compressions per minute.
c. Give chest compressions that are smooth and regular.
d. Both b and c.
6. You notice that a child looks panicked and cannot cough, speak or breathe. What life-threatening condition could the child be experiencing?
a. Choking
b. Indigestion
c. Poisoning
d. Upset stomach
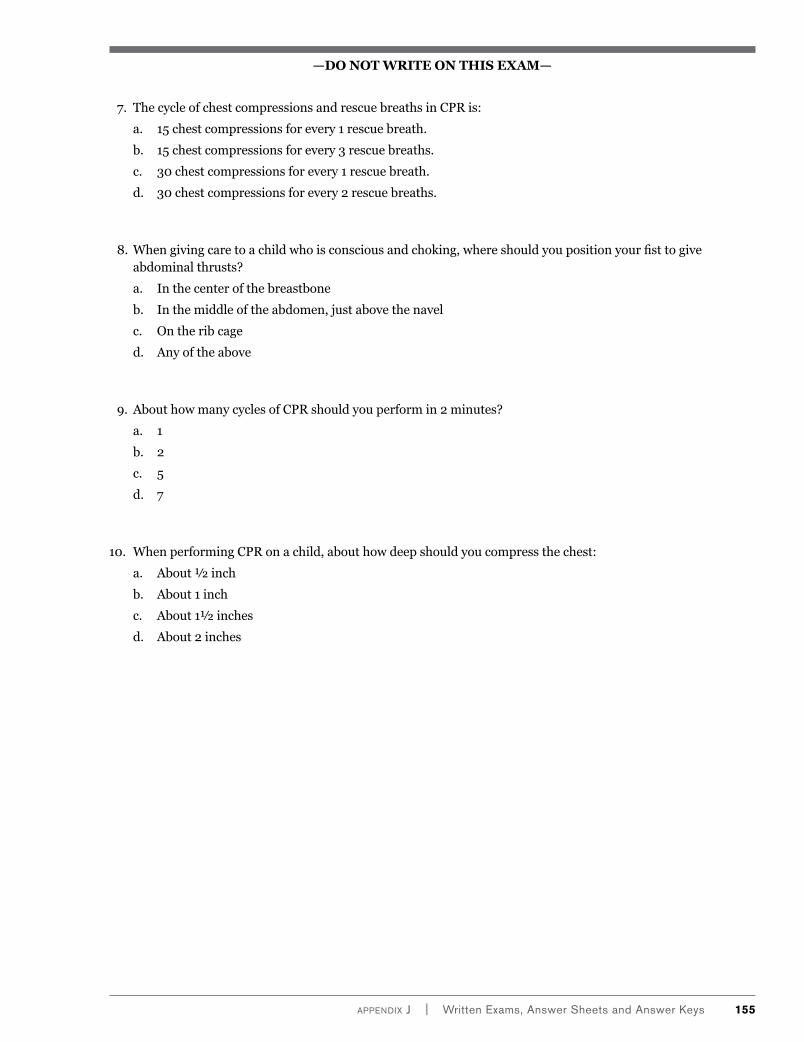
appendix J | Written exams, answer Sheets and answer Keys 155
—Do not write on this exam—
7. The cycle of chest compressions and rescue breaths in CPR is:
a. 15 chest compressions for every 1 rescue breath.
b. 15 chest compressions for every 3 rescue breaths.
c. 30 chest compressions for every 1 rescue breath.
d. 30 chest compressions for every 2 rescue breaths.
8. When giving care to a child who is conscious and choking, where should you position your fist to give abdominal thrusts?
a. In the center of the breastbone
b. In the middle of the abdomen, just above the navel
c. On the rib cage
d. Any of the above
9. About how many cycles of CPR should you perform in 2 minutes?
a. 1
b. 2
c. 5
d. 7
10. When performing CPR on a child, about how deep should you compress the chest:
a. About ½ inch
b. About 1 inch
c. About 1½ inches
d. About 2 inches

156 First aid/CpR/aed | instructor’s Manual
—Do not write on this exam—
American Red Cross CPR—Child Exam B
IMPORTANT: Read all instructions before beginning the exam.
INSTRUCTIONS: Do not write on this exam. Mark all answers in pencil on the separate answer sheet as directed by your instructor. Read each question carefully. Then choose the best answer and fill in that circle completely on the answer sheet. If you wish to change an answer, erase your first answer entirely. Return this exam with your answer sheet to your instructor when you are finished.
EXAMPLE
ANSWER SHEET
xx. a b c d
xx. Why does the American Red Cross teach this course?
a. To help people recognize and respond appropriately in an emergency
b. To help people make appropriate decisions when they see an emergency
c. To enable people to give immediate care to a suddenly injured or ill person until more advanced medical care takes over
d. All of the above
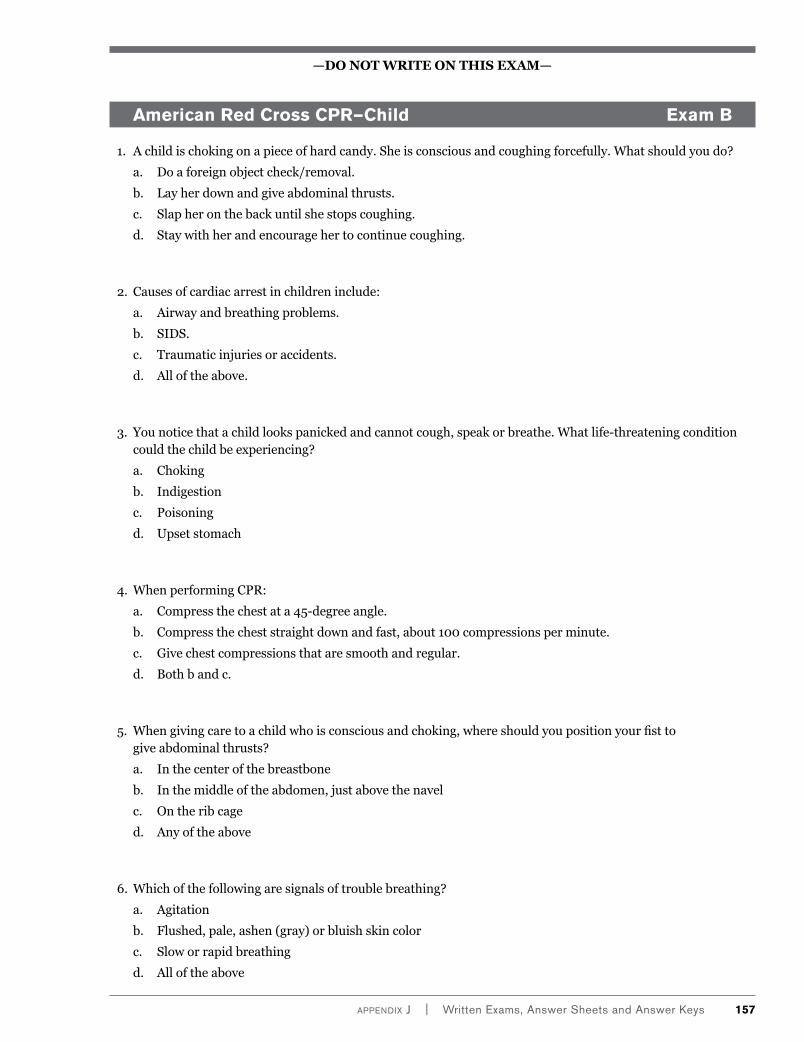
appendix J | Written exams, answer Sheets and answer Keys 157
—Do not write on this exam—
American Red Cross CPR—Child Exam B
1. A child is choking on a piece of hard candy. She is conscious and coughing forcefully. What should you do?
a. Do a foreign object check/removal.
b. Lay her down and give abdominal thrusts.
c. Slap her on the back until she stops coughing.
d. Stay with her and encourage her to continue coughing.
2. Causes of cardiac arrest in children include:
a. Airway and breathing problems.
b. SIDS.
c. Traumatic injuries or accidents.
d. All of the above.
3. You notice that a child looks panicked and cannot cough, speak or breathe. What life-threatening condition could the child be experiencing?
a. Choking
b. Indigestion
c. Poisoning
d. Upset stomach
4. When performing CPR:
a. Compress the chest at a 45-degree angle.
b. Compress the chest straight down and fast, about 100 compressions per minute.
c. Give chest compressions that are smooth and regular.
d. Both b and c.
5. When giving care to a child who is conscious and choking, where should you position your fist to give abdominal thrusts?
a. In the center of the breastbone
b. In the middle of the abdomen, just above the navel
c. On the rib cage
d. Any of the above
6. Which of the following are signals of trouble breathing?
a. Agitation
b. Flushed, pale, ashen (gray) or bluish skin color
c. Slow or rapid breathing
d. All of the above
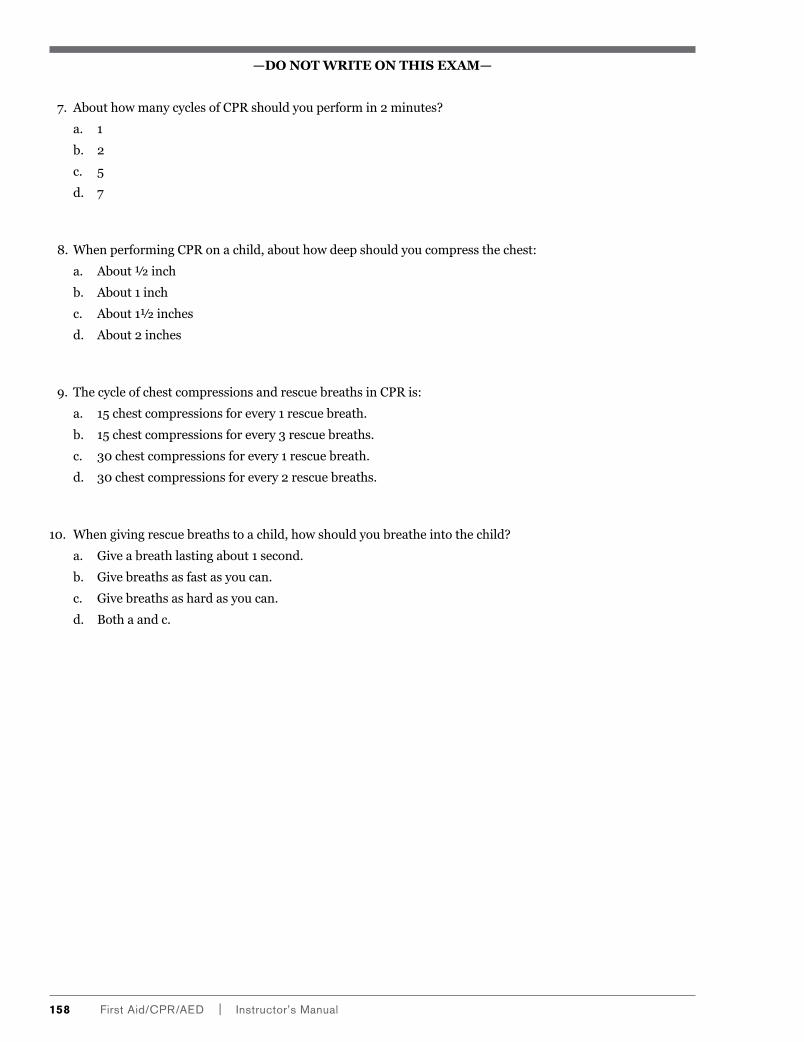
158 First aid/CpR/aed | instructor’s Manual
—Do not write on this exam—
7. About how many cycles of CPR should you perform in 2 minutes?
a. 1
b. 2
c. 5
d. 7
8. When performing CPR on a child, about how deep should you compress the chest:
a. About ½ inch
b. About 1 inch
c. About 1½ inches
d. About 2 inches
9. The cycle of chest compressions and rescue breaths in CPR is:
a. 15 chest compressions for every 1 rescue breath.
b. 15 chest compressions for every 3 rescue breaths.
c. 30 chest compressions for every 1 rescue breath.
d. 30 chest compressions for every 2 rescue breaths.
10. When giving rescue breaths to a child, how should you breathe into the child?
a. Give a breath lasting about 1 second.
b. Give breaths as fast as you can.
c. Give breaths as hard as you can.
d. Both a and c.

appendix J | Written exams, answer Sheets and answer Keys 159
—Do not write on this exam—
American Red Cross CPR—Infant Exam A
IMPORTANT: Read all instructions before beginning the exam.
INSTRUCTIONS: Do not write on this exam. Mark all answers in pencil on the separate answer sheet as directed by your instructor. Read each question carefully. Then choose the best answer and fill in that circle completely on the answer sheet. If you wish to change an answer, erase your first answer entirely. Return this exam with your answer sheet to your instructor when you are finished.
EXAMPLE
ANSWER SHEET
xx. a b c d
xx. Why does the American Red Cross teach this course?
a. To help people recognize and respond appropriately in an emergency
b. To help people make appropriate decisions when they see an emergency
c. To enable people to give immediate care to a suddenly injured or ill person until more advanced medical care takes over
d. All of the above
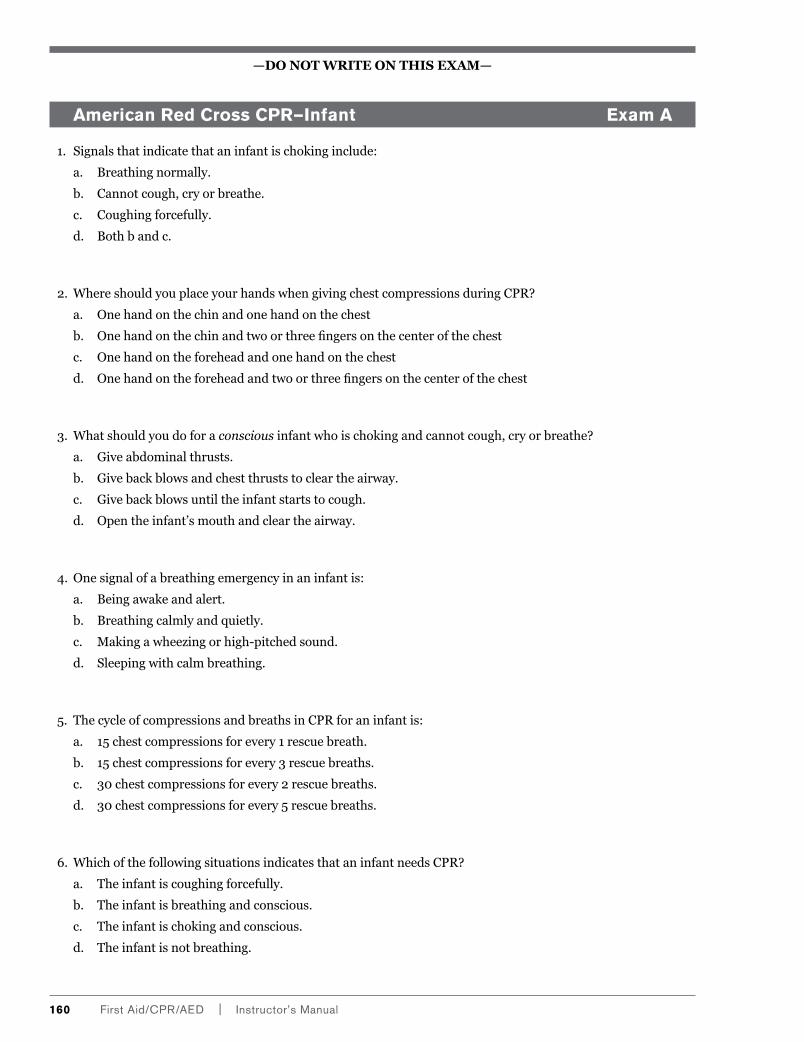
160 First aid/CpR/aed | instructor’s Manual
—Do not write on this exam—
American Red Cross CPR—Infant Exam A
1. Signals that indicate that an infant is choking include:
a. Breathing normally.
b. Cannot cough, cry or breathe.
c. Coughing forcefully.
d. Both b and c.
2. Where should you place your hands when giving chest compressions during CPR?
a. One hand on the chin and one hand on the chest
b. One hand on the chin and two or three fingers on the center of the chest
c. One hand on the forehead and one hand on the chest
d. One hand on the forehead and two or three fingers on the center of the chest
3. What should you do for a conscious infant who is choking and cannot cough, cry or breathe?
a. Give abdominal thrusts.
b. Give back blows and chest thrusts to clear the airway.
c. Give back blows until the infant starts to cough.
d. Open the infant’s mouth and clear the airway.
4. One signal of a breathing emergency in an infant is:
a. Being awake and alert.
b. Breathing calmly and quietly.
c. Making a wheezing or high-pitched sound.
d. Sleeping with calm breathing.
5. The cycle of compressions and breaths in CPR for an infant is:
a. 15 chest compressions for every 1 rescue breath.
b. 15 chest compressions for every 3 rescue breaths.
c. 30 chest compressions for every 2 rescue breaths.
d. 30 chest compressions for every 5 rescue breaths.
6. Which of the following situations indicates that an infant needs CPR?
a. The infant is coughing forcefully.
b. The infant is breathing and conscious.
c. The infant is choking and conscious.
d. The infant is not breathing.
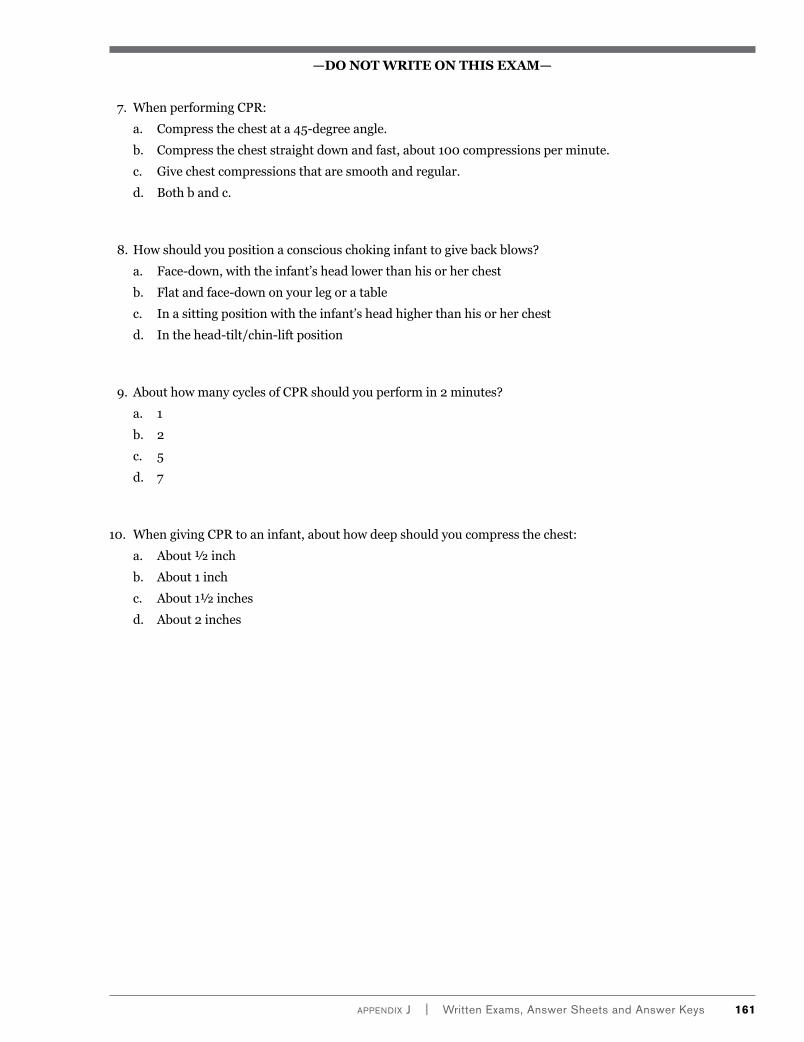
appendix J | Written exams, answer Sheets and answer Keys 161
—Do not write on this exam—
7. When performing CPR:
a. Compress the chest at a 45-degree angle.
b. Compress the chest straight down and fast, about 100 compressions per minute.
c. Give chest compressions that are smooth and regular.
d. Both b and c.
8. How should you position a conscious choking infant to give back blows?
a. Face-down, with the infant’s head lower than his or her chest
b. Flat and face-down on your leg or a table
c. In a sitting position with the infant’s head higher than his or her chest
d. In the head-tilt/chin-lift position
9. About how many cycles of CPR should you perform in 2 minutes?
a. 1
b. 2
c. 5
d. 7
10. When giving CPR to an infant, about how deep should you compress the chest:
a. About ½ inch
b. About 1 inch
c. About 1½ inches
d. About 2 inches

162 First aid/CpR/aed | instructor’s Manual
—Do not write on this exam—
American Red Cross CPR—Infant Exam B
IMPORTANT: Read all instructions before beginning the exam.
INSTRUCTIONS: Do not write on this exam. Mark all answers in pencil on the separate answer sheet as directed by your instructor. Read each question carefully. Then choose the best answer and fill in that circle completely on the answer sheet. If you wish to change an answer, erase your first answer entirely. Return this exam with your answer sheet to your instructor when you are finished.
EXAMPLE
ANSWER SHEET
xx. a b c d
xx. Why does the American Red Cross teach this course?
a. To help people recognize and respond appropriately in an emergency
b. To help people make appropriate decisions when they see an emergency
c. To enable people to give immediate care to a suddenly injured or ill person until more advanced medical care takes over
d. All of the above
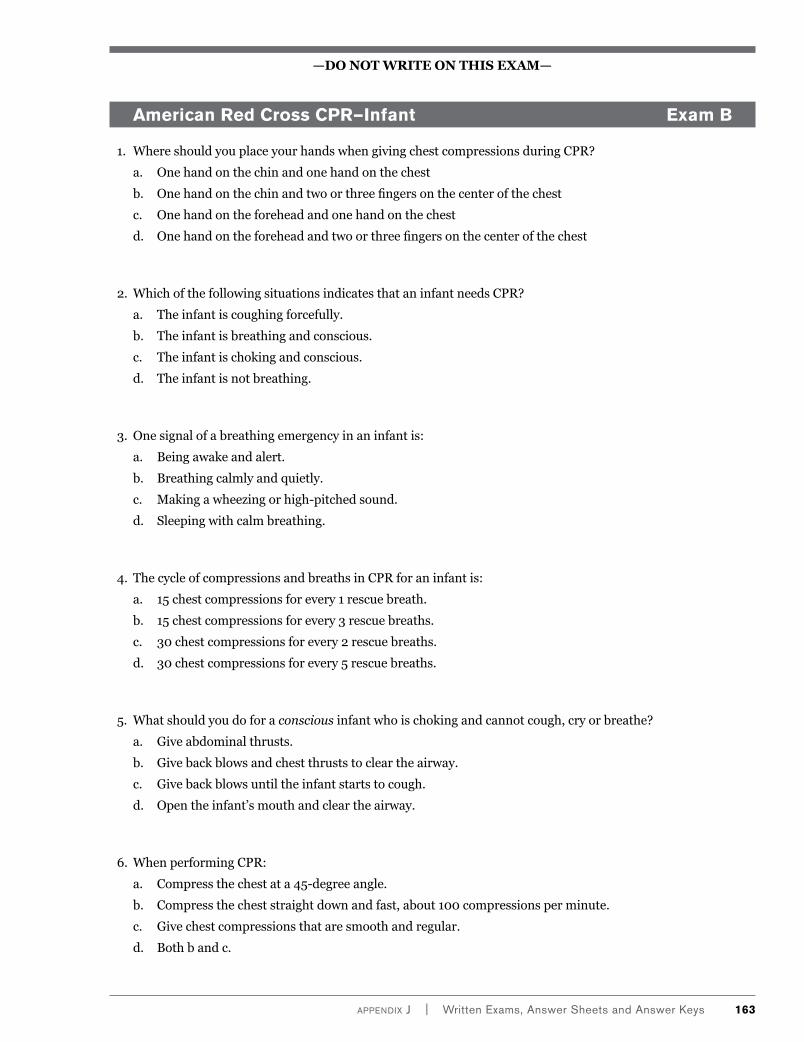
appendix J | Written exams, answer Sheets and answer Keys 163
—Do not write on this exam—
American Red Cross CPR—Infant Exam B
1. Where should you place your hands when giving chest compressions during CPR?
a. One hand on the chin and one hand on the chest
b. One hand on the chin and two or three fingers on the center of the chest
c. One hand on the forehead and one hand on the chest
d. One hand on the forehead and two or three fingers on the center of the chest
2. Which of the following situations indicates that an infant needs CPR?
a. The infant is coughing forcefully.
b. The infant is breathing and conscious.
c. The infant is choking and conscious.
d. The infant is not breathing.
3. One signal of a breathing emergency in an infant is:
a. Being awake and alert.
b. Breathing calmly and quietly.
c. Making a wheezing or high-pitched sound.
d. Sleeping with calm breathing.
4. The cycle of compressions and breaths in CPR for an infant is:
a. 15 chest compressions for every 1 rescue breath.
b. 15 chest compressions for every 3 rescue breaths.
c. 30 chest compressions for every 2 rescue breaths.
d. 30 chest compressions for every 5 rescue breaths.
5. What should you do for a conscious infant who is choking and cannot cough, cry or breathe?
a. Give abdominal thrusts.
b. Give back blows and chest thrusts to clear the airway.
c. Give back blows until the infant starts to cough.
d. Open the infant’s mouth and clear the airway.
6. When performing CPR:
a. Compress the chest at a 45-degree angle.
b. Compress the chest straight down and fast, about 100 compressions per minute.
c. Give chest compressions that are smooth and regular.
d. Both b and c.
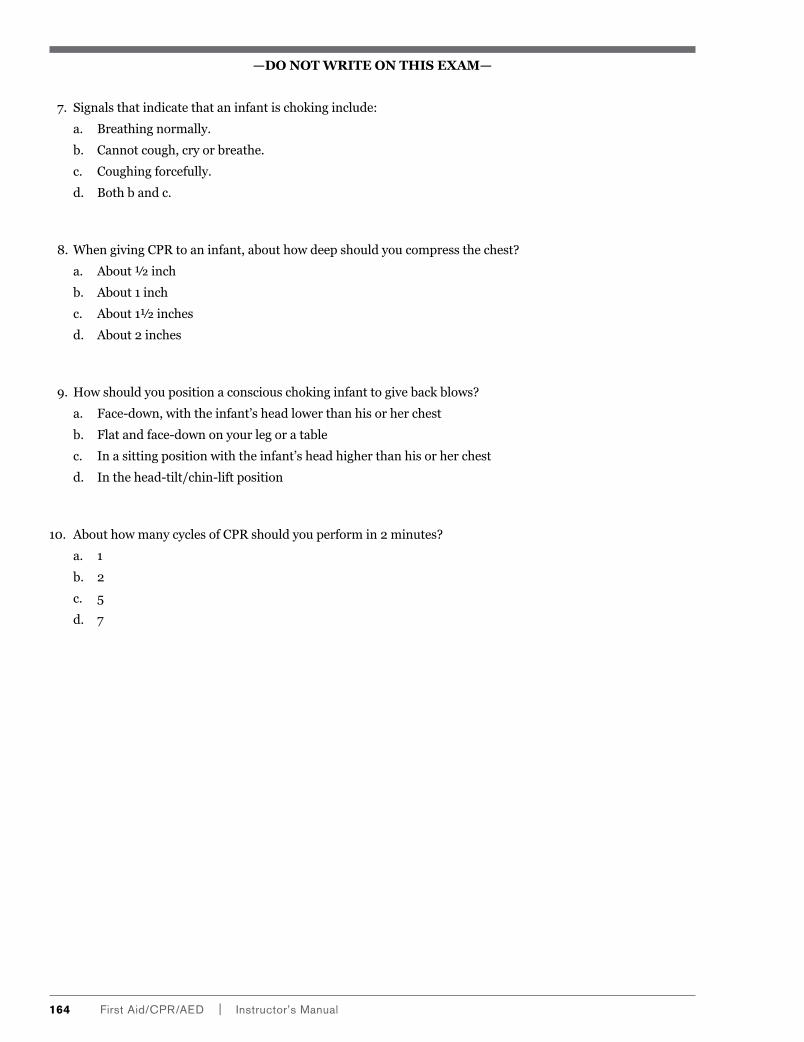
164 First aid/CpR/aed | instructor’s Manual
—Do not write on this exam—
7. Signals that indicate that an infant is choking include:
a. Breathing normally.
b. Cannot cough, cry or breathe.
c. Coughing forcefully.
d. Both b and c.
8. When giving CPR to an infant, about how deep should you compress the chest?
a. About ½ inch
b. About 1 inch
c. About 1½ inches
d. About 2 inches
9. How should you position a conscious choking infant to give back blows?
a. Face-down, with the infant’s head lower than his or her chest
b. Flat and face-down on your leg or a table
c. In a sitting position with the infant’s head higher than his or her chest
d. In the head-tilt/chin-lift position
10. About how many cycles of CPR should you perform in 2 minutes?
a. 1
b. 2
c. 5
d. 7
appendix J | Written exams, answer Sheets and answer Keys 165
—Do not write on this exam—
American Red Cross CPR—Adult, Child and Infant Exam A
IMPORTANT: Read all instructions before beginning the exam.
INSTRUCTIONS: Do not write on this exam. Mark all answers in pencil on the separate answer sheet as directed by your instructor. Read each question carefully. Then choose the best answer and fill in that circle completely on the answer sheet. If you wish to change an answer, erase your first answer entirely. Return this exam with your answer sheet to your instructor when you are finished.
EXAMPLE
ANSWER SHEET
xx. a b c d
xx. Why does the American Red Cross teach this course?
a. To help people recognize and respond appropriately in an emergency
b. To help people make appropriate decisions when they see an emergency
c. To enable people to give immediate care to a suddenly injured or ill person until more advanced medical care takes over
d. All of the above
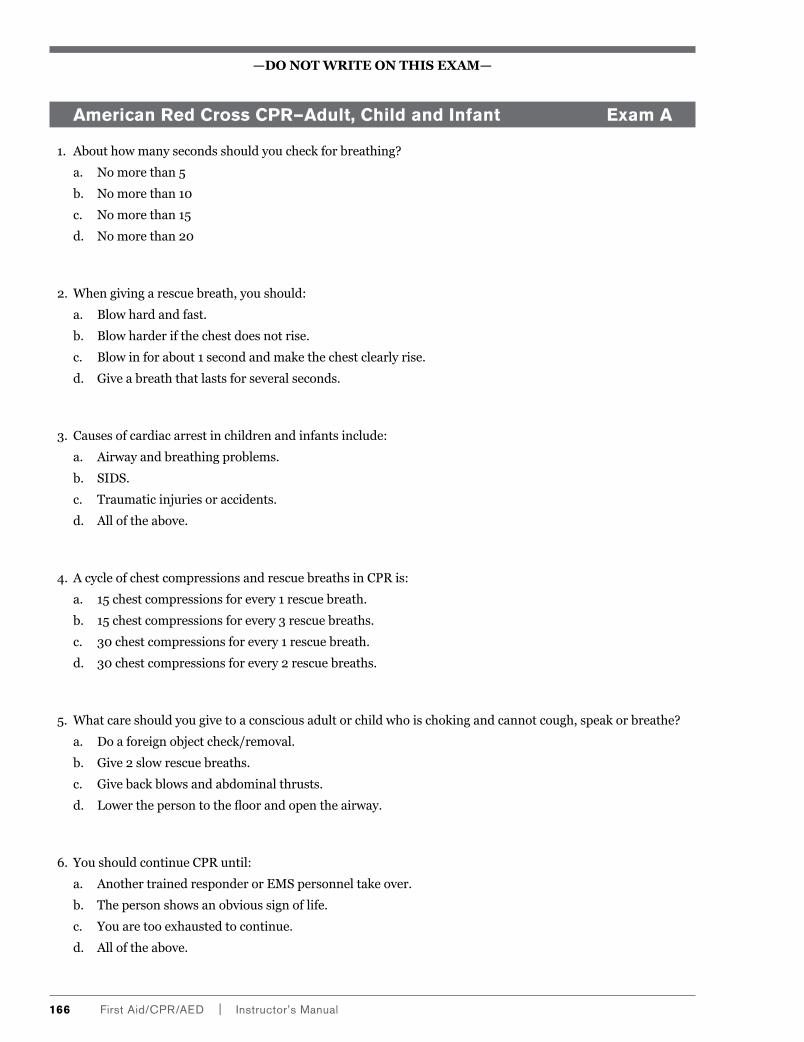
166 First aid/CpR/aed | instructor’s Manual
—Do not write on this exam—
American Red Cross CPR—Adult, Child and Infant Exam A
1. About how many seconds should you check for breathing?
a. No more than 5
b. No more than 10
c. No more than 15
d. No more than 20
2. When giving a rescue breath, you should:
a. Blow hard and fast.
b. Blow harder if the chest does not rise.
c. Blow in for about 1 second and make the chest clearly rise.
d. Give a breath that lasts for several seconds.
3. Causes of cardiac arrest in children and infants include:
a. Airway and breathing problems.
b. SIDS.
c. Traumatic injuries or accidents.
d. All of the above.
4. A cycle of chest compressions and rescue breaths in CPR is:
a. 15 chest compressions for every 1 rescue breath.
b. 15 chest compressions for every 3 rescue breaths.
c. 30 chest compressions for every 1 rescue breath.
d. 30 chest compressions for every 2 rescue breaths.
5. What care should you give to a conscious adult or child who is choking and cannot cough, speak or breathe?
a. Do a foreign object check/removal.
b. Give 2 slow rescue breaths.
c. Give back blows and abdominal thrusts.
d. Lower the person to the floor and open the airway.
6. You should continue CPR until:
a. Another trained responder or EMS personnel take over.
b. The person shows an obvious sign of life.
c. You are too exhausted to continue.
d. All of the above.
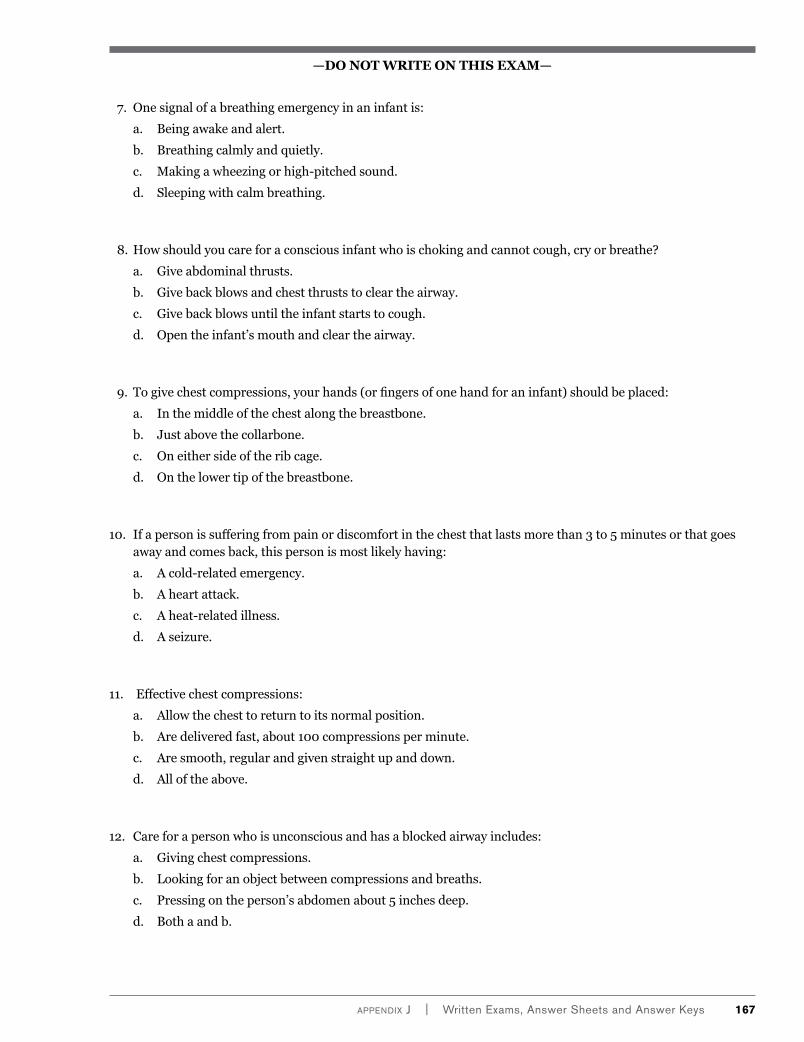
appendix J | Written exams, answer Sheets and answer Keys 167
—Do not write on this exam—
7. One signal of a breathing emergency in an infant is:
a. Being awake and alert.
b. Breathing calmly and quietly.
c. Making a wheezing or high-pitched sound.
d. Sleeping with calm breathing.
8. How should you care for a conscious infant who is choking and cannot cough, cry or breathe?
a. Give abdominal thrusts.
b. Give back blows and chest thrusts to clear the airway.
c. Give back blows until the infant starts to cough.
d. Open the infant’s mouth and clear the airway.
9. To give chest compressions, your hands (or fingers of one hand for an infant) should be placed:
a. In the middle of the chest along the breastbone.
b. Just above the collarbone.
c. On either side of the rib cage.
d. On the lower tip of the breastbone.
10. If a person is suffering from pain or discomfort in the chest that lasts more than 3 to 5 minutes or that goes away and comes back, this person is most likely having:
a. A cold-related emergency.
b. A heart attack.
c. A heat-related illness.
d. A seizure.
11. Effective chest compressions:
a. Allow the chest to return to its normal position.
b. Are delivered fast, about 100 compressions per minute.
c. Are smooth, regular and given straight up and down.
d. All of the above.
12. Care for a person who is unconscious and has a blocked airway includes:
a. Giving chest compressions.
b. Looking for an object between compressions and breaths.
c. Pressing on the person’s abdomen about 5 inches deep.
d. Both a and b.

168 First aid/CpR/aed | instructor’s Manual
—Do not write on this exam—
American Red Cross CPR—Adult, Child and Infant Exam B
IMPORTANT: Read all instructions before beginning the exam.
INSTRUCTIONS: Do not write on this exam. Mark all answers in pencil on the separate answer sheet as directed by your instructor. Read each question carefully. Then choose the best answer and fill in that circle completely on the answer sheet. If you wish to change an answer, erase your first answer entirely. Return this exam with your answer sheet to your instructor when you are finished.
EXAMPLE
ANSWER SHEET
xx. a b c d
xx. Why does the American Red Cross teach this course?
a. To help people recognize and respond appropriately in an emergency
b. To help people make appropriate decisions when they see an emergency
c. To enable people to give immediate care to a suddenly injured or ill person until more advanced medical care takes over
d. All of the above
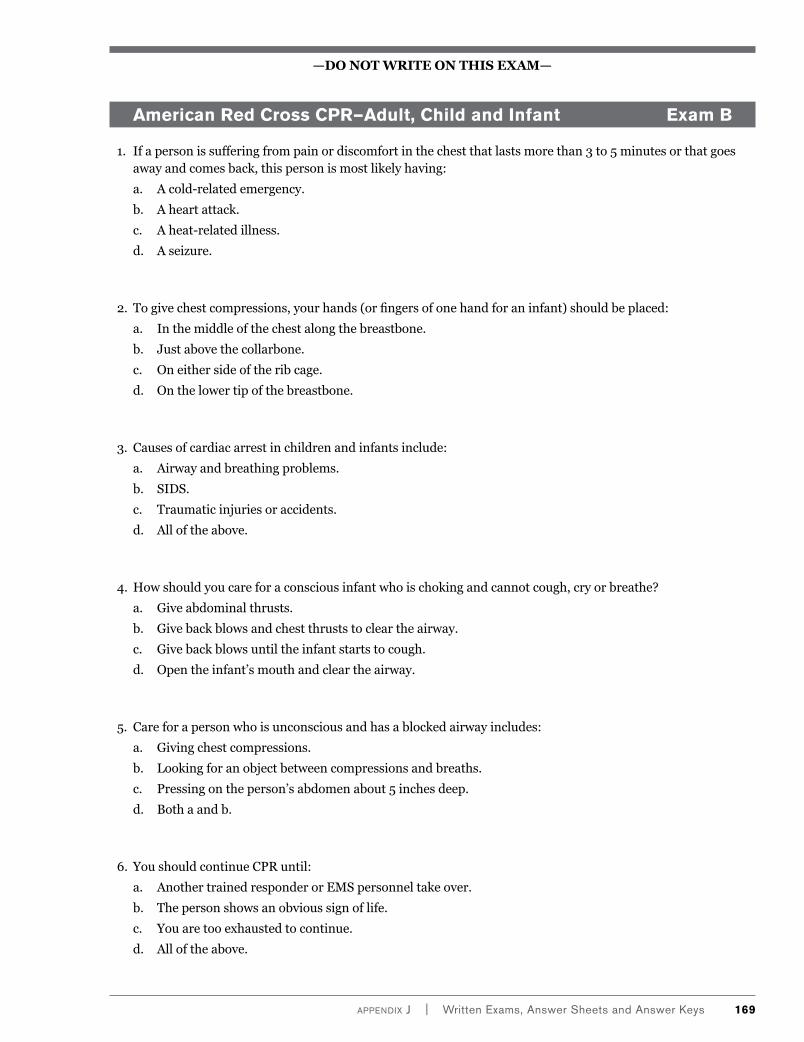
appendix J | Written exams, answer Sheets and answer Keys 169
—Do not write on this exam—
American Red Cross CPR—Adult, Child and Infant Exam B
1. If a person is suffering from pain or discomfort in the chest that lasts more than 3 to 5 minutes or that goes away and comes back, this person is most likely having:
a. A cold-related emergency.
b. A heart attack.
c. A heat-related illness.
d. A seizure.
2. To give chest compressions, your hands (or fingers of one hand for an infant) should be placed:
a. In the middle of the chest along the breastbone.
b. Just above the collarbone.
c. On either side of the rib cage.
d. On the lower tip of the breastbone.
3. Causes of cardiac arrest in children and infants include:
a. Airway and breathing problems.
b. SIDS.
c. Traumatic injuries or accidents.
d. All of the above.
4. How should you care for a conscious infant who is choking and cannot cough, cry or breathe?
a. Give abdominal thrusts.
b. Give back blows and chest thrusts to clear the airway.
c. Give back blows until the infant starts to cough.
d. Open the infant’s mouth and clear the airway.
5. Care for a person who is unconscious and has a blocked airway includes:
a. Giving chest compressions.
b. Looking for an object between compressions and breaths.
c. Pressing on the person’s abdomen about 5 inches deep.
d. Both a and b.
6. You should continue CPR until:
a. Another trained responder or EMS personnel take over.
b. The person shows an obvious sign of life.
c. You are too exhausted to continue.
d. All of the above.
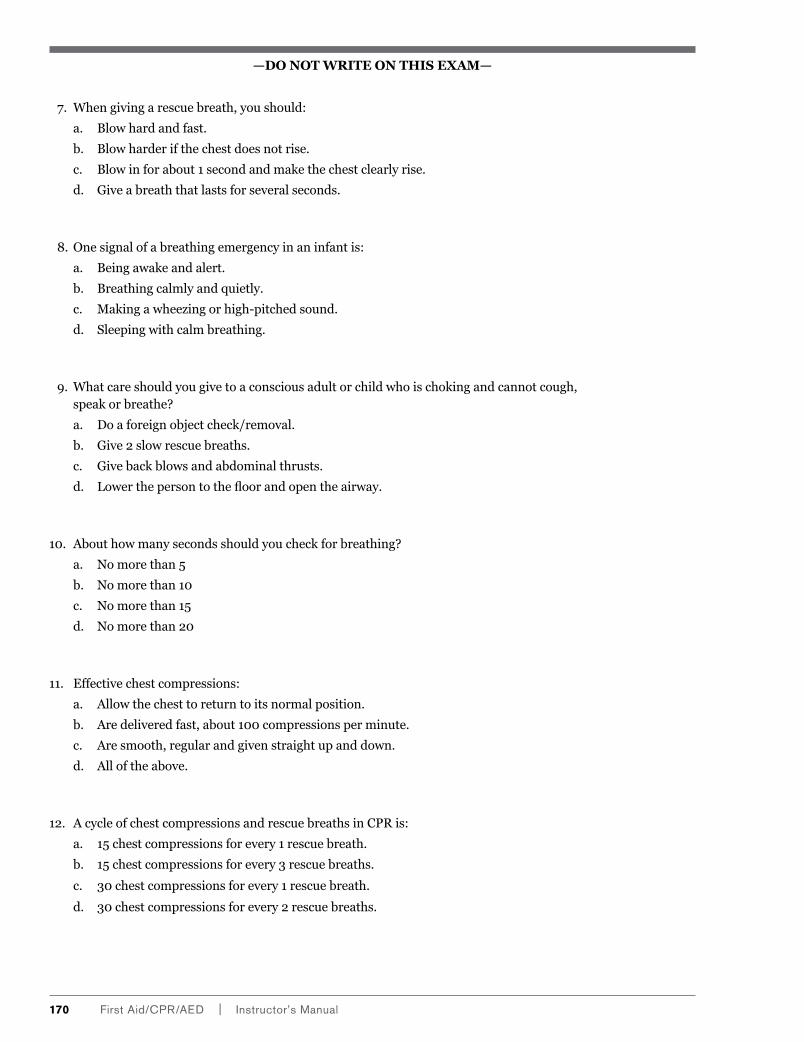
170 First aid/CpR/aed | instructor’s Manual
—Do not write on this exam—
7. When giving a rescue breath, you should:
a. Blow hard and fast.
b. Blow harder if the chest does not rise.
c. Blow in for about 1 second and make the chest clearly rise.
d. Give a breath that lasts for several seconds.
8. One signal of a breathing emergency in an infant is:
a. Being awake and alert.
b. Breathing calmly and quietly.
c. Making a wheezing or high-pitched sound.
d. Sleeping with calm breathing.
9. What care should you give to a conscious adult or child who is choking and cannot cough, speak or breathe?
a. Do a foreign object check/removal.
b. Give 2 slow rescue breaths.
c. Give back blows and abdominal thrusts.
d. Lower the person to the floor and open the airway.
10. About how many seconds should you check for breathing?
a. No more than 5
b. No more than 10
c. No more than 15
d. No more than 20
11. Effective chest compressions:
a. Allow the chest to return to its normal position.
b. Are delivered fast, about 100 compressions per minute.
c. Are smooth, regular and given straight up and down.
d. All of the above.
12. A cycle of chest compressions and rescue breaths in CPR is:
a. 15 chest compressions for every 1 rescue breath.
b. 15 chest compressions for every 3 rescue breaths.
c. 30 chest compressions for every 1 rescue breath.
d. 30 chest compressions for every 2 rescue breaths.
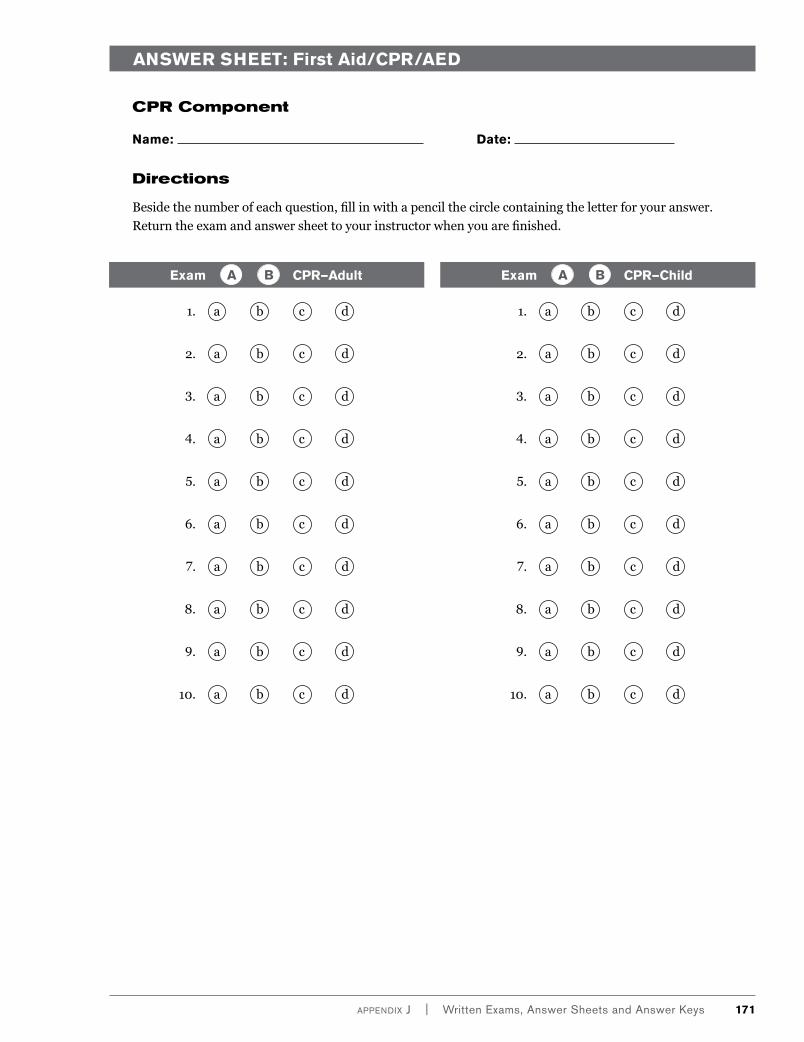
appendix J | Written exams, answer Sheets and answer Keys 171
ANSWER SHEET: First Aid/CPR/AED
CPR Component
Name: Date:
Directions
Beside the number of each question, fill in with a pencil the circle containing the letter for your answer.
Return the exam and answer sheet to your instructor when you are finished.
Exam CPR—Adult A B
1. a b c d
2. a b c d
3. a b c d
4. a b c d
5. a b c d
6. a b c d
7. a b c d
8. a b c d
9. a b c d
10. a b c d
Exam CPR—Child A B
1. a b c d
2. a b c d
3. a b c d
4. a b c d
5. a b c d
6. a b c d
7. a b c d
8. a b c d
9. a b c d
10. a b c d
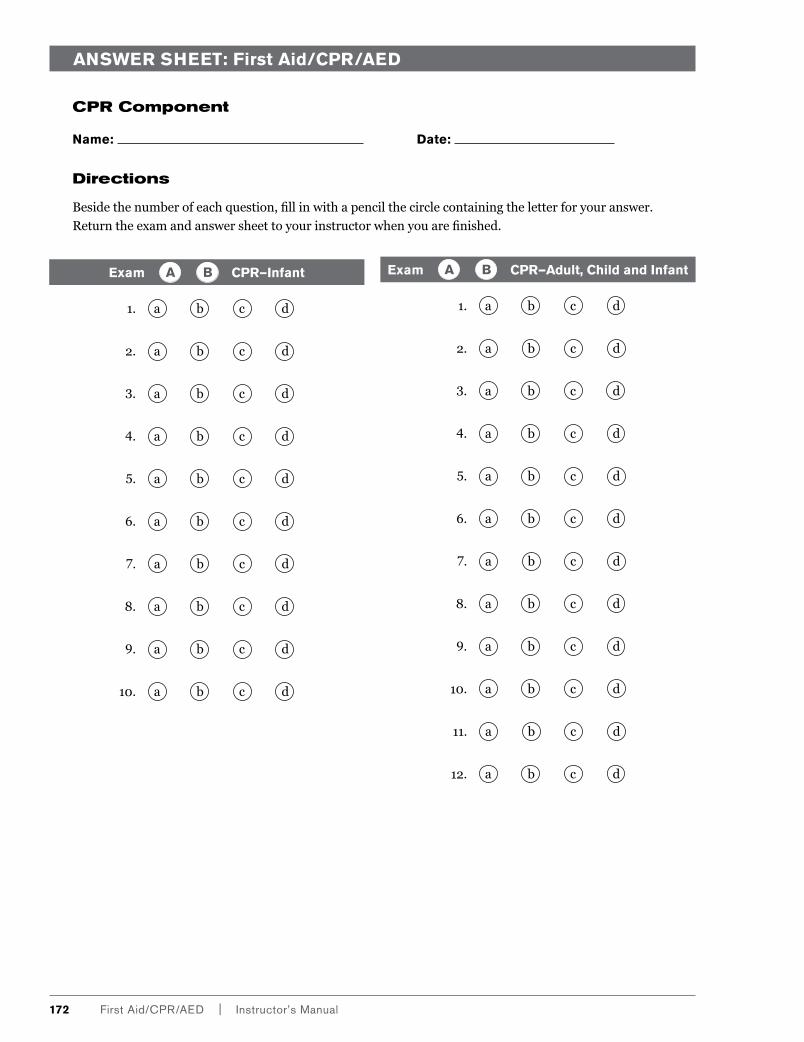
172 First aid/CpR/aed | instructor’s Manual
ANSWER SHEET: First Aid/CPR/AED
CPR Component
Name: Date:
Directions
Beside the number of each question, fill in with a pencil the circle containing the letter for your answer.
Return the exam and answer sheet to your instructor when you are finished.
Exam CPR—Infant A B
1. a b c d
2. a b c d
3. a b c d
4. a b c d
5. a b c d
6. a b c d
7. a b c d
8. a b c d
9. a b c d
10. a b c d
Exam CPR—Adult, Child and Infant A B
1. a b c d
2. a b c d
3. a b c d
4. a b c d
5. a b c d
6. a b c d
7. a b c d
8. a b c d
9. a b c d
10. a b c d
11. a b c d
12. a b c d

appendix J | Written exams, answer Sheets and answer Keys 173
—Do not write on this exam—
American Red Cross AED—Adult or Child Exam A
IMPORTANT: Read all instructions before beginning the exam.
INSTRUCTIONS: Do not write on this exam. Mark all answers in pencil on the separate answer sheet as directed by your instructor. Read each question carefully. Then choose the best answer and fill in that circle completely on the answer sheet. If you wish to change an answer, erase your first answer entirely. Return this exam with your answer sheet to your instructor when you are finished.
EXAMPLE
ANSWER SHEET
xx. a b c d
xx. Why does the American Red Cross teach this course?
a. To help people recognize and respond appropriately in an emergency
b. To help people make appropriate decisions when they see an emergency
c. To enable people to give immediate care to a suddenly injured or ill person until more advanced medical care takes over
d. All of the above
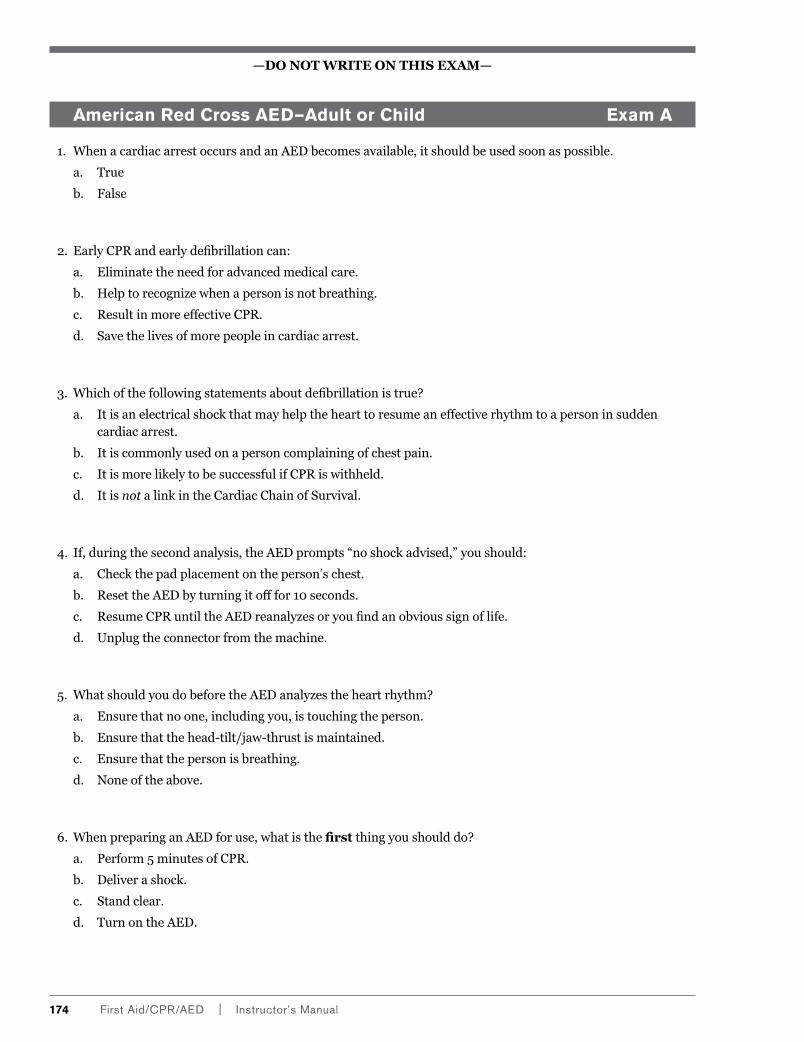
174 First aid/CpR/aed | instructor’s Manual
—Do not write on this exam—
American Red Cross AED—Adult or Child Exam A
1. When a cardiac arrest occurs and an AED becomes available, it should be used soon as possible.
a. True
b. False
2. Early CPR and early defibrillation can:
a. Eliminate the need for advanced medical care.
b. Help to recognize when a person is not breathing.
c. Result in more effective CPR.
d. Save the lives of more people in cardiac arrest.
3. Which of the following statements about defibrillation is true?
a. It is an electrical shock that may help the heart to resume an effective rhythm to a person in sudden cardiac arrest.
b. It is commonly used on a person complaining of chest pain.
c. It is more likely to be successful if CPR is withheld.
d. It is not a link in the Cardiac Chain of Survival.
4. If, during the second analysis, the AED prompts “no shock advised,” you should:
a. Check the pad placement on the person’s chest.
b. Reset the AED by turning it off for 10 seconds.
c. Resume CPR until the AED reanalyzes or you find an obvious sign of life.
d. Unplug the connector from the machine.
5. What should you do before the AED analyzes the heart rhythm?
a. Ensure that no one, including you, is touching the person.
b. Ensure that the head-tilt/jaw-thrust is maintained.
c. Ensure that the person is breathing.
d. None of the above.
6. When preparing an AED for use, what is the first thing you should do?
a. Perform 5 minutes of CPR.
b. Deliver a shock.
c. Stand clear.
d. Turn on the AED.
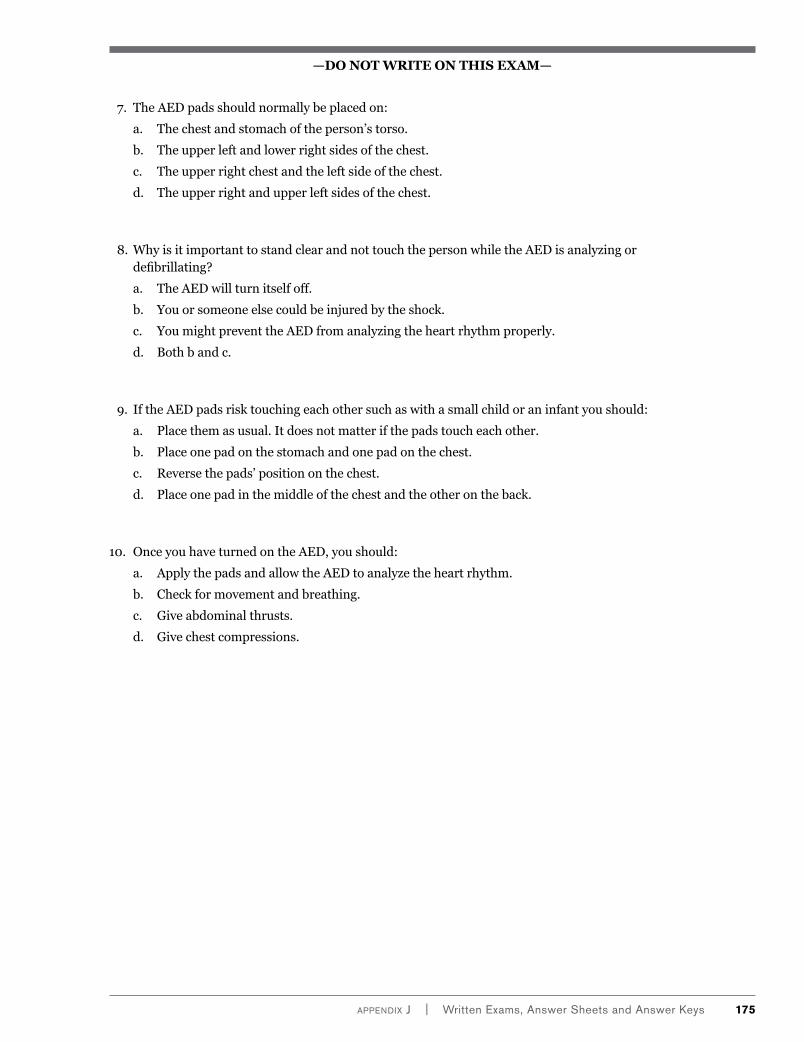
appendix J | Written exams, answer Sheets and answer Keys 175
—Do not write on this exam—
7. The AED pads should normally be placed on:
a. The chest and stomach of the person’s torso.
b. The upper left and lower right sides of the chest.
c. The upper right chest and the left side of the chest.
d. The upper right and upper left sides of the chest.
8. Why is it important to stand clear and not touch the person while the AED is analyzing or defibrillating?
a. The AED will turn itself off.
b. You or someone else could be injured by the shock.
c. You might prevent the AED from analyzing the heart rhythm properly.
d. Both b and c.
9. If the AED pads risk touching each other such as with a small child or an infant you should:
a. Place them as usual. It does not matter if the pads touch each other.
b. Place one pad on the stomach and one pad on the chest.
c. Reverse the pads’ position on the chest.
d. Place one pad in the middle of the chest and the other on the back.
10. Once you have turned on the AED, you should:
a. Apply the pads and allow the AED to analyze the heart rhythm.
b. Check for movement and breathing.
c. Give abdominal thrusts.
d. Give chest compressions.

176 First aid/CpR/aed | instructor’s Manual
—Do not write on this exam—
American Red Cross AED—Adult or Child Exam B
IMPORTANT: Read all instructions before beginning the exam.
INSTRUCTIONS: Do not write on this exam. Mark all answers in pencil on the separate answer sheet as directed by your instructor. Read each question carefully. Then choose the best answer and fill in that circle completely on the answer sheet. If you wish to change an answer, erase your first answer entirely. Return this exam with your answer sheet to your instructor when you are finished.
EXAMPLE
ANSWER SHEET
xx. a b c d
xx. Why does the American Red Cross teach this course?
a. To help people recognize and respond appropriately in an emergency
b. To help people make appropriate decisions when they see an emergency
c. To enable people to give immediate care to a suddenly injured or ill person until more advanced medical care takes over
d. All of the above
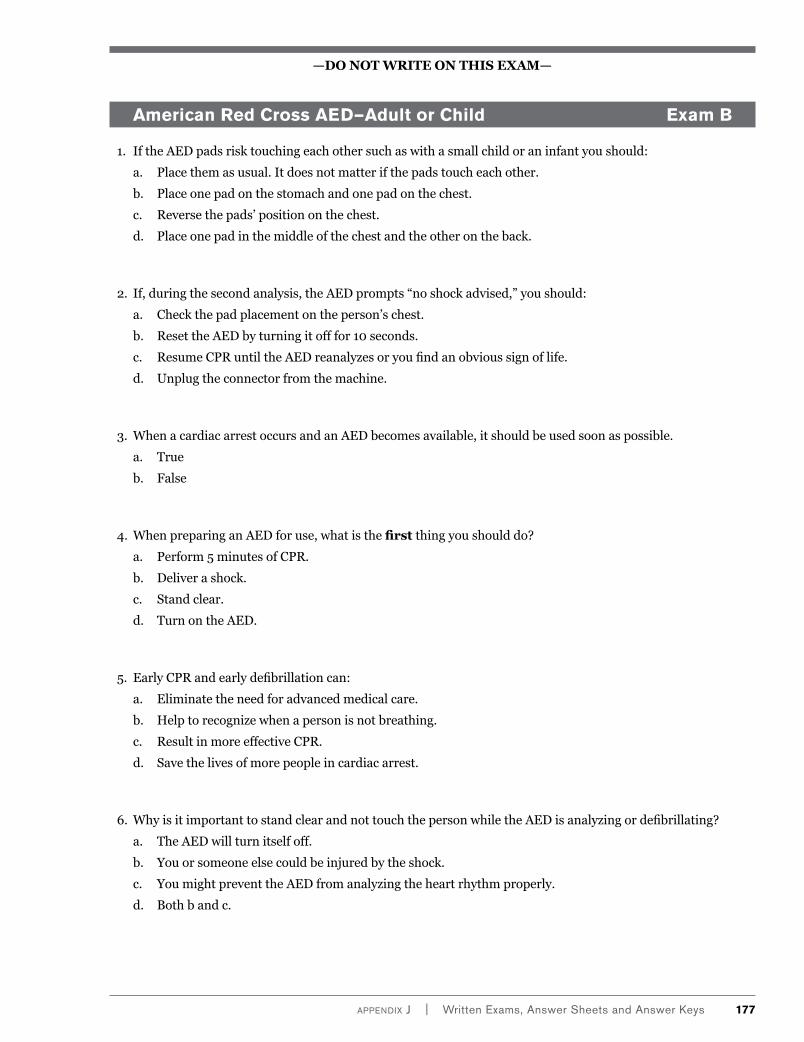
appendix J | Written exams, answer Sheets and answer Keys 177
—Do not write on this exam—
American Red Cross AED—Adult or Child Exam B
1. If the AED pads risk touching each other such as with a small child or an infant you should:
a. Place them as usual. It does not matter if the pads touch each other.
b. Place one pad on the stomach and one pad on the chest.
c. Reverse the pads’ position on the chest.
d. Place one pad in the middle of the chest and the other on the back.
2. If, during the second analysis, the AED prompts “no shock advised,” you should:
a. Check the pad placement on the person’s chest.
b. Reset the AED by turning it off for 10 seconds.
c. Resume CPR until the AED reanalyzes or you find an obvious sign of life.
d. Unplug the connector from the machine.
3. When a cardiac arrest occurs and an AED becomes available, it should be used soon as possible.
a. True
b. False
4. When preparing an AED for use, what is the first thing you should do?
a. Perform 5 minutes of CPR.
b. Deliver a shock.
c. Stand clear.
d. Turn on the AED.
5. Early CPR and early defibrillation can:
a. Eliminate the need for advanced medical care.
b. Help to recognize when a person is not breathing.
c. Result in more effective CPR.
d. Save the lives of more people in cardiac arrest.
6. Why is it important to stand clear and not touch the person while the AED is analyzing or defibrillating?
a. The AED will turn itself off.
b. You or someone else could be injured by the shock.
c. You might prevent the AED from analyzing the heart rhythm properly.
d. Both b and c.
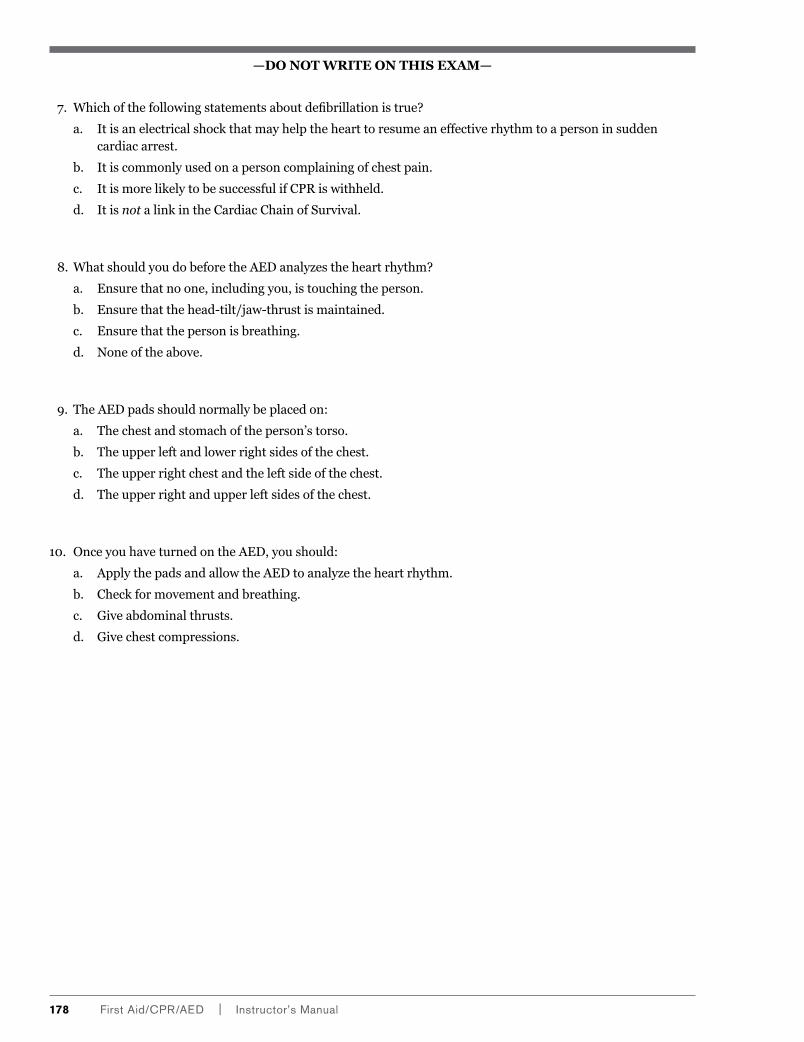
178 First aid/CpR/aed | instructor’s Manual
—Do not write on this exam—
7. Which of the following statements about defibrillation is true?
a. It is an electrical shock that may help the heart to resume an effective rhythm to a person in sudden cardiac arrest.
b. It is commonly used on a person complaining of chest pain.
c. It is more likely to be successful if CPR is withheld.
d. It is not a link in the Cardiac Chain of Survival.
8. What should you do before the AED analyzes the heart rhythm?
a. Ensure that no one, including you, is touching the person.
b. Ensure that the head-tilt/jaw-thrust is maintained.
c. Ensure that the person is breathing.
d. None of the above.
9. The AED pads should normally be placed on:
a. The chest and stomach of the person’s torso.
b. The upper left and lower right sides of the chest.
c. The upper right chest and the left side of the chest.
d. The upper right and upper left sides of the chest.
10. Once you have turned on the AED, you should:
a. Apply the pads and allow the AED to analyze the heart rhythm.
b. Check for movement and breathing.
c. Give abdominal thrusts.
d. Give chest compressions.
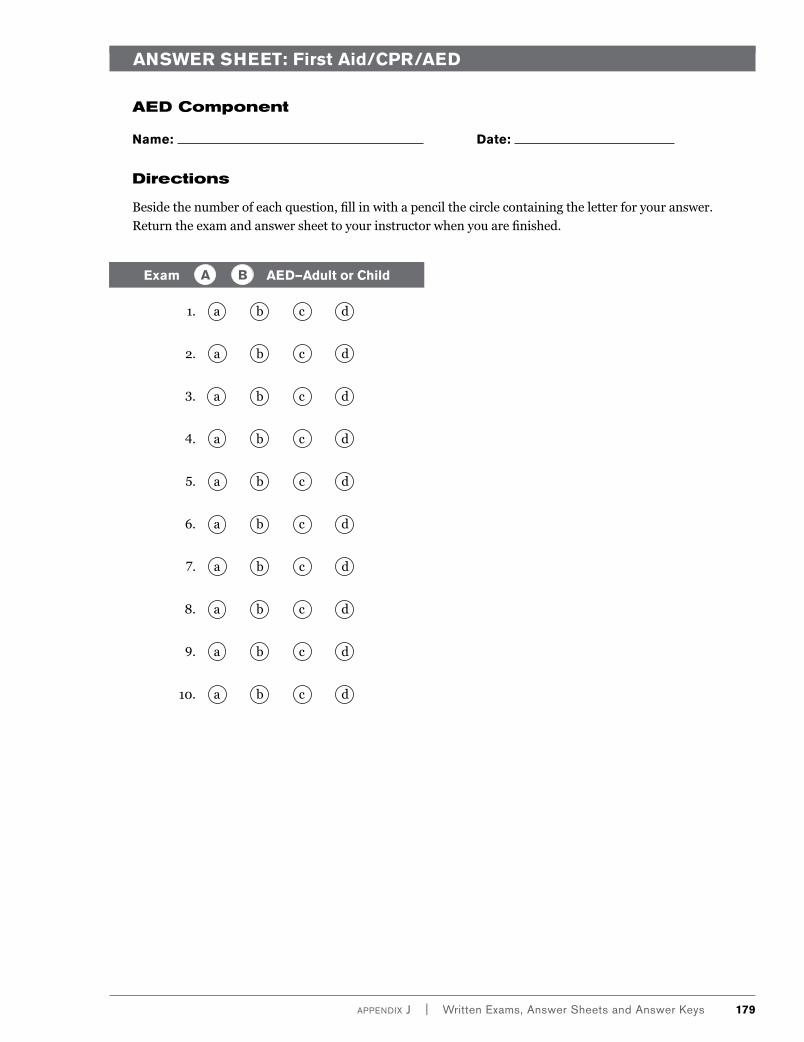
appendix J | Written exams, answer Sheets and answer Keys 179
—Do not write on this exam—ANSWER SHEET: First Aid/CPR/AED
AED Component
Name: Date:
Directions
Beside the number of each question, fill in with a pencil the circle containing the letter for your answer.
Return the exam and answer sheet to your instructor when you are finished.
Exam AED—Adult or Child A B
1. a b c d
2. a b c d
3. a b c d
4. a b c d
5. a b c d
6. a b c d
7. a b c d
8. a b c d
9. a b c d
10. a b c d

180 First aid/CpR/aed | instructor’s Manual
—Do not write on this exam—
American Red Cross First Aid Exam A
IMPORTANT: Read all instructions before beginning the exam.
INSTRUCTIONS: Do not write on this exam. Mark all answers in pencil on the separate answer sheet as directed by your instructor. Read each question carefully. Then choose the best answer and fill in that circle completely on the answer sheet. If you wish to change an answer, erase your first answer entirely. Return this exam with your answer sheet to your instructor when you are finished.
EXAMPLE
ANSWER SHEET
xx. a b c d
xx. Why does the American Red Cross teach this course?
a. To help people recognize and respond appropriately in an emergency
b. To help people make appropriate decisions when they see an emergency
c. To enable people to give immediate care to a suddenly injured or ill person until more advanced medical care takes over
d. All of the above
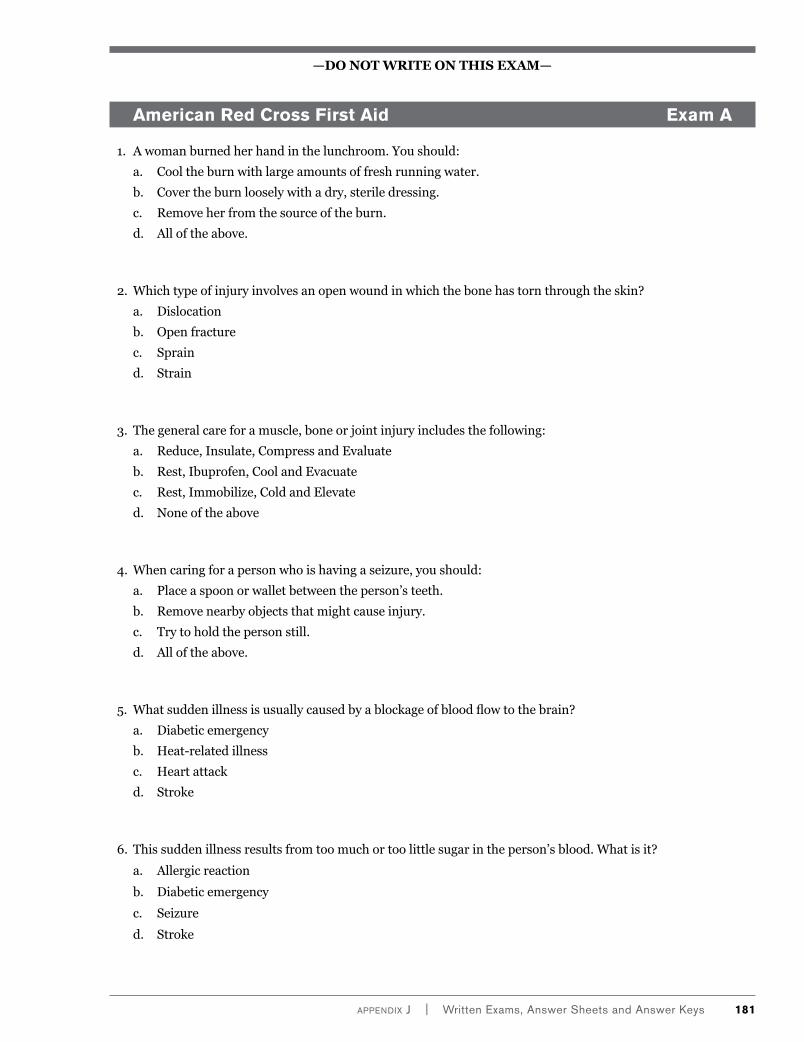
appendix J | Written exams, answer Sheets and answer Keys 181
—Do not write on this exam—
American Red Cross First Aid Exam A
1. A woman burned her hand in the lunchroom. You should:
a. Cool the burn with large amounts of fresh running water.
b. Cover the burn loosely with a dry, sterile dressing.
c. Remove her from the source of the burn.
d. All of the above.
2. Which type of injury involves an open wound in which the bone has torn through the skin?
a. Dislocation
b. Open fracture
c. Sprain
d. Strain
3. The general care for a muscle, bone or joint injury includes the following:
a. Reduce, Insulate, Compress and Evaluate
b. Rest, Ibuprofen, Cool and Evacuate
c. Rest, Immobilize, Cold and Elevate
d. None of the above
4. When caring for a person who is having a seizure, you should:
a. Place a spoon or wallet between the person’s teeth.
b. Remove nearby objects that might cause injury.
c. Try to hold the person still.
d. All of the above.
5. What sudden illness is usually caused by a blockage of blood flow to the brain?
a. Diabetic emergency
b. Heat-related illness
c. Heart attack
d. Stroke
6. This sudden illness results from too much or too little sugar in the person’s blood. What is it?
a. Allergic reaction
b. Diabetic emergency
c. Seizure
d. Stroke
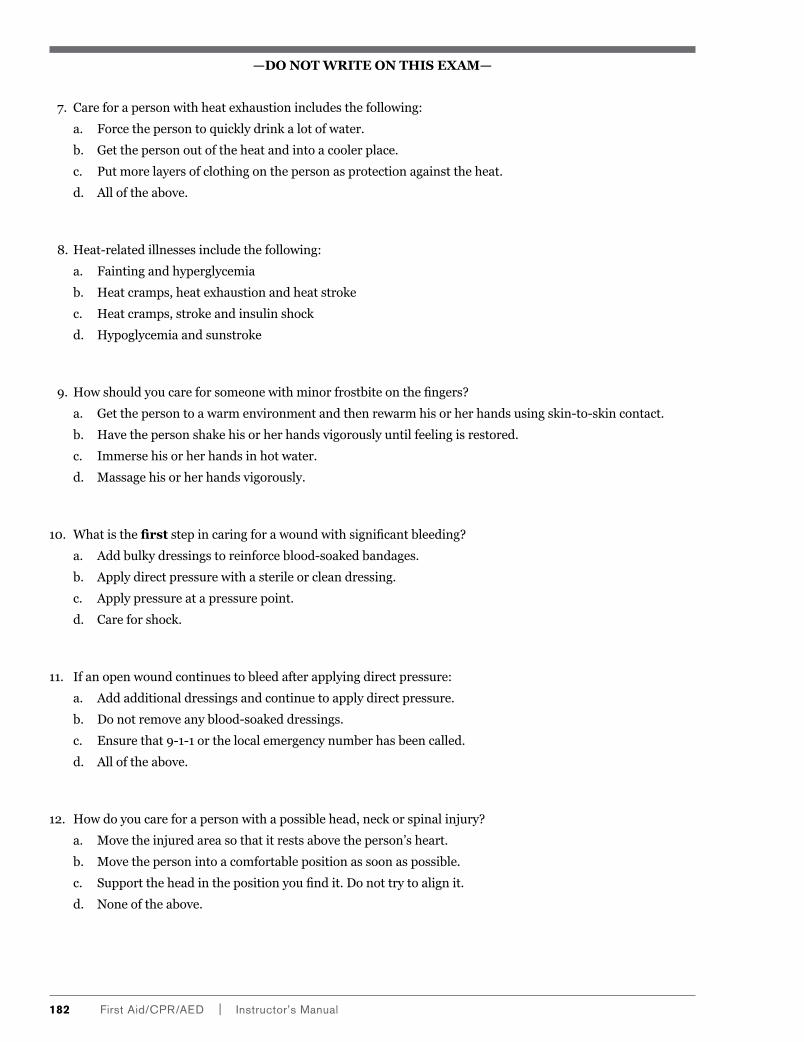
182 First aid/CpR/aed | instructor’s Manual
—Do not write on this exam—
7. Care for a person with heat exhaustion includes the following:
a. Force the person to quickly drink a lot of water.
b. Get the person out of the heat and into a cooler place.
c. Put more layers of clothing on the person as protection against the heat.
d. All of the above.
8. Heat-related illnesses include the following:
a. Fainting and hyperglycemia
b. Heat cramps, heat exhaustion and heat stroke
c. Heat cramps, stroke and insulin shock
d. Hypoglycemia and sunstroke
9. How should you care for someone with minor frostbite on the fingers?
a. Get the person to a warm environment and then rewarm his or her hands using skin-to-skin contact.
b. Have the person shake his or her hands vigorously until feeling is restored.
c. Immerse his or her hands in hot water.
d. Massage his or her hands vigorously.
10. What is the first step in caring for a wound with significant bleeding?
a. Add bulky dressings to reinforce blood-soaked bandages.
b. Apply direct pressure with a sterile or clean dressing.
c. Apply pressure at a pressure point.
d. Care for shock.
11. If an open wound continues to bleed after applying direct pressure:
a. Add additional dressings and continue to apply direct pressure.
b. Do not remove any blood-soaked dressings.
c. Ensure that 9-1-1 or the local emergency number has been called.
d. All of the above.
12. How do you care for a person with a possible head, neck or spinal injury?
a. Move the injured area so that it rests above the person’s heart.
b. Move the person into a comfortable position as soon as possible.
c. Support the head in the position you find it. Do not try to align it.
d. None of the above.
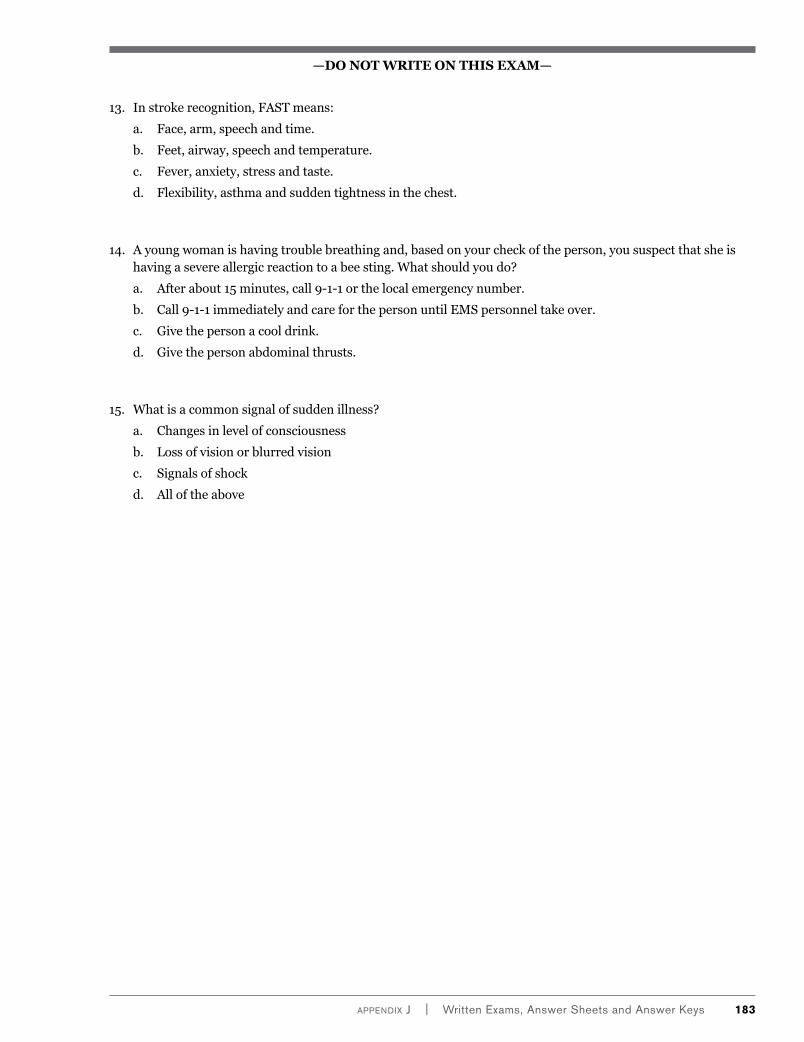
appendix J | Written exams, answer Sheets and answer Keys 183
—Do not write on this exam—
13. In stroke recognition, FAST means:
a. Face, arm, speech and time.
b. Feet, airway, speech and temperature.
c. Fever, anxiety, stress and taste.
d. Flexibility, asthma and sudden tightness in the chest.
14. A young woman is having trouble breathing and, based on your check of the person, you suspect that she is having a severe allergic reaction to a bee sting. What should you do?
a. After about 15 minutes, call 9-1-1 or the local emergency number.
b. Call 9-1-1 immediately and care for the person until EMS personnel take over.
c. Give the person a cool drink.
d. Give the person abdominal thrusts.
15. What is a common signal of sudden illness?
a. Changes in level of consciousness
b. Loss of vision or blurred vision
c. Signals of shock
d. All of the above
184 First aid/CpR/aed | instructor’s Manual
—Do not write on this exam—
American Red Cross First Aid Exam B
IMPORTANT: Read all instructions before beginning the exam.
INSTRUCTIONS: Do not write on this exam. Mark all answers in pencil on the separate answer sheet as directed by your instructor. Read each question carefully. Then choose the best answer and fill in that circle completely on the answer sheet. If you wish to change an answer, erase your first answer entirely. Return this exam with your answer sheet to your instructor when you are finished.
EXAMPLE
ANSWER SHEET
xx. a b c d
xx. Why does the American Red Cross teach this course?
a. To help people recognize and respond appropriately in an emergency
b. To help people make appropriate decisions when they see an emergency
c. To enable people to give immediate care to a suddenly injured or ill person until more advanced medical care takes over
d. All of the above
—DO NOT wRITe ON ThIS exAM—
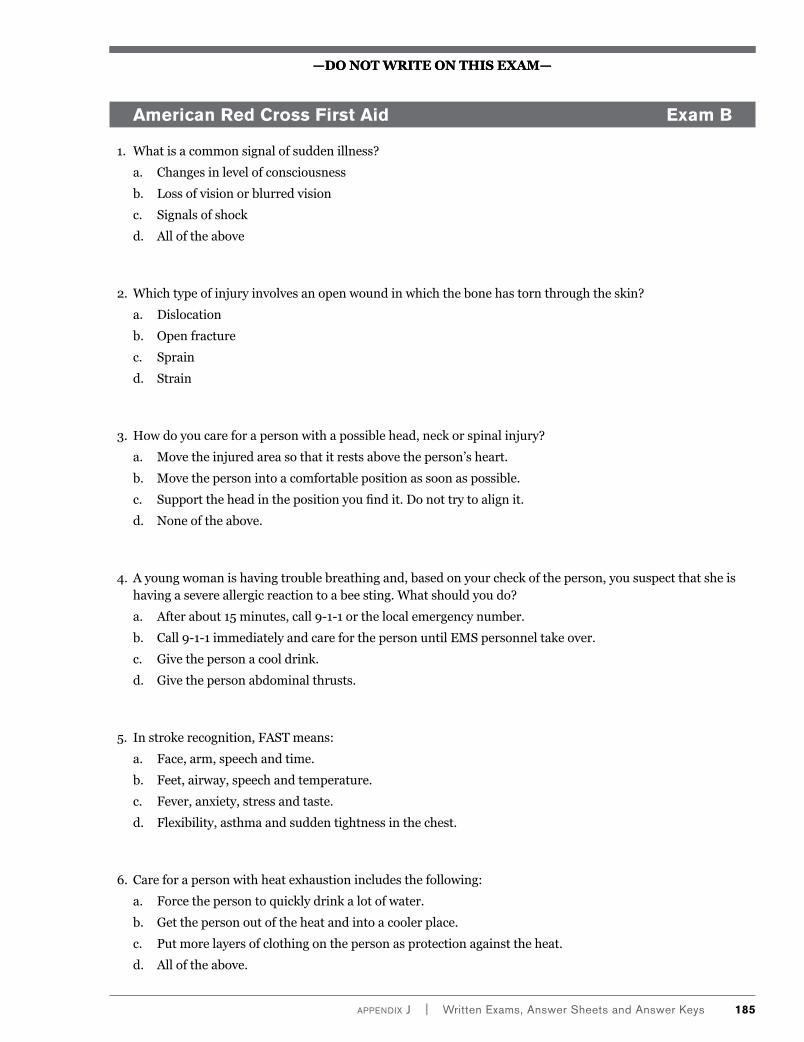
appendix J | Written exams, answer Sheets and answer Keys 185
—Do not write on this exam—
American Red Cross First Aid Exam B
1. What is a common signal of sudden illness?
a. Changes in level of consciousness
b. Loss of vision or blurred vision
c. Signals of shock
d. All of the above
2. Which type of injury involves an open wound in which the bone has torn through the skin?
a. Dislocation
b. Open fracture
c. Sprain
d. Strain
3. How do you care for a person with a possible head, neck or spinal injury?
a. Move the injured area so that it rests above the person’s heart.
b. Move the person into a comfortable position as soon as possible.
c. Support the head in the position you find it. Do not try to align it.
d. None of the above.
4. A young woman is having trouble breathing and, based on your check of the person, you suspect that she is having a severe allergic reaction to a bee sting. What should you do?
a. After about 15 minutes, call 9-1-1 or the local emergency number.
b. Call 9-1-1 immediately and care for the person until EMS personnel take over.
c. Give the person a cool drink.
d. Give the person abdominal thrusts.
5. In stroke recognition, FAST means:
a. Face, arm, speech and time.
b. Feet, airway, speech and temperature.
c. Fever, anxiety, stress and taste.
d. Flexibility, asthma and sudden tightness in the chest.
6. Care for a person with heat exhaustion includes the following:
a. Force the person to quickly drink a lot of water.
b. Get the person out of the heat and into a cooler place.
c. Put more layers of clothing on the person as protection against the heat.
d. All of the above.
—DO NOT wRITe ON ThIS exAM—
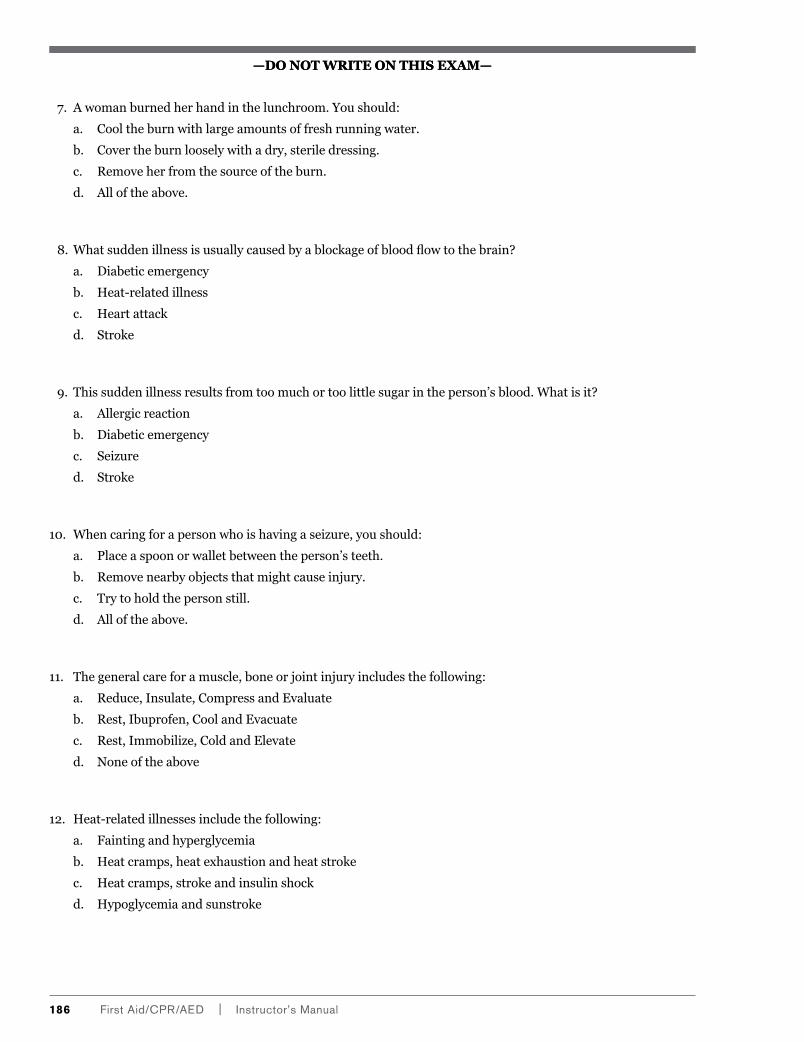
186 First aid/CpR/aed | instructor’s Manual
—Do not write on this exam—
7. A woman burned her hand in the lunchroom. You should:
a. Cool the burn with large amounts of fresh running water.
b. Cover the burn loosely with a dry, sterile dressing.
c. Remove her from the source of the burn.
d. All of the above.
8. What sudden illness is usually caused by a blockage of blood flow to the brain?
a. Diabetic emergency
b. Heat-related illness
c. Heart attack
d. Stroke
9. This sudden illness results from too much or too little sugar in the person’s blood. What is it?
a. Allergic reaction
b. Diabetic emergency
c. Seizure
d. Stroke
10. When caring for a person who is having a seizure, you should:
a. Place a spoon or wallet between the person’s teeth.
b. Remove nearby objects that might cause injury.
c. Try to hold the person still.
d. All of the above.
11. The general care for a muscle, bone or joint injury includes the following:
a. Reduce, Insulate, Compress and Evaluate
b. Rest, Ibuprofen, Cool and Evacuate
c. Rest, Immobilize, Cold and Elevate
d. None of the above
12. Heat-related illnesses include the following:
a. Fainting and hyperglycemia
b. Heat cramps, heat exhaustion and heat stroke
c. Heat cramps, stroke and insulin shock
d. Hypoglycemia and sunstroke
—DO NOT wRITe ON ThIS exAM—
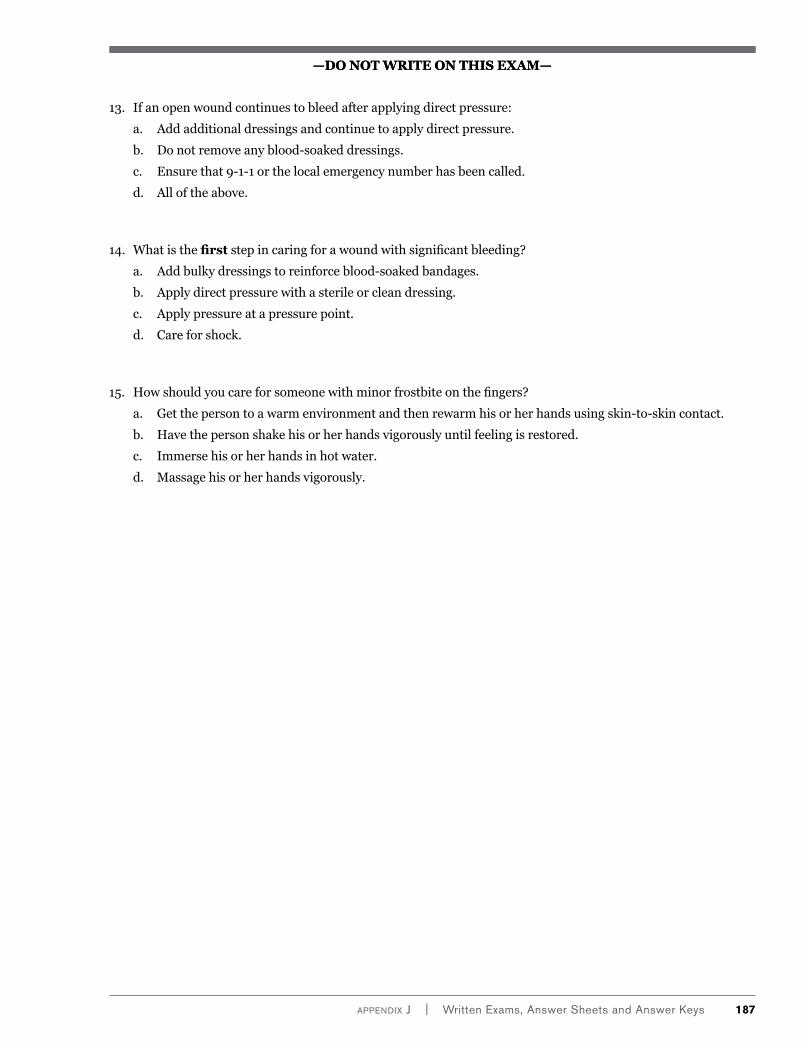
appendix J | Written exams, answer Sheets and answer Keys 187
—Do not write on this exam—
13. If an open wound continues to bleed after applying direct pressure:
a. Add additional dressings and continue to apply direct pressure.
b. Do not remove any blood-soaked dressings.
c. Ensure that 9-1-1 or the local emergency number has been called.
d. All of the above.
14. What is the first step in caring for a wound with significant bleeding?
a. Add bulky dressings to reinforce blood-soaked bandages.
b. Apply direct pressure with a sterile or clean dressing.
c. Apply pressure at a pressure point.
d. Care for shock.
15. How should you care for someone with minor frostbite on the fingers?
a. Get the person to a warm environment and then rewarm his or her hands using skin-to-skin contact.
b. Have the person shake his or her hands vigorously until feeling is restored.
c. Immerse his or her hands in hot water.
d. Massage his or her hands vigorously.
—DO NOT wRITe ON ThIS exAM—
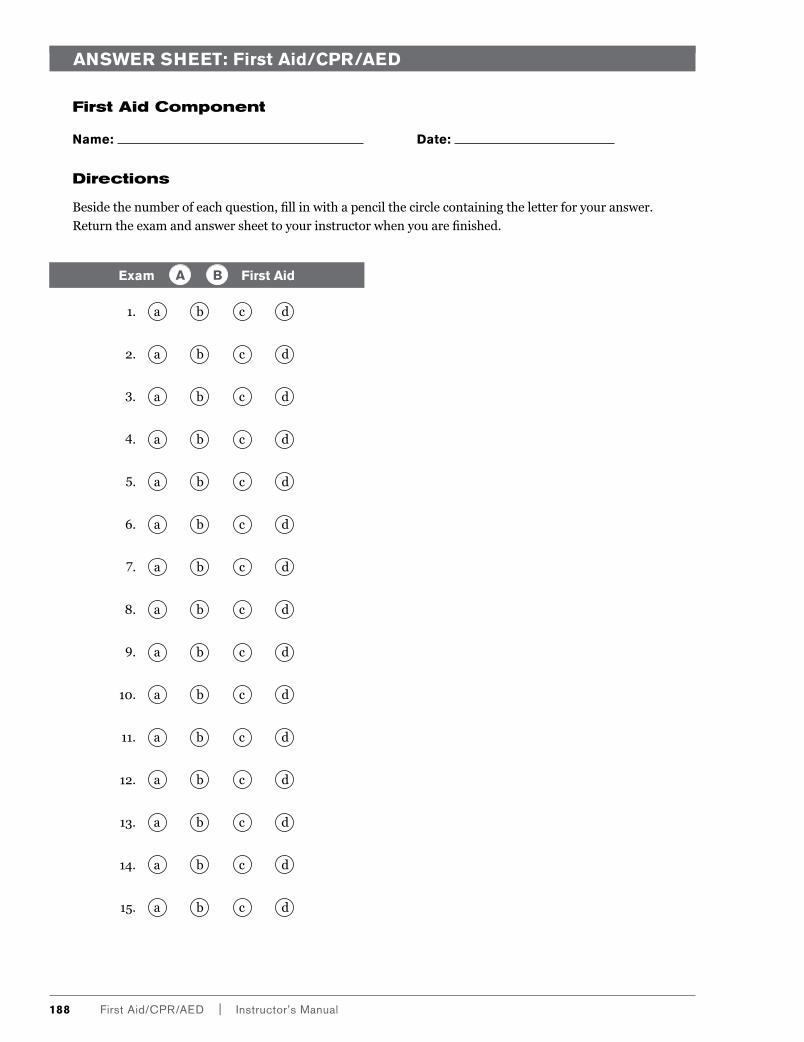
188 First aid/CpR/aed | instructor’s Manual
—Do not write on this exam—ANSWER SHEET: First Aid/CPR/AED
First Aid Component
Name: Date:
Directions
Beside the number of each question, fill in with a pencil the circle containing the letter for your answer.
Return the exam and answer sheet to your instructor when you are finished.
Exam First Aid A B
1. a b c d
2. a b c d
3. a b c d
4. a b c d
5. a b c d
6. a b c d
7. a b c d
8. a b c d
9. a b c d
10. a b c d
11. a b c d
12. a b c d
13. a b c d
14. a b c d
15. a b c d

189 Index
index
AAbdominal thrusts, 43Abrasions, 58Acquired immune deficiency syndrome (AIDS), 103, 129Activity resources, 83–98AED. See Automated external defibrillationAgonal gasps, 128AIDS. See Acquired immune deficiency syndromeAlcohol in cold-related emergencies, 135Allergic reactions, 51, 137American Academy of Pediatrics (AAP), 120, 132American Red Cross
certification criteria of, 3, 115courses offered by, 6resources, 2
American Red Cross First Aid/CPR/AED Course Presentation, 6
American Red Cross First Aid/CPR/AED DVD, 6American Red Cross First Aid/CPR/AED Instructor’s
Manual, 4–5American Red Cross First Aid/CPR/AED Participant’s
Manual, 4American Red Cross First Aid/CPR/AED program, 1–15
assistant and co-instructors for, 13certification criteria for, 3class safety for, 13class size for, 11content of, 3course organization of, 99–101courses and modules in, 3course times for, 11DVD for, 6as employee benefit, 14final written exam for, 73health precautions for course participants in, 13–14, 18,
34, 105–106instructor responsibilities and, 1–2lesson objectives for, 7–10materials, equipment and resources for instructors and
participants in, 4–6, 107–108modifications for different settings of, 14–15purpose of, 1refresher program following, 4resources for, 2workplace certification requirement and, 14–15See also Course outlines; Evaluation; Teaching strategies
American Red Cross First Aid/CPR/AED Ready Reference Cards, 4
Americans with Disabilities Act, course modification guide of, 14
Anaphylaxis, 135lesson objectives for, 10
Anatomic splint, skills chart and assessment tool for, 67Answer sheets and keys, 146, 171, 179, 188, 189–197Aspirin in cardiac emergencies, 130Assessment. See EvaluationAssistant and co-instructors, 13Asthma inhaler, lesson objectives for, 10Authorized Provider Agreement, 2Automated external defibrillation (AED), 33–39
basics of, 35cardiac chain of survival and, 34–35for children, 120, 132defibrillation and, 119, 121definition of, 119equipment operation and pad placement of, 121–122fact or fiction activity for, 35–36fact or fiction worksheet for, 86frequently asked questions about, 131–132for infants, 132lesson objectives for, 8, 33lesson topics for, 34–37lesson wrap-up for, 37maintenance of, 124oxygen and, 124pediatric pads for, 120, 131resource information for, 119–124skill chart and assessment tool for, 38–39skill scenarios for, 79–80, 95–96special resuscitation situations for, 122–124video segment for, 125
Avulsions or amputations, 58
BBack blows, 45, 46Back injuries. See Spinal injuriesBarriers to action in emergencies, 19, 21Biohazards, 128Blood and bleeding
contamination by, 128controlling, 59, 62, 136
Body fluids, 129Body piercings and AEDs, 36, 123Brain attack. See StrokeBreathing emergencies, 41–46
causes of choking in, 42conscious choking in adult and child in, 43, 44,
132–133conscious choking in infant in, 43, 45, 133frequently asked questions about, 132–134lesson objectives for, 8, 41lesson topics for, 41–43lesson wrap-up for, 44recognition of, 41–42signals of, 41, 42skills charts and assessment tools for, 45–46video segments for, 125See also Cardiopulmonary resuscitation (CPR)
Breathing, normal, 21Burns, 59–61, 87
CCaffeine in cold-related emergencies, 135Cardiac emergencies, 25–31, 119
causes of, 119chain of survival in, 27, 34–35in children and infants, 120CPR in, 26–27, 28, 120–121frequently asked questions about, 130–131lesson objectives for, 8, 25
189 Index
190 First Aid/CPR/AED | Instructor’s Manual190
lesson topics for, 25–27lesson wrap-up for, 27–28review of, 34signals of heart attacks and, 25–26, 27sudden cardiac arrest, 35, 119video segments for, 125
Cardiopulmonary resuscitation (CPR), 26–31for children, 75–76cycle for, 28frequently asked questions about, 130–131hands-only, 27for infants, 77–78lesson objectives for, 8review of, 34–35role in cardiac arrest, 120–121scenario worksheets for, 74–78, 90–94self-initiated or cough, 130skills chart and assessment tool for, 29–31skill scenarios for, 74–78video segments for, 125when to stop, 43See also Breathing emergencies
Certification, Red Cross, 3, 14, 115Checking an ill or injured person, 17–24
conscious, 127frequently asked questions about, 127–130lesson objectives for, 7, 17lesson topics for, 19–21lesson wrap-up for, 21overcoming barriers to act, 19, 21rescue breathing and, 22–24shock and, 21skills chart and assessment tool for, 22–24unconscious adult and child, 20, 22–23, 127–128unconscious infant and, 20, 127–128, 129–130video segments for, 125
Chemical burns, 60, 61Chest compressions, 29, 30Chest thrusts, 45Children
AED for, 122cardiac emergencies in, 120causes of cardiac arrest in, 120checking unconscious, 20, 23, 127–128conscious choking in, 43, 44, 132–133CPR scenarios for, 75–76, 91–92defibrillation recommendations for, 119–120in heat- and cold-related emergencies, 54poisoning emergency in, 51sudden collapse of, 28
Closed wounds, 58. See also Soft tissue injuriesCoaching versus prompting participants, 110Co-instructors, 13Cold-related emergencies, 55–56, 135Commotio cordis, 131Competency, 3, 115Concussion, 65–66Confined spaces, 124, 127Consent, obtaining, 43, 44Continuing education, first aid training for, 15Contusions, 58Cough (self-initiated) CPR, 130Course introduction, 18CPR. See Cardiopulmonary resuscitation
DDefibrillation, 119, 121
for children, 119–120See also Automated external defibrillation (AED)
Diabetic emergency, 50, 134
Disabilitiescourse modification for, 112–113participants with, 14, 112–113
Discussion facilitation, 107–108Disease transmission prevention, 129Disposable gloves, 60, 136DVDs for American Red Cross First Aid/CPR/AED
program, 6
EElderly, in heat- and cold-related emergencies, 54Electrical burns, 61, 136Emergencies
emotional aspects of giving care in, 127overcoming barriers to act in, 19, 21See also Diabetic emergency; Environmental
emergenciesEmployee benefit, first aid training as, 14Environmental emergencies, 53–56
frequently asked questions about, 135–136lesson objectives for, 9, 53lesson topics for, 53–56lesson wrap-up for, 56See also Cold-related emergencies; Heat-related
illnessesEpinephrine auto-injector, lesson objectives for, 10Equipment. See Materials and equipmentEvaluation, 115–118
certificates and, 118criteria for course completion and, 115scenarios and, 115–117of skills, 115See also American Red Cross First Aid/CPR/AED
program; Teaching strategiesExams. See Written exams
FFacilitation principles, 107–108Fainting, 51, 134F.A.S.T. (face/arm/speech/time) in stroke, 50FDA. See Food and Drug AdministrationFebrile seizures, 50, 134First aid
scenarios for, 81–82, 97–98video segments for, 125
Food and Drug Administration (FDA), 120Fractures, 137. See also Muscle, bone and joint injuriesFree-flowing oxygen, 124Frequently asked questions about first aid, CPR and AED,
127–137Frostbite, 55, 56, 135Full thickness burns, 59
GGloves, disposable, 62, 136Good Samaritan laws and consent, 129
HHair (chest) and AEDs, 36, 123Hand washing, 136Head, neck and spinal injuries, 64–66, 137Heart attack
signals of, 25–26, 27versus sudden cardiac arrest, 35See also Cardiac emergencies
Heat cramps, 53, 54Heat exhaustion, 53, 54Heat-related illnesses, 53–54, 56, 135Heat stroke, 53–54, 56Hepatitis B virus (HBV), 103, 129
191 Index
Hepatitis C virus (HCV), 103, 129Human immunodeficiency virus (HIV), 103, 129Hyperglycemia, 134Hypoglycemia, 134Hypothermia, 55, 56
AEDs and, 122
IIACET. See International Association for Continuing
Education and TrainingIce or cold packs, 136ILCOR. See International Liaison Committee on
ResuscitationIllness. See Checking an ill or injured person; Sudden
illnessImplantable devices and AEDs, 36, 122–123, 132Infants
AED for, 36, 122cardiac emergencies in, 120checking unconscious, 20, 24, 127–128, 129–130conscious choking in, 43, 45, 133CPR scenarios for, 77–78
Injured persons, moving, 21Injuries. See Checking an ill or injured person; Muscle,
bone and joint injuries; Soft tissue injuriesInstructor Agreement and Code of Conduct, 2Instructor aides, 13Instructors
resources and materials for, 4–6, 106responsibilities of, 1–2video segments for training of, 126
Instructor’s Corner (www.redcross.org/instructorscorner), 2, 5–6
International Association for Continuing Education and Training (IACET), 15
International Liaison Committee on Resuscitation (ILCOR), 120
JJewelry and AEDs, 36, 123
LLacerations, 58Lectures, 108–109Lesson objectives for First Aid/CPR/AED program, 7–10Lessons
course conclusion, 71–82See also individual topics
MManikins
cleaning of, 103–104determining need for, 103Manikin Decontamination and Use, 1
Materials and equipmentfor the class, 105–106for instructors, 4–6, 106for participants, 4, 106
Medication patches and AEDs, 123Metal surfaces and AEDs, 36, 124Muscle, bone and joint injuries, 63–70
concussion and, 65–66dazedness and confusion and, 64–65frequently asked questions about, 137lesson objectives for, 9, 63lesson topics for, 63–66lesson wrap-up for, 66RICE (rest/immobilize/cold/elevate) and, 63skills charts and assessments for, 67–70splinting skill for, 64
NNational Athletic Trainers Association, 131National Poison Control Center (PCC), 135Neck injuries, 64–65, 137Nitroglycerin, 130Nitroglycerin patches and AEDs, 123Nosebleeds, 59
OOccupational Safety and Health Administration (OSHA), 4,
127, 128Older adults. See ElderlyOpen fractures, 137Open wounds, 58. See also Soft tissue injuriesOSHA. See Occupational Safety and Health
AdministrationOxygen
AED and, 124free-flowing, 124
PPacemakers and AEDs, 36, 122–123, 132Partial thickness burns (second degree), 59Participants, 1
coaching versus prompting, 110with disabilities, 14, 112–113health precautions for, 13–14, 18, 34, 103–104materials for, 4, 106with reading difficulties/disabilities, 113See also Evaluation
PCC. See Poison Control Center; National Poison Control Center
Pediatric Advanced Life Supports (PALS) Task Force, 120
Poison Control Center (PCC), 135Poisoning, 51, 135Posters, skills, 6Pregnant women
AED for, 36, 132choking in, 133CPR for, 130
Prompting versus coaching participants, 110Punctures, 58
RRadiation (sun) burns, 61Red Cross. See American Red CrossRescue breaths
in adults, 22, 29, 30chest rise and, 28, 29in children, 23, 29, 30in infants, 24, 31See also cardiopulmonary resuscitation (CPR)
Respiratory distress. See Breathing emergenciesRICE (rest/immobilize/cold/elevate), 63Rigid splint, skills chart and assessment tool for, 69
SSafety
checking scene for, 127in class, 13
Scenarios. See Skill scenariosSeizures, 50, 134Self-initiated (cough) CPR, 130Shock, 21, 44, 130Skill scenarios
for AED, 79–80, 95–96course components and, 71–72, 116–117for CPR, 74–78, 90–94for first aid, 81–82, 97–98

192 First Aid/CPR/AED | Instructor’s Manual
skills evaluation and, 115worksheets for, 90–98
Skillsevaluation of, 115posters for, 6See also Evaluation; Teaching strategies
Skills charts and assessment toolsfor applying an anatomic splint, 67for applying a rigid splint, 69for applying a sling and binder, 70for applying a soft splint, 68for checking an unconscious adult, 22for checking an unconscious child, 23for checking an unconscious infant, 24for conscious choking, 45–46for controlling external bleeding, 62for CPR, 29–31for using an AED, 38–39
Sling and binder, skills chart and assessment tool for, 70Soft splint, skills chart and assessment tool for, 68Soft tissue injuries, 57–62
caring for, 59–61controlling bleeding in, 59, 62frequently asked questions about, 136–137identification of, 58lesson objectives for, 9, 57lesson topics for, 57–61lesson wrap-up for, 61skills chart and assessment tool for, 62
Spinal injuries, 64–65, 137Splinting, 64, 137
See also Muscle, bone and joint injuriesSports drinks, 135Stitches, 58, 136Stroke, 50, 134–135Sudden cardiac arrest, 35, 119Sudden illness, 49–51
allergic reactions as, 51, 135diabetic emergency as, 50, 134fainting as, 51, 134F.A.S.T. (face/arm/speech/time) and, 50frequently asked questions about, 134–135lesson objectives for, 8, 49lesson topics on, 49–50lesson wrap-up for, 50–51poisoning as, 51recognition of, 49seizure as, 50, 134stroke as, 50, 135
Sunburn, 61Superficial (first degree) burns, 59
TTeaching strategies, 107–113
coaching versus prompting participants, 110conducting skill practice sessions, 109–112discussion facilitation, 107–108educational activities and, 108–109group activities, 109lectures, 108–109lesson wrap-ups, 109practicing skills correctly, 112types of practice, 111working with participants with disabilities, 112–113See also American Red Cross First Aid/CPR/AED
program; EvaluationThermal burns, 60Tourniquets, 10, 136Training equipment, 6Transdermal medication patches and AEDs, 123Trauma and AEDs, 123
VVentricular fibrillation (V-fib), 119–120Ventricular tachycardia (V-tach), 119Video segments for First Aid/CPR/AED program, 125–126Vomiting
during CPR, 131head, neck and spinal injuries and, 137in poisoning, 135
WWashing hands, 136Water and AEDs, 123Workplace certification requirement, 14Worksheets
AED—Fact or Fiction, 86Burn Care—Fact or Fiction, 87Dazed and Confused, 88–89scenario, 90–98
Wounds, closed and open, 58. See also Soft tissue injuriesWritten exams, 117
for adult, child, infant CPR, 165–172for adult CPR, 147–152for AED, 173–179answers for, back of bookfor child CPR, 153–158final, 73for first aid, 180–188before giving care, 140–146for infant CPR, 159–164
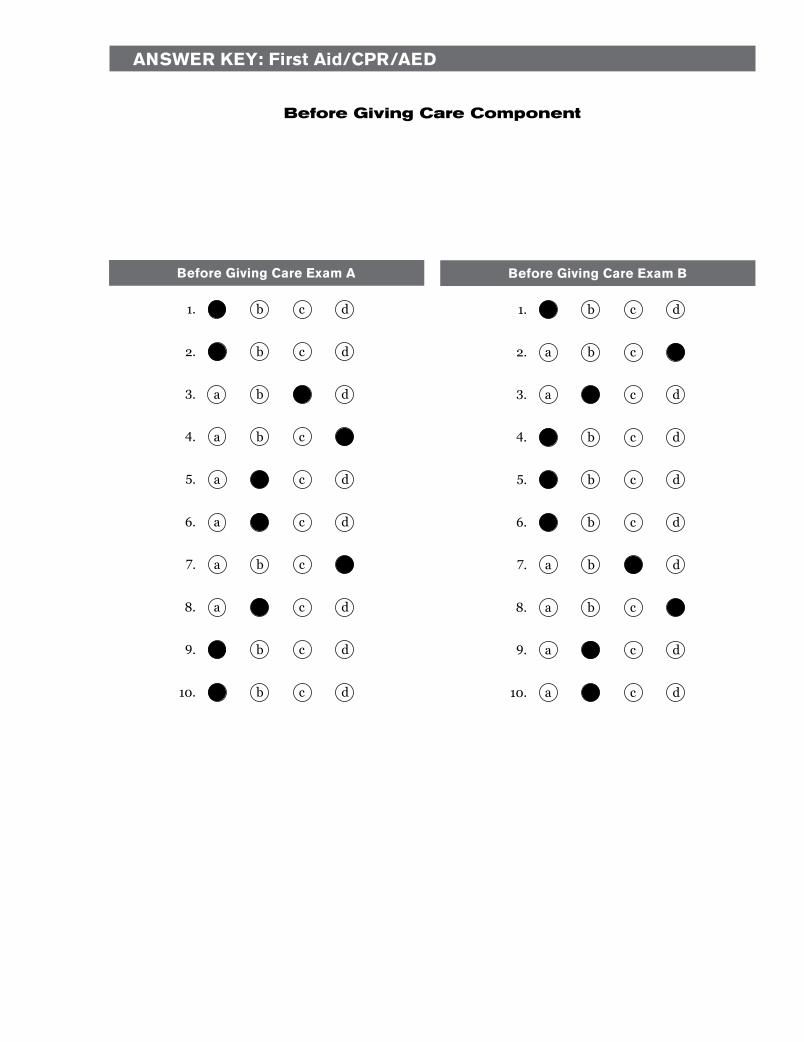
Answer Key: First Aid/CPr/AeD
Before Giving Care Component
Before Giving Care exam A
1. a b c d
2. a b c d
3. a b c d
4. a b c d
5. a b c d
6. a b c d
7. a b c d
8. a b c d
9. a b c d
10. a b c d
Before Giving Care exam B
1. a b c d
2. a b c d
3. a b c d
4. a b c d
5. a b c d
6. a b c d
7. a b c d
8. a b c d
9. a b c d
10. a b c d

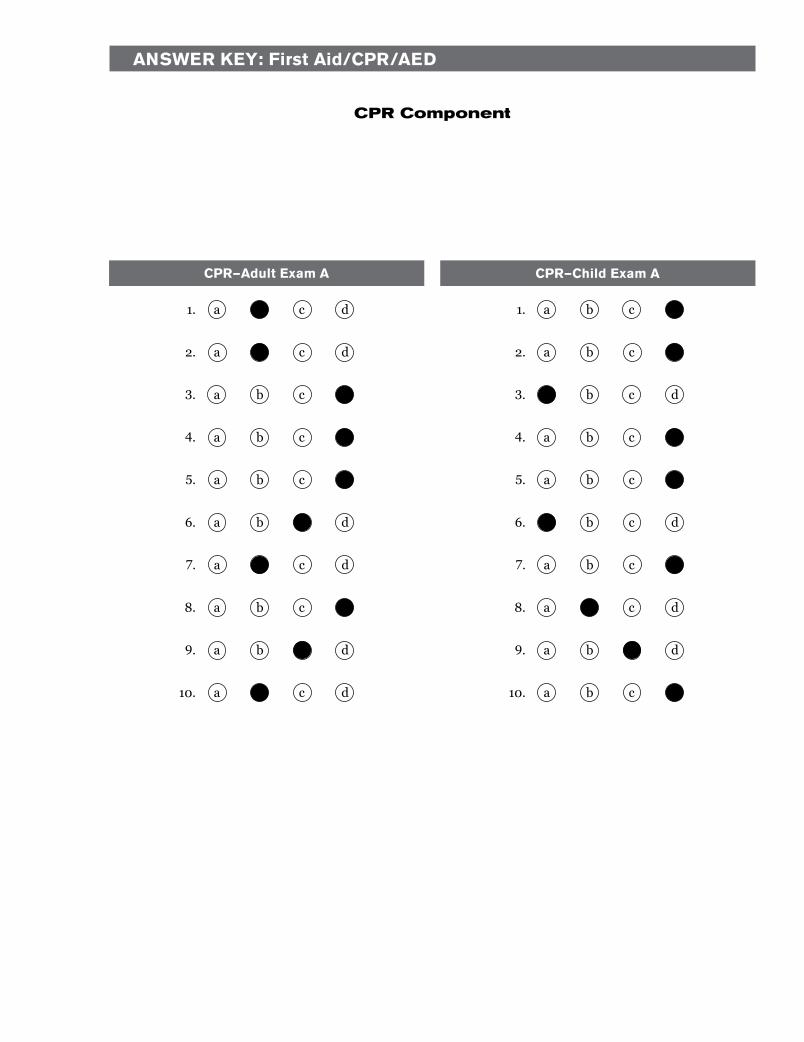
Answer Key: First Aid/CPr/AeD
CPR Component
CPr—Adult exam A
1. a b c d
2. a b c d
3. a b c d
4. a b c d
5. a b c d
6. a b c d
7. a b c d
8. a b c d
9. a b c d
10. a b c d
CPr—Child exam A
1. a b c d
2. a b c d
3. a b c d
4. a b c d
5. a b c d
6. a b c d
7. a b c d
8. a b c d
9. a b c d
10. a b c d

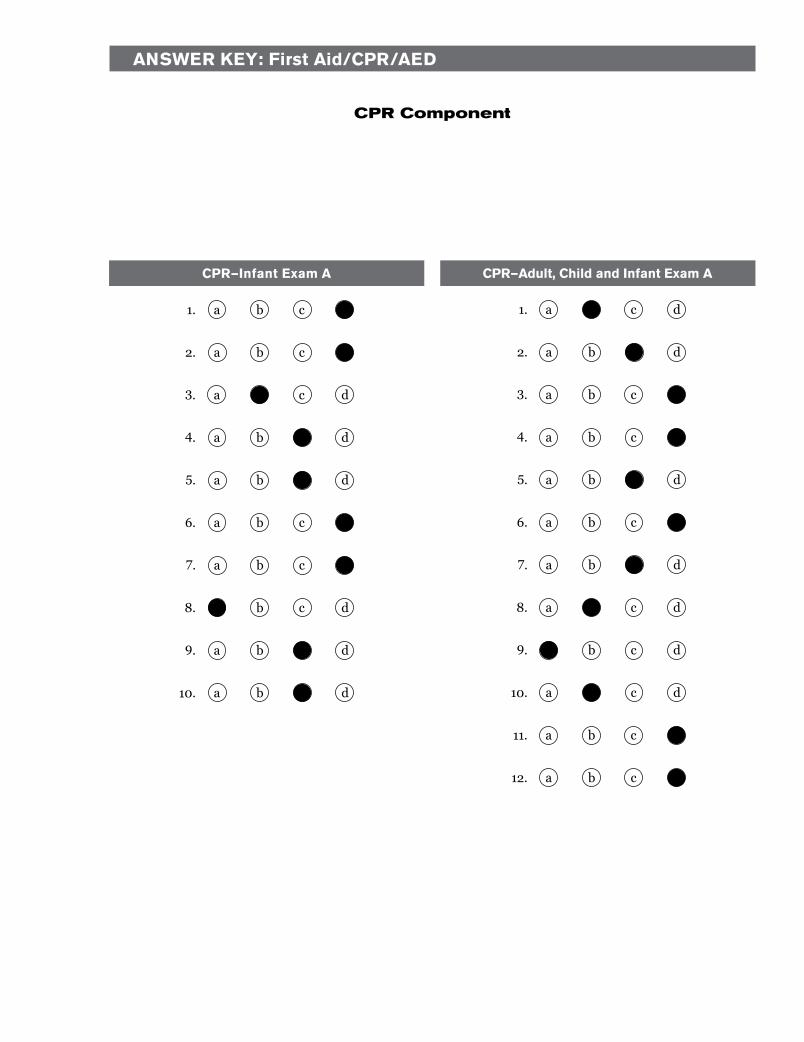
CPr—Adult, Child and Infant exam A
1. a b c d
2. a b c d
3. a b c d
4. a b c d
5. a b c d
6. a b c d
7. a b c d
8. a b c d
9. a b c d
10. a b c d
11. a b c d
12. a b c d
CPr—Infant exam A
1. a b c d
2. a b c d
3. a b c d
4. a b c d
5. a b c d
6. a b c d
7. a b c d
8. a b c d
9. a b c d
10. a b c d
Answer Key: First Aid/CPr/AeD
CPR Component

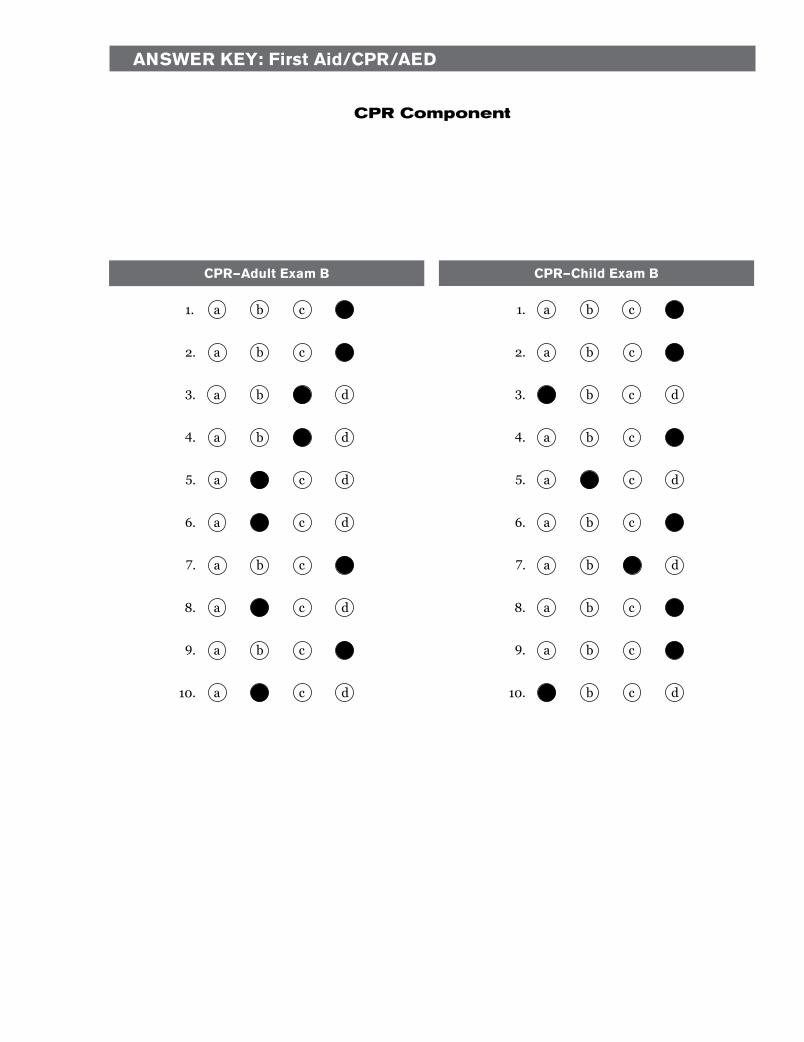
Answer Key: First Aid/CPr/AeD
CPR Component
CPr—Adult exam B
1. a b c d
2. a b c d
3. a b c d
4. a b c d
5. a b c d
6. a b c d
7. a b c d
8. a b c d
9. a b c d
10. a b c d
CPr—Child exam B
1. a b c d
2. a b c d
3. a b c d
4. a b c d
5. a b c d
6. a b c d
7. a b c d
8. a b c d
9. a b c d
10. a b c d

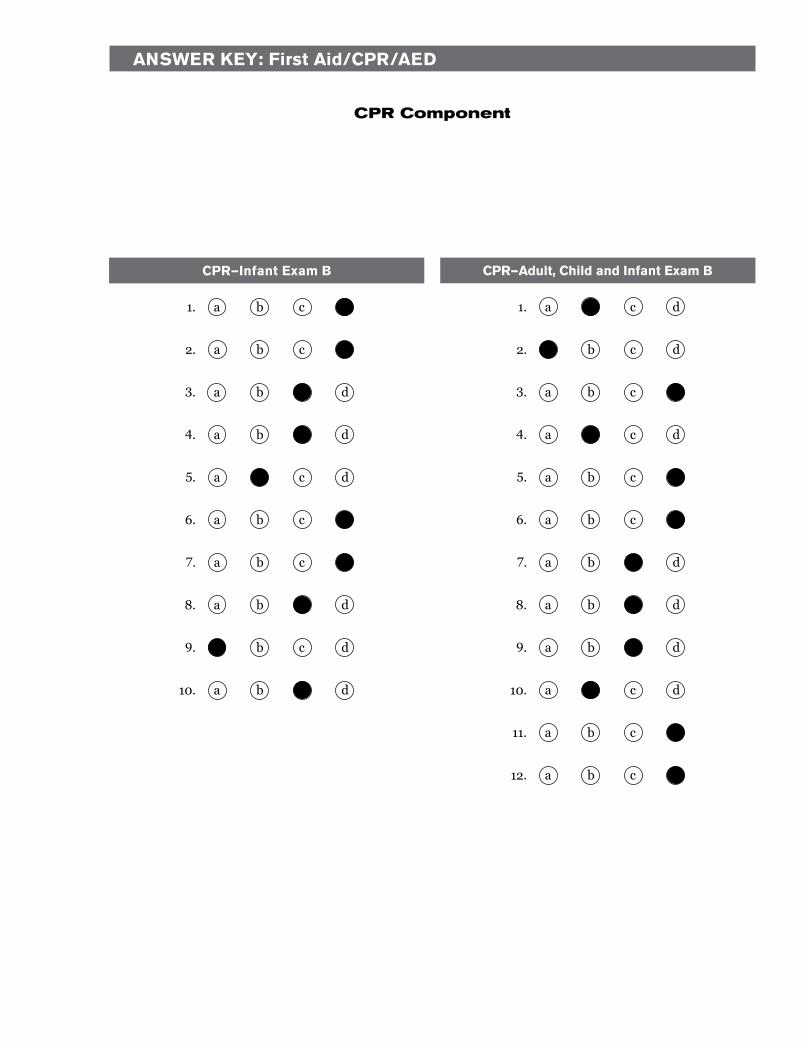
Answer Key: First Aid/CPr/AeD
CPR Component
CPr—Adult, Child and Infant exam B
1. a b c d
2. a b c d
3. a b c d
4. a b c d
5. a b c d
6. a b c d
7. a b c d
8. a b c d
9. a b c d
10. a b c d
11. a b c d
12. a b c d
CPr—Infant exam B
1. a b c d
2. a b c d
3. a b c d
4. a b c d
5. a b c d
6. a b c d
7. a b c d
8. a b c d
9. a b c d
10. a b c d

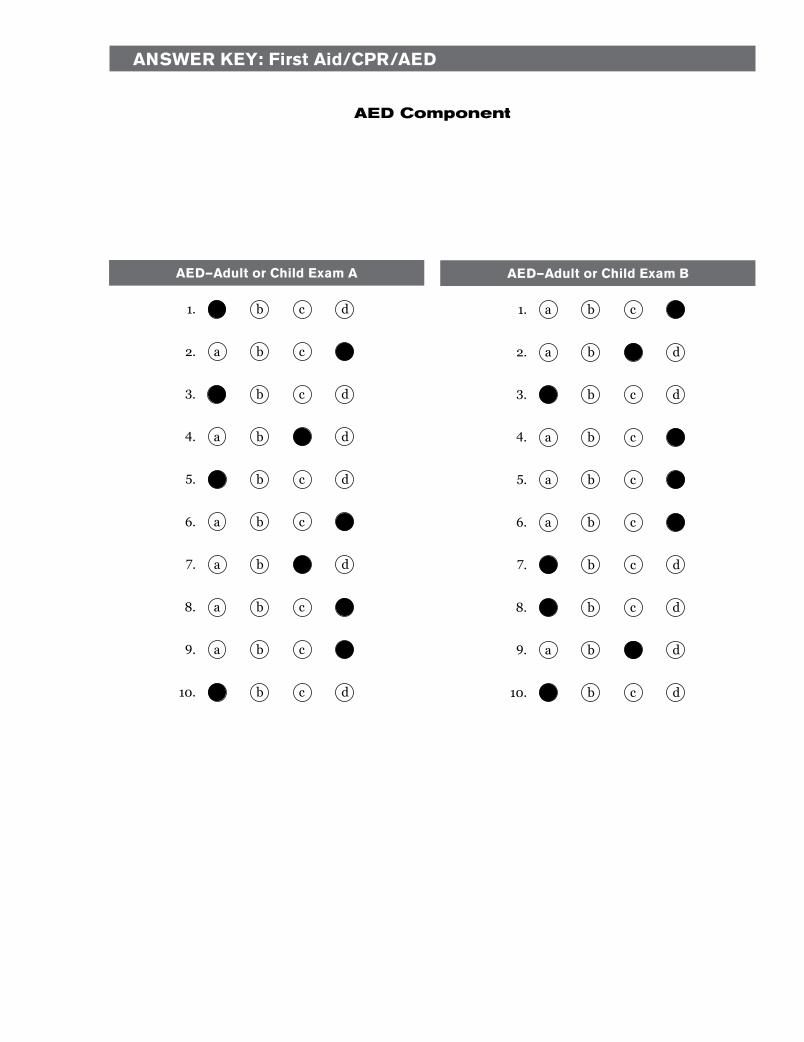
Answer Key: First Aid/CPr/AeD
AED Component
AeD—Adult or Child exam A
1. a b c d
2. a b c d
3. a b c d
4. a b c d
5. a b c d
6. a b c d
7. a b c d
8. a b c d
9. a b c d
10. a b c d
AeD—Adult or Child exam B
1. a b c d
2. a b c d
3. a b c d
4. a b c d
5. a b c d
6. a b c d
7. a b c d
8. a b c d
9. a b c d
10. a b c d

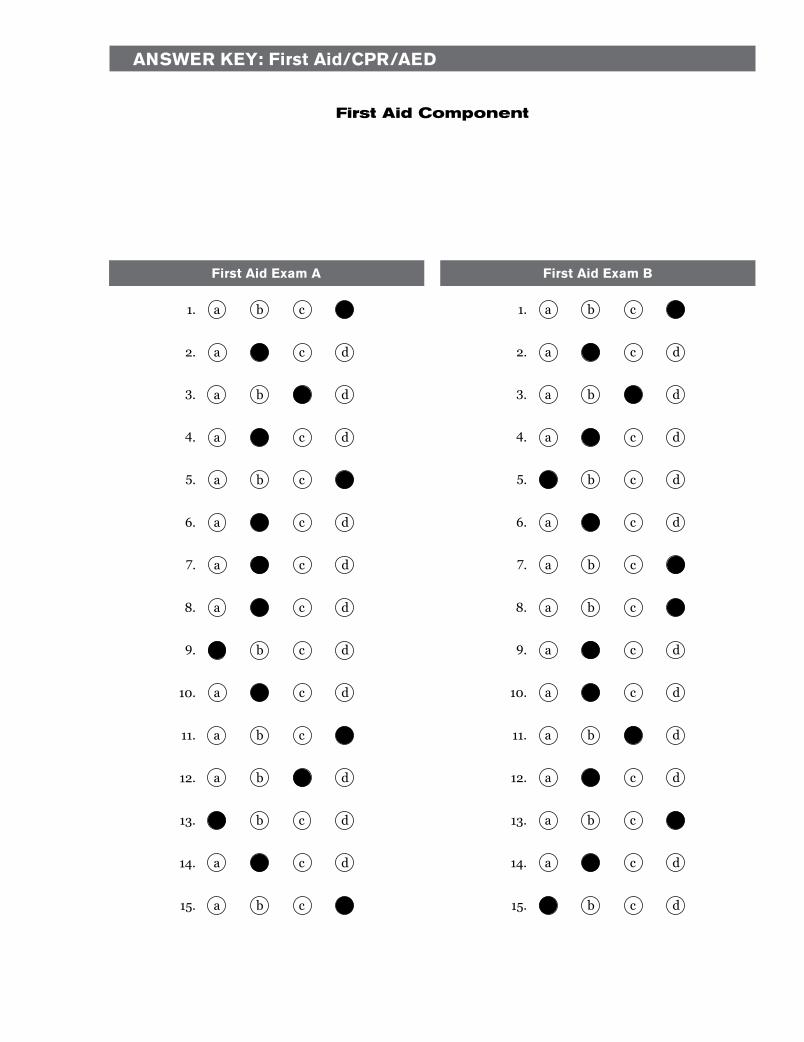
Answer Key: First Aid/CPr/AeD
First Aid Component
First Aid exam A
1. a b c d
2. a b c d
3. a b c d
4. a b c d
5. a b c d
6. a b c d
7. a b c d
8. a b c d
9. a b c d
10. a b c d
11. a b c d
12. a b c d
13. a b c d
14. a b c d
15. a b c d
First Aid exam B
1. a b c d
2. a b c d
3. a b c d
4. a b c d
5. a b c d
6. a b c d
7. a b c d
8. a b c d
9. a b c d
10. a b c d
11. a b c d
12. a b c d
13. a b c d
14. a b c d
15. a b c d


First Aid/CPR/AED Participant’s Manual
First A
id/C
PR
/AE
D | P
articipant’s Manual