Embed Size (px)
Citation preview
Login
1. Enter your User ID into the User ID text box using the keyboard.
2. Use the Tab or Enter key to move to the PIN text box.
3. Enter your PIN into the PIN text box using the keyboard.
4. Touch the Login button or press the Enter key on your
keyboard.
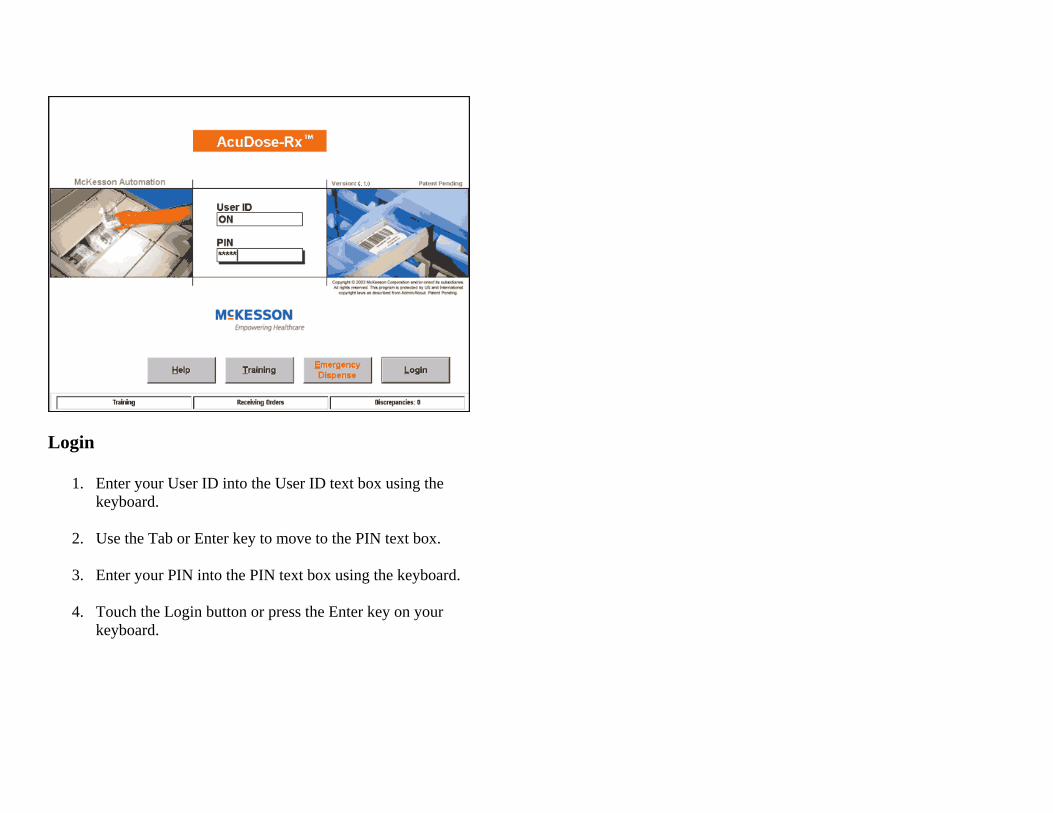
Emergency Dispense
1. Enter your User ID and PIN. 2. Touch the Emergency Dispense button.
3. Select the medication(s) you wish to dispense.
4. Touch the Dispense button.
5. Enter patient information, and then touch OK.
6. Follow the Inventory Dispense process to complete the
transaction.
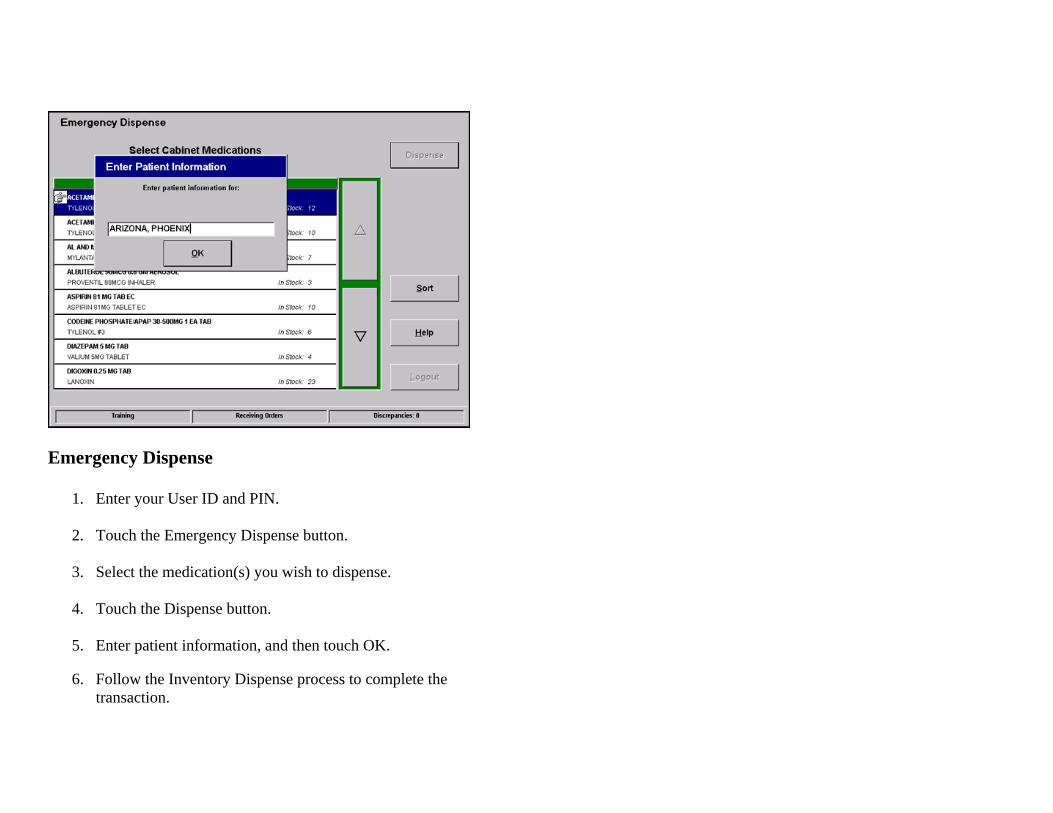
Inventory Dispense 1. Touch to highlight the patient’s name. 2. Touch the Inventory Dispense button.
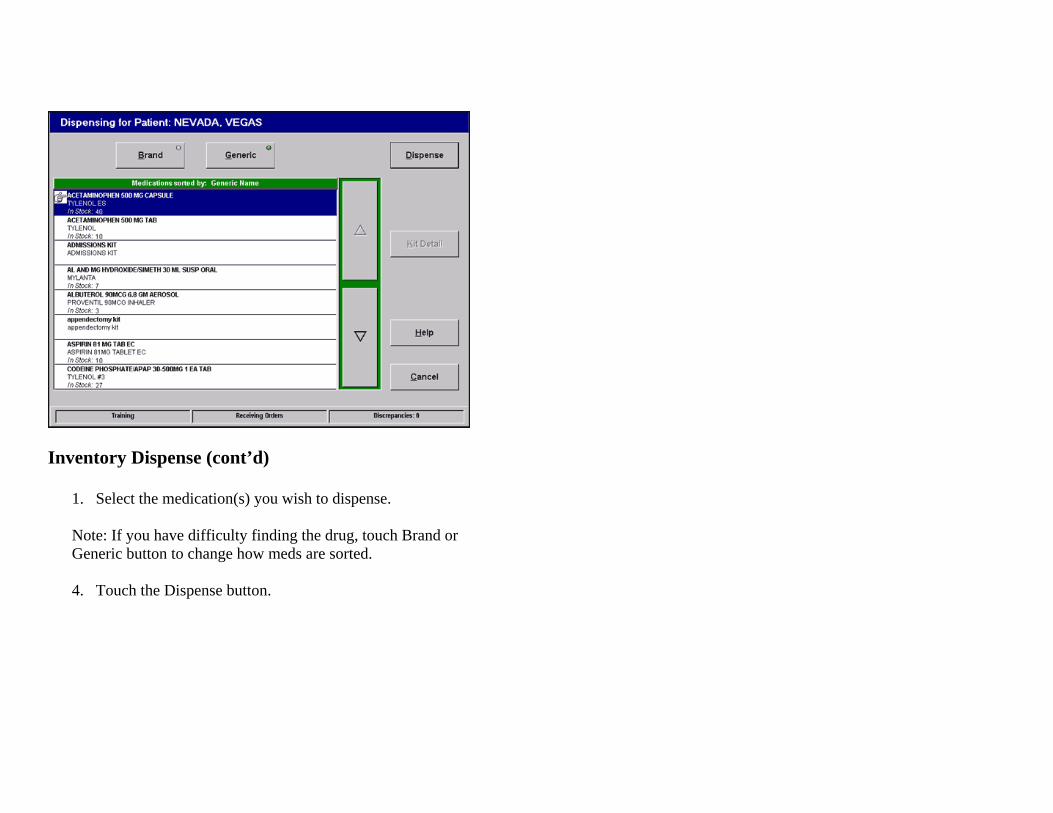
Inventory Dispense (cont’d)
1. Select the medication(s) you wish to dispense. Note: If you have difficulty finding the drug, touch Brand or Generic button to change how meds are sorted.
4. Touch the Dispense button.
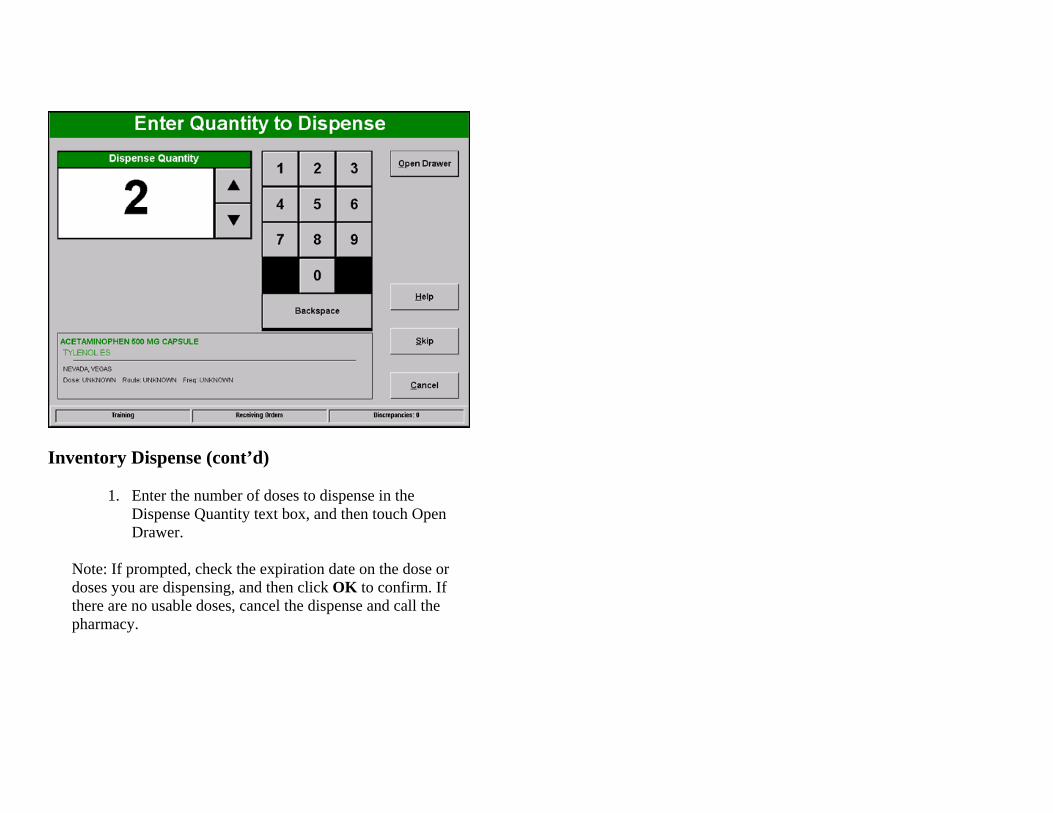
Inventory Dispense (cont’d)
1. Enter the number of doses to dispense in the Dispense Quantity text box, and then touch Open Drawer.
Note: If prompted, check the expiration date on the dose or doses you are dispensing, and then click OK to confirm. If there are no usable doses, cancel the dispense and call the pharmacy.
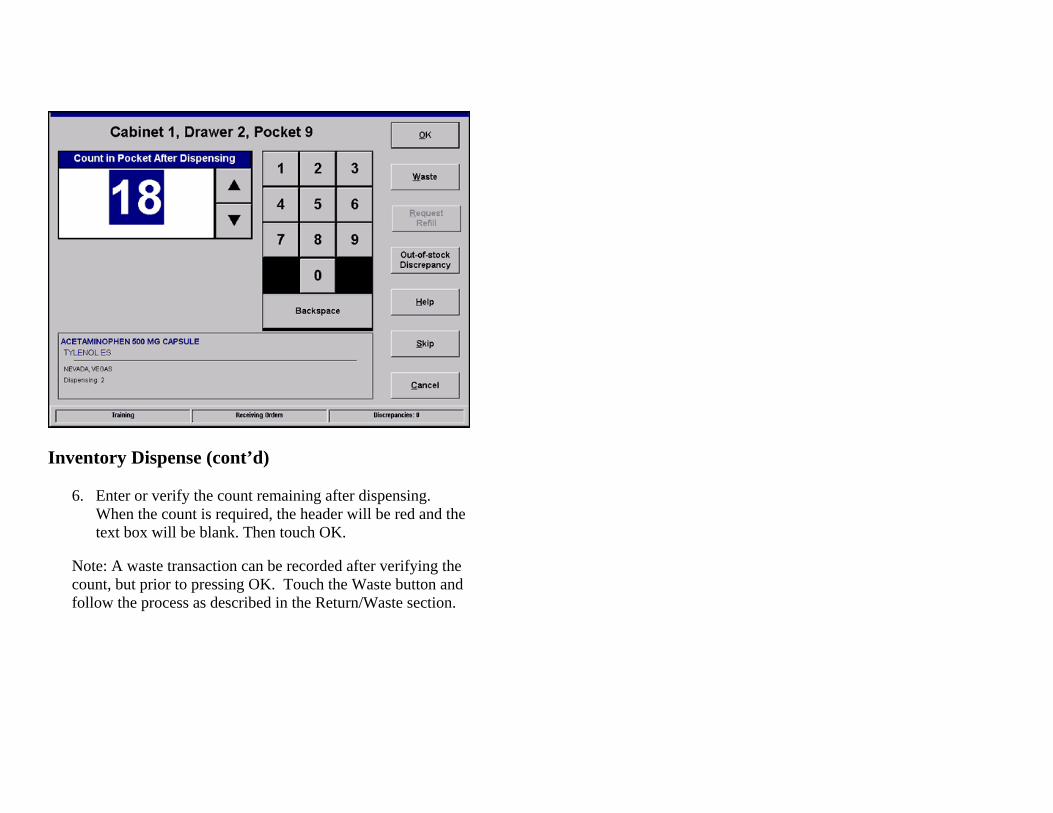
Inventory Dispense (cont’d)
6. Enter or verify the count remaining after dispensing. When the count is required, the header will be red and the text box will be blank. Then touch OK.
Note: A waste transaction can be recorded after verifying the count, but prior to pressing OK. Touch the Waste button and follow the process as described in the Return/Waste section.
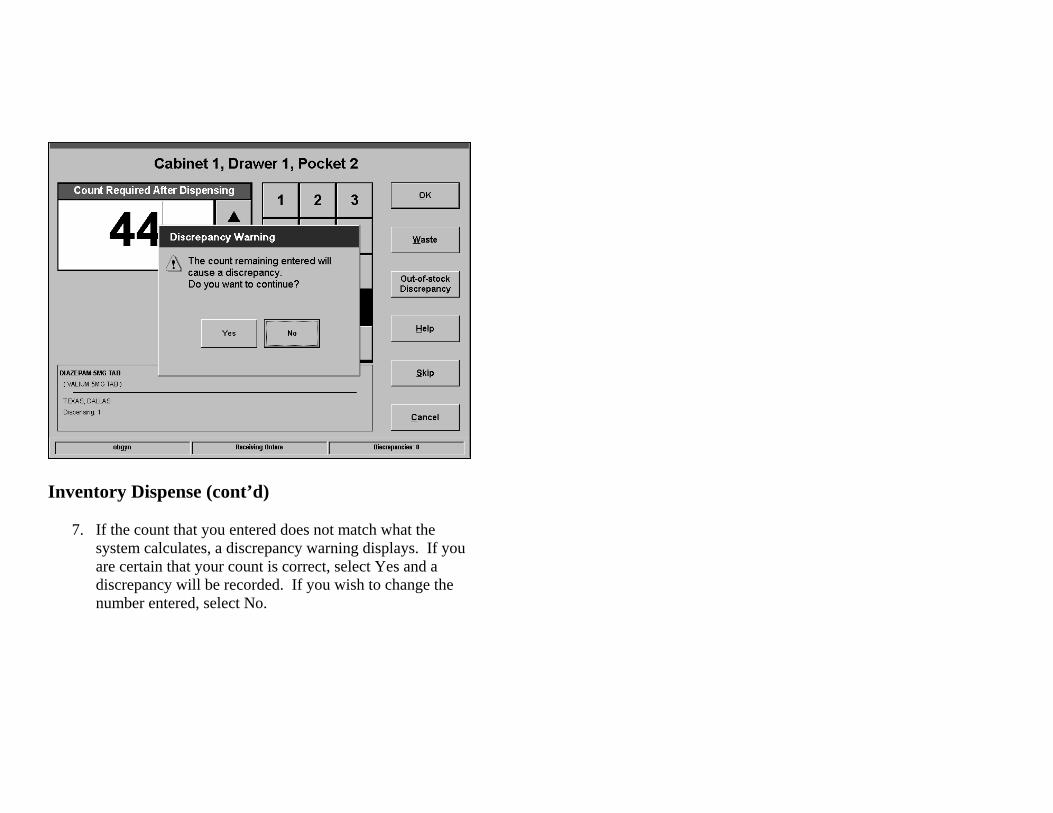
Inventory Dispense (cont’d)
7. If the count that you entered does not match what the system calculates, a discrepancy warning displays. If you are certain that your count is correct, select Yes and a discrepancy will be recorded. If you wish to change the number entered, select No.
Inventory Dispense (cont’d)
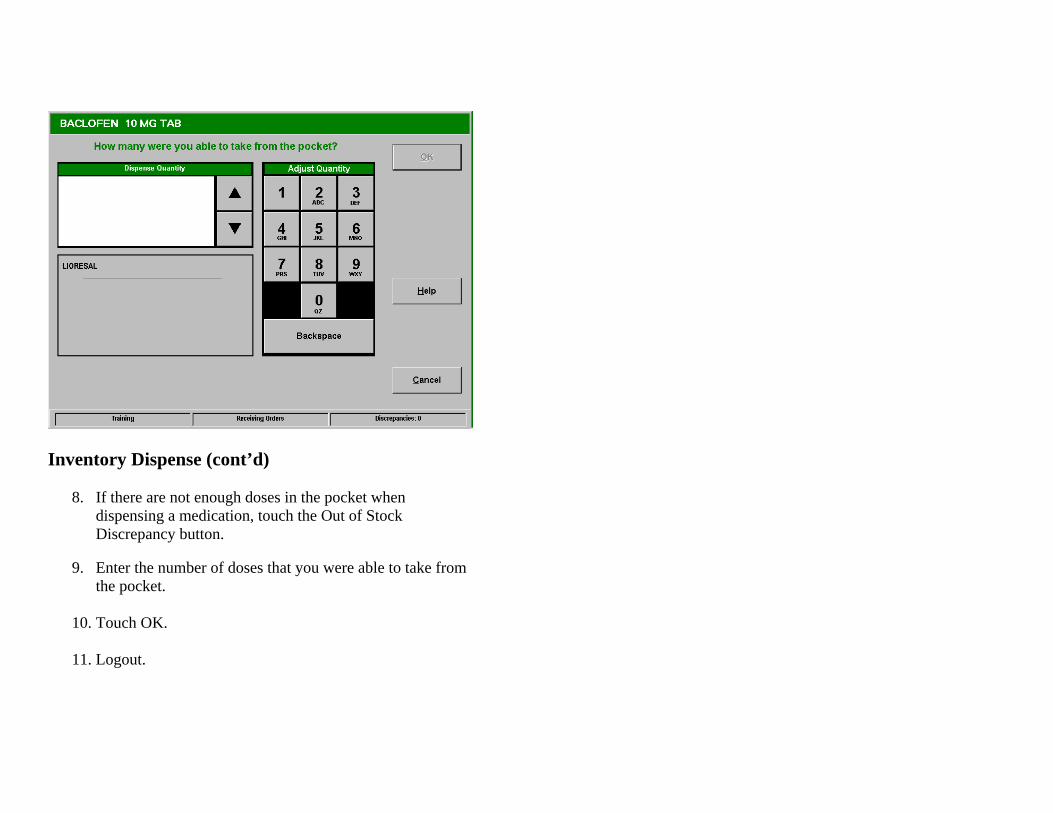
8. If there are not enough doses in the pocket when dispensing a medication, touch the Out of Stock Discrepancy button.
9. Enter the number of doses that you were able to take from
the pocket.
10. Touch OK.
11. Logout.

Profile Dispense
1. Touch to highlight the patient’s name. 2. Touch the Profile Dispense button
Profile Dispense (cont’d)
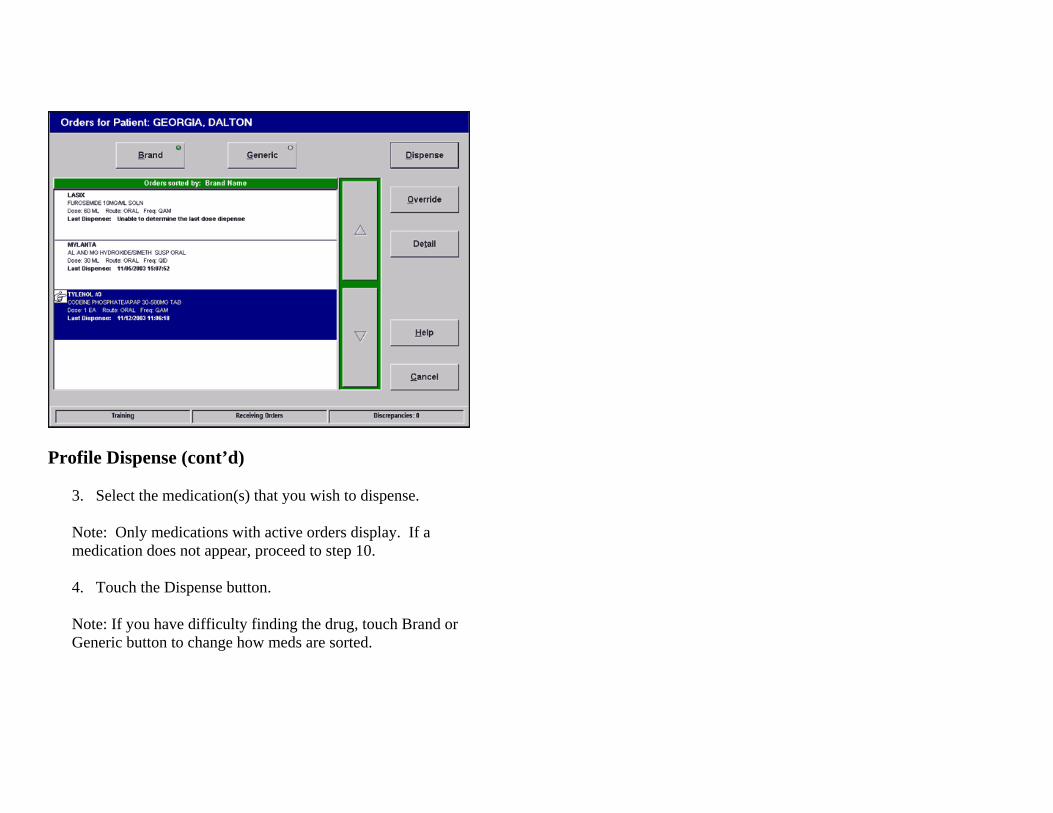
3. Select the medication(s) that you wish to dispense. Note: Only medications with active orders display. If a medication does not appear, proceed to step 10. 4. Touch the Dispense button. Note: If you have difficulty finding the drug, touch Brand or Generic button to change how meds are sorted.
Profile Dispense (cont’d)
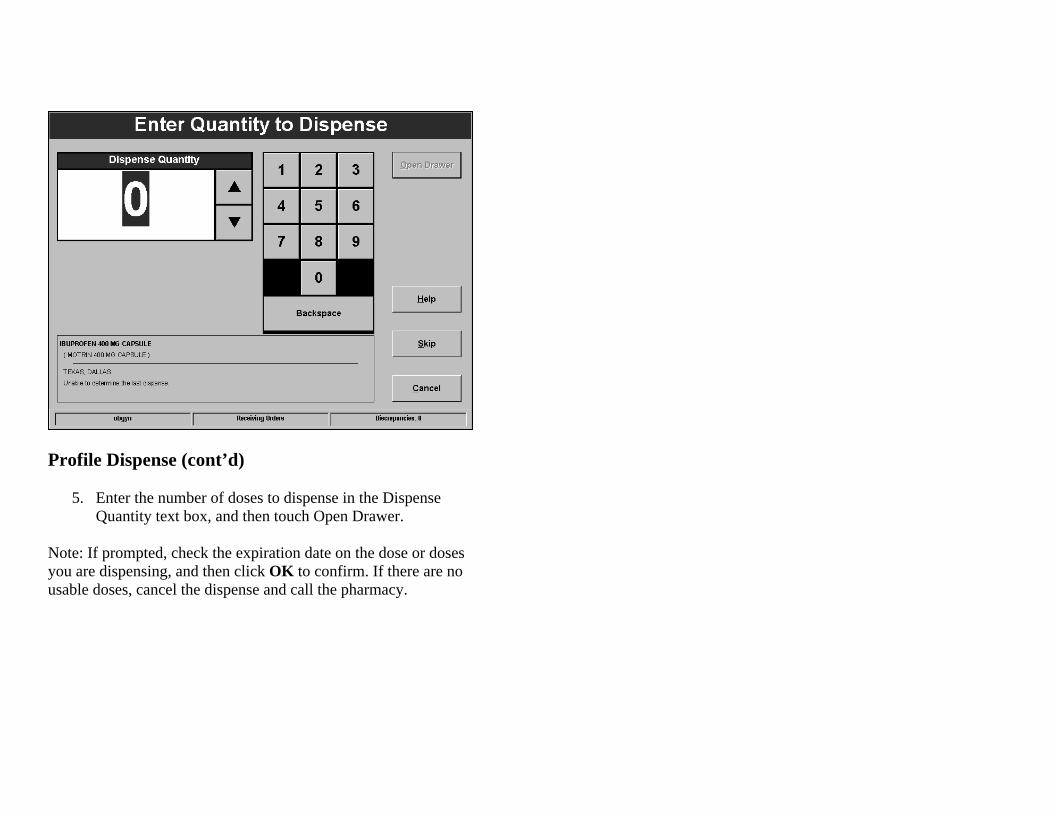
5. Enter the number of doses to dispense in the Dispense
Quantity text box, and then touch Open Drawer.
Note: If prompted, check the expiration date on the dose or doses you are dispensing, and then click OK to confirm. If there are no usable doses, cancel the dispense and call the pharmacy.
Profile Dispense (cont’d)
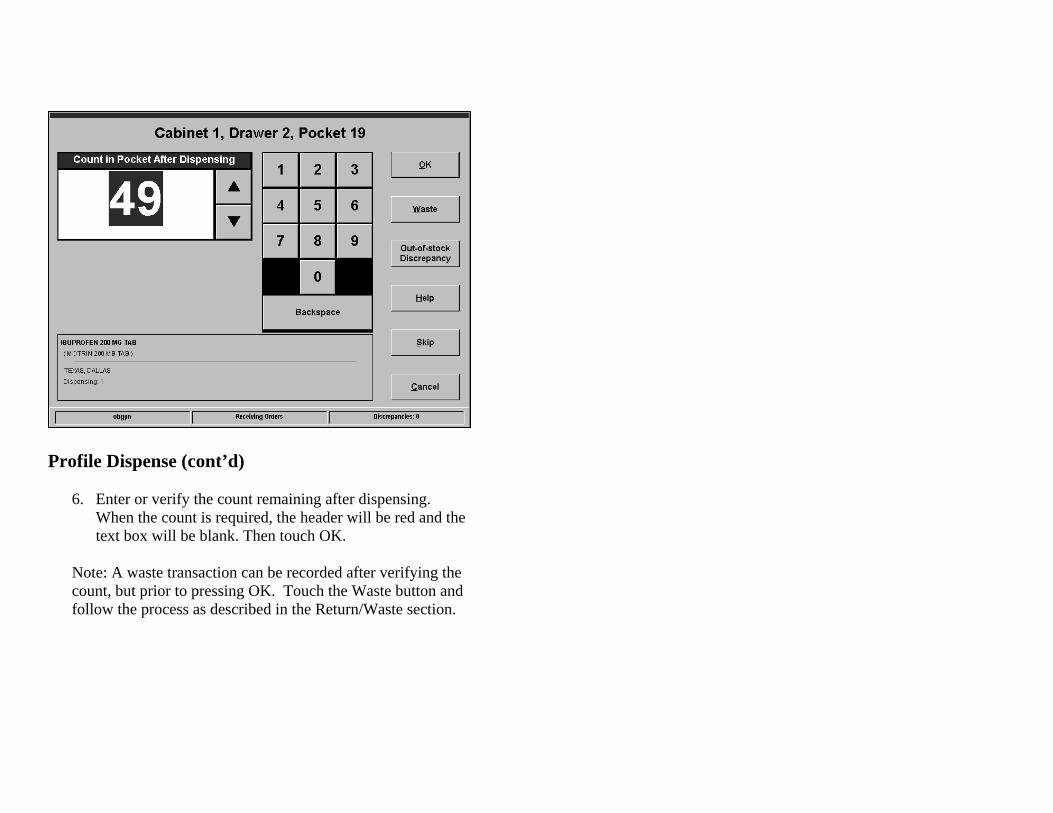
6. Enter or verify the count remaining after dispensing. When the count is required, the header will be red and the text box will be blank. Then touch OK.
Note: A waste transaction can be recorded after verifying the count, but prior to pressing OK. Touch the Waste button and follow the process as described in the Return/Waste section.

Profile Dispense (cont’d)
7. If the count that you entered does not match what the system calculates, a discrepancy warning displays. If you are certain that your count is correct, select Yes, and a discrepancy will be recorded. If you wish to change the number entered, select No.
8. If there are not enough doses in the pocket when
dispensing a medication, touch the Out of Stock Discrepancy button.

Profile Dispense (cont’d)
9. Enter the number of doses that you were able to take from the pocket, and then touch OK.
Note: The inventory is adjusted and a discrepancy is recorded.
Profile Dispense (cont’d)
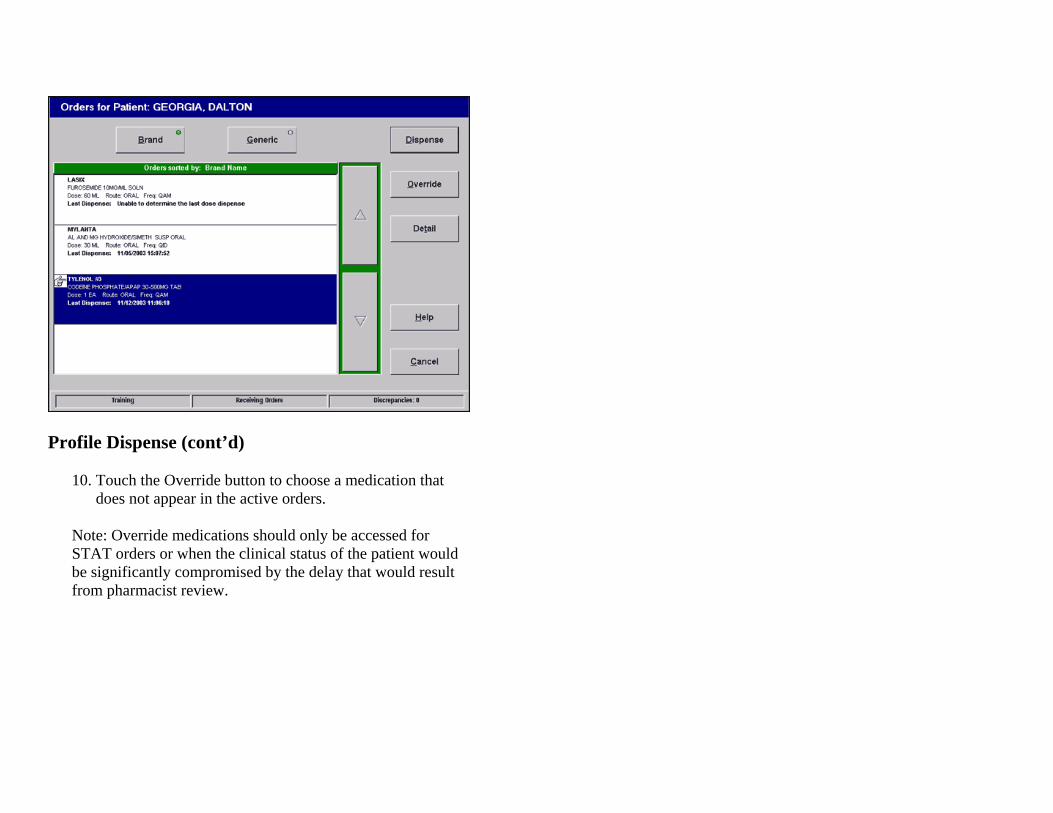
10. Touch the Override button to choose a medication that does not appear in the active orders.
Note: Override medications should only be accessed for STAT orders or when the clinical status of the patient would be significantly compromised by the delay that would result from pharmacist review.
Profile Dispense (cont’d)
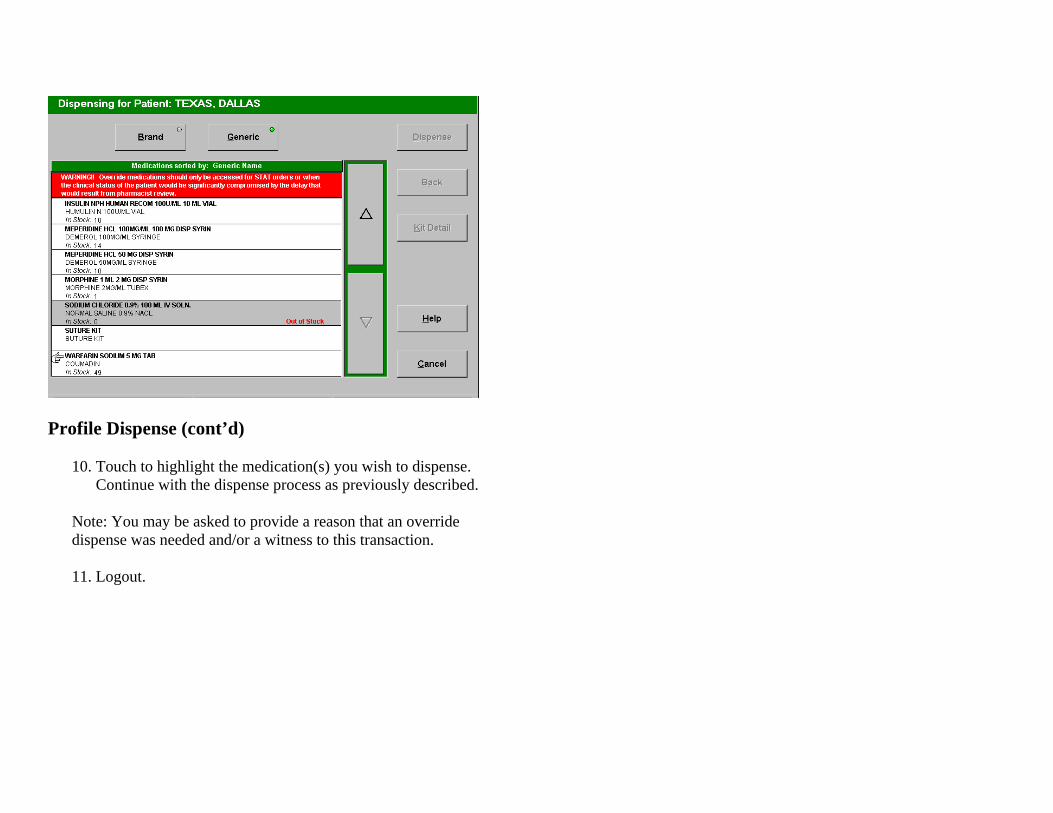
10. Touch to highlight the medication(s) you wish to dispense. Continue with the dispense process as previously described.
Note: You may be asked to provide a reason that an override dispense was needed and/or a witness to this transaction.
11. Logout.
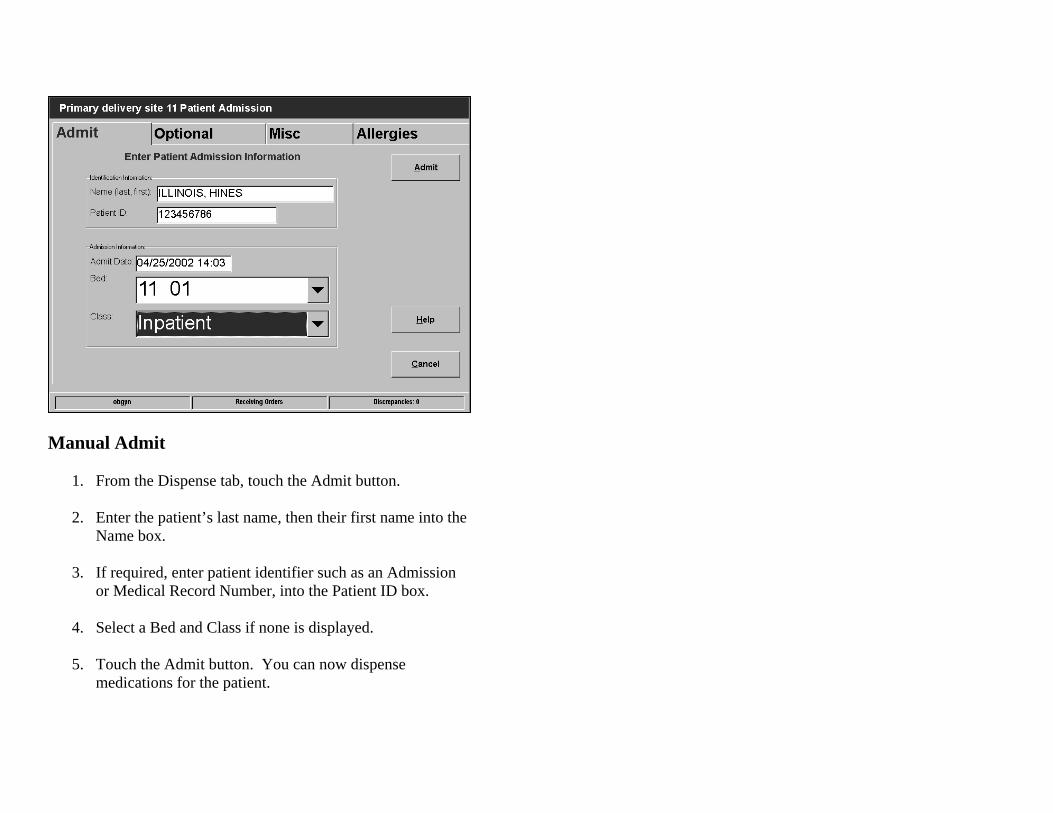
Manual Admit
1. From the Dispense tab, touch the Admit button. 2. Enter the patient’s last name, then their first name into the
Name box.
3. If required, enter patient identifier such as an Admission or Medical Record Number, into the Patient ID box.
4. Select a Bed and Class if none is displayed.
5. Touch the Admit button. You can now dispense
medications for the patient.
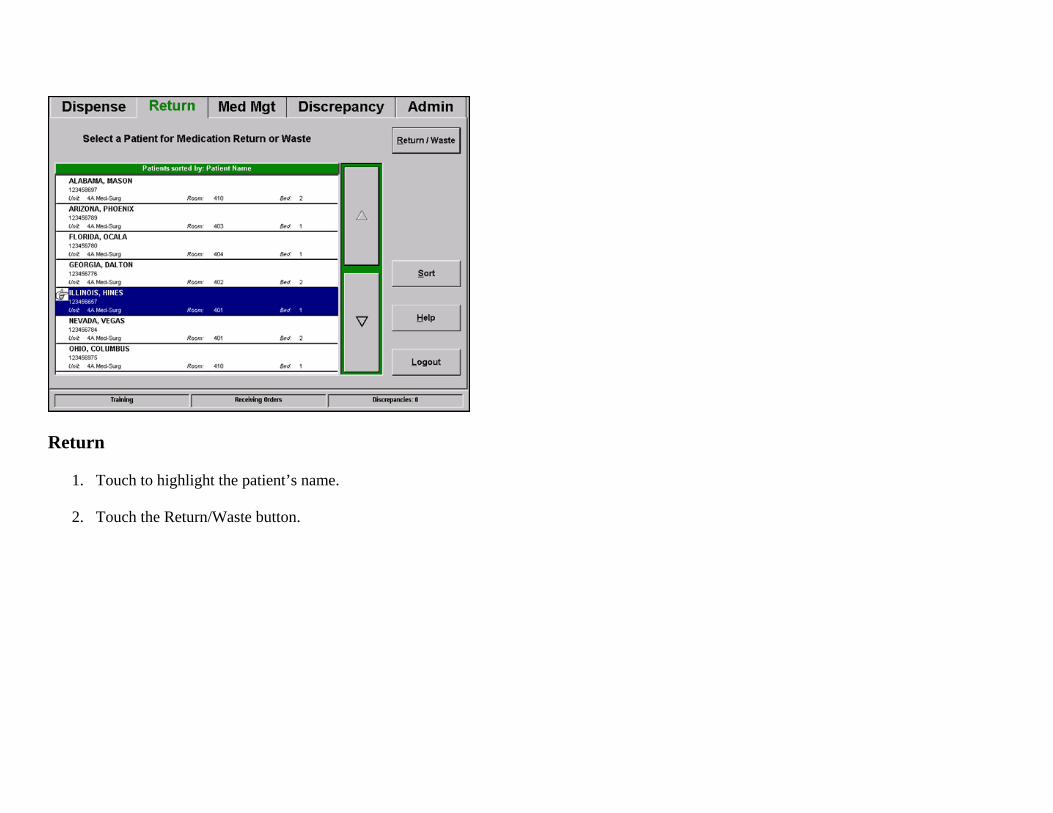
Return
1. Touch to highlight the patient’s name. 2. Touch the Return/Waste button.

Return (cont’d)
3. Select the medication(s) you wish to return. 4. Touch the Return button.
5. Have a witness enter their User ID and Pin when required.
6. Touch the Witness button.
Return (cont’d)
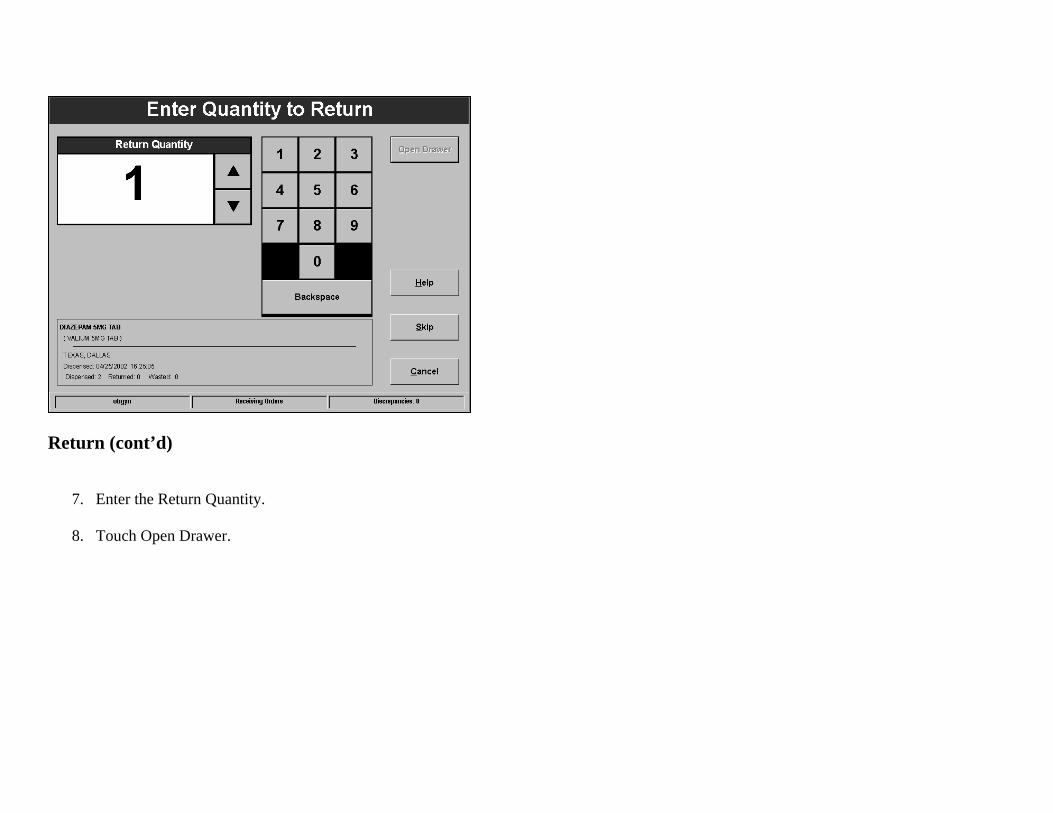
7. Enter the Return Quantity.
8. Touch Open Drawer.
Return (cont’d)
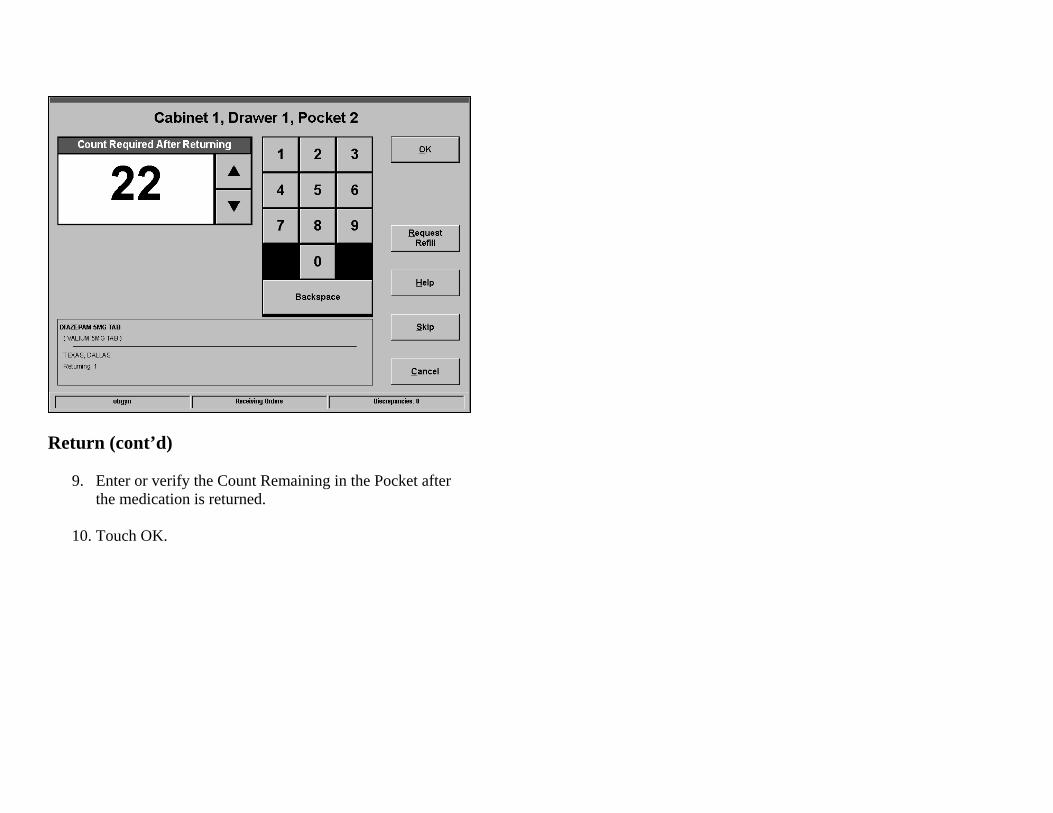
9. Enter or verify the Count Remaining in the Pocket after the medication is returned.
10. Touch OK.

Waste
1. Touch to highlight the patient’s name.
2. Touch the Return/Waste button.
Waste (cont’d)
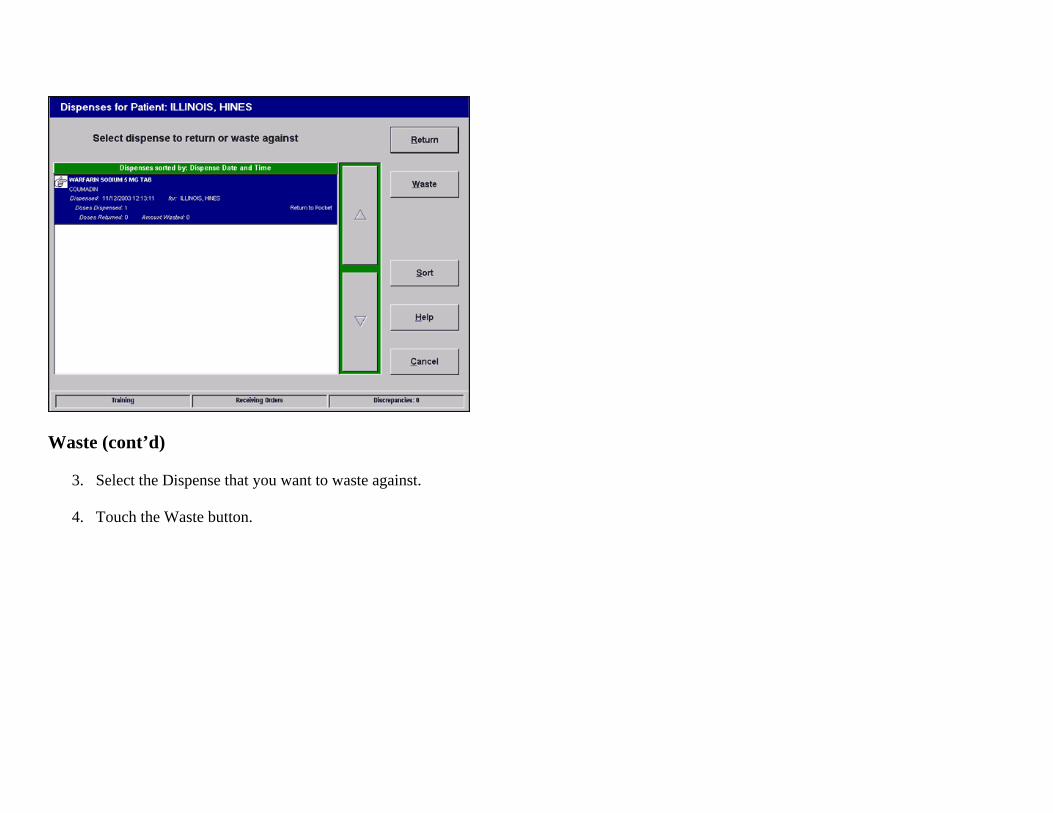
3. Select the Dispense that you want to waste against. 4. Touch the Waste button.
Waste (cont’d)
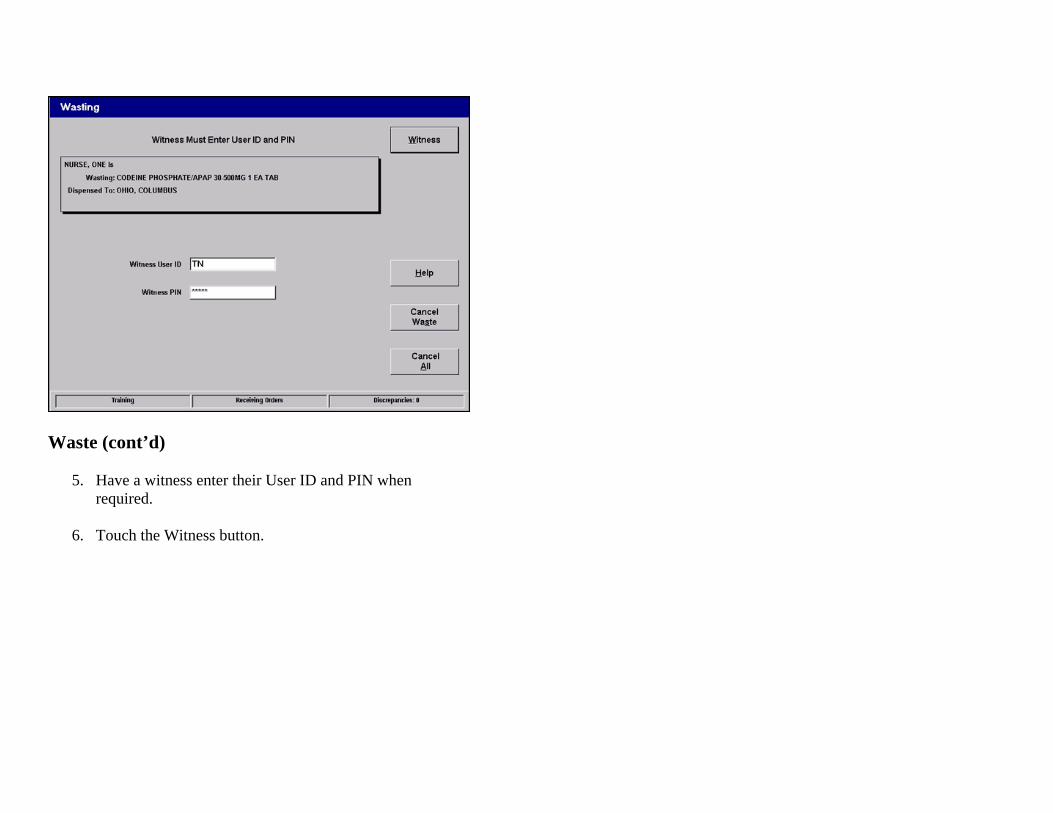
5. Have a witness enter their User ID and PIN when required.
6. Touch the Witness button.
Waste (cont’d)
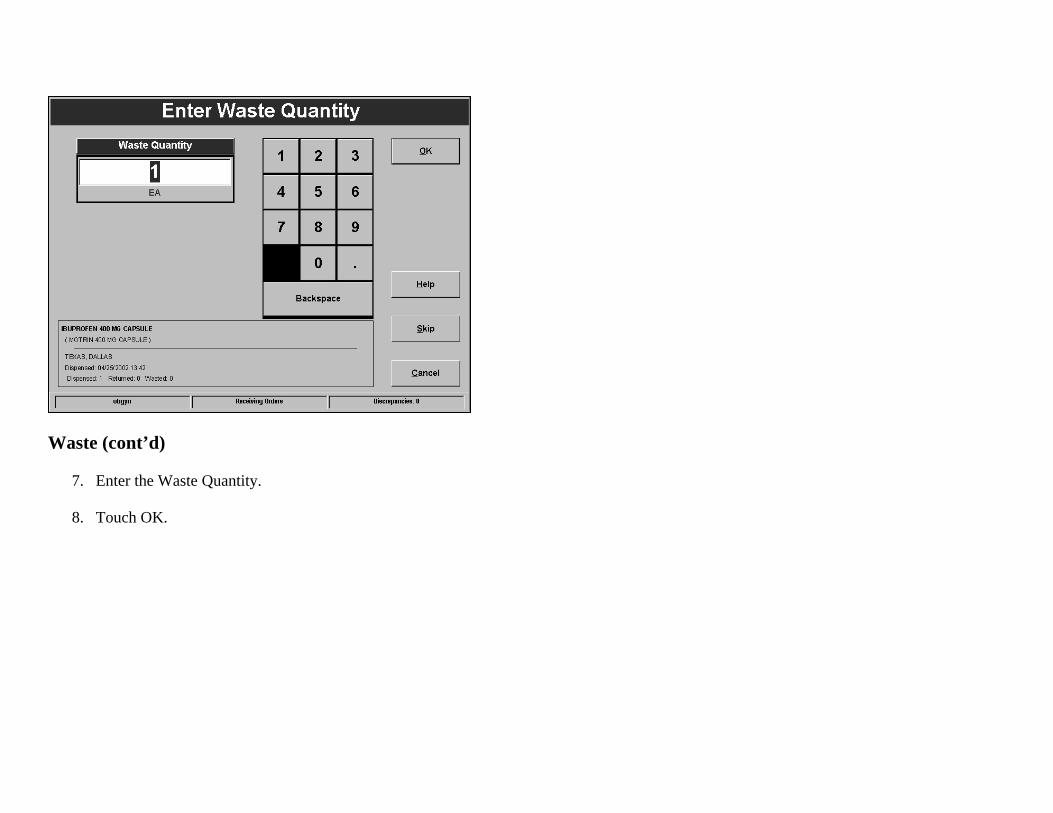
7. Enter the Waste Quantity.
8. Touch OK.
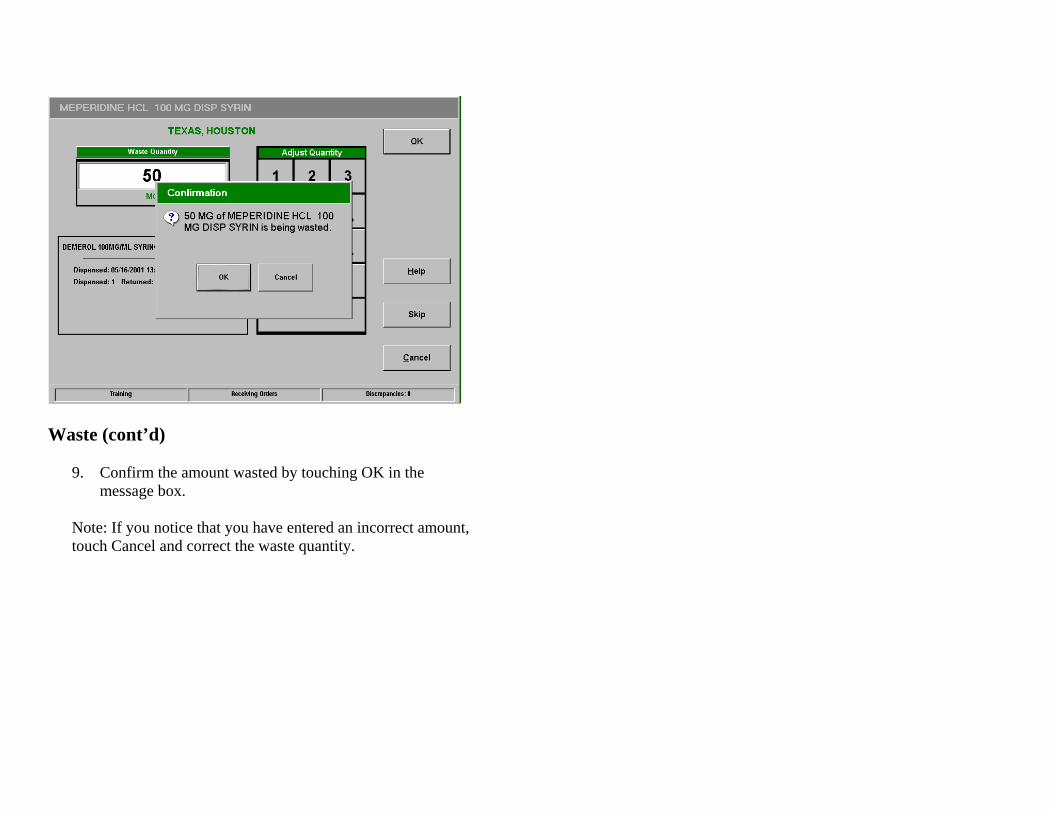
Waste (cont’d)
9. Confirm the amount wasted by touching OK in the message box.
Note: If you notice that you have entered an incorrect amount, touch Cancel and correct the waste quantity.
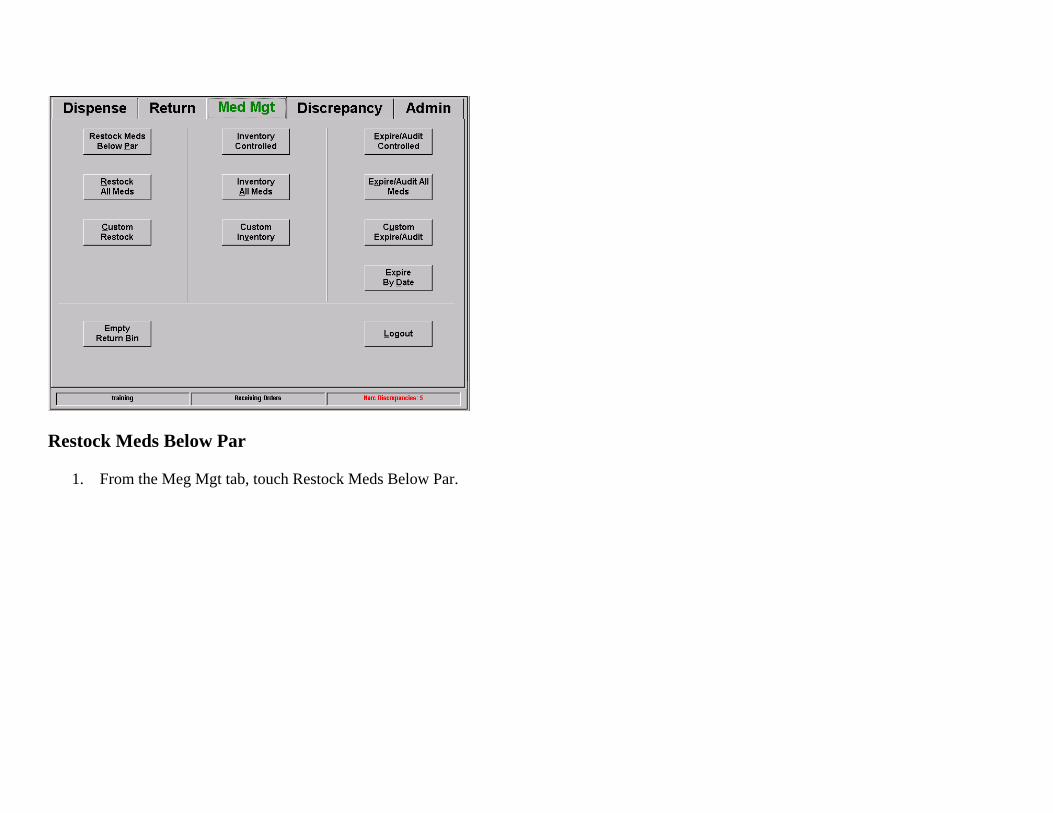
Restock Meds Below Par
1. From the Meg Mgt tab, touch Restock Meds Below Par.
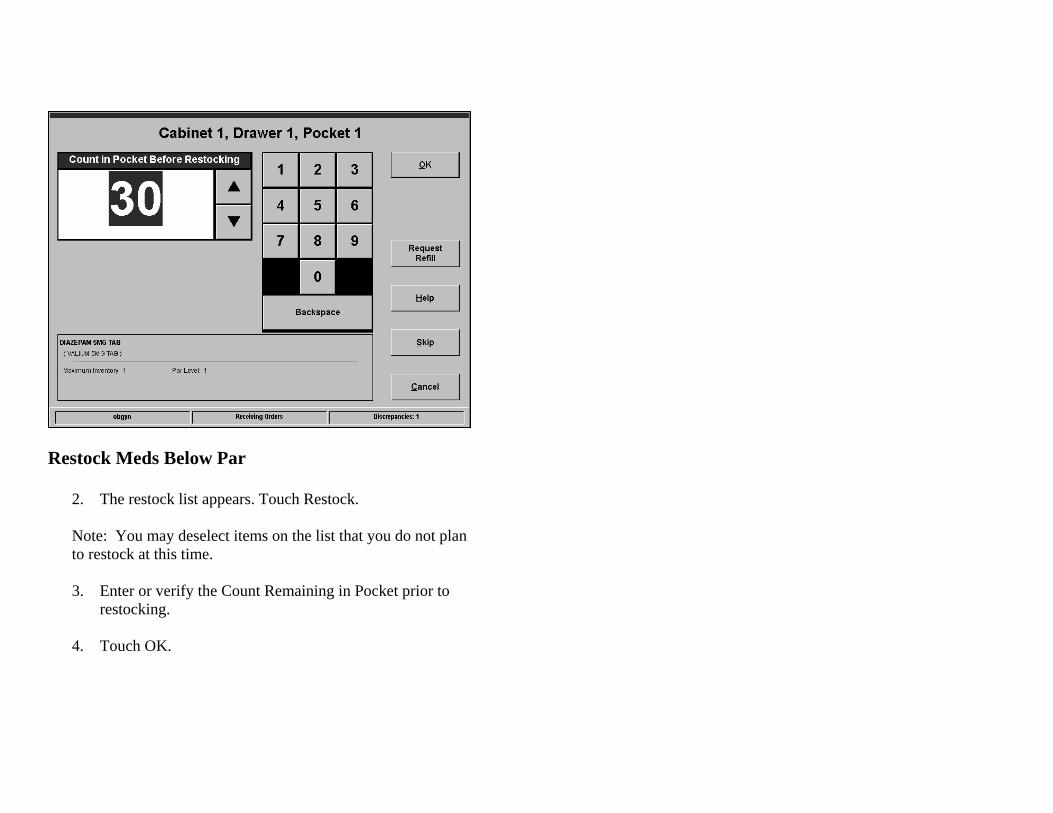
Restock Meds Below Par
2. The restock list appears. Touch Restock. Note: You may deselect items on the list that you do not plan to restock at this time. 3. Enter or verify the Count Remaining in Pocket prior to
restocking.
4. Touch OK.
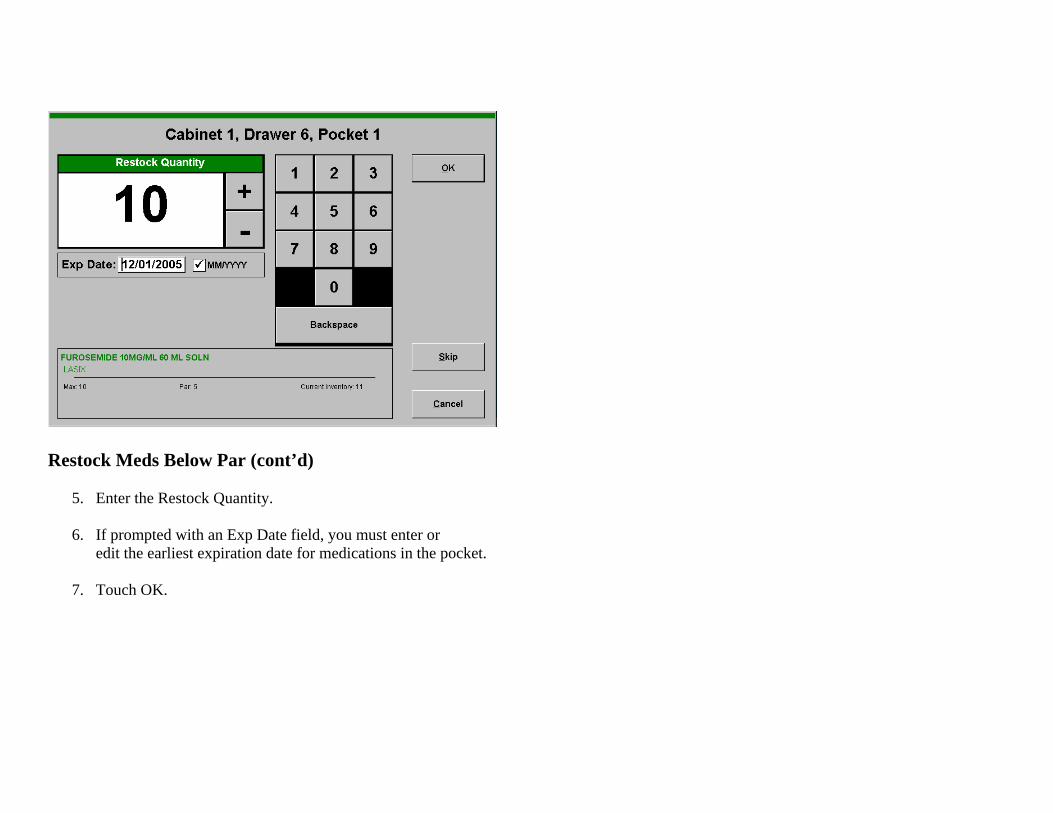
Restock Meds Below Par (cont’d)
5. Enter the Restock Quantity. 6. If prompted with an Exp Date field, you must enter or
edit the earliest expiration date for medications in the pocket. 7. Touch OK.
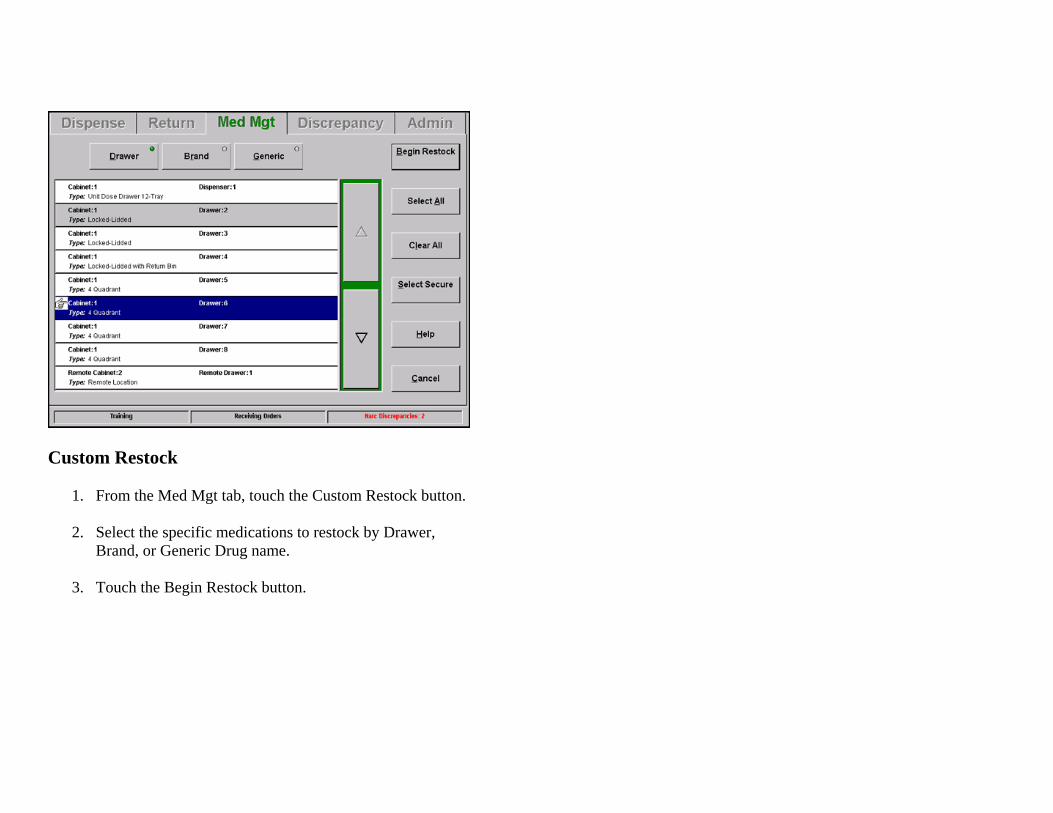
Custom Restock
1. From the Med Mgt tab, touch the Custom Restock button. 2. Select the specific medications to restock by Drawer,
Brand, or Generic Drug name. 3. Touch the Begin Restock button.
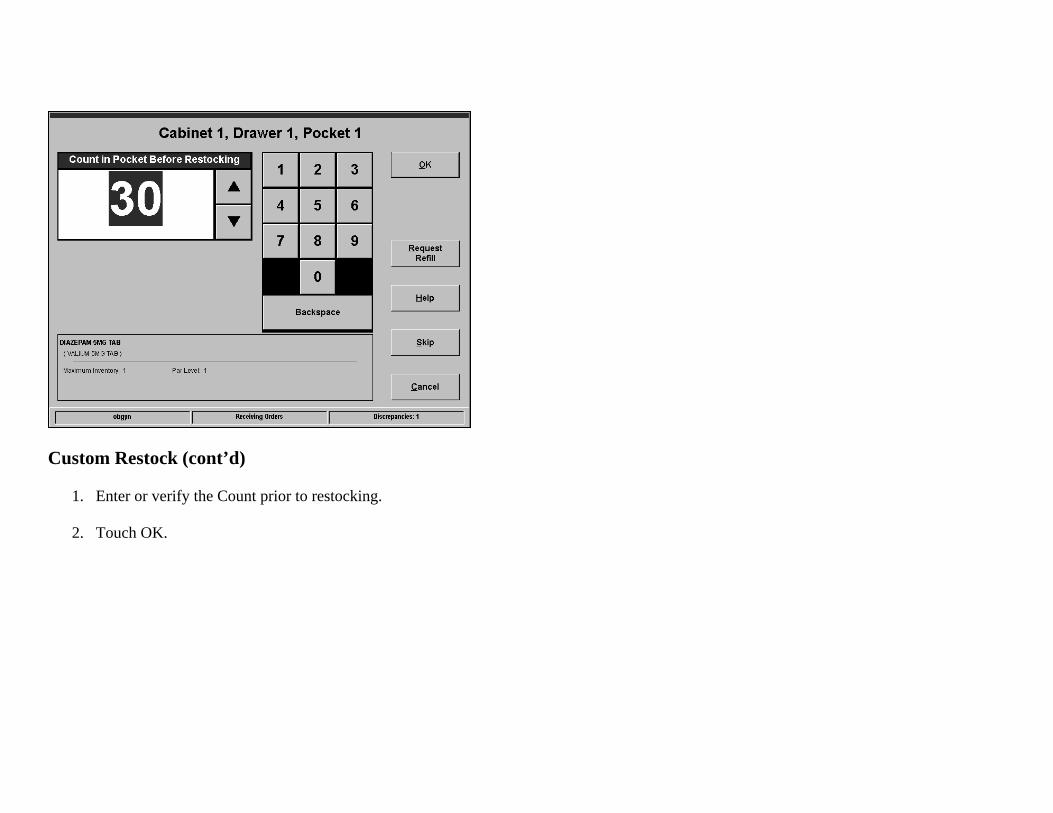
Custom Restock (cont’d)
1. Enter or verify the Count prior to restocking. 2. Touch OK.
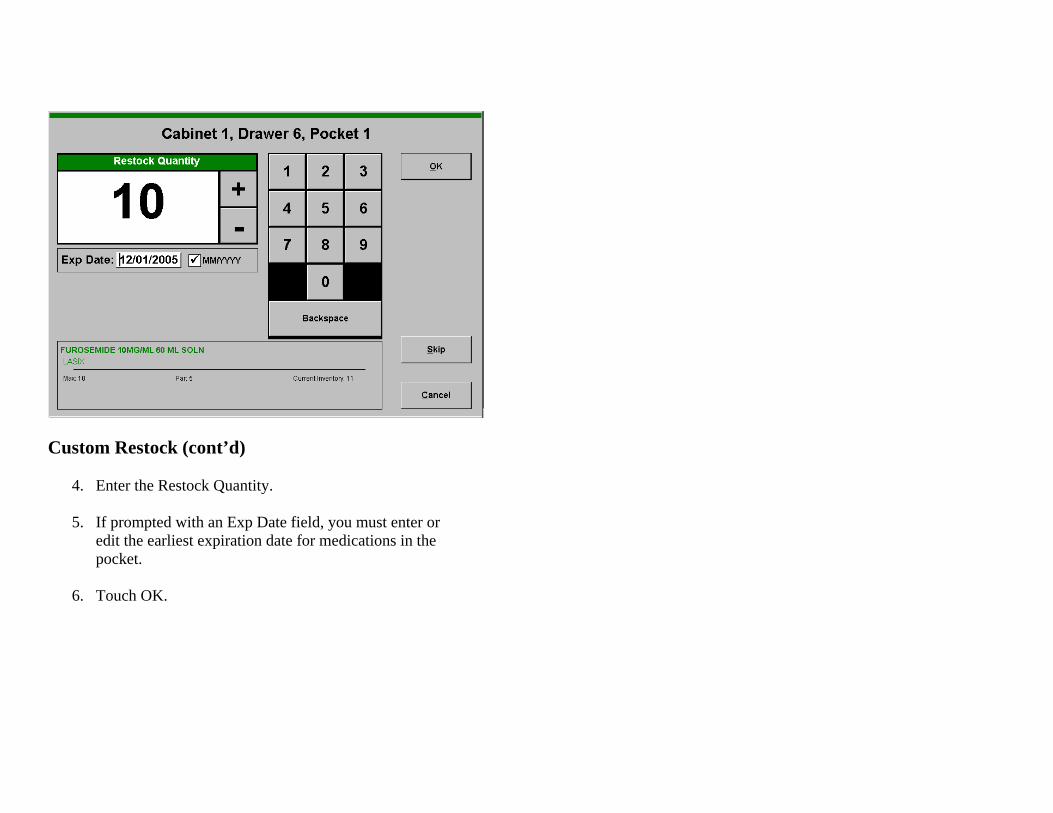
Custom Restock (cont’d)
4. Enter the Restock Quantity.
5. If prompted with an Exp Date field, you must enter or edit the earliest expiration date for medications in the pocket.
6. Touch OK.
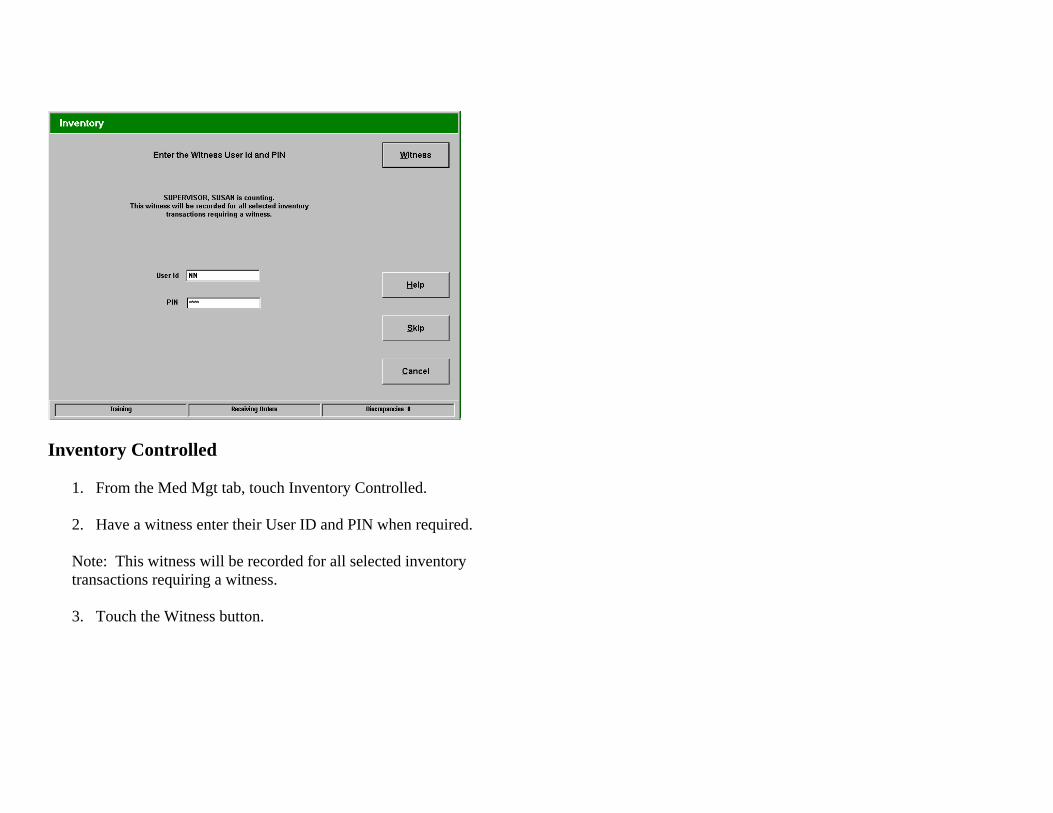
Inventory Controlled
1. From the Med Mgt tab, touch Inventory Controlled. 2. Have a witness enter their User ID and PIN when required. Note: This witness will be recorded for all selected inventory transactions requiring a witness. 3. Touch the Witness button.
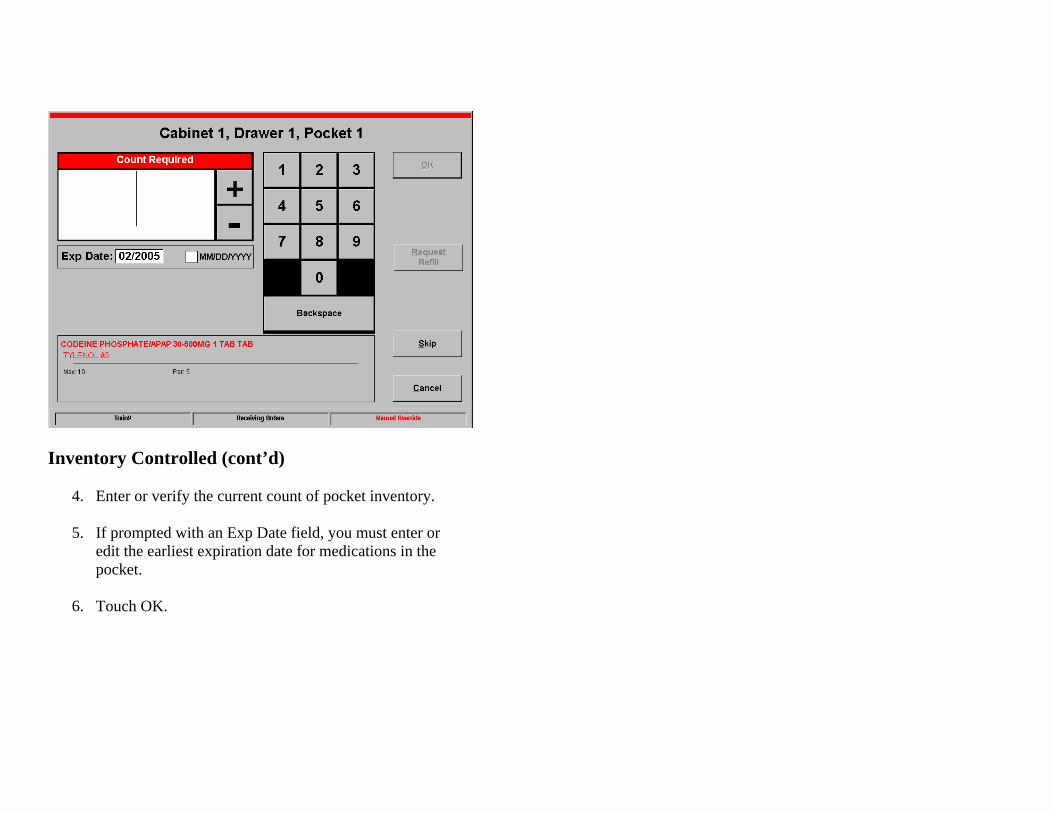
Inventory Controlled (cont’d)
4. Enter or verify the current count of pocket inventory.
5. If prompted with an Exp Date field, you must enter or edit the earliest expiration date for medications in the pocket.
6. Touch OK.
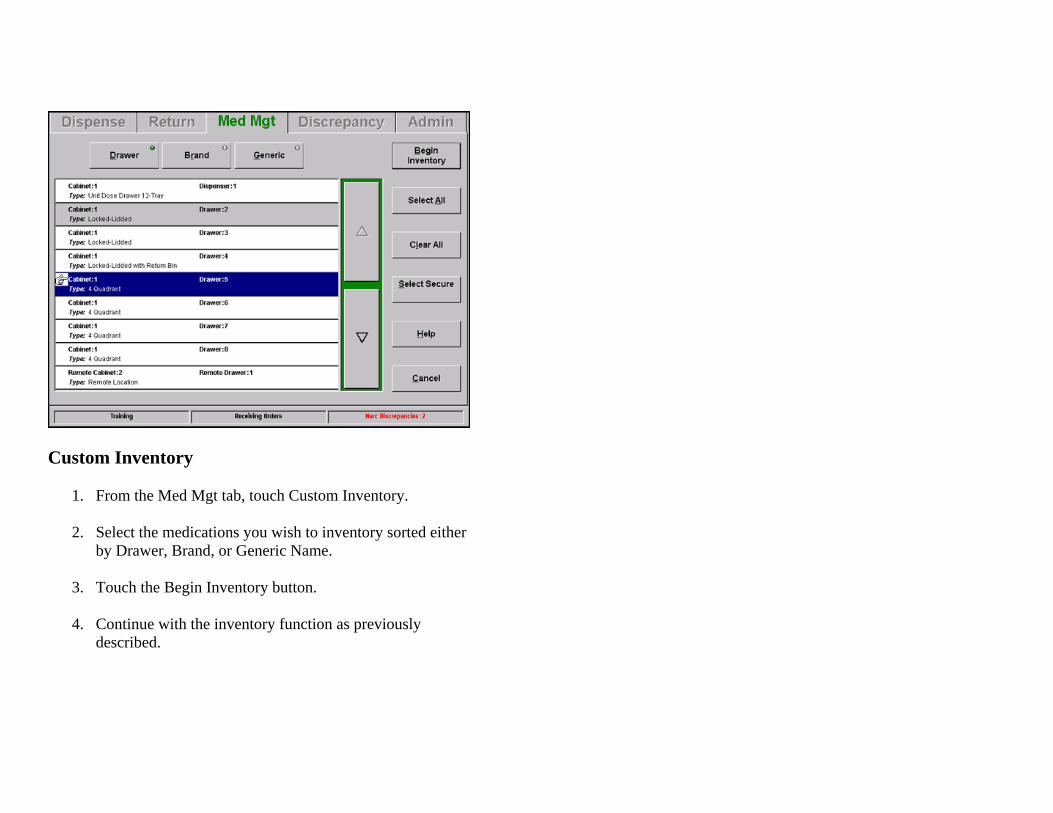
Custom Inventory
1. From the Med Mgt tab, touch Custom Inventory. 2. Select the medications you wish to inventory sorted either
by Drawer, Brand, or Generic Name. 3. Touch the Begin Inventory button.
4. Continue with the inventory function as previously
described.
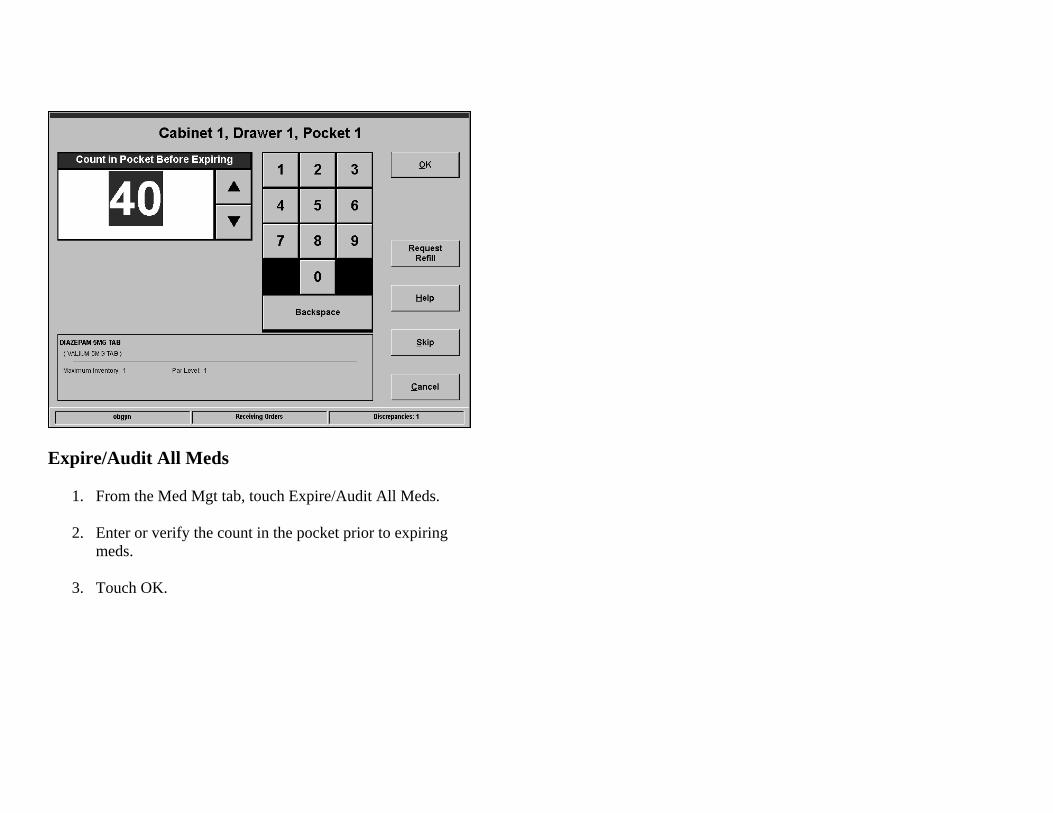
Expire/Audit All Meds
1. From the Med Mgt tab, touch Expire/Audit All Meds. 2. Enter or verify the count in the pocket prior to expiring
meds.
3. Touch OK.
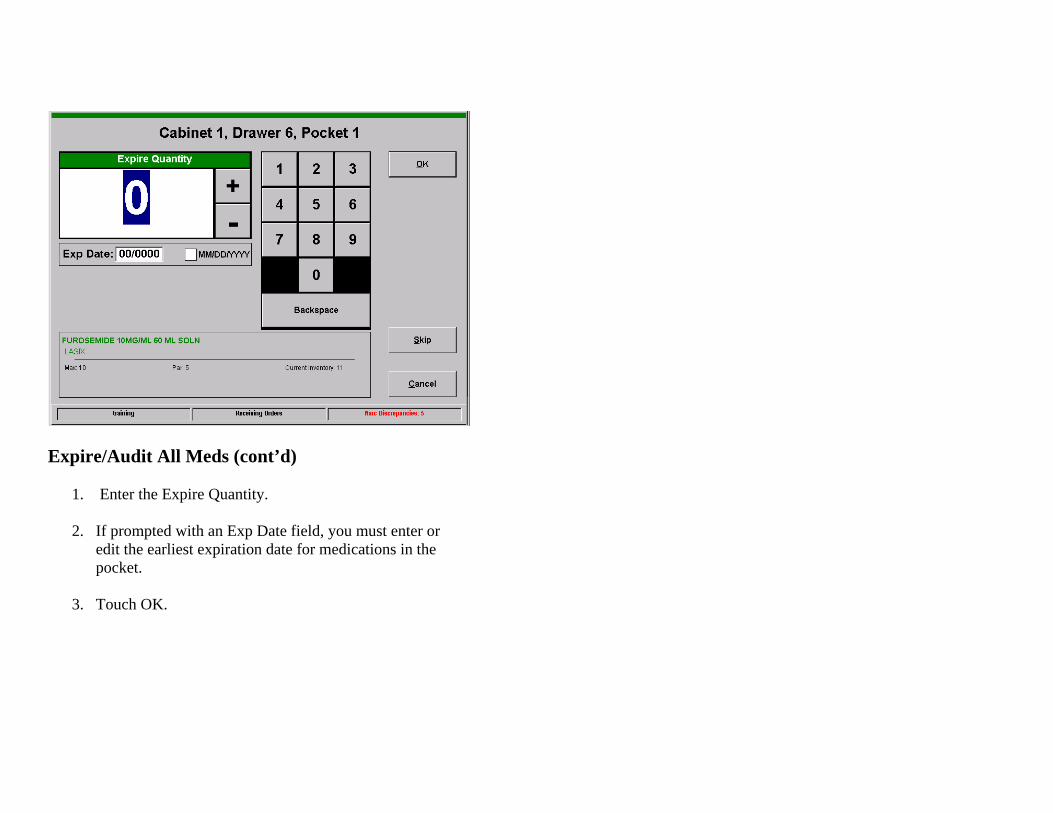
Expire/Audit All Meds (cont’d)
1. Enter the Expire Quantity.
2. If prompted with an Exp Date field, you must enter or edit the earliest expiration date for medications in the pocket.
3. Touch OK.

Custom Expire/Audit
1. From the Med Mgt tab, touch Custom Expire/Audit. 2. Select the medications you wish to expire/audit sorted
either by Drawer, Brand, or Generic Name. 3. Touch the Begin Expire button.
4. Continue with the Expire/Audit function as previously
described.
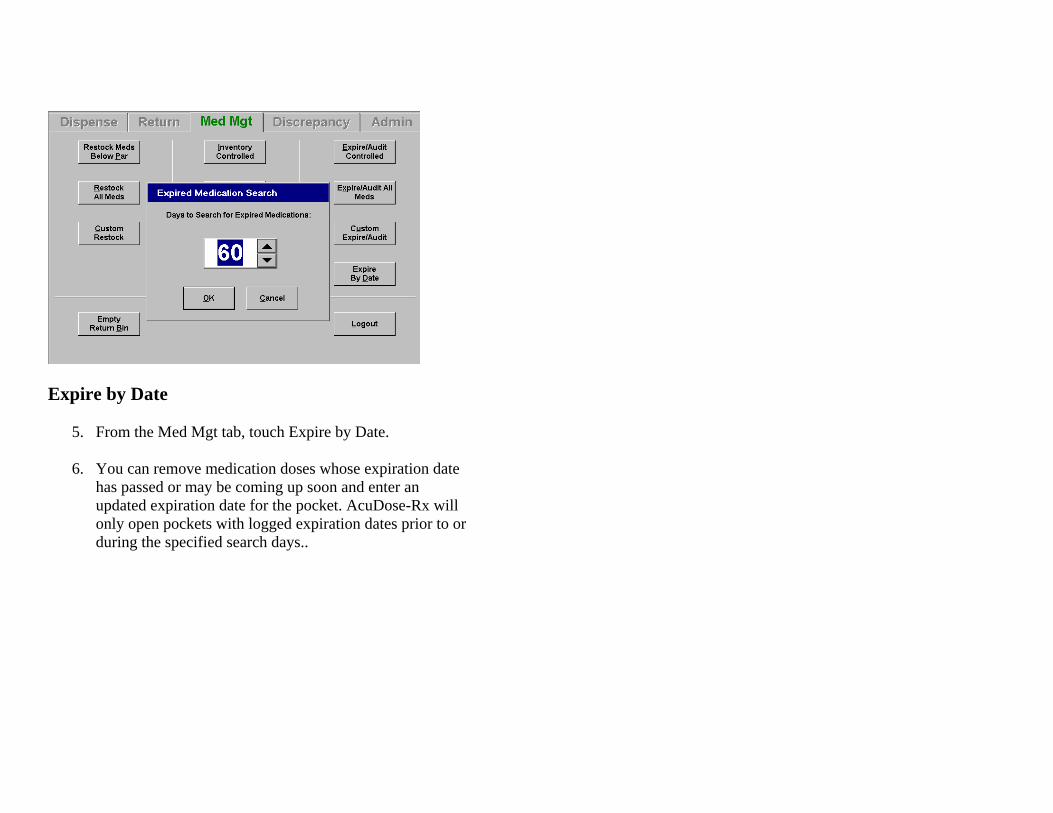
Expire by Date
5. From the Med Mgt tab, touch Expire by Date. 6. You can remove medication doses whose expiration date
has passed or may be coming up soon and enter an updated expiration date for the pocket. AcuDose-Rx will only open pockets with logged expiration dates prior to or during the specified search days..
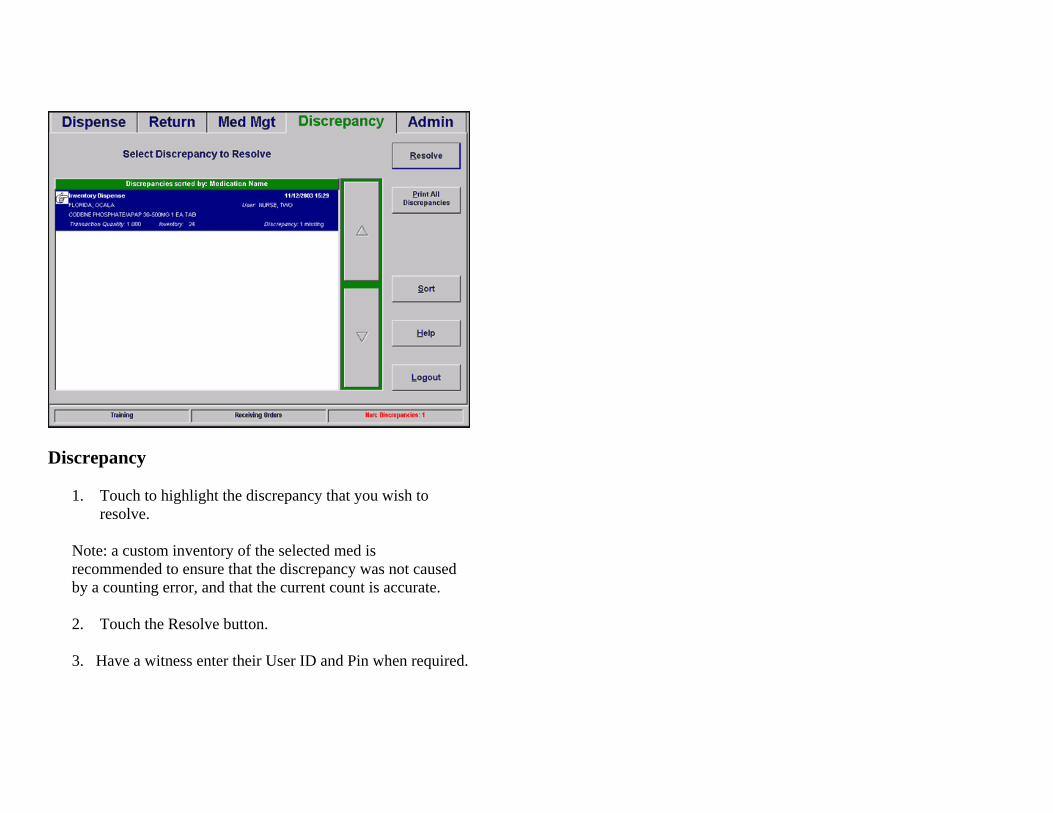
Discrepancy
1. Touch to highlight the discrepancy that you wish to resolve.
Note: a custom inventory of the selected med is recommended to ensure that the discrepancy was not caused by a counting error, and that the current count is accurate.
2. Touch the Resolve button. 3. Have a witness enter their User ID and Pin when required.
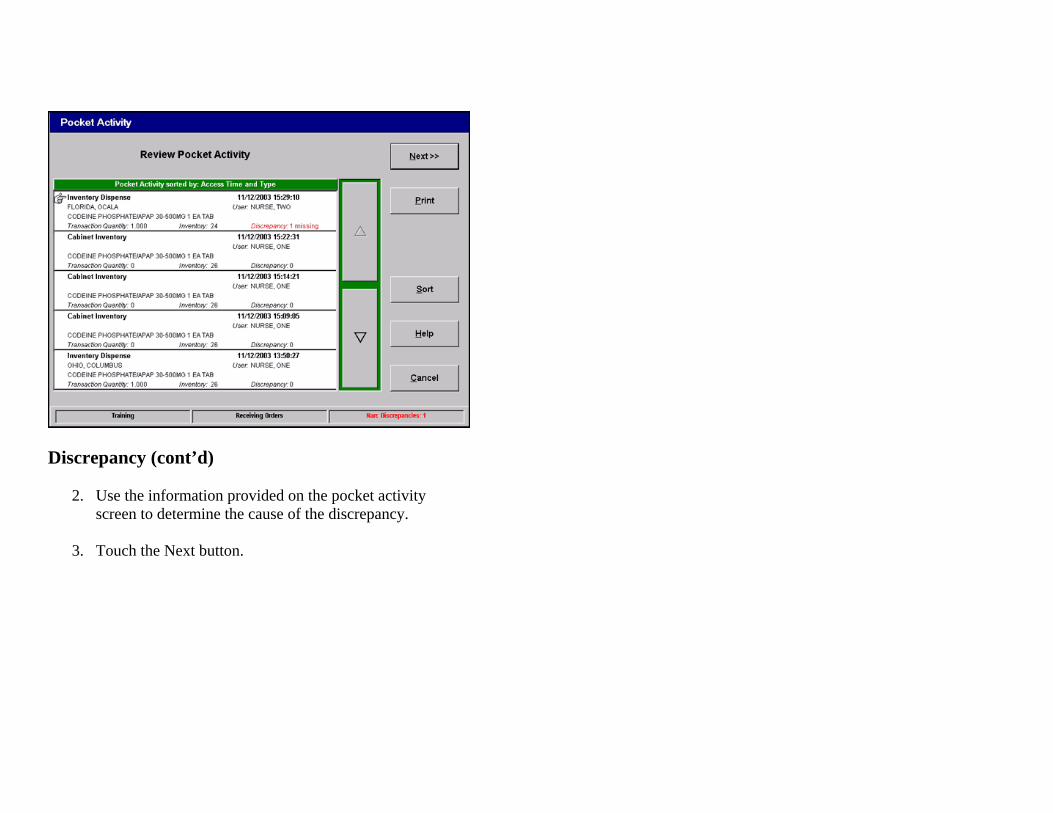
Discrepancy (cont’d)
2. Use the information provided on the pocket activity screen to determine the cause of the discrepancy.
3. Touch the Next button.

Discrepancy (cont’d)
6. Touch to select the reason for the discrepancy.
Note: Use the keyboard to type the reason if an appropriate one is not listed or to enter additional information.
7. Touch the Next button.

Discrepancy (cont’d)
6. Select a responsible user (optional). 7. Touch Finish.
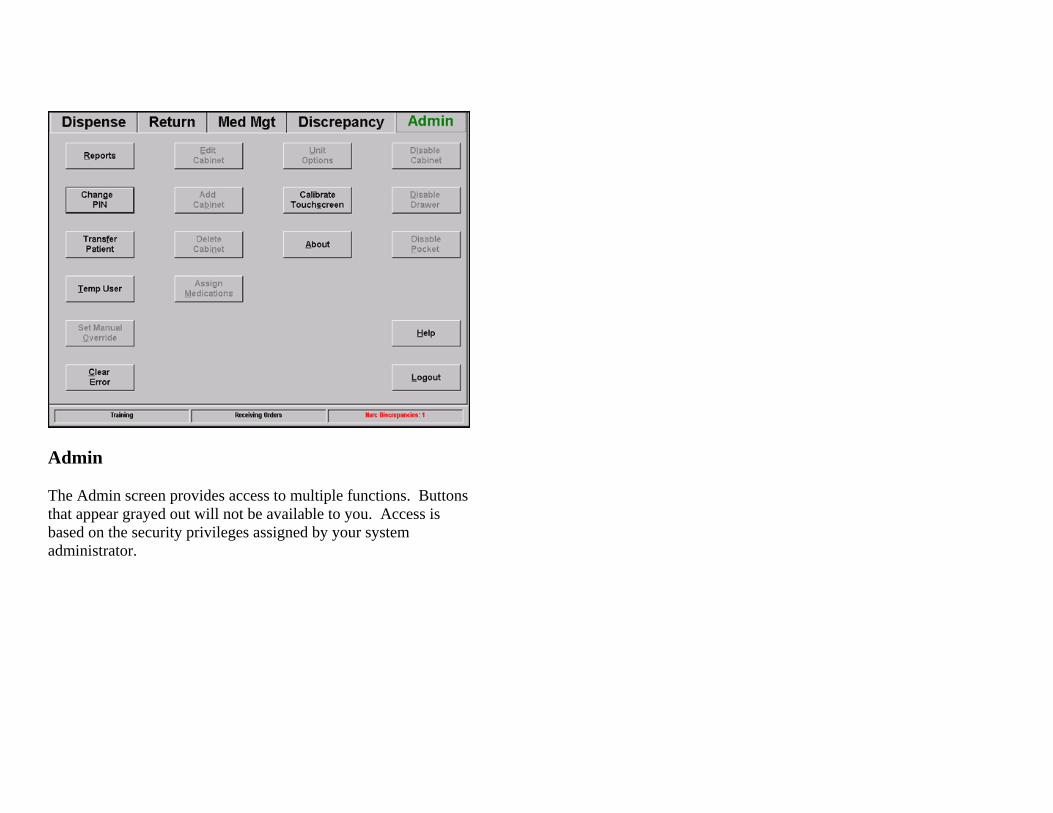
Admin The Admin screen provides access to multiple functions. Buttons that appear grayed out will not be available to you. Access is based on the security privileges assigned by your system administrator.
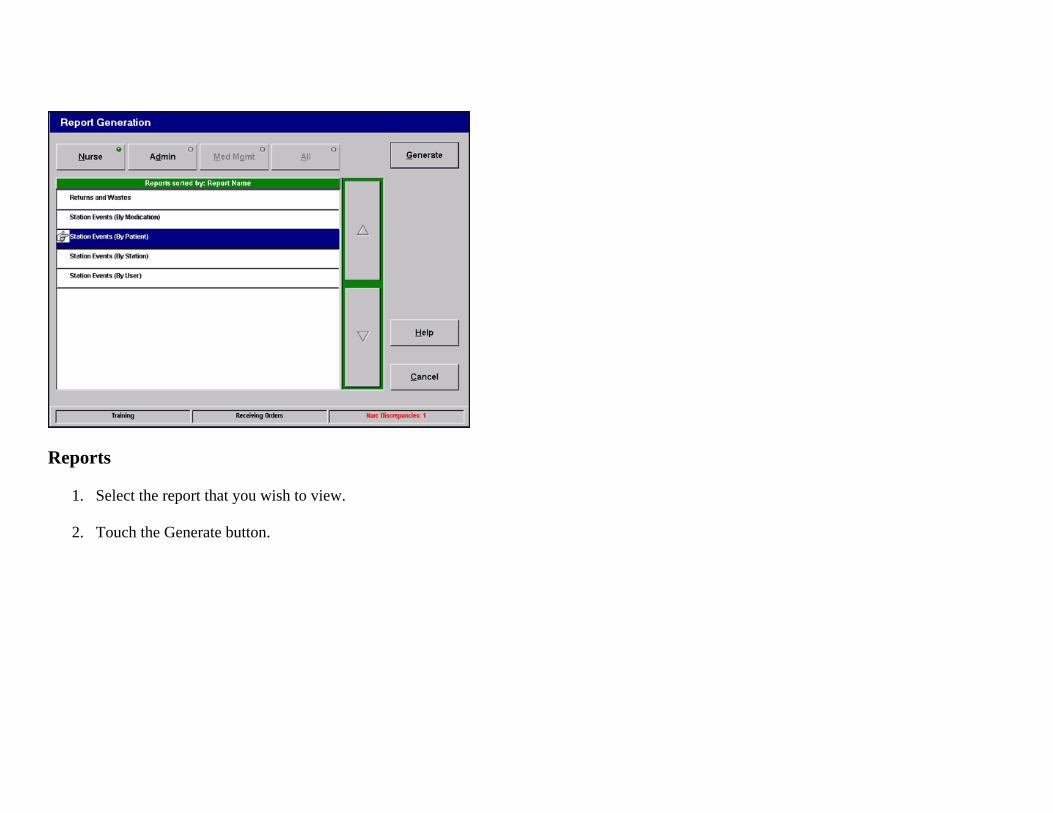
Reports
1. Select the report that you wish to view. 2. Touch the Generate button.
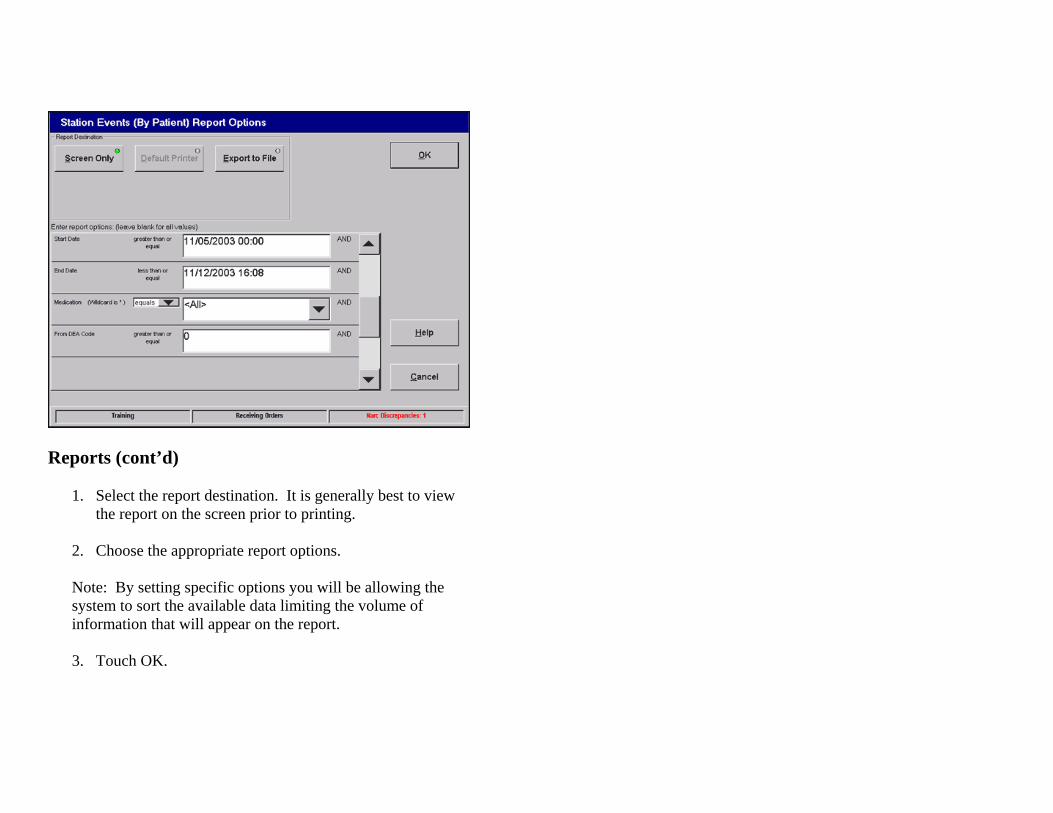
Reports (cont’d)
1. Select the report destination. It is generally best to view the report on the screen prior to printing.
2. Choose the appropriate report options. Note: By setting specific options you will be allowing the system to sort the available data limiting the volume of information that will appear on the report. 3. Touch OK.
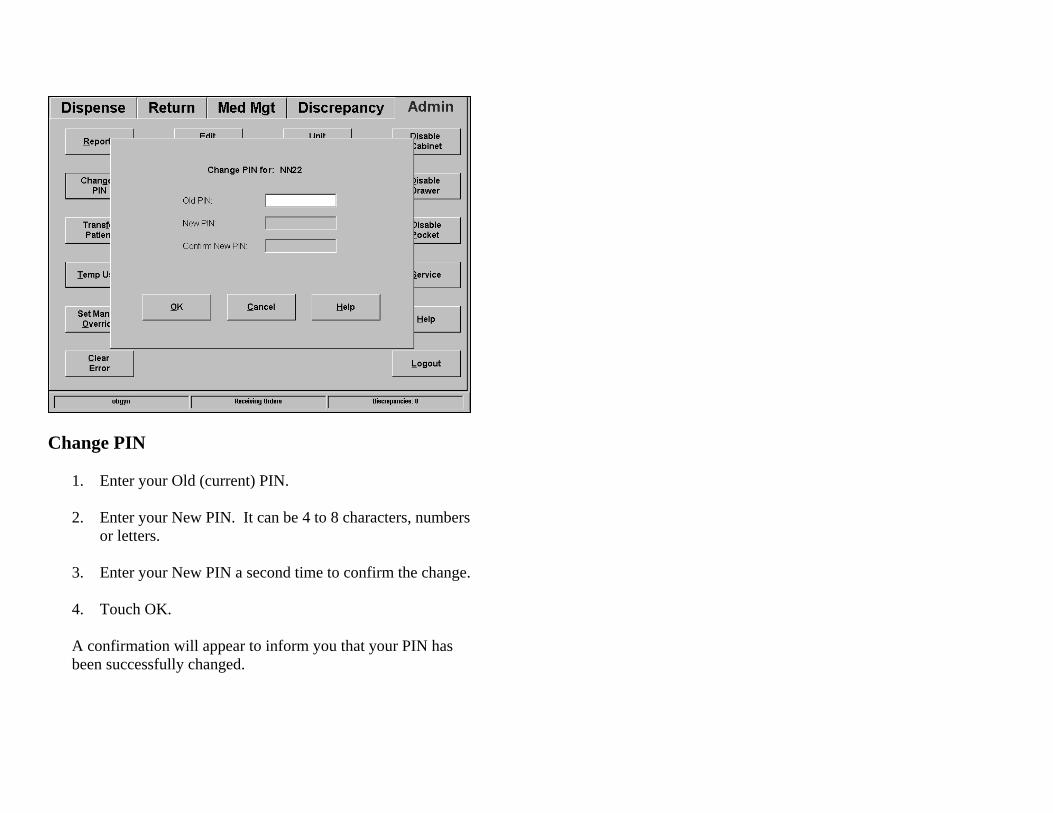
Change PIN
1. Enter your Old (current) PIN. 2. Enter your New PIN. It can be 4 to 8 characters, numbers
or letters.
3. Enter your New PIN a second time to confirm the change.
4. Touch OK.
A confirmation will appear to inform you that your PIN has been successfully changed.
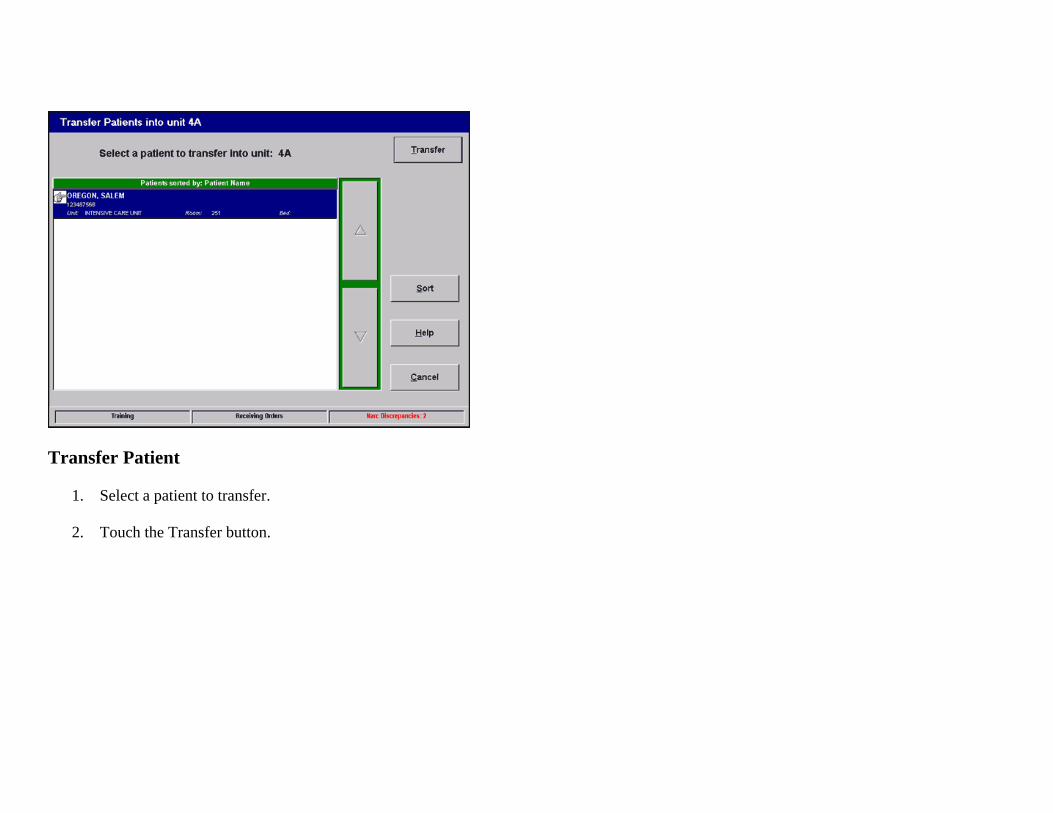
Transfer Patient
1. Select a patient to transfer. 2. Touch the Transfer button.

Transfer Patient (cont’d)
1. Select a bed to transfer the patient to. 2. Touch the Transfer button.
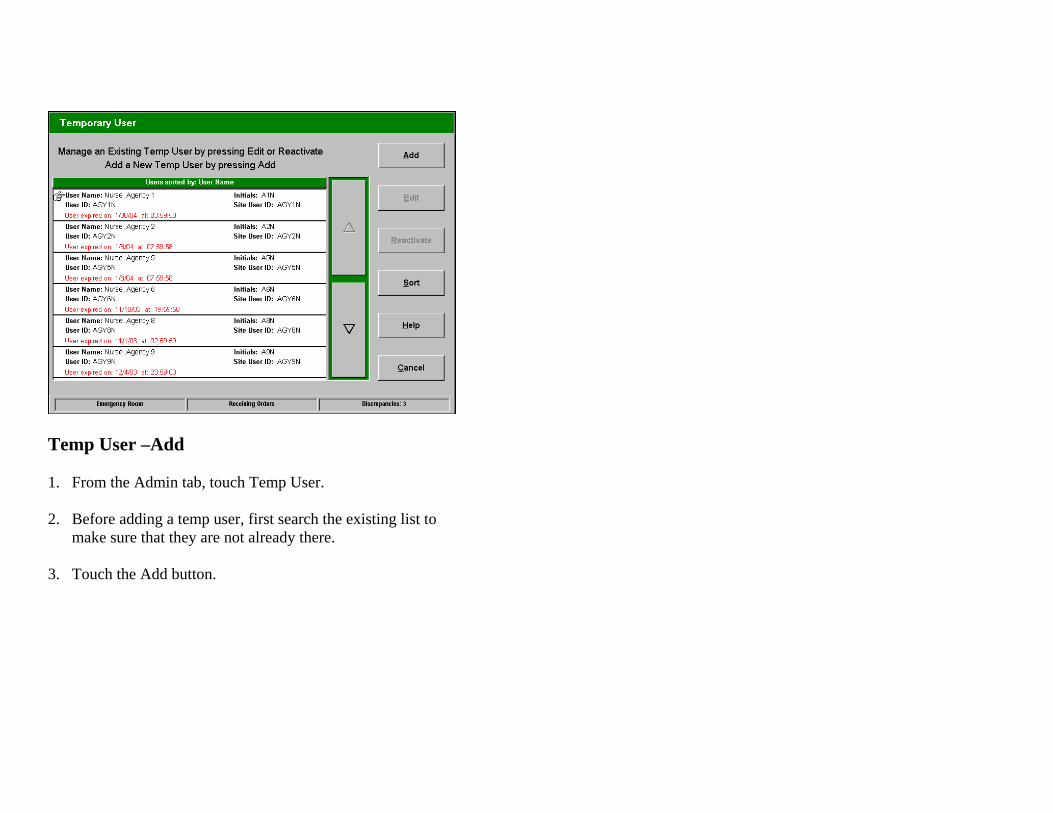
Temp User –Add 1. From the Admin tab, touch Temp User. 2. Before adding a temp user, first search the existing list to
make sure that they are not already there. 3. Touch the Add button.
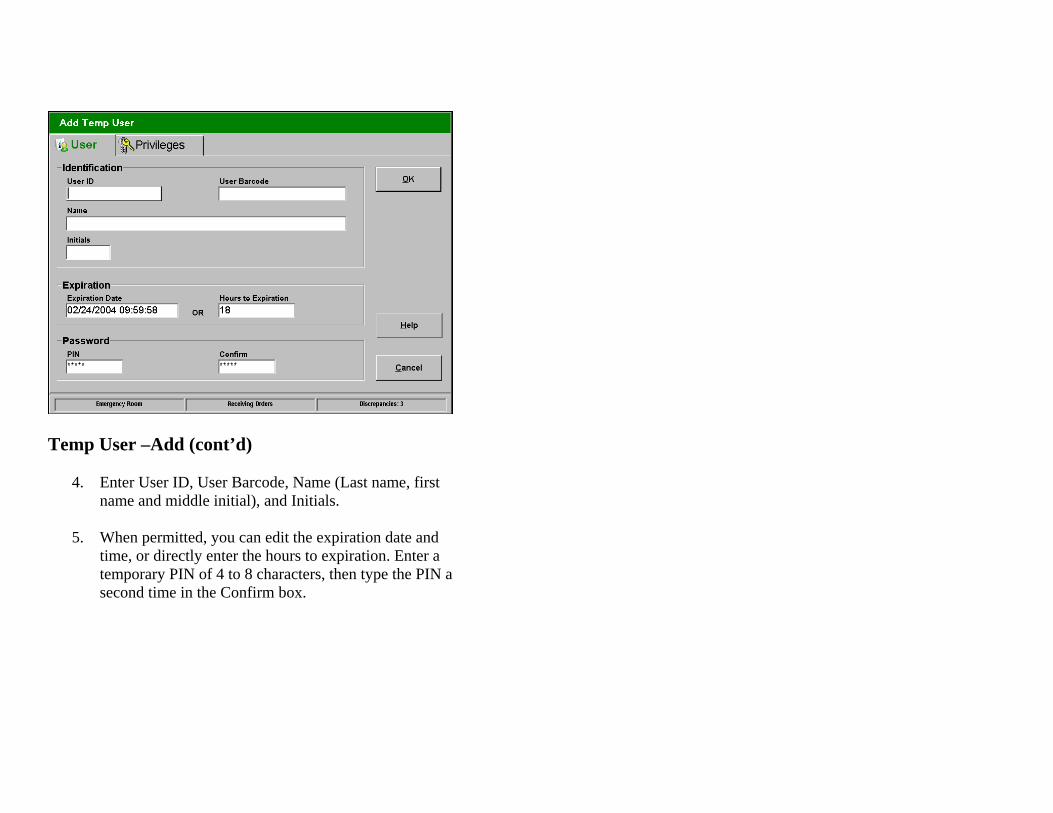
Temp User –Add (cont’d)
4. Enter User ID, User Barcode, Name (Last name, first name and middle initial), and Initials.
5. When permitted, you can edit the expiration date and
time, or directly enter the hours to expiration. Enter a temporary PIN of 4 to 8 characters, then type the PIN a second time in the Confirm box.
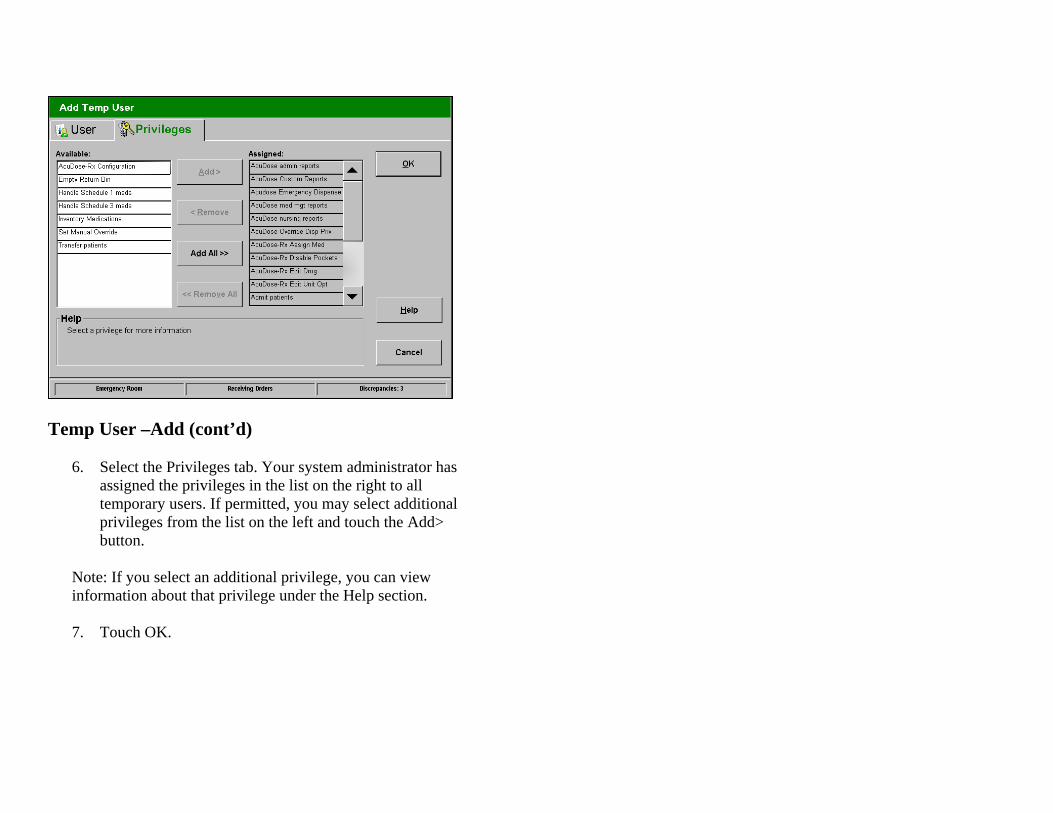
Temp User –Add (cont’d)
6. Select the Privileges tab. Your system administrator has assigned the privileges in the list on the right to all temporary users. If permitted, you may select additional privileges from the list on the left and touch the Add> button.
Note: If you select an additional privilege, you can view information about that privilege under the Help section. 7. Touch OK.

Temp User -Edit
1. From the Admin tab, touch Temp User.
2. Select the temp user’s name from the list.
3. Touch the Edit button.
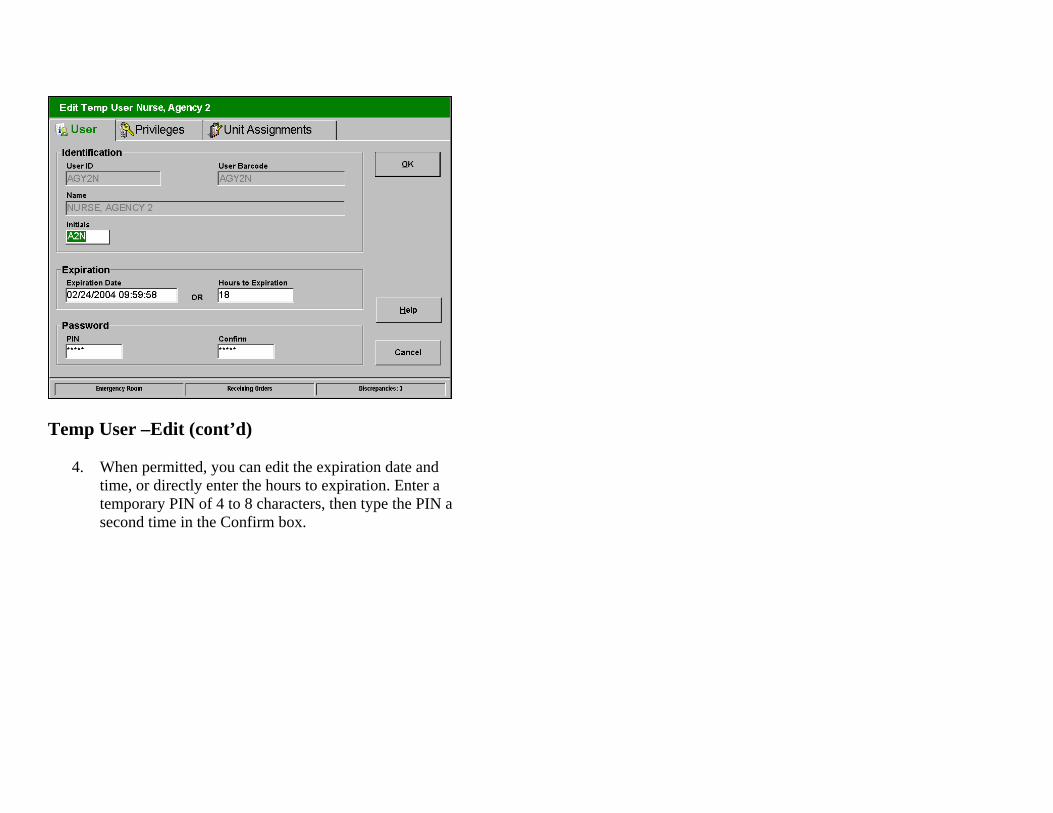
Temp User –Edit (cont’d)
4. When permitted, you can edit the expiration date and time, or directly enter the hours to expiration. Enter a temporary PIN of 4 to 8 characters, then type the PIN a second time in the Confirm box.
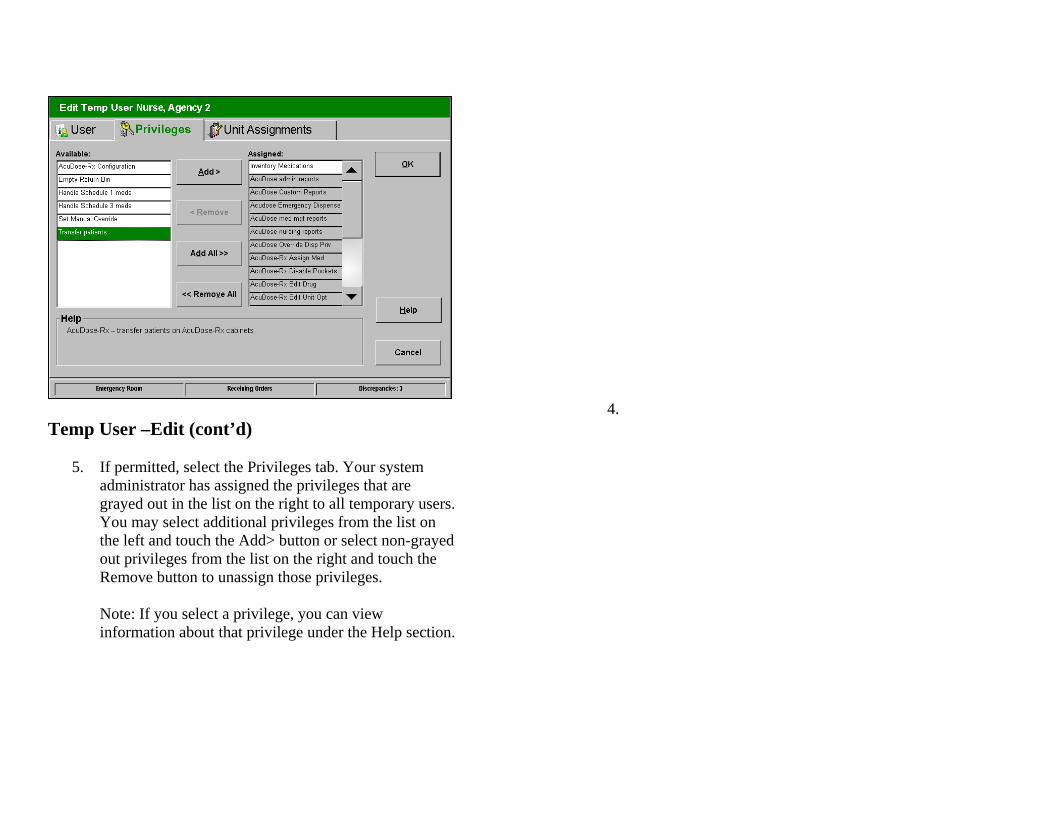
Temp User –Edit (cont’d)
5. If permitted, select the Privileges tab. Your system administrator has assigned the privileges that are grayed out in the list on the right to all temporary users. You may select additional privileges from the list on the left and touch the Add> button or select non-grayed out privileges from the list on the right and touch the Remove button to unassign those privileges. Note: If you select a privilege, you can view information about that privilege under the Help section.
4.
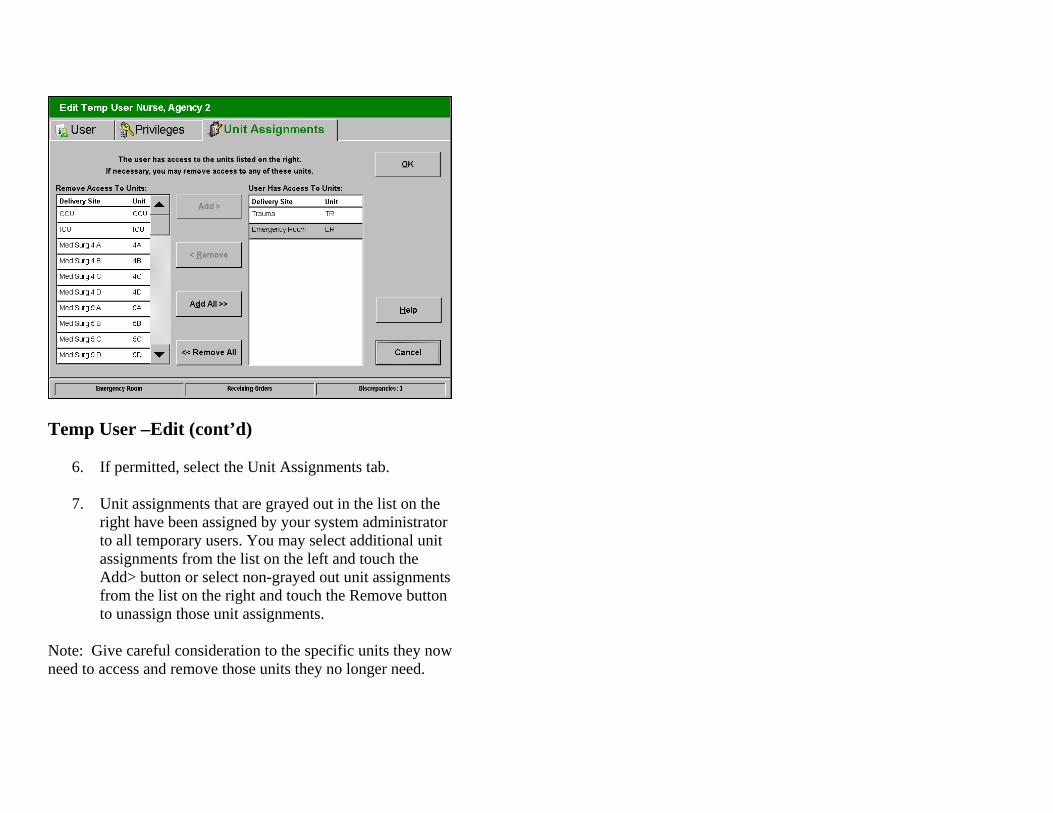
Temp User –Edit (cont’d)
6. If permitted, select the Unit Assignments tab.
7. Unit assignments that are grayed out in the list on the right have been assigned by your system administrator to all temporary users. You may select additional unit assignments from the list on the left and touch the Add> button or select non-grayed out unit assignments from the list on the right and touch the Remove button to unassign those unit assignments.
Note: Give careful consideration to the specific units they now need to access and remove those units they no longer need.
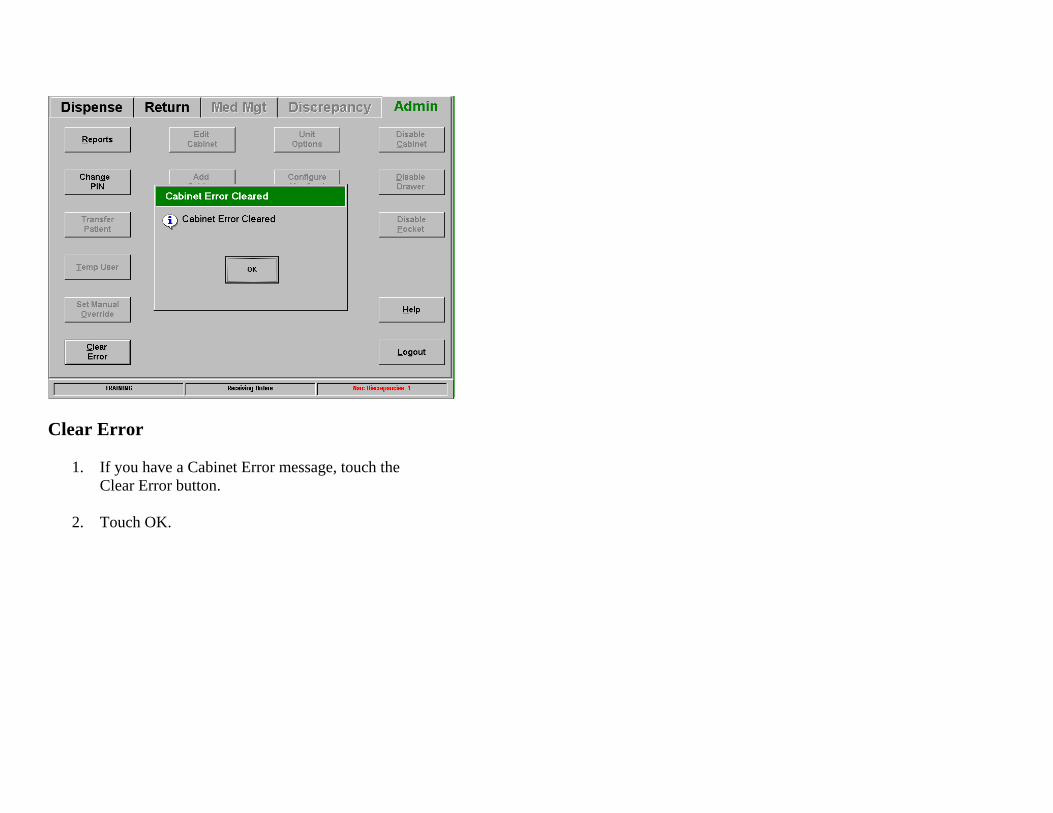
Clear Error
1. If you have a Cabinet Error message, touch the Clear Error button.
2. Touch OK.

Assign Medications
1. Use the drop down menus to select the cabinet and drawer where you would like to assign a medication.
2. Select the pocket for med assignment. 3. Touch the Assign Medication button.
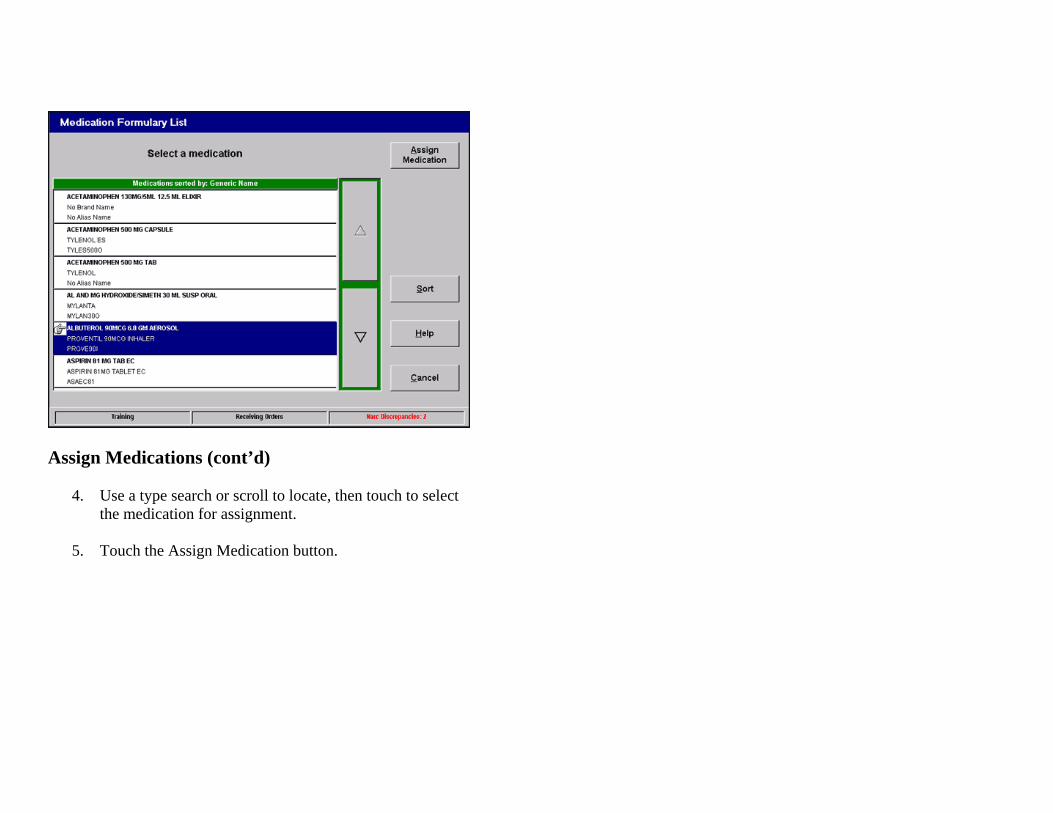
Assign Medications (cont’d)
4. Use a type search or scroll to locate, then touch to select the medication for assignment.
5. Touch the Assign Medication button.
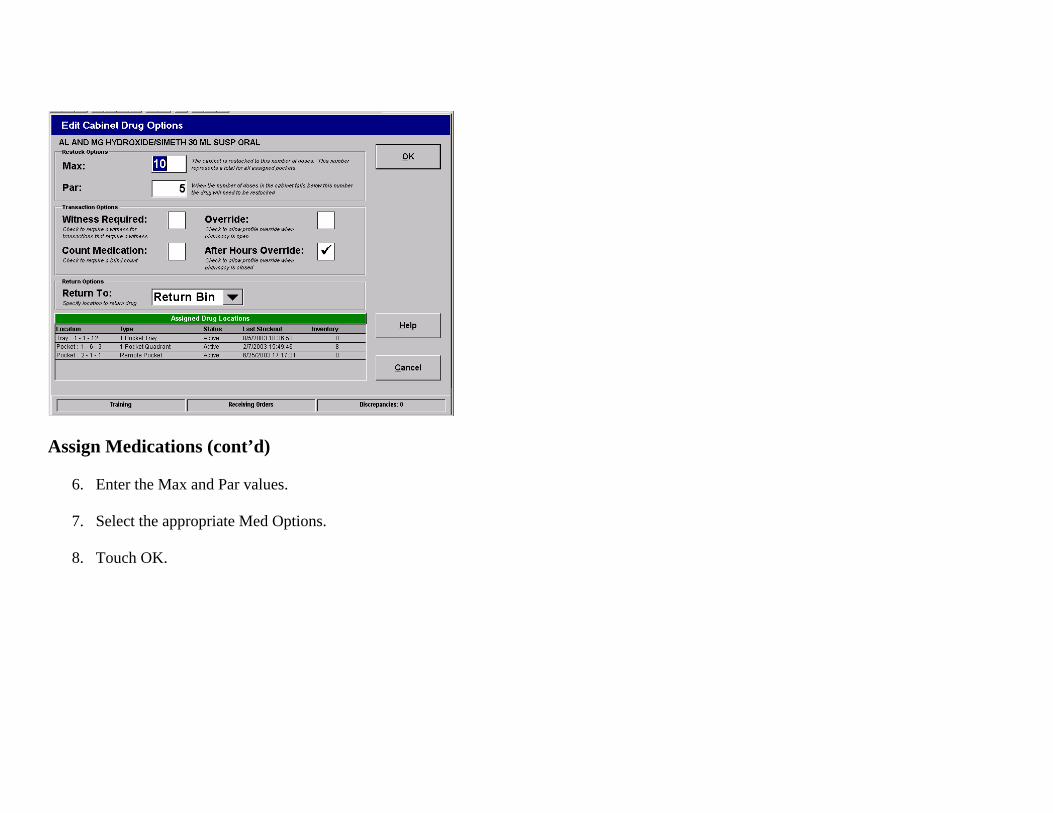
Assign Medications (cont’d)
6. Enter the Max and Par values. 7. Select the appropriate Med Options.
8. Touch OK.
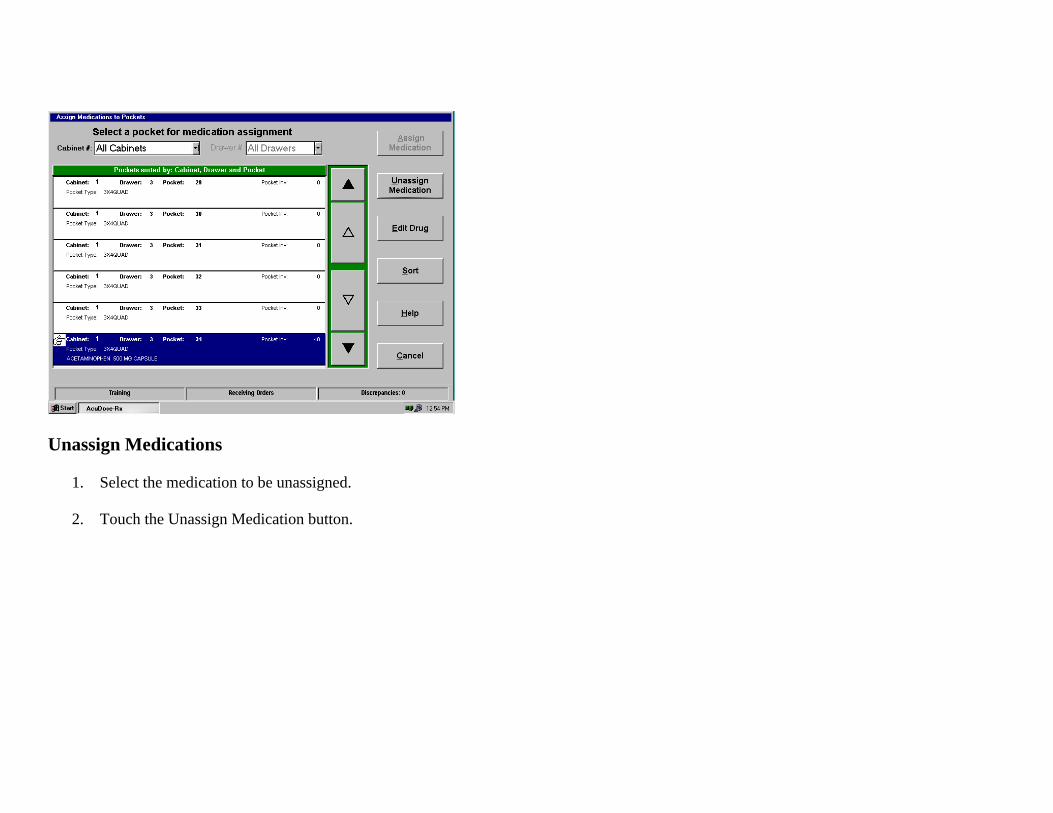
Unassign Medications
1. Select the medication to be unassigned. 2. Touch the Unassign Medication button.

This AcuDose-Rx User Guide is confidential and contains information proprietary to McKesson Automation. Neither this document, nor any of the information contained in other documentation or software assistance publications, may be reproduced or disclosed to any person under any circumstances without the express written permission of McKesson Automation. For more information, please call McKesson Automation at 1-800-700-USER, and ask to speak with the Technical Writing Department. Additional information is provided in the AcuDose-Rx Reference Guide and on-line help. McKesson Automation is dedicated to providing you with accurate, consistent support for AcuDose-Rx. However, as with all computer software, changes in equipment and code occur frequently. As these changes are made, AcuDose-Rx users will be trained and informed of the new procedures in the most timely manner possible. However, because of the inherent delays involved in producing documentation, information in this Guide is subject to change. If you have questions about changes in your software, please call McKesson Automation.
© Copyright 1995 – 2004 McKesson Automation 700 Waterfront Drive, Pittsburgh, PA 15222
1-800-700-USER Fax: 412-209-1414 AcuDose-Rx is a trademark of McKesson Automation. Printed in Ireland