Embed Size (px)
Citation preview

Provide self tanning services
1
What you will learnMaintain safe and effective methods of working when providing self tanning treatments
Consult, plan and prepare for treatments with clients
Apply self tan products
Provide aftercare advice
Unit B25

Pro
vid
e s
elf ta
nnin
g s
erv
ices
Level 3 Beauty Therapy
Unit B
25
2
Introduction Self tanning is a very popular treatment in salons and is now at the forefront of public consciousness both through celebrity endorsement and the growing awareness of the dangers associated with regular ultraviolet (UV) tanning. There has been great advancement in the formulation of the products used in self tanning – gone are the days of streaking and strong-smelling products. A polished tan is now easily applied and straightforward for therapists. It is important to stress that it is a salon treatment, rather than one the client can perform at home. Techniques are now so good that therapists can also perform body sculpting – this involves highlighting muscle groups by adding defi nition through the use of clever shading. The client ends up with an all over, even glow with no strap marks or redness of the skin.
Throughout history, people have had a close connection with the sun. Past civilisations worshipped and off ered sacrifi ces to the sun god, who provided warmth and made crops grow. As cultures changed, so did our relationship with the sun. Skin colour became an indicator of social status, one that separated the working classes from the upper classes – if you had a tan it meant you worked in the fi elds all day so people who didn’t need to work went to great lengths to be pale. Some of them even risked poisoning themselves by using lead-based cosmetics to artifi cially whiten their skin. This continued until the early 1920s when the leading fashion icon Coco Chanel travelled back from the Mediterranean with a deep golden tan and bronzed skin become truly desirable. By the 1930s the suntan was an indicator of health, wealth and style and – in the 1940s – suntan lotion hit the market. At that time, it was designed to assist with the tanning process and not to protect skin from the sun’s rays.
Dermatological (skin) research now proves that regular tanning can lead to long-term damage. It can even reduce life expectancy, with incidences of skin cancer on the increase worldwide.
Today, beaches are as busy as ever but most sunbathers are better at protecting their skin from the potentially harmful eff ects of tanning. Although people are now more aware of the dangers of regular tanning, they still want the healthy glow of a tan and so the need for an artifi cial tan was generated.
Makes the client feel better – a good pick-me-up
Helps skin condition due to exfoliation and moisturising eff ect
Benefi ts of self tanning:
Not harmful to the skin
Can help to even out pigmentation patches
What is a tan? A suntan is a by-product of the action the skin takes when trying to protect itself from the sun’s rays. Melanin production within the epidermis increases and the longer the exposure to UV rays, the darker the pigment becomes.
How self tanning works Self tanning uses a form of vegetable dye which coats the very top layer of the epidermis – the horny layer. Aside from the minimal risk of allergic reaction, the process is harmless and does no damage to the skin’s structure, while producing diff ering levels of skin colour to suit individual client needs. The fi nished result will vary depending upon individual manufacturers’ products, the depth of application, the base shade of the skin to begin with and the type of product used. The end result of a self tanning treatment is also dependent upon the condition of the skin prior to treatment – poor
Instant results
Level 3 Beauty Therapy
3
Pro
vid
e s
elf
tannin
g s
erv
icesU
nit
B25
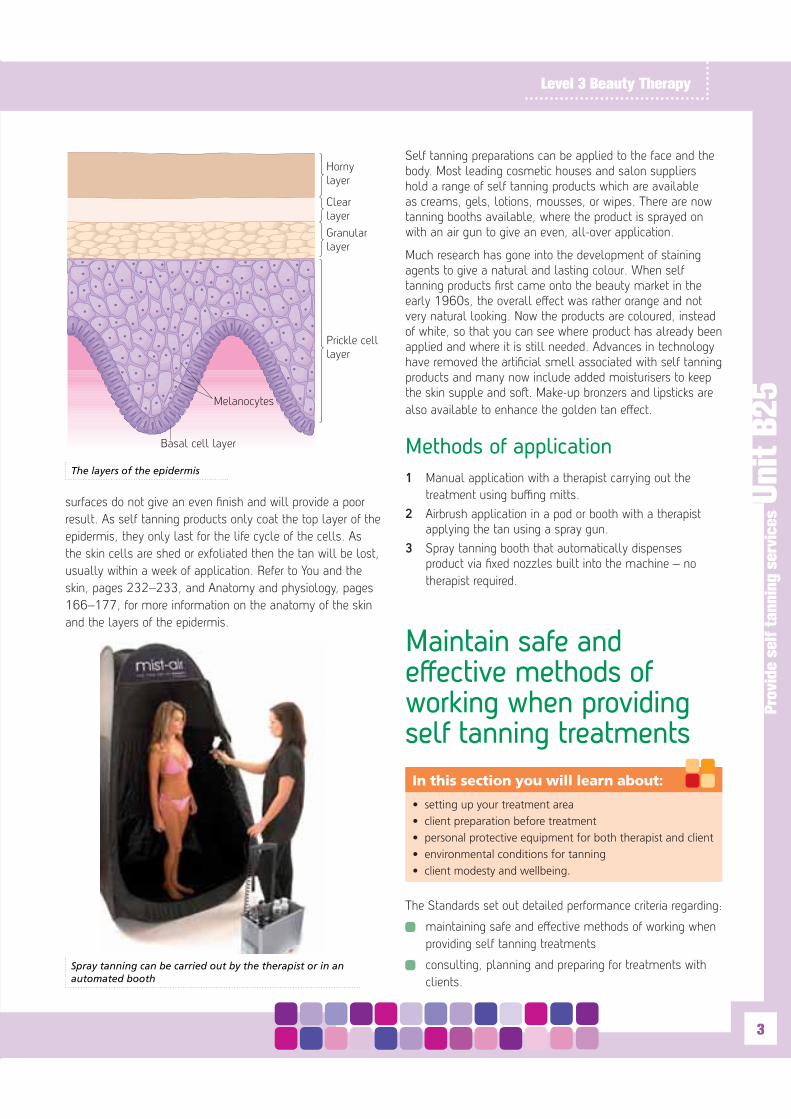
surfaces do not give an even finish and will provide a poor result. As self tanning products only coat the top layer of the epidermis, they only last for the life cycle of the cells. As the skin cells are shed or exfoliated then the tan will be lost, usually within a week of application. Refer to You and the skin, pages 232–233, and Anatomy and physiology, pages 166–177, for more information on the anatomy of the skin and the layers of the epidermis.
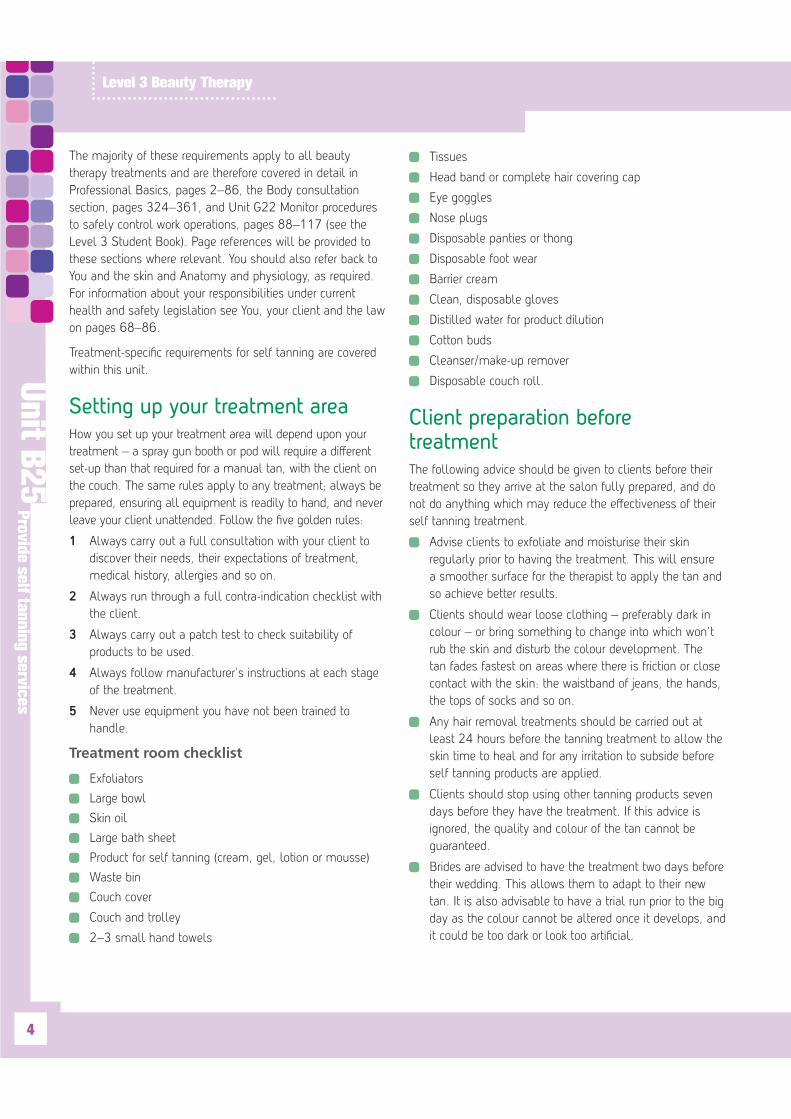
Self tanning preparations can be applied to the face and the body. Most leading cosmetic houses and salon suppliers hold a range of self tanning products which are available as creams, gels, lotions, mousses, or wipes. There are now tanning booths available, where the product is sprayed on with an air gun to give an even, all-over application.
Much research has gone into the development of staining agents to give a natural and lasting colour. When self tanning products first came onto the beauty market in the early 1960s, the overall effect was rather orange and not very natural looking. Now the products are coloured, instead of white, so that you can see where product has already been applied and where it is still needed. Advances in technology have removed the artificial smell associated with self tanning products and many now include added moisturisers to keep the skin supple and so�. Make-up bronzers and lipsticks are also available to enhance the golden tan effect.
Methods of application 1 Manual application with a therapist carrying out the
treatment using buffing mitts.
2 Airbrush application in a pod or booth with a therapist applying the tan using a spray gun.
3 Spray tanning booth that automatically dispenses product via fixed nozzles built into the machine – no therapist required.
The layers of the epidermis
Spray tanning can be carried out by the therapist or in an automated booth
Maintain safe and effective methods of working when providing self tanning treatmentsIn this section you will learn about:
The Standards set out detailed performance criteria regarding:
maintaining safe and effective methods of working when providing self tanning treatments
consulting, planning and preparing for treatments with clients.
Pro
vid
e s
elf ta
nnin
g s
erv
ices
Level 3 Beauty Therapy
Unit B
25
4
Tissues
Head band or complete hair covering cap
Eye goggles
Nose plugs
Disposable panties or thong
Disposable foot wear
Barrier cream
Clean, disposable gloves
Distilled water for product dilution
Cotton buds
Cleanser/make-up remover
Disposable couch roll.
Client preparation before treatmentThe following advice should be given to clients before their treatment so they arrive at the salon fully prepared, and do not do anything which may reduce the effectiveness of their self tanning treatment.
Advise clients to exfoliate and moisturise their skin regularly prior to having the treatment. This will ensure a smoother surface for the therapist to apply the tan and so achieve better results.
Clients should wear loose clothing – preferably dark in colour – or bring something to change into which won’t rub the skin and disturb the colour development. The tan fades fastest on areas where there is friction or close contact with the skin: the waistband of jeans, the hands, the tops of socks and so on.
Any hair removal treatments should be carried out at least 24 hours before the tanning treatment to allow the skin time to heal and for any irritation to subside before self tanning products are applied.
Clients should stop using other tanning products seven days before they have the treatment. If this advice is ignored, the quality and colour of the tan cannot be guaranteed.
Brides are advised to have the treatment two days before their wedding. This allows them to adapt to their new tan. It is also advisable to have a trial run prior to the big day as the colour cannot be altered once it develops, and it could be too dark or look too artificial.
The majority of these requirements apply to all beauty therapy treatments and are therefore covered in detail in Professional Basics, pages 2–86, the Body consultation section, pages 324–361, and Unit G22 Monitor procedures to safely control work operations, pages 88–117 (see the Level 3 Student Book). Page references will be provided to these sections where relevant. You should also refer back to You and the skin and Anatomy and physiology, as required. For information about your responsibilities under current health and safety legislation see You, your client and the law on pages 68–86.
Treatment-specific requirements for self tanning are covered within this unit.
Setting up your treatment areaHow you set up your treatment area will depend upon your treatment – a spray gun booth or pod will require a different set-up than that required for a manual tan, with the client on the couch. The same rules apply to any treatment; always be prepared, ensuring all equipment is readily to hand, and never leave your client unattended. Follow the five golden rules:
1 Always carry out a full consultation with your client to discover their needs, their expectations of treatment, medical history, allergies and so on.
2 Always run through a full contra-indication checklist with the client.
3 Always carry out a patch test to check suitability of products to be used.
4 Always follow manufacturer’s instructions at each stage of the treatment.
5 Never use equipment you have not been trained to handle.
Treatment room checklist
Exfoliators
Large bowl
Skin oil
Large bath sheet
Product for self tanning (cream, gel, lotion or mousse)
Waste bin
Couch cover
Couch and trolley
2–3 small hand towels
Level 3 Beauty Therapy
5
Pro
vid
e s
elf
tannin
g s
erv
icesU
nit
B25
Environmental conditions for tanningRefer to Professional basics, You and your working environment, pages 58–63 for revision of acceptable environmental conditions for your client. As the client is in a state of undress, the room should be warm but not too hot. You should also ensure there is suitable ventilation to allow good air flow. This is especially important when using a spray gun, as it is possible to inhale the mist from the spray if you are too close – the chemical composition may give the therapist a headache over a period of time with repeat treatments. Some manufacturers offer nose plugs for the client and a mask for the therapist to avoid any inhalation of product – always refer to the manufacturer’s instructions for the equipment you are using.
Client modesty and wellbeingIt is essential that client modesty is maintained at all times throughout the treatment, whichever type of treatment you are giving. The treatment room should be private and warm, so that the client feels comfortable when undressed and confident that the treatment will not be disturbed.
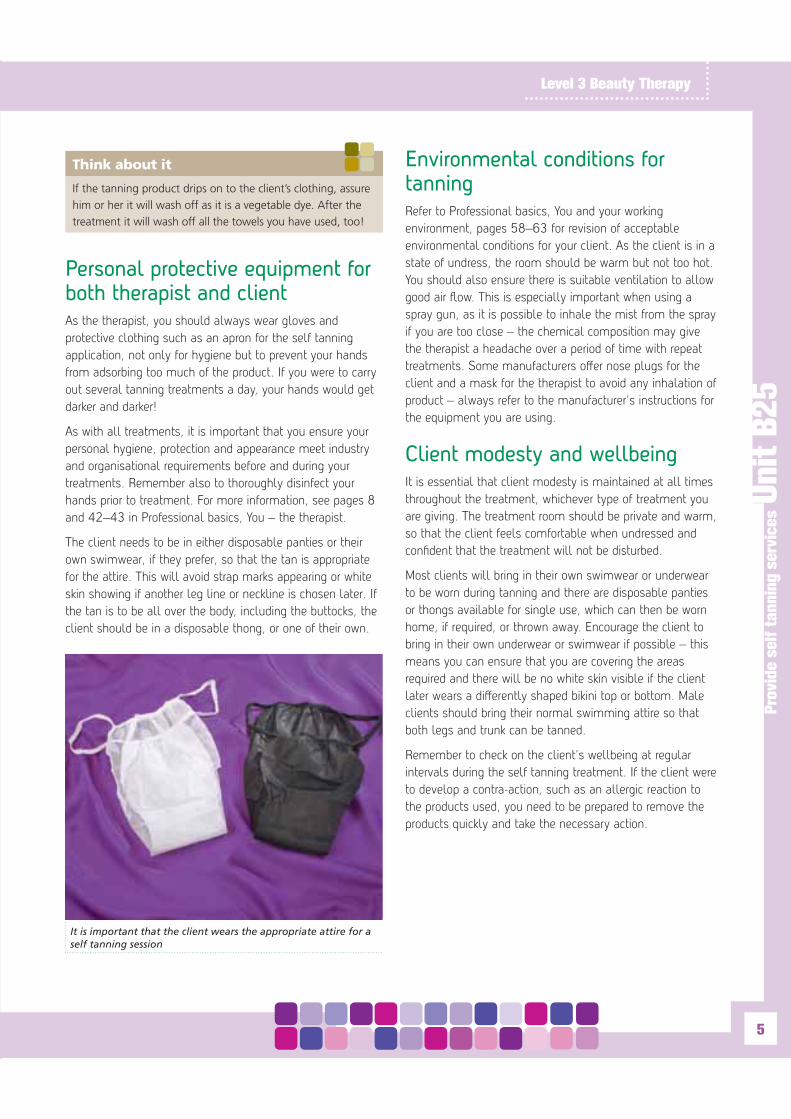
Most clients will bring in their own swimwear or underwear to be worn during tanning and there are disposable panties or thongs available for single use, which can then be worn home, if required, or thrown away. Encourage the client to bring in their own underwear or swimwear if possible – this means you can ensure that you are covering the areas required and there will be no white skin visible if the client later wears a differently shaped bikini top or bottom. Male clients should bring their normal swimming attire so that both legs and trunk can be tanned.
Remember to check on the client’s wellbeing at regular intervals during the self tanning treatment. If the client were to develop a contra-action, such as an allergic reaction to the products used, you need to be prepared to remove the products quickly and take the necessary action.
Think about it
Personal protective equipment for both therapist and clientAs the therapist, you should always wear gloves and protective clothing such as an apron for the self tanning application, not only for hygiene but to prevent your hands from adsorbing too much of the product. If you were to carry out several tanning treatments a day, your hands would get darker and darker!
As with all treatments, it is important that you ensure your personal hygiene, protection and appearance meet industry and organisational requirements before and during your treatments. Remember also to thoroughly disinfect your hands prior to treatment. For more information, see pages 8 and 42–43 in Professional basics, You – the therapist.
The client needs to be in either disposable panties or their own swimwear, if they prefer, so that the tan is appropriate for the attire. This will avoid strap marks appearing or white skin showing if another leg line or neckline is chosen later. If the tan is to be all over the body, including the buttocks, the client should be in a disposable thong, or one of their own.
It is important that the client wears the appropriate attire for a self tanning session
Pro
vid
e s
elf ta
nnin
g s
erv
ices
Level 3 Beauty Therapy
Unit B
25
6
This will help to ensure that you have fully understood their expectations. For more information about consultation and questioning techniques, refer to Professional basics, You and your client, pages 34–42.
Client’s skin colouringWhen carrying out the initial consultation it is important to consider the client’s skin colouring and type. The ideal tanning result for the client is a natural and healthy glow to the skin, with an even finish. You should take time to explain to the client that the finished tan should be an enhancement of their natural colouring. So, if the client is naturally very pale, the skin should be given a golden honey colour by diluting the tanning product with moisturiser, rather than attempting to go very dark, which can look unnatural with fair hair or blue eyes. Again, refer to the manufacturer’s instructions – some airbrush tanning solutions can be diluted with distilled water to so�en the end result and prevent the tan from looking too dark or harsh. A second application can always be applied to light or fair skin once the client has adjusted to the colour, but a heavy application cannot be taken off once the tan has developed. A client who is naturally quite dark will be able to take a heavier application while still ensuring a natural-looking finish once the tan has developed.
Many manufacturers make tanning preparations in fair, medium and dark tones and they always recommend the use of the Fitzpatrick skin categories. For further information on pigmentation, related problems and skin characteristics please refer to You and the skin, pages 222–254.
The following table shows the Fitzpatrick Skin Categories:
Skin type Typical features Tanning ability
Consult, plan and prepare for treatments with clientsIn this section you will learn about:
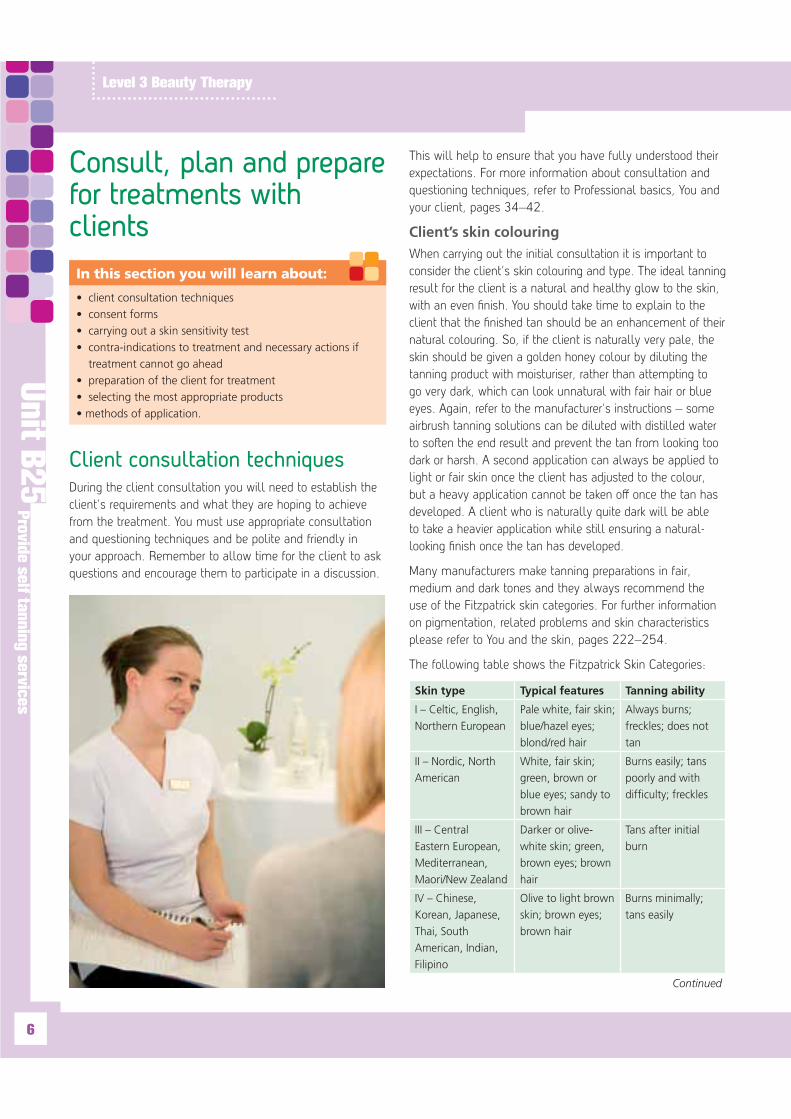
Client consultation techniques During the client consultation you will need to establish the client’s requirements and what they are hoping to achieve from the treatment. You must use appropriate consultation and questioning techniques and be polite and friendly in your approach. Remember to allow time for the client to ask questions and encourage them to participate in a discussion.
Continued

Level 3 Beauty Therapy
7
Pro
vid
e s
elf
tannin
g s
erv
icesU
nit
B25
a morale booster, it is not a skin treatment as such and will not hide blackheads, spots or other skin problems. Nor does it offer coverage in the same way that make-up would. O�en, the opposite will occur – a tan application may highlight and draw attention to skin imperfections, as the colour will be uneven and patchy.
Do fully discuss the reason why the client wants the treatment. For example, if she is a bride who wants to have glowing skin for her big day you must allow plenty of time prior to the wedding to have a trial run in case she does not like the colour or it looks unnatural against her wedding dress.
If the client wants a pre-holiday treatment to take the edge off a very pale body, you must inform them that an artificial tan will not protect the skin from burning and a sun cream should still be used. Most self tanning products do not contain any sun protection factor (SPF) as it does not mix well with high levels of dihydroxyacetone (DHA) – a key ingredient in self tan.
Ensure the client is aware that the treatment is only as good as the surface it goes on to; rather like an application of gloss paint. If the underlying surface is uneven and poorly prepared then the finished result will be poor. The client should regularly exfoliate and moisturise their skin prior to treatment. Dry patches of skin will absorb more product and this will result in an accumulation of colour – hard skin on the feet, knees or elbows is particularly prone to this.
Self tan cannot change the underlying muscle structure but it can add artificial definition and there are specialist spray tanners who will emphasise the muscle groups with careful shading; as used by many professional body builders.
The consultation is o�en a good time to introduce the client to a�ercare products, such as moisturisers and dry-skin oils, which help the tan last longer.
You should agree in writing the client’s needs, expectations and treatment outcomes to ensure they are realistic and achievable. Record your decisions on the client’s record card, as well as the outcome of any treatment undertaken. Your client record cards must be up to date and accurate, and stored in a safe place. For more information on client record cards, refer to Professional basics, You and your client, pages 29–54.
Skin type Typical features Tanning ability
Cost, duration and frequency of treatmentDuring the consultation stage it is a good idea to talk through the treatment, particularly the cost, duration and frequency. Prices vary from salon to salon and also for packages and home treatments; some include homecare products, others do not. Make sure your client fully understands what their treatment entails – whether it is for a course or a one-off treatment – and which products are included.
The client has to understand that the colouring of the skin is temporary and that it only lasts for the lifetime of the skin cells – no claim can be made for a permanent colouring of the skin. See Professional basics, You, your client and the law (pages 78–80) for information on the Trade Descriptions Act, the Consumer Protection Act and the risks of making false claims in advertising or pricing.
It is also important to explain the benefits of the treatment and any restrictions to use in a way that your client can understand. Under the Trade Descriptions Act, it is unlawful for you to mislead your client or make promises that the treatment cannot deliver so it is important that you check your client’s understanding of the information you have given them.
Managing client expectationsIf it is your client’s first experience with tanning products, do suggest that they go a lighter shade to begin with and then you can offer a darker application next time. As the pigmentation will develop 4–8 hours a�er the treatment, it is not always easy to judge the finished result and your client may be unhappy if the tan ends up too dark at the end of the development time.
It is important to manage the client’s expectations, in order to offer the right advice.
Be realistic (but gentle) with the client who thinks that a self tan will make him or her slimmer or get rid of skin problems or tone the skin. While a healthy skin colour is
Pro
vid
e s
elf ta
nnin
g s
erv
ices
Level 3 Beauty Therapy
Unit B
25
8
Some clients may have a nut allergy and nuts are a common ingredient in exfoliants – almond kernels for example. Remember that it may not be the tanning ingredients themselves that are causing the problems.
The sensitivity test can also be used to check the finished colour, to help determine the client’s colour preference before the treatment begins.
Contra-indications to treatment and necessary actions if treatment cannot go aheadA full consultation will be used to determine the client’s requirements of the treatment and their colour preferences, but it should also involve a contra-indication check to ensure that the client has no pre-existing conditions which may restrict the treatment or prevent it from being carried out. The severity of some conditions will determine whether the treatment can be modified or whether it must be avoided. The conditions below can either restrict or prevent a self tanning treatment.
Broken or inflamed skin: these areas should be avoided. There can be a risk of cross-infection if there is a viral, bacterial or fungal infection present.
Recent sunburn, especially if the skin is inflamed or irritated.
Infectious skin conditions (bacterial, viral or fungal): these are total contra-indications and treatment should not be carried out to avoid the spread of infection.
Non-infectious skin conditions, such as eczema, psoriasis and dermatitis: the condition of the skin determines the effectiveness of the treatment, so areas affected by these conditions will absorb more tanning agent and dark patches may appear. You may feel in your professional judgement that the affected area is too large and the client will not be pleased with the end result, in which case the treatment cannot go ahead. It is also possible that the products used may cause further irritation to the skin.
Insulin-dependent diabetics or clients on medication containing Retinol A or roactane: these clients may have thinner skin, leading to a much higher risk of bruising. Treatment can go ahead if GP approval is obtained.
Clients on steroid-based medication or having chemotherapy may find they develop a reaction to the treatment and should be made aware of this.
Clients with high sensitivity or allergies may also not be suitable for treatment.
Consent formsAlways ensure that parental or guardian consent is obtained for minors under the age of 16 and that the parent or guardian is present during the self tanning treatment. This is also for your own protection and to avoid any malpractice allegations. For more information about the importance of consent and the relevant legislation, refer to page 23 in Professional basics.
Think about it
For your portfolio
Carrying out a skin sensitivity test It is important that you always carry out a sensitivity test to check the suitability of all the chosen product(s) prior to treatment, even if the client has not informed you of any problems with self tanners or known sensitivities. It is advisable to carry out the sensitivity test 24 hours before the treatment. Always carry out the sensitivity test on the inner elbow or behind the ear and ask the client to check a�er 12–24 hours for any reactions.
Reaction to the test can be immediate; clients may experience itchiness or a burning sensation in the area. A more common reaction involves the client developing a prickly heat type of rash (urticaria) within 12 hours. If this is the case, an antihistamine tablet will reduce the inflammation and it is advisable not to continue with the treatment.

Level 3 Beauty Therapy
9
Pro
vid
e s
elf
tannin
g s
erv
icesU
nit
B25
Pigmentation disorders – hypopigmentation and hyperpigmentation
Failure of the sensitivity test with irritation present would be a contra-indication.
Asthmatics may find their condition is irritated in a spray booth because of the fine particles and limited ventilation – do warn the client there is a possibility of an attack, and suggest a manual application instead.
If the client presents with any condition you feel would be contra-indicated and you are not happy to carry out the treatment, then you must follow your training and refuse to treat the client. If this is necessary, you must explain tactfully and politely why the treatment cannot be carried out, and do recommend the client seeks advice from their own GP if appropriate. Remember that it is not your place to comment on possible medical conditions. You are not medically trained and it may affect your insurance cover should you choose to offer advice which later turns out to be incorrect.
Some skin conditions which are contra-indicated for a self tanning treatment may respond well to a UV sunbed treatment, so this may be a suitable alternative to offer the client, subject to GP approval. For example, psoriasis or eczema will not offer a smooth skin base for the self tanning products and may be irritated by them, but the UV light in a short dose treatment on a sunbed may actually help the healing process.
Self tanning treatments are safe for pregnant women, although they may prefer not to have the abdomen massaged if having a manual treatment. However, there is an insurance risk with a pregnant client as most insurance companies stipulate that no treatments of any kind should be carried out in the first three months of pregnancy because of the risk of miscarriage, however small. Check with both your insurer and your awarding body, if in doubt.
Hormones influence pigmentation levels within the skin, so if the client is pregnant, on the contraceptive pill, on HRT or going through the menopause, they may have patches of differently-coloured skin which could affect the end result.
Think about it
Think about it
Vitiligo (hypopigmentation)
Chloasma (hyperpigmentation)
This occurs in skin with deficient, or lower than normal, pigmentation or colouring. It can be hormonally related or can happen as a result of the ageing process and o�en occurs in patches. While skin texture is unaffected, it can make the skin look rough and be quite inhibiting for the client. The most common form of hypopigmentation is vitiligo (also known as leucoderma), which is characterised by the formation of smooth, white, circumscribed irregular patches, o�en with increased pigmentation of the surrounding skin which appears darker because of the contrast against the lighter patches. The white patches burn easily in the sun, as their melanin content is low or non-existent. Vitiligo occurs chiefly on the hands and o�en in the elderly. Its cause is unknown, but it is most commonly found in the tropics.

Pro
vid
e s
elf ta
nnin
g s
erv
ices
Level 3 Beauty Therapy
Unit B
25
10
Apply a barrier cream as appropriate: in an automatic spray booth you can ask the client to apply a barrier cream to the hands and feet, eyebrows and nails to prevent staining and if the client has particularly long nails, even underneath the free edge. However, if the spray gun is operated by a trained therapist, they will know not to apply product on the palms of the hands or the soles of the feet so this will not be necessary.
Ensure the client is wearing the appropriate attire: check again that the client is happy with what they are wearing as it will affect the tan lines.
Selecting the most appropriate products
Self tanning productsThere are different types of products available for self tanning treatments.
Tanning creams – thick in consistency, develop over a period of hours a�er application. Creams are easily absorbed, so do not need to be rubbed into the skin. They should be stroked onto the skin in a sweeping movement. There are many good creams on the market and they tend to suit most skin types. It is better to use a tinted cream, as opposed to a white cream, for ease of application, as you can see where you have put the product.
Tanning gels – gels are ideal for the client who prefers a product that is lighter and slightly thinner in texture. Be wary of spreading the gel too thinly and not getting enough coverage for an even tan. Again, it is best to use a tinted product for ease of application and to avoid the risk of overlapping and causing uneven coverage.
Tanning mousse – light, foamy texture; quick-drying; normally applied using an aerosol can. The product becomes liquid in contact with the skin and is very easy to apply. Most bronzing mousses are infused with moisturisers such as aloe vera to help the condition of the skin. A good application technique is required to ensure an even finish and you should buff with a mitt to ensure no lines are le� a�er application.
Spray tan liquid – liquid products for use with a spray gun; available in a variety of shades. Most manufacturers of spray gun systems recommend their own liquid and you may find that if you try an alternative to the one recommended, it does not come out of the nozzle evenly or causes blockages in the spray gun.
This skin colouring can be evened out by applying self tanners but you should check with individual manufacturers for their recommendations. The treatment can help to disguise the lighter patches for a special occasion, giving confidence to clients who are psychologically affected by the condition.
This occurs as the result of excessive pigmentation – above the normal ratio expected for the natural colour of the skin. The most common condition is chloasma, which is the development of smooth irregular-shaped patches of brown pigment. This is usually hormone-related, so may occur in pregnancy or as a result of the increased hormone levels of a client taking the oral contraceptive pill. As the affected skin is already dark, the only way of evening out the skin colour is to apply tan around the dark patches and avoid the area itself, to try and minimise the difference. Applying self tan to the chloasma will only deepen the colour and draw attention to the area.
Preparation of the client for treatmentA�er a full consultation and when written consent has been given, you will need to prepare your client for treatment.
Thoroughly cleanse the area to be treated: make-up, creams and body lotions act as a barrier and the self tan will not develop in those areas. It is important to cleanse the skin before treatment, whether the client is having self tan applied manually or in a spray booth. Ideally, the client should shower prior to treatment, either at home or in the salon.
Cover the hair using a protective hair covering: it is important both to protect the hair from products used during the self tanning treatment and also to ensure that hair is not obscuring areas to be treated. In a spray tanning booth, which is automatically operated, the spray will cover all of the face – if you le� the fringe over the forehead, the product would not come into contact with the skin in this area.
Nose plugs and eye coverings should be available in a spray booth and clients should be asked to remove contact lenses to avoid irritation.
All jewellery should be removed: this is to avoid it being tarnished with product and also to give an even skin coverage – a good end result will not include watch or ring marks!
Level 3 Beauty Therapy
11
Pro
vid
e s
elf
tannin
g s
erv
icesU
nit
B25
Methods of applicationChoosing the right method for application of self tanning products will depend upon several factors:
the time the client has for treatment
client preference
the type of result required, such as body sculpting for muscular definition.
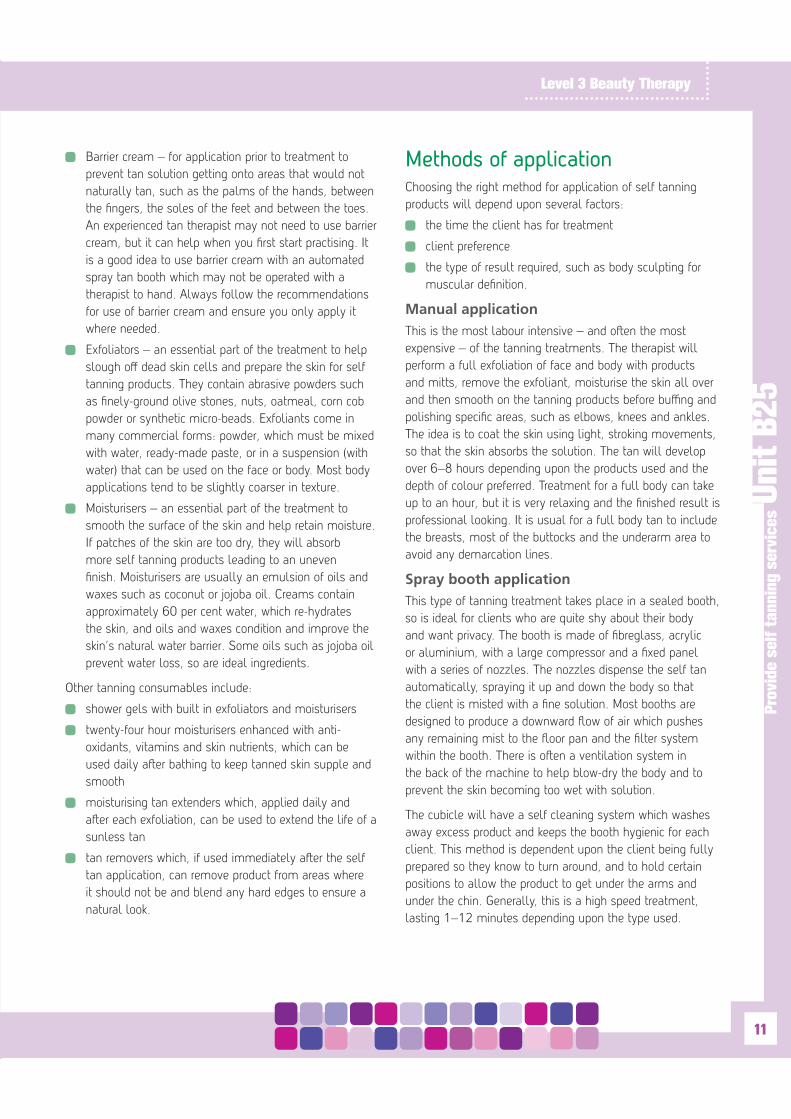
Manual application This is the most labour intensive – and o�en the most expensive – of the tanning treatments. The therapist will perform a full exfoliation of face and body with products and mitts, remove the exfoliant, moisturise the skin all over and then smooth on the tanning products before buffing and polishing specific areas, such as elbows, knees and ankles. The idea is to coat the skin using light, stroking movements, so that the skin absorbs the solution. The tan will develop over 6–8 hours depending upon the products used and the depth of colour preferred. Treatment for a full body can take up to an hour, but it is very relaxing and the finished result is professional looking. It is usual for a full body tan to include the breasts, most of the buttocks and the underarm area to avoid any demarcation lines.
Spray booth application This type of tanning treatment takes place in a sealed booth, so is ideal for clients who are quite shy about their body and want privacy. The booth is made of fibreglass, acrylic or aluminium, with a large compressor and a fixed panel with a series of nozzles. The nozzles dispense the self tan automatically, spraying it up and down the body so that the client is misted with a fine solution. Most booths are designed to produce a downward flow of air which pushes any remaining mist to the floor pan and the filter system within the booth. There is o�en a ventilation system in the back of the machine to help blow-dry the body and to prevent the skin becoming too wet with solution.
The cubicle will have a self cleaning system which washes away excess product and keeps the booth hygienic for each client. This method is dependent upon the client being fully prepared so they know to turn around, and to hold certain positions to allow the product to get under the arms and under the chin. Generally, this is a high speed treatment, lasting 1–12 minutes depending upon the type used.
Barrier cream – for application prior to treatment to prevent tan solution getting onto areas that would not naturally tan, such as the palms of the hands, between the fingers, the soles of the feet and between the toes. An experienced tan therapist may not need to use barrier cream, but it can help when you first start practising. It is a good idea to use barrier cream with an automated spray tan booth which may not be operated with a therapist to hand. Always follow the recommendations for use of barrier cream and ensure you only apply it where needed.
Exfoliators – an essential part of the treatment to help slough off dead skin cells and prepare the skin for self tanning products. They contain abrasive powders such as finely-ground olive stones, nuts, oatmeal, corn cob powder or synthetic micro-beads. Exfoliants come in many commercial forms: powder, which must be mixed with water, ready-made paste, or in a suspension (with water) that can be used on the face or body. Most body applications tend to be slightly coarser in texture.
Moisturisers – an essential part of the treatment to smooth the surface of the skin and help retain moisture. If patches of the skin are too dry, they will absorb more self tanning products leading to an uneven finish. Moisturisers are usually an emulsion of oils and waxes such as coconut or jojoba oil. Creams contain approximately 60 per cent water, which re-hydrates the skin, and oils and waxes condition and improve the skin’s natural water barrier. Some oils such as jojoba oil prevent water loss, so are ideal ingredients.
Other tanning consumables include:
shower gels with built in exfoliators and moisturisers
twenty-four hour moisturisers enhanced with anti-oxidants, vitamins and skin nutrients, which can be used daily a�er bathing to keep tanned skin supple and smooth
moisturising tan extenders which, applied daily and a�er each exfoliation, can be used to extend the life of a sunless tan
tan removers which, if used immediately a�er the self tan application, can remove product from areas where it should not be and blend any hard edges to ensure a natural look.

Pro
vid
e s
elf ta
nnin
g s
erv
ices
Level 3 Beauty Therapy
Unit B
25
12
Some manufacturers make turbine-type spray tanning systems using a turbine motor rather than a compressor. These are louder than compressors but produce a higher volume of air flow at a lower pressure (HVLP). Check with individual manufacturers which one is most suitable for your business needs – the smaller units are ideal for a mobile therapist but if you are in a salon you will need a larger, heavy-duty type of machine.
Either way, this method allows for a more personal service and can be used for both body sculpting and muscle definition. It has also been used for body painting and artificial tattooing.
The skin is immediately coloured and then the colour deepens as the product develops. As it is controlled by the therapist, it allows for a more precise application than an automatic booth and a skilled technician can deliver a body spray in about 15–20 minutes, including both the front and back of the body. You will need to allow drying time so the complete treatment takes approximately 30 minutes. This application requires more skill on the part of the therapist to ensure an even application. The spray gun needs to be kept at a regular distance from the client and should be moved smoothly without lingering for too long in one area.
Which method to choose?The method chosen will depend on the client’s needs and personal preferences, and the available time.
The equipment you have available to you will depend upon whether you are in a large salon – with the capital to invest in bigger equipment and the space to house a booth or pod – or if you are self-employed, mobile or part of a smaller salon. Equipment varies enormously in price and a smaller salon or self-employed therapist may feel that the investment in equipment is not appropriate for their market.
Some therapists prefer to apply self tan by hand for a more personal treatment, including thorough preparation of the skin, but those who prefer spray tanning would highlight the speed with which you can complete treatments making it more profitable.
Whichever method you go for, it is important to consider any contra-indications identified during the client consultation and the cost implications of the different treatments.
Airbrush application
Airbrush application
This type of tanning treatment is performed by a therapist while the client stands in a booth or pod. The therapist holds an airbrush pen linked to a bottle of liquid product, with a long flexible tube attached to an air compressor to push the product into the nozzle in order to deliver a fine mist of spray onto the client’s skin. This device was originally designed for paint-spraying systems. The most common system used is HVLP, which stands for high volume low pressure.
Most compressed air machines have a gauge to adjust the psi reading. This is a measurement of air pressure – psi = pounds per square inch. For a small spray tanning unit you will only need a machine with a psi of 100 or less, but it depends upon what type of equipment you buy. Some bigger machines used in car spraying and industrial work go very much higher and would be too powerful for tanning application. Always check with your individual manufacturer’s instructions.
Level 3 Beauty Therapy
13
Pro
vid
e s
elf
tannin
g s
erv
icesU
nit
B25
Apply self tan productsIn this section you will learn about:
The process of self tanning Self tanning application is a three-step process:
1 Exfoliation
2 Moisturising
3 Application of tanning agents.
Performing one step without the others will result in an uneven colour distribution, patchy colour appearing at the natural creases of the body, such as elbows and knees, or an accumulation of darker colour where there are dry or rough patches of skin.
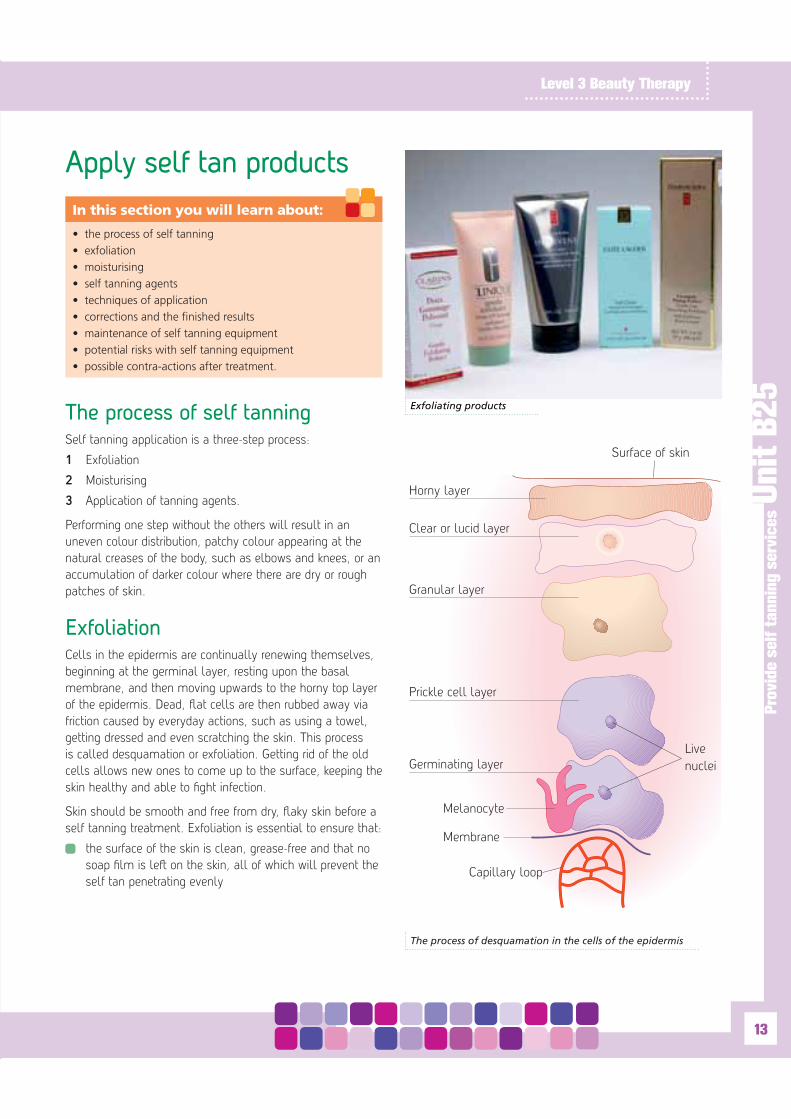
ExfoliationCells in the epidermis are continually renewing themselves, beginning at the germinal layer, resting upon the basal membrane, and then moving upwards to the horny top layer of the epidermis. Dead, flat cells are then rubbed away via friction caused by everyday actions, such as using a towel, getting dressed and even scratching the skin. This process is called desquamation or exfoliation. Getting rid of the old cells allows new ones to come up to the surface, keeping the skin healthy and able to fight infection.
Skin should be smooth and free from dry, flaky skin before a self tanning treatment. Exfoliation is essential to ensure that:
the surface of the skin is clean, grease-free and that no soap film is le� on the skin, all of which will prevent the self tan penetrating evenly
Horny layer
Clear or lucid layer
Granular layer
Germinating layer
Membrane
Capillary loop
Melanocyte
Prickle cell layer
Surface of skin
Livenuclei
The process of desquamation in the cells of the epidermis
Exfoliating products
Pro
vid
e s
elf ta
nnin
g s
erv
ices
Level 3 Beauty Therapy
Unit B
25
14
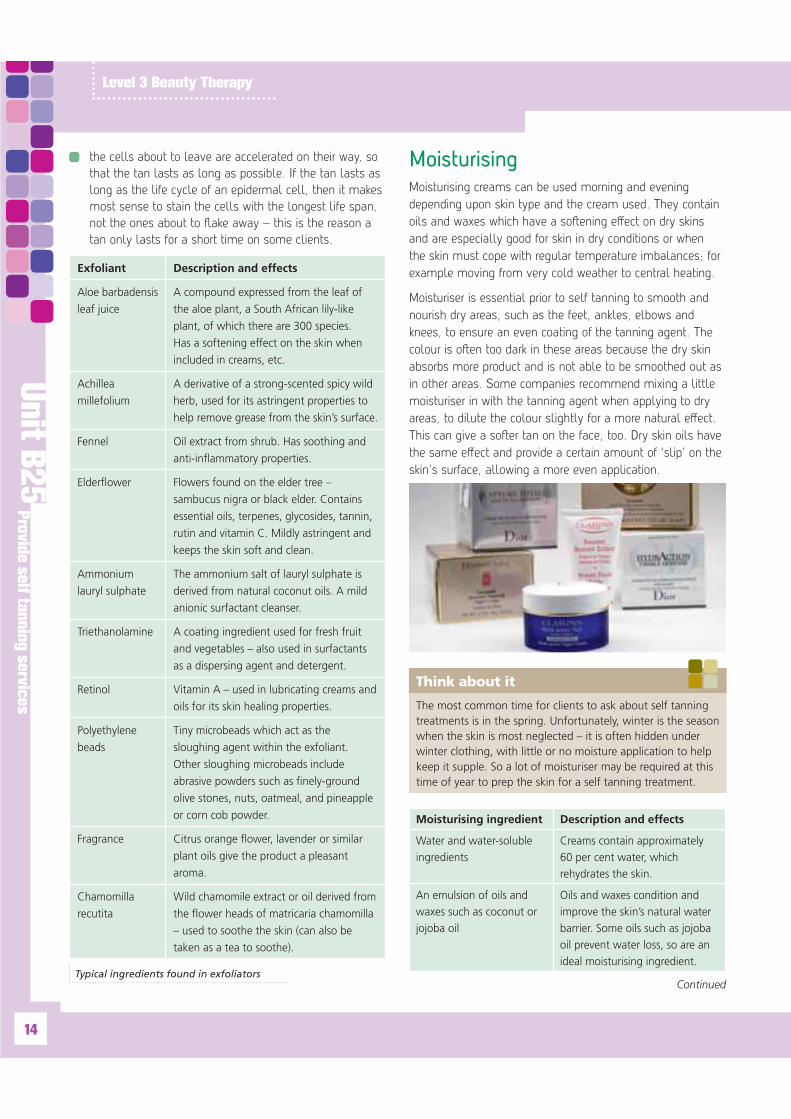
MoisturisingMoisturising creams can be used morning and evening depending upon skin type and the cream used. They contain oils and waxes which have a so�ening effect on dry skins and are especially good for skin in dry conditions or when the skin must cope with regular temperature imbalances; for example moving from very cold weather to central heating.
Moisturiser is essential prior to self tanning to smooth and nourish dry areas, such as the feet, ankles, elbows and knees, to ensure an even coating of the tanning agent. The colour is o�en too dark in these areas because the dry skin absorbs more product and is not able to be smoothed out as in other areas. Some companies recommend mixing a little moisturiser in with the tanning agent when applying to dry areas, to dilute the colour slightly for a more natural effect. This can give a so�er tan on the face, too. Dry skin oils have the same effect and provide a certain amount of ‘slip’ on the skin’s surface, allowing a more even application.
the cells about to leave are accelerated on their way, so that the tan lasts as long as possible. If the tan lasts as long as the life cycle of an epidermal cell, then it makes most sense to stain the cells with the longest life span, not the ones about to flake away – this is the reason a tan only lasts for a short time on some clients.
Exfoliant Description and effects
Typical ingredients found in exfoliators
Think about it
Moisturising ingredient Description and effects
Continued

Level 3 Beauty Therapy
15
Pro
vid
e s
elf
tannin
g s
erv
icesU
nit
B25
Tanning ingredient Description and effects
Ingredients found in tanning agents
Common ingredients found in moisturisers
Self tanning agents Modern tanning agents are tinted so that application is visible and therefore easier. Early self tanning agents had a rather pungent odour which has since been improved, and application has become much easier, both for home use and in the salon. Remember that individual companies will have their own particular emollients and colorants, so check the manufacturer’s instructions for all products that you use.
The tint of the cream will not always be an indication of the colour when it fully develops; it is more of an aid to application, rather than a colour chart for the tan. Self tanning products vary in viscosity, colour and form, but their active ingredients are always the same.

Pro
vid
e s
elf ta
nnin
g s
erv
ices
Level 3 Beauty Therapy
Unit B
25
16
Techniques of application
1 Thoroughly cleanse the face, neck and décolleté area.
2 Tone and blot.
3 Apply gentle facial exfoliators, working in small circular motions all over the area. Remove and blot.
4 Moisturise with the appropriate lotion and apply extra product around the eyebrows and hair line to dilute the tanning product and prevent a build-up of unnatural colour. Heavy moisturiser can act as a barrier to self tan so only use the product supplied by the tanning manufacturer.
5 Apply the tanning product at full strength to the face or, if a lighter colour is preferred, mix with moisturiser to dilute the effect slightly.
6 Rub lightly along the hair line. You might like to use a cosmetic sponge for more control of the product. Remember to do the back of the neck to the hair line – nothing looks worse than a ‘tide mark’ of colour difference when the client wants to wear her hair up.
7 Allow the product to dry for 15–20 minutes before the client puts his or her clothes back on. Recommend the client ‘sleeps’ in the product or leaves it on for at least four hours before showering.
8 A�er showering, the tan should be enhanced by moisturising the skin.
9 The finished result is a glowing, tanned face.
Manual application for facial tanning – step-by-step guide
Think about it
1 2 3
4 5 6
(Images courtesy of Fake Bake UK Ltd)
Level 3 Beauty Therapy
17
Pro
vid
e s
elf
tannin
g s
erv
icesU
nit
B25
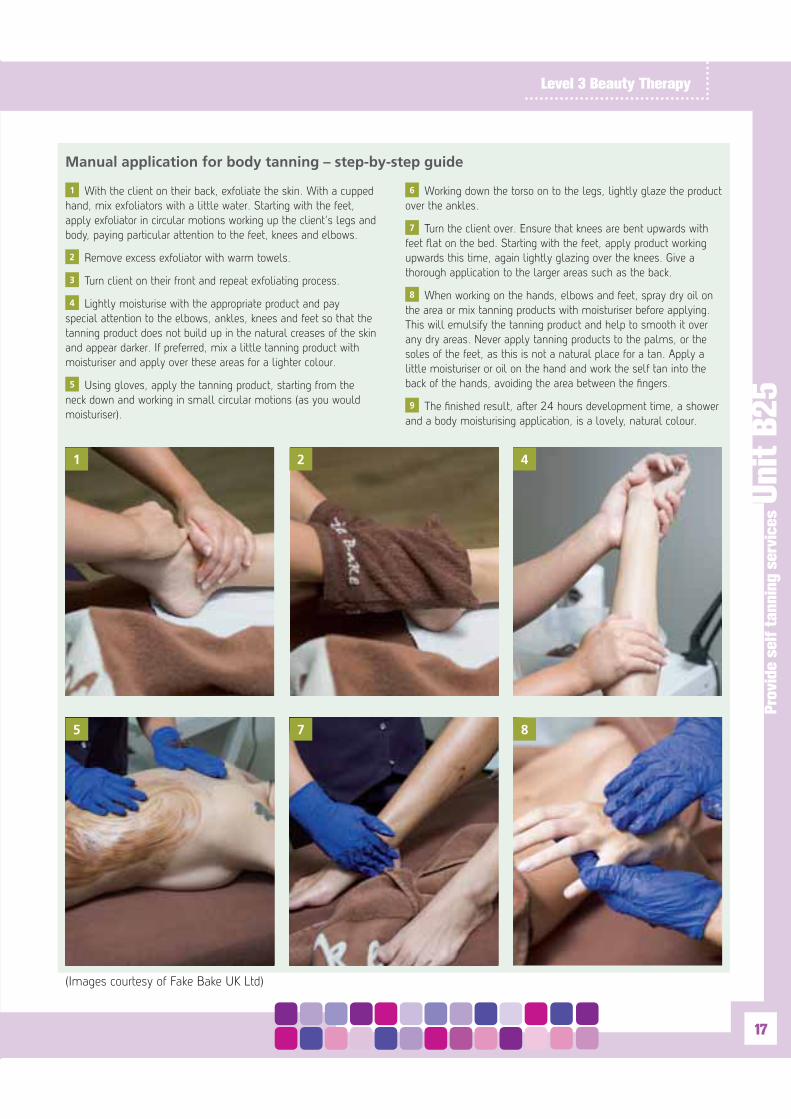
1 With the client on their back, exfoliate the skin. With a cupped hand, mix exfoliators with a little water. Starting with the feet, apply exfoliator in circular motions working up the client’s legs and body, paying particular attention to the feet, knees and elbows.
2 Remove excess exfoliator with warm towels.
3 Turn client on their front and repeat exfoliating process.
4 Lightly moisturise with the appropriate product and pay special attention to the elbows, ankles, knees and feet so that the tanning product does not build up in the natural creases of the skin and appear darker. If preferred, mix a little tanning product with moisturiser and apply over these areas for a lighter colour.
5 Using gloves, apply the tanning product, starting from the neck down and working in small circular motions (as you would moisturiser).
6 Working down the torso on to the legs, lightly glaze the product over the ankles.
7 Turn the client over. Ensure that knees are bent upwards with feet flat on the bed. Starting with the feet, apply product working upwards this time, again lightly glazing over the knees. Give a thorough application to the larger areas such as the back.
8 When working on the hands, elbows and feet, spray dry oil on the area or mix tanning products with moisturiser before applying. This will emulsify the tanning product and help to smooth it over any dry areas. Never apply tanning products to the palms, or the soles of the feet, as this is not a natural place for a tan. Apply a little moisturiser or oil on the hand and work the self tan into the back of the hands, avoiding the area between the fingers.
9 The finished result, a�er 24 hours development time, a shower and a body moisturising application, is a lovely, natural colour.
Manual application for body tanning – step-by-step guide
421
5 7 8
(Images courtesy of Fake Bake UK Ltd)
Pro
vid
e s
elf ta
nnin
g s
erv
ices
Level 3 Beauty Therapy
Unit B
25
18
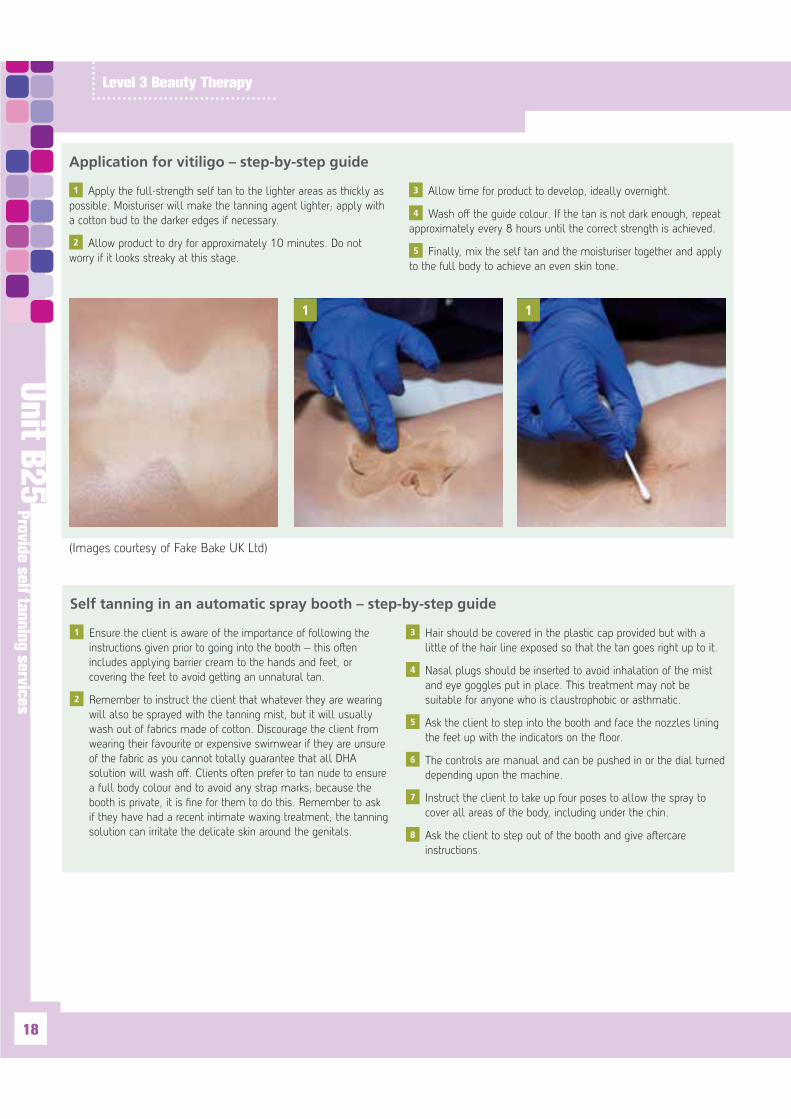
1 Apply the full-strength self tan to the lighter areas as thickly as possible. Moisturiser will make the tanning agent lighter; apply with a cotton bud to the darker edges if necessary.
2 Allow product to dry for approximately 10 minutes. Do not worry if it looks streaky at this stage.
3 Allow time for product to develop, ideally overnight.
4 Wash off the guide colour. If the tan is not dark enough, repeat approximately every 8 hours until the correct strength is achieved.
5 Finally, mix the self tan and the moisturiser together and apply to the full body to achieve an even skin tone.
Application for vitiligo – step-by-step guide
1 Ensure the client is aware of the importance of following the instructions given prior to going into the booth – this o�en includes applying barrier cream to the hands and feet, or covering the feet to avoid getting an unnatural tan.
2 Remember to instruct the client that whatever they are wearing will also be sprayed with the tanning mist, but it will usually wash out of fabrics made of cotton. Discourage the client from wearing their favourite or expensive swimwear if they are unsure of the fabric as you cannot totally guarantee that all DHA solution will wash off. Clients o�en prefer to tan nude to ensure a full body colour and to avoid any strap marks; because the booth is private, it is fine for them to do this. Remember to ask if they have had a recent intimate waxing treatment; the tanning solution can irritate the delicate skin around the genitals.
3 Hair should be covered in the plastic cap provided but with a little of the hair line exposed so that the tan goes right up to it.
4 Nasal plugs should be inserted to avoid inhalation of the mist and eye goggles put in place. This treatment may not be suitable for anyone who is claustrophobic or asthmatic.
5 Ask the client to step into the booth and face the nozzles lining the feet up with the indicators on the floor.
6 The controls are manual and can be pushed in or the dial turned depending upon the machine.
7 Instruct the client to take up four poses to allow the spray to cover all areas of the body, including under the chin.
8 Ask the client to step out of the booth and give a�ercare instructions.
Self tanning in an automatic spray booth – step-by-step guide
1 1
(Images courtesy of Fake Bake UK Ltd)

Level 3 Beauty Therapy
19
Pro
vid
e s
elf
tannin
g s
erv
icesU
nit
B25
1 Some machines come with a small turntable, rather like a cake stand, which the client stands on so they can rotate around the therapist, rather than the other way around.
2 Always wear PPE and gloves and test the equipment on yourself, following the manufacturer’s instructions, to ensure it is safe and functioning correctly. Switch on the compressor and adjust the pressure to suit the area – you need a constant fine mist rather than a heavy concentration as this will over wet the skin. Once you start blotting areas to dry them you cannot guarantee the evenness, so it is best to avoid the need to do this.
3 Most manufacturers recommend you begin with the legs as they take the longest to dry – remember to ask the client to stretch out at the ankle to avoid lines. Increasing the distance from the skin will give a lighter application – ankles, backs of knees and elbows require less product, as they are not naturally darkened with a suntan. Remember that the idea is to create a natural look.
4 Remember to ask the client to stretch out the skin if they have folds of adipose tissue along the back or under the bust line as the product will not spray onto the skin underneath.
5 When spraying the arms, ask the client to stretch out the skin and remember that the top of the arm naturally tans darker than the inner arm. Reduce the pressure of the spray and increase the distance from the inner arm, but do coat it lightly to prevent a tan line. Ask the client to stand with their arm extended and bent at the elbow to ensure that the armpit perimeter is coated, but not the armpit itself.
6 When carrying out the facial application, ask the client to close their eyes, breathe in and then gently exhale through the nose with the mouth closed as you work down the face – this will prevent them from inhaling any of the mist. You must be quick and even with your application.
7 Ensure that the finish is as natural as possible – lighter in the ear, neck and under the chin.
Air brush application of self tan – step-by-step guide
43 5
(Images courtesy of Fake Bake UK Ltd)

Pro
vid
e s
elf ta
nnin
g s
erv
ices
Level 3 Beauty Therapy
Unit B
25
20
Salon lifeArietta’s story
Hi, my name is Arietta. I’ve been a tanning therapist for about six months now. My favourite method of application is the spray gun, because it is quick and you get such good results. A few weeks ago, I learned a valuable lesson in client care when I carried out a treatment on a middle-aged lady who was going to her daughter’s wedding in the Caribbean.
Fortunately, I recommended a practice run about a month before they were all due to travel out for the wedding. The treatment went fi ne but a� er the client stepped out of the pod, I realised I really needed the loo. I gave the client the impregnated cleaning tissue to use on the palms of her hands and her feet – so that they wouldn’t go dark – and excused myself. When I came back my client was dressed and ready to pay for her treatment.
Unfortunately she came back two days later to complain about the terribly patchy colour on her arms. It was just awful, I couldn’t understand it. Eventually I asked the client about the impregnated tissue she’d used a� er the treatment and whether she’d used it anywhere apart from her hands and feet. She told me that her arms were a little bit wet, so she wiped the towel over them to dry them off . The penny dropped – she had wiped off most of the colour, hence the patchy fi nish.
I should have been there to stop her – the skin needs a few moments to dry and set the tan prior to the clothes going on and the wipes are only for the hands and feet. I re-explained the a� ercare and told her that I was at fault. My salon manager gave the client another tanning treatment for free. I’m so relieved that I had convinced the client to have a trial treatment prior to the wedding. I had to contribute to the cost of the repeat treatment and I have never le� a client unattended again.
Top tips
is not primed and smooth the end result will be disappointing. Ask the client to exfoliate and moisturise at least twice a week prior to the appointment, to help make the salon treatment more eff ective.
used, to make sure the client has no allergic reactions.
of tanning product and then build it up than to over apply and have to blend excess product.
product more thinly over knees, ankles and elbows. Blend the product to avoid tide marks.
neck and the ears to avoid tide marks should the client choose to wear her hair up.
them appear more pronounced. Check that the client understands this before proceeding with the treatment.
involve going over the breasts. Remember that the skin in this area is fi ner and more sensitive, so be gentle and apply products lightly.
Tanning products can accumulate here and leave a brown ring around the nail plate.
avoid a line where skin folds naturally occur.
not rush the client – that is how mistakes are made in application.
dressed.
from the clothing rubbing off the tan before it has had time to develop. Tanning products should not come off on clothing, but darker colours are still advisable.
Level 3 Beauty Therapy
21
Pro
vid
e s
elf
tannin
g s
erv
icesU
nit
B25
Method of application
Maintenance and care of equipment
Maintenance and care of tanning equipment
Potential risks with self tanning equipment
Equipment or hazard
Potential risk
The Pressure Systems Safety Regulations 2000
Corrections and the finished resultsA�er a spray tan, the client can wipe the palms of their hands and in between the fingers with an impregnated wipe to avoid a build up of colour, which can make the tan appear artificial.
If manual application has taken place, the therapist can buff with a mitt or sponge and work the areas in need of a thinner application such as the hands, elbows, knees and feet to ensure a natural finish.
Use a cotton bud over the eyebrows to remove any excess product and wipe around the inside of the ear to remove any product present. Ensure that the product is completely dry before the client dresses.
Maintenance of self tanning equipmentAll equipment should be le� clean and sterile, ready for the next treatment, to avoid cross-contamination and to help keep the equipment working smoothly.
Method of application
Maintenance and care of equipment
Continued
Pro
vid
e s
elf ta
nnin
g s
erv
ices
Level 3 Beauty Therapy
Unit B
25
22
Possible contra-actions a�er treatment A full contra-indication check as part of a thorough consultation will help minimise the risk of a contra-action a�er treatment. You should have checked whether the client has any allergies and performed a sensitivity test to check whether the client is likely to react to any of the products being used. However, there is a small risk that the following reactions may occur:
skin irritation or inflammation
swelling in the area
burning or itching (urticaria)
watery eyes
coughing through inhalation of the product
fainting.
These reactions may occur for a number of reasons and a client can develop a reaction to any product, even if they have been using it for years. If the client has been on certain medication, especially hormonal-based drugs such as the contraceptive pill or HRT, antibiotics or steroids, it can upset the acid mantle on the skin and cause skin irritation.
An adverse effect may also be caused by the self tanning products reacting with other products that the client has recently used, such as hair dye or a body product used at home. Hair removal cream or even a different type of washing powder may be enough to trigger irritation with a tanning product. O�en it is the combination of the two products that causes a reaction, rather than the self tanning product on its own.
Be especially cautious with asthmatics when using a booth to ensure they do not inhale the spray mist. It is also important to ask the client when they last had something to eat – some clients who have not eaten recently are more prone to fainting when asked to stand still for a period of time, especially if blood sugar levels are low, or if they are a diabetic.
Always explain potential contra-actions before you begin the treatment and explain what the client should do if a reaction occurs. Mild irritation can also be soothed by the application of a cool compress to the area, or some cooling cream – such as an a�er-wax lotion or an antiseptic cream purchased over the counter from a chemist. Creams designed for bites and skin rashes normally contain a mild antihistamine. If you are in any doubt about the client’s health or the nature of their reaction, the client should see their GP or a trained medical professional.
Equipment or hazard
Potential risk
(Source: based on information provided by Fylde Borough Council)

Level 3 Beauty Therapy
23
Pro
vid
e s
elf
tannin
g s
erv
icesU
nit
B25
Do not have several self tanning sessions too close together. This could result in a build-up of product in some areas causing the tan to look patchy.
Colour on the face is the first to fade so advise the client to choose gentle cleansers and to avoid face masks and salon treatments.
Home care and products to avoid Clients should be given advice about products they can use at home and those they should avoid.
In order for clients to maintain their tan, they should not use soap-based products on the skin while they are tanning. The alkaline in these products may make the tan go patchy. A flannel with warm water is all that is required or clients can use a moisturising body wash or cream shower gel which are more gentle on the skin.
Avoid using exfoliators – they will accelerate the shedding process of the cells which are coated in the tan and mean that the tan will be lost very quickly.
Do encourage the client to use skin care products such as body oil or moisturising cream daily as this will help to prolong the life of the tan. The oil will keep the skin moisturised and lock the tan into the layers of the skin, preventing premature shedding.
Bath oil or additives will also help the skin stay rehydrated and therefore slow down the rate of shedding. The more a client moisturises, the longer the tan will last.
Consecutive treatments will darken the tan – but do tell the client that if they apply their own tanning lotions on top of a salon one you cannot guarantee a colour match or the evenness of application as there may be a build-up of product on the skin. It is better to encourage the client to come back for regular treatments, to ensure that the same products are used.
Other products available Most companies offer a selection of tanning enhancers to help prolong a tan and give an extra glow to the skin. These include bronzing blushers, face powders containing shimmer beads, and lipsticks and nail varnishes. Shades of bronze, brown, peach and pink can enhance a tan but use bronzing products lightly to avoid making the skin look ‘sweaty’. A light dusting over the cheeks to highlight is all that is required. Skin glisteners are rich, moist shimmering lotions which replenish, moisten and buff up the existing tan.
Provide a�ercare advice In this section you will learn about:
A�ercare advice and recommendations immediately a�er treatment A�er a self tanning treatment, you should give your client the following advice to ensure they get the best results and a long-lasting tan.
Allow at least 4 hours for the colour to develop – ideally the tan should develop overnight.
Do not get the skin wet for at least 6–8 hours a�er treatment – clients should avoid showering or bathing during this time.
Avoid swimming a�er treatment – if this is not possible, the client should shower off the chlorine and moisturise immediately to prevent the chlorine from bleaching the tan.
Do not apply deodorant or cosmetics while the colour guide is on.
Do not have any other treatments on the same day.
Avoid activity that will induce perspiration during the development time.
Wear loose clothing and footwear during the development time – restrictive clothing may affect the end colour as it can cause friction and the loss of skin cells, leading to a patchy result.
Post treatment restrictions To help the client maximise the life of their self tan, you can offer advice on the correct skincare procedures to follow.
Avoid using exfoliators which will speed up the shedding of the skin cells and take the tan with it. Even a rough towel will have this effect, so a�er a shower the client should be advised to pat the body dry rather than creating friction by rubbing.
Do not wax the skin – the skin cells carrying the tan will be lost.

Pro
vid
e s
elf ta
nnin
g s
erv
ices
Level 3 Beauty Therapy
Unit B
25
24
These products should be used sparingly as they can produce a harsh tone in the skin and create an artificial look.
Suitable follow-on treatments a�er self tanning There is plenty of scope a�er a self tanning treatment to recommend further salon treatments to the client, both to enhance the tan but also to link into any events that the client may have booked the self tanning session for, such as a wedding, holiday or special occasion.
Getting ready for assessment
Obviously with such a practical skill, you will not be allowed any simulation for this unit.
Your assessor will expect to see both a spray tan and a manual application of tan and you will be assessed on a minimum of three different clients, over a period of time. This is such a popular treatment that you should have no trouble getting clients for these treatments!
Do ensure that you use at least four of the six products in the ranges – you will definitely be using exfoliators, moisturisers and spray tanning liquid for the spray gun but it depends on which system your college uses as to whether you try tanning creams or gels. There is a wide range of products available on the market. It is also a good idea to practise application of tanning on yourself so that you get used to the process and the preparation required for a smooth application. To start with, try the tanning preparations that have colour in them so that you can see where you have applied them as you go. Bad tanning application can look awful – you only need to check the celebrity magazines for dark faces with pale hands, or dark knees on golden legs. A good self tan application should look natural and give a glow to the face and body. It really is a case of practice makes perfect!
Tan-enhancing make-up can give an extra glow to the skin
Weddingrecommendations
Holidayrecommendations
Special occasion recommendations
All of the above treatments also present a retail opportunity for you to recommend the products the client will need to enhance the effects of the treatments at home. For example, you may recommend a cleanser, toner and moisturiser for the face, specialist body creams, nail colours, hand cream or even bath oils and serums.
Always ensure your client goes away with a full price list and an explanation of the treatments that you carry out in the salon. This will give them a full idea of the costing and benefits of these treatments as this will vary from salon to salon and depending upon your area.
Level 3 Beauty Therapy
25
Pro
vid
e s
elf
tannin
g s
erv
icesU
nit
B25
Check your knowledge
1 Why is it important to exfoliate before a self tanning treatment?a) To ensure the skin will not react to the tanning
products used.b) To ensure the skin is warm for better absorption of
the tanning agent.c) To ensure the skin is free from dry patches which
could affect the end result.d) To ensure the skin is free from contra-indications.
2 Tanning agents are a form of:a) vegetable dyeb) clothing dyec) make-up dyed) floral dye.
3 Which of the following is a possible contra-indication to a tanning treatment? a) Vitiligob) Leucodermac) Bacterial skin conditionsd) Freckles
4 Jojoba oil is a common ingredient found in:a) moisturisers b) tanning agentsc) exfoliatorsd) blushers.
5 The active ingredient for a tanning product is: a) AHAb) DHAc) DNAd) NBG.
6 Panthenol is found in skincare products and shampoos and is a form of: a) vitamin C complexb) vitamin B complexc) vitamin A complexd) vitamin D complex.
7 The three key steps to a successful tanning application are: a) cleanse, tone and moisturiseb) wash, tan and rinse c) exfoliate, moisturise and tand) soak, spray and dry.
8 A spray gun mechanism uses:a) a battery b) an enginec) a turbo chargerd) a compressor.
9 Legionella bacteria can be found in: a) moisturisersb) water tanksc) spray gunsd) all of the above.
10 For home care you should recommend that your client avoids using: a) soap-based productsb) acid-based productsc) oil-based productsd) water-based products.

Pro
vid
e s
elf ta
nnin
g s
erv
ices
Level 3 Beauty Therapy
Unit B
25
26
a�ercare 23–4air compressor 12, 21allergic reaction 5application airbrush 12, 19 automatic spray booth 11–12, 18 body 17 choice of method 11–12 corrections 21 exfoliation 13–14 face 16 manual 11, 16–17 moisturising 14–15 for vitiligo 18 asthma 9
bacteria 22barrier cream 10, 11benefits (of self tanning) 2bridal treatments 4, 7
chloasma 9client allergic reaction 5 clothing 4, 5 consent 8 consultation 6–8 expectations 7 hair 10 jewellery 10 preparation 4, 10 skin colouring 6–7compressed air machine 12, 21consent 8consultation 6–8contra-actions 22contra-indications 8–10corrections 21cosmetic colourings 15
dermatitis 8desquamation 13diabetes 8dihydroxyacetone (DHA) 7, 15dimethicone 15
eczema 8environmental conditions 5epidermis 3, 13equipment maintenance 21–22 risks 21–22 tanning 12 erythrulose 15exfoliating products 11, 13–14exfoliation 13–14expectations (client) 7
facial application 16Fitzpatrick skin categories 6–7
hazards 21–22home care 23–24hyperpigmentation 9–10hypopigmentation 9–10
infections 8
legislation 7
maintenance equipment 21 tan 23–4manual application 11, 16, 17manual handling 21medication 8melanin 2moisturising 11, 14–15
nose plugs 5, 10
panthenol 15personal protective equipment (PPE) 5pigmentation disorders 9–10post treatment restrictions 23pregnancy 9pre-holiday treatments 7preparation client 4–5, 10 treatment area 4products home care 23–24 pre-treatment 4, 11 self tanning 10 tan extenders 11 tan removers 11 tanning agents 15psoriasis 8
risks 21–22
skin colouring 6–7skin conditions 8skin sensitivity test 8spray booth application 11–12, 18–19spray tan liquid 12stearyl alcohol 15stretch marks 9sun protection factor (SPF) 7sunburn 8
tan removers 11tanning agents 15tanning products 10–11techniques see application treatment area 4
ventilation 22vitiligo 9–10, 18
waste disposal 21
Index

Level 3 Beauty Therapy
27
Pro
vid
e s
elf
tannin
g s
erv
icesU
nit
B25
The authors and publisher would like to thank the following individuals and organisations for permission to reproduce photographs:
Unit opener – Perov Stanislav/Shutterstock; Sunbather – Leonid and Anna Dedukh/Shutterstock; Disposable underwear – www.hiveofbeauty.com; Client consultation – Pearson Education Ltd/Mindstudio; Vitiligo – James Stevenson/Science Photo Library; Chloasma – Science Photo Library; Airbrush spray tan in portable tent – Courtesy of Ellisons; Exfoliating products – Cut2White; Moisturising products – Cut2White; Tanning products – Cut2White; Image of ‘Arietta’ – Paul Matthew Photography/Shutterstock; Tan-enhancing make-up – Fake Bake UK Ltd.
Grateful thanks to Fake Bake UK Ltd for supplying step-by-step images for facial tanning (p.16), body tanning (p.17), application for vitiligo (p.18) and air brush application (p.19) and granting us permission to use them in our resources.
Our thanks also go to Mist-air for the image of spray tanning reproduced on p.3.
Acknowlegements