Embed Size (px)
Citation preview

Langenscheidt e-Dictionaries
© Langenscheidt KG, Berlin and Munich
Langenscheidt e-Dictionaries: an abundance of information at your fingertips
With e-Dictionaries you not only get comprehensive and carefully edited dictionaries but also two intelligent applications allowing quick and easy reference:
Standard user interface In addition to the various search options, the standard user interface also offers numerous functions for expanding and adding to the data: from inserting bookmarks and marking important passages with a "highlight" to creating your own entries in the user dictionaries.
In addition to the e-dictionaries, all PC Library titles up to and including version 3.0 can be consulted in the standard user interface.
Pop-up search The pop-up search enables you to look up words in any text document and on web pages using the mouse and the translation is shown immediately on screen. An additional list window with a headword list and a scroll function makes the pop-up search a fully-fledged dictionary application for all e-dictionaries.
If you experience technical problems which you are unable to solve using the manual, simply contact us for assistance. Our hotline details are as follows:
��You will find tips, updates, FAQs and lots of other information relating to Langenscheidt e-Dictionaries on a special home page: www.langenscheidt.de/e-woerterbuecher
��E-mail: [email protected]
��Number to call if you are using our products and have technical queries: Tel. (+49) (0)1 80/500 24 49*
��Number to call if you are interested in our products and would like to obtain more information: Tel. (+49) (0)1 80/523 23 57* Mon–Fri 9.00–17.00
��Number to call for information on multi-user licences or network applications: Tel. (+49) (0)1 80/523 23 57* Mon–Fri 9.00–17.00
* € 0.12/min.
Contents
THE SCREEN........................................................................................................... 7 User interface language ........................................................................................ 7 The standard user interface application screen .................................................... 7 The manager window............................................................................................ 8
Showing and hiding folders................................................................................ 8 Creating your own folders.................................................................................. 8 Moving items to other folders............................................................................. 9 Deleting folders and entries you have created .................................................. 9
WORKING WITH BOOKS...................................................................................... 10 Adding books ...................................................................................................... 10 Removing books.................................................................................................. 10 Updating books ................................................................................................... 10 Supplements ....................................................................................................... 11 Working with book groups................................................................................... 11
Creating a new book group.............................................................................. 12 Modifying a book group ................................................................................... 12 Renaming a book group .................................................................................. 12 Removing a book group................................................................................... 12 Editing icon graphics........................................................................................ 13 Allocating a specific graphic to a book group .................................................. 13
CONSULTING E-DICTIONARIES .......................................................................... 14 Quick search ....................................................................................................... 14
Specifying the search area for a quick search................................................. 15 Carrying out a quick search ............................................................................. 16
Expert search ...................................................................................................... 17 Entering a search item and using wildcard characters .................................... 18 Selecting a search area................................................................................... 18 Specifying the type of search .......................................................................... 19 Selecting search options ................................................................................. 19 Setting filters for special fields, style levels, etc............................................... 19
Combining several words to form a search item ................................................. 20 Activating the quick search from other applications ............................................ 20
WORKING WITH ENTRIES ................................................................................... 21 Scanning the text of an entry............................................................................... 21 Copying text from an entry .................................................................................. 22 Saving an entry as a text file ............................................................................... 22 Printing an entry .................................................................................................. 23 Following a cross-reference ................................................................................ 23 Looking up a word from an entry......................................................................... 24 Inserting bookmarks in an entry .......................................................................... 24 Allocating a bookmark to an entry ....................................................................... 24

Renaming or removing a bookmark................................................................. 25 Opening an entry with a bookmark .................................................................. 25 Moving a bookmark to another folder .............................................................. 26 Including bookmarks in a search ..................................................................... 26
Text highlighting .................................................................................................. 26 Highlighting text ............................................................................................... 27 Renaming or removing a highlight ................................................................... 27 Opening an entry with a highlight .................................................................... 28 Moving a highlight to another folder................................................................. 28 Including highlights in a search........................................................................ 29
Inserting comments............................................................................................. 29 Making a comment on an entry ....................................................................... 29 Reading a comment ........................................................................................ 30 Modifying, renaming or removing a comment.................................................. 30 Opening an entry with a comment ................................................................... 31 Moving a comment to another folder ............................................................... 31 Including comments in a search ...................................................................... 31
Linking entries ..................................................................................................... 32 Linking one entry to another ............................................................................ 32 Opening a linked entry..................................................................................... 33 Renaming or removing a link ........................................................................... 33 Opening an entry with a link ............................................................................ 34 Moving a link to another folder......................................................................... 34 Including links in a search................................................................................ 34
Including an entry in a keyword catalogue .......................................................... 35 Allocating a keyword to an entry...................................................................... 35 Renaming or removing a keyword ................................................................... 36 Opening an entry with a keyword .................................................................... 36 Moving a keyword to another keyword folder .................................................. 36 Including keywords in a search........................................................................ 37
Sub-divided entries.............................................................................................. 37
WORKING WITH USER DICTIONARIES .............................................................. 38 Creating and removing user dictionaries............................................................. 38
Removing a user dictionary ............................................................................. 39 Creating a folder in a user dictionary................................................................... 39 Creating your own entries ................................................................................... 39
Modifying an entry you have made.................................................................. 40 Moving entries you have made........................................................................ 41 Deleting entries you have made ...................................................................... 41
Importing a text file into an entry you have made................................................ 41 Importing a database into a user dictionary ........................................................ 42
How to import a database................................................................................ 42 Importing a user dictionary .................................................................................. 43 Exporting a user dictionary.................................................................................. 43
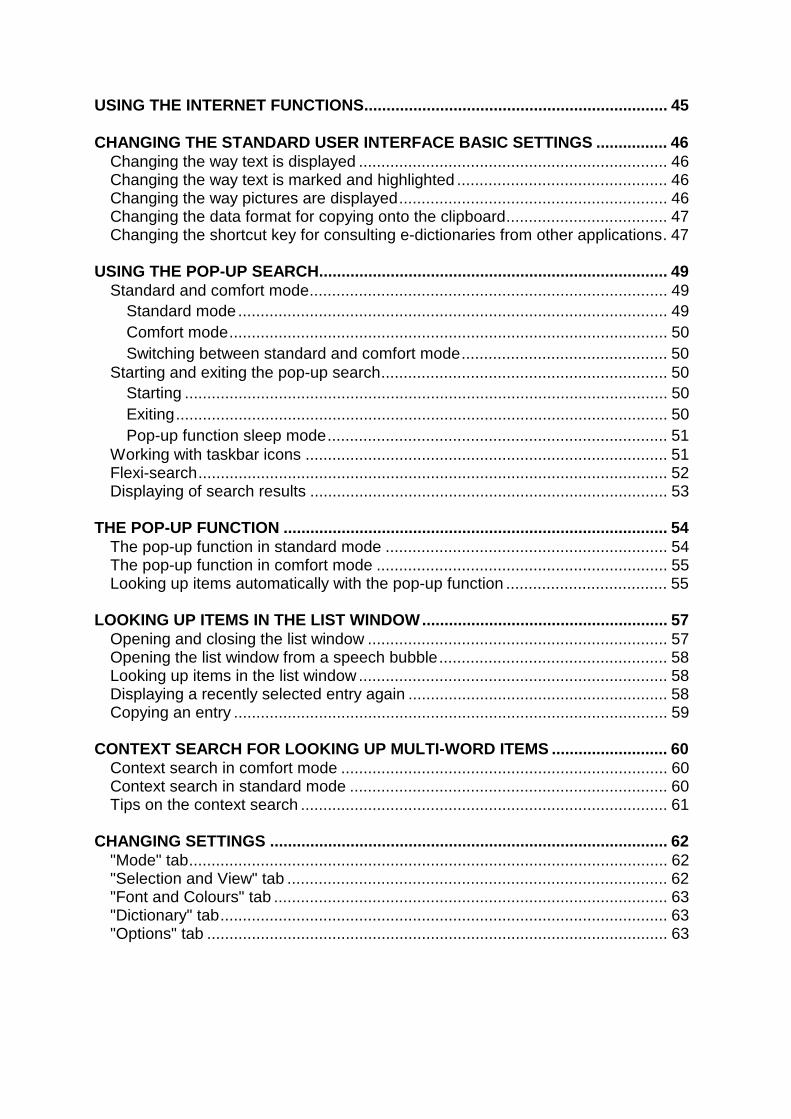
USING THE INTERNET FUNCTIONS.................................................................... 45
CHANGING THE STANDARD USER INTERFACE BASIC SETTINGS ................ 46 Changing the way text is displayed ..................................................................... 46 Changing the way text is marked and highlighted ............................................... 46 Changing the way pictures are displayed............................................................ 46 Changing the data format for copying onto the clipboard.................................... 47 Changing the shortcut key for consulting e-dictionaries from other applications. 47
USING THE POP-UP SEARCH.............................................................................. 49 Standard and comfort mode................................................................................ 49
Standard mode................................................................................................ 49 Comfort mode.................................................................................................. 50 Switching between standard and comfort mode.............................................. 50
Starting and exiting the pop-up search................................................................ 50 Starting ............................................................................................................ 50 Exiting.............................................................................................................. 50 Pop-up function sleep mode............................................................................ 51
Working with taskbar icons ................................................................................. 51 Flexi-search......................................................................................................... 52 Displaying of search results ................................................................................ 53
THE POP-UP FUNCTION ...................................................................................... 54 The pop-up function in standard mode ............................................................... 54 The pop-up function in comfort mode ................................................................. 55 Looking up items automatically with the pop-up function .................................... 55
LOOKING UP ITEMS IN THE LIST WINDOW....................................................... 57 Opening and closing the list window ................................................................... 57 Opening the list window from a speech bubble................................................... 58 Looking up items in the list window ..................................................................... 58 Displaying a recently selected entry again .......................................................... 58 Copying an entry ................................................................................................. 59
CONTEXT SEARCH FOR LOOKING UP MULTI-WORD ITEMS .......................... 60 Context search in comfort mode ......................................................................... 60 Context search in standard mode ....................................................................... 60 Tips on the context search .................................................................................. 61
CHANGING SETTINGS ......................................................................................... 62 "Mode" tab........................................................................................................... 62 "Selection and View" tab ..................................................................................... 62 "Font and Colours" tab ........................................................................................ 63 "Dictionary" tab.................................................................................................... 63 "Options" tab ....................................................................................................... 63
PART I: Standard User Interface 6
PART I: Standard User Interface
PART I: Standard User Interface 7
THE SCREEN
User interface language Langenscheidt e-Dictionaries can be operated with an English or German user interface. If you want the menus, dialogue boxes, program messages and help function to appear in German, select View – User Interface – German User Interface. If you want to return to the English user interface, select Ansicht –Benutzeroberfläche – englische Benutzeroberfläche.
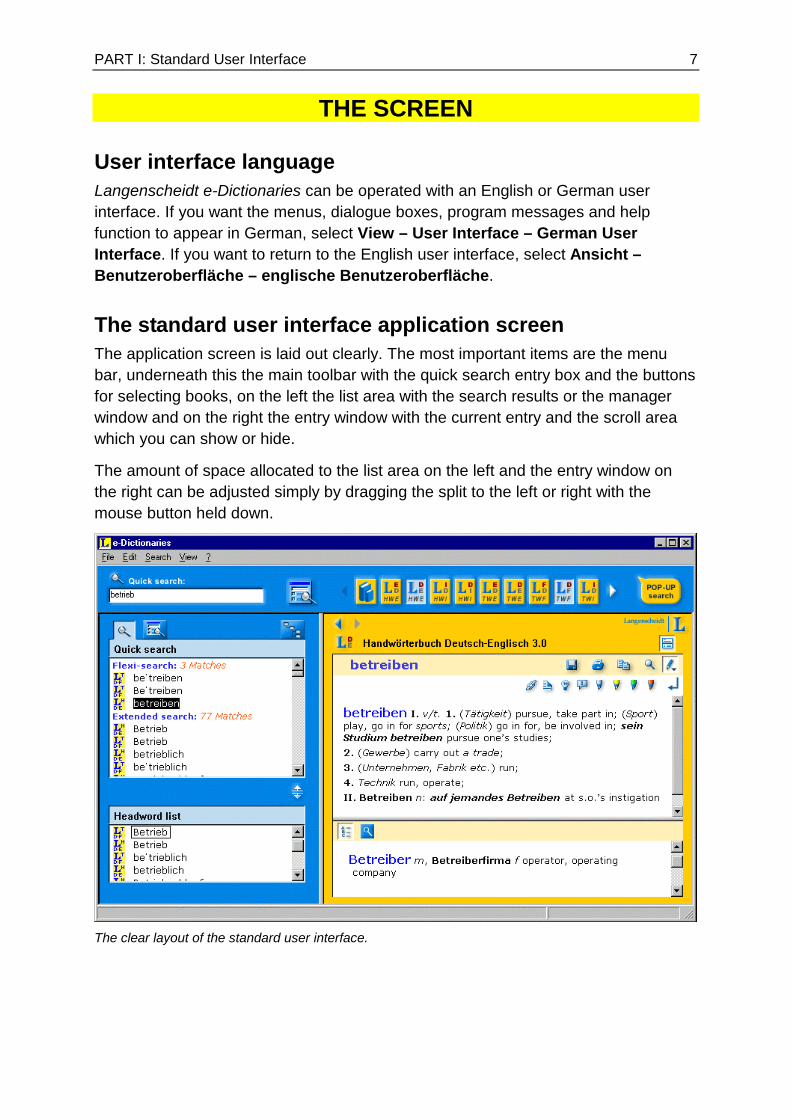
The standard user interface application screen The application screen is laid out clearly. The most important items are the menu bar, underneath this the main toolbar with the quick search entry box and the buttons for selecting books, on the left the list area with the search results or the manager window and on the right the entry window with the current entry and the scroll area which you can show or hide.
The amount of space allocated to the list area on the left and the entry window on the right can be adjusted simply by dragging the split to the left or right with the mouse button held down.
The clear layout of the standard user interface.
PART I: Standard User Interface 8
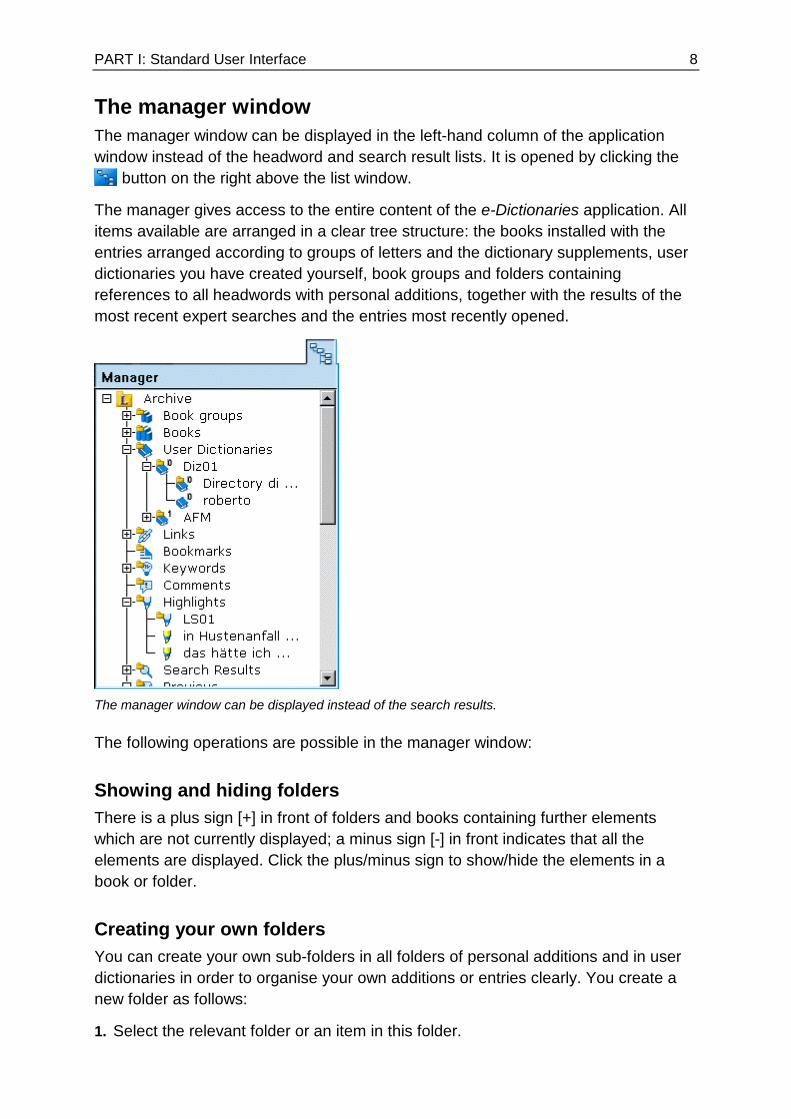
The manager window The manager window can be displayed in the left-hand column of the application window instead of the headword and search result lists. It is opened by clicking the
button on the right above the list window.
The manager gives access to the entire content of the e-Dictionaries application. All items available are arranged in a clear tree structure: the books installed with the entries arranged according to groups of letters and the dictionary supplements, user dictionaries you have created yourself, book groups and folders containing references to all headwords with personal additions, together with the results of the most recent expert searches and the entries most recently opened.
The manager window can be displayed instead of the search results.
The following operations are possible in the manager window:
Showing and hiding folders There is a plus sign [+] in front of folders and books containing further elements which are not currently displayed; a minus sign [-] in front indicates that all the elements are displayed. Click the plus/minus sign to show/hide the elements in a book or folder.
Creating your own folders You can create your own sub-folders in all folders of personal additions and in user dictionaries in order to organise your own additions or entries clearly. You create a new folder as follows:
1. Select the relevant folder or an item in this folder.
PART I: Standard User Interface 9
2. Select the File – New – Folder command from the menu or the New Folder command from the pop-up menu (right mouse click) and enter a title in the Create Folder dialogue box. Click Create to create the new folder.
Moving items to other folders You can move entries and sub-folders between different folders in a user dictionary or a folder for personal additions. This is done as follows:
1. Select the relevant entry or folder N.B.: You can only select one item
2. Drag it into another folder keeping the mouse button down and confirm
or
select the File – Rename command from the menu or Rename from the pop-up menu (right mouse click). If the item to be moved is a folder, click the button with the three dots next to "Root Folder"; if it is an entry, this button is next to "User Dictionary for Entry". The item can then be allocated to a different folder in the Select Folder dialogue box.
Deleting folders and entries you have created You can only delete folders and entries which you have created and personal additions. Folders can only be deleted if they do not contain any entries. You delete an item as follows:
1. Select the item to be deleted.
2. Select the File – Delete command from the menu or Delete from the pop-up menu and confirm.

PART I: Standard User Interface 10
WORKING WITH BOOKS
Adding books As well as the books developed specially for Langenscheidt e-Dictionaries, you can also include all PC Library titles up to and including version 3.0. However, unlike e-dictionaries, PC Library titles do not support all functions (e.g. pop-up search or flexi-search).
You add a new book as follows:
1. Open the standard user interface.
2. Insert the diskette or CD-ROM with the book to be added in the drive.
3. Select the File – Add books command and enter the name of the drive with the data carrier containing the new book.
4. Click Continue and follow the on-screen instructions.
Removing books If you remove an installed book or a user dictionary, it is deleted from the hard disk together with any personal additions. Even if the book or user dictionary is subsequently re-installed, it will no longer be possible to retrieve such additions.
You remove a book as follows:
1. Select the File – Remove books command.
2. Select the book you want to remove and then click Remove.
N.B.: Before removing a user dictionary you should think about whether you may need it again subsequently. If this is a possibility, you can export the data file using the File – Export – User Dictionary command.
Updating books There are update files on the Internet for some e-dictionaries which allow the books to be kept constantly up to date.
You update an e-dictionary as follows:
1. Open the Internet Vocabulary Update dialogue box by selecting the relevant command from the File menu.
2. Select the book required from the list of updateable books.
3. Click Start vocabulary update to connect to the Internet.
4. A dialogue box indicates the size of the update file. Confirm by clicking Yes to start downloading and update the book.
PART I: Standard User Interface 11
Tips � You must have registered with Langenscheidt and received a password to
download its dictionary update files. If you have not yet done so, when you click Start vocabulary update the Obtain authorisation for access to Internet vocabulary updates dialogue box appears. This gives access to a special on-line registration page and has a text box to enter the password.
� The process is not fully automatic for updateable PC Library titles; the update is carried out after downloading the update file in a separate step following the on-screen instructions.
Searching for updated entries When you have completed the update, you can search specifically for entries which have been added to or modified as follows:
1. Open the Expert Search dialogue box (Search menu).
2. Ensure that the Find text box is empty and the updated book is in the search area (Where do you want to look?).
3. Under Look for special fields, style levels, etc. select "Internet update vocabulary" from the list.
4. Click Search to start the search.
Supplements Supplements contain all the information relating to an installed e-dictionary which would normally appear in the preface and appendices of a printed book, e.g. list of abbreviations, instructions for use, pronunciation, conjugation of verbs, etc.
To display the supplements of an installed book, click the book icon above the entry window to the left of the title or select the View – Supplements (selected book) command.
To display the copyright information on the e-dictionary or user dictionary selected, use the Copyright (Current Book) command in the ? menu.
Working with book groups Book groups are specific combinations of installed dictionaries and user dictionaries. As with individual books, they too are listed in the Determine Search Area dialogue box (Search menu) and appear with their own icon on the main toolbar, enabling several books to be included in the search area or removed from it with a single click of the mouse.
To create and edit book groups, open the Book Groups dialogue box (Edit menu).
PART I: Standard User Interface 12
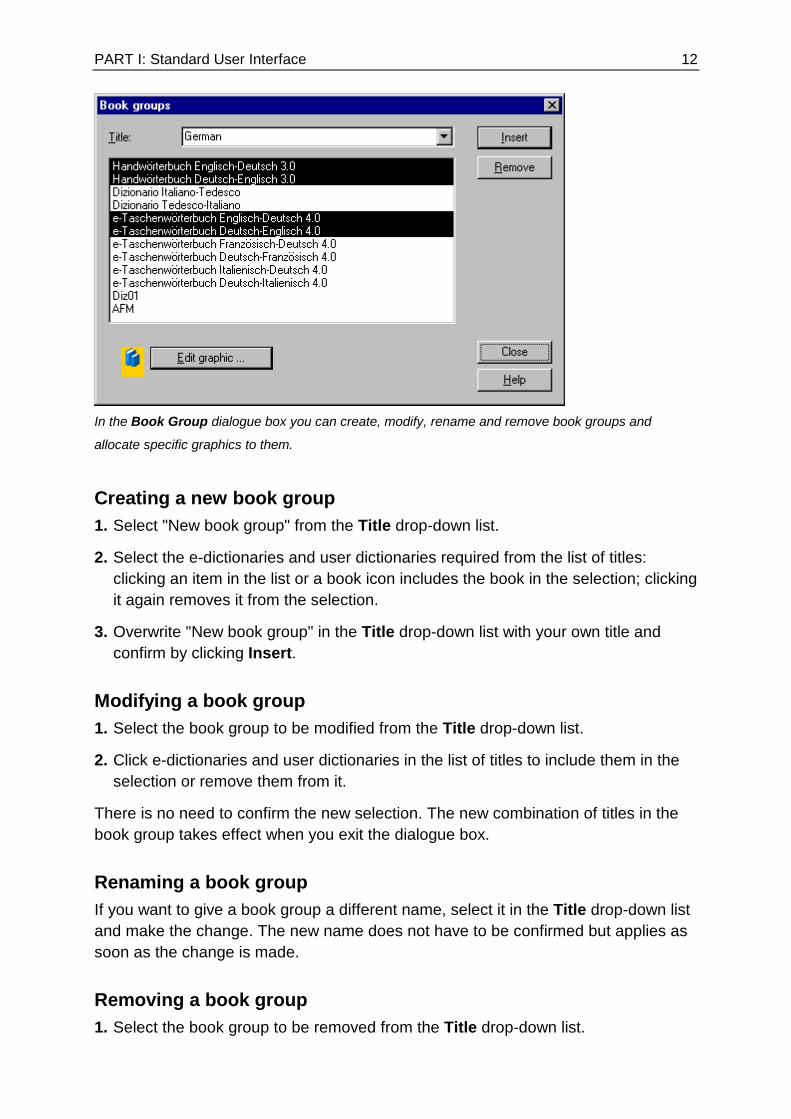
In the Book Group dialogue box you can create, modify, rename and remove book groups and
allocate specific graphics to them.
Creating a new book group 1. Select "New book group" from the Title drop-down list.
2. Select the e-dictionaries and user dictionaries required from the list of titles: clicking an item in the list or a book icon includes the book in the selection; clicking it again removes it from the selection.
3. Overwrite "New book group" in the Title drop-down list with your own title and confirm by clicking Insert.
Modifying a book group 1. Select the book group to be modified from the Title drop-down list.
2. Click e-dictionaries and user dictionaries in the list of titles to include them in the selection or remove them from it.
There is no need to confirm the new selection. The new combination of titles in the book group takes effect when you exit the dialogue box.
Renaming a book group If you want to give a book group a different name, select it in the Title drop-down list and make the change. The new name does not have to be confirmed but applies as soon as the change is made.
Removing a book group 1. Select the book group to be removed from the Title drop-down list.

PART I: Standard User Interface 13
2. Click Remove to delete the book group.
N.B.: Obviously, only the specific combination of books is deleted, not the books themselves.
Editing icon graphics 1. Select the relevant book group from the Title drop-down list.
2. Click Edit graphic to start the image-editing program allocated to the bmp file type on your computer and the existing icon is opened for editing.
3. Make the required changes in the image-editing program and then save the icon.
4. When you have finished, return to the Book Groups dialogue box and confirm that you have finished editing in the relevant window.
Allocating a specific graphic to a book group You have the option of allocating your own graphics to user dictionaries and book groups instead of the standard icons so that you can recognise them more quickly.
With user dictionaries this is only possible when they are first created but book groups can be given a different icon at any time (Book Groups dialogue box).
It is only possible to edit icon graphics if you have an image-editing program linked to the bmp file type on your computer. This is normally the Windows accessory Paint.
Please note the following editing tips:
� If you click the graphic editing button, your image-editing program will start with the existing icon graphic. Only once you have finished editing in this program can you confirm as prompted in the standard user interface.
� Irrespective of the actual design, the standard background is automatically allocated to icon graphics so that even with your own icons it is ensured that a differentiation is made between selected (blue background) and not selected (yellow background). The program goes by the colour of the pixel in the top left corner of the icon. For example, if this is red, all red pixels in the graphic are replaced by the standard background colour (blue or yellow depending on the status).

PART I: Standard User Interface 14
CONSULTING E-DICTIONARIES In the standard user interface there are two search options: the quick search for quick and easy reference and the expert search for more complex requirements. The pop-up search is used to look up words in other applications and the entries can be displayed there next to the word looked up. However, the pop-up search is only available for books which have been specially edited for Langenscheidt e-Dictionaries. PC Library titles and user dictionaries you have created yourself can only be scanned in the standard user interface.
Quick search The quick search combines several intelligent search methods yet it is extremely easy to use: simply enter the word you want to look up. Even if it is an inflected form or the search item does not even exist as a headword, only in the entry text, and even if you key the word incorrectly, you still have a good chance of finding a matching entry.
Depending on the settings selected, the quick search combines up to five different search methods which interact automatically:
� The incremental search in the headword list sorts all headwords from all books in the search area alphabetically. It is incremental because the highlighting reacts immediately to each letter keyed and moves automatically to the first matching headword (alphabetically) in the list. Depending on the search item, it is often sufficient just to key a few letters to find the relevant headword in the list. For example, if you are looking up lavender you only need to key lav for the word to appear in the headword list.
� The flexi-search tries to recognise inflected forms (e.g. "gone" or "went") and trace them back to their root form in e-dictionaries specially set up for this. Compounds are broken down into their component parts wherever possible; for example, if you look up the German "Bierflasche", the headwords Bier and Flasche are offered.
� In addition to the main headwords, the extended search also includes so-called sub-headwords, for example words not occurring first in multi-word entries such as "bladder" in the headword gall bladder or "Osten" in the German headword Nahe(r) Osten.
� With the full-text search the entire dictionary text is scanned in addition to the headwords. This means that words are found which are not even listed as a headword in the dictionary.
� The spelling-tolerant search tries to find a headword even if it has not been spelt correctly. This is not only helpful in the case of typos but also if you are not entirely sure how to spell a word.
PART I: Standard User Interface 15
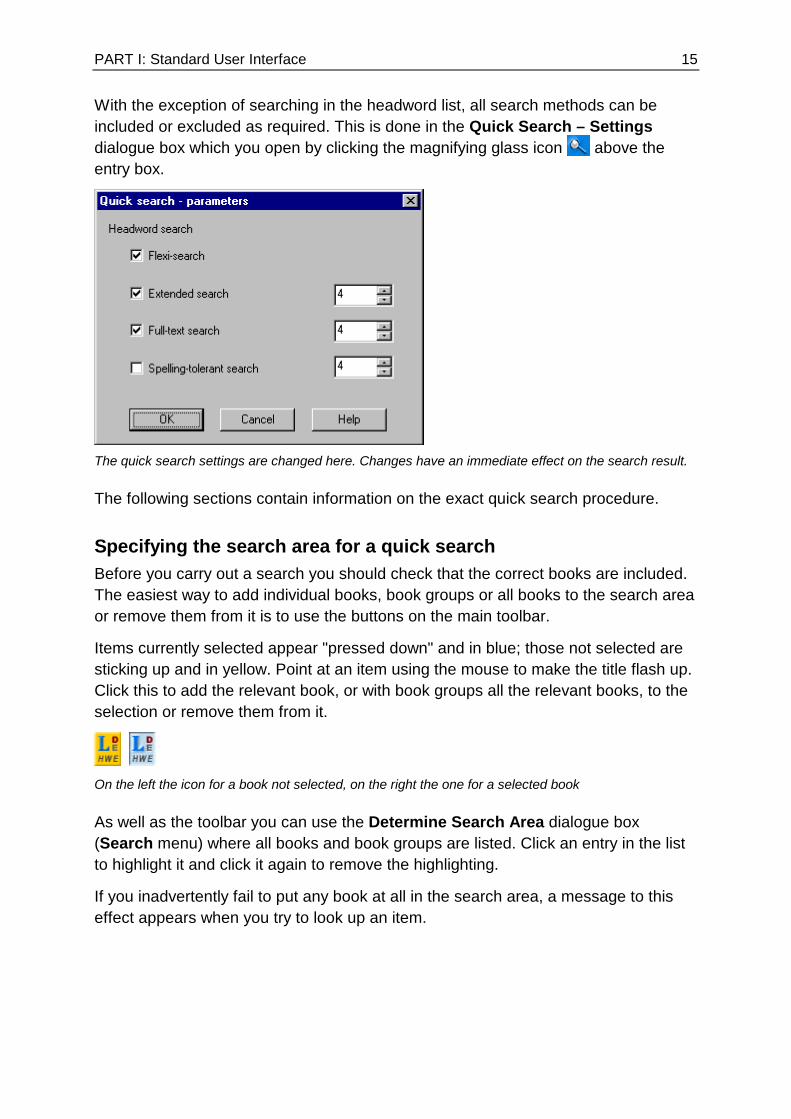
With the exception of searching in the headword list, all search methods can be included or excluded as required. This is done in the Quick Search – Settings dialogue box which you open by clicking the magnifying glass icon above the entry box.
The quick search settings are changed here. Changes have an immediate effect on the search result.
The following sections contain information on the exact quick search procedure.
Specifying the search area for a quick search Before you carry out a search you should check that the correct books are included. The easiest way to add individual books, book groups or all books to the search area or remove them from it is to use the buttons on the main toolbar.
Items currently selected appear "pressed down" and in blue; those not selected are sticking up and in yellow. Point at an item using the mouse to make the title flash up. Click this to add the relevant book, or with book groups all the relevant books, to the selection or remove them from it.
On the left the icon for a book not selected, on the right the one for a selected book
As well as the toolbar you can use the Determine Search Area dialogue box (Search menu) where all books and book groups are listed. Click an entry in the list to highlight it and click it again to remove the highlighting.
If you inadvertently fail to put any book at all in the search area, a message to this effect appears when you try to look up an item.
PART I: Standard User Interface 16
Carrying out a quick search Before you look up a word using the quick search, you should first ensure that the quick search options required and the correct search area have been selected (see above).
Entering a search item You can simply start keying the item, irrespective of the position of the cursor. This automatically activates the quick search text entry box. You only need to click in the text entry box or press the TAB key until the text entered is highlighted if you want to continue entering or edit an existing item.
When keying items you do not need to worry about upper and lower case or accents; characters with umlauts are treated like the relevant letters without umlauts (ä=a, ö=o, ü=u) and accents above or below letters such as the cedilla (Ç) can simply be left out.
As you are keying the item, keep an eye on the list of search results and the headword list. Both are updated each time a new letter is keyed and it is possible that the entry you require will appear in the entry window after a few letters or at least that the relevant headword will be in one of the two lists. All you have to do then is click the entry to open it.
N.B.: As searching starts while you are still keying the item, the system may from time to time not allow you to key any letters for a few seconds and you will need to wait before you can continue.
The list of search results The results of the individual search methods selected are displayed in the list of search results (the top of the two lists on the left). Here – or in the headword list below – you can simply click a headword to open the associated entry in the entry window.
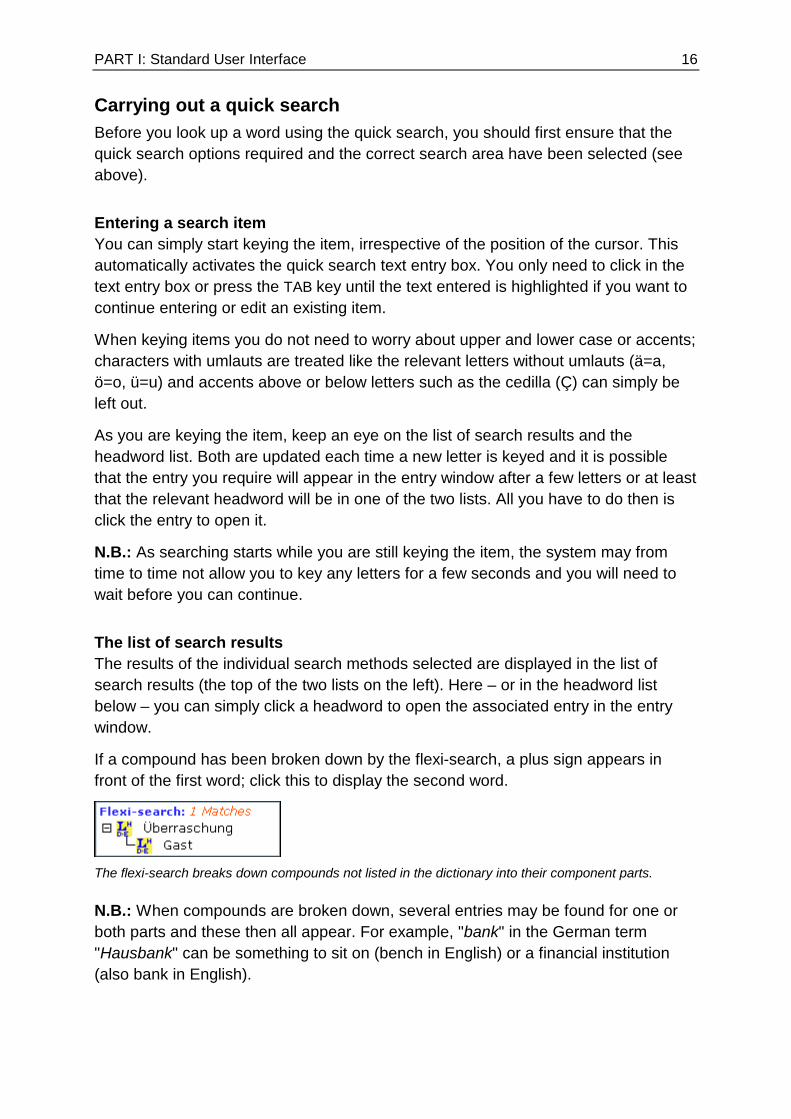
If a compound has been broken down by the flexi-search, a plus sign appears in front of the first word; click this to display the second word.
The flexi-search breaks down compounds not listed in the dictionary into their component parts.
N.B.: When compounds are broken down, several entries may be found for one or both parts and these then all appear. For example, "bank" in the German term "Hausbank" can be something to sit on (bench in English) or a financial institution (also bank in English).
PART I: Standard User Interface 17
Adjusting the search result All changes to the search area or quick search settings affect the search result in the two lists immediately. You can make use of this feature by starting with a simple setting (e.g. without the full-text and spelling-tolerant search options) which provides the clearest search results in the shortest time and only adding further search methods and/or extending the search area if the initial result is unsatisfactory.
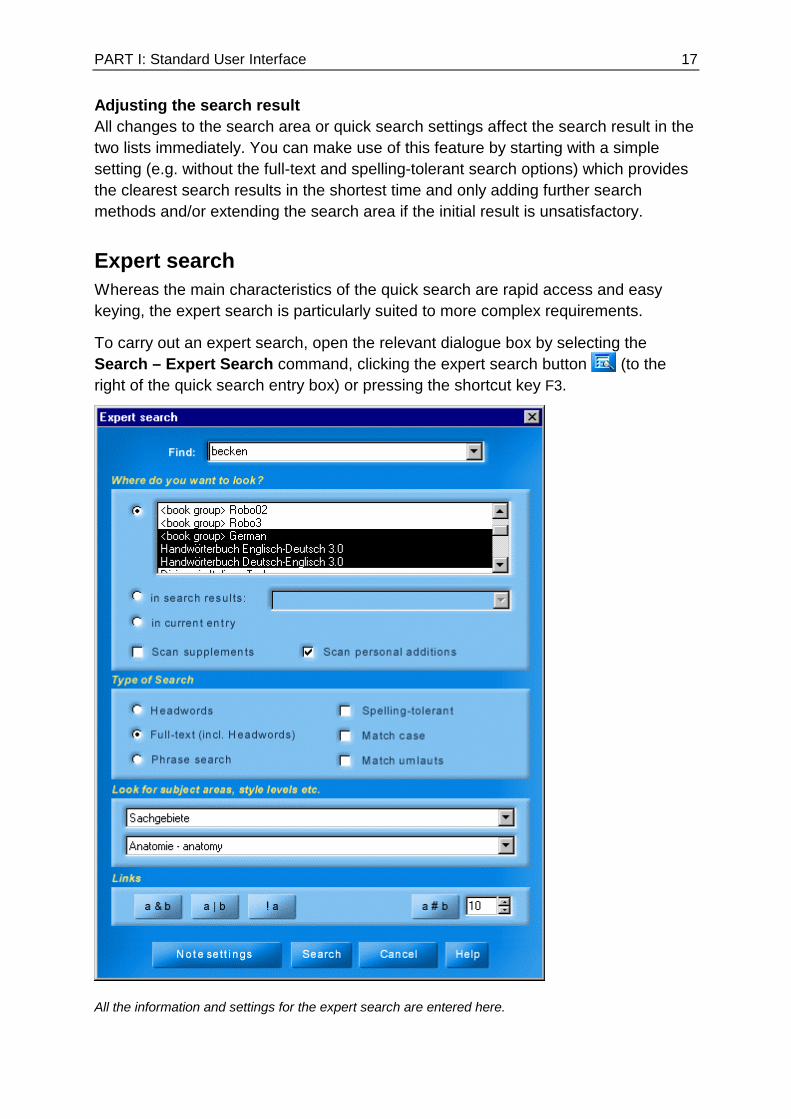
Expert search Whereas the main characteristics of the quick search are rapid access and easy keying, the expert search is particularly suited to more complex requirements.
To carry out an expert search, open the relevant dialogue box by selecting the Search – Expert Search command, clicking the expert search button (to the right of the quick search entry box) or pressing the shortcut key F3.
All the information and settings for the expert search are entered here.
PART I: Standard User Interface 18
Entering a search item and using wildcard characters The following points should be noted when entering a search item in the Find drop-down list:
� You can select one of the search items recently entered from the drop-down list to modify this if appropriate and then look it up again.
� No differentiation is made between upper and lower case unless the relevant search option is selected.
� It is not necessary to put the accents on accented characters. Both façade and facade are possible and both lügen and lugen in German. (This can be changed for German umlauts in the search options.)
� Wildcard characters can be used to save time or simplify keying. The characters available are ? for any one character and * for any number of characters. Wildcard characters can also be used at the start of search items and may be combined within a given search item.
Examples of search items with wildcard characters ?ush ?ush ?ush ?ush finds e.g. bush, gush, rush d?sh d?sh d?sh d?sh finds e.g. dash, dish *ish *ish *ish *ish finds e.g. standoffish, swish, ticklish, wish ?li*ng ?li*ng ?li*ng ?li*ng finds e.g. fling, glistening, slithering
Selecting a search area With the expert search you can choose from three search areas:
� In the books: All titles (All), book groups or individual titles can be selected from the list of available dictionaries. Click an item in the list to select the relevant group of books/the relevant book or remove it from the selection.
� In search results: This option enables you to reselect an expert search already carried out and make it narrower with the current search item. Example: You have carried out a full-text search for all entries containing the word "train". You now open the expert search again, reselect this search under In search results (home in on "train") and under Find enter the search item track. The search will now only find those entries with the word "train" which also contain the word "track".
� In the current entry: The search only covers the text of the entry just opened. There is also a command with its own dialogue box for this type of search. See under "Scanning the text of an entry" for further information.
The following can also be included in the search:
PART I: Standard User Interface 19
� Supplements: With this option, the supplements of the e-dictionaries selected are also scanned. Supplements contain information on the structure of an e-dictionary, how to use it, etc.
� Personal additions: With this option, the titles you have given your personal additions are also included in the search area.
Specifying the type of search There are three different search options:
� Headwords: The search is limited to headwords, including sub-headwords.
� Full-text: The complete text of each entry is scanned.
� Phrase search: This is a special form of the full-text search for search items made up of several words. It only finds entries in which the entire phrase occurs in the order keyed. For example, if you carry out a phrase search for "dog and cat", the three words must be written exactly like this in the text; the dog and the cat would not be found because of the additional "the".
Selecting search options The following options can be selected with the expert search under "Type of search":
� Spelling-tolerant: In most cases, a word is found even if the search item contains a typo but it can slow down the search significantly, in particular when scanning the entire text (full-text search). Consequently, it should only be selected if necessary, for example if a normal search does not produce any results.
� Match case: Words are only found if the use of upper and lower case matches the search item exactly. With the full-text search the number of hits for certain search items can be reduced in this way (e.g. searching for just "Pole" rather than "Pole" and "pole").
� Match umlauts: Words are only found if the umlauts ä, ö and ü have been keyed correctly. For example, with the German search item losung you only find the word "Losung" (motto) and not "Lösung" (solution).
Setting filters for special fields, style levels, etc. It depends on the individual e-dictionaries in the search area whether it is possible to set special search filters (e.g. to search only in dictionary entries with basic vocabulary or which are used colloquially). Such coded additional information is only included in some titles.
If there is an e-dictionary of this type in the search area, a category can be selected in the top drop-down list (e.g. "Style level") and an appropriate criterion in the bottom one (e.g. "Vulgar").
PART I: Standard User Interface 20
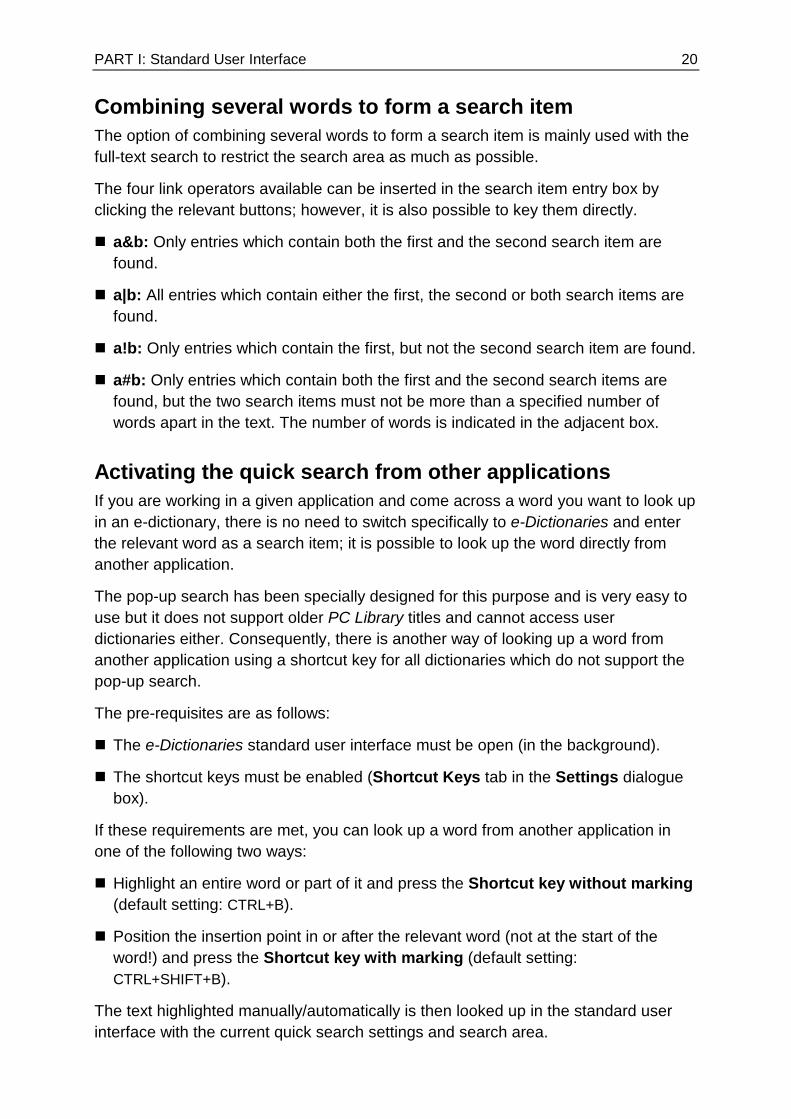
Combining several words to form a search item The option of combining several words to form a search item is mainly used with the full-text search to restrict the search area as much as possible.
The four link operators available can be inserted in the search item entry box by clicking the relevant buttons; however, it is also possible to key them directly.
� a&b: Only entries which contain both the first and the second search item are found.
� a|b: All entries which contain either the first, the second or both search items are found.
� a!b: Only entries which contain the first, but not the second search item are found.
� a#b: Only entries which contain both the first and the second search items are found, but the two search items must not be more than a specified number of words apart in the text. The number of words is indicated in the adjacent box.
Activating the quick search from other applications If you are working in a given application and come across a word you want to look up in an e-dictionary, there is no need to switch specifically to e-Dictionaries and enter the relevant word as a search item; it is possible to look up the word directly from another application.
The pop-up search has been specially designed for this purpose and is very easy to use but it does not support older PC Library titles and cannot access user dictionaries either. Consequently, there is another way of looking up a word from another application using a shortcut key for all dictionaries which do not support the pop-up search.
The pre-requisites are as follows:
� The e-Dictionaries standard user interface must be open (in the background).
� The shortcut keys must be enabled (Shortcut Keys tab in the Settings dialogue box).
If these requirements are met, you can look up a word from another application in one of the following two ways:
� Highlight an entire word or part of it and press the Shortcut key without marking (default setting: CTRL+B).
� Position the insertion point in or after the relevant word (not at the start of the word!) and press the Shortcut key with marking (default setting: CTRL+SHIFT+B).
The text highlighted manually/automatically is then looked up in the standard user interface with the current quick search settings and search area.
PART I: Standard User Interface 21
WORKING WITH ENTRIES An entry in a dictionary or other reference work is made up of a headword (equivalent to the heading under which the entry is listed alphabetically in the book) and the associated entry text.
In the Langenscheidt e-Dictionaries standard user interface you find the headwords in the various list windows (e.g. in the headword list or the list of search results) and in the individual manager folders; the entries appear in the entry window.
Langenscheidt e-Dictionaries offers many possibilities for working with entries. For example, you can
� scan an entry for a word; this is particularly helpful for large entries,
� copy text from an entry onto the clipboard in order to paste it elsewhere (e.g. in a word processing program),
� save an entry in a file in order to be able to use it again subsequently in other applications,
� print an entry,
� follow an editorial cross-reference in an entry,
� look up any given word in an entry in the e-dictionaries,
� insert a bookmark in an entry in order to be able to find it again quickly in future,
� highlight text in an entry,
� add your own comments to an entry,
� create a permanent link between two entries (i.e. incorporate a cross-reference) so that you can switch instantly from one to the other in future,
� put an entry in a keyword folder in order to have rapid access to it in future.
� use a sub-divided entry to obtain rapid access to specific information within an entry.
Scanning the text of an entry In longer reference work entries it is not always easy to find the information you are looking for straight away. In such cases it can be a good idea to scan the relevant entry for a specific word or formulation to move directly to the appropriate part of the text.
Scanning a current entry 1. Click the search icon on the entry's title bar, select the Search – Search in
entry command or press CTRL+F.
PART I: Standard User Interface 22
2. Enter the word you are looking for in the entry line and start the search by clicking the search button.
All words which match the search item entered will be highlighted in colour in the entry text. The first match found in the text will be selected. (If the insertion point was in the middle of the entry, the first match after this point will be selected.)
N.B.: � The use of upper and lower case in the search item is not taken into account.
� You can enter several words to find one of them.
� You can search for an exact sequence of words (phrase) by putting them in inverted commas.
� You can use the wildcard characters ? and *. With p?ling for example you are looking for paling or piling and with p*aling for example paling, pealing or presealing.
� If you de-select the Close dialogue after search option, the dialogue box remains open; using the « and » buttons you can then go to the previous or next match if the search item occurs several times in the entry.
Copying text from an entry You can copy an entire entry or a selected passage onto the clipboard in order to paste and edit the text elsewhere (e.g. in a word processing program).
To copy a passage of text, block it and then click the copy icon on the entry title bar, select the Edit – Copy command or press CTRL+C. This command can also be used to copy the entire entry if either the entire text or none of it is blocked. The Edit – Copy All command (ALT+C) copies the entire text irrespective of what is blocked.
You can now paste the copied text into another application using the Edit – Paste command.
Saving an entry as a text file You can save each entry as an independent text file. This text file can then be opened in or imported into all applications which are able to process the selected data format. If you use RTF (Rich Text Format), all the character formatting (bold, italics, etc.) and information on the character set is retained.
1. Select your chosen entry.
2. Select the Save As command (File menu or button on the entry title bar) to save the text of the current entry in a new text file.
PART I: Standard User Interface 23
3. Modify the proposed file name in the Save As dialogue box as necessary, select the target directory and indicate the format in which the text is to be saved; the options are RTF and text format.
Tips � The entire entry text is always saved, even if a passage of text in the entry is
selected.
� If you subsequently want to open the file in a standard word processing program, you should save it in RTF because this retains the character formatting (bold, italics, etc.) and information on the character set (e.g. Cyrillic). Most word processing programs support RTF.
Printing an entry You can print an entire entry or a selected passage on your printer.
1. Select your chosen entry.
2. Block a passage of text if you do not want to print the entire entry.
3. Select the Print command (File menu or button on the entry title bar) to open the Print dialogue box or press CTRL+P.
4. Select a printer in the dialogue box if several printers are installed. Under Print Range, indicate whether you want to print the entire entry or just the selected text and specify the number of copies. Start printing by clicking OK.
Tips � If you want to modify the printer settings (e.g. to print in landscape rather than
portrait format), select the File – Print Setup command before printing.
� If you want to check on screen how the print-out will look before printing the entry, select the Print Preview command (File menu). If you have selected a section of text, the print preview will only show the selected text.
Following a cross-reference Editorial cross-references are references to other entries in the same book or a book on a similar subject (e.g. from a dictionary entry to a spelling rule) inserted by editors. Whereas in printed books you have to turn to the page referred to, here you simply have to click the reference.
Editorial cross-references are identified by a vertical arrow in front of the relevant word and can also be highlighted by underlining and/or in colour.
To follow a cross-reference, point to the reference with the mouse (the mouse pointer changes into a cross-reference symbol) and click once.
PART I: Standard User Interface 24
Tips � You can modify the way editorial cross-references are displayed on screen using
the Display tab in the Settings dialogue box (View menu).
� Use the Back command from the Edit menu or the equivalent button to return to the original reference once you have followed the cross-reference.
� You can also add your own references to another entry in any given entry by inserting a link.
Looking up a word from an entry You can use any word in an entry as a search item: just double-click the relevant word in the selected entry or the scroll area. This starts a quick search with the current settings and search area.
Tip � Use the Back command from the Edit menu or the equivalent button to return
to the point from which the search was started.
Inserting bookmarks in an entry As with a printed book, bookmarks are used to enable you to find important passages again quickly. You can allocate one or more bookmarks to a specific place in the text or an entire entry and give each bookmark a title.
The Bookmarks folder in the manager window gives you access to all entries with a bookmark at any time.
The following sections explain how to � allocate a bookmark to an entry,
� rename or remove a bookmark,
� open an entry with a bookmark,
� move a bookmark to another folder,
� include bookmarks in a search.
Allocating a bookmark to an entry Bookmarks can be allocated to a specific position in the text or the entire entry. An entry may contain several bookmarks in identical or different positions.
1. Open the entry to be given a bookmark.
2. If you want the bookmark to be inserted in a particular position, move the insertion point to the relevant place or select text if the bookmark is to relate to a passage of text.
PART I: Standard User Interface 25
3. Select the Bookmarks command (Edit menu or button on the personal additions toolbar) to open the Bookmarks dialogue box.
4. Under Title, give the bookmark a name. Untitled bookmarks cannot be included in the search area of the expert search.
5. Under Folder, select another folder for the bookmark if necessary by clicking the button to open the Select Folder dialogue box where you can select another
folder or create a new folder for bookmarks.
6. Under Position, indicate the area to which the bookmark is to relate: If you select Cursor or Area, the bookmark is inserted at the current position of
the insertion point or selected text. The character to the right of the insertion point or selected text is highlighted according to the text marking options selected in the basic settings; if you want to edit the bookmark at any point, click the highlighted character/text to open the relevant dialogue box.
If you select Window, the bookmark relates to the entire entry window. The first character in the entry is highlighted according to the text marking options selected in the basic settings; if you want to edit the bookmark at any point, click the highlighted character to open the relevant dialogue box.
If you select All, the bookmark relates to the entire entry text. None of the text is highlighted and you can subsequently only open the dialogue box to edit the bookmark using the list of additions in the entry window or the Edit menu.
7. Click Insert to insert the bookmark and close the dialogue box.
Renaming or removing a bookmark 1. Open the entry containing the bookmark to be renamed or removed.
2. Open the Bookmarks dialogue box by selecting the Edit – Bookmarks command, clicking the button on the personal additions toolbar, pointing to the bookmark in the text using the mouse (the mouse pointer changes into the bookmark symbol) and then clicking, or opening the list of additions on the left-hand side of the window title bar and selecting the relevant bookmark.
3. Under Title, select your chosen bookmark.
4. Edit as required: You can modify the bookmark title and then click Modify to save the bookmark
under the new name or click New and then Insert to insert an additional bookmark with the new name.
Click Remove to remove the bookmark selected.
Opening an entry with a bookmark All bookmarks are filed in the manager window in the Bookmarks folder or a sub-folder which has been created. This makes them easy to find and the associated entries can be opened immediately.
PART I: Standard User Interface 26
1. Activate the manager window by clicking the relevant button above the list of search results.
2. Open the Bookmarks folder and any sub-folders it contains.
3. Double-click a bookmark to open the associated entry.
Moving a bookmark to another folder If you insert a large number of bookmarks, these should be split between several different folders according to subject, specialist area, etc. as a clearly organised structure will allow rapid access.
New (sub-)folders in the Bookmarks folder can be created directly when inserting a new bookmark. Alternatively, you can use the File – New – Folder command. If you have created new folders, it may be necessary to reorganise the bookmarks, i.e. move them to other folders. You do this as follows:
1. Activate the manager window by clicking the relevant button above the list of search results.
2. Open the Bookmarks folder and any sub-folders it contains.
3. Drag the bookmark you want to move onto the new folder and then release the mouse button. You will be prompted to confirm the move by clicking OK or to cancel it by clicking Cancel.
Including bookmarks in a search Bookmarks and other additions you have made can be included in the search area of the expert search when scanning, provided that you have given the bookmarks their own titles.
This can be done directly when inserting a new bookmark but you can also name an untitled bookmark which has already been inserted.
If bookmarks are included in the search area of the expert search, the bookmark titles are treated as headwords. They appear with the bookmark symbol in the window with the results of the search. You open the entry containing the bookmark by double-clicking the bookmark title.
� If you want bookmarks to be included in the search area of the expert search, check the Scan personal additions option. You enable this option in the Expert Search dialogue box (Search menu).
Text highlighting You can highlight sections of text in entries in colour. Not only does this enable you to mark important passages in longer entries so that they stand out immediately when you next open the entry; you can also find and open all entries with a highlight

PART I: Standard User Interface 27
very quickly because they are automatically filed in the Highlights folder (or in a sub-folder you have created).
There are three different highlighting colours available (red, yellow and green). You can use these colours to create an individual filing system, for example by using different colours for different subjects.
The following sections explain how to � highlight text,
� rename or remove a highlight,
� open an entry with a highlight,
� move a highlight to another folder,
� include highlights in a search.
Highlighting text 1. Open the entry containing the text to be highlighted.
2. Select text if just a particular passage of text is to be highlighted or move the insertion point to your chosen position if the highlight is to be inserted at a specific point in the entry.
3. There are two ways of highlighting text: using the direct method (the highlight is not given its own title) or a dialogue box where you can give the highlight a title and select a specific area.
Direct method: Select the Highlighting – Colour – Yellow/Green/Red command (Edit menu or one of the coloured highlight buttons, e.g. on the personal additions toolbar) to highlight the selected area/the character to the right of the insertion point's current position in the selected colour. The highlight is called "in [headword of current entry] (untitled)" and is filed in the Highlights folder.
Using the dialogue box: Select the Highlighting – Highlights command (Edit menu or grey highlight button ) to open the Highlights dialogue box where you can give the highlight a title which you can subsequently use to search for it. You can file the highlight in a folder other than the standard Highlights folder and in addition to the passage of text selected (Area) or the current position of the insertion point (Cursor), you can also select All (the entire text is highlighted) or Window (the first character in the entry is highlighted) as the highlighting option. Click Insert to apply the highlighting and close the dialogue box.
Renaming or removing a highlight 1. Open the entry containing the highlight to be renamed or removed.
PART I: Standard User Interface 28
2. Open the Highlights dialogue box by selecting the Edit – Highlighting – Highlights command, clicking the grey button on the personal additions toolbar, pointing to the highlighted text using the mouse (the mouse pointer changes into the highlight symbol) and then clicking, or opening the list of additions on the left-hand side of the window title bar and selecting the relevant highlight.
3. Under Title, select your chosen highlight.
4. Edit as required. You can modify the highlight title and then click Modify to save it under the new
name or click New and then Insert to insert an additional highlight with the new name.
Click Remove to remove the highlight selected.
Opening an entry with a highlight All highlights are filed in the manager window in the Highlights folder or a sub-folder which has been created. This makes them easy to find and the associated entries can be opened immediately.
1. Activate the manager window by clicking the relevant button above the list of search results.
2. Open the Highlights folder and any sub-folders it contains.
3. Double-click a highlight to open the associated entry.
Moving a highlight to another folder If you use a large number of highlights, these should be split between several different folders according to subject as a clearly organised structure will allow rapid access.
New (sub-)folders in the Highlights folder can be created directly when inserting a new highlight if you use the dialogue box. Alternatively, you can use the File – New – Folder command. If you have created new folders, it may be necessary to reorganise the highlights, i.e. move them to other folders. You do this as follows:
1. Activate the manager window by clicking the relevant button above the list of search results.
2. Open the Highlights folder and any sub-folders it contains.
3. Drag the highlight you want to move onto the new folder and then release the mouse button. You will be prompted to confirm the move by clicking OK or to cancel it by clicking Cancel.

PART I: Standard User Interface 29
Including highlights in a search Highlights and other additions you have made can be included in the search area of the expert search when scanning, provided that you have given the highlights their own titles.
This can be done directly when inserting a new highlight if you use the dialogue box but you can also name an untitled highlight which has already been inserted.
If highlights are included in the search area, their titles are treated as headwords. They appear with the highlight symbol of the appropriate colour in the window with the search results. You open the entry containing the highlight by double-clicking the highlight title.
� If you want highlights to be included in the search area of the expert search, check the Scan personal additions option. You enable this option in the Expert Search dialogue box (Search menu).
Inserting comments You can add a comment to an entry or a specific passage of text. You can subsequently click the text with a comment to display your remarks in a separate window.
As all comments are automatically filed in the Comments folder (or a sub-folder you have created), you can quickly find all entries which you have commented on at any time in the manager window.
The following sections explain how to � make a comment on an entry,
� read a comment,
� modify, rename or remove a comment,
� open an entry with a comment,
� move a comment to another folder,
� include comments in a search.
Making a comment on an entry Comments can refer to a specific point in the text, a passage of text or the entire entry. An entry may contain several comments in identical or different positions.
1. Open the entry you want to comment on.
2. If you want the comment to be inserted in a particular position, move the insertion point to the relevant place or select text if the comment is to relate to a passage of text.
PART I: Standard User Interface 30
3. Select the Comments command (Edit menu, pop-up menu or button on the personal additions toolbar) to open the Edit Comments dialogue box.
4. Under Title, give the comment a name. Untitled comments cannot be included in the search area of the expert search.
5. Under Comment, enter the comment you want to make.
6. Under Folder, select another folder for the comment if necessary by clicking the button to open the Select Folder dialogue box where you can select another
folder or create a new folder for comments.
7. Under Position, indicate the area to which the comment is to relate: If you select Cursor or Area, the comment is inserted at the current position of the
insertion point or selected text. The character to the right of the insertion point or selected text is highlighted according to the text marking options selected in the basic settings; if you want to read or edit the comment at any point, click the highlighted character/text.
If you select Window, the comment relates to the entire entry window. The first character in the entry is highlighted according to the text marking options selected in the basic settings; if you want to read or edit the comment at any point, click the highlighted character.
If you select All, the comment relates to the entire entry text. None of the text is highlighted and it is subsequently only possible to display and edit the comment using the list of additions in the entry window or the Edit menu.
8. Click Insert to insert the comment and close the dialogue box.
Reading a comment 1. Open the entry containing the comment you want to read.
2. Open the window with the text of the comment either by pointing to the relevant highlighted text (the mouse pointer changes into the comment symbol) and then clicking or by opening the list of additions on the left-hand side of the window title bar and selecting the relevant comment.
3. If the entry contains several comments, you can browse back and forth using the relevant buttons in the text window. Click Close to close the window with the text of the comment.
Modifying, renaming or removing a comment 1. Open the entry containing the comment to be modified or removed.
2. Open the Edit Comment dialogue box by selecting the Edit – Comments command, clicking the button on the personal additions toolbar or opening the list of additions on the left-hand side of the window title bar and selecting the
PART I: Standard User Interface 31
comment or click the relevant highlighted text in the entry to open the window with the text of the comment and click Edit.
3. Under Title, select the comment you want to edit or remove.
4. Edit as required. You can modify the title and/or the text of the comment and then click Modify to
save the modified comment or click New and then Insert to save an additional comment with the modifications made.
Click Remove to remove the comment selected.
Opening an entry with a comment All comments are filed in the manager window in the Comments folder or a sub-folder which has been created. This makes them easy to find and the associated entries can be opened immediately.
1. Activate the manager window by clicking the relevant button above the list of search results.
2. Open the Comments folder and any sub-folders it contains.
3. Double-click a comment to open the associated entry.
Moving a comment to another folder If you use a large number of comments, these should be split between several different folders according to subject or type of comment as a clearly organised structure will allow rapid access.
New (sub-)folders in the Comments folder can be created directly when inserting a new comment. Alternatively, you can use the File – New – Folder command. If you have created new folders, it may be necessary to reorganise the comments, i.e. move them to other folders. You do this as follows:
1. Activate the manager window by clicking the relevant button above the list of search results.
2. Open the Comments folder and any sub-folders it contains.
3. Drag the comment you want to move onto the new folder and then release the mouse button. You will be prompted to confirm the move by clicking OK or to cancel it by clicking Cancel.
Including comments in a search Comments and other additions you have made can be included in the search area of the expert search when scanning, provided that you have given the comments their own titles.

PART I: Standard User Interface 32
This can be done directly when inserting a new comment but you can also name an untitled comment which has already been inserted.
If comments are included in the search area, the associated titles are treated as headwords. They appear with the comment symbol in the window with the search results. You open the entry containing the comment by double-clicking the relevant title.
� If you want comments to be included in the search area of the expert search, check the Scan personal additions option. You enable this option in the Expert Search dialogue box (Search menu).
Linking entries By linking two entries you incorporate your own cross-references. If you click the link at any point, you immediately open the linked entry. This may be another entry in the same book but it may also be from another book.
As all links are automatically filed in the Links folder (or a sub-folder you have created), you can quickly find all entries containing a link at any time in the manager window.
The following sections explain how to � link one entry to another,
� open a linked entry,
� rename or remove a link,
� open an entry with a link,
� move a link to another folder,
� include links in a search.
Linking one entry to another Links can relate to a specific point, a passage of text or the entire entry. Any of the last twenty entries opened can be nominated as the linked entry. (These are all in the Previous folder.)
An entry may contain several links in identical or different positions.
1. Only entries filed in the Previous folder can be nominated as linked entries; this folder contains the last twenty entries opened. If you are not sure whether the linked entry is one of these last twenty entries, you should re-open the entry to which the link is to refer.
2. Open the entry which is to contain the link.

PART I: Standard User Interface 33
3. If you want the link to be inserted in a particular position, move the insertion point to the relevant place or select text if the link is to relate to a passage of text.
4. Select the Link command (Edit menu, pop-up menu or button on the personal additions toolbar) to open the Links dialogue box.
5. Under Title, give the link a name. Untitled links cannot be included in the search area of the expert search.
6. Select the linked entry from the list of available entries. (If you want to re-check the linked entry, click Go to to open the relevant entry.)
7. Under Folder, select another folder for the link if necessary by clicking the button to open the Select Folder dialogue box where you can select another folder or create a new folder for links.
8. Under Position, indicate the area to which the link is to refer: If you select Cursor or Area, the link is inserted at the current position of the
insertion point or selected text. The character to the right of the insertion point or selected text is highlighted according to the text marking options selected in the basic settings; if you want to open the linked entry at any point, click the highlighted character/text.
If you select Window, the link relates to the entire entry window. The first character in the entry is highlighted according to the text marking options selected in the basic settings; if you want to open the linked entry at any point, click the highlighted character.
If you select All, the link relates to the entire entry text. None of the text is highlighted and you can subsequently only open the linked entry using the list of additions in the entry window or the Edit menu.
9. Click Insert to insert the link and close the dialogue box.
Opening a linked entry 1. Open the entry containing the link to your chosen linked entry.
2. Open the linked entry by pointing to the relevant highlighted text (the mouse pointer changes into the link symbol) and then clicking, or selecting your chosen link from the list of additions on the left-hand side of the window title bar.
Renaming or removing a link 1. Open the entry containing the link to be modified or removed.
2. Open the Links dialogue box (Edit menu or button on the personal additions toolbar).
N.B.: You cannot edit a link by clicking the highlighted text or selecting the link in the list of additions; this opens the linked entry rather than the link itself.
3. Under Title, select the link you want to edit or remove.
PART I: Standard User Interface 34
4. Edit as required. You can modify the title of the link and then click Modify to save it under the new
title or click New and then Insert to create an additional link with the new title. Click Remove to remove the link selected.
Opening an entry with a link All links are filed in the manager window in the Links folder or a sub-folder which has been created. This makes them easy to find and the associated entries can be opened immediately.
1. Activate the manager window by clicking the relevant button above the list of search results.
2. Open the Links folder and any sub-folders it contains.
3. Double-click a link to open the entry containing it.
Moving a link to another folder If you create a large number of links, you should split these between several different folders according to subject as a clearly organised structure will allow rapid access.
New (sub-)folders in the Links folder can be created directly when inserting a new link. Alternatively, you can use the File – New – Folder command. If you have created new folders, it may be necessary to reorganise the links, i.e. move them to other folders. You do this as follows:
1. Activate the manager window by clicking the relevant button above the list of search results.
2. Open the Links folder and any sub-folders it contains.
3. Drag the link you want to move onto the new folder and then release the mouse button. You will be prompted to confirm the move by clicking OK or to cancel it by clicking Cancel.
Including links in a search Links and other additions you have made can be included in the search area of the expert search when scanning, provided that you have given the links their own titles.
This can be done directly when inserting a new link but you can also name an untitled link which has already been inserted.
If links are included in the search area, the titles of the links are treated as headwords. They appear with the link symbol in the window with the results of the search. You open the entry containing the link by double-clicking the relevant title.
PART I: Standard User Interface 35
� If you want links to be included in the search area of the expert search, check the Scan personal additions option. You enable this option in the Expert Search dialogue box (Search menu).
Including an entry in a keyword catalogue You can allocate a keyword to an entry or a particular passage in the entry; the entry/passage will then be filed in a keyword catalogue under this keyword. You can use keywords to put together a personal selection of entries with their own titles; these entries can be found quickly and opened immediately using the keyword folder in the manager window or the scan function.
The following sections explain how to � allocate a keyword to an entry,
� rename or remove a keyword,
� open an entry with a keyword,
� move a keyword to another keyword folder,
� include keywords in a search.
Allocating a keyword to an entry Keywords can be allocated to a specific point in the text or the entire entry, e.g. to identify technical terms from various fields. An entry may contain several keywords in identical or different positions.
1. Open the entry to which a keyword is to be allocated.
2. If you want the keyword to be inserted in a particular position, move the insertion point to the relevant place or select text if the keyword is to relate to a passage of text.
3. Select the Keywords command (Edit menu or button on the personal additions toolbar) to open the Keywords dialogue box.
4. Under Title, enter the keyword you want to allocate to the entry.
5. Under Folder, select another folder for the keyword if necessary by clicking the button to open the Select Folder dialogue box where you can select another
keyword folder or create a new one.
6. Under Position, indicate the area to which the keyword is to relate: If you select Cursor or Area, the keyword relates to the current position of the
insertion point or selected text. The character to the right of the insertion point or selected text is highlighted according to the text marking options selected in the basic settings; if you want to edit the keyword at any point, click the highlighted character/text to open the relevant dialogue box.
PART I: Standard User Interface 36
If you select Window, the keyword relates to the entire entry window. The first character in the entry is highlighted according to the text marking options selected in the basic settings; if you want to edit the keyword at any point, click the highlighted character to open the relevant dialogue box.
If you select All, the keyword relates to the entire entry text. None of the text is highlighted and you can subsequently only open the dialogue box to edit the keyword using the list of additions in the entry window or the Edit menu.
7. Click Insert to insert the keyword and close the dialogue box.
Renaming or removing a keyword 1. Open the entry containing the keyword to be renamed or removed.
2. Open the Keywords dialogue box by selecting the Edit – Keywords command, clicking the button on the personal additions toolbar, pointing to the keyword in the text using the mouse (the mouse pointer changes into the keyword symbol) and then clicking, or opening the list of additions on the left-hand side of the window title bar and selecting the relevant keyword.
3. Under Title, select your chosen keyword.
4. Edit as required. You can modify the keyword title and then click Modify to save the keyword under
the new name or click New and then Insert to insert an additional new keyword. Click Remove to remove the keyword selected.
Opening an entry with a keyword All keywords are filed in the manager window in the Keywords folder or a sub-folder which has been created. This makes them easy to find and the associated entries can be opened immediately.
1. Activate the manager window by clicking the relevant button above the list of search results.
2. Open the Keywords folder and any sub-folders it contains.
3. Double-click a keyword to open the associated entry.
Moving a keyword to another keyword folder If you create a large number of keywords, these should be split between different keyword folders according to subject as a clearly organised structure will allow rapid access.
New keyword (sub-)folders in the Keywords folder can be created directly when inserting a new keyword. Alternatively, you can use the File – New – Folder command. If you have created new keyword folders, it may be necessary to reorganise the keywords, i.e. move them to other folders. You do this as follows:
PART I: Standard User Interface 37
1. Activate the manager window by clicking the relevant button above the list of search results.
2. Open the Keywords folder and any sub-folders it contains.
3. Drag the keyword you want to move onto the new keyword folder and then release the mouse button. You will then be prompted to confirm the move by clicking OK or to cancel it by clicking Cancel.
Including keywords in a search Keywords and other additions you have made can be included in the search area of the expert search when scanning. They are treated as headwords and appear with the keyword symbol in the window with the results of the search. You open the entry containing the keyword by double-clicking the keyword.
� If you want keywords to be included in the search area of the expert search, check the Scan personal additions option. You enable this option in the Expert Search dialogue box (Search menu).
Sub-divided entries In certain books large entries are sub-divided to make them clearer. If an entry is sub-divided, a special button appears. Click this button to show the sub-division and click a heading to go to the relevant part of the entry.
PART I: Standard User Interface 38
WORKING WITH USER DICTIONARIES With user dictionaries you can increase the scope and possibilities of Langenscheidt e-Dictionaries enormously and, accordingly, make more demands on the system. A user dictionary is the equal of a book purchased for e-Dictionaries in every respect. Just like entries in such a book, user dictionary entries can be formatted using bold, italics, etc. and included in the quick search and expert search. They also offer the same options for making personal additions.
You can create up to ten different user dictionaries with their own icons and split the data they contain into separate folders to improve the structure.
If you already have data which you want to include in a user dictionary, you can both import text files (in RTF or text format) into individual entries and incorporate complete databases.
Thanks to an import/export function, there is no problem if the various users of Langenscheidt e-Dictionaries need to exchange user dictionaries.
The following sections explain how to � create and remove a user dictionary,
� create a folder in a user dictionary,
� create, modify and delete your own entries,
� import a text file into one of your entries,
� import a database into a user dictionary,
� import a user dictionary,
� export a user dictionary.
Creating and removing user dictionaries Creating a user dictionary When you first install Langenscheidt e-Dictionaries, there is a folder for incorporating user dictionaries in the manager window but no actual user dictionaries. Consequently, you must have created at least one user dictionary before you can create or import your own entries.
You do this as follows:
1. Select the File – New – User Dictionary command.
2. Give the new user dictionary a title in the Create User Dictionary dialogue box. You also have the option of entering a copyright statement.
3. You can select a differently numbered icon from the one proposed (a user dictionary is normally given the icon with the first free number between 0 and 9) or customise the standard icon design. To do this click Edit graphic to start the
PART I: Standard User Interface 39
image-editing program allocated to the bmp file type in the computer system used (e.g. the Windows accessory Paint).
N.B.: A user dictionary's title, copyright statement and numbered icon cannot subsequently be modified.
4. Click OK.
The new user dictionary is now in the User Dictionaries folder. The associated icon is also displayed on the toolbar with the e-dictionaries installed.
Removing a user dictionary User dictionaries are removed in the same way as other books using the File – Remove Books command. This process cannot be reversed and, as well as the user dictionary itself, any personal additions and links you may have inserted are also lost.
Tip: If you are not certain that you have definitely finished with the user dictionary, you should save the data before removing the dictionary by exporting it into a file.
1. Select the File – Remove Books command.
2. Select the user dictionary you want to remove and then click Remove.
3. If you are sure that the book indicated should be removed, confirm by clicking Yes.
Creating a folder in a user dictionary If you split the entries in a user dictionary between several folders, the individual entries can be found more easily in the manager window. You can use folders to group the entries, for example according to groups of letters (A–E, F–K, etc.) or subject (politics, engineering, EDP, etc.).
You can create a new folder either when creating a new entry or subsequently as follows:
1. Activate the manager window.
2. Open the User Dictionaries folder and select your chosen user dictionary or a folder it contains.
3. Select the File – New – Folder command or New Folder from the pop-up menu (right mouse click) and enter a title in the Create Folder dialogue box. Then click Create.
Creating your own entries Before you can create your own entries you must first create at least one user dictionary.
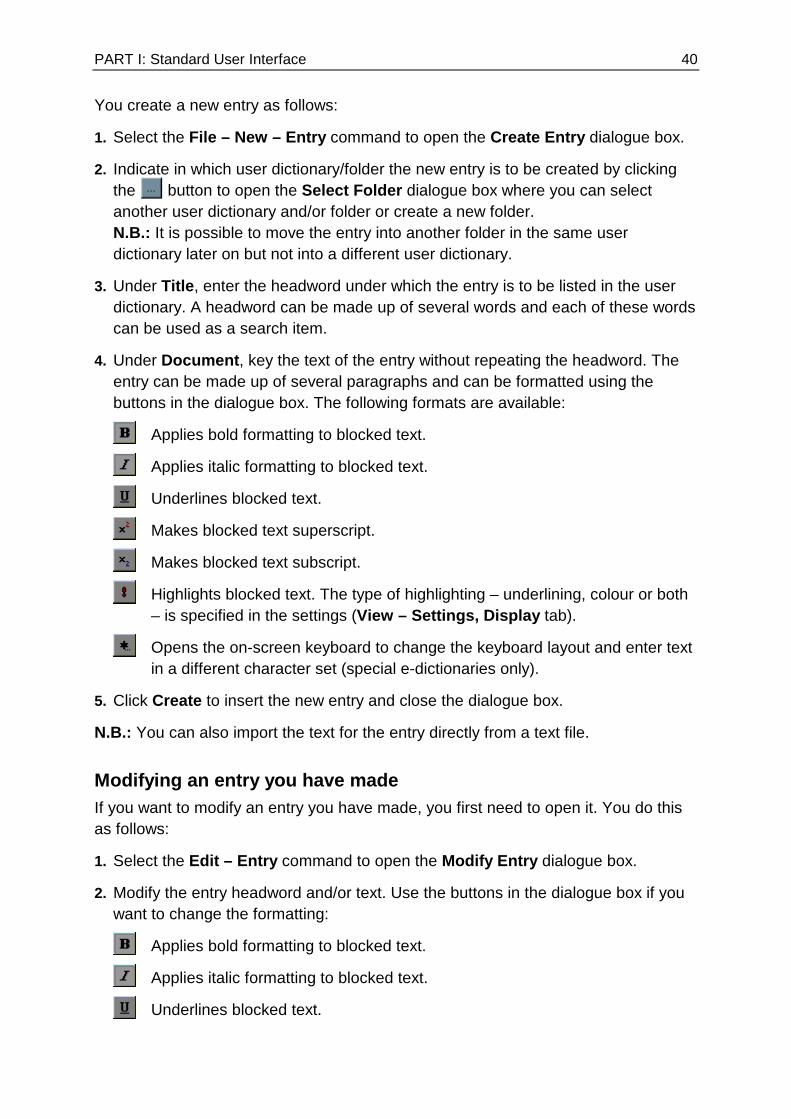
PART I: Standard User Interface 40
You create a new entry as follows:
1. Select the File – New – Entry command to open the Create Entry dialogue box.
2. Indicate in which user dictionary/folder the new entry is to be created by clicking the button to open the Select Folder dialogue box where you can select another user dictionary and/or folder or create a new folder.
N.B.: It is possible to move the entry into another folder in the same user dictionary later on but not into a different user dictionary.
3. Under Title, enter the headword under which the entry is to be listed in the user dictionary. A headword can be made up of several words and each of these words can be used as a search item.
4. Under Document, key the text of the entry without repeating the headword. The entry can be made up of several paragraphs and can be formatted using the buttons in the dialogue box. The following formats are available:
Applies bold formatting to blocked text.
Applies italic formatting to blocked text.
Underlines blocked text.
Makes blocked text superscript.
Makes blocked text subscript.
Highlights blocked text. The type of highlighting – underlining, colour or both – is specified in the settings (View – Settings, Display tab).
Opens the on-screen keyboard to change the keyboard layout and enter text in a different character set (special e-dictionaries only).
5. Click Create to insert the new entry and close the dialogue box.
N.B.: You can also import the text for the entry directly from a text file.
Modifying an entry you have made If you want to modify an entry you have made, you first need to open it. You do this as follows:
1. Select the Edit – Entry command to open the Modify Entry dialogue box.
2. Modify the entry headword and/or text. Use the buttons in the dialogue box if you want to change the formatting:
Applies bold formatting to blocked text.
Applies italic formatting to blocked text.
Underlines blocked text.
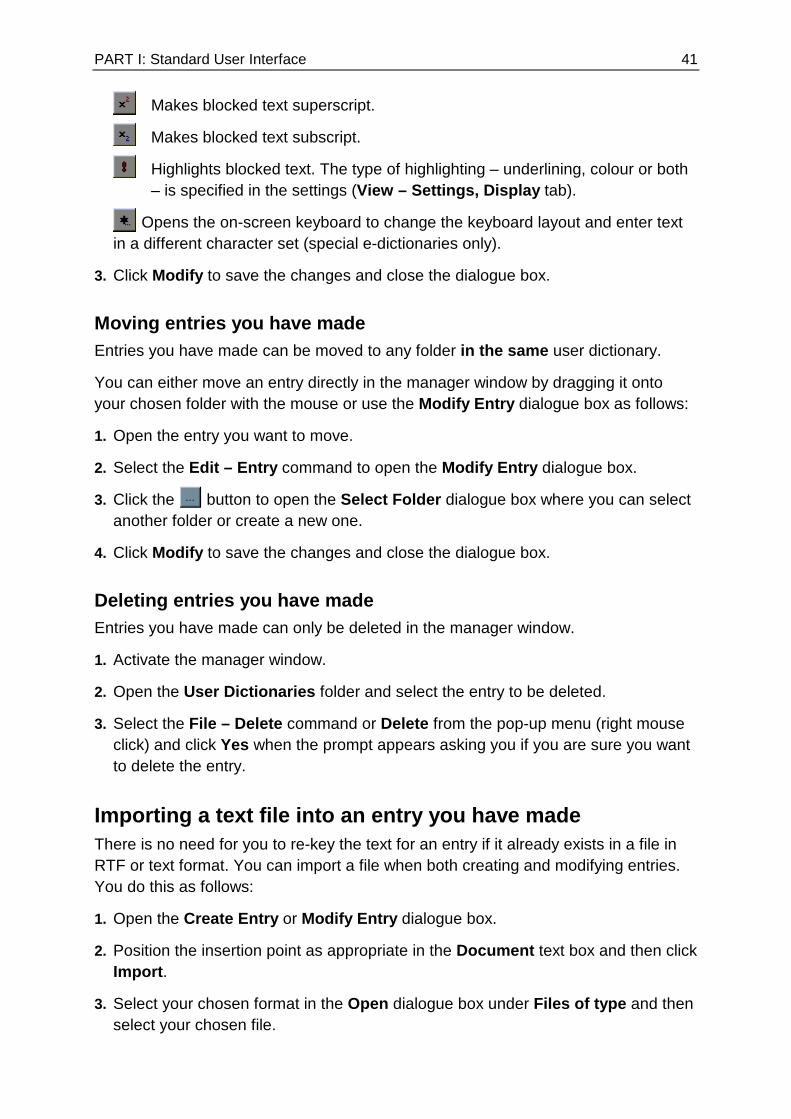
PART I: Standard User Interface 41
Makes blocked text superscript.
Makes blocked text subscript.
Highlights blocked text. The type of highlighting – underlining, colour or both – is specified in the settings (View – Settings, Display tab).
Opens the on-screen keyboard to change the keyboard layout and enter text in a different character set (special e-dictionaries only).
3. Click Modify to save the changes and close the dialogue box.
Moving entries you have made Entries you have made can be moved to any folder in the same user dictionary.
You can either move an entry directly in the manager window by dragging it onto your chosen folder with the mouse or use the Modify Entry dialogue box as follows:
1. Open the entry you want to move.
2. Select the Edit – Entry command to open the Modify Entry dialogue box.
3. Click the button to open the Select Folder dialogue box where you can select another folder or create a new one.
4. Click Modify to save the changes and close the dialogue box.
Deleting entries you have made Entries you have made can only be deleted in the manager window.
1. Activate the manager window.
2. Open the User Dictionaries folder and select the entry to be deleted.
3. Select the File – Delete command or Delete from the pop-up menu (right mouse click) and click Yes when the prompt appears asking you if you are sure you want to delete the entry.
Importing a text file into an entry you have made There is no need for you to re-key the text for an entry if it already exists in a file in RTF or text format. You can import a file when both creating and modifying entries. You do this as follows:
1. Open the Create Entry or Modify Entry dialogue box.
2. Position the insertion point as appropriate in the Document text box and then click Import.
3. Select your chosen format in the Open dialogue box under Files of type and then select your chosen file.
PART I: Standard User Interface 42
N.B.: When importing RTF files the character formatting (bold, underlining, etc.) and information on the character set is also retained but paragraph formatting and the font used cannot be imported.
Importing a database into a user dictionary The books in Langenscheidt e-Dictionaries are structured like databases with two fields, the first containing the headword and the second the text of the entry. Consequently, data from a database structured in this way are ideal for importing into a user dictionary.
The following should be noted when importing a database file:
� A database can only be imported into a user dictionary which already exists. Consequently, you may need to create a user dictionary before you can start
importing.
� The database data must be in a delimited text file. A delimited text file is a database file in text format. Each record makes up exactly
one paragraph (i.e. it ends with a hard return) and the individual fields in each record are separated from each other using a specific delimiter; semicolons (;), tabs and spaces can be used as delimiters.
Single or double inverted commas (' or ") are sometimes used as text identification characters so that the specified delimiter character can also be used as a normal text character. In such cases for example, a semicolon on its own (;) is used as a delimiter whereas a semicolon in inverted commas (";") is the normal text character.
All standard database and spreadsheet applications have an appropriate export function. A standardised format for this file type is CSV format.
� When importing, the first field is always used as a headword; the second and any other fields make up the text of the entry.
How to import a database 1. Create an appropriate database file. The file must be in CSV format or a text only
format (.txt), the fields must be delimited by a delimiter (semicolon, tab or space) and each record must make up one paragraph.
2. Create a user dictionary if you have not already done so.
3. Select the File – Import – Database command to open the Open dialogue box. Select your chosen file format in the Files of type box and select the database file.
4. The Import Database dialogue box is opened. Under Import into User Dictionary in this box, select the user dictionary into which the data is to be
PART I: Standard User Interface 43
incorporated and, if appropriate, create a new folder by clicking the button to open the Select Folder dialogue box.
5. Under Delimiter, select the field delimiter used in the database file. You can check the result of the selection immediately in the Analysed Data list.
6. Under Text Identification, select the character placed either side of the delimiter in the database file to identify it as a normal text character. You can check the result of the selection immediately in the Analysed Data list.
7. Under Style of Field 1, select the Paragraph option if you want the headword to appear in the entry in a separate paragraph from the text which follows it. You can check the effect of this setting option immediately in the sample text Preview of a formatted entry.
8. Click Import to import the database file and close the dialogue box.
Importing a user dictionary You can import user dictionaries which have previously been exported by you or another e-Dictionaries user. You do this as follows:
1. Select the File – Import – User Dictionary command to open the Open dialogue box.
2. Select the user dictionary to be imported. User dictionary files have a .usl extension.
3. Confirming the file selection opens the Create User Dictionary dialogue box where you can read the title and copyright information for the new user dictionary and allocate an icon to it. Click OK to import the user dictionary.
N.B.: Ensure that e-Dictionaries has a spare place for an additional user dictionary. If you already have the maximum number (ten), you will need to remove a user dictionary before you can incorporate another one.
Exporting a user dictionary You can export a user dictionary to make it available to other users or to save the current version of the dictionary.
An exported user dictionary is in a special format (USL format) and can be re-imported at any time using the File – Import – User Dictionary command.
You export a user dictionary as follows:
1. Select the File – Export – User Dictionary command to open the Export User Dictionary dialogue box.
2. Select the user dictionary to be exported and then click Export.

PART I: Standard User Interface 44
3. In the Save As dialogue box, modify the file name and the drive/directory where the file is to be saved if necessary. The .usl file extension should be retained so that the exported user dictionary is subsequently displayed in the file selection list for importing. Click Save to export the user dictionary.
N.B.: Files in USL format cannot be edited in another application, for example a word processing application.
PART I: Standard User Interface 45
USING THE INTERNET FUNCTIONS The Langenscheidt e-Dictionaries standard user interface is linked to your computer's Internet access in such a way that it is possible to go directly to an Internet page with one click of the mouse. This facility can be used for the following functions:
� Visiting the e-Dictionaries home page: Click the Home Page button in the Info dialogue box (help menu) to go to the www.langenscheidt.de/e-woerterbuecher/ home page where you will find information about e-dictionaries.
� Visiting a publisher's home page: Click the publisher's logo on the right above the entry window to go to the home page of the publisher of the selected book.
� Updating the data: For certain books you can download update files from the Internet.
Please note that it is only possible to call up an Internet page from e-Dictionaries if you have Internet access and a web browser is installed.
PART I: Standard User Interface 46
CHANGING THE STANDARD USER INTERFACE BASIC SETTINGS
You can change the following:
� The way text is displayed
� The way text is marked and highlighted
� The way pictures are displayed
� The data format for copying onto the clipboard
� The shortcut key for consulting e-dictionaries from other applications
� The quick search settings
Changing the way text is displayed You can allocate different font sizes to the text displayed in the list window (list of search results, headword list and manager window) and entries and select a different font. To do this, open the Display tab in the Settings dialogue box (View – Standard User Interface menu). Under Character Set, select a font and indicate your chosen font size. You can check the result immediately by looking at the sample text displayed.
Changing the way text is marked and highlighted You can adjust the way text is marked and highlighted to suit your particular requirements by opening the Display tab in the Settings dialogue box (View – Standard User Interface menu) and making the following changes:
Highlighting: Highlighting can be used in addition to bold, italics and underlining when marking text. When writing your own entries, use the button to indicate how highlighting is to be displayed (underlining, colour or both).
Text markings: Indicate whether text markings in entries are to be underlined and/or in a different colour. Disable both options if you do not want text markings to be displayed.
Changing the way pictures are displayed For books which have illustrations as well as text, you can specify how these are to be displayed. To do so, open the General tab in the Settings dialogue box (View – Settings – Standard User Interface menu) to select one of the following options in the Output Format drop-down list:
PART I: Standard User Interface 47
� Select a fixed size between 10% and 1000% if you always want illustrations to be opened with the selected reduction or magnification factor.
� Select the WP - Window Proportional option to automatically adjust the size of illustrations to the size of the window when they are opened, without distorting the picture.
� Select the WnP - Window not Proportional option to automatically adjust the size of illustrations to the size of the window; because the illustrations use the entire window area, they may be distorted.
Changing the data format for copying onto the clipboard If there are any problems exchanging data with another application or if for any reason you do not want to transfer the formatting information, you can disable the Also copy data as RTF text option by opening the General tab in the Settings dialogue box (View – Standard User Interface menu) and unchecking the relevant box.
Changing the shortcut key for consulting e-dictionaries from other applications To look up a word in the standard user interface from other applications you use special shortcut keys: CTRL+SHIFT+B (the current word is automatically highlighted and looked up) and CTRL+B (text highlighted manually is looked up). If you want to modify or disable the shortcut keys, you can do so using the Shortcut Keys tab in the Settings dialogue box (View – Standard User Interface menu).
PART II: Pop-Up Search 48
PART II: Pop-Up Search

PART II: Pop-Up Search 49
USING THE POP-UP SEARCH The pop-up search complements the Langenscheidt e-Dictionaries standard user interface and integrates seamlessly into the Windows environment. Once you have started the application you will see two additional icons on the taskbar which you can use to control and adjust the pop-up search.
The two icons on the right of the taskbar for controlling the pop-up search.
With the pop-up search there are two different ways of looking up items in the e-dictionaries installed:
� With the pop-up function you take a word from a Windows application (e.g. from a word processing application or a web browser) or a DOS window and have its translation displayed directly next to the word looked up in a speech bubble. You can either work in standard mode where you have to highlight the word first or in comfort mode which also works without prior highlighting and can display the translation automatically if required.
� When looking up items in the list window you can key a word yourself to look up its translation. It is also possible to copy the entry here.
The Settings dialogue box allows you to adjust the pop-up search to suit your requirements. For example, you can specify other shortcut keys to activate the dictionary functions, modify the font size in the dictionary windows or select a different background colour.
Standard and comfort mode The pop-up function can be used in two ways: in standard or comfort mode.
Standard mode Before you can look up a word in standard mode, you first have to highlight it. If you want to look up a multi-word item (e.g. turn on or cash flow) using the context search, all the words in the item have to be highlighted. Consequently, you should mainly use standard mode if you find that words are not always correctly recognised with your system using comfort mode. For example, problems may occur in comfort mode with certain applications or if inadequate system resources are available. Windows XP, 2000 and NT only support standard mode.
If standard mode has been selected the mode indicator does not have a background ( ) and there is no tick in the menu after the Comfort mode on/off command.
PART II: Pop-Up Search 50
Comfort mode In comfort mode a word does not have to be highlighted before you right-click it to look it up. This also applies to the context search (looking up multi-word items). Unlike standard mode, comfort mode allows you to look up items not only in all Windows applications but also in Windows menus etc. and DOS programs run in a DOS window. Only in comfort mode is it possible to look up items automatically simply by pointing at a word with the mouse (without clicking it). Comfort mode is not supported by Windows XP, 2000 or NT.
In comfort mode the mode indicator on the taskbar appears with a yellow background ( ) and there is a tick ( ) in the menu after the Comfort mode on/off command.
Should you find that words are not always recognised correctly in comfort mode, the first thing to do is to try adjusting the reaction time. If the problems persist, you will have to work in standard mode.
Switching between standard and comfort mode It is possible to switch between the two modes at any time. There are two ways of doing this:
� Right-click the mode indicator.
� Right-click the Langenscheidt icon to open the menu and select the Comfort mode on/off command.
Starting and exiting the pop-up search
Starting The pop-up search can be started directly from the Langenscheidt e-Dictionaries program folder in the Start menu. If the Langenscheidt e-Dictionaries standard user interface is already running, you can also start the pop-up search directly from there by clicking the speech bubble icon on the far right of the toolbar or selecting Pop-up search in the Search menu. As soon as the application has been started, two icons appear on the taskbar which you can use to control the pop-up search: the Langenscheidt icon and the mode indicator .
Exiting To exit the pop-up search, select the Exit pop-up search command from the pop-up search pop-up menu. If the pop-up search was started from the standard user interface, it will close automatically when you exit this.
N.B.: If you only want to disable the pop-up function, use the Sleep mode on/off command or left-click the mode indicator instead; you can then continue looking
PART II: Pop-Up Search 51
up items in the list window and enable the pop-up function again immediately if required.
Pop-up function sleep mode If you do not want to look up any words from Windows applications for quite a time, you can temporarily disable the pop-up function. It is not possible to look up a word directly from the text when in sleep mode but you still have access to the list window where you can key a headword you are looking for.
You can see whether the pop-up function is enabled at any time from the mode indicator on the taskbar. If it is green the function is enabled and if it is red it is in sleep mode.
There are two ways of switching the pop-up function on and off:
� Left-click the mode indicator.
� Select the Sleep mode on/off command from the pop-up search pop-up menu.
Working with taskbar icons Once the pop-up search has been started, two additional icons appear on the taskbar: the Langenscheidt icon and the mode indicator . By using the left and right mouse buttons, these two icons give you access to all the pop-up search functions.
The Langenscheidt icon The Langenscheidt icon gives you access to the menu and you can open the list window to look up items.
� Right-click the Langenscheidt icon to open the pop-up menu and select a menu command.
� Left-click the Langenscheidt icon to open the list window.
The mode indicator The mode indicator is used to switch the pop-up function on and off and to switch between standard and comfort mode. It also provides a permanent indication of the current pop-up search mode.
� Left-click the mode indicator to switch the pop-up function on or off.
� Right-click the mode indicator to switch between standard and comfort mode.
The colour of the indicator tells you the operating status (green = ON, red = OFF) and the background indicates the mode selected (no background = standard mode, yellow background = comfort mode). Consequently, there are four different mode indicator options in all:
Pop-up function in sleep mode, standard mode
PART II: Pop-Up Search 52
Pop-up function ON, standard mode
Pop-up function in sleep mode, comfort mode
Pop-up function ON, comfort mode
Flexi-search When looking up words directly from a text document, it quickly becomes clear that most words do not appear in the root form given in the dictionary but in an inflected form. Thanks to a specially developed search item transformation facility, you will still be able to find many words with the pop-up search even though they are not in the dictionary in the form you are looking up.
N.B.: The flexi-search is also used with the quick search in the standard user interface.
Inflected forms Inflected forms are normally recognised. For example, you can look up went, gone or goes and will always get to the entry for go. If you have looked up an inflected form, the icon appears next to the headword.
Separable verbs Separable verbs in German such as ankommen are often separated in the text (e.g. Er kam gestern am Bahnhof an). If both parts are on the same line, it is often sufficient simply to look up one of the parts (e.g. kam or an) to find the relevant entry in comfort mode. If a separable verb is found during the search, the icon appears.
Old spelling The e-dictionaries follow the new German spelling rules. However, you can also look up German words using the old spelling. Possible cases are as follows:
� The old spelling is not significantly different from the new, for example ss replacing ß (dass/daß, Kuss/Kuß, mussten/mußten, etc.). In these cases, the entry is simply shown with the headword in the new spelling. No special icon appears.
� The new rules result in the same letter appearing three times in succession instead of twice (for example in the word Brennnessel which was previously written Brennessel) or in the creation of two separate words (for example übrig lassen which was previously written übriglassen). In these cases, the entry appears with the headword in the new spelling and is flagged by an icon.
� The old spelling is so different from the new alphabetically that the entry moves to a different place in the dictionary (e.g. Gämse/Gemse or selbstständig/selbständig). In these cases, there is a separate entry for the old spelling and a link (reference) to the headword with the new spelling.

PART II: Pop-Up Search 53
Compounds In German, there is no limit to the number of new compounds that can be formed which means that it is impossible to include them all in a dictionary, but the search item transformation facility does give you rapid access to the translations of the separate components as compounds can normally be broken down. For example, if you look up a German compound such as Ferienparadies, the two words making up the compound – Ferien and Paradies – both appear in the list window’s result window.
Displaying of search results If you look up a word, an icon appears with the entry displayed telling you how the search result came about. See also the section on the flexi-search.
The word looked up appears in this exact form in the dictionary.
The word looked up does not appear in this form in the dictionary but could be traced back to the root form displayed. Example: You look up the word went and the entry for the headword go is displayed.
(Comfort mode only) The word looked up is part of a separable verb. The entry for the complete verb is displayed. Example: Er kam am Bahnhof an appears on a single line in the text. If you look up kam or an, the entry for ankommen will be displayed.
No matching entry could be found for the word looked up. The entry for the headword closest alphabetically to the word looked up is displayed.
(In the speech bubble on the right) The word looked up is written differently according to the new German spelling rules. Either the same letter appears three times in succession (Brennnessel which was previously written Brennessel) or a verb previously written as one word is now separated (übrig lassen which was previously written übriglassen). In both cases, the entry for the headword is displayed with the new spelling. N.B.: For most spelling changes the current spelling is displayed automatically without this being specially flagged by an icon (e.g. where ss replaces ß in words such as dass/daß, Kuss/Kuß, etc.). However, if the spelling has changed to such an extent that the alphabetical order is different for the old and new spelling (e.g. Gämse/Gemse), the headword remains in the old spelling and is given a link (reference) to the headword with the new spelling.
(In the speech bubble only, appearing on the right) Several possible translations have been found for the word looked up. If appropriate, press the CTRL key to go to the list window where you can easily switch between the various possibilities.
(In the list window’s result window only) The word is a compound which was not found as a single word in the dictionary but could be broken down into its component parts. Click the plus sign to display the individual words.

PART II: Pop-Up Search 54
THE POP-UP FUNCTION The pop-up function allows you to look up a word directly from the text of a Windows application. The flexi-search ensures that words looked up are often found even if the form they occur in is not in the dictionary, for example inflections (e.g. went rather than go or gegangen rather than gehen) or words which are still in the old spelling (e.g. Kuß rather than Kuss or Brennessel rather than Brennnessel).
The translation normally appears right beside the word looked up in a speech bubble which disappears as soon as the mouse is moved. If there are several matching entries in the dictionary for the word looked up, the list window appears instead of the speech bubble; this can also happen with very long entries.
The pop-up function must be enabled before you can use it (mode indicator green: ).
The speech bubble displays the search result right beside the word looked up.
The pop-up function in standard mode If standard mode is selected (no mode indicator background: ), you can look up words in any Windows application which allows highlighting. You look up a word from the text as follows:
1. Ensure that the correct language combination is set. To check this, simply point at the Langenscheidt icon with the mouse. To change the current dictionary and/or language combination you need to open the Dictionary tab in the Pop-up search settings dialogue box.
2. Hide any characters which do not print if you want to look up words in an application which can display such characters. To do this in Microsoft Word, for example, use the View tab under Tools – Options.
3. Highlight the word you want to look up. If you want to look up a multi-word item (e.g. cash flow or read between the lines), you need to highlight all the relevant words. (To look up multi-word items the context search must be activated.)
PART II: Pop-Up Search 55
4. Right-click the highlighted word(s). (If you have specified an additional activation key in the settings menu, you must press this as you right-click.)
or
Press the activation key for the list window together with the shift key (default setting: SHIFT+SCROLL).
The result is then displayed. Depending on the settings selected and the search result, it appears either in a speech bubble or in the list window. The speech bubble is closed as soon as you move the mouse; if you want to close the list window, click outside the window or press the ESC key. If you want to switch from the speech bubble to the list window, press the CTRL key and release it straight away.
The pop-up function in comfort mode If comfort mode is selected (mode indicator with background: ), you look up a word from the text as follows:
1. Ensure that the correct language combination is set. To check this, simply point at the Langenscheidt icon with the mouse. To change the current dictionary and/or language combination you need to open the Dictionary tab in the Pop-up search settings dialogue box.
2. Hide any characters which do not print if you want to look up words in an application which can display such characters. To do this in Microsoft Word, for example, use the View tab under Tools – Options.
3. Simply right-click the word you want to look up; you do not need to highlight it first. (If you have specified an additional activation key in the settings menu, you must press this as you right-click.)
The result is then displayed. Depending on the settings selected and the search result, it appears either in a speech bubble or in the list window. The speech bubble is closed as soon as you move the mouse; if you want to close the list window, click outside the window or press the ESC key. If you want to switch from the speech bubble to the list window, press the CTRL key and release it straight away.
N.B.: Please note that Windows XP, 2000 and NT do not support comfort mode.
Looking up items automatically with the pop-up function You can change the pop-up function settings in such a way that words in the text are looked up without the mouse being clicked but this is only possible in comfort mode (mode indicator with background: ).
You look up a word automatically as follows:
PART II: Pop-Up Search 56
1. Ensure that the correct language combination is set. To check this, simply point at the Langenscheidt icon with the mouse. To change the current dictionary and/or language combination you need to open the Dictionary tab in the Pop-up search settings dialogue box.
2. Open the pop-up search pop-up menu and select the Pop-up search settings command. Check the Automatic time delay option in the Selection and View tab section.
3. Point at the word you want to look up with the mouse and keep the pointer still for your specified time delay.
The result is then displayed. Depending on the settings selected and the search result, it appears either in a speech bubble or in the list window. The speech bubble is closed as soon as you move the mouse; if you want to close the list window, click outside the window or press the ESC key. If you want to switch from the speech bubble to the list window, press the CTRL key and release it straight away.
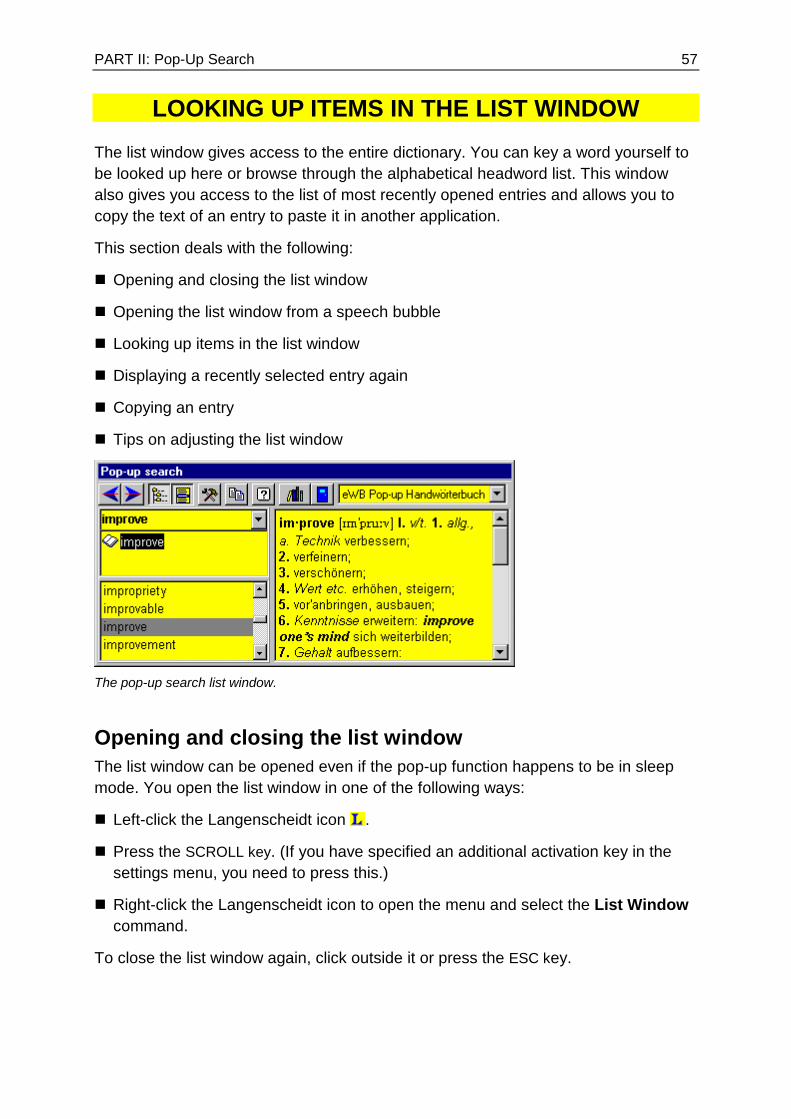
PART II: Pop-Up Search 57
LOOKING UP ITEMS IN THE LIST WINDOW The list window gives access to the entire dictionary. You can key a word yourself to be looked up here or browse through the alphabetical headword list. This window also gives you access to the list of most recently opened entries and allows you to copy the text of an entry to paste it in another application.
This section deals with the following:
� Opening and closing the list window
� Opening the list window from a speech bubble
� Looking up items in the list window
� Displaying a recently selected entry again
� Copying an entry
� Tips on adjusting the list window
The pop-up search list window.
Opening and closing the list window The list window can be opened even if the pop-up function happens to be in sleep mode. You open the list window in one of the following ways:
� Left-click the Langenscheidt icon .
� Press the SCROLL key. (If you have specified an additional activation key in the settings menu, you need to press this.)
� Right-click the Langenscheidt icon to open the menu and select the List Window command.
To close the list window again, click outside it or press the ESC key.

PART II: Pop-Up Search 58
Opening the list window from a speech bubble If you have looked up a word using the pop-up function and the speech bubble is open, you can display the relevant dictionary entry straight away in the list window by pressing the CTRL key or your chosen activation key (default setting: SCROLL key).
Looking up items in the list window The default setting for the way the list window is divided up is as follows: on the left is the search item entry box with the result window and alphabetical headword list underneath; the dictionary entry for the word being looked up appears on the right in the entry window.
If you want to hide the headword list or show it again, click the icon on the toolbar; the button is used to show/hide the result window.
You key a search item as follows: 1. Open the list window (e.g. by left-clicking the Langenscheidt icon ) and make
sure the headword list is displayed.
2. You can start keying the word you want to look up as soon as the list window is open. The insertion point is already in the entry box and any text in this box will be deleted as soon as you start keying the new item. If you have already looked up a word in the list window, you have to place the insertion point in the entry box manually.
3. The headword list reacts as soon as you start keying and displays the first entry alphabetically which starts with the letters keyed. This entry also appears in the result window. If there are several matching entries, these are all listed in the result window. Either keep keying until the entry you require appears in the entry window or click the relevant headword in the headword or result list to display the entry.
You select a search item from the headword list as follows: 1. Open the list window (e.g. by left-clicking the Langenscheidt icon ) and make
sure the headword list is displayed.
2. Position the insertion point in the headword list and browse through the list. You can do this by holding the left mouse button down and dragging the mouse up and down in the headword list or use the scroll bar or the UP ARROW and DOWN ARROW keys.
Displaying a recently selected entry again The pop-up search stores a list of the most recently selected entries. You can open these again quickly and easily from the list window. There are two ways of doing this:
� Selecting from the list: Click the button in the entry box or press the F4 key to display the list of most recently selected entries instead of the headword list and

PART II: Pop-Up Search 59
click one of the headwords in the list to display the entry. To display the headword list again click the button or press the F4 key again.
� Browsing back and forth between entries: Press the SHIFT+LEFT ARROW and SHIFT+RIGHT ARROW keys or click the relevant buttons and on the toolbar to browse through the list of recently selected entries. The relevant entry is displayed immediately.
Copying an entry You can copy the entire text of an entry or part of it onto the clipboard to paste it in another application. You do this as follows:
1. Position the insertion point in the entry window.
2. If you want to copy the entire text and the toolbar is displayed, you simply need to click the button. Otherwise, you first have to block the entire text and then press CTRL+C. If you only want to copy a section of text, block this first and then select the copy command ( or CTRL+C).
3. You can now switch to a different application and paste the text at the position of the insertion point using Edit – Paste or CTRL+V.
PART II: Pop-Up Search 60
CONTEXT SEARCH FOR LOOKING UP MULTI-WORD ITEMS
The pop-up search can be set up so that instead of a single word an entire multi-word item is looked up. Multi-word items can either occur as a headword (e.g. parking offender) or as an example or expression in bold italics within an entry (e.g. read between the lines in the entry for line).
If multi-word items are to be looked up, the context search must be enabled (Settings, Options tab).
It is best to use comfort mode for the context search as the pop-up search then recognises multi-word items automatically. If you use the context search in standard mode, you must first highlight the words in the multi-word item. Please also note the tips on the context search.
Context search in comfort mode 1. Point at any word in the multi-word item with the mouse.
For example, if the phrase You have to read between the lines to understand her letter appears in the text, you can point at any of the words in bold to open the entry for line with the relevant expression.
2. Right-click (default setting) to look up the multi-word item. The relevant entry is opened. If the multi-word item is a headword, the entry is displayed in a speech bubble; if it is an example or expression within an entry, the list window is opened. The entry looked up is at the very top and highlighted; all headwords in the multi-word item appear in the result window so that these can also be looked up individually.
Context search in standard mode 1. Highlight all the words in the multi-word item.
For example, if the phrase I hope you have a good time at the movies appears in the text, all the words in bold must be highlighted to open the entry for good with the relevant expression.
2. Right-click (default setting) to look up the multi-word item. The relevant entry is opened. If the multi-word item is a headword, the entry is displayed in a speech bubble; if it is an example or expression within an entry, the list window is opened. The entry looked up is at the very top and highlighted; all headwords in the multi-word item appear in the result window so that these can also be looked up individually.
PART II: Pop-Up Search 61
Tips on the context search Multi-word items are only found if the text looked up matches the dictionary entry exactly. In the entry good for example, there is the expression have a good time. This expression is not found even if the context search is enabled in the following cases:
� If one of the words in the text looked up is different from the entry, e.g. has instead of have (for example she has a good time).
� If there is another word between the words which does not form part of the multi-word item, e.g. we have a very good time.
� (Comfort mode only) If all the words in the multi-word item are not on a single line, e.g. I hope you have a good time at the movies.
� (Standard mode only) If only some of the words in the multi-word item are highlighted.
If a multi-word item is not displayed even though it occurs in the dictionary, this is normally because the form in which it appears in the text looked up is slightly different from the dictionary entry. In such cases you have to look up the words in the multi-word item separately and then look for the expression in the actual entry text.
PART II: Pop-Up Search 62
CHANGING SETTINGS To change the pop-up search settings, open the menu by right-clicking the Langenscheidt icon on the taskbar and select the Pop-up search settings command. You can also open the settings from the list window by clicking the button on the drop-down list toolbar.
The settings are divided between five tabs which are described below.
"Mode" tab It is possibe to switch between the two modes at any time during a pop-up search session. In addition to the Settings dialogue box, the following shortcut commands are also available:
� Right-click the mode indicator on the taskbar.
� Right-click the Langenscheidt icon on the taskbar to open the menu and select the Comfort mode on/off command.
Details on the two modes can be found above in the section "Standard and comfort mode".
"Selection and View" tab This tab has the following options:
Activate with: right mouse click plus » This option can be used to allocate ALT or SHIFT as the additional key to be used with the right mouse click. If no additional key is allocated, the normal commands in the pop-up menu for the individual applications are no longer available by right-clicking while the pop-up search is enabled.
Automatic time delay: In comfort mode it is possible to look up a word simply by pointing at it with the mouse. It is not necessary to either highlight or click the word.
To prevent a pop-up window repeatedly appearing when the mouse is moved across the text, the function has a time delay facility: the word is only looked up if the mouse pointer remains over the text for the relevant amount of time.
To adjust the time delay the slide control is dragged to the left (shorter) or right (longer) using the mouse.
Shortcut key for list window: To change the shortcut key for opening the list window, the insertion point is positioned in the box and the required key or combination of keys is pressed. The keys are then displayed in text form.
PART II: Pop-Up Search 63
If no key at all is being allocated, the SPACEBAR or just the ALT, CTRL or SHIFT key is pressed. The default setting is the SCROLL key.
Display in: window (list) or speech bubble: The search result can be displayed in a speech bubble (default setting) or in the list window. If it is displayed in the list window it can also be indicated whether it is to be opened at the current mouse position or at the same place as the previous time.
Switch automatically to window (list) if several suggested translations: If this option is enabled, the search result is displayed in the list window for words with several translations (e.g. the German word Bank which can mean bank and bench) even if the speech bubble has been selected as the default setting.
Display toolbar in list window Shows or hides the toolbar in the list window.
"Font and Colours" tab The font size for entries in the speech bubble and list window and for the headword list in the list window can be set separately using slide controls. To display an example in the size selected, simply click the slide control for the first two options (text font size); click the Test button to display an example of the headword list font size.
To set the background colour of the speech bubble and list window, simply click the relevant colour box. An example is also shown in this case.
"Dictionary" tab This tab specifies the e-dictionary in which items are to be looked up.
With certain e-dictionaries German place names can be included in the search if the relevant option is selected.
"Options" tab Multi-word recognition (context search) Switches the context search on and off.
Display pop-up search pop-up menu if no text present If this option is enabled, the pop-up search pop-up menu is opened if you right-click at a point where there is no text or no word has been highlighted in standard mode.
If this option is disabled, an equivalent message appears instead.

PART II: Pop-Up Search 64
List of recently selected headwords In the list window it is quick and easy to return to the headwords most recently displayed. The maximum number of headwords stored is indicated here (default setting: 64).
Clicking the Delete List button replaces the current list of recently selected headwords with an empty list.
Reaction time The time the program has to recognise a word it is looking up is indicated here. The default value of 100 should only be increased if there are repeated problems with word recognition.
If there are no such problems, the reaction time may be reduced on a trial basis.