Embed Size (px)
Citation preview
Page 1 of 17
Junos Pulse VPN Client Installation
Windows 7 Installation p 2- 6 Windows 8.1 Installation p 7-11 Macintosh version 10.6 and greater p 12-17
*This vpn appliance is to replace the Legacy SP vpn client “Cisco AnyConnect”
Page 2 of 17
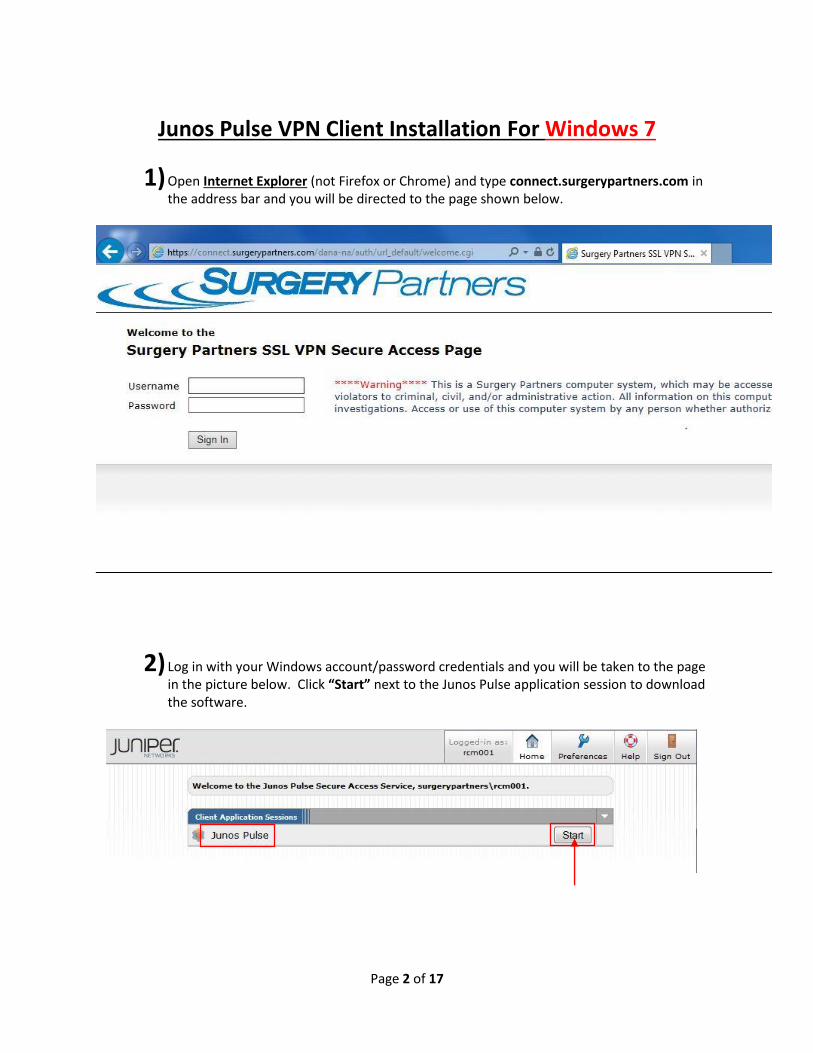
Junos Pulse VPN Client Installation For Windows 7
1) Open Internet Explorer (not Firefox or Chrome) and type connect.surgerypartners.com in the address bar and you will be directed to the page shown below.
2) Log in with your Windows account/password credentials and you will be taken to the page in the picture below. Click “Start” next to the Junos Pulse application session to download the software.
Page 3 of 17
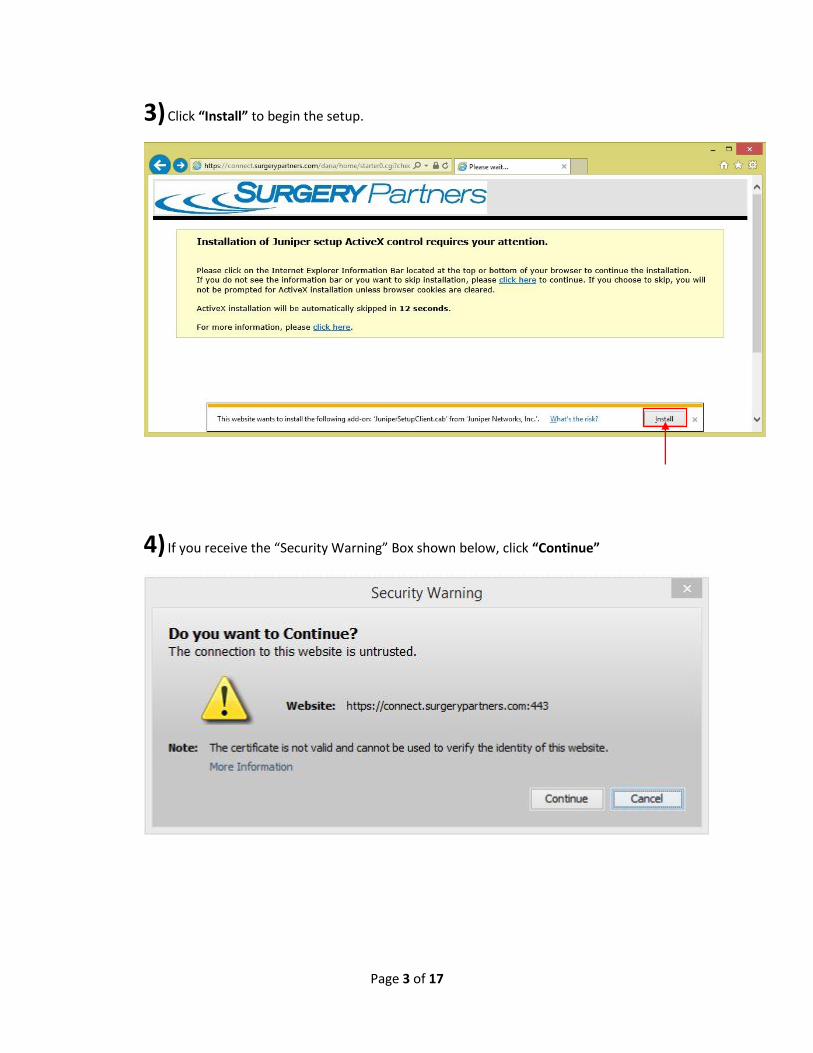
3) Click “Install” to begin the setup.
4) If you receive the “Security Warning” Box shown below, click “Continue”
Page 4 of 17
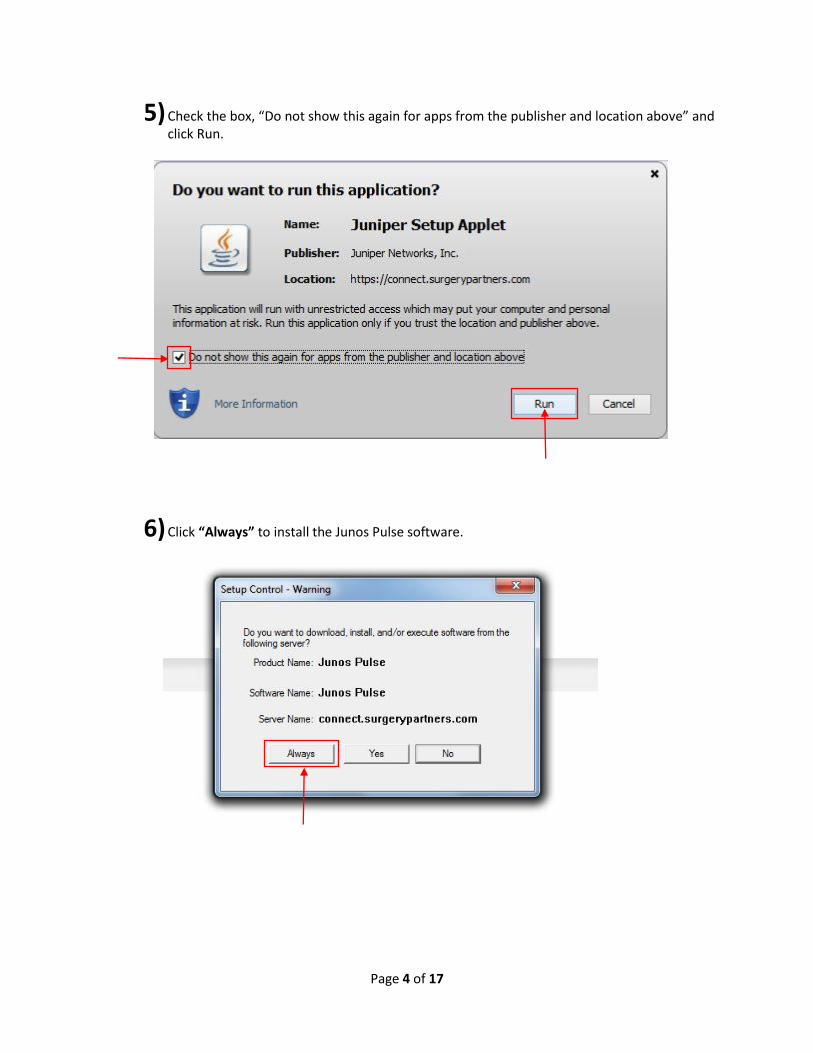
5) Check the box, “Do not show this again for apps from the publisher and location above” and click Run.
6) Click “Always” to install the Junos Pulse software.
Page 5 of 17
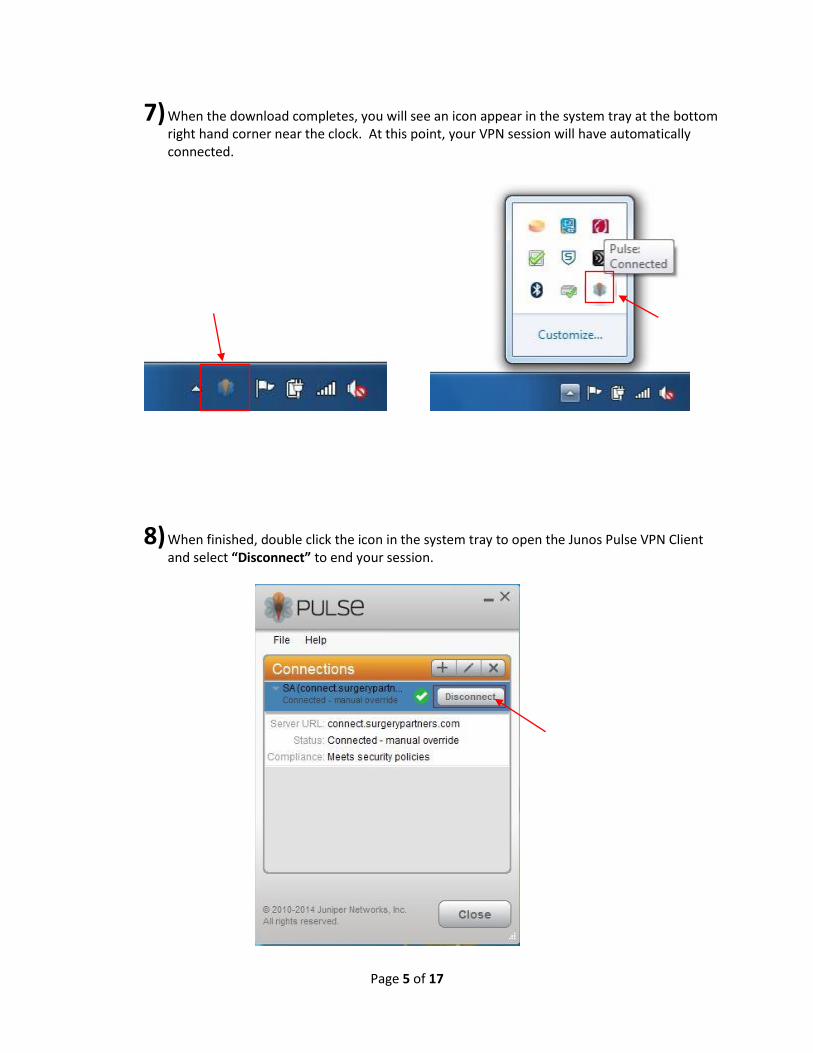
7) When the download completes, you will see an icon appear in the system tray at the bottom right hand corner near the clock. At this point, your VPN session will have automatically connected.
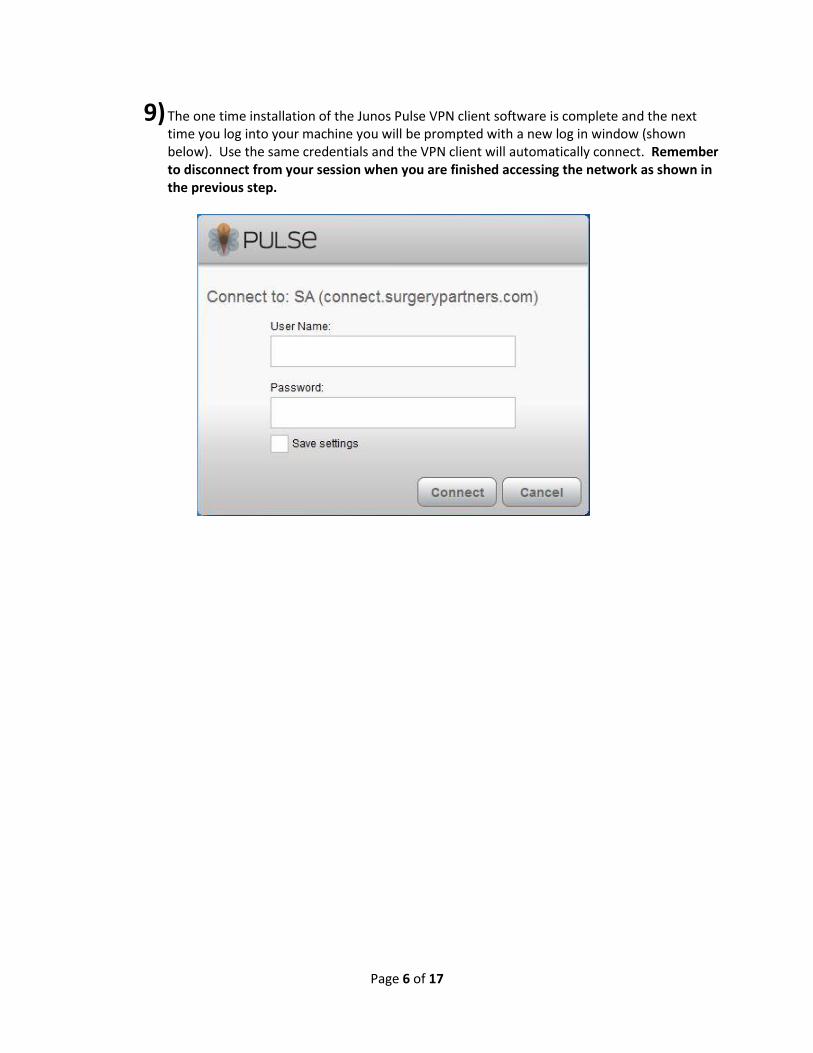
8) When finished, double click the icon in the system tray to open the Junos Pulse VPN Client and select “Disconnect” to end your session.
Page 6 of 17
9) The one time installation of the Junos Pulse VPN client software is complete and the next time you log into your machine you will be prompted with a new log in window (shown below). Use the same credentials and the VPN client will automatically connect. Remember to disconnect from your session when you are finished accessing the network as shown in the previous step.
Page 7 of 17
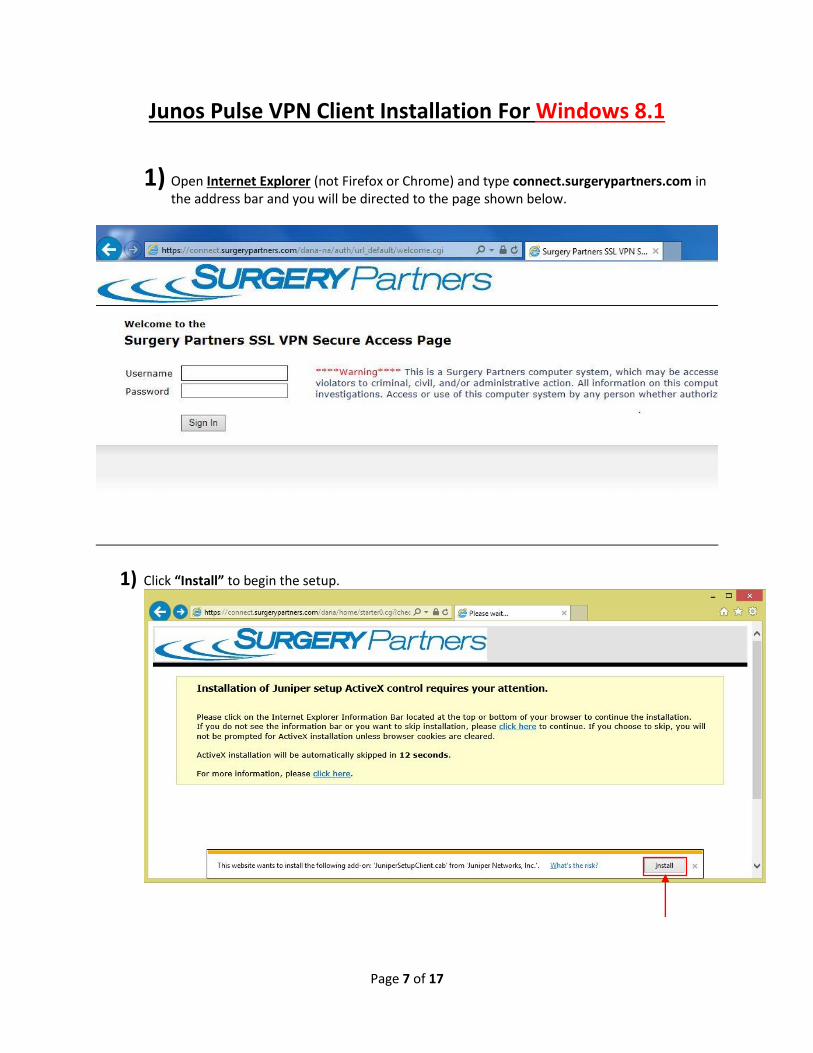
Junos Pulse VPN Client Installation For Windows 8.1
1) Open Internet Explorer (not Firefox or Chrome) and type connect.surgerypartners.com in the address bar and you will be directed to the page shown below.
1) Click “Install” to begin the setup.
Page 8 of 17
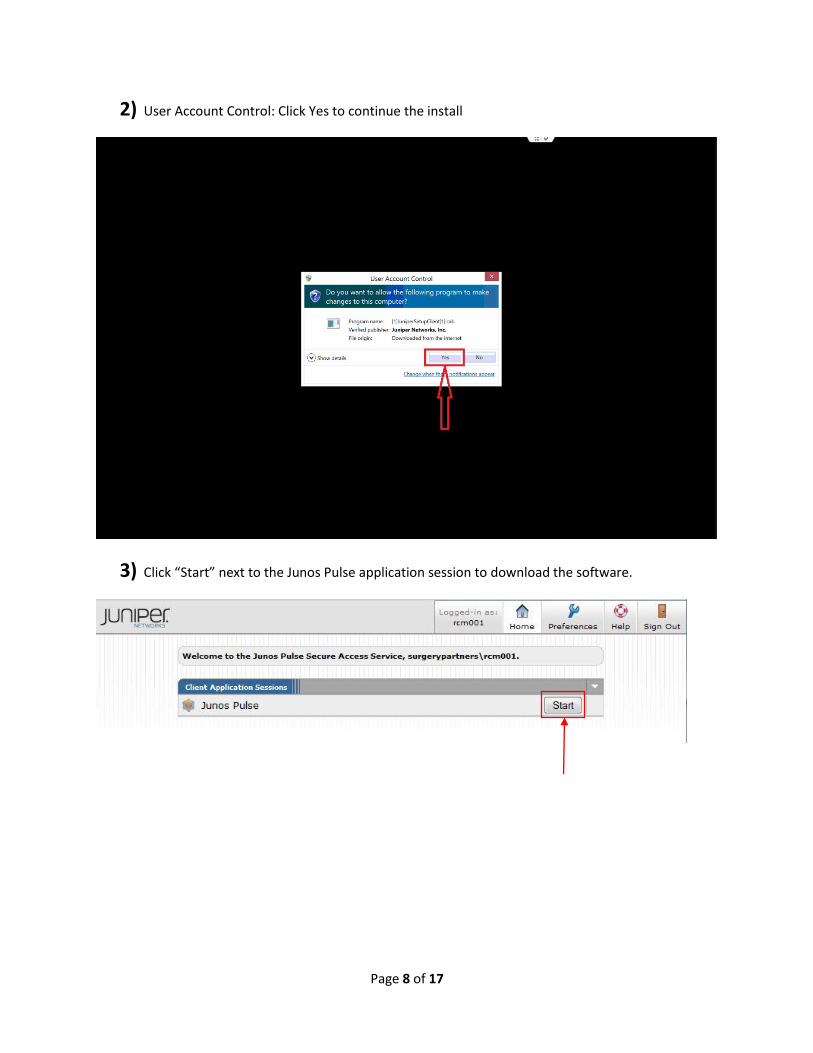
2) User Account Control: Click Yes to continue the install
3) Click “Start” next to the Junos Pulse application session to download the software.
Page 9 of 17
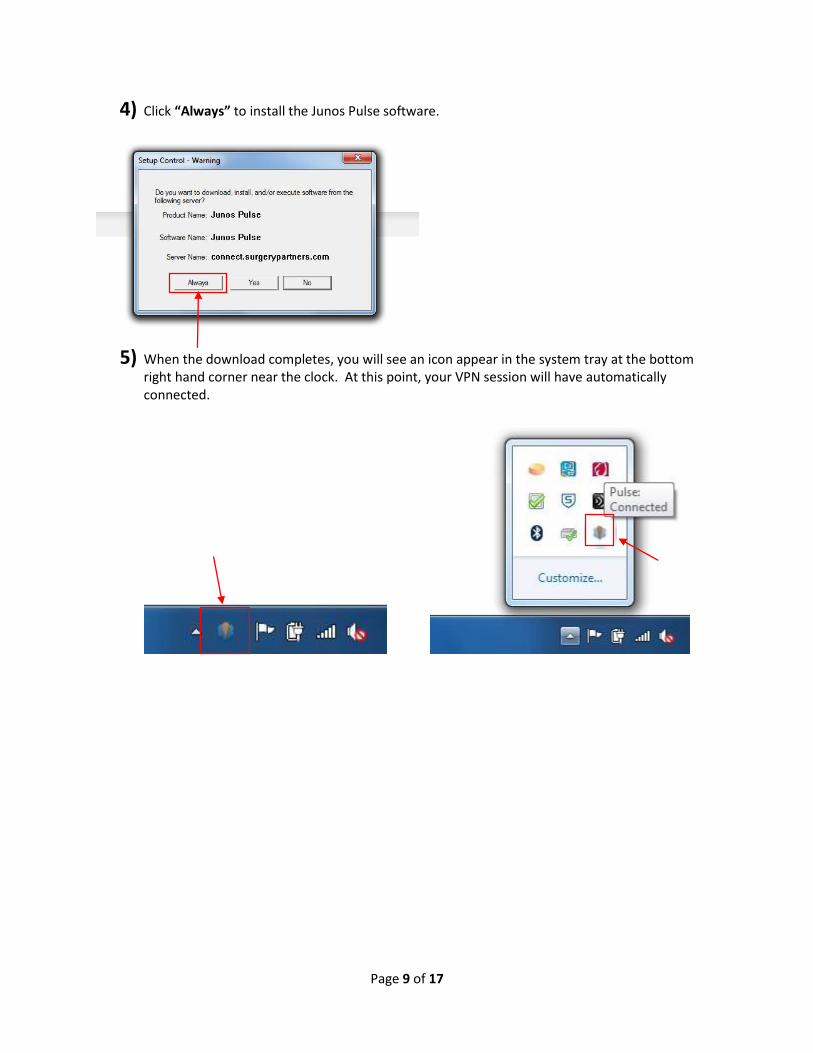
4) Click “Always” to install the Junos Pulse software.
5) When the download completes, you will see an icon appear in the system tray at the bottom right hand corner near the clock. At this point, your VPN session will have automatically connected.
Page 10 of 17
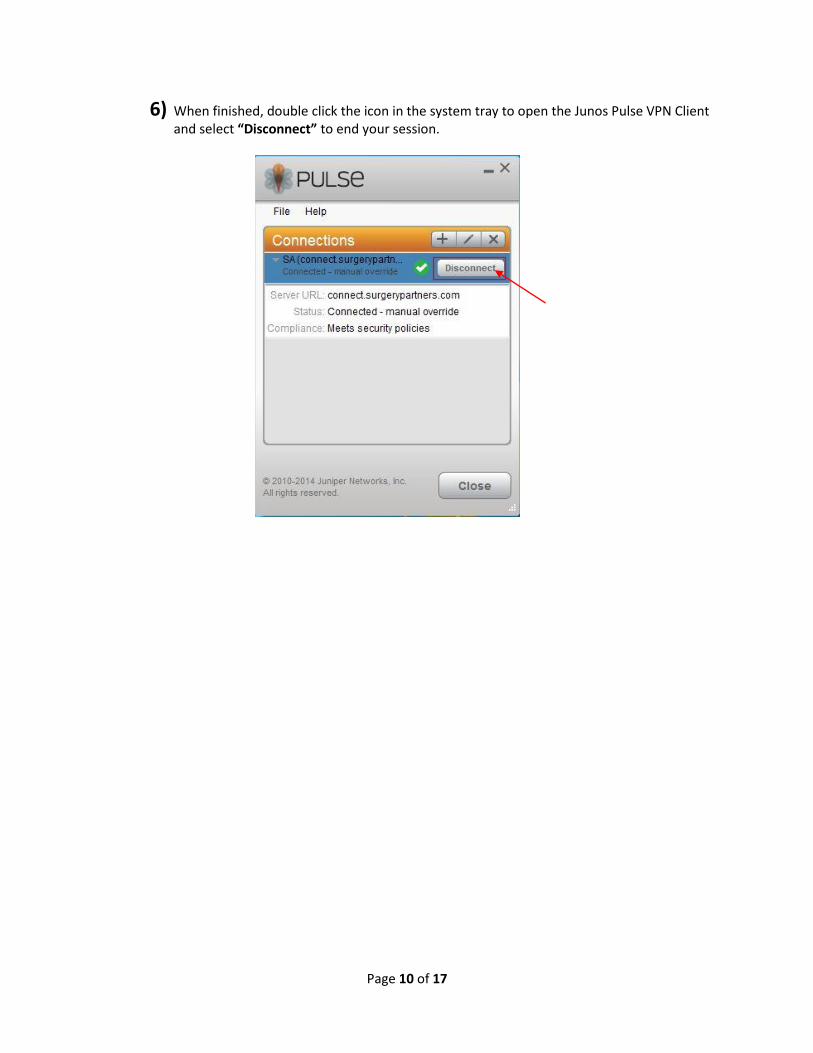
6) When finished, double click the icon in the system tray to open the Junos Pulse VPN Client and select “Disconnect” to end your session.
Page 11 of 17
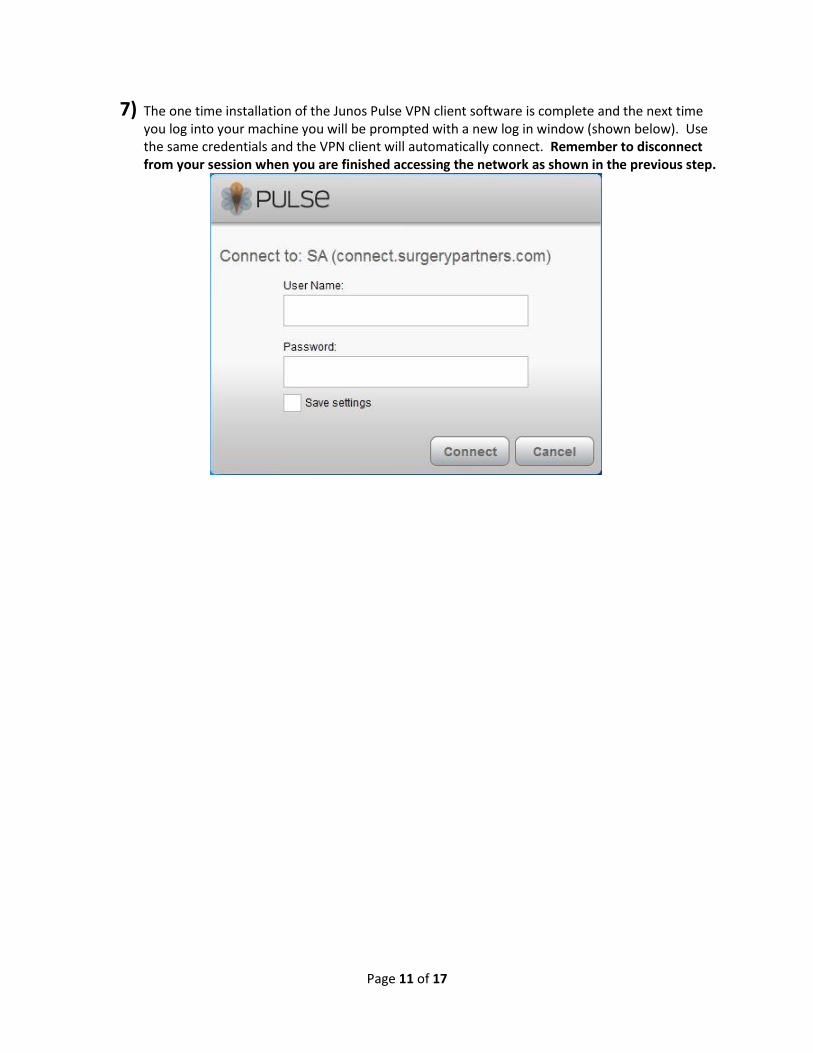
7) The one time installation of the Junos Pulse VPN client software is complete and the next time you log into your machine you will be prompted with a new log in window (shown below). Use the same credentials and the VPN client will automatically connect. Remember to disconnect from your session when you are finished accessing the network as shown in the previous step.

Page 12 of 17
Junos Pulse VPN Client Installation For Macintosh (V10.6 and greater)
1) Open Safari web browser and browse to http://www.surgerypartners.com/downloads
2) Double-click on “Junos Pulse Mac” and download the .dmg file. Once the installer had been
downloaded double click on the installer.
3)
Page 13 of 17
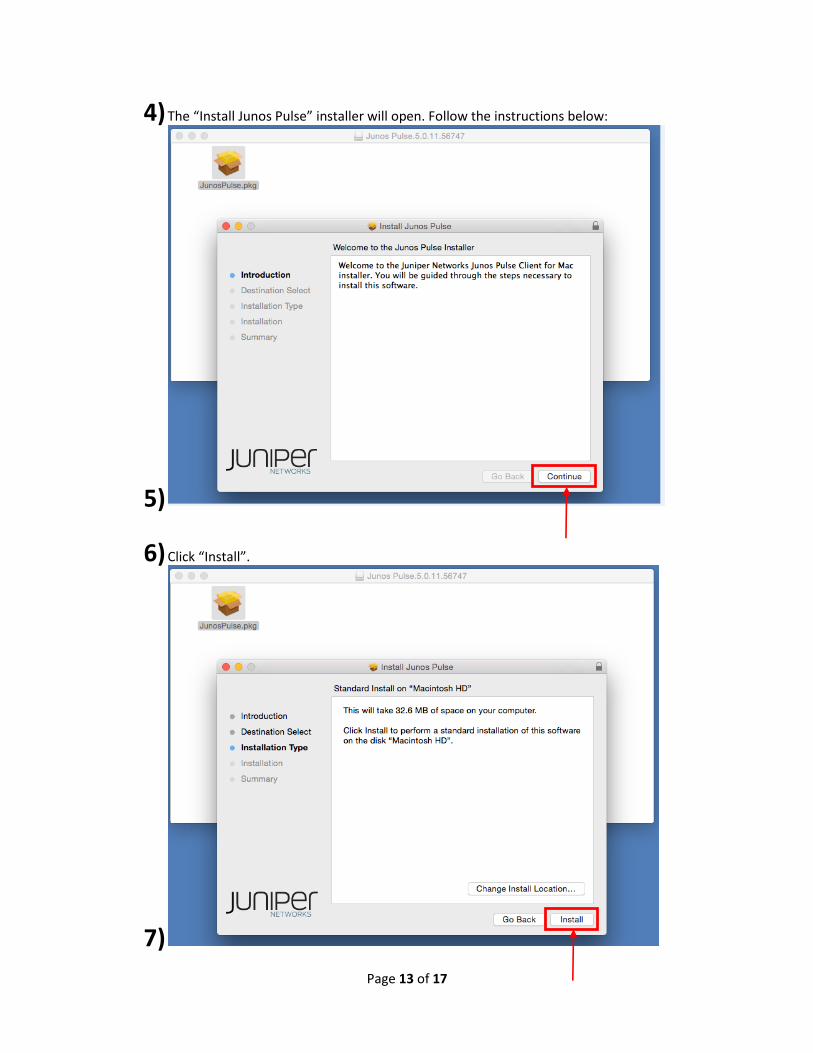
4) The “Install Junos Pulse” installer will open. Follow the instructions below:
5)
6) Click “Install”.
7)
Page 14 of 17
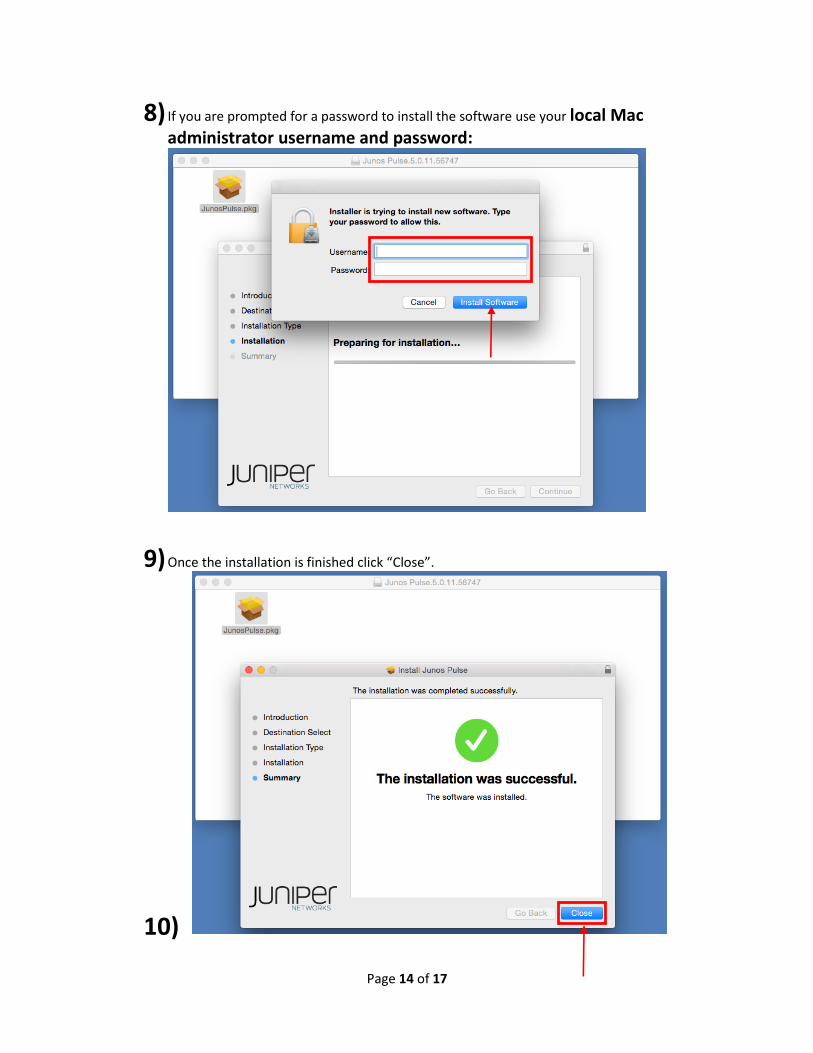
8) If you are prompted for a password to install the software use your local Mac administrator username and password:
9) Once the installation is finished click “Close”.
10)
Page 15 of 17
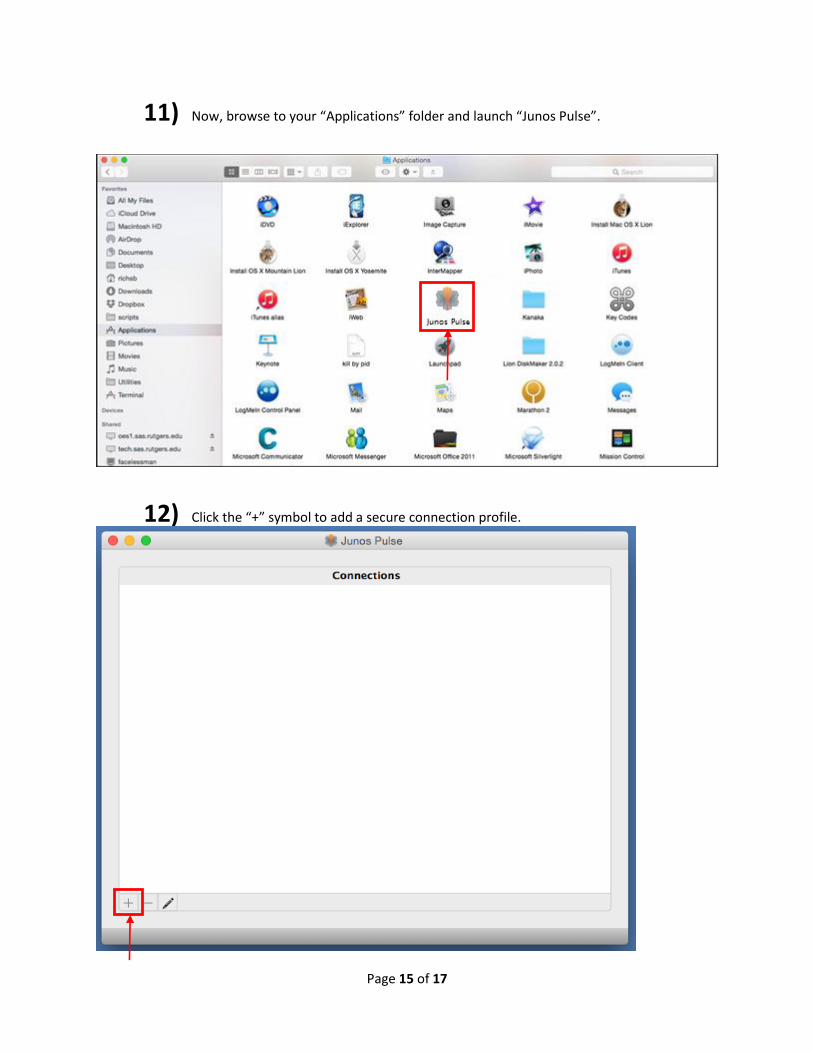
11) Now, browse to your “Applications” folder and launch “Junos Pulse”.
12) Click the “+” symbol to add a secure connection profile.
Page 16 of 17
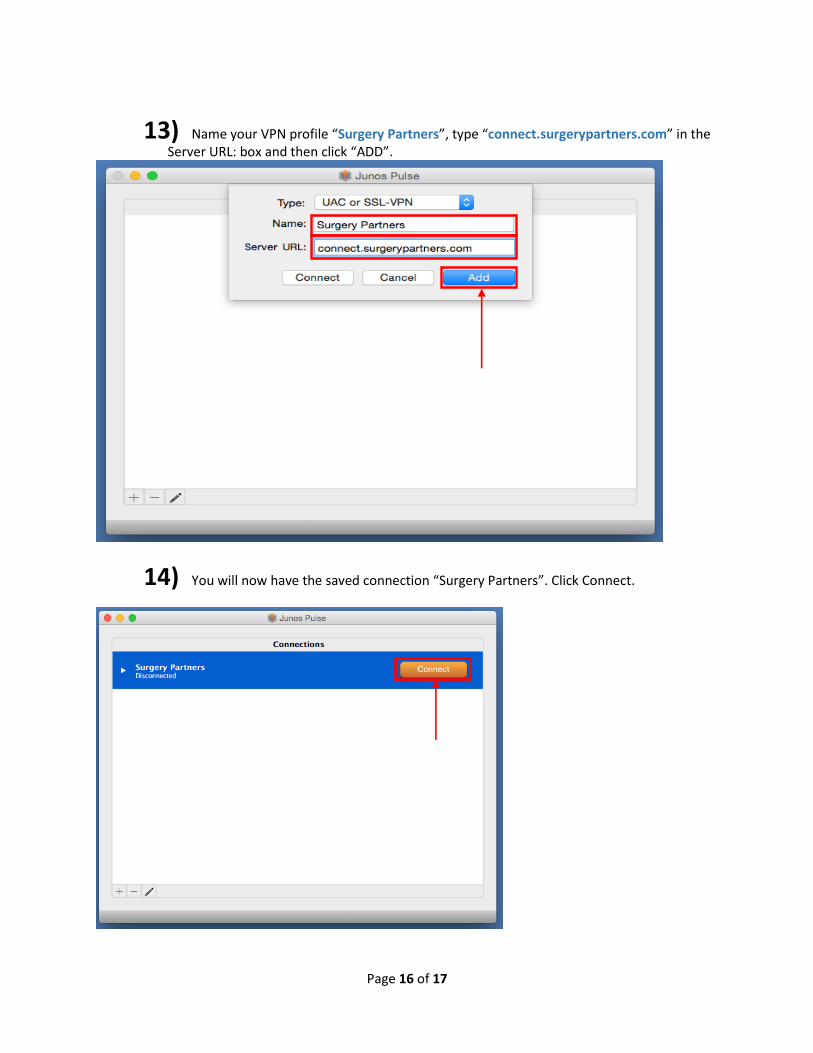
13) Name your VPN profile “Surgery Partners”, type “connect.surgerypartners.com” in the Server URL: box and then click “ADD”.
14) You will now have the saved connection “Surgery Partners”. Click Connect.
Page 17 of 17
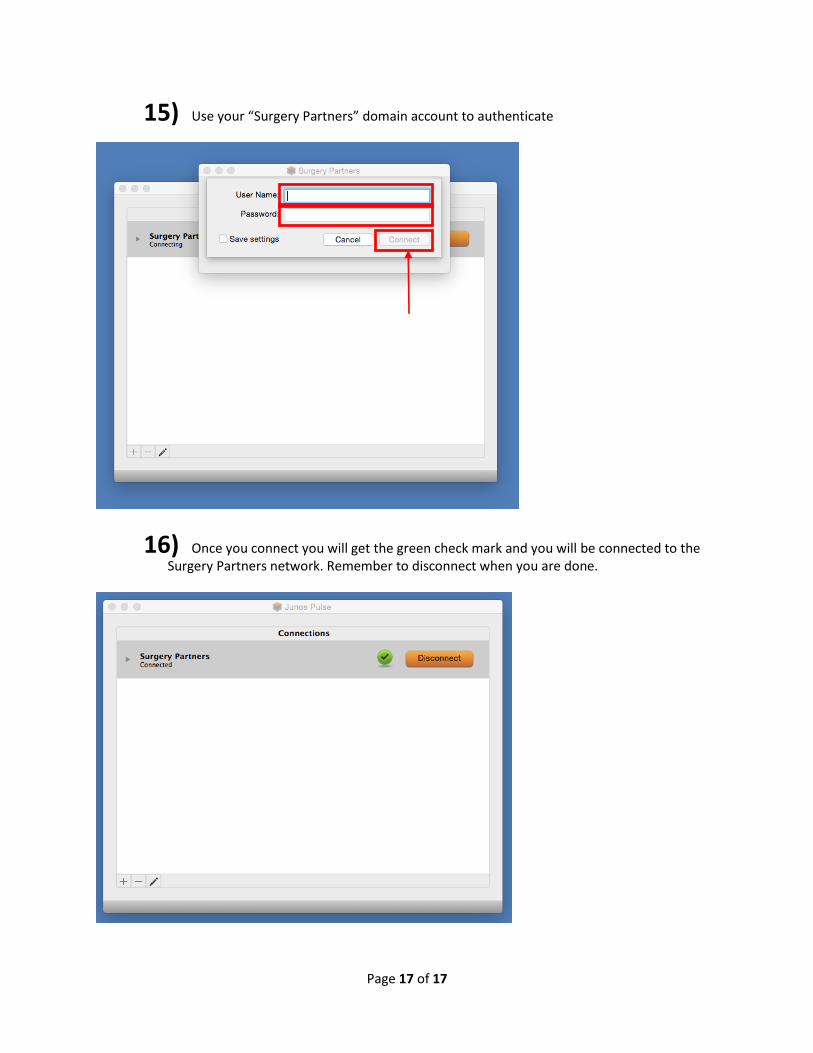
15) Use your “Surgery Partners” domain account to authenticate
16) Once you connect you will get the green check mark and you will be connected to the Surgery Partners network. Remember to disconnect when you are done.