Embed Size (px)
Citation preview
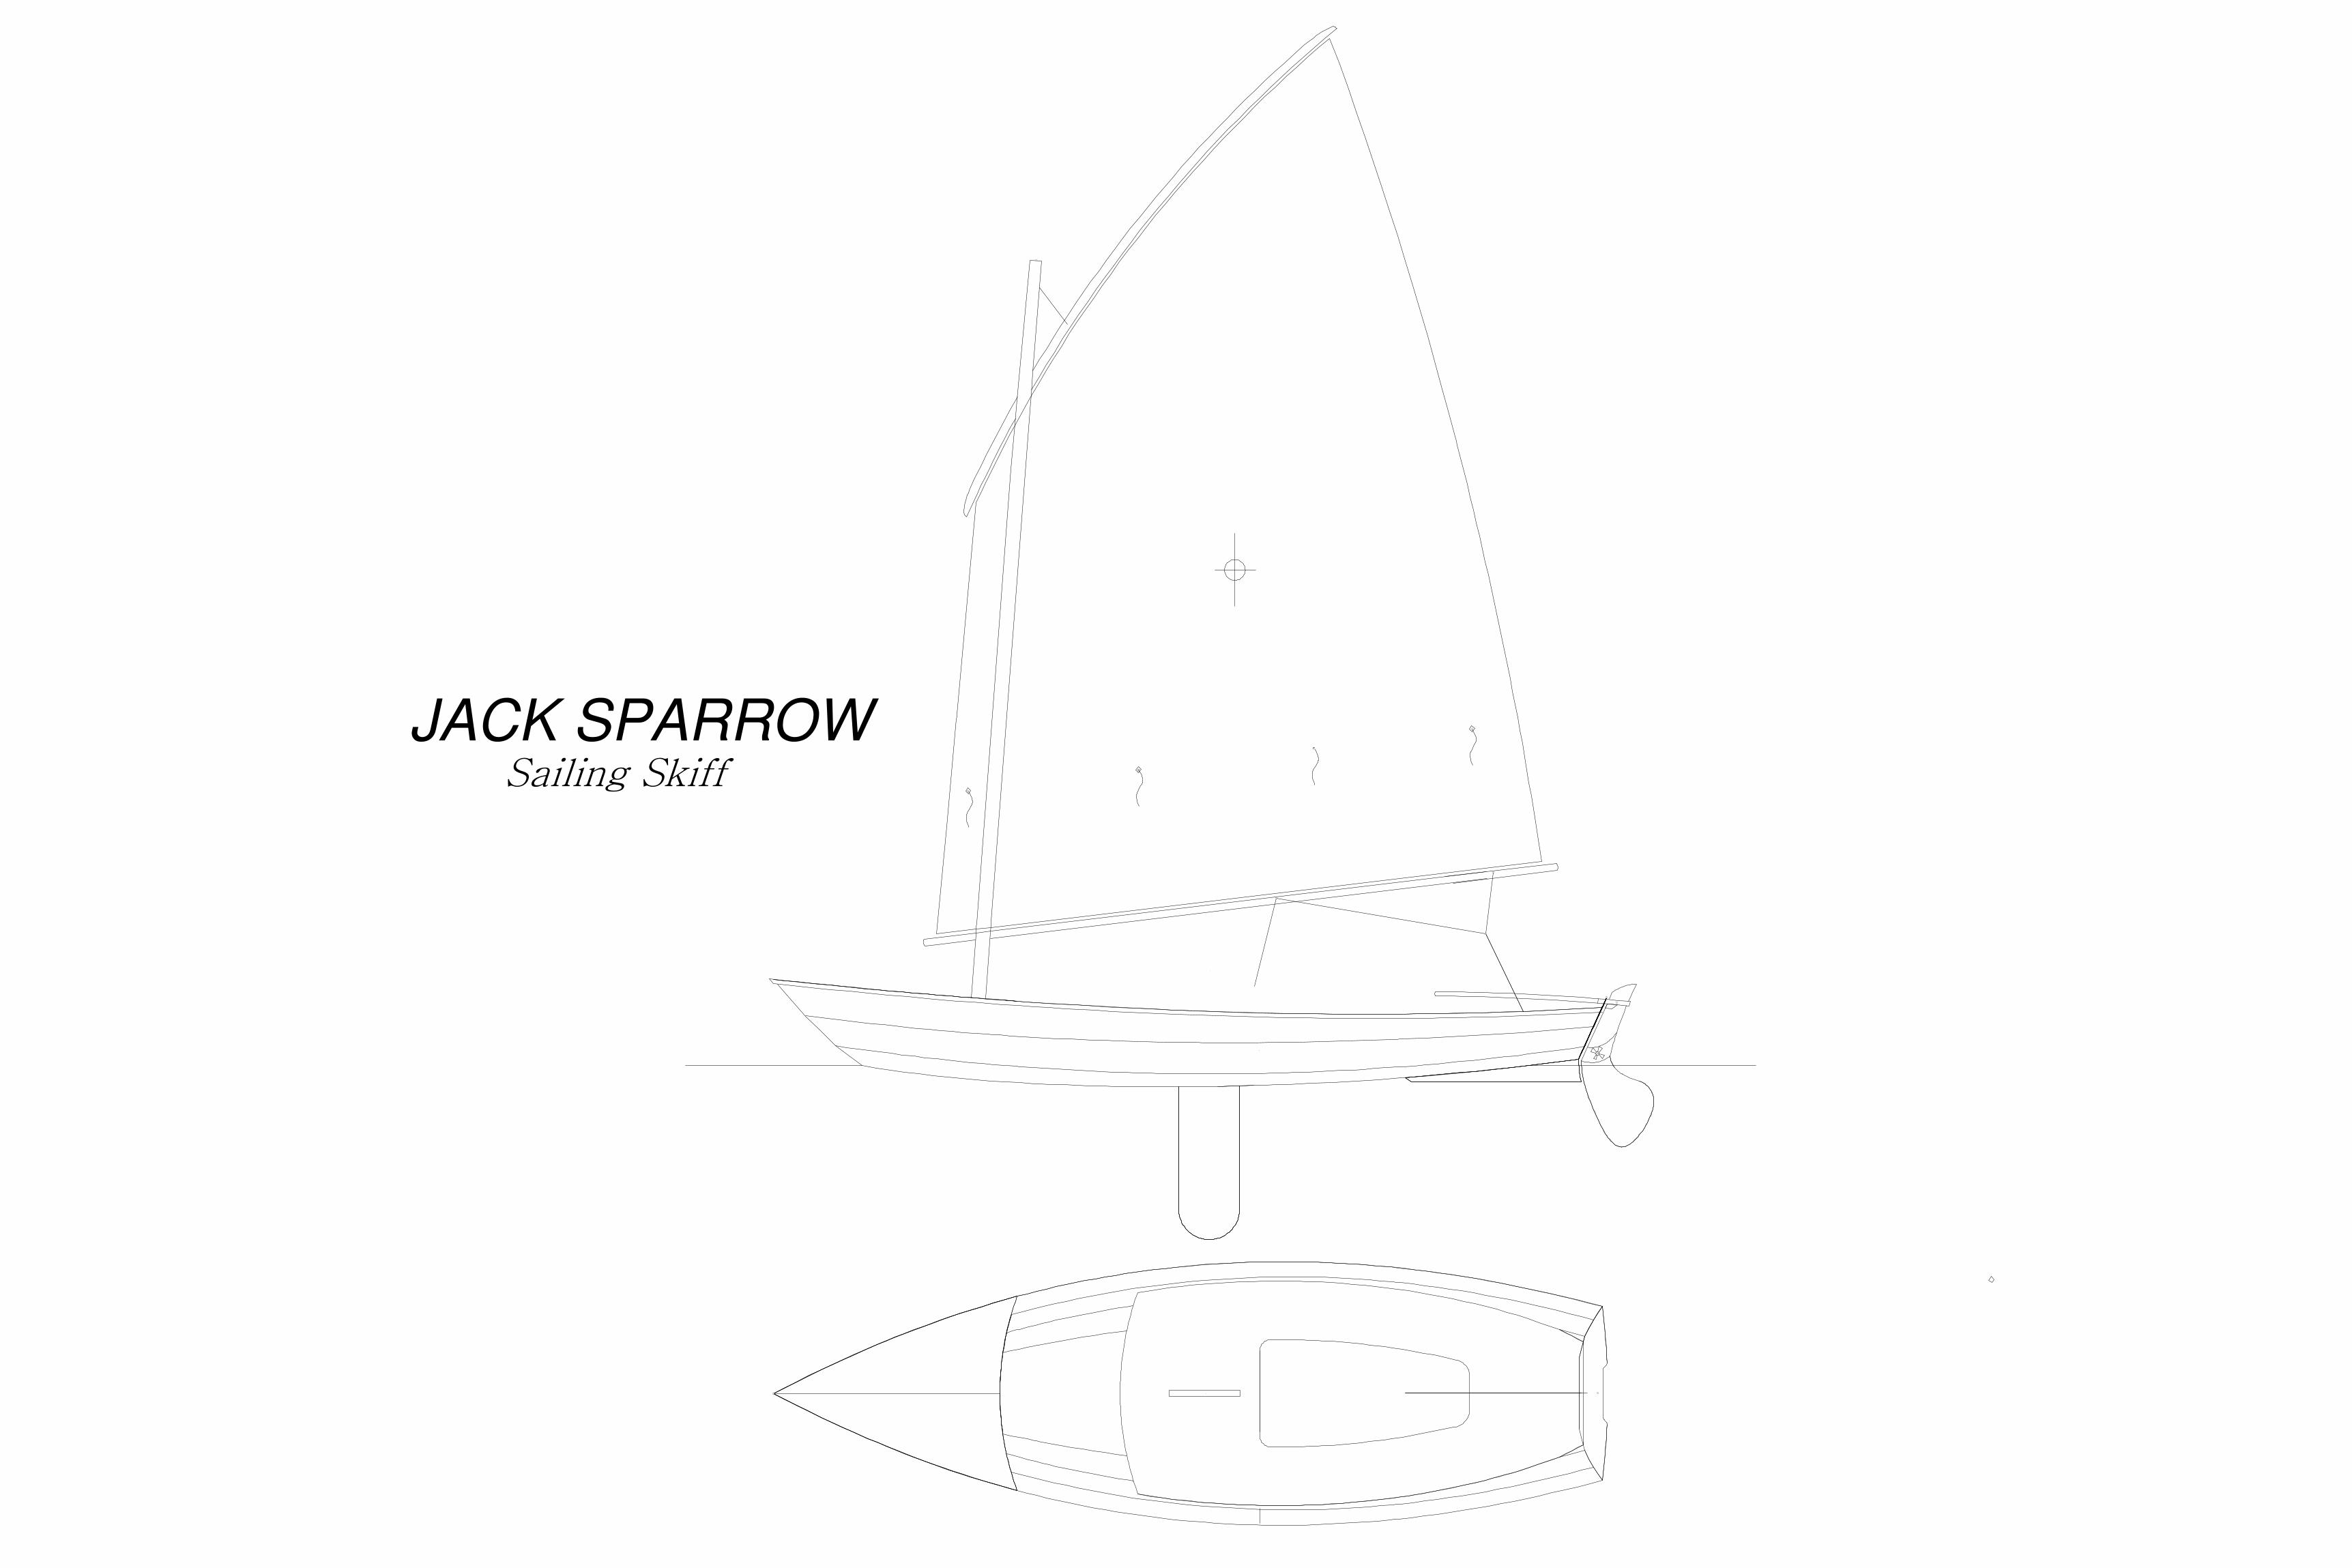
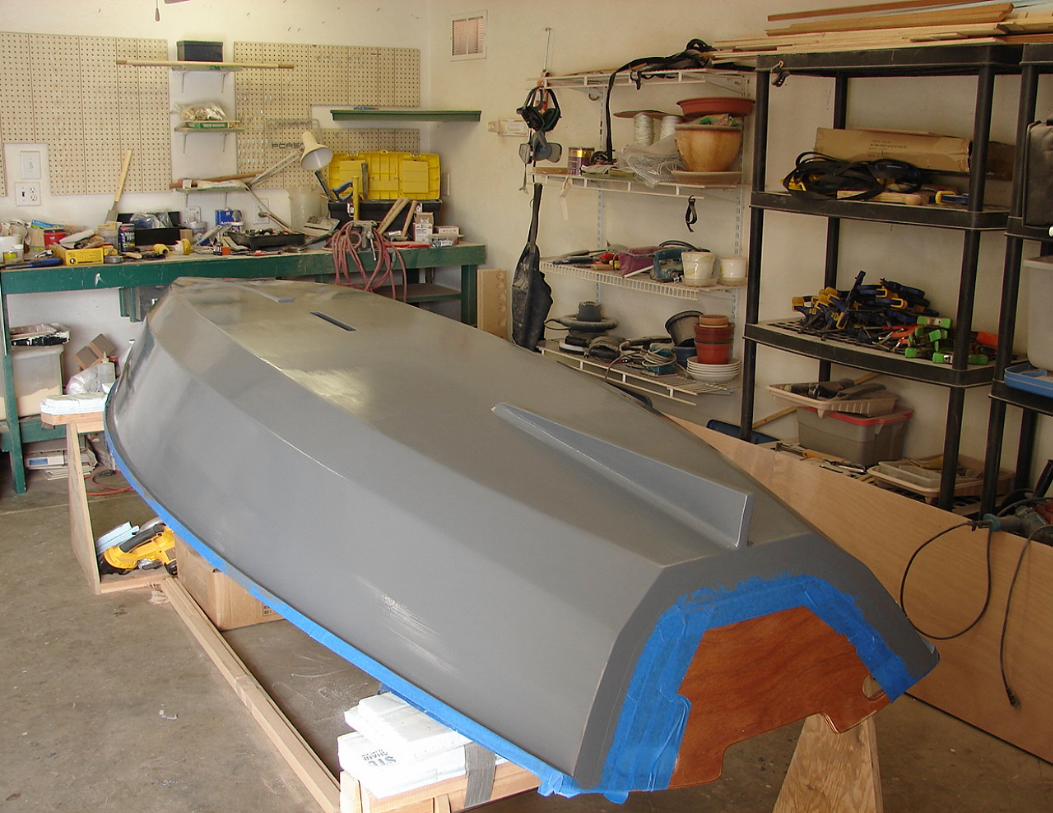
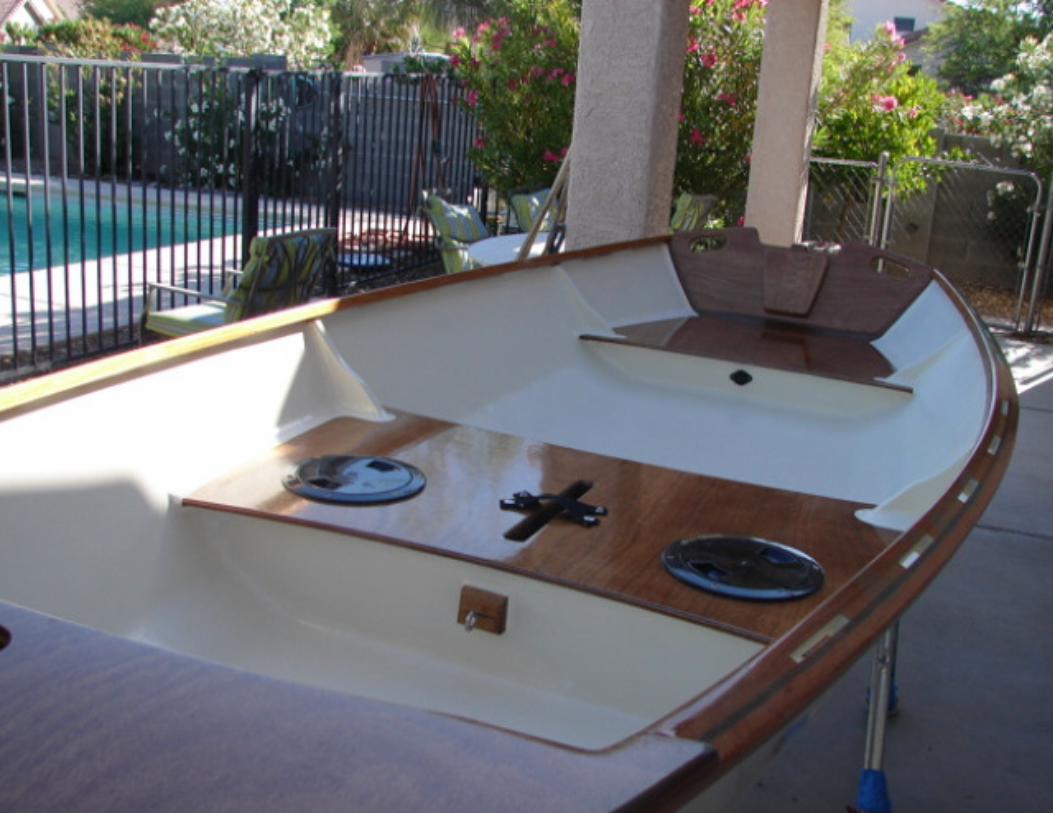
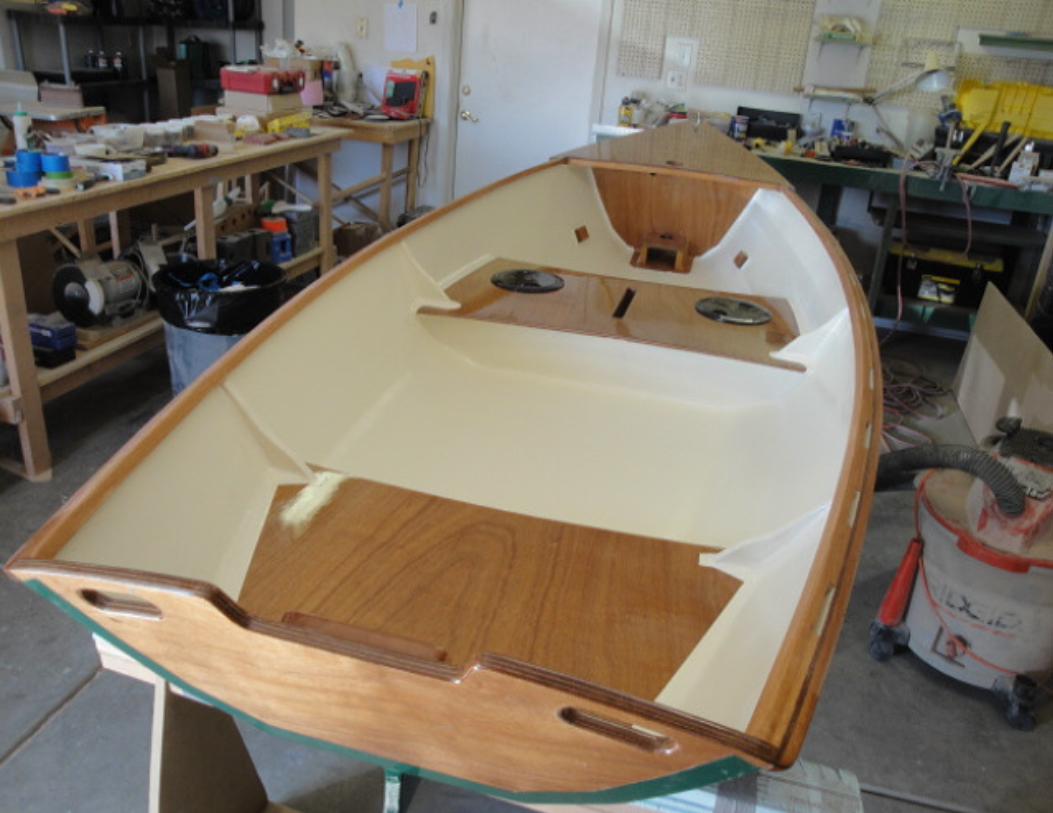
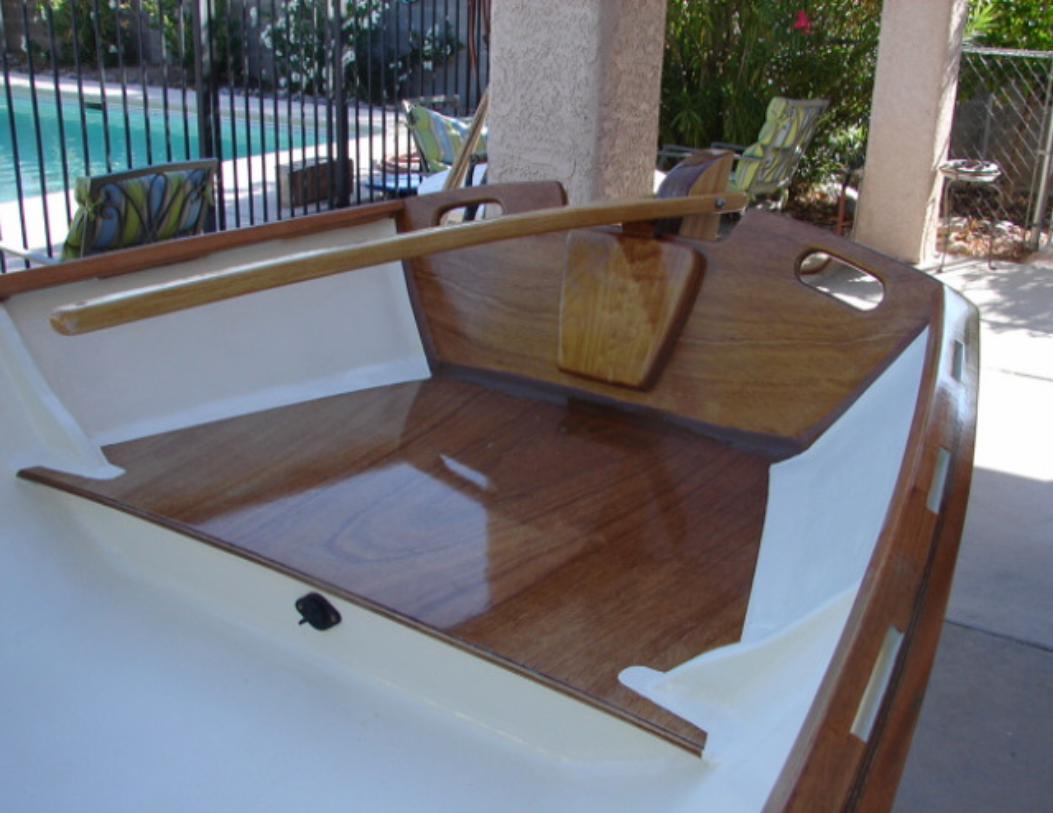
Sailing Skiff
JACK SPARROW
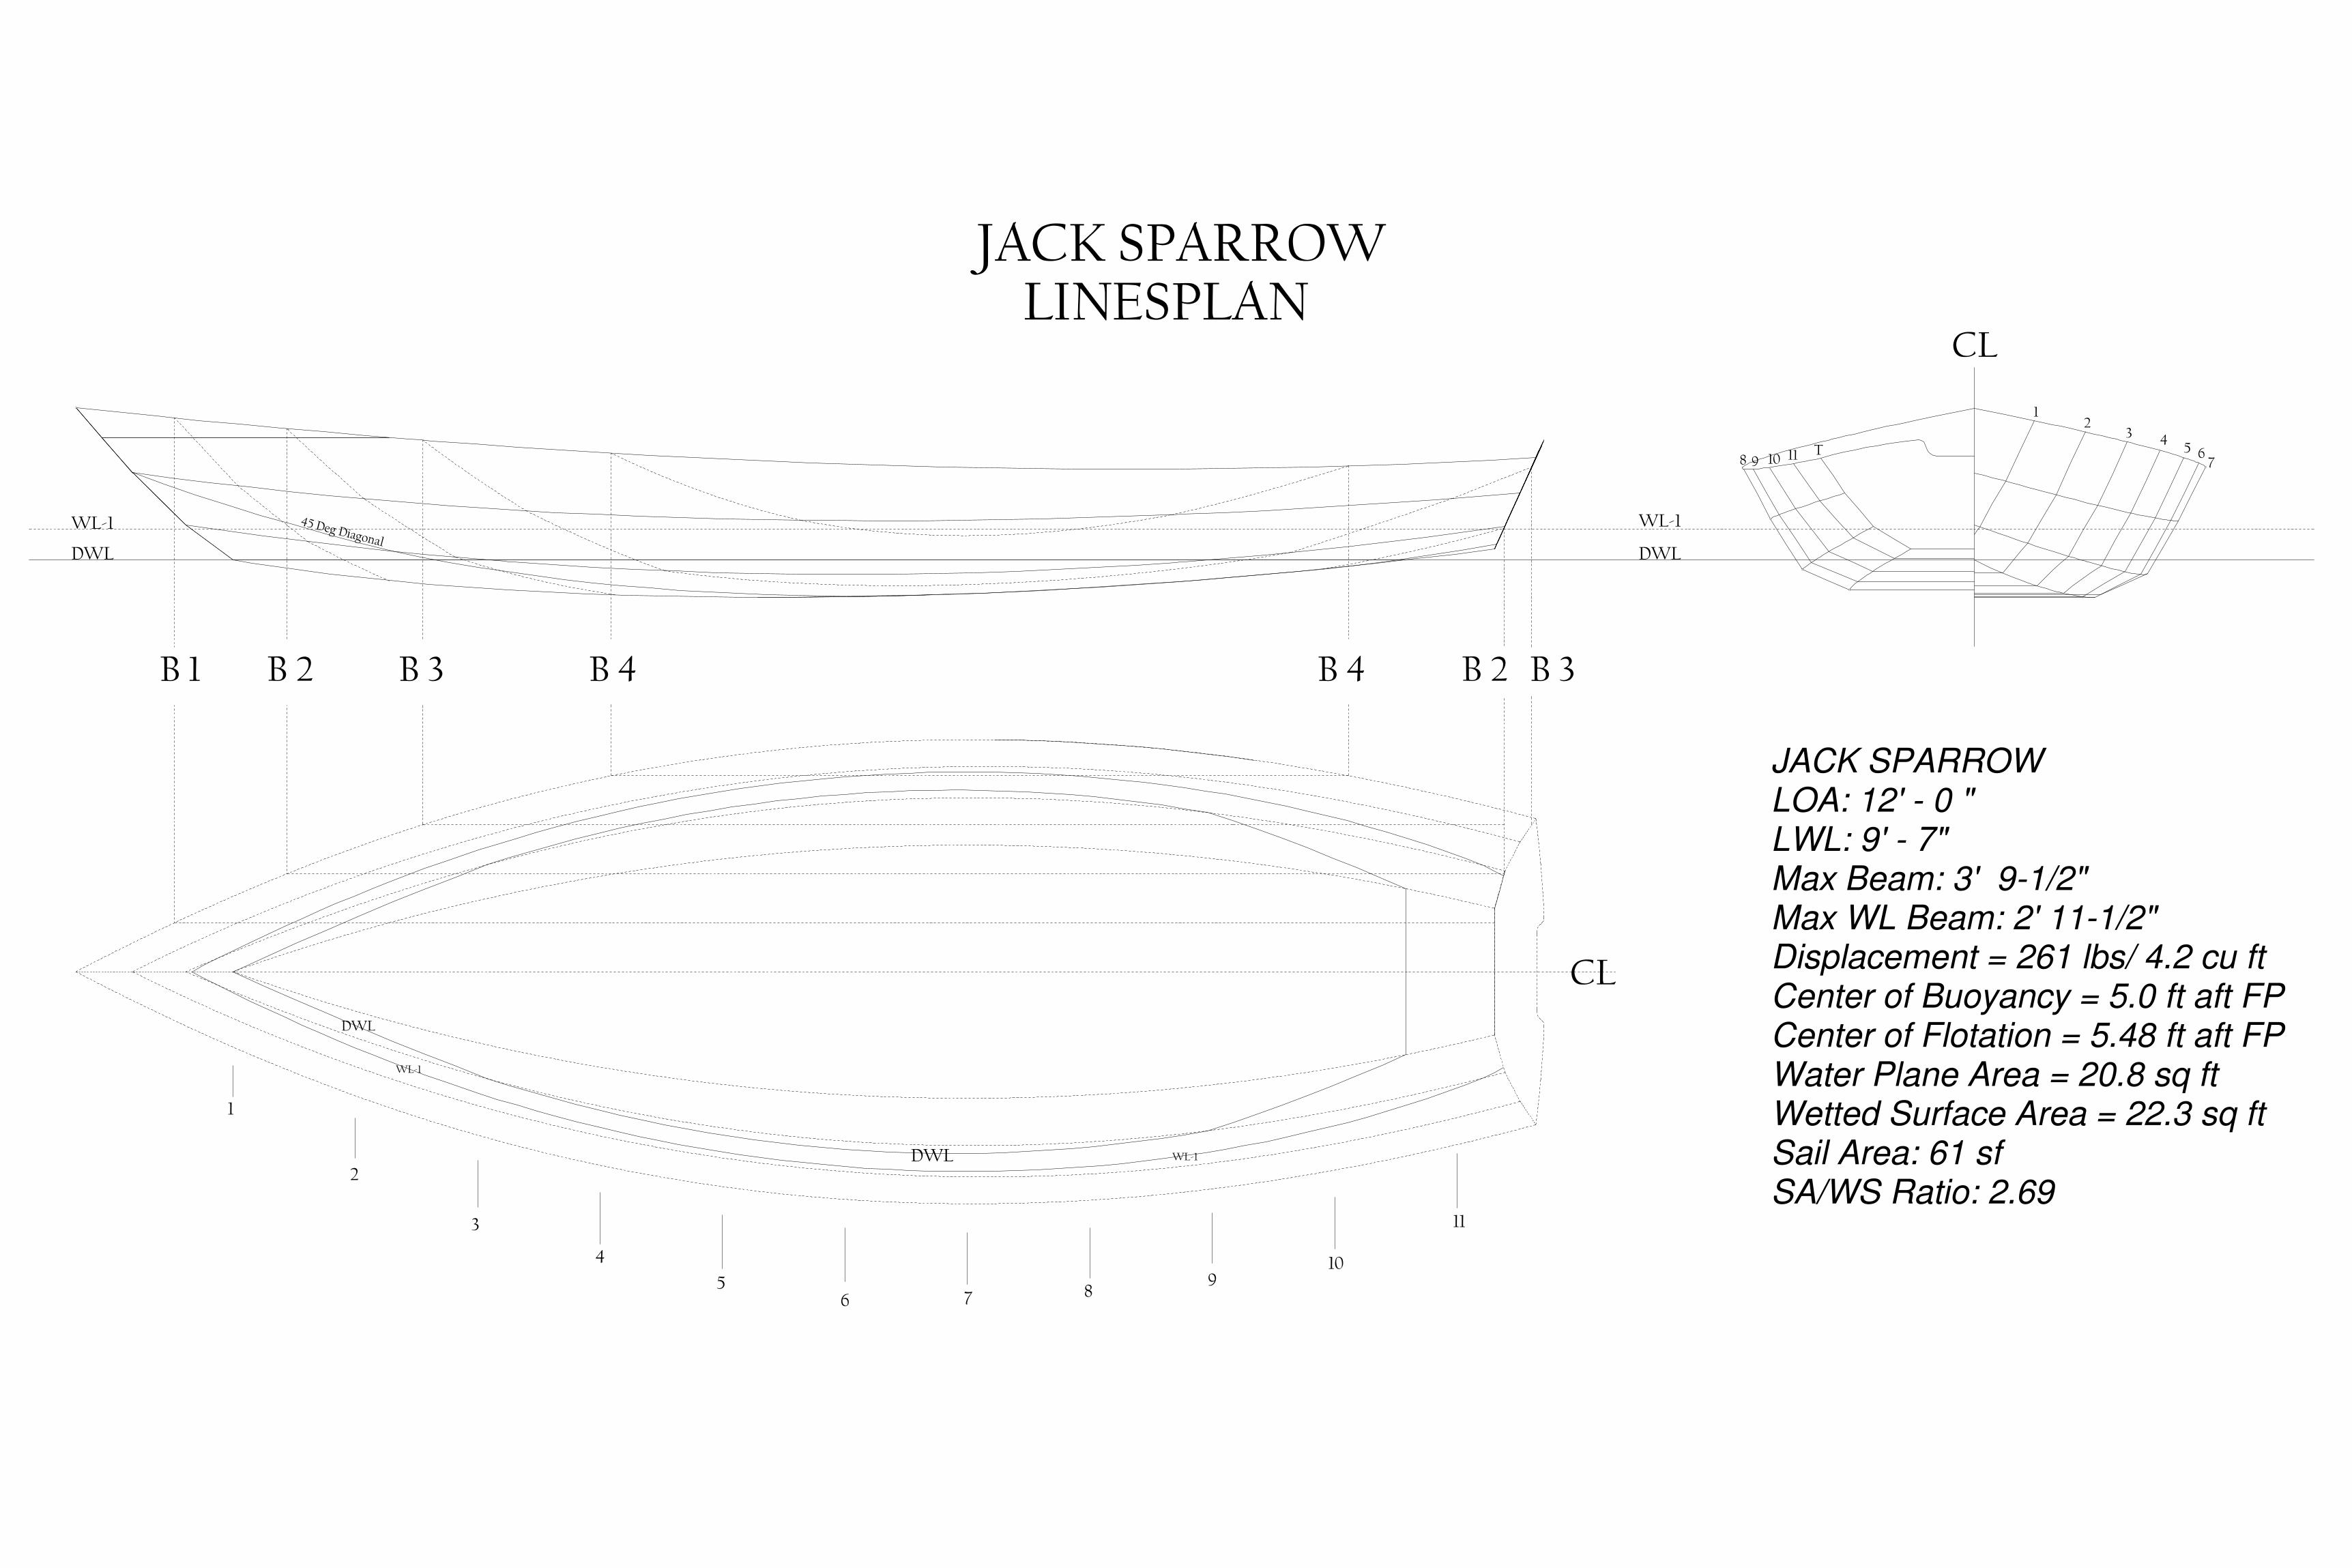
JACK SPARROW LINESPLAN
11
10
89
765
4
3
2
1
T
WL-1
DWL
WL-1 45 Deg Diagonal
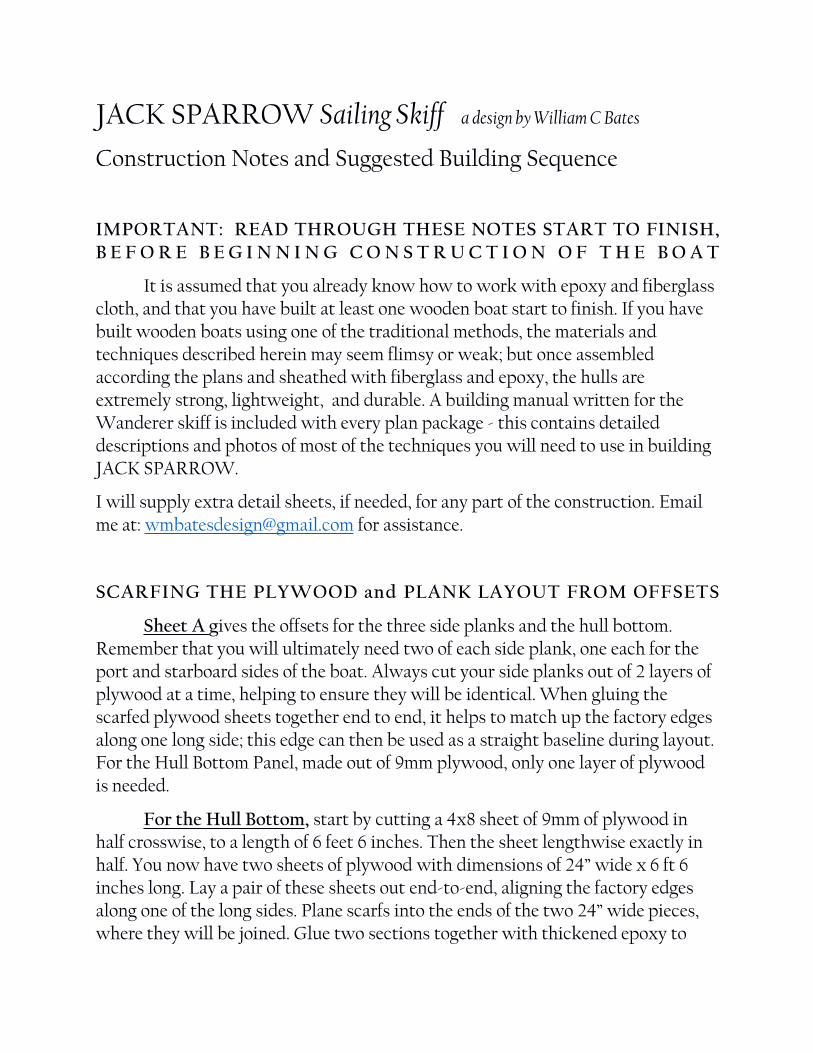
JACK SPARROWLOA: 12' - 0 "LWL: 9' - 7"Max Beam: 3' 9-1/2"Max WL Beam: 2' 11-1/2"Displacement = 261 lbs/ 4.2 cu ftCenter of Buoyancy = 5.0 ft aft FPCenter of Flotation = 5.48 ft aft FPWater Plane Area = 20.8 sq ftWetted Surface Area = 22.3 sq ftSail Area: 61 sfSA/WS Ratio: 2.69
B 2 B 3B 4B 4
CL
WL-1
WL-1DWL
DWL
CL
98 71110 65
432
1
DWL
B 3B 2B 1
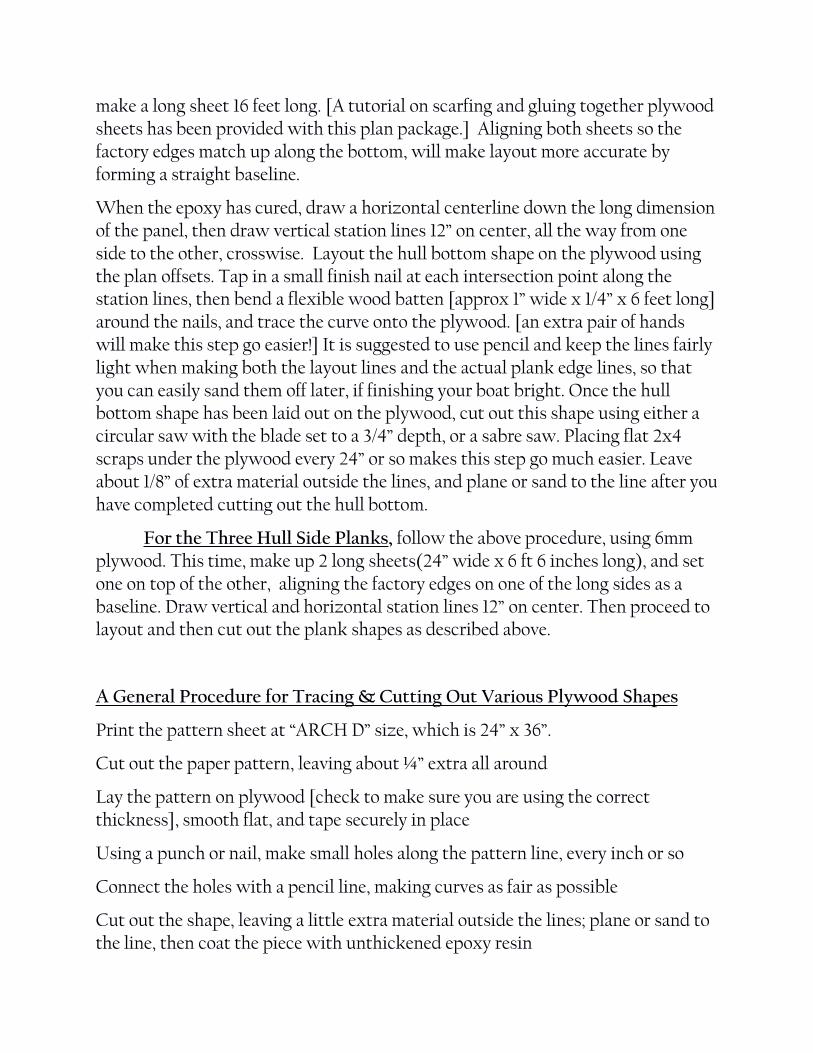
JACK SPARROW Sailing Skiff a design byWilliamC Bates
Construction Notes and Suggested Building Sequence
IMPORTANT: READ THROUGH THESE NOTES START TO FINISH,B E F O R E B E G I N N I N G C O N S T R U C T I O N O F T H E B O A T
It is assumed that you already know how to work with epoxy and fiberglasscloth, and that you have built at least one wooden boat start to finish. If you havebuilt wooden boats using one of the traditional methods, the materials andtechniques described herein may seem flimsy or weak; but once assembledaccording the plans and sheathed with fiberglass and epoxy, the hulls areextremely strong, lightweight, and durable. A building manual written for theWanderer skiff is included with every plan package - this contains detaileddescriptions and photos of most of the techniques you will need to use in buildingJACK SPARROW.
I will supply extra detail sheets, if needed, for any part of the construction. Emailme at: [email protected] for assistance.
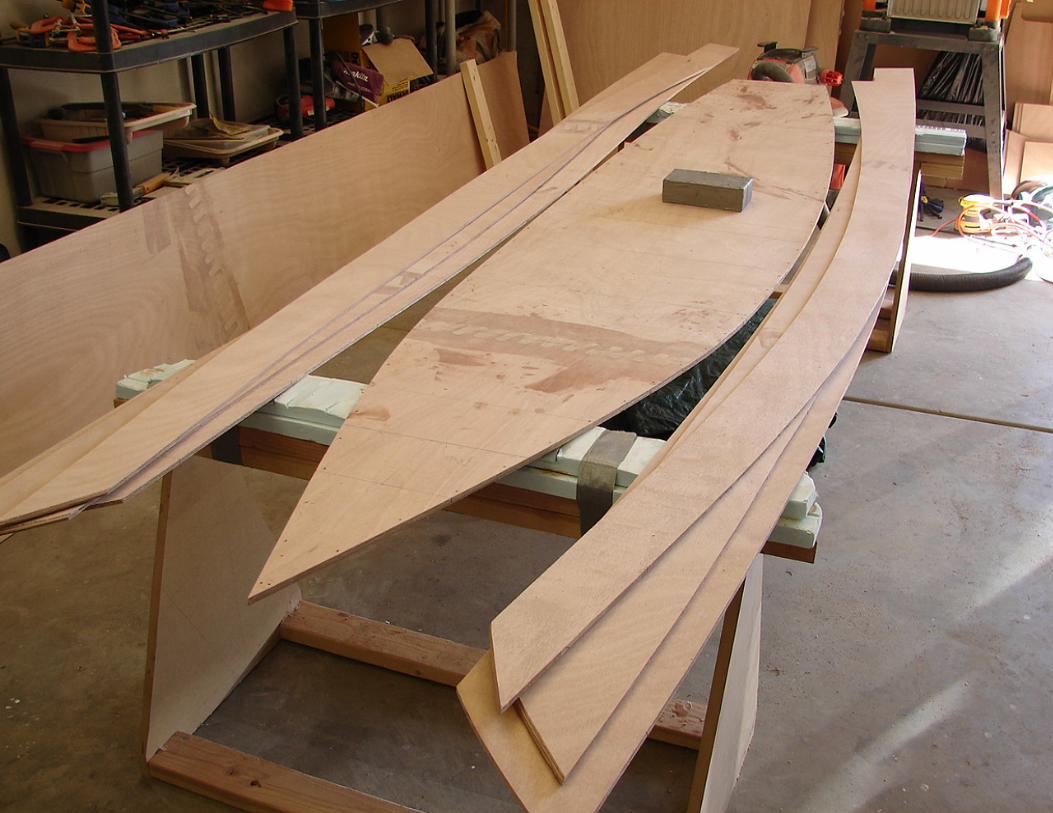
SCARFING THE PLYWOOD and PLANK LAYOUT FROM OFFSETS
Sheet A gives the offsets for the three side planks and the hull bottom.Remember that you will ultimately need two of each side plank, one each for theport and starboard sides of the boat. Always cut your side planks out of 2 layers ofplywood at a time, helping to ensure they will be identical. When gluing thescarfed plywood sheets together end to end, it helps to match up the factory edgesalong one long side; this edge can then be used as a straight baseline during layout.For the Hull Bottom Panel, made out of 9mm plywood, only one layer of plywoodis needed.
For the Hull Bottom, start by cutting a 4x8 sheet of 9mm of plywood inhalf crosswise, to a length of 6 feet 6 inches. Then the sheet lengthwise exactly inhalf. You now have two sheets of plywood with dimensions of 24” wide x 6 ft 6inches long. Lay a pair of these sheets out end-to-end, aligning the factory edgesalong one of the long sides. Plane scarfs into the ends of the two 24” wide pieces,where they will be joined. Glue two sections together with thickened epoxy to
make a long sheet 16 feet long. [A tutorial on scarfing and gluing together plywoodsheets has been provided with this plan package.] Aligning both sheets so thefactory edges match up along the bottom, will make layout more accurate byforming a straight baseline.
When the epoxy has cured, draw a horizontal centerline down the long dimensionof the panel, then draw vertical station lines 12” on center, all the way from oneside to the other, crosswise. Layout the hull bottom shape on the plywood usingthe plan offsets. Tap in a small finish nail at each intersection point along thestation lines, then bend a flexible wood batten [approx 1” wide x 1/4” x 6 feet long]around the nails, and trace the curve onto the plywood. [an extra pair of handswill make this step go easier!] It is suggested to use pencil and keep the lines fairlylight when making both the layout lines and the actual plank edge lines, so thatyou can easily sand them off later, if finishing your boat bright. Once the hullbottom shape has been laid out on the plywood, cut out this shape using either acircular sawwith the blade set to a 3/4” depth, or a sabre saw. Placing flat 2x4scraps under the plywood every 24” or so makes this step go much easier. Leaveabout 1/8” of extra material outside the lines, and plane or sand to the line after youhave completed cutting out the hull bottom.
For the Three Hull Side Planks, follow the above procedure, using 6mmplywood. This time, make up 2 long sheets(24” wide x 6 ft 6 inches long), and setone on top of the other, aligning the factory edges on one of the long sides as abaseline. Draw vertical and horizontal station lines 12” on center. Then proceed tolayout and then cut out the plank shapes as described above.
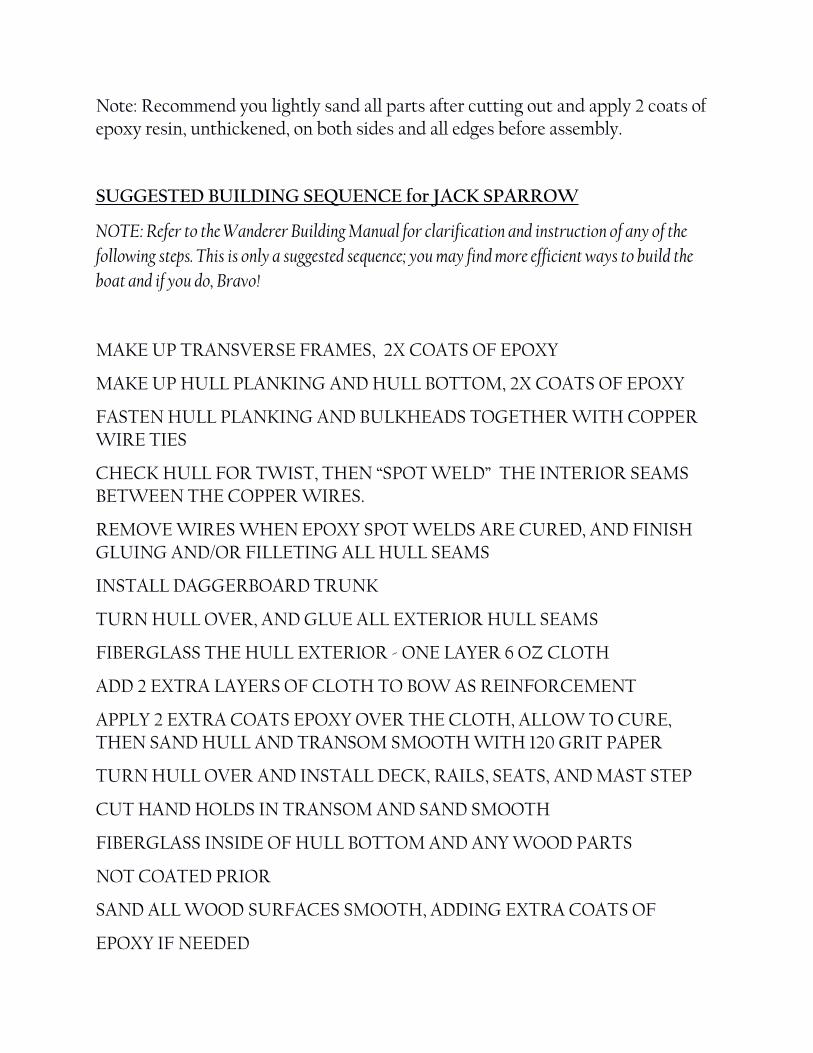
A General Procedure for Tracing & Cutting Out Various Plywood Shapes
Print the pattern sheet at “ARCH D” size, which is 24” x 36”.
Cut out the paper pattern, leaving about ¼” extra all around
Lay the pattern on plywood [check to make sure you are using the correctthickness], smooth flat, and tape securely in place
Using a punch or nail, make small holes along the pattern line, every inch or so
Connect the holes with a pencil line, making curves as fair as possible
Cut out the shape, leaving a little extra material outside the lines; plane or sand tothe line, then coat the piece with unthickened epoxy resin
Note: Recommend you lightly sand all parts after cutting out and apply 2 coats ofepoxy resin, unthickened, on both sides and all edges before assembly.
SUGGESTED BUILDING SEQUENCE for JACK SPARROW
NOTE: Refer to theWanderer BuildingManual for clarification and instruction of any of the
following steps. This is only a suggested sequence; youmay findmore efficient ways to build the
boat and if you do, Bravo!
MAKEUP TRANSVERSE FRAMES, 2X COATS OF EPOXY
MAKEUP HULL PLANKING ANDHULL BOTTOM, 2X COATS OF EPOXY
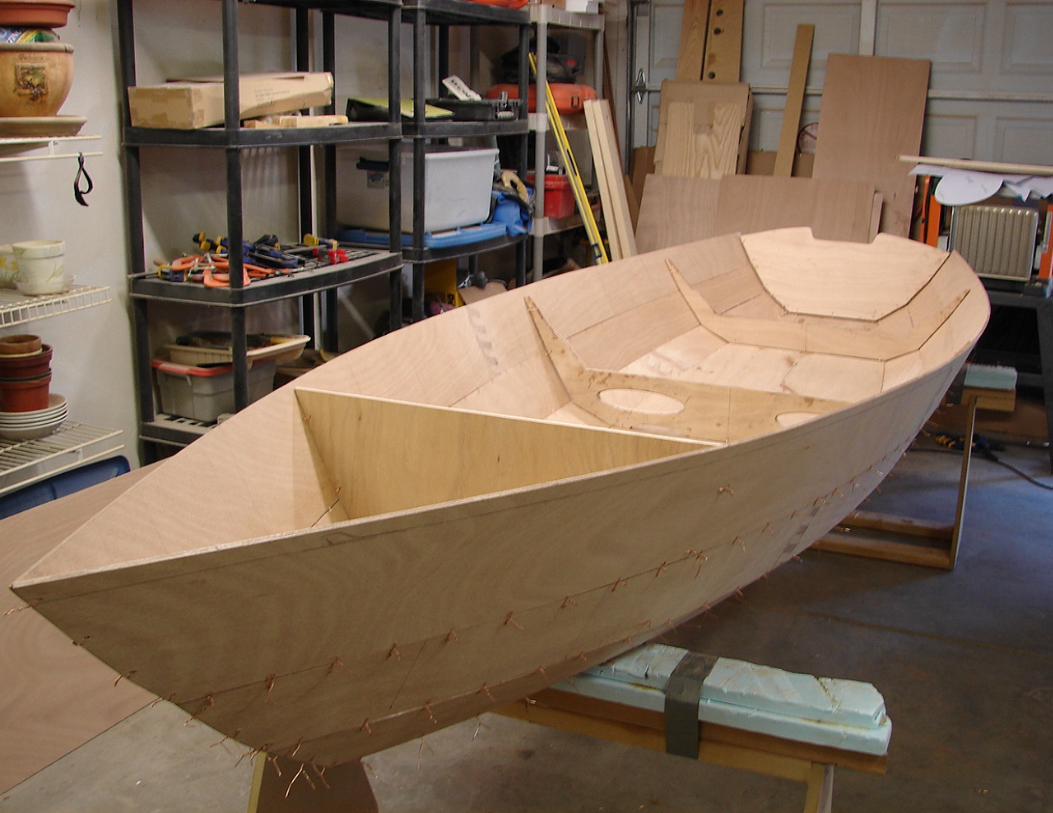
FASTENHULL PLANKING AND BULKHEADS TOGETHERWITH COPPERWIRE TIES
CHECKHULL FOR TWIST, THEN “SPOTWELD” THE INTERIOR SEAMSBETWEEN THE COPPERWIRES.
REMOVEWIRESWHEN EPOXY SPOTWELDS ARE CURED, AND FINISHGLUING AND/OR FILLETING ALL HULL SEAMS
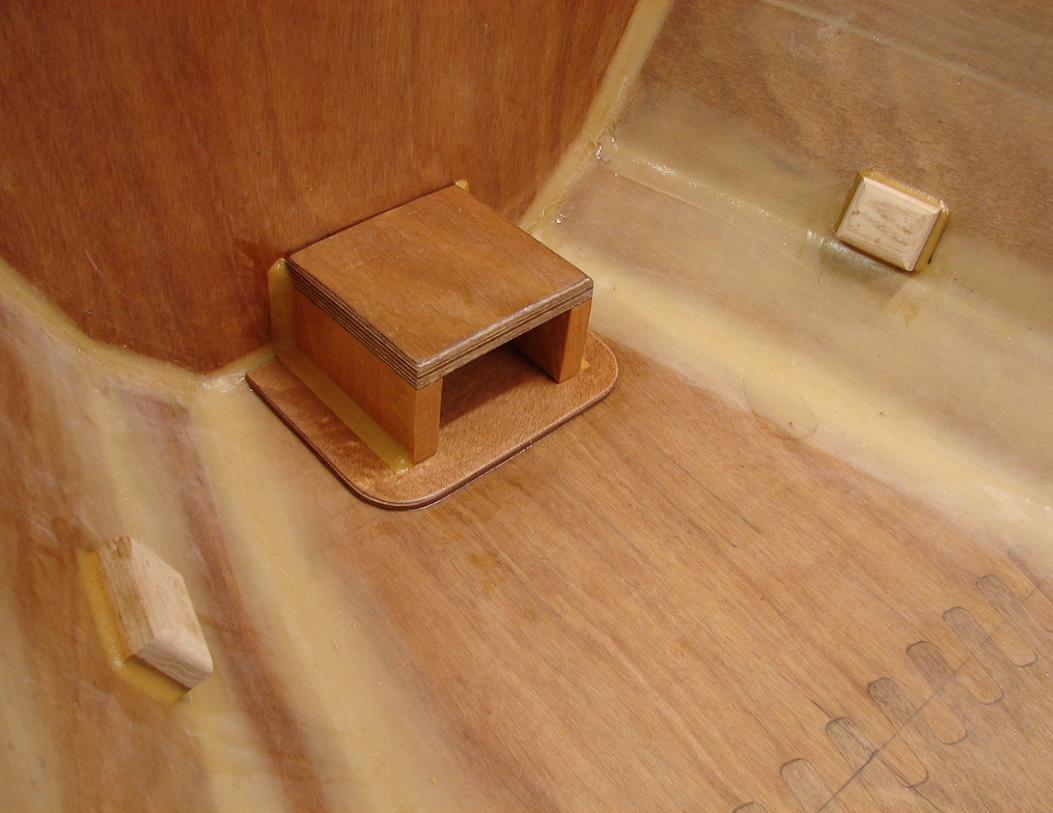
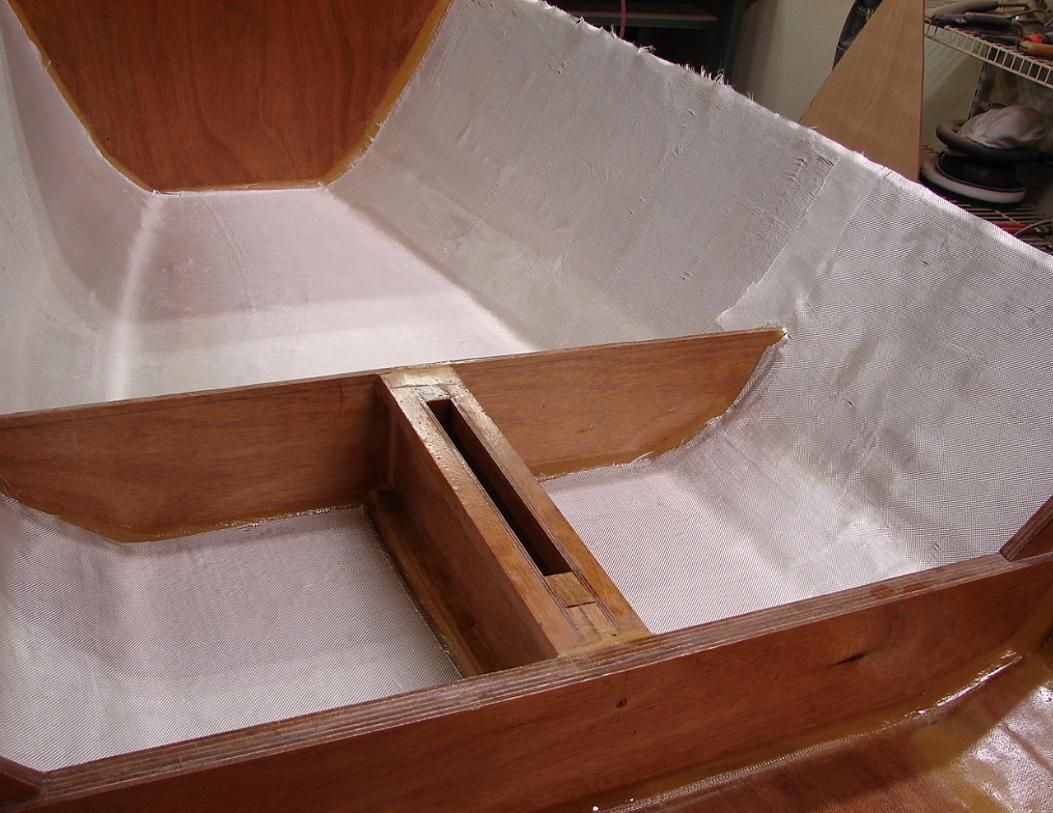
INSTALL DAGGERBOARD TRUNK
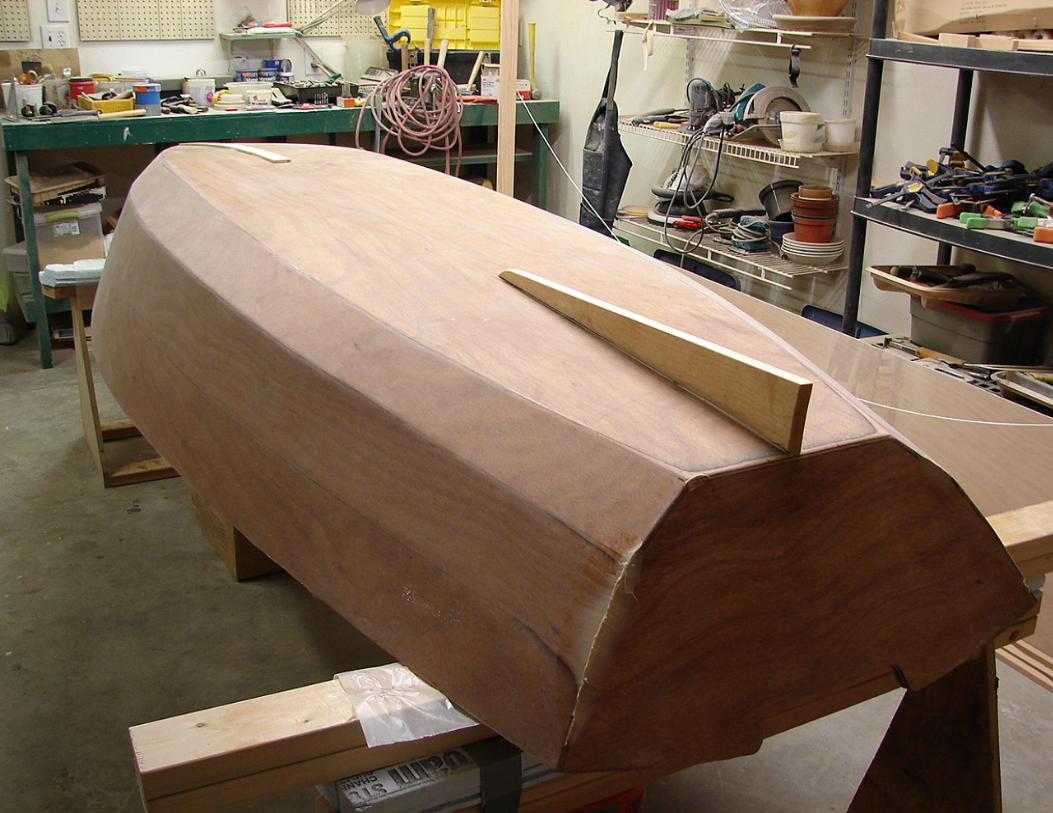
TURNHULL OVER, ANDGLUE ALL EXTERIORHULL SEAMS
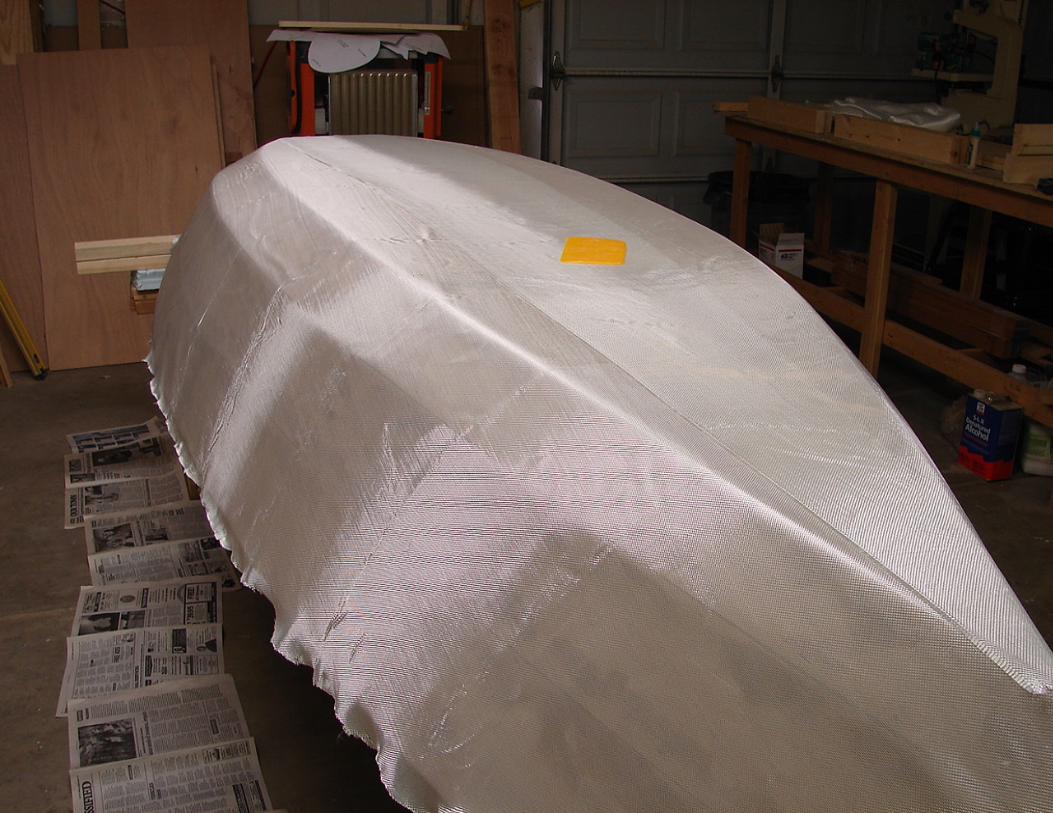
FIBERGLASS THEHULL EXTERIOR - ONE LAYER 6 OZ CLOTH
ADD 2 EXTRA LAYERS OF CLOTH TO BOWAS REINFORCEMENT
APPLY 2 EXTRA COATS EPOXY OVER THE CLOTH, ALLOWTOCURE,THEN SANDHULL AND TRANSOM SMOOTHWITH 120 GRIT PAPER
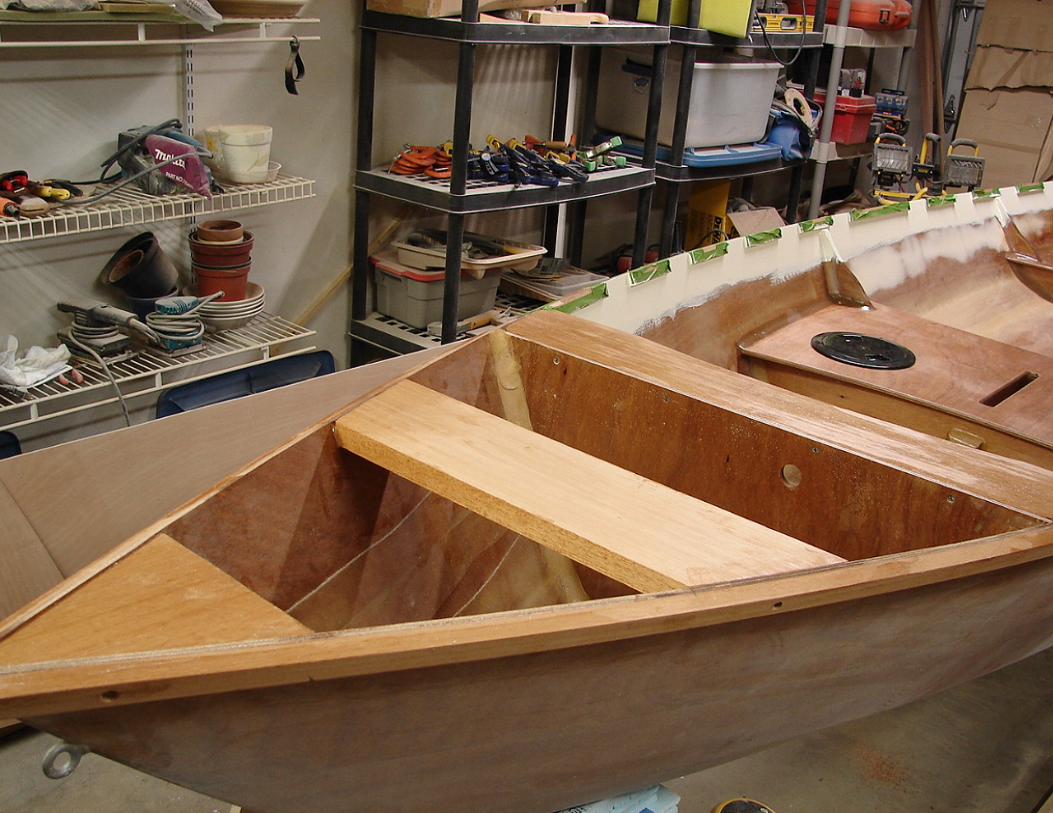
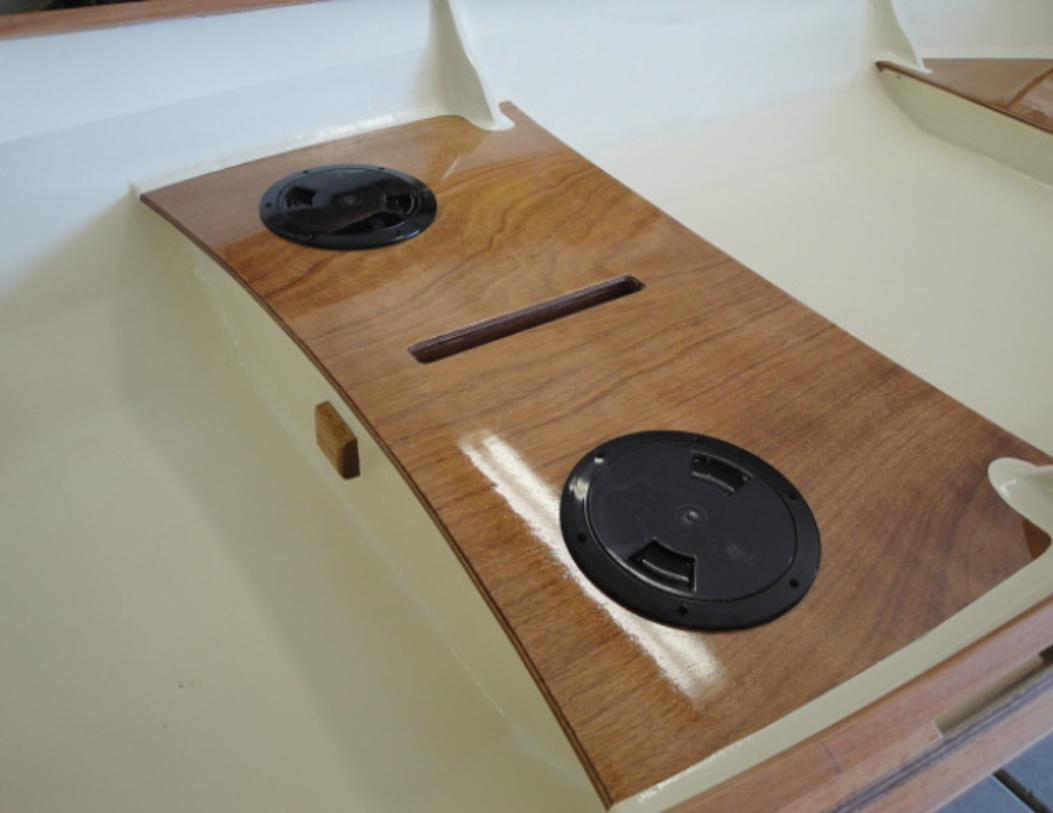
TURNHULL OVER AND INSTALL DECK, RAILS, SEATS, ANDMAST STEP
CUTHANDHOLDS IN TRANSOMAND SAND SMOOTH
FIBERGLASS INSIDE OF HULL BOTTOMAND ANYWOOD PARTS
NOT COATED PRIOR
SAND ALLWOOD SURFACES SMOOTH, ADDING EXTRA COATS OF
EPOXY IF NEEDED

TURNHULL OVER
PRIME AND PAINT HULL
TURNHULL OVER
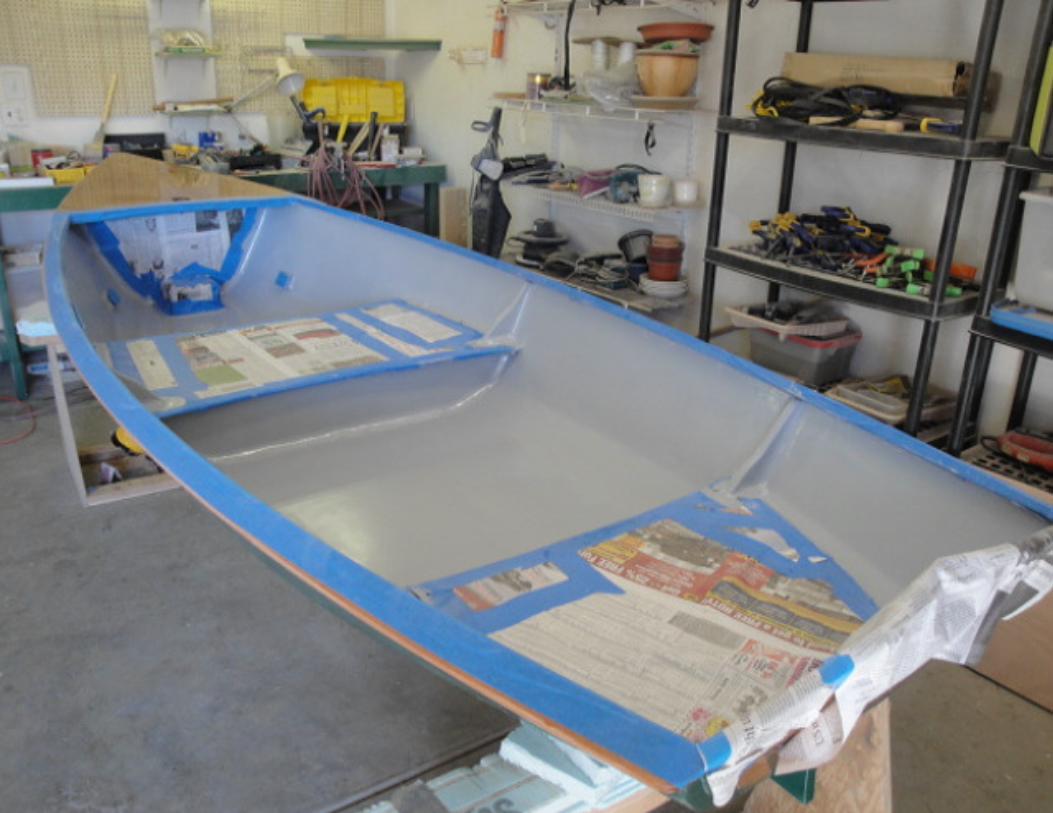
PRIME AND PAINT THE INTERIOR OF THEHULL
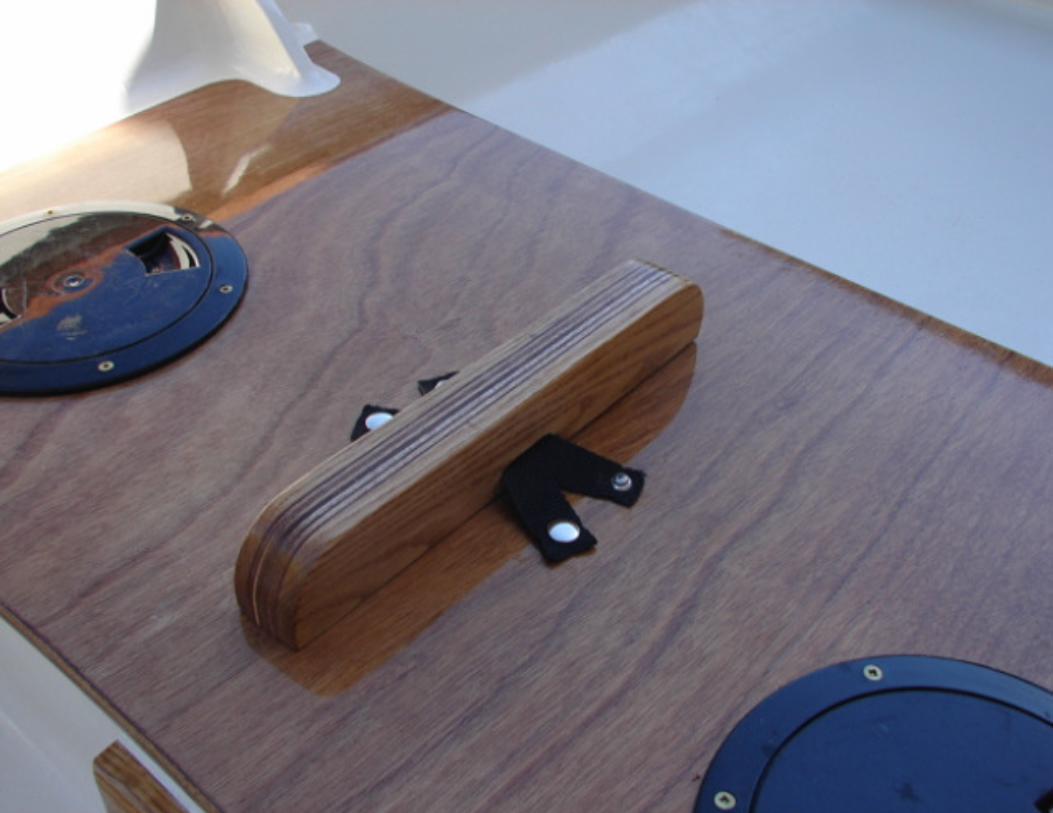
INSTALL HULL HARDWARE
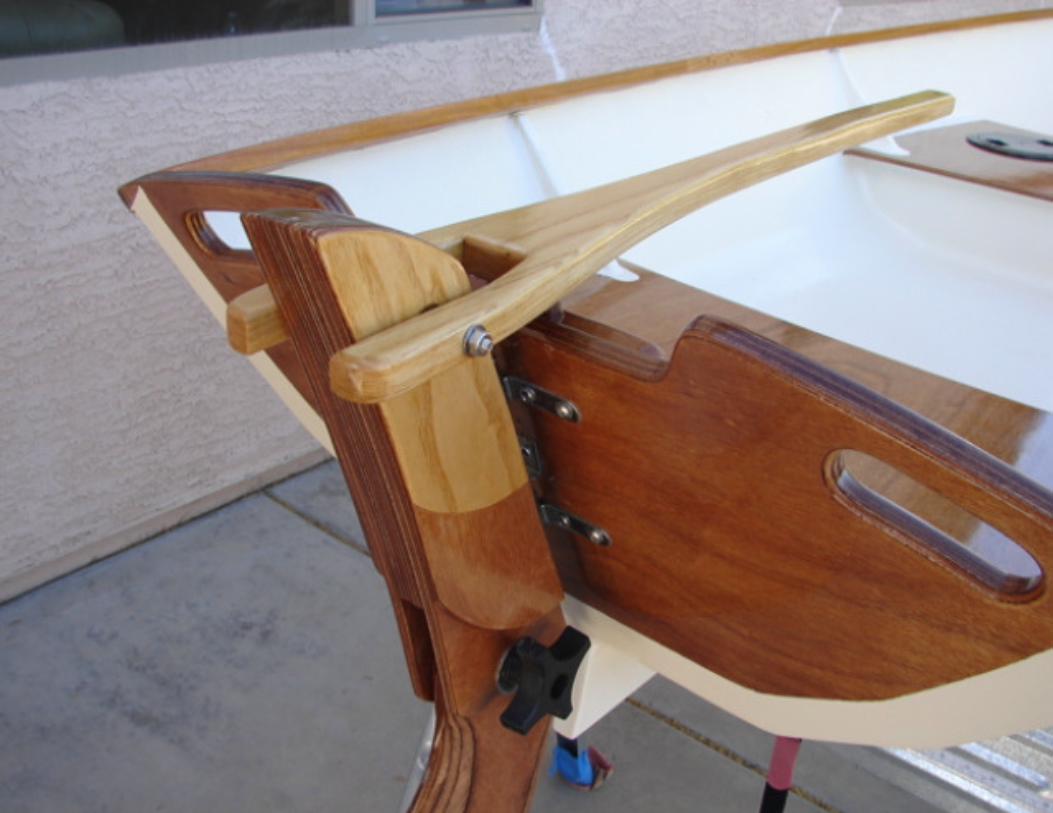
MAKEUP THE RUDDER AND STEERING ASSEMBLY
MAKEUP THE DAGGERBOARD
BUILD THE SPARS
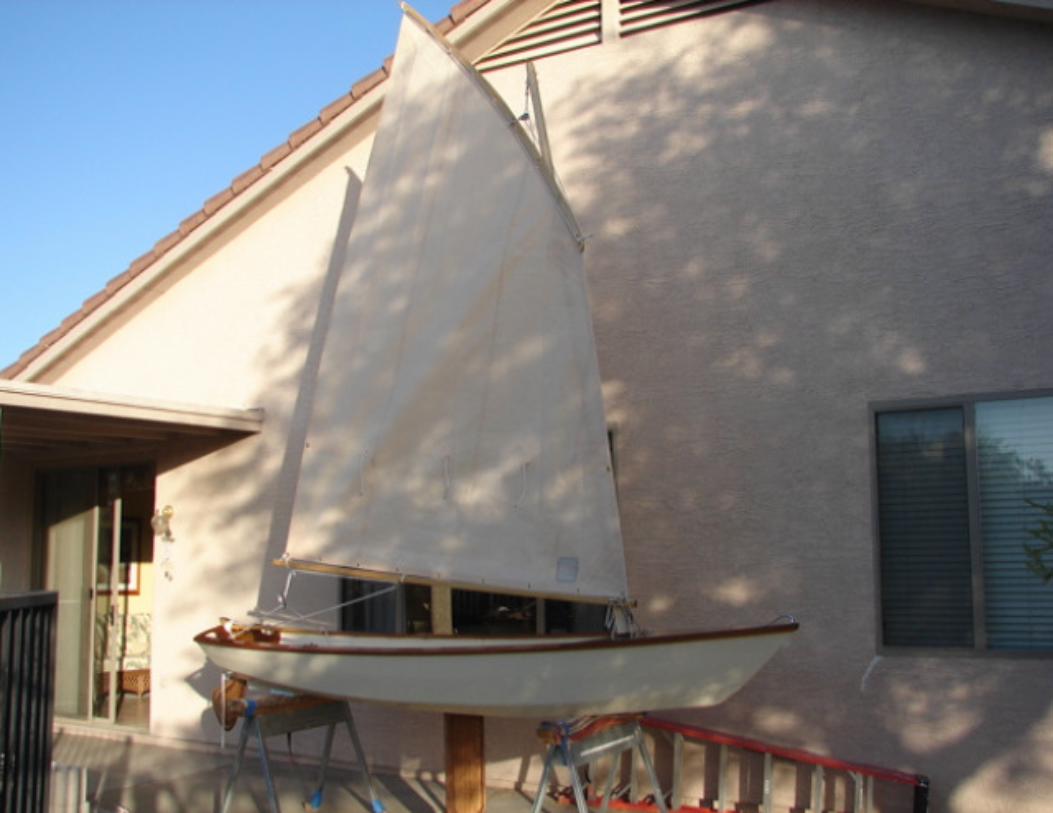
SET UP THE SAIL RIG
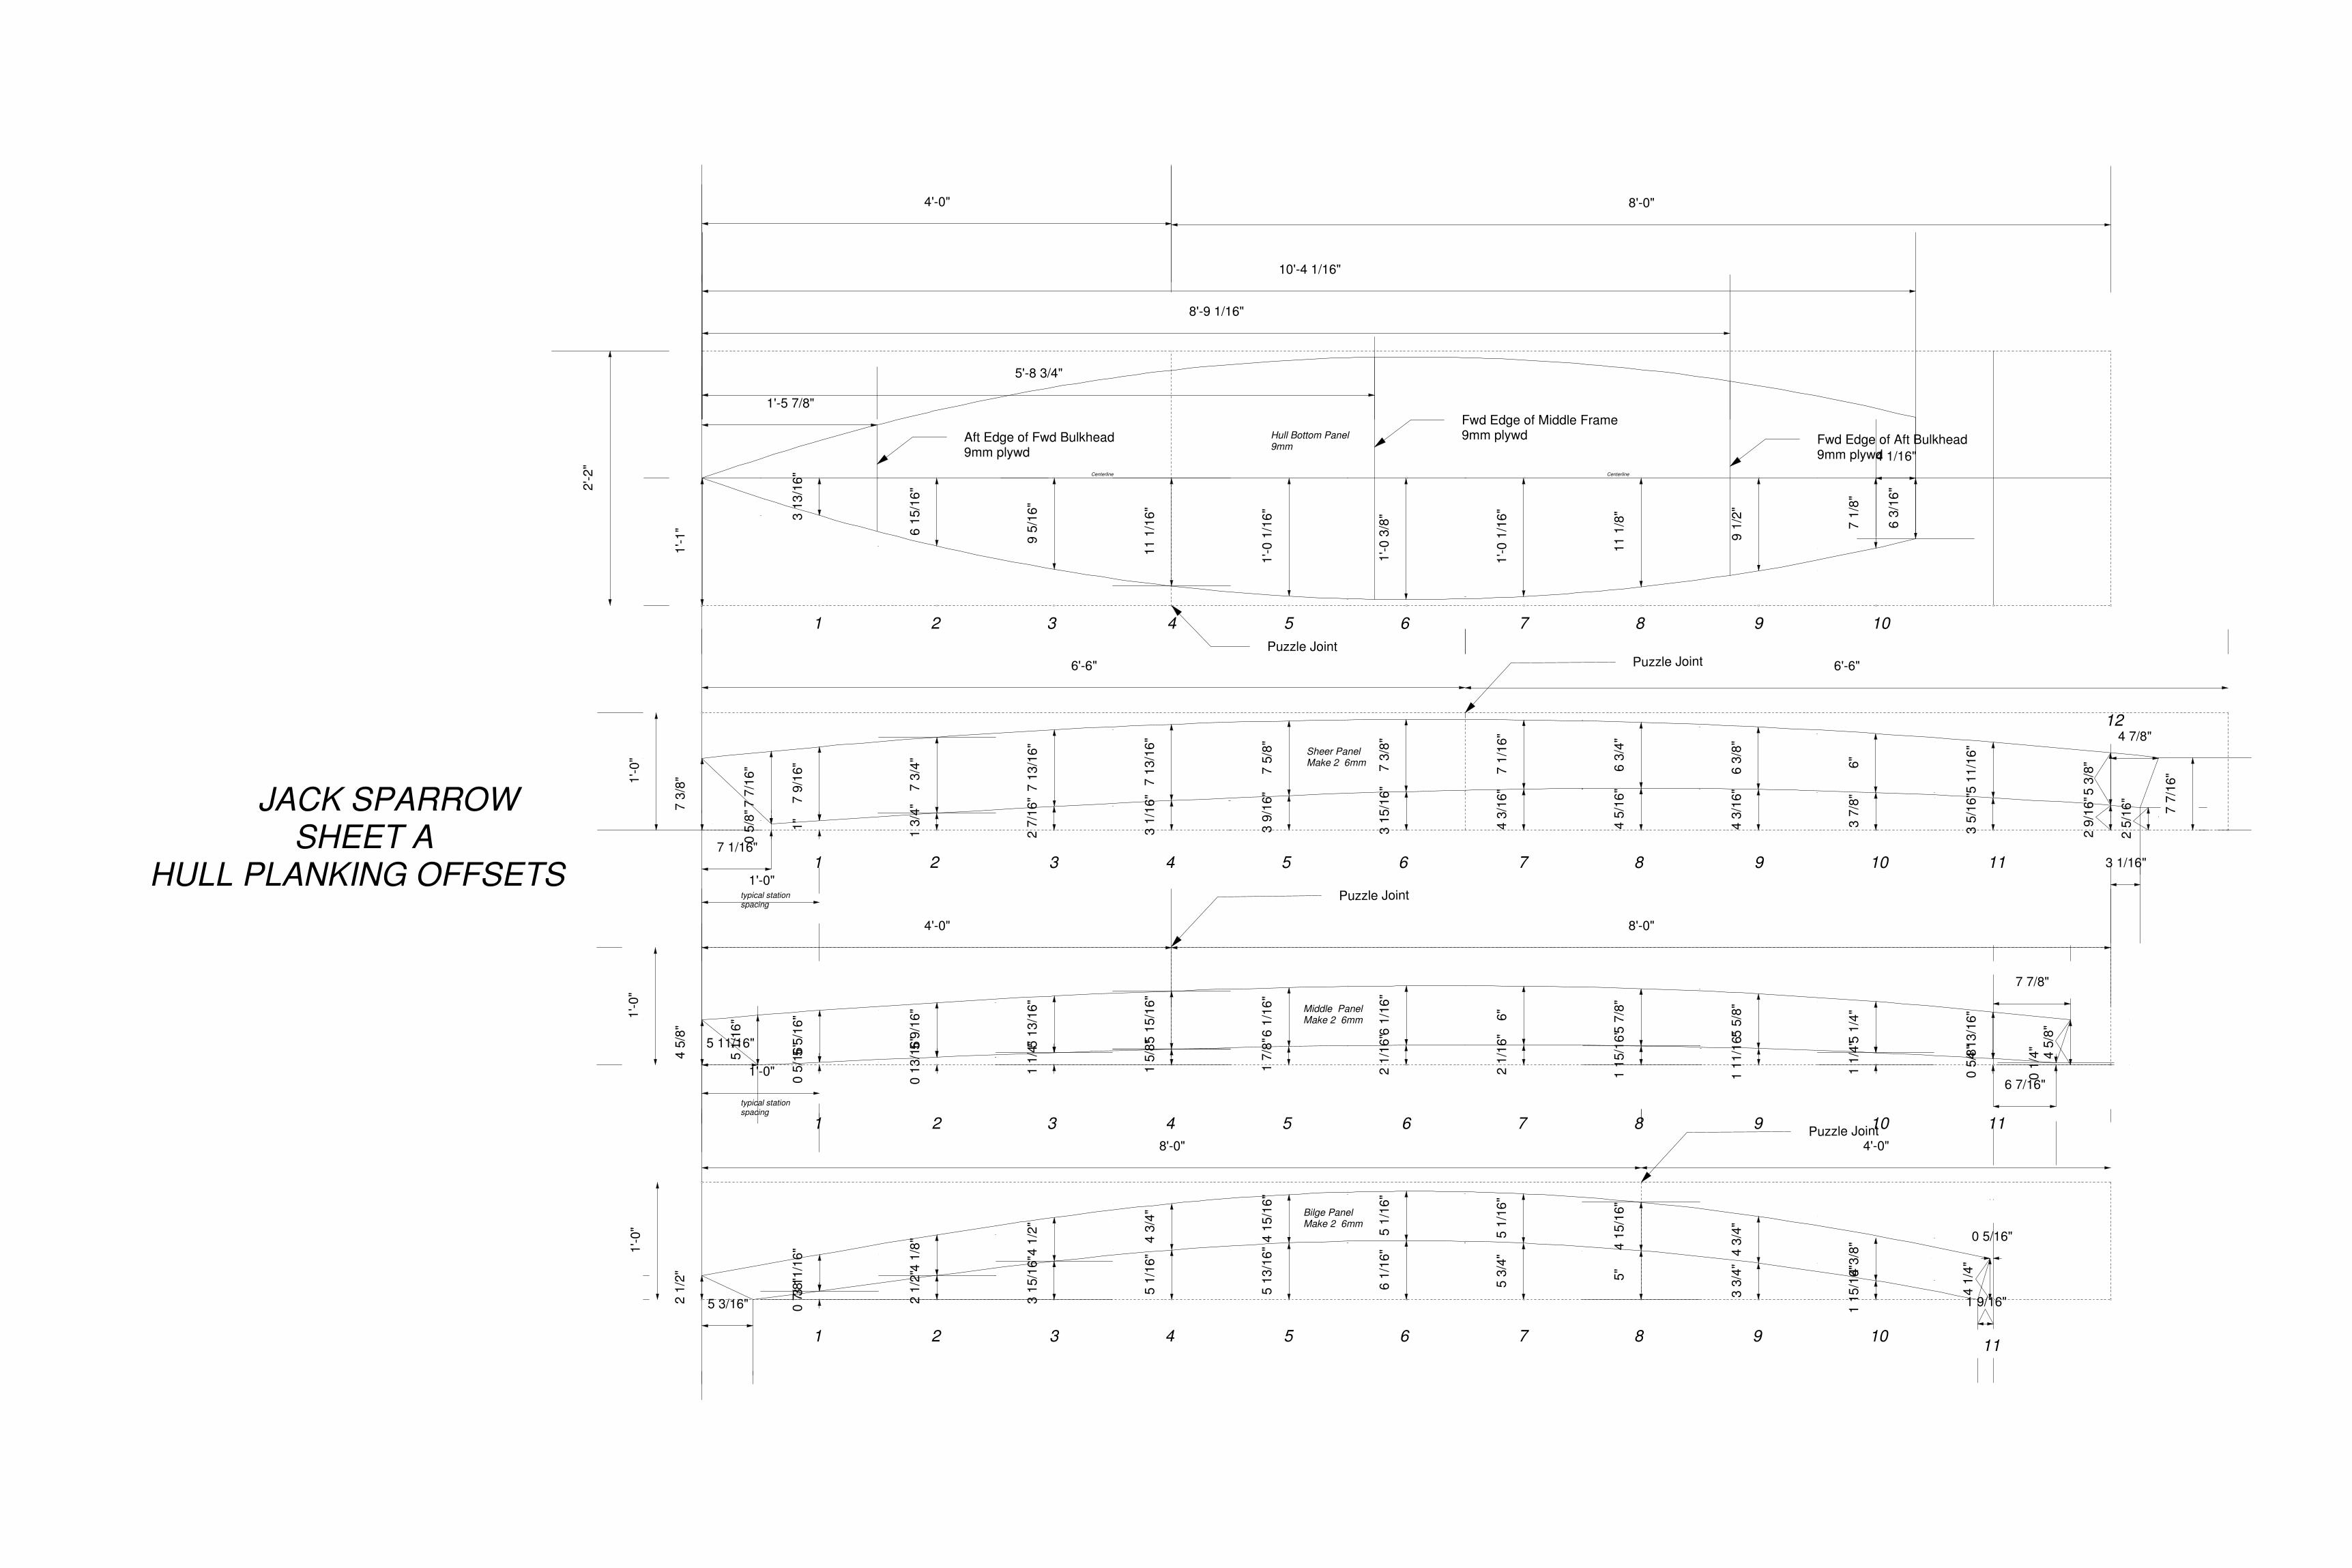
JACK SPARROW SHEET A HULL PLANKING OFFSETS
7 1/16"
typical station spacing
6 7/16"
11 1
/16"
6 1
5/1
6"
1 7
/8"
2 1
/16"
1 1
/4"
1'-0"
5 7
/8"
1 1
5/1
6"
3 1/16"
4 7/8"
7 7
/16"
2 5
/16
"
2 9
/16"
4 3
/16"
1 3
/4"7 3
/8"
1 1
1/1
6"
6 3
/16
"
4 1/16"
7 1
/8"
9 1
/2"
11
1/8
"
1'-0 1
/16
"
1'-0 3
/8"
1'-0
1/1
6"
9 5
/16
"
3 1
3/1
6"
1'-1"
6'-6"6'-6"
CenterlineCenterline
8'-9 1/16"
5'-8 3/4"
1'-5 7/8"
Fwd Edge of Aft Bulkhead9mm plywd
Fwd Edge of Middle Frame9mm plywdAft Edge of Fwd Bulkhead
9mm plywd
10'-4 1/16"
4 5
/8"
7 7/8"
4 1
3/1
6"
0 5
/8"5
1/4
"
5 5
/8"
6"
2 1
/16"6
1/1
6"
6 1
/16
"
5 1
5/1
6"
1 5
/8"5 1
3/1
6"
1 1
/4"
0 1
3/1
6"
5 9
/16"
5 5
/16"
0 5
/16
"
5 1
/16
"
4 5
/8"
5 11/16"
1'-0"
1'-0
"
typical station spacing
1'-0"
4'-0"8'-0"
1 1
5/1
6"4 3
/8"
4 3
/4"
4 1
5/1
6"
5 1
/16
"
5 1
/16
"
4 1
5/1
6"
5 1
3/1
6"
4 1
/4"
0 5/16"
1 9/16"
3 3
/4"
5"
5 3
/4"
6 1
/16"
4 3
/4"
4 1
/8"
2'-2
"
5 1
/16"4
1/2
"
2 1
/2"
3 1
1/1
6"
0 7
/8"
0 1
/4"
2 1
/2"
1'-0"
5 3/16"
8'-0"4'-0"
4'-0" 8'-0"
Puzzle Joint
7 7
/16"
0 5
/8"
7 9
/16"
1"
7 3
/4"
2 7
/16
"
3 1
/16"
7 1
3/1
6"
7 1
3/1
6"
3 9
/16
"
3 1
5/1
6"
4 5
/16
"
4 3
/16"
3 7
/8"
3 5
/16
"
7 5
/8"
7 3
/8"
7 1
/16"
Puzzle JointPuzzle Joint
Puzzle Joint
6 3
/4"
6 3
/8"
6"
5 1
1/1
6"
5 3
/8"
1
1
1
1 2 3 4 5
2 3 4 5
2
2 3
3 4
4
5
5
6
6
6 7 8 9 10
6 7 8 9 10 11
12
7
7
8
8 9 1011
9 10 11
Hull Bottom Panel9mm
Sheer PanelMake 2 6mm
Middle PanelMake 2 6mm
Bilge PanelMake 2 6mm
3 1
5/1
6"
10
12
9
3
7
10
8
9
8
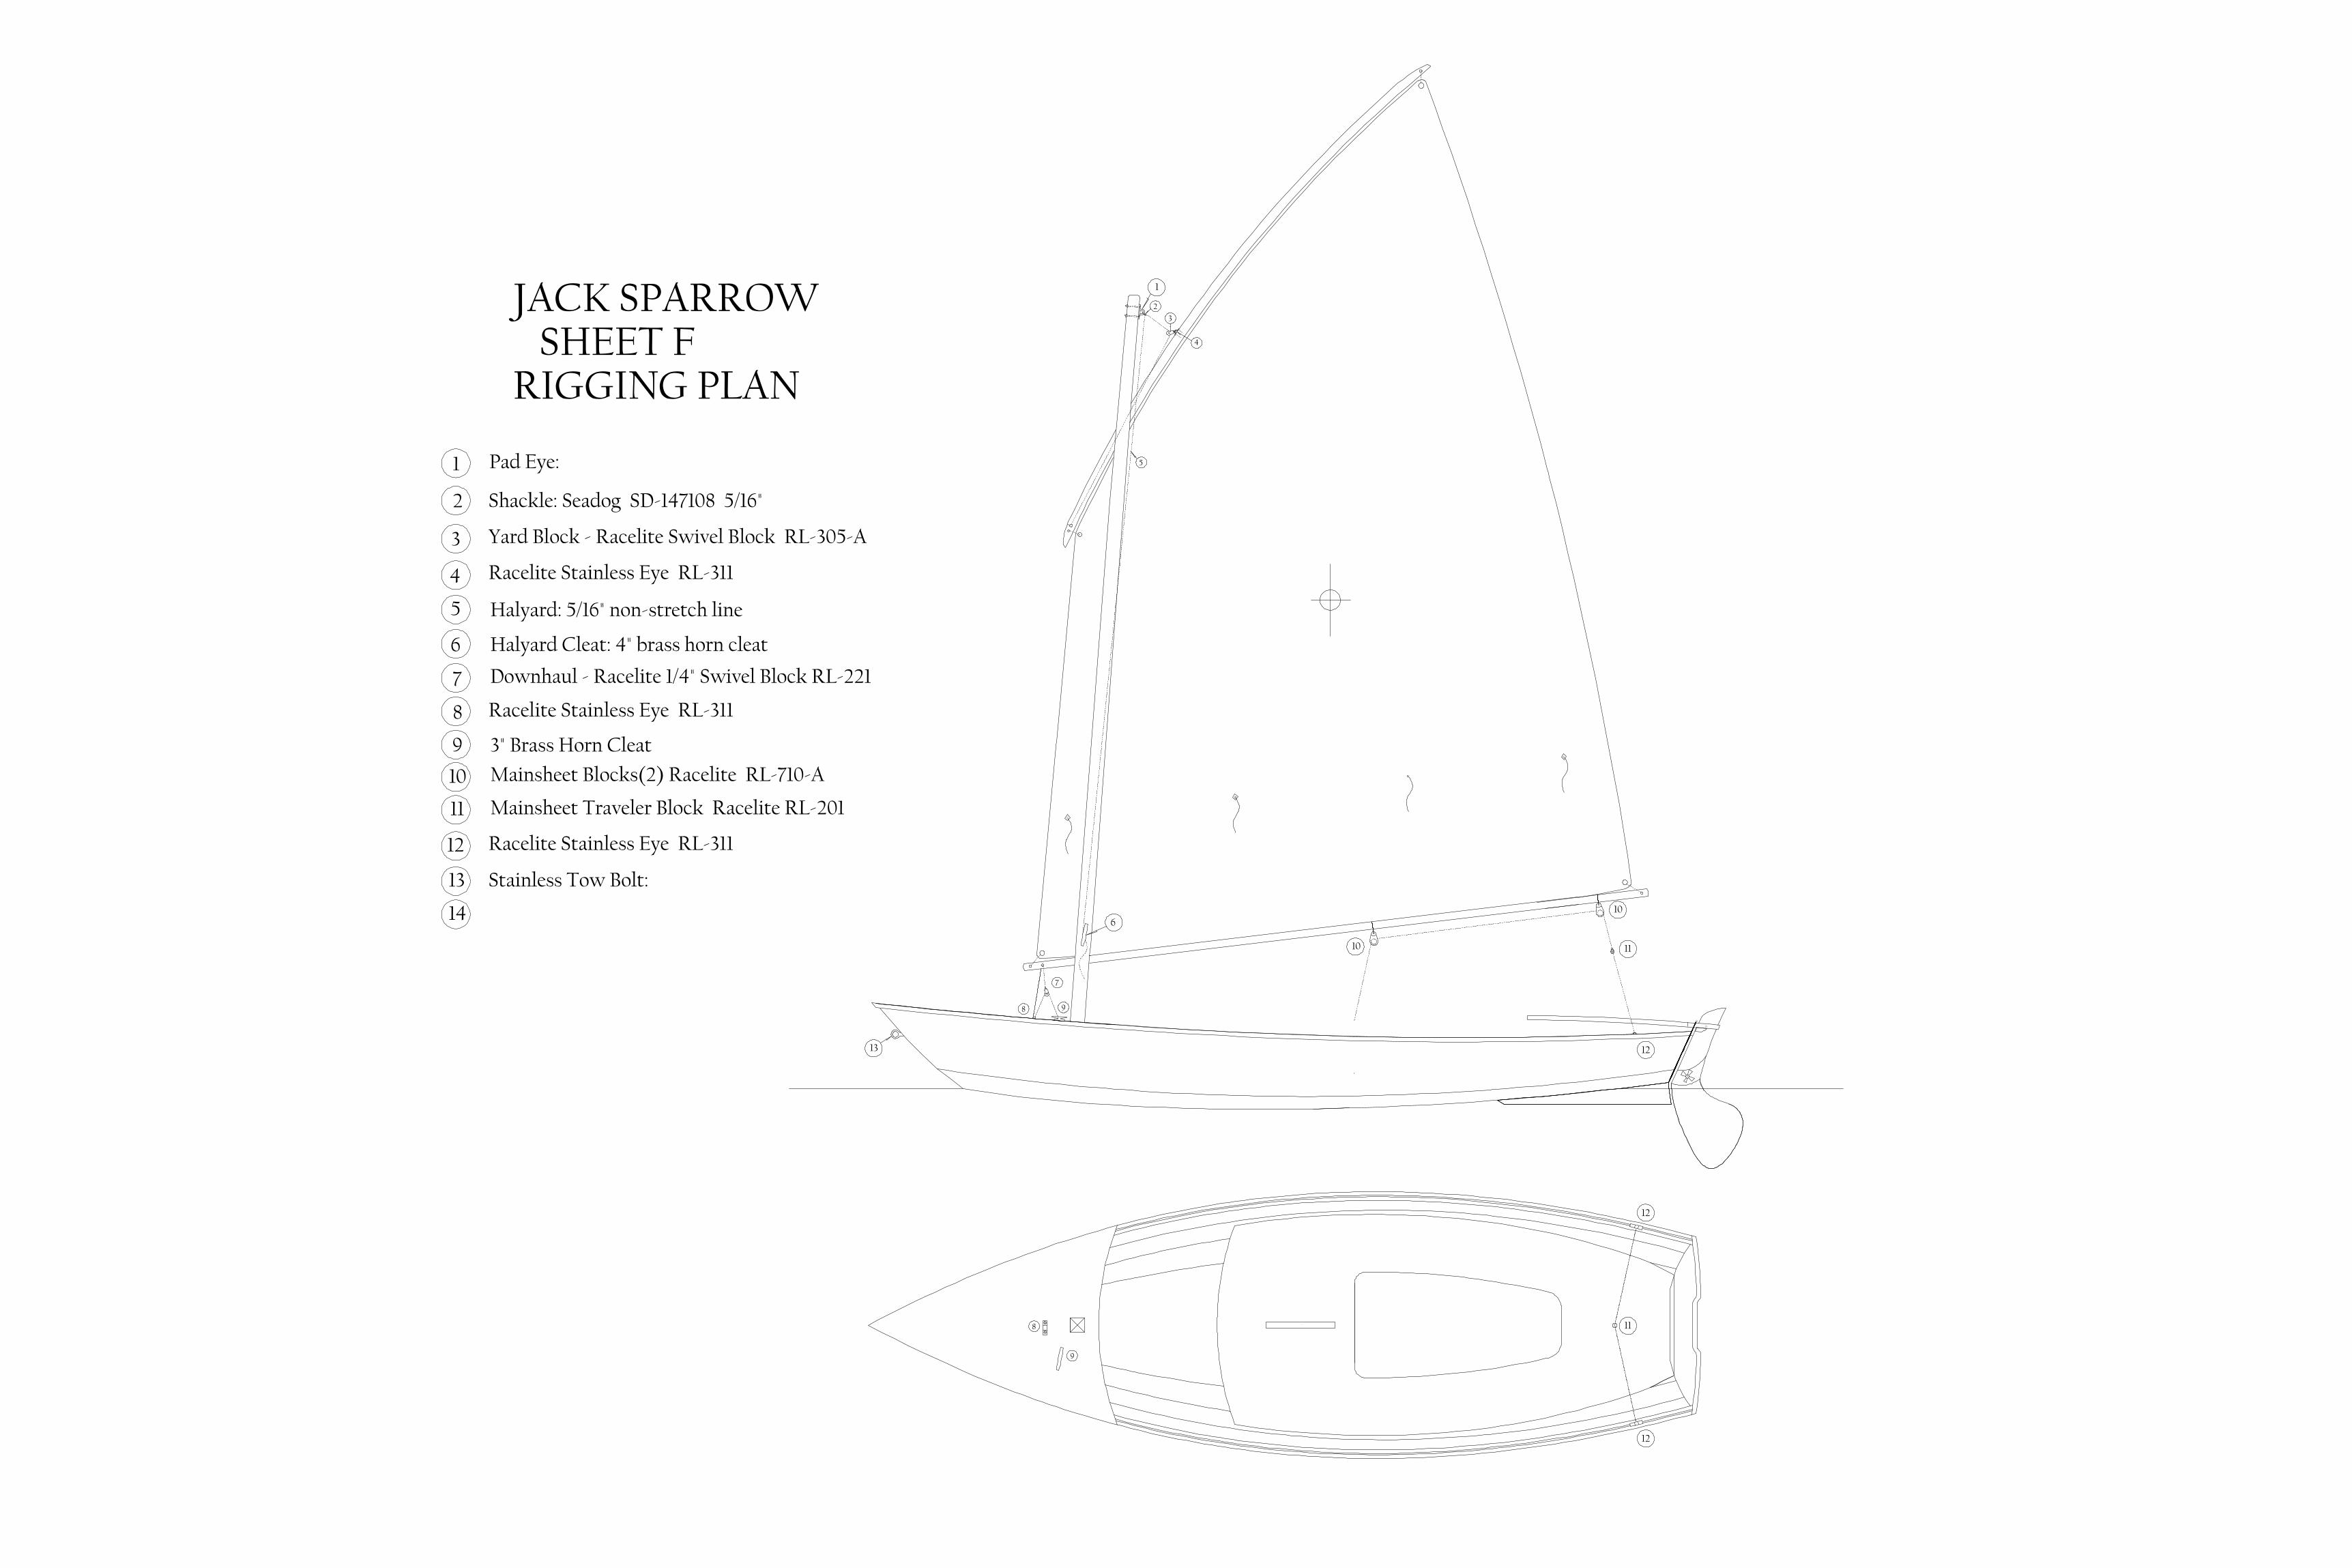
Shackle: Seadog SD-147108 5/16"
4
6
Mainsheet Traveler Block Racelite RL-201
10
1
11
2
11
9
Racelite Stainless Eye RL-311
13 Stainless Tow Bolt:
3" Brass Horn Cleat
Pad Eye:
Mainsheet Blocks(2) Racelite RL-710-A
13
11
4
6
12
JACK SPARROW SHEET FRIGGING PLAN
Racelite Stainless Eye RL-311
Halyard: 5/16" non-stretch line
12
1
Halyard Cleat: 4" brass horn cleat
14
5
5
2
Yard Block - Racelite Swivel Block RL-305-A3
Racelite Stainless Eye RL-311
8
7
12
Downhaul - Racelite 1/4" Swivel Block RL-221
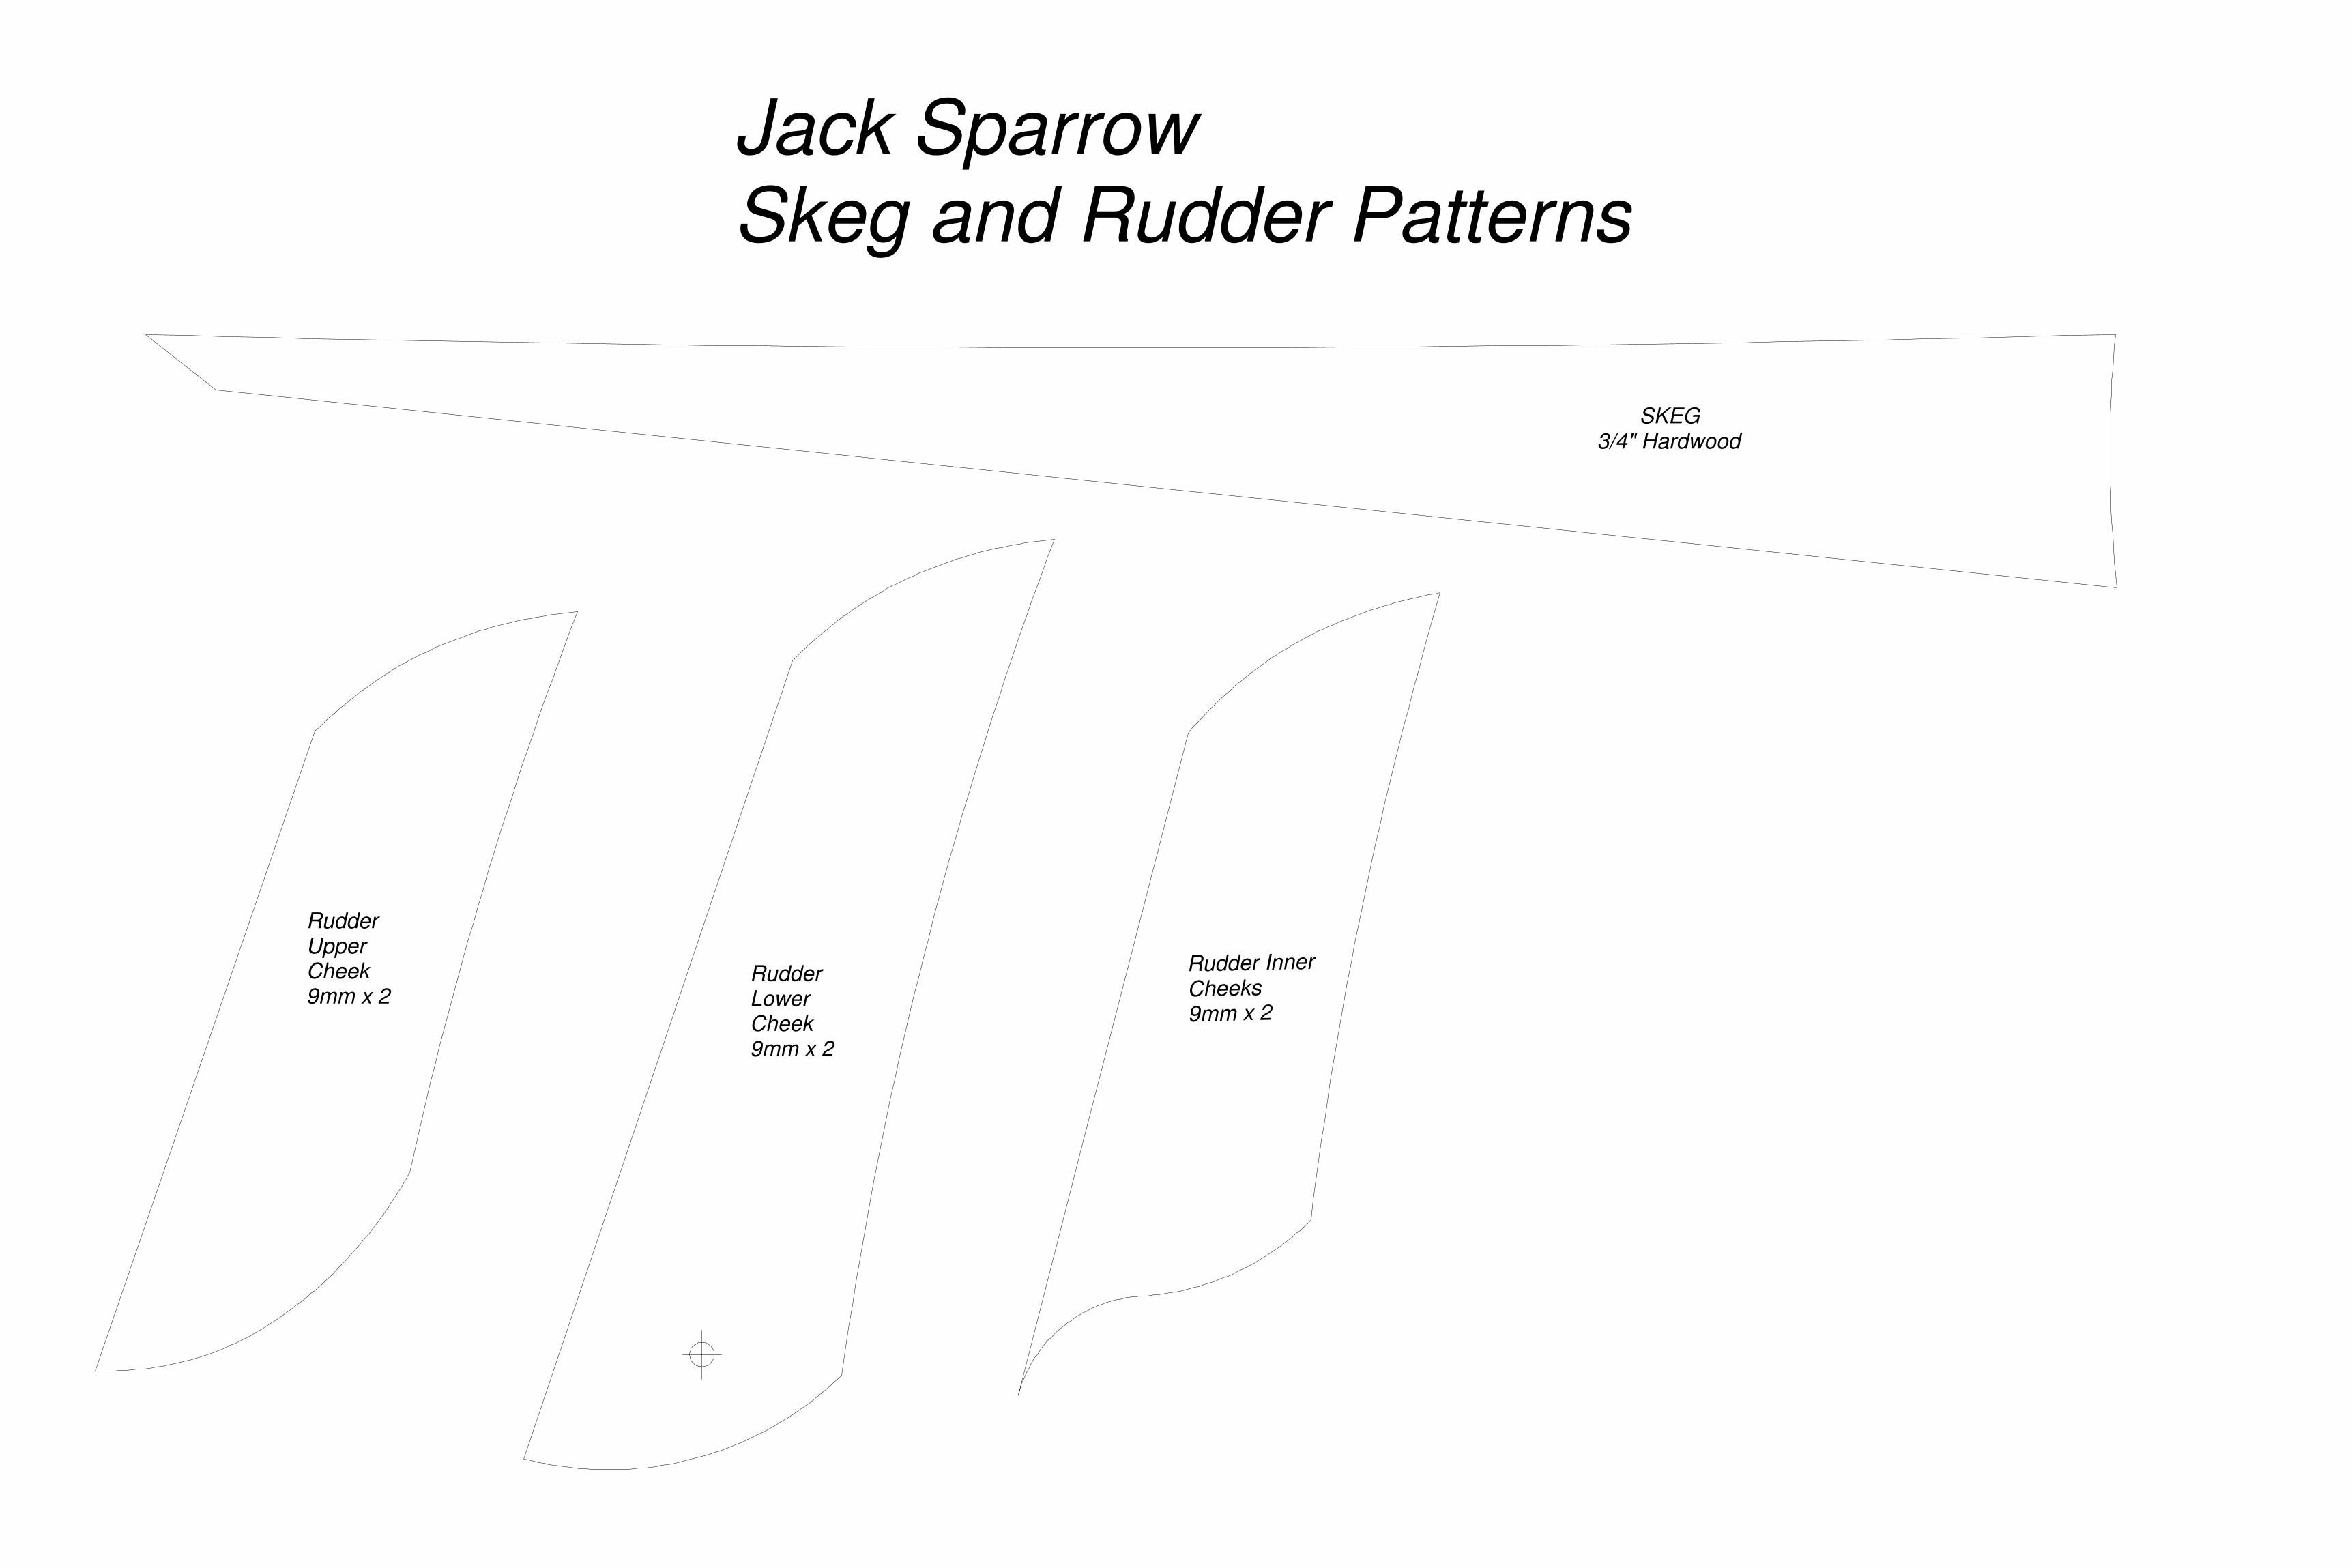
RudderUpperCheek9mm x 2
Rudder Inner
Cheeks
9mm x 2
SKEG3/4" Hardwood
RudderLowerCheek9mm x 2
Jack SparrowSkeg and Rudder Patterns
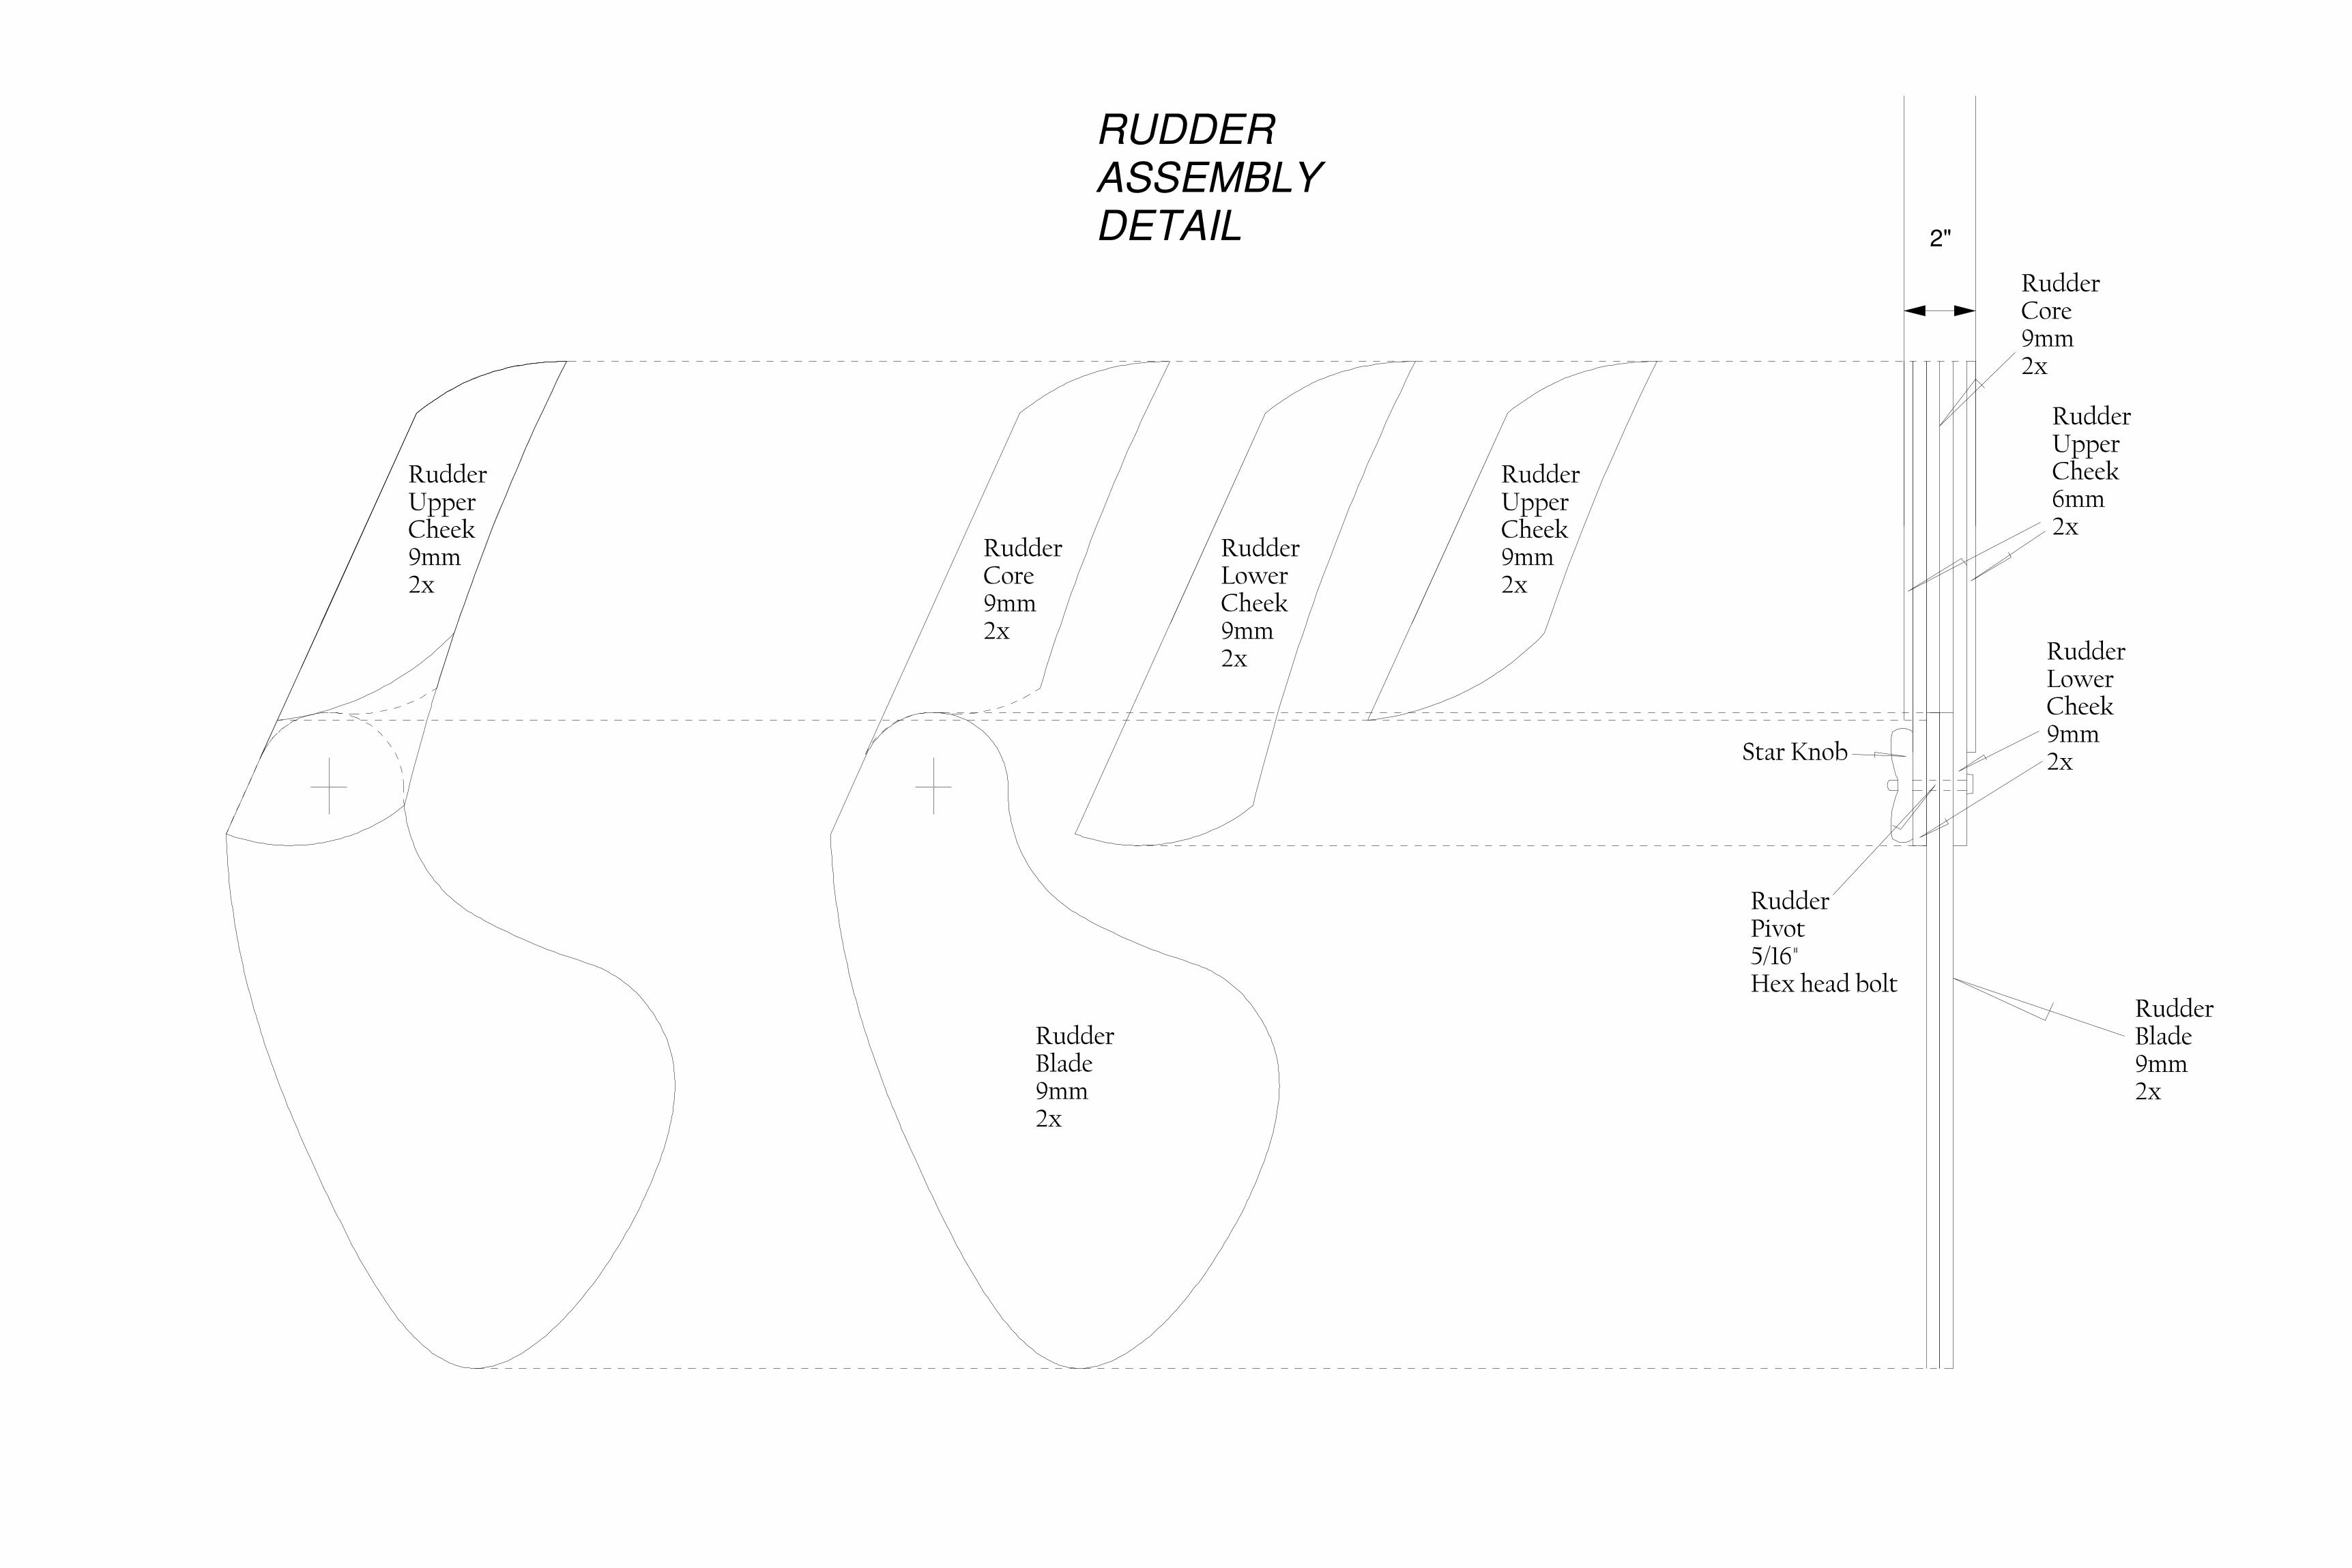
Rudder Core9mm2x
Rudder LowerCheek9mm2x
Rudder UpperCheek6mm2x
Rudder LowerCheek9mm2x
Rudder Upper Cheek9mm2x
Rudder Core9mm2x
Rudder Blade9mm2x
Rudder Pivot5/16" Hex head bolt
Rudder Upper Cheek9mm2x
Star Knob
Rudder Blade9mm2x
RUDDER
ASSEMBLY
DETAIL 2"
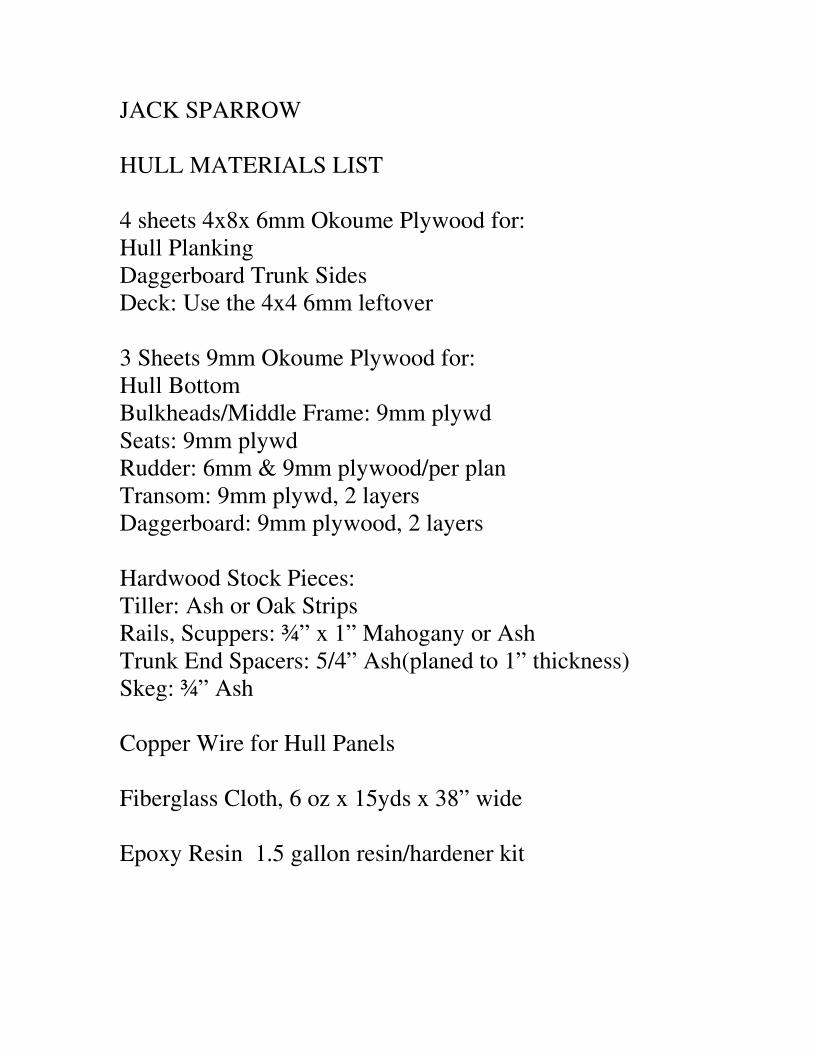
JACK SPARROW
HULL MATERIALS LIST
4 sheets 4x8x 6mm Okoume Plywood for:
Hull Planking
Daggerboard Trunk Sides
Deck: Use the 4x4 6mm leftover
3 Sheets 9mm Okoume Plywood for:
Hull Bottom
Bulkheads/Middle Frame: 9mm plywd
Seats: 9mm plywd
Rudder: 6mm & 9mm plywood/per plan
Transom: 9mm plywd, 2 layers
Daggerboard: 9mm plywood, 2 layers
Hardwood Stock Pieces:
Tiller: Ash or Oak Strips
Rails, Scuppers: ¾” x 1” Mahogany or Ash
Trunk End Spacers: 5/4” Ash(planed to 1” thickness)
Skeg: ¾” Ash
Copper Wire for Hull Panels
Fiberglass Cloth, 6 oz x 15yds x 38” wide
Epoxy Resin 1.5 gallon resin/hardener kit