Embed Size (px)
Citation preview
Introduction to Publisher 2010 Tutorial

Microsoft 2010: Publisher
2
TABLE OF CONTENTS
Introduction and Accessing Publisher 3
Getting Started 4
Publisher Workspace 6
Adding and Formatting Text 8
Adding and Editing Pictures 11
Saving, Print Setup, Exiting, and Opening Existing Documents 13
Copyright 2011, Software Application Training Unit, West Chester University. No Portion of this document may be reproduced without the written permission of the authors. For Assistance Call x3350. A Member of the Pennsylvania State System of Higher Education.
Microsoft 2010: Publisher
3
Introduction: Welcome to Microsoft Publisher 2010! Publisher is a program that allows users to create professional documents such as newsletters, flyers, brochures, gift certificates, and business cards. This unique program includes several different pre-designed templates that make it quick and easy to create a professional-looking document.
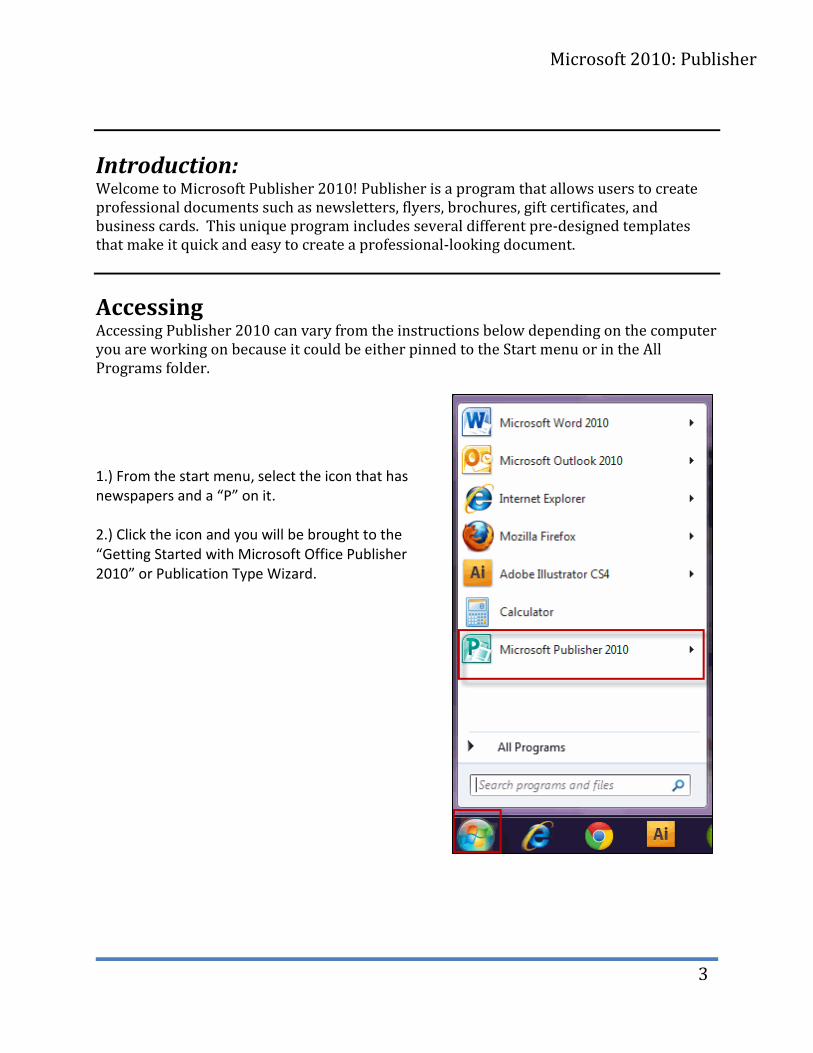
Accessing Accessing Publisher 2010 can vary from the instructions below depending on the computer you are working on because it could be either pinned to the Start menu or in the All Programs folder.
1.) From the start menu, select the icon that has newspapers and a “P” on it. 2.) Click the icon and you will be brought to the “Getting Started with Microsoft Office Publisher 2010” or Publication Type Wizard.
Microsoft 2010: Publisher
4
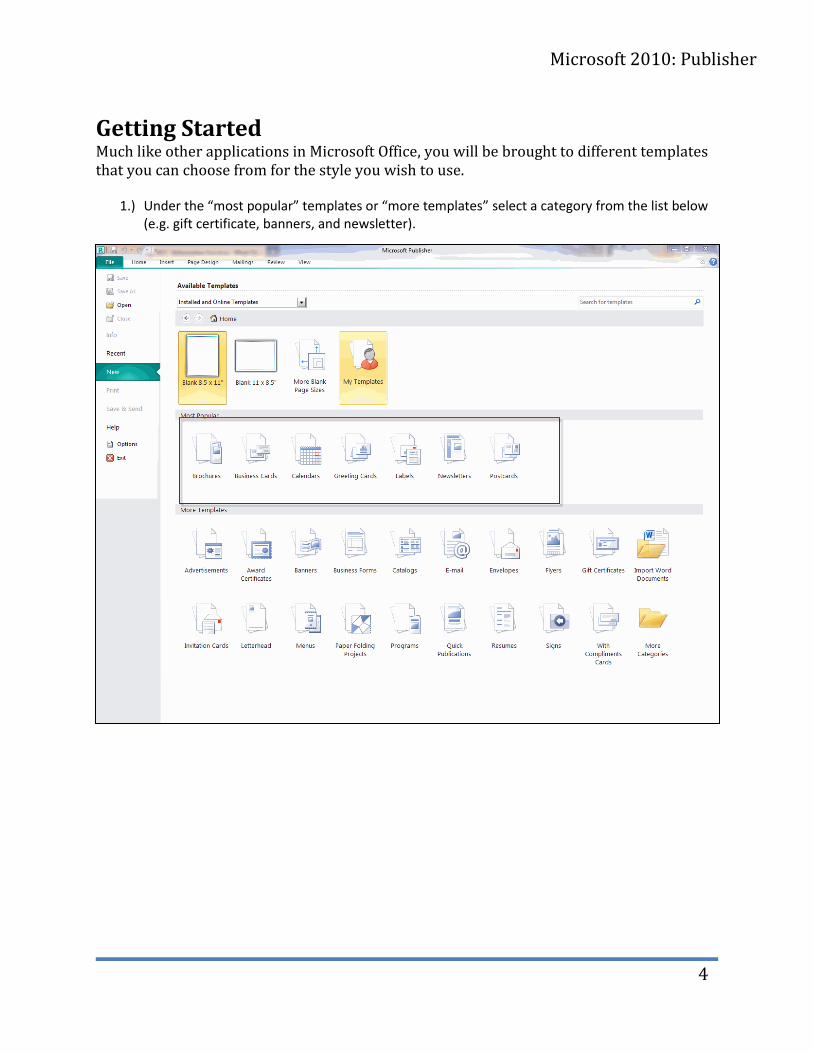
Getting Started Much like other applications in Microsoft Office, you will be brought to different templates that you can choose from for the style you wish to use.
1.) Under the “most popular” templates or “more templates” select a category from the list below (e.g. gift certificate, banners, and newsletter).

Microsoft 2010: Publisher
5
2.) Select a template (i.e. if you choose greeting card, you’ll be brought to holiday, birthday, and sympathy cards; see below).
The template can be customized to your liking by changing the options located in the right hand pane. If
you would like to create your own color and font schemes, simply scroll to the bottom of the list and
select “Create New”.
Microsoft 2010: Publisher
6
Microsoft Publisher Workspace
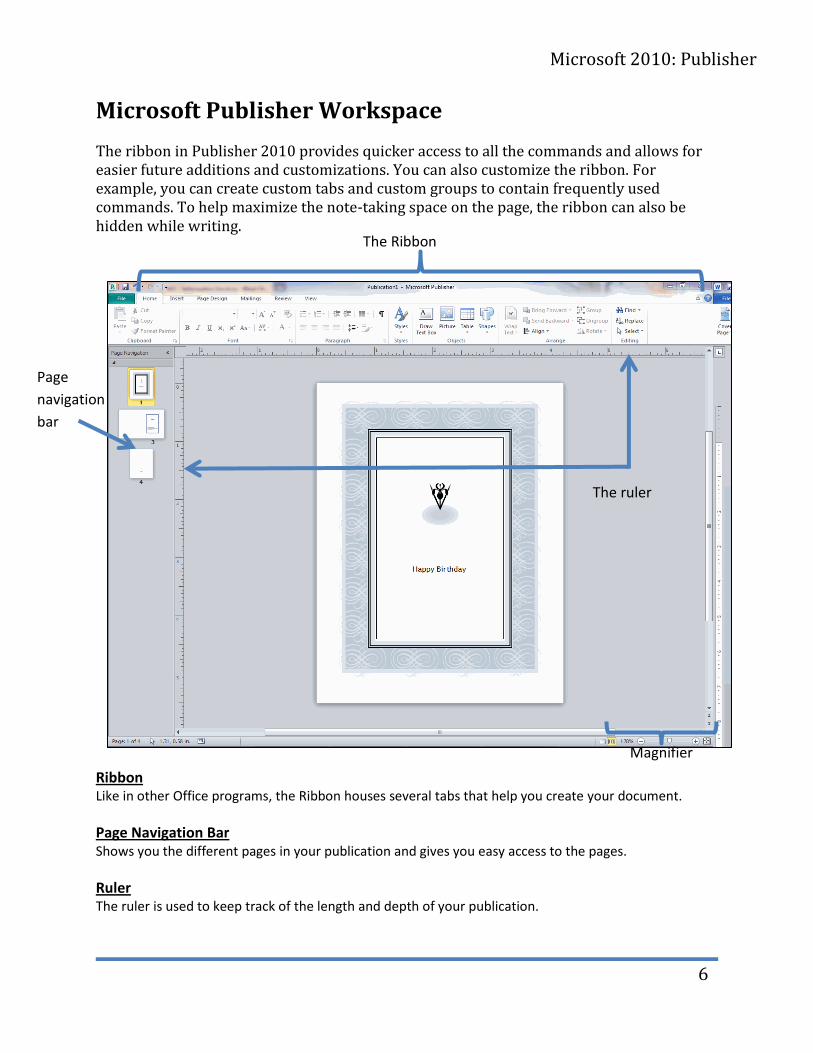
The ribbon in Publisher 2010 provides quicker access to all the commands and allows for easier future additions and customizations. You can also customize the ribbon. For example, you can create custom tabs and custom groups to contain frequently used commands. To help maximize the note-taking space on the page, the ribbon can also be hidden while writing.
Ribbon Like in other Office programs, the Ribbon houses several tabs that help you create your document.
Page Navigation Bar Shows you the different pages in your publication and gives you easy access to the pages.
Ruler The ruler is used to keep track of the length and depth of your publication.
Page
navigation
bar
The Ribbon
The ruler
Magnifier
Microsoft 2010: Publisher
7
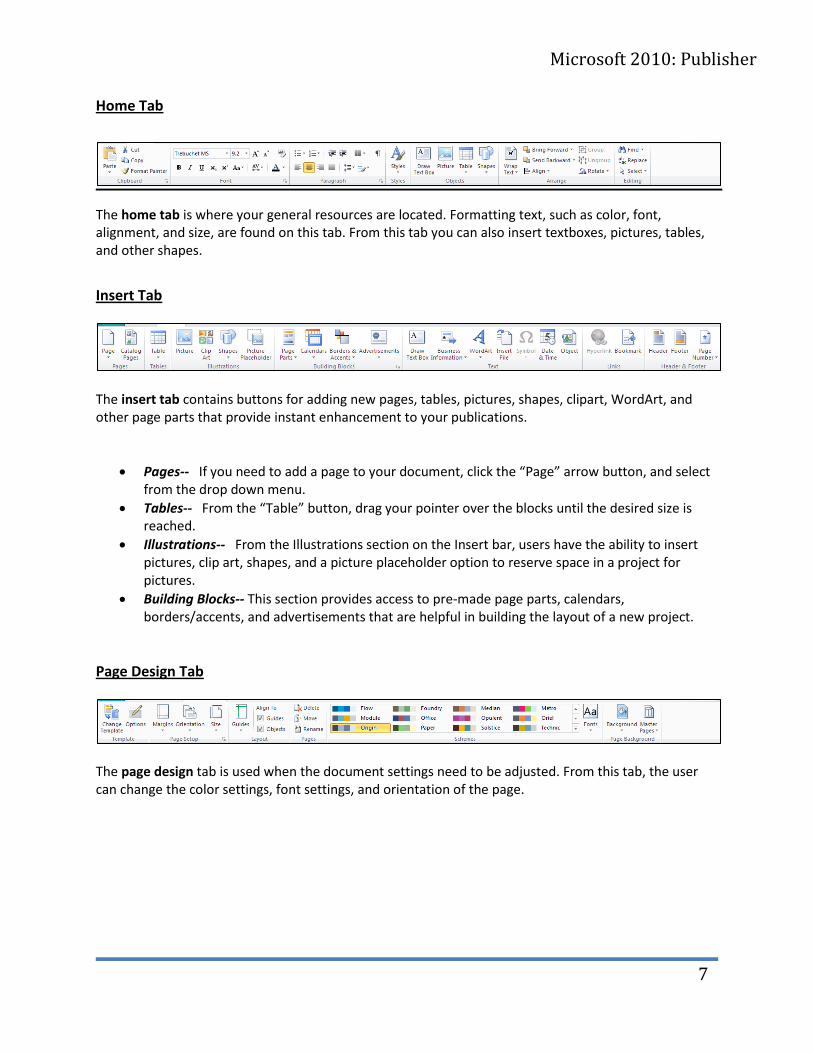
Home Tab
The home tab is where your general resources are located. Formatting text, such as color, font, alignment, and size, are found on this tab. From this tab you can also insert textboxes, pictures, tables, and other shapes.
Insert Tab
The insert tab contains buttons for adding new pages, tables, pictures, shapes, clipart, WordArt, and other page parts that provide instant enhancement to your publications.
Pages-- If you need to add a page to your document, click the “Page” arrow button, and select from the drop down menu.
Tables-- From the “Table” button, drag your pointer over the blocks until the desired size is reached.
Illustrations-- From the Illustrations section on the Insert bar, users have the ability to insert pictures, clip art, shapes, and a picture placeholder option to reserve space in a project for pictures.
Building Blocks-- This section provides access to pre-made page parts, calendars, borders/accents, and advertisements that are helpful in building the layout of a new project.
Page Design Tab
The page design tab is used when the document settings need to be adjusted. From this tab, the user can change the color settings, font settings, and orientation of the page.
Microsoft 2010: Publisher
8
Adding and Formatting Text
Inserting a textbox:
1.) In the home tab, click the “Draw Text Box” button. After you click Draw Textbox, move the tool across the screen and click on the document where the textbox should appear. Hold the left mouse button and draw the textbox to the desired size; a cursor will appear in the textbox after the size is set.
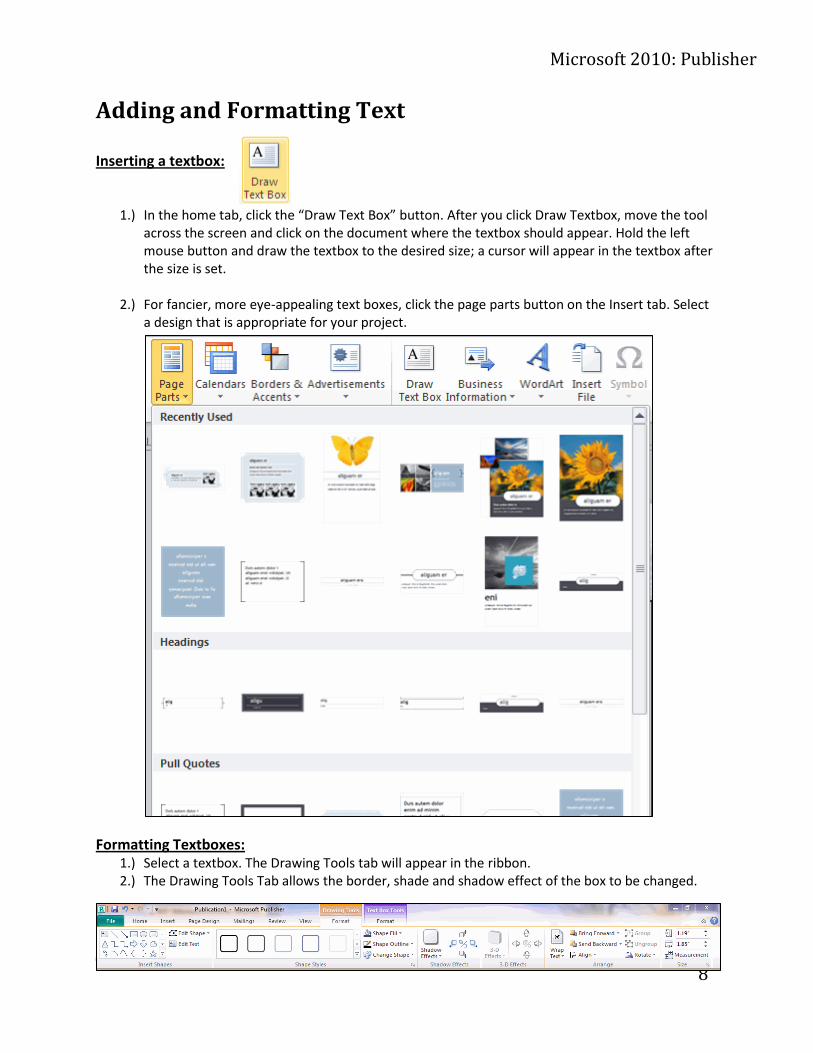
2.) For fancier, more eye-appealing text boxes, click the page parts button on the Insert tab. Select
a design that is appropriate for your project.
Formatting Textboxes: 1.) Select a textbox. The Drawing Tools tab will appear in the ribbon. 2.) The Drawing Tools Tab allows the border, shade and shadow effect of the box to be changed.
Microsoft 2010: Publisher
9
Changing Text Format
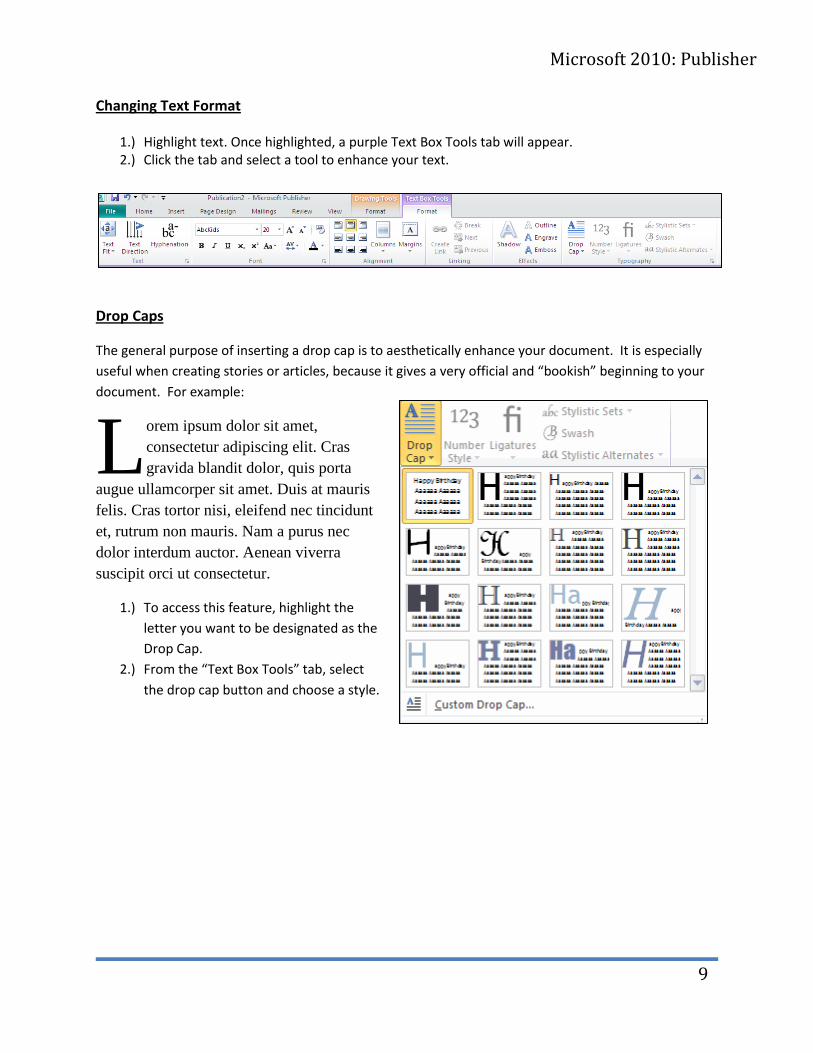
1.) Highlight text. Once highlighted, a purple Text Box Tools tab will appear. 2.) Click the tab and select a tool to enhance your text.
Drop Caps
The general purpose of inserting a drop cap is to aesthetically enhance your document. It is especially
useful when creating stories or articles, because it gives a very official and “bookish” beginning to your
document. For example:
orem ipsum dolor sit amet,
consectetur adipiscing elit. Cras
gravida blandit dolor, quis porta
augue ullamcorper sit amet. Duis at mauris
felis. Cras tortor nisi, eleifend nec tincidunt
et, rutrum non mauris. Nam a purus nec
dolor interdum auctor. Aenean viverra
suscipit orci ut consectetur.
1.) To access this feature, highlight the
letter you want to be designated as the
Drop Cap.
2.) From the “Text Box Tools” tab, select
the drop cap button and choose a style.
L

Microsoft 2010: Publisher
10
Character Spacing
1.) Right click inside the textbox. 2.) Select the Change Text command and then select Character Spacing. 3.) Under Kerning use the drop-down arrow to select Expand or Condense. 4.) Click OK when finished.
Tight
Loose
Very Loose
Very Tight
Microsoft 2010: Publisher
11
Adding and Editing Pictures
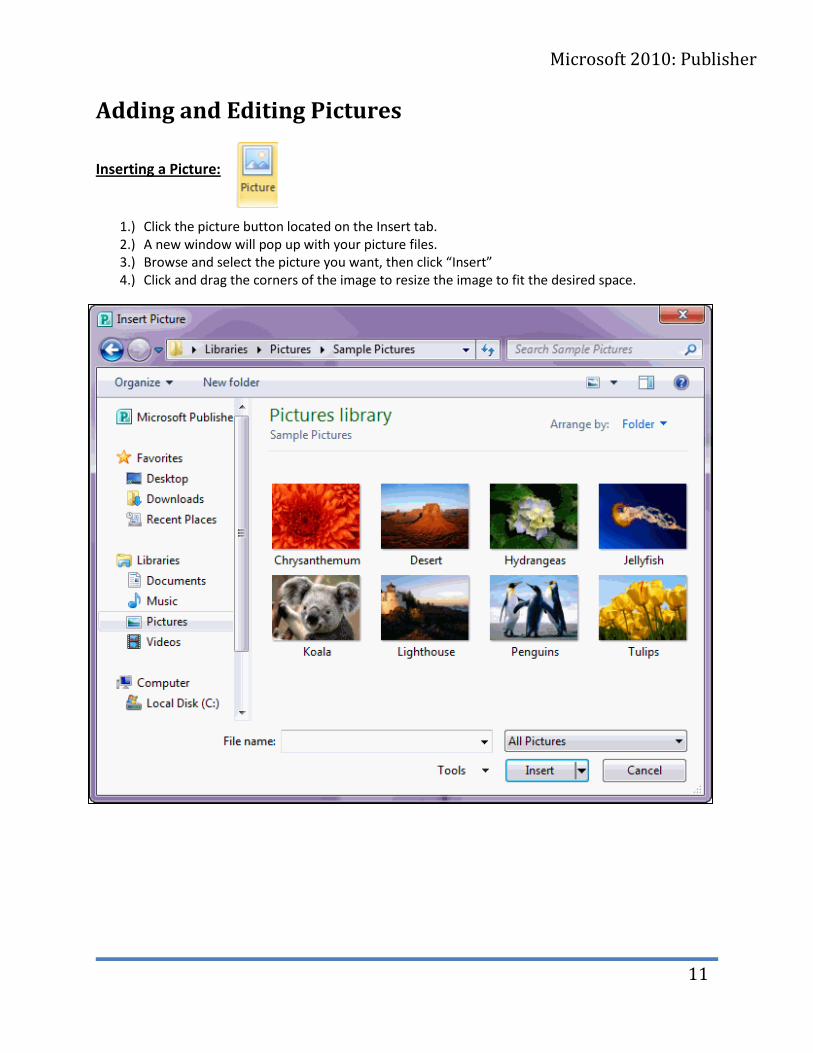
Inserting a Picture:
1.) Click the picture button located on the Insert tab. 2.) A new window will pop up with your picture files. 3.) Browse and select the picture you want, then click “Insert” 4.) Click and drag the corners of the image to resize the image to fit the desired space.
Tight Very tight Very Loose
Microsoft 2010: Publisher
12
Insert Clip Art:
1.) Click the Clip Art button in the Insert tab.
2.) Search for an image, and then click on the image to insert it into your document.
Editing Pictures
Publisher 2010 has editing features that can change the color, texture, border, and shape of the pictures you insert. When a picture is selected, there will be a red picture tools tab in the ribbon.
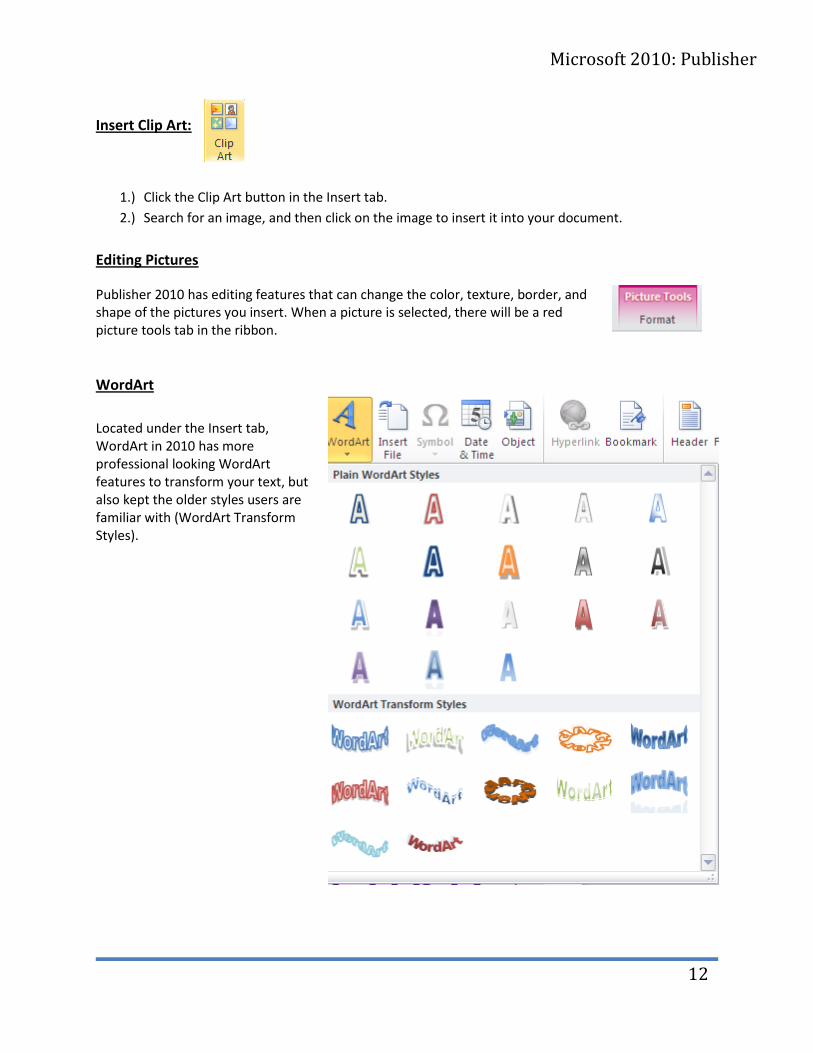
WordArt
Located under the Insert tab, WordArt in 2010 has more professional looking WordArt features to transform your text, but also kept the older styles users are familiar with (WordArt Transform Styles).
Microsoft 2010: Publisher
13
Saving
1.) From the toolbar at the top, click the blue floppy disk. 2.) You can also go into file and go to “save” or “save as.” The “save as” command is also used for
changing locations of the document.
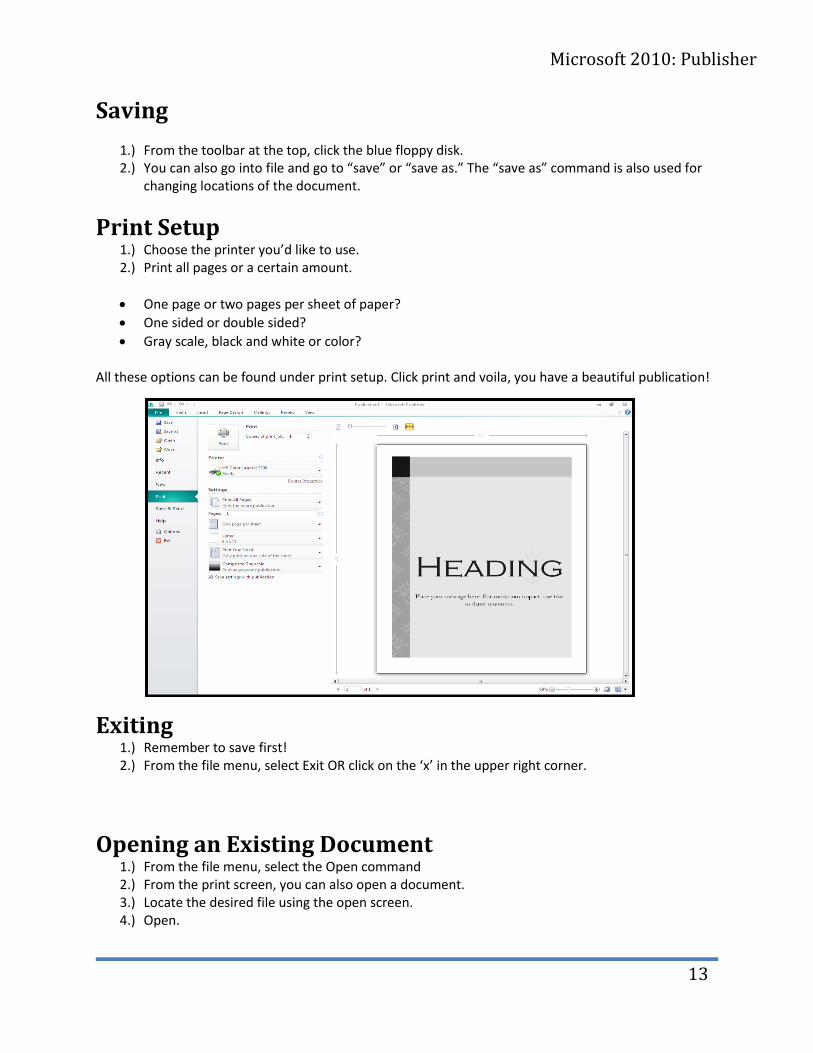
Print Setup 1.) Choose the printer you’d like to use. 2.) Print all pages or a certain amount.
One page or two pages per sheet of paper?
One sided or double sided?
Gray scale, black and white or color? All these options can be found under print setup. Click print and voila, you have a beautiful publication!
Exiting 1.) Remember to save first! 2.) From the file menu, select Exit OR click on the ‘x’ in the upper right corner.
Opening an Existing Document 1.) From the file menu, select the Open command 2.) From the print screen, you can also open a document. 3.) Locate the desired file using the open screen. 4.) Open.
Microsoft 2010: Publisher
14
NOTES
Copyright 2011 © Software Application Training Unit, West Chester University. No portion of this document may be reproduced without the written permission of the authors.
A member of the Pennsylvania State System of Higher Education. For assistance call x3350.