Embed Size (px)
Citation preview

Description
Integra® Gynecological Surgical Forceps are designed to provide a secure grip on tissue during vaginal and abdominal hysterectomy procedures. These atraumatic instruments are designed to minimize laceration or perforation of the tissue even when required retraction is exerted. Due to differences in anatomy of the site and types of surgical procedures, a variety of configurations and models are offered to provide the surgeon with options to ensure clinical needs are met. Indications For Use
Integra® Gynecological Surgical Forceps are hand-held instruments with dual blades that are indicated for pulling, grasping, holding, or compressing tissue during gynecological procedures. Contraindications
None known Warnings
• DO NOT flash sterilize the Integra® Gynecological Surgical Forceps. The instruments have not been validated for flash sterilization.
• Discard instrument after suspected Creutzfeldt-Jakob Disease (CJD) exposure.
• The Integra® Gynecological Surgical Forceps have not been validated to withstand the chemical and thermal exposures recommended to eradicate prions.
Precautions
• Read the Instructions for Use and keep them in a safe place.
• Use the product only in accordance with its intended use, see INDICATIONS FOR USE.
• Use of an instrument for a task other than that for which it is intended could result in a damaged or broken instrument, or one which provides an unsatisfactory performance.
• Instruments should be handled and operated by personnel completely familiar with their use, assembly and disassembly.
• Instruments must be rendered safe for handling, inspection and assembly by wearing appropriate personal protection equipment (PPE) as promulgated by OSHA & AORN.
• Inappropriate use of instruments will lead to damage that is usually not repairable.
• Instruments must be thoroughly inspected upon receipt and prior to use to assure proper functioning. Failure to make a complete inspection to assure proper operation and function of instrument may result in unsatisfactory performance.
• Integra® Gynecological Surgical Forceps are supplied non-sterile and must be pre-cleaned, cleaned, lubricated, visually examined and sterilized prior to use. Please see pre-cleaning, cleaning, visual examination, and sterilization procedures below.
• Check screws on instruments after ultrasonic cleaning. Vibration from ultrasonic cleaning may cause them to loosen or fall out.
• Prior to each use, inspect the product for: loose, bent, broken, cracked, worn, or fractured components.
• Do not use the product if it is damaged or defective.
Integra® Gynecological Surgical Forceps Rx Only CAUTION: Federal (USA) law restricts this device to sale by or on the order of a surgeon.
Instructions for Use/English
• Replace any damaged components immediately with original spare parts.
• Store products in a dry, clean and safe place.
Pre-Cleaning, Cleaning, and Sterilization Procedures
Before using the instruments pre-clean, clean (manual or automated), dry, visually examine, and sterilize following the procedures below.
Personnel should follow accepted guidelines as recommended in ANSI/AAMI ST79:2006, A1:2008, A2:2009 -Comprehensive guide to steam sterilization and sterility assurance in health care facilities.
Pre-Cleaning Pre-cleaning should occur as soon as possible after instrumentation is used.
1. Remove gross debris from surgical instruments with a sponge and sterile water after use to prevent drying of blood and body fluids on the instruments.
2. Place instruments in an instrument tray/container and saturate all surfaces for five (5) minutes with a pre-cleaning enzymatic product such as Miltex Instrument Prep Enzyme Foam.
Note 1: Other foam, spray or gel products, intended for use with surgical instruments, are available to keep soil moist but have not been validated for use with Integra® Gynecological Surgical Forceps.
Cleaning:
Cleaning should occur as soon as possible after instrumentation is pre-cleaned.
After performing steps 1-6 below, perform either “Manual Cleaning” or “Automated Cleaning”.
1. Rinse instrument with deionized water for two (2) minutes.
2. Use a clean, soft bristled brush to clean and remove visible soil from the surfaces of the instruments.
3. Prepare Miltex® EZ-Zyme® All-Purpose Enzyme Cleaner solution per manufacturer’s recommendations/instructions for correct dilution and temperature.
4. Immerse fully opened instruments in the prepared Miltex EZ-Zyme All-Purpose Enzyme Cleaner solution for ten (10) minutes.
5. Rinse instrument and hinge with deionized water for two (2) minutes.
6. Proceed either to “Manual Cleaning” or “Automated Cleaning” procedures below:
Manual Cleaning
1. Prepare Miltex EZ-Zyme All-Purpose Enzyme Cleaner solution per manufacturer’s recommendations/instructions for correct dilution and temperature.
Note 2: Other cleaning reagents/detergents are available but have not been validated for use with Integra® Gynecological Surgical Forceps.
2. Using a small, clean hand-held brush, remove soil from all surfaces of instrument while fully immersed in solution.
Note 3: Never use steel wool, wire brushes, scalpel blades or highly abrasive detergent or cleansers to remove soil as these will damage the instruments’ protective surface and lead to corrosion.
3. Rinse thoroughly and aggressively for two (2) minutes with deionized water.
4. Using a Branson 8510 ultrasonic cleaner sonicate instruments for ten (10) minutes.
• Prepare Miltex EZ-Zyme All-Purpose Enzyme Cleaner solution per manufacturer’s recommendations/instructions for correct dilution and temperature and place in the Branson 8510 ultrasonic cleaner.
• Condition (de-gas) ultrasonic cleaner for 5 minutes.
• Place instruments in the ultrasonic cleaner manufacturer’s instrument tray.
• Ensure instruments are in the open position.
• Keep different metal types separated (i.e., separate stainless steel from non-anodized aluminum, brass, copper and chrome-plating to avoid possible transfer of one metal plating to another).
• Place tray with the instruments into the Branson 8510 ultrasonic cleaner.
• Sonicate instruments for ten (10) minutes.
Note 4: Other ultrasonic cleaners may be available but have not been validated for use with Integra® Gynecological Surgical Forceps.
5. Remove instruments from sonicator and rinse for two (2) minutes with distilled water.
6. Visually inspect instrument for cleanliness and ensure all parts are in proper working order.
7. Apply Miltex Spray Lube to all joints and moveable mating surfaces.
8. Allow instruments to dry on lint-free cloth for 60 minutes at 24°C (75°F) temperature.
Note 5: Other drying methods may be available but have not been validated for use with Integra® Gynecological Surgical Forceps.
9. Inspect instruments for visual dryness.
10. Apply Miltex Spray Lube to all joints and moveable mating surfaces as per manufacturer’s instructions.
Automated Cleaning
1. Place instruments in a wire basket.
• Ensure instruments are in the open position.
• Keep different metal types separated (i.e., separate stainless steel from non-anodized aluminum, brass, copper and chrome-plating to avoid possible transfer of one metal plating to another).
2. Place wire baskets in an automatic washer-sterilizer or washer-disinfector, such as a Steris Amsco Reliance 444 single-chamber washer/disinfector. Using the parameters/detergents listed in the table below clean the instruments.
Note 6: Other automatic washer-sterilizer or washer-disinfector specific parameters may be available but have not been validated for use with Integra® Gynecological Surgical Forceps.
3. Remove instruments from automatic washer.
4. Visually inspect instrument for cleanliness and ensure all parts are in proper working order.
5. Visually inspect instrument to ensure it is dry.
Note 7: Other drying methods may be available but have not been validated for use with Integra® Gynecological Surgical Forceps.
6. Apply Miltex Spray Lube to all joints and moveable mating surfaces as per manufacturer’s instructions.
Treatment Time (mm:ss) Temperature Cleaner
Presoak 02:00 Cold (10°C±2) WaterEnzymatic Wash
04:00 Hot (minimal 43°C/109°F)
Endozime A W Plus®, Enzymatic Detergent
Wash (Cleaning)
02:00 60°C (140°F) Endozime A W Plus®, Enzymatic Detergent
Rinse 02:00 70°C (158°F) WaterDry 15:00 80°C (176°F) N/A
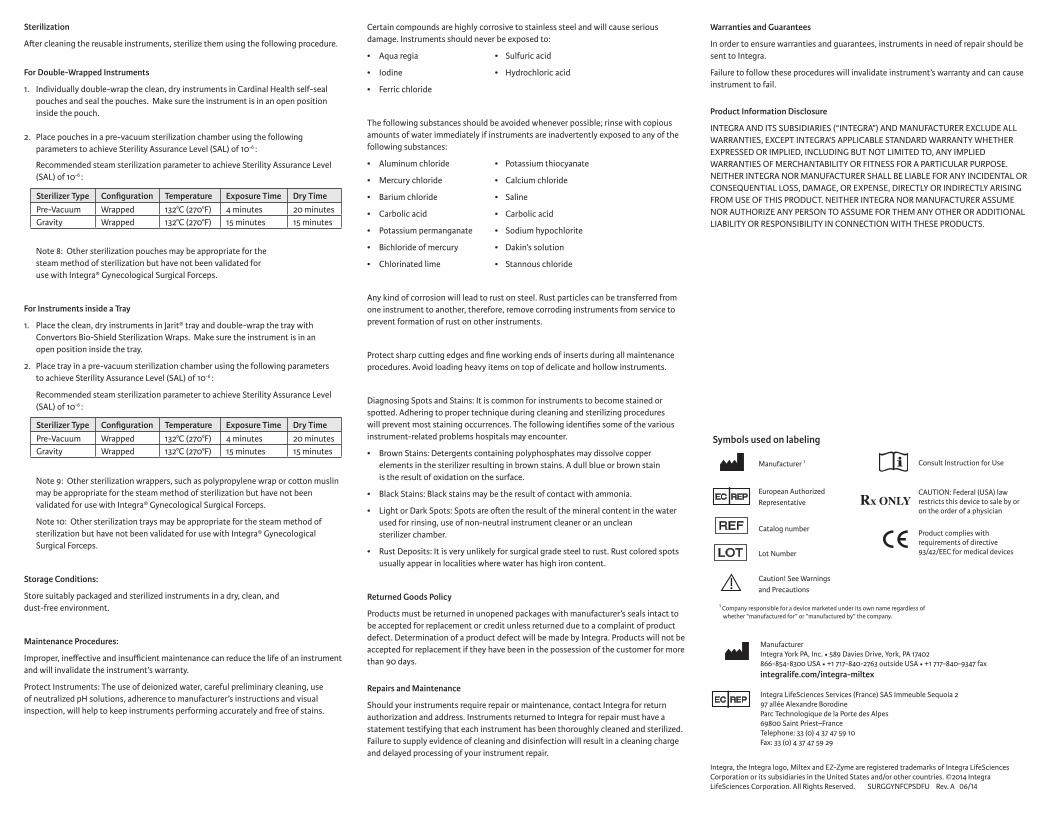
Sterilization
After cleaning the reusable instruments, sterilize them using the following procedure.
For Double-Wrapped Instruments
1. Individually double-wrap the clean, dry instruments in Cardinal Health self-seal pouches and seal the pouches. Make sure the instrument is in an open position inside the pouch. 2. Place pouches in a pre-vacuum sterilization chamber using the following parameters to achieve Sterility Assurance Level (SAL) of 10-6 : Recommended steam sterilization parameter to achieve Sterility Assurance Level (SAL) of 10-6 :
Note 8: Other sterilization pouches may be appropriate for the steam method of sterilization but have not been validated for use with Integra® Gynecological Surgical Forceps.
For Instruments inside a Tray
1. Place the clean, dry instruments in Jarit® tray and double-wrap the tray with Convertors Bio-Shield Sterilization Wraps. Make sure the instrument is in an open position inside the tray.
2. Place tray in a pre-vacuum sterilization chamber using the following parameters to achieve Sterility Assurance Level (SAL) of 10-6 :
Recommended steam sterilization parameter to achieve Sterility Assurance Level (SAL) of 10-6 :
Note 9: Other sterilization wrappers, such as polypropylene wrap or cotton muslin may be appropriate for the steam method of sterilization but have not been validated for use with Integra® Gynecological Surgical Forceps.
Note 10: Other sterilization trays may be appropriate for the steam method of sterilization but have not been validated for use with Integra® Gynecological Surgical Forceps.
Storage Conditions:
Store suitably packaged and sterilized instruments in a dry, clean, and dust-free environment.
Maintenance Procedures:
Improper, ineffective and insufficient maintenance can reduce the life of an instrument and will invalidate the instrument’s warranty.
Protect Instruments: The use of deionized water, careful preliminary cleaning, use of neutralized pH solutions, adherence to manufacturer’s instructions and visual inspection, will help to keep instruments performing accurately and free of stains.
Certain compounds are highly corrosive to stainless steel and will cause serious damage. Instruments should never be exposed to:
• Aqua regia • Sulfuric acid
• Iodine • Hydrochloric acid
• Ferric chloride
The following substances should be avoided whenever possible; rinse with copious amounts of water immediately if instruments are inadvertently exposed to any of the following substances:
• Aluminum chloride • Potassium thiocyanate
• Mercury chloride • Calcium chloride
• Barium chloride • Saline
• Carbolic acid • Carbolic acid
• Potassium permanganate • Sodium hypochlorite
• Bichloride of mercury • Dakin’s solution
• Chlorinated lime • Stannous chloride
Any kind of corrosion will lead to rust on steel. Rust particles can be transferred from one instrument to another, therefore, remove corroding instruments from service to prevent formation of rust on other instruments.
Protect sharp cutting edges and fine working ends of inserts during all maintenance procedures. Avoid loading heavy items on top of delicate and hollow instruments.
Diagnosing Spots and Stains: It is common for instruments to become stained or spotted. Adhering to proper technique during cleaning and sterilizing procedures will prevent most staining occurrences. The following identifies some of the various instrument-related problems hospitals may encounter.
• Brown Stains: Detergents containing polyphosphates may dissolve copper elements in the sterilizer resulting in brown stains. A dull blue or brown stain is the result of oxidation on the surface.
• Black Stains: Black stains may be the result of contact with ammonia.
• Light or Dark Spots: Spots are often the result of the mineral content in the water used for rinsing, use of non-neutral instrument cleaner or an unclean sterilizer chamber.
• Rust Deposits: It is very unlikely for surgical grade steel to rust. Rust colored spots usually appear in localities where water has high iron content.
Returned Goods Policy
Products must be returned in unopened packages with manufacturer’s seals intact to be accepted for replacement or credit unless returned due to a complaint of product defect. Determination of a product defect will be made by Integra. Products will not be accepted for replacement if they have been in the possession of the customer for more than 90 days.
Repairs and Maintenance
Should your instruments require repair or maintenance, contact Integra for return authorization and address. Instruments returned to Integra for repair must have a statement testifying that each instrument has been thoroughly cleaned and sterilized. Failure to supply evidence of cleaning and disinfection will result in a cleaning charge and delayed processing of your instrument repair.
Warranties and Guarantees
In order to ensure warranties and guarantees, instruments in need of repair should be sent to Integra.
Failure to follow these procedures will invalidate instrument’s warranty and can cause instrument to fail.
Product Information Disclosure
INTEGRA AND ITS SUBSIDIARIES (“INTEGRA”) AND MANUFACTURER EXCLUDE ALL WARRANTIES, EXCEPT INTEGRA’S APPLICABLE STANDARD WARRANTY WHETHER EXPRESSED OR IMPLIED, INCLUDING BUT NOT LIMITED TO, ANY IMPLIED WARRANTIES OF MERCHANTABILITY OR FITNESS FOR A PARTICULAR PURPOSE. NEITHER INTEGRA NOR MANUFACTURER SHALL BE LIABLE FOR ANY INCIDENTAL OR CONSEQUENTIAL LOSS, DAMAGE, OR EXPENSE, DIRECTLY OR INDIRECTLY ARISING FROM USE OF THIS PRODUCT. NEITHER INTEGRA NOR MANUFACTURER ASSUME NOR AUTHORIZE ANY PERSON TO ASSUME FOR THEM ANY OTHER OR ADDITIONAL LIABILITY OR RESPONSIBILITY IN CONNECTION WITH THESE PRODUCTS.
Consult Instruction for Use
CAUTION: Federal (USA) law restricts this device to sale by or on the order of a physician
Product complies with requirements of directive 93/42/EEC for medical devices
Manufacturer 1
European AuthorizedRepresentative
Catalog number
Lot Number
Caution! See Warnings and Precautions
1 Company responsible for a device marketed under its own name regardless of whether “manufactured for” or “manufactured by” the company.
EC REP
REF
LOT
Integra LifeSciences Services (France) SAS Immeuble Sequoia 297 allée Alexandre BorodineParc Technologique de la Porte des Alpes69800 Saint Priest–FranceTelephone: 33 (0) 4 37 47 59 10Fax: 33 (0) 4 37 47 59 29
ManufacturerIntegra York PA, Inc. i 589 Davies Drive, York, PA 17402 866-854-8300 USA i +1 717-840-2763 outside USA i +1 717-840-9347 faxintegralife.com/integra-miltex
Integra, the Integra logo, Miltex and EZ-Zyme are registered trademarks of Integra LifeSciences Corporation or its subsidiaries in the United States and/or other countries. ©2014 Integra LifeSciences Corporation. All Rights Reserved. SURGGYNFCPSDFU Rev. A 06/14
EC REP
Symbols used on labeling
0123
Sterilizer Type Configuration Temperature Exposure Time Dry Time
Pre-Vacuum Wrapped 132°C (270°F) 4 minutes 20 minutesGravity Wrapped 132°C (270°F) 15 minutes 15 minutes
Sterilizer Type Configuration Temperature Exposure Time Dry Time
Pre-Vacuum Wrapped 132°C (270°F) 4 minutes 20 minutesGravity Wrapped 132°C (270°F) 15 minutes 15 minutes
Descripción
Los fórceps quirúrgicos ginecológicos Integra® están diseñados para proporcionar un agarre seguro del tejido durante los procedimientos de histerectomía vaginal y abdominal. Estos instrumentos atraumáticos están diseñados para minimizar la laceración o perforación del tejido incluso cuando se ejerce una retracción requerida. Debido a diferencias en la anatomía del lugar y los tipos de procedimientos quirúrgicos, se ofrece una variedad de configuraciones y modelos para brindar opciones al cirujano con el objetivo de garantizar que se satisfagan las necesidades clínicas. Indicaciones de uso
Los fórceps quirúrgicos ginecológicos Integra® son instrumentos manuales con cuchillas dobles indicados para la tracción, agarre, sujeción o compresión de tejidos durante los procedimientos ginecológicos. Contraindicaciones
Ninguna conocida Advertencias
• NO realice la esterilización rápida de los fórceps quirúrgicos ginecológicos Integra®. Los instrumentos no han sido validados como aptos para esterilización rápida.
• Deseche el instrumento después de una sospecha de exposición a la Enfermedad de Creutzfeldt-Jakob (ECJ).
• Los fórceps quirúrgicos ginecológicos Integra® no han sido validados como aptos para soportar las exposiciones a los químicos y las temperaturas recomendados para eliminar los priones.
Precauciones
• Lea las instrucciones de uso y manténgalas en un lugar seguro.
• Use el producto sólo de acuerdo con su uso previsto, consulte las INSTRUCCIONES DE USO.
• El uso de un instrumento para una función distinta a aquella para la que está diseñado podría hacer que el instrumento se dañe o se rompa, o que no funcione correctamente.
• Los instrumentos deben ser manipulados y operados por personal completamente familiarizado con su uso, ensamblaje y desensamblaje.
• Se debe hacer que los instrumentos sean seguros de manipular, inspeccionar y armar usando los equipos de protección personal (PPE) adecuados según lo estipulado por OSHA y AORN.
• El uso inadecuado de instrumentos conducirá a daños que generalmente no son reparables.
• Los instrumentos se deben inspeccionar completamente después de ser recibidos y antes de su uso, a fin de asegurar su funcionamiento correcto. No realizar una inspección completa para garantizar una función y un funcionamiento correctos del instrumento puede tener como resultado un funcionamiento incorrecto.
• Los fórceps quirúrgicos ginecológicos Integra® se suministran sin esterilizar y se les deben realizar procedimientos de pre-limpieza, limpieza, lubricación, examen visual y esterilización antes de su uso. Consulte los procedimientos de pre-limpieza, limpieza, examen visual y esterilización a continuación.
Fórceps quirúrgicos ginecológicos Integra® PRECAUCIÓN, venta sólo con receta médica: Las Leyes Federales de EE. UU. restringen la venta
de este dispositivo por prescripción de un cirujano.
Instrucciones de uso/Español
• Verifique los tornillos de los instrumentos después de la limpieza ultrasónica. La vibración a causa de la limpieza ultrasónica puede hacer que éstos se aflojen o se salgan.
• Antes de cada uso, inspeccione el producto en busca de: componentes sueltos, doblados, rotos, rajados, desgastados o fracturados.
• No use el producto si está dañado o defectuoso.
• Reemplace de inmediato cualquier componente dañado con piezas de repuesto originales.
• Guarde los productos en un lugar seco, limpio y seguro.
Procedimientos de pre-limpieza, limpieza y esterilización
Antes de usar los instrumentos, realice su pre-limpieza, limpieza (manual o automática), secado, examen visual y esterilización siguiendo los procedimientos a continuación.
El personal debe seguir las directrices aceptadas, tal y como se recomienda en la norma ANSI/AAMI ST79:2006, A1:2008, A2:2009 - Guía completa para la esterilización con vapor y aseguramiento de la esterilidad en los centros de salud.
Pre-limpieza La pre-limpieza debe realizarse tan pronto como sea posible después de la utilización de los instrumentos.
1. Elimine la suciedad más importante de los instrumentos quirúrgicos con una compresa y agua estéril después de su uso, a fin de evitar que la sangre y los fluidos corporales se sequen sobre los instrumentos.
2. Coloque los instrumentos en una bandeja/recipiente para instrumentos y sature todas las superficies durante cinco (5) minutos con un producto enzimático de pre-limpieza, tal como la Espuma enzimática de preparación de instrumentos Miltex.
Nota 1: Para mantener la suciedad húmeda puede usar otras espumas, vaporizadores o geles para uso en instrumentos quirúrgicos, pero éstos no han sido validados como aptos para usarse con los fórceps quirúrgicos ginecológicos Integra®.
Limpieza:
La limpieza debe realizarse tan pronto como sea posible después de la pre-limpieza de los instrumentos.
Después de llevar a cabo los pasos 1-6 a continuación, realice la “Limpieza manual” o la “Limpieza automática”.
1. Enjuague el instrumento con agua desionizada por dos (2) minutos.
2. Use un cepillo limpio de cerdas suaves para limpiar y eliminar la suciedad visible de los lúmenes y de otras superficies de los instrumentos.
3. Prepare la solución limpiadora enzimática multiuso Miltex® EZ-Zyme® según las recomendaciones/instrucciones del fabricante para obtener la dilución y la temperatura correctas.
4. Sumerja durante diez (10) minutos los instrumentos completamente abiertos en la solución limpiadora enzimática multiuso Miltex EZ-Zyme preparada.
5. Enjuague el instrumento y la bisagra con agua desionizada por dos (2) minutos.
6. Continúe con los procedimientos de “Limpieza manual” o “Limpieza automática” a continuación:
Limpieza manual
1. Prepare la solución limpiadora enzimática multiuso Miltex EZ-Zyme según las recomendaciones/instrucciones del fabricante para obtener la dilución y la temperatura correctas.
Nota 2: Se encuentran disponibles otros reactivos/detergentes de limpieza, pero éstos no han sido validados como aptos para usarse con los fórceps quirúrgicos ginecológicos Integra®.
2. Con un cepillo manual pequeño y limpio, elimine la suciedad de todas las superficies del instrumento mientras esté completamente sumergido en la solución.
Nota 3: Nunca use lana de acero, cepillos de alambre, hojas de bisturíes o detergentes/limpiadores altamente abrasivos para eliminar la suciedad, ya que éstos dañarán la superficie protectora de los instrumentos y provocarán corrosión.
3. Enjuague completamente y de manera enérgica por dos (2) minutos con agua desionizada.
4. Usando un limpiador ultrasónico Branson 8510 irradie con ultrasonido los instrumentos por diez (10) minutos.
• Prepare la solución limpiadora enzimática multiuso Miltex EZ-Zyme según las recomendaciones/instrucciones del fabricante para obtener la dilución y la temperatura correctas y colóquela en el dispositivo ultrasónico Branson 8510.
• Acondicione (elimine el gas) del limpiador ultrasónico por 5 minutos.
• Coloque los instrumentos en la bandeja para instrumentos del fabricante del limpiador ultrasónico.
• Asegúrese de que los instrumentos estén en la posición abierta.
• Mantenga separados los tipos de metales diferentes (es decir, separe el acero inoxidable del aluminio no anodizado, el bronce, el cobre y los enchapados de cromo para evitar posibles transferencias de un enchapado de metal a otro).
• Coloque la bandeja con los instrumentos en el limpiador ultrasónico Branson 8510.
• Irradie los instrumentos con ultrasonido por diez (10) minutos.
Nota 4: Puede haber otros limpiadores ultrasónicos, pero éstos no han sido validados como aptos para usarse con los fórceps quirúrgicos ginecológicos Integra®.
5. Saque los instrumentos del dispositivo de irradiación con ultrasonido y enjuáguelos por dos (2) minutos con agua destilada.
6. Inspeccione visualmente el instrumento para comprobar que esté limpio y que todos los componentes funcionen correctamente.
7. Aplique lubricante en aerosol Miltex en todas las articulaciones y superficies de unión móviles.
8. Deje que los instrumentos se sequen sobre un paño sin pelusas durante 60 minutos a una temperatura de 24 °C (75 °F).
Nota 5: Puede haber otros métodos de secado, pero éstos no han sido validados como aptos para usarse con los fórceps quirúrgicos ginecológicos Integra®.
9. Inspeccione los instrumentos para ver si están secos.
10. Aplique lubricante en aerosol Miltex en todas las articulaciones y superficies de unión móviles según las instrucciones del fabricante.
Limpieza automática
1. Coloque los instrumentos en un canasto de alambre.
• Asegúrese de que los instrumentos estén en la posición abierta.
• Mantenga separados los tipos de metales diferentes (es decir, separe el acero inoxidable del aluminio no anodizado, el bronce, el cobre y los enchapados de cromo para evitar posibles transferencias de un enchapado de metal a otro).
2. Coloque los canastos de alambre en una lavadora-esterilizadora automática o en una lavadora-desinfectadora, tal como la lavadora-desinfectadora de cámara única Steris Amsco Reliance 444. Usando los parámetros/detergentes enumerados en la tabla a continuación, limpie los instrumentos.
Tratamiento Tiempo (mm:ss) Temperatura Limpiador
Remojo previo 02:00 Fría (10 °C±2) Agua
Lavado enzimático
04:00 Caliente (mínima 43 °C/109 °F) Detergente enzimático Endozime A W Plus®
Lavado (limpieza)
02:00 60 °C (140 °F) Detergente enzimático Endozime A W Plus®
Enjuague 02:00 70 °C (158 °F) Agua
Secado 15:00 80 °C (176 °F) N/A
Nota 6: Puede haber otros parámetros específicos para lavadoras-esterilizadoras o lavadoras-desinfectadoras automáticas, pero éstos no han sido validados como aptos para usarse con los fórceps quirúrgicos ginecológicos Integra®.
3. Extraiga los instrumentos de la lavadora automática.
4. Inspeccione visualmente el instrumento para comprobar que esté limpio y que todos los componentes funcionen correctamente.
5. Inspeccione visualmente el instrumento para asegurarse de que esté seco.
Nota 7: Puede haber otros métodos de secado, pero éstos no han sido validados como aptos para usarse con los fórceps quirúrgicos ginecológicos Integra®.
6. Aplique lubricante en aerosol Miltex en todas las articulaciones y superficies de unión móviles según las instrucciones del fabricante.
Esterilización
Después de limpiar los instrumentos reutilizables, esterilícelos usando el siguiente procedimiento.
Para instrumentos en envoltura doble
1. Envuelva individualmente con una envoltura doble los instrumentos limpios y secos en bolsas médicas con cierre hermético incorporado Cardinal Health y séllelas. Asegúrese de que el instrumento esté en una posición abierta dentro de la bolsa.
2. Coloque las bolsas en una cámara de esterilización por vacío usando los siguientes parámetros para lograr el Nivel de garantía de esterilidad (SAL) de 10-6 :
Parámetro de esterilización por vapor recomendado para lograr el Nivel de garantía de esterilidad (SAL) de 10-6 :
Tipo de esterilizador
Configuración TemperaturaTiempo de exposición
Tiempo de secado
Prevacío Envuelto 132 °C (270 °F) 4 minutos 20 minutos
Gravedad Envuelto 132 °C (270 °F) 15 minutos 15 minutos
Nota 8: Para el método de esterilización por vapor pueden ser adecuadas otras bolsas de esterilización, pero éstas no han sido validadas como aptas para usarse con los fórceps quirúrgicos ginecológicos Integra®.
Para instrumentos dentro de una bandeja
1. Coloque los instrumentos limpios y secos en la bandeja Jarit® y envuélvala con una envoltura doble de esterilización Convertors Bio-Shield. Asegúrese de que el instrumento esté en una posición abierta dentro de la bandeja.
2. Coloque la bandeja en una cámara de esterilización por vacío usando los siguientes parámetros para lograr el Nivel de garantía de esterilidad (SAL) de 10-6 :
Parámetro de esterilización por vapor recomendado para lograr el Nivel de garantía de esterilidad (SAL) de 10-6 :
Tipo de esterilizador
Configuración TemperaturaTiempo de exposición
Tiempo de secado
Prevacío Envuelto 132 °C (270 °F) 4 minutos 20 minutos
Gravedad Envuelto 132 °C (270 °F) 15 minutos 15 minutos
Nota 9: Para el método de esterilización por vapor pueden ser adecuadas otras envolturas de esterilización, tal como una envoltura de polipropileno o una muselina de algodón, pero éstas no han sido validadas como aptas para usarse con los fórceps quirúrgicos ginecológicos Integra®.
Nota 10: Para el método de esterilización por vapor pueden ser adecuadas otras bandejas de esterilización, pero éstas no han sido validadas como aptas para usarse con los fórceps quirúrgicos ginecológicos Integra®.
Condiciones de almacenamiento:
Almacene los instrumentos correctamente envueltos y esterilizados en un ambiente seco, limpio y libre de polvo.
Procedimientos de mantenimiento:
Un mantenimiento inadecuado, ineficaz e insuficiente puede reducir la vida útil de un instrumento e invalidará la garantía de éste.
Proteja los instrumentos: El uso de agua desionizada, la limpieza previa cuidadosa, usar soluciones con pH neutro, seguir las instrucciones del fabricante y la inspección visual ayudarán a mantener la precisión de funcionamiento de los componentes y a evitar que aparezcan manchas en ellos.
Ciertos compuestos son altamente corrosivos para el acero inoxidable y pueden causar daños graves. Los instrumentos nunca se deben exponer a:
• Agua regia • Ácido sulfúrico
• Yodo • Ácido clorhídrico
• Cloruro de hierro
Se deben evitar las siguientes sustancias siempre que sea posible; enjuague de inmediato con abundante cantidad de agua si los instrumentos se exponen por accidente a cualquiera de las siguientes sustancias:
• Cloruro de aluminio • Tiocianato de potasio
• Cloruro de mercurio • Cloruro de calcio
• Cloruro de bario • Solución salina
• Ácido carbólico • Ácido carbólico
• Permanganato de potasio • Hipoclorito de sodio
• Bicloruro de mercurio • Solución de Dakin
• Hipoclorito de calcio • Cloruro de estaño
Cualquier tipo de corrosión se traducirá en la oxidación del acero. Las partículas de óxido se pueden transmitir de un instrumento a otro, por lo tanto, saque de servicio los instrumentos corroídos, para evitar la formación de óxido en otros instrumentos.
Proteja los bordes cortantes afilados y los extremos de los insertos que funcionan bien durante todos los procedimientos de mantenimiento. Evite cargar objetos pesados en la parte superior de los instrumentos delicados y huecos.
Diagnóstico de puntos y manchas. Es común que los instrumentos se manchen o se ensucien. Observar la técnica apropiada durante los procedimientos de limpieza y esterilización evitará la mayor presencia de manchas. A continuación se describen diversos problemas relacionados con los instrumentos que se pueden encontrar en los hospitales.
• Manchas de color marrón: Los detergentes con polifosfatos pueden disolver los elementos de cobre dentro del esterilizador, lo que produce manchas marrones. Una mancha azul o marrón sin brillo es resultado de la oxidación de la superficie.
• Manchas negras: Las manchas negras pueden producirse por el contacto con amoníaco.
• Manchas claras u oscuras: Las manchas a menudo son el resultado del contenido de minerales en el agua que se usó para el enjuague, del uso de un limpiador de instrumentos no neutro o de una cámara esterilizadora sucia.
• Depósitos de óxido: Es muy improbable que el acero de calidad quirúrgica se oxide. Generalmente, las manchas de color del óxido aparecen en localidades en las que el agua tiene un alto contenido de hierro.
Política de productos devueltos
Los productos deben devolverse en paquetes sin abrir, con los sellos del fabricante intactos para ser aceptados para reemplazo o crédito, a menos que se devuelvan
debido a defecto del producto. Integra determinará si el producto es defectuoso. Los productos no se aceptarán para reemplazo si han estado en manos del cliente por más de 90 días.
Reparaciones y mantenimiento
Si sus instrumentos necesitan reparación o mantenimiento, comuníquese con Integra para obtener autorización de devolución y la dirección. Los instrumentos devueltos a Integra para reparación deben incluir una declaración que atestigüe que cada instrumento ha sido limpiado y esterilizado minuciosamente. No proporcionar prueba de limpieza y desinfección derivará en un cargo de limpieza y demora al procesar la reparación de su instrumento.
Garantías y avales
A fin de asegurar las garantías y avales, los instrumentos que se deban reparar deben ser enviados a Integra.
No seguir estos procedimientos invalidará la garantía del instrumento y puede causar que éste falle.
Divulgación de la información del producto
INTEGRA Y SUS SUBSIDIARIAS (“INTEGRA”) Y EL FABRICANTE RECHAZAN TODAS LAS GARANTÍAS, SALVO LA GARANTÍA CONVENCIONAL VIGENTE DE INTEGRA, YA SEAN EXPLÍCITAS O IMPLÍCITAS, INCLUIDAS ENTRE OTRAS, TODAS LAS GARANTÍAS IMPLÍCITAS DE COMERCIABILIDAD O APTITUD PARA UN PROPÓSITO ESPECÍFICO. NI INTEGRA NI EL FABRICANTE SERÁN RESPONSABLES DE PÉRDIDAS FORTUITAS O EMERGENTES, DAÑOS O GASTOS QUE SURJAN EN FORMA DIRECTA O INDIRECTA DEL USO DE ESTE PRODUCTO. NI INTEGRA NI EL FABRICANTE ASUMEN O AUTORIZAN A NINGUNA PERSONA A ASUMIR POR ELLOS NINGUNA OBLIGACIÓN O RESPONSABILIDAD ADICIONAL RELACIONADA CON ESTOS PRODUCTOS.
Consulte las instrucciones de uso
ATENCIÓN: Las leyes federales de EE. UU. restringen la venta de este dispositivo a médicos o por prescripción médica
El producto cumple con los requisitos de la directiva 93/42/EEC para dispositivos médicos
Fabricante 1
Representante autorizado en la Unión Europea
Número de catálogo
Número de lote
¡Atención! Consulte las advertencias y precauciones
1 Empresa responsable por un dispositivo comercializado con su propio nombre, independientemente de si es “fabricado para” o “fabricado por” la empresa.
EC REP
REF
LOT
Integra LifeSciences Services (Francia) SAS Immeuble Sequoia 297 allée Alexandre BorodineParc Technologique de la Porte des Alpes69800 Saint Priest–FranciaTeléfono: 33 (0) 4 37 47 59 10Fax: 33 (0) 4 37 47 59 29
FabricanteIntegra York PA, Inc. i 589 Davies Drive, York, PA 17402 866-854-8300 EE. UU. i +1 717-840-2763 fuera de los EE. UU. i +1 717-840-9347 faxintegralife.com/integra-miltex
Integra, el logotipo de Integra, Miltex y EZ-Zyme son marcas registradas de Integra LifeSciences Corporation o sus subsidiarias en los Estados Unidos y otros países. ©2014 Integra LifeSciences Corporation. Todos los derechos reservados. SURGGYNFCPSDFU Rev. A 06/14
EC REP
Símbolos utilizados en el etiquetado
0123
Description
Les pinces chirurgicales gynécologiques Integra® sont conçues pour fournir une préhension sûre des tissus au cours de procédures d'hystérectomies vaginale et abdominale. Ces instruments atraumatiques sont conçus pour réduire la lacération ou la perforation du tissu lorsque la rétraction requise est exercée. De par les différences d'anatomie entre les sites et les types de procédures chirurgicales, différentes configurations et différents modèles sont proposés afin que le chirurgien dispose des options garantissant de répondre aux besoins cliniques. Mode d'emploi
Les pinces chirurgicales gynécologiques Integra® sont des instruments à main à double lame indiqués pour la traction, la préhension, le maintien ou la compression des tissus pendant les procédures gynécologiques. Contre-indications
Aucune connue
Avertissements
• NE PAS soumettre les pinces chirurgicales gynécologiques Integra® à une stérilisation éclair. Les instruments n'ont pas été validés pour cette méthode de stérilisation.
• Jeter l'instrument après une exposition supposée à la maladie de Creutzfeldt-Jakob (MCJ).
• Les pinces chirurgicales gynécologiques Integra® n'ont pas été validées pour résister aux expositions chimiques et thermiques recommandées pour éradiquer les prions.
Précautions
• Lire et conserver les consignes d'utilisation en lieu sûr.
• Utiliser le produit uniquement en conformité avec son utilisation prévue, voir la section MODE D'EMPLOI.
• En cas d'emploi d'un instrument pour un usage pour lequel il n'est pas conçu, l'instrument risque de s'endommager ou de se briser, ou encore de donner des résultats insatisfaisants.
• Les instruments doivent uniquement être manipulés et utilisés par des personnes possédant une maîtrise totale de leur fonctionnement, de leur montage et de leur démontage.
• Pour la manipulation, l'inspection et l'assemblage des instruments, porter un équipement de protection individuelle (EPI), comme recommandé par OSHA & AORN.
• Un emploi inadéquat des instruments se traduira par des dommages qui ne sont généralement pas réparables.
• Afin de garantir leur bon fonctionnement, les instruments doivent être soigneusement examinés au moment où ils sont reçus et avant de les utiliser. Le fait de ne pas procéder à une inspection complète afin de vérifier que l'instrument est opérationnel et fonctionne correctement risque de se solder par des résultats insatisfaisants.
• Les pinces chirurgicales gynécologiques Integra® sont fournies non stériles et doivent être pré-nettoyées, nettoyées, lubrifiées, examinées visuellement, et stérilisées avant toute utilisation. Consulter les procédures de pré-nettoyage, de nettoyage, d'examen visuel, de lubrification et de stérilisation décrites ci-dessous.
Pinces chirurgicales gynécologiques Integra® MISE EN GARDE : selon la loi fédérale des États-Unis, ce dispositif ne peut être vendu que par un
médecin ou sur ordonnance d'un médecin.
Mode d'emploi/Français
• Contrôler les vis des instruments après le nettoyage aux ultrasons. Avec les vibrations du nettoyage aux ultrasons, les vis peuvent se desserrer ou tomber.
• Avant chaque utilisation, vérifier que le produit ne comporte pas : de parties desserrées, pliées, cassées, craquelées, usées ou fracturées.
• Ne pas utiliser le produit s'il est endommagé ou défectueux.
• Remplacer immédiatement tous les composants endommagés par des pièces de rechange agréées.
• Conserver les produits dans un lieu sec, propre et sûr.
Procédures de pré-nettoyage, de nettoyage et de stérilisation
Avant d'utiliser les instruments, les pré-nettoyer, nettoyer (nettoyage manuel ou automatique), sécher, examiner visuellement, lubrifier et stériliser selon les procédures décrites ci-dessous.
Le personnel doit respecter les consignes de la norme ANSI/AAMI ST79:2006, A1:2008, A2:2009 - Guide complet de stérilisation à la vapeur et de garantie de la stérilité dans les établissements de soins médicaux.
Pré-nettoyage Le pré-nettoyage doit être effectué aussi rapidement que possible après utilisation de l’instrument.
1. Après utilisation, éliminer les gros débris des instruments chirurgicaux avec une éponge et de l’eau stérile pour éviter que le sang et les liquides biologiques n'y sèchent.
2. Placer les instruments sur un plateau/dans un récipient à instruments et saturer toutes les surfaces pendant cinq (5) minutes à l'aide d'un produit enzymatique de pré-nettoyage tel que la mousse enzymatique pour préparation d'instrument Miltex.
Remarque 1 : d'autres mousses, sprays ou gels, destinés à être utilisés avec des instruments chirurgicaux, permettent de maintenir l'humidité des souillures, cependant ils n'ont pas été validés pour être utilisés avec les pinces chirurgicales gynécologiques Integra®.
Nettoyage :
Le nettoyage doit être effectué aussi rapidement que possible après le pré-nettoyage de l’instrument.
Après avoir complété les étapes 1 à 6 ci-dessous, procéder à un « nettoyage manuel » ou à un « nettoyage automatique ».
1. Rincer soigneusement les instruments avec de l'eau déionisée pendant deux (2) minutes.
2. Utiliser une brosse à poils doux pour nettoyer et retirer les souillures visibles des surfaces des instruments.
3. Préparer une solution de nettoyage enzymatique multi-usages EZ-Zyme® Miltex®, conformément aux recommandations / instructions du fabricant, pour assurer une dilution et une température adéquates.
4. Immerger les instruments grand ouverts dans la solution de nettoyage enzymatique multi-usages EZ-Zyme Miltex pendant dix (10) minutes.
5. Rincer soigneusement les instruments et la charnière avec de l'eau déionisée pendant deux (2) minutes.
6. Procéder au « nettoyage manuel » ou au « nettoyage automatique » comme décrit ci-dessous :
Nettoyage manuel
1. Préparer une solution de nettoyage enzymatique multi-usages EZ-Zyme Miltex, conformément aux recommandations / instructions du fabricant, pour assurer une dilution et une température adéquates.
Remarque 2 : d'autres réactifs/détergents nettoyants sont disponibles, cependant ils n'ont pas été validés pour une utilisation avec les pinces chirurgicales gynécologiques Integra®.
2. Avec une petite brosse à main propre, éliminer la saleté de toutes les surfaces de l’instrument tout en le maintenant immergé dans la solution.
Remarque 3 : ne jamais utiliser de laine d’acier, de brosses métalliques, de lames de scalpel ni de détergents ou nettoyants extrêmement abrasifs pour éliminer la saleté des instruments chirurgicaux, ce qui endommagerait gravement la surface des instruments tout en favorisant la corrosion.
3. Rincer soigneusement et de façon agressive les instruments avec de l'eau déionisée pendant deux (2) minutes.
4. À l'aide d'un nettoyeur à ultrasons, Branson 8510, traiter les instruments aux ultrasons pendant dix (10) minutes.
• Préparer une solution de nettoyage enzymatique multi-usages EZ-Zyme Miltex, conformément aux recommandations / instructions du fabricant, pour assurer une dilution et une température adéquates et la placer dans le nettoyeur Branson 8510.
• Conditionner (dégazer) le nettoyeur à ultrasons pendant 5 minutes.
• Placer les instruments dans le plateau d'instruments du fabricant.
• S'assurer que les instruments sont en position ouverte.
• Conserver les différents types de métaux séparés (séparer l'acier inoxydable de l'aluminium non-anodisé, laiton, cuivre et de chromage pour éviter le transfert possible d'un revêtement métallique à l'autre).
• Placer le plateau avec les instruments dans le nettoyeur à ultrasons Branson 8510.
• Traiter les instruments aux ultrasons pendant dix (10) minutes.
Remarque 4 : d'autres nettoyeurs à ultrasons sont disponibles, cependant ils n'ont pas été validés pour une utilisation avec les pinces chirurgicales gynécologiques Integra®.
5. Retirer les instruments du nettoyeur à ultrasons et les rincer avec de l'eau distillée pendant deux (2) minutes.
6. Examiner visuellement les instruments afin de s'assurer qu'ils sont propres et que tous les éléments fonctionnent correctement.
7. Appliquer le lubrifiant en spray de Miltex sur toutes les articulations et les surfaces de contact mobiles.
8. Laisser sécher les instruments sur un tissu sec non pelucheux pendant 60 minutes à une température de 24 °C (75 °F).
Remarque 5 : d'autres méthodes de séchage sont disponibles, cependant elles n'ont pas été validées pour une utilisation avec les pinces chirurgicales gynécologiques Integra®.
9. Vérifier visuellement que les instruments sont secs.
10. Appliquer le lubrifiant en spray de Miltex sur toutes les articulations et les surfaces de contact mobiles conformément aux instructions du fabricant.
Nettoyage automatique
1. Mettre les instruments dans un panier métallique.
• S'assurer que les instruments sont en position ouverte.
• Conserver les différents types de métaux séparés (séparer l'acier inoxydable de l'aluminium non-anodisé, laiton, cuivre et de chromage pour éviter le transfert possible d'un revêtement métallique à l'autre).
2. Placer les corbeilles métalliques dans un appareil de lavage-stérilisation ou de lavage-désinfection, tel qu'un appareil de lavage et de désinfection Steris Amsco Reliance 444 à simple chambre. En utilisant les paramètres/détergents figurant dans le tableau ci-dessous pour le nettoyage des instruments.
Traitement Durée (mm:ss) Température nettoyeur
Pré-trempage 02:00 Froid (10 °C±2) Eau
Lavage enzymatique
04:00 Chaud (43 °C/109 °F minimum) Détergent enzymatique Endozime A W Plus®
Lavage (nettoyage)
02:00 60 °C (140 °F) Détergent enzymatique Endozime A W Plus®
Rinçage 02:00 70 °C (158 °F) Eau
Séchage 15:00 80 °C (176 °F) S/O
Remarque 6 : d'autres paramètres spécifiques pour appareils de lavage-stérilisation ou de lavage-désinfection sont possibles, cependant ils n'ont pas été validés pour être utilisés avec les pinces chirurgicales gynécologiques Integra®.
3. Retirer les instruments du nettoyeur automatique.
4. Examiner visuellement l'instrument afin de s'assurer qu'il est propre et que tous les éléments fonctionnent correctement.
5. Examiner visuellement l'instrument afin de s'assurer qu'il est sec.
Remarque 7 : d'autres méthodes de séchage sont disponibles, cependant elles n'ont pas été validées pour une utilisation avec les pinces chirurgicales gynécologiques Integra®.
6. Appliquer le lubrifiant en spray de Miltex sur toutes les articulations et les surfaces de contact mobiles conformément aux instructions du fabricant.
Stérilisation
Après avoir nettoyé les instruments réutilisables, les stériliser en utilisant la procédure suivante.
Pour les instruments en sachet double
1. Envelopper chaque instrument sec séparément dans deux sachets autocollants de Cardinal Health et les fermer. Veiller à ce que chaque instrument soit en position ouverte dans le sachet.
2. Placer les sachets dans une chambre de stérilisation à pré-vide, en utilisant les paramètres de stérilisation recommandés pour atteindre un niveau d'assurance de stérilité (NAS) de 10-6 :
Paramètre recommandé de stérilisation à la vapeur pour atteindre un niveau d'assurance de stérilité (NAS) de 10-6 :
Type de stérilisateur
Configuration TempératureDurée d'exposition
Durée de séchage
Pré-vide Enveloppé 132 °C (270 °F) 4 minutes 20 minutesGravité Enveloppé 132 °C (270 °F) 15 minutes 15 minutes
Remarque 8 : d'autres poches de stérilisation peuvent convenir à la méthode de stérilisation par vapeur, cependant elles n'ont pas été validées pour être utilisées avec les pinces chirurgicales gynécologiques Integra®.
Pour les instruments dans un plateau
1. Placer les instruments propres et secs sur un plateau Jarit® et emballer celui-ci dans deux sachets de stérilisation Convertors Bio-Shield. Veiller à ce que chaque instrument soit en position ouverte dans le plateau.
2. Placer le plateau enveloppé dans une chambre de stérilisation à pré-vide, en utilisant les paramètres de stérilisation suivants pour atteindre un niveau d'assurance de stérilité (NAS) de 10-6 :
Paramètre recommandé de stérilisation à la vapeur pour atteindre un niveau d'assurance de stérilité (NAS) de 10-6 :
Type de stérilisateur
Configuration TempératureDurée d'exposition
Durée de séchage
Pré-vide Enveloppé 132 °C (270 °F) 4 minutes 20 minutesGravité Enveloppé 132 °C (270 °F) 15 minutes 15 minutes
Remarque 9 : d'autres sachets de stérilisation, tels que des sachets en polypropylène ou en mousseline de coton peuvent convenir à la méthode de stérilisation par vapeur, cependant ils n'ont pas été validés pour être utilisés avec les pinces chirurgicales gynécologiques Integra®.
Remarque 10 : d'autres plateaux de stérilisation peuvent convenir à la méthode de stérilisation par vapeur, cependant ils n'ont pas été validés pour être utilisés avec les pinces chirurgicales gynécologiques Integra®.
Conditions de stockage :
Conserver les instruments stérilisés et correctement emballés dans un endroit sec, propre et sans poussière.
Procédures d'entretien :
Une maintenance incorrecte, inadéquate et insuffisante peut réduire la durée de vie d'un instrument et en annulera la garantie.
Protection des instruments : l'emploi d'eau déionisée, un nettoyage préliminaire minutieux, l'utilisation de solutions à pH neutralisé, le respect des consignes du fabricant et l'inspection visuelle aideront à avoir des instruments qui fonctionnent avec précision et ne se tachent pas.
Certains composés ont une action corrosive très forte contre l'acier inoxydable et provoquent un endommagement important. Les instruments ne doivent jamais être exposés aux produits suivants :
• Eau régale • Acide sulfurique
• Iode • Acide chlorhydrique
• Chlorure ferrique
Éviter autant que possible toute exposition aux substances suivantes ; rincer immédiatement à grande eau si les instruments sont accidentellement exposés à l'une de ces substances :
• Chlorure d'aluminium • Thiocyanate de potassium
• Chlorure de mercure • Chlorure de calcium
• Chlorure de baryum • Solution saline
• Acide phénique • Acide phénique
• Permanganate de potassium • Hypochlorite de sodium
• Bichlorure de mercure • Liqueur de Dakin
• Chlorure de chaux • Chlorure stanneux
Tout type de corrosion fera rouiller l'acier. Étant donné que les particules de rouille peuvent être transférées d'un instrument à un autre, les instruments atteints de corrosion doivent être éliminés afin d'empêcher la formation de rouille sur d'autres instruments.
Protéger les bords aiguisés et les extrémités des inserts pendant toutes les procédures de maintenance. Éviter de poser des objets lourds sur les instruments délicats et creux.
Détection des salissures et des taches : il n'est pas rare que les instruments se salissent ou se tachent. L'application de techniques adéquates de nettoyage et de stérilisation évitera la majorité de ces problèmes. La liste suivante indique certains des problèmes liés aux instruments qui risquent de se présenter en environnement hospitalier.
• Taches marron : les détergents contenant des polyphosphates peuvent dissoudre les éléments de cuivre dans le stérilisateur et faire des taches marrons. Une tache terne bleue ou marron indique une oxydation sur la surface.
• Taches noires : les taches noires peuvent résulter d'un contact avec de l'ammoniac.
• Salissures claires ou foncées : les salissures résultent fréquemment du contenu minéral de l'eau utilisée pour le rinçage, de l'utilisation d'un produit nettoyant non neutre ou d'une chambre de stérilisateur sale.
• Dépôts de rouille : il est très rare que l'acier de qualité chirurgicale rouille. Les taches de couleur rouille apparaissent généralement dans les lieux où l'eau contient beaucoup de fer.
Politique des marchandises renvoyées
Les produits doivent être renvoyés dans des emballages fermés et avec les cachets du fabricant intacts pour que le remplacement ou l'octroi d'un crédit soit accepté, à moins que les produits ne soient renvoyés dans le cadre d’une réclamation due à un défaut. Integra se réserve le droit de déterminer si un produit est défectueux ou non. Les produits ne peuvent plus être remplacés après 90 jours en possession de l’utilisateur.
Réparations et maintenance
Si vos instruments nécessitent une réparation ou une intervention de maintenance, contactez Integra pour obtenir une autorisation et une adresse de renvoi. Les instruments renvoyés à Integra pour réparation doivent être accompagnés d'une déclaration certifiant que chaque instrument a été soigneusement nettoyé et stérilisé. Si aucune preuve de nettoyage et de désinfection n'est fournie, des frais de nettoyage seront facturés et la réparation de l'instrument sera retardée.
Garanties
Afin de ne pas risquer d'annulation de garantie, les instruments nécessitant une réparation doivent être envoyés à Integra.
Le non-respect de ces procédures entraînera l'annulation de la garantie et risque de provoquer le dysfonctionnement de l'instrument.
Information sur la responsabilité
INTEGRA ET SES FILIALES (« INTEGRA ») ET LE FABRICANT EXCLUENT TOUTE GARANTIE, EXPRESSE OU TACITE, AUTRE QUE LA GARANTIE STANDARD INTEGRA APPLICABLE, Y COMPRIS, MAIS SANS S'Y LIMITER, TOUTE GARANTIE TACITE DE QUALITÉ MARCHANDE OU D'APTITUDE À UN USAGE PARTICULIER. NI INTEGRA NI LE FABRICANT NE PEUVENT ÊTRE TENUS RESPONSABLES EN CAS DE PERTE ACCIDENTELLE OU CAUSALE, DE DOMMAGE OU DE FRAIS PROVENANT DIRECTEMENT OU INDIRECTEMENT DE L’UTILISATION DE CET APPAREIL. INTEGRA ET LE FABRICANT REJETTENT, DIRECTEMENT OU INDIRECTEMENT, TOUTE RESPONSABILITÉ SUPPLÉMENTAIRE EN RELATION AVEC CES PRODUITS.
Consulter le mode d'emploi
MISE EN GARDE : selon la loi fédérale des États-Unis, ce dispositif ne peut être vendu que par un médecin ou sur ordonnance d'un médecin
Ce produit est conforme aux exigences de la directive 93/42/EEC concernant les appareils médicaux
Fabricant 1
Représentant européen autorisé
Référence
Numéro du lot
Mise en garde ! Voir les avertissements et précautions
1 Société responsable d'un dispositif mis en marché sous son propre nom qu'il soit ou non « fabriqué pour » ou « fabriqué par » la société.
EC REP
REF
LOT
Integra LifeSciences Services (France) SAS Immeuble Sequoia 297 allée Alexandre BorodineParc Technologique de la Porte des Alpes69800 Saint Priest - FranceTéléphone : 33 (0) 4 37 47 59 10Fax: 33 (0) 4 37 47 59 29
FabricantIntegra York PA, Inc. i 589 Davies Drive, York, PA 17402 866-854-8300 États-Unis i +1 717-840-2763 Hors des États-Unis i +1 717-840-9347 faxintegralife.com/integra-miltex
Integra, le logo Integra, Miltex et EZ-Zyme sont des marques déposées par Integra LifeSciences Corporation ou ses filiales aux États-Unis et/ou dans d'autres pays. ©2014 Integra LifeSciences Corporation. Tous droits réservés. SURGGYNFCPSDFU Rev. A 06/14
EC REP
Symboles utilisés sur les étiquettes
0123
Beschreibung
Die Integra® Gynäkologische Operationspinzette wurde entwickelt, um Gewebe bei vaginalen und abdominalen Hysterektomieverfahren sicher zu greifen. Dieses atraumatische Instrument ist dafür vorgesehen, Risswunden oder Perforation des Gewebes selbst dann zu minimieren, wenn notwendige Retraktion angewendet wird. Aufgrund der Unterschiede in der Anatomie des Situs und der Arten der Operationsverfahren werden eine Reihe von Konfigurationen und Modellen angeboten, damit der Chirurg in der Lage ist hat, die Erfüllung klinischer Anforderungen sicherzustellen. Anwendungsbereiche
Die Integra® Gynäkologische Operationspinzette ist ein Handinstrument mit Doppelklingen, das zum Ziehen, Ergreifen, Halten oder Zusammendrücken von Gewebe bei gynäkologischen Verfahren indiziert ist. Kontraindikationen
Keine bekannt Warnhinweise
• Die Integra® Gynäkologische Operationspinzette NICHT blitzsterilisieren. Das Instrument ist nicht für Blitzsterilisation validiert.
• Das Instrument entsorgen, wenn eine Exposition mit Creutzfeld-Jakobs-Krankheit (CJK) vermutet wird.
• Die Integra® Gynäkologische Operationspinzette wurde nicht validiert, der chemischen und thermischen Exposition zu widerstehen, die zur Vernichtung von Prionen empfohlen wird.
Vorsichtsmaßnahmen
• Lesen Sie diese Gebrauchsanleitung genau durch und bewahren Sie sie an einem sicheren Ort auf.
• Verwenden Sie das Produkt nur gemäß des Verwendungszwecks, siehe ANWENDUNGBEREICHE.
• Durch die Verwendung eines Instruments zu einer anderen als der vorgesehenen Aufgabe kann das Instrument beschädigt oder zerbrochen werden oder mangelhafte Leistung aufweisen.
• Die Instrumente dürfen nur von Personal gehandhabt werden, das vollständig mit deren Verwendung, Montage und Demontage vertraut ist.
• Instrumente müssen sicher für Gebrauch, Inspektion und Montage vorbereitet werden, indem wie von OSHA & AORN veröffentlicht entsprechende persönliche Schutzausrüstung (PPE) getragen wird.
• Die nicht ordnungsgemäße Verwendung der Instrumente führt zu gewöhnlich irreparablen Schäden.
• Die Instrumente müssen beim Empfang und vor jedem Gebrauch genau auf ihre Funktion geprüft werden. Wird keine vollständige Inspektion durchgeführt, mit der die korrekte Bedienung und Funktion des Instruments sichergestellt wird, kann dies zu einem unbefriedigenden Ergebnis führen.
• Integra® Gynäkologische Operationspinzette wird nicht-steril geliefert und muss vor Gebrauch vorgereinigt, gereinigt, sichtgeprüft und sterilisiert werden. Nachfolgend finden Sie die Verfahren zur Vorreinigung, Reinigung, Sichtprüfung und Sterilisierung.
Integra® Gynäkologische Operationspinzette
Verschreibungspflichtig ACHTUNG: US-Bundesgesetze beschränken dieses Gerät auf den
Verkauf an oder auf Anweisung eines Chirurgen.
Gebrauchsanweisung/Deutsch
• Überprüfen Sie nach der Ultraschallreinigung Schrauben an Instrumenten. Vibrationen durch die Ultraschallreinigung können sie lösen und herausfallen lassen.
• Überprüfen Sie das Produkt vor jedem Gebrauch auf: lose, verbogene, zerbrochene, gerissene, abgenutzte oder gebrochene Bestandteile.
• Verwenden Sie das Produkt nicht, wenn es beschädigt oder defekt ist.
• Ersetzen Sie alle beschädigten Bestandteile umgehend durch Originalersatzteile.
• Lagern Sie die Produkte an einem trockenen, sauberen und sicheren Ort.
Verfahren zur Vorreinigung, Reinigung und Sterilisation
Bevor Sie die Instrumente verwenden, müssen diese gemäß den nachfolgenden Verfahren vorgereinigt, gereinigt (manuell oder automatisch), getrocknet, optisch überprüft und sterilisiert werden.
Das Personal sollte anerkannte Richtlinien, wie in ANSI/AAMI ST79:2006, A1:2008, A2:2009 - Comprehensive guide to steam sterilization and sterility assurance in health care facilities (Ausführliche Richtlinien zur Dampfsterilisation und Sterilitätssicherung in Gesundheitseinrichtungen) empfohlen, befolgen.
Vorreinigung Instrumente müssen nach der Verwendung so schnell wie möglich vorgereinigt werden.
1. Entfernen Sie groben Schmutz mit einem Schwamm und sterilem Wasser von den Instrumenten, um zu verhindern, dass Blut und andere Körperflüssigkeiten an das Instrument trocknen.
2. Legen Sie die Instrumente in ein Instrumententablett/einen Instrumentenbehälter und tränken Sie alle Oberflächen fünf (5) Minuten lang mit einem enzymatischen Vorreinigungsprodukt, wie z. B. dem Enzymschaum zur Instrumentenvorbereitung von Miltex.
Hinweis 1: Es sind andere Schaum-, Spray- oder Gelprodukte zur Befeuchtung von Schmutz für chirurgische Instrumente verfügbar, diese wurden jedoch nicht für die Verwendung mit der Integra® Gynäkologischen Operationspinzette validiert.
Reinigung:
Nach der Vorreinigung müssen Instrumente so schnell wie möglich gereinigt werden.
Nachdem Sie die nachfolgenden Schritte 1-6 durchgeführt haben, führen Sie entweder die „Manuelle Reinigung“ oder die „Automatische Reinigung“ durch.
1. Spülen Sie das Instrument zwei (2) Minuten lang mit entionisiertem Wasser.
2. Verwenden Sie eine saubere, weiche Bürste, um sichtbaren Schmutz von den Instrumentenoberflächen zu entfernen.
3. Bereiten Sie die Miltex® EZ-Zyme® Allzweck-Enzymreinigungslösung gemäß den Empfehlungen/der Anleitung des Herstellers vor, um eine korrekte Verdünnung und Temperatur zu erreichen.
4. Tauchen Sie die vollständig geöffneten Instrumente zehn (10) Minuten lang in die vorbereitete Miltex EZ-Zyme Allzweck-Enzymreinigerlösung.
5. Hängen Sie das Instrument ab und spülen Sie es zwei (2) Minuten lang mit entionisiertem Wasser.
6. Fahren Sie entweder mit dem nachfolgenden Verfahren „Manuelle Reinigung“ oder „Automatische Reinigung“ fort:
Manuelle Reinigung
1. Bereiten Sie die Miltex EZ-Zyme Allzweck-Enzymreinigungslösung gemäß den Empfehlungen/der Anleitung des Herstellers vor, um eine korrekte Verdünnung und Temperatur zu erreichen.
Hinweis 2: Es sind andere Reinigungsmittel verfügbar, diese wurden jedoch nicht für die Verwendung mit der Integra® Gynäkologischen Operationspinzette validiert.
2. Entfernen sie mit einer kleinen, sauberen Handbürste Schmutz von allen Oberflächen des Instruments und tauchen Sie diese dabei in die Lösung.
Hinweis 3: Verwenden Sie nie Stahlwolle, Drahtbürsten, Skalpellklingen oder scheuernde Reinigungsmittel, um Schmutz zu entfernen, da diese die schützende Oberfläche der Instrumente beschädigen und zu Korrosion führen.
3. Spülen Sie gründlich und energisch zwei (2) Minuten lang mit entionisiertem Wasser.
4. Behandeln Sie die Instrumente zehn (10) Minuten lang mit einem Branson 8510 Ultraschallreiniger im Ultraschallbad.
• Bereiten Sie die Miltex EZ-Zyme Allzweck-Enzymreinigungslösung gemäß den Empfehlungen/der Anleitung des Herstellers vor, um eine korrekte Verdünnung und Temperatur zu erreichen und legen Sie die Instrumente in den Branson 8510 Ultraschallreiniger.
• Bereiten Sie den Ultraschallreiniger 5 Minuten lang auf (entgasen).
• Legen Sie die Instrumente auf das Instrumententablett des Ultraschallreiniger-Herstellers.
• Stellen Sie sicher, dass die Instrumente geöffnet sind.
• Halten Sie verschiedene Metallarten getrennt (d. h. trennen Sie Edelstahl von uneloxiertem Aluminium, Messing, Kupfer und Chrombeschichtungen, um den möglichen Transfer von einer Metallbeschichtung zur anderen zu verhindern).
• Stellen Sie das Tablett mit den Instrumenten in den Branson 8510 Ultraschallreiniger.
• Behandeln Sie die Instrumente zehn (10) Minuten lang im Ultraschallbad.
Hinweis 4: Es sind eventuell andere Ultraschallreiniger verfügbar, diese wurden jedoch nicht für die Verwendung mit der Integra® Gynäkologischen Operationspinzette validiert.
5. Nehmen Sie die Instrumente aus dem Ultraschallreiniger und spülen Sie sie zwei (2) Minuten lang mit destilliertem Wasser.
6. Führen Sie eine optische Kontrolle der Instrumente auf Sauberkeit durch und stellen Sie sicher, dass sich alle Teile funktionsfähig sind.
7. Verwenden Sie Miltex Sprayschmieröl an allen Gelenken und beweglichen Passflächen.
8. Lassen Sie die Instrumente auf einem fusselfreien Tuch 60 Minuten lang bei einer Temperatur von 24 °C (75 °F) trocknen.
Hinweis 5: Es sind andere Trocknungsmethoden verfügbar, diese wurden jedoch nicht für die Verwendung mit der Integra® Gynäkologischen Operationspinzette validiert.
9. Überprüfen Sie die Instrumente optisch auf Trockenheit.
10. Verwenden Sie Miltex Sprayschmieröl an allen Gelenken und beweglichen Passflächen gemäß Herstelleranweisungen.
Automatische Reinigung
1. Legen Sie die Instrumente in einen Drahtkorb.
• Stellen Sie sicher, dass die Instrumente geöffnet sind.
• Halten Sie verschiedene Metallarten getrennt (d. h. trennen Sie Edelstahl von uneloxiertem Aluminium, Messing, Kupfer und Chrombeschichtungen, um den möglichen Transfer von einer Metallbeschichtung zur anderen zu verhindern).
2. Legen Sie die Drahtkörbe in ein automatisches Wasch- oder Desinfektionssystem, wie z. B. ein Steris Amsco Reliance 444-Desinfektionssystem mit einer Kammer. Verwenden Sie die Parameter/Reinigungsmittel aus der nachfolgenden Tabelle, um die Instrumente zu reinigen.
Behandlung Zeit (mm:ss) temperatur Reiniger
Einweichen 02:00 Kalt (10 °C±2) Wasser
Enzymwäsche 04:00 Heiß (mindestens 43 °C/109 °F) Endozime AW Plus® Enzymreiniger
Waschen (Reinigen)
02:00 60 °C (140 °F) Endozime AW Plus® Enzymreiniger
Abspülen 02:00 70 °C (158 °F) Wasser
Trocknen 15:00 80 °C (176 °F) Entfällt
Hinweis 6: Es sind möglicherweise andere Parameter für automatische Wasch- oder Desinfektionssysteme verfügbar, diese wurden jedoch nicht für die Verwendung mit der Integra® Gynäkologischen Operationspinzette validiert.
3. Nehmen Sie die Instrumente aus dem Reinigungsautomaten.
4. Führen Sie eine optische Kontrolle der Instrumente auf Sauberkeit durch und stellen Sie sicher, dass sich alle Teile funktionsfähig sind.
5. Überprüfen Sie das Instrument optisch auf Trockenheit.
Hinweis 7: Es sind andere Trocknungsmethoden verfügbar, diese wurden jedoch nicht für die Verwendung mit der Integra® Gynäkologischen Operationspinzette validiert.
6. Verwenden Sie Miltex Sprayschmieröl an allen Gelenken und beweglichen Passflächen gemäß Herstelleranweisungen.
Sterilisation
Nach der Reinigung der wiederverwendbaren Instrumente sterilisieren Sie sie unter Anwendung des folgenden Verfahrens.
Für doppelt eingepackte Instrumente
1. Packen Sie die sauberen, trockenen Instrumente einzeln in medizinische selbstdichtende Beutel von Cardinal Health ein und versiegeln Sie die Beutel. Stellen Sie sicher, dass das Instrument im Beutel in einer geöffneten Position ist.
2. Legen Sie die Beutel in eine Vorvakuum-Sterilisationskammer und befolgen Sie die folgenden Parameter, um einen Sterilisationsgrad (SAL) von 10-6 zu erreichen:
Empfohlene Parameter für die Dampfsterilisation, um einen Sterilisierungsgrad (SAL) von 10-6 zu erreichen:
Sterilisatortyp Konfiguration temperatur Expositionszeit Trockenzeit
Vorvakuum Verpackt 132 °C (270 °F) 4 Minuten 20 Minuten
Schwerkraft Verpackt 132 °C (270 °F) 15 Minuten 15 Minuten
Hinweis 8: Es sind für die Dampfsterilisation andere Sterilisationsbeutel verfügbar, diese wurden jedoch nicht für die Verwendung mit der Integra® Gynäkologischen Operationspinzette validiert.
Für Instrumente in einem Tablett
1. Stellen Sie die sauberen, trockenen Instrumente auf ein Jarit® Tablett und packen Sie das Tablett doppelt mit Convertors Bio-Shield Sterilisationstüchern ein. Stellen Sie sicher, dass das Instrument im Tablett in einer geöffneten Position ist.
2. Stellen Sie das Tablett in eine Vorvakuum-Sterilisationskammer und verwenden Sie folgende Parameter, um einen SAL-Wert von 10-6 zu erreichen:
Empfohlene Parameter für die Dampfsterilisation, um einen Sterilisierungsgrad (SAL) von 10-6 zu erreichen:
Sterilisatortyp Konfiguration temperatur Expositionszeit Trockenzeit
Vorvakuum Verpackt 132 °C (270 °F) 4 Minuten 20 Minuten
Schwerkraft Verpackt 132 °C (270 °F) 15 Minuten 15 Minuten
Hinweis 9: Es sind für die Dampfsterilisation andere Sterilisationsverpackungen,
wie Polypropylen oder Baumwollmusselin, verfügbar, diese wurden jedoch nicht für die Verwendung mit der Integra® Gynäkologischen Operationspinzette validiert.
Hinweis 10: Es sind für die Dampfsterilisation andere Sterilisationstabletts verfügbar, diese wurden jedoch nicht für die Verwendung mit der Integra® Gynäkologischen Operationspinzette validiert.
Lagerbedingungen:
Lagern Sie entsprechend verpackte und sterilisierte Instrumente in einer trockenen, sauberen und staubfreien Umgebung.
Wartungsverfahren:
Eine unsachgemäße, nicht effektive und nicht ausreichende Wartung kann die Lebensdauer des Instruments verringern und führt zum Verlust der Gültigkeit der Gewährleistung.
Instrumente schützen: Die Verwendung von deionisiertem Wasser, die sorgfältige Vorreinigung, die Verwendung von Lösungen mit neutralem pH-Wert, die Beachtung der Herstelleranweisungen und die Sichtprüfung trägt zur präzisen Leistung der Instrumente bei und hilft sie frei von Flecken zu halten.
Bestimmte Verbindungen wirken stark ätzend auf rostfreien Stahl und verursachen schwere Schäden. Die Instrumente dürfen nie folgenden Substanzen ausgesetzt werden:
• Königswasser • Schwefelsäure
• Iod • Salzsäure
• Eisenchlorid
Die folgenden Substanzen sollten möglichst immer vermieden werden; spülen Sie mit reichlich Wasser ab, wenn Instrumente aus Versehen mit einer der folgenden Substanzen in Berührung gekommen sind:
• Aluminumchlorid • Kaliumthiocyanat
• Quecksilberchlorid • Calciumchlorid
• Bariumchlorid • Saline
• Karbolsäure • Karbolsäure
• Kaliumpermanganat • Natriumhypochlorit
• Quecksilberdichlorid • Dakin-Lösung
• Calciumhypochlorit • Zinn(II)-chlorid
Jegliche Art von Korrosion hat das Rosten von Stahl zur Folge. Da Rostteilchen von einem Instrument auf das andere übertragen werden können, dürfen korrodierende Instrumente nicht mehr verwendet werden, um die Rostbildung an anderen Instrumenten zu verhindern.
Schützen Sie scharfe Schneidekanten und feine Arbeitsspitzen von Einsätzen während sämtlicher Wartungsverfahren. Vermeiden Sie es, schwere Gegenstände auf empfindliche und hohle Instrumente zu legen.
Diagnose von Flecken und Verfärbungen: Es ist normal, dass Instrumente Verfärbungen oder Flecken bekommen. Die Anwendung der richtigen Technik bei Reinigungs- und Sterilisationsverfahren verhindert das Auftreten der meisten Verfärbungen. Im Folgenden werden verschiedene Probleme mit dem Instrument aufgeführt, die in Krankenhäusern auftreten können.
• Braune Verfärbungen: Reinigungsmittel mit Polyphosphaten können Kupferelemente im Sterilisator auflösen und zu braunen Verfärbungen führen. Eine fahlblaue oder -braune Verfärbung ist das Ergebnis von Oxidation an der Oberfläche.
• Schwarze Verfärbungen: Schwarze Verfärbungen können von Kontakt mit Ammoniak herrühren.
• Helle oder dunkle Flecken: Flecken treten durch den Mineralanteil im Wasser, das für die Spülung verwendet wurde, die Verwendung nicht-neutraler Instrumentenreiniger oder einer unsauberen Sterilisatorkammer auf.
• Rostablagerungen: Es ist sehr unwahrscheinlich, dass chirurgischer Stahl rostet. Rostfarbene Flecken treten üblicherweise in Gegenden auf, in denen das Wasser einen hohen Eisengehalt hat.
Hinweise zur Rücksendung von Waren
Produkte müssen in der ungeöffneten Verpackung mit intaktem Herstellersiegel zurückgesandt werden, um einen Ersatz oder eine Gutschrift zu erhalten; es sei denn, sie werden aufgrund einer Beschwerde oder eines Produktdefekts zurückgesandt. Integra entscheidet, ob es sich um einen Produktdefekt handelt. Produkte können nicht zurückgesandt werden, wenn sie mehr als 90 Tage im Besitz des Kunden waren.
Reparatur und Wartung
Sollten Ihre Instrumente reparatur- oder wartungsbedürftig sein, wenden Sie sich an Integra, um eine Rücksendegenehmigung und -adresse zu erhalten. Den an Integra zur Reparatur zurückgesendeten Instrumenten muss eine Bescheinigung darüber beiliegen, dass jedes Instrument sorgfältig gereinigt und sterilisiert wurde. Falls kein Nachweis über die Reinigung oder Desinfektion vorhanden ist, wird eine Reinigungsgebühr erhoben und die Reparatur Ihres Instruments wird verzögert.
Gewährleistung und Garantie
Reparaturbedürftige Instrumente sollten zur Sicherung von Garantie- und Gewährleistungsansprüchen an Integra geschickt werden.
Die Nichtbefolgung dieser Verfahren führt zum Erlöschen der Garantie des Instruments und kann das Versagen des Instruments zur Folge haben.
Angaben zu den Produktinformationen
INTEGRA UND SEINE TOCHTERGESELLSCHAFTEN („INTEGRA“) UND DER HERSTELLER ÜBERNEHMEN AUSSER DER INTEGRA STANDARDGARANTIE KEINE ANDEREN GARANTIEN, AUSDRÜCKLICH ODER STILLSCHWEIGEND, EINSCHLIESSLICH, JEDOCH NICHT BESCHRÄNKT AUF GARANTIEN DER MARKTGÄNGIGKEIT ODER EIGNUNG FÜR EINEN BESTIMMTEN ZWECK. WEDER INTEGRA NOCH DER HERSTELLER SIND HAFTBAR FÜR NEBEN- ODER FOLGEVERLUSTE, SCHÄDEN ODER KOSTEN, DIE DIREKT ODER INDIREKT AUS DEM GEBRAUCH DIESES PRODUKTS ENTSTEHEN. WEDER INTEGRA NOCH DER HERSTELLER ÜBERNEHMEN EINE ANDERE BZW. WEITERE HAFTUNG BZW. VERANTWORTUNG IN VERBINDUNG MIT DIESEN PRODUKTEN ODER AUTORISIEREN DRITTE DIESE FÜR SIE ZU ÜBERNEHMEN.
Gebrauchsanweisung beachten
VORSICHT: Laut Bundesgesetz der USA darf dieses Produkt ausschließlich von oder auf Anordnung eines Arztes verkauft werden
Das Produkt erfüllt die Anforderungen der Richtlinie 93/42/EWG über Medizinprodukte
Hersteller 1
Autorisierte Vertretung in Europa
Bestellnummer
Lotnummer
Achtung! Siehe Warnhinweise und Vorsichtsmaßnahmen
1 Unternehmen mit Verantwortung für ein unter dem eigenem Namen vermarktetes Produkt, unabhängig davon ob es „vom“ oder „für das“ Unternehmen hergestellt wurde.
EC REP
REF
LOT
Integra LifeSciences Services (Frankreich) SAS Immeuble Sequoia 297 allée Alexandre BorodineParc Technologique de la Porte des Alpes69800 Saint Priest–FrankreichTelefon: 33 (0) 4 37 47 59 10Fax: 33 (0) 4 37 47 59 29
HerstellerIntegra York PA, Inc. i 589 Davies Drive, York, PA 17402 866-854-8300 USA i +1 717-840-2763 außerhalb der USA i +1 717-840-9347 Faxintegralife.com/integra-miltex
Integra, das Logo von Integra, Miltex und EZ-Zyme sind eingetragene Warenzeichen der Integra LifeSciences Corporation oder ihrer Tochtergesellschaften in den USA und/oder anderen Ländern. ©2014 Integra LifeSciences Corporation. Alle Rechte Vorbehalten. SURGGYNFCPSDFU Rev. A 06/14
EC REP
Symbole auf dem Produktetikett
0123
Descrizione
Le pinze per chirurgia ginecologica Integra® sono indicate per consentire una salda presa sui tessuti durante gli interventi di isterectomia vaginale e addominale. Il design atraumatico di questi strumenti consente di ridurre al minimo la lacerazione o la perforazione del tessuto anche quando venga eseguita la retrazione richiesta. In ragione delle peculiarità anatomiche del sito e dei tipi di intervento chirurgico, lo strumento viene offerto in una gamma di configurazioni e modelli per mettere a disposizione del chirurgo le opzioni necessarie a garantire la perfetta rispondenza ai requisiti clinici. Indicazioni per l'uso
Le pinze per chirurgia ginecologica Integra® sono strumenti manuali a doppia lama indicati per la trazione, la presa o la compressione del tessuto durante gli interventi ginecologici. Controindicazioni
Nessuna nota Avvertenze
• NON sottoporre a sterilizzazione lampo (ciclo flash) le pinze per chirurgia ginecologica Integra®. Tali strumenti non sono stati convalidati per la sterilizzazione flash.
• Eliminare gli strumenti qualora si sospetti un'esposizione alla malattia di Creutzfeldt-Jakob (MCJ).
• Le pinze per chirurgia ginecologica Integra® non sono state convalidate per resistere all'esposizione chimica e termica raccomandata per debellare i prioni.
Precauzioni
• Leggere le istruzioni per l'uso e conservarle in un luogo sicuro.
• Usare il prodotto unicamente secondo la sua destinazione d'uso, facendo riferimento alle INDICAZIONI PER L'USO.
• L'uso di uno strumento per uno scopo diverso da quello per cui è indicato potrebbe provocare il danneggiamento o la rottura dello stesso, oppure fornire prestazioni non soddisfacenti.
• Gli strumenti devono essere manipolati e usati da personale competente nel loro uso, montaggio e smontaggio.
• Gli strumenti devono essere resi sicuri per la manipolazione, l'ispezione e l'assemblaggio indossando dispositivi di protezione personale (DPI) idonei come indicato da OSHA e AORN.
• L’uso inappropriato degli strumenti può causare danni che sono, in genere, irreparabili.
• Per garantirne il corretto funzionamento, gli strumenti devono essere attentamente ispezionati quando vengono ricevuti e prima dell'utilizzo. La mancata completa ispezione volta ad assicurare il corretto funzionamento dello strumento può essere causa di prestazioni non soddisfacenti.
• Le pinze per chirurgia ginecologica Integra® non sono sterili alla fornitura, devono pertanto essere pre-pulite, pulite, esaminate visivamente e sterilizzate prima dell'uso. Si prega di consultare le procedure di pulizia preliminare, pulizia, esame visivo e sterilizzazione seguenti.
• Dopo ogni ciclo di lavaggio a ultrasuoni, verificare lo stato delle viti. La vibrazione delle lavatrici a ultrasuoni può indurne l'allentamento o il distacco.
Pinze per chirurgia ginecologica Integra® ATTENZIONE: la legge federale degli Stati Uniti limita la vendita del presente dispositivo ai soli
chirurghi o su presentazione di prescrizione di un chirurgo.
Istruzioni per l'uso/Italiano
• Prima di ciascun utilizzo, ispezionare il prodotto per verificare che non presenti componenti allentati, piegati, rotti, incrinati, usurati o fratturati.
• Non utilizzare il prodotto se è danneggiato o difettoso.
• Sostituire immediatamente i componenti danneggiati con ricambi originali.
• Conservare i prodotti in un luogo asciutto, pulito e sicuro.
Procedure di pulizia preliminare, pulizia e sterilizzazione
Prima di utilizzare gli strumenti, pre-pulirli, pulirli (mediante pulizia manuale o automatica), asciugarli, esaminarli visivamente e sterilizzarli seguendo le procedure sottoelencate.
Il personale deve seguire le linee guida approvate, come raccomandato in ANSI/AAMI ST79:2006, A1:2008, A2:2009 - Comprehensive guide to steam sterilization and sterility assurance in health care facilities (Guida completa alla sterilizzazione a vapore e alla garanzia di sterilità nelle strutture sanitarie).
Pulizia preliminare È necessario eseguire la pulizia preliminare non appena possibile dopo aver usato lo strumento.
1. Rimuovere i residui evidenti dagli strumenti chirurgici con una spugna chirurgica e acqua sterile dopo l'uso per evitare che il sangue e i fluidi corporei si secchino sugli strumenti.
2. Porre gli strumenti in un contenitore/vassoio strumenti e impregnare tutte le superfici per cinque (5) minuti con un prodotto enzimatico per la pulizia preliminare come la schiuma enzimatica Miltex per la pre-pulizia degli strumenti.
Nota 1: sono disponibili prodotti in schiuma, spray o gel per mantenere umido lo sporco sugli strumenti chirurgici, ma non sono stati autorizzati per l'uso con le pinze per chirurgia ginecologica Integra®.
Pulizia:
È necessario eseguire la pulizia non appena possibile dopo la pulizia preliminare della strumentazione.
Dopo aver eseguito i passi 1-6 seguenti, eseguire una “pulizia manuale” o una “pulizia automatica”.
1. Sciacquare strumento con acqua deionizzata per due (2) minuti.
2. Per rimuovere i residui visibili dalle superfici degli strumenti, utilizzare una spazzola con setole morbide.
3. Preparare la soluzione di detergente enzimatico polivalente Miltex® EZ-Zyme® in base alle raccomandazioni/istruzioni del produttore relative alla diluizione e alla temperatura corrette.
4. Immergere gli strumenti completamente aperti nella soluzione di detergente enzimatico polivalente Miltex EZ-Zyme preparata per dieci (10) minuti.
5. Risciacquare lo strumento e la cerniera con acqua deionizzata per due (2) minuti.
6. Eseguire le procedure di “Pulizia manuale” o di “Pulizia automatica” riportate di seguito:
Pulizia manuale
1. Preparare la soluzione di detergente enzimatico polivalente Miltex EZ-Zyme in base alle raccomandazioni/istruzioni del produttore relative alla diluizione e alla temperatura corrette.
Nota 2: sono disponibili altri reagenti di pulizia/detergenti ma non sono stati convalidati per l'uso con le pinze per chirurgia ginecologica Integra®.
2. Usando una piccola spazzola manuale pulita, eliminare lo sporco da tutte le superfici dello strumento tenendolo completamente immerso nella soluzione.
Nota 3: non utilizzare mai spazzole in lana d'acciaio o fili di ferro, lame di bisturi o detergenti/pulitori altamente abrasivi per rimuovere lo sporco poiché tali elementi danneggiano la superficie protettiva degli strumenti, portando alla loro corrosione.
3. Risciacquare meticolosamente ed energicamente per due (2) minuti con acqua deionizzata.
4. Sottoporre gli strumenti a pulizia a ultrasuoni per dieci (10) minuti in una lavatrice a ultrasuoni Branson 8510.
• Preparare la soluzione di detergente enzimatico polivalente Miltex EZ-Zyme in base alle raccomandazioni/istruzioni del produttore relative alla diluizione e alla temperatura corrette, quindi collocare in una lavatrice a ultrasuoni Branson 8510.
• Eseguire il degasaggio della lavatrice a ultrasuoni per 5 minuti.
• Porre gli strumenti nel vassoio strumenti del produttore della lavatrice a ultrasuoni.
• Verificare che gli strumenti siano in posizione aperta.
• Tenere separati gli strumenti di metalli diversi (ovvero, separare gli strumenti in acciaio inossidabile da quelli in alluminio non anodizzato, ottone, rame e cromati per evitare il potenziale trasferimento del rivestimento metallico dell'uno sugli altri strumenti).
• Porre il vassoio con gli strumenti nella lavatrice a ultrasuoni Branson 8510.
• Trattare agli ultrasuoni gli strumenti per dieci (10) minuti.
Nota 4: sono disponibili altri detergenti per pulizia ad ultrasuoni, ma non sono stati convalidati per l'uso con le pinze per chirurgia ginecologica Integra®.
5. Rimuovere gli strumenti dal dispositivo di pulizia a ultrasuoni e sciacquare per due (2) minuti con acqua distillata.
6. Controllare visivamente che lo strumento sia pulito e assicurarsi che tutte le parti siano in buone condizioni di funzionamento.
7. Applicare il lubrificante spray Miltex su tutte le articolazioni e le superfici mobili combacianti.
8. Lasciare che gli strumenti si asciughino su un panno privo di lanugine per 60 minuti alla temperatura di 24 °C (75 °F).
Nota 5: sono disponibili altri metodi di asciugatura, ma non sono stati convalidati per l'uso con le pinze per chirurgia ginecologica Integra®.
9. Ispezionare visivamente gli strumenti per verificare che siano asciutti.
10. Applicare il lubrificante spray Miltex su tutte le articolazioni e le superfici mobili combacianti in conformità alla istruzioni del produttore.
Pulizia automatica
1. Disporre gli strumenti in un cestello di filo metallico.
• Verificare che gli strumenti siano in posizione aperta.
• Tenere separati gli strumenti di metalli diversi (ovvero, separare gli strumenti in acciaio inossidabile da quelli in alluminio non anodizzato, ottone, rame e cromati per evitare il potenziale trasferimento del rivestimento metallico dell'uno sugli altri strumenti).
2. Porre il cestello di filo metallico in una lavatrice-sterilizzatrice o una lavatrice-disinfettatrice automatica, come la lavatrice-disinfettatrice Steris Amsco Reliance 444 monocamera. Pulire gli strumenti impostando i parametri e utilizzando i detergenti elencati nella tabella seguente.
Trattamento Tempo (mm:ss) Temperatura Detergente
Pre-bagno 02:00 Fredda (10 °C±2) Acqua
Lavaggio
enzimatico
04:00 Calda (minima 43 °C/109 °F) Detergente enzimatico Endozime A W Plus®
Lavaggio
(pulizia)
02:00 60 °C (140 °F) Detergente enzimatico Endozime A W Plus®
Risciacquo 02:00 70 °C (158 °F) Acqua
Asciugatura 15:00 80 °C (176 °F) N.A.
Nota 6: sono disponibili altri parametri specifici per la lavatrice-sterilizzatrice o la lavatrice-disinfettatrice, ma non sono stati convalidati per l'uso con le pinze per chirurgia ginecologica Integra®.
3. Rimuovere gli strumenti dalla lavatrice automatica.
4. Controllare visivamente che lo strumento sia pulito e assicurarsi che tutte le parti siano in buone condizioni di funzionamento.
5. Controllare visivamente lo strumento per verificare che sia asciutto.
Nota 7: sono disponibili altri metodi di asciugatura, ma non sono stati convalidati per l'uso con le pinze per chirurgia ginecologica Integra®.
6. Applicare il lubrificante spray Miltex su tutte le articolazioni e le superfici mobili combacianti in conformità alla istruzioni del produttore.
Sterilizzazione
Dopo aver pulito gli strumenti riutilizzabili, sterilizzarli con la seguente procedura.
Per gli strumenti che richiedano doppio avvolgimento
1. Avvolgere singolarmente in un doppio involucro gli strumenti puliti e asciutti in buste autosigillanti Cardinal Health, quindi sigillare le buste. Verificare che lo strumento sia completamente aperto nella busta.
2. Posizionare le buste in una camera di sterilizzazione pre-vuoto utilizzando i seguenti parametri per ottenere un livello di garanzia della sterilità (SAL) di 10-6 :
Parametro consigliato di sterilizzazione a vapore per ottenere il Livello di garanzia della sterilità (SAL) di 10-6 :
Tipo di
sterilizzatoreConfigurazione Temperatura
Tempo di
esposizione
Tempo di
asciugatura
Pre-vuoto Imbustato 132 °C (270 °F) 4 minuti 20 minuti
Per gravità Imbustato 132 °C (270 °F) 15 minuti 15 minuti
Nota 8: sono disponibili altre buste sterilizzazione idonee per il metodo di sterilizzazione a vapore, ma non sono state convalidate per l'uso con le pinze per chirurgia ginecologica Integra®.
Per gli strumenti collocati in un vassoio
1. Disporre gli strumenti puliti e asciutti nel vassoio Jarit® e avvolgere due volte il vassoio con involucri di sterilizzazione Convertors Bio-Shield. Verificare che lo strumento sia completamente aperto nel vassoio.
2. Porre il vassoio in una camera di sterilizzazione a pre-vuoto utilizzando i seguenti parametri per raggiungere un Livello di garanzia della sterilità (SAL) pari a 10-6 :
Parametro consigliato di sterilizzazione a vapore per ottenere il Livello di garanzia della sterilità (SAL) di 10-6 :
Tipo di
sterilizzatoreConfigurazione Temperatura
Tempo di
esposizione
Tempo di
asciugatura
Pre-vuoto Imbustato 132 °C (270 °F) 4 minuti 20 minuti
Per gravità Imbustato 132 °C (270 °F) 15 minuti 15 minuti
Nota 9: sono disponibili altri involucri di sterilizzazione, quali quelli in polipropilene o mussolina di cotone, idonei per il metodo di sterilizzazione a vapore, ma non sono stati convalidati per l'uso con le pinze per chirurgia ginecologica Integra®.
Nota 10: sono disponibili altri vassoi di sterilizzazione idonei per il metodo di sterilizzazione a vapore, ma non sono stati convalidati per l'uso con le pinze per chirurgia ginecologica Integra®.
Condizioni di conservazione:
Conservare gli strumenti correttamente confezionati e sterilizzati in un ambiente pulito, asciutto e privo di polvere.
Procedure di manutenzione:
Una manutenzione inappropriata, inefficace e insufficiente può ridurre la durata di uno strumento invalidandone la garanzia.
Proteggere gli strumenti: l'uso di acqua deionizzata, un'attenta pulizia preliminare, l'uso di soluzioni a pH neutro, l'osservanza delle istruzioni del produttore e l'ispezione visiva contribuiscono a mantenere gli strumenti in perfetto stato di funzionamento e privi di macchie.
Determinati composti sono altamente corrosivi per l'acciaio inossidabile e causano seri danni. Non esporre mai gli strumenti a:
• Acqua regia • Acido solforico
• Iodio • Acido cloridrico
• Cloruro ferrico
Le sostanze che seguono devono essere, se possibile, evitate; se gli strumenti vengono inavvertitamente esposti a queste sostanze, risciacquare immediatamente con acqua abbondante:
• Cloruro d'alluminio • Tiocianato di potassio
• Cloruro mercuroso • Cloruro di calcio
• Cloruro di bario • Soluzione salina
• Fenolo • Fenolo
• Permanganato di potassio • Ipoclorito di sodio
• Cloruro mercurico • Soluzione di Dakin
• Calcio ipoclorito • Cloruro stannoso
Qualunque tipo di corrosione porta alla ruggine dell'acciaio. Le particelle di ruggine possono essere trasferite da uno strumento all'altro; è quindi necessario interrompere l'uso degli strumenti che presentano corrosione, onde evitare la formazione di ruggine su altri strumenti.
Proteggere i bordi affilati e le estremità di lavoro sottili durante tutte le procedure di manutenzione. Evitare di caricare articoli pesanti sopra strumenti delicati e vuoti all'interno.
Diagnosi di punti e macchie: è normale che sugli strumenti appaiano punti o macchie. Se si adotta una tecnica di pulizia e sterilizzazione corretta è possibile prevenire la maggior parte delle macchie. Quanto segue individua alcuni dei problemi legati agli strumenti che possono presentarsi agli ospedali.
• Macchie marroni: detergenti che contengono polifosfati possono dissolvere gli elementi del rame nello sterilizzatore causando la formazione di macchie marroni. Solitamente una macchia opaca di blu scuro o marrone è il risultato di ossidazione sulla superficie.
• Macchie nere: le macchie nere potrebbero essere il risultato del contatto con ammoniaca.
• Punti chiari o scuri: i punti sono spesso il risultato del contenuto minerale dell'acqua utilizzata per il risciacquo, dell'utilizzo di un detergente per strumenti non neutro o di una camera non pulita dello sterilizzatore.
• Depositi di ruggine: è molto improbabile che l’acciaio di grado chirurgico si arrugginisca. I punti colorati di ruggine normalmente appaiono in località in cui l'acqua ha un elevato contenuto ferroso.
Direttive per il reso delle merci
I prodotti devono essere restituiti in confezioni chiuse con i sigilli del produttore intatti per essere accettati per la restituzione o il credito a meno che non siano restituiti per un reclamo o un difetto. Spetta a Integra stabilire se il prodotto è difettoso. I prodotti non saranno accettati per la sostituzione se in possesso del cliente da oltre 90 giorni.
Riparazione e manutenzione
Se gli strumenti richiedono riparazioni o manutenzione, contattare Integra per ottenere l’autorizzazione alla restituzione e l’indirizzo. Gli strumenti restituiti a Integra per la riparazione devono essere accompagnati da una dichiarazione a testimonianza che ciascuno strumento è stato pulito e sterilizzato attentamente. La mancata fornitura di una prova di pulizia e disinfezione avrà come conseguenza un addebito per la pulizia e un ritardo nel trattamento della riparazione dello strumento.
Garanzie di buon funzionamento e per difetti di conformità
Per conservare le garanzie e i diritti derivanti, gli strumenti che necessitano di riparazione devono essere inviati a Integra.
La mancata osservanza di queste procedure rende nulla la garanzia dello strumento e può causarne il guasto.
Divulgazione di informazioni sul prodotto
INTEGRA E LE SUE FILIALI (“INTEGRA”) E IL PRODUTTORE ESCLUDONO TUTTE LE GARANZIE, ESPLICITE O IMPLICITE, COMPRESE TRA L’ALTRO, EVENTUALI GARANZIE IMPLICITE DI COMMERCIABILITÀ O DI IDONEITÀ AD UNO SCOPO PARTICOLARE, ECCETTO LA NORMALE GARANZIA INTEGRA APPLICABILE. NÉ INTEGRA NÉ IL PRODUTTORE SARANNO RESPONSABILI PER EVENTUALI PERDITE, DANNI O SPESE INDIRETTI O DERIVATI, INCIDENTALI O CONSEGUENTI, LEGATI DIRETTAMENTE O INDIRETTAMENTE ALL’USO DI QUESTO PRODOTTO. NÉ INTEGRA NÉ IL PRODUTTORE SI ASSUMONO NÉ AUTORIZZANO ALCUNA PERSONA AD ASSUMERE PER LORO QUALSIASI ALTRA O ULTERIORE RESPONSABILITÀ RELATIVA AI PRESENTI PRODOTTI.
Consultare le istruzioni per l'uso
ATTENZIONE: la legge federale degli Stati Uniti limita la vendita di questo dispositivo ai soli medici o dietro presentazione di ricetta medica
Il prodotto è conforme ai requisiti della direttiva 93/42/EEC per i dispositivi medici
Produttore 1
Rappresentante autorizzato per l’Europa
Numero di catalogo
Numero di lotto
Attenzione! Vedere le avvertenze e precauzioni
1 L'Azienda è responsabile di ogni dispositivo commercializzato con il suo nome indipendentemente da che sia stato “prodotto per” o “prodotto da” l'Azienda.
EC REP
REF
LOT
Integra LifeSciences Services (Francia) SAS Immeuble Sequoia 297 allée Alexandre BorodineParc Technologique de la Porte des Alpes69800 Saint Priest - FranciaTelefono: 33 (0) 4 37 47 59 10Fax: 33 (0) 4 37 47 59 29
ProduttoreIntegra York PA, Inc. i 589 Davies Drive, York, PA 17402 866-854-8300 negli Stati Uniti i +1 717-840-2763 al di fuori degli Stati Uniti i +1 717-840-9347 faxintegralife.com/integra-miltex
Integra, il logo Integra e Miltex e EZ-Zyme sono marchi registrati di Integra LifeSciences Corporation o delle sue filiali negli Stati Uniti e/o in altri paesi. ©2014 Integra LifeSciences Corporation. Tutti i diritti riservati. SURGGYNFCPSDFU Rev. A 06/14.
EC REP
Simboli utilizzati sulle etichette
0123
Beschrijving
Deze tang voor gynaecologische chirurgie van Integra® is ontworpen voor goede grip op weefsel tijdens vaginale en abdominale hysterectomie. Dit atraumatische instrument is ontworpen met het oog op het minimaal risico op weefselruptuur of -perforatie, ook tijdens onontkoombare retractie. Vanwege anatomische verschillen op de plek van de ingreep en de aard van de chirurgische ingrepen, zijn er diverse configuraties en modellen verkrijgbaar zodat de chirurg onder alle omstandigheden kan voldoen aan de klinische eisen. Gebruiksindicaties
De tang voor gynaecologische chirurgie van Integra® is een handinstrument met dubbele snijbladen, geïndiceerd voor trekken aan, of grijpen, vasthouden of compressie van weefsel tijdens gynaecologische ingrepen. Contra-indicaties
Geen bekend Waarschuwingen
• Onderwerp de tang voor gynaecologische chirurgie van Integra® NIET aan flash-sterilisatie. Dit instrument is niet gevalideerd voor flash-sterilisatie.
• Als wordt vermoed dat het instrument is blootgesteld aan de ziekte van Creutzfeld-Jakob, moet het worden weggegooid.
• De tang voor gynaecologische chirurgie van Integra® is niet gevalideerd voor de chemische en thermische blootstelling zoals aanbevolen voor eradicatie van prionen.
Voorzorgsmaatregelen
• Lees de gebruiksaanwijzing en bewaar deze op een veilige plaats.
• Gebruik het product alleen voor de beoogde toepassingen, zie GEBRUIKSINDICATIES.
• Gebruik van instrumenten voor een taak anders dan het beoogde doel kan leiden tot een beschadigd of kapot instrument of een instrument dat een onbevredigende prestatie levert.
• Instrumenten dienen gehanteerd en bediend te worden door personeel dat volledig vertrouwd is met gebruik, montage en demontage ervan.
• Instrumenten moeten op veilige wijze gehanteerd, geïnspecteerd en gemonteerd worden door het dragen van de toepasselijke middelen voor persoonlijke bescherming zoals afgekondigd door OSHA en AORN.
• Incorrect gebruik van instrumenten veroorzaakt schade die meestal onherstelbaar is.
• Instrumenten moeten bij ontvangst en voor gebruik grondig worden geïnspecteerd om een juiste werking ervan te waarborgen. Als er geen volledige inspectie uitgevoerd wordt om de juiste werking van het instrument te verifiëren, kan dit tot onbevredigende prestaties leiden.
• De tang voor gynaecologsiche chirurgie van Integra® wordt niet-steriel geleverd en moet voor gebruik worden voorgereinigd, gereinigd en gesmeerd, visueel worden gecontroleerd en worden gesteriliseerd. Raadpleeg onderstaande procedures voor voorreiniging, reiniging, visuele controle en sterilisatie.
Tang voor gynaecologische chirurgie van Integra® LET OP: De federale wet in de VS beperkt de verkoop van dit instrument tot door of op
voorschrift van een chirurg.
Gebruiksaanwijzing/Nederlands
• Controleer na ultrasone reiniging de schroeven van het instrument. Door de vibratie van ultrasone reiniging kunnen deze losraken of uitvallen.
• Controleer het instrument voor gebruik op losse, verbogen, defecte, gebarsten, versleten of gebroken onderdelen.
• Gebruik het product niet als het beschadigd of defect is.
• Vervang beschadigde onderdelen onmiddellijk door originele reserveonderdelen.
• Bewaar producten op een droge, schone en veilige plaats.
Procedures voor voorreiniging, reiniging, visueel onderzoek en sterilisatie
Voer voor gebruik van de instrumenten een voorreiniging, reiniging (handmatig of automatisch), droging, visueel onderzoek en sterilisatie uit volgens onderstaande procedures.
De geaccepteerde richtlijnen zoals aanbevolen in ANSI/AAMI ST79:2006, A1:2008, A2:2009 (Comprehensive guide to steam sterilization and sterility assurance in health care facilities) moeten worden opgevolgd.
Voorreiniging Voorreiniging dient zo snel mogelijk na gebruik van de instrumenten plaats te vinden.
1. Verwijder met een sponsdoekje en steriel water na gebruik de grove resten van chirurgische instrumenten om te voorkomen dat bloed en lichaamsvloeistoffen opdrogen op de instrumenten.
2. Plaats instrumenten in een instrumentenblad/-bak en bevochtig alle oppervlakken vijf (5) minuten lang grondig met een enzymatisch voorreinigingsproduct zoals Miltex Instrument Prep Enzyme Foam.
Opmerking 1: Er zijn andere schuim-, spray- of gelproducten verkrijgbaar voor gebruik met chirurgische instrumenten om vuil vochtig te houden, maar deze zijn niet gevalideerd voor gebruik met de tang voor gynaecologische chirurgie van Integra®.
Reinigen:
Reiniging dient zo snel mogelijk na de voorreiniging van de instrumenten plaats te vinden.
Na het uitvoeren van stap 1-6 hieronder voert u “Handmatige reiniging” of “Automatische reiniging” uit.
1. Spoel het instrument twee (2) minuten lang af met gedeïoniseerd water.
2. Met behulp van een schone, zachte borstel reinigt u de oppervlakken van de instrumenten en verwijdert u het zichtbare vuil.
3. Prepareer oplossing van Miltex® EZ-Zyme® universeel enzymatisch reinigingsmiddel volgens de aanbevelingen/instructies van de fabrikant voor de juiste verdunning en temperatuur.
4. Dompel de volledig geopende instrumenten tien (10) minuten lang onder in de geprepareerde oplossing van Miltex EZ-Zyme universeel enzymatisch reinigingsmiddel.
5. Spoel het instrument en het scharnier twee (2) minuten lang met gedeïoniseerd water.
6. Ga nu naar de procedure “Handmatige reiniging” of “Automatische reiniging” hieronder:
Handmatige reiniging
1. Prepareer een oplossing van Miltex EZ-Zyme universeel enzymatisch reinigingsmiddel volgens de aanbevelingen/instructies van de fabrikant voor de juiste verdunning en temperatuur.
Opmerking 2: Er zijn andere reinigingsreagentia of detergentia verkrijgbaar, maar deze zijn niet gevalideerd voor gebruik met de tang voor gynaecologische chirurgie van Integra®.
2. Verwijder met een kleine, schone handborstel het vuil van alle oppervlakken van het instrument, terwijl dit volledig is ondergedompeld in de oplossing.
Opmerking 3: Gebruik nooit staalwol, staalborstels, scalpelsnijbladen of sterk schurende detergentia of reinigingsmiddelen voor het verwijderen van vuil, want daardoor wordt het beschermende oppervlak van de instrumenten beschadigd en ontstaat corrosie.
3. Spoel het instrument gedurende twee (2) minuten grondig en krachtig met gedeïoniseerd water.
4. Behandel het instrument tien (10) minuten lang met een Branson 8510 ultrasoon reinigingstoestel.
• Prepareer een oplossing van Miltex EZ-Zyme universeel enzymatisch reinigingsmiddel volgens de aanbevelingen/instructies van de fabrikant betreffende de juiste verdunning en temperatuur en plaats deze in het Branson 8510 ultrasoon reinigingstoestel.
• Conditioneer (ontgas) het ultrasone reinigingstoestel 5 minuten lang.
• Plaats de instrumenten op het instrumentenblad van de fabrikant van het ultrasone reinigingstoestel.
• Zorg dat de instrumenten in de open stand staan.
• Houd verschillende metaaltypen gescheiden (d.w.z. scheid roestvrij staal van platering met niet-geanodiseerd aluminium, messing, koper en chroom om mogelijke overdracht van de ene metaalplatering op de ander te voorkomen).
• Plaats het blad met instrumenten in de Branson 8510 ultrasone reiniger.
• Behandel de instrumenten tien (10) minuten lang.
Opmerking 4: Er zijn andere ultrasone reinigers verkrijgbaar, maar deze zijn niet gevalideerd voor gebruik met de tang voor gynaecologische chirurgie van Integra®.
5. Neem het instrument uit het ultrasone reinigingstoestel en spoel het twee (2) minuten lang met gedestilleerd water.
6. Inspecteer het instrument visueel of het schoon is en om er zeker van te zijn dat alle onderdelen goed functioneren.
7. Breng smeerspray van Miltex aan op alle scharnieren en bewegende pasvlakken.
8. Laat de instrumenten 60 minuten bij 24 °C (75 °F) drogen op een pluisvrije doek.
Opmerking 5: Er zijn andere methoden om te drogen, maar deze zijn niet gevalideerd voor gebruik met de tang voor gynaecologische chirurgie van Integra®.
9. Onderzoek visueel of de instrumenten droog zijn.
10. Breng smeerspray van Miltex aan op alle scharnieren en bewegende pasvlakken volgens de aanwijzingen van de fabrikant.
Automatische reiniging
1. Plaats de instrumenten in een draadmand.
• Zorg dat de instrumenten in de open stand staan.
• Houd verschillende metaaltypen gescheiden (d.w.z. scheid roestvrij staal van platering met niet-geanodiseerd aluminium, messing, koper en chroom om mogelijke overdracht van de ene metaalplatering op de ander te voorkomen).
2. Plaats de draadmanden in een was-/sterilisatieautomaat of een was-/desinfectieautomaat, zoals een Steris Amsco Reliance 444 was-/desinfectieautomaat met één kamer. Gebruik de in de onderstaande tabel vermelde parameters/detergentia voor het reinigen van de instrumenten.
Behandeling Duur (mm:ss) Temperatuur Reinigingsmiddel
Voorweken 02:00 Koud (10 °C ± 2) Water
Enzymatisch wassen 04:00 Warm (minimaal 43 °C/109 °F) Endozime A W Plus®, enzymatisch reinigingsmiddel
Wassen (reinigen) 02:00 60 °C (140 °F) Endozime A W Plus®, enzymatisch reinigingsmiddel
Spoelen 02:00 70 °C (158 °F) Water
Drogen 15:00 80 °C (176 °F) N.v.t.
Opmerking 6: Er zijn andere specifieke parameters voor was-/sterilistatie- of was-/desinfectieapparaten, maar deze zijn niet gevalideerd voor gebruik met de tang voor gynaecologische chirurgie van Integra®.
3. Neem de instrumenten uit de wasautomaat.
4. Inspecteer het instrument visueel of het schoon is en om er zeker van te zijn dat alle onderdelen goed functioneren.
5. Inspecteer de instrumenten visueel op droogheid.
Opmerking 7: Er zijn andere methoden om te drogen, maar deze zijn niet gevalideerd voor gebruik met de tang voor gynaecologische chirurgie van Integra®.
6. Breng smeerspray van Miltex aan op alle scharnieren en bewegende pasvlakken volgens de aanwijzingen van de fabrikant.
Sterilisatie
Steriliseer de herbruikbare instrumenten, nadat die zijn gereinigd, volgens de hierna beschreven procedure.
Voor dubbel verpakte instrumenten
1. Verpak de schone droge instrumenten afzonderlijk en dubbel in medische zakken van Cardinal Health met zelfklevende sluiting en plak de zakken dicht. Zorg ervoor dat het instrument in geopende stand in de zak is geplaatst.
2. Plaats de zakken in een pre-vacuümsterilisatiekamer en gebruik de volgende parameters voor een sterilisatieborgingsniveau (SAL) van 10-6:
Aanbevolen stoomsterilisatieparameters voor een sterilisatieborgingsniveau (SAL) van 10-6:
Type sterilisatietoestel Configuratie Temperatuur Blootstellingsduur Droogtijd
Pre-vacuüm Omwikkeld 132 °C (270 °F) 4 minuten 20 minuten
Zwaartekracht Omwikkeld 132 °C (270 °F) 15 minuten 15 minuten
Opmerking 8: Andere sterilisatiezakken zijn mogelijk geschikt voor deze stoomsterilisatiemethode, maar niet gevalideerd voor gebruik met de tang voor gynaecologische chirurgie van Integra®.
Voor instrumenten op een blad
1. Plaats de schone, droge instrumenten op een Jarit®-blad en verpak het blad dubbel in Convertors Bio-Shield sterilisatiewikkels. Plaats dat het instrument in geopende stand op het blad.
2. Plaats het omwikkelde blad in een pre-vacuümsterilisatiekamer met de volgende parameters voor een sterilisatieborgingsniveau (SAL) van 10-6:
Aanbevolen stoomsterilisatieparameters voor een sterilisatieborgingsniveau (SAL) van 10-6:
Type sterilisatietoestel Configuratie Temperatuur Blootstellingsduur Droogtijd
Pre-vacuüm Omwikkeld 132 °C (270 °F) 4 minuten 20 minuten
Zwaartekracht Omwikkeld 132 °C (270 °F) 15 minuten 15 minuten
Opmerking 9: Andere sterilisatiewikkels, zoals polypropyleen of katoenen wikkels,
zijn mogelijk geschikt voor deze stoomsterilisatiemethode, maar niet gevalideerd voor gebruik met de tang voor gynaecologische chirurgie van Integra®.
Opmerking 10: Andere sterilisatiebladen zijn mogelijk geschikt voor deze stoomsterilisatiemethode, maar niet gevalideerd voor gebruik met de tang voor gynaecologische chirurgie van Integra®.
Opslagcondities:
Sla op de juiste wijze verpakte en gesteriliseerde instrumenten in een droge, schone en stofvrije omgeving op.
Onderhoudsprocedures:
Bij onjuist, ondoelmatig of onvoldoende onderhoud wordt de levensduur van een instrument beperkt en komt de garantie van het instrument te vervallen.
Instrumenten beschermen: Het gebruik van gedeïoniseerd water, zorgvuldige reiniging vooraf, het gebruik van pH-neutrale oplossingen, het zich houden aan de instructies van fabrikanten en visuele inspecties zullen helpen bij een nauwkeurig presteren van instrumenten zonder vlekken.
Bepaalde verbindingen hebben een corrosieve werking op roestvrij staal en veroorzaken ernstige schade. Instrumenten mogen nooit worden blootgesteld aan:
• Aqua regia (koningswater) • Zwavelzuur
• Jodium • Zoutzuur
• IJzerchloride
De volgende stoffen moeten waar mogelijk worden vermeden; spoel de instrumenten onmiddellijk met een overvloedige hoeveelheid water als zij toch aan de volgende stoffen zijn blootgesteld:
• Aluminiumchloride • Kaliumthiocyanaat
• Kwikchloride • Calciumchloride
• Bariumchloride • Zoutoplossing
• Fenol • Fenol
• Kaliumpermanganaat • Natriumhypochloriet
• Kwikbichloride • Dakins vloeistof
• Gechloreerde kalk • Tinchloride
Elke soort corrosie heeft roest op staal tot gevolg. Roestdeeltjes kunnen van het ene op het andere instrument overgebracht worden, corroderende instrumenten moeten dan ook direct buiten gebruik gesteld worden om roestvorming op andere instrumenten te voorkomen.
Bescherm scherpe snijranden en fijne werkuiteinden van inzetstukken tijdens alle onderhoudsprocedures. Vermijd het laden van zware items bovenop kwetsbare en holle instrumenten.
Diagnosticeren van vlekken en plekjes: Het is normaal dat instrumenten vlekken of plekjes gaan vertonen. Wanneer een juiste techniek wordt gevolgd tijdens reinigings- en sterilisatieprocedures zullen de meeste vlekken voorkomen worden. Hieronder staan enkele van de diverse problemen vermeld die instellingen kunnen ondervinden in relatie tot instrumenten.
• Bruine verkleuringen: Detergentia die polyfosfaten bevatten kunnen koperelementen in de sterilisator oplossen waardoor bruine vlekken ontstaan. Een doffe blauwe of bruine vlek is het gevolg van oxidatie aan de oppervlakte.
• Zwarte verkleuringen: Zwarte verkleuringen kunnen ontstaan als gevolg van contact met ammoniak.
• Lichte of donkere vlekjes: Vlekjes zijn vaak het gevolg van mineralen in het water dat wordt gebruikt voor het spoelen of van het gebruik van een niet-neutrale instrumentreiniger of een vervuilde sterilisatiekamer.
• Roestafzettingen: Het is zeer onwaarschijnlijk dat staal van chirurgische kwaliteit roest. Roestkleurige vlekjes doen zich gewoonlijk voor op locaties waar het water een hoog ijzergehalte heeft.
Beleid voor retourneren van artikelen
Alleen producten die in ongeopende verpakking met ongebroken verzegeling teruggestuurd worden, worden vervangen of gecrediteerd, tenzij ze teruggezonden zijn als gevolg van een klacht of productdefect. Integra bepaalt of een product defect is. Als producten langer dan 90 dagen in het bezit van de klant zijn geweest, worden ze niet vervangen.
Reparatie en onderhoud
Neem contact op met Integra voor een terugzendautorisatie en adres als uw instrumenten gerepareerd of onderhouden moeten worden. De aan Integra teruggezonden instrumenten moeten vergezeld gaan van een verklaring dat elk instrument grondig gereinigd en gesteriliseerd is. Als u geen bewijs van reiniging en desinfectie meestuurt, worden reinigingskosten in rekening gebracht en duurt het langer voordat uw instrument gerepareerd wordt.
Garanties
Om te zorgen dat de garantie geldig blijft, moeten instrumenten ter reparatie naar Integra gestuurd worden.
Het niet volgen van deze procedures zal de garantie van het instrument doen vervallen en kan leiden tot storing in het instrument.
Productkennisgeving
INTEGRA EN HAAR DOCHTERONDERNEMINGEN (“INTEGRA”) EN FABRIKANT SLUITEN ALLE GARANTIES UIT, BEHALVE DE VAN TOEPASSING ZIJNDE STANDAARDGARANTIE VAN INTEGRA, EXPLICIET OF IMPLICIET, INCLUSIEF MAAR NIET BEPERKT TOT ENIGE IMPLICIETE GARANTIE VAN VERHANDELBAARHEID OF GESCHIKTHEID VOOR EEN BEPAALD DOEL. NOCH INTEGRA NOCH DE FABRIKANT ZIJN VERANTWOORDELIJK VOOR ENIGE INCIDENTELE OF GEVOLGSCHADE OF KOSTEN, DIRECT OF INDIRECT, DIE HET GEVOLG ZIJN VAN HET GEBRUIK VAN DIT PRODUCT. NOCH INTEGRA NOCH DE FABRIKANT NEMEN ENIGE AANVULLENDE AANSPRAKELIJKHEID OF VERANTWOORDELIJKHEID IN VERBAND MET DEZE PRODUCTEN OP ZICH OF AUTORISEREN ENIGE PERSOON OM DEZE VOOR HEN OP ZICH TE NEMEN.
Raadpleeg gebruiksaanwijzing
PAS OP: De federale wetgeving van de Verenigde Staten staat de verkoop van dit instrument alleen toe door of op voorschrift van een arts
Product is in overeenstemming met de vereisten van richtlijn 93/42/EEG voor medische hulpmiddelen
Fabrikant 1
Geautoriseerd Europees vertegenwoordiger
Catalogusnummer
Partijnummer
Let op! Zie waarschuwingen en voorzorgsmaatregelen
1 Bedrijf verantwoordelijk voor een hulpmiddel dat onder eigen naam op de markt wordt gebracht, ongeacht of dit “voor” of “door” het bedrijf wordt gefabriceerd.
EC REP
REF
LOT
Integra LifeSciences Services (Frankrijk) SAS Immeuble Sequoia 297 allée Alexandre BorodineParc Technologique de la Porte des Alpes69800 Saint Priest - FrankrijkTelefoon: 33 (0) 4 37 47 59 10Fax: 33 (0) 4 37 47 59 29
FabrikantIntegra York PA, Inc. i 589 Davies Drive, York, PA 17402 866-854-8300 VS i +1 717-840-2763 buiten de VS i +1 717-840-9347 faxintegralife.com/integra-miltex
Integra, het Integra-logo, Miltex en EZ-Zyme zijn gedeponeerde handelsmerken van Integra LifeSciences Corporation of haar dochterondernemingen in de Verenigde staten en/of andere landen. ©2014 Integra LifeSciences Corporation. Alle rechten voorbehouden. SURGGYNFCPSDFU Rev. A 06/14
EC REP
Op etiketten gebruikte symbolen
0123