Embed Size (px)
Citation preview
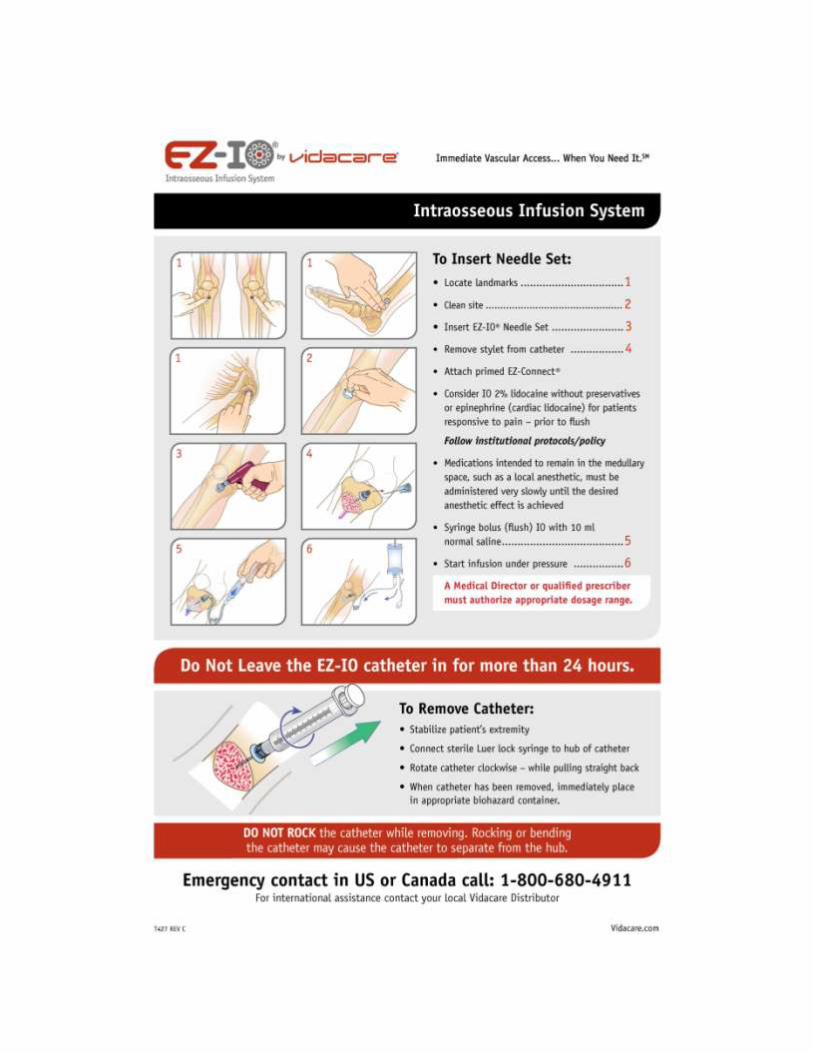
Installing an intraosseous Infusion System (EZ-IO®)
(See annex “Direction for Use” by Vidacare for a quick guide or watch the video in the bibliography for
more details)
IMPORTANT: This protocol is intended for emergency use requiring a vascular access. All nursing and medical professionals that have obtained training/demonstration on the installation of EZ-IO may proceed with the technique after approval by consulting physician OR nurses without training may proceed only with the guidance of the physician and the procedures contained in this guide.
The EZ-IO® Intraosseous Infusion System is a complete solution for immediate vascular access —
whether you’re facing difficult vascular access challenges or need immediate intraosseous access for critical situations and life-threatening emergencies. EZ-IO provides rapid, smooth entry into the bone’s medullary cavity, creating an immediate conduit to the central circulation.
- All IV fluids or IV medications can be administered via an IO (including pressors and blood products). - Doses of medications are the same as per IV administration. - Infusion rate achieved with a pressure pump or syringe will be similar to a 21G peripheral line. IO medication administration is as efficient as per a central line. - IO is a temporary access, and is not to be used for more than 24 hours.
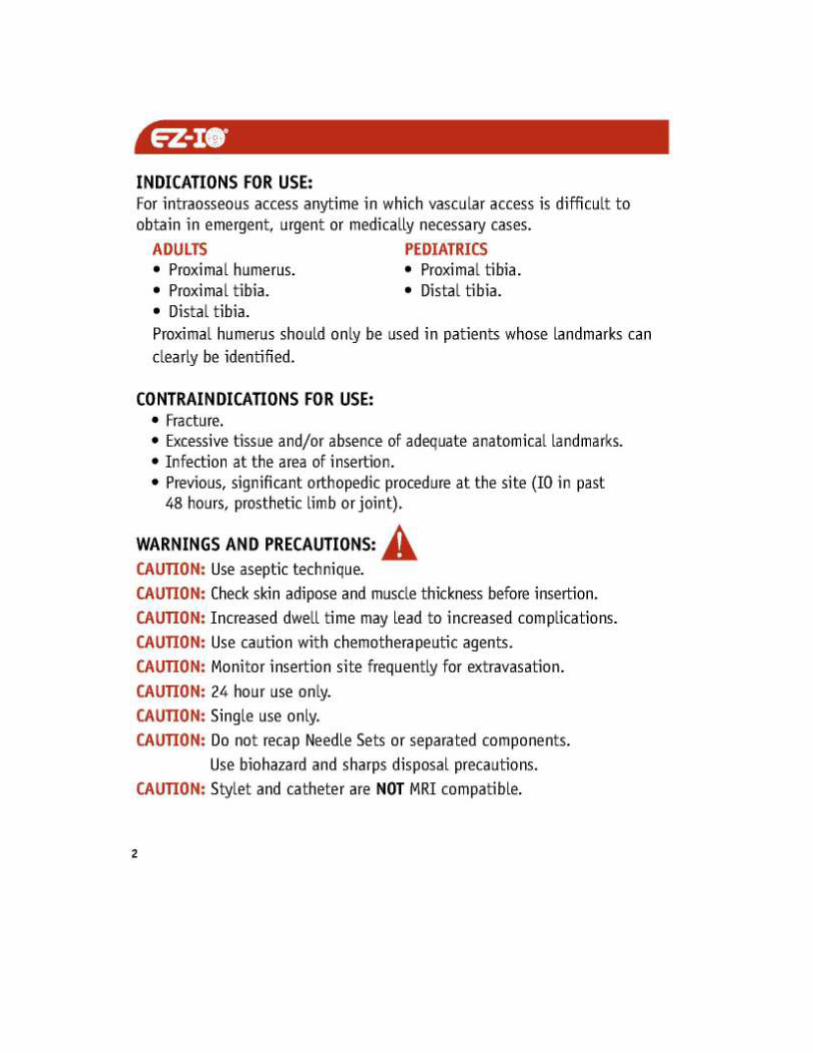
INDICATIONS OF USE
- All adult and pediatric patients who need vascular access in emergent, urgent or medically required cases and for whom a peripheral line is not easily accessible - Have an immediate need for medications or fluids - Require multiple IV sticks to obtain vascular access for medication or fluid infusion - Need urgent fluid resuscitation - Are in cardiac or respiratory arrest - Require rapid intubation or sedation - Intraosseous access for emergencies
CONTRAINDICATIONS OF USE
Use an alternate site if possible and if presence of any conditions below: - Fracture of the bone selected for IO infusion - Absence of anatomical landmarks (for example: due to excessive tissue or swelling) - Previous significant orthopedic surgery of the nearest joint (e.g. knee prosthesis) - IO insertion within the past 24 hours on the same bone - Infection at site of IO insertion - NB: hemophilia or coagulopathy is not a contra-indication
PREPARATION MATERIALS
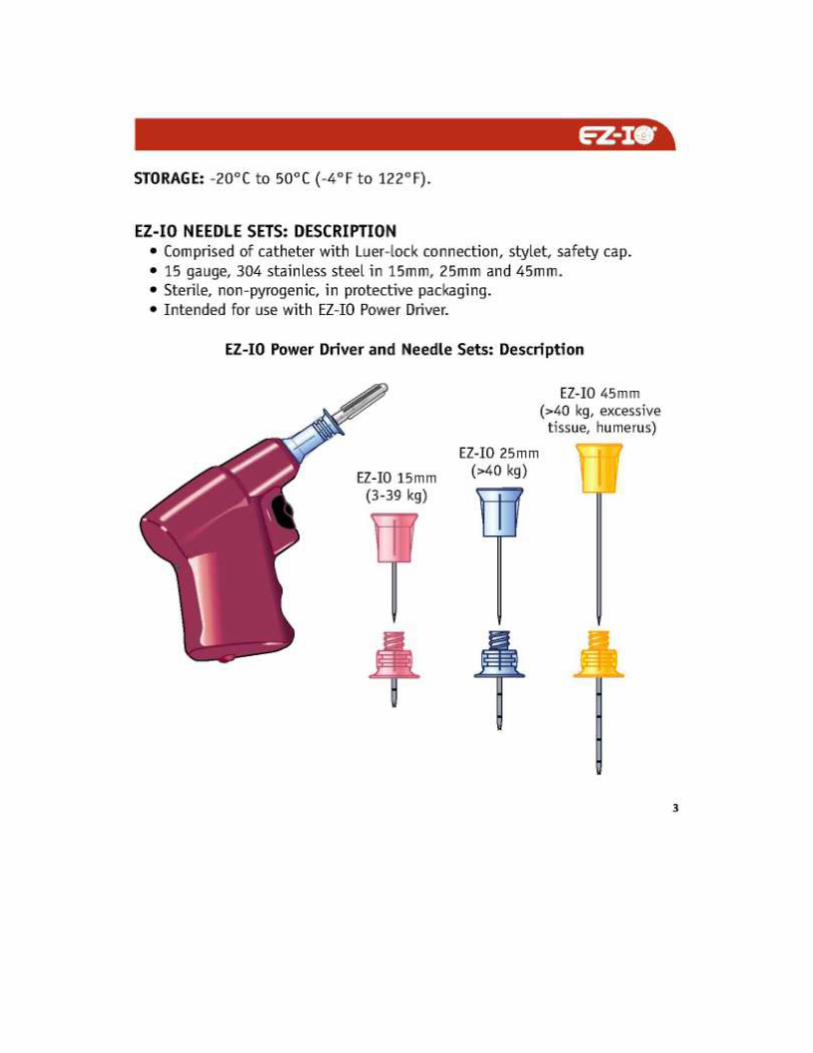
EZ-IO Power Driver
Appropriate size intraosseous Needle Set based on patient size and weight
EZ-IO 15mm pink: pediatrics 3-39 kg
EZ-IO 25mm blue: adults >40kg
EZ-IO 45mm yellow: adults >40kg with excessive tissue
1 EZ-Connect
2 x 10 ml syringes
Sterile saline solution for flush
Consider 2% lidocaine (without preservatives and without epinephrine, i.e. cardiac lidocaine) for patients responding to pain
Non-sterile non-latex gloves, protective mask and glasses
Antiseptic agent (example Iodine or Chlorhexidine)
One (1) semi-permeable transparent dressing (optional)
One (1) sterile 2x2 or 4x4 gauze pad
One (1) (appropriate volume and type) intravenous solution
One (1) fluid administration set
One (1) fluid administration pump or pressure bag if available or syringe
EZ-Stabilizer
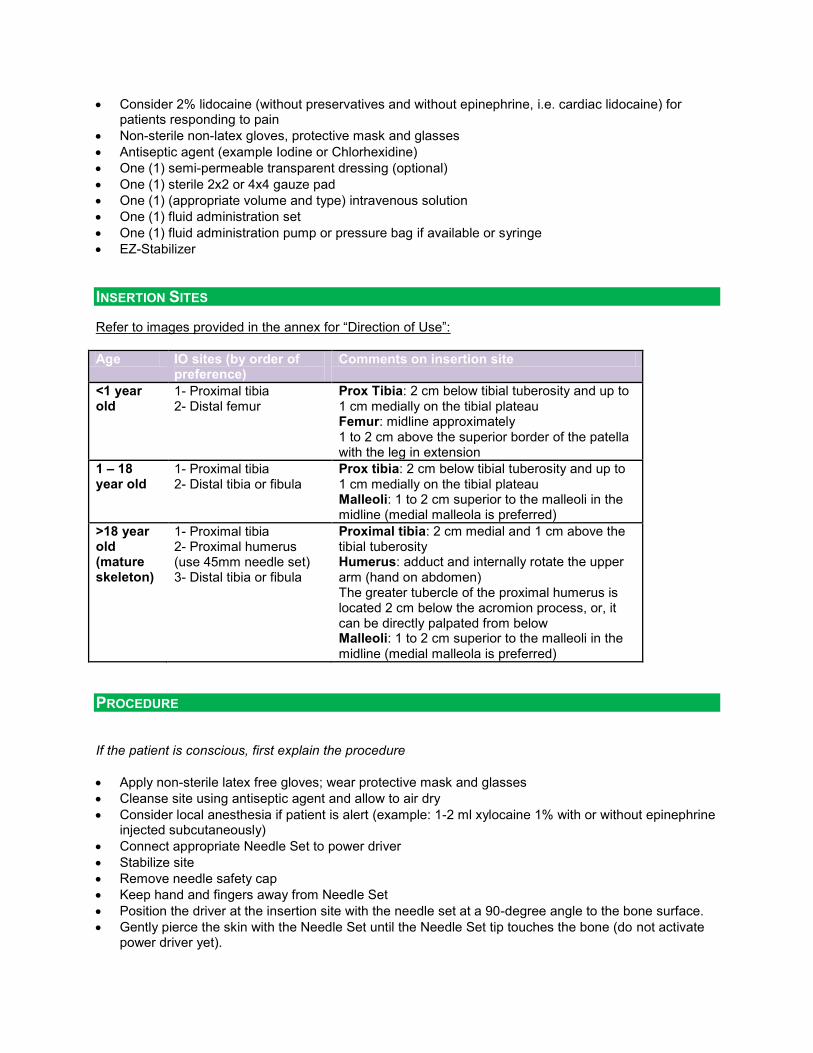
INSERTION SITES
Refer to images provided in the annex for “Direction of Use”:
Age IO sites (by order of preference)
Comments on insertion site
<1 year old
1- Proximal tibia 2- Distal femur
Prox Tibia: 2 cm below tibial tuberosity and up to 1 cm medially on the tibial plateau Femur: midline approximately 1 to 2 cm above the superior border of the patella with the leg in extension
1 – 18 year old
1- Proximal tibia 2- Distal tibia or fibula
Prox tibia: 2 cm below tibial tuberosity and up to 1 cm medially on the tibial plateau Malleoli: 1 to 2 cm superior to the malleoli in the midline (medial malleola is preferred)
>18 year old (mature skeleton)
1- Proximal tibia 2- Proximal humerus (use 45mm needle set) 3- Distal tibia or fibula
Proximal tibia: 2 cm medial and 1 cm above the tibial tuberosity Humerus: adduct and internally rotate the upper arm (hand on abdomen) The greater tubercle of the proximal humerus is located 2 cm below the acromion process, or, it can be directly palpated from below Malleoli: 1 to 2 cm superior to the malleoli in the midline (medial malleola is preferred)
PROCEDURE
If the patient is conscious, first explain the procedure
Apply non-sterile latex free gloves; wear protective mask and glasses
Cleanse site using antiseptic agent and allow to air dry
Consider local anesthesia if patient is alert (example: 1-2 ml xylocaine 1% with or without epinephrine injected subcutaneously)
Connect appropriate Needle Set to power driver
Stabilize site
Remove needle safety cap
Keep hand and fingers away from Needle Set
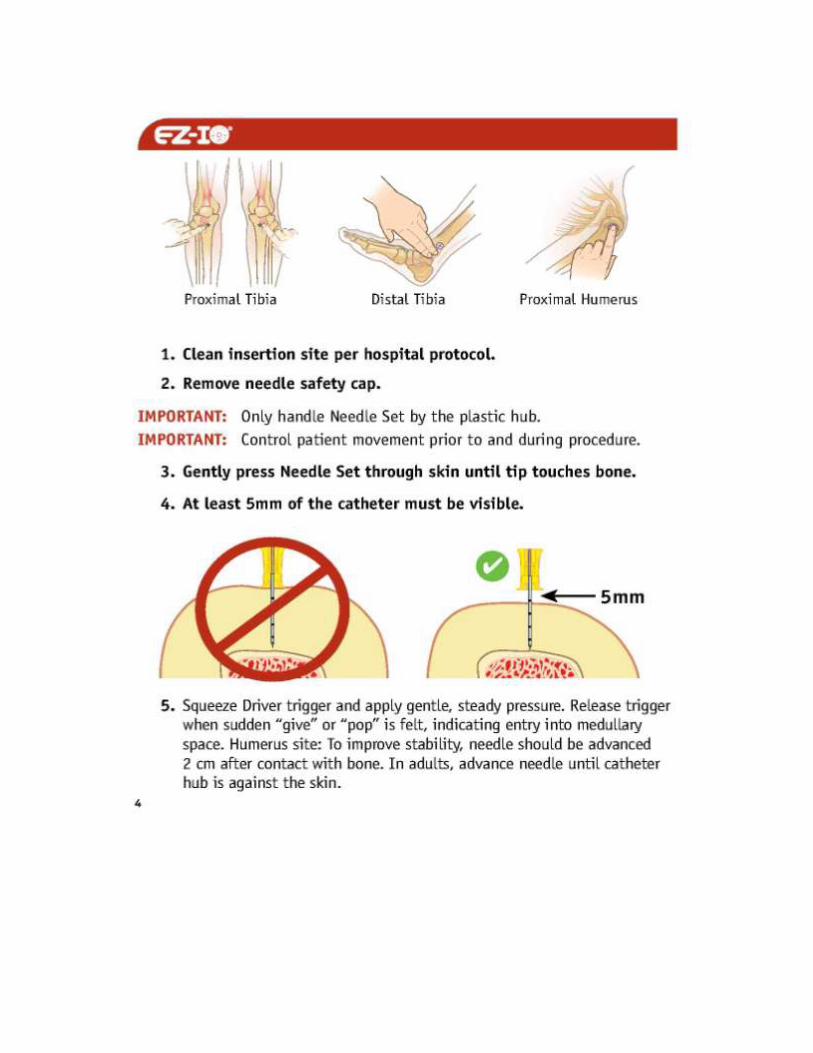
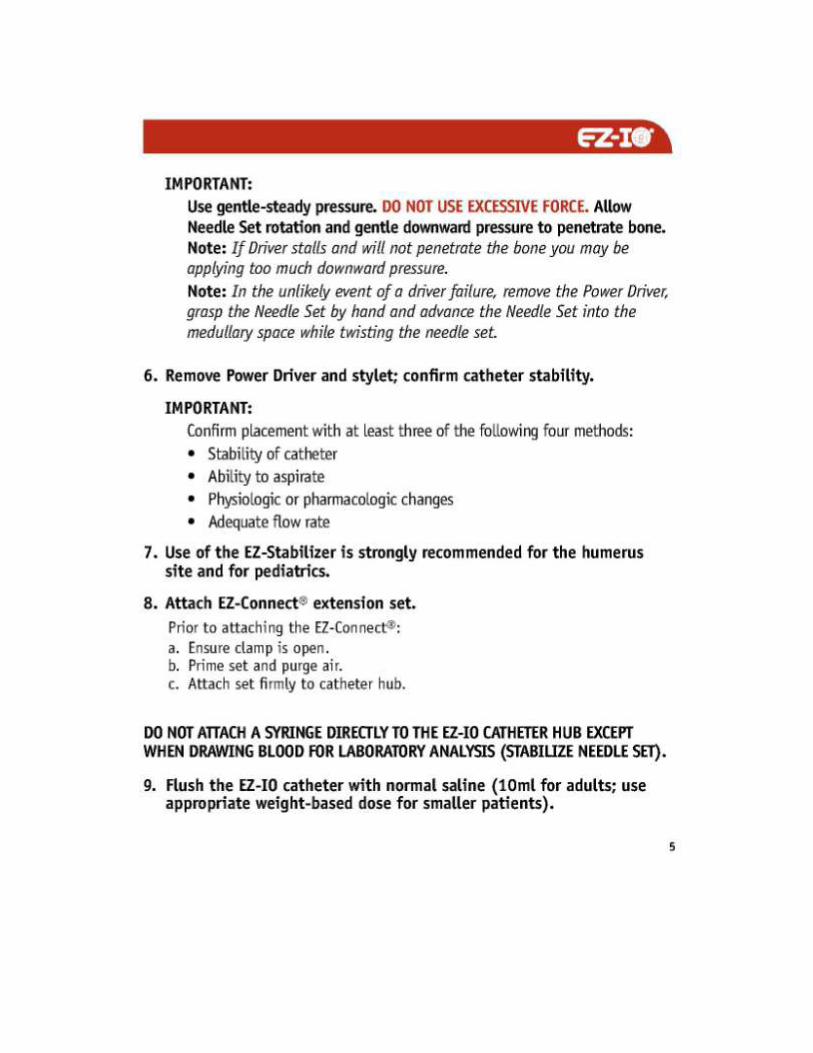
Position the driver at the insertion site with the needle set at a 90-degree angle to the bone surface.
Gently pierce the skin with the Needle Set until the Needle Set tip touches the bone (do not activate power driver yet).
Ensure there is still visualization of at least one black line on the needle
Penetrate the bone cortex by squeezing driver’s trigger and applying gentle, consistent, steady, downward pressure (allow the driver to do the work)
*Do not use excessive force. In some patients insertion may take greater than 10 seconds, if
the driver sounds like it is slowing down during insertion; reduce pressure on the driver to allow
the RPMs of the needle tip to do the work.
*In the unlikely event that the battery on the Driver fails, clinicians may manually finish inserting
the EZ-IO Needle Set. Grasp the Needle Set and rotate your arm, while pushing the needle into
the intraosseous space. This may take several minutes.
On adult patients when accessing the tibia using the 25mm Needle Set or the proximal humerus using the 45mm Needle Set, you may stop by releasing the trigger when the hub is almost flush with the skin.
On pediatric patients when you feel a decrease in resistance indicating the Needle Set has entered the medullary space, release (stop pushing) the trigger.
Remove EZ-IO Power Driver from Needle Set while stabilizing the catheter hub
Remove stylet from catheter by turning counter-clockwise and immediately dispose of stylet in appropriate biohazard sharps container
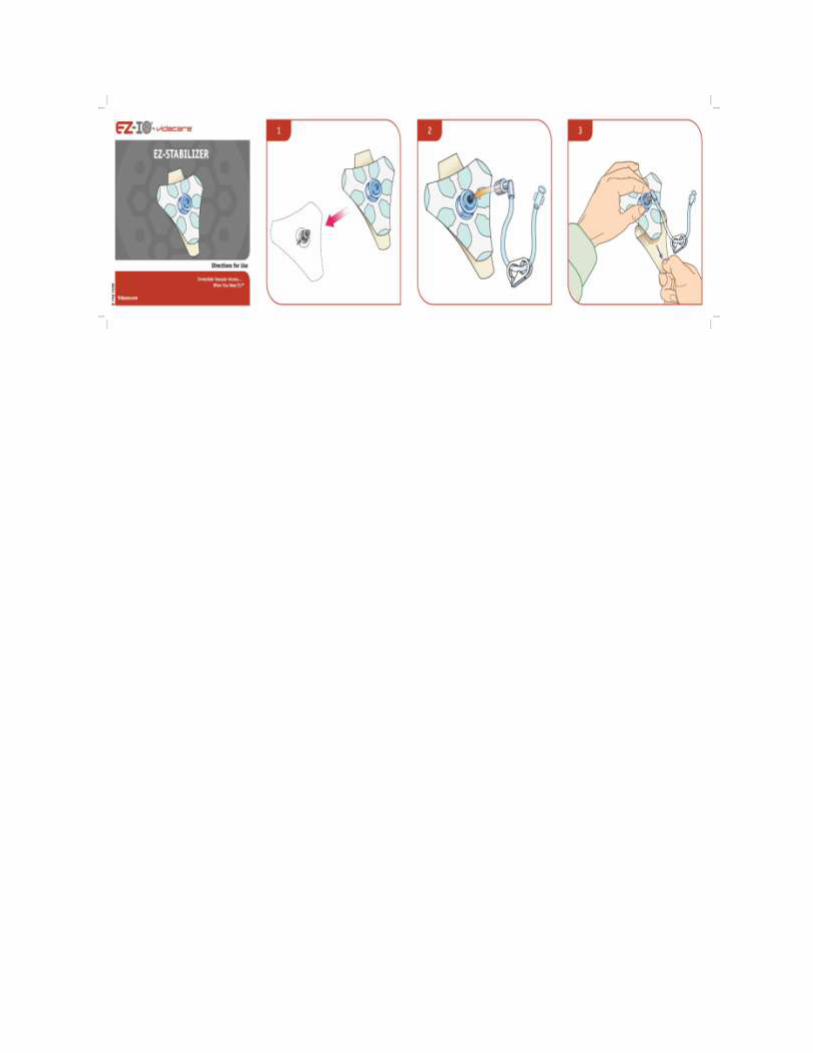
Secure site with EZ Stabilizer
Consider withdrawing blood for diagnostic studies (notify lab that they are from an IO source): o These values are reliable if blood samples are taken during initial installation of IO:
Glucose, hemoglobin, pH, pCO2, serum bicarbonate, sodium, chloride, blood urea nitrogen, creatinine, serum drug levels, cultures (bacterial, viral, or fungal), ABO and Rh type for type and screen.
o These values may not be accurate: Blood oxygenation, white blood cell count, potassium, AST, ALT, ionized calcium.
Connect pre-primed EZ Connect (example: with Normal Saline) to exposed Luer-lock hub
If the patient is responsive to pain, consider administration of anesthetic via the IO catheter: slow administration over 1 minute of preservative-free/epinephrine-free 2% lidocaine (ie use cardiac lidocaine found in crash cart – not the lidocaine used for local anesthesia):
o Dose: 0.5 mg/kg (20 mg/mL); max dose: 40 mg (2ml) o weight examples: 20kg: 10mg (0.5ml); 80kg: 40mg (2ml)
Syringe 10ml bolus: flush the catheter with a rapid and vigorous 10 ml flush of normal saline prior to infusions; repeat this flush as needed if flow still not adequate. “NO FLUSH = NO FLOW”
Assess for potential IO complications and infiltration
Disconnect 10 ml syringe from EZ-Connect extension set
Connect primed EZ-Connect extension set to primed IV tubing
Begin infusion utilizing a pressure delivery system (infusion pump, pressure bag at 300mmHg (if available), or simply using a large syringe and manually pushing fluids and medications)
Secure tubing; cover the IO site with gauze pad and dry dressing
Continue to monitor extremity for complications or infiltrations
Document time and date of EZ-IO insertion (VERY IMPORTANT: IO CANNOT BE USED FOR MORE THAN 24 HOURS)
IO site should be flushed before and after each medication administration.
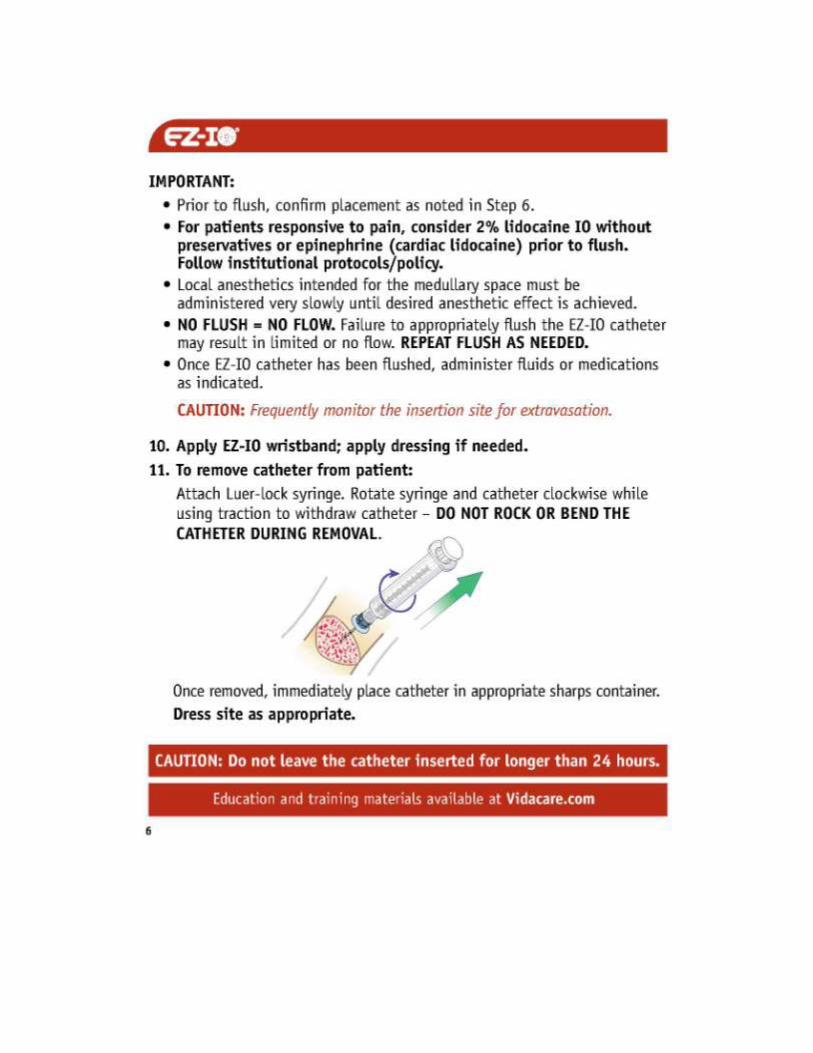
PROCEDURE ON HOW TO REMOVE AN IO
Explain the procedure to the patient if alert
Remove EZ Connect IV tubing
Secure an empty 10cc syringe directly onto the IO needle
Apply continuous gentle traction while turning the syringe and IO needle clockwise until the needle is removed; discard of needle appropriately
Apply pressure onto wound site and apply a simple dry dressing. No need for prolonged pressure or pressure dressing unless clinically indicated.
PRECAUTIONS
- Do not leave IO catheter inserted for more than 24 hours - Use aseptic technique - Check skin adipose and muscle thickness before insertion - Single use only - Do not recap Needle Sets - Stylet and catheter are NOT Magnetic Resonance Imaging (MRI) compatible
CLINICAL FOLLOW-UP
- Frequently assess for potential IO complications such as extravasation and infiltration, tibial fracture, osteomyelitis, epiphyseal injury, hemorrhage, fat embolism, low extremity compartment syndrome, obstruction of needle with marrow, bone fragments, or tissue, skin necrosis. [Perform a test infusion by slowly infusing 10 ml of normal saline to check for signs of soft tissue circumferential swelling or increased firmness, or increased resistance to injection. Verify the site Q 3-5 minutes x 3 then Q 30 minutes. - Remove IO if signs of infection, infiltrations or complications – discuss with MD prior to removal
BIBLIOGRAPHY
Dr. Nagler, J. (M.D.) and Dr. Krauss, B. (M.D., Ed. M.) (2011). Intraosseous Catheter Placement in
Children. N Engl J Med 2011; 364:e14February 24, 2011DOI: 10.1056/NEJMvcm0900916.
Vidacare. http://www.youtube.com/watch?v=PL3DMY1Zln0. Link consulted in March 2013.
Vidacare.http://www.vidacare.com/EZ-IO/Index.aspx. Page consulted: March 3rd 2013
Up-to-date Medical Resource. Intraosseous Infusion. Page consulted: March 3rd
2013
Canada Health Guide. Respiratory System. Clinical Practice Guidelines for Nurses in Primary
Care: Pediatric and Adolescent Care. Pediatric Procedures – Intraosseous Acess. [Page
consulted September 1, 2013].
http://www.hc-sc.gc.ca/fniah-spnia/services/nurs-infirm/clini/pediat/proced-meth-eng.php#a5.
ANNEX
DIRECTION OF USE