Embed Size (px)
Citation preview
IndigoVision
Control Center
Operator's Guide
2 Operator's Guide - v16-14
PREFACE
THIS MANUAL WAS CREATEDONWEDNESDAY, APRIL 17, 2019.
DOCUMENT ID: IU-CC-MAN004-16-14
Legal ConsiderationsLAWS THAT CAN VARY FROM COUNTRY TO COUNTRY MAY PROHIBIT CAMERA SURVEILLANCE. PLEASE ENSURE THAT THE RELEVANT LAWSARE FULLY UNDERSTOOD FOR THE PARTICULAR COUNTRY OR REGION IN WHICH YOU WILL BE OPERATING THIS EQUIPMENT. INDIGOVISIONLTD. ACCEPTS NO LIABILITY FOR IMPROPEROR ILLEGAL USE OF THIS PRODUCT.
CopyrightCOPYRIGHT© INDIGOVISION LIMITED. ALL RIGHTS RESERVED.
THIS MANUAL IS PROTECTED BY NATIONAL AND INTERNATIONAL COPYRIGHT AND OTHER LAWS. UNAUTHORIZED STORAGE, REPRODUCTION,TRANSMISSION AND/ORDISTRIBUTION OF THIS MANUAL, OR ANY PARTOF IT,MAY RESULT IN CIVIL AND/ORCRIMINAL PROCEEDINGS.
INDIGOV ISION IS A TRADEMARK OF INDIGOV ISION L IMITED AND IS REGISTERED IN CERTAIN COUNTRIES . INDIGOULTRA , INDIGOPRO ,INDIGOL ITE , INTEGRA AND CYBERV IGILANT ARE REGISTERED TRADEMARKS OF INDIGOV ISION L IMITED . CAMERA GATEWAY IS ANUNREGISTERED TRADEMARK OF INDIGOVISION LIMITED. ALL OTHER PRODUCT NAMES REFERRED TO IN THIS MANUAL ARE TRADEMARKS OFTHEIR RESPECTIVE OWNERS.
SAVE AS OTHERWISE AGREED WITH INDIGOVISION LIMITED AND/OR INDIGOVISION, INC., THIS MANUAL IS PROVIDED WITHOUT EXPRESSREPRESENTATION AND/OR WARRANTY OF ANY KIND. TO THE FULLEST EXTENT PERMITTED BY APPLICABLE LAWS, INDIGOVISION LIMITEDAND INDIGOVISION, INC. DISCLAIM ALL IMPLIED REPRESENTATIONS , WARRANTIES , CONDITIONS AND/OR OBLIGATIONS OF EVERY KIND INRESPECT OF THIS MANUAL. ACCORDINGLY, SAVE AS OTHERWISE AGREED WITH INDIGOVISION LIMITED AND/OR INDIGOVISION, INC., THISMANUAL IS PROVIDED ON AN “AS IS”, “WITH ALL FAULTS” AND “AS AVAILABLE” BASIS. PLEASE CONTACT INDIGOVISION LIMITED (EITHER BYPOST OR BY E-MAIL AT [email protected]) WITH ANY SUGGESTED CORRECTIONS AND/OR IMPROVEMENTS TO THISMANUAL.
SAVE AS OTHERWISE AGREED WITH INDIGOVISION L IMITED AND/OR INDIGOVISION, INC., THE LIABILITY OF INDIGOVISION L IMITED ANDINDIGOVISION, INC. FOR ANY LOSS (OTHER THAN DEATH OR PERSONAL INJURY) ARISING AS A RESULT OF ANY NEGLIGENT ACT OR OMISSIONBY INDIGOV ISION L IMITED AND/OR INDIGOV ISION, INC. IN CONNECTION WITH THIS MANUAL AND/OR AS A RESULT OF ANY USE OF ORRELIANCE ON THIS MANUAL IS EXCLUDED TO THE FULLEST EXTENT PERMITTED BY APPLICABLE LAWS.
Contact addressIndigoVision LimitedCharlesDarwin House,The Edinburgh Technopole,Edinburgh,EH26 0PY
Control Center
Operator's Guide - v16-14 3
TABLE OF CONTENTS
Legal Considerations 2Copyright 2Contact address 2
1 Welcome to Control Center 1Control Center overview 1Using the interface 2Conventions used 3Control Center online help 3
2 Concepts overview 5Live overview 5Recordings overview 5Sites overview 5Site database overview 7Users and groups overview 8
Users and groups example: opting out 9Users and groups example: opting in 11
Alarms overview 12CCTV keyboards overview 12Authentication overview 13ONVIF overview 13Camera Gateway overview 14Video footage authentication overview 14FrontLine System Overview 15
Using body worn video 16Automatic NVR switching 16Licensing Overview 16
3 Control Center Interface 19Customizing your layout 19
Docking and pinning icons 20Undock a panel 21Dock a panel 21Auto hide panels 22Close and open a panel 23
Explorer panels 23Video explorer 23Alarms explorer 24Users explorer 24
Events panels 25Maps overview 25
4 Operator's Guide - v16-14
Alarm status bar 25Monitors panel 26Alerts panel 27Storyboard panel 27
Storyboard toolbar 27PTZ Control panel 28Drag-and-drop items 28
4 How do I...? 31Change password 31Log out 31Specify how video is displayed 31
Video display options 31Change the text or icon size 33Change how date and time are displayed in video panes 33Change the appearance of the user interface 34View video in a full screen 34Start up in fullscreen mode 35Keep Control Center on top 35
View live video 35Reveal a hidden zone 35View live video from a camera on the PC screen 35View live video on an analog monitor 36View live video on an IndigoVision video wall 36View live video on a Barco video wall 37Work with live video 38Work with salvos 44Work with sequences 46Work with guard tours 47Work with persistent connections 49
View recordings 49Play back a recording in a video pane 49Change the playback NVR 50Play back a recording on an analog monitor 51Play back several recordings at once 51Work with recordings 52Work with thumbnails 58Review recordings 60Save and protect recordings 62Work with incidents 67
Work with maps 68Maps overview 68Map toolbar 69Display a map 69View video from a map 69Deal with alarm from a map 70
Search for motion 70Show analytics in live video 70In recorded video 71
Search for audio 75
Control Center
Operator's Guide - v16-14 5
Audio Search overview 75Search for audio in recorded video 75Change the threshold value 76Play back video found by search 76View thumbnails of all activity over threshold 77
Work with alarms and relays 77Alarms overview 77Escalation policy overview 78Handling alarms 78Take action when an alarm occurs 78Authorize relay activation 84Authorize clearing an alarm 84Carry out an action at any time 84Isolate or restore a detector 86Unset or set a zone 86Find alarms 86Filter alarms 87Find activations 87Display event details 88Move the Events panels 88View thumbnails of alarms 88View thumbnails of activations 88View alarms on the timeline 89View activations on the timeline 89View alarm counts 89View active detectors 89Create an alarm report 90Create an activation report 90View alarm details 91View unacknowledged alarms 91Edit an acknowledge response 91View video for an event 92Temporarily disable an alarm group video pane 92
Work with bookmarks 92Bookmarks overview 92Add a bookmark 93Delete a bookmark 93View details of a bookmark 94View bookmarks in a video overlay 94View bookmark video 94Create a bookmark report 95Find bookmarks 95Select bookmarks 96View bookmarks on the timeline 96
Work with data records 97Data records overview 97Find data records 97Display data record details 97View data record video 98
Work with sites 98Change my home site 98
Control Center
6 Operator's Guide - v16-14
Search your sites 98Work offline 99Use a segmented site database 99
Work with cameras 100Control a PTZ camera 100Using a CCTV keyboard 101Using the Control Center interface 105
Work with audio 108Listen to audio 108Broadcast audio 109
Work with external tools 110Run a report 110Run an external tool 110
View stream statistics 110View a web page 110Lock out users 111
Lock out other users 111Lock out all users 111Release lockout 112
5 Troubleshooting 113Alarms and relays 113
How do I know an alarm has occurred? 113Why does the alarm sound continue? 113I can't clear an alarm 113I can't activate a relay 114A looped replay is not displayed when an alarm occurs 114
CCTV keyboards 114Video does not appear in video pane when using a CCTV keyboard 114Clear error messages using a CCTV keyboard 114
Live video 115I can't control a PTZ camera 115A camera I'm viewing has been locked out 115I can't view video from a camera 116I can't start an external tool 116I get an error when I run an external tool 116I get feedback when talking to someone on screen 116Live video is jerky 117
Motion search 117Timing of peaks on museum mode motion search 117Motion search object size does not act as expected 117Rectangles are not displayed around motion 118I can't see a motion profile in the timeline 118
Passwords 118I've forgotten my password 118Change password 118Which password should I use? 119
Recordings 119A saved recording is shorter than expected 119The time shown on the timeline appears to be incorrect 119
Control Center
Operator's Guide - v16-14 7
I can't select the CD drive when saving a recording 119Recorded video is jerky and/or slow when played back 119I can't see a motion profile in the timeline 120Nothing is displayed in the timeline 120I can't see all the bookmarks available 120I can't playback video from a camera 120
Salvos, sequences and guard tours 121Guard tour does not display all cameras in a salvo 121I can't change the position of a guard tour 121A guard tour/salvo/sequence starts up when I log in 121Salvo/guard tour does not appear where expected 121
Sites 122I can't access all devices 122I can't edit an object 122There's a red X through a device 122All segments mode settings 122
Troubleshooting FrontLine Manager 123I cannot find my FrontLine recordings in Control Center 123FrontLine recordings are not appearing in Control Center 123
Other troubleshooting 124Audit log database error 124Control Center reacts more slowly than expected 125Overlays do not work as expected 125Why can I see less on an analog monitor than in a PC screen? 125Image distorts when the video pane resized 125I can't export recorded footage for a particular camera 125I see an error that there is problem with Control Center's license backup 126I see a warning that the Control Center License Server is unavailable 126
Control Center

8 Operator's Guide - v16-14
Control Center

Operator's Guide - v16-14 1
1 WELCOME TO CONTROL CENTER
Control Center overviewIndigoVision's Control Center is a powerful and easy-to-use software solution that enablesyou to manage all your video surveillance operations and investigate security events quicklyand effectively in one integrated platform.
The Control Center suite consists of a number of applications that provide a complete end-to-end IP security solution. These applications include the NVR-AS and the Control Centerfront-end application.
The Control Center front-end application enables all users (subject to access permissions) tocarry out the following tasks:
View live video
• Display live video on one or more PC screens, in a variety of layouts.• Display live video from any networked camera on analogmonitors.• View live video from ONVIF cameras.• Listen and speak to people you view on screen.• Use sequences to view a set of cameras in succession in one video pane or analog
monitor.• Use salvos and guard tours to view a set of cameras in consecutive video panes or
analogmonitors.• Use the CCTV keyboard to display video from cameras, sequences salvos and guard
tours on video panes and analogmonitors by number using a CCTV keyboard.• Control a PTZ camera using the on screen joystick and/or a CCTV keyboard.• Record live video and take snapshots of images.• Usemaps to quickly locate cameras you want to view.• Perform relay actions, e.g. open door, turn on light directly from the video pane.• Use Pursuit Mode to follow subjects of interest from one camera view to an adjacent
camera.
View recorded video
• Search through past recorded footage.• Review recorded footage using thumbnail images by time, alarm, bookmarks,
activation andmotion.• Play back recordings.• Record and review recordings from ONVIF cameras.• Use digital zoom to view footage inmore detail.• Save snapshots and recordings to file as evidence.• Export and protect recordings.• Save recordings as incidents.• Play back exported recordings or incidents.• Findmotion in sections of recorded footage.
2 Operator's Guide - v16-14
View and deal with alarms
• View, and acknowledge all alarms that have occurred on your sites.• Black screenmonitoring of alarms.• Carry out actions when an event occurs.• Play back recordings associated with alarms.• View alarm history and search for alarms.• Generate reports about alarms.• View an alarm procedure• View live video of the scene where an alarm has occurred.• Display amap of the site where an alarm has occurred.
Control Center enables administrators to carry out the following tasks:
Set up and configure Control Center
• Create and administer user groups and accounts (requires full administratorpermissions).
• Create sites and organize cameras, analogmonitors, NVRs, and Alarm Servers into ahierarchy within sites.
• Create sequences, salvos and guard tours within sites.• Specify users’ access permissions on sites and the objects within them.• Set up detectors and zones.• Set up alarm notification and actions on events (alarms or detector activations).• Manage recordings and alarms.• Set up transmitters and receivers using their Configuration pages.• Associate maps with sites, and add cameras, zones and detectors to maps• Number cameras andmonitors, sequences, salvos and guard tours for use with the
CCTV keyboard.• Set up an IP VideoWall (requires an additional license)
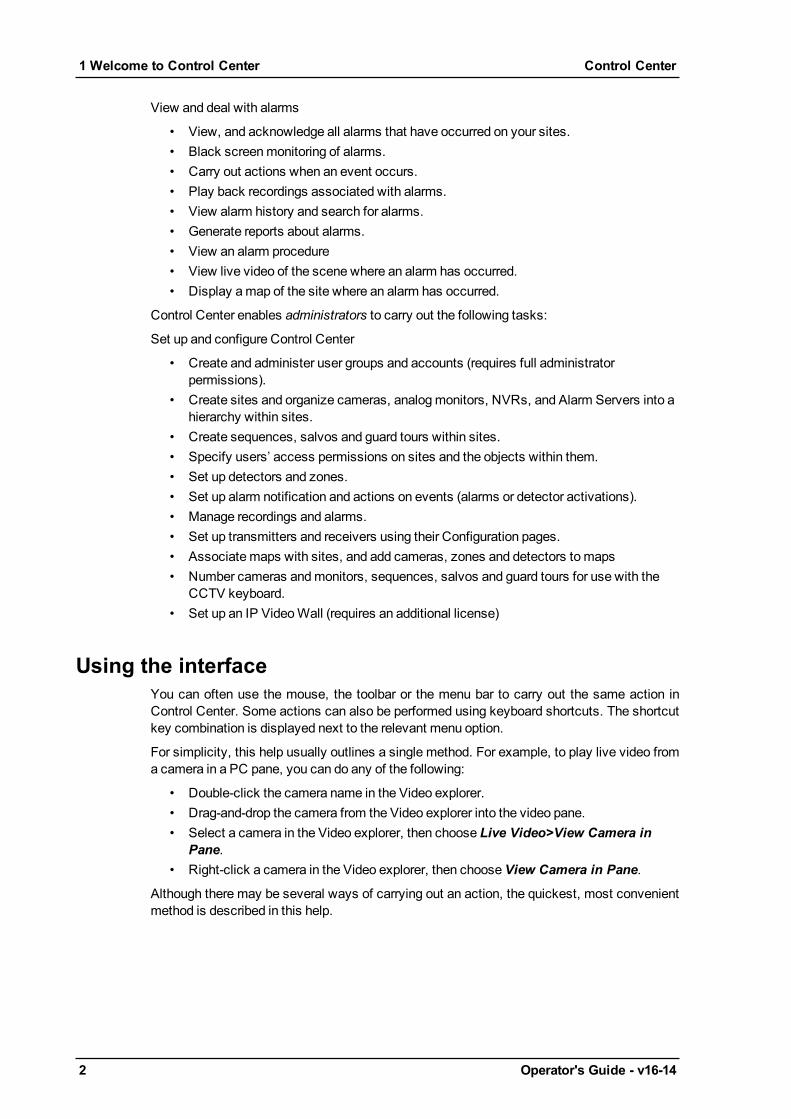
Using the interfaceYou can often use the mouse, the toolbar or the menu bar to carry out the same action inControl Center. Some actions can also be performed using keyboard shortcuts. The shortcutkey combination is displayed next to the relevant menu option.
For simplicity, this help usually outlines a single method. For example, to play live video froma camera in a PC pane, you can do any of the following:
• Double-click the camera name in the Video explorer.• Drag-and-drop the camera from the Video explorer into the video pane.• Select a camera in the Video explorer, then choose Live Video>View Camera in
Pane.• Right-click a camera in the Video explorer, then chooseView Camera in Pane.
Although there may be several ways of carrying out an action, the quickest, most convenientmethod is described in this help.
1 Welcome to Control Center Control Center

Operator's Guide - v16-14 3
Conventions usedThe following visual indications are used in this document to help you locate and identifyinformation quickly.
Additional information relating to the current section.
Potential hazard that could seriously impair operations.
Control Center online helpControl Center has a comprehensive online help system that provides an overview of keyconcepts used by Control Center and details the user interface.
The help is divided into Operator and Administrator level topics.
l The How do I... sections contain details of everyday tasks.l The Troubleshooting sections contain problem solving information.
To access the Control Center online help, press the F1 key. Alternatively, many of ControlCenter's dialogs contain a help button. Click the Help button on the dialog to view usefulinformation about using the dialog.
To search the help system for a particular word or phrase, for example, "view live video",click the Search tab, then type the text you want to find. Click List Topics, then double-clickthe topic you require from the list.
Green, bold text indicates additional information is available. Click the text to reveal theadditional information.
Control Center 1 Welcome to Control Center

4 Operator's Guide - v16-14
1 Welcome to Control Center Control Center
Operator's Guide - v16-14 5
2 CONCEPTS OVERVIEW
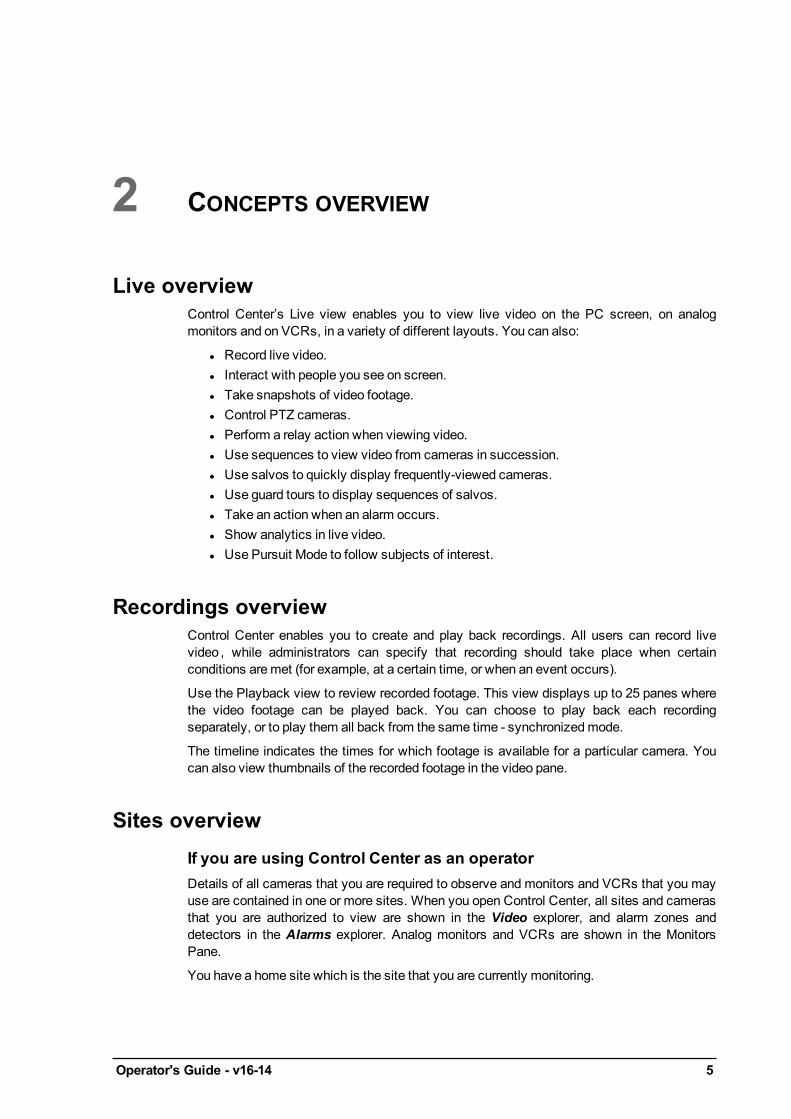
Live overviewControl Center’s Live view enables you to view live video on the PC screen, on analogmonitors and on VCRs, in a variety of different layouts. You can also:
l Record live video.l Interact with people you see on screen.l Take snapshots of video footage.l Control PTZ cameras.l Perform a relay action when viewing video.l Use sequences to view video from cameras in succession.l Use salvos to quickly display frequently-viewed cameras.l Use guard tours to display sequences of salvos.l Take an action when an alarm occurs.l Show analytics in live video.l Use Pursuit Mode to follow subjects of interest.
Recordings overviewControl Center enables you to create and play back recordings. All users can record livevideo , while administrators can specify that recording should take place when certainconditions aremet (for example, at a certain time, or when an event occurs).
Use the Playback view to review recorded footage. This view displays up to 25 panes wherethe video footage can be played back. You can choose to play back each recordingseparately, or to play them all back from the same time - synchronizedmode.
The timeline indicates the times for which footage is available for a particular camera. Youcan also view thumbnails of the recorded footage in the video pane.
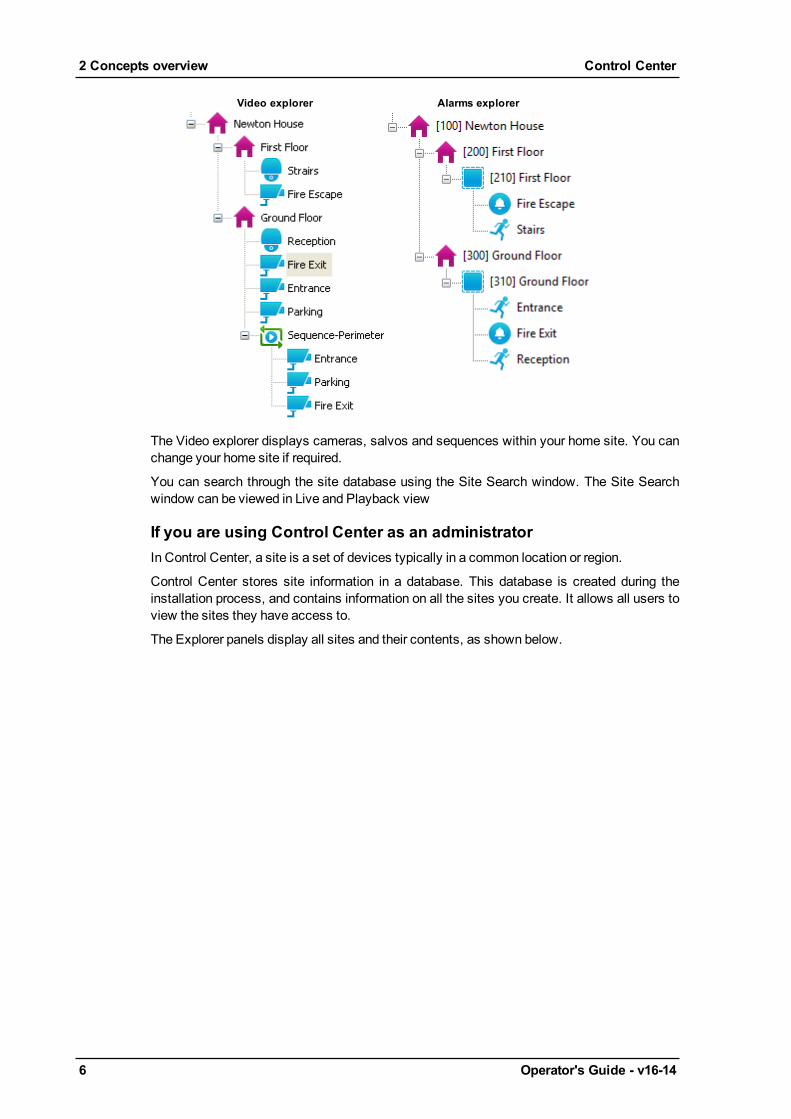
Sites overviewIf you are using Control Center as an operatorDetails of all cameras that you are required to observe and monitors and VCRs that you mayuse are contained in one or more sites. When you open Control Center, all sites and camerasthat you are authorized to view are shown in the Video explorer, and alarm zones anddetectors in the Alarms explorer. Analog monitors and VCRs are shown in the MonitorsPane.
You have a home site which is the site that you are currently monitoring.
6 Operator's Guide - v16-14
Video explorer Alarms explorer
The Video explorer displays cameras, salvos and sequences within your home site. You canchange your home site if required.
You can search through the site database using the Site Search window. The Site Searchwindow can be viewed in Live and Playback view
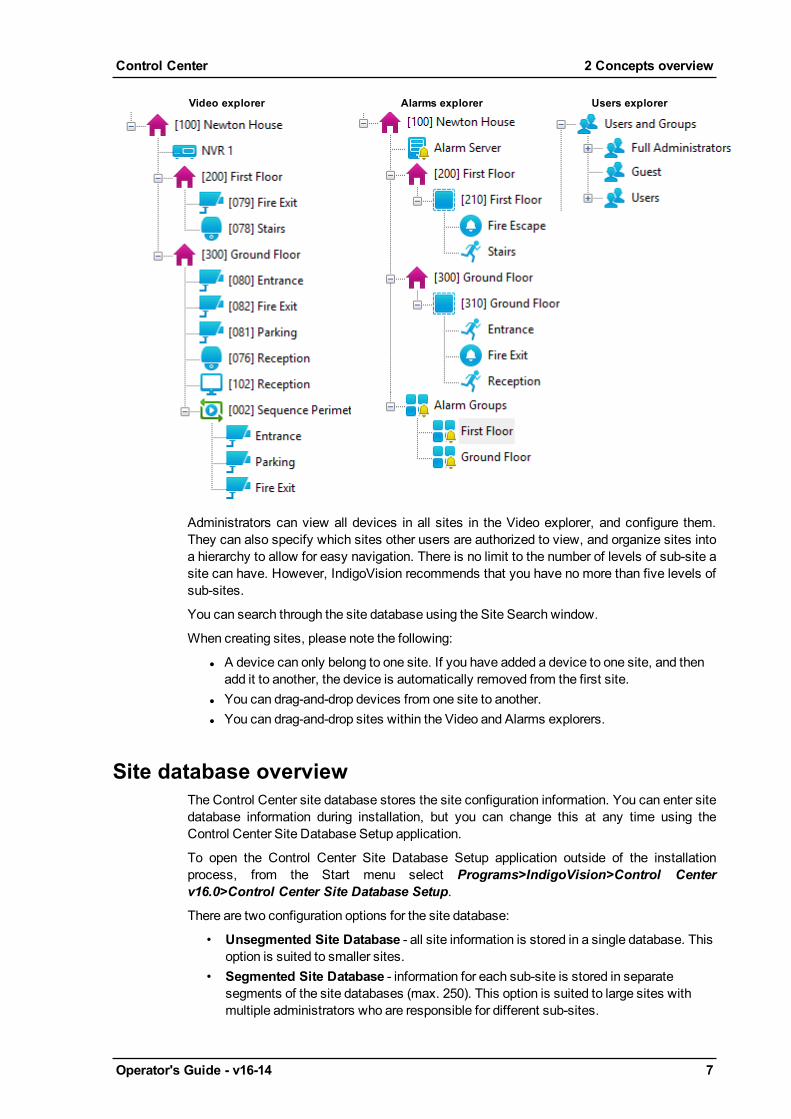
If you are using Control Center as an administratorIn Control Center, a site is a set of devices typically in a common location or region.
Control Center stores site information in a database. This database is created during theinstallation process, and contains information on all the sites you create. It allows all users toview the sites they have access to.
The Explorer panels display all sites and their contents, as shown below.
2 Concepts overview Control Center
Operator's Guide - v16-14 7
Video explorer Alarms explorer Users explorer
Administrators can view all devices in all sites in the Video explorer, and configure them.They can also specify which sites other users are authorized to view, and organize sites intoa hierarchy to allow for easy navigation. There is no limit to the number of levels of sub-site asite can have. However, IndigoVision recommends that you have no more than five levels ofsub-sites.
You can search through the site database using the Site Search window.
When creating sites, please note the following:
l A device can only belong to one site. If you have added a device to one site, and thenadd it to another, the device is automatically removed from the first site.
l You can drag-and-drop devices from one site to another.l You can drag-and-drop sites within the Video and Alarms explorers.
Site database overviewThe Control Center site database stores the site configuration information. You can enter sitedatabase information during installation, but you can change this at any time using theControl Center Site Database Setup application.
To open the Control Center Site Database Setup application outside of the installationprocess, from the Start menu select Programs>IndigoVision>Control Centerv16.0>Control Center Site Database Setup.
There are two configuration options for the site database:
• Unsegmented Site Database - all site information is stored in a single database. Thisoption is suited to smaller sites.
• Segmented Site Database - information for each sub-site is stored in separatesegments of the site databases (max. 250). This option is suited to large sites withmultiple administrators who are responsible for different sub-sites.
Control Center 2 Concepts overview

8 Operator's Guide - v16-14
► Formore information, "Using a segmented site database" on page 1
For either option, the site database can be stored locally on the PC running the Control Centerfront-end application, or centrally on a Windows file server. If you have installed ControlCenter front-end application on several PCs you should use a central site database.
Users and groups overviewTo access the Control Center front-end application you require a user account. Each useraccount is assigned a user name and user-definable password that are required to log on toControl Center.
All user accounts are organized into groups. There are three group roles:
• Full Administrator: Users in groups with the full administrator role have access to allControl Center functionality.
• Restricted Administrator: Users in groups with the restricted administrator role haveaccess to all Control Center functionality, except that they cannot create, modify ordelete users. However, they can create or edit user tasks.
• Operator: Users in groups with the operator role have access to only Live andPlayback views. Administrators can also define operator access permissions to siteobjects.
Groups help administrators manage users by enabling operator access permissions andsettings for multiple users to be changed in one place.
To view or control a site object in the Video explorer, for example, a camera, users require thecorrect access permissions for that object, and the object's parent. Administrators can setexplicit access permissions for operator groups.
Each user in a group inherits the values from their group. However, administrators can setexplicit access permissions and settings for individual users - these override the groupsettings for that user.
User and group access permissions set for a site are inherited by the objects in that siteunless explicit access permissions are granted to an object.
What are object
permissions for
User
What are object
permissions for
Group
Which permissions
are used for
this object?
What are default
permissions for
Object
User Permissions Group Permissions Default Permissions
Inherit
Explicit
Inherit
Explicit
Inherit
Explicit
Users and Groups
Repeat for
Parent Site
The top site always has explicit permissions defined, therefore, if no explicit accesspermissions have been set, Control Center uses the default access permissions defined forthe top site.
For example, in the scenario below, when the users access the camera called Stairs in theInternal site, the users are granted the following access permissions:
• Alice: List - Inherited from the top site default as no explicit permissions are set for thisuser or their group.
• Bob: List, View - Inherited from the Internal team group as no explicit permissions areset for this user.
2 Concepts overview Control Center
Operator's Guide - v16-14 9
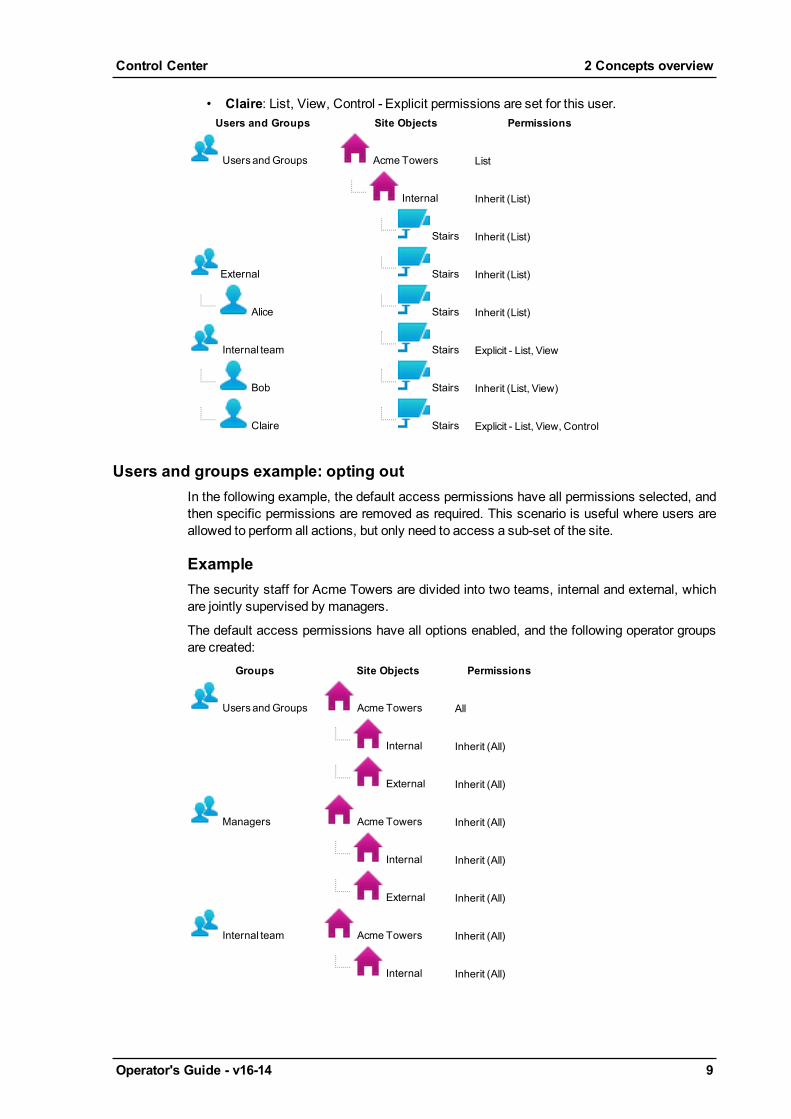
• Claire: List, View, Control - Explicit permissions are set for this user.Users and Groups Site Objects Permissions
Users andGroups Acme Towers List
Internal Inherit (List)
Stairs Inherit (List)
External Stairs Inherit (List)
Alice Stairs Inherit (List)
Internal team Stairs Explicit - List, View
Bob Stairs Inherit (List, View)
Claire Stairs Explicit - List, View, Control
Users and groups example: opting outIn the following example, the default access permissions have all permissions selected, andthen specific permissions are removed as required. This scenario is useful where users areallowed to perform all actions, but only need to access a sub-set of the site.
ExampleThe security staff for Acme Towers are divided into two teams, internal and external, whichare jointly supervised by managers.
The default access permissions have all options enabled, and the following operator groupsare created:
Groups Site Objects Permissions
Users andGroups Acme Towers All
Internal Inherit (All)
External Inherit (All)
Managers Acme Towers Inherit (All)
Internal Inherit (All)
External Inherit (All)
Internal team Acme Towers Inherit (All)
Internal Inherit (All)
Control Center 2 Concepts overview

10 Operator's Guide - v16-14
External Explicit - None
External team Acme Towers Inherit (All)
Internal Explicit - None
External Inherit (All)
The users in these groups will see the following objects in the Video explorer:Managers Internal team External team
For a trial project, a member of the Internal team, Dave, requires temporary access to viewvideo from the Entrance camera. So the Administrator explicitly grants Dave access to viewthat camera, such that his permissions are:
User and Group Site Objects Permissions
Dave Acme Towers Inherit (All)
Internal Inherit (All)
External Explicit - List
Entrance Explicit - List, View
All other objects Explicit - None
Dave will now see the following objects in the Video explorer:Internal team: Dave
2 Concepts overview Control Center
Operator's Guide - v16-14 11
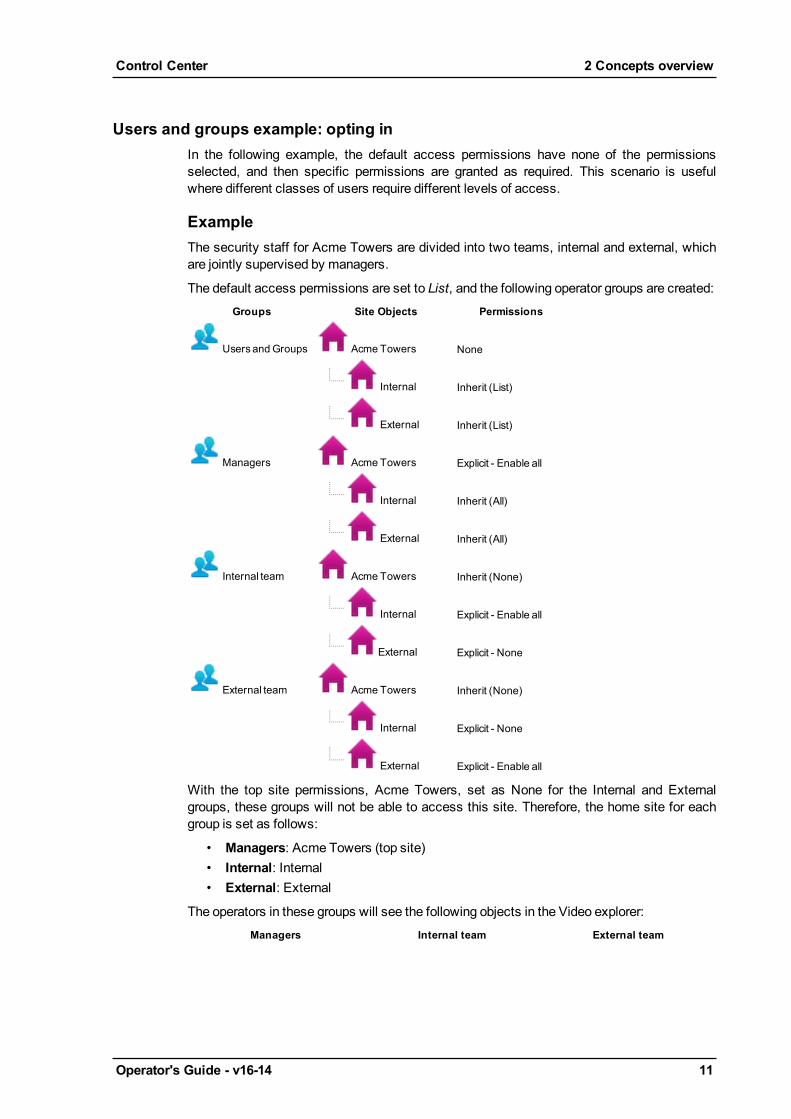
Users and groups example: opting inIn the following example, the default access permissions have none of the permissionsselected, and then specific permissions are granted as required. This scenario is usefulwhere different classes of users require different levels of access.
ExampleThe security staff for Acme Towers are divided into two teams, internal and external, whichare jointly supervised by managers.
The default access permissions are set to List, and the following operator groups are created:Groups Site Objects Permissions
Users andGroups Acme Towers None
Internal Inherit (List)
External Inherit (List)
Managers Acme Towers Explicit - Enable all
Internal Inherit (All)
External Inherit (All)
Internal team Acme Towers Inherit (None)
Internal Explicit - Enable all
External Explicit - None
External team Acme Towers Inherit (None)
Internal Explicit - None
External Explicit - Enable all
With the top site permissions, Acme Towers, set as None for the Internal and Externalgroups, these groups will not be able to access this site. Therefore, the home site for eachgroup is set as follows:
• Managers: Acme Towers (top site)• Internal: Internal• External: External
The operators in these groups will see the following objects in the Video explorer:Managers Internal team External team
Control Center 2 Concepts overview

12 Operator's Guide - v16-14
Alarms overviewThe IndigoVision Control Center can be configured to detect alarms when any of the followingoccur:
l A trigger device is activated (for example, a pressure-sensitive pad is activated, or awindow is broken).
l Actions are detected by a camera using video analytics (for example, motion).l External systems are activated.l A fault is detected with a device (for example, network connection is lost).
Detectors are configured in Control Center to activate when events are captured by devicessuch as PIRs, pressure-sensitive pads, or cameras. Detectors are grouped into zones.Zones organize detectors into logical groups, for example, one floor of a building, to helpmanage alarms more effectively.
When a detector is activated, it triggers an alarm in the zone. If more than one detector in azone is activated before the alarm is cleared, no further alarms are triggered.
Two detectors can be combined as a double knock detector that is activated when bothdetectors are triggered. For example, the detector activates when a door opens and motion isdetected.
A schedule can be applied to zones and detectors to specify when they are active and,therefore, when alarms can be triggered.
An alarm is indicated by a flashing alarm icon in the Alarm status bar and the alarm appears inred type in the Alarms panel. The detectors that activated the alarm are also displayed in theDetectors tab. Other methods may also be used to indicate that an alarm has occurred.
To ensure alarms are responded to in a timely manner, you can configure the system toescalate alarms. If an alarm has not be responded to within the defined timeout period, thesystem escalates it by bringing it to the attention of another group of users.
Events and subsequent detector activations are captured and filtered by an alarm server, andpassed onto Control Center. They are stored on the same alarm server. Alarms can alsooriginate from other external systems and be filtered by an alarm server.
CCTV keyboards overviewControl Center currently supports the:
2 Concepts overview Control Center
Operator's Guide - v16-14 13
l IndigoVision v1 Keyboardl IndigoVision Surveillance Keyboardl Pelco KBD300A Universal Keyboard (version 5.20 keyboard firmware and later)l Pelco CM9760-KBD Intelligent Keyboardl American Dynamics ADCC1100 Keyboardl American Dynamics AD2088 Keyboard (labelled Sensormatic)l Panasonic WV-CU650 Keyboard
You can use keyboards to:
l Control camerasl Display cameras, salvos, sequences and guard tours on the PC screen or on analogmonitors
Administrators only - To allow users to carry out these functions, you must configure basicnumbering options. See Numbering Overview for details on how Control Center allocatesnumbers.
Authentication overview
This functionality is only available if you have administrator permissions.
When you create a user account, youmust specify themethod that user uses to log in:
l Windows authentication:When this user tries to log in, Control Center checks thatthe current Windows user is the same as theWindows user linked to that useraccount. If it is the same user, they are logged in; if not, an error message is displayedand the user is not logged in.
l Password authentication: The user must enter this password each time they log in toControl Center. You can create operator accounts without a password, if required.
When Require users to enter their password when logging out of or exiting ControlCenter is selected in the User Management dialog, users with password authentication mustenter a password before they can log out or exit Control Center. This restriction does notapply to users withWindows authentication.
ONVIF overviewONVIF is an open industry forum for the development of a global standard for the interface ofIP-based physical security products. Control Center supports devices conformant with theONVIF 1.02 standard.
Control Center supports the following features for ONVIF devices:
• View live video• Listen to live audio• Record and play back video and audio
Control Center 2 Concepts overview
14 Operator's Guide - v16-14
• Export footage recorded from ONVIF devices• Control PTZ cameras• Add and view bookmarks on footage recorded from ONVIF devices• Recording video on an event• MPEG-4 from ONVIF devices• Motion search on recorded footage• Show analytics on live footage
ONVIF devices have the following limitations with Control Center:
• Show analytics on recorded footage• Video lockout is not supported by ONVIF devices
You can configure an ONVIF camera using the ONVIF Configuration Utility provided withControl Center.
Camera Gateway overviewThe IndigoVision Camera Gateway enables third party cameras from a range ofmanufacturers to be connected to IndigoVision Control Center. The Camera Gateway takesvideo streams from third party cameras using their native protocols and enables users to viewthe streams in a Control Center front-end application and record them using NVRs.
The cameras do not need to support ONVIF in order to connect to the IndigoVision system,giving customers a wide choice of cameras to choose from.
The Camera Gateway supports video streams from H.264, MPEG-4 and MJPEG cameras,PTZ control, and events.
The Camera Gateway is a software service that can be installed on aWindows server, givingtotal flexibility. The Camera Gateway service enables multiple clients to stream video fromthe same camera, whilst only requiring a single stream from the camera to the CameraGateway.
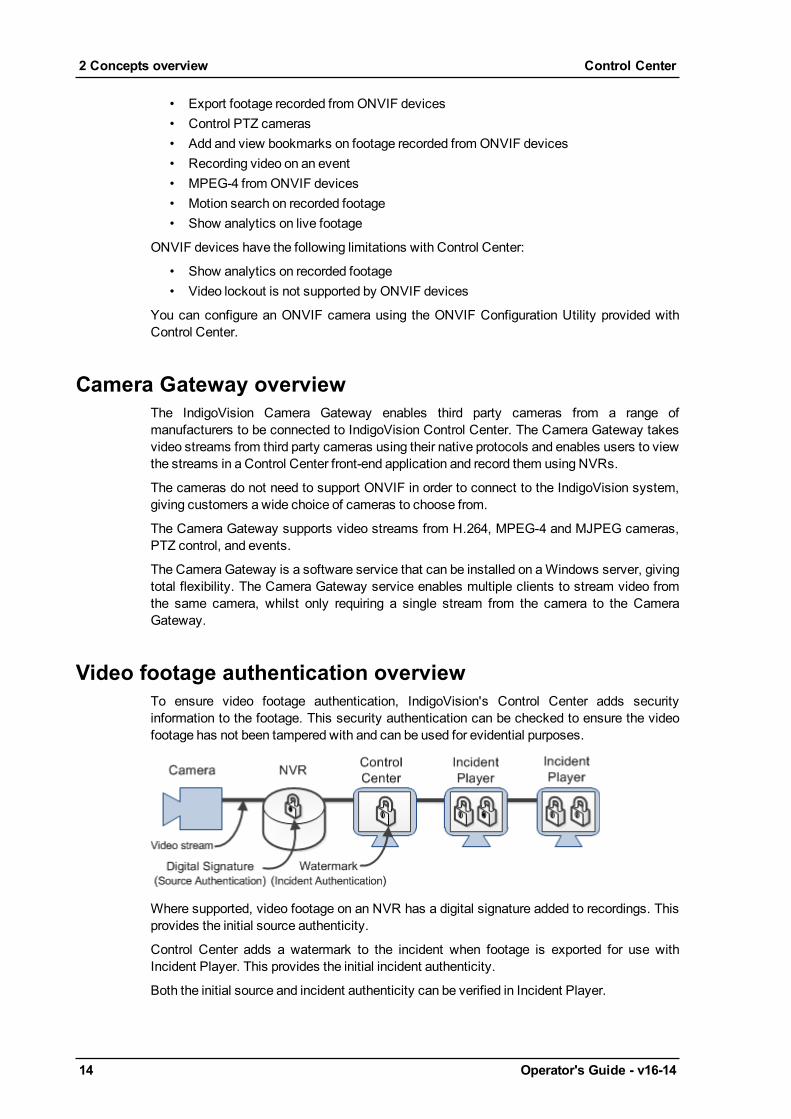
Video footage authentication overviewTo ensure video footage authentication, IndigoVision's Control Center adds securityinformation to the footage. This security authentication can be checked to ensure the videofootage has not been tampered with and can be used for evidential purposes.
Where supported, video footage on an NVR has a digital signature added to recordings. Thisprovides the initial source authenticity.
Control Center adds a watermark to the incident when footage is exported for use withIncident Player. This provides the initial incident authenticity.
Both the initial source and incident authenticity can be verified in Incident Player.
2 Concepts overview Control Center

Operator's Guide - v16-14 15
An incident can be exported from Incident Player. The exported incident maintainsauthenticity of the source and the exported footage.
After exporting from Incident Player, the source authenticity now refers to the video footageexported from Control Center and the incident authenticity now refers to the exported incidentfrom Incident Player.
FrontLine System OverviewThe IndigoVision FrontLine System allows recording of evidential quality video and audiousing body worn cameras.
• Lightweight, easy-to-use cameras designed from the ground up to support loneworkers
• Automatic import of video and audio from docked FrontLine Cameras into the ControlCenter suite.
• Digital signatures and tamper protection of recordings.• Play back and export of recordings.
The system comprises the following components:
• License Server: An IndigoVision License Server with a Control Center license thatincludes the Body Worn Video feature.
• FrontLine Manager: Software used for managing FrontLine Cameras andautomatically importing video.
• FrontLine Dock: Hardware device connected to the PC that is running FrontLineManager (the FrontLineManager PC).The FrontLine Dock provides ports for dockingmultiple FrontLine Cameras.
• FrontLine Cameras: Portable cameras that connect to the FrontLineManager PCusing the FrontLine Dock.
• NVR-AS: An IndigoVision Network Video Recorder/Alarm Server (NVR-AS) that isused to store andmanage recordings downloaded from the FrontLine Cameras.The NVR-AS must be installed on the FrontLineManager PC.
• Control Center front-end application: The IndigoVision Control Center front-endapplication provides a powerful and flexible user interface for viewing and exporting thevideo and audio recordings created by FrontLine Cameras.
• Camera wearer: The person who uses a FrontLine Camera andmay or may not beable to review their recordings in Control Center, depending on their accesspermissions.
Figure 1: FrontLineManager overview
Control Center 2 Concepts overview
16 Operator's Guide - v16-14
Using body worn videoUsers with FrontLine Cameras (camera wearers) can record video and audio footage.
To do this, they are assigned a FrontLine Camera, which they remove from the FrontLineDock attached to the FrontLineManager PC.
They use the camera to record video and audio and then return the camera to the sameFrontLine Dock and FrontLineManager PC.
The recordings are automatically downloaded from the camera and the camera battery isrecharged.
After the footage has been downloaded the camera can be reused by the same camerawearer or manually assigned to another user. This cycle is repeated every time a FrontLineCamera is used.
Automatic NVR switchingEnable automatic NVR switching to allow Control Center to automatically switch to adifferent NVR when playing back or exporting footage from a camera. The switch betweenNVRs occurs if there is no footage available at the current time on the current NVR andanother NVR in the site has footage from the same camera.
You can specify one or more failover NVRs for an NVR or set up recording jobs on multipleNVRs to help ensure that footage is available even if the primary NVR fails to record footagefrom the camera.
Motion search and replay is available as normal across all alternative NVRs.
Licensing OverviewTo operate the Control Center suite, you must have a Control Center license. A ControlCenter license covers the number of cameras, encoders and NVR-AS that can be used andthe level of software functionality allowed.
The Control Center license is stored on a License Server and contains the followinginformation:
• Software tierThis defines the level of software functionality and themaximum number of deviceconnection licenses allowed.
• Number of device connectionsThis defines the number of cameras or encoders which can be connected to theControl Center.When a camera or encoder is connected to Control Center, you can do the following:• View live video• Play back video• Trigger alarms• Record video on an unlimited number of NVR-AS serversYou can change the NVR-AS server on which video from a camera or encoder isrecorded without needing the license to be altered.
• Number of third party Windows NVR-AS connections
2 Concepts overview Control Center
Operator's Guide - v16-14 17
This defines the number of Windows servers which can run the IndigoVision NVR-ASsoftware.A third party Windows NVR-AS connection license allows a singleWindows server torun an instance of IndigoVision NVR-AS software.• An NVR-AS running on a third party server without a third party Windows NVR-AS
connection license cannot record video from a camera or encoder or managealarms.
• IndigoVision NVR-AS 3000 and NVR-AS 4000 appliances do not require anyadditional license.
Workstations running the Control Center front-end application and servers running NVR-ASmust be connected to the License Server to operate.
The Control Center front-end application and NVR-AS maintain a 30-day rolling backup oftheir license.
• If connectivity to the License Server is lost, for example due to routinemaintenance,then this backup is automatically used, and the Control Center front-end applicationand NVR-AS continue to operate for 30 days.
• Once connectivity to the License Server is restored, the Control Center front-endapplication and NVR-AS revert to using the License Server.
Control Center 2 Concepts overview

18 Operator's Guide - v16-14
2 Concepts overview Control Center

Operator's Guide - v16-14 19
3 CONTROL CENTER INTERFACE
Control Center has three "views" which give you access to different functionality: Live view,Playback view and Setup view. The first two are available to all users; Setup view is onlyavailable when logged in as an administrator.
Live view
Playback view
Setup view
The Live view main window can display up to 25 video panes for viewing live video. You canselect from a range of video display options.
If you are usingmultiple PC screens, you can view up to 25 video panes in each window (withamaximum of 100 live video streams over the PC screens).
If working with recorded video, you can view up to 25 recordings in one window, and livevideo in the other windows (up to amaximum of 100 video streams).
You can change the user interface appearance to a dark theme. This is useful if you need tooperate Control Center in low-light conditions, for example, a control room.
Only users who have logged in as operators, can change the user interface appearance. Thisfeature is not available if you have logged in as an administrator.
Customizing your layoutThe user interface can be configured to suit your needs. The interface is made up from fixedand flexible areas. The fixed areas always appear in the same location in the user interface.The flexible areas, or panels, can be docked or pinned anywhere within the user interface.
Docking is the ability to 'snap' a panel into any position around the user interface. As youmove a panel, docking indicators appear on the user interface and placing the panel over oneof these indicators lets you 'dock' the panel in that location.
Using the pinning icon you can automatically hide a panel. After selecting the pin icon in thetitle bar of a panel, then moving the mouse away from that panel, the panel automatically'slides' to the edge of the user interface and becomes a tab option.
Moving your mouse over the panel tab; the panel 'slides' back into view. It remains there aslong as you have your mouse over the panel or you have pinned the panel again.
20 Operator's Guide - v16-14
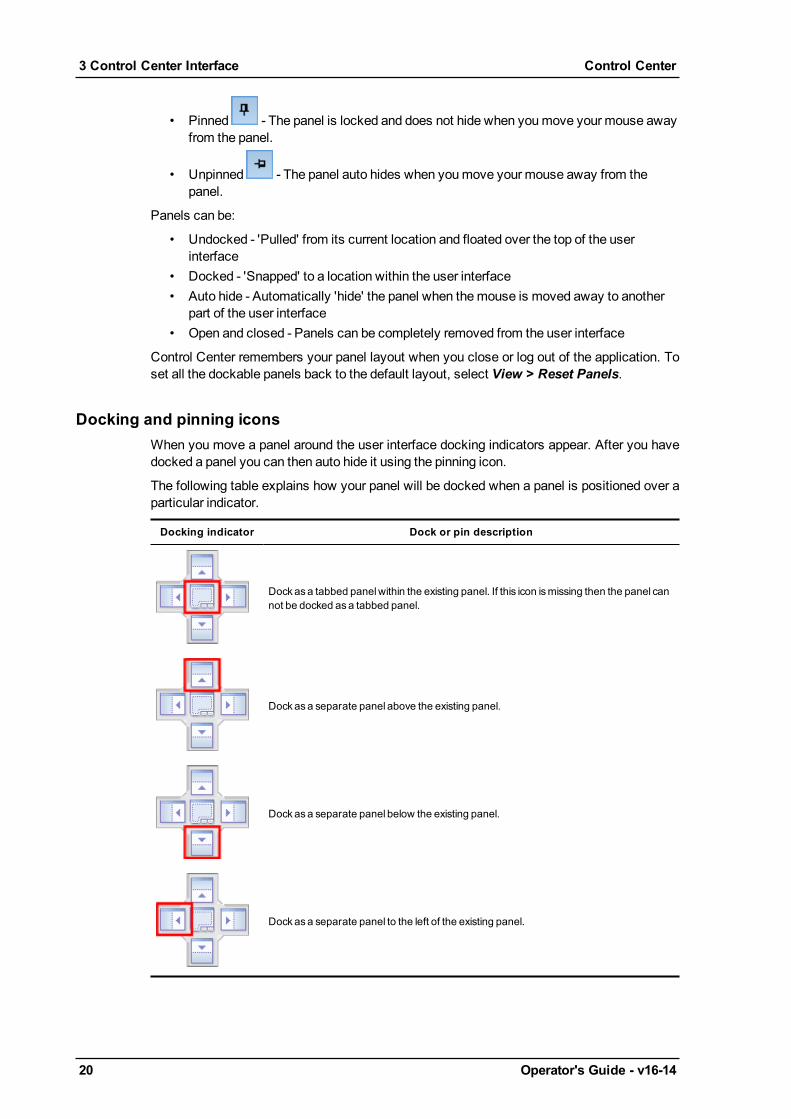
• Pinned - The panel is locked and does not hide when youmove your mouse awayfrom the panel.
• Unpinned - The panel auto hides when youmove your mouse away from thepanel.
Panels can be:
• Undocked - 'Pulled' from its current location and floated over the top of the userinterface
• Docked - 'Snapped' to a location within the user interface• Auto hide - Automatically 'hide' the panel when themouse is moved away to another
part of the user interface• Open and closed - Panels can be completely removed from the user interface
Control Center remembers your panel layout when you close or log out of the application. Toset all the dockable panels back to the default layout, select View > Reset Panels.
Docking and pinning iconsWhen you move a panel around the user interface docking indicators appear. After you havedocked a panel you can then auto hide it using the pinning icon.
The following table explains how your panel will be docked when a panel is positioned over aparticular indicator.
Docking indicator Dock or pin description
Dockasa tabbed panelwithin the existing panel. If this icon ismissing then the panel cannot be docked asa tabbed panel.
Dockasa separate panel above the existing panel.
Dockasa separate panel below the existing panel.
Dockasa separate panel to the left of the existing panel.
3 Control Center Interface Control Center
Operator's Guide - v16-14 21
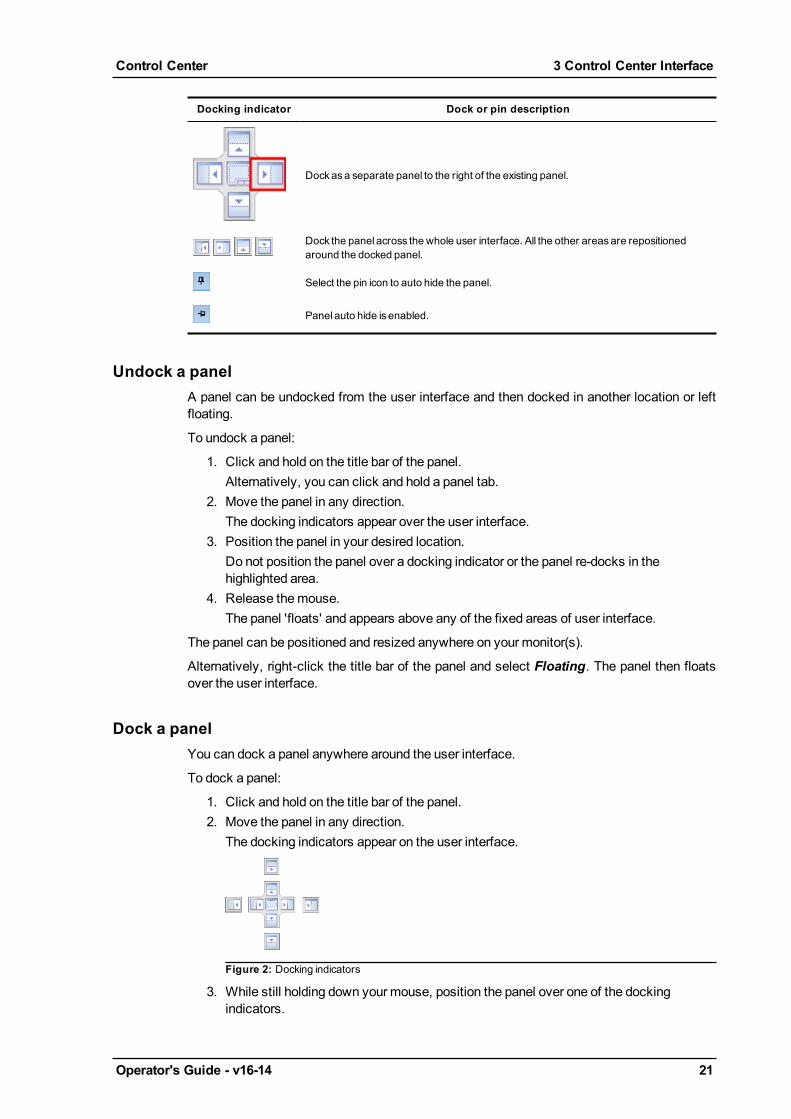
Docking indicator Dock or pin description
Dockasa separate panel to the right of the existing panel.
Dock the panel across the whole user interface. All the other areasare repositionedaround the docked panel.
Select the pin icon to auto hide the panel.
Panel auto hide is enabled.
Undock a panelA panel can be undocked from the user interface and then docked in another location or leftfloating.
To undock a panel:
1. Click and hold on the title bar of the panel.Alternatively, you can click and hold a panel tab.
2. Move the panel in any direction.The docking indicators appear over the user interface.
3. Position the panel in your desired location.Do not position the panel over a docking indicator or the panel re-docks in thehighlighted area.
4. Release themouse.The panel 'floats' and appears above any of the fixed areas of user interface.
The panel can be positioned and resized anywhere on your monitor(s).
Alternatively, right-click the title bar of the panel and select Floating. The panel then floatsover the user interface.
Dock a panelYou can dock a panel anywhere around the user interface.
To dock a panel:
1. Click and hold on the title bar of the panel.2. Move the panel in any direction.
The docking indicators appear on the user interface.
Figure 2: Docking indicators
3. While still holding down your mouse, position the panel over one of the dockingindicators.
Control Center 3 Control Center Interface
22 Operator's Guide - v16-14
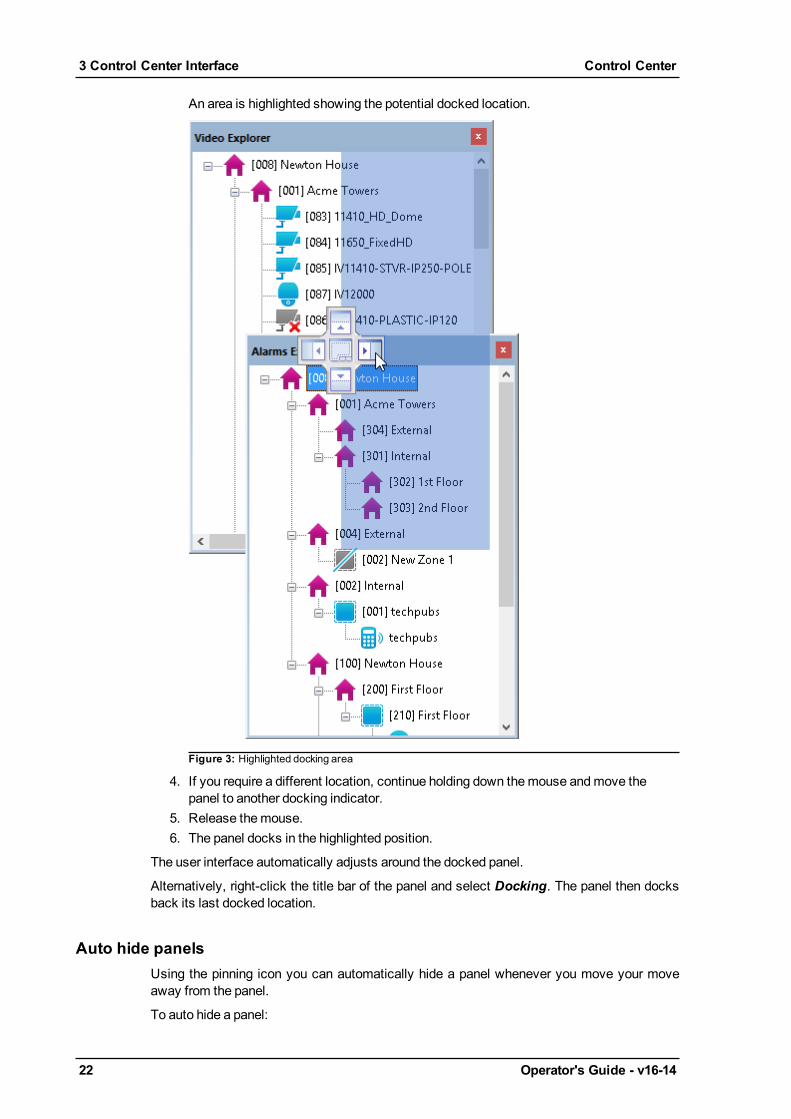
An area is highlighted showing the potential docked location.
Figure 3: Highlighted docking area
4. If you require a different location, continue holding down themouse andmove thepanel to another docking indicator.
5. Release themouse.6. The panel docks in the highlighted position.
The user interface automatically adjusts around the docked panel.
Alternatively, right-click the title bar of the panel and select Docking. The panel then docksback its last docked location.
Auto hide panelsUsing the pinning icon you can automatically hide a panel whenever you move your moveaway from the panel.
To auto hide a panel:
3 Control Center Interface Control Center
Operator's Guide - v16-14 23
1. Select .
The panel automatically 'slides' to the edge of the user interface.2. Position youmouse over the panel tab and the panel 'slides' back into view. The
pinning icon now indicates that the auto hide option is enabled .3. Select the pin icon again to lock the panel in position.
Alternatively, right-click the title bar of the panel and select Auto hide. The panel then slidesto the edge of the user interface.
Close and open a panelPanels can be closed if they are not required after you have configured your layout
To close a panel:
1. Select .
2. Alternatively, select View > [panel name].3. Disable the selectedmenu option.
To open a panel:
1. Select View > [panel name].2. Enable the selectedmenu option.
Explorer panelsIn Control Center, the cameras and zones you are required to monitor are organized intosites. The Explorer panels display your home site and its contents.
The Explorer panels comprise the following:
l Video explorer: displays the all the video objects in the site such as cameras andmon-itors
l Alarms explorer: displays the objects in the site such as alarm servers, detectors, andexternal data sources
l Users explorer: provides access to the users and groups in the site
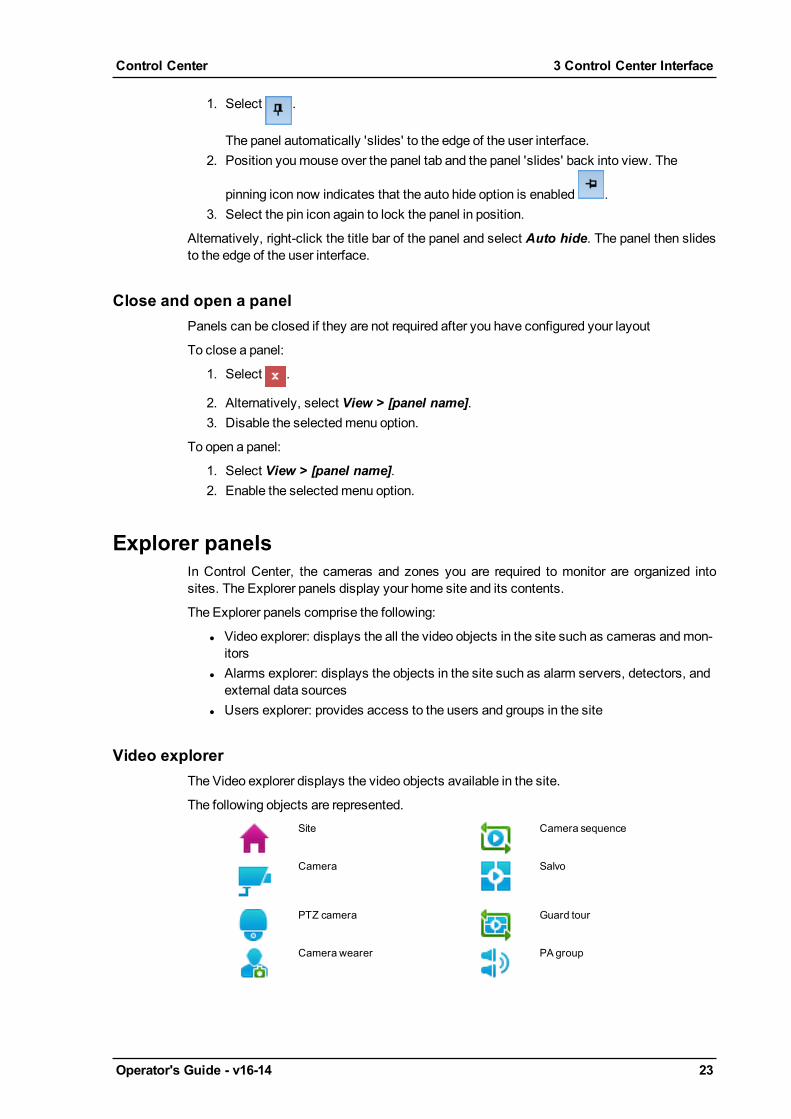
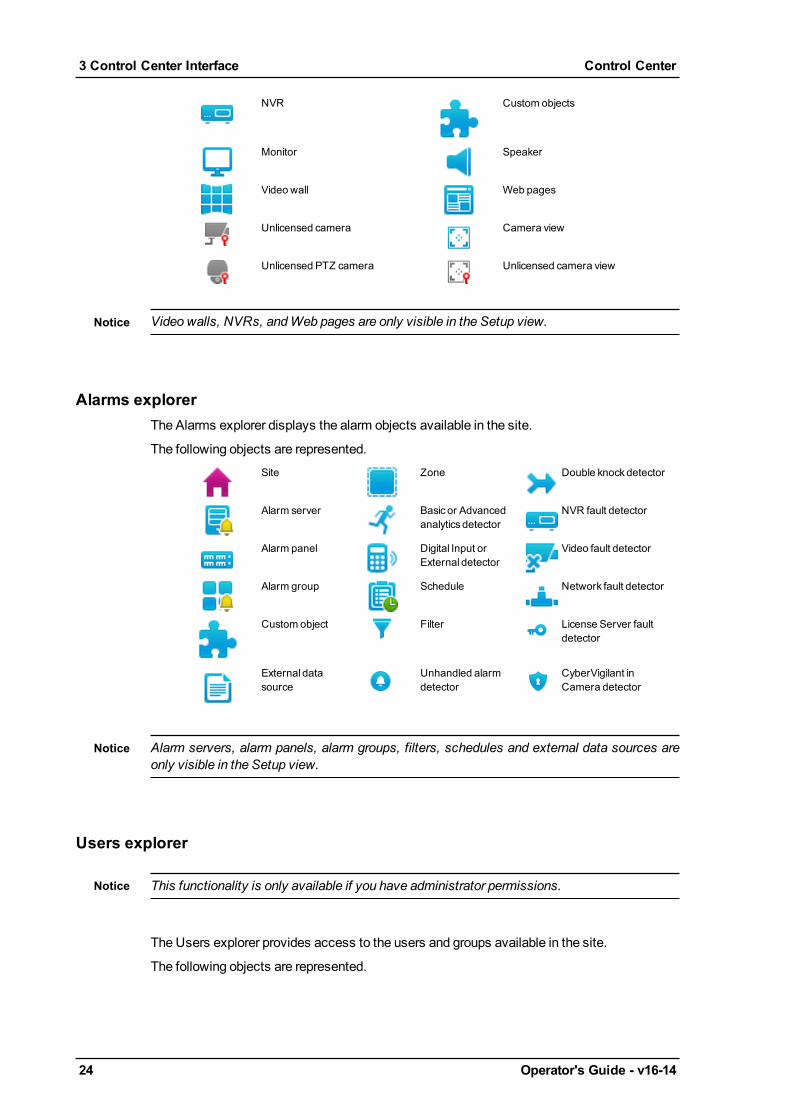
Video explorerThe Video explorer displays the video objects available in the site.
The following objects are represented.Site Camera sequence
Camera Salvo
PTZ camera Guard tour
Camera wearer PA group
Control Center 3 Control Center Interface
24 Operator's Guide - v16-14
NVR Custom objects
Monitor Speaker
Video wall Web pages
Unlicensed camera Camera view
Unlicensed PTZ camera Unlicensed camera view
Video walls, NVRs, andWeb pages are only visible in the Setup view.
Alarms explorerThe Alarms explorer displays the alarm objects available in the site.
The following objects are represented.Site Zone Double knockdetector
Alarm server Basic or Advancedanalytics detector
NVR fault detector
Alarm panel Digital Input orExternal detector
Video fault detector
Alarm group Schedule Network fault detector
Custom object Filter License Server faultdetector
External datasource
Unhandled alarmdetector
CyberVigilant inCamera detector
Alarm servers, alarm panels, alarm groups, filters, schedules and external data sources areonly visible in the Setup view.
Users explorer
This functionality is only available if you have administrator permissions.
The Users explorer provides access to the users and groups available in the site.
The following objects are represented.
3 Control Center Interface Control Center
Operator's Guide - v16-14 25
Groups
Users
Events panelsThe Events panels, located below the Control Center main window, display current activealarms, activations, alerts, and bookmarks.
You canmove the Events panels individually if required.
Control Center may have been configured to enable you to view video footage from camerasrelated to an alarm or a bookmark. Drag-and-drop the alarm or bookmark from the list into aplayback video pane to play back footage starting from the time of the alarm or bookmark.
Maps overviewMaps can be used in Live, Playback and Setup views, and provide a representation of thelayout your site(s). Maps enable you to identify the location of the site objects including:
• Where cameras are located, and their field of vision• Where events have occurred• Where devices are locate that you need to activate (for example, relays)
There are a number of actions that you can initiate frommaps, including:
• Display video from cameras• Move to other maps• Deal with alarms• Actuate relays
Sites may have one or moremaps associated with them in Control Center.
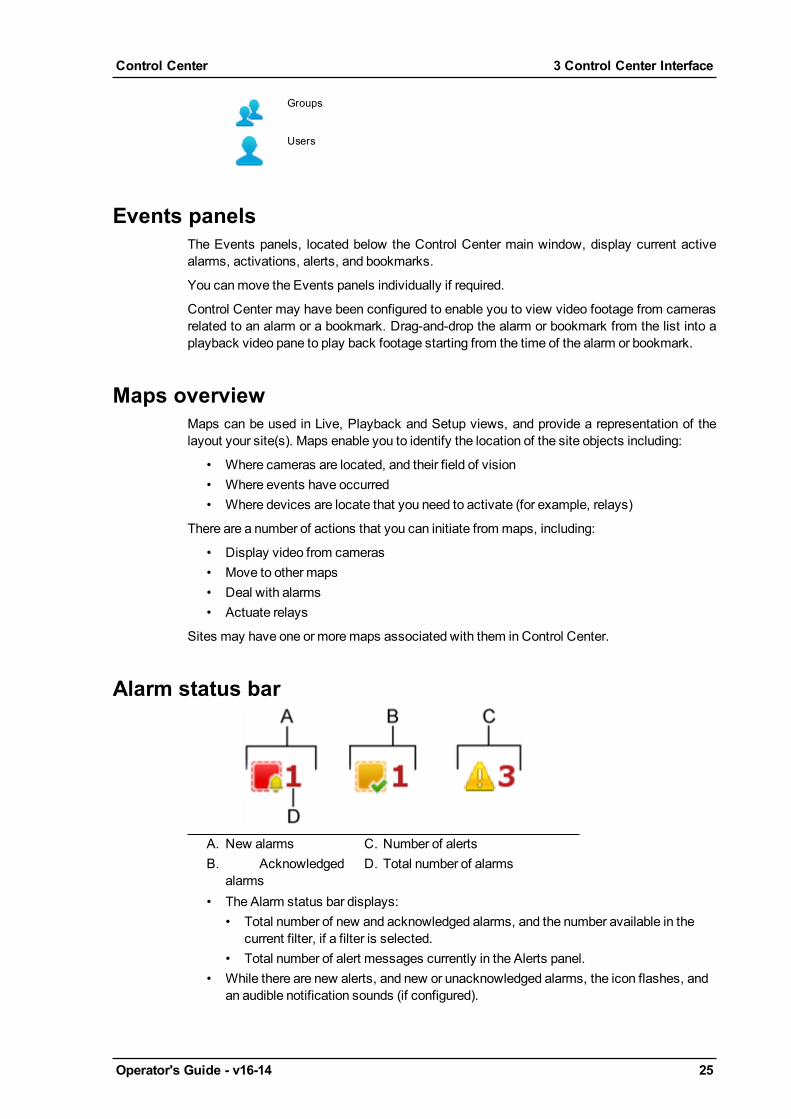
Alarm status bar
A. New alarmsB. Acknowledged
alarms
C. Number of alertsD. Total number of alarms
• The Alarm status bar displays:• Total number of new and acknowledged alarms, and the number available in the
current filter, if a filter is selected.• Total number of alert messages currently in the Alerts panel.
• While there are new alerts, and new or unacknowledged alarms, the icon flashes, andan audible notification sounds (if configured).
Control Center 3 Control Center Interface
26 Operator's Guide - v16-14
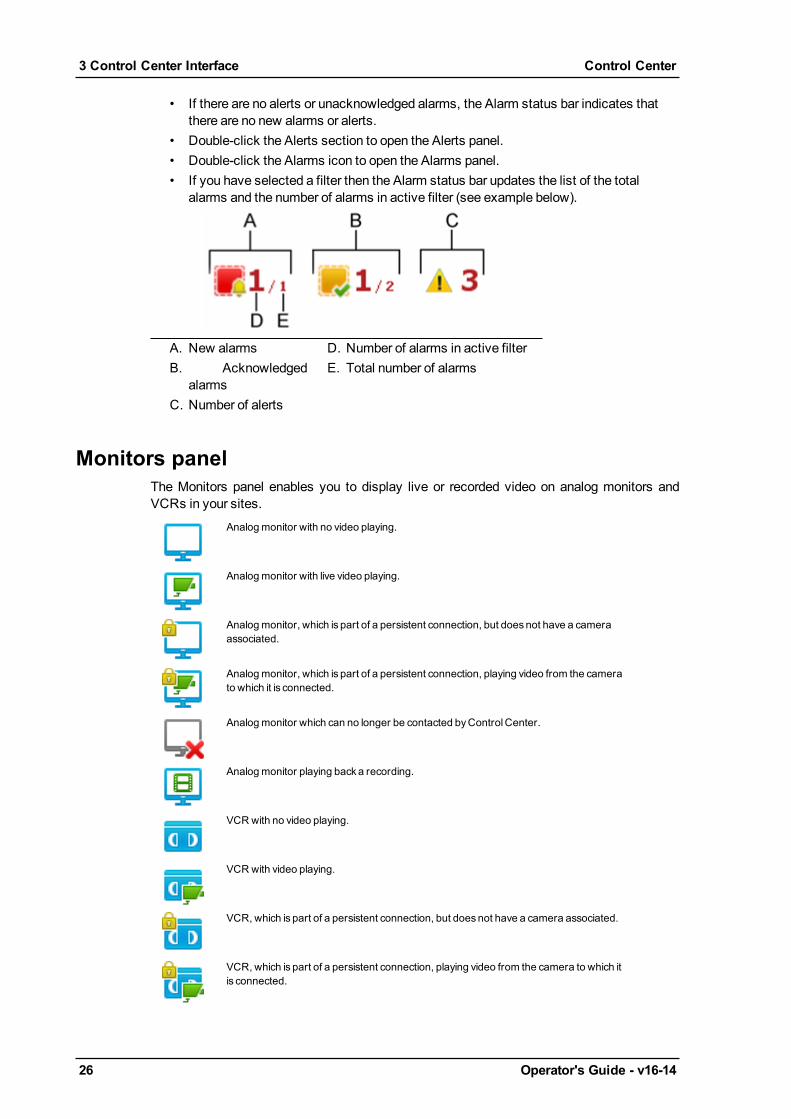
• If there are no alerts or unacknowledged alarms, the Alarm status bar indicates thatthere are no new alarms or alerts.
• Double-click the Alerts section to open the Alerts panel.• Double-click the Alarms icon to open the Alarms panel.• If you have selected a filter then the Alarm status bar updates the list of the total
alarms and the number of alarms in active filter (see example below).
A. New alarmsB. Acknowledged
alarmsC. Number of alerts
D. Number of alarms in active filterE. Total number of alarms
Monitors panelThe Monitors panel enables you to display live or recorded video on analog monitors andVCRs in your sites.
Analogmonitor with no video playing.
Analogmonitor with live video playing.
Analogmonitor, which is part of a persistent connection, but doesnot have a cameraassociated.
Analogmonitor, which is part of a persistent connection, playing video from the camerato which it is connected.
Analogmonitor which can no longer be contacted byControlCenter.
Analogmonitor playing backa recording.
VCR with no video playing.
VCR with video playing.
VCR, which is part of a persistent connection, but doesnot have a camera associated.
VCR, which is part of a persistent connection, playing video from the camera to which itis connected.
3 Control Center Interface Control Center
Operator's Guide - v16-14 27
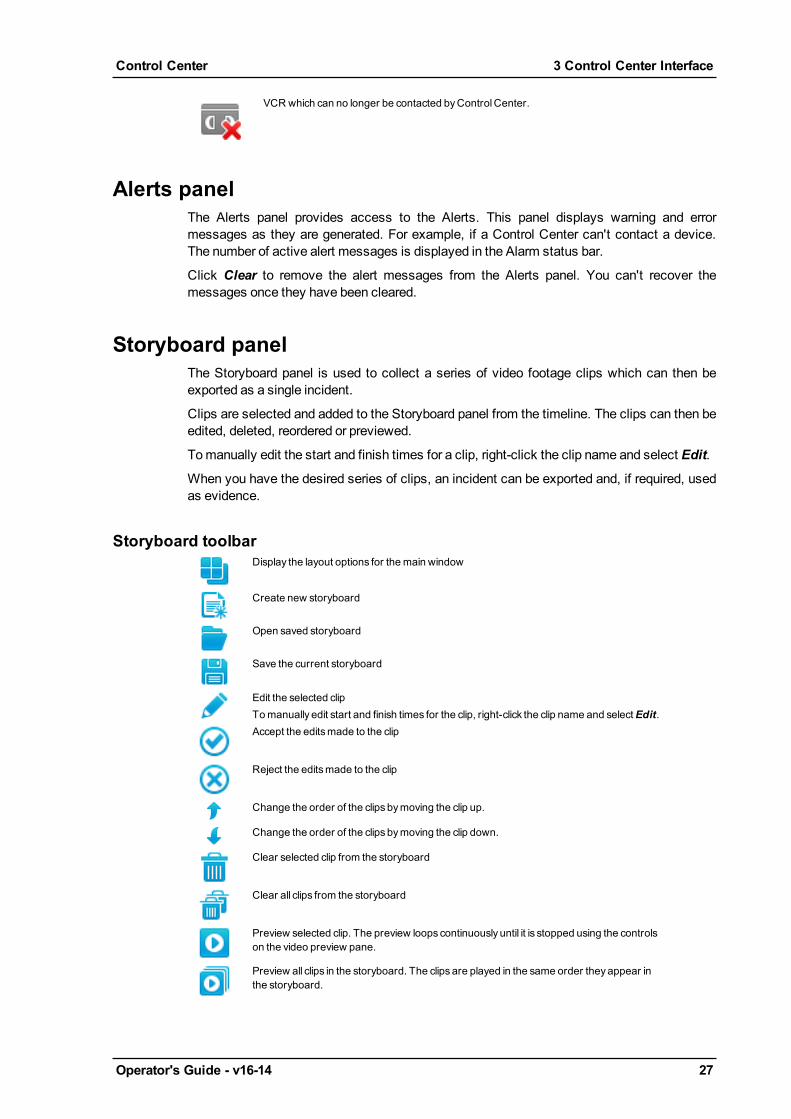
VCR which can no longer be contacted byControlCenter.
Alerts panelThe Alerts panel provides access to the Alerts. This panel displays warning and errormessages as they are generated. For example, if a Control Center can't contact a device.The number of active alert messages is displayed in the Alarm status bar.
Click Clear to remove the alert messages from the Alerts panel. You can't recover themessages once they have been cleared.
Storyboard panelThe Storyboard panel is used to collect a series of video footage clips which can then beexported as a single incident.
Clips are selected and added to the Storyboard panel from the timeline. The clips can then beedited, deleted, reordered or previewed.
Tomanually edit the start and finish times for a clip, right-click the clip name and select Edit.
When you have the desired series of clips, an incident can be exported and, if required, usedas evidence.
Storyboard toolbarDisplay the layout options for themain window
Create new storyboard
Open saved storyboard
Save the current storyboard
Edit the selected clipTomanually edit start and finish times for the clip, right-click the clip name and selectEdit.Accept the editsmade to the clip
Reject the editsmade to the clip
Change the order of the clips bymoving the clip up.
Change the order of the clips bymoving the clip down.
Clear selected clip from the storyboard
Clear all clips from the storyboard
Preview selected clip. The preview loops continuously until it is stopped using the controlson the video preview pane.
Preview all clips in the storyboard. The clips are played in the same order theyappear inthe storyboard.
Control Center 3 Control Center Interface
28 Operator's Guide - v16-14
Export the clips asa single incident
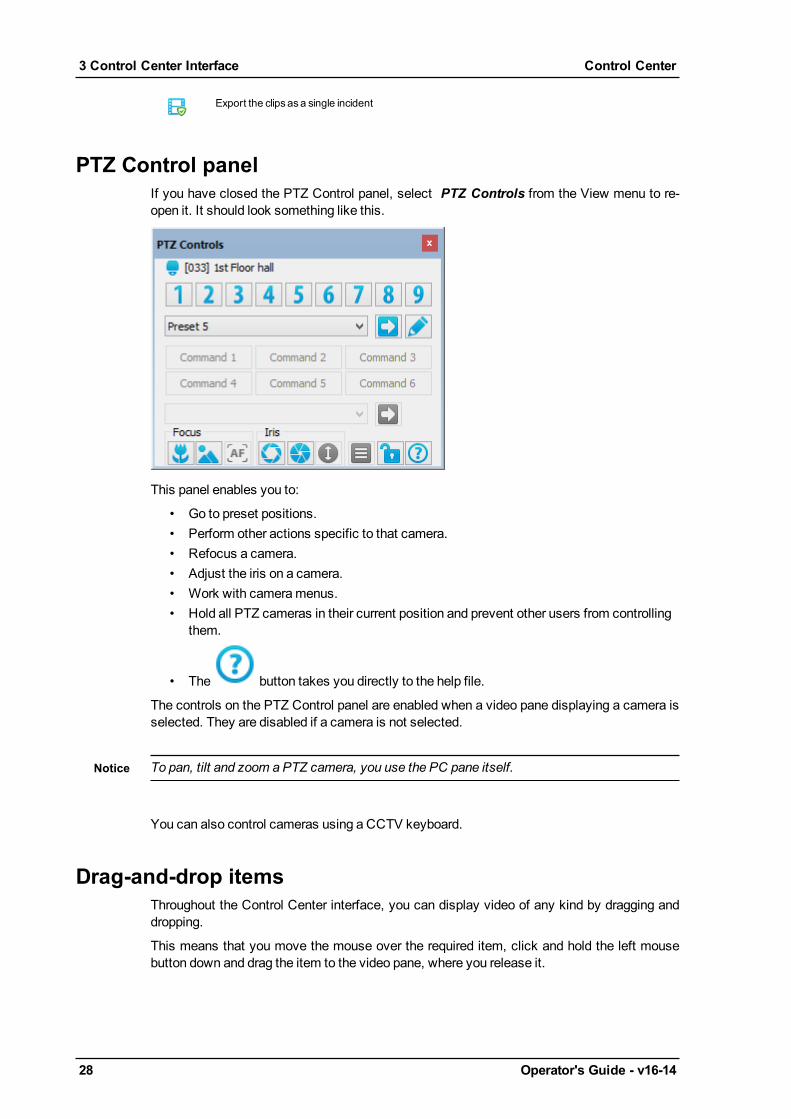
PTZ Control panelIf you have closed the PTZ Control panel, select PTZ Controls from the View menu to re-open it. It should look something like this.
This panel enables you to:
• Go to preset positions.• Perform other actions specific to that camera.• Refocus a camera.• Adjust the iris on a camera.• Work with cameramenus.• Hold all PTZ cameras in their current position and prevent other users from controlling
them.
• The button takes you directly to the help file.
The controls on the PTZ Control panel are enabled when a video pane displaying a camera isselected. They are disabled if a camera is not selected.
To pan, tilt and zoom a PTZ camera, you use the PC pane itself.
You can also control cameras using a CCTV keyboard.
Drag-and-drop itemsThroughout the Control Center interface, you can display video of any kind by dragging anddropping.
This means that you move the mouse over the required item, click and hold the left mousebutton down and drag the item to the video pane, where you release it.
3 Control Center Interface Control Center
Operator's Guide - v16-14 29
This method is used in Live view, to display video from a selected camera in a video pane oron an analog monitor, and in Playback view, to view recorded footage on the timeline, or toplay back video.
You can also drag video that is being displayed in one video pane and drop it into anothervideo pane within the same screen.
Control Center 3 Control Center Interface

30 Operator's Guide - v16-14
3 Control Center Interface Control Center
Operator's Guide - v16-14 31
4 HOW DO I...?
Change passwordYoumay want to change your password to something you can remembermore easily.
The Change Password option is unavailable when working in all segments mode or if youruser login is verified usingWindows authentication.
To change your password:
1. From the Filemenu, select Change Password.2. Enter the current password.3. Enter a new password, then confirm it and click OK.
Log outTo log out of Control Center and log in as another user without closing Control Center, selectLog out from the Filemenu. Control Center's Login dialog opens, allowing a different user tolog in.
Youmay be required to reenter your password when you log out.
Specify how video is displayed
Video display optionsYou can display live and recorded video in a variety of different ways:
In a full screen, without toolbars
Click in the toolbar. The video panes expand to fill the entire screen, hiding theExplorer panels, menu and toolbar.
To view themainmenu bar while in full screenmode, press theAlt key.
32 Operator's Guide - v16-14
To view video again in the normal window, click , if enabled, or press F11 or Esc on
your keyboard.
In the current window, without toolbarsTo expand the video panes to fill the current video window, hiding the Explorer panels andtoolbar, press F12. The current window is not resized.
To view themainmenu bar while in video panes only mode, press theAlt key.
To view video again in the normal window, click , if enabled, or press F12 or Esc on
your keyboard.
In a single large pane, with toolbarsDouble-click once in the video pane that you want to view at maximum size.
In the toolbar, click . The display contains a single pane containing video from thatcamera.
In multiple panesYou can display video in a variety of different ways on one or more video windows. To access
the different layouts, click in the toolbar and select the layout you require.
You can choose a different layout for each video window. You can use up to 4 video windowsto view additional video panes, with up to 25 in each video window (up to a maximum of 100panes in total).
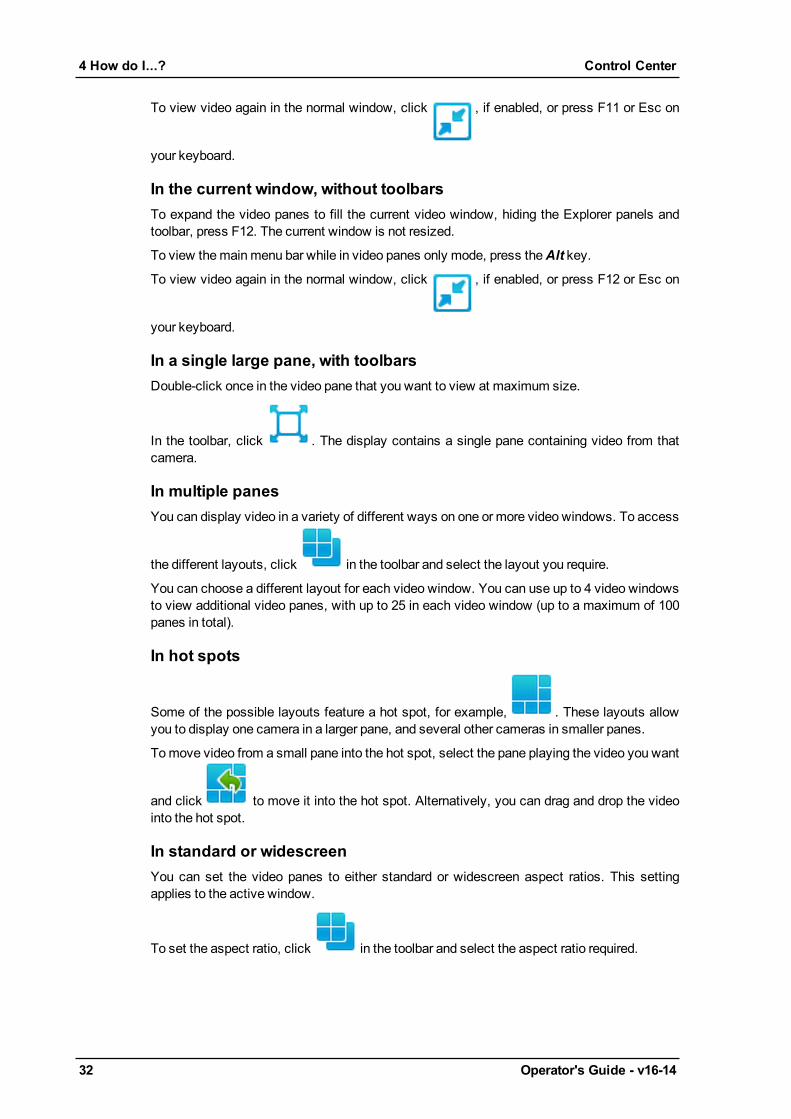
In hot spots
Some of the possible layouts feature a hot spot, for example, . These layouts allowyou to display one camera in a larger pane, and several other cameras in smaller panes.
Tomove video from a small pane into the hot spot, select the pane playing the video you want
and click to move it into the hot spot. Alternatively, you can drag and drop the videointo the hot spot.
In standard or widescreenYou can set the video panes to either standard or widescreen aspect ratios. This settingapplies to the active window.
To set the aspect ratio, click in the toolbar and select the aspect ratio required.
4 How do I...? Control Center
Operator's Guide - v16-14 33
Standard
Widescreen
Standard, non-HD video streams are displayed in a black pillar box in widescreen panes. HDvideo streams are displayed in a black letter box in standard panes.
In all the available spaceYou can set the video to fill all the available space in a video pane using the stretch to fitaspect ratio.
To set the aspect ratio to stretch to fit, click in the toolbar and select .
The video image could be distorted if the aspect ratio of the video pane is not the same asthat of the video.
Change the text or icon sizeYou can change the size of the text and icons displayed in video panes in Live and Playbackview.
Your Operating Systemmay require these changes to be authorized.
To change the text size:
1. From the Toolsmenu, select Options, and click theOverlay tab.2. In the Text Size area, enter the required size for text.3. Select Adjust the size as the video pane's size changes to adjust the text size as
the video pane size changes.4. Click OK.
To change the icon size:
1. From the Toolsmenu, select Options, and click theOverlay tab.2. In the Icon Size area, select the default icon size (normal, medium or large).3. Select Adjust the size as the video pane's size changes to adjust the text size as
the video pane size changes.4. Click OK.
Change how date and time are displayed in video panesYou can change how the date and time are displayed in video panes in either Live or Playbackview.
Control Center 4 How do I...?

34 Operator's Guide - v16-14
To change the date and time settings:
1. From the Toolsmenu, select Options, and click theOverlay tab.2. In the Time on Video Panes area, select one of the following options for either the live
or recorded video:l None: the time is not displayedl All: the time is displayed in all video panesl Selected Pane Only: the time is displayed only in the video pane currently selec-ted
3. Select Include Date to also display the date in the video pane.4. Click OK.
Your Operating Systemmay require this change to be authorized.
Change the appearance of the user interfaceYou can change the color theme of the user interface. This is useful if you use Control Centerin low-light conditions.
To change the appearance of the user interface:
1. Select Tools > Appearance.2. From theAppearance dialog, select a theme:
• Light - light background color• Dark - dark background color
3. To see your color theme change, restart Control Center.
This feature is only available to users who have logged in as operators. It is not available ifyou have logged in as an administrator.
View video in a full screenYou can view video from up to 25 cameras in a full PC screen, without toolbars, as follows:
1. In Live view, drag-and-drop the camera from the Video explorer onto the video paneyou want to use.
2. The video appears in the selected video pane. Repeat step 2 for each camera youwant to display.
3. Click in the toolbar. The video panes expand to fill the entire screen, hiding the
Explorer panels, menu and toolbar.4. To view themainmenu bar while in full screenmode, press the Alt key.5. To view video again in the normal window, click , if enabled, or press F11 or
Esc on your keyboard.
4 How do I...? Control Center
Operator's Guide - v16-14 35
Start up in fullscreen modeTo automatically start Control Center in fullscreenmode:
1. Start Control Center and enter fullscreenmode for each video window.2. Exit Control Center (Alt+F4) without leaving fullscreenmode.3. Restart Control Center. Each video window displays in a full screen.
Keep Control Center on topYou can specify that Control Center should always be displayed on top of other applications.
From the Tools menu, select Options. In the General tab, select Keep Control Centerwindow always on top. Click OK.
Your Operating Systemmay require this change to be authorized.
View live video
Reveal a hidden zoneWhen viewing live or recorded video, you may find that certain areas of the scene have beenblocked out, usually for reasons of privacy.
If you are authorized, you can reveal these areas to view the whole scene.
1. Select the pane containing the hidden areas.• If you are viewing live video, select Reveal Hidden Zone from the Live Video
menu.• If you are viewing recorded video, select Reveal Hidden Zone from thePlayback
menu.The hidden zone is removed to reveal the entire scene.
2. To hide the zone again, select Reveal Hidden Zone again.
View live video from a camera on the PC screenTo view live video using the Control Center interface:
1. In Live view, select the camera in the Video explorer whose video you want to view.2. Drag the camera name onto one of the PC panes in themain window and release the
mouse button.Live video is displayed in the video pane using the configured video and audio profilefor the camera.If dynamic video profile switching is configured, then the appropriate High Resolutionor Low Resolution profile is automatically chosen based on the camera resolution andthe size of the video pane.
To view live video using a CCTV keyboard:
1. On the keyboard, enter the number allocated to the video pane where you want to viewthe video. This selects the video pane where the video will be displayed.
Control Center 4 How do I...?
36 Operator's Guide - v16-14
2. Enter the number of the camera you want to view. The video is displayed in the selec-ted video pane.
The LED on the keyboard displays only the number of the video pane you have selected, notthe camera number.
View live video on an analog monitor
You can only view live video on an analog monitor from IndigoVision cameras andtransmitters.
To view live video using the Control Center interface:
1. In theMonitors Pane, locate the icon that represents themonitor where you want toview video.
2. In the Video explorer, select the camera whose video you want to view.3. Drag the camera onto the icon representing themonitor and release themouse button.
Live video is displayed on themonitor. Details of the camera and the date and timemay also be displayed.
To view live video using a CCTV keyboard:
1. On the keyboard, enter the number allocated to themonitor where you want to view thevideo. This selects themonitor where the video will be displayed.
2. Enter the number of the camera you want to view. The video is displayed in the selec-tedmonitor.In the event of a video lockout, video display is stopped on all analogmonitors:l If themonitor is compatible with this version of Control Center, it goes blank but theconnection persists, and the icon in theMonitors Pane remains green. When videolockout stops, the camera is displayed again on themonitor.
l If themonitor is incompatible with this version of Control Center, it goes blank andthe icon in theMonitors Pane turns blue. When video lockout stops, the camera dis-play does not restart and themonitor remains blank.
The LED on the keyboard displays only the number of the video pane you have selected, notthe camera number.
View live video on an IndigoVision video wallTo view live video on an IndigoVision video wall, you can either use Control Center or aCCTV keyboard.
To push live video to an IndigoVision video wall using Control Center:
1. In Live view, select a live video window.
2. Select in themain toolbar menu.
4 How do I...? Control Center
Operator's Guide - v16-14 37
3. Select the IndigoVision VideoWall to push video to.The list only displays VideoWalls which have at least one slave configured.
4. Select the slave to use.
To push live video to an IndigoVision video wall using a CCTV keyboard:
1. On the keyboard, enter the number allocated to the video pane where you want to viewthe video.
2. Enter the number of the camera you want to view. The video is displayed in the videopane entered in step one.
The LED on the keyboard displays only the number of the video pane you have selected, notthe camera number.
To clear video from an IndigoVision video wall:
1. Stop video in all panes on the current video window
2. Select in themain toolbar.
This pushes the empty video window to the video wall.
Video wall content is not automatically synchronized with the Control Center video window. Ifyou want to update the layout or cameras on the IndigoVision video wall, push the videowindow to the video wall again.
View live video on a Barco video wallTo push live video to a Barco video wall:
1. In Live view, select a live video window.
2. Select in themain toolbar.3. Select the Barco VideoWall to push video to.
The list only displays VideoWalls which have at least one perspective configured.4. Select the perspective to use.
Control Center updates the Barco video wall to show the layout in that video window, anddisplay live video from the cameras currently showing in that layout.
To clear video from a Barco video wall:
1. Stop video in all panes on the current video window
2. Select in themain toolbar.
This pushes the empty video window to the video wall.
Control Center 4 How do I...?
38 Operator's Guide - v16-14
Video wall content is not automatically synchronized with the Control Center video window. Ifyou want to update the layout or cameras on the Barco video wall, push the video window tothe video wall again.
Work with live video
Stop displaying live video
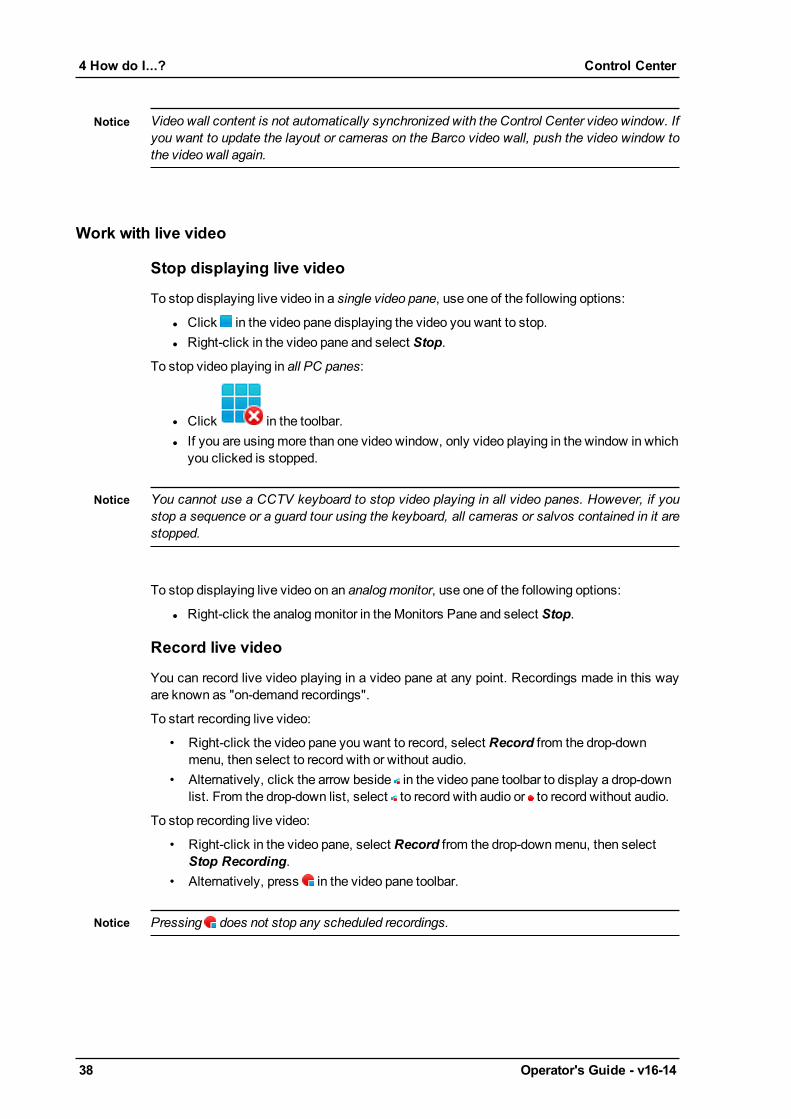
To stop displaying live video in a single video pane, use one of the following options:
l Click in the video pane displaying the video you want to stop.l Right-click in the video pane and select Stop.
To stop video playing in all PC panes:
l Click in the toolbar.l If you are usingmore than one video window, only video playing in the window in whichyou clicked is stopped.
You cannot use a CCTV keyboard to stop video playing in all video panes. However, if youstop a sequence or a guard tour using the keyboard, all cameras or salvos contained in it arestopped.
To stop displaying live video on an analogmonitor, use one of the following options:
l Right-click the analogmonitor in theMonitors Pane and select Stop.
Record live video
You can record live video playing in a video pane at any point. Recordings made in this wayare known as "on-demand recordings".
To start recording live video:
• Right-click the video pane you want to record, select Record from the drop-downmenu, then select to record with or without audio.
• Alternatively, click the arrow beside in the video pane toolbar to display a drop-downlist. From the drop-down list, select to record with audio or to record without audio.
To stop recording live video:
• Right-click in the video pane, select Record from the drop-downmenu, then selectStop Recording.
• Alternatively, press in the video pane toolbar.
Pressing does not stop any scheduled recordings.
4 How do I...? Control Center

Operator's Guide - v16-14 39
A recording icon (with audio , without audio ) is displayed in the video pane when thatcamera is being recorded. Video may be recorded if a recording has been scheduled, orsomeone else has started to record it, as well as when you start recordingmanually.
To play back these recordings, use the Playback view, where they will appear on thetimeline.
You can also take a snapshot of a particular moment while watching live video.
Zoom in and out of live video
You can zoom into specific areas of live video to amagnification of up to 800%.
1. Click in the video pane to activate the zoom.2. Click the area of the video pane you want to see inmore detail. Themagnification is dis-
played in the lower left corner of the video pane.3. Right-click the video pane to zoom out again.4. Click again to deactivate the zoom.
While the zoom is activated, click and drag the mouse across the pane to view different partsof an image when it is magnified. The cursor changes to a hand.
Save a snapshot of a video frame
When viewing video, you may want to take a snapshot image of a particular frame playing inthe video pane. The name of the camera, the site, and a time date & stamp are captured in thesnapshot.
l To take a snapshot using the default settings, select the video pane displaying the
video, and click in the toolbar (or press F4).l To take a snapshot and define your own settings, select the video pane displaying the
video, and click in the toolbar.
While the snapshot is being taken, a camera icon appears in the top right of the video pane.
Snapshots can be saved as either a bitmap (.bmp) or JPEG (.jpeg) file. The default filenamecontains the name of the camera and the time the snapshot was taken. Snapshots are savedto the snapshot folder on your PC.
Administrators can define the default format and snapshot folder on the Options - General tab.
Save a snapshot from all video panes
When viewing video, you may want to take snapshot images of video playing in all panes.You can also take a snapshot of video playing in a single video pane.
To take a snapshot of all panes playing video, click in the toolbar. While thesnapshots are being taken, a camera icon appears in the top right of the video panes.
Snapshots are saved to the snapshot folder on your PC. The filename contains the name ofthe camera and the time the snapshot was taken. Snapshots are saved as either a bitmap(.bmp) or JPEG (.jpeg) file.
Administrators define the file format and snapshot folder on the Options - General tab.
Control Center 4 How do I...?
40 Operator's Guide - v16-14
Print snapshot of live video
When viewing video, youmay want to print a live video snapshot. Control Center can send animage of a snapshot directly to a printer.
To print a snapshot of live video, select the pane playing the video, and click . Selectthe required printer from the Print dialog and click OK . The camera name, site name, IPaddress, and time of the snapshot footage are printed below the image.
The snapshot image is not saved to your PC. To save a snapshot, click in thetoolbar.
Specify snapshot settings
This functionality is only available if you have administrator permissions.
You can define the default folder and file format for snapshots.
To define the default snapshot settings:
1. Select Options from the Toolsmenu.2. Click Browse in the Snapshot area, and navigate to the folder where you want to save
snapshots.3. Select the Snapshot format.4. If you want to allow users to change these settings on the Save Snapshot As dialog,
select Allow users to change snapshot folder and format.5. Click OK.
Your Operating Systemmay require this change to be authorized.
Show an overlay
When viewing live or recorded video, you can show an image on top of the video steam. Thisis useful when you need to provide context for the scene or to show tripwire positions.
If you are authorized, to show the overlay image:
1. Select a video pane.2. Right-click in the video pane and select Show Custom Camera Overlay.
If you are authorized, to hide the overlay image:
1. Select a video pane.2. Right-click in the video pane.
If an image is displayed, theShow Custom Camera Overlay option is ticked.3. Select Show Custom Camera Overlay to hide the overlay image.
4 How do I...? Control Center
Operator's Guide - v16-14 41
Administrators define the image to be used for the overlay.
Control a PTZ camera
Some cameras may have PTZ (Pan-Tilt-Zoom) functionality. You can control these camerasusing the Control Center interface or a CCTV keyboard.
Display video from the required PTZ camera in the video pane you want to use.
l If you are using the Control Center interface to control the camera, click in the videopane to display a PTZ control “grid” over the video. This grid indicates that you havesuccessfully connected to the camera, and provides pan, tilt and zooming func-tionality.
l If you are using a CCTV keyboard, move the joystick to display a PTZ control “grid”over the video. This grid indicates that you have successfully connected to the cam-era, and provides pan, tilt and zooming functionality.
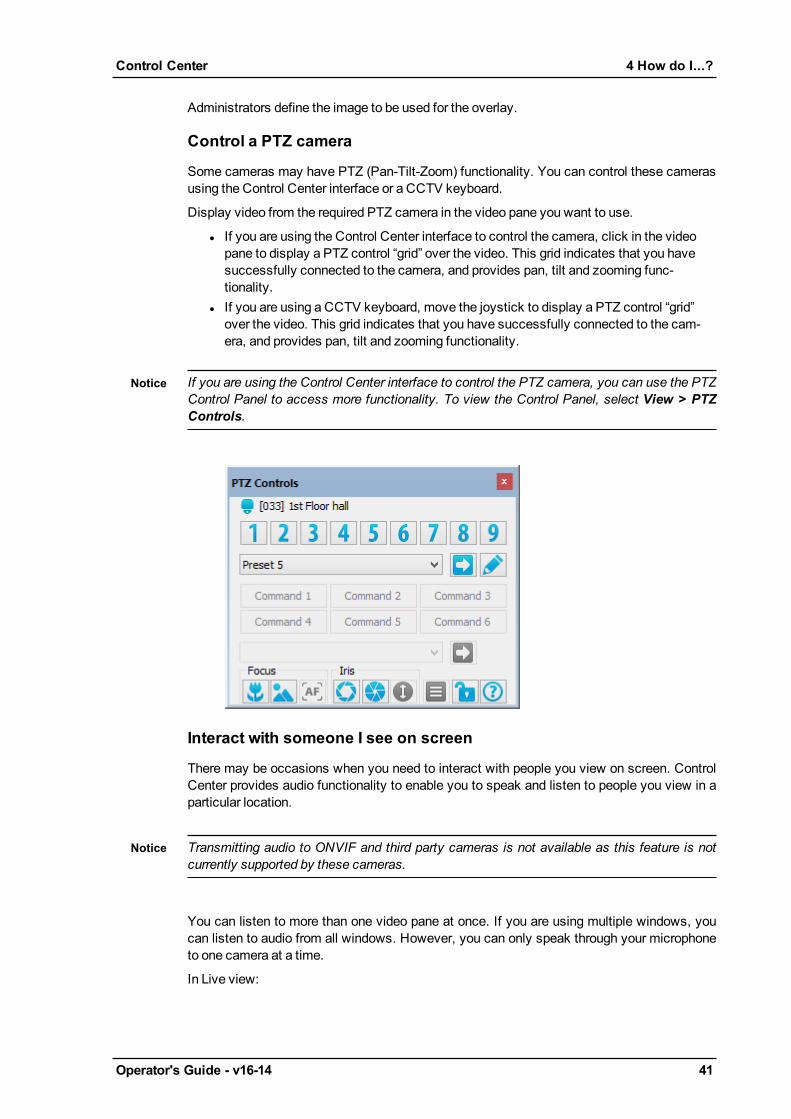
If you are using the Control Center interface to control the PTZ camera, you can use the PTZControl Panel to access more functionality. To view the Control Panel, select View > PTZControls.
Interact with someone I see on screen
There may be occasions when you need to interact with people you view on screen. ControlCenter provides audio functionality to enable you to speak and listen to people you view in aparticular location.
Transmitting audio to ONVIF and third party cameras is not available as this feature is notcurrently supported by these cameras.
You can listen to more than one video pane at once. If you are using multiple windows, youcan listen to audio from all windows. However, you can only speak through your microphoneto one camera at a time.
In Live view:
Control Center 4 How do I...?
42 Operator's Guide - v16-14
l To speak to someone you view on camera, right-click in the video pane and selectSpeak. Alternatively, click in the pane displaying video from the camera.
l To listen to someone you view on camera, right-click in the video pane and select
Listen. Alternatively, click in the pane displaying video from the camera.
Carry out an action at any time
Control Center may have been configured so that you can perform certain actions, such asopening a door, at any time, and not just when an alarm occurs. These actions are known asrelays.
To perform an action while viewing video from a particular camera1. In Live view, display video from the required camera in a video pane.
2. Click the arrow beside to display a list of available actions.
A maximum of 4 relays are displayed per camera.
3. Select the required action from the drop-down list to perform it.
Depending on how the relay has been configured, Control Center may require a second,authorized user to enter their password before the relay is activated.
To perform an action from a map1. In Live view, display themapwith the required relay.
2. Click the arrow beside to display a list of available actions.3. Select the required action from the drop-down list to perform it.
Depending on how the relay has been configured, Control Center may require a second,authorized user to enter their password before the relay is activated.
To perform an action at any time
4 How do I...? Control Center
Operator's Guide - v16-14 43
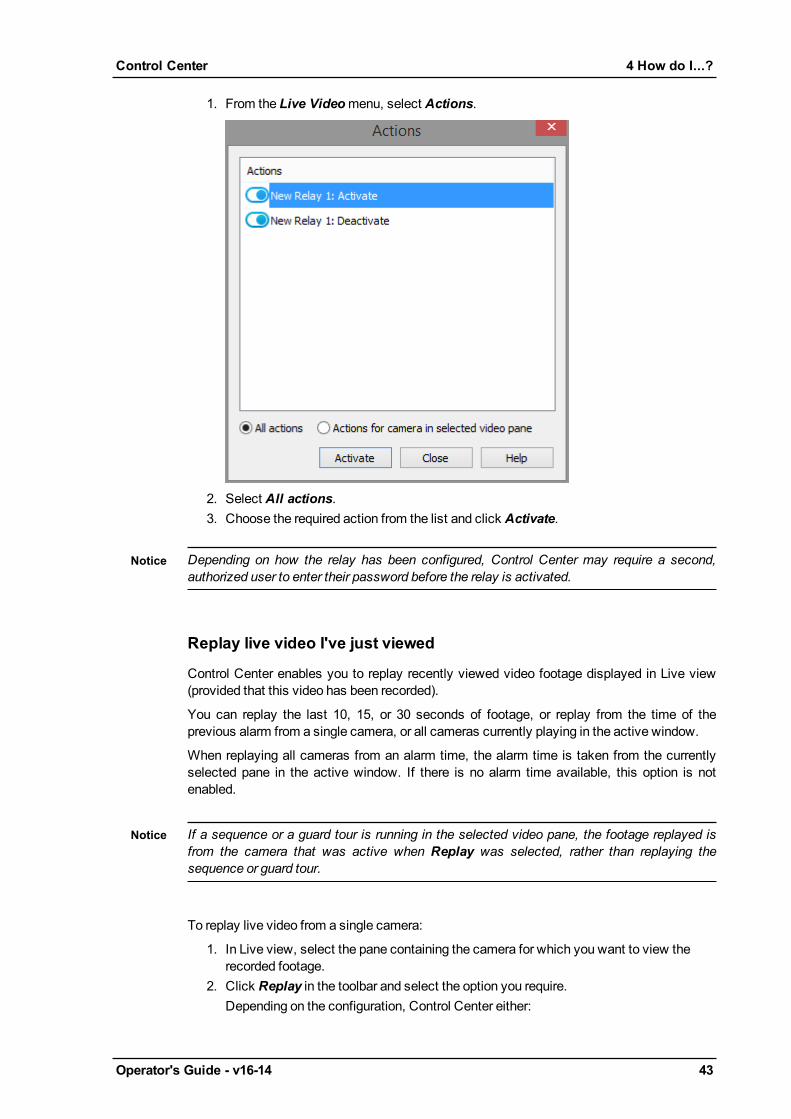
1. From the Live Videomenu, select Actions.
2. Select All actions.3. Choose the required action from the list and click Activate.
Depending on how the relay has been configured, Control Center may require a second,authorized user to enter their password before the relay is activated.
Replay live video I've just viewed
Control Center enables you to replay recently viewed video footage displayed in Live view(provided that this video has been recorded).
You can replay the last 10, 15, or 30 seconds of footage, or replay from the time of theprevious alarm from a single camera, or all cameras currently playing in the active window.
When replaying all cameras from an alarm time, the alarm time is taken from the currentlyselected pane in the active window. If there is no alarm time available, this option is notenabled.
If a sequence or a guard tour is running in the selected video pane, the footage replayed isfrom the camera that was active when Replay was selected, rather than replaying thesequence or guard tour.
To replay live video from a single camera:
1. In Live view, select the pane containing the camera for which you want to view therecorded footage.
2. Click Replay in the toolbar and select the option you require.Depending on the configuration, Control Center either:
Control Center 4 How do I...?
44 Operator's Guide - v16-14
• switches to Playback view and replays the video footage selected, or• remains in Live view and replays the video footage in the selected video pane.If there is no recording for this period, the application informs you of this.
To replay live video from all cameras in the active window:
1. In Live view, select a pane in the window containing the cameras for which you want toview the recorded footage.
2. Click Replay in the toolbar and select theReplay all option you require.• Control Center switches to Playback view and replays the video footage.If there is no recording for this period, the application informs you of this.
View stream statistics
To view details of frame rate, resolution, and video/audio bit rates for a live video stream,select Show Stream Statistics from the Live Videomenu.
Statistics are shown for all cameras which are currently displaying video on screen.
Show event count on screen
Control Center can count the number of events that have occurred in live video from a camerasince video was started. To show this count in a PC pane:
1. In Live view, display the camera you require in a video pane.2. From the Live Videomenu, select Show Event Count.
An overlay appears in the bottom left of the pane, and shows the number of events asthey occur.
Reset the event count
Control Center can count the number of events that have occurred in live video from a camerasince video was started. To reset the count showing in a video pane, from the Live Videomenu, select Reset Event Count. The event count is reset to zero.
Locate a camera
When you are viewing live video from a camera, you may want to know where the camera islocated in the Video explorer, or on a site map.
To locate a camera:
1. In the Live view, right-click the video pane displaying video from the camera you wantto locate.
2. Select Locate Camera. The camera is highlighted in the Video explorer, and, if thecamera has been added to a site map, on themap.
Work with salvos
Salvo overview
Salvos provide a convenient way of displaying a collection of frequently viewed cameras.Each salvo contains a particular set of cameras, specified by the administrator, which can bedisplayed quickly using the video windows or analog monitors. For example, there may becameras which are frequently displayed at the same time. Using a salvo enables you todisplay them with a single action.
4 How do I...? Control Center
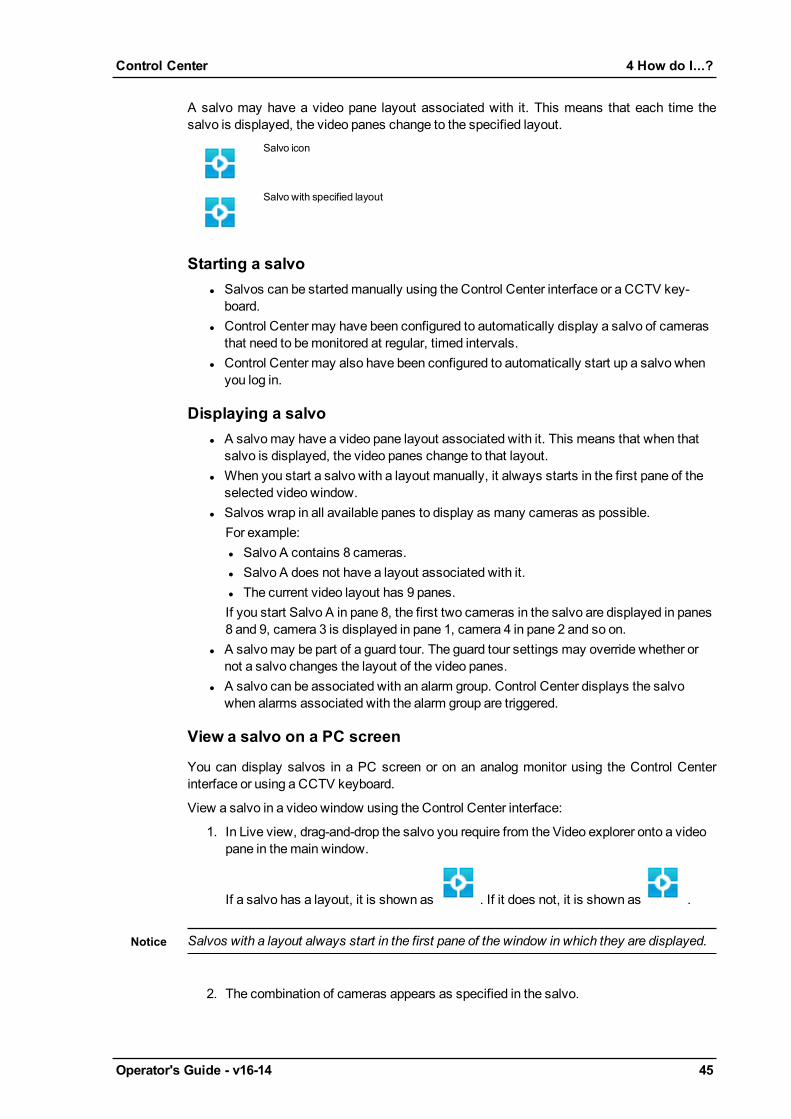
Operator's Guide - v16-14 45
A salvo may have a video pane layout associated with it. This means that each time thesalvo is displayed, the video panes change to the specified layout.
Salvo icon
Salvo with specified layout
Starting a salvol Salvos can be startedmanually using the Control Center interface or a CCTV key-board.
l Control Center may have been configured to automatically display a salvo of camerasthat need to bemonitored at regular, timed intervals.
l Control Center may also have been configured to automatically start up a salvo whenyou log in.
Displaying a salvol A salvomay have a video pane layout associated with it. This means that when thatsalvo is displayed, the video panes change to that layout.
l When you start a salvo with a layout manually, it always starts in the first pane of theselected video window.
l Salvos wrap in all available panes to display as many cameras as possible.For example:l Salvo A contains 8 cameras.l Salvo A does not have a layout associated with it.l The current video layout has 9 panes.If you start Salvo A in pane 8, the first two cameras in the salvo are displayed in panes8 and 9, camera 3 is displayed in pane 1, camera 4 in pane 2 and so on.
l A salvomay be part of a guard tour. The guard tour settings may override whether ornot a salvo changes the layout of the video panes.
l A salvo can be associated with an alarm group. Control Center displays the salvowhen alarms associated with the alarm group are triggered.
View a salvo on a PC screen
You can display salvos in a PC screen or on an analog monitor using the Control Centerinterface or using a CCTV keyboard.
View a salvo in a video window using the Control Center interface:
1. In Live view, drag-and-drop the salvo you require from the Video explorer onto a videopane in themain window.
If a salvo has a layout, it is shown as . If it does not, it is shown as .
Salvos with a layout always start in the first pane of the window in which they are displayed.
2. The combination of cameras appears as specified in the salvo.
Control Center 4 How do I...?
46 Operator's Guide - v16-14
View a salvo on an analog monitor
You can display salvos on analog monitors or on the PC screen using the Control Centerinterface or using a CCTV keyboard.
Salvos provide a quick display of frequently-viewed cameras.
To view a salvo on an analogmonitor using the Control Center interface:
1. In Live view, drag-and-drop the salvo you require from the Video explorer onto theanalogmonitor where you want to view the first camera in the salvo.
If a salvo has a layout, it is shown as . If it does not, it is shown as .2. The combination of cameras appears on the analogmonitors in the salvo.
Work with sequences
Sequence overview
Sequences enable you to view video from each camera in succession in a video pane or on
an analogmonitor. They are displayed as in the Video explorer.
Starting a sequence
l Sequences can be startedmanually using the interface or a CCTV keyboard.l Control Center may have been configured to automatically display a sequence thatneeds to bemonitored at regular, timed intervals.
l Control Center may also have been configured to automatically start up a sequencewhen you log in.
Run a sequence on the PC screen
You can run sequences on the PC screen or on an analog monitor using the Control Centerinterface or using a CCTV keyboard.
To run a sequence on the PC screen using Control Center:
1. In Live view, drag-and-drop the camera sequence from the Video explorer on to thevideo pane where you want to run it.Each camera is displayed in succession in the video pane.
2. Use the video pane control buttons to control the sequence:l To step back one camera, click .l To step forward one camera, click .l To hold a sequence, click . Click again to resume the sequence. If you have aPTZ camera in a sequence, youmust hold the sequence in order to control its move-ments.
Run a sequence on an analog monitor
Sequences enable you to view video from each camera in succession on an analog monitoror in a video pane.
To run a sequence on an analogmonitor using Control Center:
4 How do I...? Control Center
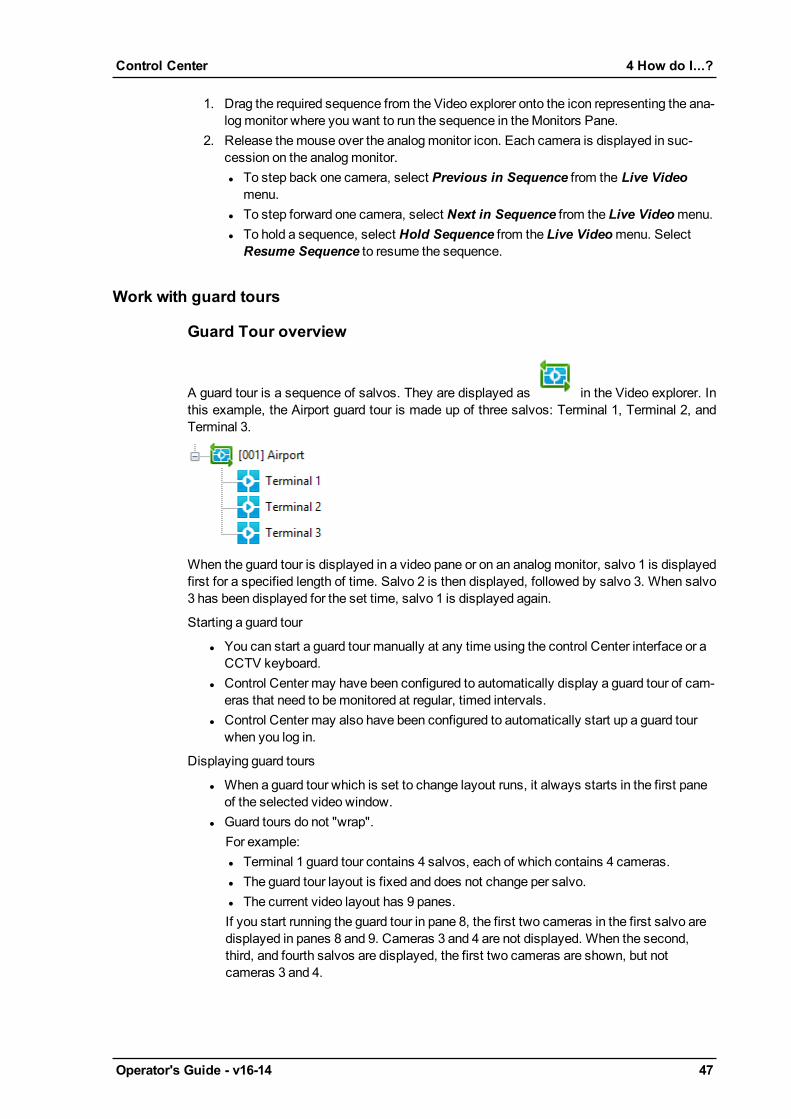
Operator's Guide - v16-14 47
1. Drag the required sequence from the Video explorer onto the icon representing the ana-logmonitor where you want to run the sequence in theMonitors Pane.
2. Release themouse over the analogmonitor icon. Each camera is displayed in suc-cession on the analogmonitor.l To step back one camera, select Previous in Sequence from the Live Videomenu.
l To step forward one camera, select Next in Sequence from the Live Videomenu.l To hold a sequence, select Hold Sequence from the Live Videomenu. SelectResume Sequence to resume the sequence.
Work with guard tours
Guard Tour overview
A guard tour is a sequence of salvos. They are displayed as in the Video explorer. Inthis example, the Airport guard tour is made up of three salvos: Terminal 1, Terminal 2, andTerminal 3.
When the guard tour is displayed in a video pane or on an analog monitor, salvo 1 is displayedfirst for a specified length of time. Salvo 2 is then displayed, followed by salvo 3. When salvo3 has been displayed for the set time, salvo 1 is displayed again.
Starting a guard tour
l You can start a guard tour manually at any time using the control Center interface or aCCTV keyboard.
l Control Center may have been configured to automatically display a guard tour of cam-eras that need to bemonitored at regular, timed intervals.
l Control Center may also have been configured to automatically start up a guard tourwhen you log in.
Displaying guard tours
l When a guard tour which is set to change layout runs, it always starts in the first paneof the selected video window.
l Guard tours do not "wrap".For example:l Terminal 1 guard tour contains 4 salvos, each of which contains 4 cameras.l The guard tour layout is fixed and does not change per salvo.l The current video layout has 9 panes.If you start running the guard tour in pane 8, the first two cameras in the first salvo aredisplayed in panes 8 and 9. Cameras 3 and 4 are not displayed. When the second,third, and fourth salvos are displayed, the first two cameras are shown, but notcameras 3 and 4.
Control Center 4 How do I...?

48 Operator's Guide - v16-14
If you change the layout to show more panes, the "missing" guard tour panes are displayed.
l You can display one guard tour at a time on your analogmonitors. For example, if youhave eight analogmonitors, you can only display one guard tour at a time on them. Ifthe guard tour needs less than eight monitors, the others can be used to display sep-arate cameras, salvos and sequences, as usual.
l You can display one guard tour at a time in a video window. If you are usingmultiplewindows, you can display one tour in each of the windows.
l If you are displaying a camera in a video pane or an analogmonitor, and you start aguard tour in that pane or analogmonitor, the guard tour takes precedence over the indi-vidual display and video from that camera is stopped.
l If a guard tour is running, and you start video from a single camera in one of the panes,the video from the single camera takes precedence and the guard tour is stopped.
Run a guard tour on the PC screen
You can run guard tours on the PC screen or on an analog monitor using the Control Centerinterface or using a CCTV keyboard.
To run a guard tour on the PC screen using Control Center:
1. In Live view, drag-and-drop the guard tour icon you want to run from the Videoexplorer onto a video pane.l If the guard tour has been set to change layout according to the layout of the salvo itis currently displaying, it automatically starts in the first pane of the selected videowindow.
l If the guard tour has not been set to change layout, you can start the guard tour inany pane.
2. The combination of salvos runs as specified in the guard tour.3. To stop the tour, select Stop Guard Tour from the Live Viewmenu.
When a guard tour is in progress, Control Center displays the salvo and tour name at thebottom of the screen.
Run a guard tour on an analog monitor
You can run guard tours on analog monitors or on the PC screen using the Control Centerinterface or using a CCTV keyboard.
A guard tour is a sequence of salvos. When a guard tour is displayed in a video pane or on ananalogmonitor, each salvo is displayed for a specified length of time.
To run a guard tour on an analogmonitor using Control Center:
1. In Live view, drag-and-drop the guard tour you require from the Video exploreronto the analogmonitor where you want to view the first salvo.
2. The combination of salvos appears on the analogmonitors in the guard tour.3. To stop the tour, select Stop Guard Tour from the Live Viewmenu.
4 How do I...? Control Center
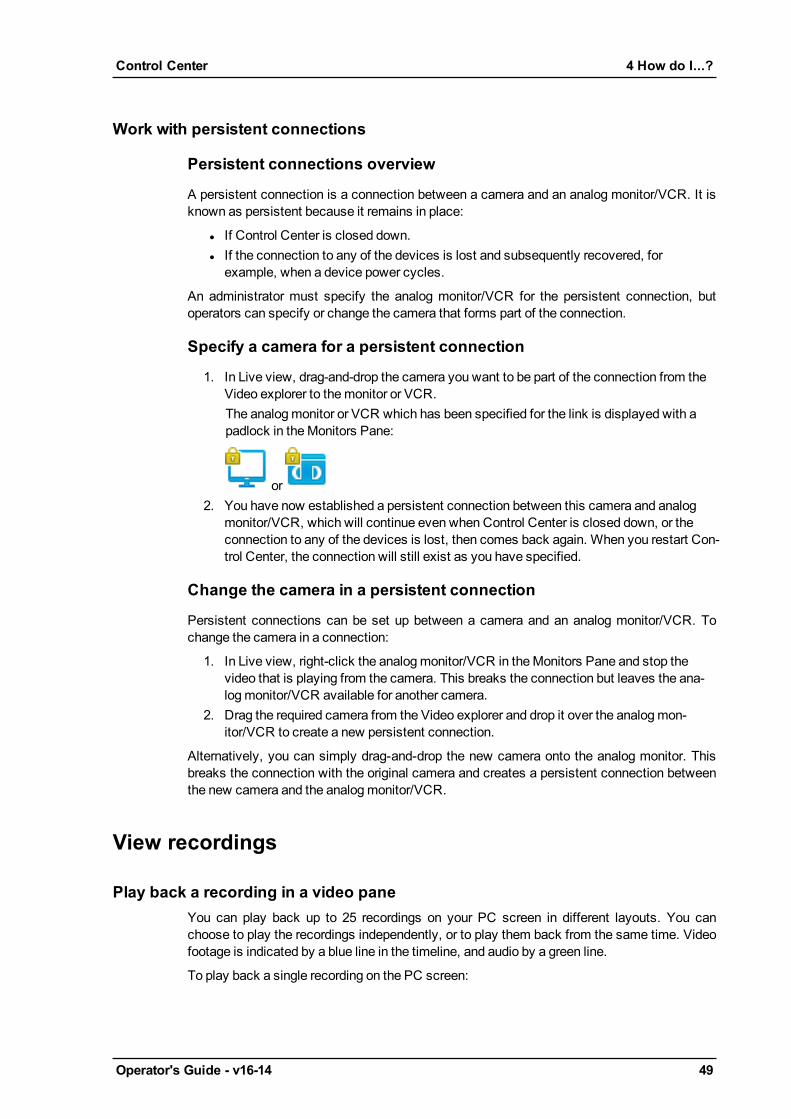
Operator's Guide - v16-14 49
Work with persistent connections
Persistent connections overview
A persistent connection is a connection between a camera and an analog monitor/VCR. It isknown as persistent because it remains in place:
l If Control Center is closed down.l If the connection to any of the devices is lost and subsequently recovered, forexample, when a device power cycles.
An administrator must specify the analog monitor/VCR for the persistent connection, butoperators can specify or change the camera that forms part of the connection.
Specify a camera for a persistent connection
1. In Live view, drag-and-drop the camera you want to be part of the connection from theVideo explorer to themonitor or VCR.The analogmonitor or VCR which has been specified for the link is displayed with apadlock in theMonitors Pane:
or2. You have now established a persistent connection between this camera and analog
monitor/VCR, which will continue even when Control Center is closed down, or theconnection to any of the devices is lost, then comes back again. When you restart Con-trol Center, the connection will still exist as you have specified.
Change the camera in a persistent connection
Persistent connections can be set up between a camera and an analog monitor/VCR. Tochange the camera in a connection:
1. In Live view, right-click the analogmonitor/VCR in theMonitors Pane and stop thevideo that is playing from the camera. This breaks the connection but leaves the ana-logmonitor/VCR available for another camera.
2. Drag the required camera from the Video explorer and drop it over the analogmon-itor/VCR to create a new persistent connection.
Alternatively, you can simply drag-and-drop the new camera onto the analog monitor. Thisbreaks the connection with the original camera and creates a persistent connection betweenthe new camera and the analogmonitor/VCR.
View recordings
Play back a recording in a video paneYou can play back up to 25 recordings on your PC screen in different layouts. You canchoose to play the recordings independently, or to play them back from the same time. Videofootage is indicated by a blue line in the timeline, and audio by a green line.
To play back a single recording on the PC screen:
Control Center 4 How do I...?

50 Operator's Guide - v16-14
1. Make sure you are in Playback view.2. In the Video explorer, locate the camera from which you want to play back recorded
footage and drag and drop it onto a video pane. Choose a time to play back from bydoing one of the following:l To go to the first recording from that camera, click .l To go to the end of themost recent recording from that camera, click .l To select a precise time to start playing back a recording, select Set Time Range> Custom from the Timelinemenu and enter a time.The time shown for a recording in Recorded Video view is determined by the localtime of the site to which the camera belongs, not by the PC onwhich it is beingviewed. The timezone is shown in the status bar below the application e.g. (GMT -5:00) Eastern TimeUS and Canada.
l Double-click the timeline at the point from which you want to start playing backvideo.
3. Press . The recorded footage is played back from the specified time, and con-tinues until you stop it.
If video is already playing, Control Center starts playing automatically from the time you haveselected. If there is no footage at the selected time, the recording starts playing back from thenext available section of footage, if available.
4. Audio is automatically enabled when you start displaying a camera in a video pane. To
turn audio off, click in the bottom right of the pane.
Change the playback NVRIf a gap occurs in the recorded video you are watching, you can change the playback NVR.This allows you to view video from the same camera, recorded onto a different NVR.
The site administrator will have set the failover NVRs for the site. See Set up a failover NVRfor full details.
To change the playback NVR:
1. Ensure you are in the Playback view.2. In the Cameras panel, on the left of the screen, right-click on the camera you wish to
view.3. Select Change Playback NVR from themenu. The Change Playback NVR dialog
opens.4. Do one of the following:
l Select Use failover NVR and, select the failover NVR that you wish to use fromthe drop-downmenu.
l Select Use other NVR and, select the NVR that you wish to use from the drop-downmenu.
5. Click OK. No you can browse the available recordings as normal. See View recordingsfor full details.
4 How do I...? Control Center

Operator's Guide - v16-14 51
To change back to the primary NVR, follow the same steps as shown above but at step 4select Use primary NVR and click OK.
Play back a recording on an analog monitor1. Make sure you are in Playback view.2. In the Video explorer, select the camera that you want to view a recording from. Drag-
and-drop it into a video pane. This allows you to find the footage that you want to viewon the analogmonitor. Choose a time to play back from by doing one of the following:l To go to the first recording on that camera, click .l To go to the end of themost recent recording on that camera, click .l To select a precise time to start playing back a recording, select Set Time Range> Custom from the Timelinemenu and enter a time.The time shown for a recording in Recorded Video view is determined by the localtime of the site to which the camera belongs, not by the PC onwhich it is beingviewed. The timezone is shown in the status bar below the application, for example,(GMT -5:00) Eastern TimeUS and Canada.
If you know the exact time that you want to play back from on the analog monitor, simplyclick the timeline at that point - you do not need to first view the video in a video pane.
3. Drag the required camera from the Video explorer onto the analogmonitor in theMon-itors Pane where you want to view the recording. The recording starts playing back inthe selected analogmonitor from the time you selected.
If video is already playing, Control Center starts playing automatically from the time you haveselected. If there is no footage available for the selected time, a message is displayedindicating that no footage is available.
Play back several recordings at once
Overview of multiple playback
Control Center enables you to play back up to 25 recordings at once.
You can choose to play back each recording independently, and to navigate through each ofthem separately.
Alternatively, you can synchronize the recordings, so that they all play back from the sametime. When you use the video controls in synchronized mode, the action applies to allrecordings that you are playing back.
Play back recordings independently
You can play back up to 25 recordings independently, and navigate through each of themseparately, as follows:
Control Center 4 How do I...?
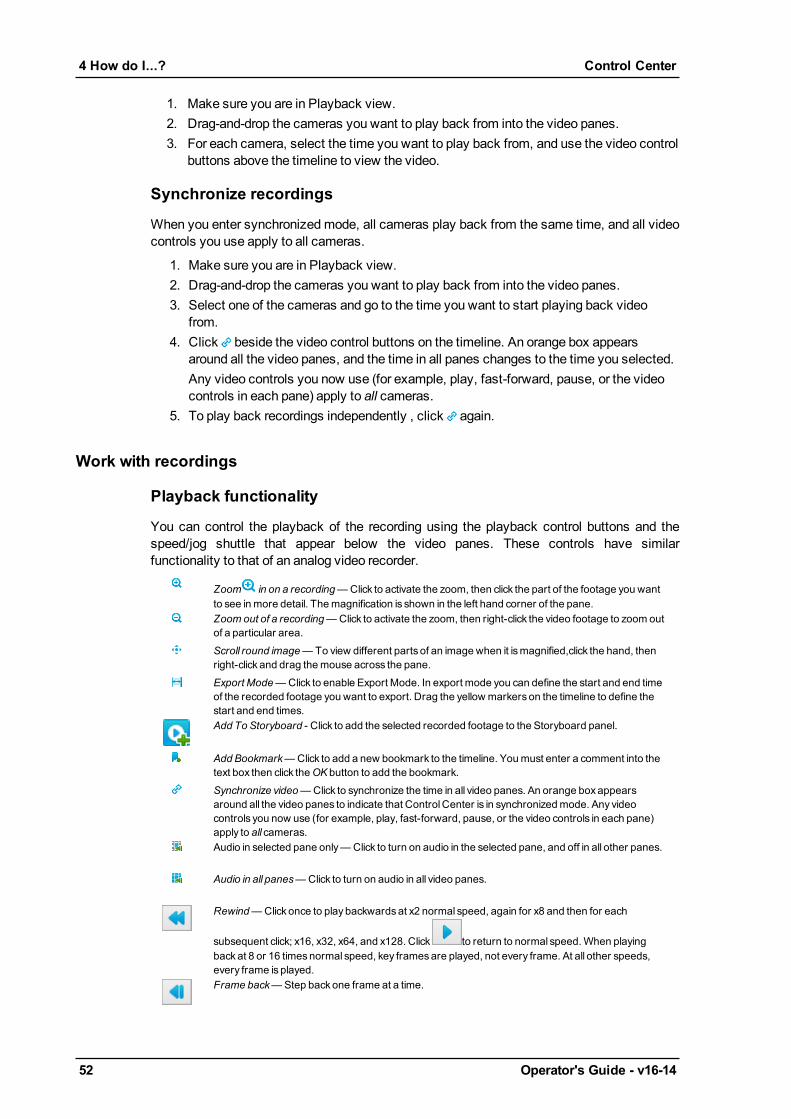
52 Operator's Guide - v16-14
1. Make sure you are in Playback view.2. Drag-and-drop the cameras you want to play back from into the video panes.3. For each camera, select the time you want to play back from, and use the video control
buttons above the timeline to view the video.
Synchronize recordings
When you enter synchronized mode, all cameras play back from the same time, and all videocontrols you use apply to all cameras.
1. Make sure you are in Playback view.2. Drag-and-drop the cameras you want to play back from into the video panes.3. Select one of the cameras and go to the time you want to start playing back video
from.4. Click beside the video control buttons on the timeline. An orange box appears
around all the video panes, and the time in all panes changes to the time you selected.Any video controls you now use (for example, play, fast-forward, pause, or the videocontrols in each pane) apply to all cameras.
5. To play back recordings independently , click again.
Work with recordings
Playback functionality
You can control the playback of the recording using the playback control buttons and thespeed/jog shuttle that appear below the video panes. These controls have similarfunctionality to that of an analog video recorder.
Zoom in on a recording— Click to activate the zoom, then click the part of the footage you wantto see inmore detail. Themagnification is shown in the left hand corner of the pane.Zoom out of a recording— Click to activate the zoom, then right-click the video footage to zoom outof a particular area.Scroll round image— To view different parts of an image when it ismagnified,click the hand, thenright-click and drag themouse across the pane.Export Mode—Click to enable Export Mode. In export mode you can define the start and end timeof the recorded footage you want to export. Drag the yellow markers on the timeline to define thestart and end times.Add To Storyboard - Click to add the selected recorded footage to the Storyboard panel.
Add Bookmark—Click to add a new bookmark to the timeline. Youmust enter a comment into thetext box then click theOK button to add the bookmark.Synchronize video— Click to synchronize the time in all video panes. An orange boxappearsaround all the video panes to indicate that ControlCenter is in synchronizedmode. Any videocontrols you now use (for example, play, fast-forward, pause, or the video controls in each pane)apply to all cameras.Audio in selected pane only— Click to turn on audio in the selected pane, and off in all other panes.
Audio in all panes—Click to turn on audio in all video panes.
Rewind—Click once to playbackwardsat x2 normal speed, again for x8 and then for each
subsequent click; x16, x32, x64, and x128. Click to return to normal speed.When playingbackat 8 or 16 timesnormal speed, key framesare played, not every frame. At all other speeds,every frame is played.Frame back— Step backone frame at a time.
4 How do I...? Control Center
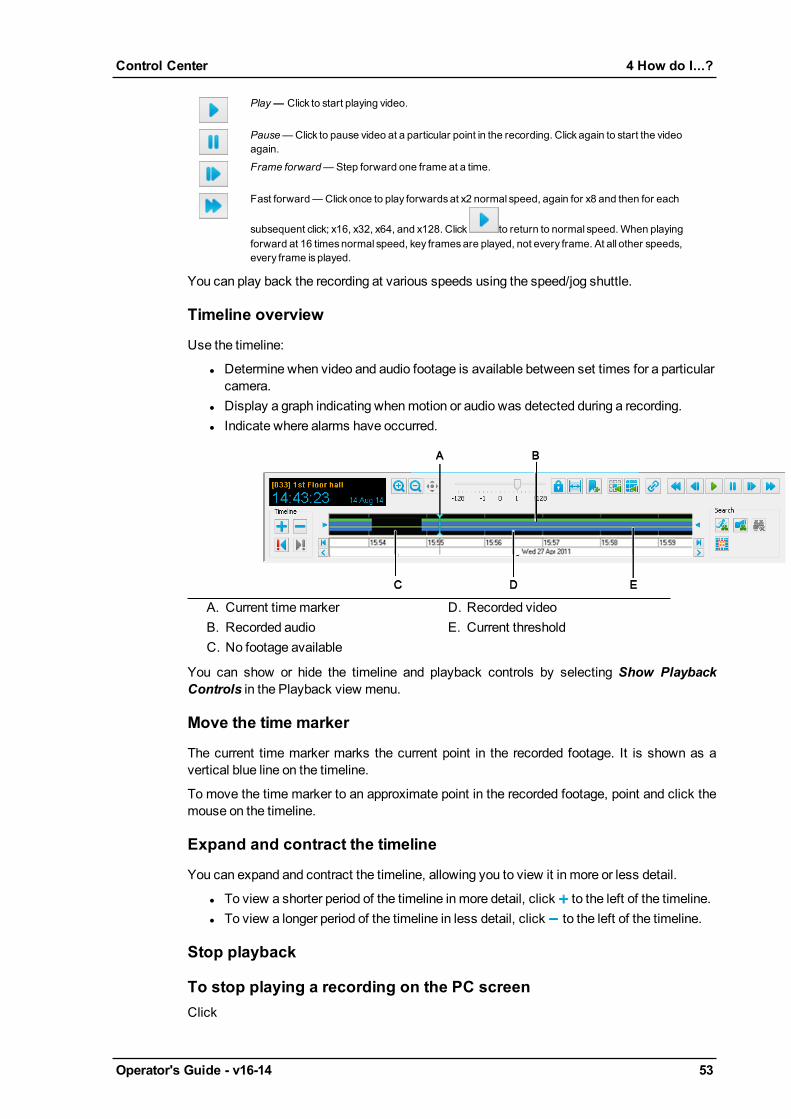
Operator's Guide - v16-14 53
Play— Click to start playing video.
Pause—Click to pause video at a particular point in the recording. Click again to start the videoagain.Frame forward—Step forward one frame at a time.
Fast forward—Click once to play forwardsat x2 normal speed, again for x8 and then for each
subsequent click; x16, x32, x64, and x128. Click to return to normal speed.When playingforward at 16 timesnormal speed, key framesare played, not every frame. At all other speeds,every frame is played.
You can play back the recording at various speeds using the speed/jog shuttle.
Timeline overview
Use the timeline:
l Determine when video and audio footage is available between set times for a particularcamera.
l Display a graph indicating whenmotion or audio was detected during a recording.l Indicate where alarms have occurred.
A. Current timemarkerB. Recorded audioC. No footage available
D. Recorded videoE. Current threshold
You can show or hide the timeline and playback controls by selecting Show PlaybackControls in the Playback view menu.
Move the time marker
The current time marker marks the current point in the recorded footage. It is shown as avertical blue line on the timeline.
To move the time marker to an approximate point in the recorded footage, point and click themouse on the timeline.
Expand and contract the timeline
You can expand and contract the timeline, allowing you to view it in more or less detail.
l To view a shorter period of the timeline in more detail, click to the left of the timeline.l To view a longer period of the timeline in less detail, click to the left of the timeline.
Stop playback
To stop playing a recording on the PC screenClick
Control Center 4 How do I...?
54 Operator's Guide - v16-14
in the playback pane.
To stop playing a recording on an analog monitor1. In theMonitors Pane, right-click the required analogmonitor.2. Select Stop. The recording playback is stopped.
Save a snapshot of a video frame
When viewing video, you may want to take a snapshot image of a particular frame playing inthe video pane. The name of the camera, the site, and a time date & stamp are captured in thesnapshot.
l To take a snapshot using the default settings, select the video pane displaying the
video, and click in the toolbar (or press F4).l To take a snapshot and define your own settings, select the video pane displaying the
video, and click in the toolbar.
While the snapshot is being taken, a camera icon appears in the top right of the video pane.
Snapshots can be saved as either a bitmap (.bmp) or JPEG (.jpeg) file. The default filenamecontains the name of the camera and the time the snapshot was taken. Snapshots are savedto the snapshot folder on your PC.
Administrators can define the default format and snapshot folder on the Options - General tab.
Save a snapshot from all video panes
When viewing video, you may want to take snapshot images of video playing in all panes.You can also take a snapshot of video playing in a single video pane.
To take a snapshot of all panes playing video, click in the toolbar. While thesnapshots are being taken, a camera icon appears in the top right of the video panes.
Snapshots are saved to the snapshot folder on your PC. The filename contains the name ofthe camera and the time the snapshot was taken. Snapshots are saved as either a bitmap(.bmp) or JPEG (.jpeg) file.
Administrators define the file format and snapshot folder on the Options - General tab.
Print snapshot of recorded video
Control Center allows you to send an image of a snapshot from recorded video directly to aprinter.
To print a snapshot of recorded video, select the pane playing the video, and click .Select the required printer from the Print dialog and click OK. The camera name, site name,IP address and time of the snapshot footage are printed below the image.
4 How do I...? Control Center

Operator's Guide - v16-14 55
The snapshot image is not saved to your PC. To save a snapshot, click in thetoolbar.
To print a snapshot of zoomed footage, click in the timeline to select the zoom in tool. Click
the part of the footage you want to see in more detail. Click to print the originalsnapshot with the zoomed section beside it. The level of magnification is indicated along withthe camera name, site name, IP address and time of the snapshot footage.
Pause/resume playback
To pause a recording on the PC screen
1. Click below the playback window. The recording playback is paused at thecurrent frame.
2. To resume playback, click .
To pause a recording on an analog monitor1. Select an analogmonitor in theMonitors Pane.2. From thePlaybackmenu, select Pause.3. To resume playback, select Unpause from thePlaybackmenu.
Go to the start of recordings
To go to the start of the first recordingmade from a camera:
1. Make sure you are in Playback view.2. In the Video explorer, locate the camera from which you want to play back recorded
footage and drag-and-drop it into a video pane.3. Click . This takes you to the start of the first recordingmade from that camera.
Alternatively, you can press theHome key on your keyboard.
Control Center 4 How do I...?

56 Operator's Guide - v16-14
Go to the end of recordings
To go to the end of the last recordingmade on a camera:
1. Make sure you are in Playback view.2. In the Video explorer, locate the camera from which you want to play back recorded
footage and drag-and-drop into a video pane.3. Click . This takes you to the end of the last recordingmade on that camera. Altern-
atively, you can press theEnd key on your keyboard.
Rewind a recording
To rewind a recording on the PC screen, click below the playback window to rewind therecording. The video plays backward at a faster speed. When rewinding at 8 times or higherthan normal speed, only key frames are played. At all other speeds, every frame is played.
Click again to stop rewinding and to play back at normal speed.
To rewind at different speeds, use the speed/jog shuttle.
You cannot rewind recordings playing on analogmonitors.
Fast-forward a recording
To fast-forward a recording on the PC screen, click below the playback window. Thecurrent time marker moves forward and the video plays forwards at a faster speed. Whenplaying back at 16 times or higher than normal speed, only key frames are played. At all otherspeeds, every frame is played.
Audio is only played up to 8 times normal speed.
Click again to stop playing faster and to play back at normal speed.
To fast-forward at different speeds, use the speed/jog shuttle.
You cannot fast-forward recordings playing on analogmonitors.
Step backwards through a recording
Click to step backwards through the footage frame by frame. When you reach a gap inthe footage, it jumps backwards to the end of the previous footage.
4 How do I...? Control Center
Operator's Guide - v16-14 57
You cannot step backwards through a recording playing on an analogmonitor .
Step forwards through a recording
Click to step forward through the footage frame by frame. When you reach a gap in thefootage, it jumps forwards to the start of the next footage.
You cannot step forward through a recording playing on an analogmonitor.
Work with audio in a recording
When you start viewing a recording in a video pane, audio is automatically enabled. This is
indicated by at the bottom right of the pane.
To turn audio off, click in the bottom right of the pane. Click to enable it again.
Alternatively, click in the timeline to enable audio in the selected pane and disable it in allother panes. Click in the timeline to enable audio in all panes currently displaying video.
View video for an event
You can configure Control Center to associate video to a detector. You can review therecorded video for the event, at any time.
To view video for a particular event:
1. In the Playback view, select theActivations panel.If the Activations panel is not displayed, select Events > Activations from theViewmenu or double-click the Alarm status bar.
2. Click to display the Find Activations dialog.3. Specify which site you want Control Center to search in. This determines which detect-
ors appear in theAvailable list. Select a detector and click to move it to theSelected list. To select all detectors in the site, click .
4. If required, specify the activation details.5. Choose the required time period using the hour, day, week or month options, or enter a
custom time period.6. Click OK to display the Activations in theActivations panel.7. Select the activation from the list, then drag-and-drop it into a video pane.
Control Center 4 How do I...?
58 Operator's Guide - v16-14
Work with thumbnails
Thumbnails overview
Control Center enables you to display thumbnails of still images taken from recorded video.You can then browse these, choose an image and start playback from the time of the image.
There are four different thumbnail views. Only one of these views is visible at any one time:
l Time-based thumbnail view: This displays a fixed number of images, distributed at
equal intervals across the current range of the timeline. Click to access thisview.
l Alarm thumbnail view: This displays an image for each alarm that is in the current
timeline range. Click to access this view.l Bookmark thumbnail view: This displays an image for each bookmark that is in the
current timeline range. Click to access this view.l Activation thumbnail view: This displays an image for each activation that is in the cur-
rent timeline range. Click to access this viewl Search thumbnail view: This displays an image from each time that themotion or
audio profile in the current timeline range exceeds the threshold. Click toaccess this view.
To view the playback window again without playing from the time of the thumbnail, click
. To return to the previous thumbnail view, click .
The thumbnail views display images within the current range of the timeline. When the rangeof the timeline is changed by expanding, contracting, scrolling or changing the current time,the thumbnail views are updated to show only the images within the time range.
The events displayed on the timeline are the ones listed in the Events panels. By default theEvents panels show all events since midnight of the previous day. To use the Search tochange the events listed, click .
To browse the thumbnails in the time range shown on the timeline and other time periods:
• Move around the timeline using the expand/contract timeline, scroll left/right controlsand timeline controls to display thumbnails in different time periods. This may result infewer or more thumbnails being displayed.
• Use the scroll bar on the right of the thumbnail view to browse all the thumbnails for thecurrent time range.
View time-based thumbnails of recorded video
To view time-based thumbnails of the recorded video currently in the time range:
4 How do I...? Control Center
Operator's Guide - v16-14 59
1. Click on the toolbar.2. The thumbnails for the time range currently visible on the timeline are displayed. The
current time range is divided into 36 equal intervals and the thumbnail view contains animage corresponding to the time in themiddle of each interval. Double-click a thumb-nail to start playing back video from that point.The time shown for a recording in Recorded Video view is determined by the local timeof the site to which the camera belongs, not by the PC onwhich it is being viewed. Thetimezone is shown in the status bar below the application e.g. (GMT -5:00) EasternTimeUS and Canada.
3. To return to the playback window, click .
View thumbnails of alarms
You can display thumbnails which display a still image from each time an alarm has occurred.Each thumbnail contains the date and time that the image was recorded.
To display the alarm thumbnails:
1. Click on the toolbar.2. The alarm thumbnails for the current time range are displayed. Double-click a thumb-
nail to start playing back video from that point.
View thumbnails of all activity over threshold
To view time thumbnails of the recorded video currently in the time range, click on thetoolbar. The thumbnails for the current time range are displayed.
Any points of significant motion or audio found during a search are displayed on the timelineas peaks above the set threshold value. To view thumbnails of the recorded video whichexceeds the threshold value, select Motion Search or Audio Search from the Searchmenu.
The thumbnail view contains an image for each time that the motion or audio profile exceedsthe threshold. Double-click a thumbnail to start playing back video from that point.
View thumbnails of bookmarks
You can display thumbnails which display a still image from each time a bookmark has beenadded. Each thumbnail contains the date and time that the image was recorded.
You can only view bookmarks that you are authorized to view.
To display the bookmark thumbnails:
Control Center 4 How do I...?

60 Operator's Guide - v16-14
1. Click on the toolbar.2. The bookmark thumbnails for the current time range are displayed. Double-click a
thumbnail to start playing back video from that point.
View thumbnails of activations
You can display thumbnails which display a still image from each time an activation hasoccurred. Each thumbnail contains the date and time that the image was recorded.
To display the activation thumbnails:
1. Click on the toolbar.2. The activation thumbnails for the current time range are displayed. Double-click a
thumbnail to start playing back video from that point.
Review recordings
Find a specific recording
To search for recordings in the Playback view timeline:
1. Click thePlayback view button on the toolbar.The first time you display footage from any camera, Control Center displays recordedfootage from the previous hour in the timeline. If you are later searching for videofootage from a different camera, Control Center uses the times you specified for thelast camera.
2. If you want to view footage from a different time, select Set Time Range>Custom...from the Timelinemenu.
3. Enter the times between which you want to view recordings.The time shown for a recording in Playback Video view is determined by the local timeof the site to which the camera belongs, not by the PC onwhich it is being viewed. Thetimezone is shown in the status bar below the application e.g. (GMT -5:00) EasternTimeUS and Canada.
4. In the Video explorer, select the camera that you want to view a recording from. Drag-and-drop it onto a video pane.
5. Click to start playing back the recording. You can control the playback of the record-ing using the playback control buttons.
Zoom in and out of recordings
To zoom in on a recording while it is playing or paused, click to select the zoom in tool.Click the part of the footage you want to see in more detail. The magnification is shown in theleft hand corner of the pane. You canmagnify the image up to 800%.
While is selected, right-click the video pane to zoom out again. Alternatively, you can clickto select the zoom out tool and click the video pane to zoom out again.
To view different parts of an image when it is magnified, click and drag the mouse across thepane when zooming in or zooming out. The cursor changes to a hand. Alternatively, clickand drag themouse across the pane.
4 How do I...? Control Center
Operator's Guide - v16-14 61
View recorded video associated with an alarm
Control Center may automatically display a looped replay from a camera or salvo in a newvideo pane when an alarm occurs. The looped replay is displayed next to the live video from
the same camera. The looped replay icon is displayed in the video pane.
If Automatic NVR switching is enabled, there may be a brief pause during playback whileControl Center searches for an alternative NVR to play back footage from.
You can also manually display recorded video from an associated camera or a salvo wherean alarm has occurred.
Tomanually view recorded video associated with an alarm:
1. Ensure you are in Playback view.2. Select the required alarm in the Alarms panel.
If the Alarms panel is not displayed, select Events > Alarms from theViewmenu ordouble-click the Alarm status bar.
3. Drag-and-drop the alarm from the list into the playback window. This plays back foot-age from the camera associated with the alarm starting from the time of the alarm.
For video of the alarm to be displayed, the cameramust be associated with a zone.
Show analytics in recorded video
You can specify that Control Center displays analytics in recorded video.
To show analytics in recorded video for IndigoVision proprietary cameras:
1. Make sure you are in Playback View.2. Drag-and-drop the camera you require into a video pane.
3. Click in the video pane, or select Show Analytics in the context menu to showmotion that occurs in that pane.
4. Any motion detected in that pane is highlighted by a rectangle or small squares.
This feature requires that the camera is configured to sendmotion information.
This feature is not available onONVIF cameras.
Reveal a hidden zone
When viewing live or recorded video, you may find that certain areas of the scene have beenblocked out, usually for reasons of privacy.
Control Center 4 How do I...?
62 Operator's Guide - v16-14
If you are authorized, you can reveal these areas to view the whole scene.
1. Select the pane containing the hidden areas.• If you are viewing live video, select Reveal Hidden Zone from the Live Video
menu.• If you are viewing recorded video, select Reveal Hidden Zone from thePlayback
menu.The hidden zone is removed to reveal the entire scene.
2. To hide the zone again, select Reveal Hidden Zone again.
Show an overlay
When viewing live or recorded video, you can show an image on top of the video steam. Thisis useful when you need to provide context for the scene or to show tripwire positions.
If you are authorized, to show the overlay image:
1. Select a video pane.2. Right-click in the video pane and select Show Custom Camera Overlay.
If you are authorized, to hide the overlay image:
1. Select a video pane.2. Right-click in the video pane.
If an image is displayed, theShow Custom Camera Overlay option is ticked.3. Select Show Custom Camera Overlay to hide the overlay image.
Administrators define the image to be used for the overlay.
View video for an event
You can configure Control Center to associate video to a detector. You can review therecorded video for the event, at any time.
To view video for a particular event:
1. In the Playback view, select theActivations panel.If the Activations panel is not displayed, select Events > Activations from theViewmenu or double-click the Alarm status bar.
2. Click to display the Find Activations dialog.3. Specify which site you want Control Center to search in. This determines which detect-
ors appear in theAvailable list. Select a detector and click to move it to theSelected list. To select all detectors in the site, click .
4. If required, specify the activation details.5. Choose the required time period using the hour, day, week or month options, or enter a
custom time period.6. Click OK to display the Activations in theActivations panel.7. Select the activation from the list, then drag-and-drop it into a video pane.
Save and protect recordings
Save recordings as evidence
You can save (export) up to 31 days of recorded footage at a time. Each hour is saved as aseparate file. Files are labeled 1 of 3, 2 of 3 etc.
4 How do I...? Control Center
Operator's Guide - v16-14 63
If you have several cameras which have recorded footage of a particular event, you can savethese as an incident, making the review process much easier.
You can also ensure that the recordings are not deleted automatically by the NVR on whichthey are stored.
If automatic NVR switching is enabled, Control Center exports video from alternative NVRswhen there is a gap in recordings on the primary NVR, in the same way as when ControlCenter plays back video.
You can choose to:
• Export recordings from a single camera to another location• Export recordings frommultiple cameras to another location• Protect a recording from deletionwithout exporting it
Save a recording from a single camera
You can save up to 31 days of recorded footage at a time. Each hour is saved as a separatefile. Files are labeled 1 of 3, 2 of 3 etc.
Date and time information for footage from ONVIF and third party cameras is not available inthe exported footage.
You can save any recording to a disk, onto a CD or onto a network drive, from where you canplay it back. When you save the recording, a copy is made to the location selected. Therecording is still accessible via the Control Center.
If you are saving recordings to a CD, the behavior depends on the CD writing softwareavailable on the PC, and on the operating system. You can save the file directly to the CD,but the CD writing software may intervene and prompt you to copy the file to CD as an extrastep.
To save a recording from a single camera:
1. In the Setup view, select a camera or NVR from theVideo explorer and click theRecordings tab.
2. Right-click a recording and select Export and Protect... The Export and ProtectRecording dialog opens.
Recorded footage is not listed on the Recordings tab when the site is in offline mode. Toexport recordings, set the site back online.
3. Select the start (From) and finish (To) time of the footage you wish to export.4. If necessary, select theProtect check box to ensure the original footage on the NVR
is not deleted.5. Enter a name for the Incident.6. Select the Locationwhere you want to save the recordings.7. If there is a hidden zone in this video pane, select Allow incident reviewer to reveal
hidden zone to allow the hidden zone to be revealed.
Control Center 4 How do I...?

64 Operator's Guide - v16-14
If this option is unavailable, youmay not have permissions to reveal hidden zones.
8. If you would like to export the bookmarks associated with the recording, selectInclude Bookmarks.Only bookmarks you are authorized to view are exported.
Bookmarks cannot be exported when the site is in offlinemode. To export bookmarks, set thesite back online.
9. Select Copy Incident Player, if required, to save a copy of the Incident Playerapplication.
10.SelectWrite date and time on exported recordings, if required, to add the date andtime to the recording.
11.Select Rename new recordings to prevent the system from overwriting existingrecordings with the same file name.
The system uses the camera name and recording start time for the recording file name.
12.Click OK. The progress of the export process is shown.
When saving the recoding has finished, it indicates the length of recording that has beensaved. This may be shorter than the time you requested. There are several possible reasonsfor this.
Additional steps are required when saving a recording to a CD
13.In My Computer, double-click the CD recording drive. Windows displays thetemporary area where the file is held before being copied to the CD.
14.Verify that the recording you intend to copy to the CD appears under Files Ready tobe Written to the CD.
15.Right-click in themain window and selectWrite these files to CD. Windows displaysthe CD WritingWizard. Follow the instructions in the wizard.
Save a recording frommultiple cameras
You can save up to 31 days of recorded footage at a time. Each hour is saved as a separatefile. Files are labeled 1 of 3, 2 of 3 etc.
Date and time information for footage from ONVIF and third party cameras is not available inthe exported footage.
If you have several cameras which have recorded footage of a particular event, you can savethese as an incident, making the review process much easier. You can also ensure that therecordings are not deleted automatically by the NVR onwhich they are stored.
4 How do I...? Control Center
Operator's Guide - v16-14 65
Recorded footage cannot be protected when the site is in offline mode. To protect thefootage, set the site back online.
You can save any recording to a disk, onto a CD or onto a network drive, from where you canplay it back. When you save the recording, a copy is made to the location selected. Therecording is still accessible via the Control Center.
If you are saving recordings to a CD, the behavior depends on the CD writing softwareavailable on the PC, and on the operating system. You can save the file directly to the CD,but the CD writing software may intervene and prompt you to copy the file to CD as an extrastep.
To save a recording frommultiple cameras:
1. In the Playback view, click in the timeline, then drag the yellow markers on thetimeline to select the start and end times of the recorded footage you want to export.
2. Right-click a camera or site and select Export and Protect... The Export and ProtectRecordings dialog opens.The cameras currently playing in the active video window are selected by default. Ifyou wish to include additional cameras, select the check boxes corresponding to thecameras you wish to include.If you havemany cameras in your site, select Show only selected cameras to seeonly the ones already selected.
3. Select theProtect check box, if necessary, to ensure the original footage on the NVRis not deleted.
4. Enter a name for the incident.5. Select the Locationwhere you want to save the recordings.6. If there is a hidden zone in this video pane, select Allow incident reviewer to reveal
hidden zone to allow the hidden zone to be revealed.
If this option is unavailable, youmay not have permissions to reveal hidden zones.
7. If you would like to export the bookmarks associated with the recording, selectInclude Bookmarks.Only bookmarks you are authorized to view are exported.
Bookmarks cannot be exported when the site is in offlinemode. To export bookmarks, set thesite back online.
8. Select Copy Incident Player, if required, to save a copy of the Incident Playerapplication.
9. SelectWrite date and time on exported recordings, if required, to add the date andtime to the recording.
10.Select Rename new recordings to prevent the system from overwriting existingrecordings with the same file name.
Control Center 4 How do I...?
66 Operator's Guide - v16-14
The system uses the camera name and recording start time for the recording file name.
11.Click OK. The dialog closes and the Export Status dialog opens.
When saving the recording has finished, it indicates the length of recording that has beensaved. This may be shorter than the time you requested. There are several possiblereasons for this.
Additional steps are required when saving a recording to a CD
12.In My Computer, double-click the CD recording drive. Windows displays thetemporary area where the file is held before being copied to the CD.
13.Verify that the recording you intend to copy to the CD appears under Files Ready tobe Written to the CD.
14.Right-click in themain window and selectWrite these files to CD. Windows displaysthe CD WritingWizard. Follow the instructions in the wizard.
Save recordings using a storyboard
Footage added to the Storyboard panel can be edited to create a single incident that usesfootage frommultiple cameras.
To save a recording using the Storyboard panel:
1. From theViewmenu, select Storyboard. The Storyboard panel opens.2. After selecting a video pane, in the timeline select .3. Drag the yellow markers to the desired start and end times.4. Select to add the selected footage to the storyboard panel.
The selected footage is added to the Storyboard panel. The Storyboard panel displaysthe camera name, and start and end times of the footage.
5. Select to edit a selected clip in the storyboard.
6. Select or to reorder clips in the storyboard panel.
7. Select or to preview the storyboard.
8. Select to export the storyboard as an incident.
The Export storyboard dialog opens.9. Enter a name for the incident.10.Select the Locationwhere you want to save the recordings.11.If you would like to export the bookmarks associated with the recording, select
Include Bookmarks.Only bookmarks you are authorized to view are exported.
Bookmarks cannot be exported when the site is in offlinemode. To export bookmarks, set thesite back online.
4 How do I...? Control Center
Operator's Guide - v16-14 67
12.If there is a hidden zone in this video pane, select Allow incident reviewer to revealhidden zone to allow the hidden zone to be revealed.
If this option is unavailable, youmay not have permissions to reveal hidden zones.
13.Select Copy Incident Player to include the Incident Player application in the samefolder as the exported recording. This lets users review recordings even if they havenot got a copy of the player already installed on their PC.
14.Select theProtect check box, if necessary, to ensure the original footage on the NVRis not deleted.
15.SelectWrite date and time on exported recordings, if required, to add the date andtime to the recording.
16.Click OK. The dialog closes and the Export Status dialog opens.
Protect recordings
Use the following procedure if you wish to protect a recording without exporting it.
Recorded footage cannot be protected when the site is in offline mode. To protect thefootage, set the site back online.
If automatic NVR switching is enabled, Control Center protects video from alternative NVRswhen there is a gap in recordings on the primary current NVR, in the same way as whenControl Center plays back video.
1. In Playback view, use the Playback controls to find the start of the recorded footageyou want to protect.
2. Stop or pause the playback at that point to ensure the current timemarker is at thecorrect time.
If you already know the times from which you want to protect the recording you do not have tocarry out this step.
3. From thePlaybackmenu, select Protect Only. The Protect Recording dialog opens.4. Confirm the start time and duration of the recording to be protected, then click OK.
Work with incidents
Save a recording as an incident
When you have several cameras that have recorded footage of a particular event fromdifferent angles, Control Center allows you to save this footage as an incident. This makesreviewing the footage of the event much easier by allowing you to view all the footagesimultaneously.
Control Center 4 How do I...?

68 Operator's Guide - v16-14
An incident is a collection of files contained in an incident directory. These include the ivi fileused to start the incident player, the footage directory which contains all the footage, and theIncidentDB directory which contains the site database files for the incident. Footage isexported in MP4 format.
Use the IndigoVision Incident Player to play back footage saved as an incident.
► To save a recoding as an incident, see " Save a recording frommultiple cameras" on page1
Date and time information for footage from ONVIF and third party cameras is not available inthe exported footage.
Install Incident Player
When you exported footage as an incident, you may have also copied the Incident Playerapplication. If you did not, a copy is available on the IndigoVision Control Center CD.
If you are installing Incident Player from a CD, and autorun is enabled on the drive, the setupprogram should start immediately. However, you can also install it manually if autorun is notenabled:
1. Browse to the location of the Incident Player setup.exe file.2. Double-click the setup.exe file.3. When the installation process is complete, click Finish.4. If Control Center locates any incident folders in the same folder as the setup.exe file,
you are prompted to enter the location on the PC where you want to store the incidentvideo clips. Click Browse to select a location for the incidents.
5. To open one of the incidents, select it from the list and select Open the selected incid-ent when done. Once the incidents have been copied, Incident Player launches auto-matically and displays the selected incident.
Play back recorded footage from disk or CD
To play back incidents and recordings exported to disk or CD from Control Center, useIndigoVision's Incident Player or a third party application, such as QuickTime.
You can save a copy of Incident Player at the same time as exporting a recording.
Work with maps
Maps overviewMaps can be used in Live, Playback and Setup views, and provide a representation of thelayout your site(s). Maps enable you to identify the location of the site objects including:
• Where cameras are located, and their field of vision• Where events have occurred• Where devices are locate that you need to activate (for example, relays)
There are a number of actions that you can initiate frommaps, including:
• Display video from cameras• Move to other maps
4 How do I...? Control Center
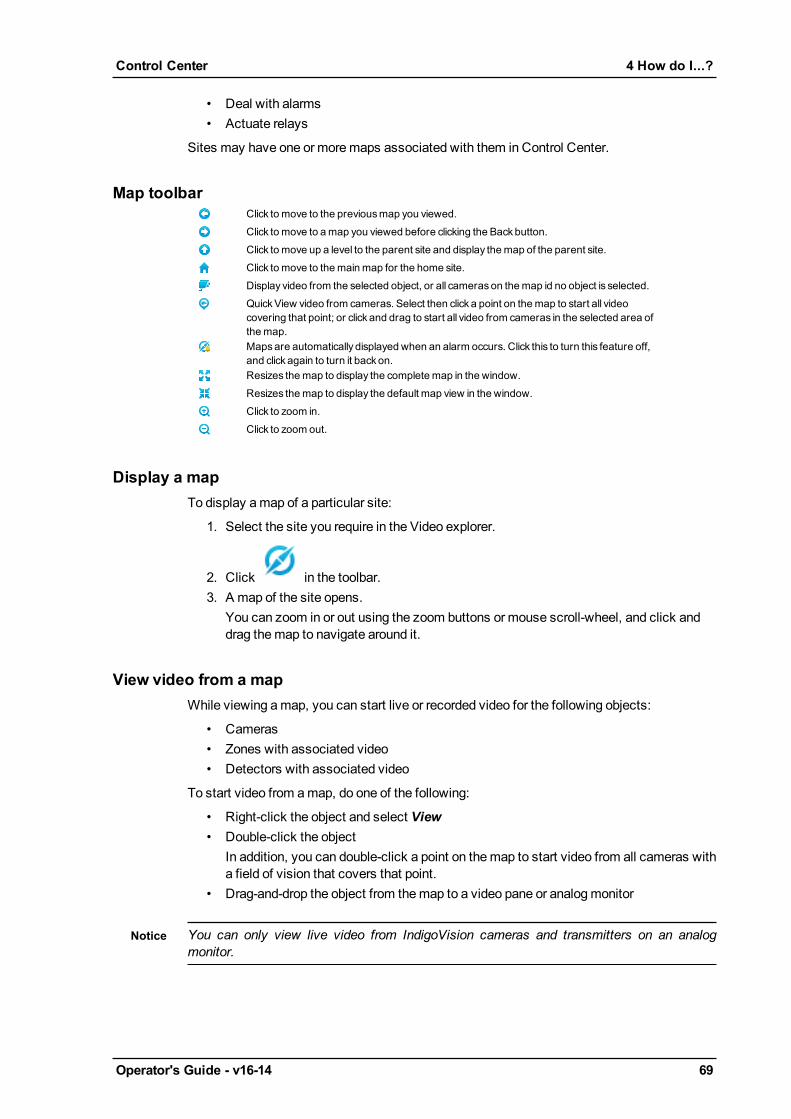
Operator's Guide - v16-14 69
• Deal with alarms• Actuate relays
Sites may have one or moremaps associated with them in Control Center.
Map toolbarClick tomove to the previousmap you viewed.Click tomove to amap you viewed before clicking the Backbutton.Click tomove up a level to the parent site and display themap of the parent site.Click tomove to themainmap for the home site.Display video from the selected object, or all camerason themap id no object is selected.QuickView video from cameras. Select then click a point on themap to start all videocovering that point; or click and drag to start all video from cameras in the selected area ofthemap.Mapsare automatically displayed when an alarm occurs. Click this to turn this feature off,and click again to turn it backon.Resizes themap to display the completemap in the window.Resizes themap to display the default map view in the window.Click to zoom in.Click to zoom out.
Display a mapTo display amap of a particular site:
1. Select the site you require in the Video explorer.
2. Click in the toolbar.3. A map of the site opens.
You can zoom in or out using the zoom buttons or mouse scroll-wheel, and click anddrag themap to navigate around it.
View video from a mapWhile viewing amap, you can start live or recorded video for the following objects:
• Cameras• Zones with associated video• Detectors with associated video
To start video from amap, do one of the following:
• Right-click the object and select View• Double-click the object
In addition, you can double-click a point on themap to start video from all cameras witha field of vision that covers that point.
• Drag-and-drop the object from themap to a video pane or analogmonitor
You can only view live video from IndigoVision cameras and transmitters on an analogmonitor.
Control Center 4 How do I...?
70 Operator's Guide - v16-14
• Quick View all cameras covering a location on themap. The field of visions for thecameras covering the location are highlighted.
For PTZ cameras, you can define the field of vision for the full range of the camera as well asthe presets defined on the camera. When you Quick View the field of vision for the camera,the field of vision is highlighted with stripes, and video is displayed for the camera's currentposition. When you Quick View the field of vision for a preset, the field of vision is highlightedas normal, and the cameramoves to that preset.
• Click in themap toolbar and click a point on themap to start video from allcameras with a field of vision that cover that point.
• Ctrl + click a point on themap to start video from all cameras with a field of visionthat cover that point.
• Click in themap toolbar then click and drag to select an area on themap to startvideo from all cameras within that area.
• Ctrl + drag to select an area on themap to start video from all cameras with a fieldof vision within that area.
• Click in themap toolbarStarts video from the selected object, or from all cameras if no object is selected.
Deal with alarm from a mapWhen an alarm on a map occurs, a map of that site may automatically be displayed. You canthen acknowledge or clear the alarm from themap if required.
The zone and detector that caused the alarm flash to indicate what caused the alarm. If anarea has been defined for the zone or detector, that is also displayed.
If you do not want to view the relevant map when an alarm occurs, click in the map panetoolbar. If you click this button again, the relevant map will again be displayed when an alarmoccurs.
Alternatively, if you are not currently displaying a map, select Show Map from the Alarmsmenu.
Search for motion
Show analytics in live videoYou can specify that Control Center displays analytics in live video. It does this bydisplaying:
• blue lines or shapes that represent the analytics rules you configured on the camera,such as a tripwire
• a rectangle around each object detected by the camera• small squares to show recent motion (motion trace)
The rectangle and squares are normally green, but change to red if that object triggersan event.
To show analytics in live video:
4 How do I...? Control Center
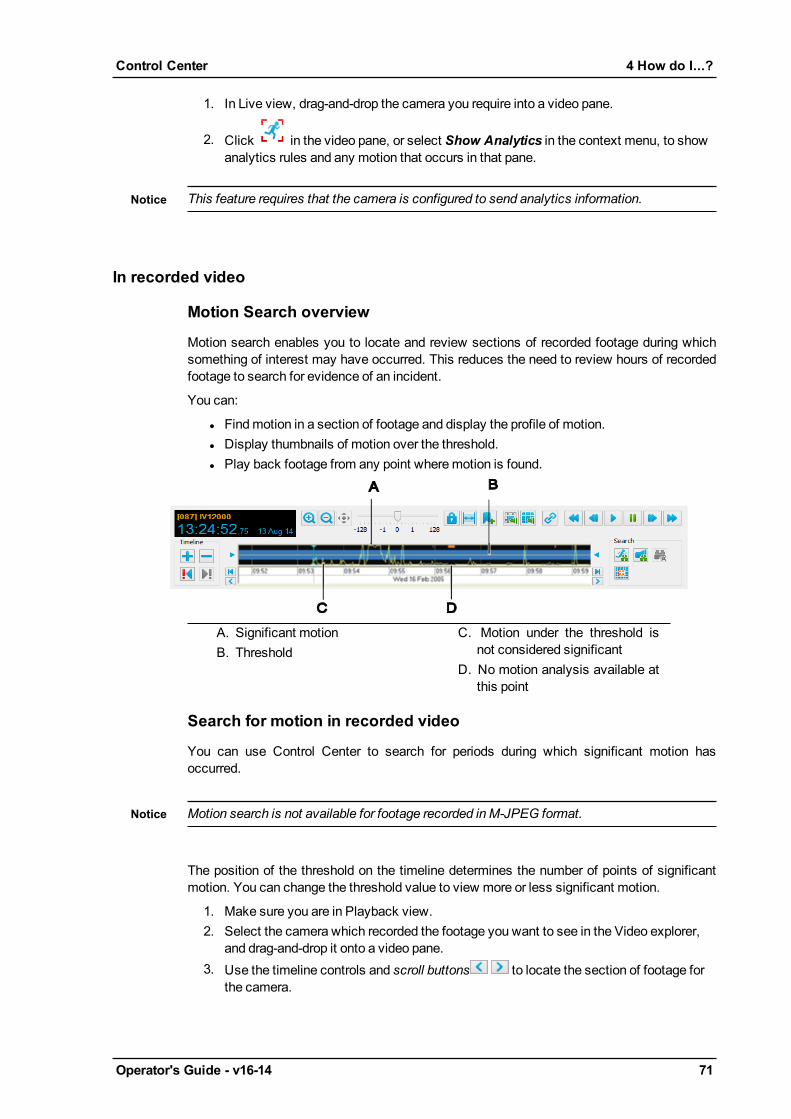
Operator's Guide - v16-14 71
1. In Live view, drag-and-drop the camera you require into a video pane.
2. Click in the video pane, or select Show Analytics in the context menu, to showanalytics rules and any motion that occurs in that pane.
This feature requires that the camera is configured to send analytics information.
In recorded video
Motion Search overview
Motion search enables you to locate and review sections of recorded footage during whichsomething of interest may have occurred. This reduces the need to review hours of recordedfootage to search for evidence of an incident.
You can:
l Findmotion in a section of footage and display the profile of motion.l Display thumbnails of motion over the threshold.l Play back footage from any point wheremotion is found.
A. Significant motionB. Threshold
C. Motion under the threshold isnot considered significant
D. No motion analysis available atthis point
Search for motion in recorded video
You can use Control Center to search for periods during which significant motion hasoccurred.
Motion search is not available for footage recorded inM-JPEG format.
The position of the threshold on the timeline determines the number of points of significantmotion. You can change the threshold value to view more or less significant motion.
1. Make sure you are in Playback view.2. Select the camera which recorded the footage you want to see in the Video explorer,
and drag-and-drop it onto a video pane.3. Use the timeline controls and scroll buttons to locate the section of footage for
the camera.
Control Center 4 How do I...?
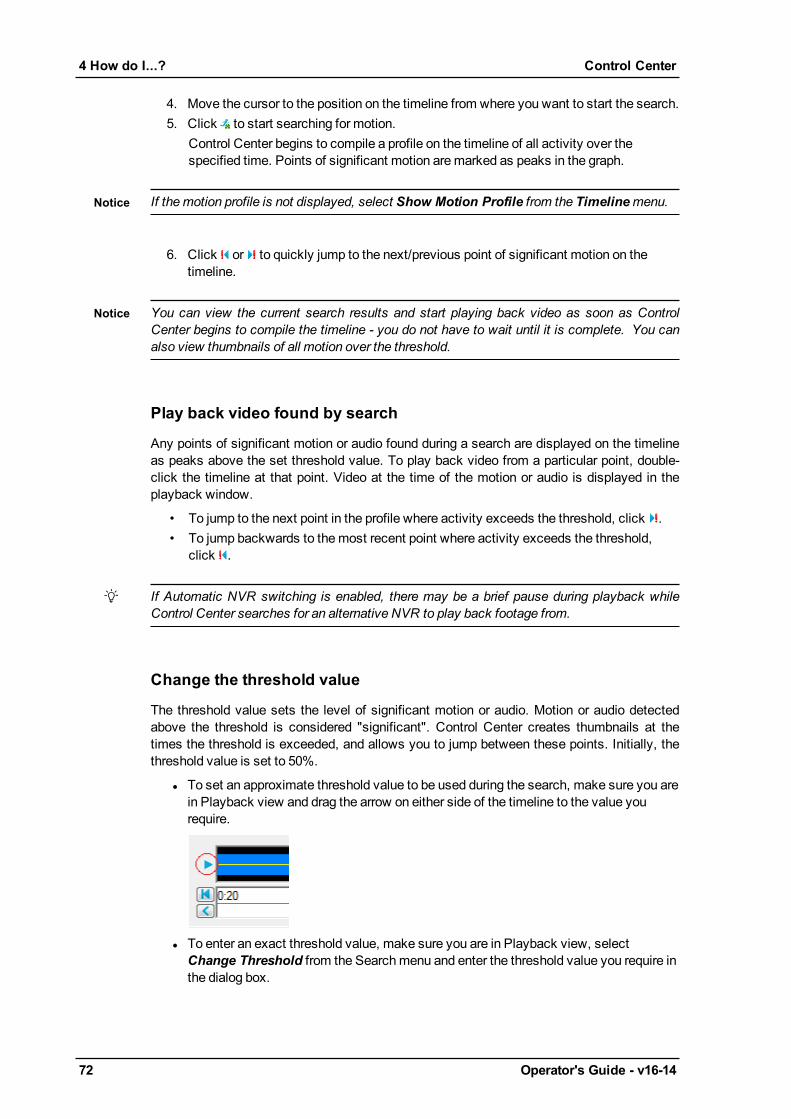
72 Operator's Guide - v16-14
4. Move the cursor to the position on the timeline from where you want to start the search.5. Click to start searching for motion.
Control Center begins to compile a profile on the timeline of all activity over thespecified time. Points of significant motion aremarked as peaks in the graph.
If themotion profile is not displayed, select Show Motion Profile from the Timelinemenu.
6. Click or to quickly jump to the next/previous point of significant motion on thetimeline.
You can view the current search results and start playing back video as soon as ControlCenter begins to compile the timeline - you do not have to wait until it is complete. You canalso view thumbnails of all motion over the threshold.
Play back video found by search
Any points of significant motion or audio found during a search are displayed on the timelineas peaks above the set threshold value. To play back video from a particular point, double-click the timeline at that point. Video at the time of the motion or audio is displayed in theplayback window.
• To jump to the next point in the profile where activity exceeds the threshold, click .• To jump backwards to themost recent point where activity exceeds the threshold,
click .
If Automatic NVR switching is enabled, there may be a brief pause during playback whileControl Center searches for an alternative NVR to play back footage from.
Change the threshold value
The threshold value sets the level of significant motion or audio. Motion or audio detectedabove the threshold is considered "significant". Control Center creates thumbnails at thetimes the threshold is exceeded, and allows you to jump between these points. Initially, thethreshold value is set to 50%.
l To set an approximate threshold value to be used during the search, make sure you arein Playback view and drag the arrow on either side of the timeline to the value yourequire.
l To enter an exact threshold value, make sure you are in Playback view, selectChange Threshold from the Searchmenu and enter the threshold value you require inthe dialog box.
4 How do I...? Control Center
Operator's Guide - v16-14 73
Specify motion search options
To specify motion search options for a camera, click above the timeline.
Motion search is not available for footage recorded inM-JPEG format.
The dialog displays the image taken from the recording at the time of the current time marker.It is divided into blocks that enable you to specify which areas of the scene are to beobserved or ignored when Control Center searches through the recording for motion.
Initially the whole image is set to detect motion. If a region of interest has been setpreviously, the dialog displays the last region set for the camera.
1. Define the area wheremotion will be detected.l To set a single cell to detect motion, click it with the left mouse button. Thesquare is shown in full color, and the red border changes to surround the areathat is detectingmotion.
l To set a single square to ignoremotion, click it with the right mouse button. Thesquare is shown in gray, and the red border changes to surround the area that isdetectingmotion.
l To set a larger area to detect or ignoremotion, click and drag over a number ofcells while holding the left or right mouse button down. Each cell that themousegoes over will be set to detect or ignoremotion.
l To set the region of interest so that motion is detected over the whole image,click Detect All.
l To set the region of interest so that motion is ignored over the whole image, clickIgnore All.
l Click Show Grid to turn the grid on or off.2. Select the searchmode:
The search modes available depend on the type of camera from which the footage wasrecorded.
l Normal: This enables you to search for motion in all directions.l Direction: This enables you to specify the direction of motion to search for.Click the arrows around the video pane to specify the direction. The directionmay be one or more of up, down, left or right.Themotion values in the profile will be higher themore an object is moving inany of the specified directions. You can combine this option with the object size.
l Museum: This enables the addition or removal of an object from a scene to bedetected. A peak in themotion profile will be generated if the object:l Appears and remains in the scenel Is removed from the scene, and not returned.l You can combinemuseummodewith the object size.
l Sensitivity: Controls how sensitive all blocks are to changes in their back-ground. The range is 0 to 100 inclusive.
l Integration time: Specifies how long an object must have been in the scene orbeen removed from the scene before the change is detected.
Control Center 4 How do I...?

74 Operator's Guide - v16-14
3. Define object size:This enables you to specify theminimum andmaximum size of moving objects. Peaksin themotion will only be generated if themoving object is within the specified sizerange. Object size can be combined with all other options.
4. Define the performance:This enables you to specify the accuracy with which Control Center searches formotion. The higher the accuracy, the longer the search will take.
The Performance setting is not available for footage recorded from all cameras, and whenMuseummode is selected.
5. When you have specified themotion search options, click OK.
If the region of interest or other search options have changed, a message is displayedinforming you that all previous motion profile data for the camera will be cleared, and asking ifyou want to continue.
View thumbnails of all activity over threshold
To view time thumbnails of the recorded video currently in the time range, click on thetoolbar. The thumbnails for the current time range are displayed.
Any points of significant motion or audio found during a search are displayed on the timelineas peaks above the set threshold value. To view thumbnails of the recorded video whichexceeds the threshold value, select Motion Search or Audio Search from the Searchmenu.
The thumbnail view contains an image for each time that the motion or audio profile exceedsthe threshold. Double-click a thumbnail to start playing back video from that point.
Show analytics in recorded video
You can specify that Control Center displays analytics in recorded video.
To show analytics in recorded video for IndigoVision proprietary cameras:
1. Make sure you are in Playback View.2. Drag-and-drop the camera you require into a video pane.
3. Click in the video pane, or select Show Analytics in the context menu to showmotion that occurs in that pane.
4. Any motion detected in that pane is highlighted by a rectangle or small squares.
This feature requires that the camera is configured to sendmotion information.
This feature is not available onONVIF cameras.
4 How do I...? Control Center

Operator's Guide - v16-14 75
Search for audio
Audio Search overviewAudio search enables you to locate and review sections of recorded footage during whichsomething of interest may have occurred. This reduces the need to review hours of recordedfootage to search for evidence of an incident.
You can:
l Find audio in a section of footage and display the profile of the audio.l Display thumbnails of video that occurred when the audio is over the threshold.l Play back footage from any point where audio is found.
A. Significant audioB. Threshold
C. Audio under the threshold is notconsidered significant
D. No audio available at this point
Search for audio in recorded videoYou can use Control Center to search for periods during which significant audio has beenrecorded.
Audio search is only available for footage recorded from IndigoVision cameras andtransmitters.
The position of the threshold on the timeline determines the number of points of significantaudio. You can change the threshold value to view more or less significant audio.
1. Make sure you are in Playback view.2. Select the camera which recorded the footage you want to see in the Video explorer,
and drag-and-drop it onto a video pane.3. Use the timeline controls and scroll buttons to locate the section of footage for
the camera.4. Move the cursor to the position on the timeline from where you want to start the search.5. Click to start searching for audio.
Control Center begins to compile a profile on the timeline of all activity over thespecified time. Points of significant audio aremarked as peaks in the graph.
Control Center 4 How do I...?
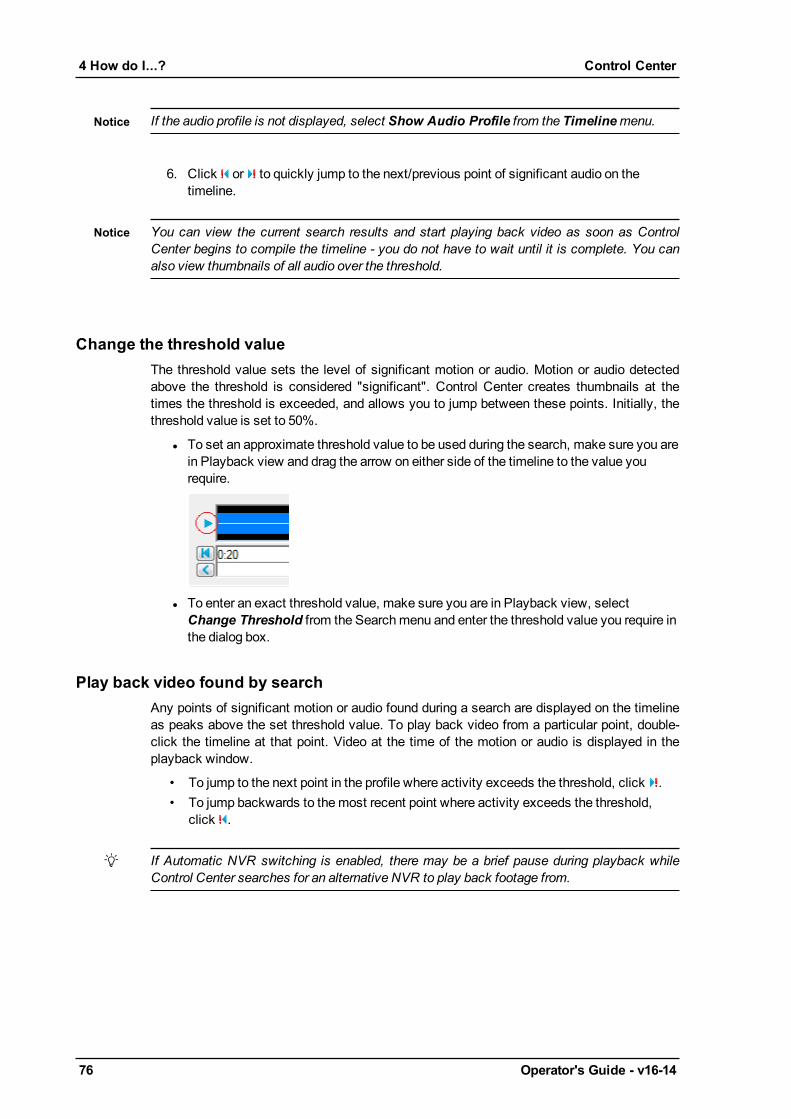
76 Operator's Guide - v16-14
If the audio profile is not displayed, select Show Audio Profile from the Timelinemenu.
6. Click or to quickly jump to the next/previous point of significant audio on thetimeline.
You can view the current search results and start playing back video as soon as ControlCenter begins to compile the timeline - you do not have to wait until it is complete. You canalso view thumbnails of all audio over the threshold.
Change the threshold valueThe threshold value sets the level of significant motion or audio. Motion or audio detectedabove the threshold is considered "significant". Control Center creates thumbnails at thetimes the threshold is exceeded, and allows you to jump between these points. Initially, thethreshold value is set to 50%.
l To set an approximate threshold value to be used during the search, make sure you arein Playback view and drag the arrow on either side of the timeline to the value yourequire.
l To enter an exact threshold value, make sure you are in Playback view, selectChange Threshold from the Searchmenu and enter the threshold value you require inthe dialog box.
Play back video found by searchAny points of significant motion or audio found during a search are displayed on the timelineas peaks above the set threshold value. To play back video from a particular point, double-click the timeline at that point. Video at the time of the motion or audio is displayed in theplayback window.
• To jump to the next point in the profile where activity exceeds the threshold, click .• To jump backwards to themost recent point where activity exceeds the threshold,
click .
If Automatic NVR switching is enabled, there may be a brief pause during playback whileControl Center searches for an alternative NVR to play back footage from.
4 How do I...? Control Center

Operator's Guide - v16-14 77
View thumbnails of all activity over threshold
To view time thumbnails of the recorded video currently in the time range, click on thetoolbar. The thumbnails for the current time range are displayed.
Any points of significant motion or audio found during a search are displayed on the timelineas peaks above the set threshold value. To view thumbnails of the recorded video whichexceeds the threshold value, select Motion Search or Audio Search from the Searchmenu.
The thumbnail view contains an image for each time that the motion or audio profile exceedsthe threshold. Double-click a thumbnail to start playing back video from that point.
Work with alarms and relays
Alarms overviewThe IndigoVision Control Center can be configured to detect alarms when any of the followingoccur:
l A trigger device is activated (for example, a pressure-sensitive pad is activated, or awindow is broken).
l Actions are detected by a camera using video analytics (for example, motion).l External systems are activated.l A fault is detected with a device (for example, network connection is lost).
Detectors are configured in Control Center to activate when events are captured by devicessuch as PIRs, pressure-sensitive pads, or cameras. Detectors are grouped into zones.Zones organize detectors into logical groups, for example, one floor of a building, to helpmanage alarms more effectively.
When a detector is activated, it triggers an alarm in the zone. If more than one detector in azone is activated before the alarm is cleared, no further alarms are triggered.
Two detectors can be combined as a double knock detector that is activated when bothdetectors are triggered. For example, the detector activates when a door opens and motion isdetected.
A schedule can be applied to zones and detectors to specify when they are active and,therefore, when alarms can be triggered.
An alarm is indicated by a flashing alarm icon in the Alarm status bar and the alarm appears inred type in the Alarms panel. The detectors that activated the alarm are also displayed in theDetectors tab. Other methods may also be used to indicate that an alarm has occurred.
To ensure alarms are responded to in a timely manner, you can configure the system toescalate alarms. If an alarm has not be responded to within the defined timeout period, thesystem escalates it by bringing it to the attention of another group of users.
Events and subsequent detector activations are captured and filtered by an alarm server, andpassed onto Control Center. They are stored on the same alarm server. Alarms can alsooriginate from other external systems and be filtered by an alarm server.
Control Center 4 How do I...?

78 Operator's Guide - v16-14
Escalation policy overviewThe IndigoVision Control Center can be configured to escalate alarms to ensure they areresponded to in a timely manner. If an alarm has not be responded to within the definedperiod, the system escalates it by bringing it to the attention of another group of users.
The timeout and user groups for each escalation level are specified in an escalation policy.The escalation policy specifies the following:
l The users who can view an alarm (user groups) at each levell The timeout after which new and acknowledged alarms are escalated to the next level
An escalation policy can specify from two to five escalation levels. After the timeout hasexpired, the alarm is escalated to the next level. When an alarm is escalated, it also becomesvisible to all users in the user group assigned to the next escalation level.
Within the escalation policy, different timeouts can be defined for each alarm priority ensuringpriority alarms are escalated appropriately.
You can define an escalation policy for each alarm server in your site. The escalation policyapplies to all alarms triggered on that alarm server.
Handling alarmsNew alarms are displayed in bold, red type in the Alarms panel. Control Center can indicatethat an alarm has occurred in a number of methods. Select an alarm in the Alarms panel toview the activations that caused the alarm.
When an alarm occurs, you can acknowledge it to show other users that you are aware of thealarm and are dealing with it. Enter a note in the Acknowledge Alarms dialog to capture anyrelevant information about the alarm.
After you have taken the necessary action to deal with the alarm, you can clear the alarm.You may need to enter a note in the Clear Alarm dialog to explain the actions you took toresolve the alarm.
Take action when an alarm occurs
How do I know an alarm has occurred?
l The alarm appears in red type and the alarm icon flashes in the Alarm status bar. It isinitially unacknowledged.
l The Video explorer icon for the zone in which the alarm occurred changes to reflect thezone's status.
l The alarm sound is activated (if this has been configured). Youmay hear either a singlesound or a continuous alarm, depending on how this has been set up.
l A map of the site where the alarm has occurredmay be displayed. The zone ordetector on themapwill flash, and the associated area is highlighted if defined.
l Live video from the camera or salvo associated with the alarm is automatically dis-played in an alarm group window, if configured. The alarm overlay in the video pane iscolored red to indicate that it has been displayed in response to an alarm.
4 How do I...? Control Center
Operator's Guide - v16-14 79
If live video is playing in a pane in the video window when an alarm occurs, the videoassociated with the alarm will replace the live video. When the alarm is cleared, the originallive video will continue. If the original video is from a sequence or guard tour, the sequence ortour continues in the background.
Acknowledge an alarm
Acknowledging an alarm indicates to Control Center that you are aware of the alarm and youare dealing with it.
You can only acknowledge an alarm after it has been escalated to you.
You can acknowledge alarms from:
l A mapa. Right-click the zone in which the alarm has occurred and select Acknow-
ledge.b. Enter explanatory text if necessary.c. Click OK. The alarm is acknowledged and the icon changes.
l The Alarms panela. Select the alarm in theAlarms panel.
b. Click in the toolbar.c. Enter explanatory text if necessary and click OK. The alarm is acknowledged
and the icon changes.
Youmay acknowledgemore than one alarm at a time:
l To select consecutive alarms, click the first alarm, press and holddown the Shift key on your keyboard, and then click the last alarm.
l To select non-consecutive alarms, press and hold down the Ctrl keyon your keyboard, and then click each alarm that you require.
l To select all alarms in the list, select one alarm, then press Ctrl+A onyour keyboard.
l The Alarms explorera. Right-click the zone in which the alarm has occurred from theAlarms
explorer, and select Acknowledge.b. Enter explanatory text if necessary.c. Click OK.
l The video pane
If Control Center has displayed live video of an alarm which has just occurred, click the
arrow beside the alarm button in the video pane , and select AcknowledgeAlarm. The alarm overlay text turns yellow.
Control Center 4 How do I...?
80 Operator's Guide - v16-14
Clear an alarm
When you have taken the necessary action to deal with an alarm, you can clear the alarm.Youmay need to enter text to explain the actions you took to resolve the alarm.
You can only clear an alarm after it has been escalated to you.
You can clear alarms from:
l A mapa. Right-click the zone in which the alarm has occurred and select Clear.b. Enter explanatory text if necessary.c. Click OK.
l The Alarm explorera. Right-click the zone in which the alarm has occurred from theAlarms
explorer, and select Clear.b. Enter explanatory text if necessary.c. Click OK.
l The Alarms panela. Select the alarm in theAlarm panel.
b. Click in the toolbar.c. Enter explanatory text, if necessary, and click OK. The alarm is no longer
shown in the Alarms tab in Live view.
Youmay clear more than one alarm at a time:
l To select consecutive alarms, click the first alarm, press and holddown the Shift key on your keyboard, and then click the last alarm.
l To select non-consecutive alarms, press and hold down the Ctrl keyon your keyboard, and then click each alarm that you require.
l To select all alarms in the list, select one alarm, then press Ctrl+A onyour keyboard.
l The video pane
If Control Center has displayed live video of an alarm which has just occurred, click thearrow beside the alarm button in the video pane, and select Clear Alarm. The alarmoverlay text turns green, and disappears after a few seconds.
Depending on how the alarm has been configured, Control Center may prompt a second,authorized user to enter their password before the alarm is cleared.
Stop an alarm sound
Control Center may sound an alarm continuously when an alarm occurs. To turn off thesound, youmust acknowledge or clear the alarm.
4 How do I...? Control Center
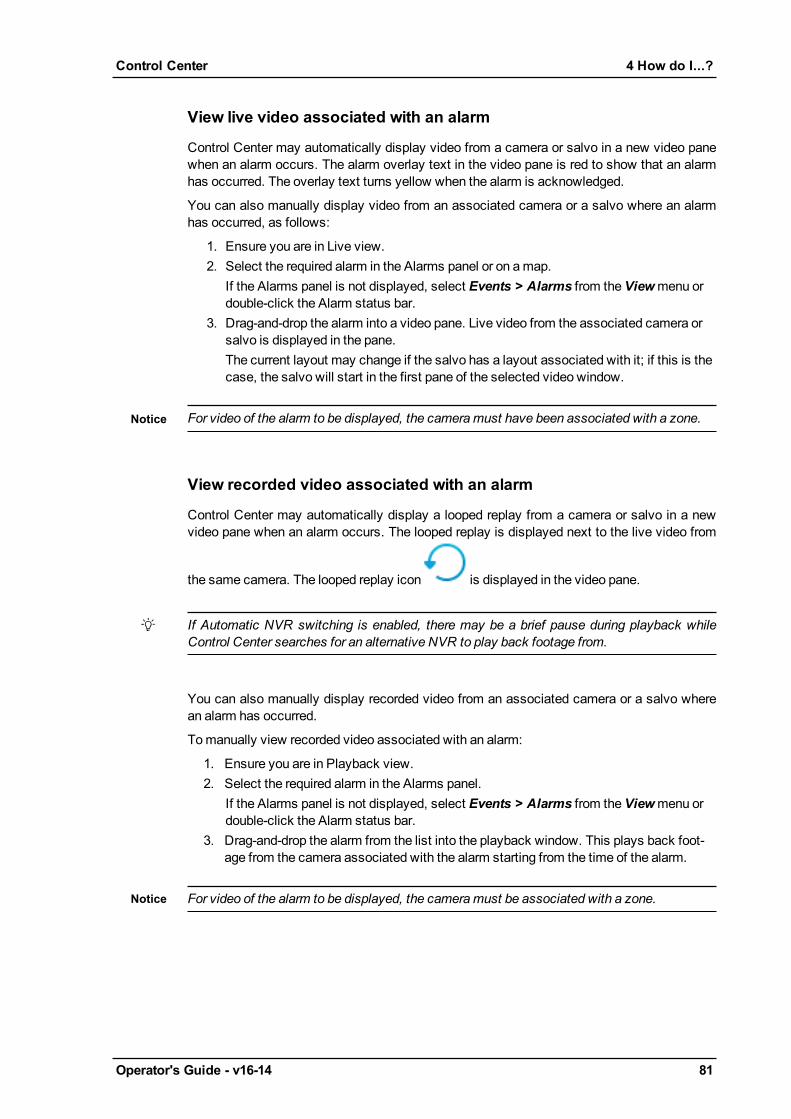
Operator's Guide - v16-14 81
View live video associated with an alarm
Control Center may automatically display video from a camera or salvo in a new video panewhen an alarm occurs. The alarm overlay text in the video pane is red to show that an alarmhas occurred. The overlay text turns yellow when the alarm is acknowledged.
You can also manually display video from an associated camera or a salvo where an alarmhas occurred, as follows:
1. Ensure you are in Live view.2. Select the required alarm in the Alarms panel or on amap.
If the Alarms panel is not displayed, select Events > Alarms from theViewmenu ordouble-click the Alarm status bar.
3. Drag-and-drop the alarm into a video pane. Live video from the associated camera orsalvo is displayed in the pane.The current layout may change if the salvo has a layout associated with it; if this is thecase, the salvo will start in the first pane of the selected video window.
For video of the alarm to be displayed, the cameramust have been associated with a zone.
View recorded video associated with an alarm
Control Center may automatically display a looped replay from a camera or salvo in a newvideo pane when an alarm occurs. The looped replay is displayed next to the live video from
the same camera. The looped replay icon is displayed in the video pane.
If Automatic NVR switching is enabled, there may be a brief pause during playback whileControl Center searches for an alternative NVR to play back footage from.
You can also manually display recorded video from an associated camera or a salvo wherean alarm has occurred.
Tomanually view recorded video associated with an alarm:
1. Ensure you are in Playback view.2. Select the required alarm in the Alarms panel.
If the Alarms panel is not displayed, select Events > Alarms from theViewmenu ordouble-click the Alarm status bar.
3. Drag-and-drop the alarm from the list into the playback window. This plays back foot-age from the camera associated with the alarm starting from the time of the alarm.
For video of the alarm to be displayed, the cameramust be associated with a zone.
Control Center 4 How do I...?
82 Operator's Guide - v16-14
Play a pre-recorded message
You can manually play an imported pre-recorded audio message across a site, or through aspecific PA group or speaker in the area where an alarm has occurred.
To play a pre-recordedmessage:
1. Ensure you are in the Live view.2. Right-click the required PA group, speaker or site in the Video or Alarms explorer and
select Send Audio Message... The Choose AudioMessage dialog opens.
If you select a site, your announcement is broadcast through all speakers and PA groups inthat site.
3. Select amessage and click OK.To stop the audiomessage, right-click the item in the Video explorer and select StopAudio Message.
Carry out an action at any time
Control Center may have been configured so that you can perform certain actions, such asopening a door, at any time, and not just when an alarm occurs. These actions are known asrelays.
To perform an action while viewing video from a particular camera1. In Live view, display video from the required camera in a video pane.
2. Click the arrow beside to display a list of available actions.
A maximum of 4 relays are displayed per camera.
3. Select the required action from the drop-down list to perform it.
Depending on how the relay has been configured, Control Center may require a second,authorized user to enter their password before the relay is activated.
To perform an action from a map1. In Live view, display themapwith the required relay.
2. Click the arrow beside to display a list of available actions.3. Select the required action from the drop-down list to perform it.
Depending on how the relay has been configured, Control Center may require a second,authorized user to enter their password before the relay is activated.
4 How do I...? Control Center
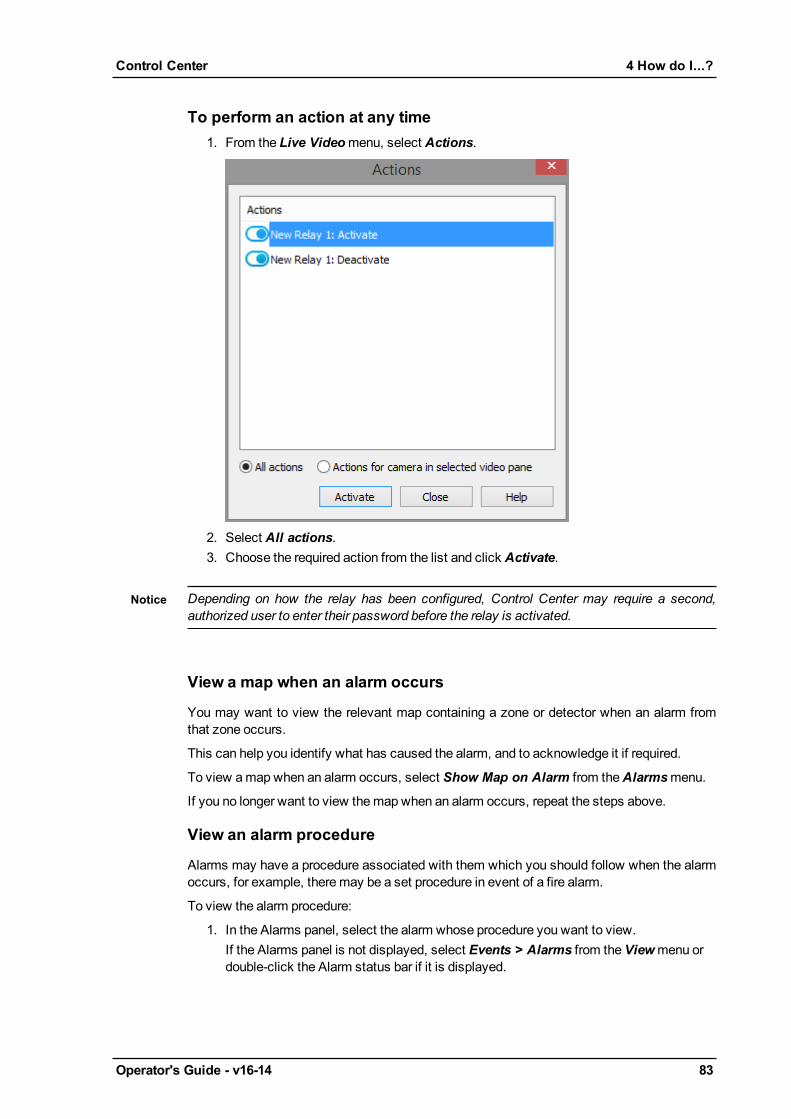
Operator's Guide - v16-14 83
To perform an action at any time1. From the Live Videomenu, select Actions.
2. Select All actions.3. Choose the required action from the list and click Activate.
Depending on how the relay has been configured, Control Center may require a second,authorized user to enter their password before the relay is activated.
View a map when an alarm occurs
You may want to view the relevant map containing a zone or detector when an alarm fromthat zone occurs.
This can help you identify what has caused the alarm, and to acknowledge it if required.
To view amapwhen an alarm occurs, select Show Map on Alarm from theAlarmsmenu.
If you no longer want to view themapwhen an alarm occurs, repeat the steps above.
View an alarm procedure
Alarms may have a procedure associated with them which you should follow when the alarmoccurs, for example, theremay be a set procedure in event of a fire alarm.
To view the alarm procedure:
1. In the Alarms panel, select the alarm whose procedure you want to view.If the Alarms panel is not displayed, select Events > Alarms from theViewmenu ordouble-click the Alarm status bar if it is displayed.
Control Center 4 How do I...?
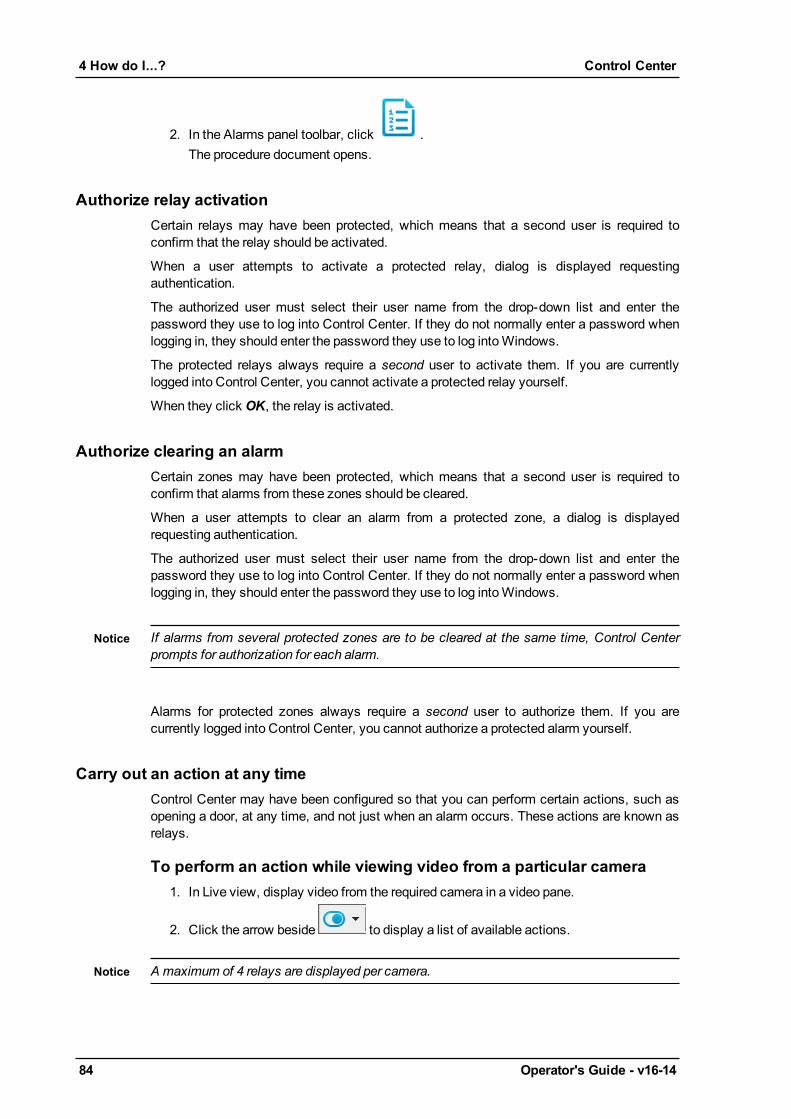
84 Operator's Guide - v16-14
2. In the Alarms panel toolbar, click .The procedure document opens.
Authorize relay activationCertain relays may have been protected, which means that a second user is required toconfirm that the relay should be activated.
When a user attempts to activate a protected relay, dialog is displayed requestingauthentication.
The authorized user must select their user name from the drop-down list and enter thepassword they use to log into Control Center. If they do not normally enter a password whenlogging in, they should enter the password they use to log intoWindows.
The protected relays always require a second user to activate them. If you are currentlylogged into Control Center, you cannot activate a protected relay yourself.
When they click OK, the relay is activated.
Authorize clearing an alarmCertain zones may have been protected, which means that a second user is required toconfirm that alarms from these zones should be cleared.
When a user attempts to clear an alarm from a protected zone, a dialog is displayedrequesting authentication.
The authorized user must select their user name from the drop-down list and enter thepassword they use to log into Control Center. If they do not normally enter a password whenlogging in, they should enter the password they use to log intoWindows.
If alarms from several protected zones are to be cleared at the same time, Control Centerprompts for authorization for each alarm.
Alarms for protected zones always require a second user to authorize them. If you arecurrently logged into Control Center, you cannot authorize a protected alarm yourself.
Carry out an action at any timeControl Center may have been configured so that you can perform certain actions, such asopening a door, at any time, and not just when an alarm occurs. These actions are known asrelays.
To perform an action while viewing video from a particular camera1. In Live view, display video from the required camera in a video pane.
2. Click the arrow beside to display a list of available actions.
A maximum of 4 relays are displayed per camera.
4 How do I...? Control Center
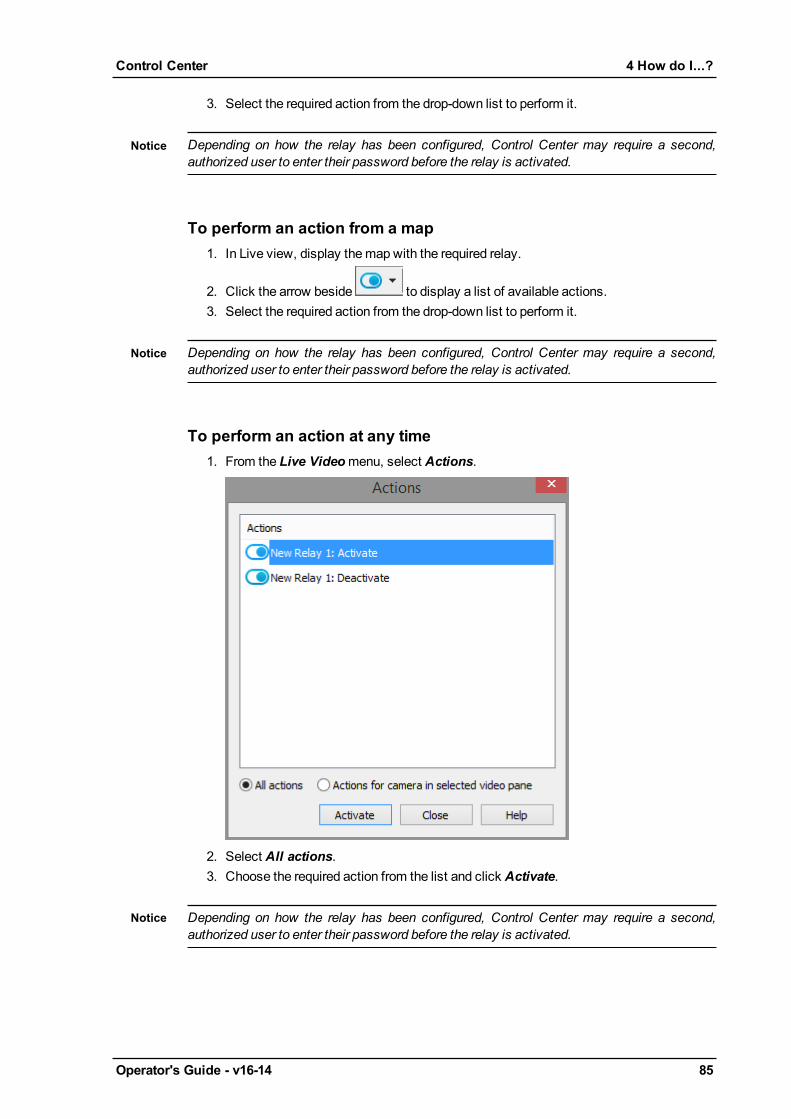
Operator's Guide - v16-14 85
3. Select the required action from the drop-down list to perform it.
Depending on how the relay has been configured, Control Center may require a second,authorized user to enter their password before the relay is activated.
To perform an action from a map1. In Live view, display themapwith the required relay.
2. Click the arrow beside to display a list of available actions.3. Select the required action from the drop-down list to perform it.
Depending on how the relay has been configured, Control Center may require a second,authorized user to enter their password before the relay is activated.
To perform an action at any time1. From the Live Videomenu, select Actions.
2. Select All actions.3. Choose the required action from the list and click Activate.
Depending on how the relay has been configured, Control Center may require a second,authorized user to enter their password before the relay is activated.
Control Center 4 How do I...?
86 Operator's Guide - v16-14
Isolate or restore a detectorIf you know that a detector is being activated incorrectly, for example, if a sensor is faulty,you can isolate the detector to stop it causing an alarm. Once the problem has been resolved,you need to restore the detector to restore normal operation.
You cannot isolate or restore a detector when a site is in offline mode. To isolate or restore adetector, set the site back online.
To isolate a detector:
1. Right-click the detector in theAlarms explorer, or on amap.2. Select Isolate and enter an explanatory text if necessary.
The detector icon changes to indicate that it is isolated
To restore a detector:
1. Right-click the detector in theAlarms explorer, theDetectors panel, or on amap.2. Select Restore. The detector icon returns to normal.
Unset or set a zoneIf you know that a zone is being triggered incorrectly, for example, duringmaintenance, or youwish to turn off alarms during office hours, you can unset the zone to stop an alarm occurring.To restore normal operation, you need to set the zone.
You cannot set, or unset a zone when a site is in offlinemode. To set, or unset a zone, set thesite back online.
To unset a zone:
1. Right-click the zone in theAlarm explorer, or on amap.2. Select Unset. The zone icon changes to indicate that it is unset.
To set a zone:
1. Right-click the zone in theAlarm explorer, or on amap.2. Select Set. The zone icon returns to normal.
Find alarmsBy default, the Alarms panel in the Playback view displays alarms that have occurred sincemidnight of the previous day (that is, alarms from today and yesterday).
Alarms cannot be displayed when a site is in offline mode. To view alarms, set the site backonline.
To search for alarms:
1. In the Playback view, open theAlarms panel.
4 How do I...? Control Center

Operator's Guide - v16-14 87
If the Alarms panel is not displayed, select Events > Alarms from theViewmenu, ordouble-click the Alarm status bar.
2. Click to open the Find Alarms dialog.3. Specify which site you want Control Center to search in. This determines which zones
appear in the Zones list.
4. Select a zone and click to move it to theSelected list. To select all zones inthe site, click .
5. If required, specify which users last handled the alarms. Select a user or user groupand click to move it to theSelected list. To select all users and user groups,click .
6. Specify the status of alarms for which you want to search.7. Choose the required time period using the hour, day, week or month options, or enter a
custom time period.8. Click OK. The alarms that match the search criteria are displayed in the list. You can
then export this information into a report about some or all of these alarms.
Filter alarmsThe Alarms panel in the Live view displays new and acknowledged alarms. You can filter thealarms displayed in the Alarms panel to make it easier to focus on alarms from specific areas.
Alarms cannot be displayed when a site is in offline mode. To view alarms, set the site backonline.
To filter alarms, in the Live view, select a predefined filter from the Filter drop-down list abovethe Filter Selection panel. The filter determines what is displayed in the Filter Selection panel,the Alarms panel, the Alarm status bar, maps and alarm groups.
Find activationsBy default, the Activations panel in the Playback view displays activations that haveoccurred sincemidnight of the previous day (that is, activations from today and yesterday).
Activations cannot be displayed when a site is in offline mode. To view activations, set thesite back online.
To search for activations:
1. In the Playback view, open theActivations panel.If the Activations panel is not displayed, select Events > Activations from theViewmenu, or double-click the Alarm status bar.
2. Click to open the Find Activations dialog.3. Specify which site you want Control Center to search in. This determines which zones
appear in the Zones list.
4. Select a zone and click to move it to theSelected list. To select all zones inthe site, click .
Control Center 4 How do I...?
88 Operator's Guide - v16-14
5. If required, specify which users last handled the activations. Select a user and clickto move it to theSelected list. To select all users, click .
6. Specify the status of activations for which you want to search.7. Choose the required time period using the hour, day, week or month options, or enter a
custom time period.8. Click OK. The activations that match the search criteria are displayed in the list. You
can then export this information into a report about some or all of these activations.
Display event detailsTo display the details for an event:
1. Find the alarm you want to view and select it. The activations for the alarm are listed inthe lower section of themain window.
2. Right-click the alarm or the activation whose details you want to view, and select ViewDetails. The Alarm Details or Activation Details dialog opens.The information about the alarm includes the status, the Alarm Server that have loggedthe alarm, who acknowledged and cleared the alarm, and any notes taken.
Move the Events panelsThe Events panels are located below the Control Center main window. To move the Eventspanels, you can either undock or close and re-open them.
To undock an Event panel, click and hold the panel's title bar and move the panel anywhereon the screen.
For more information about docking andmoving panels, click here.
For more information about closing and opening the Events panels, click here.
View thumbnails of alarmsYou can display thumbnails which display a still image from each time an alarm has occurred.Each thumbnail contains the date and time that the image was recorded.
To display the alarm thumbnails:
1. Click on the toolbar.2. The alarm thumbnails for the current time range are displayed. Double-click a thumb-
nail to start playing back video from that point.
View thumbnails of activationsYou can display thumbnails which display a still image from each time an activation hasoccurred. Each thumbnail contains the date and time that the image was recorded.
To display the activation thumbnails:
1. Click on the toolbar.2. The activation thumbnails for the current time range are displayed. Double-click a
thumbnail to start playing back video from that point.
4 How do I...? Control Center

Operator's Guide - v16-14 89
View alarms on the timelineAlarms are shown on the timeline as vertical red lines. By default, the alarms displayed on thetimeline are the ones listed in the Alarms panel.
You can filter the alarms on the timeline to display all alarms listed in the Alarms panel, or allalarms related to the camera selected in the Playback window. Right-click the timeline andselect one of the following options:
• Show alarms from the alarms list• Show alarms related to the selected camera
Alarms are related to the selected camera by the zone in which the alarm is triggered. Whenthis option is chosen, the alarms displayed are determined by the video source associatedwith the zone:
• Camera - if this camera is selected in the Playback window, the associated zone'salarms are shown in the timeline.
• Salvo - if any camera in this salvo is selected in the Playback window, the associatedzone's alarms are shown in the timeline.
Initially, alarms are shown on the timeline. To view the timeline without alarms, select ShowAlarms from the Timeline menu. To re-display these lines, select Show Alarms from theTimelinemenu.
The total number of alarms for each time division is shown in red below the timeline.
To jump from one alarm to the next/previous, click or .
View activations on the timelineActivations are shown on the timeline as vertical white lines. The activations displayed on thetimeline are the ones listed in the Activations panel.
Initially, activations are shown on the timeline. To view the timeline without activations,select Show Activations from the Timelinemenu.
To re-display these lines, select Show Activations from the Timelinemenu.
To jump from one activation to the next/previous, click or .
View alarm countsTo display the total number of alarms that have occurred within a set time, select ShowAlarms from the Timelinemenu.
The alarm total for each time division (in this case, hours) is shown below the timeline.
View active detectorsThe Detectors panel can be configured to display all active detectors.
1. Ensure you are in Live view.2. Open the Detectors panel.
Control Center 4 How do I...?
90 Operator's Guide - v16-14
If the Detectors panel is not displayed, select Events > Detectors from theViewmenu or double-click the Alarm status bar.
3. Right-click theDetectors panel and ensureShow Active is selected.All active detectors are listed and the total count is displayed at the top of the list.
Select Hide Isolated Detectors to show only active detectors in the Detectors panel.
Create an alarm reportYou may have searched through Control Center's list of alarms to find evidence of incidentsrelated to particular alarms. Control Center enables you to create reports containinginformation about alarms of particular interest.
To create an alarm report:
1. In the theAlarms panel, click to display the Create Alarm Report dialog.If the Alarms panel is not displayed, select Events > Alarms from theViewmenu ordouble-click the Alarm status bar.
2. To include only currently selected alarms in the report, chooseSelected alarms. Toinclude all alarms found using the previous search, select All queried alarms.
3. Select Include Activations to include all activations related to the alarms.4. Enter a title for the report and select the preferred page size. (This option is only
available when you select RTF format reports in step 4). You can also add commentsabout the report if required.
5. Specify what format the report will be saved in (CSV or RTF).6. Click Browse... to specify a location for the report.7. Click OK to create the report.
Create an activation reportYou may have searched through Control Center's list of activations to find evidence ofincidents related to particular activations. Control Center enables you to create reportscontaining information about activations of particular interest.
To create an activation report:
1. In the Activations panel, click to display the Create Activation Report dialog.If the Activations panel is not displayed, select Events > Activations from theViewmenu or double-click the Alarm status bar.
2. To include only currently selected activations in the report, chooseSelected activ-ations. To include all activations found using the previous search, select All queriedactivations.
3. Enter a title for the report and select the preferred page size. (This option is only avail-able when you select RTF format reports in step 4). You can also add comments aboutthe report if required.
4. Specify what format the report will be saved in (CSV or RTF).5. Click Browse... to specify a location for the report.6. Click OK to create the report.
4 How do I...? Control Center

Operator's Guide - v16-14 91
View alarm detailsYou can view full details of any alarm in the Alarm Details dialog. This shows the site wherethe alarm occurred, the alarm name, the date and time the alarm occurred, and its currentstatus. Once the alarm has been acknowledged or cleared, any response notes entered aredisplayed.
To view these details:
1. Select an alarm in theAlarms panel.If the Alarms panel is not displayed, select Events > Alarms from theViewmenu ordouble-click the alarm banner.
2. Click to display the Alarm Details dialog.
The response notes show comments that were added when the alarm was acknowledged orcleared. The acknowledge response can be edited until the alarm is cleared.
To find out more about editing an acknowledge response, click here.
View unacknowledged alarmsNew and acknowledged alarms are shown in bold red type in the Alarms panel.
To view alarms that have not been cleared, in the Live view, open the Alarms panel. Activealarms are shown in the top pane, and the activations for the selected alarm are shown in thebottom pane.
If the Alarms panel is not displayed, select Events > Alarms from the Viewmenu or double-click the Alarm status bar.
Edit an acknowledge responseA user can enter an acknowledge response when they acknowledge an alarm. You can edit orenhance this response at any time until the alarm is cleared. If there is an existingacknowledge response, it cannot be deleted and left blank.
This capability must be enabled for the Zone.
To edit the acknowledge response:
1. Select an alarm in theAlarms panel.If the Alarms panel is not displayed, select Events > Alarms from theViewmenu ordouble-click the Alarm status bar.
2. Click to display the Alarm Details dialog.
3. Click to edit the acknowledge response.The Response field becomes editable.
4. Click OK to save changes.
Control Center 4 How do I...?
92 Operator's Guide - v16-14
The acknowledge response cannot bemodified after the alarm has been cleared.
View video for an eventYou can configure Control Center to associate video to a detector. You can review therecorded video for the event, at any time.
To view video for a particular event:
1. In the Playback view, select theActivations panel.If the Activations panel is not displayed, select Events > Activations from theViewmenu or double-click the Alarm status bar.
2. Click to display the Find Activations dialog.3. Specify which site you want Control Center to search in. This determines which detect-
ors appear in theAvailable list. Select a detector and click to move it to theSelected list. To select all detectors in the site, click .
4. If required, specify the activation details.5. Choose the required time period using the hour, day, week or month options, or enter a
custom time period.6. Click OK to display the Activations in theActivations panel.7. Select the activation from the list, then drag-and-drop it into a video pane.
Temporarily disable an alarm group video paneYou can temporarily disable an alarm group video pane. This ensures that alarms do notinterrupt you when watching video in a specific pane. This only affects the logged-in user andresets each time Control Center is opened.
To temporarily disable the alarm group video pane:
l In Live view, right-click the video pane you wish to temporarily stop from showingalarms and select Disable Alarm Video.
If the Disable Alarm Video option is disabled, please contact your administrator.
Work with bookmarks
Bookmarks overviewUsers can add annotations to recorded video at specific times of interest, for example, tomark evidence. These are known as video bookmarks. They are displayed on the timeline byvertical magenta lines.
Bookmarks can be assigned a security level to ensure only authorized users can view them.A user can view and add bookmarks at their security level and lower security levels.
You can display thumbnails which display a still image from each time a bookmark has beenadded.
4 How do I...? Control Center
Operator's Guide - v16-14 93
The Bookmark Comments window displays the comments for the bookmarks currentlydisplayed in the timeline.
Bookmarks cannot be used when a site is in offline mode. To use bookmarks, set the siteback online.
Add a bookmarkYou can add bookmarks to recorded video at specific times of interest, for example to markevidence.
To add a bookmark to video footage:
1. In the Video explorer, select the camera with the footage that you want to bookmark.Drag-and-drop it into a video pane.
2. Select Alt+C or right-click the video pane and select Add Bookmark... The AddBookmark dialog opens.In Live view bookmarks are added at the current time. InPlayback view bookmarksare added at the cursor position of the recording playback.
3. Select the security level for the bookmark. 1 is the lowest, and 5 the highest securitylevel.
You can only select security levels that you are authorized to view.
4. Enter text to identify this bookmark, and click OK.
Select Alt+B or the Quick Add Bookmarks option to instantly add a bookmark with nocomment, and the highest security level available to you.
Delete a bookmarkYou can delete bookmarks that you have added to recordings, but not those added by otherusers.
Users with full and restricted administrator rights can also delete bookmarks created by anyuser.
To delete a bookmark:
1. Select theBookmarks panel.If the Bookmarks panel is not displayed, select Events > Bookmarks from theViewmenu or double-click the Alarm status bar.
2. Select the bookmark you want to delete.If the bookmark you want to delete is not shown, click to display the Find Bookmarksdialog.
3. Press theDelete key on your keyboard. The bookmark is deleted.
Control Center 4 How do I...?
94 Operator's Guide - v16-14
View details of a bookmarkYou can view details of bookmarks that have been added to recordings.
You can only view bookmarks that you are authorized to view.
To view details of a bookmark:
1. Select the Bookmarks panel.If the Bookmarks panel is not displayed, select Events > Bookmarks from theViewmenu or double-click the Alarm status bar.
2. Click theShow Details button in the Bookmarks panel to view the bookmark details.If the bookmark whose details you want to view is not shown, click to display theFind Bookmarks dialog.
If the Bookmark Overlay is displayed, bookmark comments are displayed in the video pane.
View bookmarks in a video overlayYou can view bookmark comments in the video pane displaying the bookmarked footageusing the bookmark overlay.
You can only view bookmarks that you are authorized to view.
The bookmark overlay displays bookmark comments for the previous hour of footage with themost recent bookmark at the top.
The size of the text displayed in the bookmark overlay is determined by the default text size.
To display the bookmark overlay:
1. Display the footage in a video pane.2. Right-click the video pane and select Show Bookmark Overlay. The bookmark
overlay is displayed in the video pane.
View bookmark videoTo view video that has been bookmarked:
You can only view bookmarks that you are authorized to view.
4 How do I...? Control Center
Operator's Guide - v16-14 95
1. Select the Bookmarks panel.If the Bookmarks panel is not displayed, select Events > Bookmarks from theViewmenu or double-click the Alarm status bar.
2. Double-click the required bookmark to display the video. Alternatively, drag-and-dropthe required bookmark onto a video pane.If the bookmark you require is not shown, click to display the Find Bookmarks dialog.
Create a bookmark reportControl Center enables you to create reports containing information about bookmarks ofparticular interest.
You can only view bookmarks that you are authorized to view.
To create a bookmark report:
1. In theBookmarks panel, click to display the Create Bookmark Report dialog.If the Bookmarks panel is not displayed, select Events > Bookmarks from theViewmenu or double-click the Alarm status bar.
2. To include only currently selected bookmarks in the report, chooseSelected book-marks. To include all bookmarks found using the previous search, select All queriedbookmarks.
3. Enter a title for the report and select the preferred page size. (This option is only avail-able when you select RTF format reports in step 4). You can also add comments aboutthe report if required.
4. Specify what format the report will be saved in (CSV or RTF).5. Click Browse... to specify a location for the report.6. Click OK to create the report.
Find bookmarksIn Live view, the Bookmarks panel displays bookmarks that have occurred since midnight ofthe previous day (that is, bookmarks from today and yesterday).
You can only view bookmarks that you are authorized to view.
In Playback view, the Bookmarks panel displays the bookmarks displayed on the timeline.
To find a particular bookmark:
1. Select the Bookmarks panel.If the Bookmarks panel is not displayed, select Events > Bookmarks from theViewmenu or double-click the Alarm status bar.
2. Click to display the Find Bookmarks dialog.3. Specify which site you want Control Center to search in. This determines which cam-
eras appear in theAvailable list. Select a camera and click to move it to theSelected list. To select all cameras in the site, click .
Control Center 4 How do I...?
96 Operator's Guide - v16-14
4. If required, specify which user created the bookmark. Select a user or user group andclick to move it to theSelected list. To select all users and user groups,click .
5. Choose the required time period using the hour, day, week or month options, or enter acustom time period.
6. To search using bookmark text, enter the required text in theComments field.7. Click OK to display the bookmarks in theBookmarks panel.
Select bookmarksTo select all bookmarks in the Bookmarks panel:
You can only view bookmarks that you are authorized to view.
1. Make sure you are in Playback view.2. Select the Bookmarks panel.
If the Bookmarks panel is not displayed, select Events > Bookmarks from theViewmenu or double-click the Alarm status bar.
3. Use one of the followingmethods to select the required bookmarks:• To select all bookmarks in the list, select one bookmark, then press Ctrl+A on your
keyboard.• To select consecutive bookmarks, click the first bookmark, press and hold down the
Shift key on your keyboard, and then click the last bookmark.• To select non-consecutive bookmarks, press and hold down the Ctrl key on your
keyboard, then click each bookmark that you require.
View bookmarks on the timelineBookmarks are shown on the timeline as vertical magenta lines.
You can filter the bookmarks on the timeline to displayed all bookmarks listed in theBookmarks panel, or only those for the camera selected in the Playback window. Right-clickthe timeline and select one of the following options:
• Show bookmarks from the bookmarks list• Show bookmarks related to the selected camera
You can only view bookmarks that you are authorized to view.
Initially, bookmarks are shown on the timeline. To view the timeline without bookmarks,select Show Bookmarks from the Timelinemenu.
To re-display these lines, select Show Bookmarks from the Timelinemenu.
To jump from one bookmark to the next/previous, click or .
4 How do I...? Control Center
Operator's Guide - v16-14 97
Work with data records
Data records overviewControl Center can process data supplied from an external system. Each time an eventoccurs on the external system a data record is created in Control Center.
In Control Center you can filter which data records you would like to view.
An external data source is a site object which represents a single source of data, and is usedto group data records. For example, a single till in a supermarket checkout. A data record is asmall piece of information that has been collected by the external data source system. Forexample, a transaction at a checkout till in a supermarket.
Each external data source can be associated with a camera or a salvo. Therefore each datarecord, from that external data source, will have a video stream or salvo associated with thatdata record.
Find data records
You can only view data records that you are authorized to view.
Data records are events reported by an external system. The data records can be viewed intheData Records panel.
1. Select the Data Records panel.If theData Records panel is not displayed, select Events > Data Records from theViewmenu or double-click the Alarm status bar.
2. Click to display the Find Data Records dialog.3. Specify which site you want Control Center to search in. This determines which
external data sources appear in theAvailable list. Select a data source and clickto move it to theSelected list. To select all data sources in the site, click.
4. Choose the required time period using the hour, day, week or month options, or enter acustom time period (Playback view only)
5. To search using data record text, enter the required text in theSearch Terms field.6. Click OK to display the data records in theData Records panel.
Display data record detailsTo display the details for a data record:
1. Find the data record you want to view and select it.2. Right-click the data record whose details you want to view, and select View Details.
The Data Record Details dialog opens.The information about the data record includes the external data source name, the dateand time the data record was collected, and any text associated with the data record.
Control Center 4 How do I...?
98 Operator's Guide - v16-14
View data record videoA video source can be configured with each data source. Data records from that data sourcecan then be used to view video from when each data record was created.
If you select a data record in Live view, the video displays the current stream.
1. Select theData Records panel.If the Data Records panel is not displayed, select Events > Data Records from theViewmenu.
2. Double-click the required data record to display the video. Alternatively, drag-and-dropthe required data record onto a video pane.If the data record you require is not shown, click to display the Find Data Recordsdialog.
Work with sites
Change my home siteWhen your user account was created, you were allocated a home site. You may also haveaccess to other sites, which you may need to monitor. To view another site, you make it yourhome site, as follows:
This is the site that you are required to monitor most frequently. When you log in, this is thesite that is automatically displayed. You have access to cameras and monitors in this site,and any sub-sites.
At any one time, you can see your home site and sites below it. You cannot view sites aboveyour home site, but you may also have access to other sites at the same level. If you areauthorized, you can change your home site to view objects in other sites.
1. From the Filemenu, select Change Home Site.2. Select the site you want to view. The specified site appears in the Video explorer.
You may not have full access permissions to all cameras and monitors in this site, forexample, you may not be able to play back recordings from cameras. Your user account mayhave restricted access to devices in this site.
Search your sitesUse the Site Search in Live and Playback view to search your sites for any camera,sequence, salvo, or guard tour.
Administrators can also access Site Search inSetup view.
1. Open Site Search by selecting Ctrl+S shortcut key.2. Start typing any part of the name ormatrix number of the item you are looking for.
The list of available devices automatically filters based on the text you enter.The item's location is displayed in a tooltip when you hover the cursor over it.
3. Use the arrow keys on your keyboard to highlight the item to view.4. Press Enter to view video from the highlighted item in a video pane.
4 How do I...? Control Center
Operator's Guide - v16-14 99
Alternatively, click , or select View > Site Search. Cameras can be dragged from SiteSearch to a video pane.
Work offlineControl Center sites can be configured to work offline when bandwidth to a site is restricted.When in offline mode, Control Center does not automatically communicate with the devices,NVRs, and Alarm Servers in the site.
When working offline, you can still initiate actions on devices in the site, for example, watchlive and recorded video, listen to additional audio streams, and broadcast audio. However,alarms, bookmarks, motion search, and on-demand recording are not available.
Work offline
Control Center sites can be configured to work offline when bandwidth to a site is restricted.When in offline mode, Control Center does not automatically communicate with the devices,NVRs, and Alarm Servers in the site.
When working offline, you can still initiate actions on devices in the site, for example, watchlive and recorded video, listen to additional audio streams, and broadcast audio. However,alarms, bookmarks, motion search, and on-demand recording are not available.
Set a site offline
You can set a site to work offline to stop automatic communication with the devices, NVRs,and alarm servers in the site.
When you set a site offline, only your instance of Control Center is affected. If otherinstances of Control Center are communicating with the devices in a site, they will continueto do so.
To set a site offline:
1. Right-click the site in theVideo explorer and selectWork Offline.The appearance of the site and all devices in the Video explorer changes.
All child sites are also set offline.
To set a site back online:
1. Right-click the site in theVideo explorer and selectWork Offline.The site and all devices appear as normal in the Video explorer.
Use a segmented site databaseA segmented Control Center site database stores information for each site directly under thetop site in separate segments of the database. Site wide information, such as user accounts,apply to all segments.
Control Center 4 How do I...?
100 Operator's Guide - v16-14
Operators and administrators can view and manage individual segments, or choose to viewall segments for an overview of the whole site. Full administrators can grant users access toindividual segments.
Change the active segment
When using a segmented site database, you need to specify which segment to use when youlogin. To view video and alarms in a different site database segment, you must can changethe active segment.
1. Select File > Change Segment. A list of all available segments is displayed.Segments are labeled by the name of the top site in the segment.
2. Select the segment you use, or select All Segments to view the complete sitedatabase.If you are not usingWindows authentication you will need to log in again.
You can only login to segments that you have been granted access to.
Work in all segments mode
All segments mode provides you with an overview of all the segments you have been grantedaccess to in the site database. To use all segments mode, select File > Change Segment> All Segments.
When you are working in all segments mode you can view live and recorded video from allcameras and NVRs available in any segment, and you can view and action any alarms.
In all segments mode, Control Center uses the site database settings from the earliestcreated segment that you have been granted access to. However, the site database is read-only in this mode. Therefore, you are not able to change any site database settings whenworking in all segments mode.
When working in all segments mode, all actions are captured in the audit log of the earliestcreated segment that you have been granted access to.
Work with cameras
Control a PTZ cameraSome cameras may have PTZ (Pan-Tilt-Zoom) functionality. You can control these camerasusing the Control Center interface or a CCTV keyboard.
Display video from the required PTZ camera in the video pane you want to use.
l If you are using the Control Center interface to control the camera, click in the videopane to display a PTZ control “grid” over the video. This grid indicates that you havesuccessfully connected to the camera, and provides pan, tilt and zooming func-tionality.
4 How do I...? Control Center

Operator's Guide - v16-14 101
l If you are using a CCTV keyboard, move the joystick to display a PTZ control “grid”over the video. This grid indicates that you have successfully connected to the cam-era, and provides pan, tilt and zooming functionality.
If you are using the Control Center interface to control the PTZ camera, you can use the PTZControl Panel to access more functionality. To view the Control Panel, select View > PTZControls.
Using a CCTV keyboard
Pan, tilt and zoom using a CCTV keyboard
Formore detailed information, see the CCTV keyboard's documentation.
Pan and tiltMove the joystick until the camera reaches the required position.
l Tomove the camera faster, move the joystick further away from the center.l Tomove the cameramore slowly, move the joystick closer to the center.
As you move the joystick, the PTZ camera simultaneously pans and tilts in the specifieddirection and at the specified speed.
When the camera reaches the maximum pan or tilt range, the movement stops, even if youcontinue to tilt the joystick. To start moving the camera again, move the joystick in theopposite direction.
Zooml To zoom in, twist the joystick clockwise.l To zoom out, twist the joystick counter-clockwise.
For Panasonic WV-CU650 keyboards, use the zoom wheel at the top of the joystick.
Refocus a camera using a CCTV keyboard
Formore detailed information, see the CCTV keyboard's documentation.
Control Center 4 How do I...?
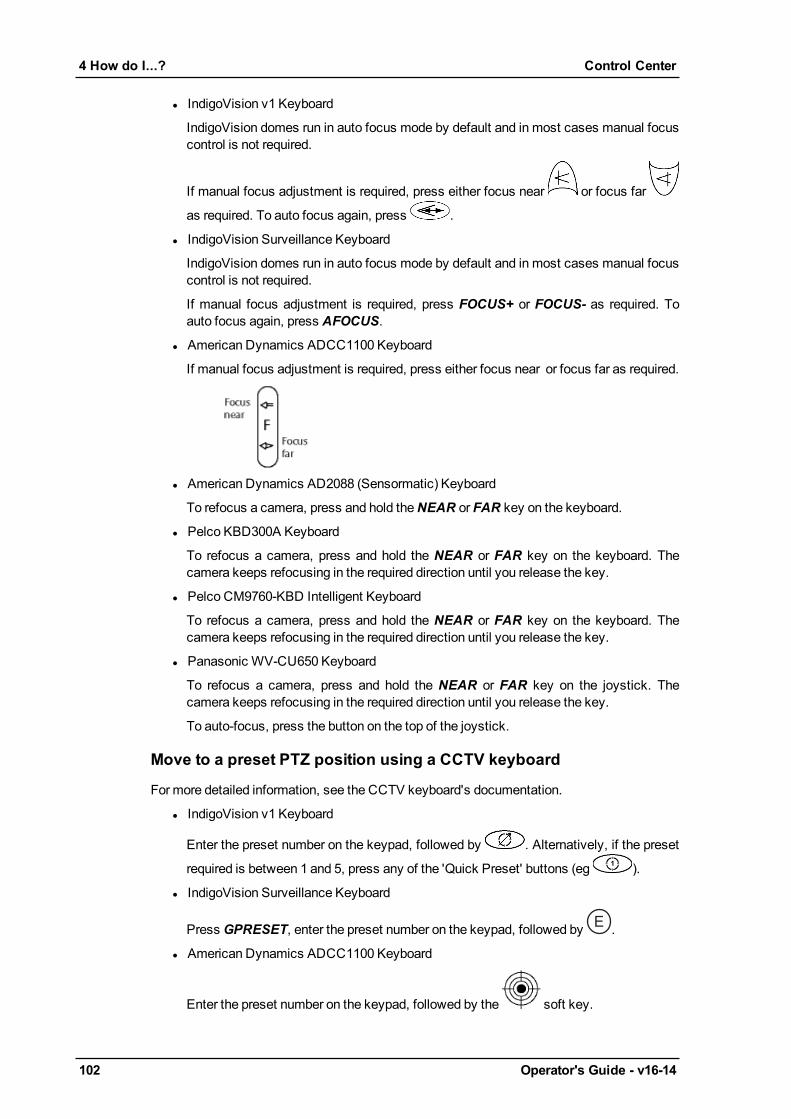
102 Operator's Guide - v16-14
l IndigoVision v1 Keyboard
IndigoVision domes run in auto focus mode by default and in most cases manual focuscontrol is not required.
If manual focus adjustment is required, press either focus near or focus far
as required. To auto focus again, press .
l IndigoVision Surveillance Keyboard
IndigoVision domes run in auto focus mode by default and in most cases manual focuscontrol is not required.
If manual focus adjustment is required, press FOCUS+ or FOCUS- as required. Toauto focus again, press AFOCUS.
l American Dynamics ADCC1100 Keyboard
If manual focus adjustment is required, press either focus near or focus far as required.
l American Dynamics AD2088 (Sensormatic) Keyboard
To refocus a camera, press and hold theNEAR or FAR key on the keyboard.
l Pelco KBD300A Keyboard
To refocus a camera, press and hold the NEAR or FAR key on the keyboard. Thecamera keeps refocusing in the required direction until you release the key.
l Pelco CM9760-KBD Intelligent Keyboard
To refocus a camera, press and hold the NEAR or FAR key on the keyboard. Thecamera keeps refocusing in the required direction until you release the key.
l Panasonic WV-CU650 Keyboard
To refocus a camera, press and hold the NEAR or FAR key on the joystick. Thecamera keeps refocusing in the required direction until you release the key.
To auto-focus, press the button on the top of the joystick.
Move to a preset PTZ position using a CCTV keyboard
Formore detailed information, see the CCTV keyboard's documentation.
l IndigoVision v1 Keyboard
Enter the preset number on the keypad, followed by . Alternatively, if the preset
required is between 1 and 5, press any of the 'Quick Preset' buttons (eg ).
l IndigoVision Surveillance Keyboard
Press GPRESET, enter the preset number on the keypad, followed by E .
l American Dynamics ADCC1100 Keyboard
Enter the preset number on the keypad, followed by the soft key.
4 How do I...? Control Center
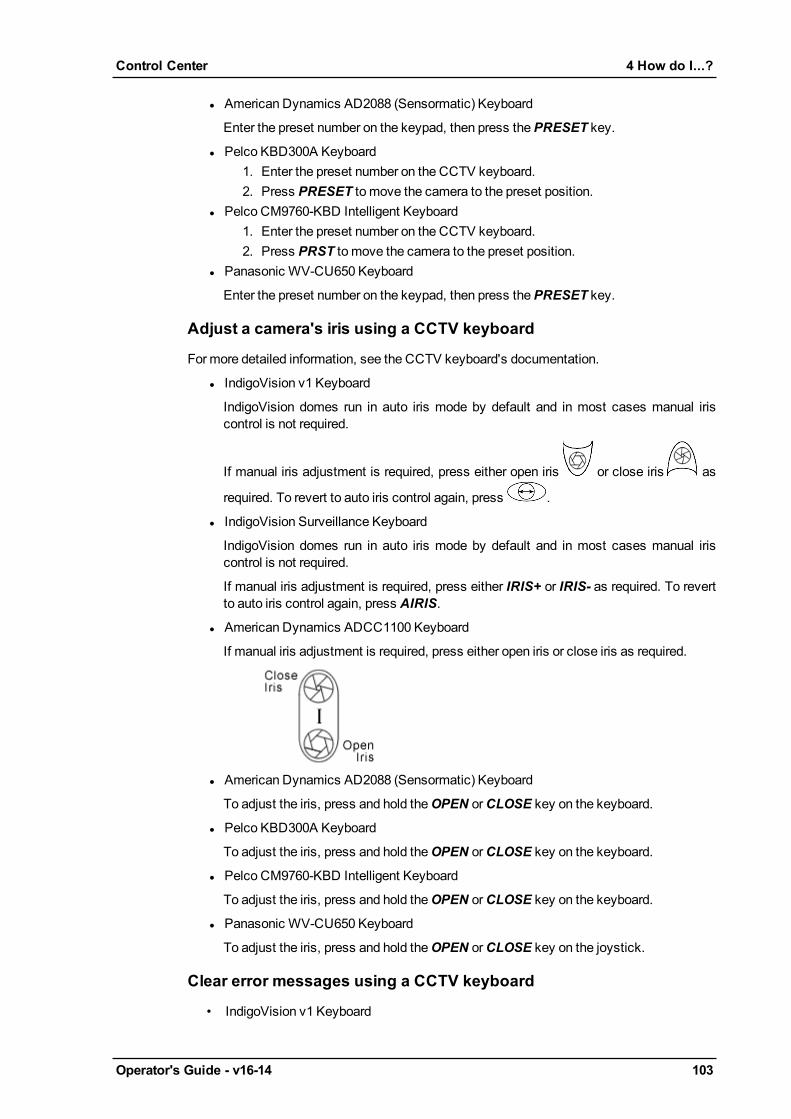
Operator's Guide - v16-14 103
l American Dynamics AD2088 (Sensormatic) Keyboard
Enter the preset number on the keypad, then press thePRESET key.
l Pelco KBD300A Keyboard1. Enter the preset number on the CCTV keyboard.2. Press PRESET to move the camera to the preset position.
l Pelco CM9760-KBD Intelligent Keyboard1. Enter the preset number on the CCTV keyboard.2. Press PRST to move the camera to the preset position.
l Panasonic WV-CU650 Keyboard
Enter the preset number on the keypad, then press thePRESET key.
Adjust a camera's iris using a CCTV keyboard
Formore detailed information, see the CCTV keyboard's documentation.
l IndigoVision v1 Keyboard
IndigoVision domes run in auto iris mode by default and in most cases manual iriscontrol is not required.
If manual iris adjustment is required, press either open iris or close iris as
required. To revert to auto iris control again, press .
l IndigoVision Surveillance Keyboard
IndigoVision domes run in auto iris mode by default and in most cases manual iriscontrol is not required.
If manual iris adjustment is required, press either IRIS+ or IRIS- as required. To revertto auto iris control again, press AIRIS.
l American Dynamics ADCC1100 Keyboard
If manual iris adjustment is required, press either open iris or close iris as required.
l American Dynamics AD2088 (Sensormatic) Keyboard
To adjust the iris, press and hold theOPEN orCLOSE key on the keyboard.
l Pelco KBD300A Keyboard
To adjust the iris, press and hold theOPEN orCLOSE key on the keyboard.
l Pelco CM9760-KBD Intelligent Keyboard
To adjust the iris, press and hold theOPEN orCLOSE key on the keyboard.
l Panasonic WV-CU650 Keyboard
To adjust the iris, press and hold theOPEN orCLOSE key on the joystick.
Clear error messages using a CCTV keyboard
• IndigoVision v1 Keyboard
Control Center 4 How do I...?
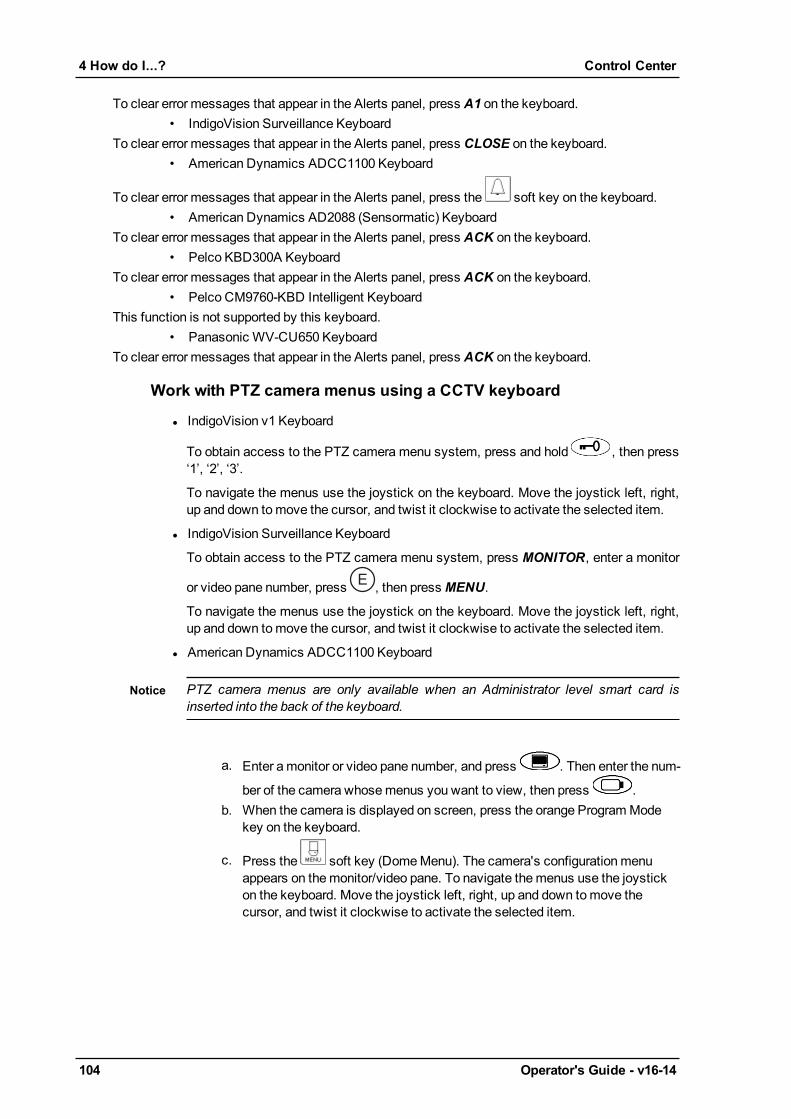
104 Operator's Guide - v16-14
To clear error messages that appear in the Alerts panel, press A1 on the keyboard.• IndigoVision Surveillance Keyboard
To clear error messages that appear in the Alerts panel, press CLOSE on the keyboard.• American Dynamics ADCC1100 Keyboard
To clear error messages that appear in the Alerts panel, press the soft key on the keyboard.• American Dynamics AD2088 (Sensormatic) Keyboard
To clear error messages that appear in the Alerts panel, press ACK on the keyboard.• Pelco KBD300A Keyboard
To clear error messages that appear in the Alerts panel, press ACK on the keyboard.• Pelco CM9760-KBD Intelligent Keyboard
This function is not supported by this keyboard.• Panasonic WV-CU650 Keyboard
To clear error messages that appear in the Alerts panel, press ACK on the keyboard.
Work with PTZ camera menus using a CCTV keyboard
l IndigoVision v1 Keyboard
To obtain access to the PTZ camera menu system, press and hold , then press‘1’, ‘2’, ‘3’.
To navigate the menus use the joystick on the keyboard. Move the joystick left, right,up and down tomove the cursor, and twist it clockwise to activate the selected item.
l IndigoVision Surveillance Keyboard
To obtain access to the PTZ camera menu system, press MONITOR, enter a monitor
or video pane number, press E , then press MENU.
To navigate the menus use the joystick on the keyboard. Move the joystick left, right,up and down tomove the cursor, and twist it clockwise to activate the selected item.
l American Dynamics ADCC1100 Keyboard
PTZ camera menus are only available when an Administrator level smart card isinserted into the back of the keyboard.
a. Enter amonitor or video pane number, and press . Then enter the num-
ber of the camera whosemenus you want to view, then press .b. When the camera is displayed on screen, press the orange ProgramMode
key on the keyboard.
c. Press the soft key (DomeMenu). The camera's configurationmenuappears on themonitor/video pane. To navigate themenus use the joystickon the keyboard. Move the joystick left, right, up and down tomove thecursor, and twist it clockwise to activate the selected item.
4 How do I...? Control Center
Operator's Guide - v16-14 105
When you press the menu soft key, the LCD display on the keyboard changes to show2 buttons (Enter and Save & Exit). Pressing these has no effect. To exit the cameramenu use the joystick to navigate to the Exit option, then press the orange Operatorkey on the keyboard to return to the standard keyboardmenu options.
l American Dynamics AD2088 (Sensormatic) Keyboard
PTZ cameramenus are not supported.
l Pelco KBD300A Keyboard
PTZ cameramenus are not supported.
l Pelco CM9760-KBD Intelligent Keyboard
PTZ cameramenus are not supported.
l Panasonic WV-CU650 Keyboard
To obtain access to the PTZ camera menu system, press the MENU key. Use thejoystick to navigate the menus. Twist the zoom wheel clockwise to activate theselected item
Using the Control Center interface
Panning, tilting and zooming using the mouse
l Panning and tilting
Click and hold the left mouse button and move the mouse in the direction you want tomove the camera.
l Tomove the camera faster, move themouse further away from the center ofthe video pane.
l Tomove the cameramore slowly, move themouse closer to the center of thevideo pane.
The cursor shape changes to show which direction the camera is panning and/or tilting.
As the mouse is moved, the PTZ camera simultaneously pans and tilts in the specifieddirection and at the specified speed. The further away the cursor is moved from thecenter of the video pane, the faster themovement.
When the camera reaches the maximum pan or tilt range, the movement stops, even ifyou continue to hold down the mouse button. To start moving the camera again, movethemouse in the opposite direction.
l Zooming in and out
Use the scroll wheel to zoom in and out.
Alternatively, click the left side of the center rectangle on the video pane to zoom in, orclick the right side of the center rectangle on the video pane to zoom out. The cursorchanges shape to show that the camera is zooming in or out.
Refocus a camera using the Control Panel
You can refocus a camera using the PTZ Control Panel. If you have closed it, select PTZControls from the View menu.
Control Center 4 How do I...?
106 Operator's Guide - v16-14
If your camera does not support focus control, the focus control buttons are not available. Ifthe camera supports either manual focus or auto focus but not both, only the focus controlbutton for the supported option is available.
In the PTZ Control Panel, press or to refocus near or far respectively.
l To refocus by a small amount, press the button once.l To refocus continuously, press and hold the button down. The camera keeps refo-cusing in the required direction until you release the button.
To auto focus the camera, press .
Move to a preset PTZ position using the PTZ Control Panel
Control Center's PTZ Control Panel enables you to move the PTZ camera to preset positionsat the touch of a button. The first nine presets are shown as numbered buttons on the panel.
If you have closed the Control Panel, select PTZ Controls from the View menu to re-open it.
To move to a preset position, click the preset button once to carry out the action. The buttonsmay display additional information explaining the position in more detail. Move the mouseover the button to display this text.
If there are more than nine presets, click the arrow beside the drop-down list, select the
required preset, and click .
Adjust a camera's iris using the PTZ Control Panel
You can adjust a camera's iris using the PTZ Control Panel. If you have closed it, select PTZControls from the View menu.
If your camera does not support iris control, the iris control buttons are not available. If thecamera supports either manual iris or auto iris but not both, only the iris control button for thesupported option is available.
In the PTZ Control Panel, press to open the iris, and to close the iris.
l To adjust the iris by a small amount, press the button once.l To adjust continuously, press and hold the button down. The camera's iris will continueto open or close until you release the button.
Press to use the camera's auto iris function.
Perform PTZ custom actions
The PTZ Control Panel may contain controls which enable you to perform certain actions withthe PTZ camera. The first six of these are shown as buttons.
Click the required button. Alternatively, if there are more than six actions, select the required
action from the list, and click .
4 How do I...? Control Center
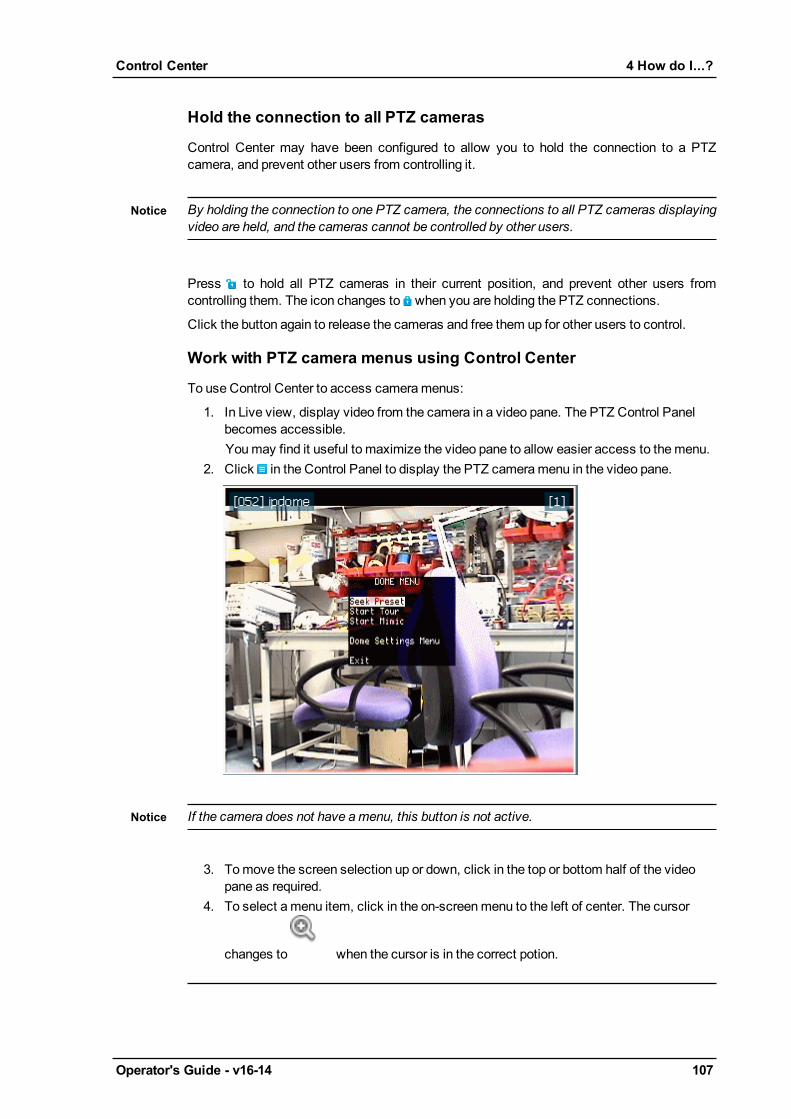
Operator's Guide - v16-14 107
Hold the connection to all PTZ cameras
Control Center may have been configured to allow you to hold the connection to a PTZcamera, and prevent other users from controlling it.
By holding the connection to one PTZ camera, the connections to all PTZ cameras displayingvideo are held, and the cameras cannot be controlled by other users.
Press to hold all PTZ cameras in their current position, and prevent other users fromcontrolling them. The icon changes to when you are holding the PTZ connections.
Click the button again to release the cameras and free them up for other users to control.
Work with PTZ camera menus using Control Center
To use Control Center to access cameramenus:
1. In Live view, display video from the camera in a video pane. The PTZ Control Panelbecomes accessible.Youmay find it useful to maximize the video pane to allow easier access to themenu.
2. Click in the Control Panel to display the PTZ cameramenu in the video pane.
If the camera does not have amenu, this button is not active.
3. Tomove the screen selection up or down, click in the top or bottom half of the videopane as required.
4. To select amenu item, click in the on-screenmenu to the left of center. The cursor
changes to when the cursor is in the correct potion.
Control Center 4 How do I...?
108 Operator's Guide - v16-14
Tomove back to the previous level, select Return on the menu. To exit the menu completely,select Exit.
Work with audio
Listen to audio
Listen to additional audio sources
Control Center allows you to listen to an audio source independently of the video currentlydisplayed. This enables you to listen to an audio source from a camera without displaying thevideo, or to listen tomore than one audio source associated with a single video.
To listen to additional audio sources in Playback view, you must activate Synchronizedmode.
To listen tomultiple additional audio sources without displaying video:
1. Click Live Menu > Configure Extra Audio... The Extra Audio Sources dialog opens.
2. Select an audio source from theAvailable list and click . Or clickto add all audio sources.To remove an audio source, select the audio source from theSelected list and click
. Or click to remove all audio sources.3. Click OK. The dialog closes and the selected audio sources start playing.
When you change views, for example, from the Live view to the Playback view, audio stopsplaying. The audio will start playing again when you return to the original view.
To listen to the audio from a single camera without displaying video:
• Right-click a camera in the Video explorer and select Listen as Extra Audio.The additional audio source starts playing.
Work with audio in a recording
When you start viewing a recording in a video pane, audio is automatically enabled. This is
indicated by at the bottom right of the pane.
To turn audio off, click in the bottom right of the pane. Click to enable it again.
Alternatively, click in the timeline to enable audio in the selected pane and disable it in allother panes. Click in the timeline to enable audio in all panes currently displaying video.
4 How do I...? Control Center
Operator's Guide - v16-14 109
Broadcast audio
Broadcast an announcement
You can broadcast an announcement across a site, or through a specific PA group orspeaker.
To broadcast an announcement:
1. Ensure you are in the Live view.2. Right-click the required PA group, speaker, or site in the Video explorer and select
Page.
If you select a site, your announcement is broadcast through all speakers and PA groups inthat site.
3. Use themicrophone connected to your PC tomake your announcement. When youhave finished your announcement, click Stop.
Interact with someone I see on screen
There may be occasions when you need to interact with people you view on screen. ControlCenter provides audio functionality to enable you to speak and listen to people you view in aparticular location.
Transmitting audio to ONVIF and third party cameras is not available as this feature is notcurrently supported by these cameras.
You can listen to more than one video pane at once. If you are using multiple windows, youcan listen to audio from all windows. However, you can only speak through your microphoneto one camera at a time.
In Live view:
l To speak to someone you view on camera, right-click in the video pane and selectSpeak. Alternatively, click in the pane displaying video from the camera.
l To listen to someone you view on camera, right-click in the video pane and select
Listen. Alternatively, click in the pane displaying video from the camera.
Play a pre-recorded message
You can manually play an imported pre-recorded audio message across a site, or through aspecific PA group or speaker in the area where an alarm has occurred.
To play a pre-recordedmessage:
1. Ensure you are in the Live view.2. Right-click the required PA group, speaker or site in the Video or Alarms explorer and
select Send Audio Message... The Choose AudioMessage dialog opens.
Control Center 4 How do I...?

110 Operator's Guide - v16-14
If you select a site, your announcement is broadcast through all speakers and PA groups inthat site.
3. Select amessage and click OK.To stop the audiomessage, right-click the item in the Video explorer and select StopAudio Message.
Work with external tools
Run a reportYou can run reports form within Control Center.
To run a report:
1. From the Toolsmenu, select Reports...The Reports dialog opens.2. Select the required report from the list and click Run... The report opens in the
appropriate reporting application.
Run an external toolControl Center may have been set up to allow you to run other applications when viewing acamera in Live view. For example, it may allow you to control something in view of thecamera, such as opening a door.
To run one of these applications:
1. In Live view, drag-and-drop the camera you require into a video pane.2. Click the button for the application you want to run at the bottom of themain window.
3. The application opens.The application remains open until you close it. Control Center does not automaticallyclose applications when you shut downControl Center.
View stream statisticsTo view details of frame rate, resolution, and video/audio bit rates for a live video stream,select Show Stream Statistics from the Live Videomenu.
Statistics are shown for all cameras which are currently displaying video on screen.
View a web pageYou can display a configuredWeb Page in either the Live or Playback view:
4 How do I...? Control Center
Operator's Guide - v16-14 111
1. Select the requiredWeb Page from theView > Othermenu.The selectedWeb Page is shown in a new panel.
2. Move, dock or pin theWeb Page panel as required.
The back, forward, refresh and home buttons on the Web Page panel can be used fornavigation similar to a standard web browser.
Lock out users
Lock out other usersWhen a major incident occurs, Control Center allows an authorized investigator toimmediately take control of the system and lock all other users out, preventing them viewingvideo from a set of cameras and accessing recordings from those cameras. This is known as"video lockout".
Authorized investigators can only lock out IndigoVision protocol cameras and transmitters.
To lock out other users, youmust have been given video lockout permission.
What do you want to do?
l Lock out all usersl Release lockout
Lock out all usersWhen you lock out all users, you immediately take control of the system and prevent all otherusers from viewing video from a set of cameras. To do this, you must have been given videolockout permission.
You can only lock out other users from IndigoVision protocol cameras and transmitters.
To lock out users from a single camera1. In Live view, right-click the camera you want to prevent users from viewing in the
Video explorer.
2. Select Lock out Camera. The camera is shown as in the Video explorer.3. To release the camera andmake it available again to other users, right-click the
camera in the Video explorer, and select Release Camera.
To lock out users from all cameras in a site1. In Live view, right-click the site containing the cameras you want to prevent users from
viewing in the Video explorer.
2. Select Lock out All Cameras. Locked out cameras are shown as in the Videoexplorer.
Control Center 4 How do I...?
112 Operator's Guide - v16-14
3. To release the cameras andmake them available again to other users, right-click thesite in the Video explorer and select Release All Cameras.
Release lockout
To prevent other users from accessing cameras (lockout), you must have been given VideoLockout permission.
You may have used video lockout to prevent users from accessing one or more cameras andfrom viewing recordings from those cameras. To allow them to access the cameras again,youmust release the cameras.
To release a single camera1. In Live view, right-click the locked camera in the Video explorer.
2. Select Release Camera. (Locked cameras are shown as in the Video explorer.)3. Video from the locked camera is restarted.
To release all cameras in a site1. In Live view, right-click the site containing the locked cameras in the Video explorer.
2. Select Release All Cameras. (Locked cameras are shown as in the Videoexplorer.)
3. Video from the locked cameras is restarted.
4 How do I...? Control Center

Operator's Guide - v16-14 113
5 TROUBLESHOOTING
Alarms and relays
How do I know an alarm has occurred?l The alarm appears in red type and the alarm icon flashes in the Alarm status bar. It isinitially unacknowledged.
l The Video explorer icon for the zone in which the alarm occurred changes to reflect thezone's status.
l The alarm sound is activated (if this has been configured). Youmay hear either a singlesound or a continuous alarm, depending on how this has been set up.
l A map of the site where the alarm has occurredmay be displayed. The zone ordetector on themapwill flash, and the associated area is highlighted if defined.
l Live video from the camera or salvo associated with the alarm is automatically dis-played in an alarm group window, if configured. The alarm overlay in the video pane iscolored red to indicate that it has been displayed in response to an alarm.
If live video is playing in a pane in the video window when an alarm occurs, the videoassociated with the alarm will replace the live video. When the alarm is cleared, the originallive video will continue. If the original video is from a sequence or guard tour, the sequence ortour continues in the background.
Why does the alarm sound continue?While there are new alarms not yet acknowledged the alarm alert icon flashes and the alarmsound continues to be heard.
I can't clear an alarmThere are a few scenarios that may prevent you from clearing an alarm:
• You cannot clear an alarm if a detector in the zone is still active. Youmust first resolvethe event that activated the detector before you clear the alarm. For example, if a dooropening triggered the alarm, youmust close the door to return the detector to a normalstate.You can view a list of all active detectors in the Detectors panel.If the detector is faulty, an administrator can isolate the detector until it is repaired toensure it does not trigger an alarm.
• Protected alarms always require a second user to authorize them. They should selecttheir user name from the drop-down list and enter the password they use to log into
114 Operator's Guide - v16-14
Control Center. If they do not normally enter a password when logging in, they shouldenter the password they use to log intoWindows.
If you are currently logged into Control Center, you cannot authorize a protected alarmyourself.
• You can only clear alarms that are at your escalation level or above.If the zone icon in the Video explorer indicates that the zone is in alarm, but the alarmis not displayed in the Detectors panel, the alarm has not been escalated to you.Contact an administrator for more information about the escalation policy.
I can't activate a relayThe relay may be protected, and require a second, authorized user, to activate it.
The authorized user should select their user name from the drop-down list and enter thepassword they use to log into Control Center. If they do not normally enter a password whenlogging in, they should enter the password they use to log intoWindows.
Protected relays always require a second user to activate them. If you are currently loggedinto Control Center, you cannot activate a protected relay yourself.
A looped replay is not displayed when an alarm occurs
These remedies are only available if you have administrator permissions.
l If live video is displayed when an alarm occurs, but no looped replay for the camera isdisplayed, the zone or detector may not be configured to display looped replay.
l If the looped replay pane is displayed, but no replay footage is available, theremay beno 24/7 recording job created for the camera or salvo.
CCTV keyboards
Video does not appear in video pane when using a CCTV keyboardWhen displaying video in a video pane using the CCTV keyboard, Control Center uses eachvideo pane's matrix number to determine where the video should be displayed. If video doesnot appear in the required pane, please check with your administrator.
Clear error messages using a CCTV keyboard• IndigoVision v1 Keyboard
To clear error messages that appear in the Alerts panel, press A1 on the keyboard.• IndigoVision Surveillance Keyboard
To clear error messages that appear in the Alerts panel, press CLOSE on the keyboard.• American Dynamics ADCC1100 Keyboard
5 Troubleshooting Control Center
Operator's Guide - v16-14 115
To clear error messages that appear in the Alerts panel, press the soft key on the keyboard.• American Dynamics AD2088 (Sensormatic) Keyboard
To clear error messages that appear in the Alerts panel, press ACK on the keyboard.• Pelco KBD300A Keyboard
To clear error messages that appear in the Alerts panel, press ACK on the keyboard.• Pelco CM9760-KBD Intelligent Keyboard
This function is not supported by this keyboard.• Panasonic WV-CU650 Keyboard
To clear error messages that appear in the Alerts panel, press ACK on the keyboard.
Live video
I can't control a PTZ cameraThis may be for the following reasons:
l Your user account may have been allocated a priority value, used when controllingPTZ cameras. Users with a higher priority are able to take control of a PTZ camera youare using.Control Center alerts you that you have lost control of the camera, and indicates whichuser now has control.If the user controlling the camera does not move it for five seconds, you can regaincontrol of it.
l Your user account may not have been authorized to use this camera. If this is thecase, the PTZ Control Panel will be unavailable and no PTZ grid appears on the videopane.
l Another user may be "holding" the connection to a PTZ camera. If this is the case, youmust wait until they have released the camera before you can control it again.
l An authorized user may have locked this camera in the event of amajor incident. Thismeans that you are no longer able to access it. Control Center notifies you that this hashappened.
l PTZ-capable ONVIF cameras are indicated by the PTZ icon if the chosenmediaprofile has the continuous PTZ setting enabled, otherwise it is indicated by a Fixed
icon .You can configure anONVIF camera using the ONVIF Configuration Utility providedwith Control Center.
A camera I'm viewing has been locked outIf Control Center notifies you that one or more cameras are locked out, this means that anauthorized investigator has taken to control of the system (usually in the event of a majorincident) and has locked all other users out.
This means that you are no longer able to access any locked cameras. Control Centernotifies you when the lockout has been released.
Control Center 5 Troubleshooting
116 Operator's Guide - v16-14
I can't view video from a cameraThis may be for one of the following reasons:
1. You do not have permissions from your administrator to view video from this camera2. The camera is unavailable3. The camera is unlicensed
Contact your administrator with details of the issue.
If you do not have permissions to view video, Control Center displays the following:
• In the Alerts panel, Control Center displays the following error message:Insufficient access permissions to perform the requestedoperation on [(device matrix number)] (device name)
The following permissions are required: View
If the camera is unavailable, Control Center displays the following:
• In the Video Explorer panel, Site Search window, and any maps the camera is on,Control Center displays a gray camera icon with a red cross.
• In the Alerts panel, Control Center displays the following error message:Unable to show video from [(device matrix number)] (devicename)
If the camera is unlicensed, Control Center displays the following:
• In the Video Explorer panel, Site Search window, and any maps the camera is on,Control Center displays an unlicensed camera icon.
• In the Alerts panel, Control Center displays the following error message:Insufficient access permissions to perform the requestedoperation on [(device matrix number)] (device name)
The following permissions are required: View
► Formore information about licensing, see "Licensing Overview" on page 16
I can't start an external toolTo start an external tool from Control Center, make sure:
l Live view is displayed.l You have selected a video pane in which live video is displayed.
I get an error when I run an external toolIf you click a button for an external tool and an error message appears, it may be that the toolhas not been set up correctly to run from Control Center. Contact your administrator for moreinformation.
I get feedback when talking to someone on screenIf you experience feedback when interacting with someone you view on screen, you shoulddisable simultaneous listen and speak.
To disable simultaneous listen and speak:
1. From the Toolsmenu, select Options.2. Select theVideo and Audio tab.
5 Troubleshooting Control Center
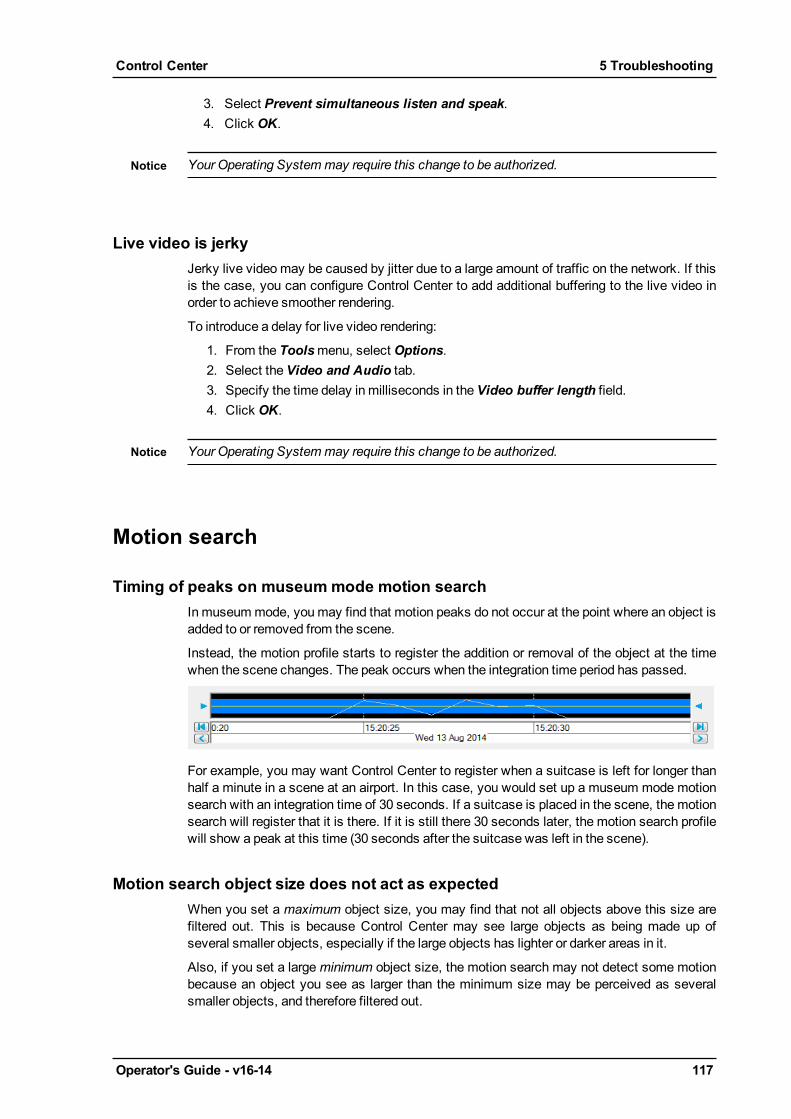
Operator's Guide - v16-14 117
3. Select Prevent simultaneous listen and speak.4. Click OK.
Your Operating Systemmay require this change to be authorized.
Live video is jerkyJerky live video may be caused by jitter due to a large amount of traffic on the network. If thisis the case, you can configure Control Center to add additional buffering to the live video inorder to achieve smoother rendering.
To introduce a delay for live video rendering:
1. From the Toolsmenu, select Options.2. Select theVideo and Audio tab.3. Specify the time delay in milliseconds in theVideo buffer length field.4. Click OK.
Your Operating Systemmay require this change to be authorized.
Motion search
Timing of peaks on museummode motion searchIn museummode, youmay find that motion peaks do not occur at the point where an object isadded to or removed from the scene.
Instead, the motion profile starts to register the addition or removal of the object at the timewhen the scene changes. The peak occurs when the integration time period has passed.
For example, you may want Control Center to register when a suitcase is left for longer thanhalf a minute in a scene at an airport. In this case, you would set up a museum mode motionsearch with an integration time of 30 seconds. If a suitcase is placed in the scene, the motionsearch will register that it is there. If it is still there 30 seconds later, the motion search profilewill show a peak at this time (30 seconds after the suitcase was left in the scene).
Motion search object size does not act as expectedWhen you set a maximum object size, you may find that not all objects above this size arefiltered out. This is because Control Center may see large objects as being made up ofseveral smaller objects, especially if the large objects has lighter or darker areas in it.
Also, if you set a largeminimum object size, the motion search may not detect some motionbecause an object you see as larger than the minimum size may be perceived as severalsmaller objects, and therefore filtered out.
Control Center 5 Troubleshooting

118 Operator's Guide - v16-14
Rectangles are not displayed around motion
If you are logged in as an operatorContact the administrator.
If you are logged in as an administrator
If you have pressed in a live video pane, and do not see rectangles around areas ofmotion or a motion trace, check that the camera you are using supports motion detection andthat it is configured to send analytics information.
To configure a camera to send analytics information, refer to the camera documentation.
This feature is not available on all IndigoVision cameras, and is available on some ONVIFcameras. For more information, please refer to the camera documentation.
I can't see a motion profile in the timeline• If you have tried to create amotion profile, but nomotion is shown in the timeline, the
system administrator may need to adjust the frame settings for that device.• Make sure Control Center is enabled to display motion on the timeline (Timeline >
Show Motion Profile).• Theremay not be any motion in the scene. Check if the yellow line is not appearing at
the bottom of the timeline.• Control Center may be unable to perform motion analysis. Check if an orange bar is
displayed at the top of the timeline. In this case, youmay need to adjust the framesettings.
• Themotion search options may not be set up correctly. This may mean that there ismotion but Control Center is ignoring. For example, it may have been set up to ignoremotion in an area instead of detecting it.
• Motion search is not available for footage recorded inM-JPEG format.
Passwords
I've forgotten my passwordContact your administrator and request a new password.
Change passwordYoumay want to change your password to something you can remembermore easily.
The Change Password option is unavailable when working in all segments mode or if youruser login is verified usingWindows authentication.
5 Troubleshooting Control Center

Operator's Guide - v16-14 119
To change your password:
1. From the Filemenu, select Change Password.2. Enter the current password.3. Enter a new password, then confirm it and click OK.
Which password should I use?If you are logging in as an operator, and have been allocated a password, you must use thiswith your login name. If required, you can change this password to something you canremembermore easily.
If logging in as an administrator, use the administrator password which you set duringinstallation.
Recordings
A saved recording is shorter than expectedWhen exporting a recording, the length of recording you have saved may be shorter that youexpected.
This may be for one of the following reasons:
• There are gaps in the recorded footage so that the total duration of the saved recordingis less than requested.This may be because:• Scheduled recordings may result in times where there are no recordings for the
parts of the requested time period.• The network connection between the camera and the recorder (NVR) was lost
during some of the requested time period.• The camera was turned off during some of the requested time period.
• You have requested a timespan that is longer than the actual recorded footage.
The time shown on the timeline appears to be incorrectThe time shown for a recording in Playback view is determined by the local time of the site towhich the camera belongs, not by the PC on which it is being viewed. The timezone is shownin the status bar below the application. e.g. (GMT -5:00) Eastern TimeUS and Canada.
I can't select the CD drive when saving a recordingWhen saving a recording to a CD, Windows first saves the recording to a temporary location.
Recorded video is jerky and/or slow when played backIf recorded video is jerky and/or slow, this may be because your network is unable to copewith the speed at which the video is being streamed.
If this is the case, you can specify that Control Center periodically pauses the video untilthere is enough data to play smoothly at the correct speed rather than playing erratically at aslower speed.
To enable buffered playback:
Control Center 5 Troubleshooting
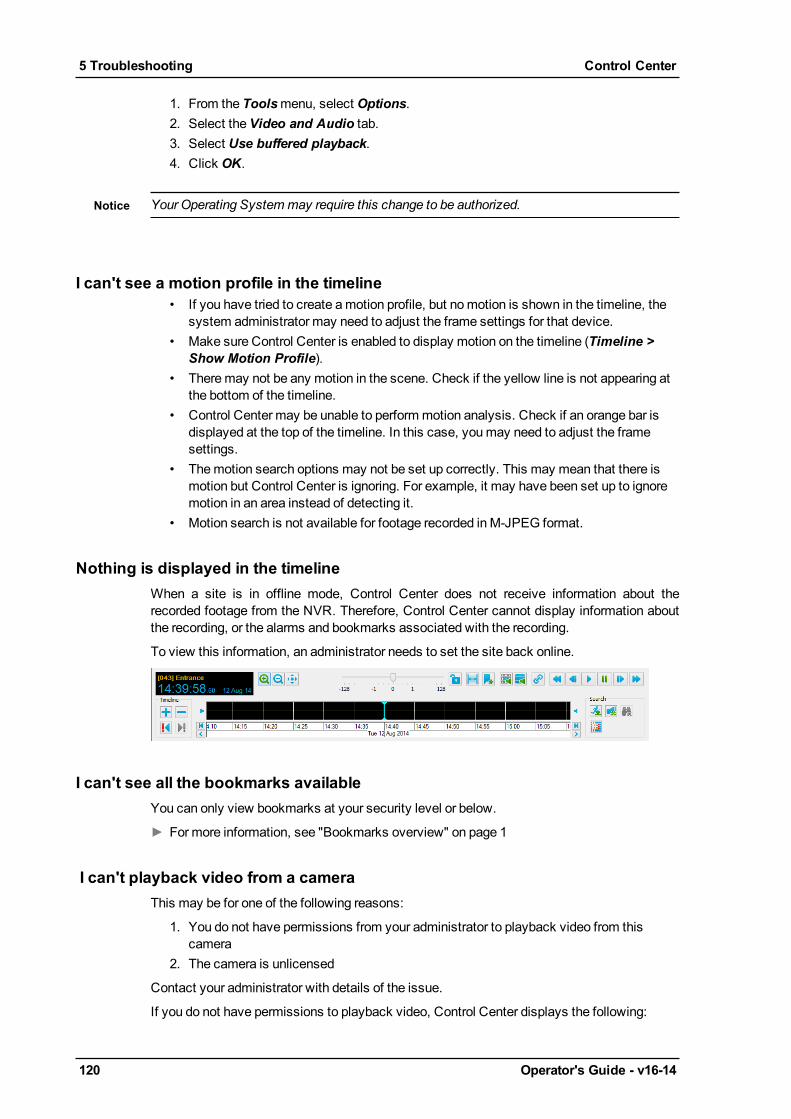
120 Operator's Guide - v16-14
1. From the Toolsmenu, select Options.2. Select theVideo and Audio tab.3. Select Use buffered playback.4. Click OK.
Your Operating Systemmay require this change to be authorized.
I can't see a motion profile in the timeline• If you have tried to create amotion profile, but nomotion is shown in the timeline, the
system administrator may need to adjust the frame settings for that device.• Make sure Control Center is enabled to display motion on the timeline (Timeline >
Show Motion Profile).• Theremay not be any motion in the scene. Check if the yellow line is not appearing at
the bottom of the timeline.• Control Center may be unable to perform motion analysis. Check if an orange bar is
displayed at the top of the timeline. In this case, youmay need to adjust the framesettings.
• Themotion search options may not be set up correctly. This may mean that there ismotion but Control Center is ignoring. For example, it may have been set up to ignoremotion in an area instead of detecting it.
• Motion search is not available for footage recorded inM-JPEG format.
Nothing is displayed in the timelineWhen a site is in offline mode, Control Center does not receive information about therecorded footage from the NVR. Therefore, Control Center cannot display information aboutthe recording, or the alarms and bookmarks associated with the recording.
To view this information, an administrator needs to set the site back online.
I can't see all the bookmarks availableYou can only view bookmarks at your security level or below.
► Formore information, see "Bookmarks overview" on page 1
I can't playback video from a cameraThis may be for one of the following reasons:
1. You do not have permissions from your administrator to playback video from thiscamera
2. The camera is unlicensed
Contact your administrator with details of the issue.
If you do not have permissions to playback video, Control Center displays the following:
5 Troubleshooting Control Center
Operator's Guide - v16-14 121
• In the Alerts panel, Control Center displays the following error message:Insufficient access permissions to perform the requestedoperation on [(device matrix number)] (device name)
The following permissions are required: Playback
If the camera is unlicensed, Control Center displays the following:
• In the Video Explorer panel, Site Search window, and any maps the camera is on,Control Center displays an unlicensed camera icon.
• In the Alerts panel, Control Center displays the following error message:Insufficient access permissions to perform the requestedoperation on [(device matrix number)] (device name)
The following permissions are required: Playback
► Formore information about licensing, see "Licensing Overview" on page 16
Salvos, sequences and guard tours
Guard tour does not display all cameras in a salvoGuard tours do not "wrap" from the end of the video panes to the start.
For example, you may have started a guard tour in pane 7 of 9 (9-pane layout). If one of thesalvos in the guard tour contains five cameras, only the first three will be shown - in panes 7,8and 9. The remaining two cameras are not shown.
To view these cameras, start the guard tour in a pane between 1 and 5, or change the layoutto display more video panes.
I can't change the position of a guard tourThis may be because:
l The position of the guard tour cannot be changed while it is running. To change thepane in which a guard tour starts, youmust first stop the guard tour and re-start it in adifferent pane.
l The guard tour has been set to change layout as it runs. This means that the tour willalways start in the first pane of the selected video window, and cannot be changed.
A guard tour/salvo/sequence starts up when I log inControl Center has been configured to start up a salvo, guard tour or sequence in a particularvideo pane when you log in. To change this, you need to be logged in as an administrator.
Salvo/guard tour does not appear where expectedYou may have dragged a salvo or guard tour and dropped it onto a video pane, but find that itstarts in the first pane of that window.
l If a salvo, this is because it has a layout associated with it. Salvos with layouts alwaysbegin in the first pane of the selected video window.
l If a guard tour, this is because its layout is set to change as it runs, according to theproperties of the salvos which it contains. Guard tours which change layout alwaysbegin in the first pane of the selected video window.
Control Center 5 Troubleshooting

122 Operator's Guide - v16-14
Sites
I can't access all devicesYoumay not be able to find or access a device for the following reasons:
• Your user account may have been allocated particular permissions to allow access tocertain sites and cameras.For example, youmay be able to view and control certain cameras, but not recordvideo from them, or youmay have access to certain sites but not others.
• The devicemay be in a different segment.If this is the case, change the active segment.
I can't edit an objectYoumay not be able to edit an object for the following reasons:
• Your user account may have been allocated particular access permissions to allowaccess to certain sites and devices.
• Youmay be working in all segments mode.In this mode, the site database is read-only. If this is the case, change the activesegment.
• Youmay be working with a local site-database copy.Control Center uses a local copy when it cannot contact either the primary sitedatabase or backup site database. The local site database copy is read-only.
There's a red X through a deviceControl Center makes three successive attempts to contact a device in a site or on thenetwork. If it cannot contact the device, it displays it with a red X:
A error message is also displayed in the Alerts panel and flagged in the Alarm status bar.
If the device is temporarily unavailable, click to refresh the display.
Administrators only — If you have permanently removed the device from the network and
want to remove it from the site, select it and click .
All segments mode settingsWhen working in all segments mode, the following settings are taken from the earliestcreated segment that you have been granted access to:
5 Troubleshooting Control Center

Operator's Guide - v16-14 123
• Audit log settings• Alarm mode (for example, sound silent, sound once)• Sort by display name• Matrix numbering: show numbers• Matrix numbering: number of digits• Matrix numbering: include panes
Troubleshooting FrontLine Manager
I cannot find my FrontLine recordings in Control CenterEven if the recordings were successfully downloaded from the FrontLine Camera and savedto the NVR-AS, a camera wearer may not see their recordings.
When a camera wearer logs in to Control Center they may not see anything in the Videoexplorer. This is because all Video explorer items are listed under a site, but the camerawearer may not have permission to see the site.
To view their recordings, the user should use Site Search (Ctrl + S) to find their camerawearer.
To view recordings the camera wearer must be in the Playback view. When logging in for thefirst time the default view is Live view. The camera wearer must switch to Playback view tosearch for their recordings.
FrontLine recordings are not appearing in Control CenterWhen a FrontLine Camera is docked in a FrontLine Dock, the footage is automaticallydownloaded to the NVR-AS installed on the same PC.
If the recordings are not showing up in the Control Center, check the following:
• The NVR-AS installed on the FrontLineManager PC has been added to your ControlCenter site.
• The current playback NVR-AS for the camera wearer is the NVR-AS installed on theFrontLineManager PC.
• Ensure the License Server is available on the network and your Control Center licenseincludes the Body Worn Video feature.
• Ensure the recording was not created with a camera wearer user who hadmultiplecameras assigned at the same time.
• Ensure the following services are running on the FrontLineManager PC:• IndigoVision NVR-AS• IndigoVision FrontLine Interface• PSS ManagerIf any of these services are not running, start them through theWindows Servicesutility.If any of these services fail to start, contact IndigoVision.
• When docked the camera is listed in FrontLineManager with a status other thanUnknown or In use.If either of these status items are shown, then the camera has not been detected byFrontLineManager.
• Check the amount of space in the NVR-AS video library.
Control Center 5 Troubleshooting
124 Operator's Guide - v16-14
The NVR-AS deletes the oldest recordings in its library if it runs out of space or if therecordings are older than themaximum age allowed by the reaping policy.
• Theremay be cameras listed in FrontLineManager with an error regarding the availablespace.The FrontLineManager footage directory must be large enough to temporarily storefootage from all of your docked cameras.
• Check FrontLineManager web interface is running.
The age of recordings from FrontLine Cameras is based on the time the recording wascreated, not the time the camera was docked.
• Check the log file for FrontLineManager interface.This can be found in the system configuration directory, which defaults to:C:\ProgramData\IndigoVision\FrontLine Interface\LogsLook for the username of the camera wearer who recorded footage with the camera.Any problems transferring the recordings to the NVR-AS are detailed in this log.Contact IndigoVision if this log file indicates a problem.
Other troubleshooting
Audit log database error
This functionality is only available if you have administrator permissions.
Control Center logs user actions, such as log in, log off, and view recorded video, in anODBC compliant database, for example, Microsoft SQL Server.
If Control Center cannot communicate with the audit log database, a warning message isdisplayed. When Control Center re-establishes communications, an information message isdisplayed.
Control Center may not be able to communicate with the database for the following reasons:
l The databasemay be off-line or otherwise not contactable.l Ensure the server database is running, and that the database service is running cor-rectly.
l Ensure user permissions are correctly configured to allow access to the database.l Ensure the remote connection configuration of the database server is correctly con-figured to allow remote connections.
l The databasemay not have the correct schema.l Ensure your database schema is up-to-date. All previous audit log databases mustbe updated to be compatible with your version of Control Center.For information about updating your audit log database, click here.
l The database does not support the required operations.l Control Center 3.14 and later versions query the database. Some database solu-tions do not support querying of data, for example, text file databases (e.g. .csv).Please upgrade to a database which does support querying of data, for example,Microsoft SQL Server.
5 Troubleshooting Control Center
Operator's Guide - v16-14 125
For information about updating your audit log from a text file database, click here.
For more information about setting up and using the audit log please refer to the Audit LogReferenceGuide.
Control Center reacts more slowly than expected
l If the CPU indicator at the bottom right of the Control Center interface ( ) turns red, thisindicates that your PC’s processing power is insufficient to view video in this number of panes.Try viewing video in fewer panes or check that your PC meets the recommended specification:it may require upgrading.
l Control Center may be communicating with one or more NVRs. This is indicated by the pro-gress bar in the bottom of themain window.
Overlays do not work as expectedSome laptops and machines running older graphics hardware may experience problems withvideo pane overlays. If overlays are not working as expected, youmay want to revert to usingthe software renderer. This may adversely affect performance.
To use software video renderer:
1. Select Options from the Toolsmenu.2. Click theVideo and Audio tab.3. ClearUse software video renderer.4. Click OK.
Your Operating Systemmay require this change to be authorized.
Why can I see less on an analog monitor than in a PC screen?Analog monitors using CRT technology do not show the extreme top, bottom, left and right ofany image they display. Different manufacturers exclude different amounts. This preventsyou from seeing the messy edges of the displayed image caused by the cathode rayscanning horizontally across the screen.
TFT, LCD or Plasma technology monitors are based on discrete pixels and show the fullheight and width of the image, making it similar to the image displayed in the video pane.
Image distorts when the video pane resizedIf the video image distorts when the video pane or the window is resized, the Stretch to Fitaspect ratio is selected.
To disable Stretch to Fit:
1. Select Change Aspect Ratio from theView menu.2. Select either theStandard orWidescreen aspect ratio.
The aspect ratio of the video panes changes.
I can't export recorded footage for a particular cameraThis may be for one of the following reasons:
Control Center 5 Troubleshooting

126 Operator's Guide - v16-14
1. You do not have permissions from your administrator to view video from this camera2. The camera is unlicensed
Contact your administrator with details of the issue.
If you do not have permissions to export, Control Center displays the following:
• In the Export Status window, the Recording column displays the followingmessage:! Permission Denied
If the camera is unlicensed, Control Center displays the following:
• In the Video Explorer panel, Site Search window, and any maps the camera is on,Control Center displays an unlicensed camera icon.
• In the Export Status window, the Recording column displays the followingmessage:! Permission Denied
► Formore information about licensing, see "Licensing Overview" on page 16
I see an error that there is problem with Control Center's license backupControl Center must be connected to its License Server to operate. If the connection to theLicense Server is interupted, for example due to routine maintenance, Control Center willcontinue to operate for 30 days.
Control Center maintains a 30-day rolling backup of its license. If connection to the LicenseServer is lost, then this backup is automatically used. After the connection to the LicenseServer is restored, Control Center reverts to using the License Server.
If Control Center is unable to back up its license, an error icon ( ) is shown in the statusbar. In this situation, if connectivity is lost with the License Server, Control Center will exitimmediately and not restart until connection is restored.
► Formore information about licensing, see "Licensing Overview" on page 16
I see a warning that the Control Center License Server is unavailableControl Center must be connected to its License Server to operate. If the connection to theLicense Server is interupted, for example due to routine maintenance, Control Center willcontinue to operate for 30 days.
Control Center maintains a 30-day rolling backup of its license. If connection to the LicenseServer is lost, then this backup is automatically used. After the connection to the LicenseServer is restored, Control Center reverts to using the License Server.
When Control Center is using a backup of its license, a warning icon ( ) is shown in thestatus bar, along with the date at which the backup license expires. If Control Center cannotconnect to its License Server before this date, Control Center exits and does not restart untilthe License Server is available.
► Formore information about licensing, see "Licensing Overview" on page 16
5 Troubleshooting Control Center